By Design Bundles
Heart Shapes in Illustrator
In this tutorial, you will learn how to quickly and easily create heart shapes in Illustrator. We will show you two ways to do this using the Pathfinder and Shape Builder tools. You can then add the heart shapes to your designs, save them as SVG files or use them as icons.

Step 1 - Create the Base Shape
First, we are going to create the base for our hearts using the rounded rectangle tool. Later on, in the tutorial, we will remove unwanted portions and merge them.
Create a Rounded Rectangle
In Illustrator, create a new document. Select the Rounded Rectangle tool, click inside the canvas to create a shape with a 65 px Width, a 200 px Height, and a 100px Corner Radius.

Fill the Shape with Red
Choose a red shade from the Swatches panel as the Fill color.

Create a Rotated Copy
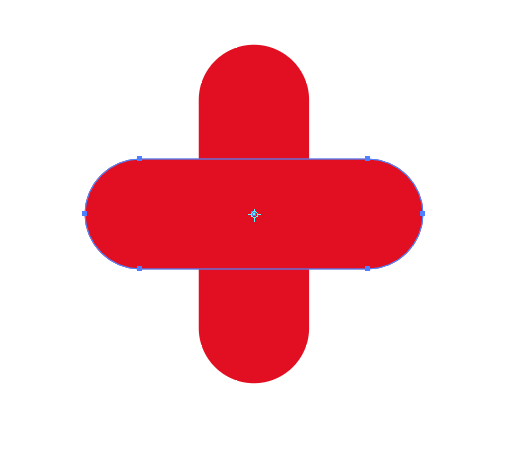
Double-click on top of the Rotate tool (R) icon on the toolbar to open the dialog window. Then, input an angle value of -90° and click Copy instead of Ok.

The two rounded rectangles should now form a cross (+).
Rotate Your Selection Again
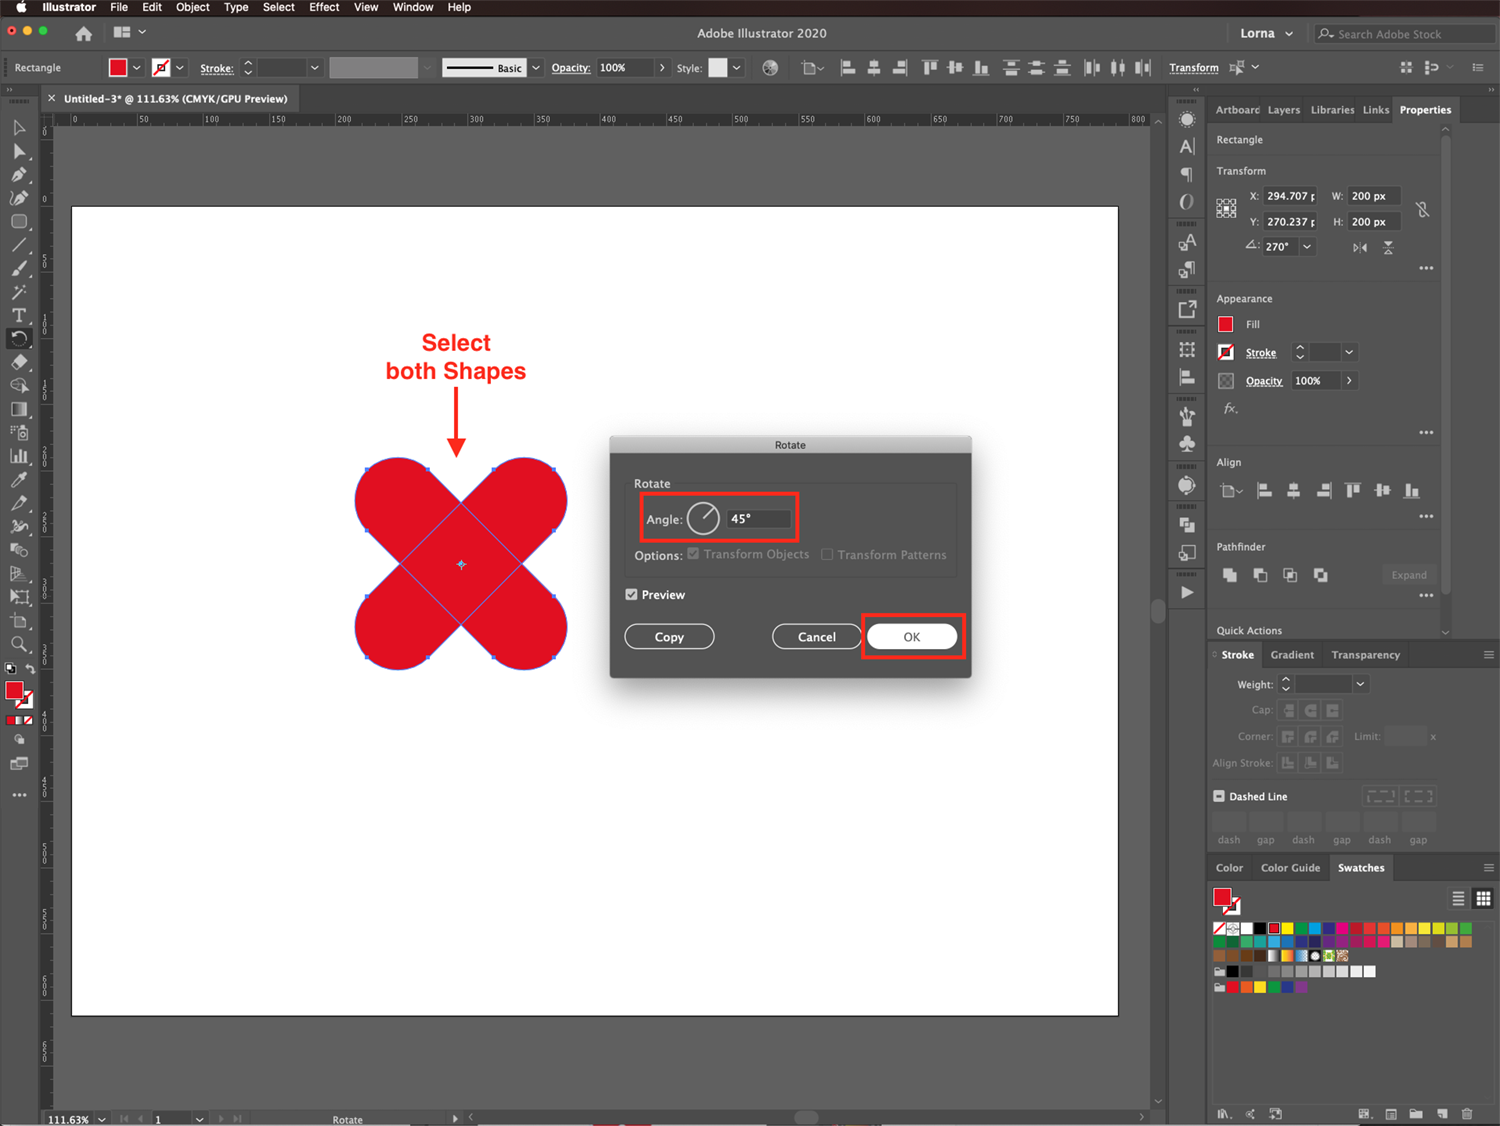
Now, select both shapes and double-click on top of the Rotate tool (R) icon on the toolbar. In the dialog window, input a 45° angle value and click Ok.
The resulting shape should now be an X.
Step 2 - Create the Heart
To create the heart, you have two options. You can use the Pathfinder panel or the Shape Builder tool.
Use the Pathfinder Panel
Select both shapes, go to the Pathfinderpanel, and choose Divide.
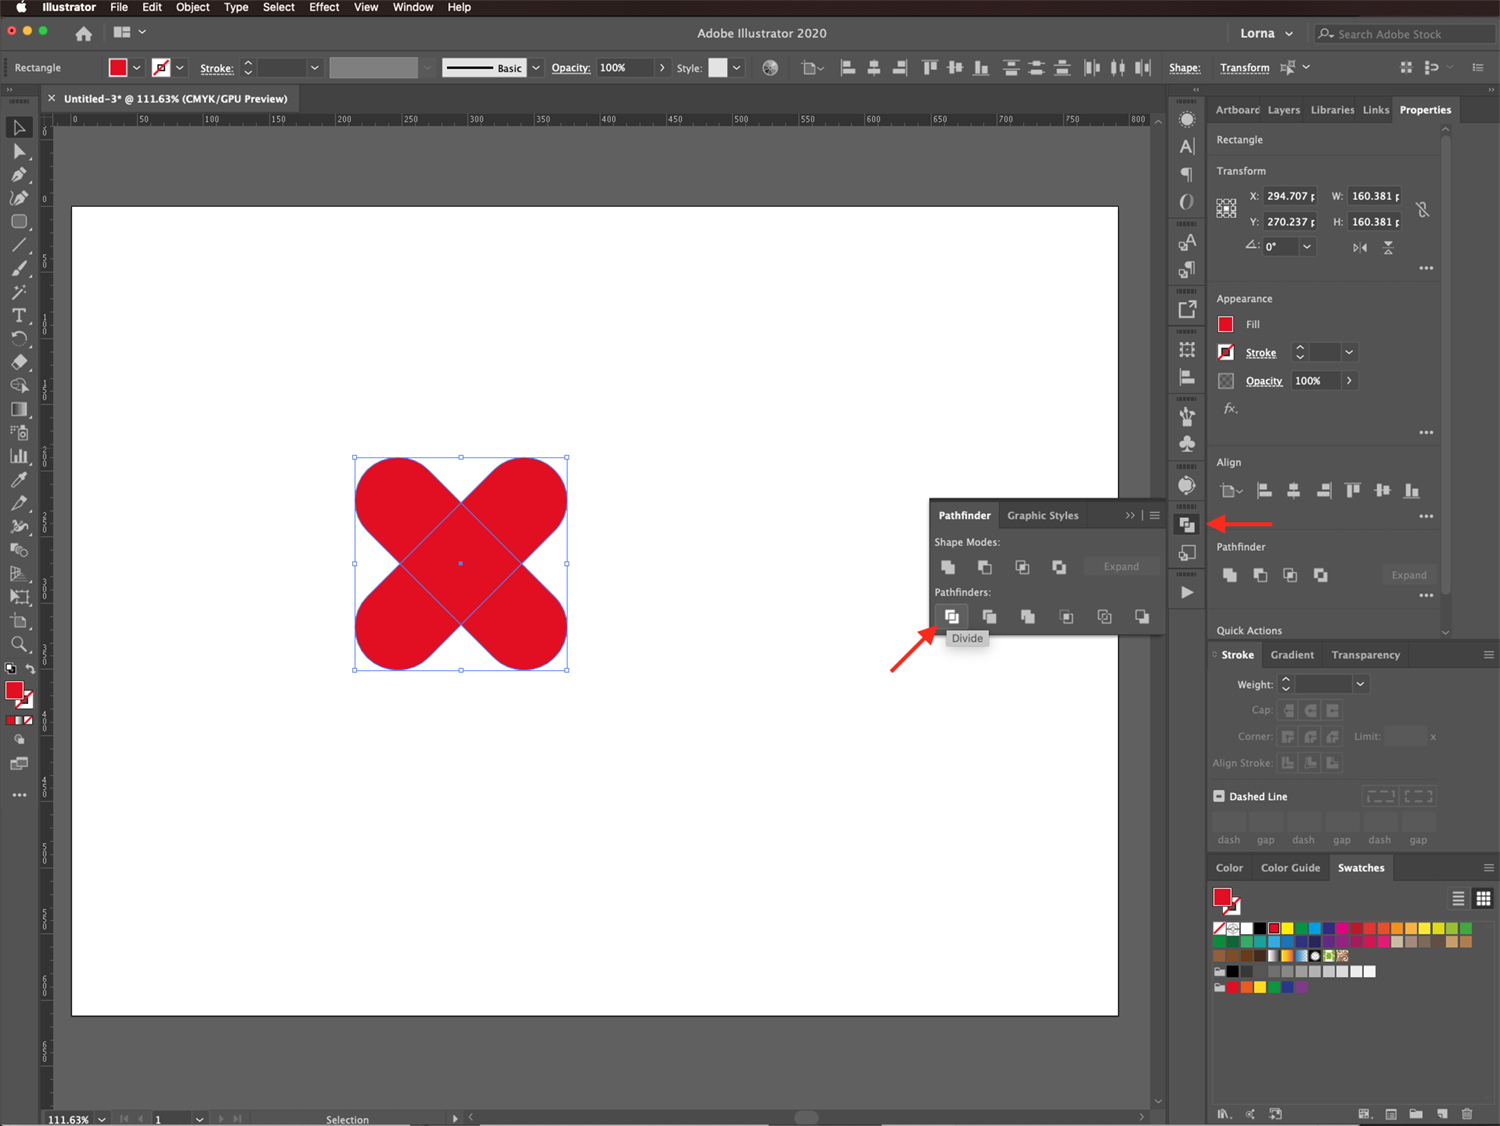
Then, right-click on top and choose Ungroup (Command/Control + U) to separate the resulting paths.
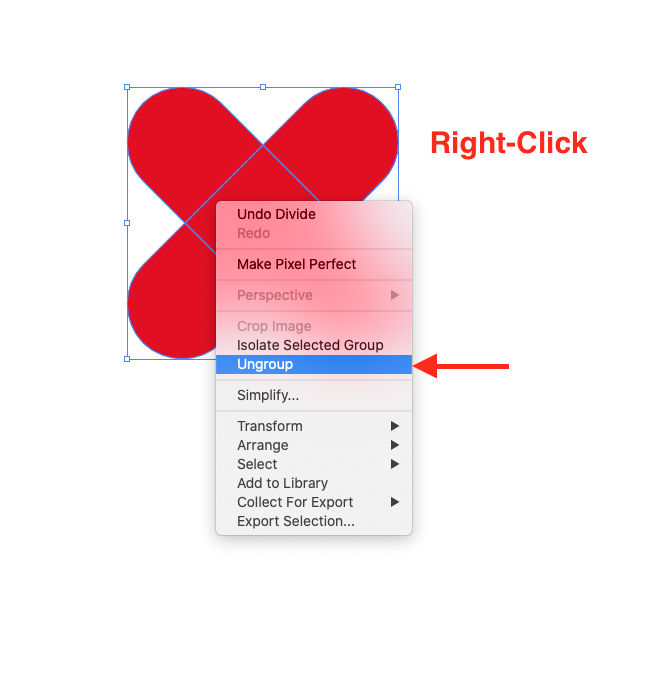
Use the Selection tool to select the bottom shapes and Delete them. The idea is to leave only the paths that form the shape of a heart.

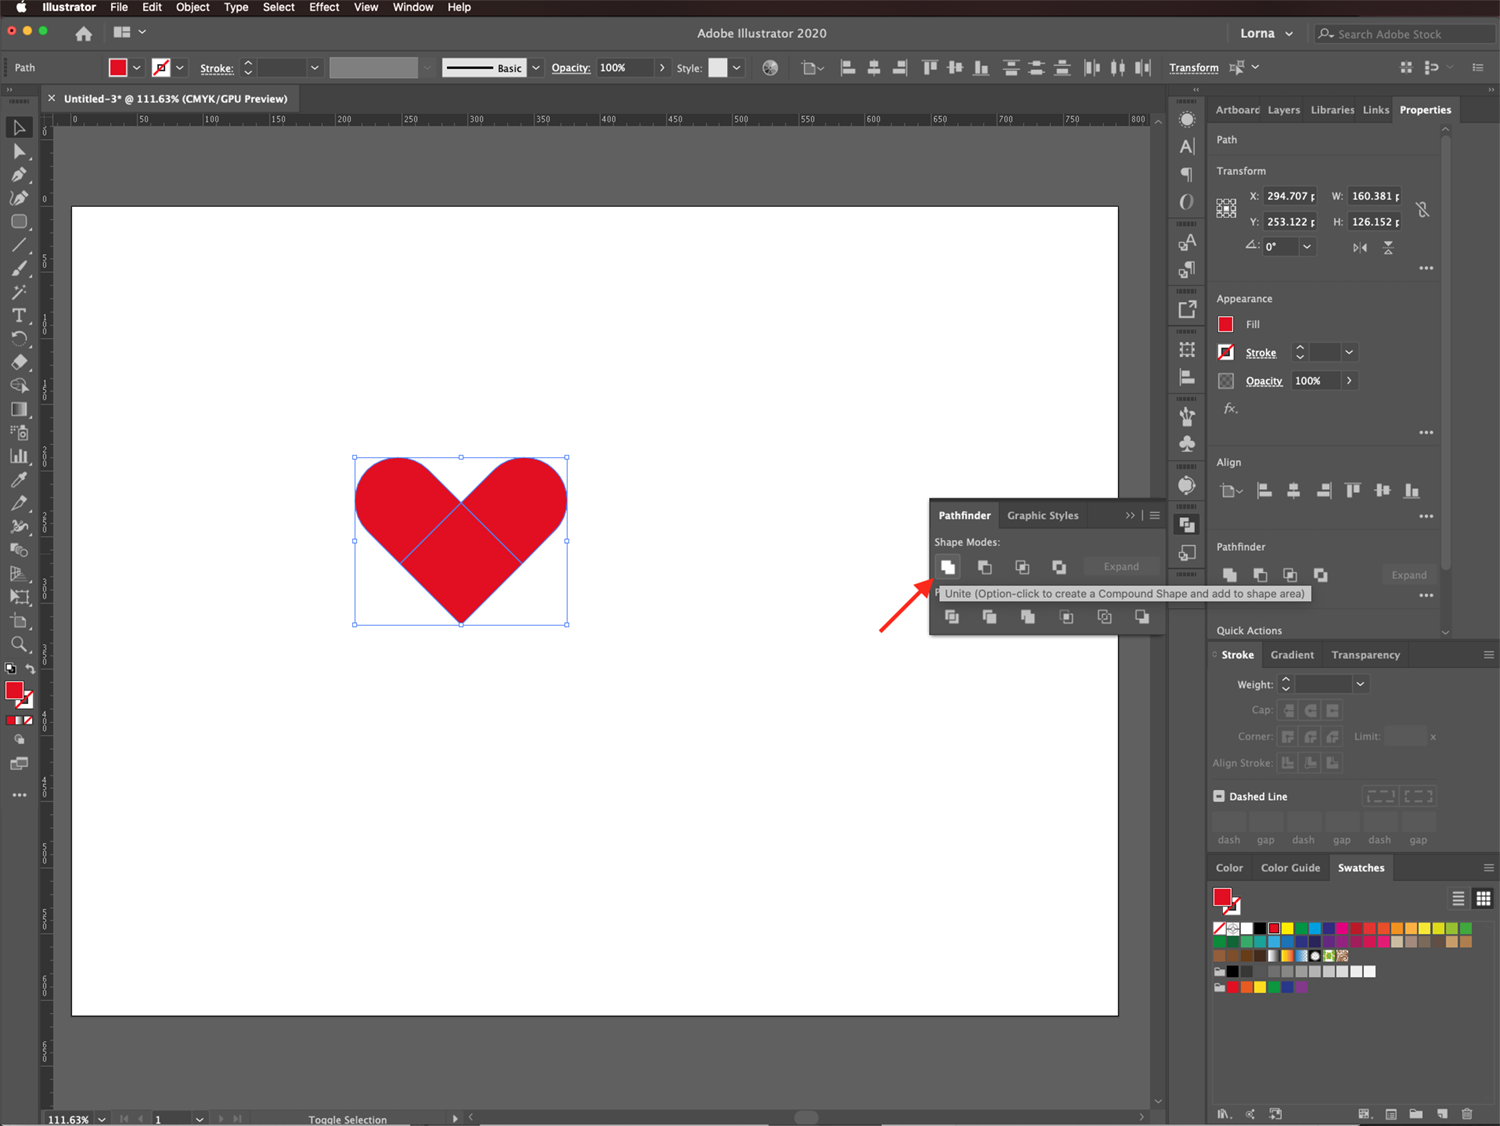
Select the remaining portions, go back to the Pathfinder panel and choose Unite. The portions will merge together into a single object.
Use the Shape Builder Tool
In the next example, we want to create a more rounded heart. Repeat Step 1 to create the base. This time, shift the objects left and right using your arrow keys. We moved the left rectangle 10 clicks to the right. The right rectangle was shifted 10 clicks to the left.

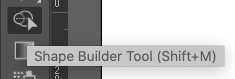
Then, select both shapes and click on the Shape Builder tool in the toolbar.
Remove the Unwanted Portions
To remove the unwanted portions, hold down the Option/Alt key while clicking on top of them.

Merge Shapes to Create the Heart
Now we want to merge the shapes. Click + drag on top of the rest of the shapes to merge them together into a single one.

Step 3 - Scale the Heart Shape
Let us resize the second heart shape just a little bit. Double-click on top of the Scale tool (S) in the toolbar and change the Scale value. We used a 110% increment.

Here are our two resulting heart shapes side by side.

Now that you have learned how to make a heart in Illustrator, maybe you'd like to learn how to make a ribbon banner, create a wavy line, or make a flat character.