By Design Bundles
How to Convert a Drawing to a Vector in Adobe Illustrator
Have you wanted to create vector images from your drawings but didn’t know how? It’s actually pretty easy to do. In this tutorial, we’ll teach you how to convert a drawing to a vector in Adobe Illustrator.
We’ll be using a drawing of a feather from this bundle of floral sketches, but another option is to use your own drawings. You can scan your drawing onto your computer or take a photo of it and upload the image to your computer.
Note: make sure your drawing is black or a dark color on a white or light background, as we need a good contrast between the background and the drawing. You can edit your image in Photoshop if you need to.
Step 1 - Import Your Drawing
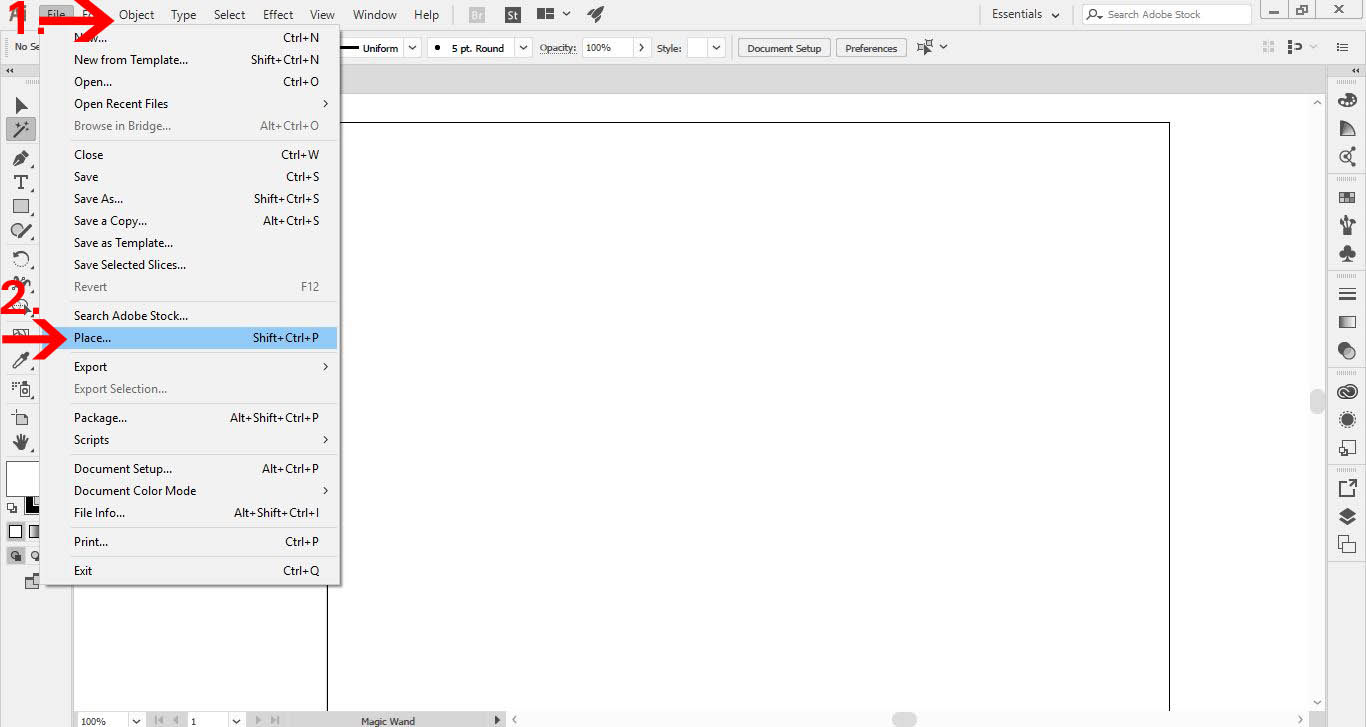
To import your drawing, go to File > Place.
Step 2 - Trace Your Drawing Using Image Trace
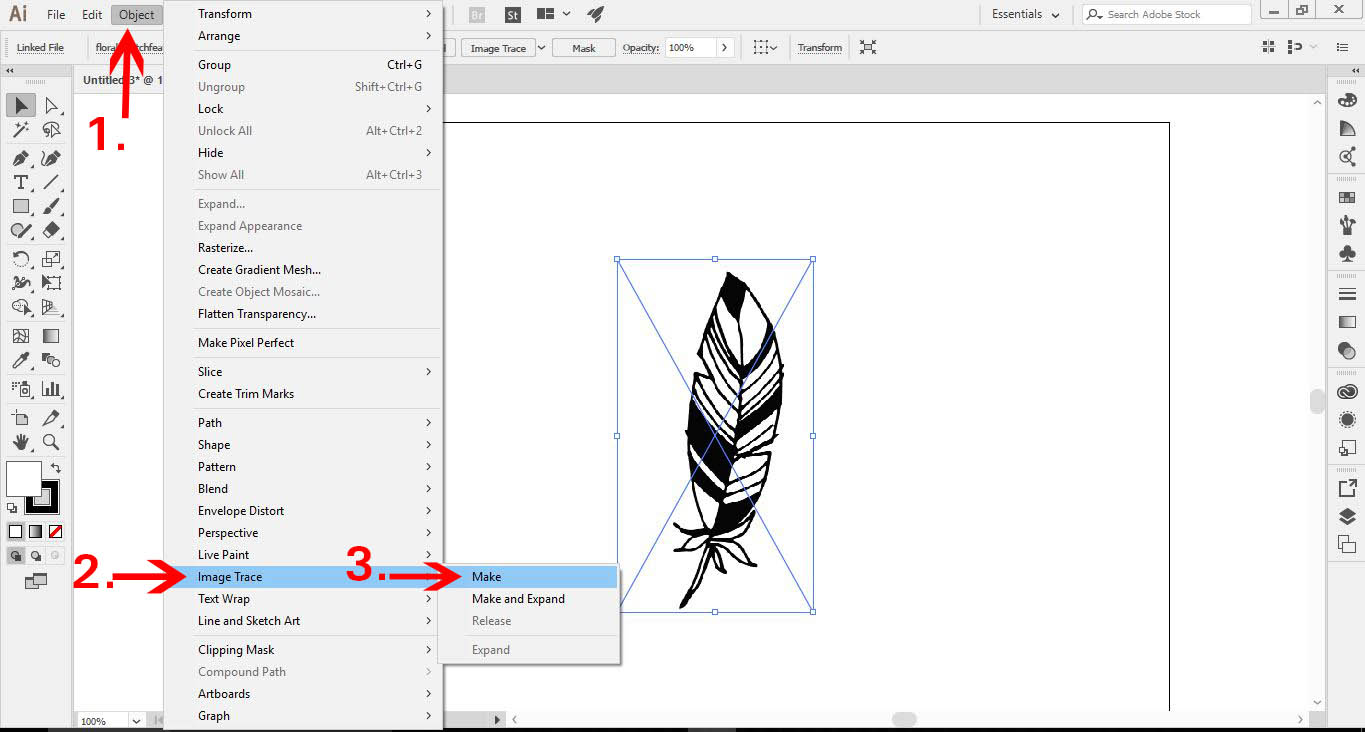
Now we will trace the drawing. Select the drawing and go to Object > Image Trace > Make.
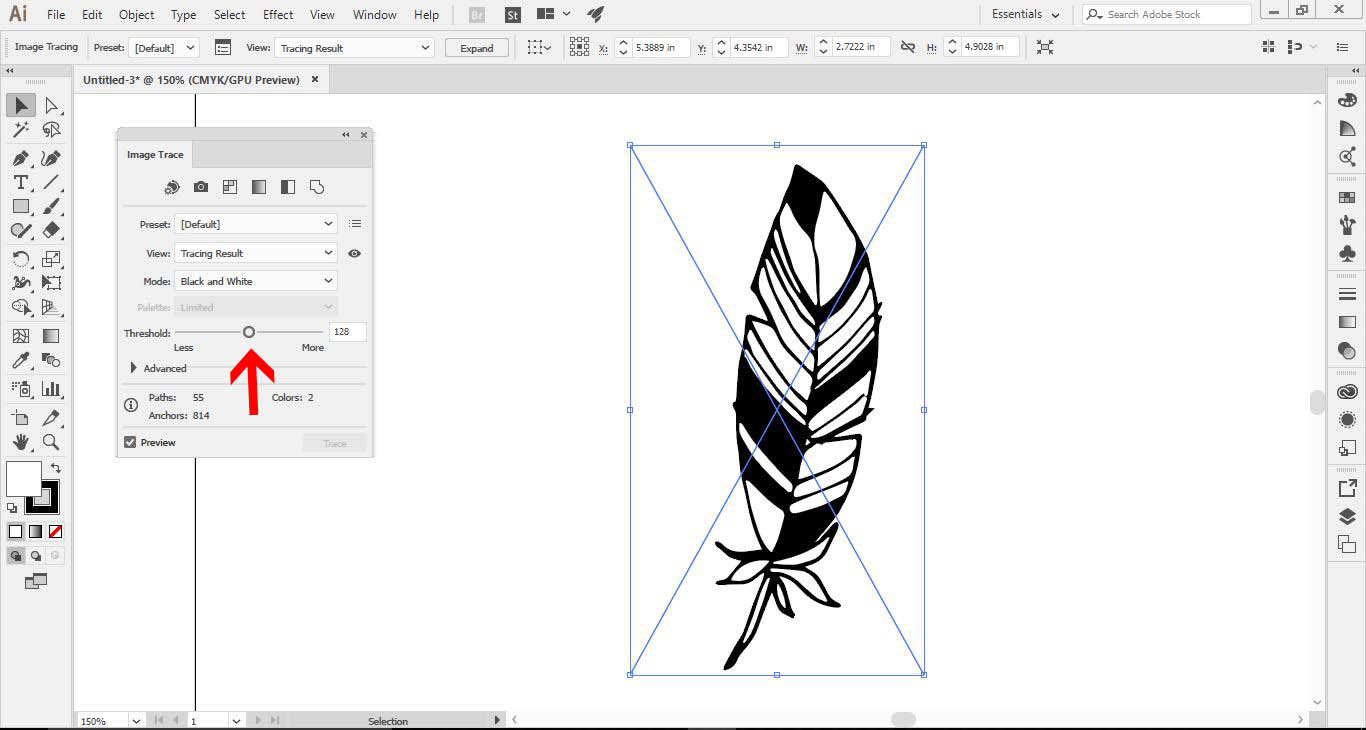
Click the Image Trace Panel icon located between Preset and View in the Control panel at the top. In the Image Trace panel, adjust the Threshold until you are happy with the trace.
Step 3 - Expand Image
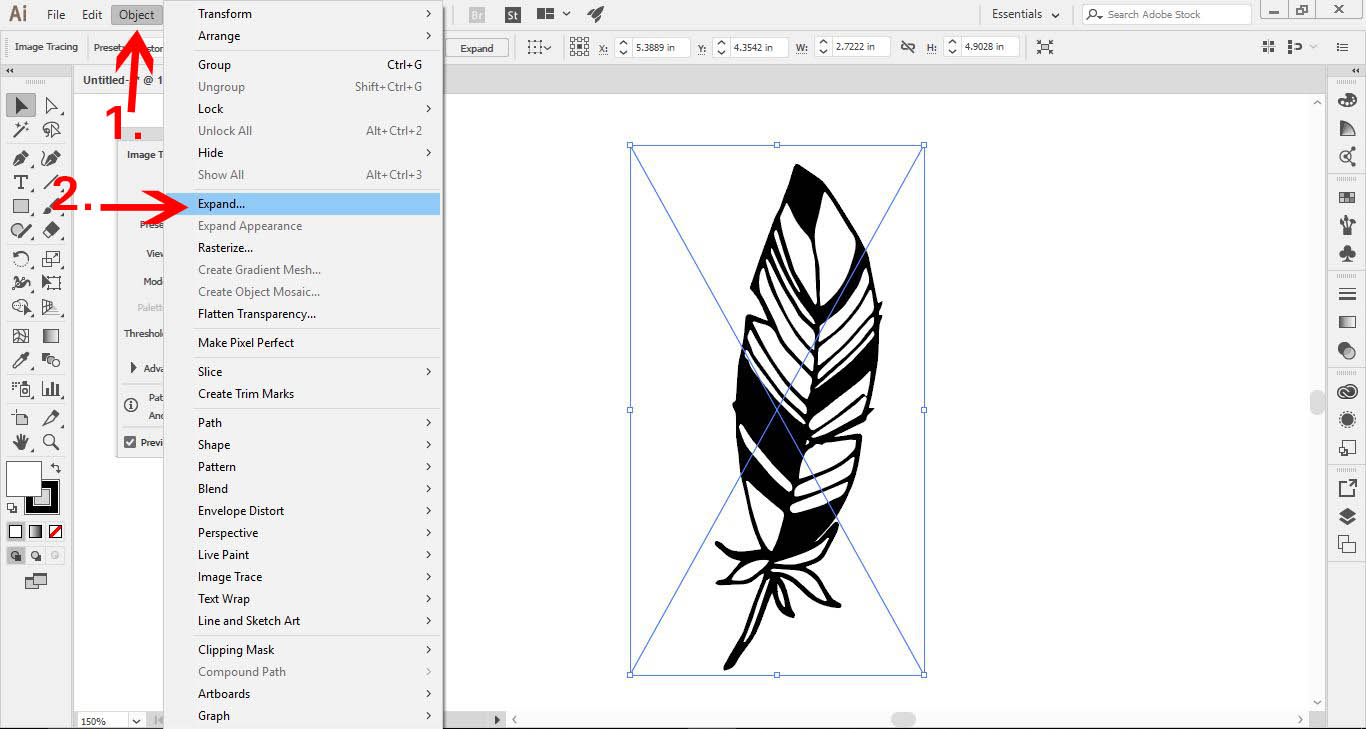
Once you’re happy with your trace, go to Object > Expand.
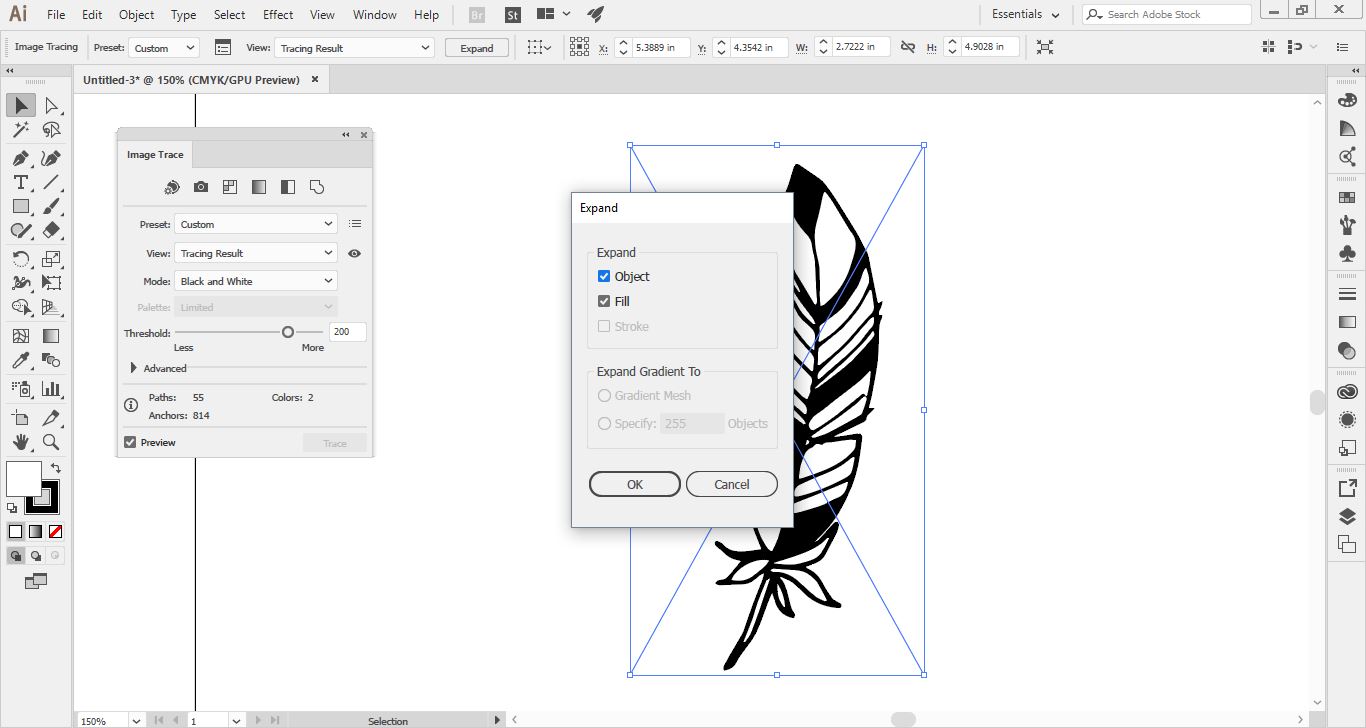
The Expand dialog will appear. Ensure the Object and Fill options are checked, then click OK.
Step 4 - Clean Up Vector Image
View Image in Outline Mode
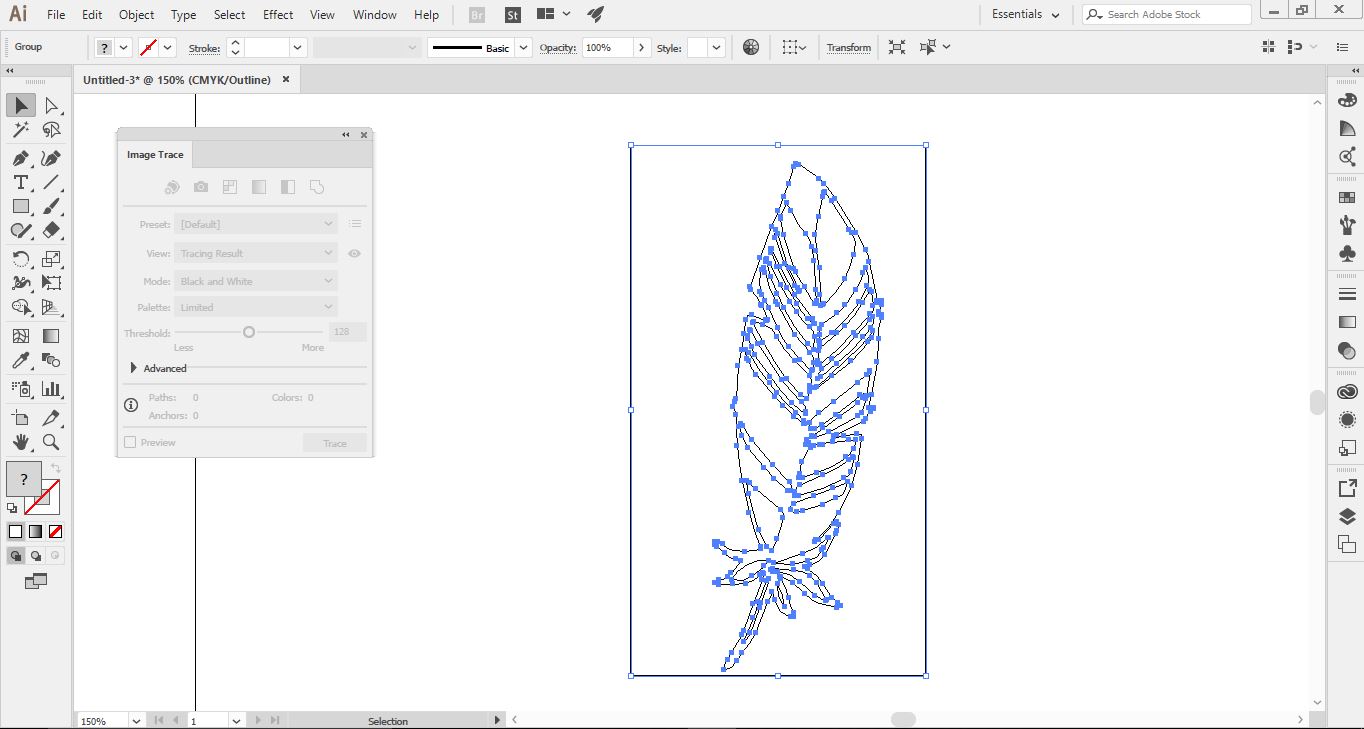
If you click Ctrl/Cmd + Y, you will enter Outline mode and see all the actual lines/edit points that make up your drawing.
You will also see a box around your newly made vector image. We do not need this box, so we’ll remove it.
At this point, you can close the Image Trace panel.
Select Black Parts of the Image
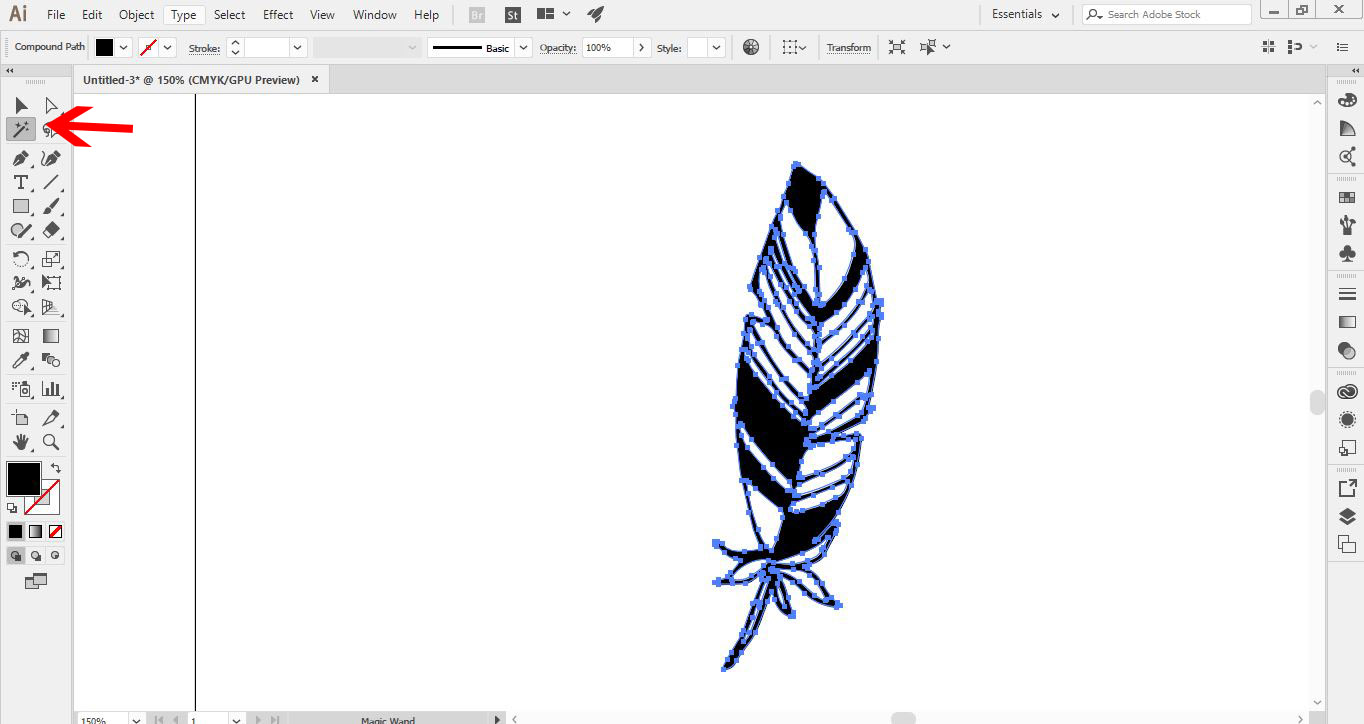
Press Ctrl/Cmd + Y again to go back to Preview mode to see the black areas. Select the Magic Wand Tool (Y) and click on a black part of your drawing to select all the black areas.
Cut the Selection
Once the black areas are selected, go to Edit > Cut (Ctrl/Cmd + X).
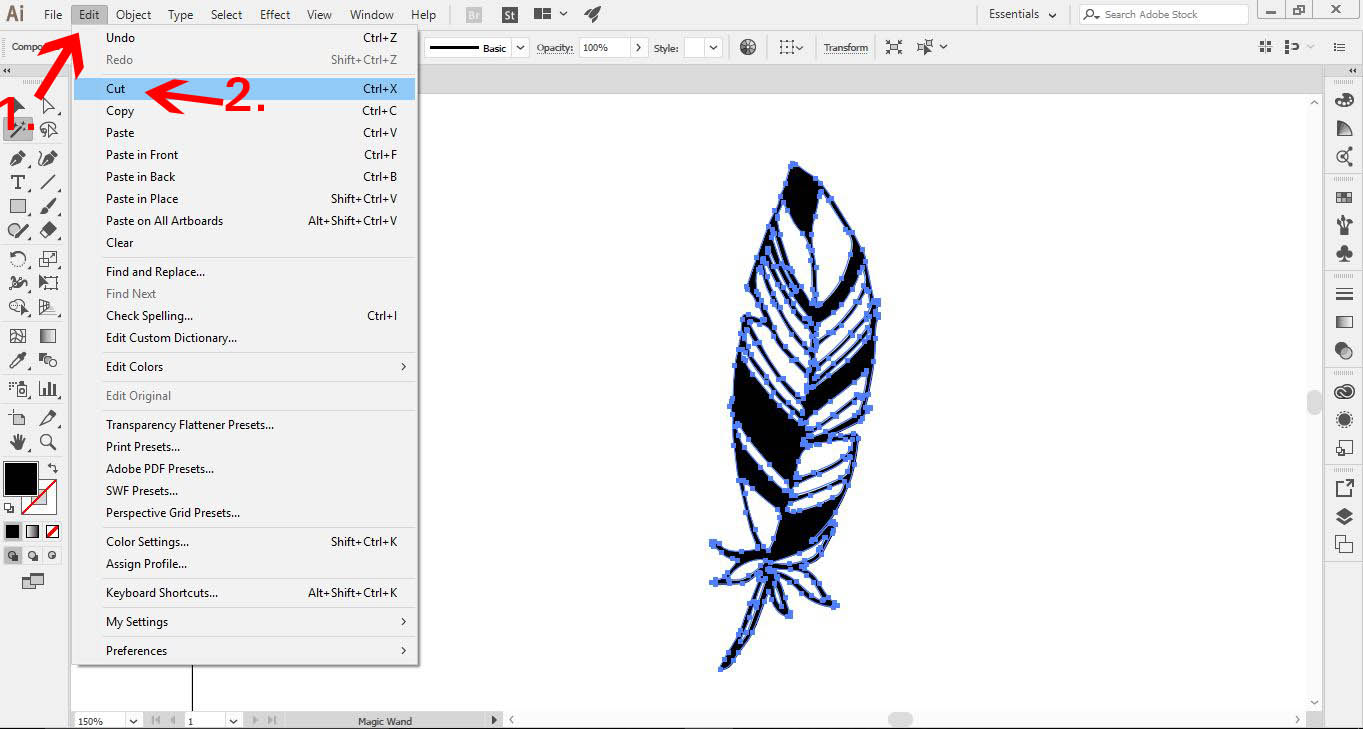
Select and Delete the "Invisible" Shapes With the Direct Selection Tool
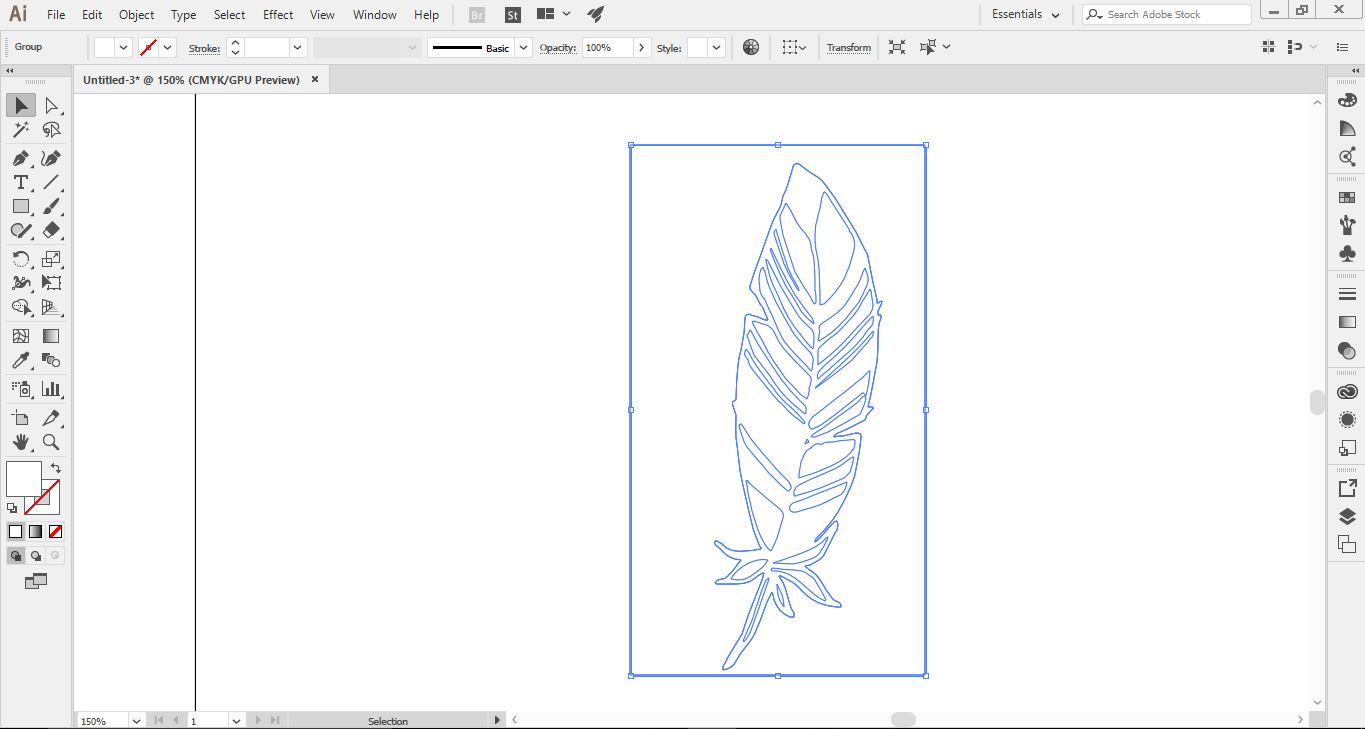
It’ll appear your image has disappeared, but that’s not the case. Select the Direct Select Tool (A). Then click + drag over where your image was. You are now selecting all the unwanted parts of your vector image, including the outside rectangle box.
Once everything is selected, click Backspace or Delete to remove them.
Paste the Cut Image
Go to Edit > Paste in Place (Ctrl/Cmd + Shift + V) to get back the vector image. This is the black image we selected and cut earlier.

Step 5 - Save Vector Image
At this point, you can save your vector image, which can now be used in many different programs like DesignScape, Silhouette Studio, Cricut Design Space, etc. We can also use it here in Illustrator.
Step 6 - Modify the Vector Image
You can change the Fill and Stroke as it’s now a vector image. As an example, we filled the vector with a yellow, orange, and red gradient to give it a fiery effect.
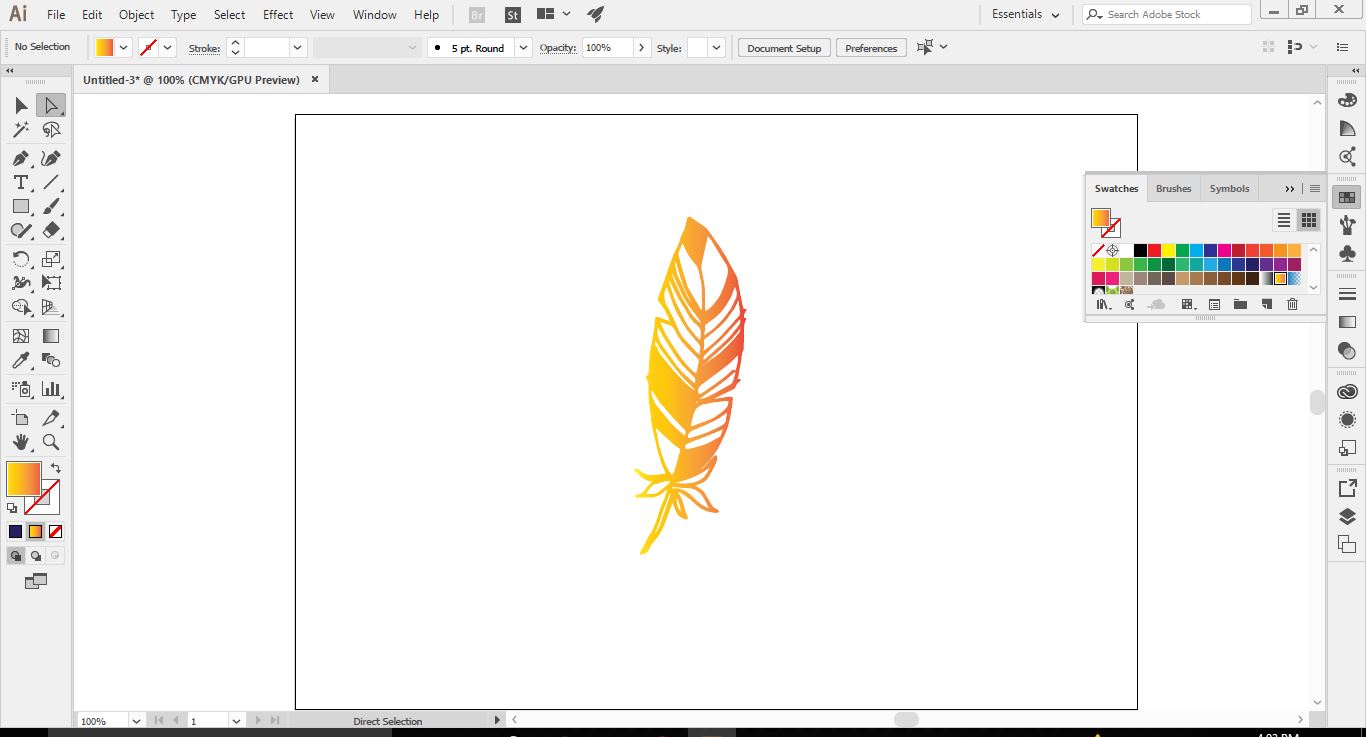
That’s all there is to convert a drawing to a vector in Illustrator. It’s wonderful that you can use this process to vectorize your drawings to use them in many different ways.