By Saqib Ahmad
How to Make a Snowflake Laser Cut Ornament in Adobe Illustrator
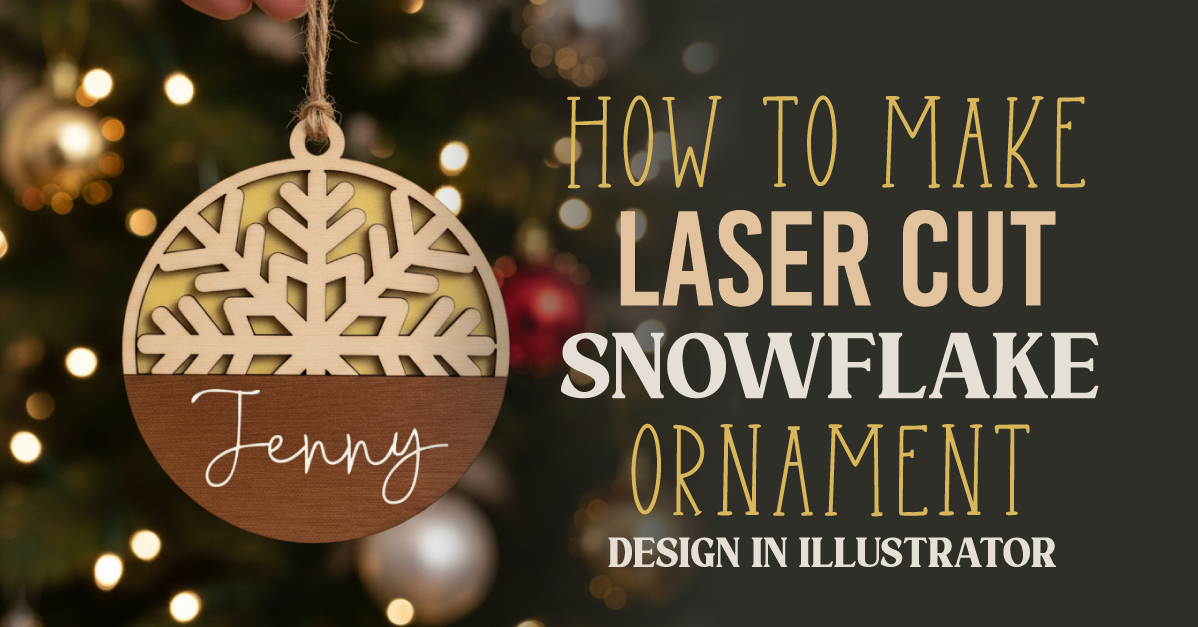
Laser cut ornaments are a beautiful way to add a personal, handcrafted touch to your holiday décor. In this tutorial, I’ll walk you through creating a snowflake ornament using Adobe Illustrator.
To keep things simple, we’ll use a pre-made snowflake template from the Design Bundles Plus library, which saves time and ensures clean, cut-ready designs.
Here is a Link for the Plus Membership:
https://designbundles.net/plus
You can Type in search box for Snowflakes pre-made svg templates:

If you’d like to use the same set I’m working with, here’s the link:
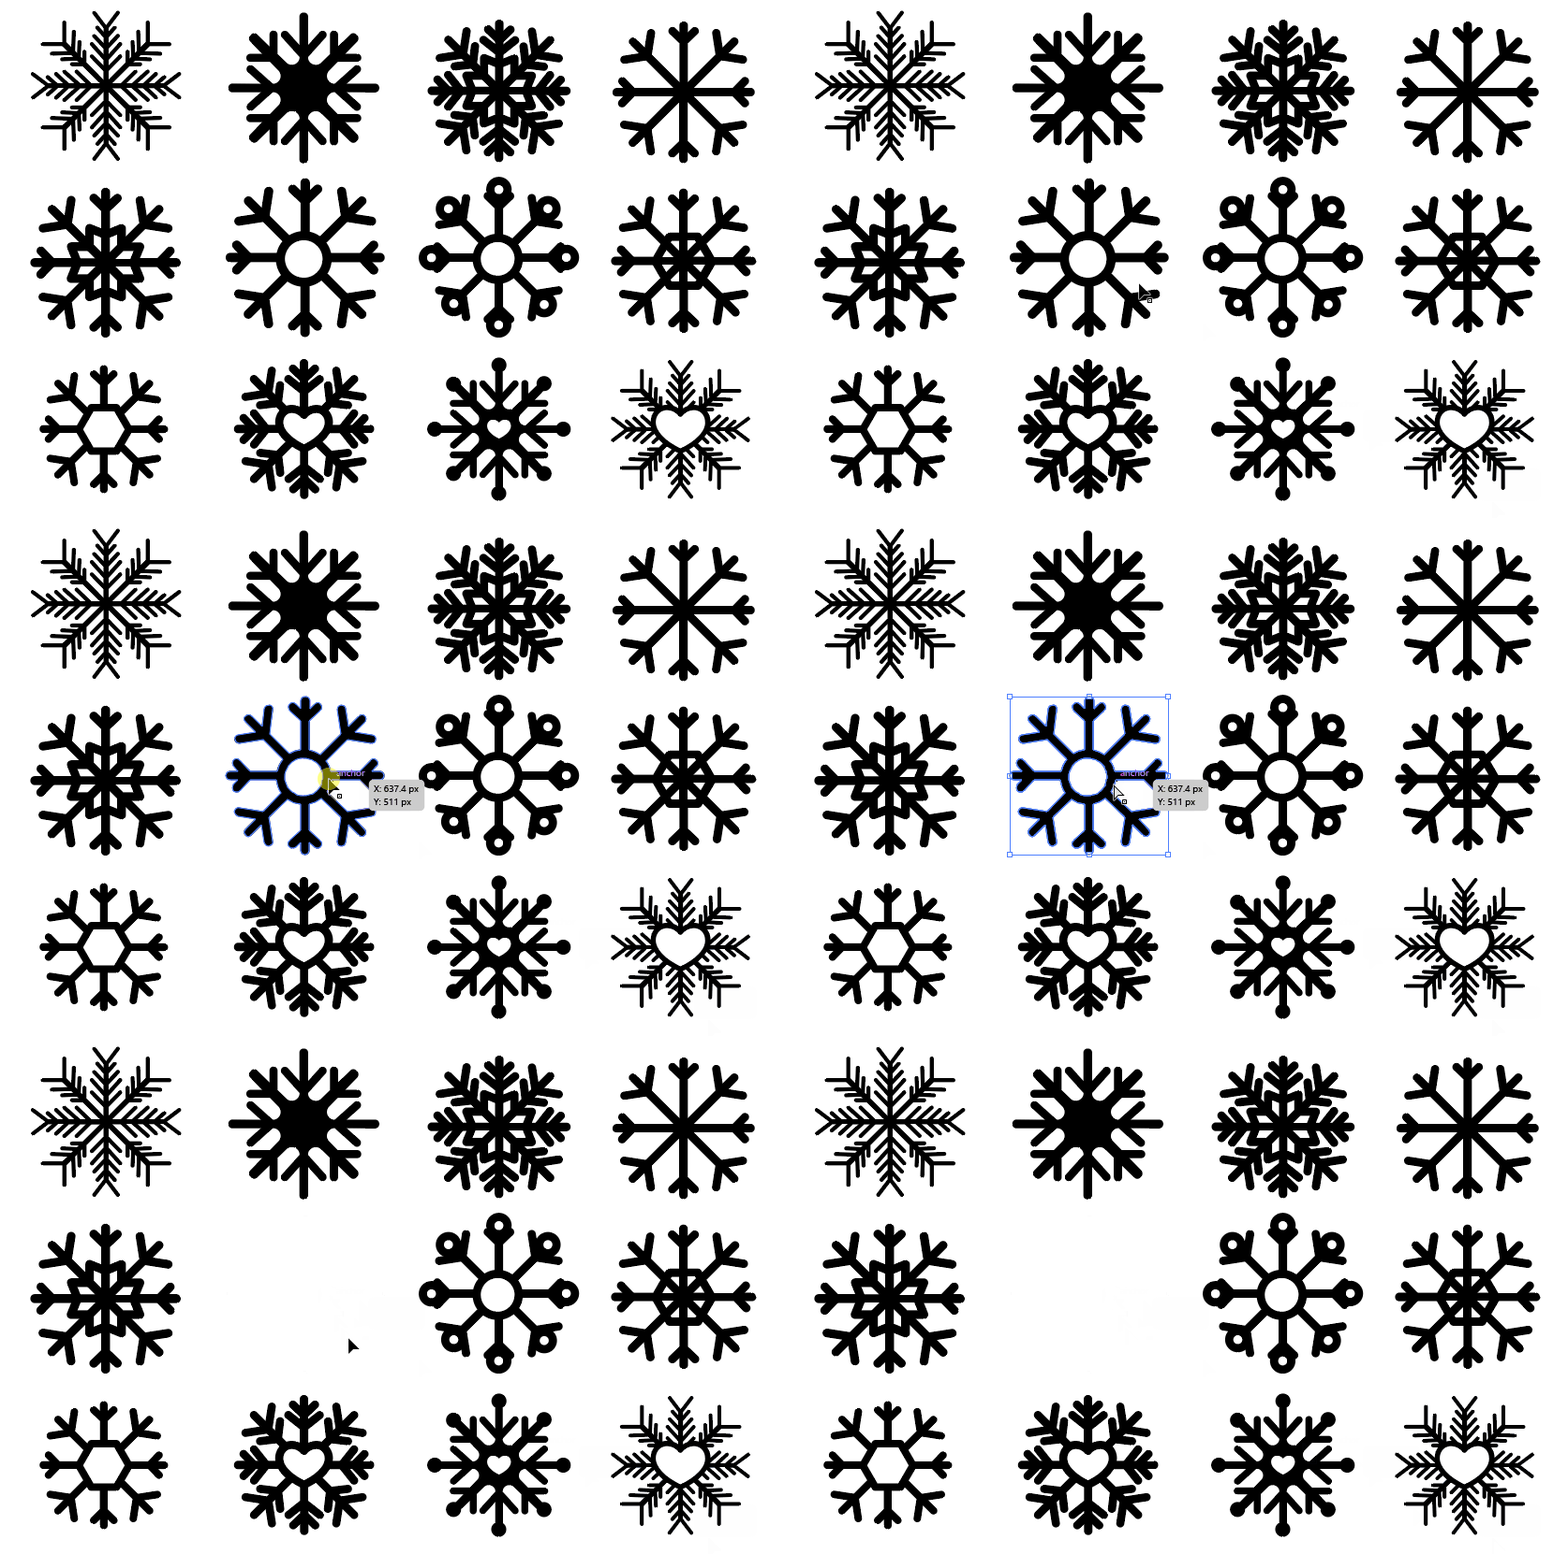
Christmas Snowflake Set – Papercut & Laser Cut Templates
You can follow these steps in Illustrator, but feel free to adapt the process if you’re using Cricut Design Space, Silhouette Studio, or any other vector-editing software.
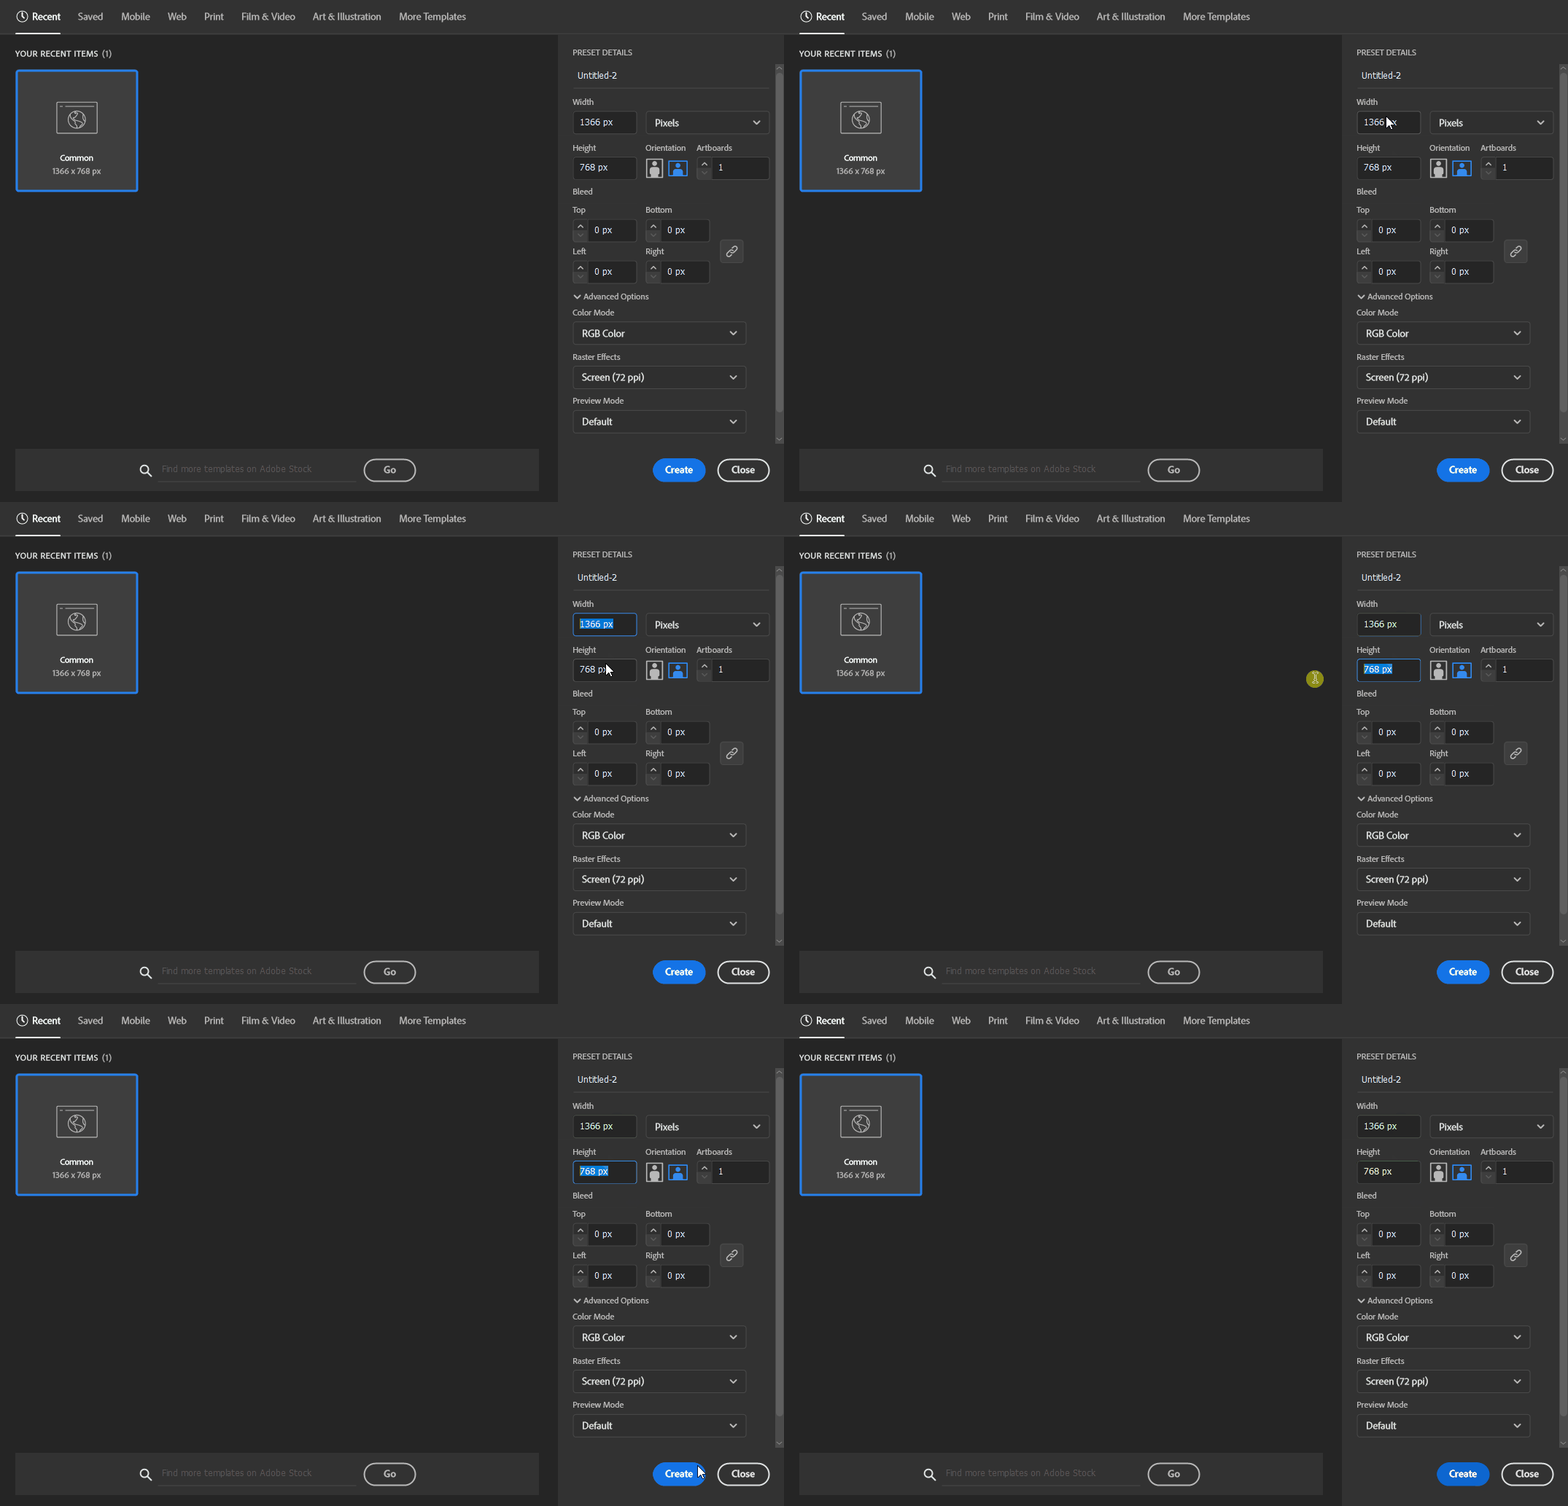
Step 1: Create a New Document
Open Adobe Illustrator and start a new document. The size doesn’t matter too much here, you can set it to any artboard size you prefer.
Step 2: Open the SVG File
Import the SVG snowflake file you downloaded. From the Set, choose the snowflake design you like best to use as the main centerpiece of your ornament.
Step 3: Create the Ornament Outline
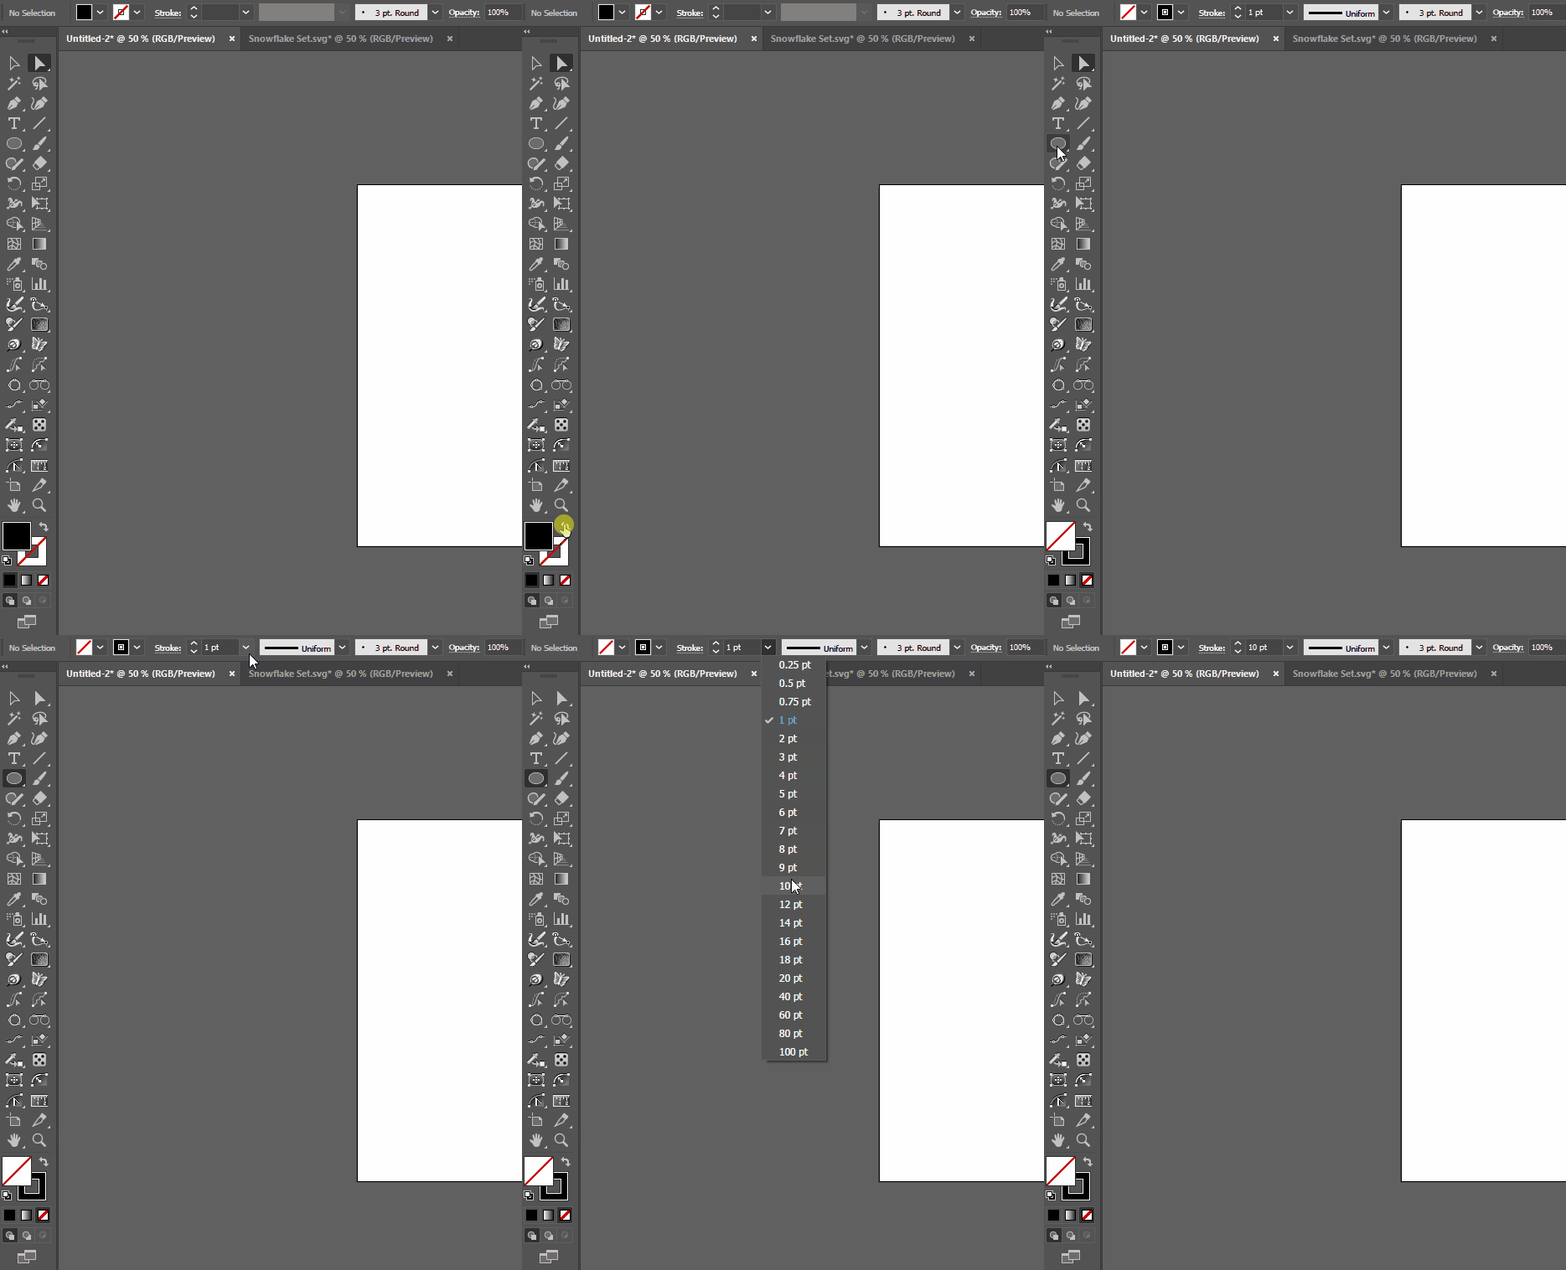
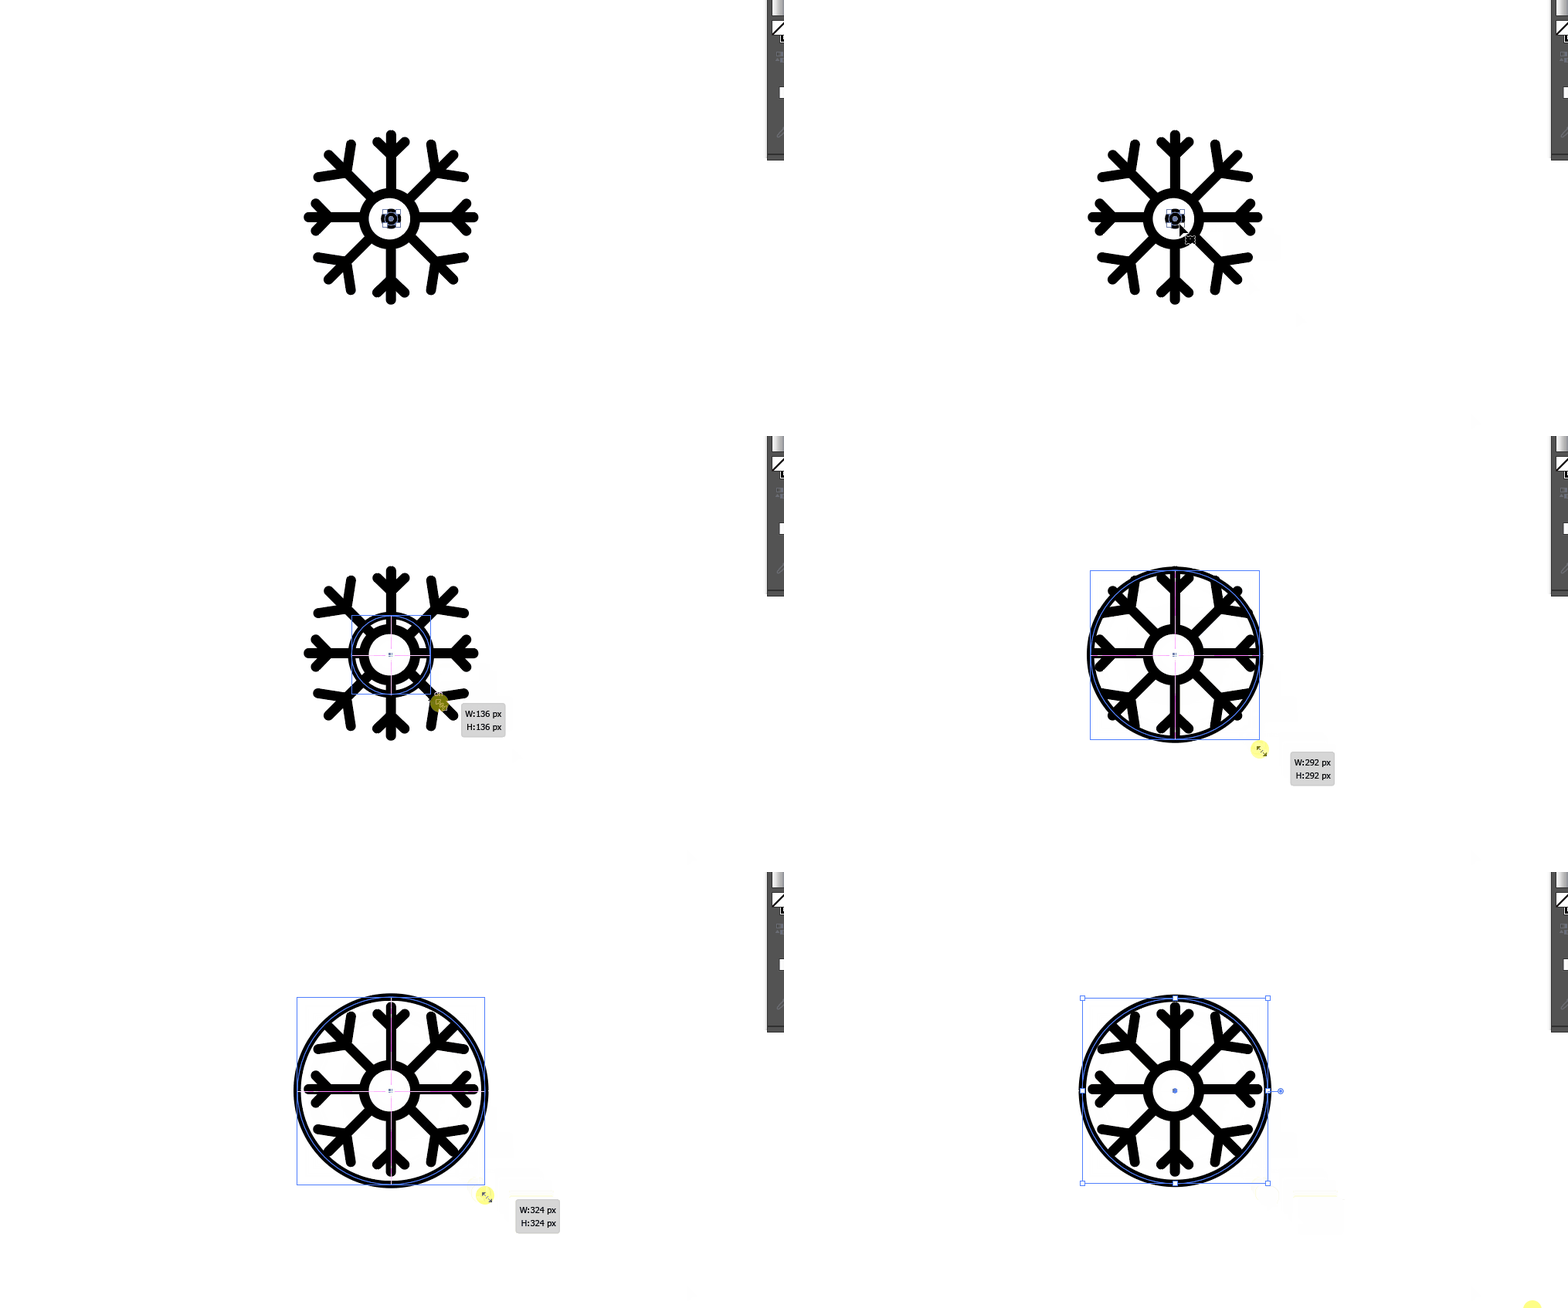
Select the Ellipse Tool and draw a perfect circle by holding Shift as you drag. Make sure to draw the circle with outline only.
- Set the stroke weight between 5–10 pt, depending on the size of your ornament and how thick you want the frame to be.
- Make sure the snowflake sits neatly inside this circle.
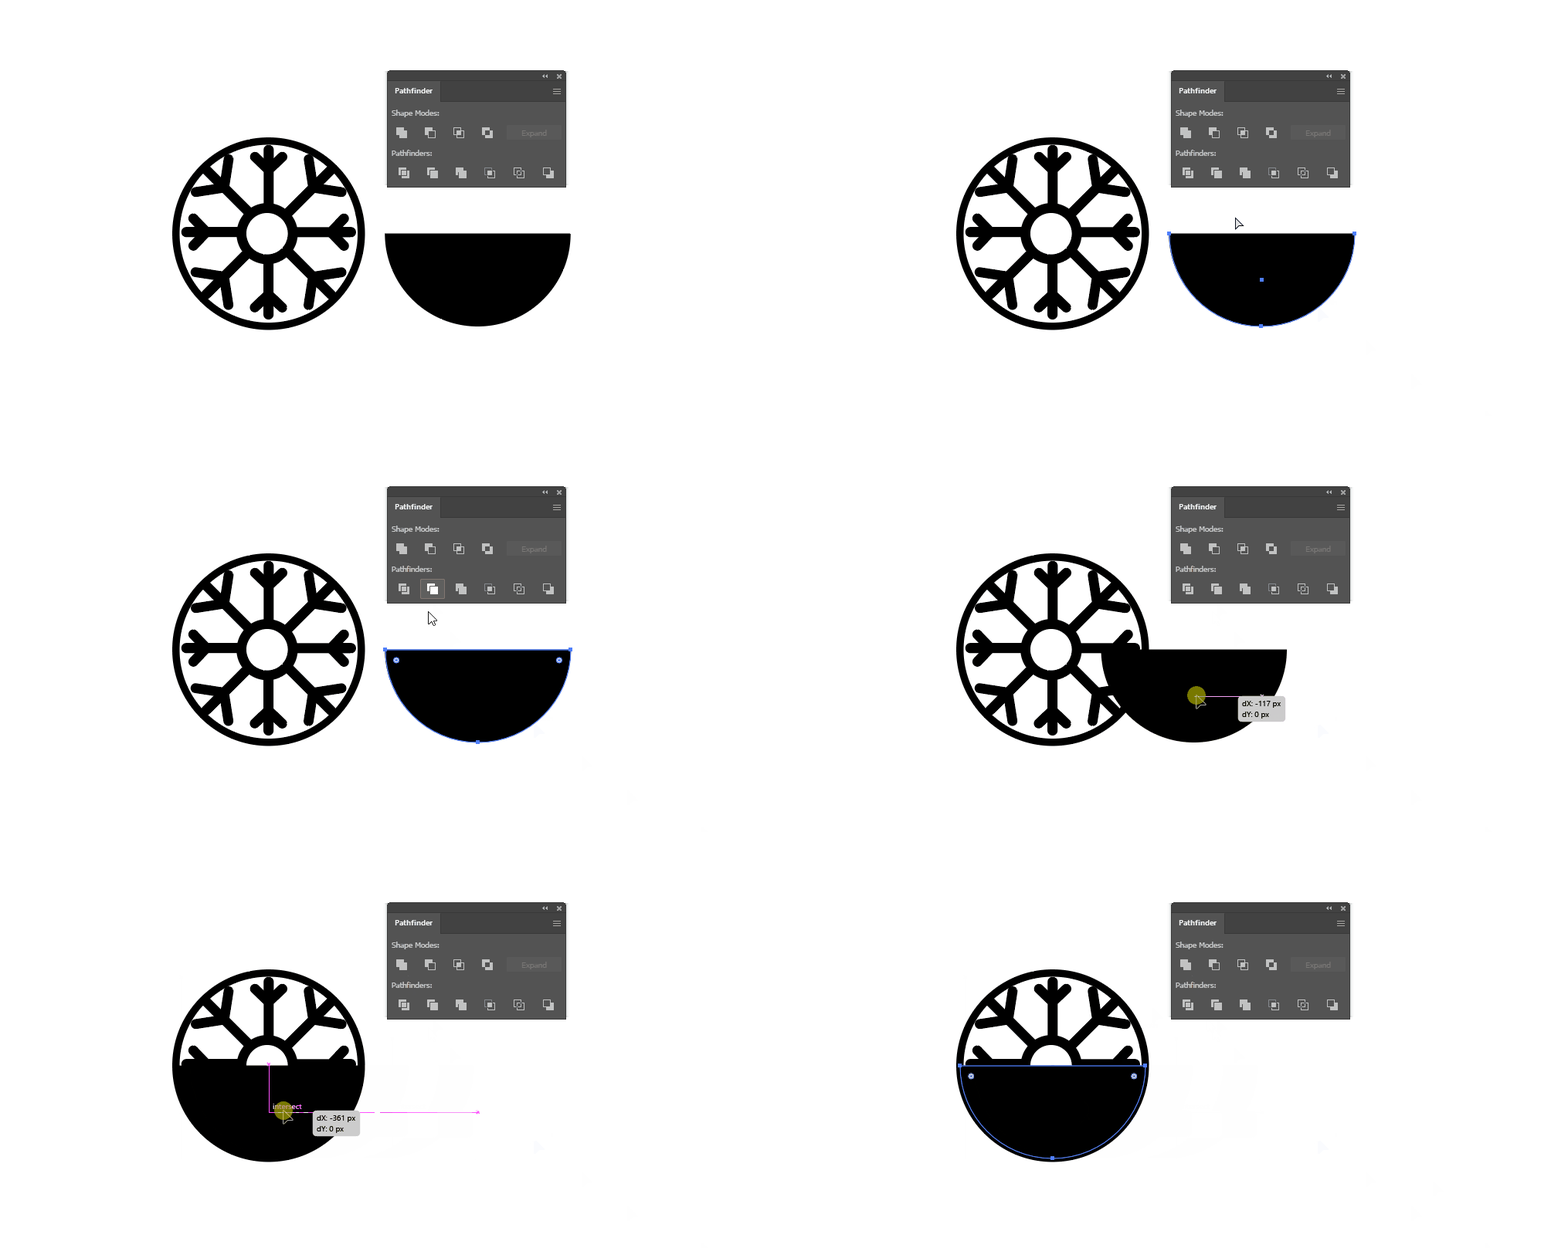
Step 4: Add the Base Circle
Copy the circle you just created. This time:
- Fill the circle with a solid color.
- Remove the outline stroke.
- Using the Direct Selection Tool (Mouse Icon from the Top), select the top anchor point of the circle and press Delete.
Now you’ll have a half-circle shape.
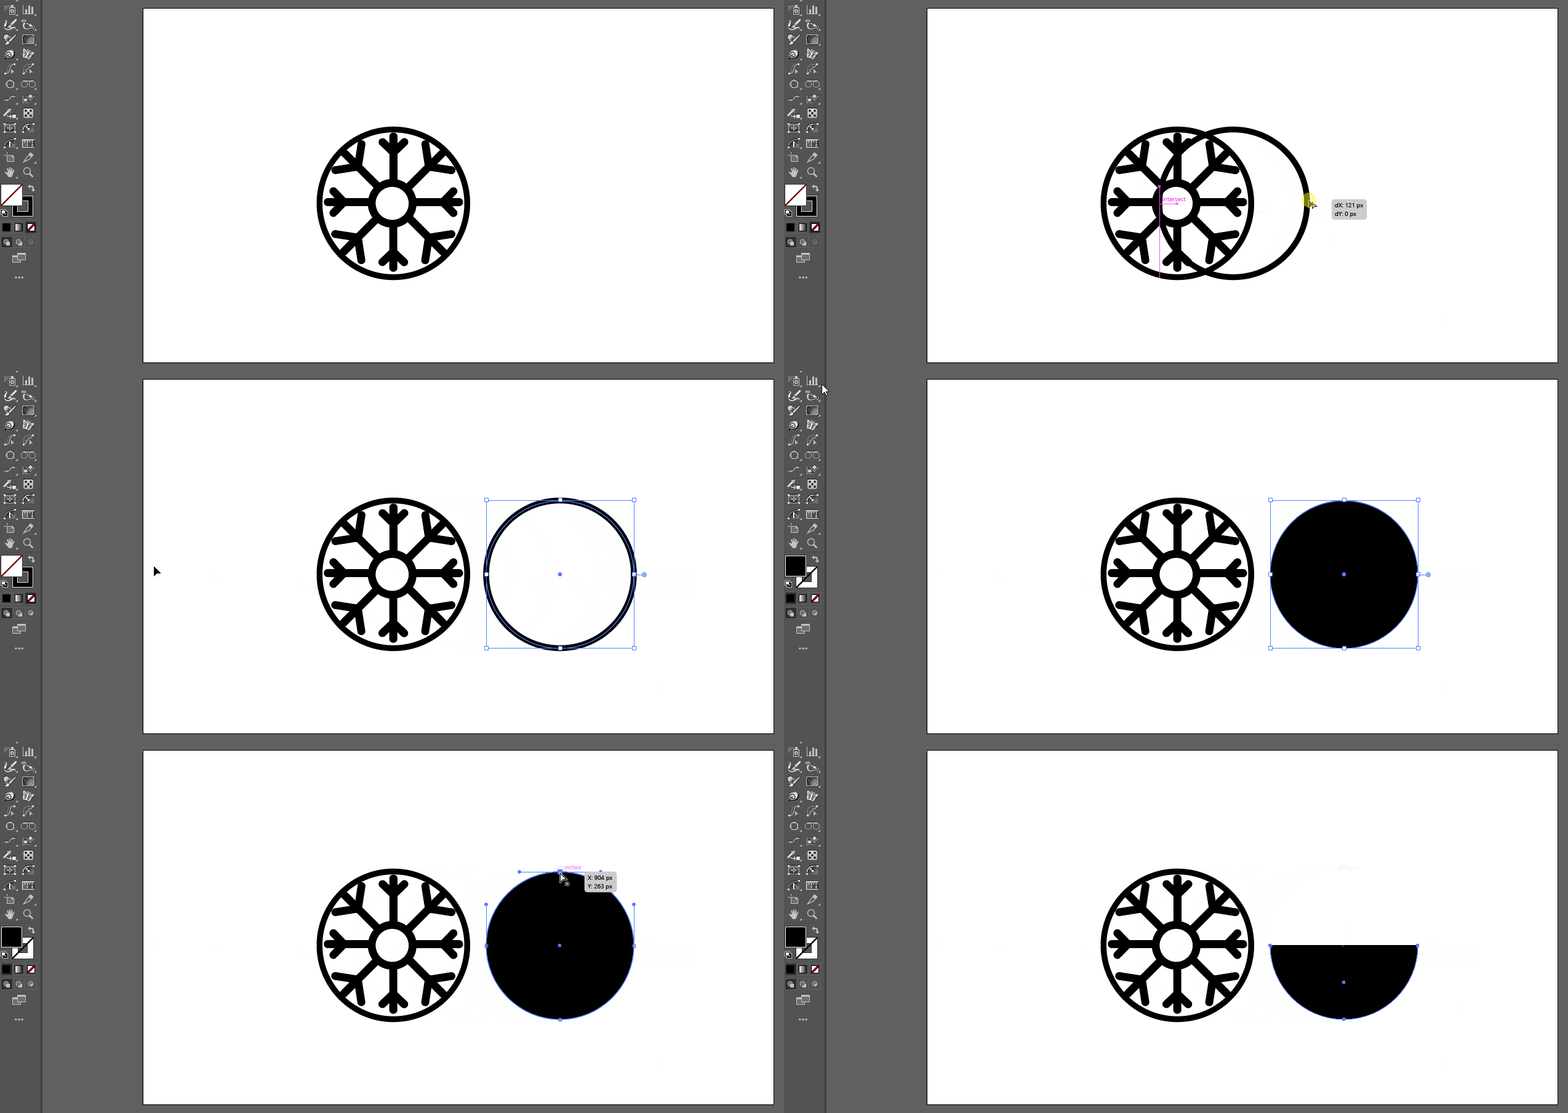
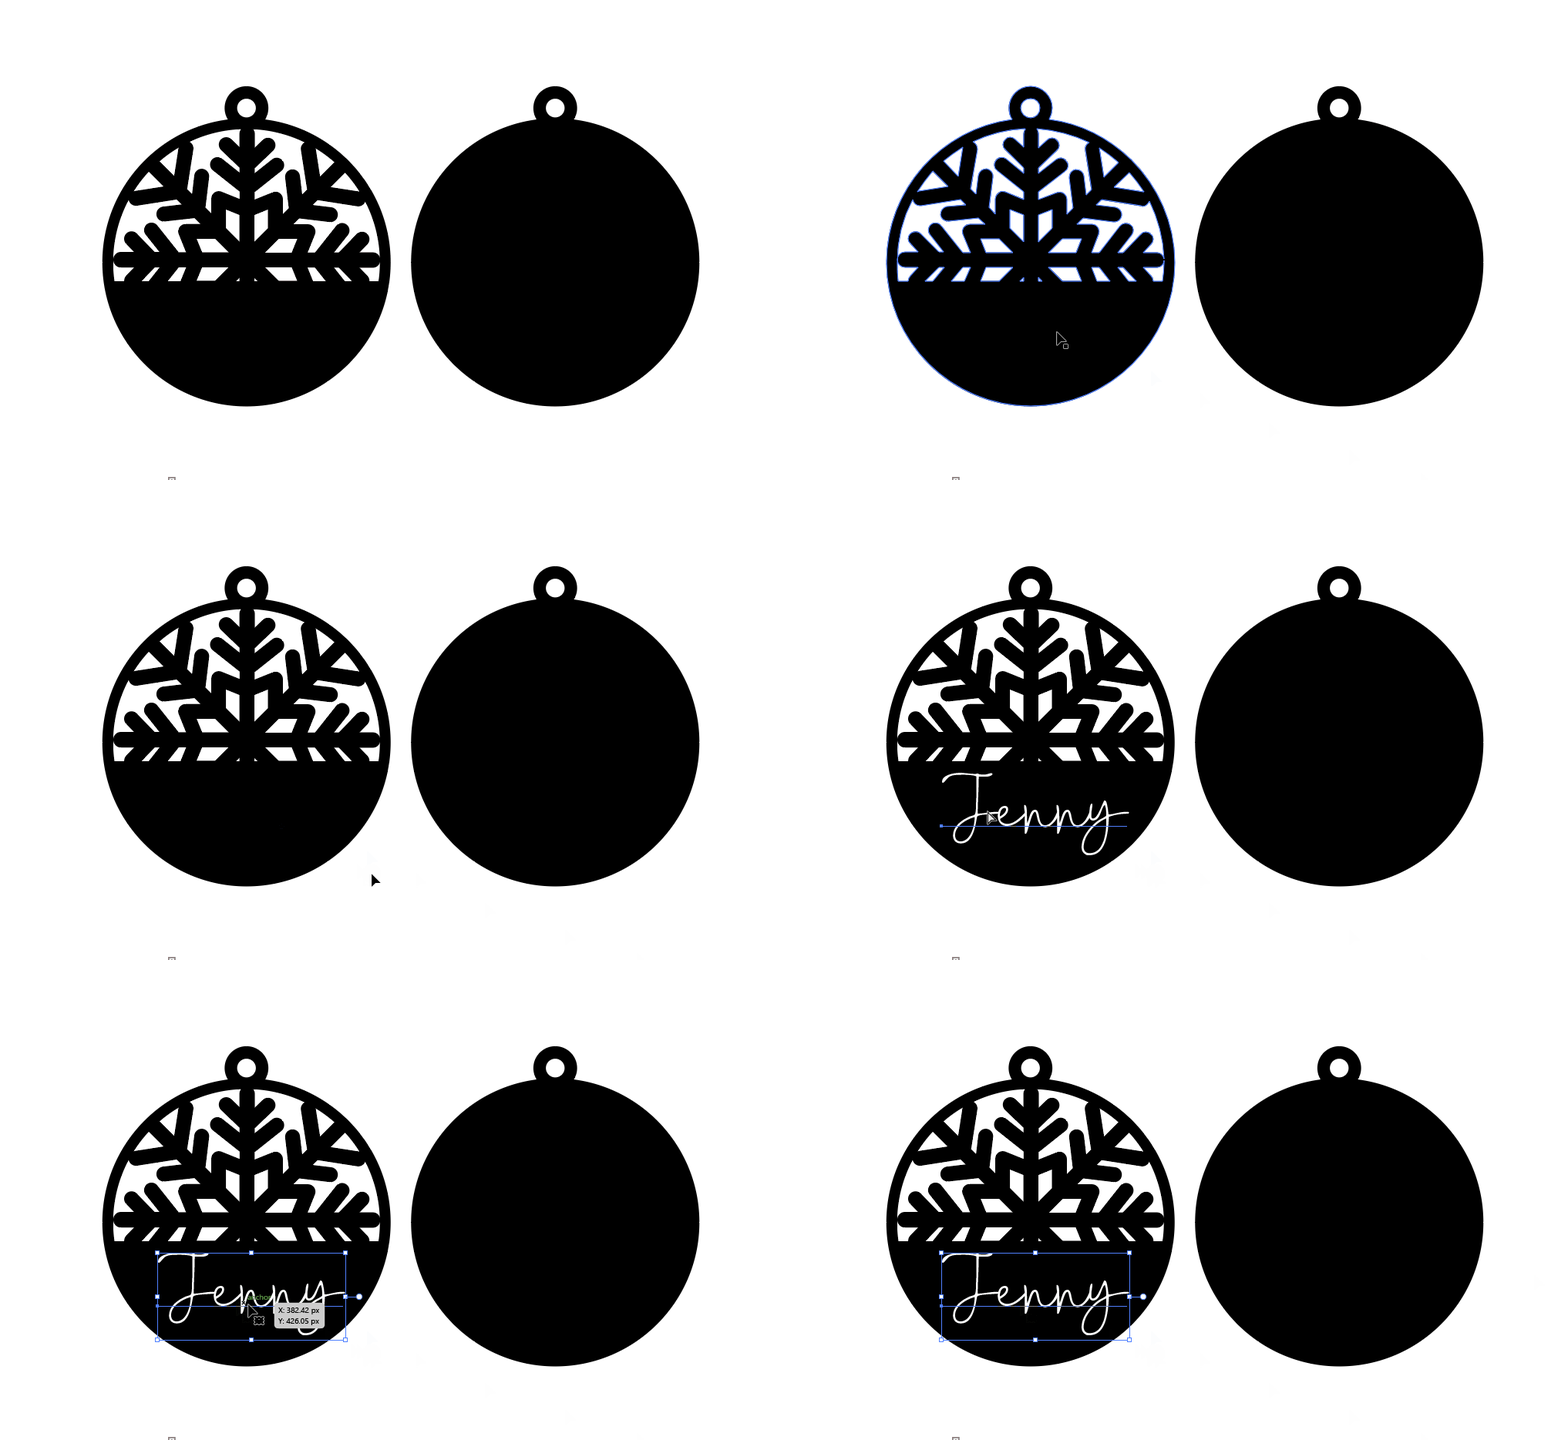
Now, Move the Half Shape of Circle you created to the center of the design and hit the unite button from the pathfinder tools.
Step 5: Adjust the Snowflake Design
At this point, feel free to swap out the snowflake if you think another one works better. Experiment with placement to get a balanced, symmetrical look.

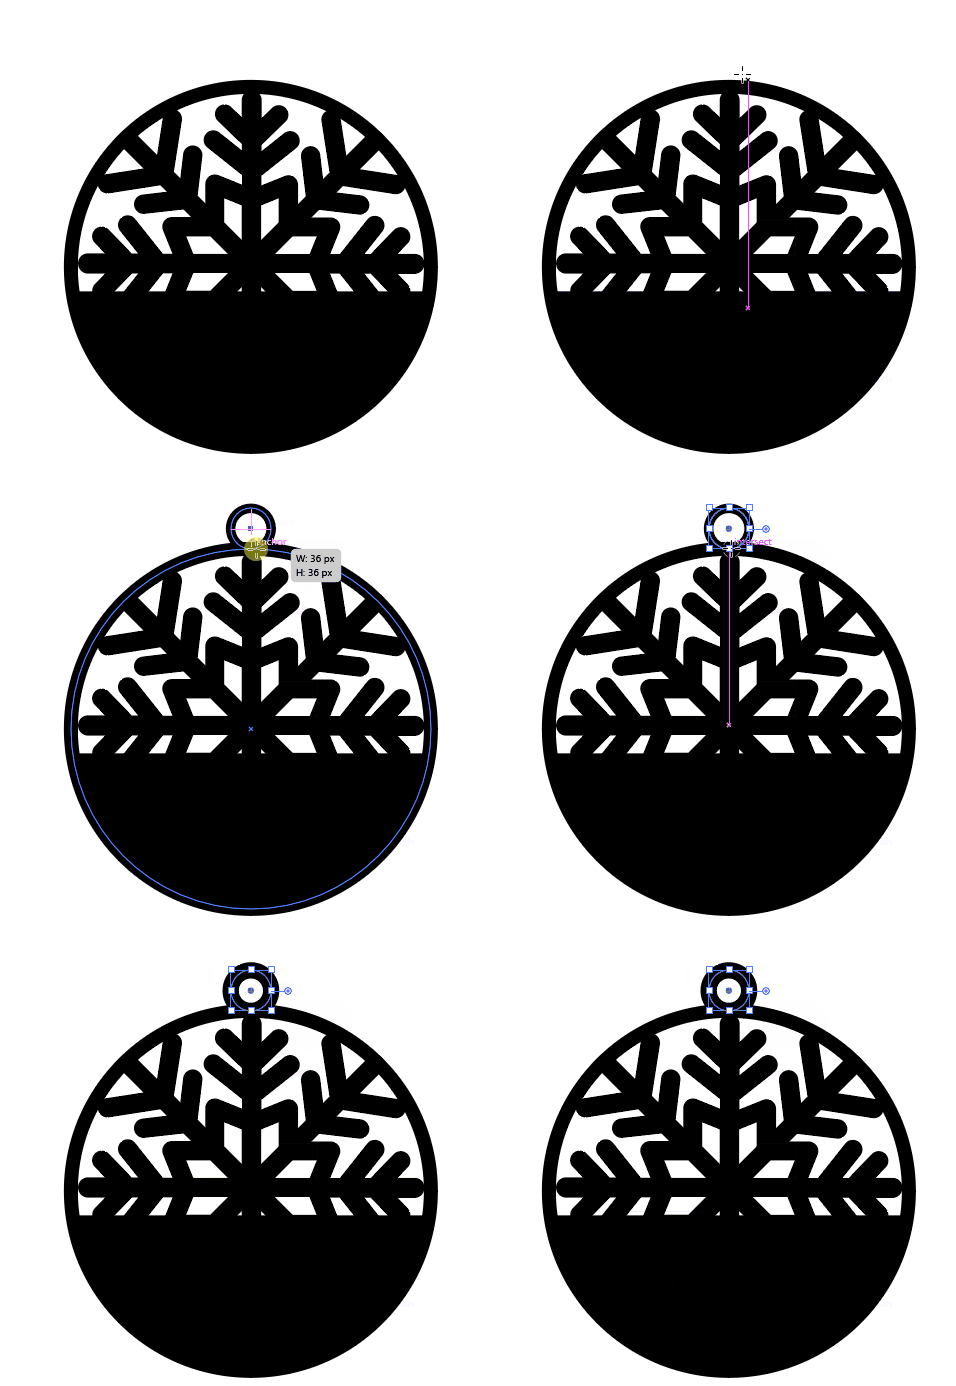
Step 6: Add a Ribbon Hole
Select the circle again and, using the stroke outline, create a small circle at the top center of the ornament. This will serve as the ribbon hole for hanging your finished piece.
Step 7: Merge the Shapes
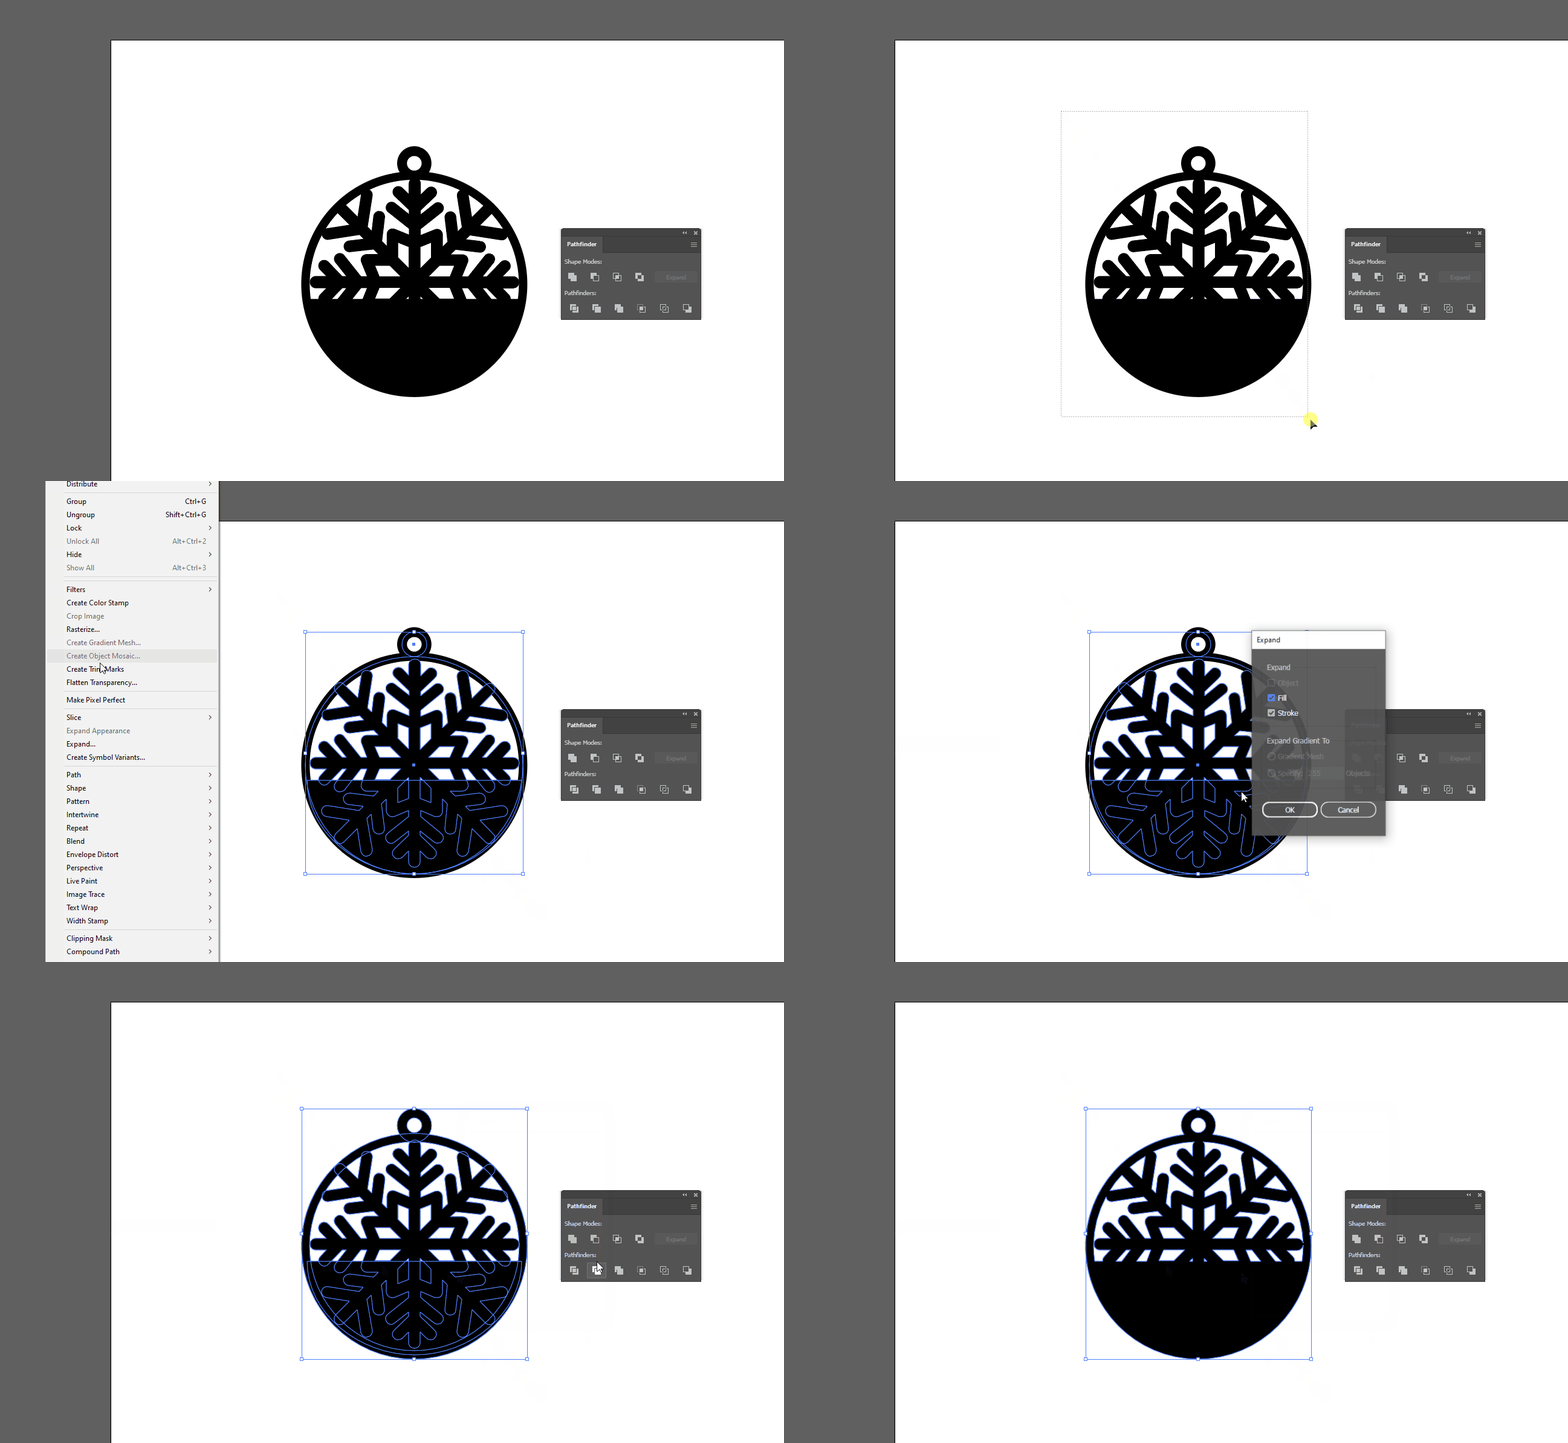
Select the entire design.
- Go to Object > Expand and click OK.
- Use the Pathfinder > Unite tool to merge everything into a single object.
This step ensures your design is machine-ready and cuts cleanly.
Step 8: Create a Background Layer (Optional)
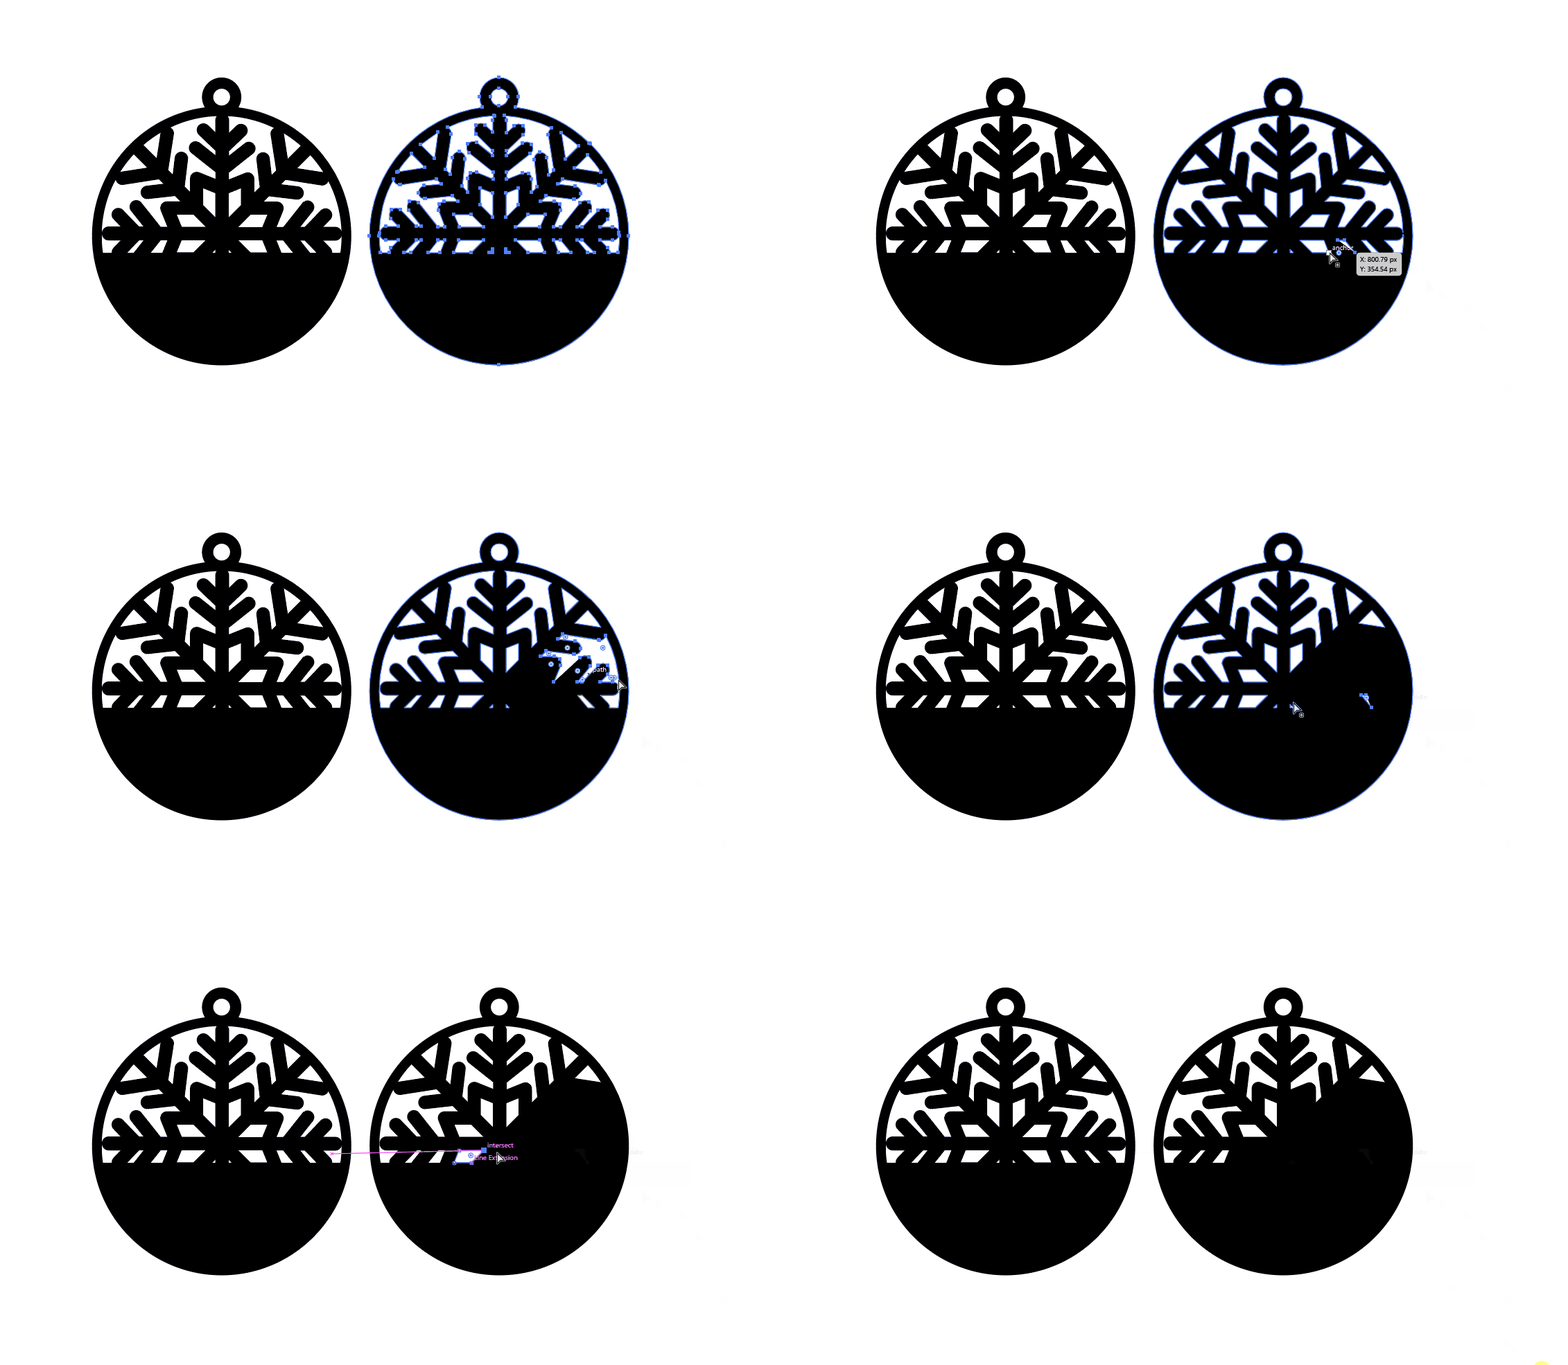
Duplicate your ornament design. For the background:
- Delete all interior anchor points so that only the fill colors remains.
- Keep the ribbon placement intact.
This gives you a solid backing shape that can be cut in a contrasting material for added depth.
Step 9: Personalize with Text
Add custom text, such as a name, year, or holiday message, to make the ornament personal. You can:
Use cut-out text for a bold look.
Or choose an engraving style if you’re using a machine like Glowforge or xTool.
I have also added a small red line for engrave purpose, which make my design even more dynamic once it cuts and applied the colors.
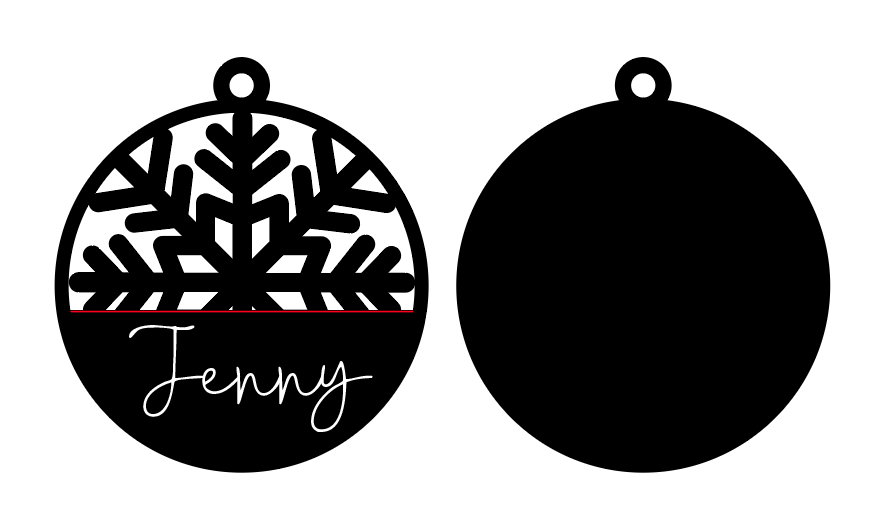
Step 10: Prepare for Cutting
With your design complete, send it to your laser cutter. Machines like xTool or Glowforge are perfect for this type of project, ensuring precision and clean cuts.
Final Result

That’s it! You’ve now created a custom snowflake laser cut ornament ready to hang on your Christmas tree or gift to loved ones. With pre-made snowflake templates, Adobe Illustrator, and a reliable cutting machine, you can quickly make beautiful ornaments in a variety of styles.
This process is easy to repeat, so once you have the base template, you can create entire sets of ornaments with different snowflakes, colors, and personalized touches.
✨ Tip: Try using different materials wood, acrylic, or cardstock for a unique look. Pair them with custom packaging or ribbon to make them gift-ready.