By Design Bundles
Illustrator Tutorials17 min
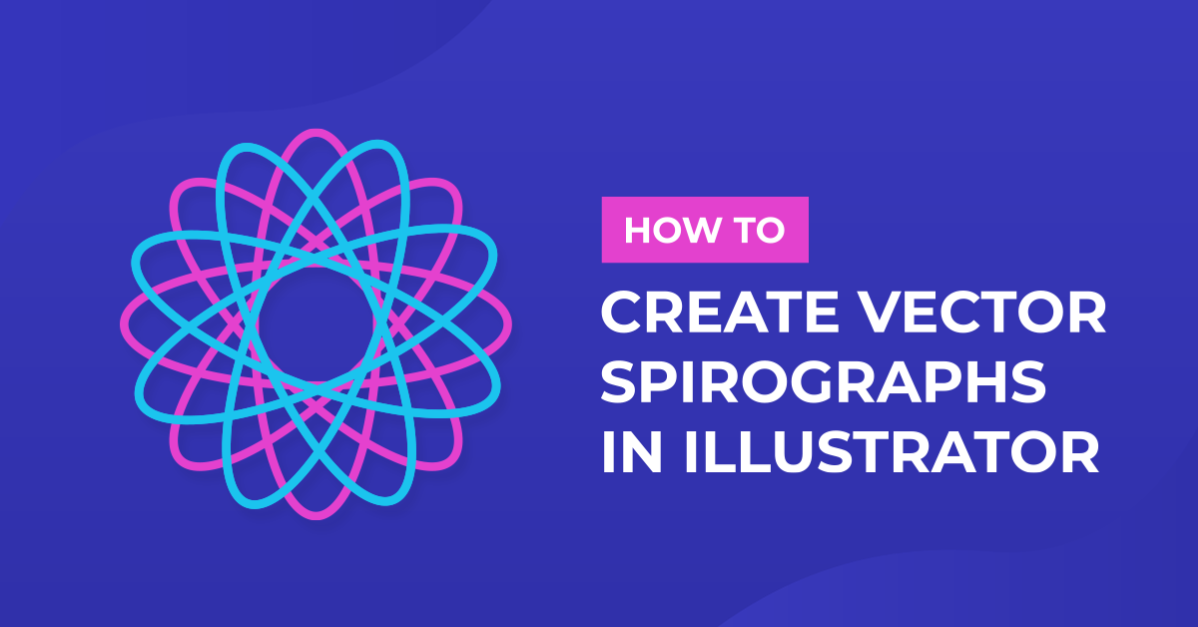
Vector Spirograph Designs in Illustrator
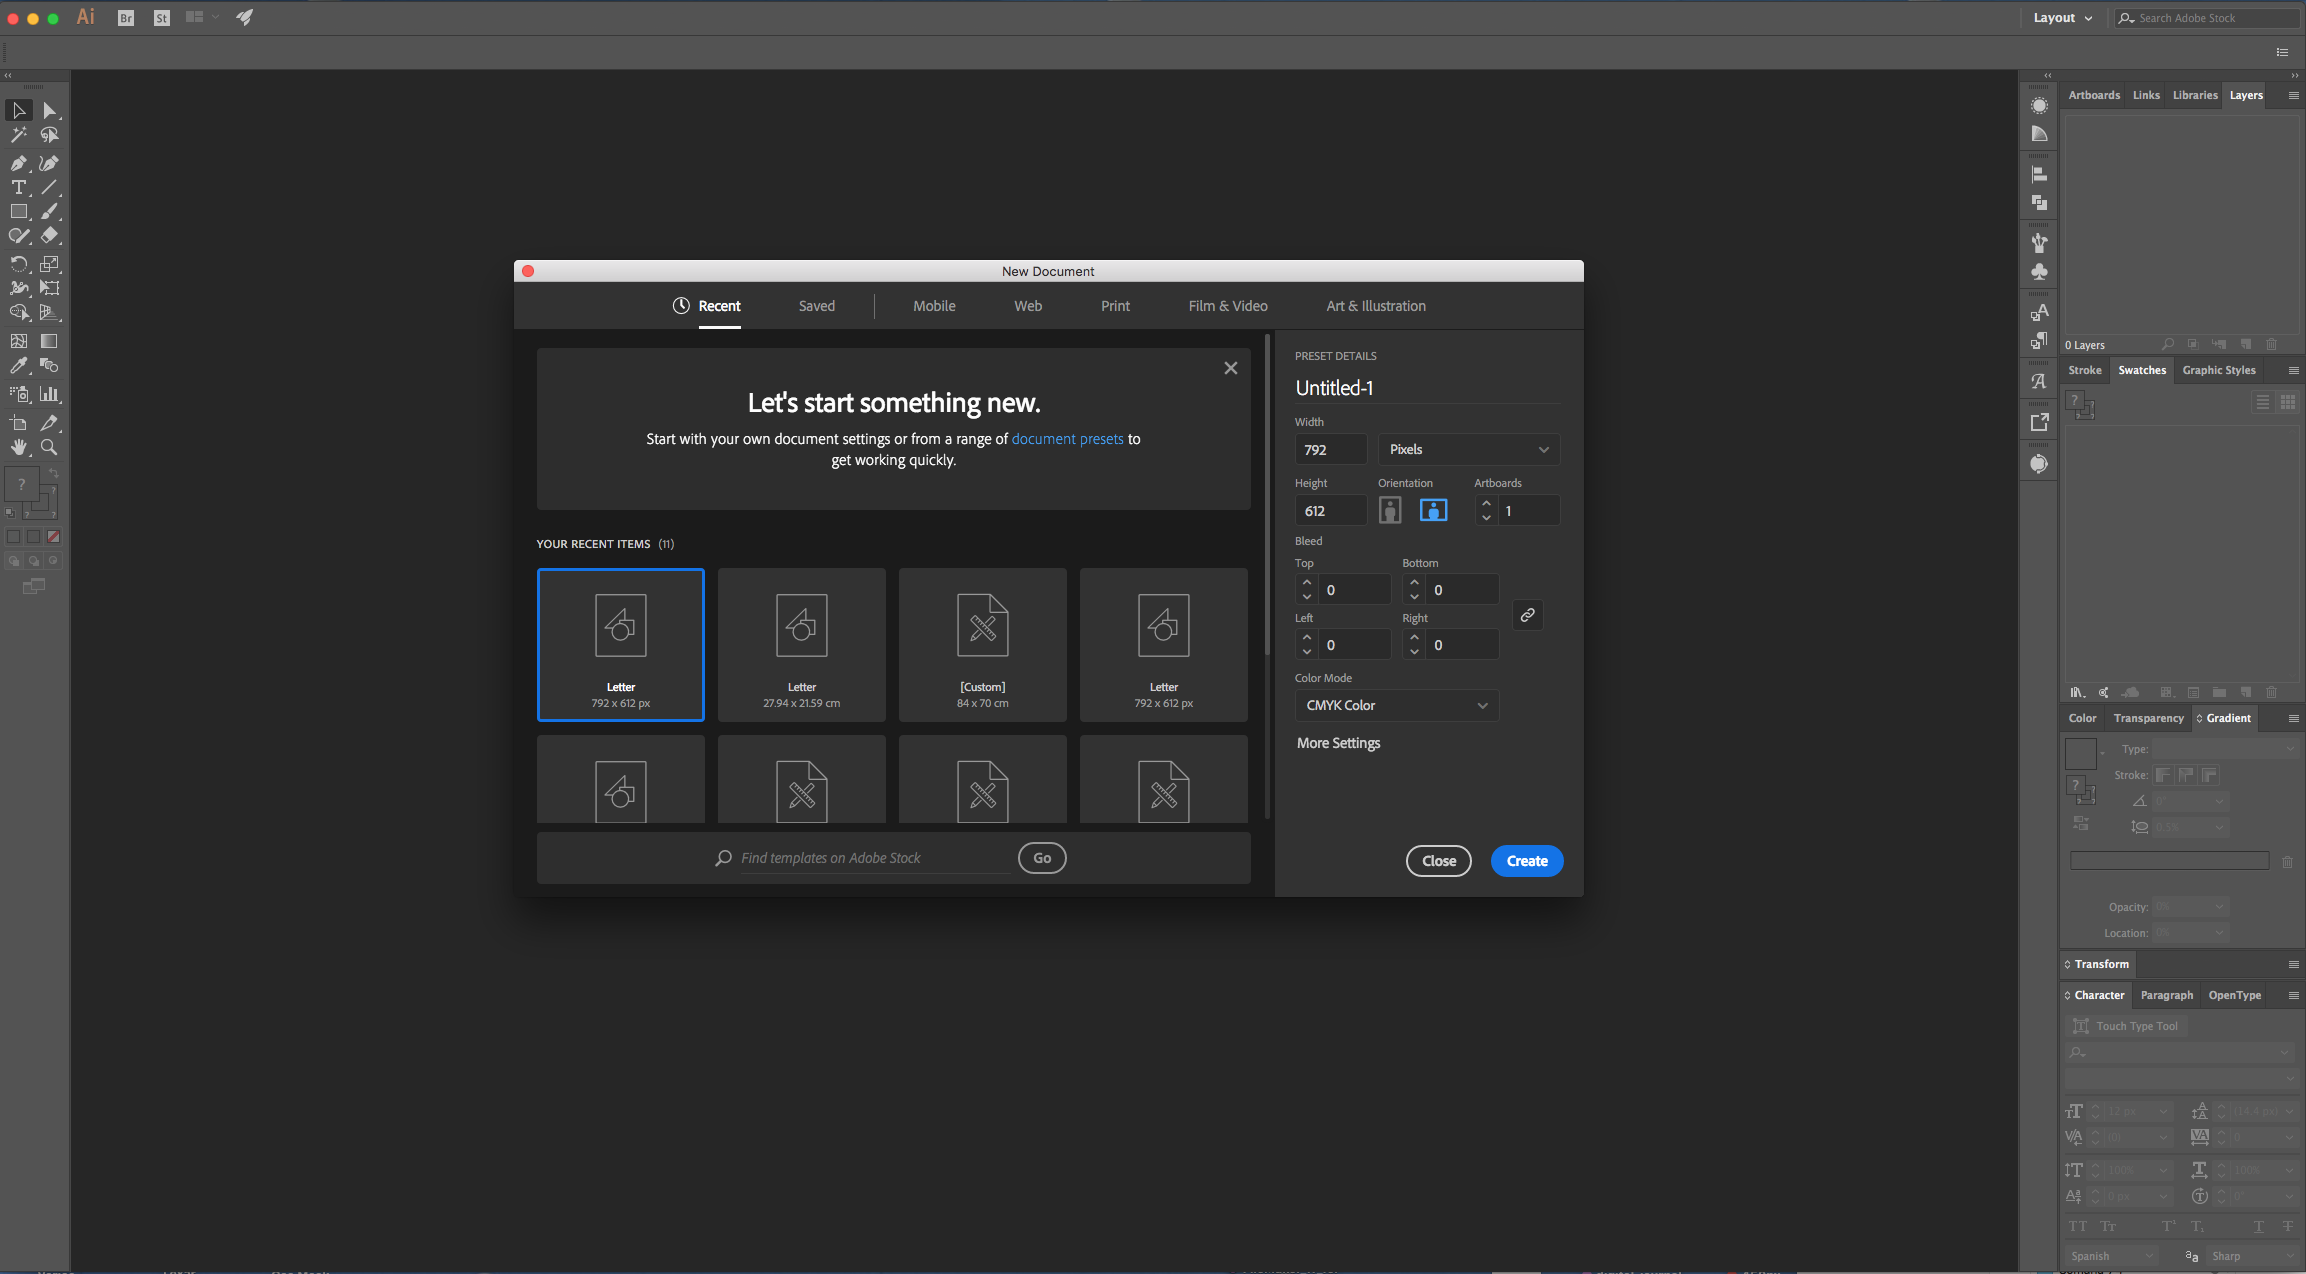
1 - In Illustrator, create a “New Document”.
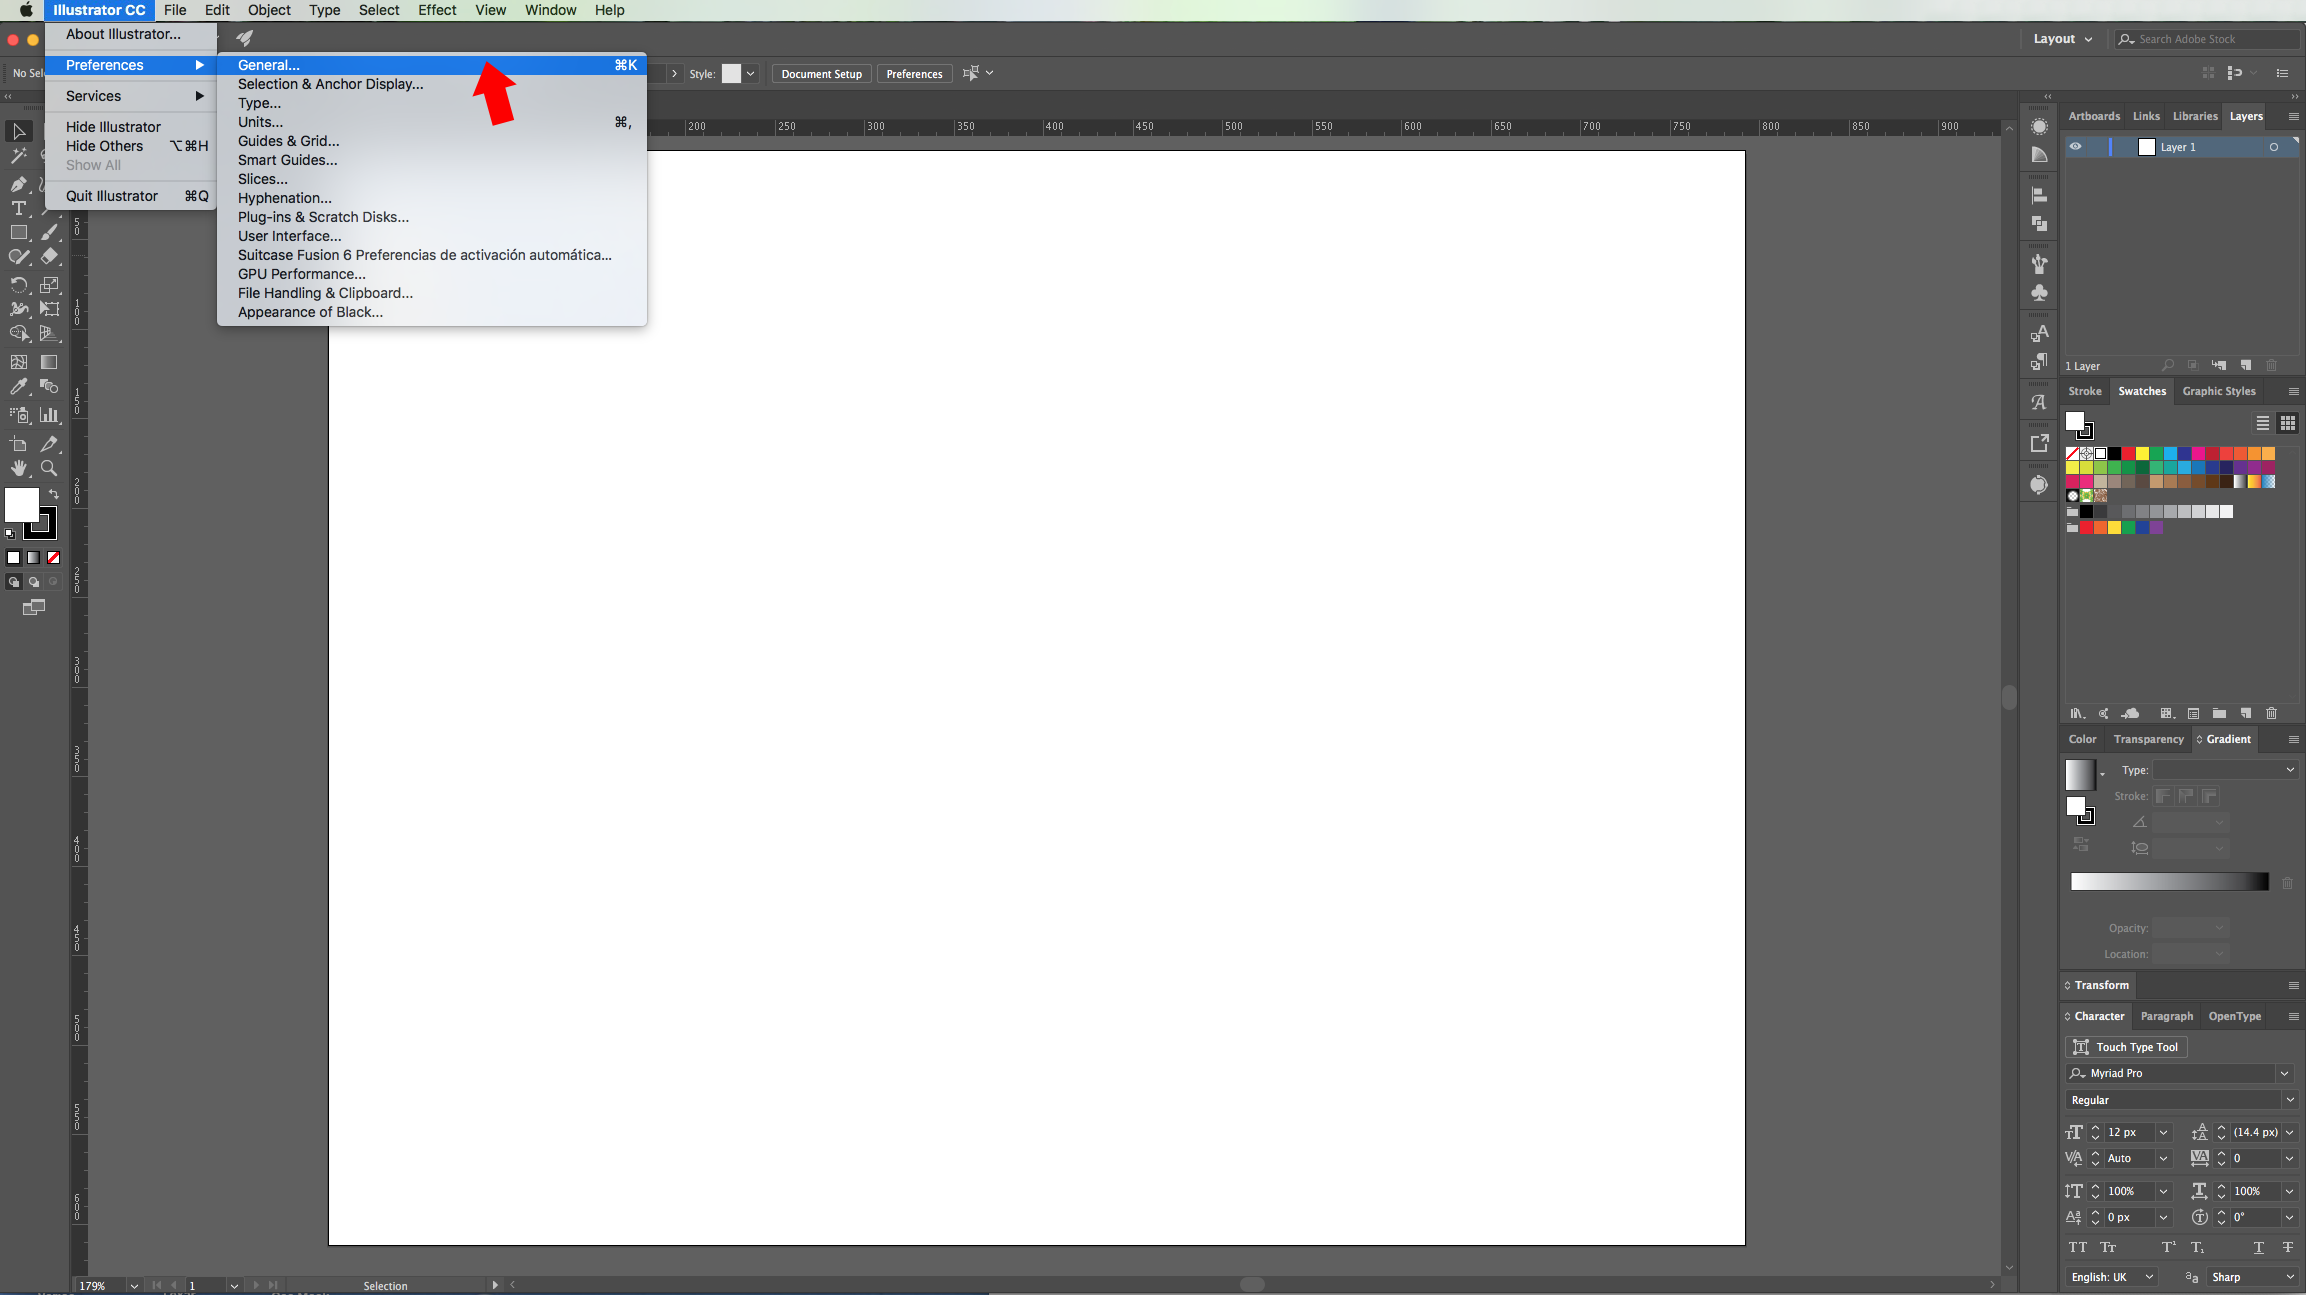
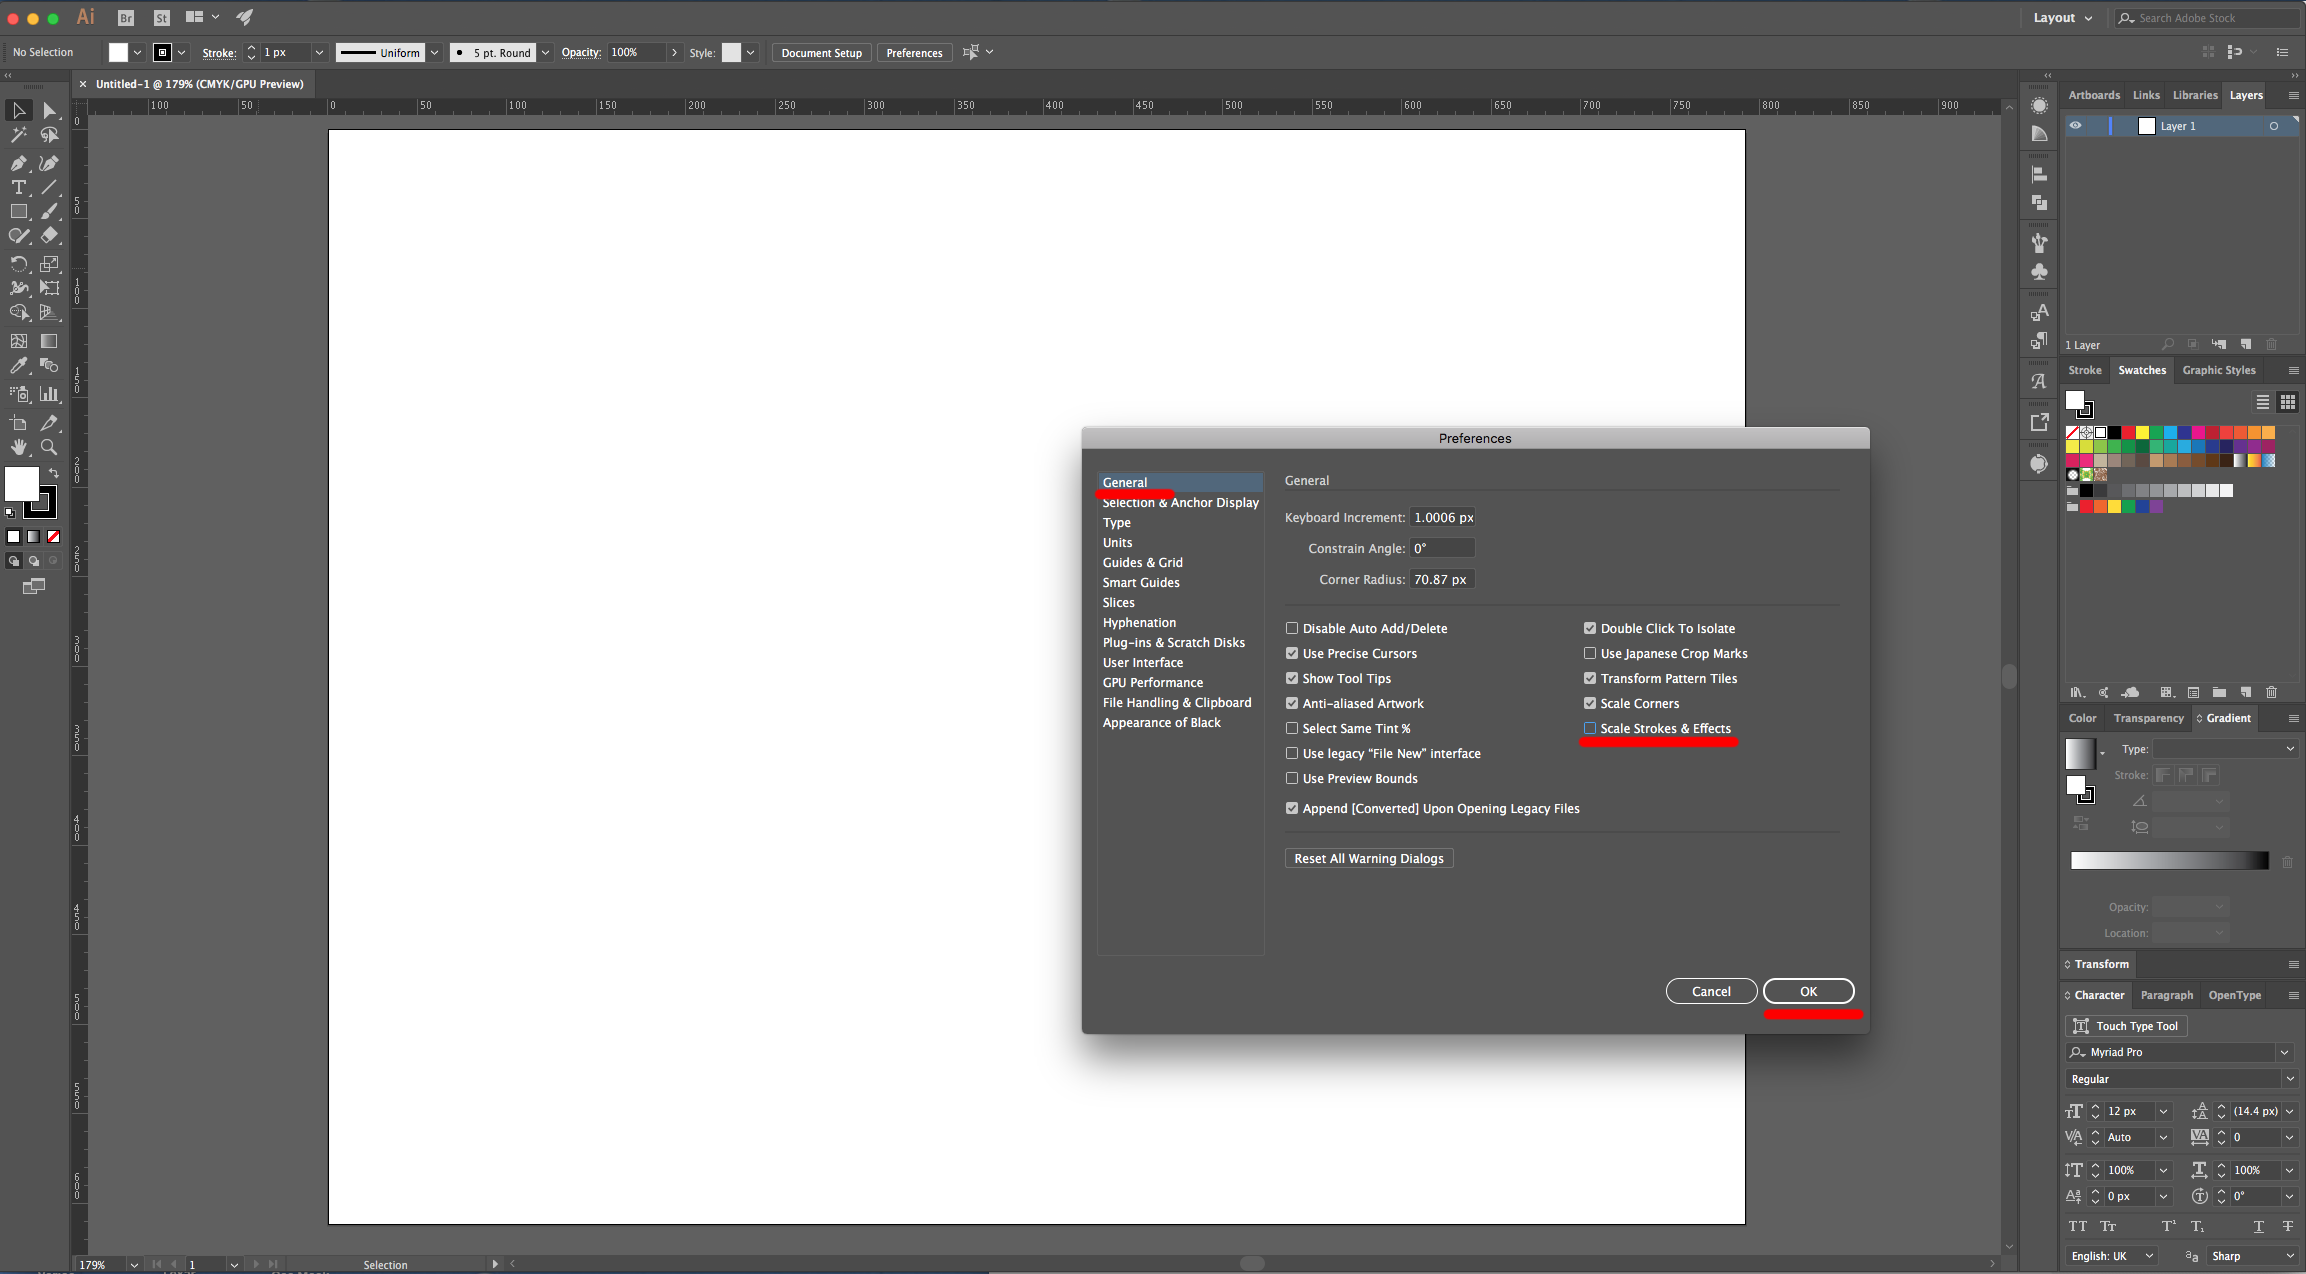
2 - Go to Illustrator > Preferences > General and make sure that the “Scale Strokes & Effects” is not checked.
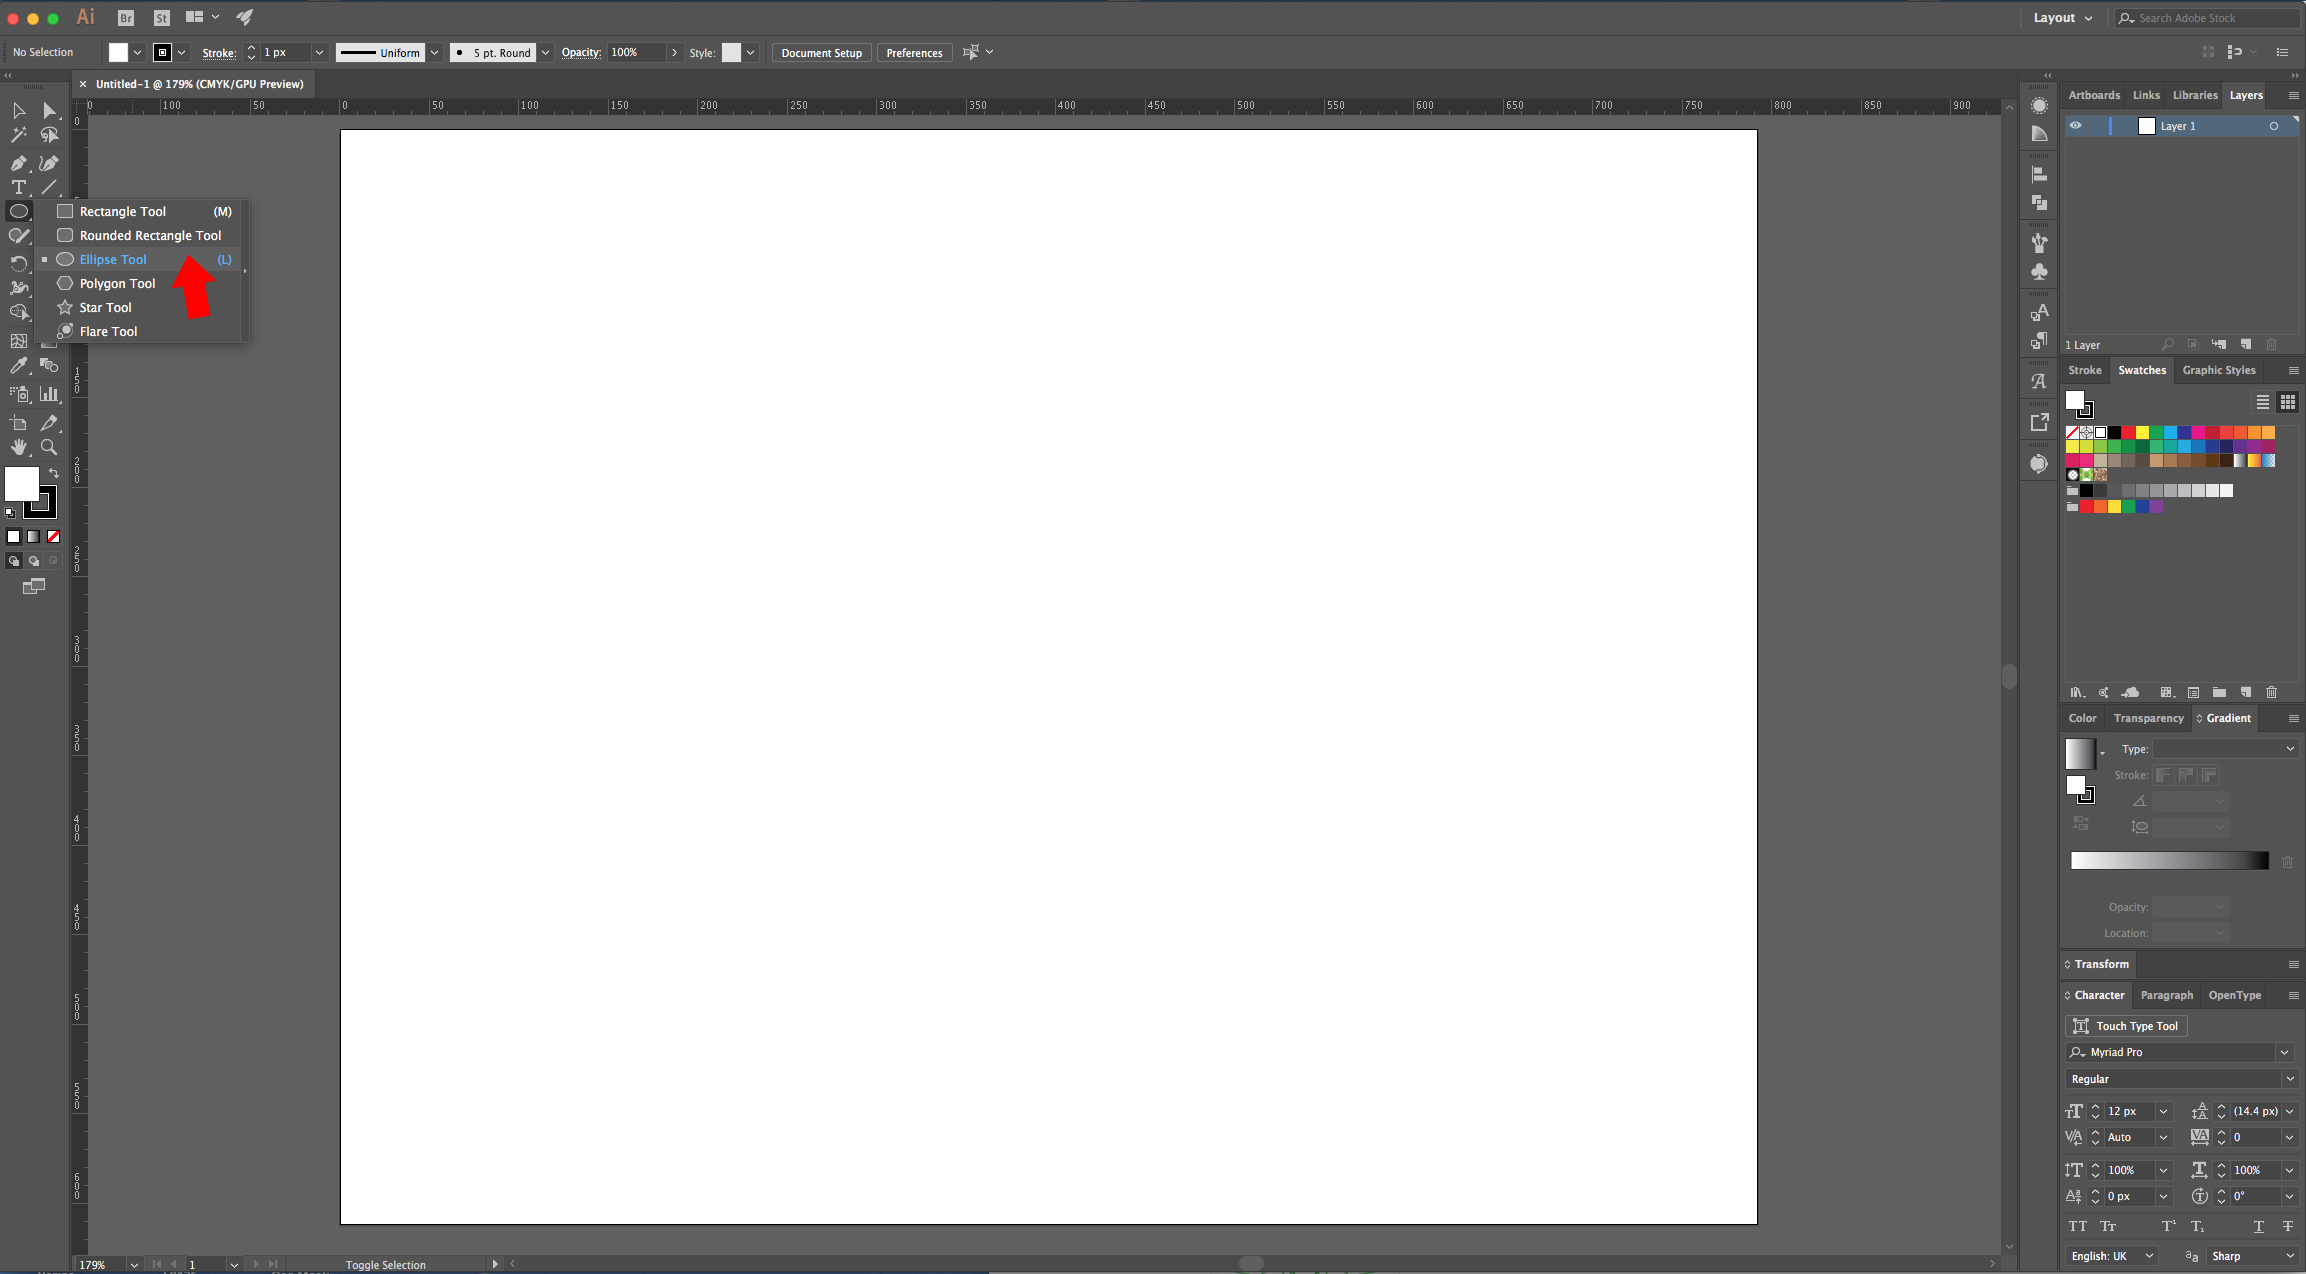
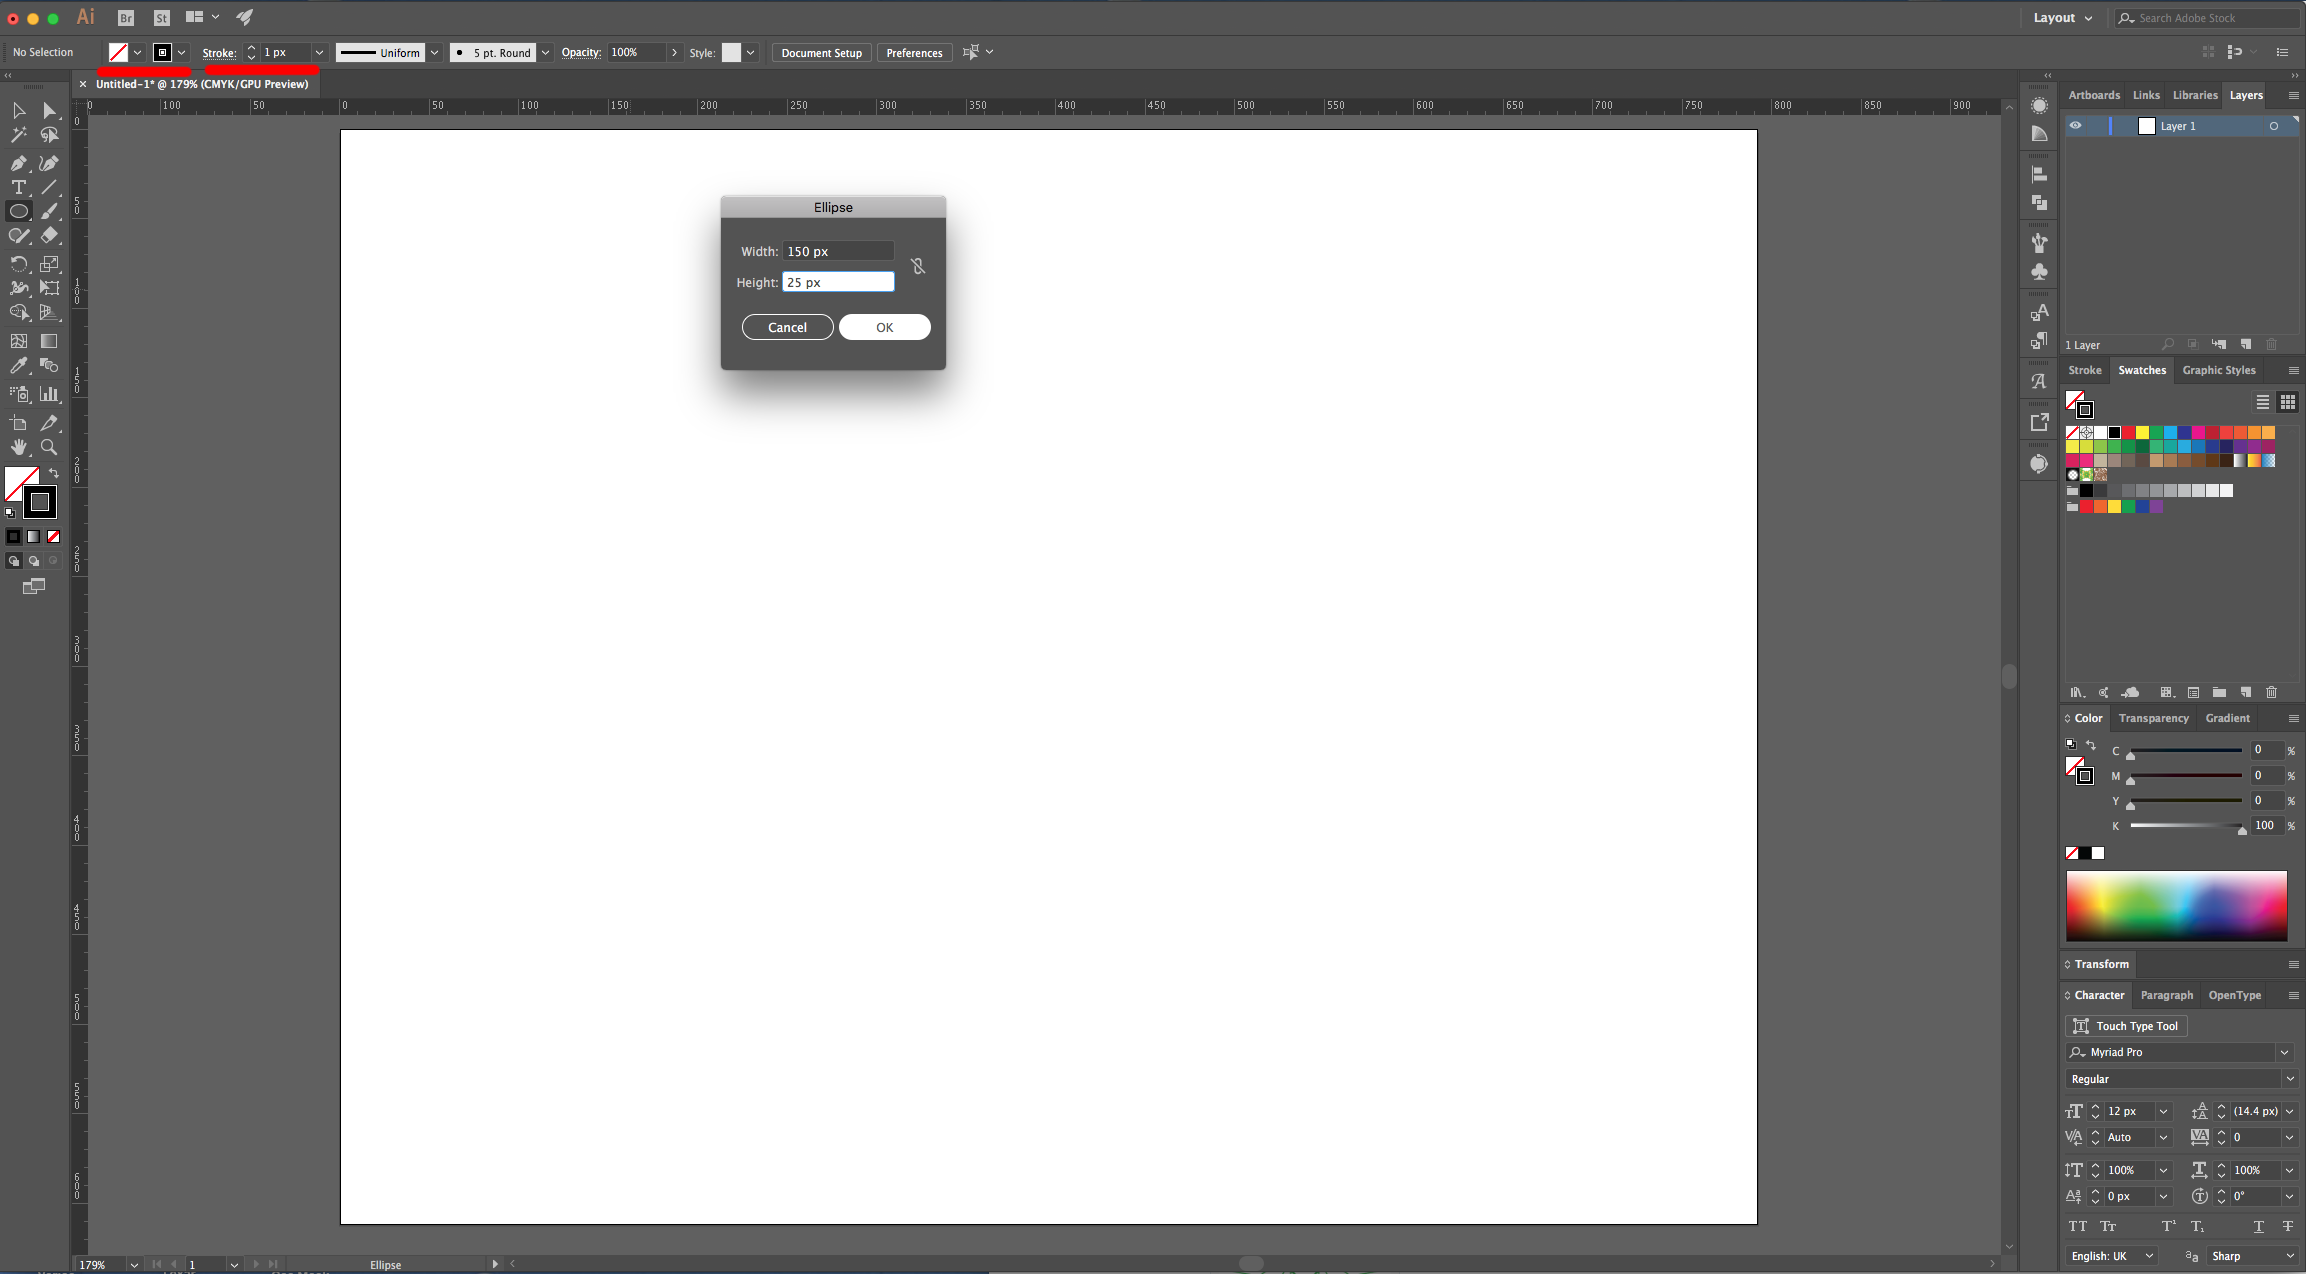
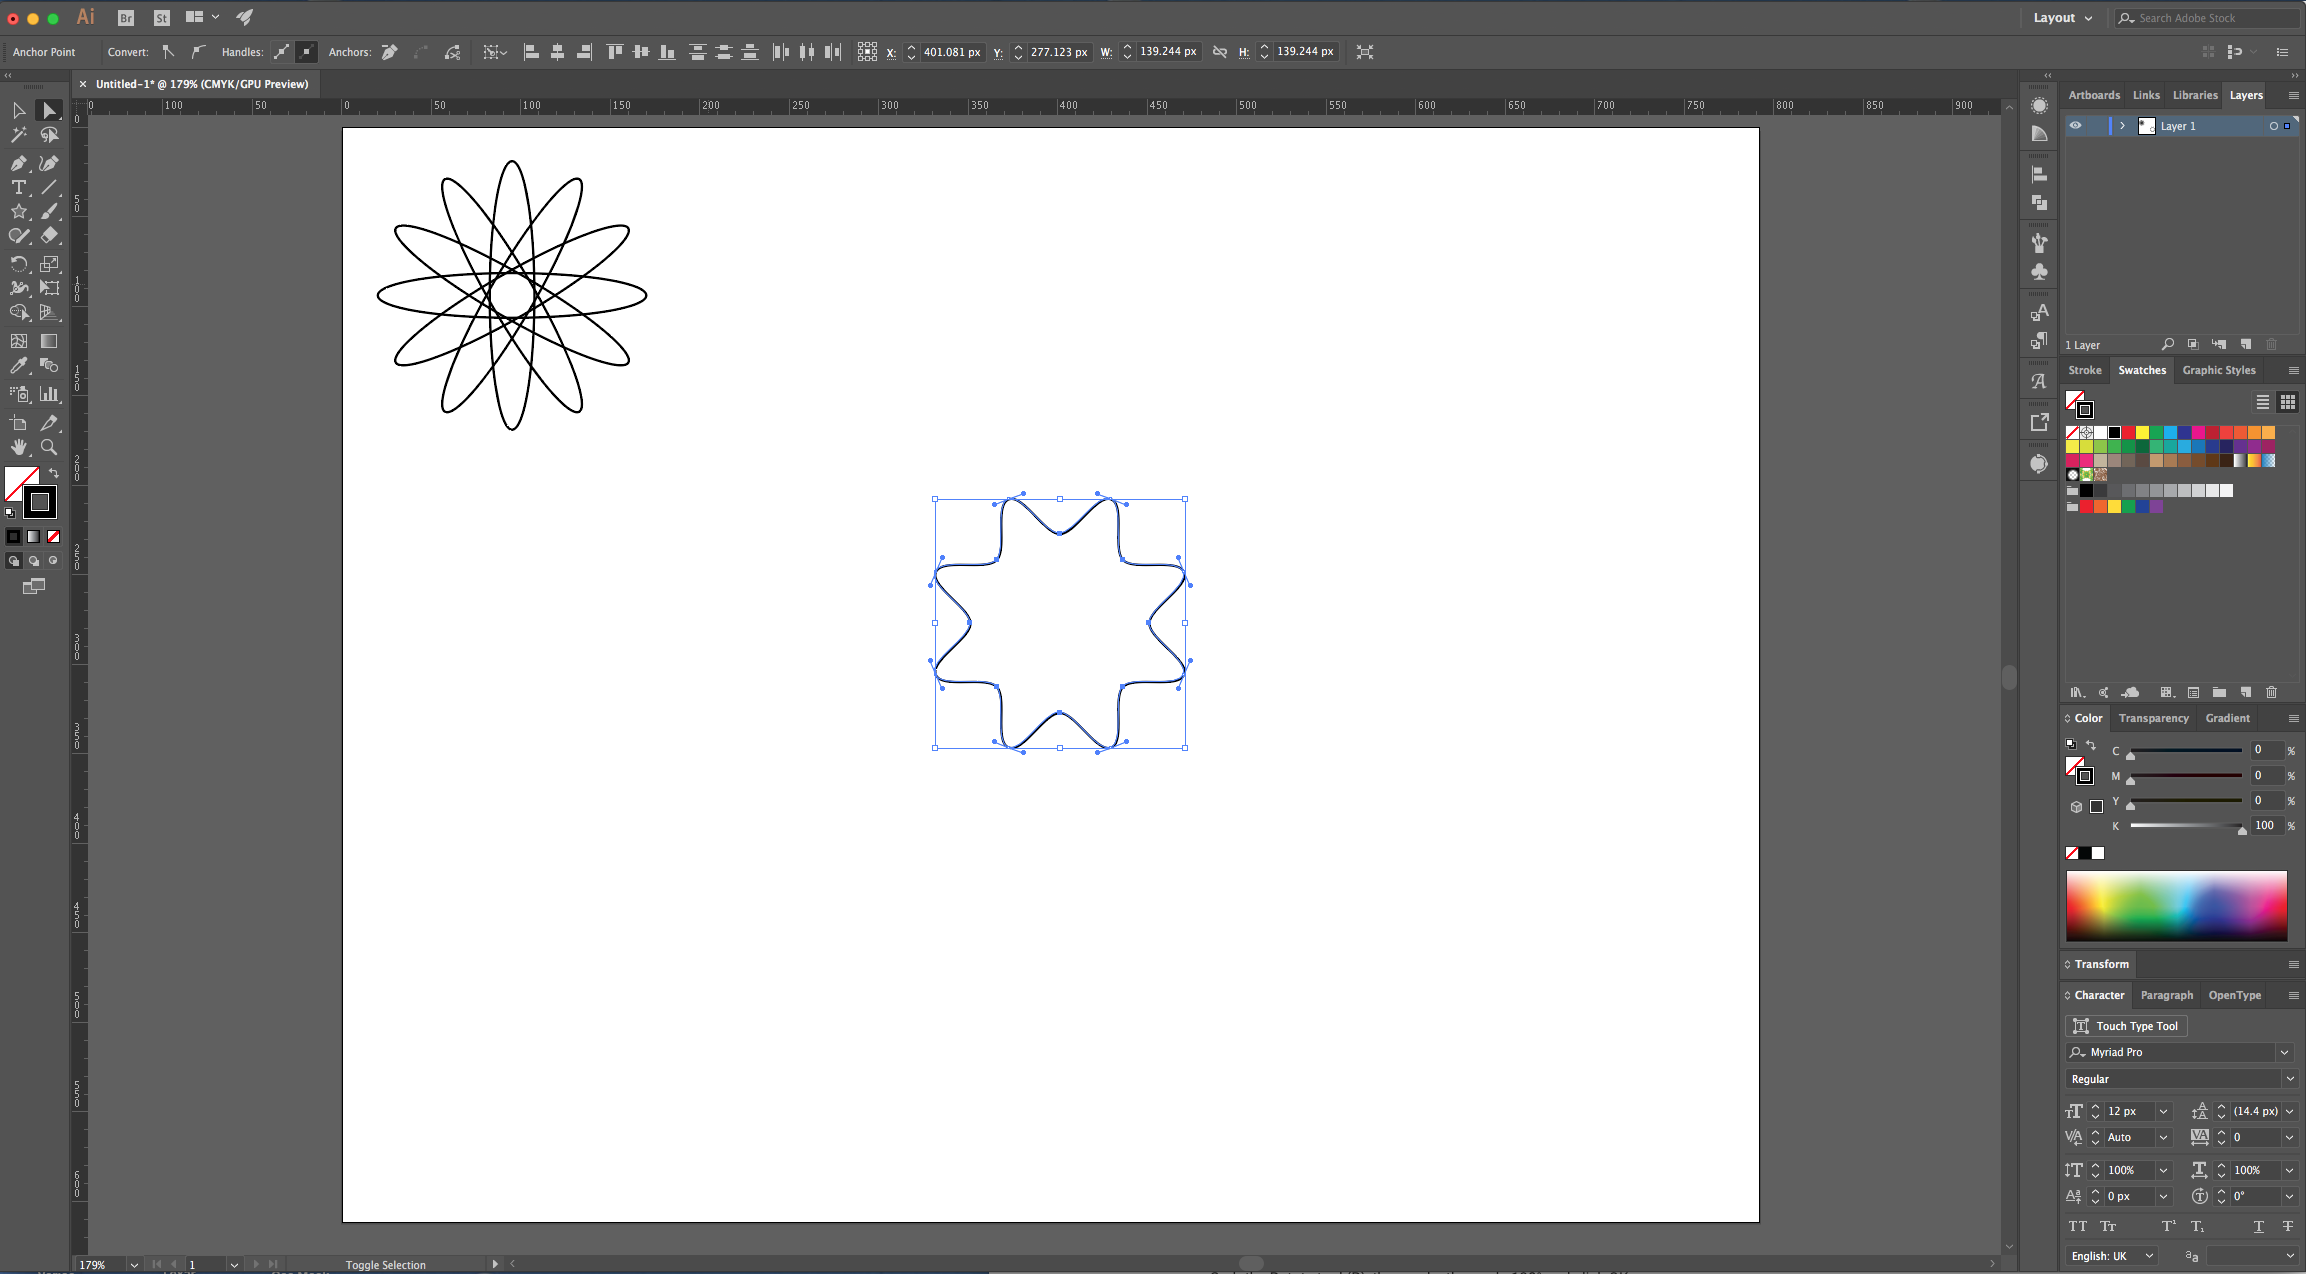
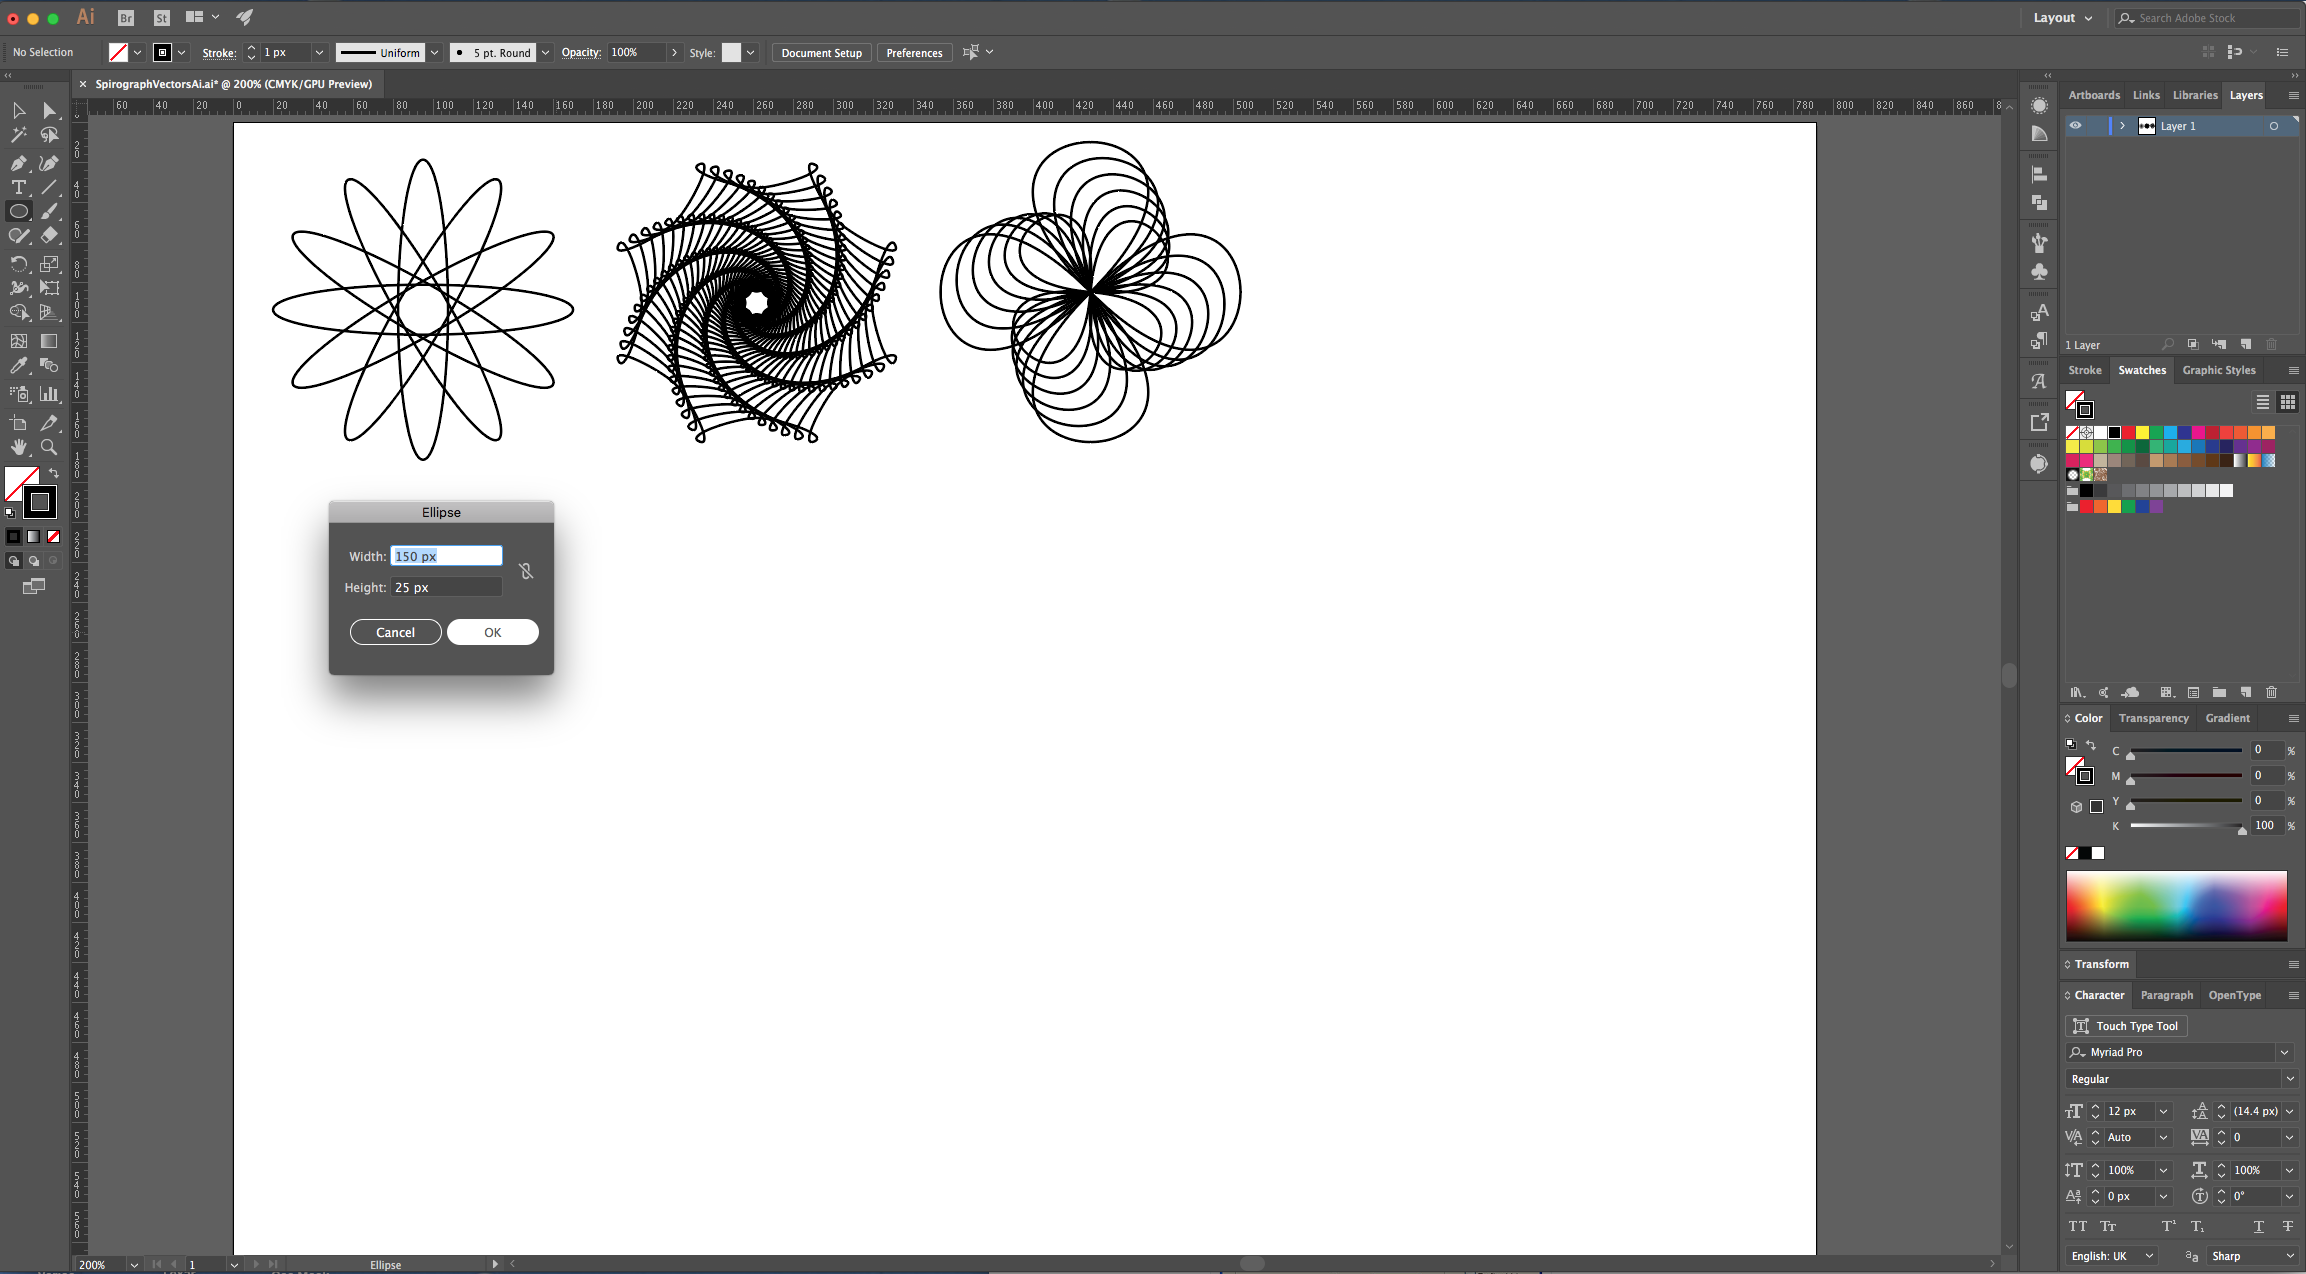
3 - Select the “Ellipse Tool” (L) click inside of your Canvas and input a “Width” of 150 px and a “Height” of 25 px.
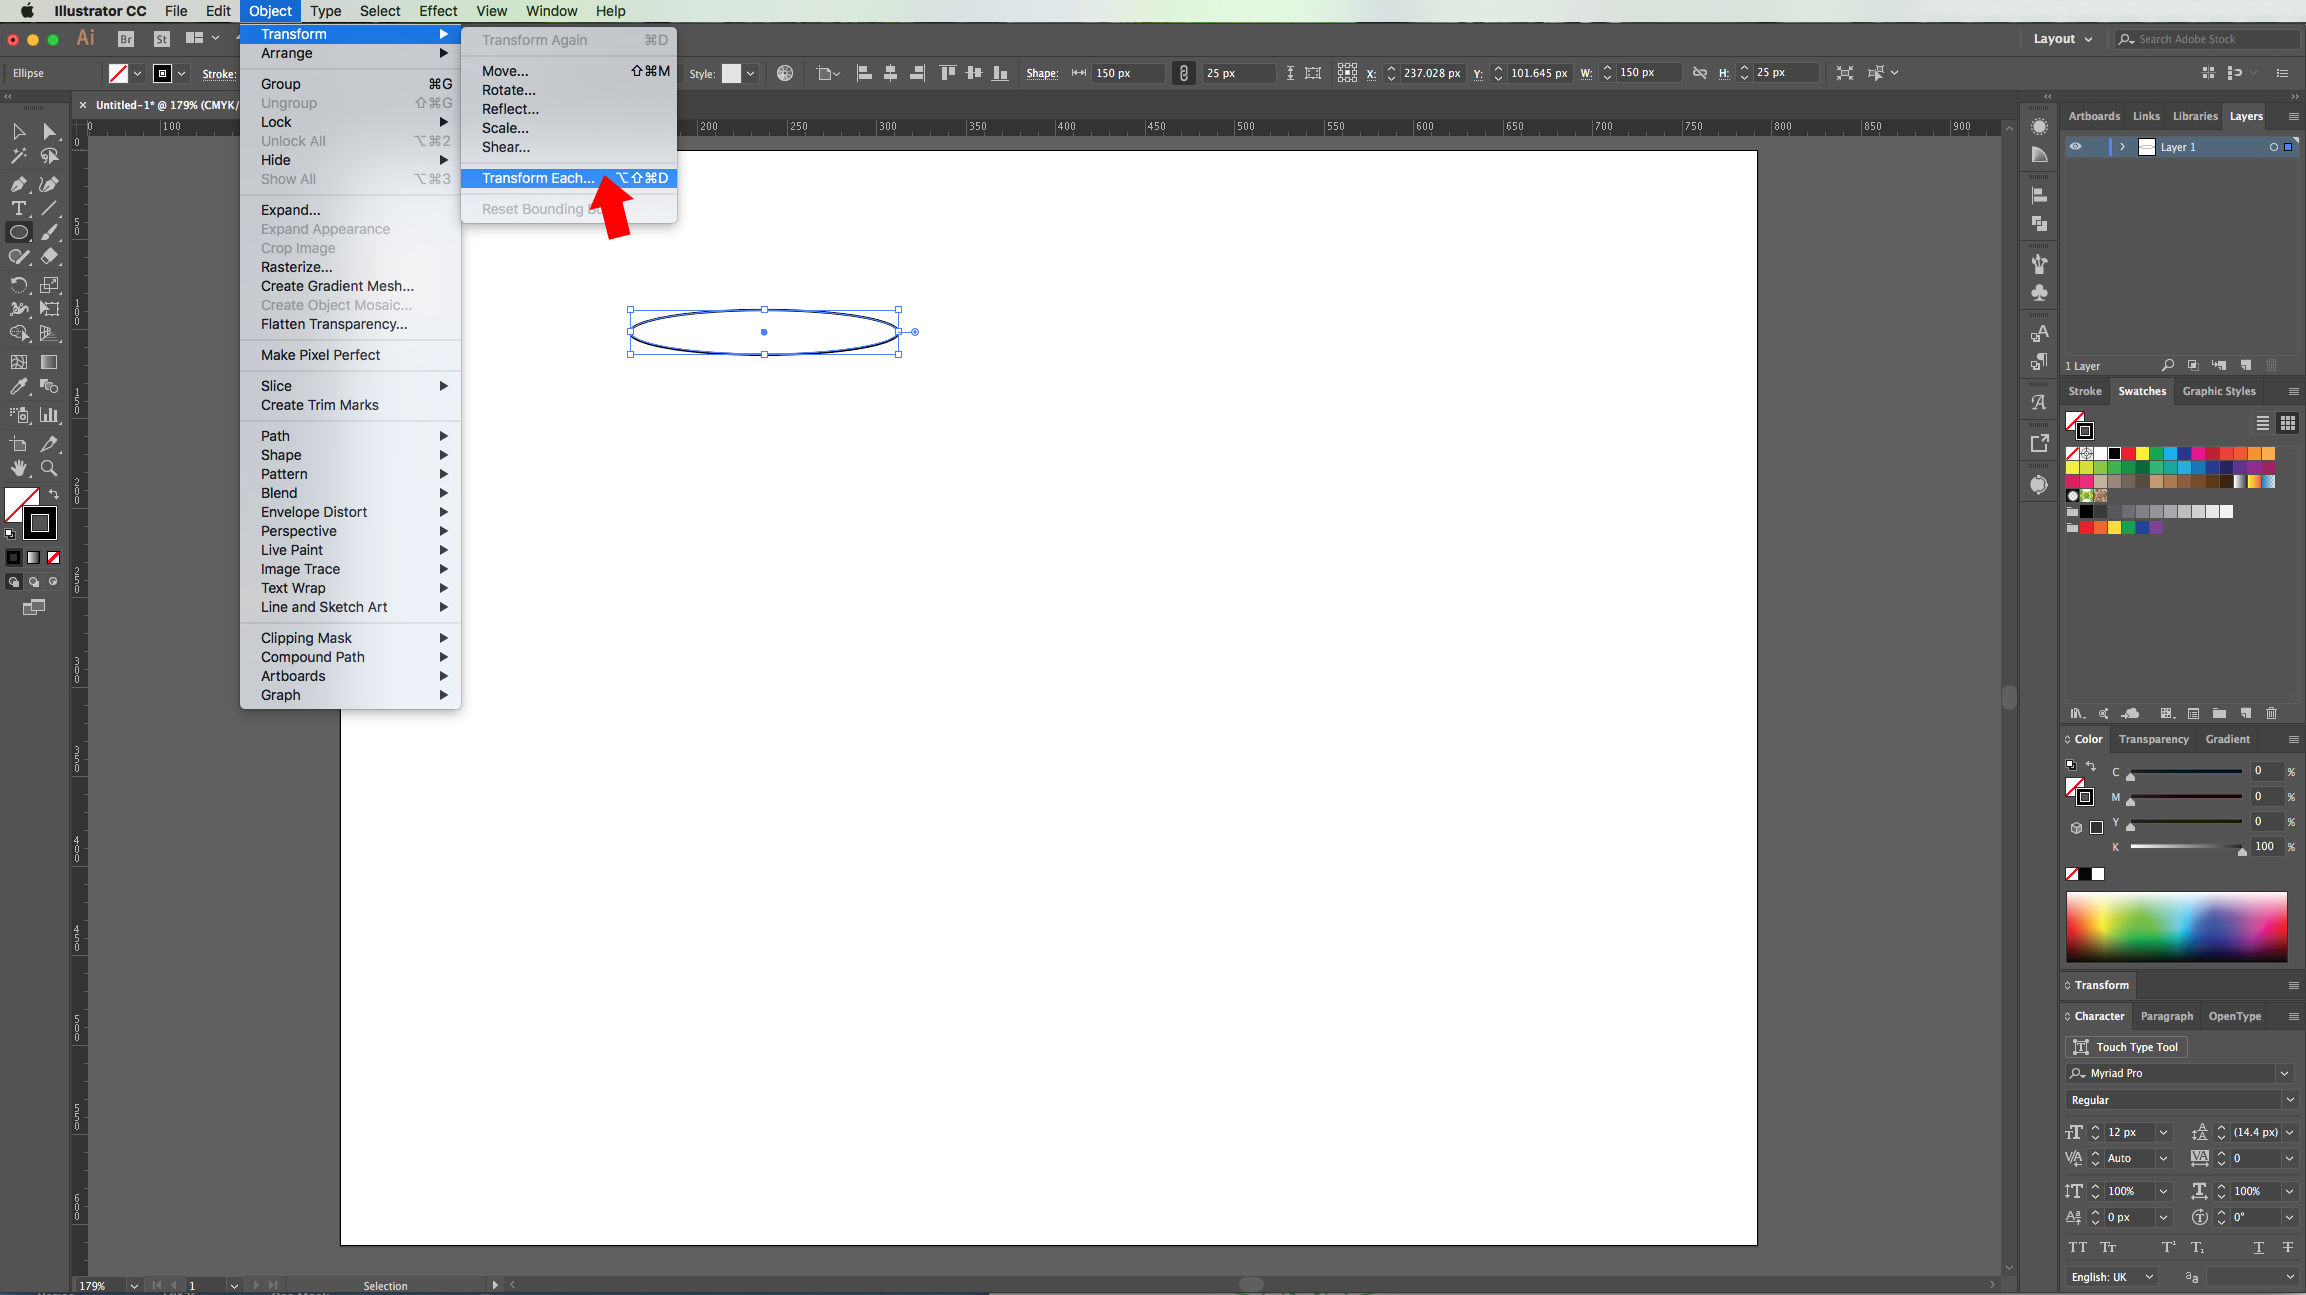
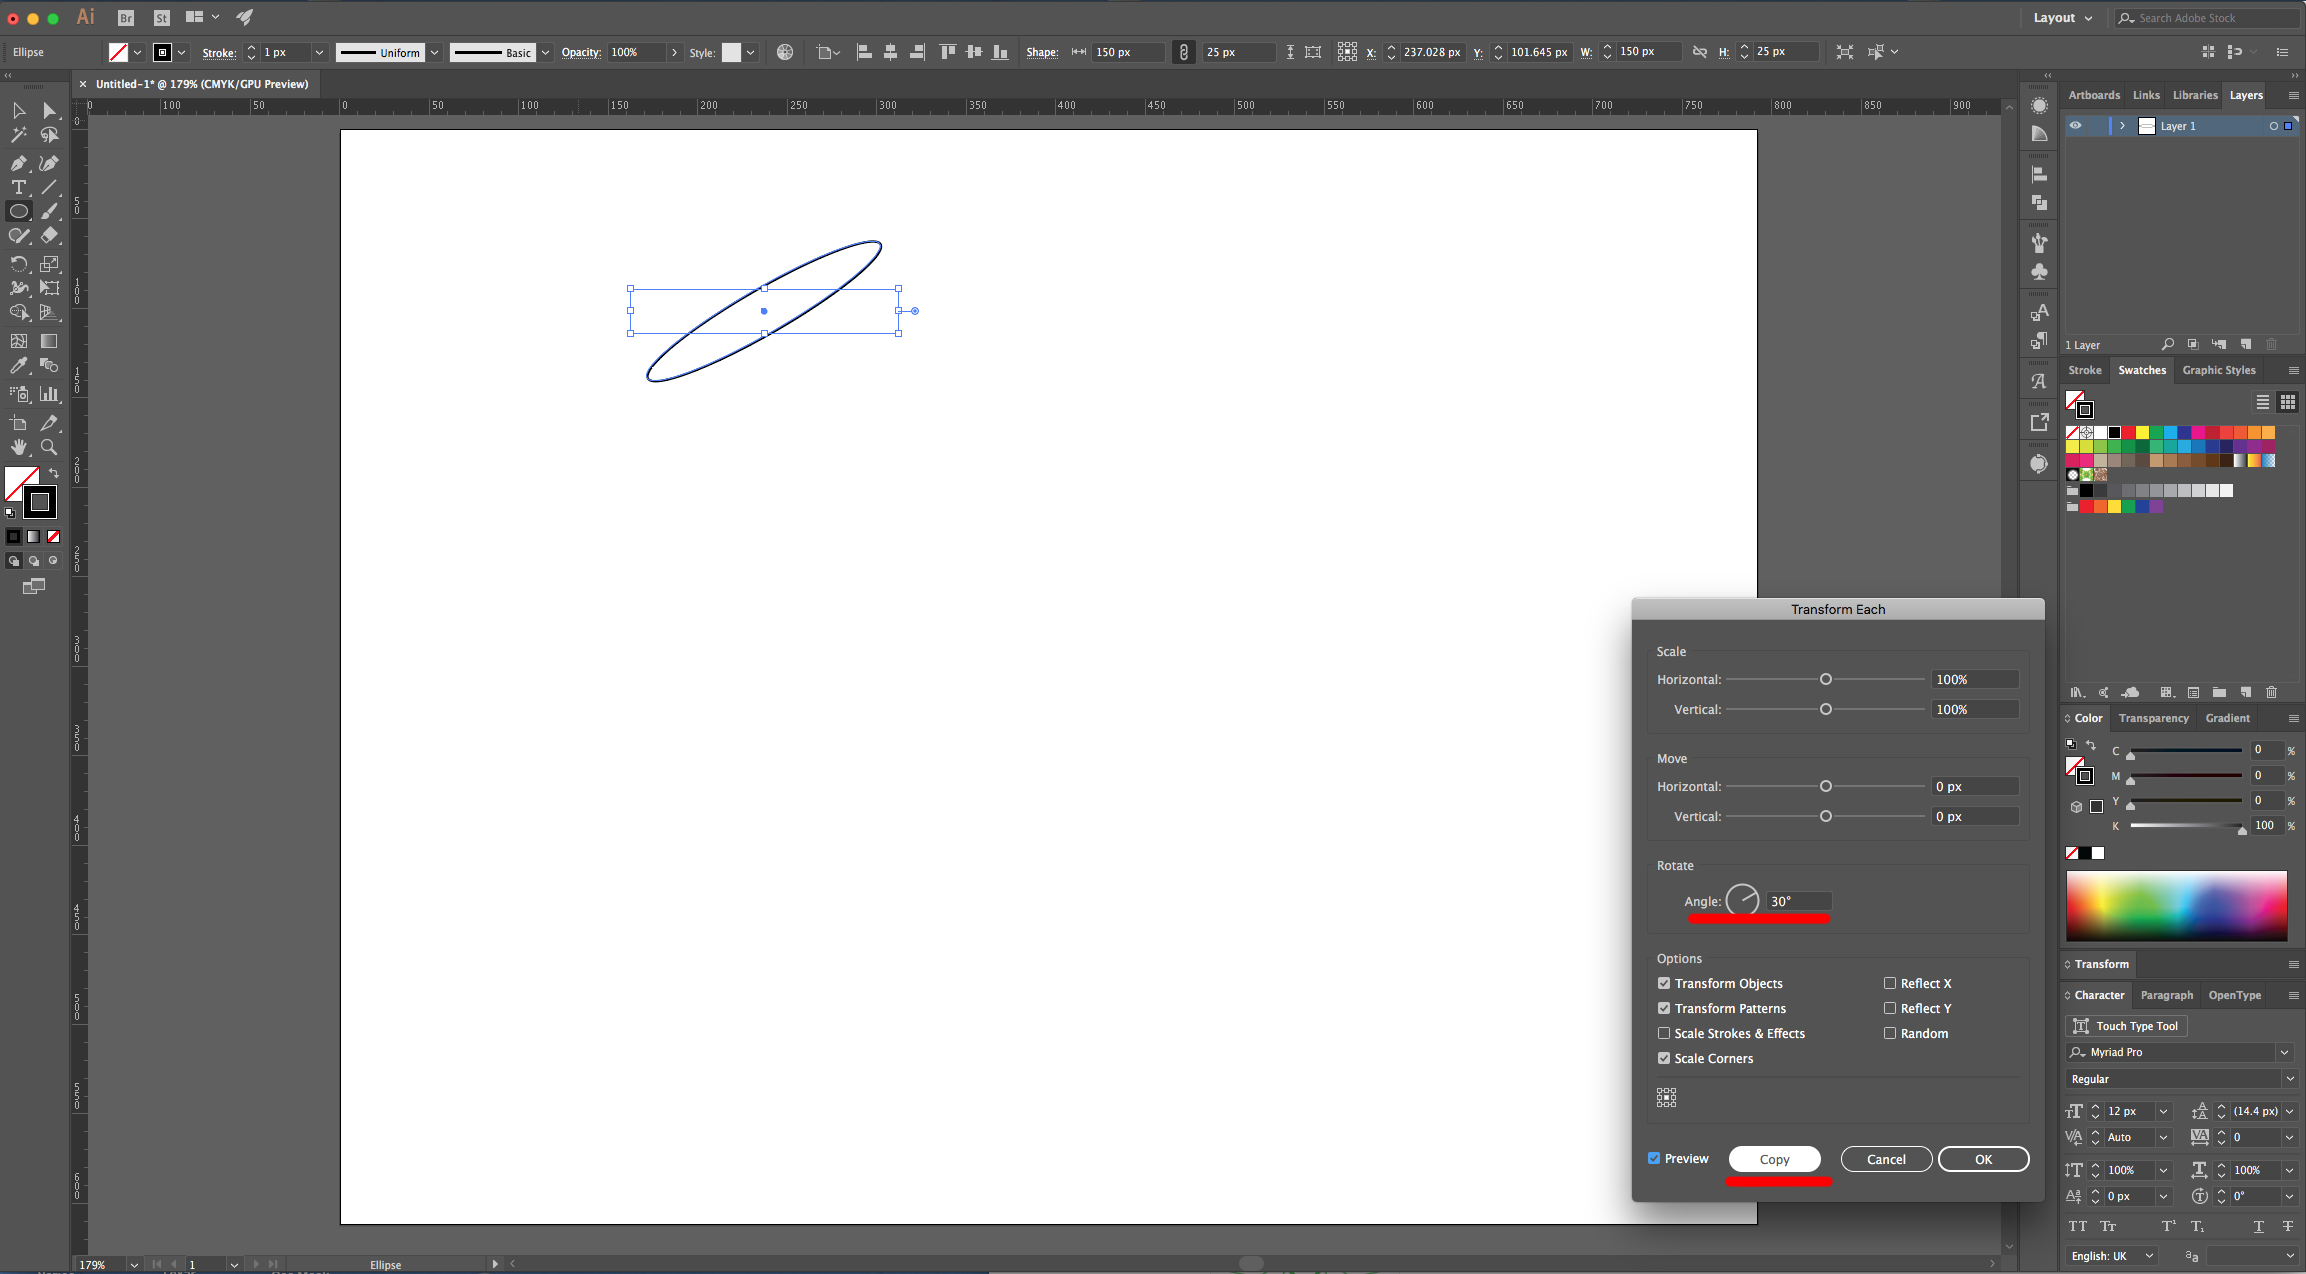
4 - Go to Object > Transform > Transform Each and use a “Rotate Angle” of 30°. Click “Copy” instead of “OK”.
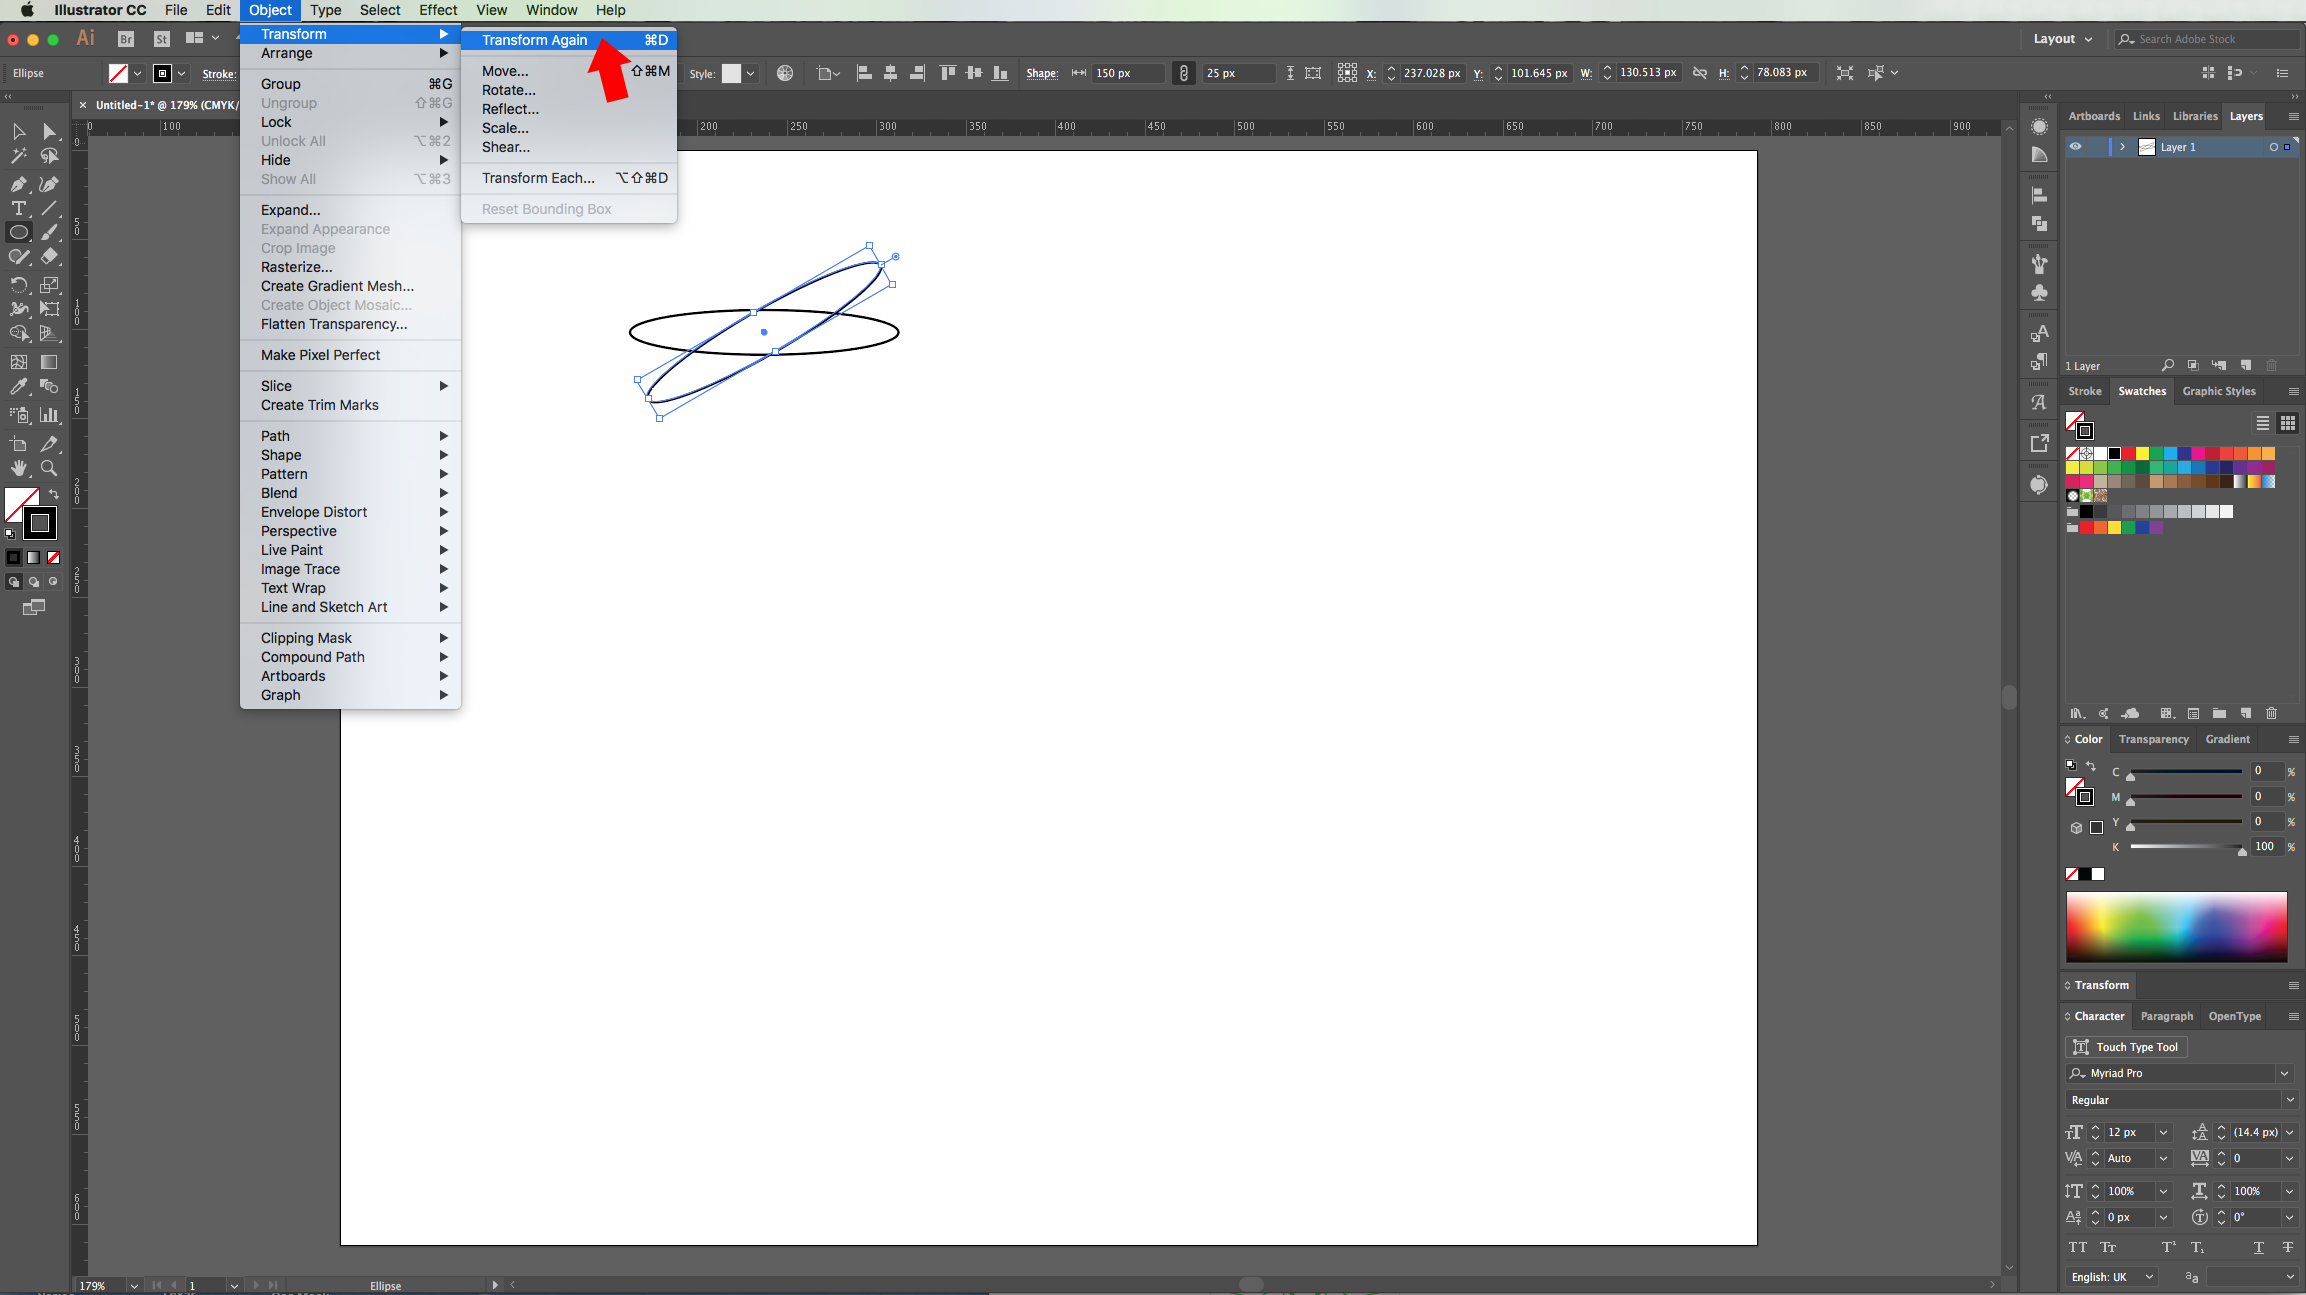
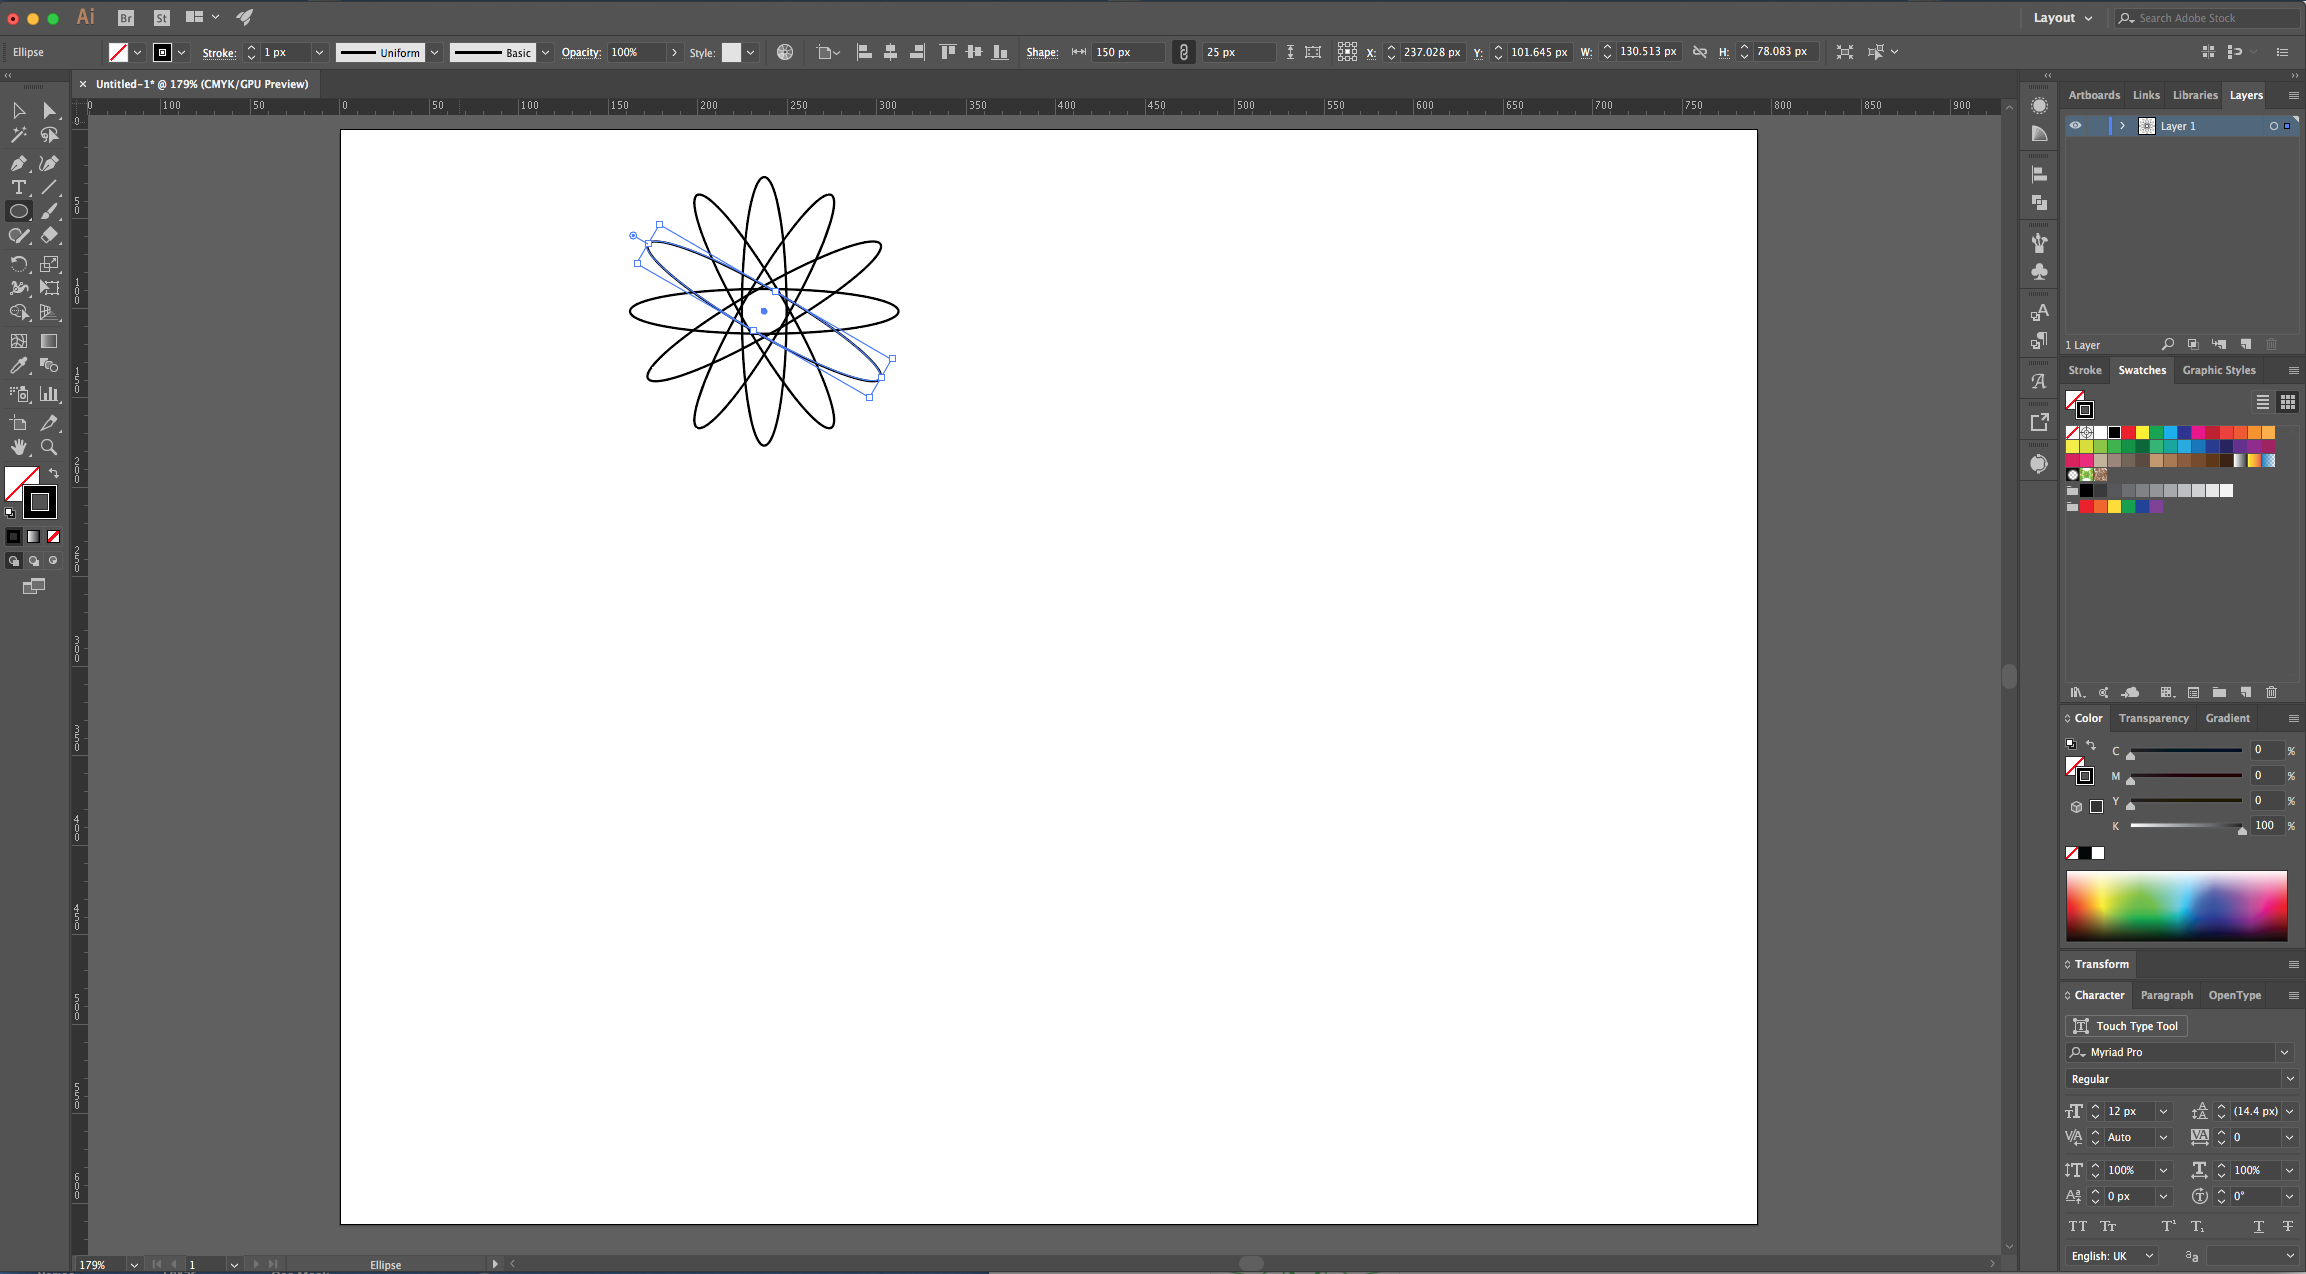
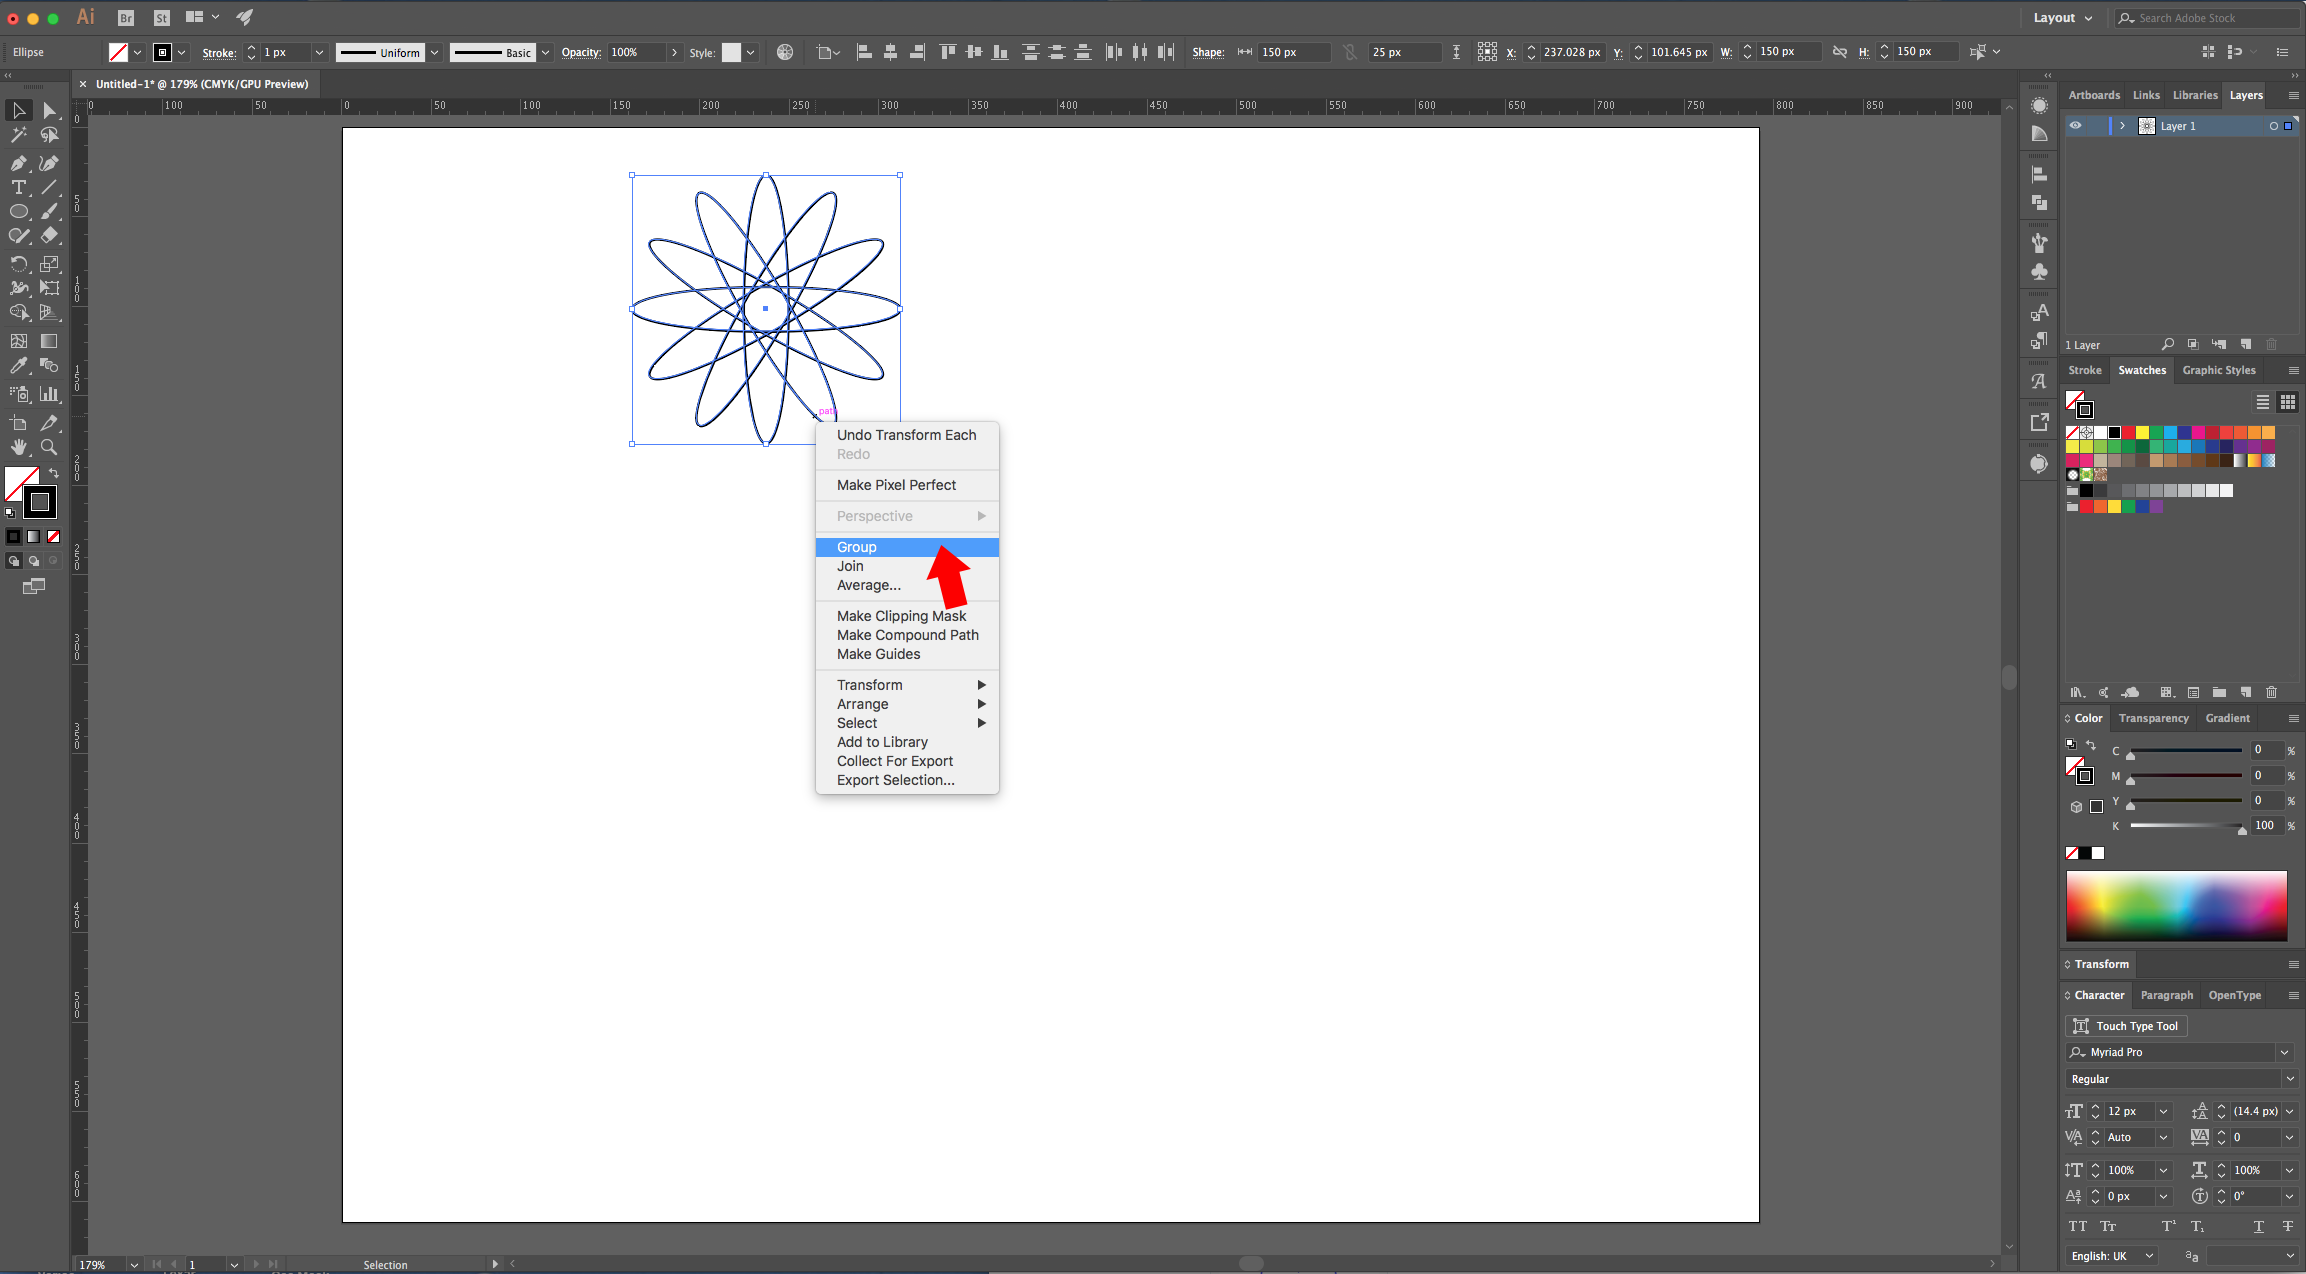
5 - Go to Object > Transform Again (Command/Control + D) to repeat the transformation. Do this other 4 times to complete the circle. Select everything, right-click on top and choose “Group” (Command/Control + G).
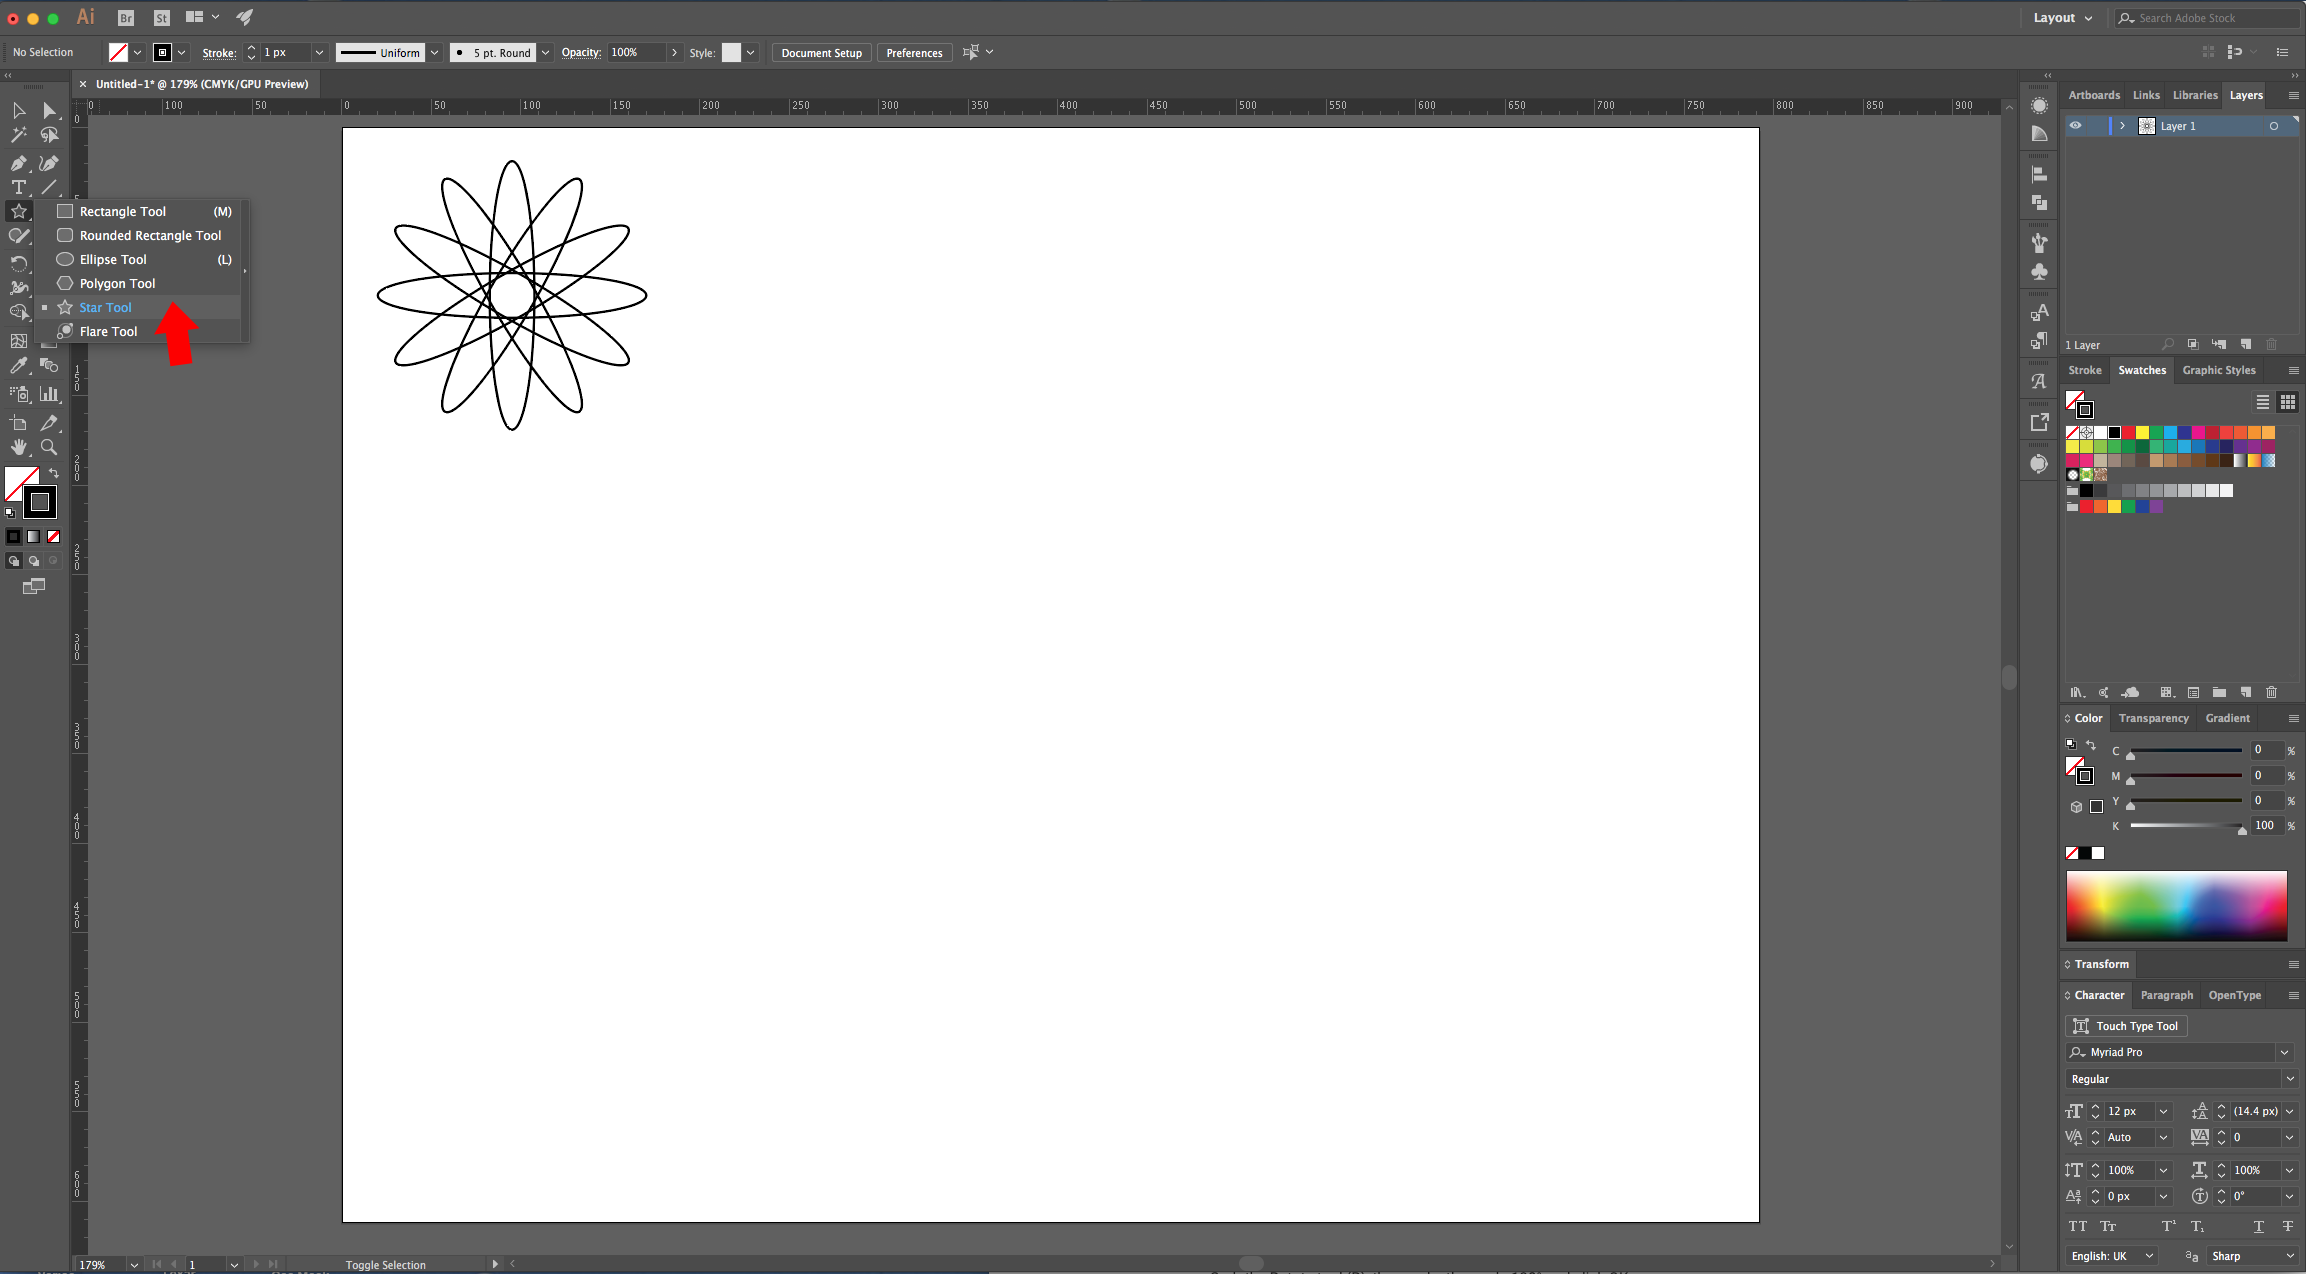
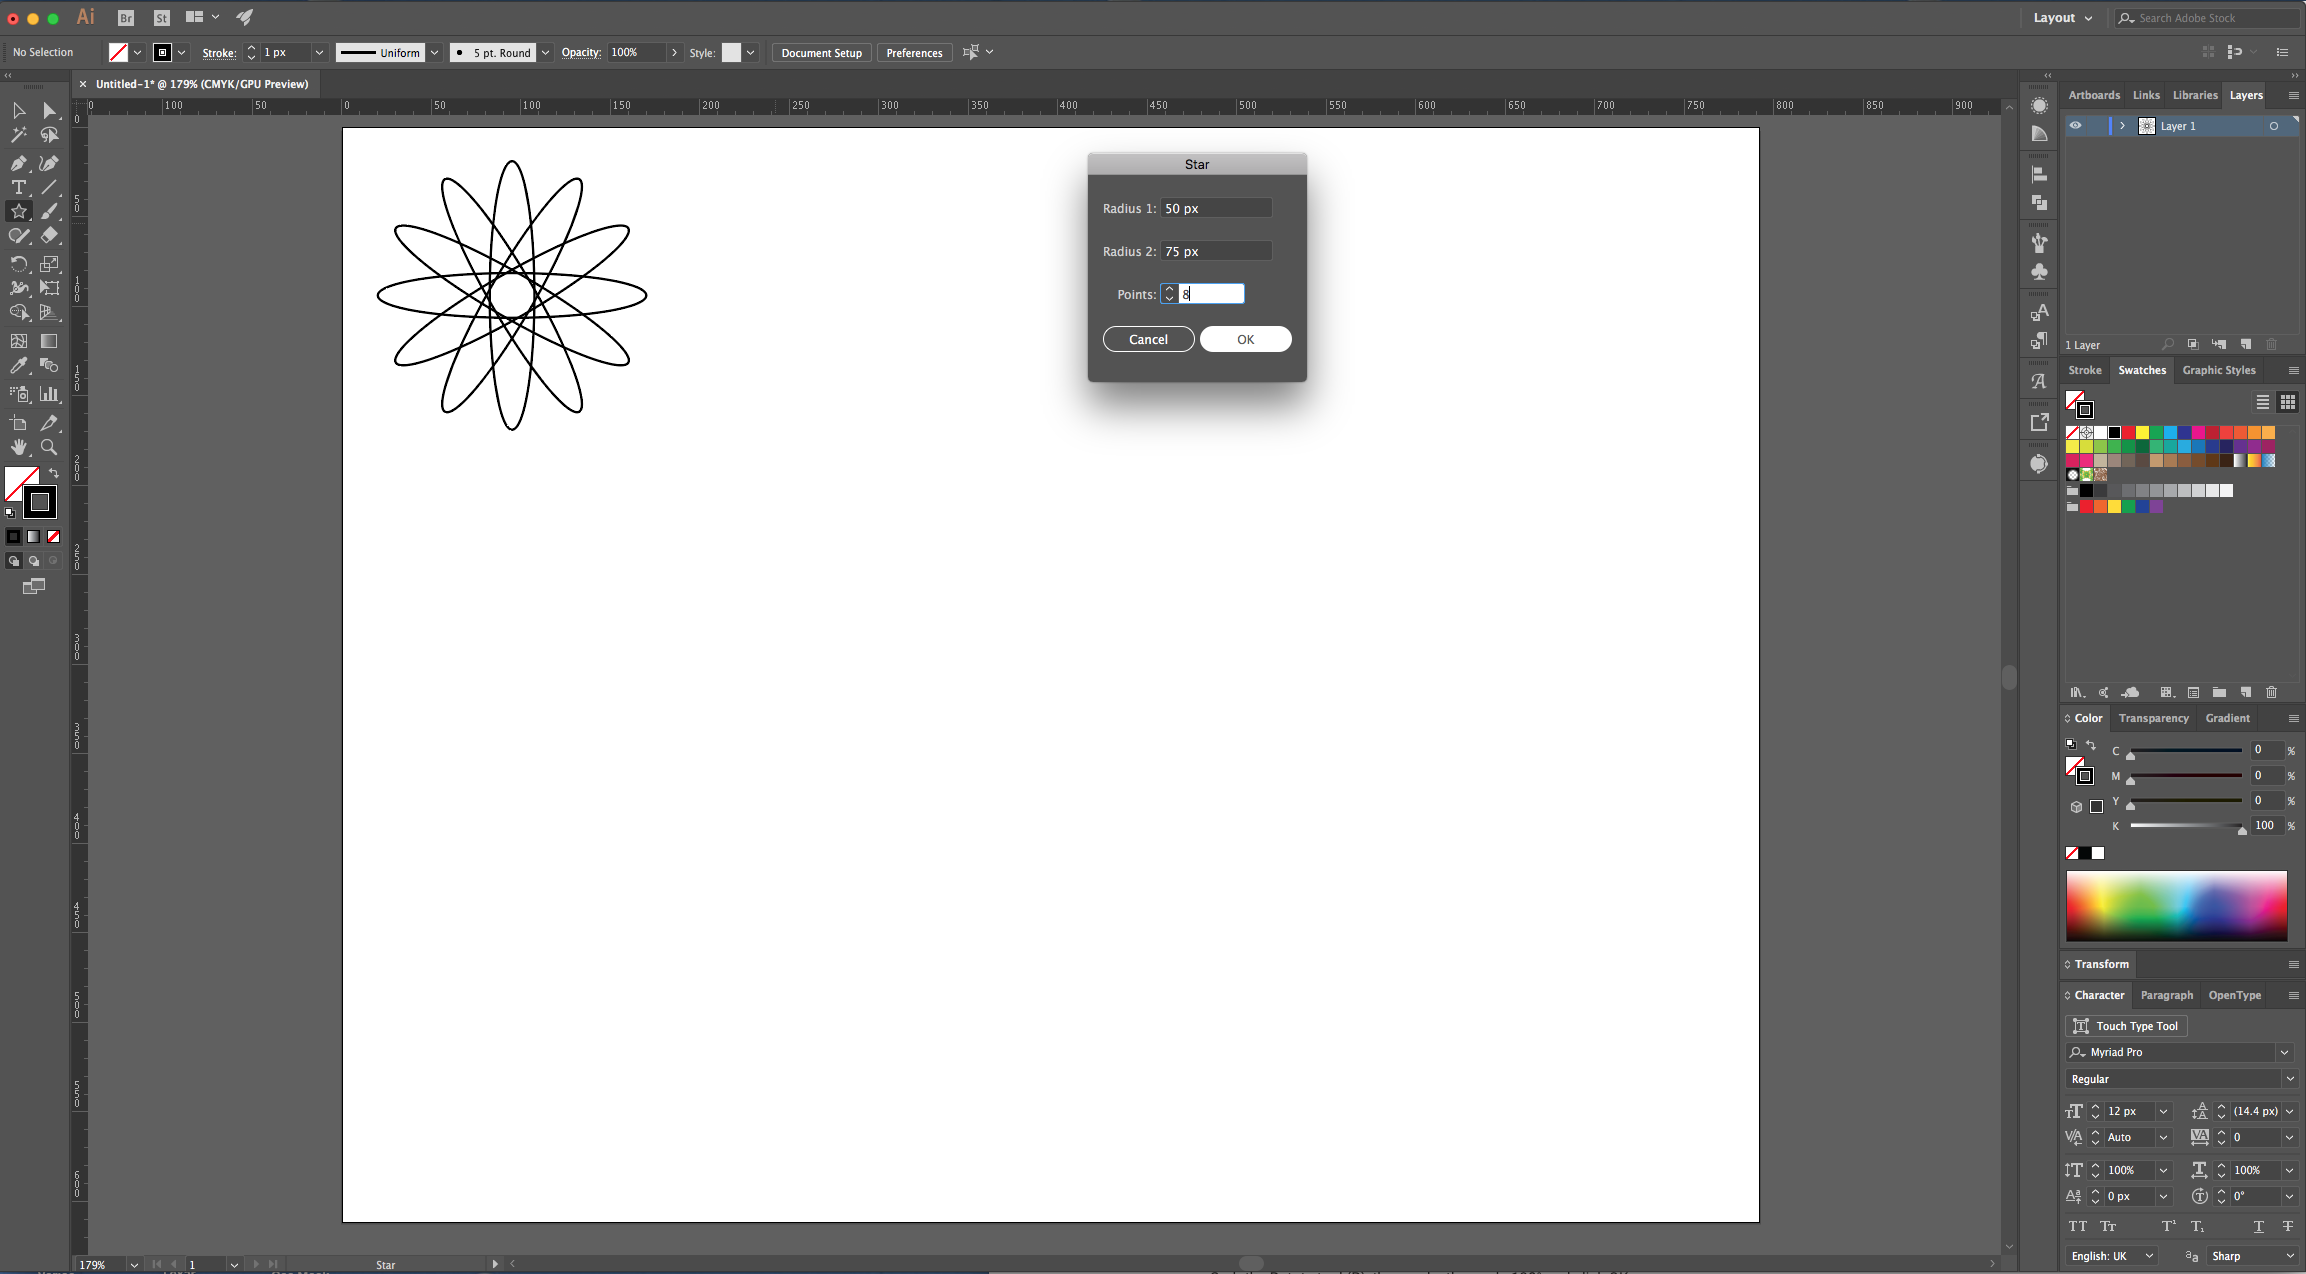
6 - Select the “Star Tool”, click inside of your Canvas and input a “Radius 1” of 50 px a “Radius 2” of 75 px and 8 “Points”.
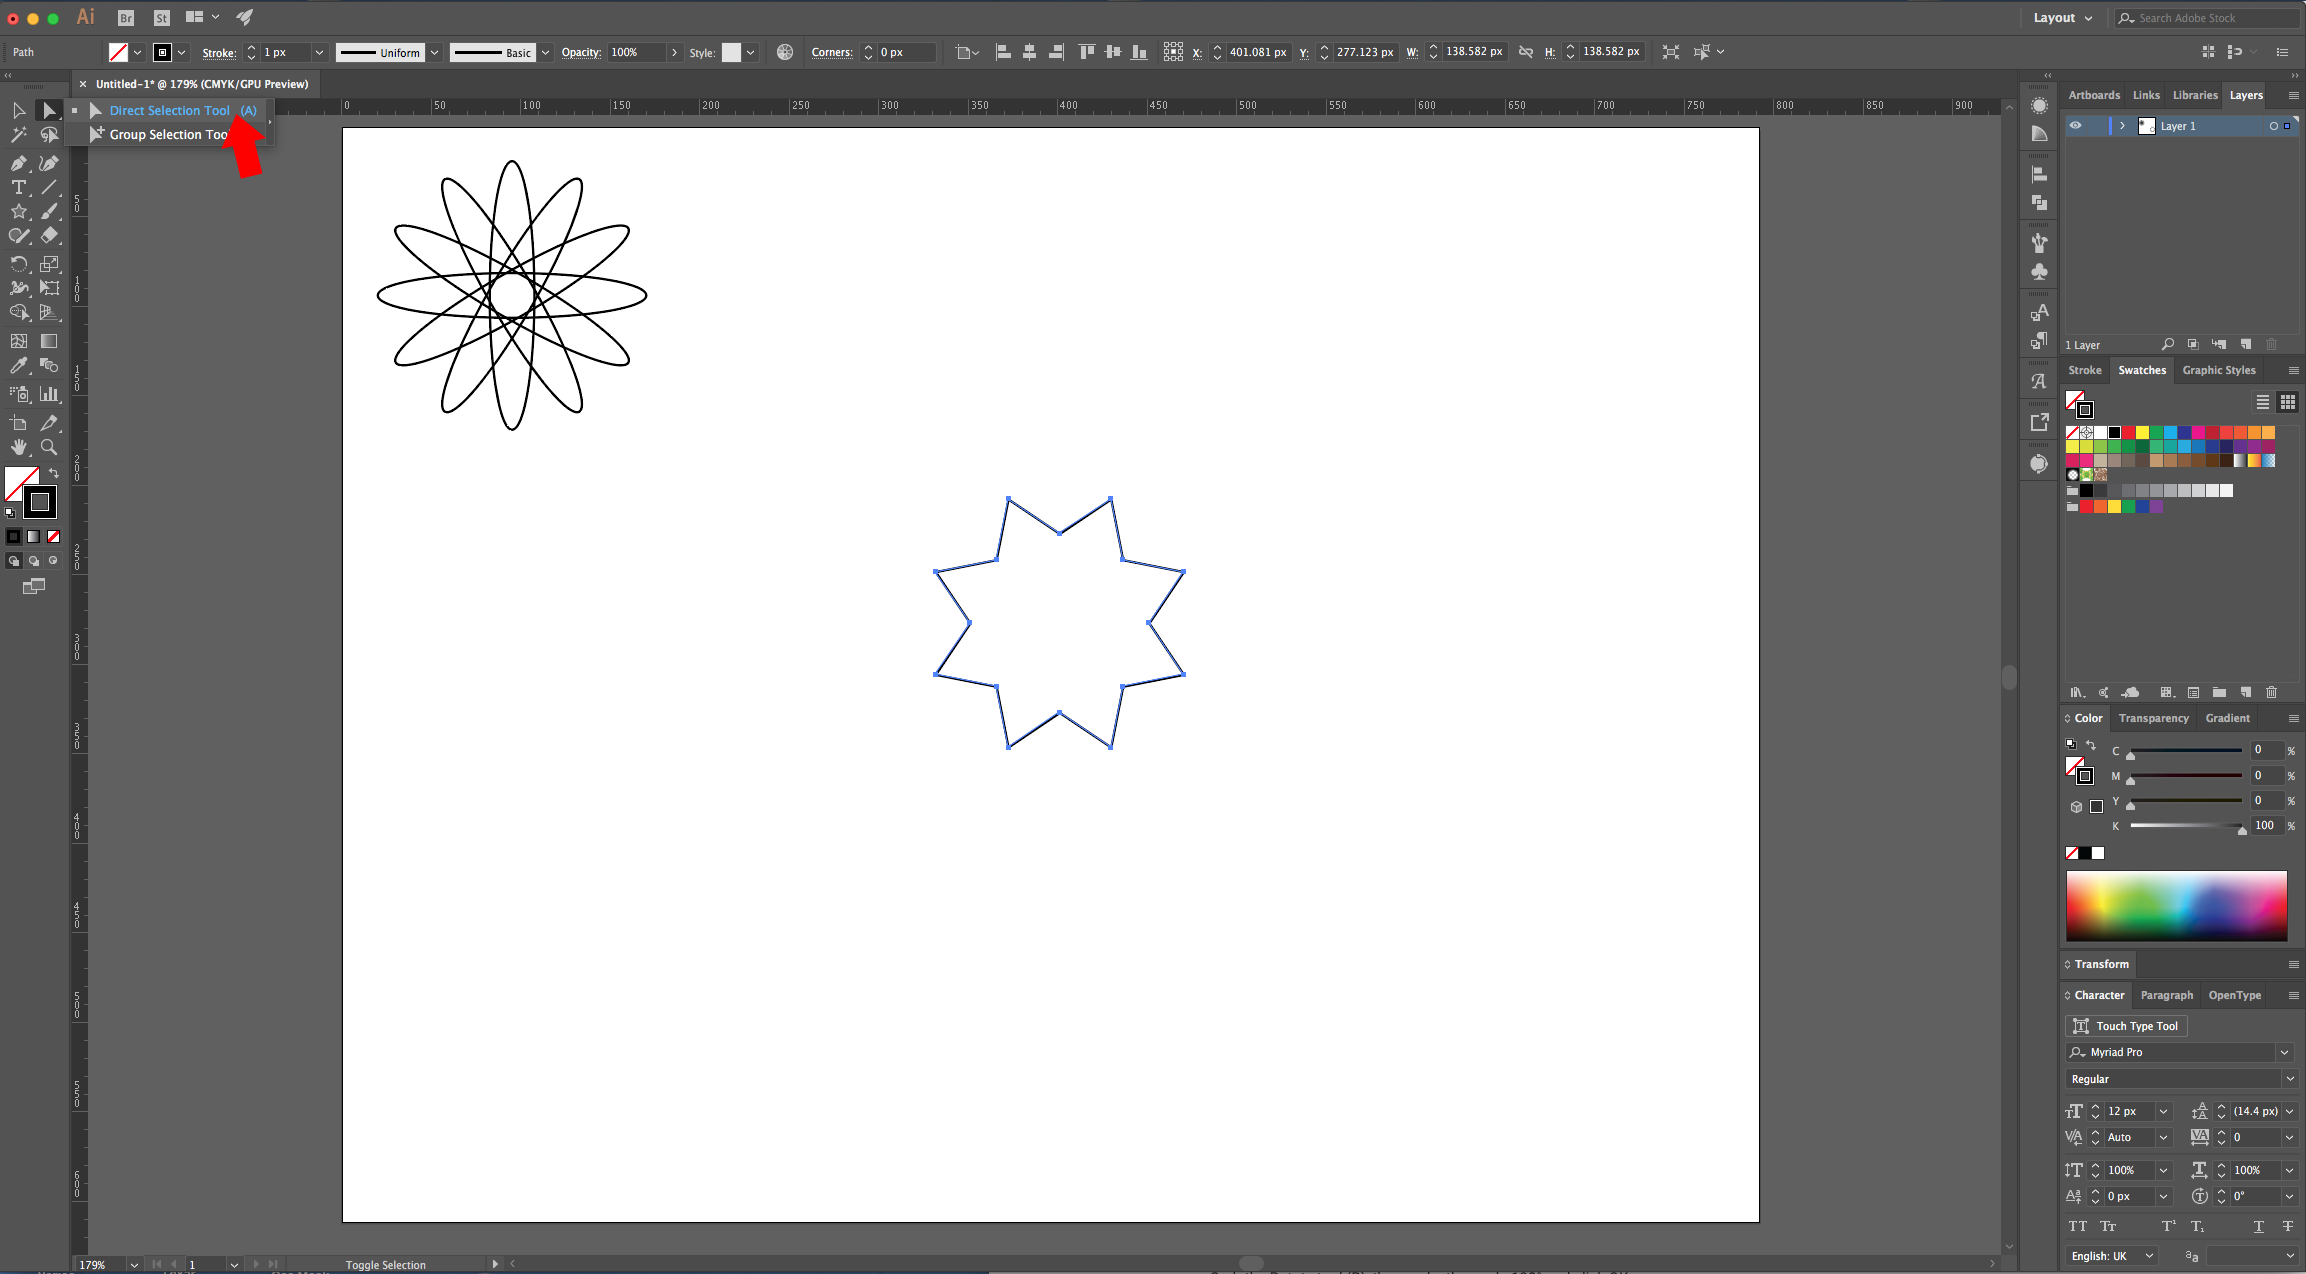
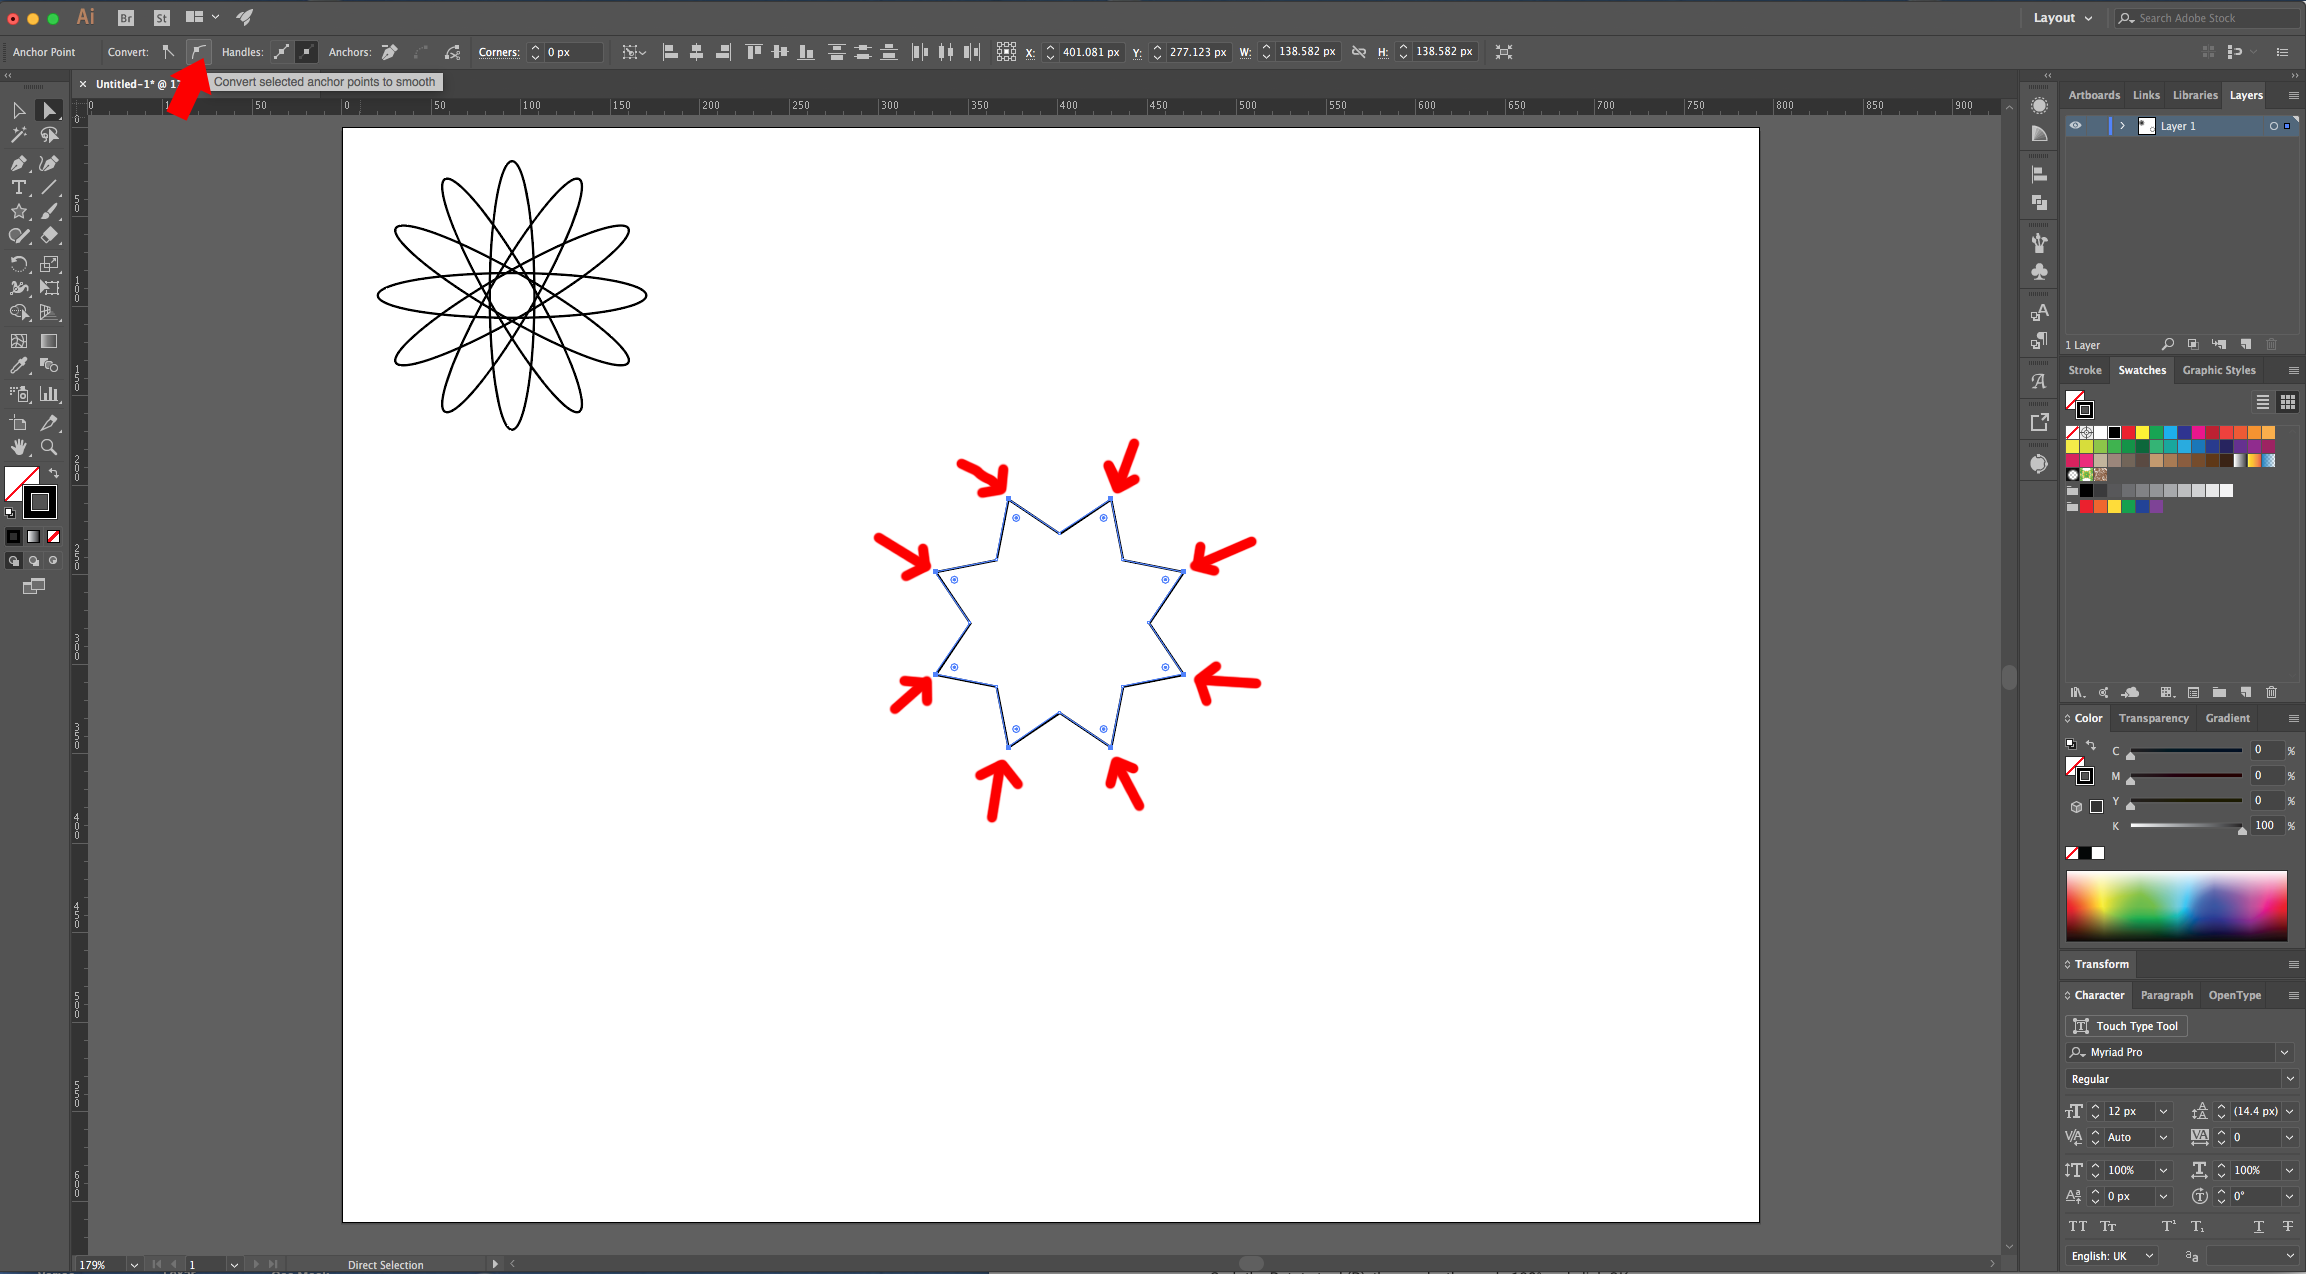
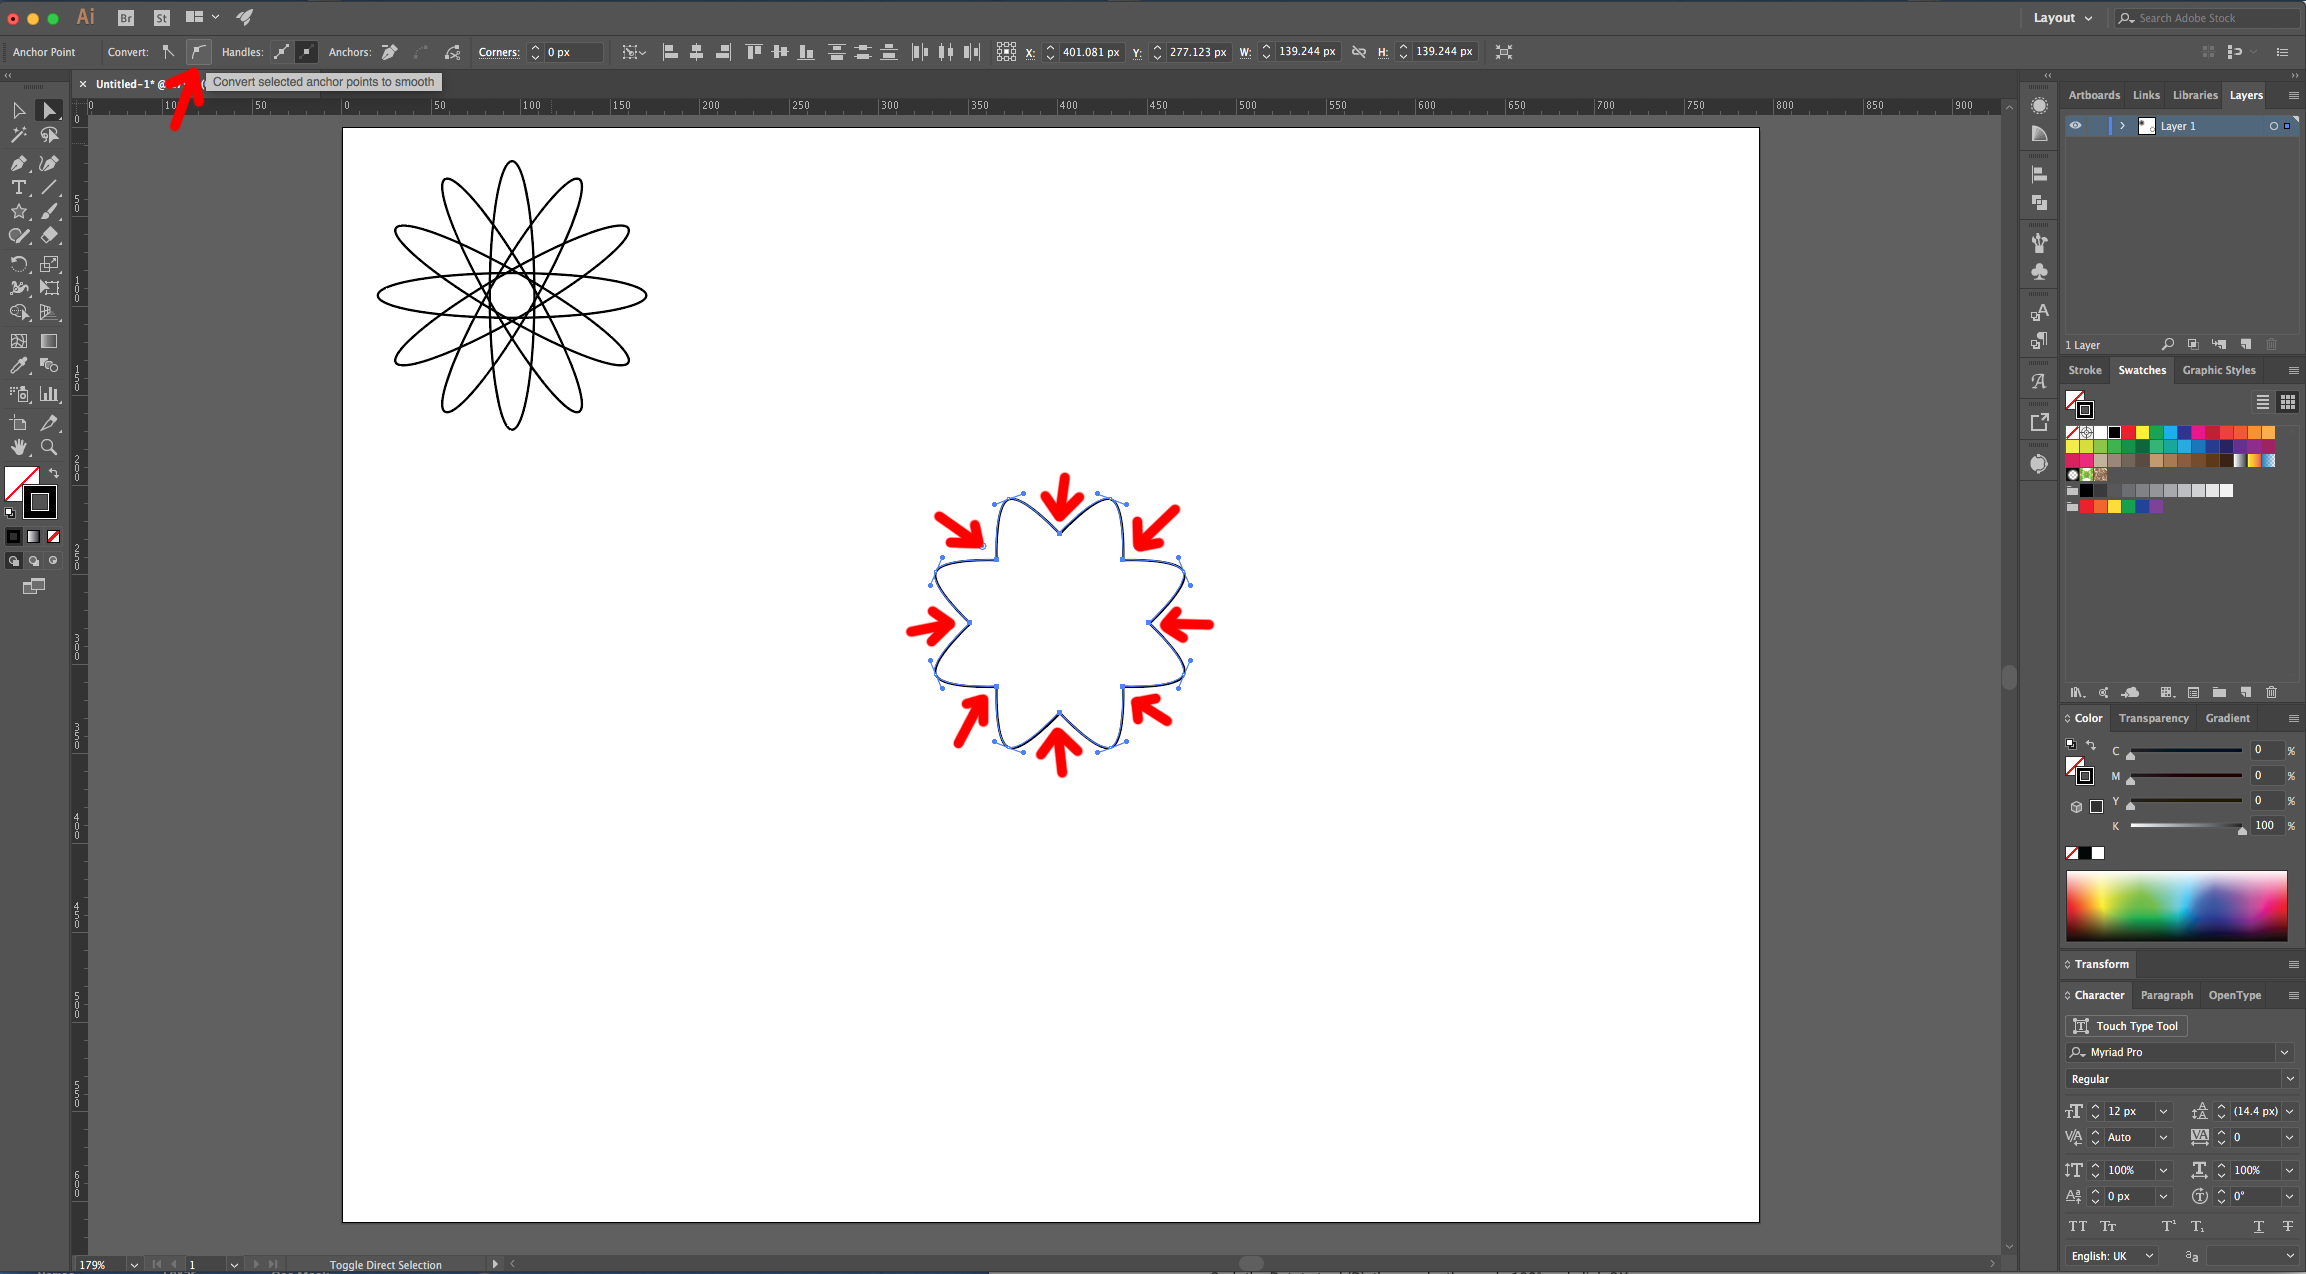
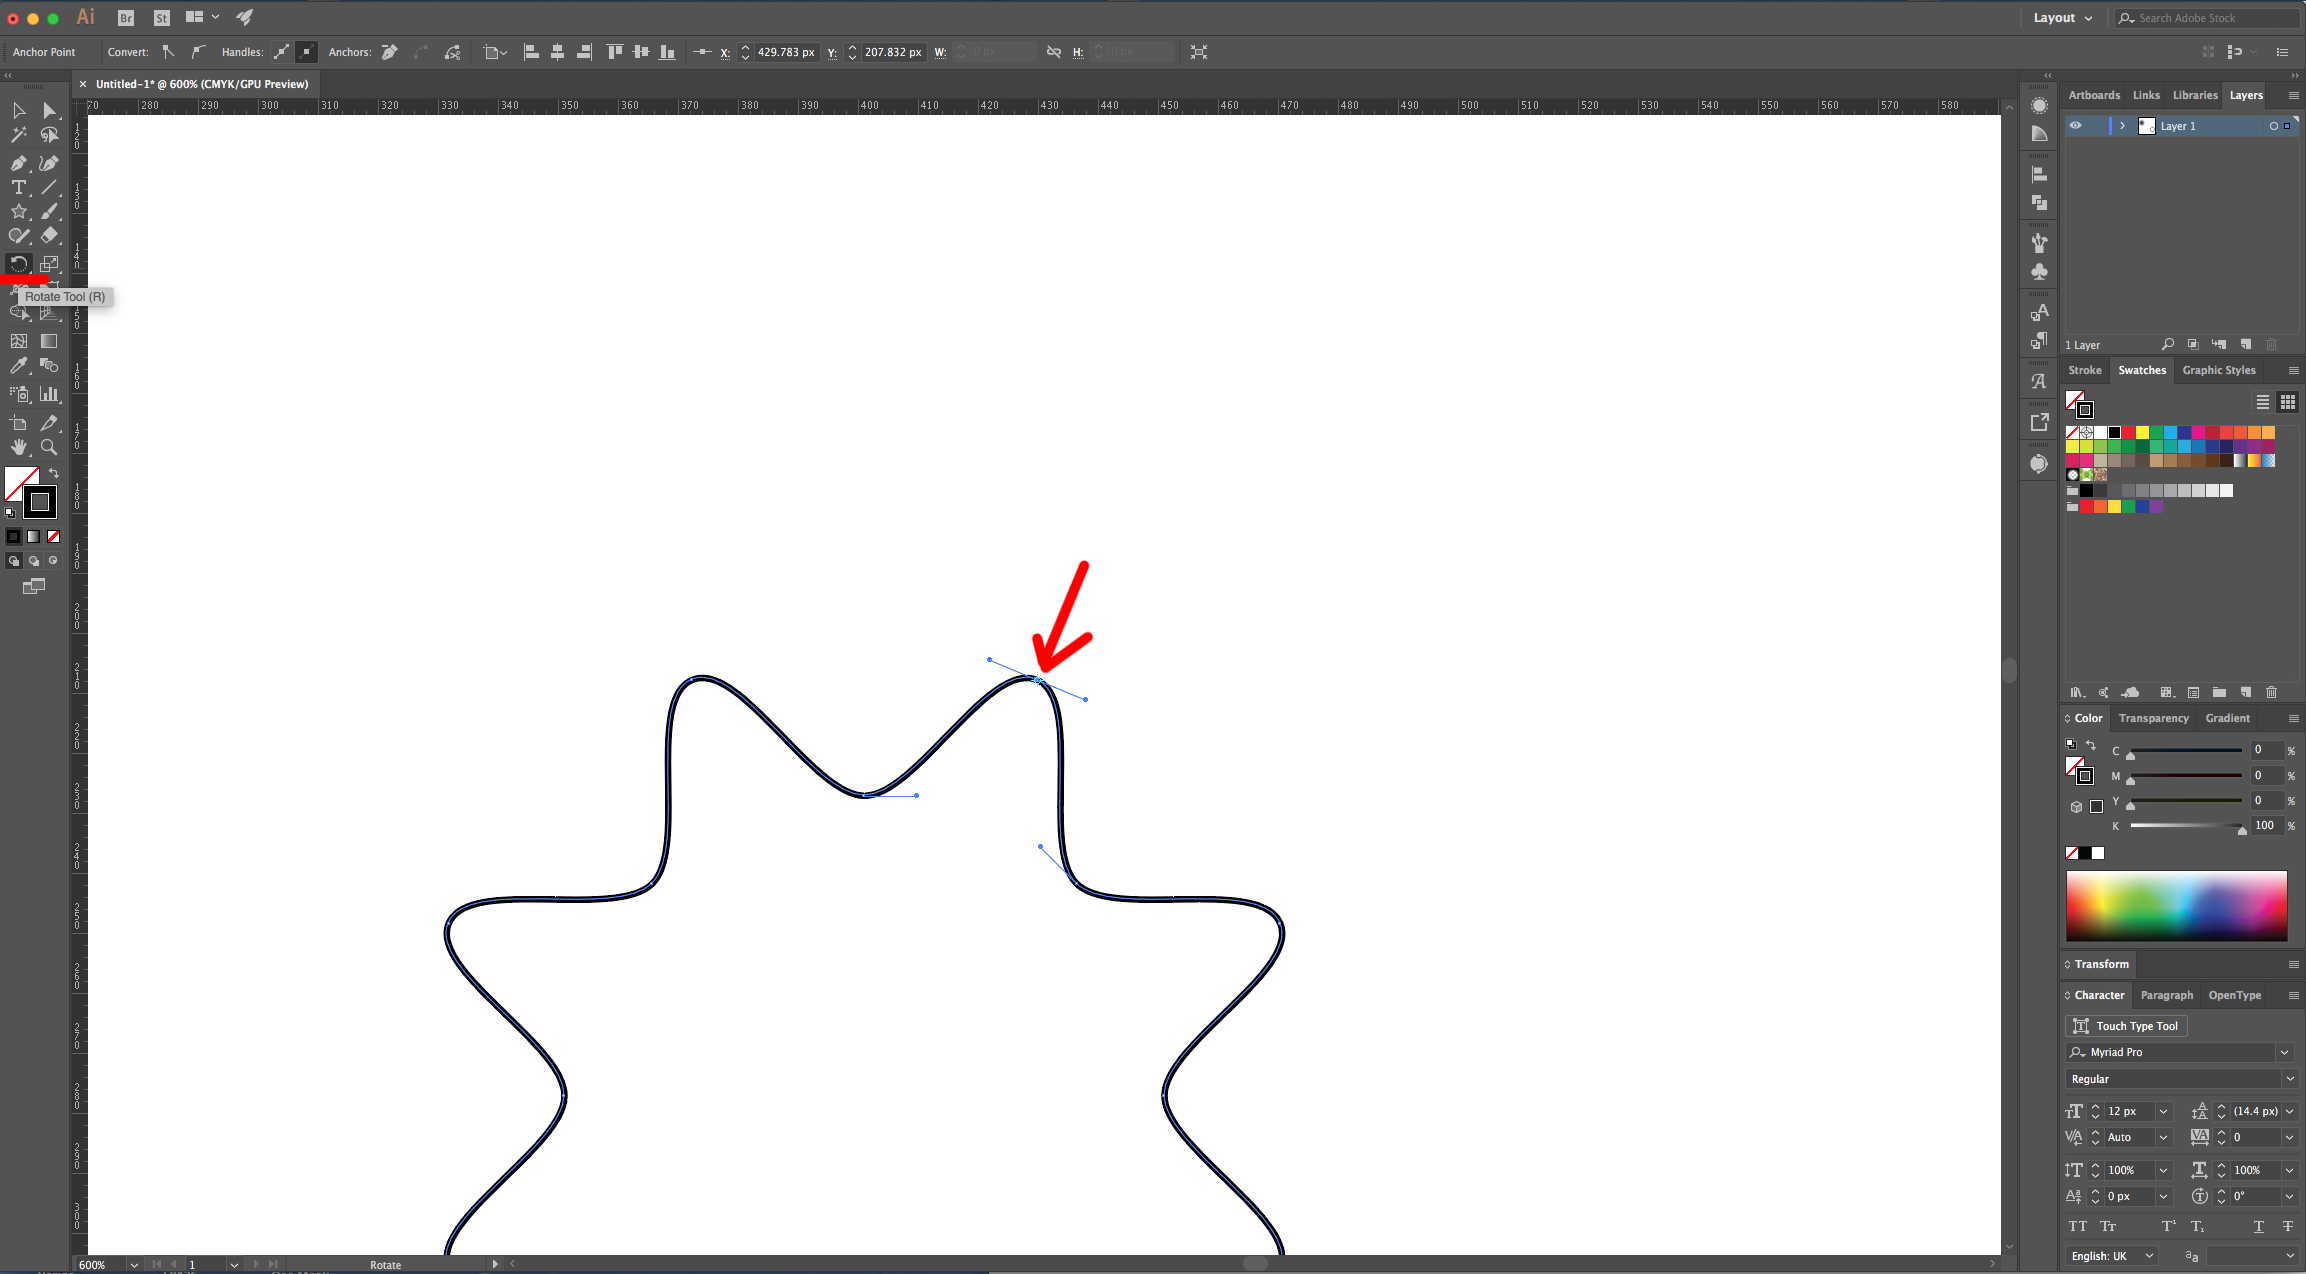
7 - Use the “Direct Selection Tool” (A) (+ “Shift” key) to select the “Anchor Points” that are on the outside of the Star. Click on the “Convert Selected Anchor Points to Smooth” button on the left side of the Top Menu, then deselect and select the ones on the inside of the Star and “Smooth” them too.
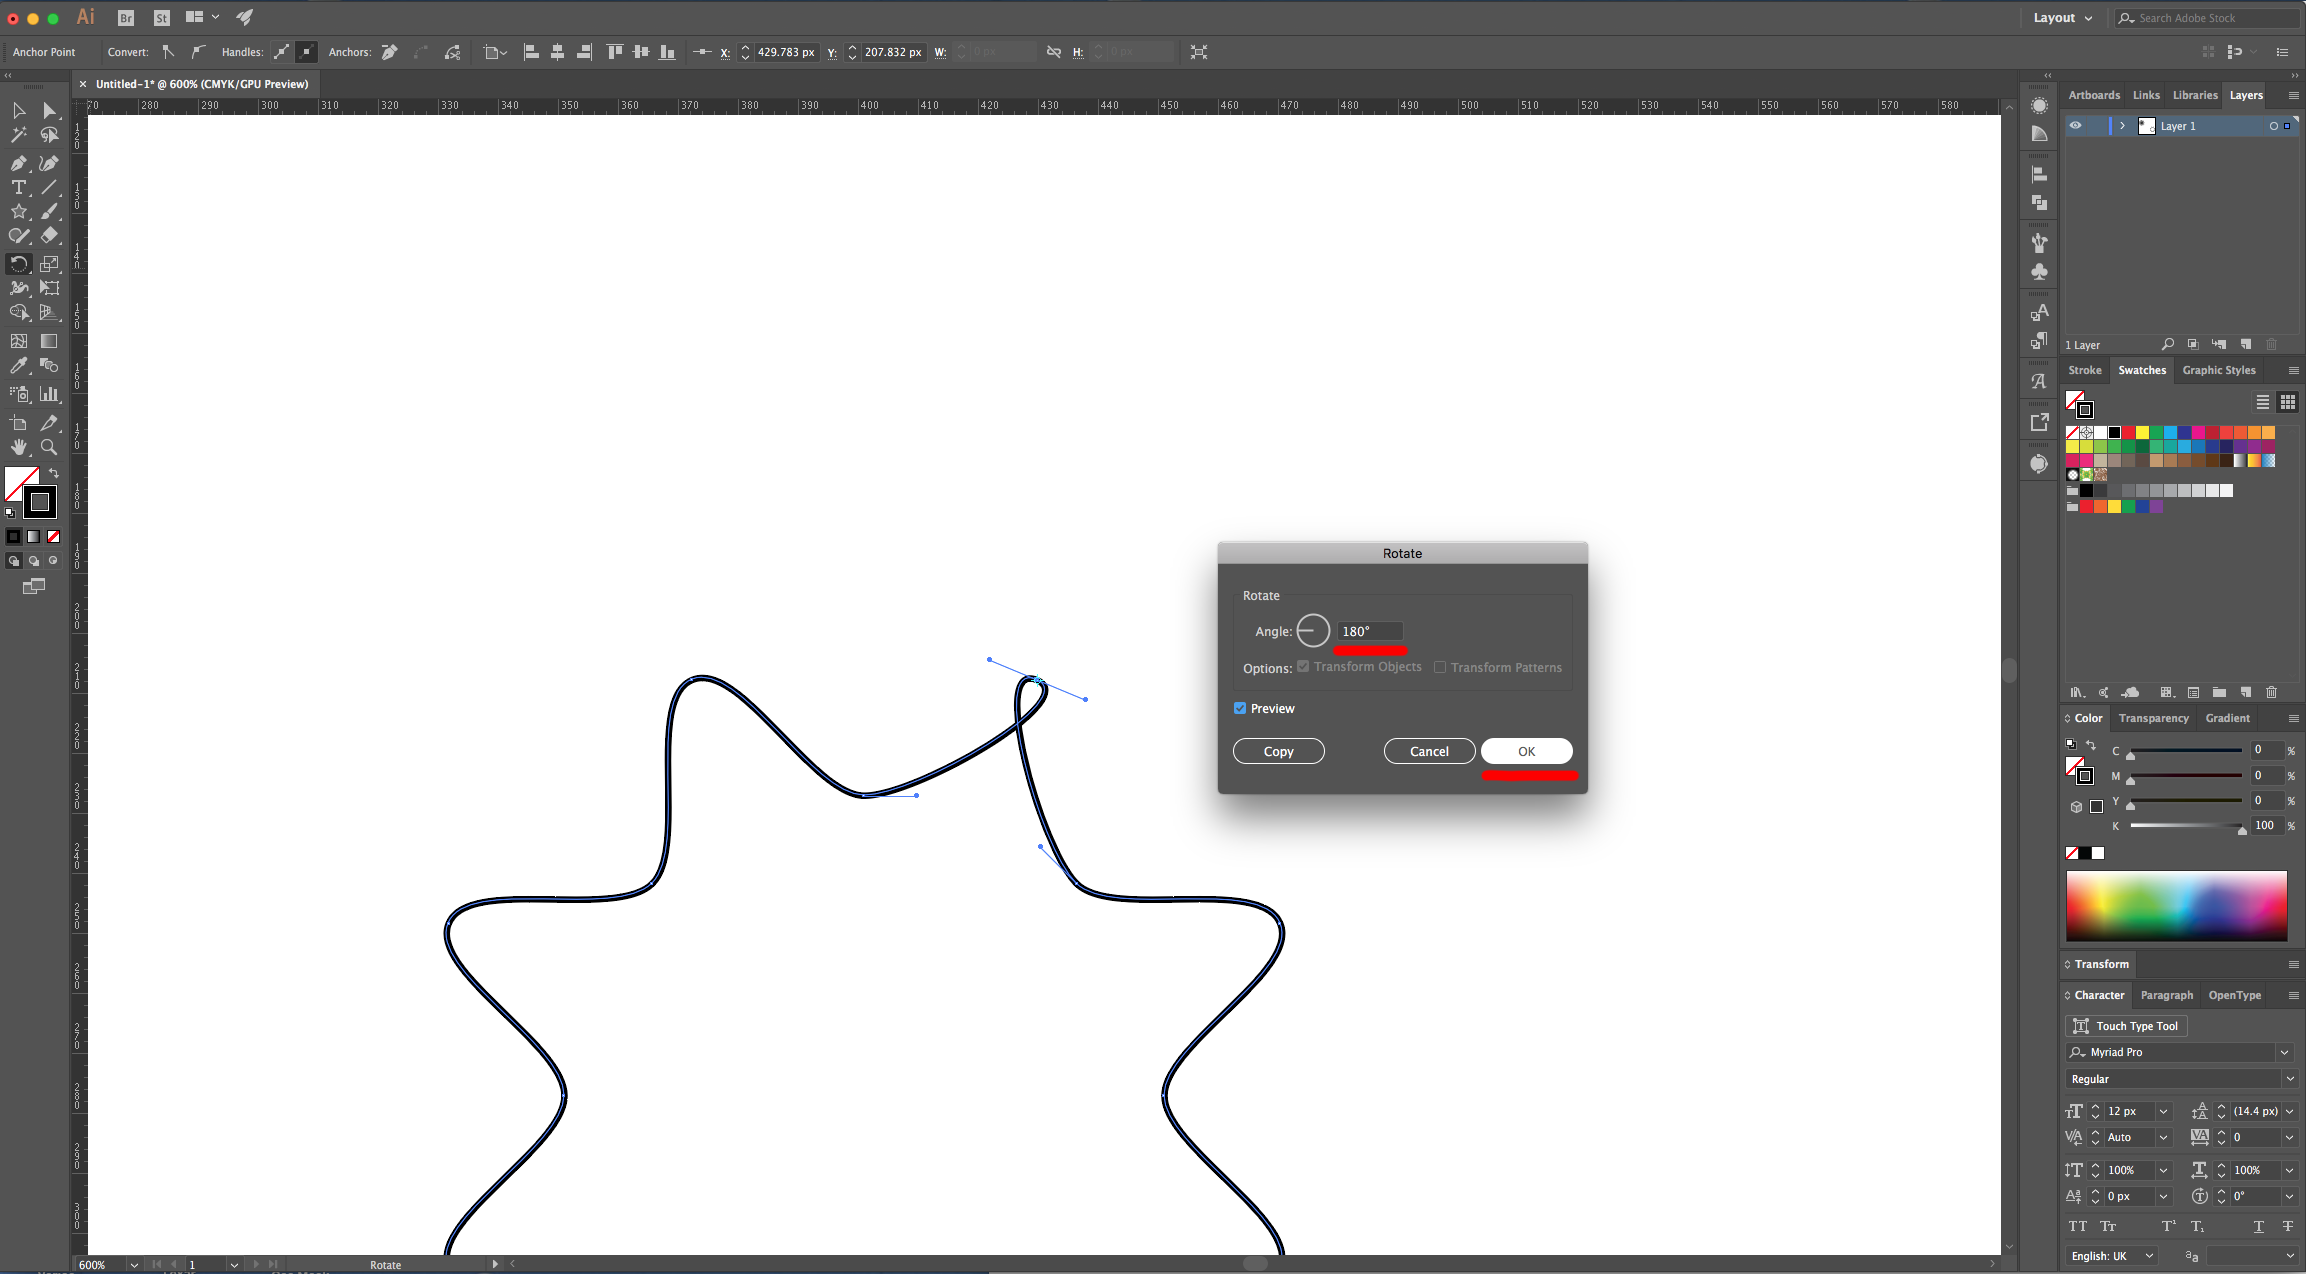
8 - With the “Direct Selection Tool” (A) select one of the Outside Anchor Points, double-click on the “Rotate Tool” (R) on the Toolbox to open the dialog and use a 180° Angle. Click “OK”. Repeat with the rest of the Outside Anchor Points.
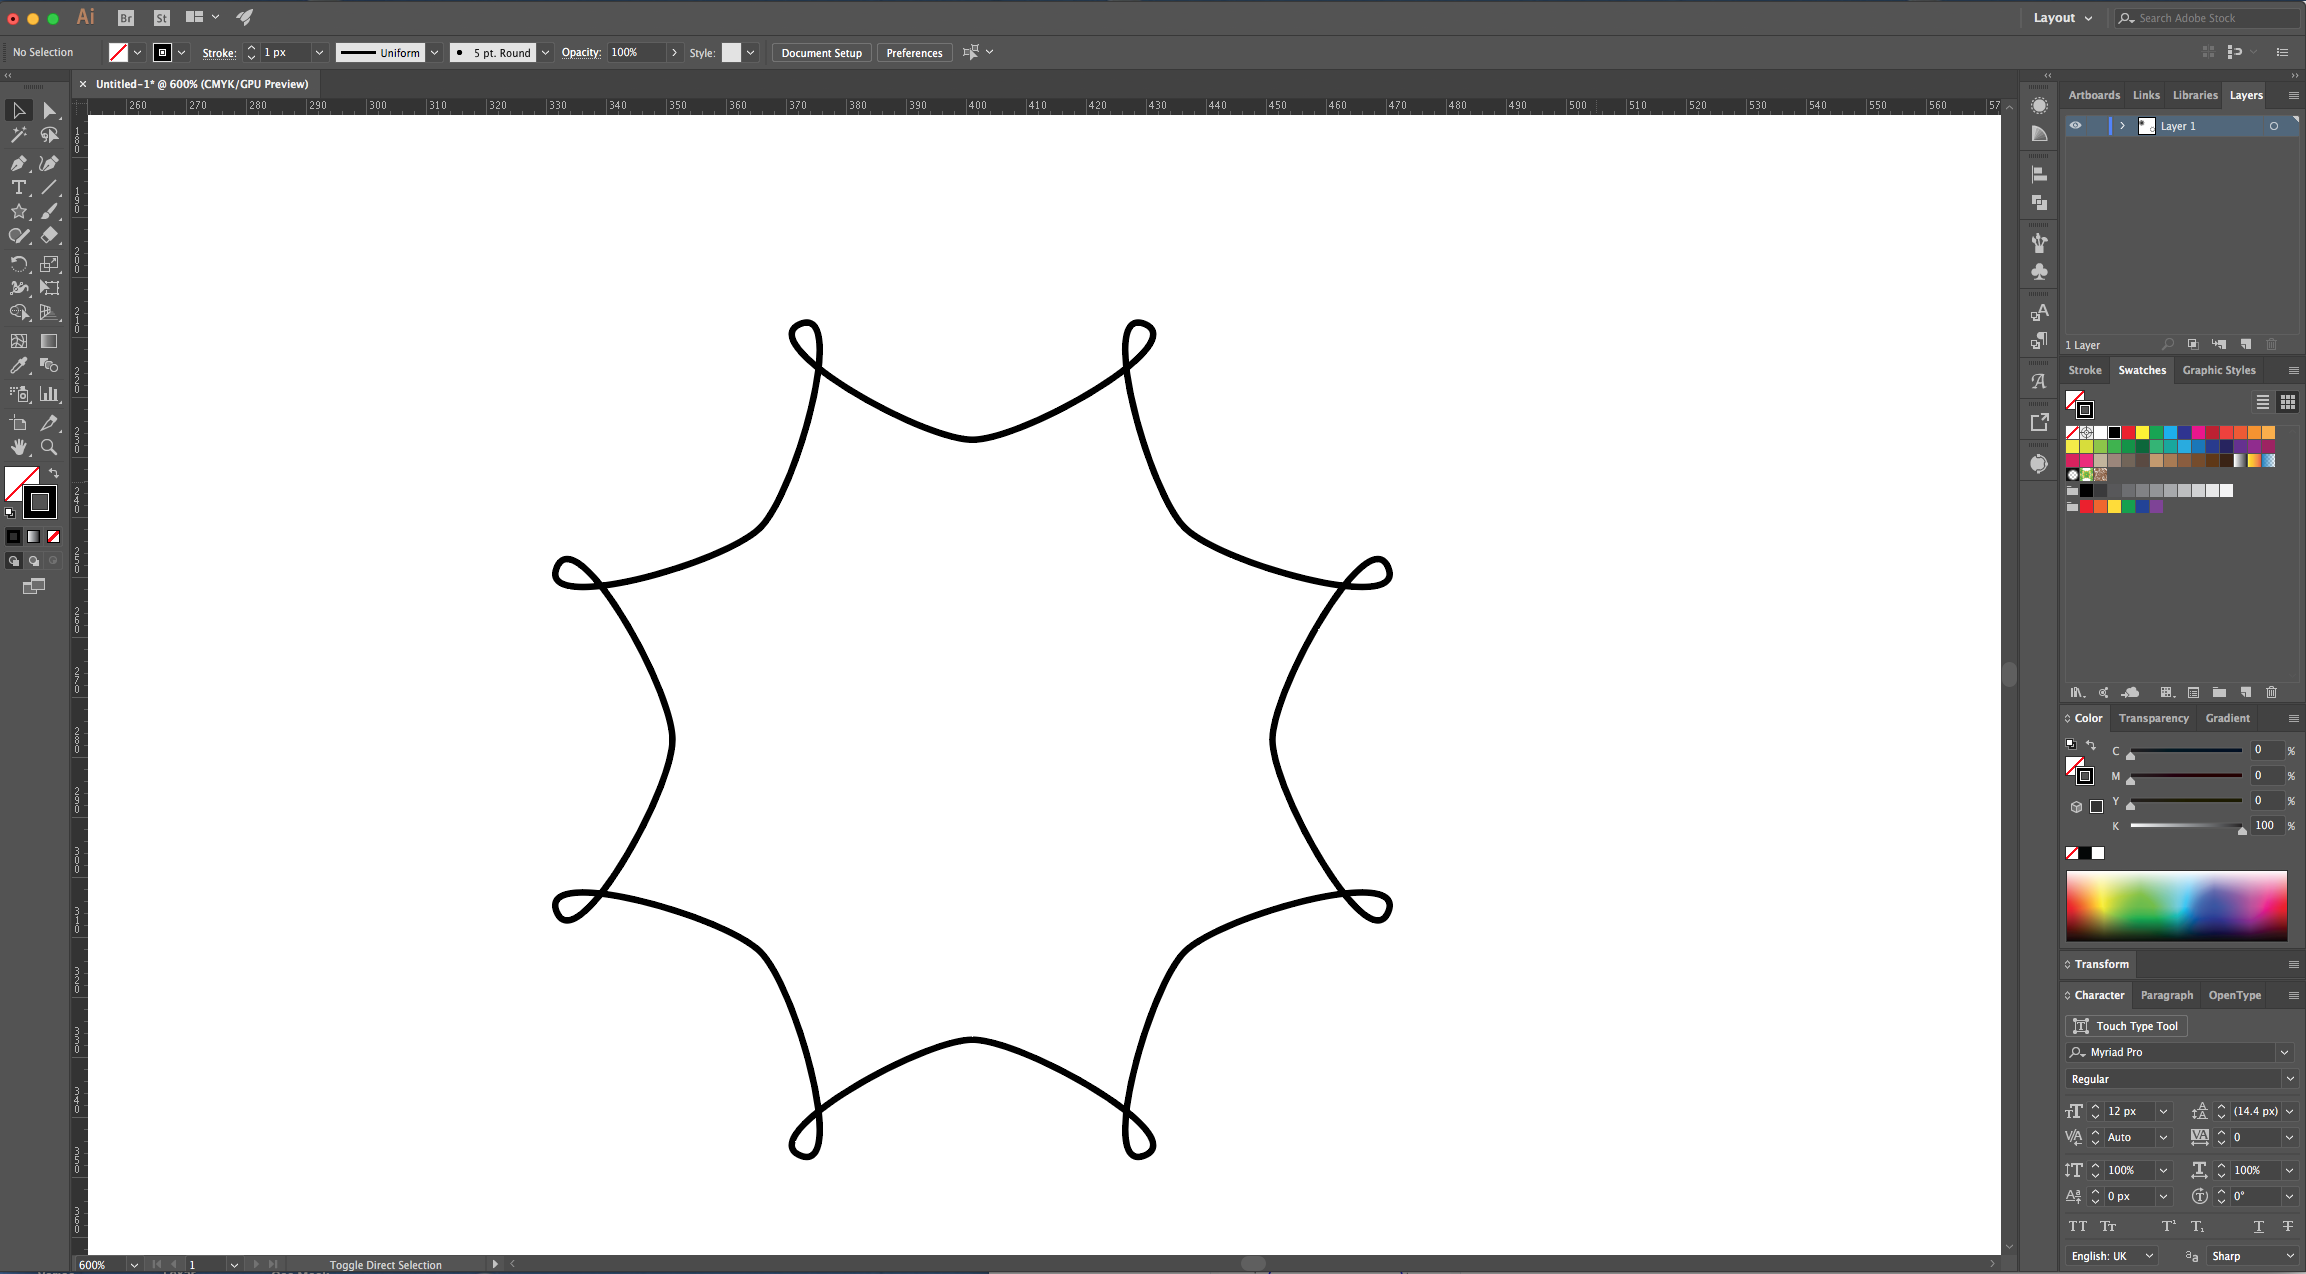
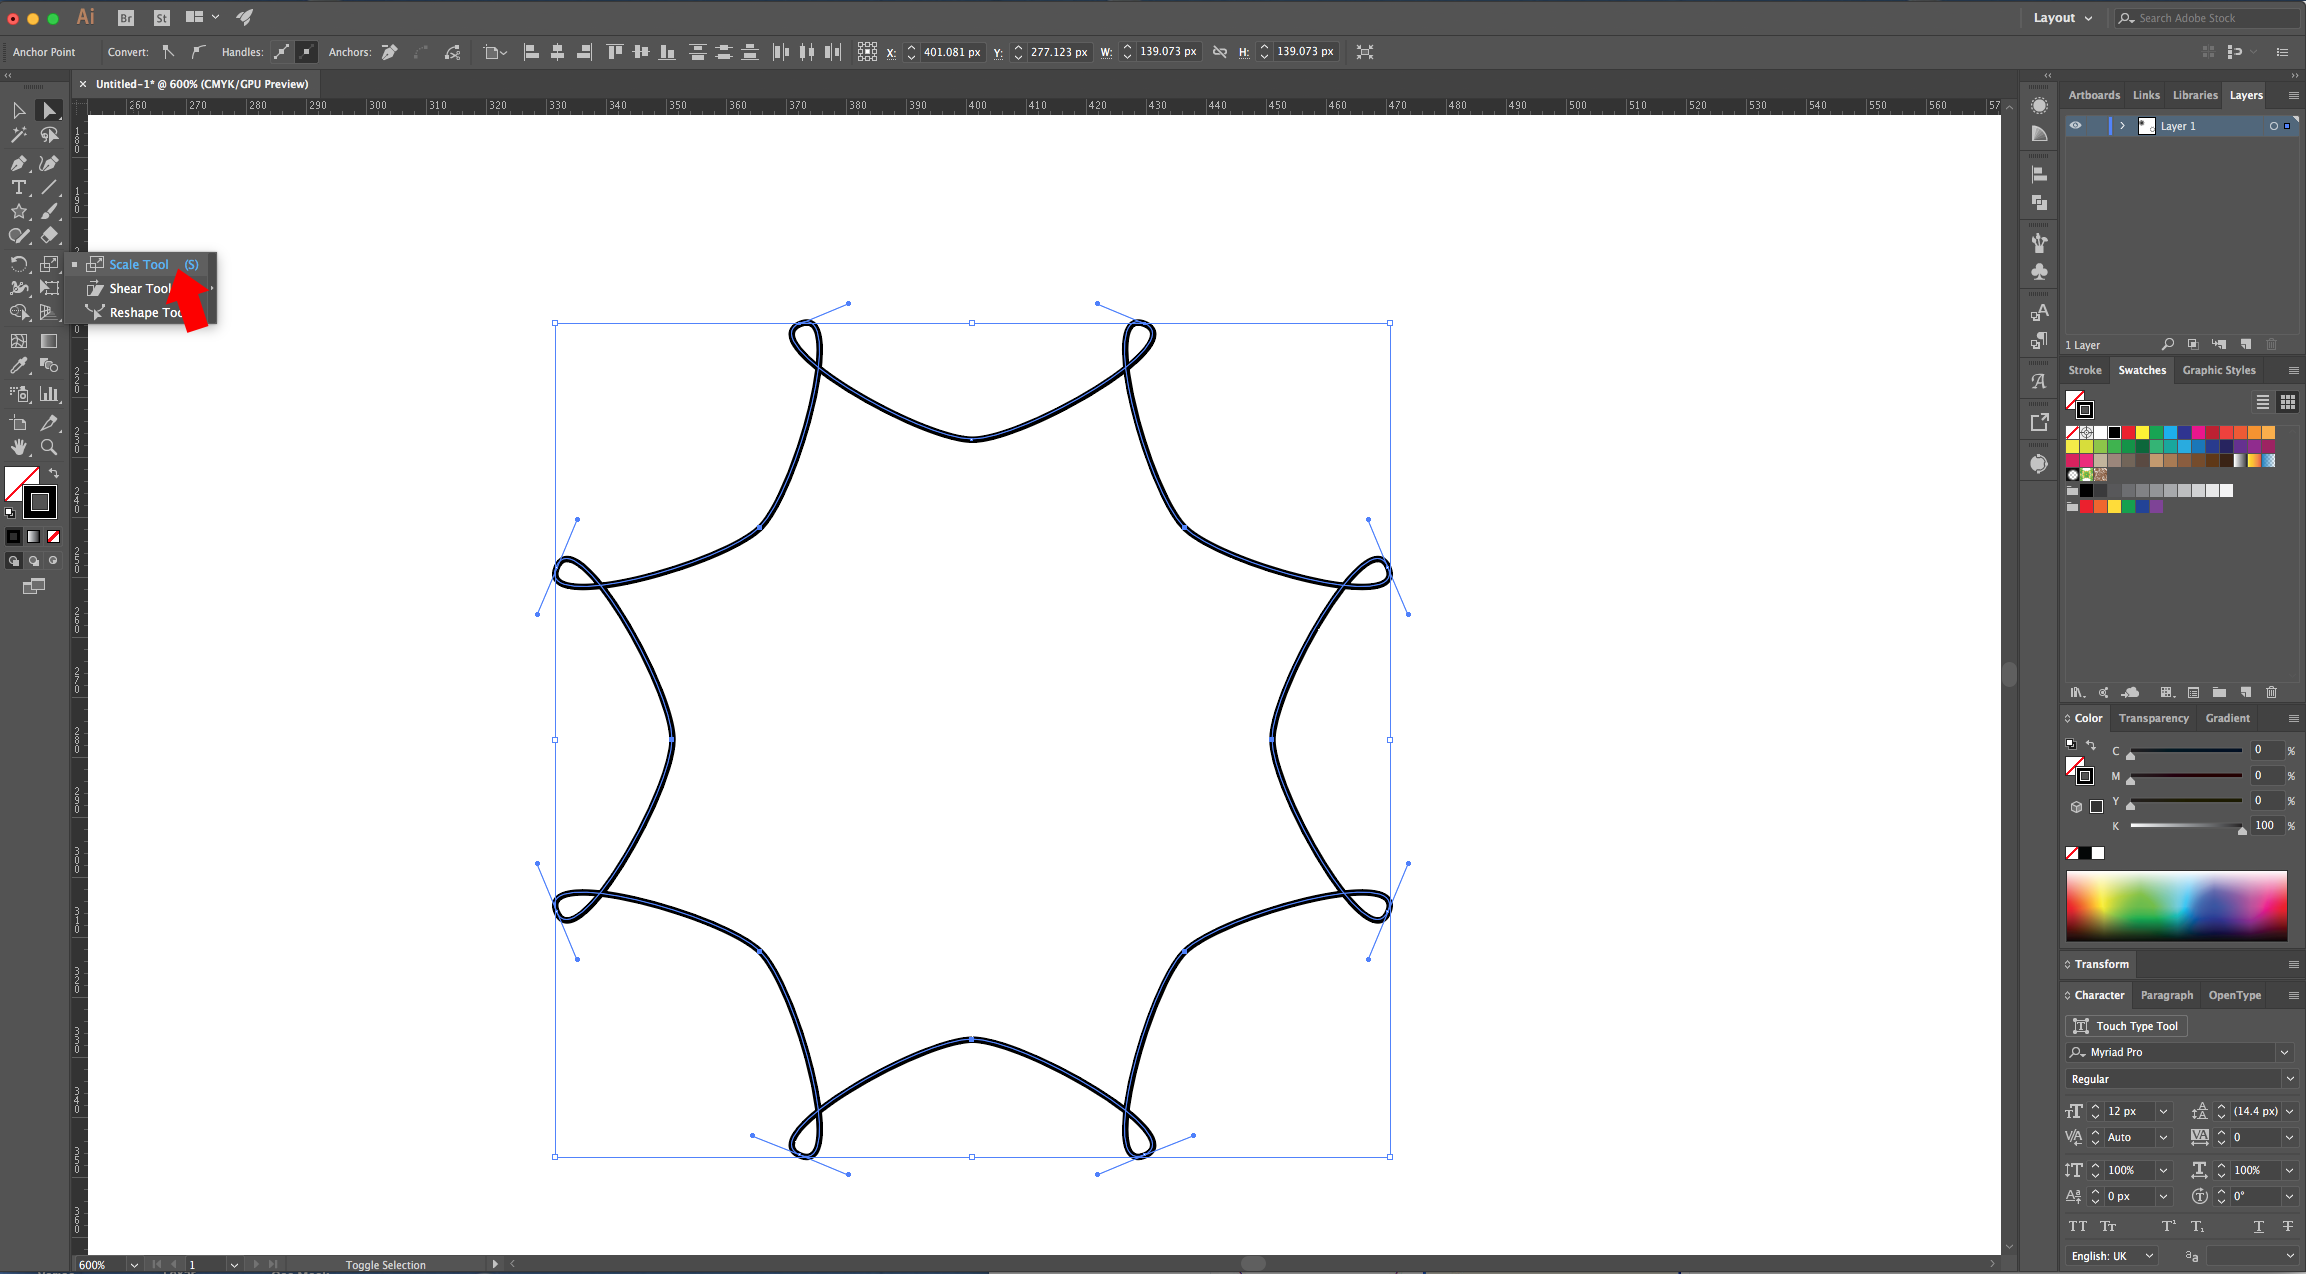
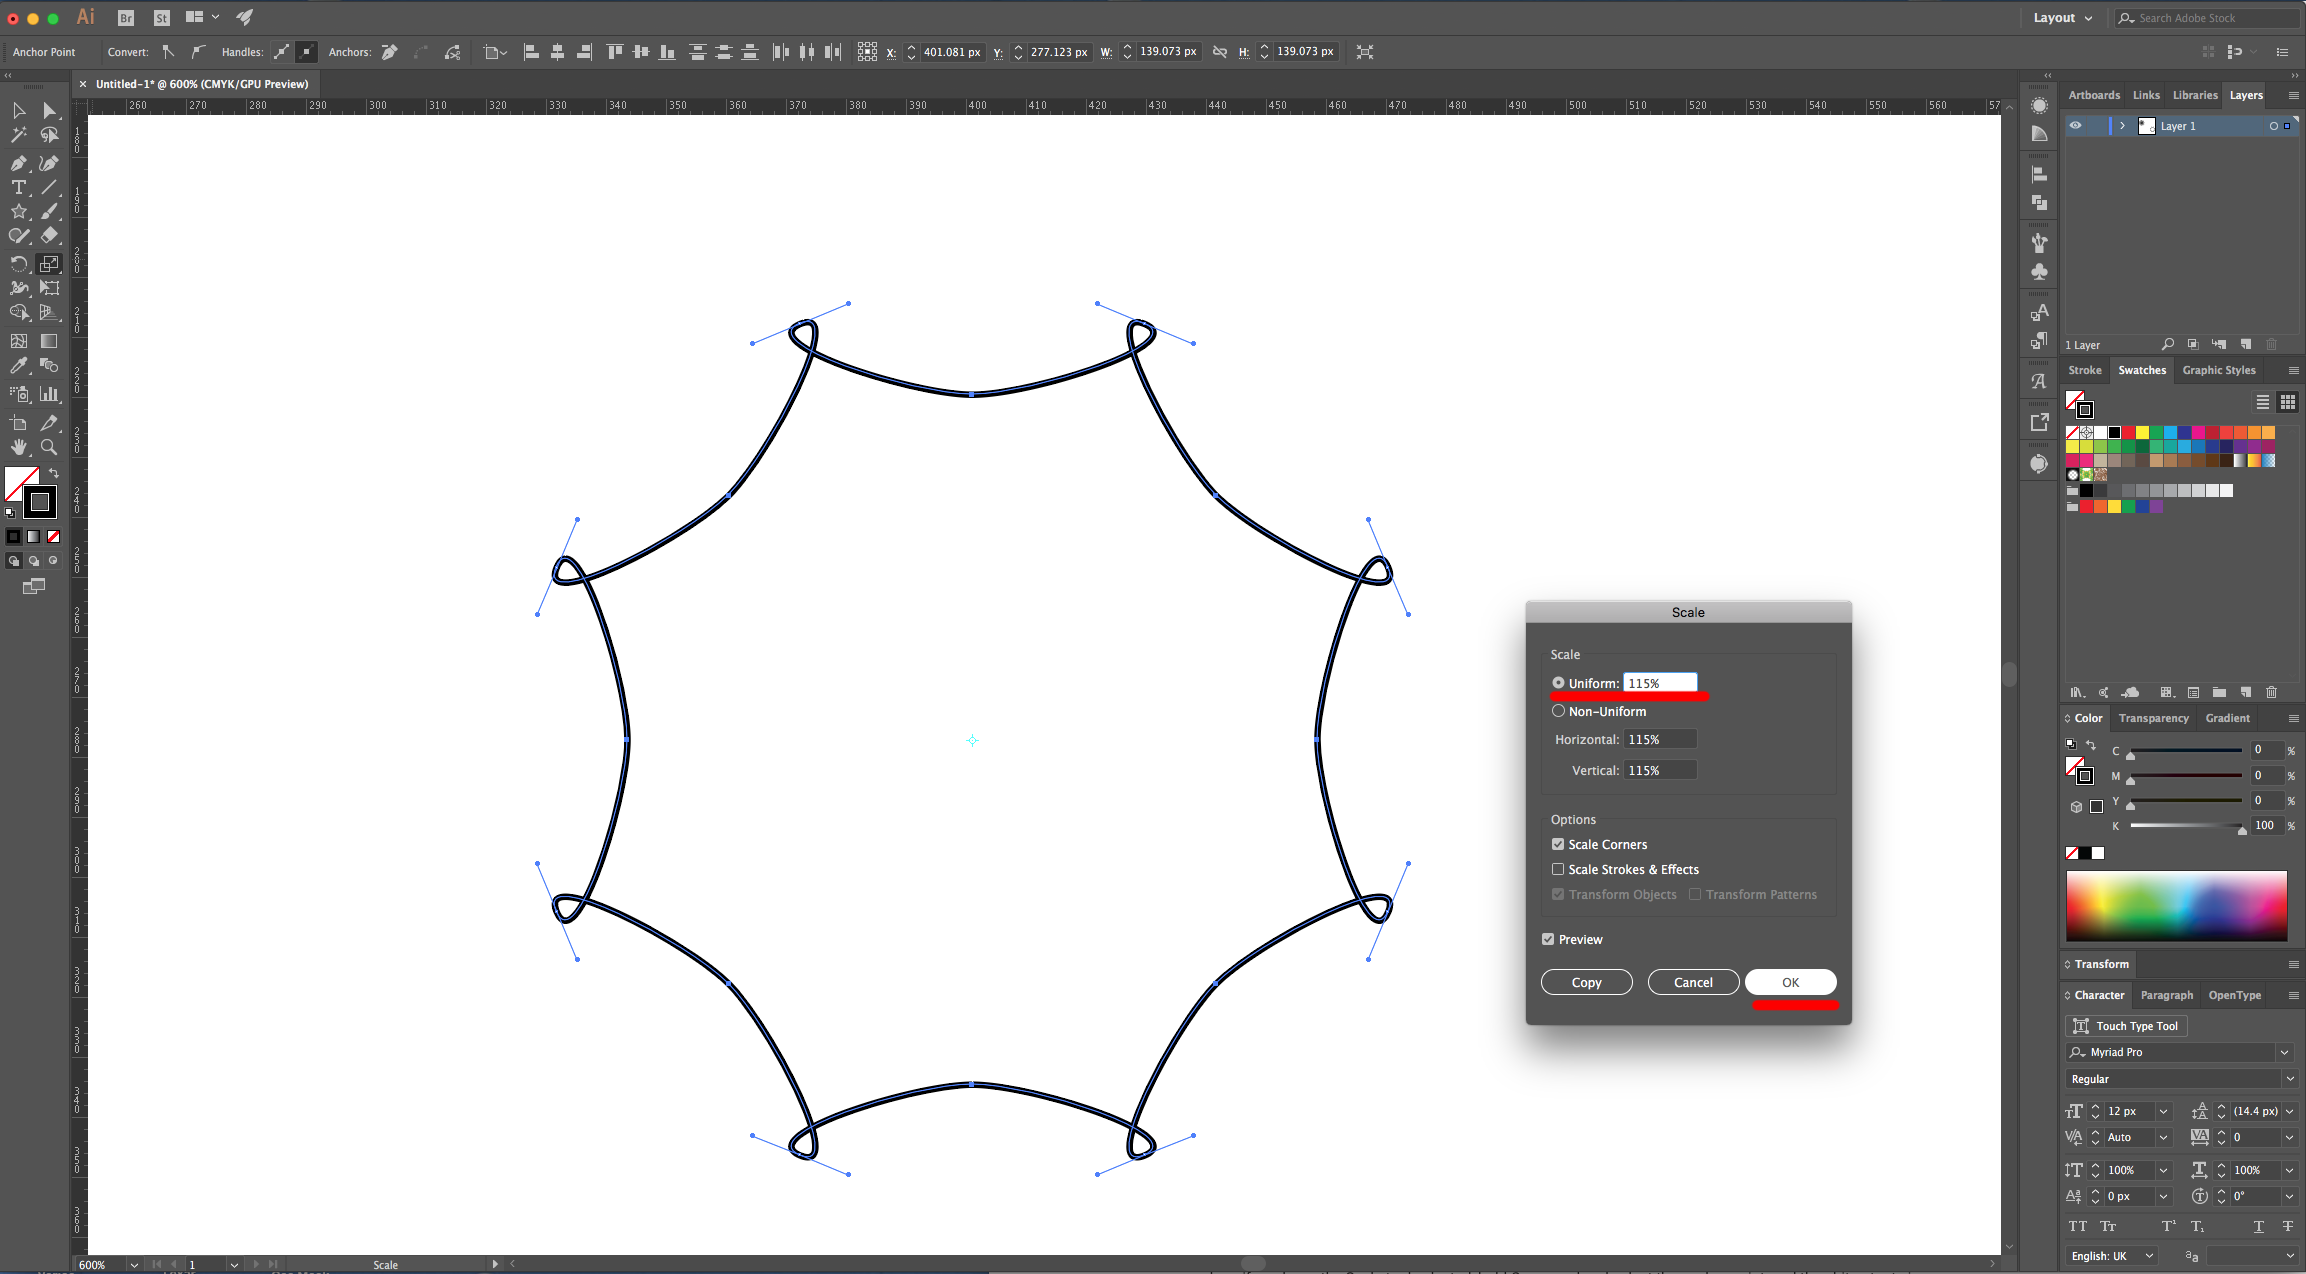
9 - Now, with the “Direct Selection Tool” (A) select the Inside Anchor Points, double-click on the “Scale Tool” (S) on the Toolbox to open the dialog and use apply an “Uniform Scale” of 115%.
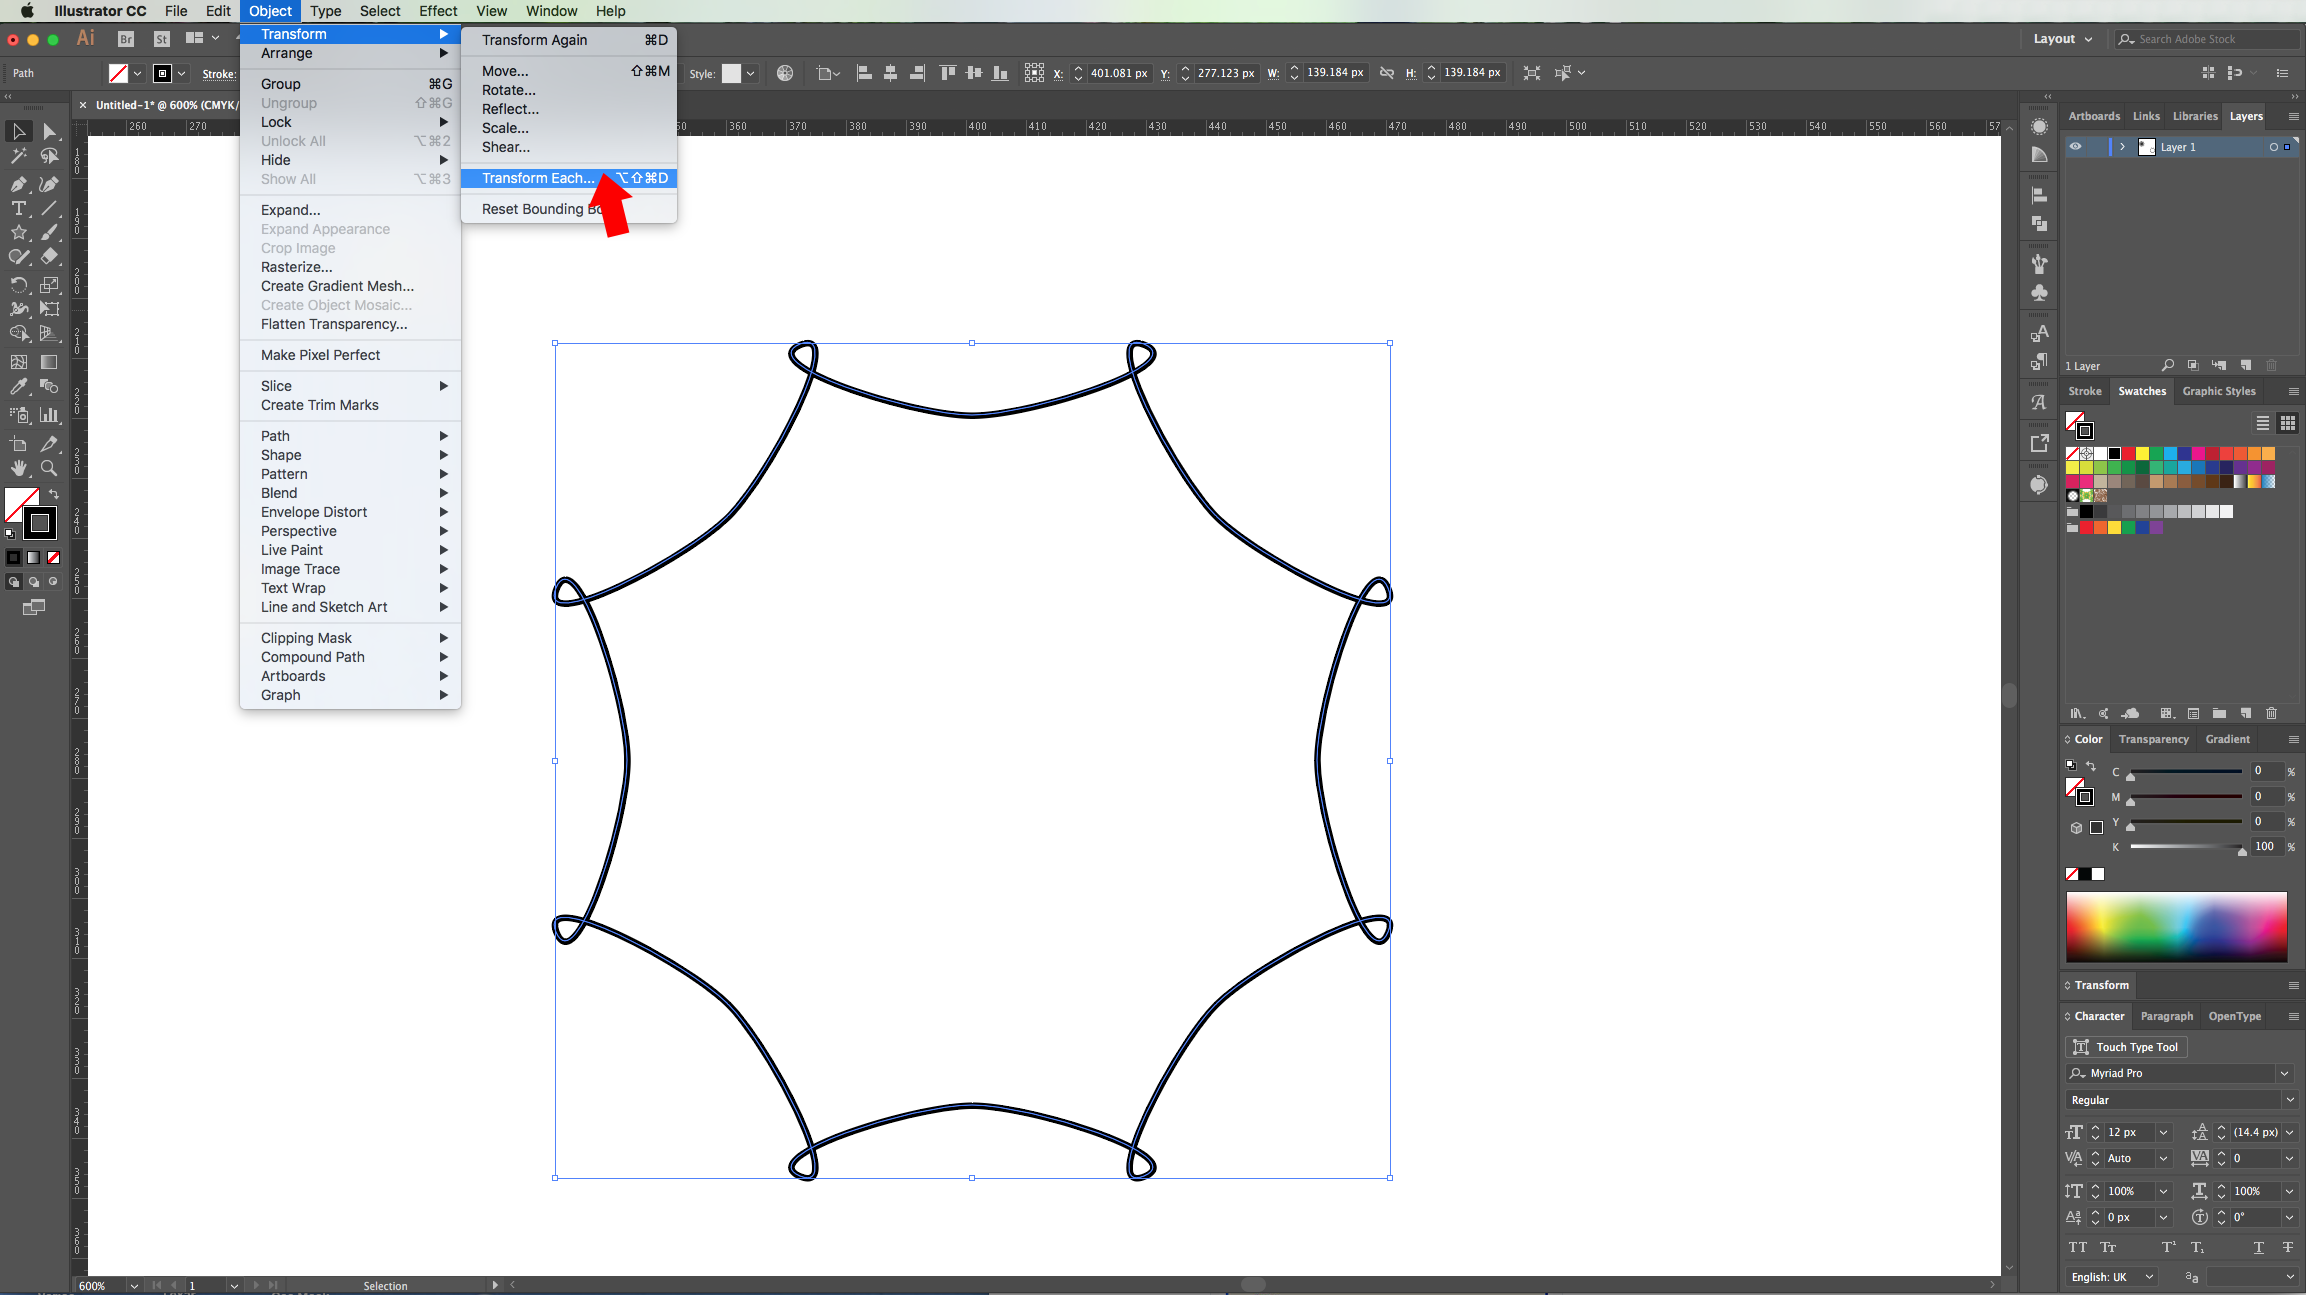
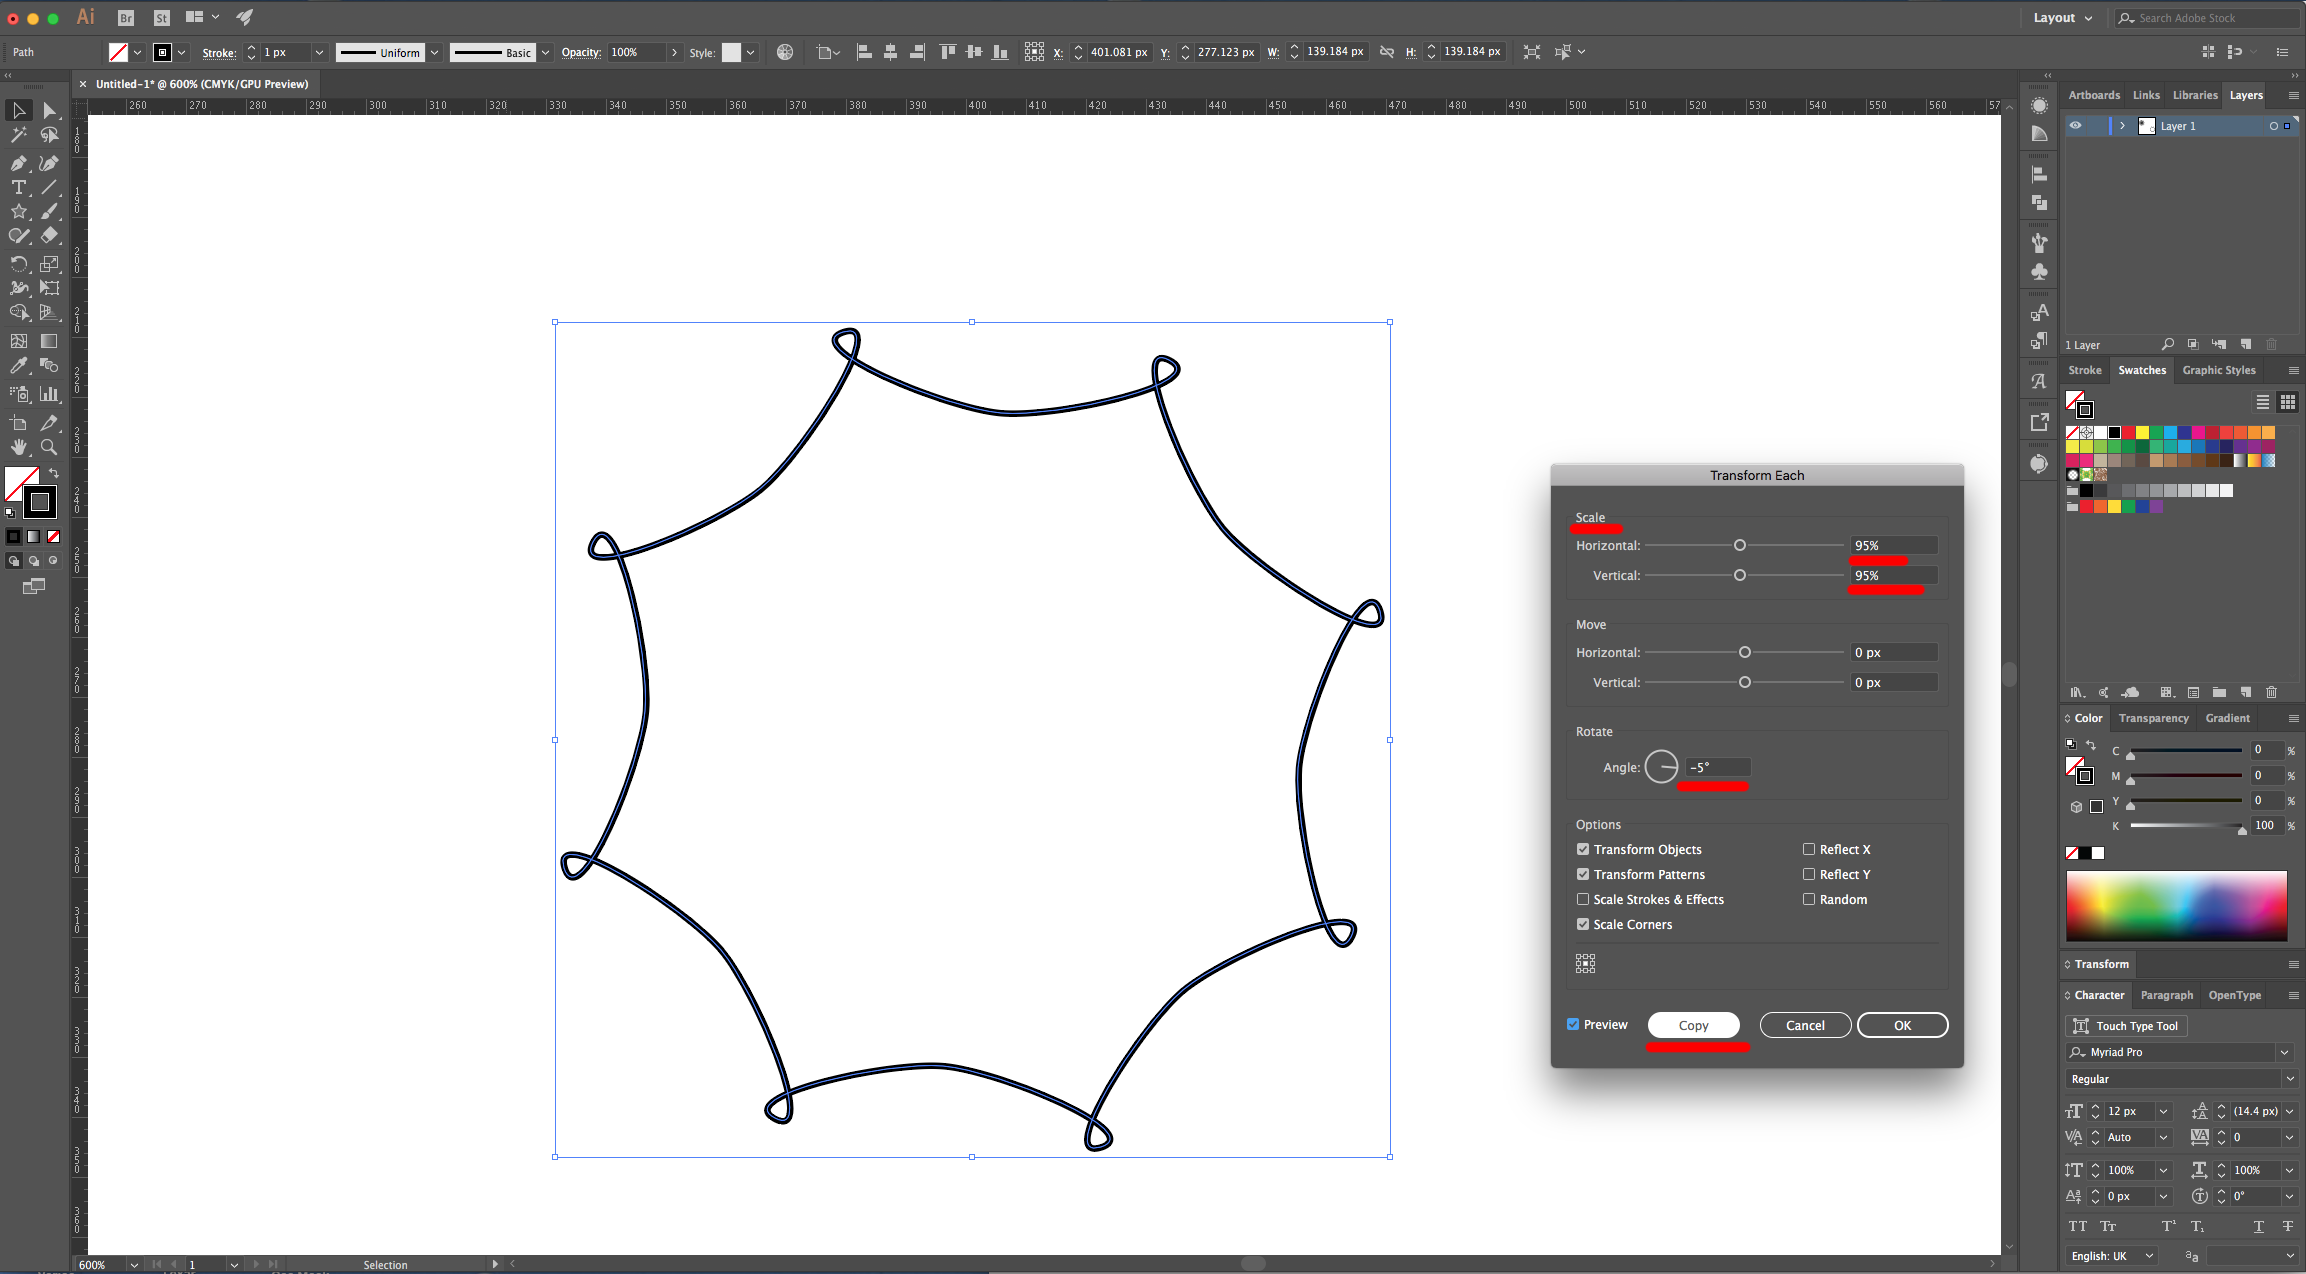
10 - Go to Object > Transform > Transform Each and use a “Horizontal and “Vertical Scale” of 95% and a “Rotate Angle” of -5°. Click “Copy” instead of “OK”. Repeat as many times as you like with Command/Control + D to create a Pattern. Right-click on top and choose “Group” (Command/Control + G).
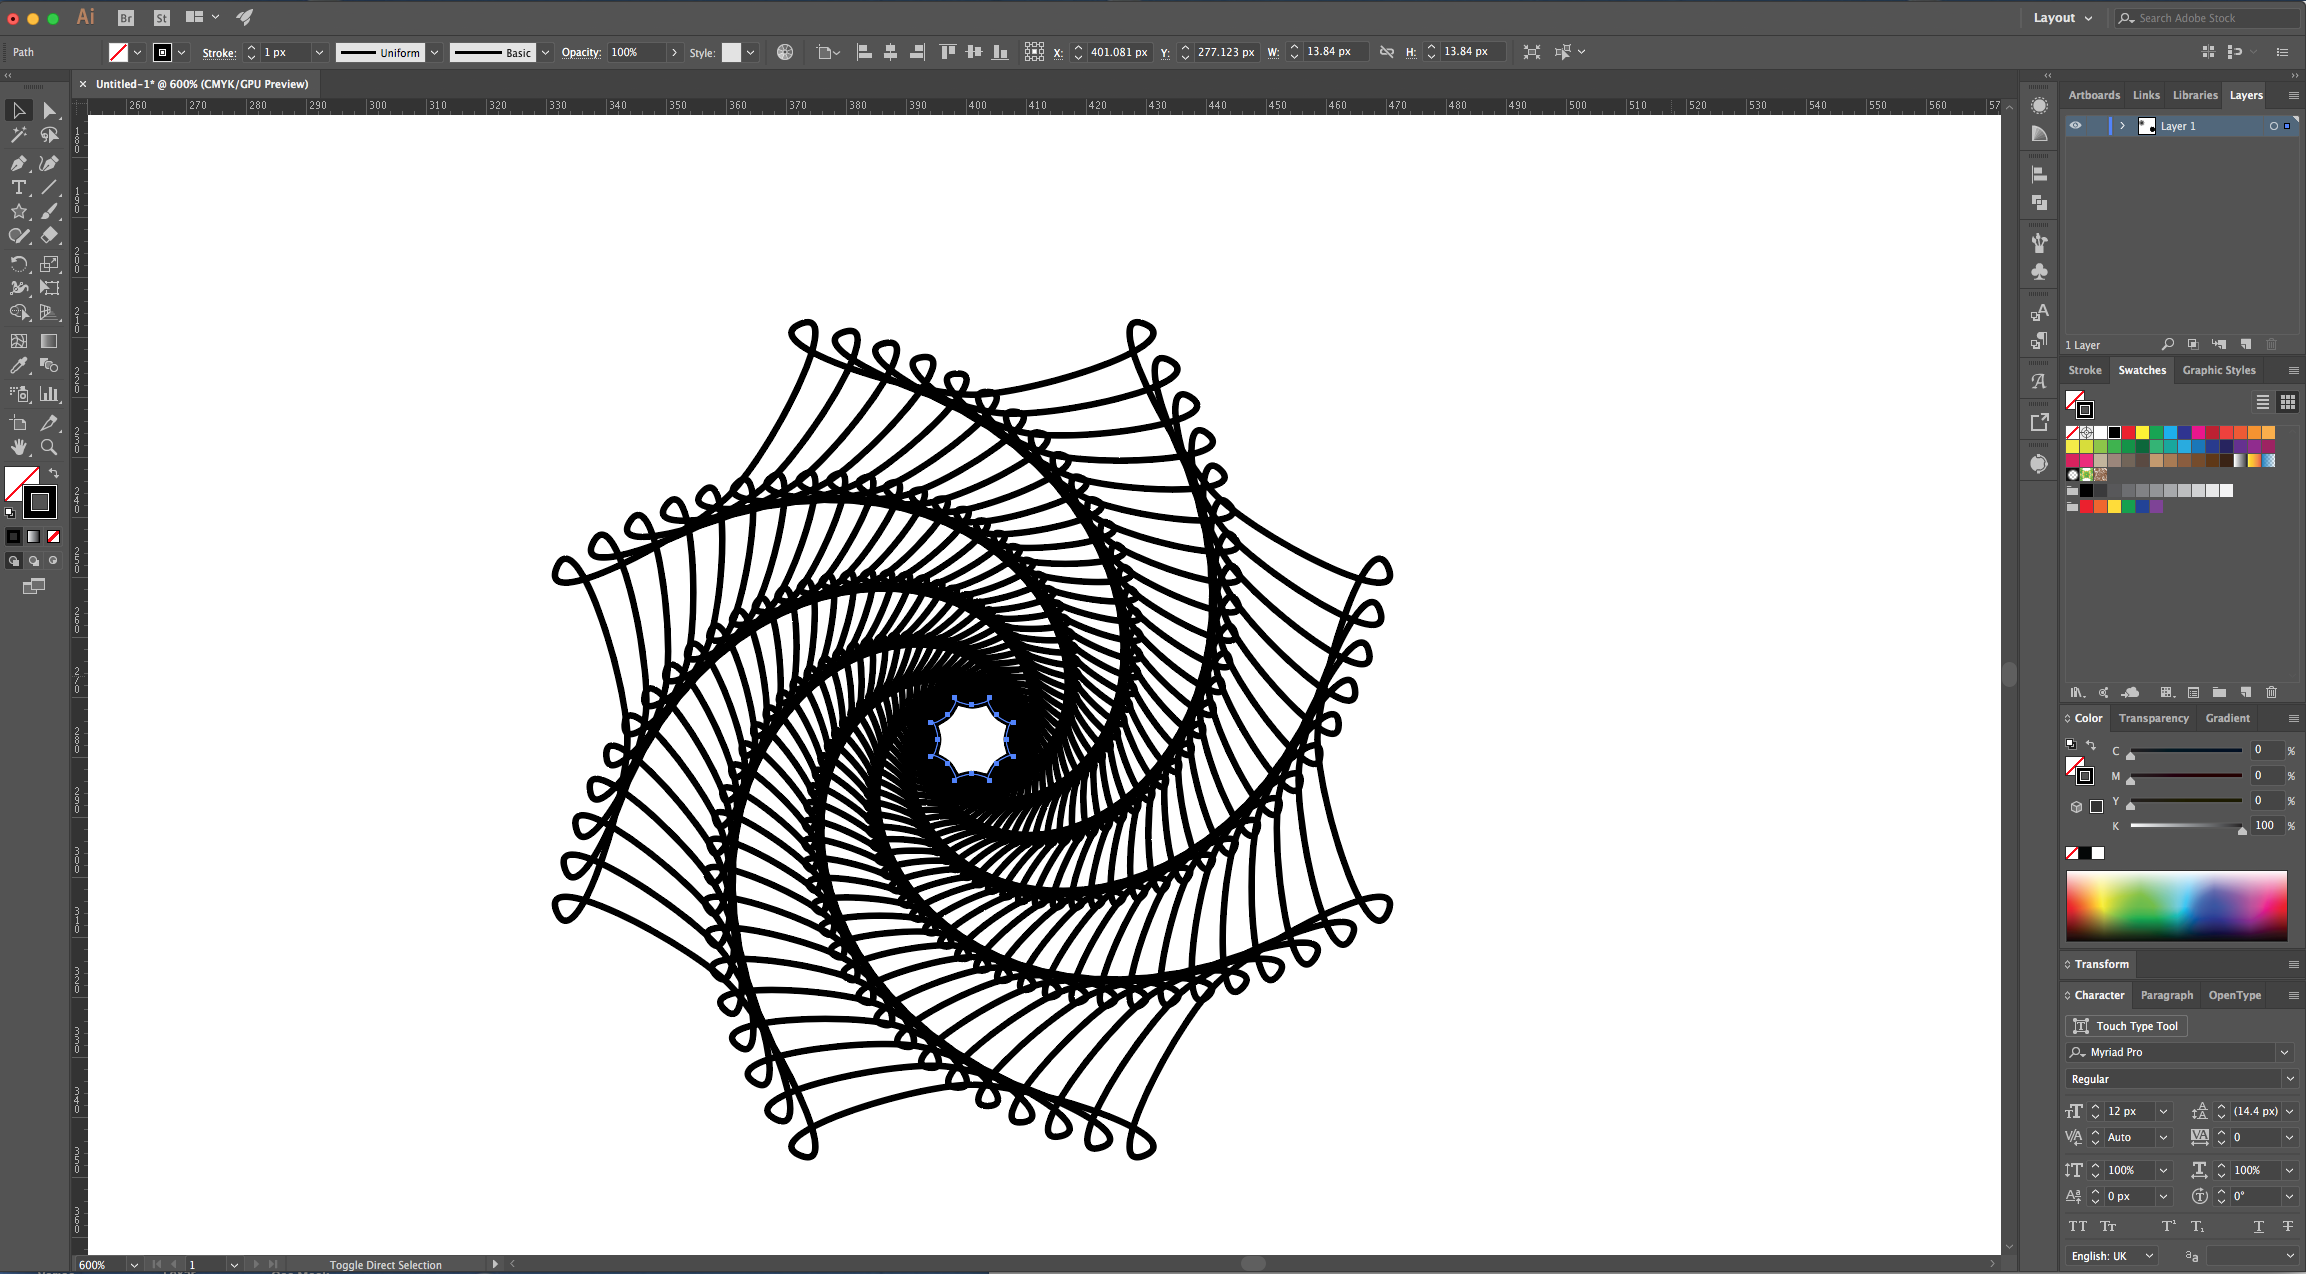
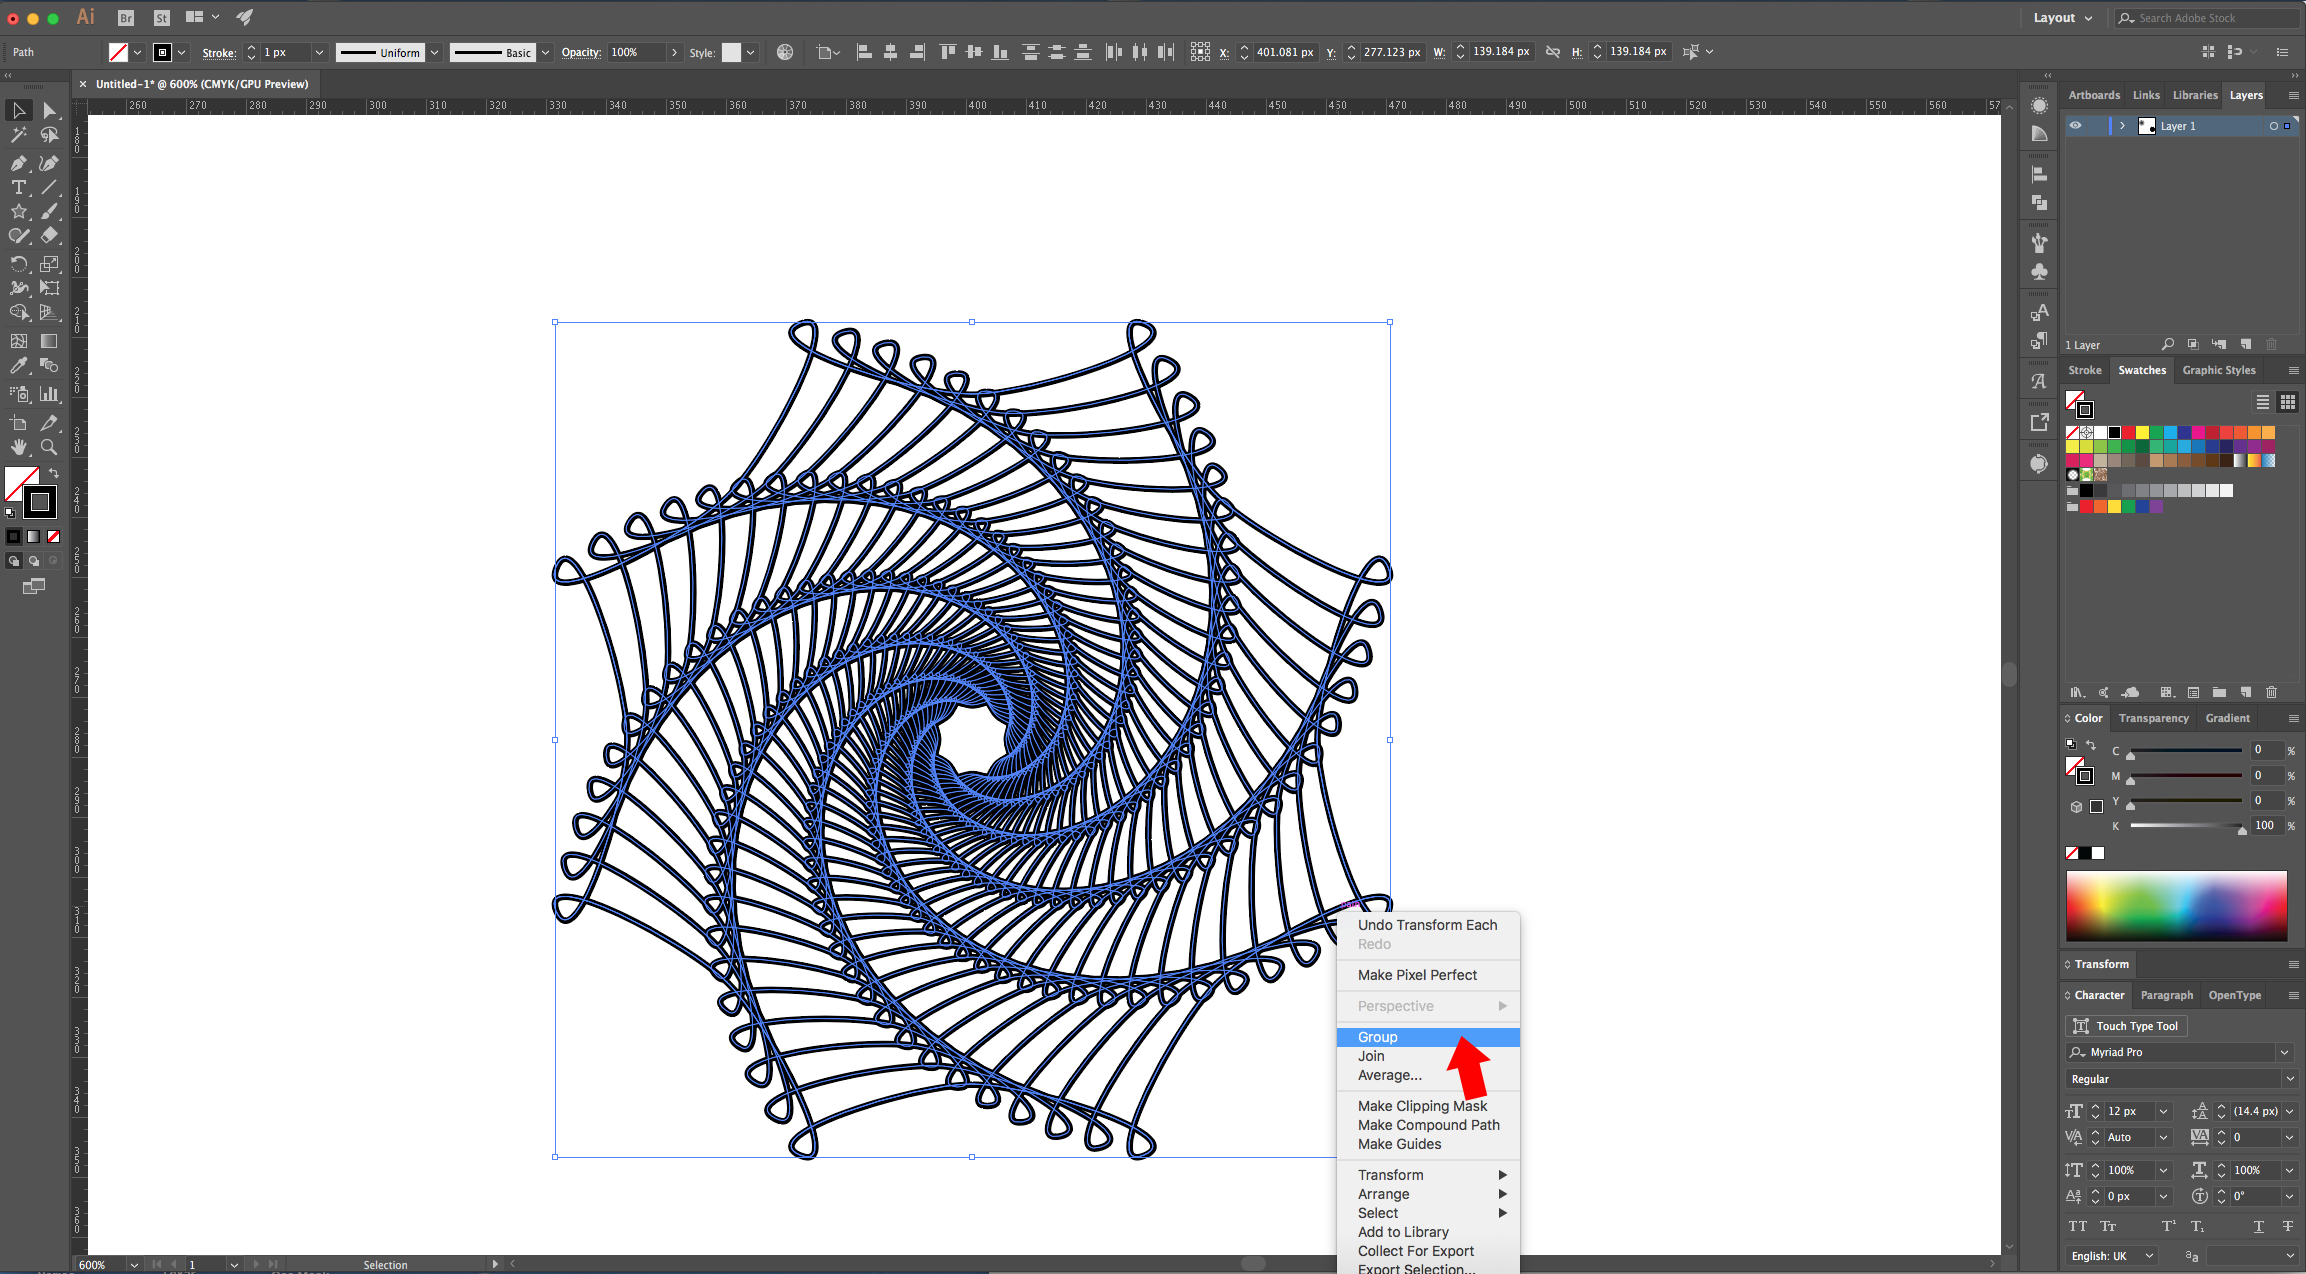
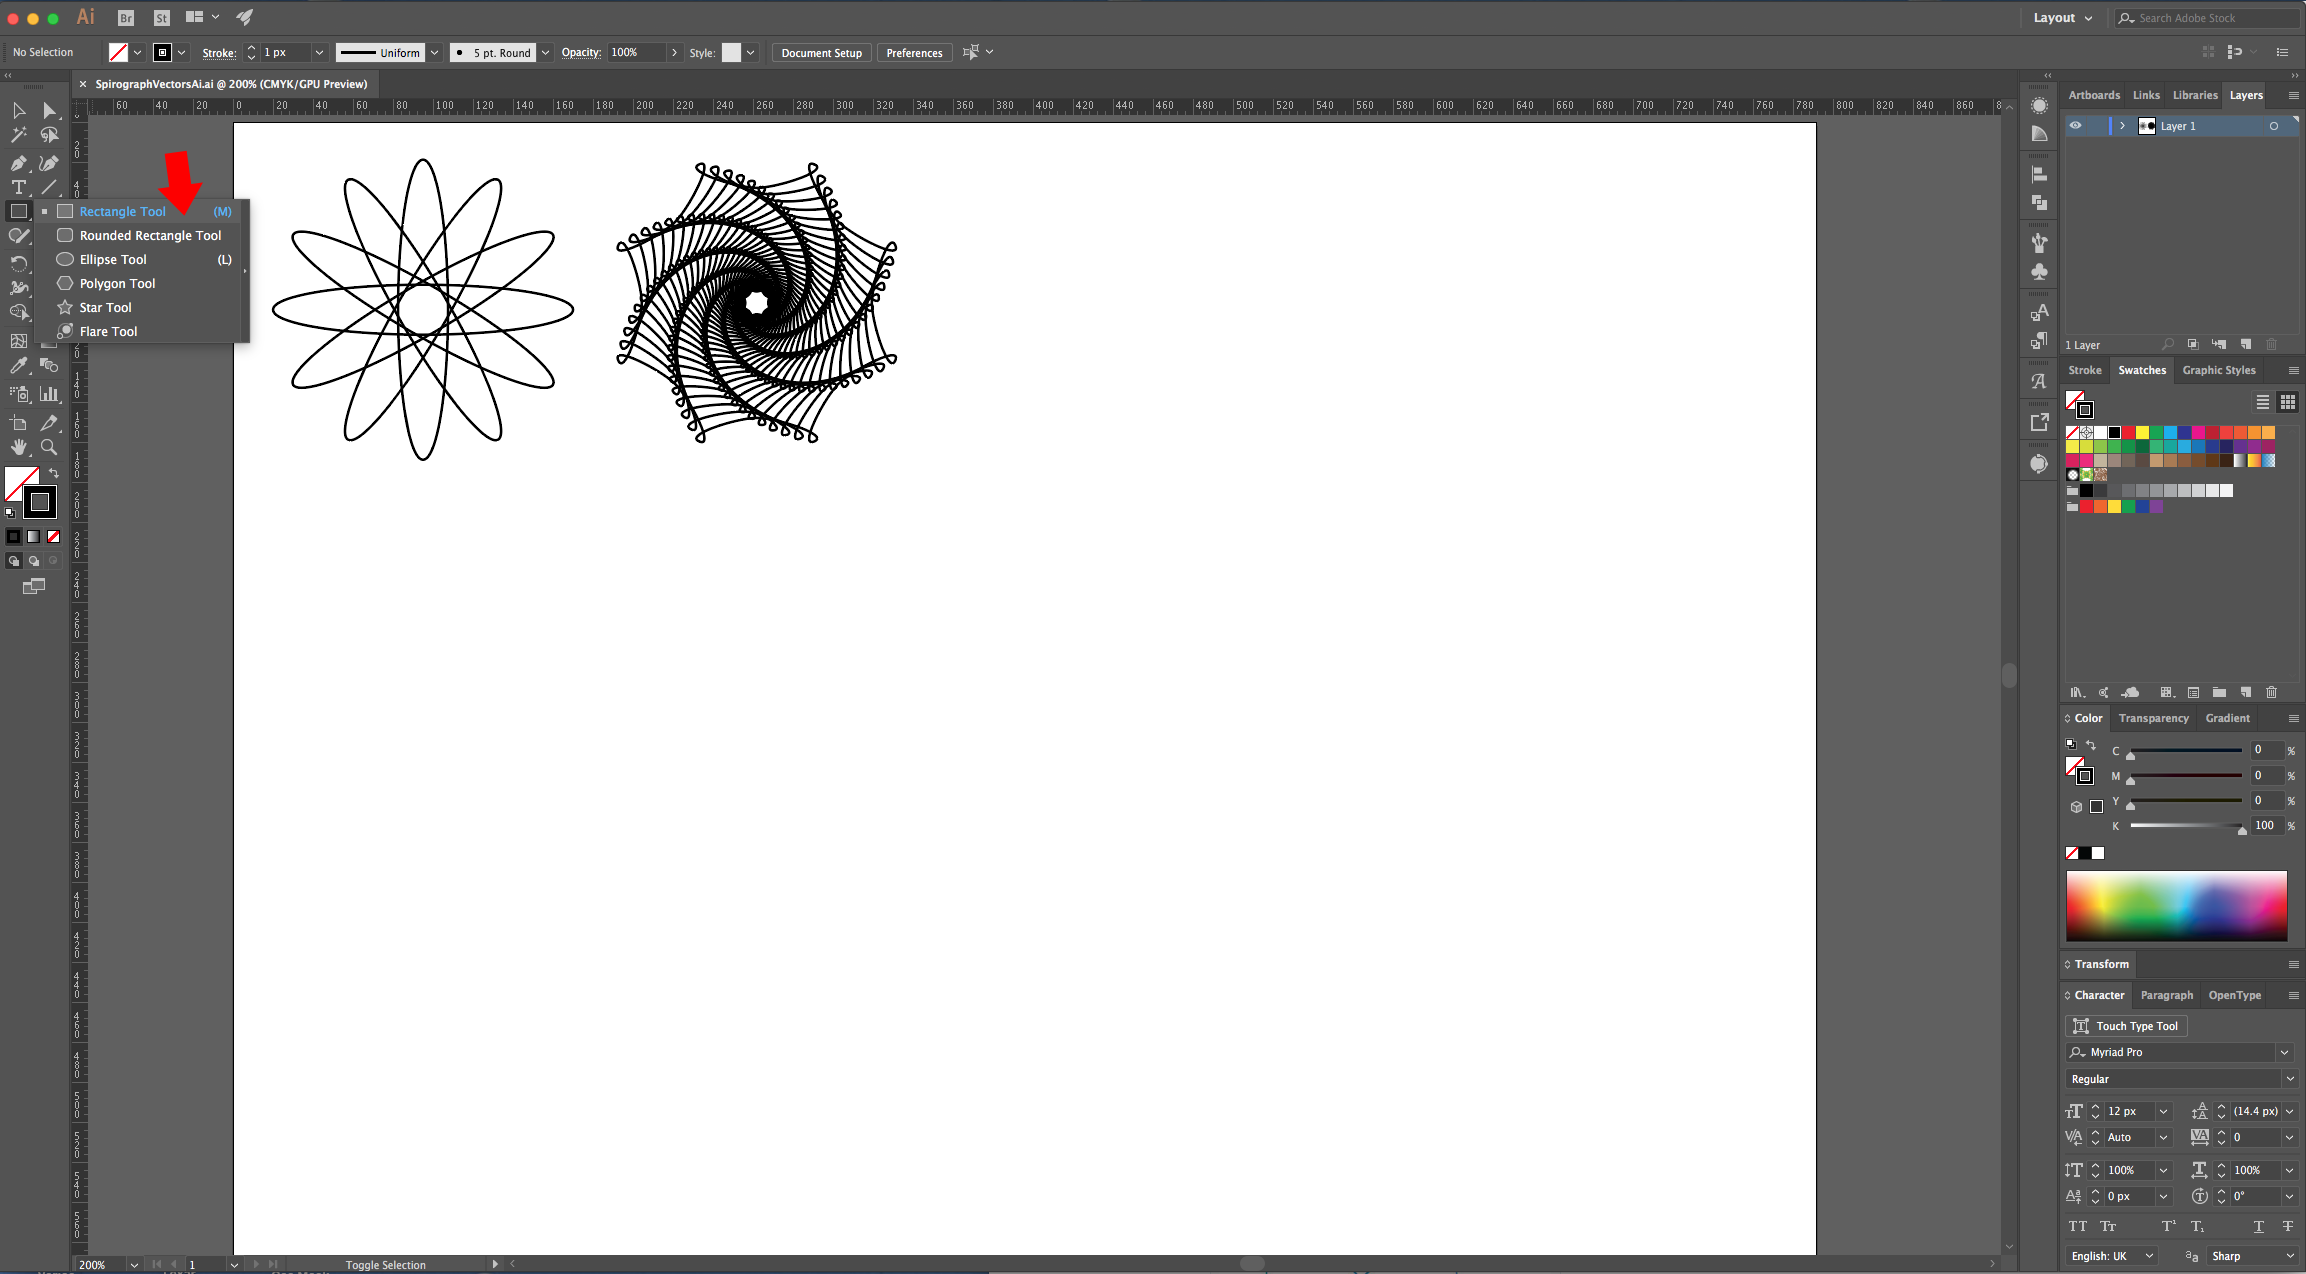
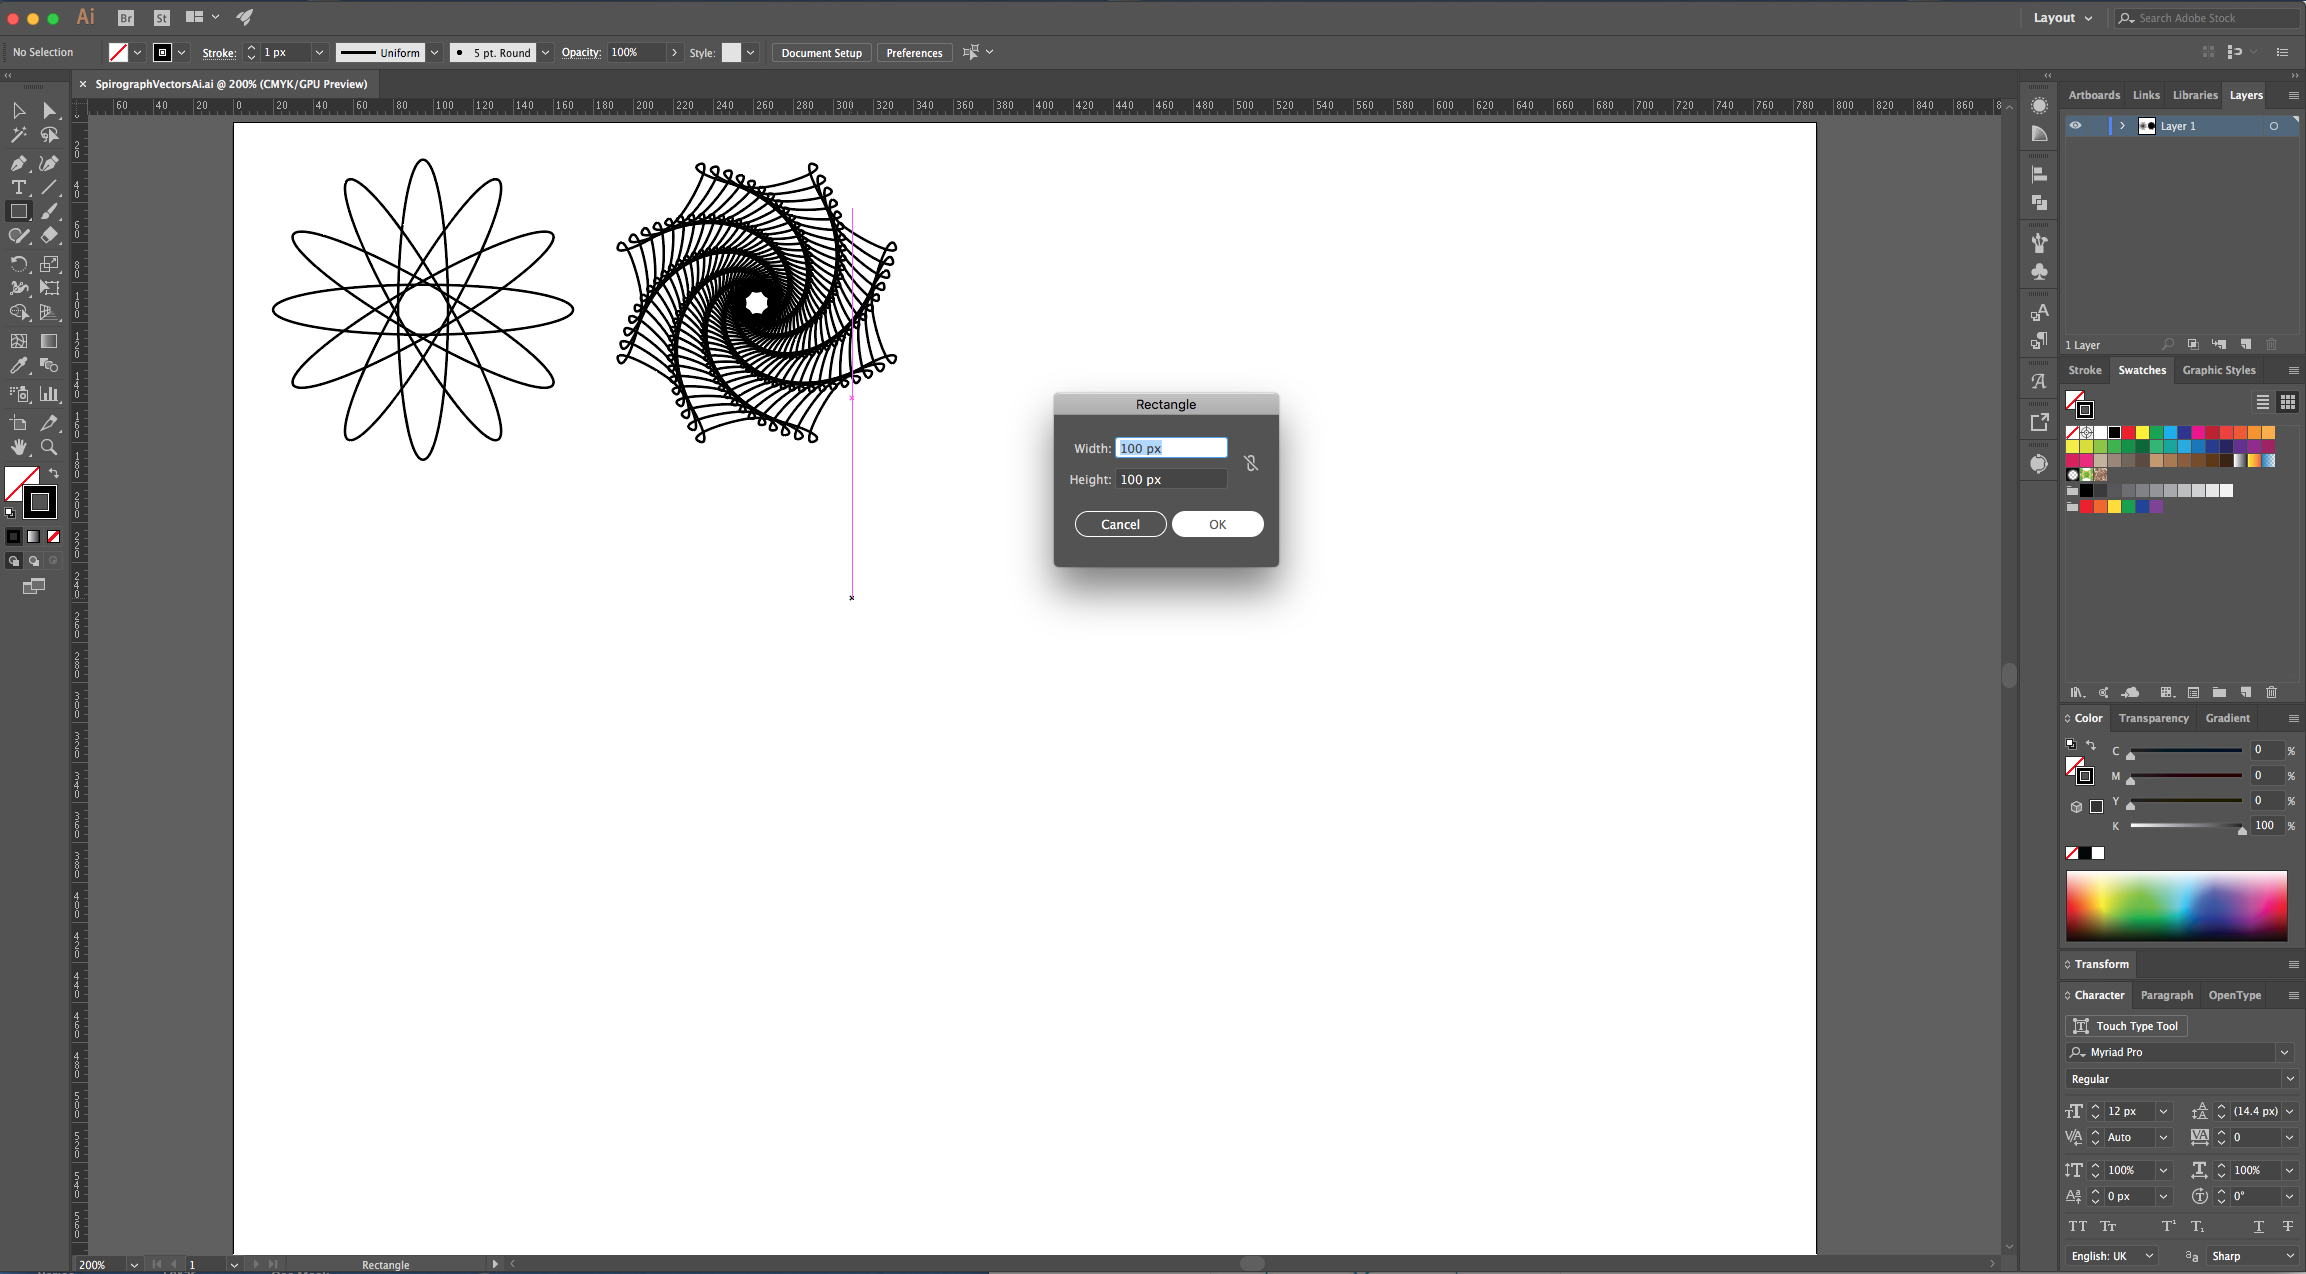
11 - Select the “Rectangle Tool” (R), click inside of your Canvas and input a “Width” and px and “Height” of 100 px.
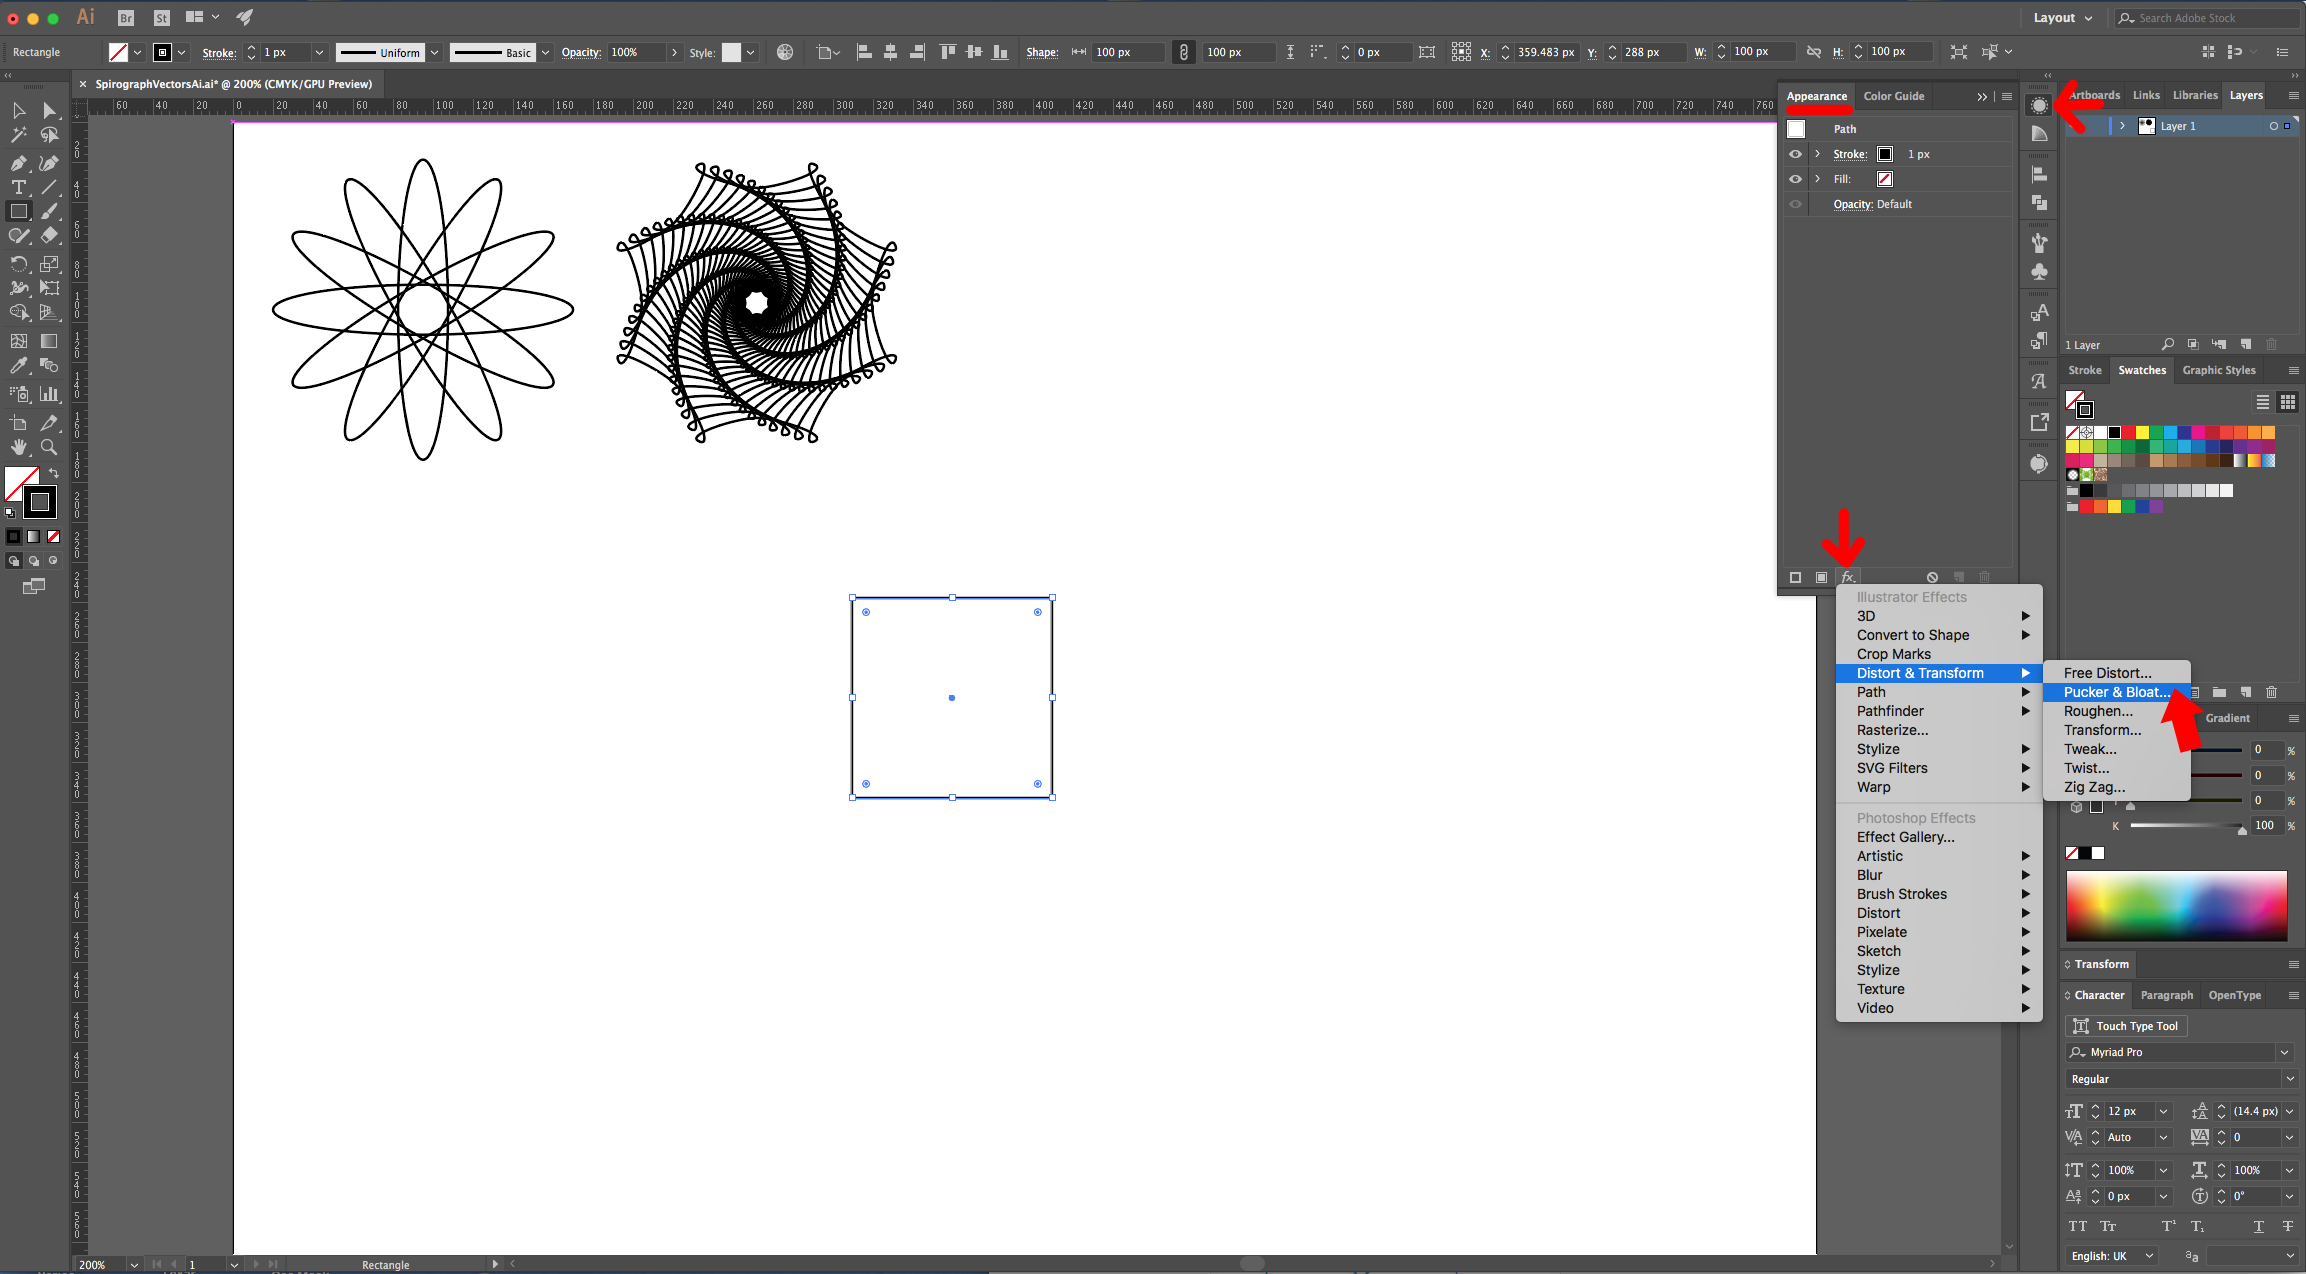
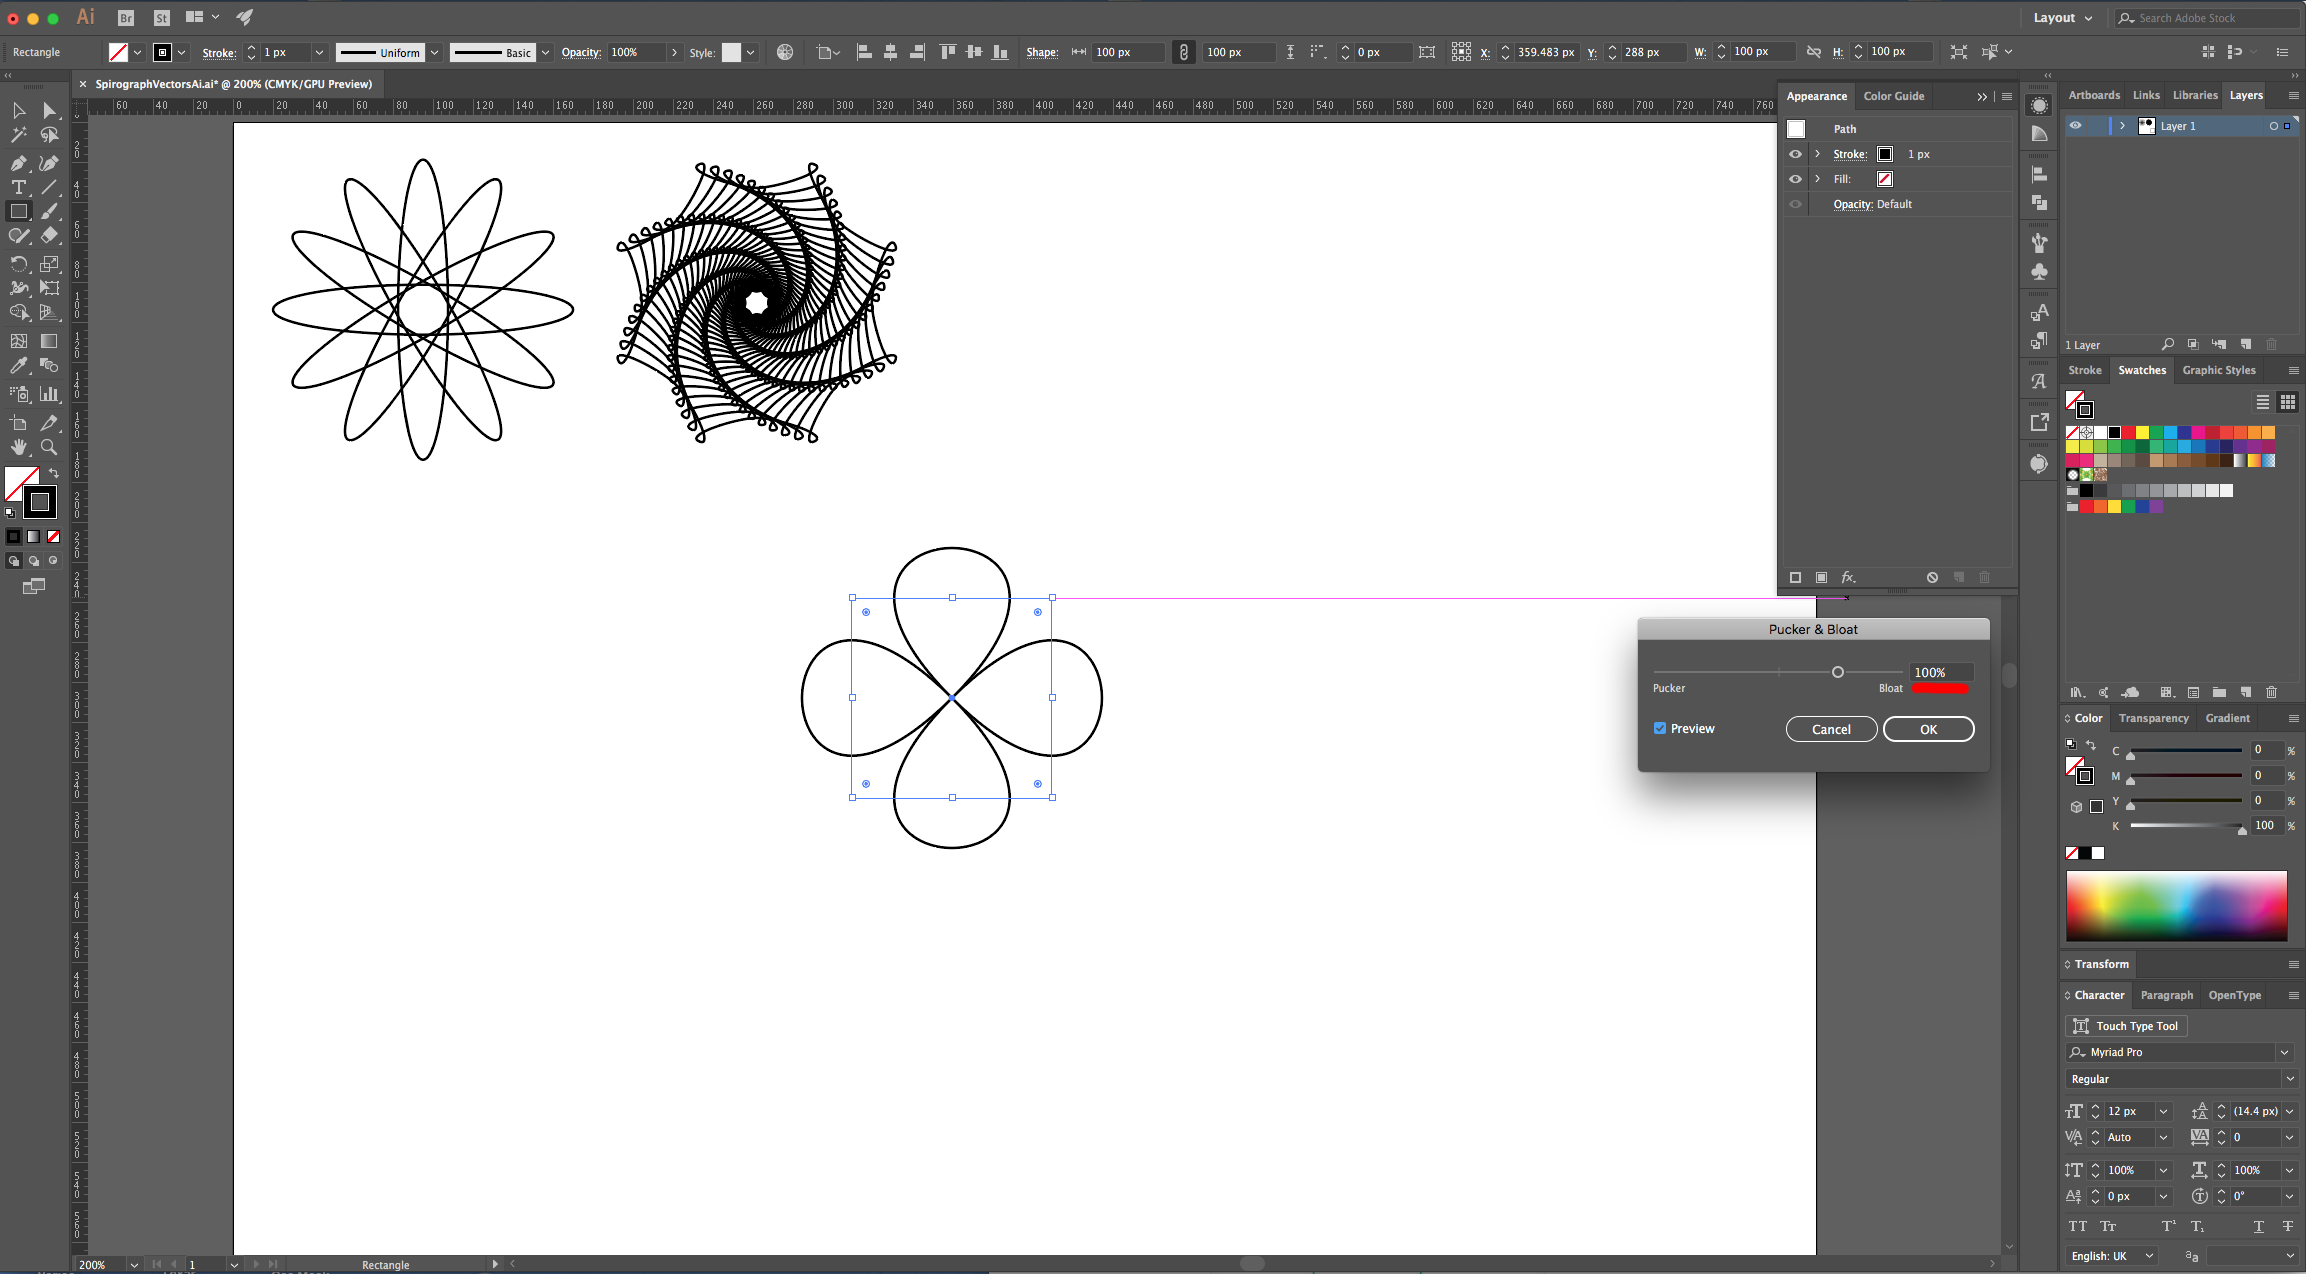
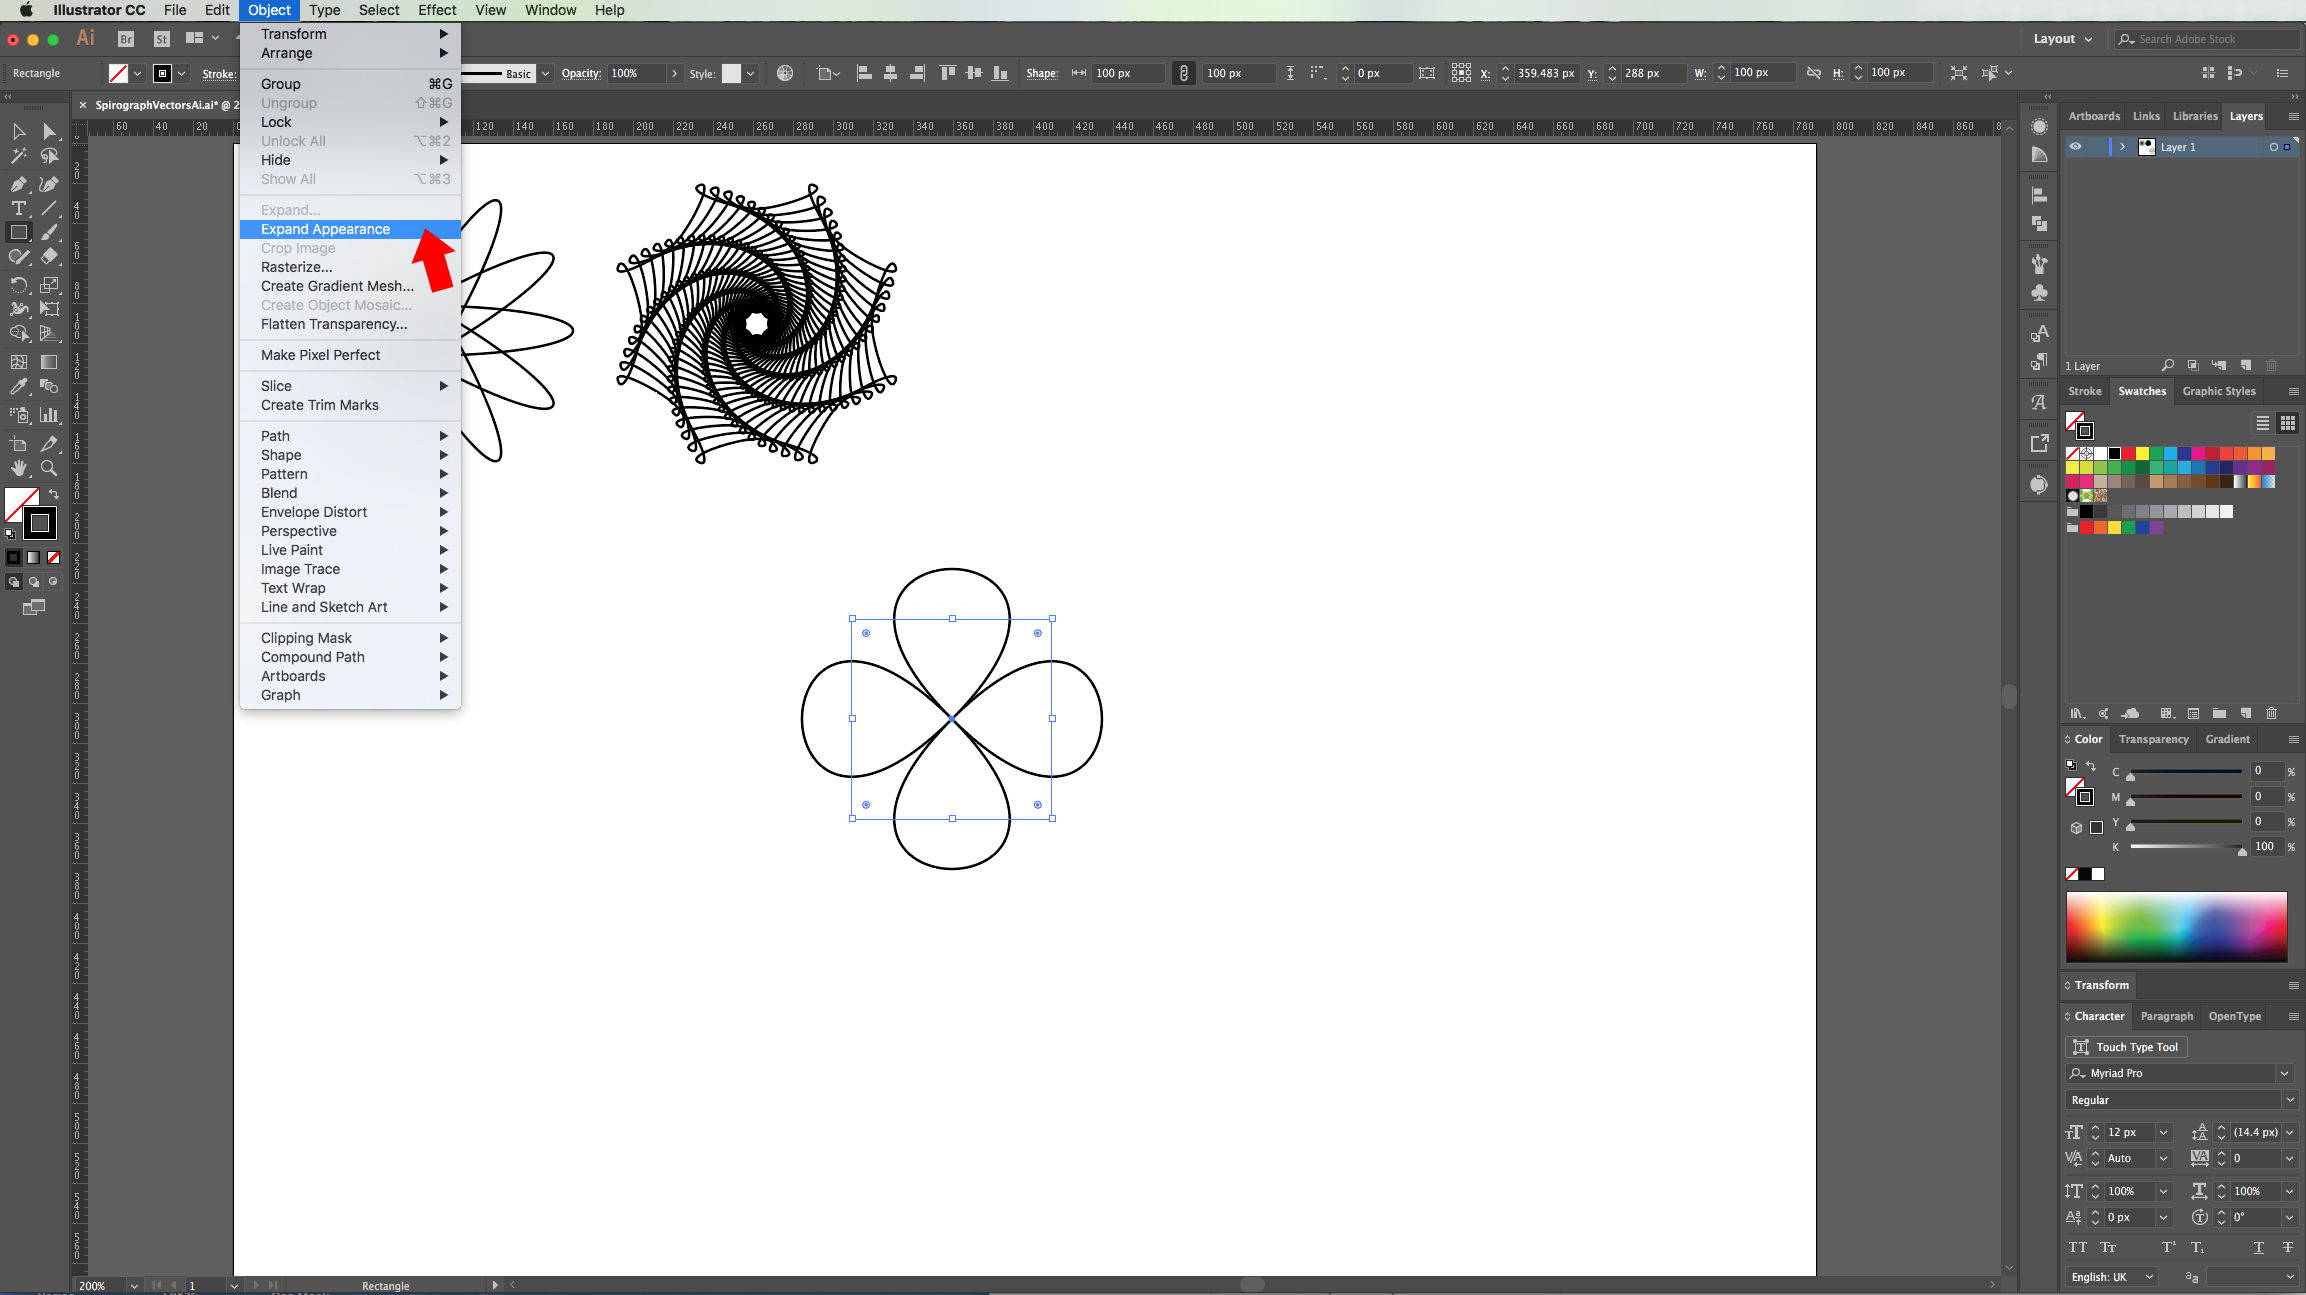
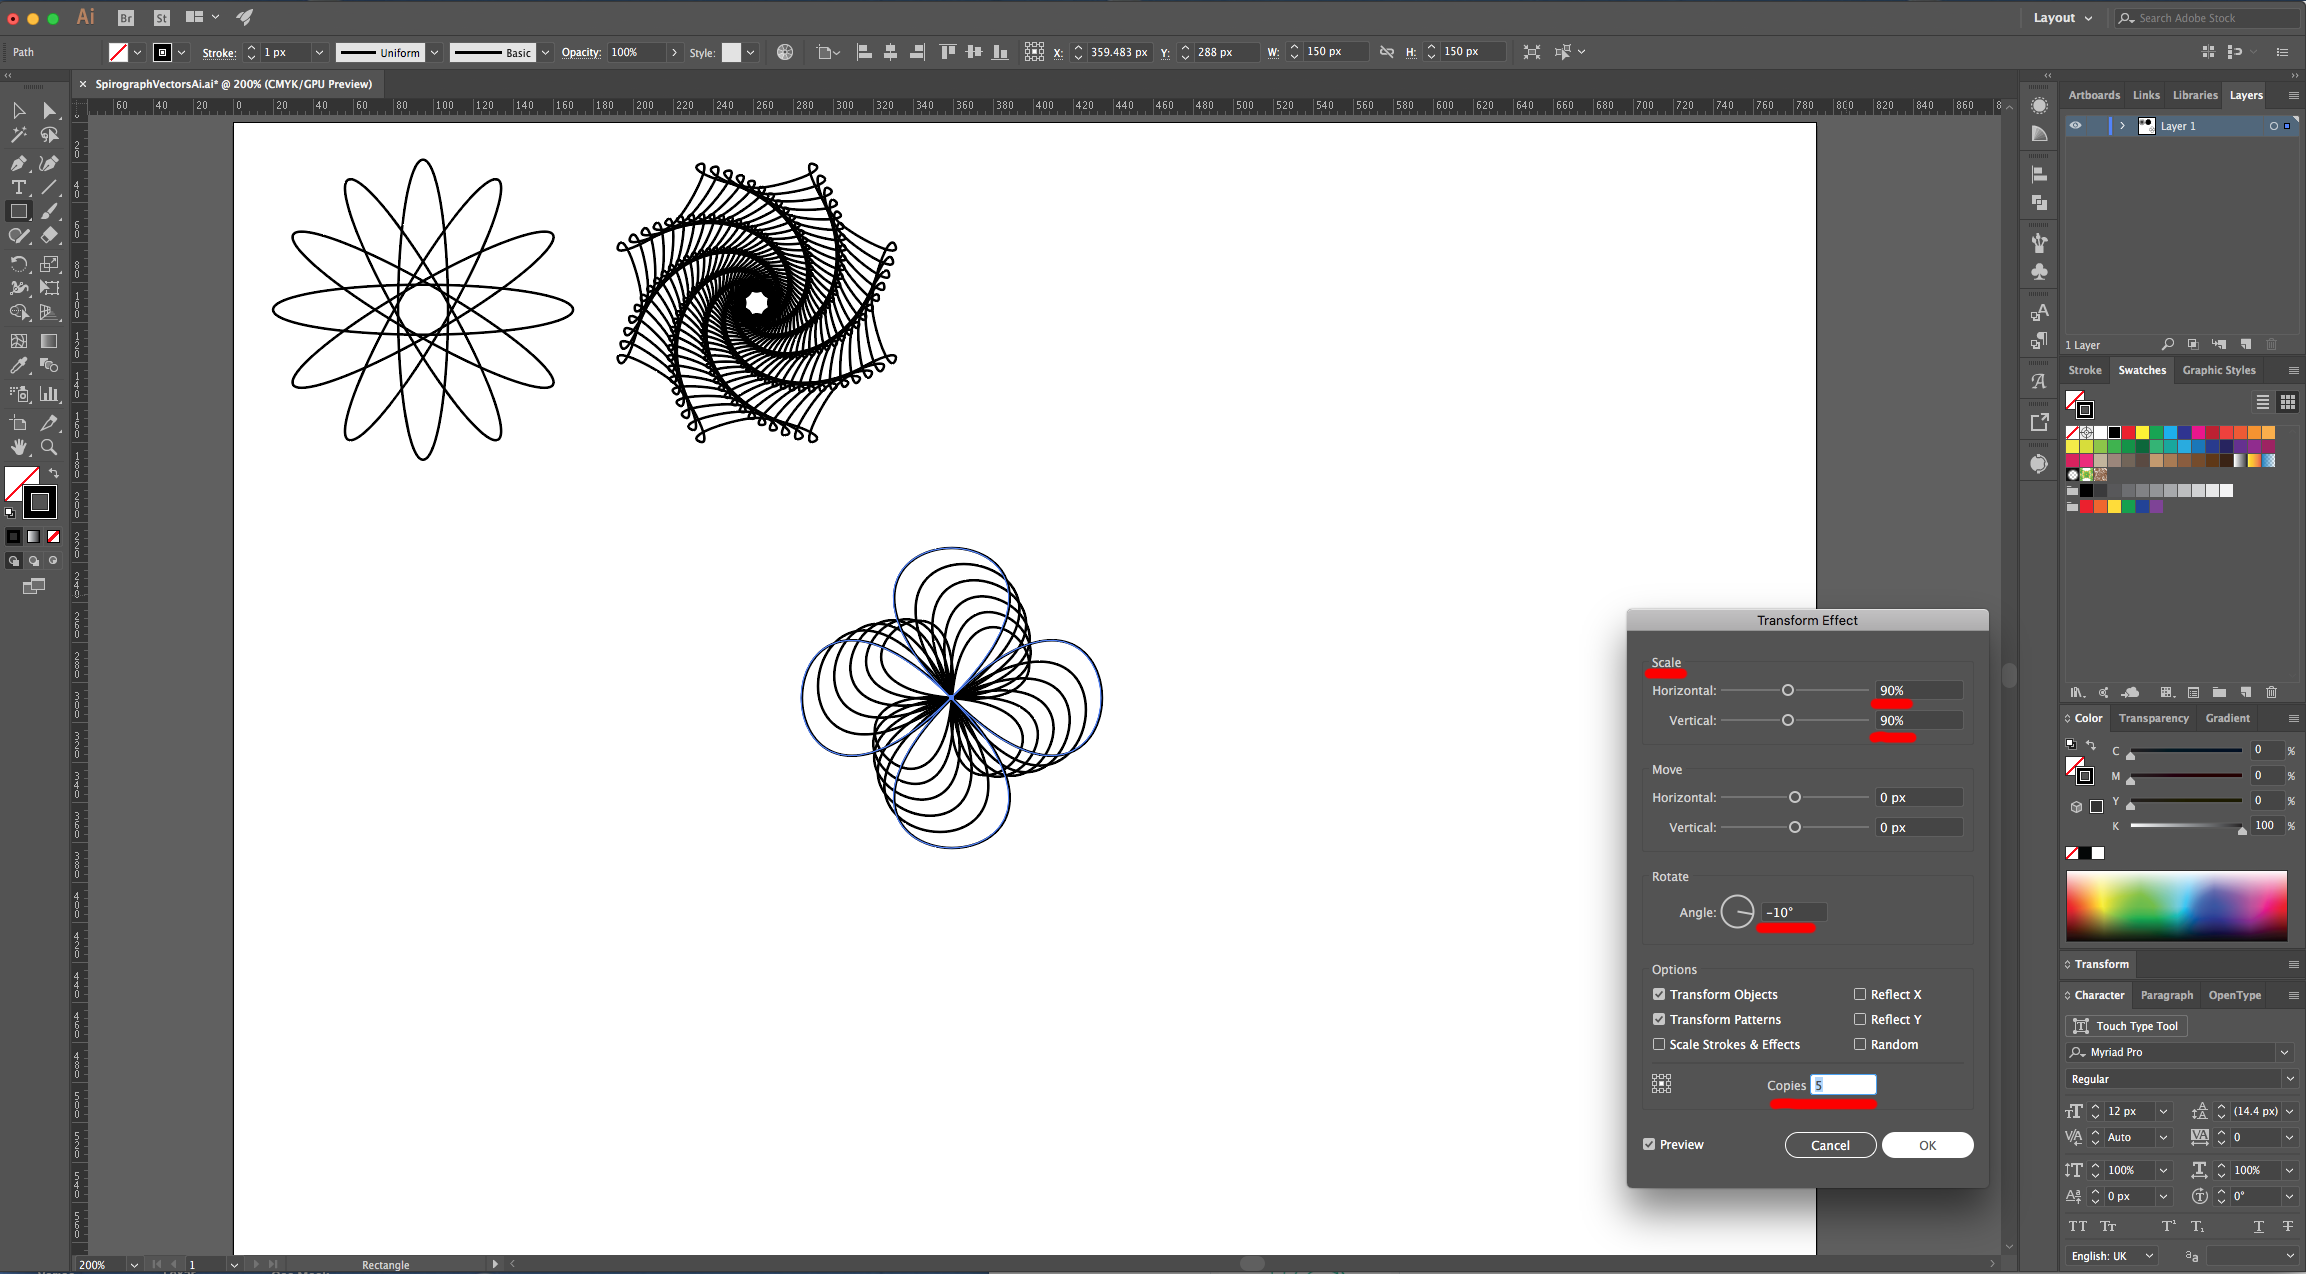
12 - Go to the “Appearance Panel”, click on the “Effects Menu” on the Bottom-Left side and navigate to Distort & Transform > Pucker & Bloat… and use a value of 100%. Click “OK” and then go to Object > Expand Appearance. Apply another “Effect” but this time choose Distort & Transform > Transform and use and use a “Horizontal and “Vertical Scale” of 90%, a “Rotate Angle” of -10° and make 5 “Copies”. Click “OK”.
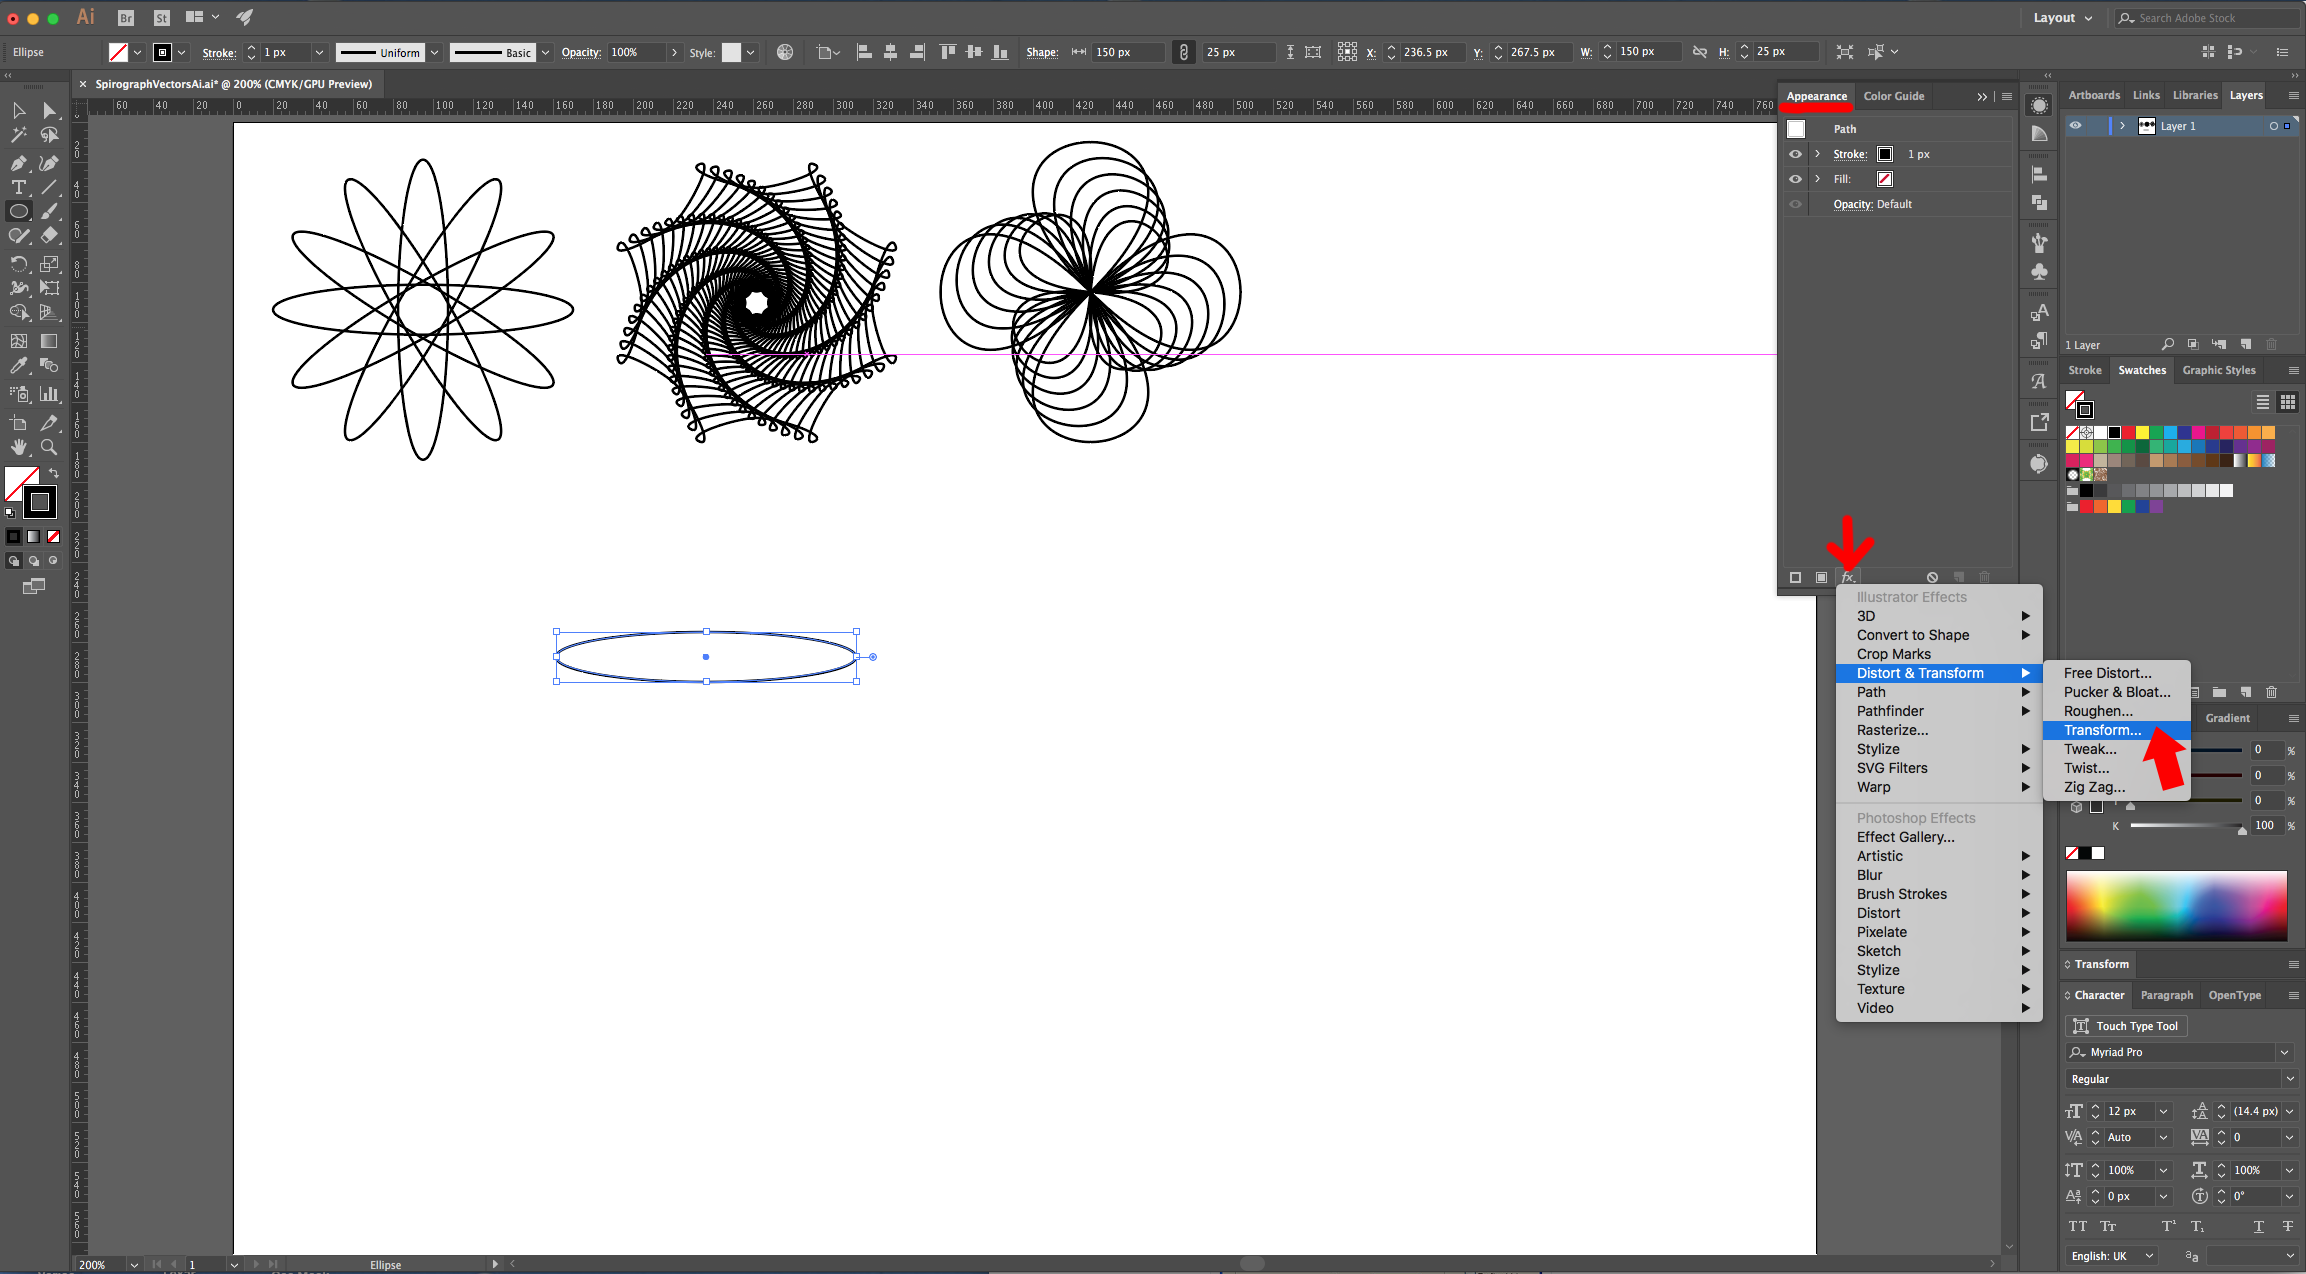
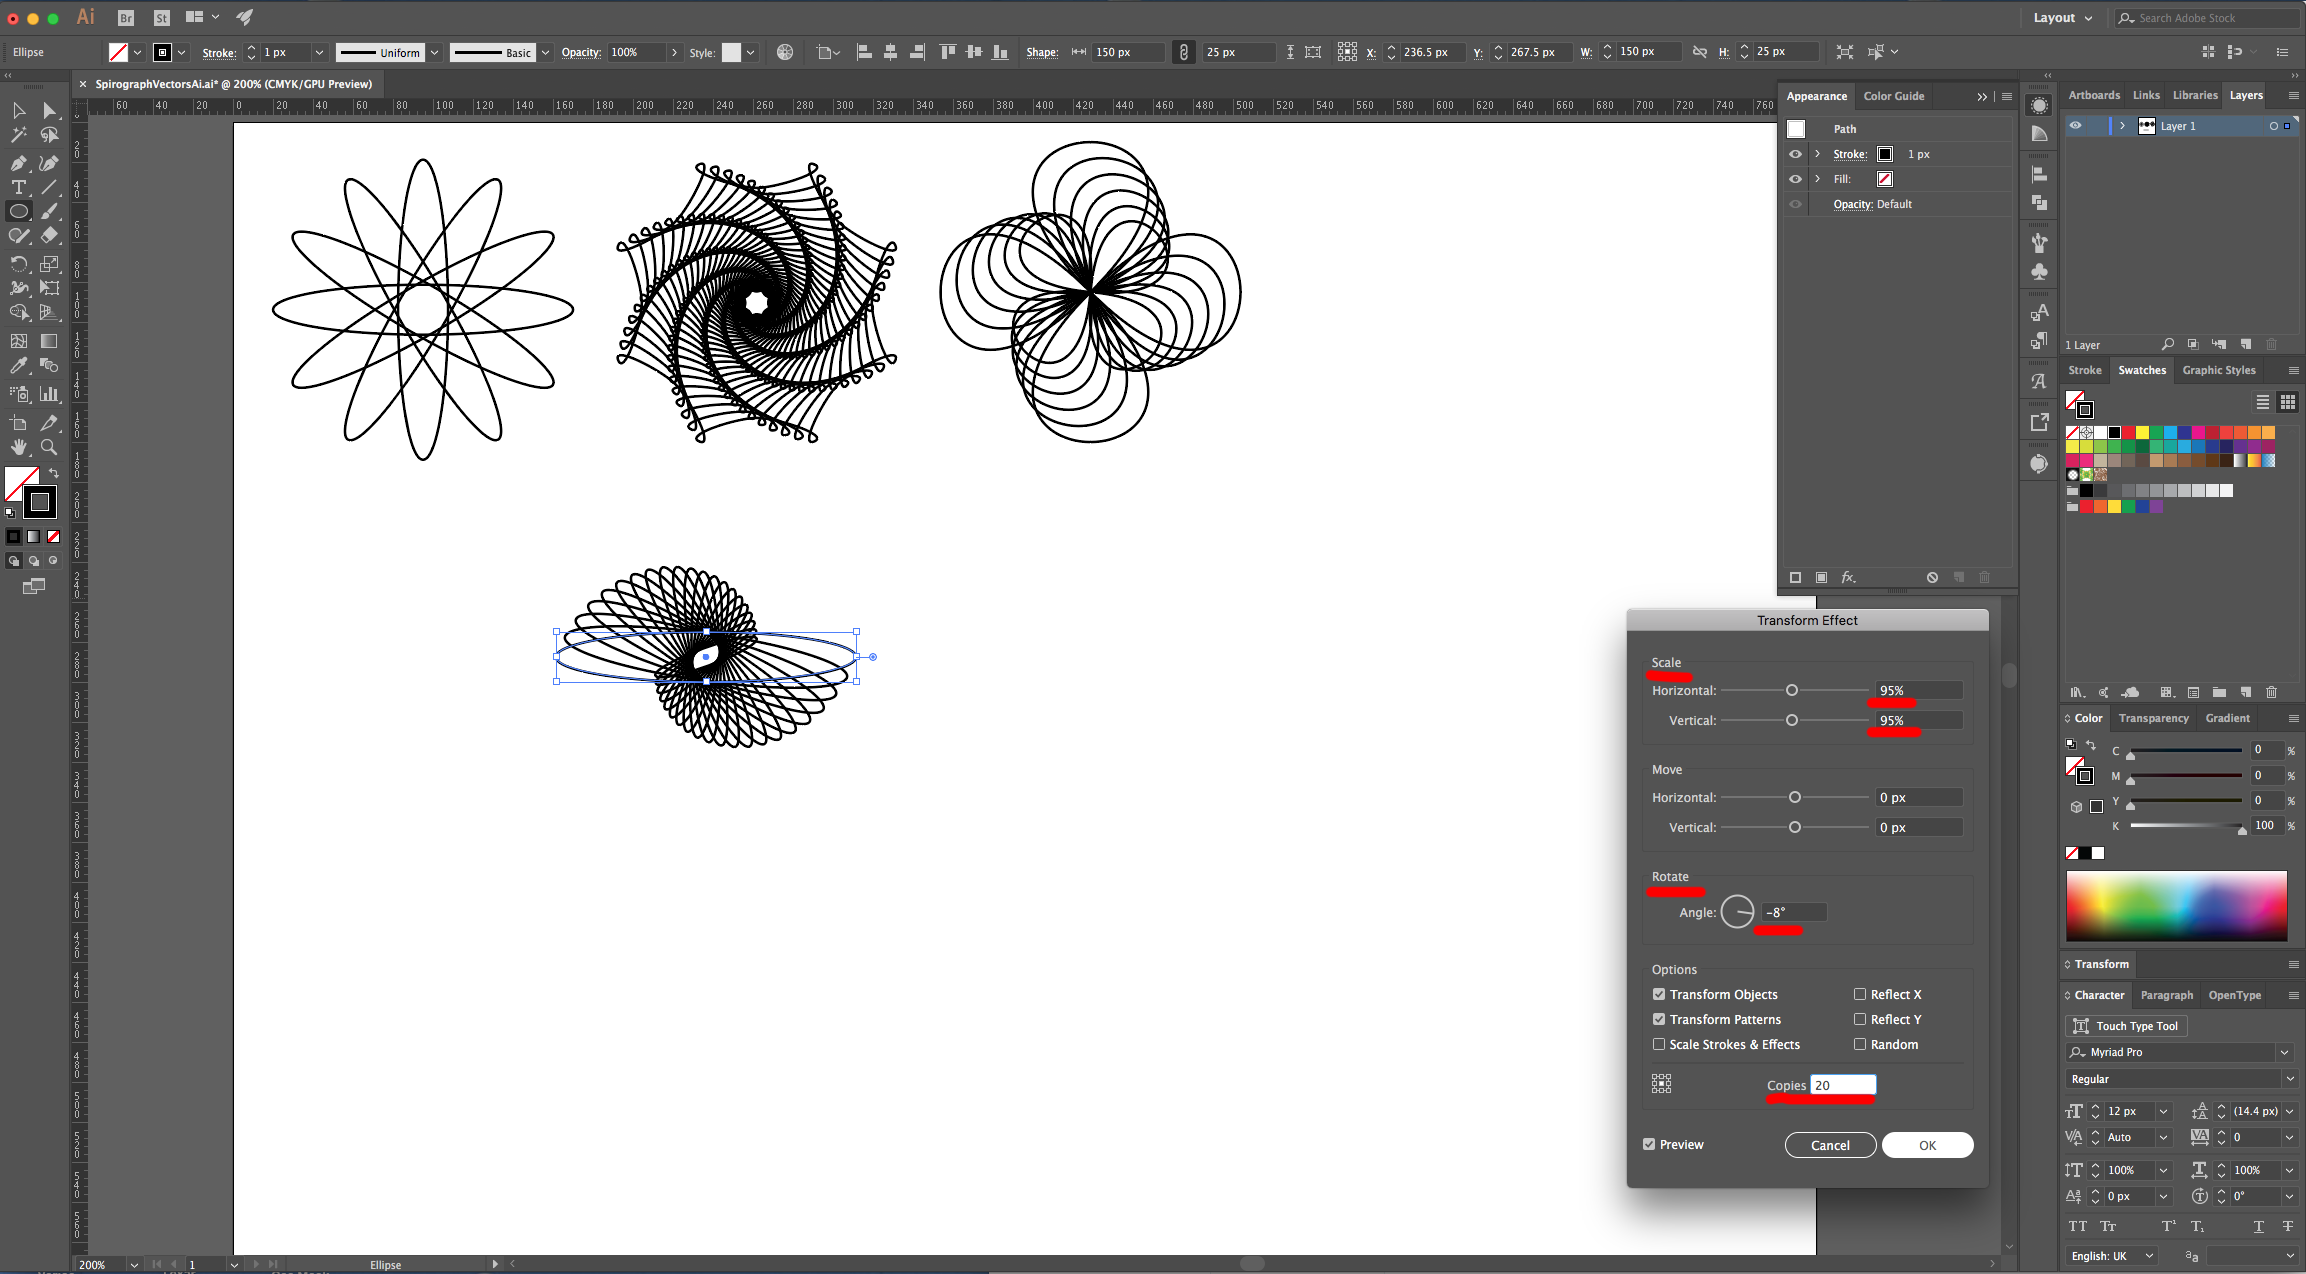
13 - Select the “Ellipse Tool” (L) click inside of your Canvas and input a “Width” of 150 px and a “Height” of 25 px. Go to the “Appearance Panel”, click on the “Effects Menu” on the Bottom-Left side and navigate to Distort & Transform > Transform and use and use a “Horizontal and “Vertical Scale” of 95%, a “Rotate Angle” of -8° and make 20 “Copies”. Click “OK”.
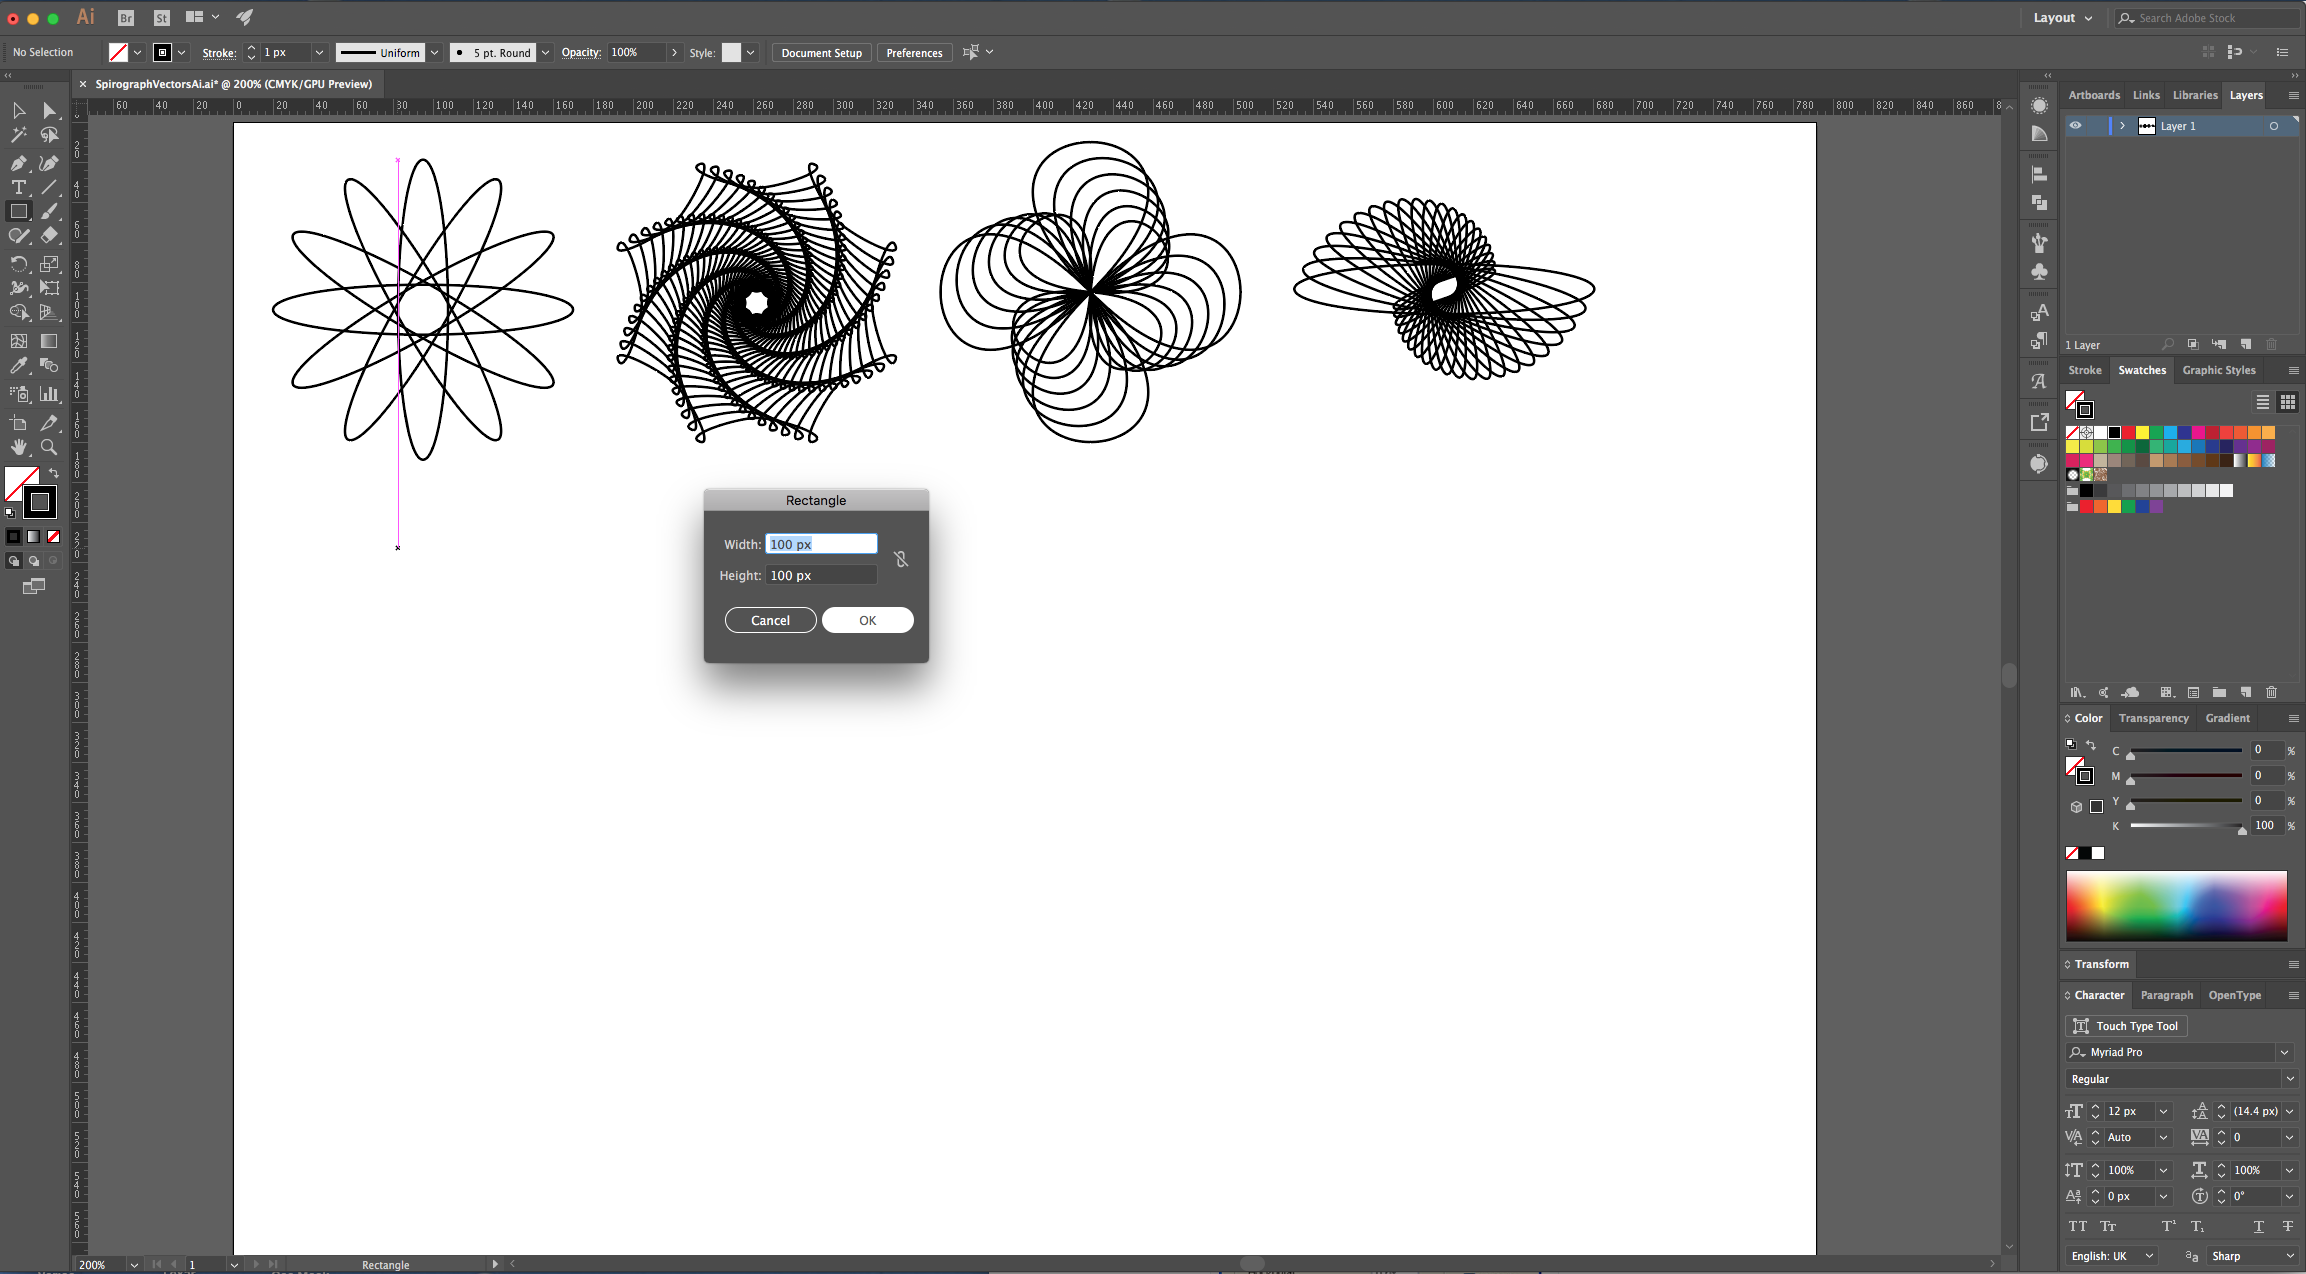
14 - Select the “Rectangle Tool” (R), click inside of your Canvas and input a “Width” and px and “Height” of 100 px. With the “Direct Selection Tool” (A) select the two top Anchor Points, click on the “Convert Selected Anchor Points to Smooth” button on the left side of the Top Menu, then deselect and select the ones on the bottom of the square and “Smooth” them too.
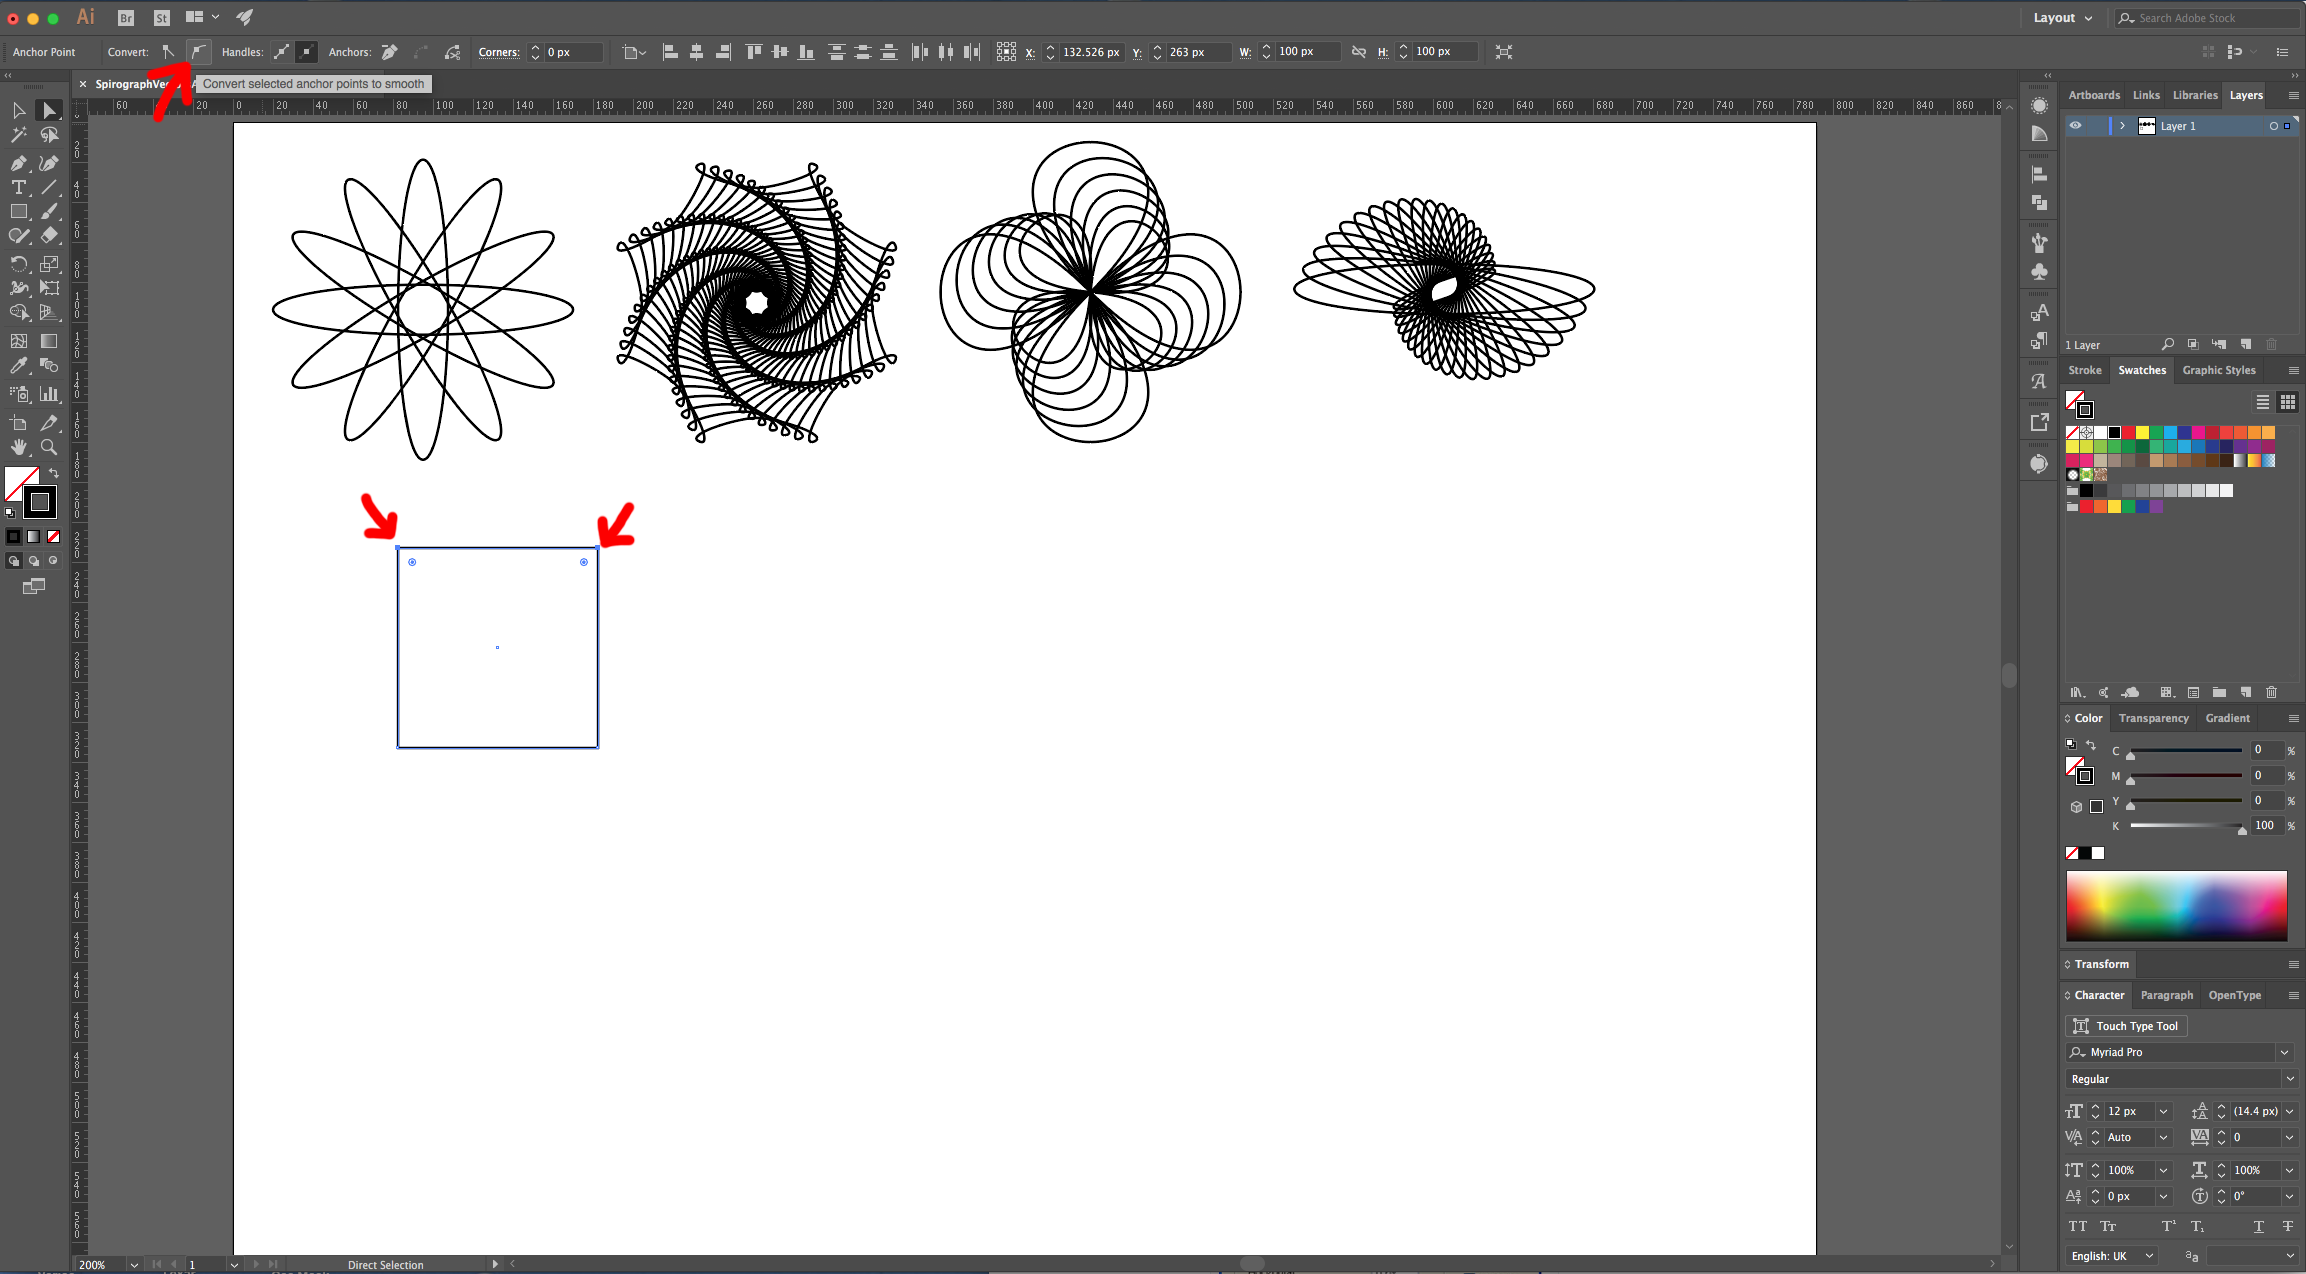
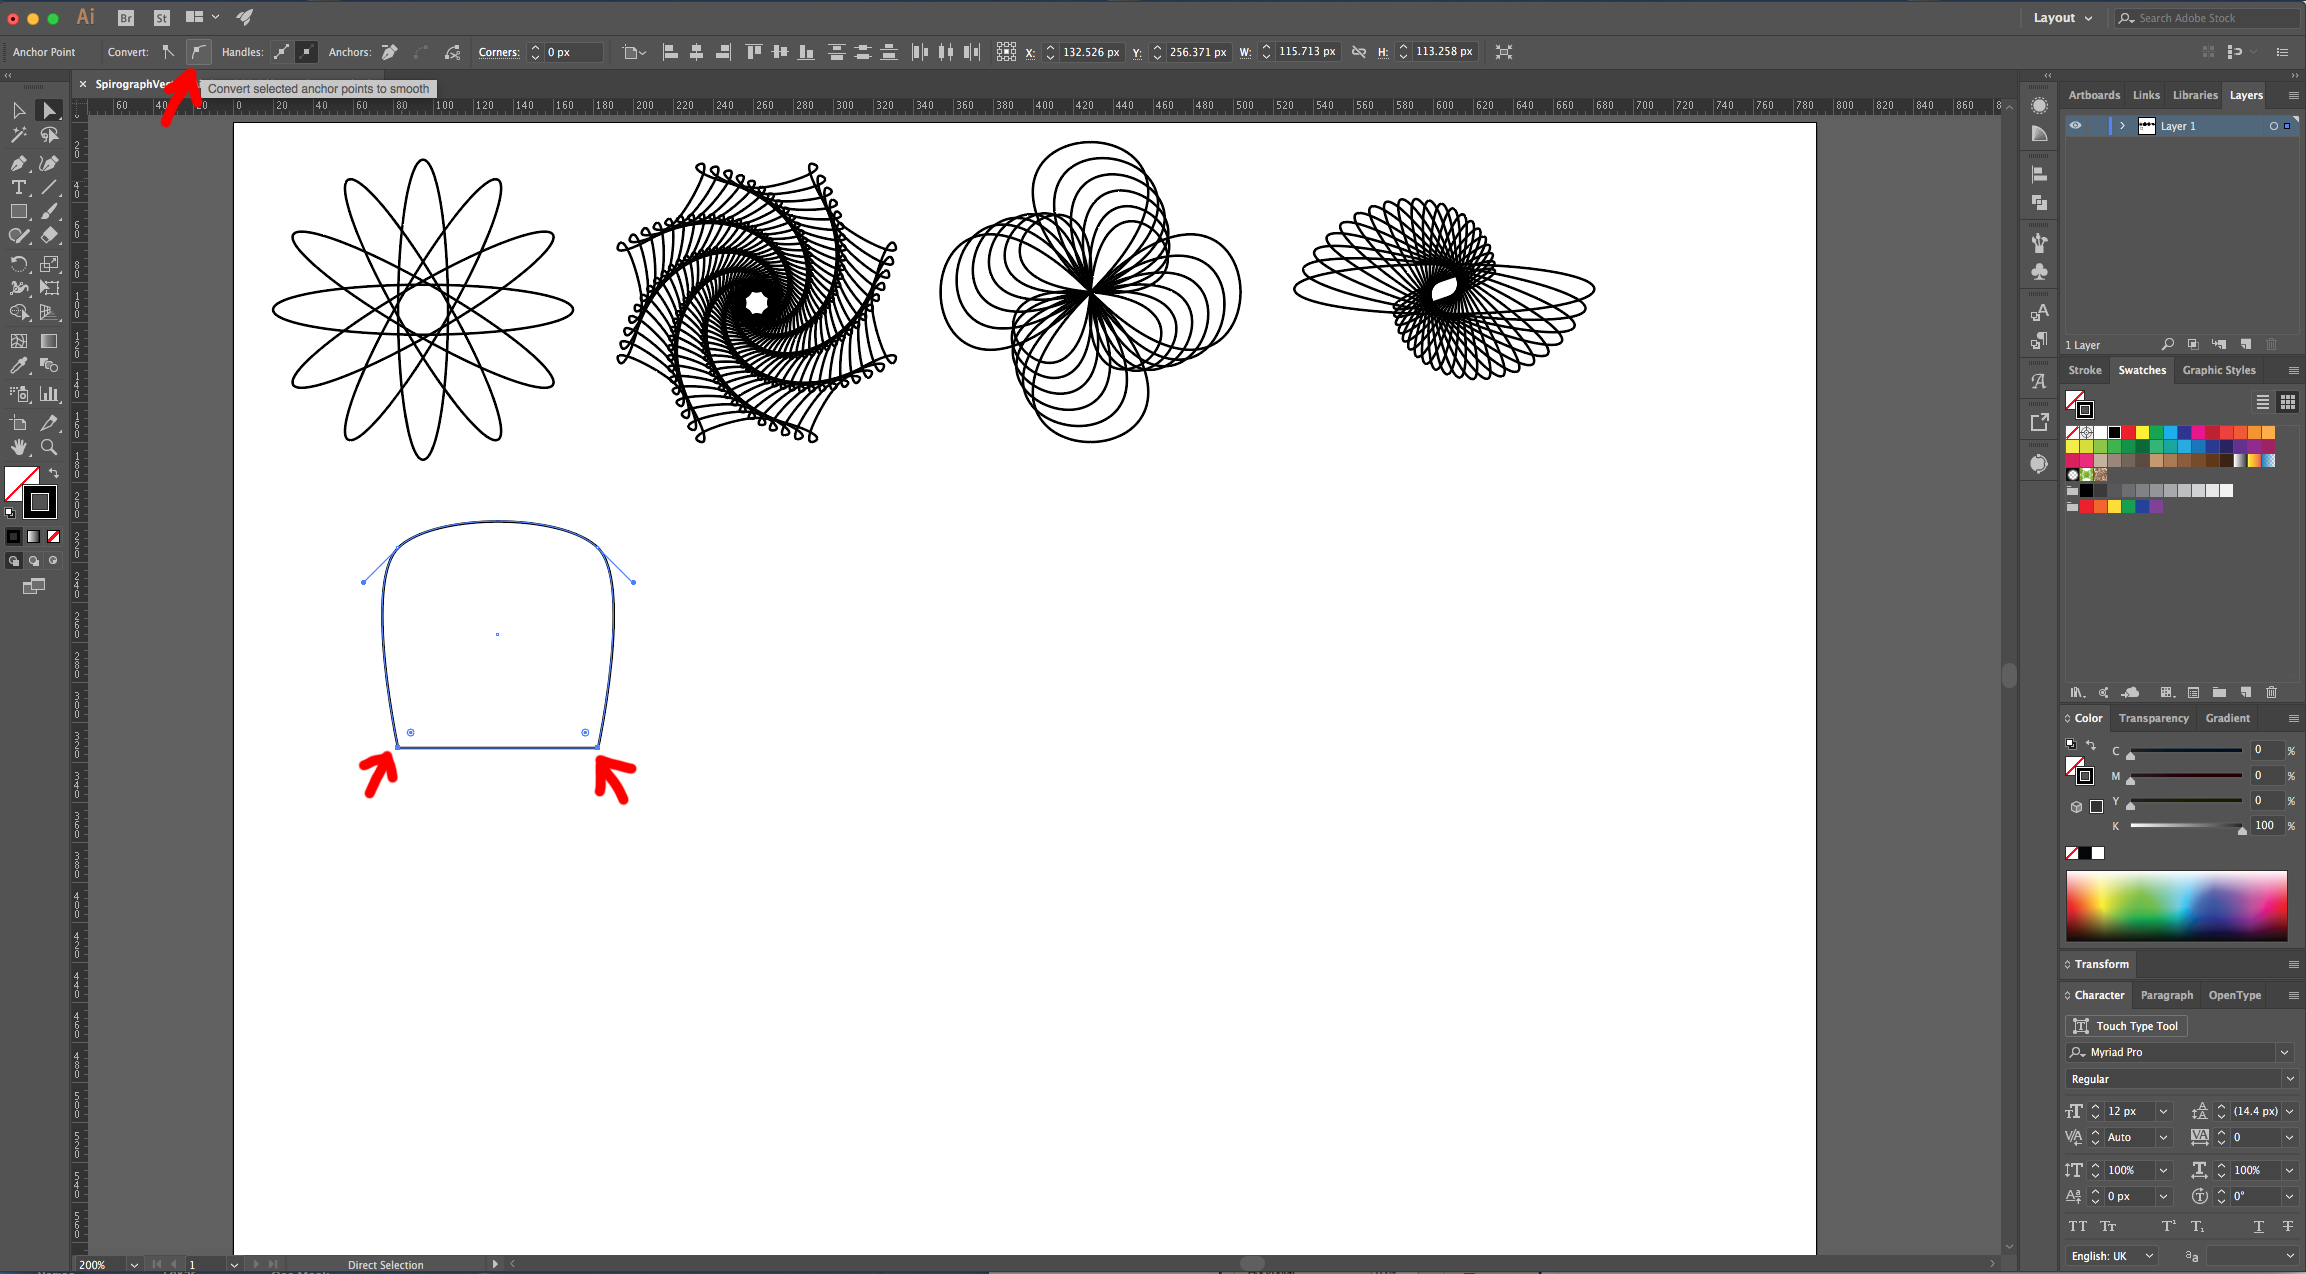
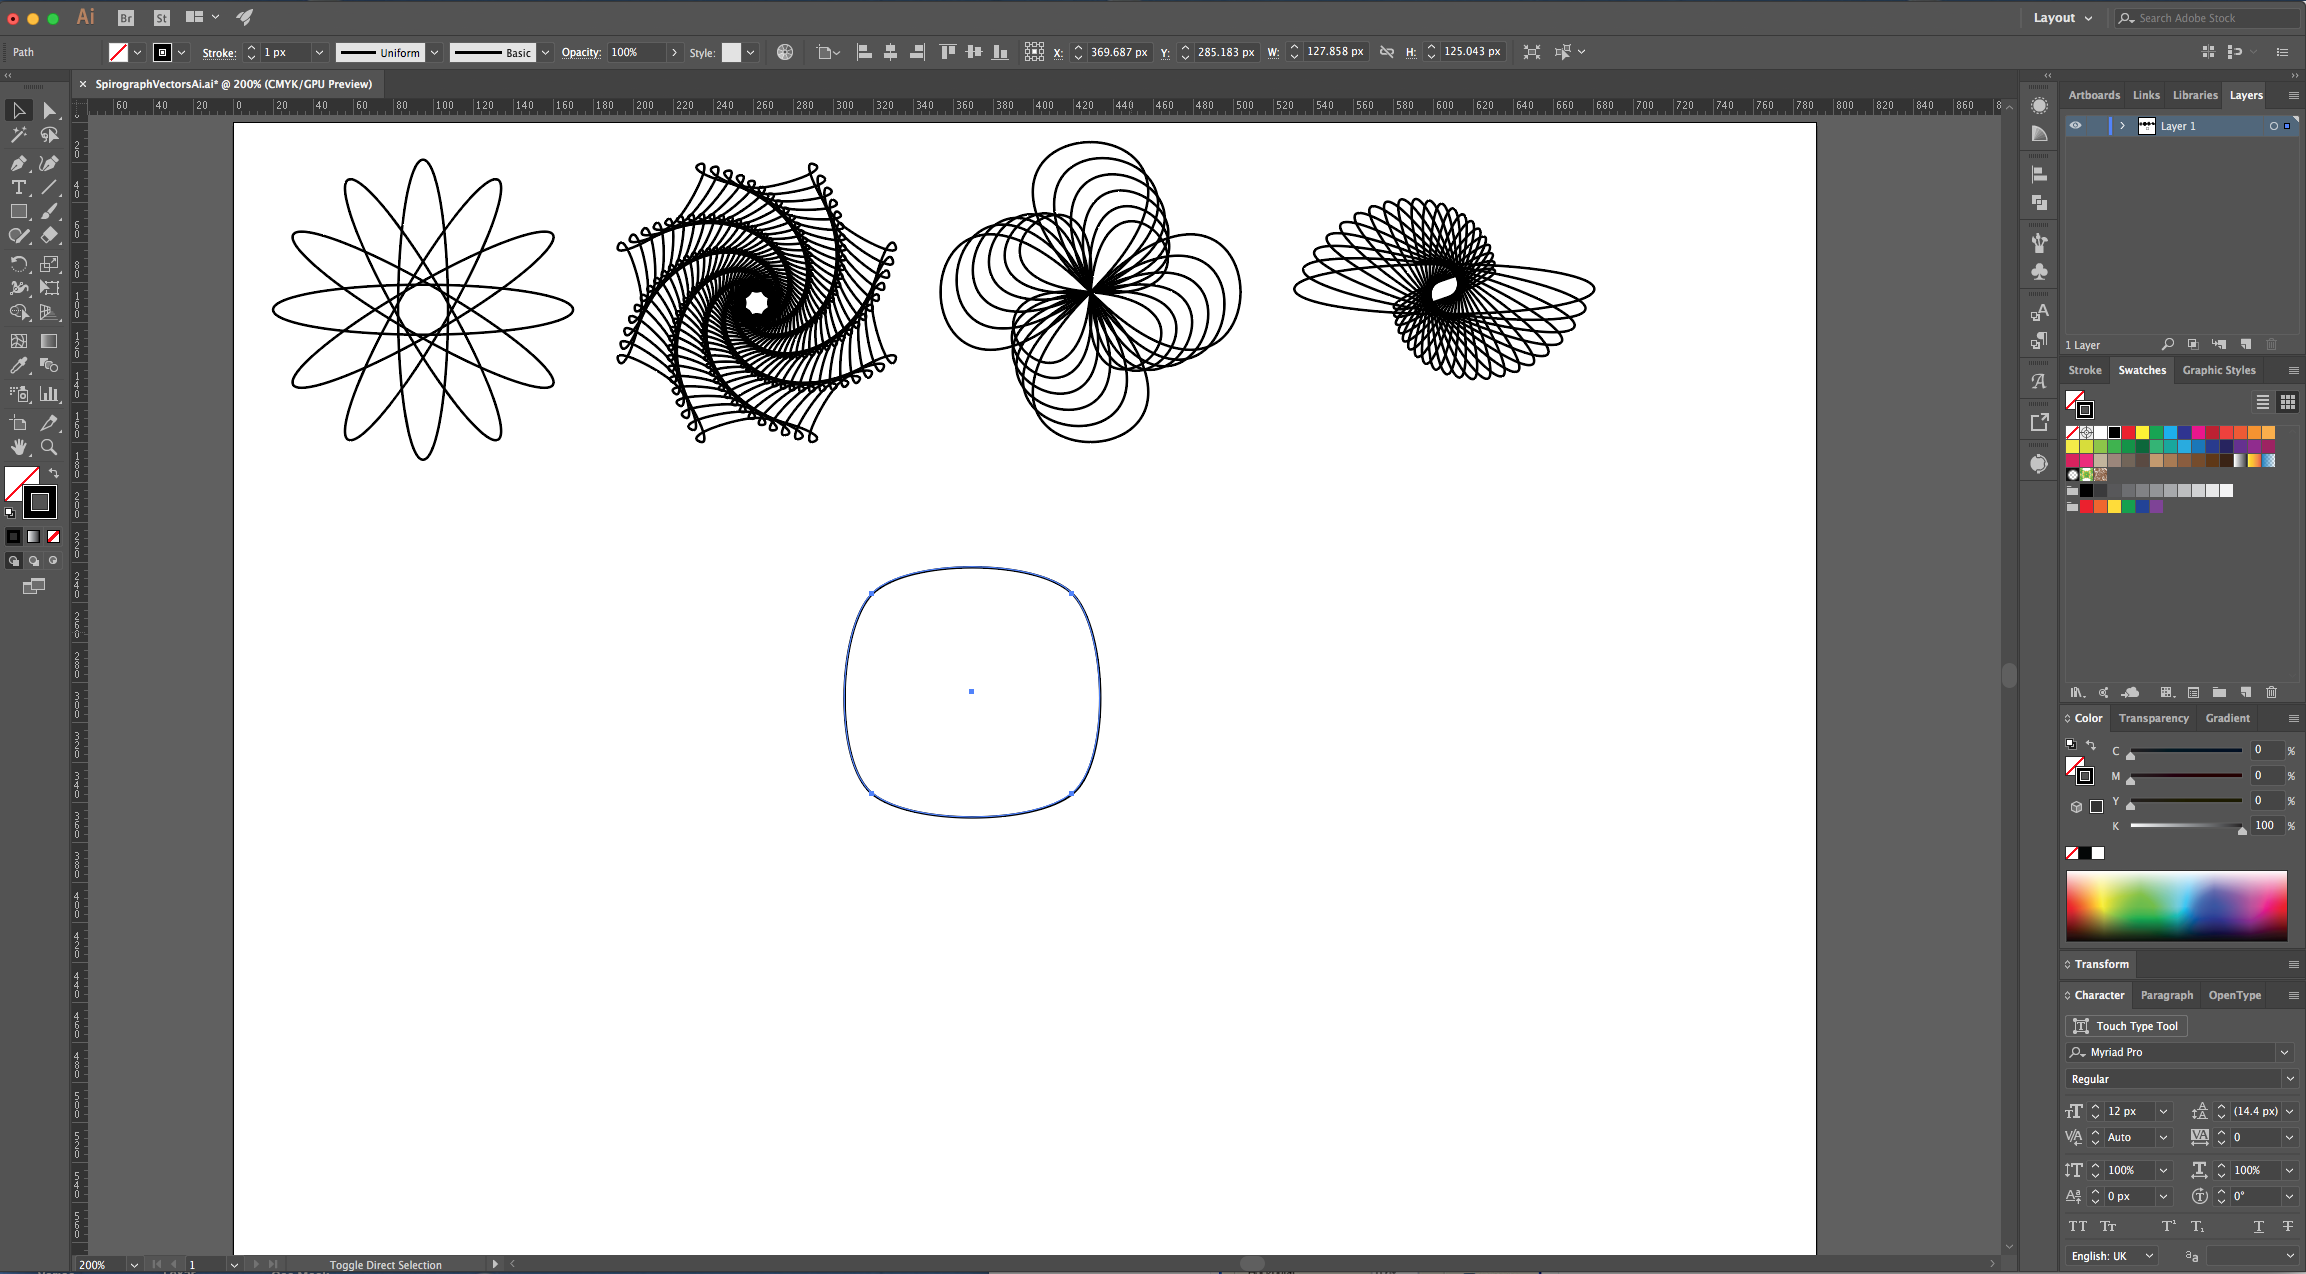
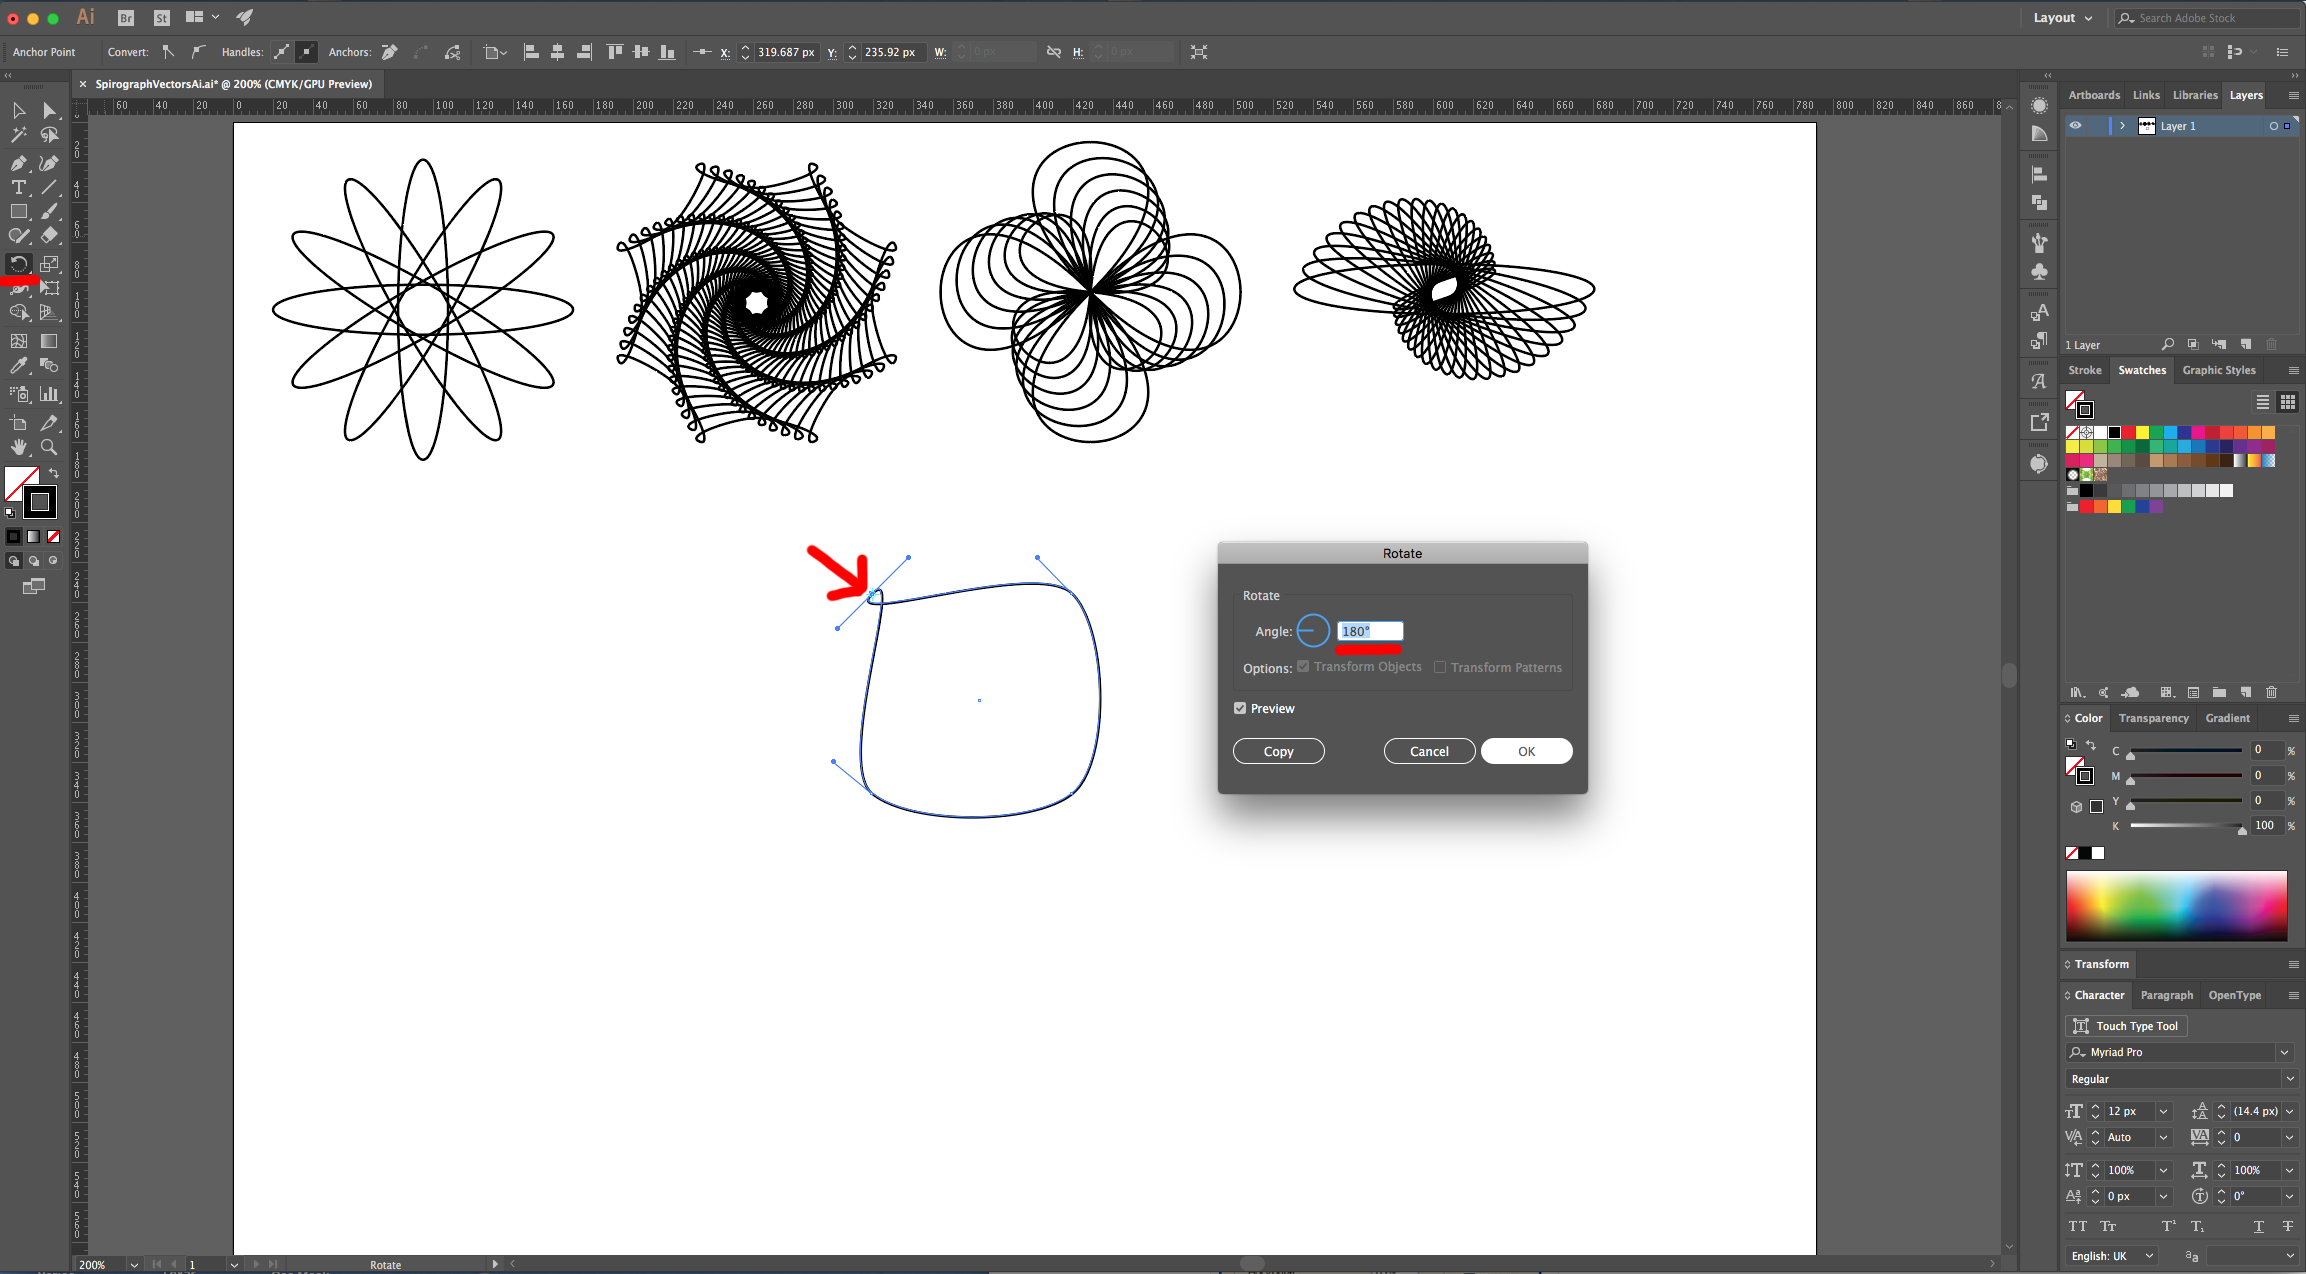
15 - With the “Direct Selection Tool” (A) select one of the Anchor Points, double-click on the “Rotate Tool” (R) on the Toolbox to open the dialog and use a 180° Angle. Click “OK”. Repeat with the rest of the Outside Anchor Points.
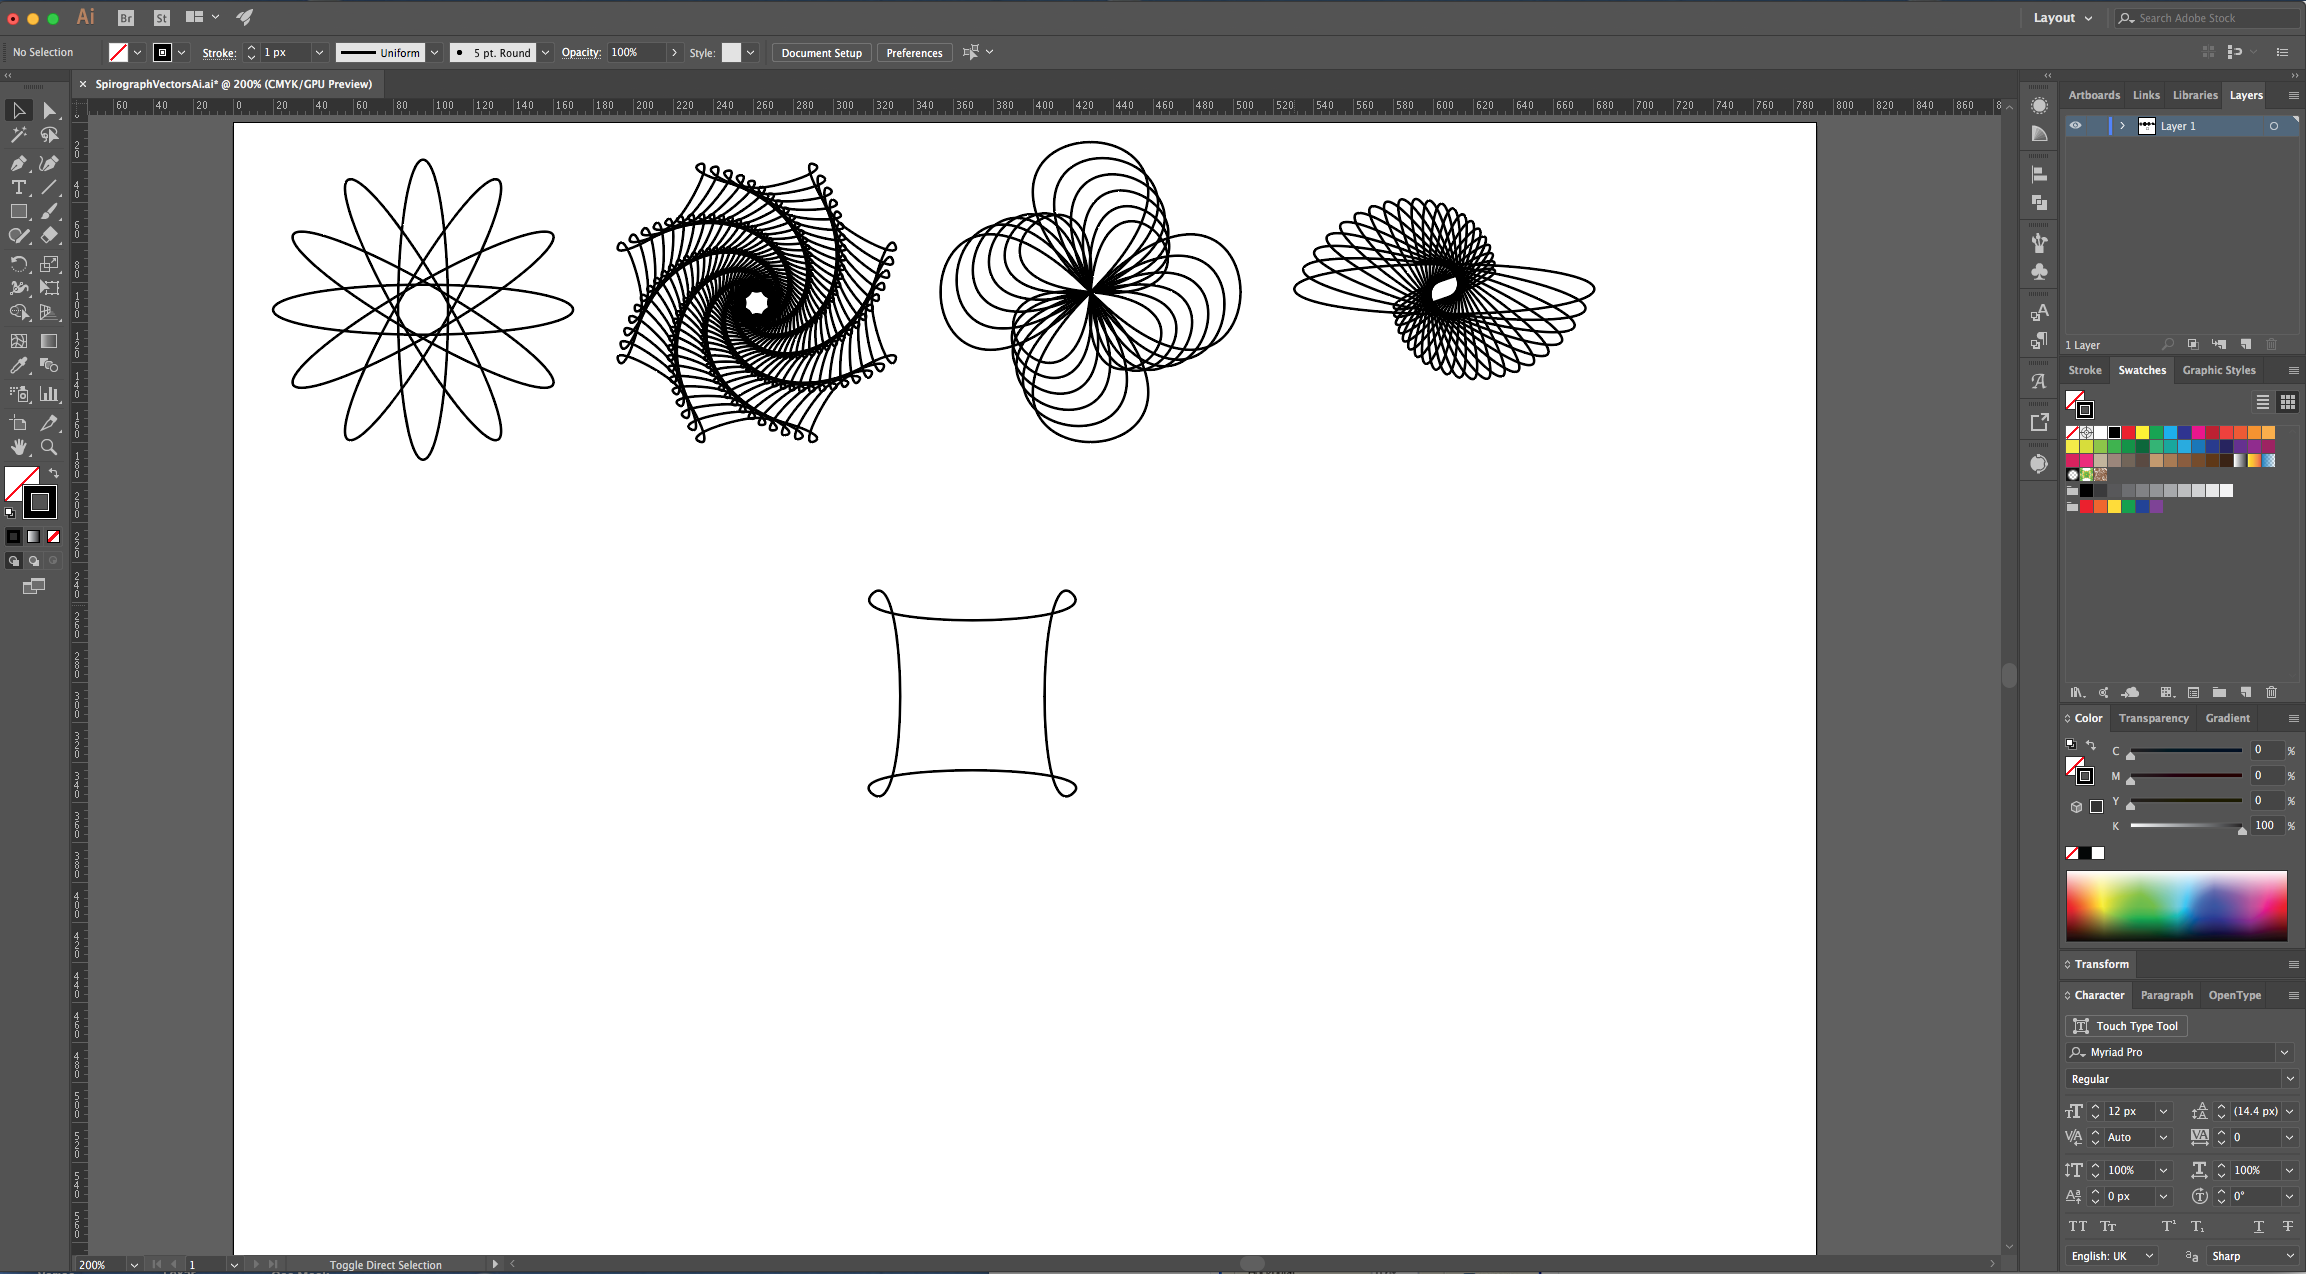
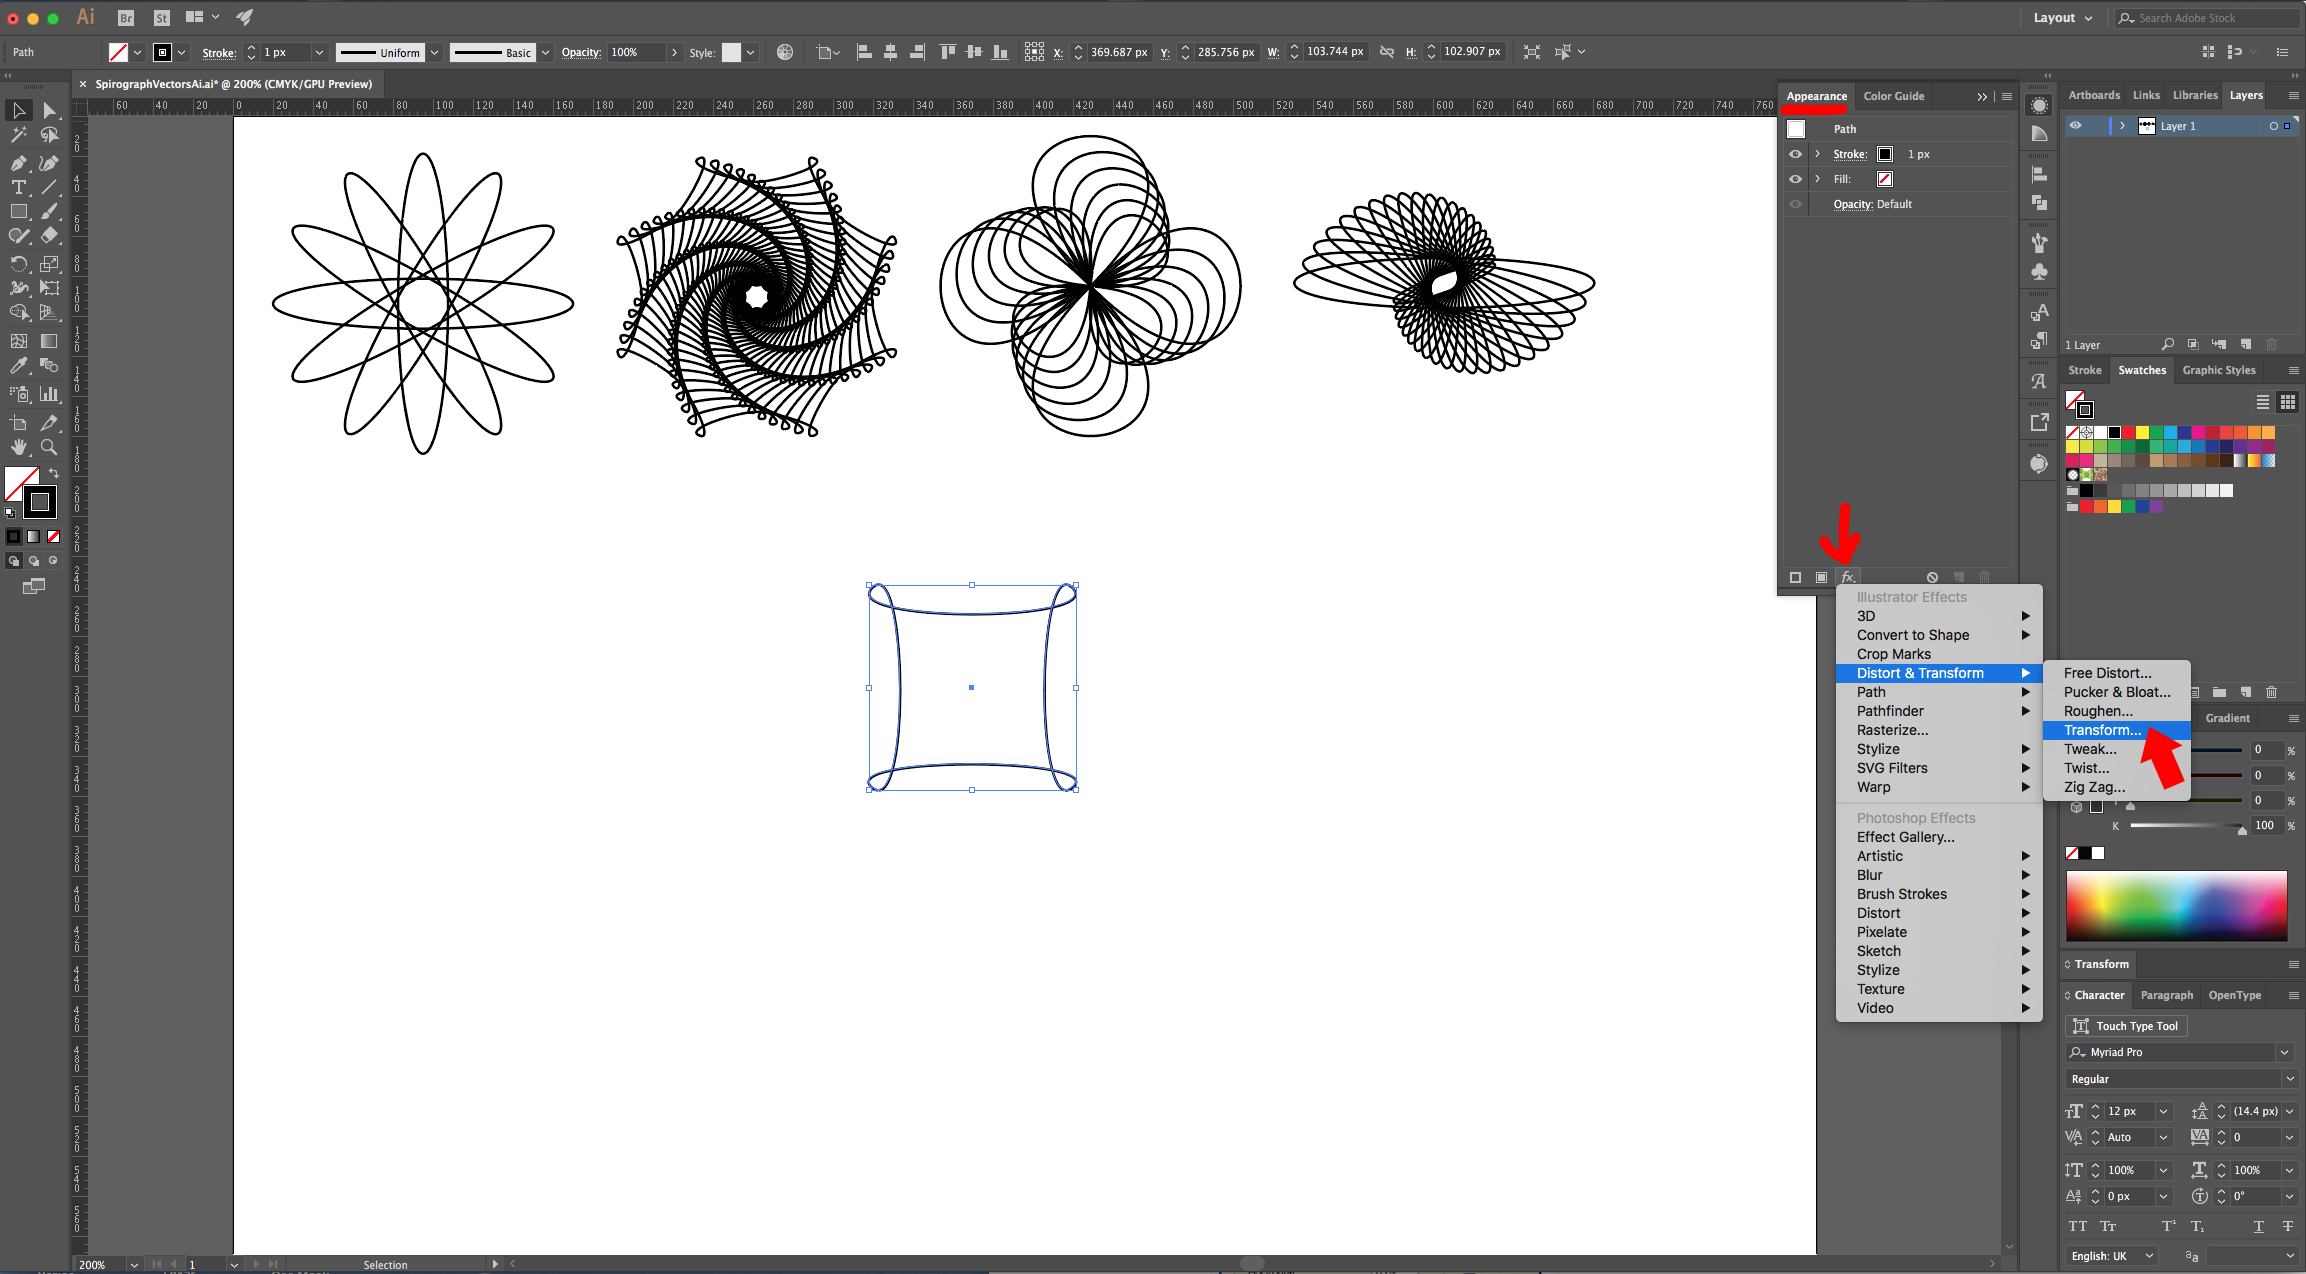
16 - Go to the “Appearance Panel”, click on the “Effects Menu” on the Bottom-Left side and navigate to Distort & Transform > Transform and use and use a “Rotate Angle” of 10° and make 8 “Copies”. Click “OK”.
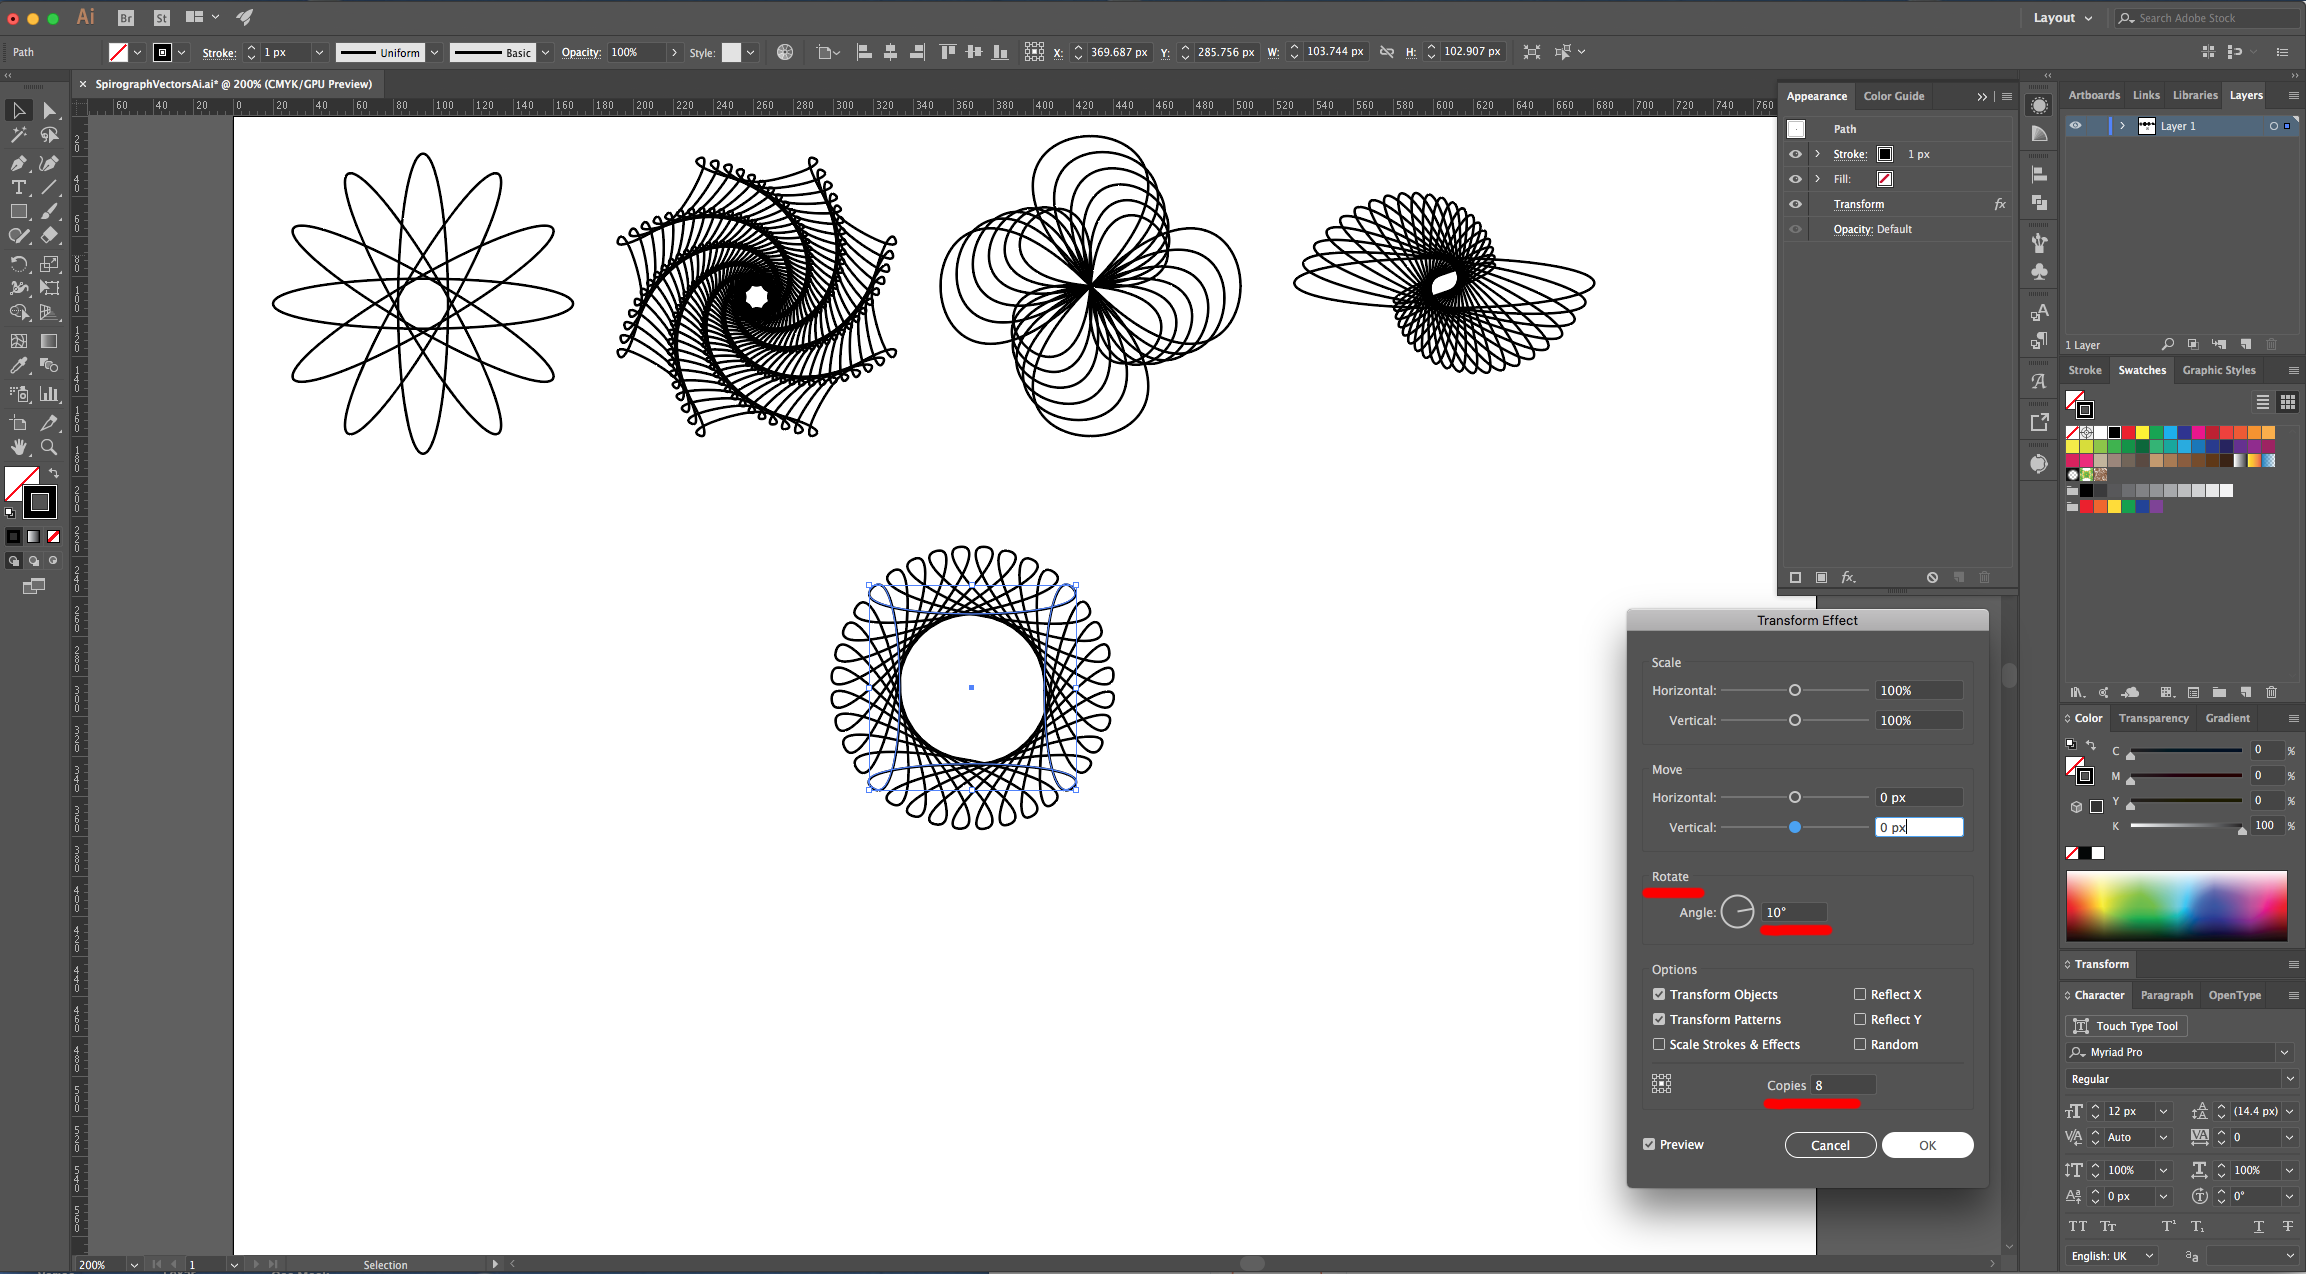
17 - Select the “Star Tool”, click inside of your Canvas and input a “Radius 1” of 50 px a “Radius 2” of 75 px and 4 “Points”. With the “Direct Selection Tool” (A) select the top and middle Anchor Points, click on the “Convert Selected Anchor Points to Smooth” button on the left side of the Top Menu, then deselect and select the ones on the bottom of the square and “Smooth” them too.
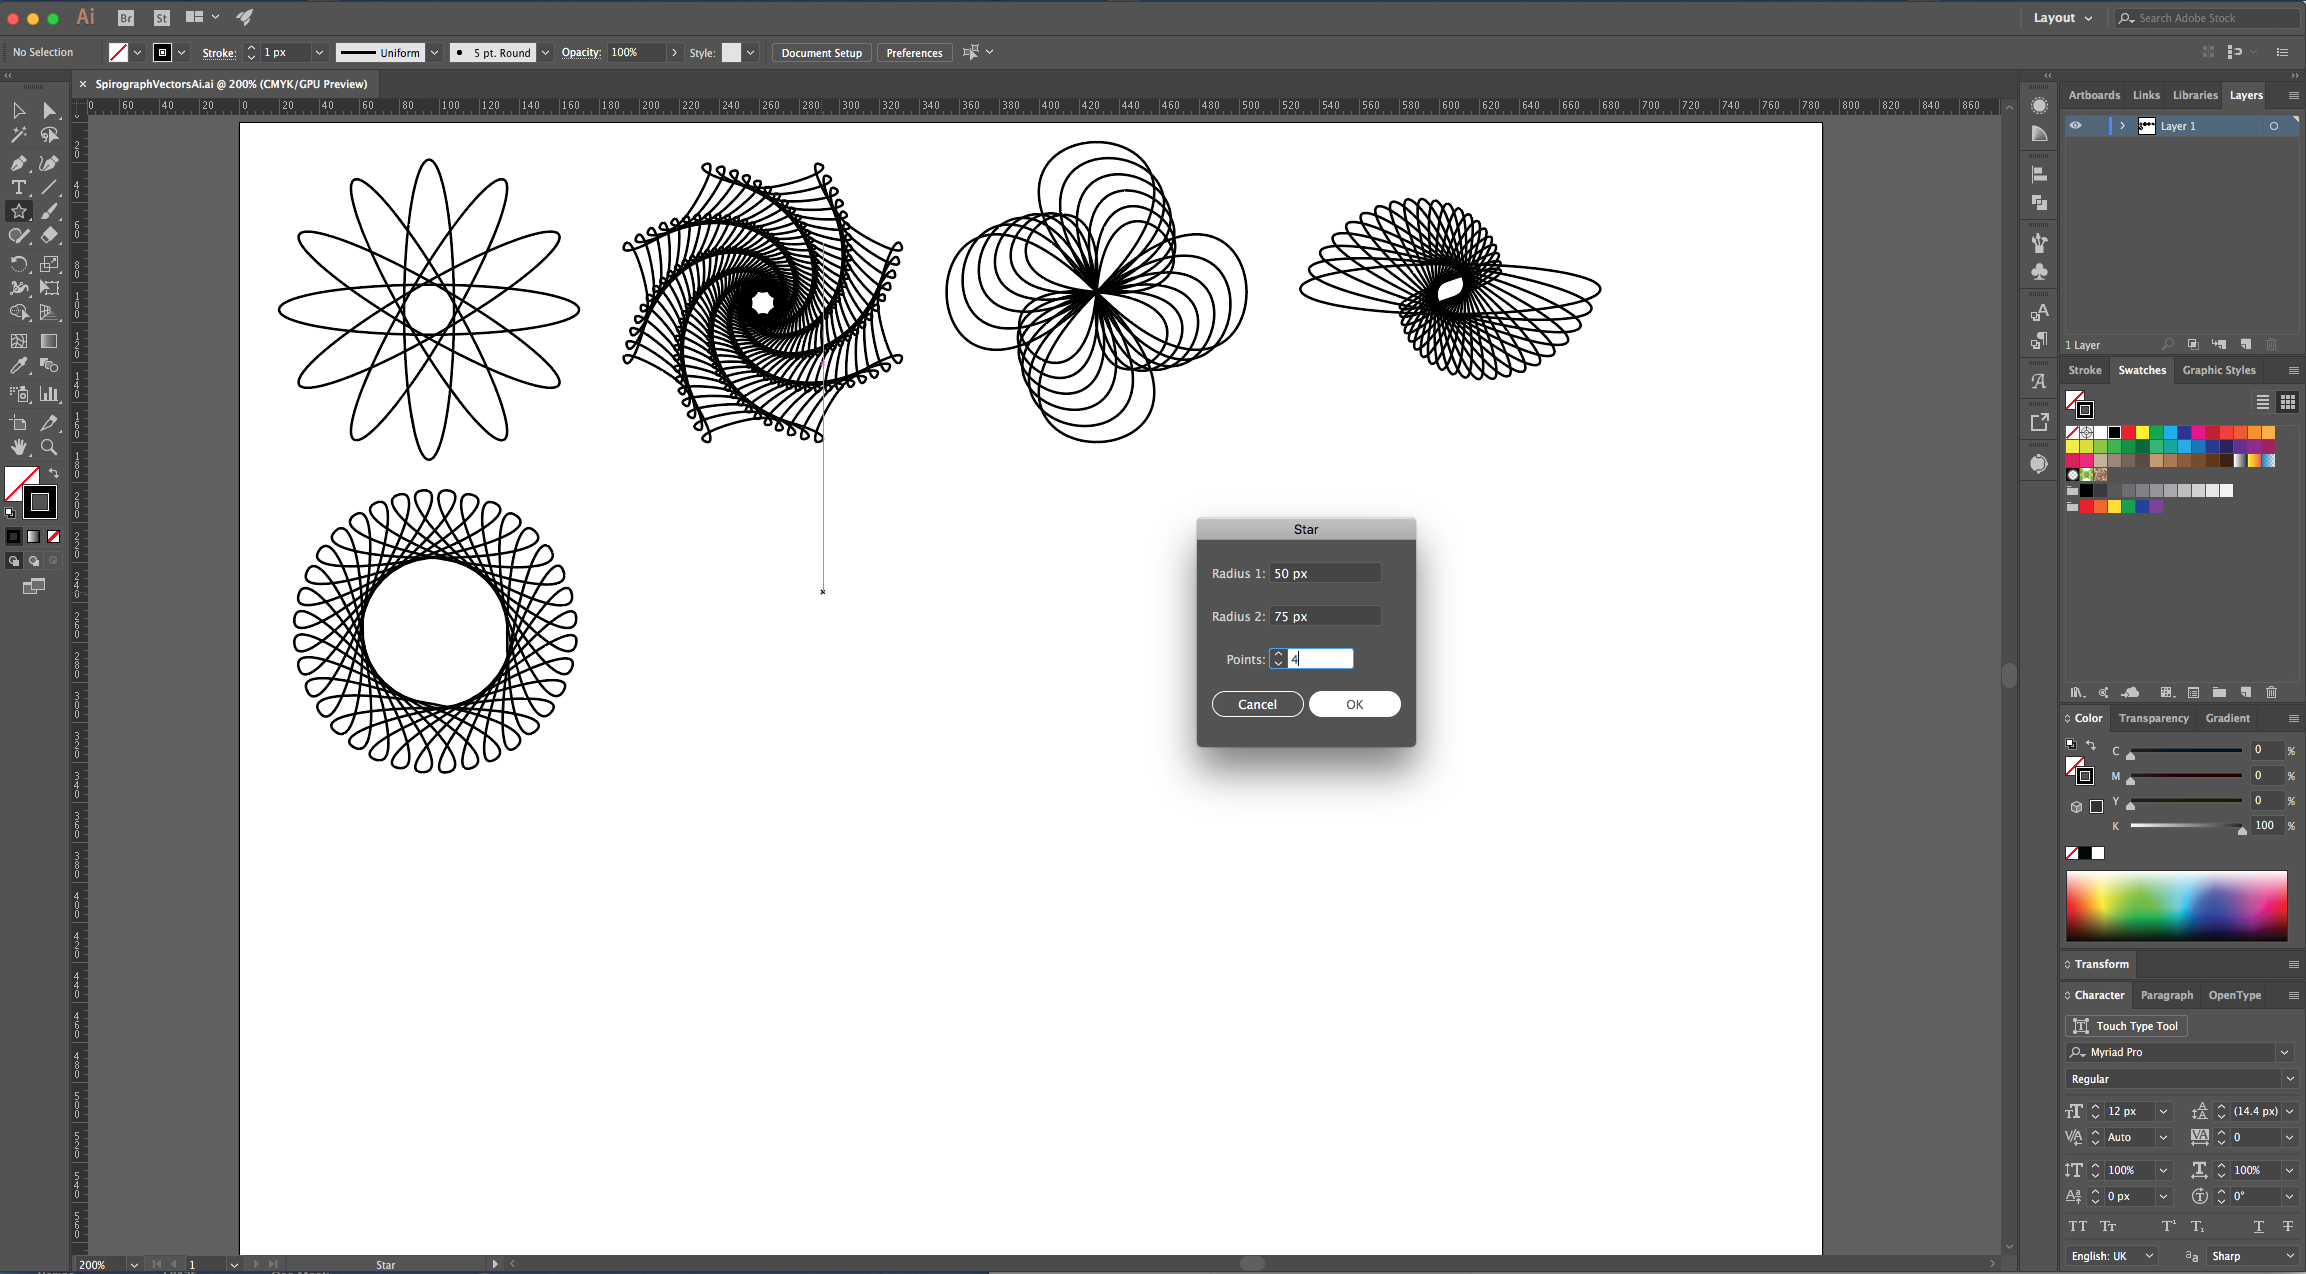
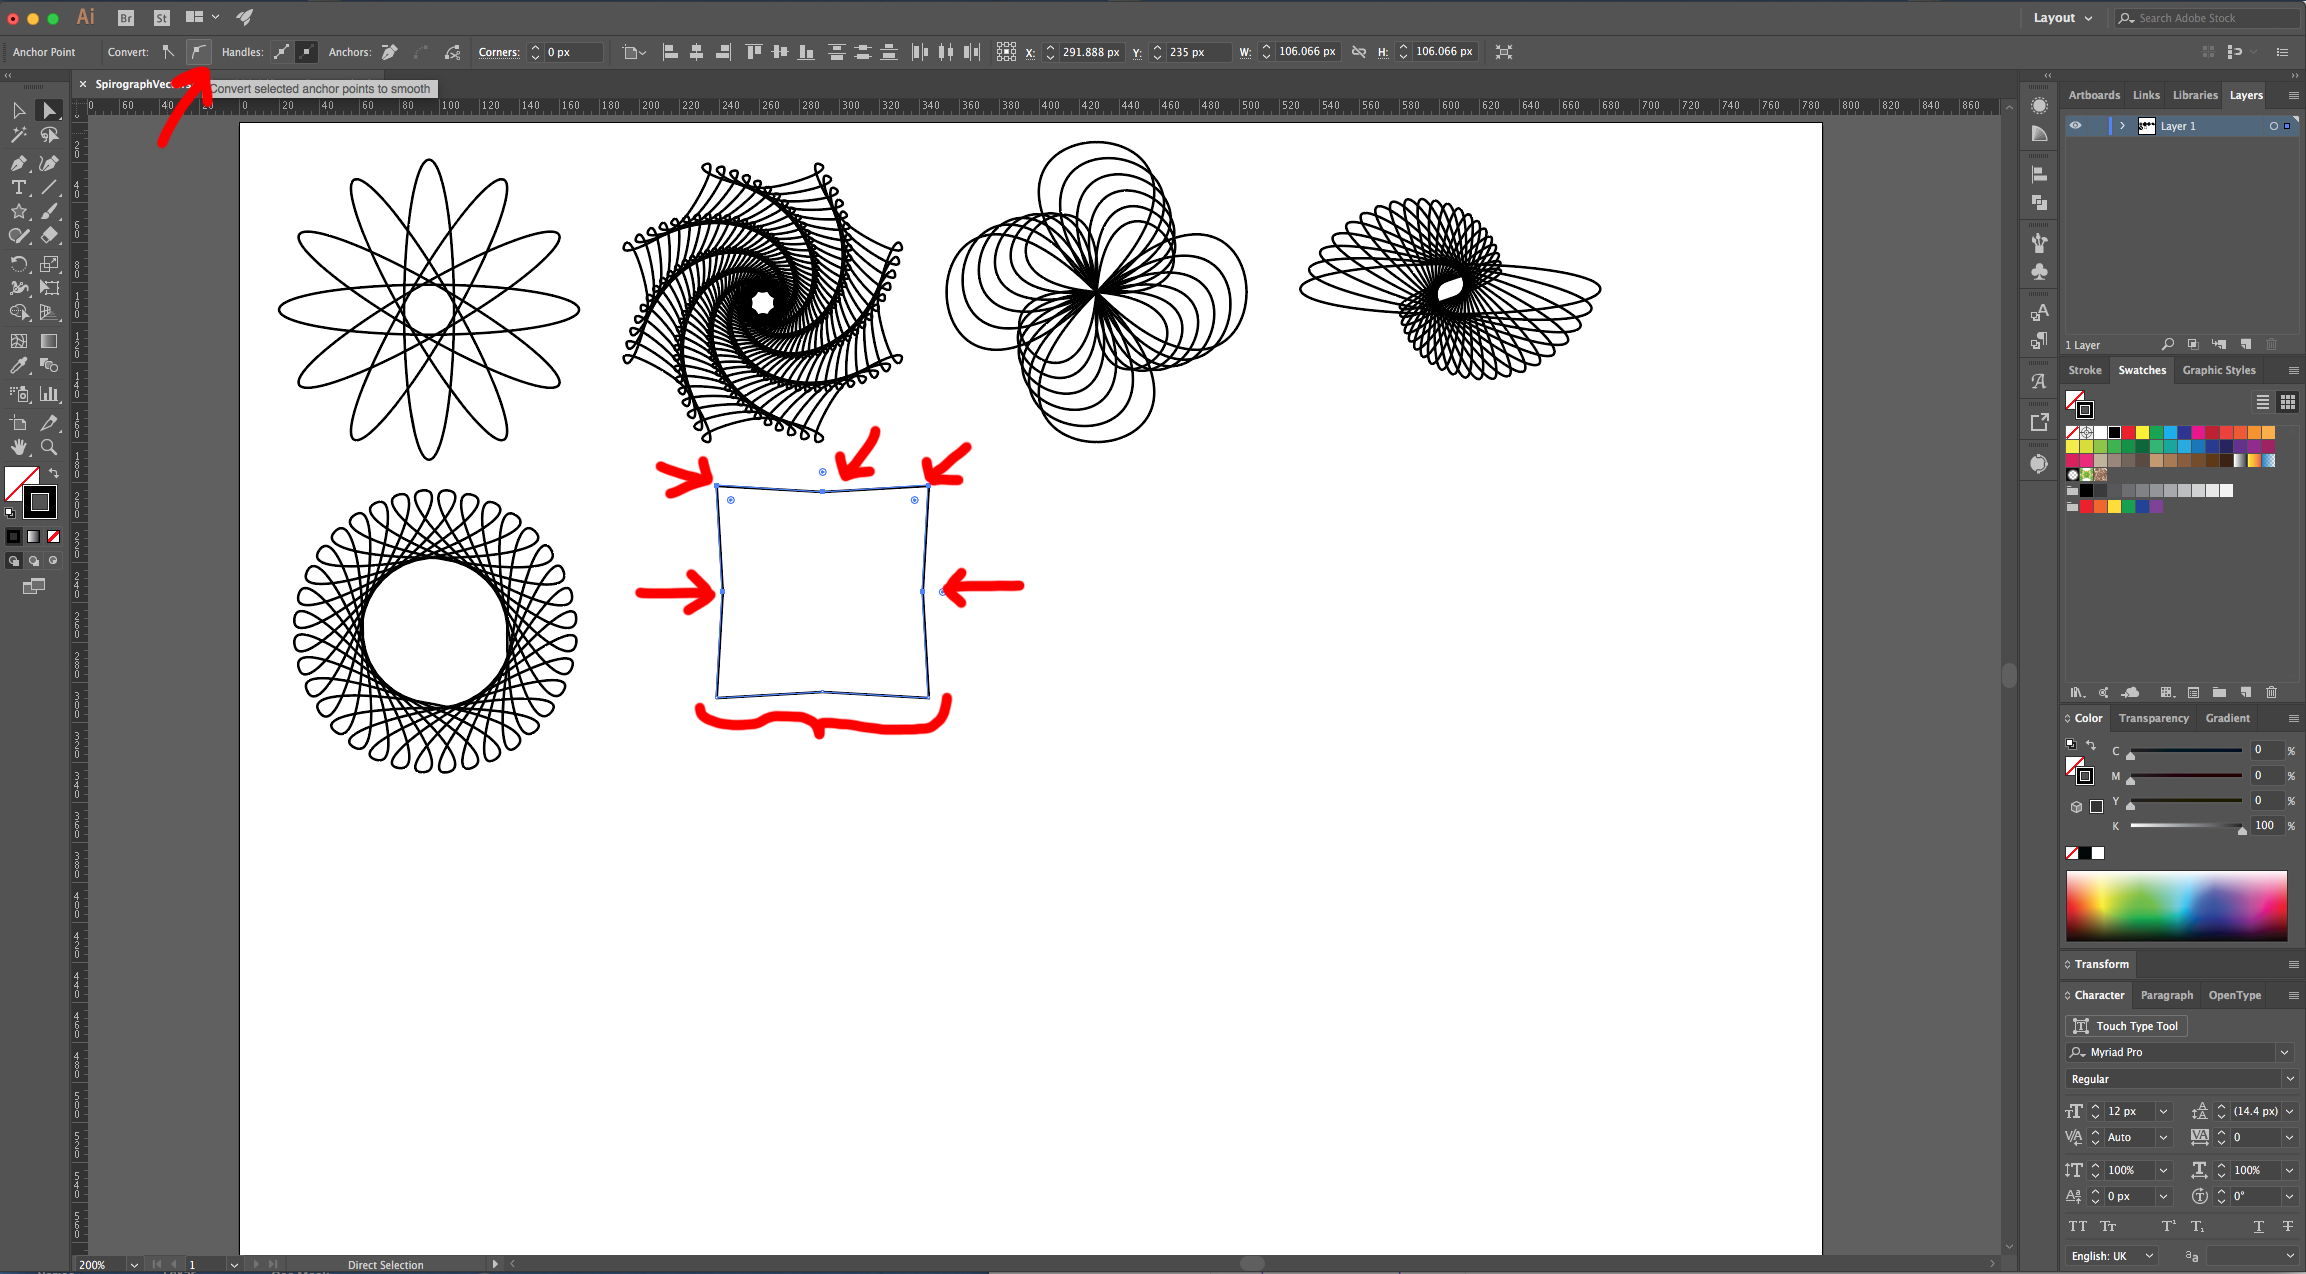
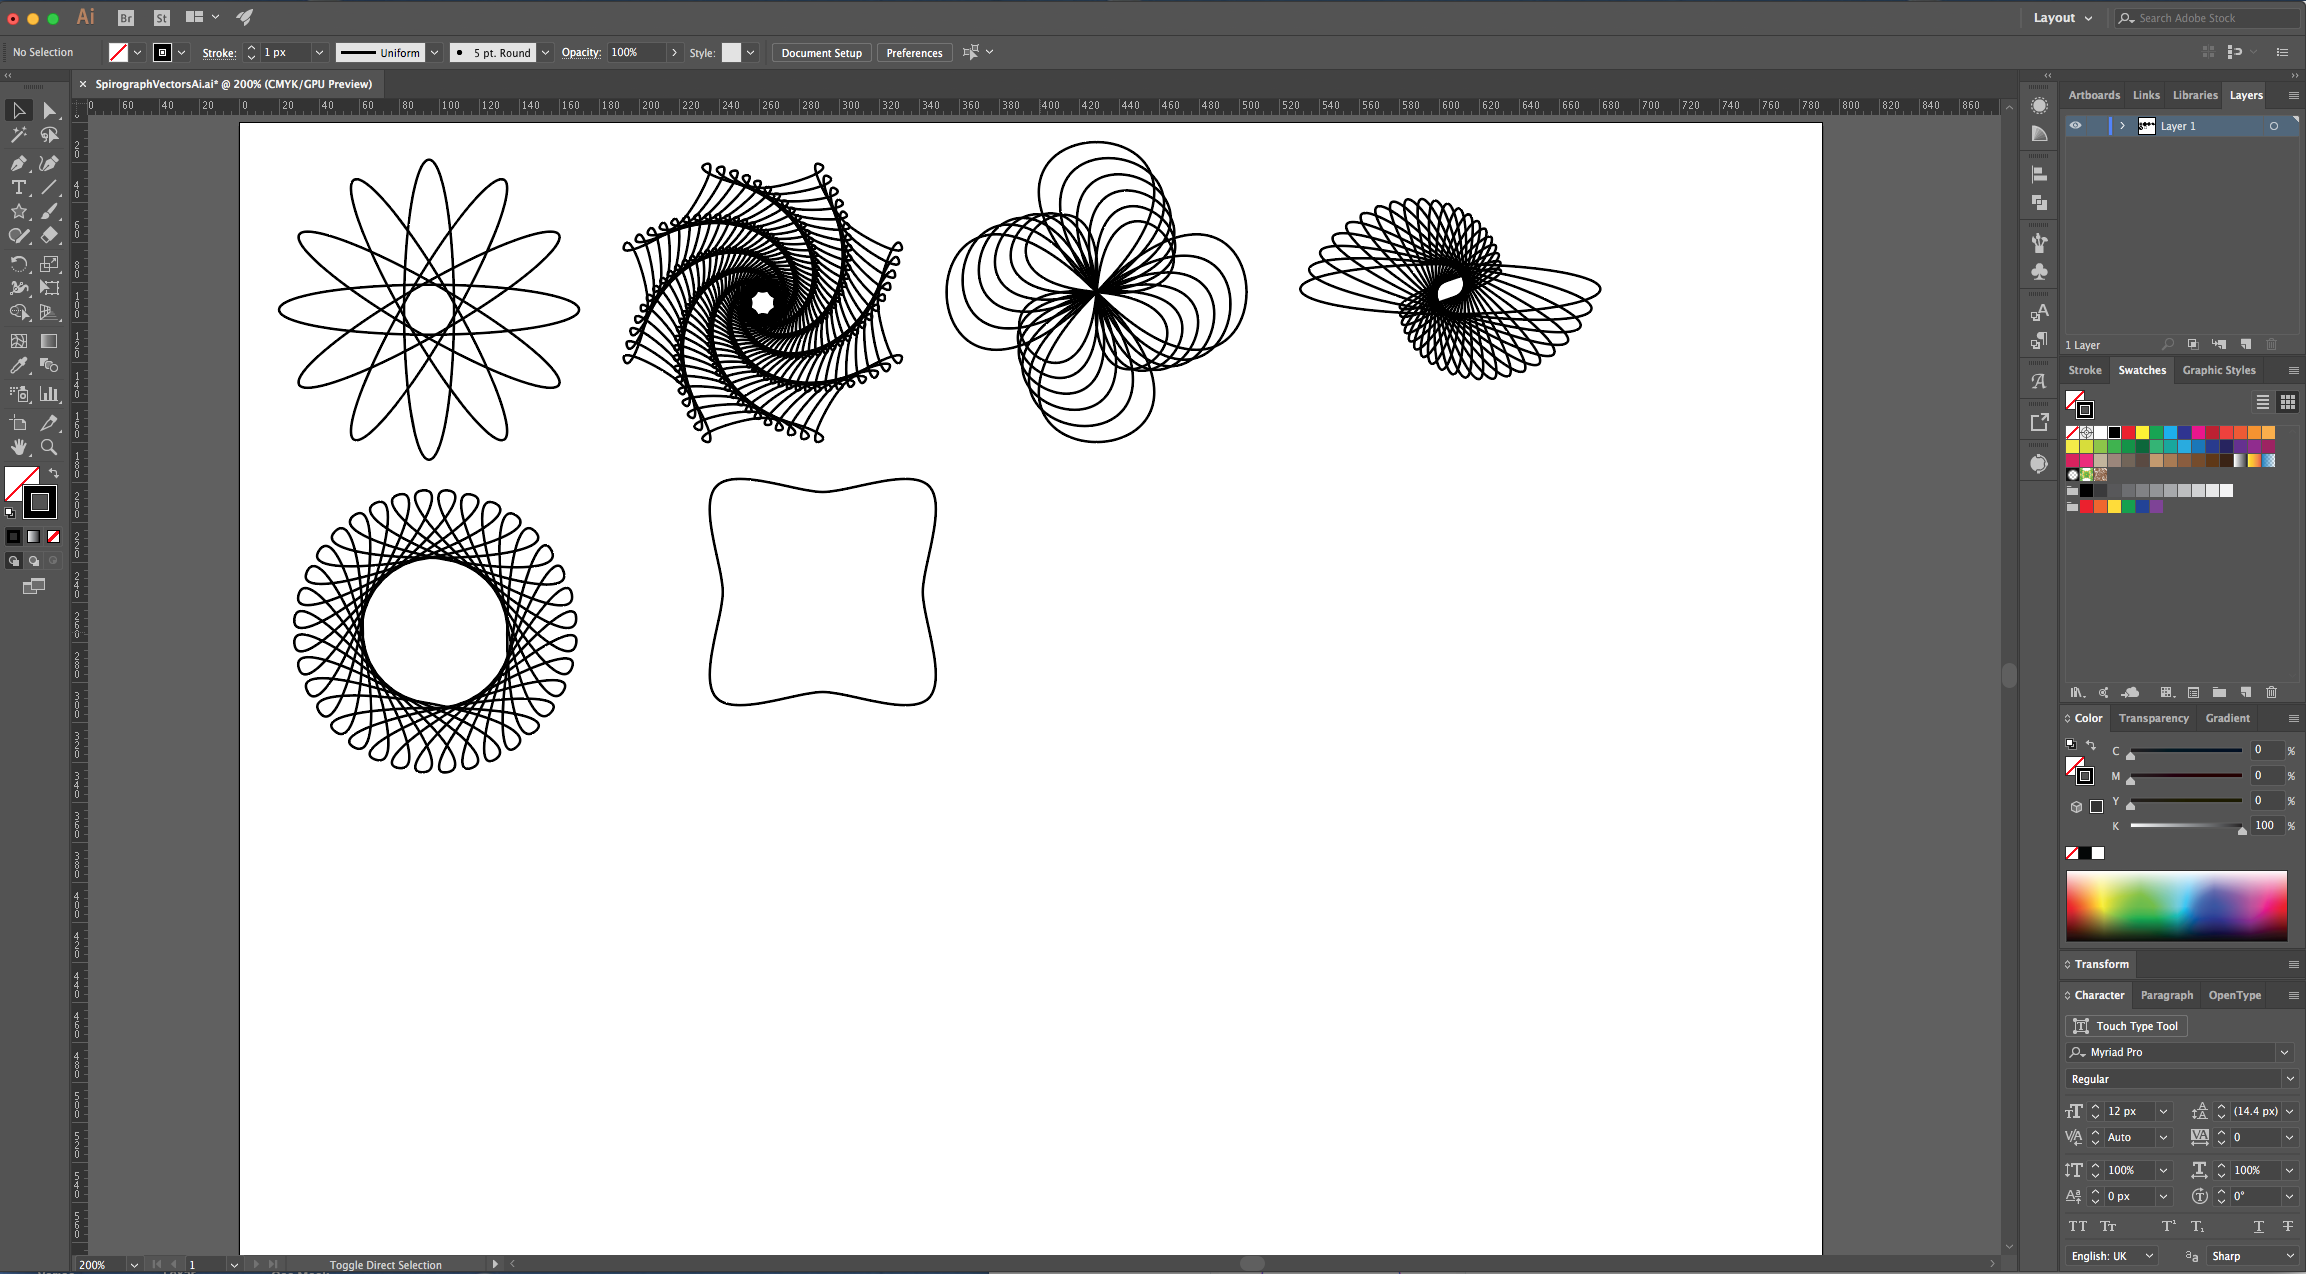
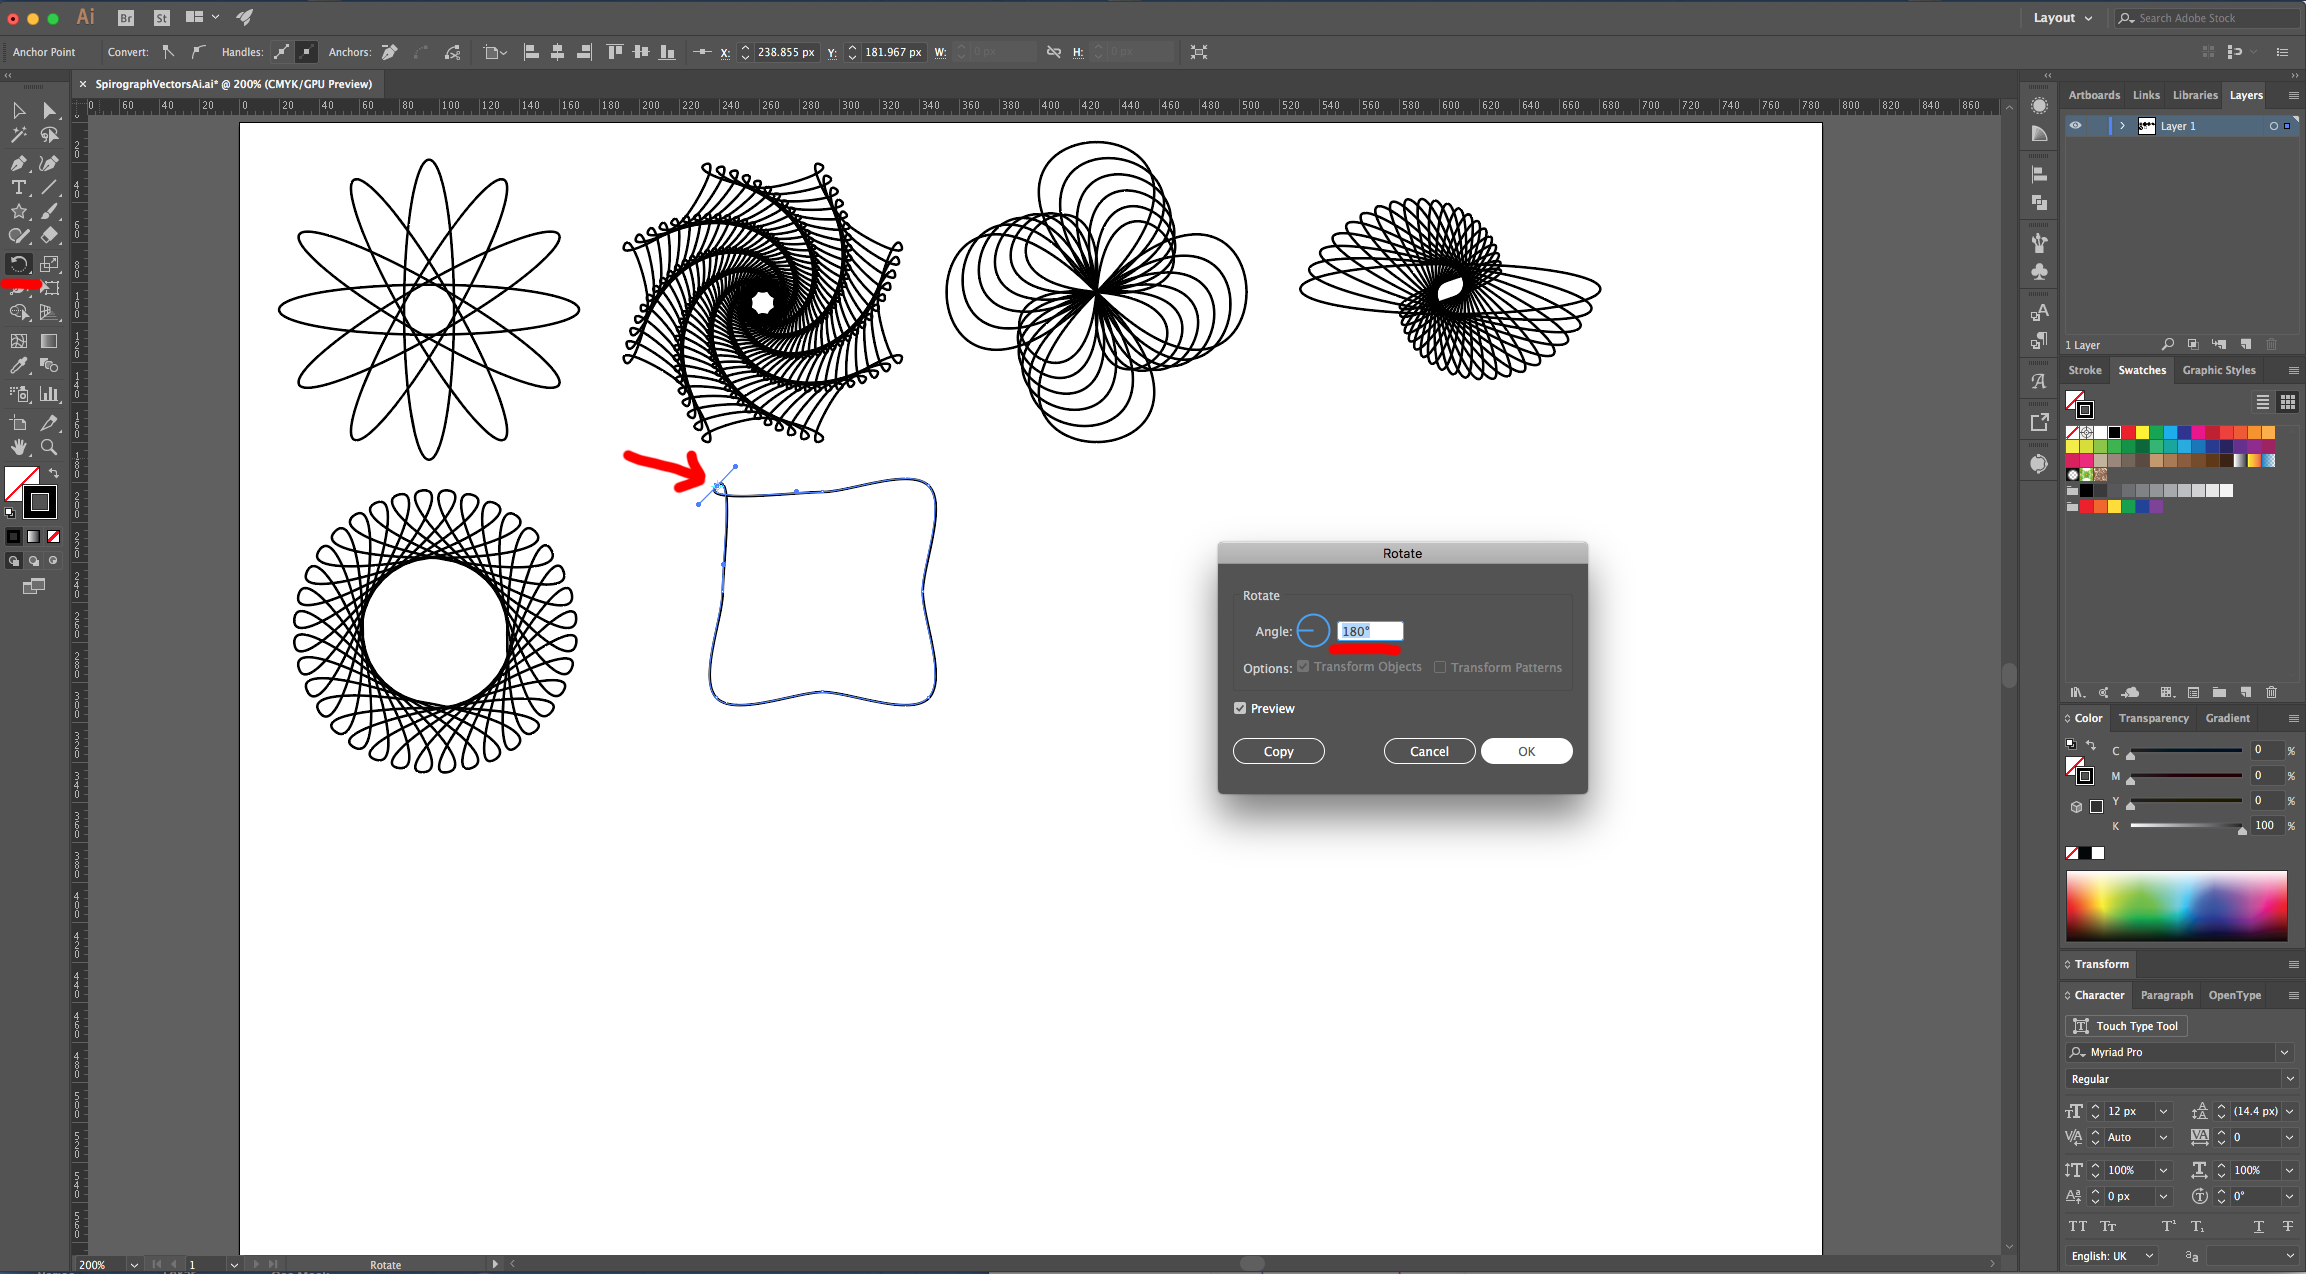
18 - With the “Direct Selection Tool” (A) select one of the Anchor Points, double-click on the “Rotate Tool” (R) on the Toolbox to open the dialog and use a 180° Angle. Click “OK”. Repeat with the rest of the Outside Anchor Points.
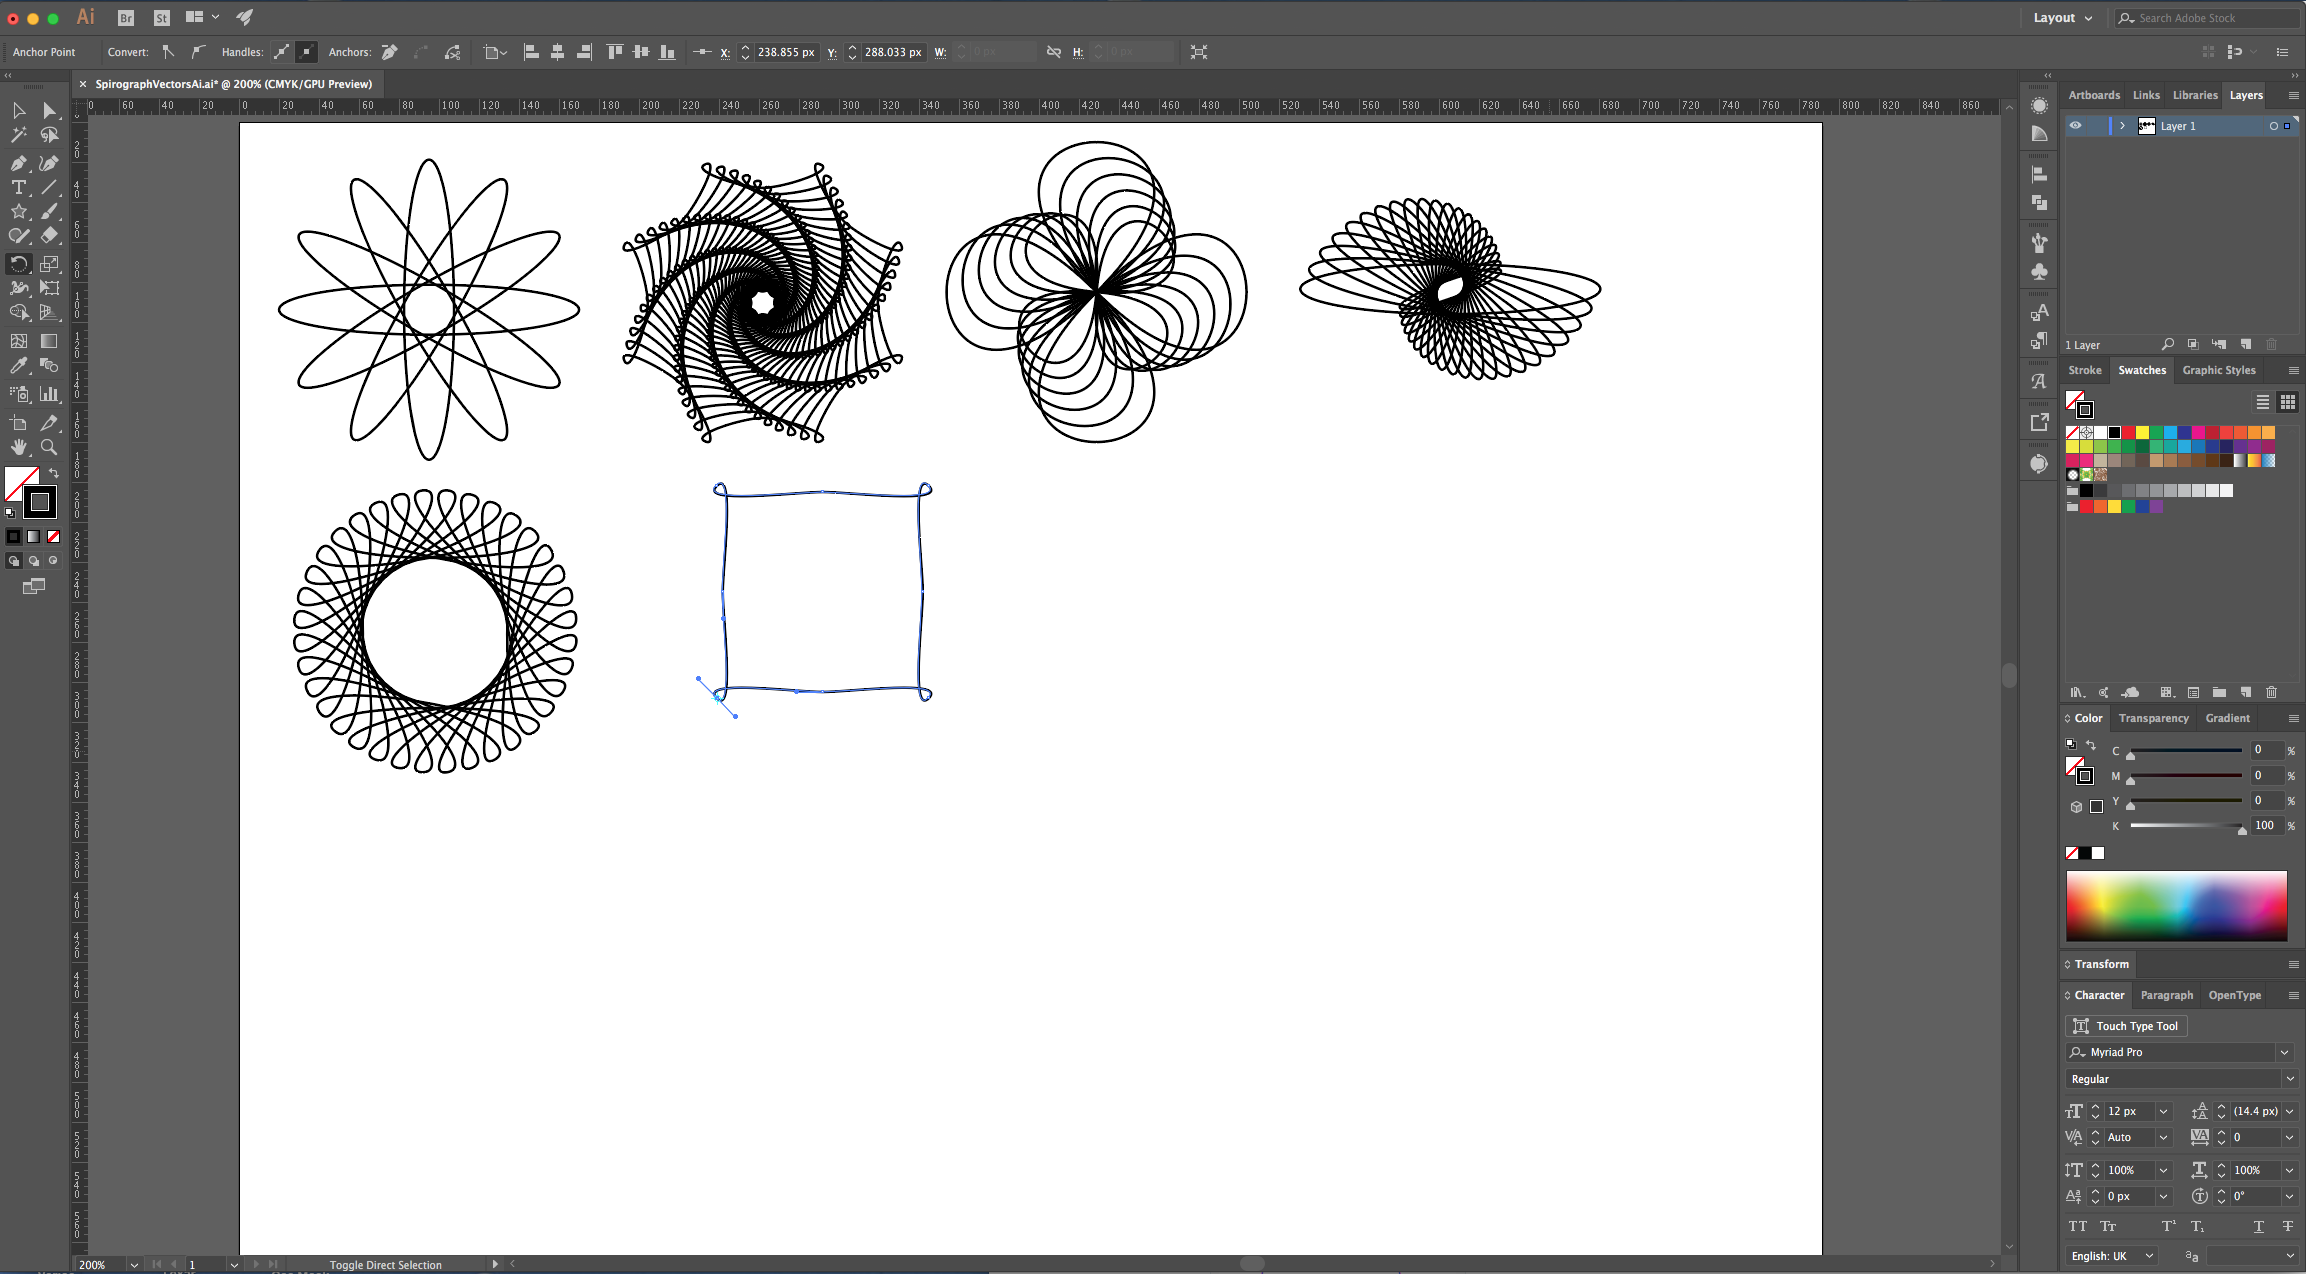
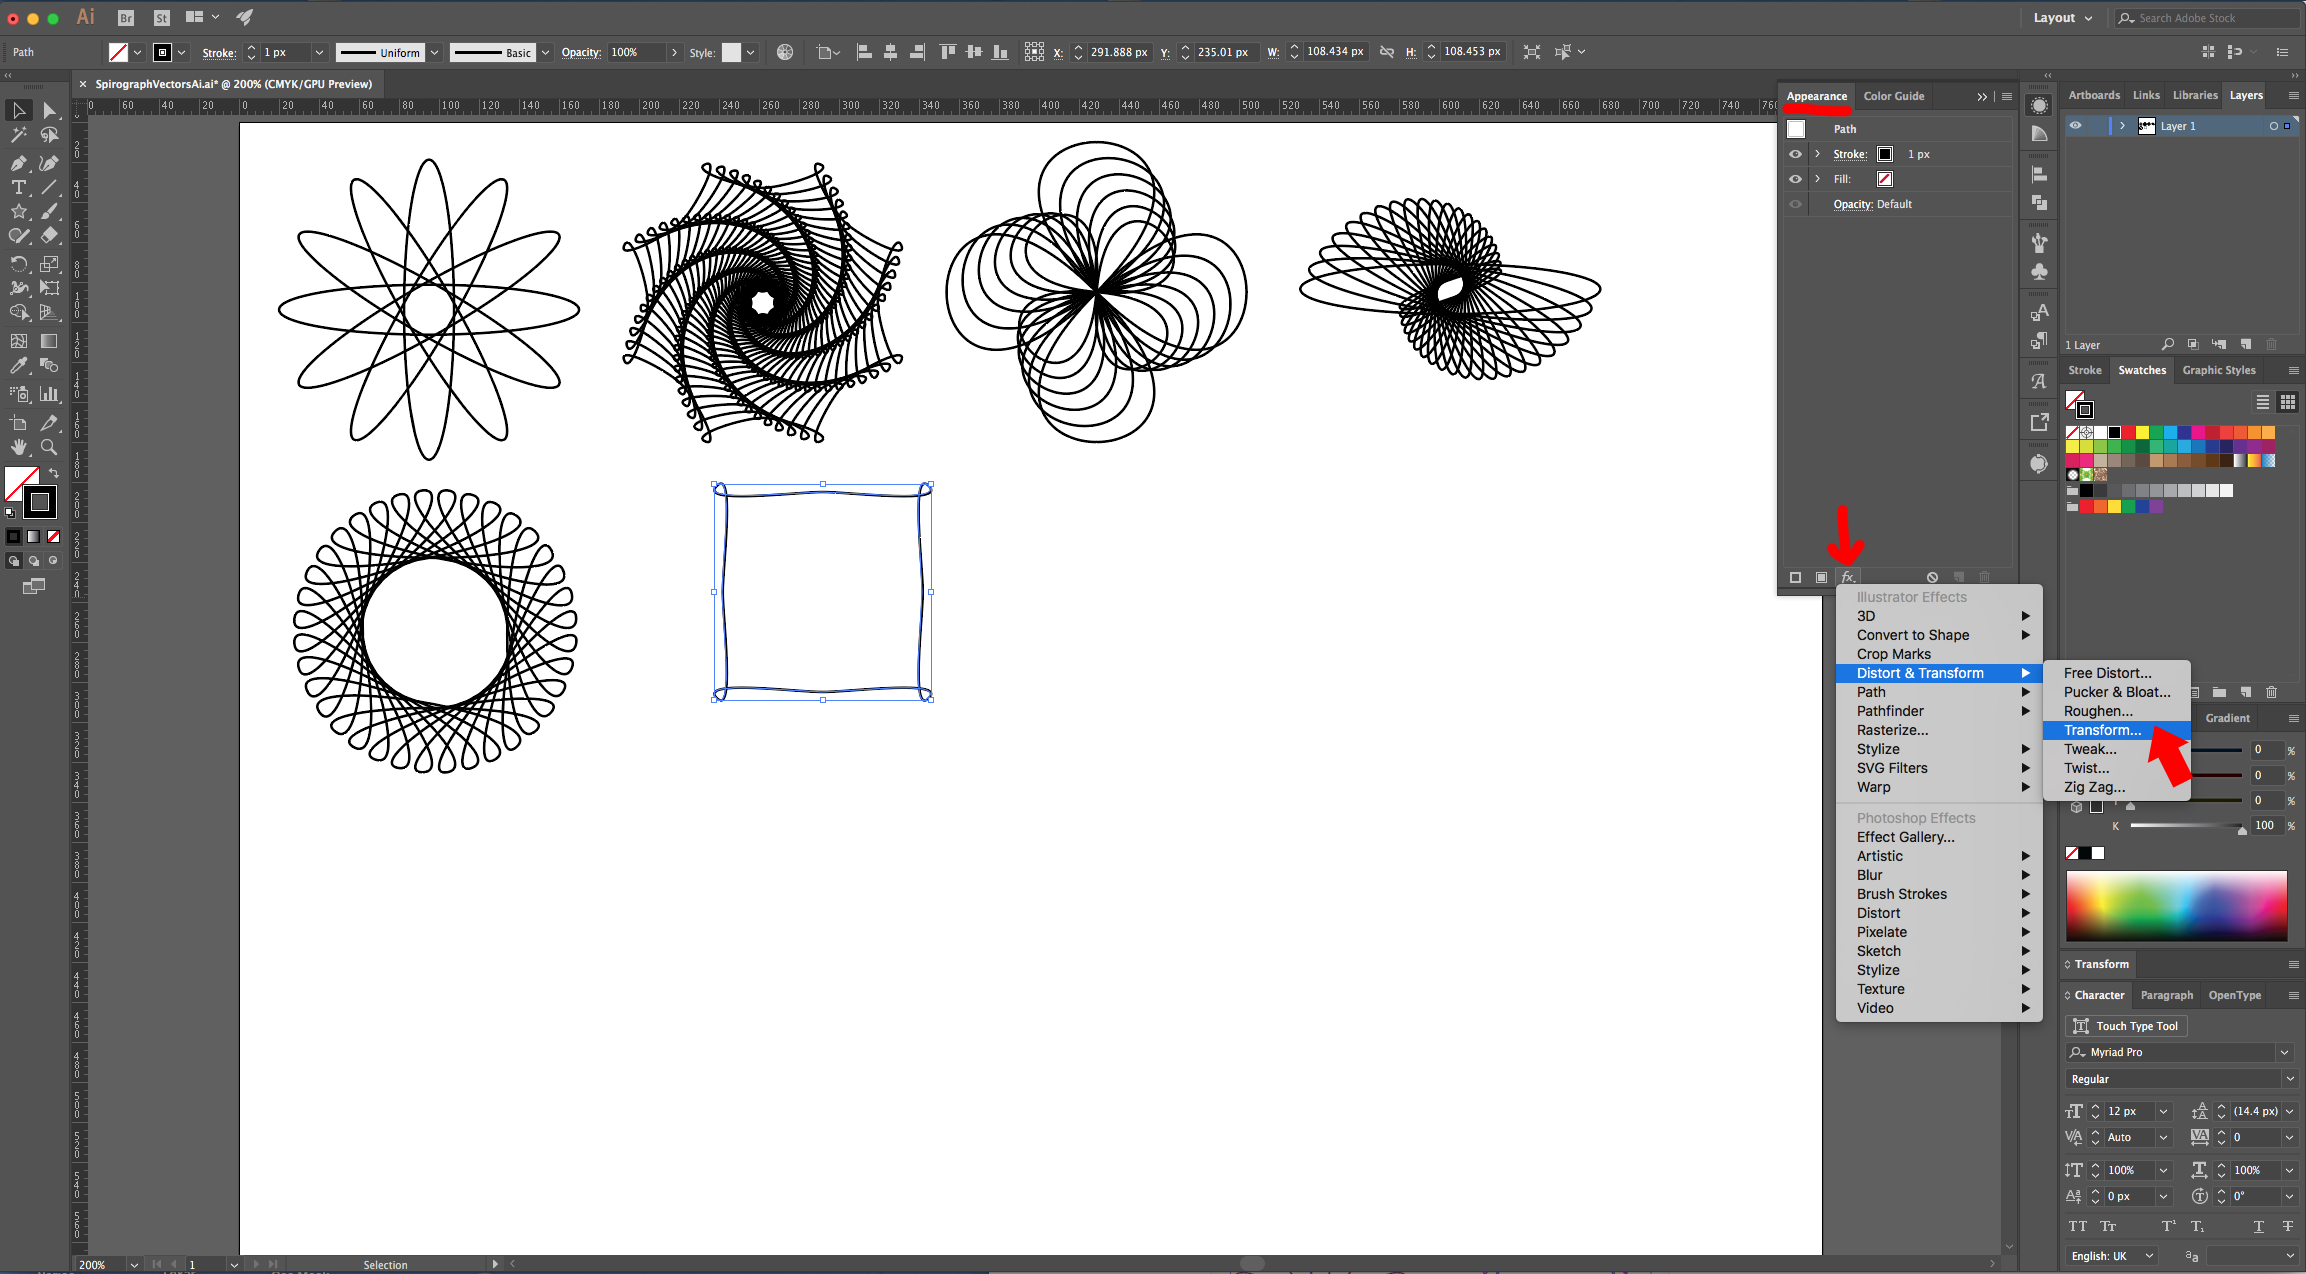
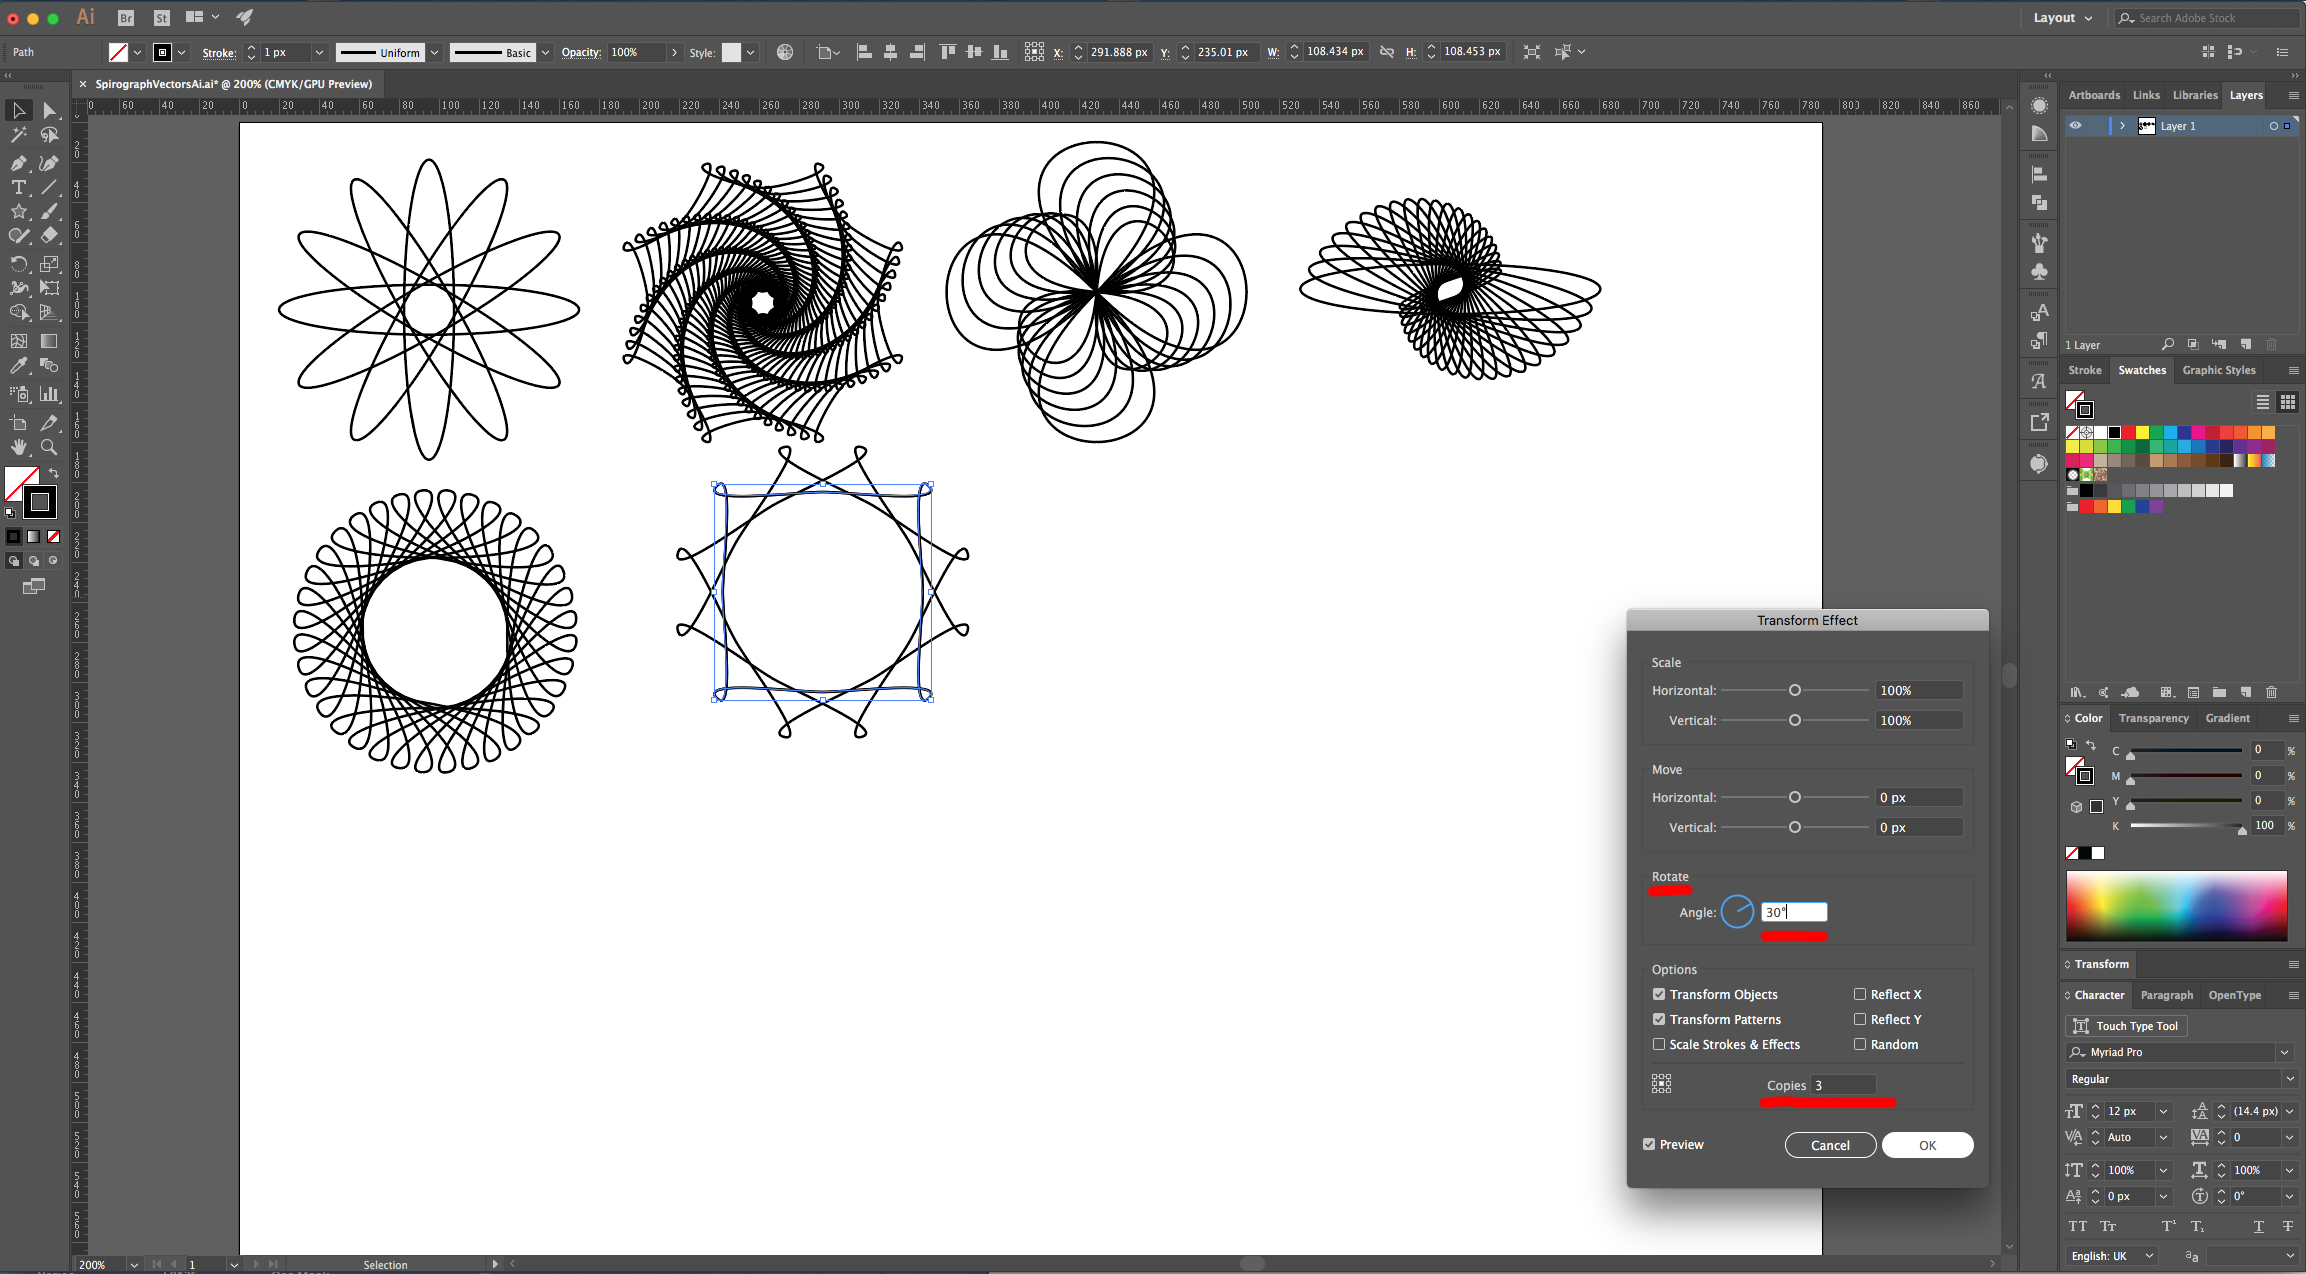
19 - Go to the “Appearance Panel”, click on the “Effects Menu” on the Bottom-Left side and navigate to Distort & Transform > Transform and use and use a “Rotate Angle” of 30° and make 3 “Copies”. Click “OK”.
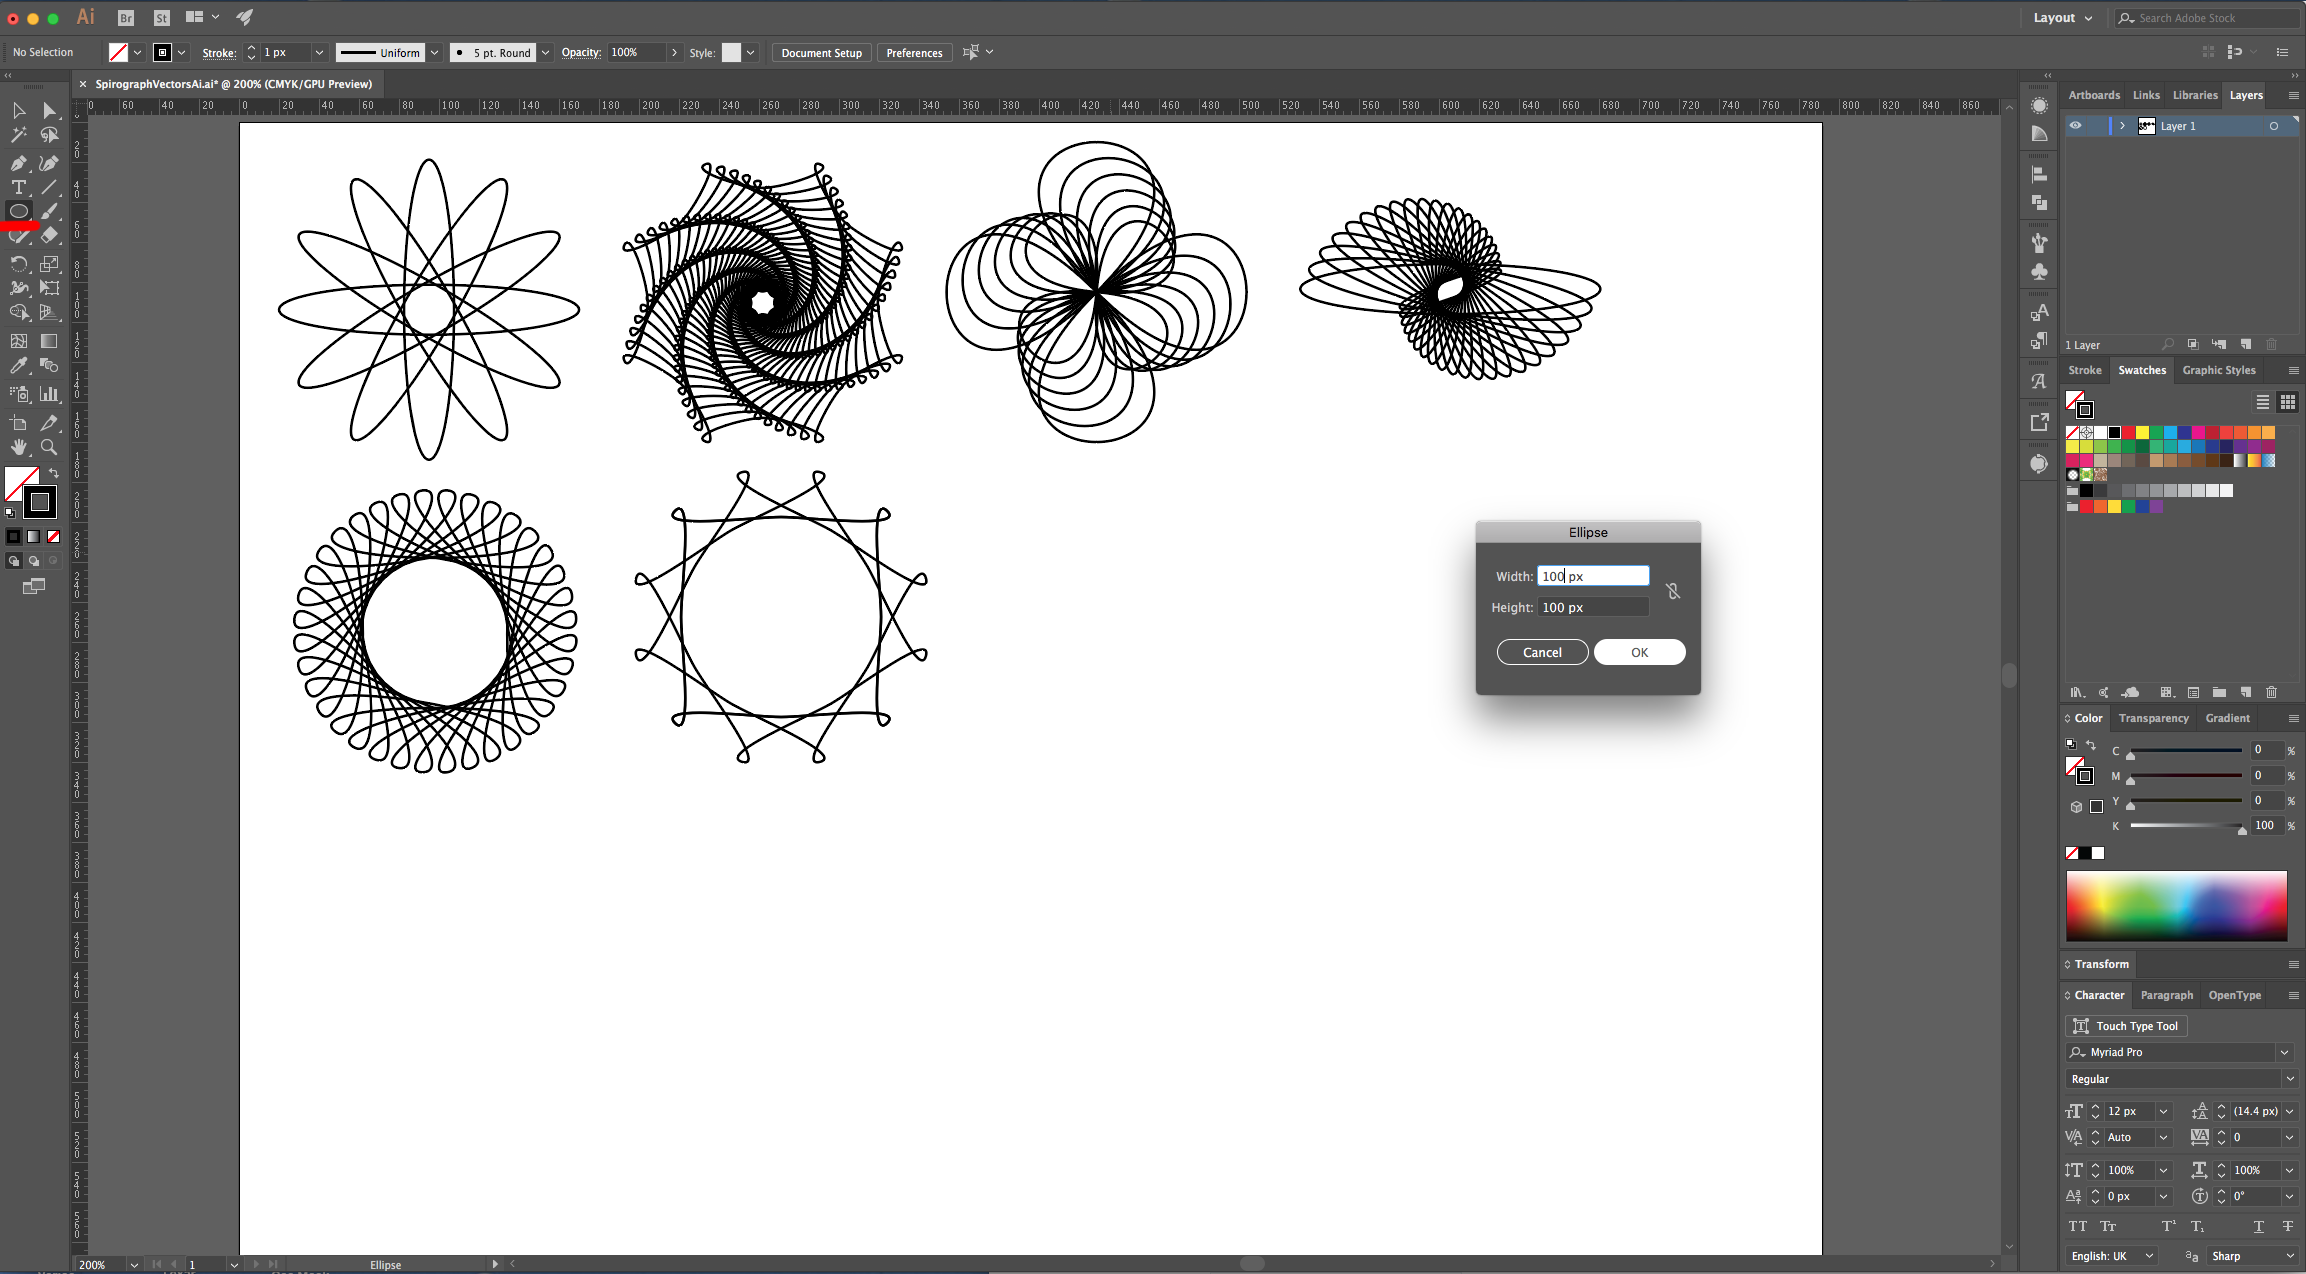
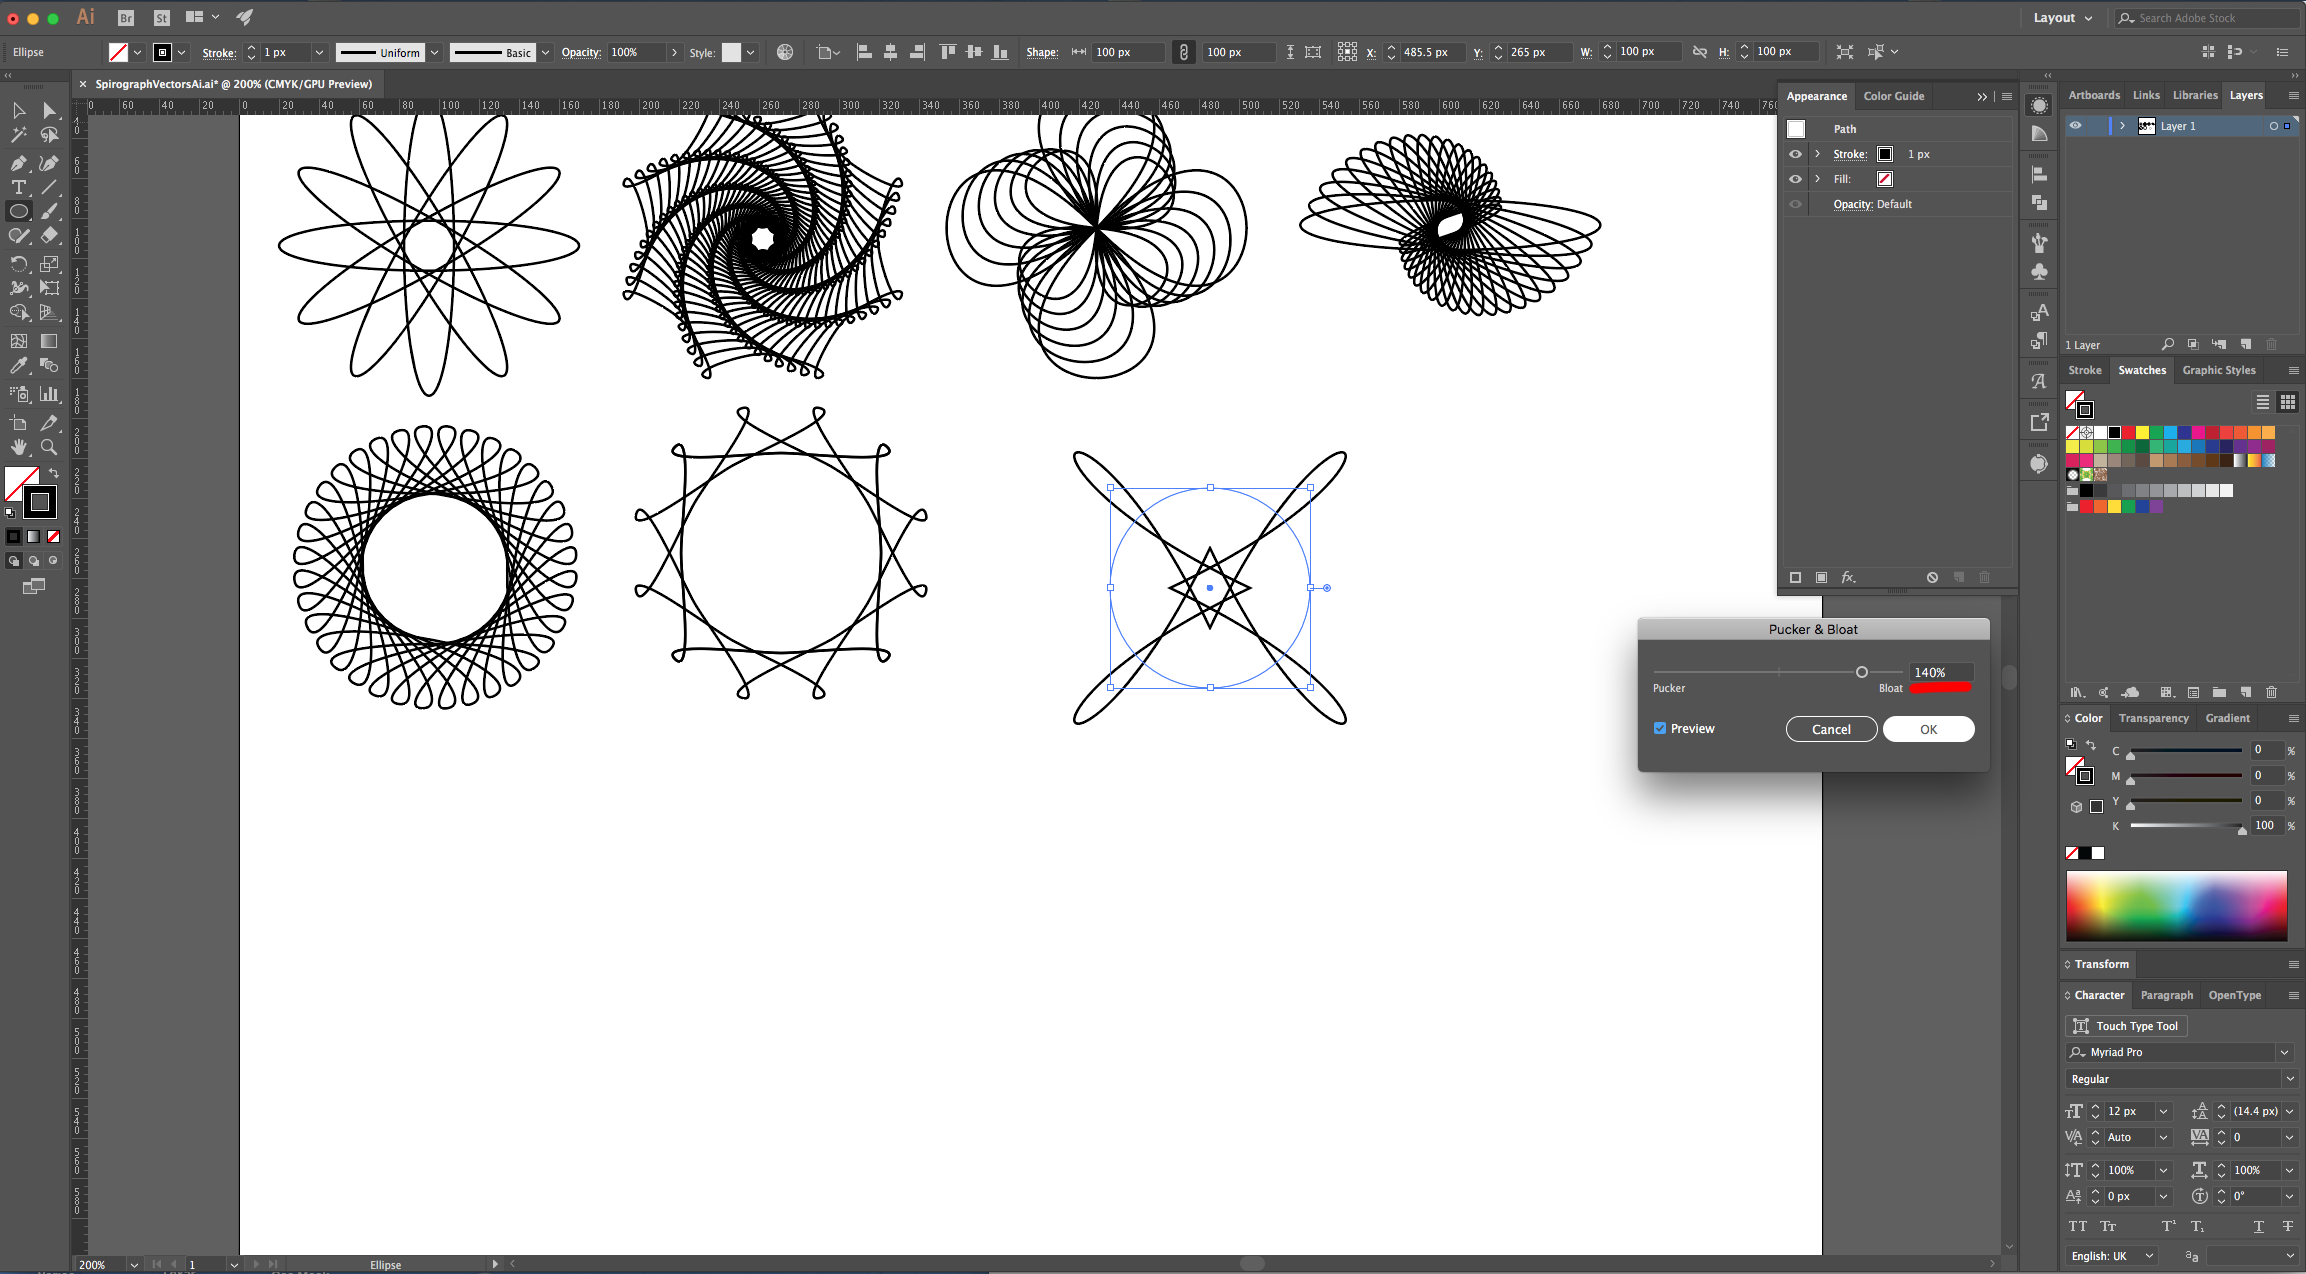
20 - Select the “Ellipse Tool” (L) click inside of your Canvas and input a “Width” and “Height” of 100 px. Go to the “Appearance Panel”, click on the “Effects Menu” on the Bottom-Left side and navigate to Distort & Transform > Pucker & Bloat… and use a value of 140%. Click “OK”.
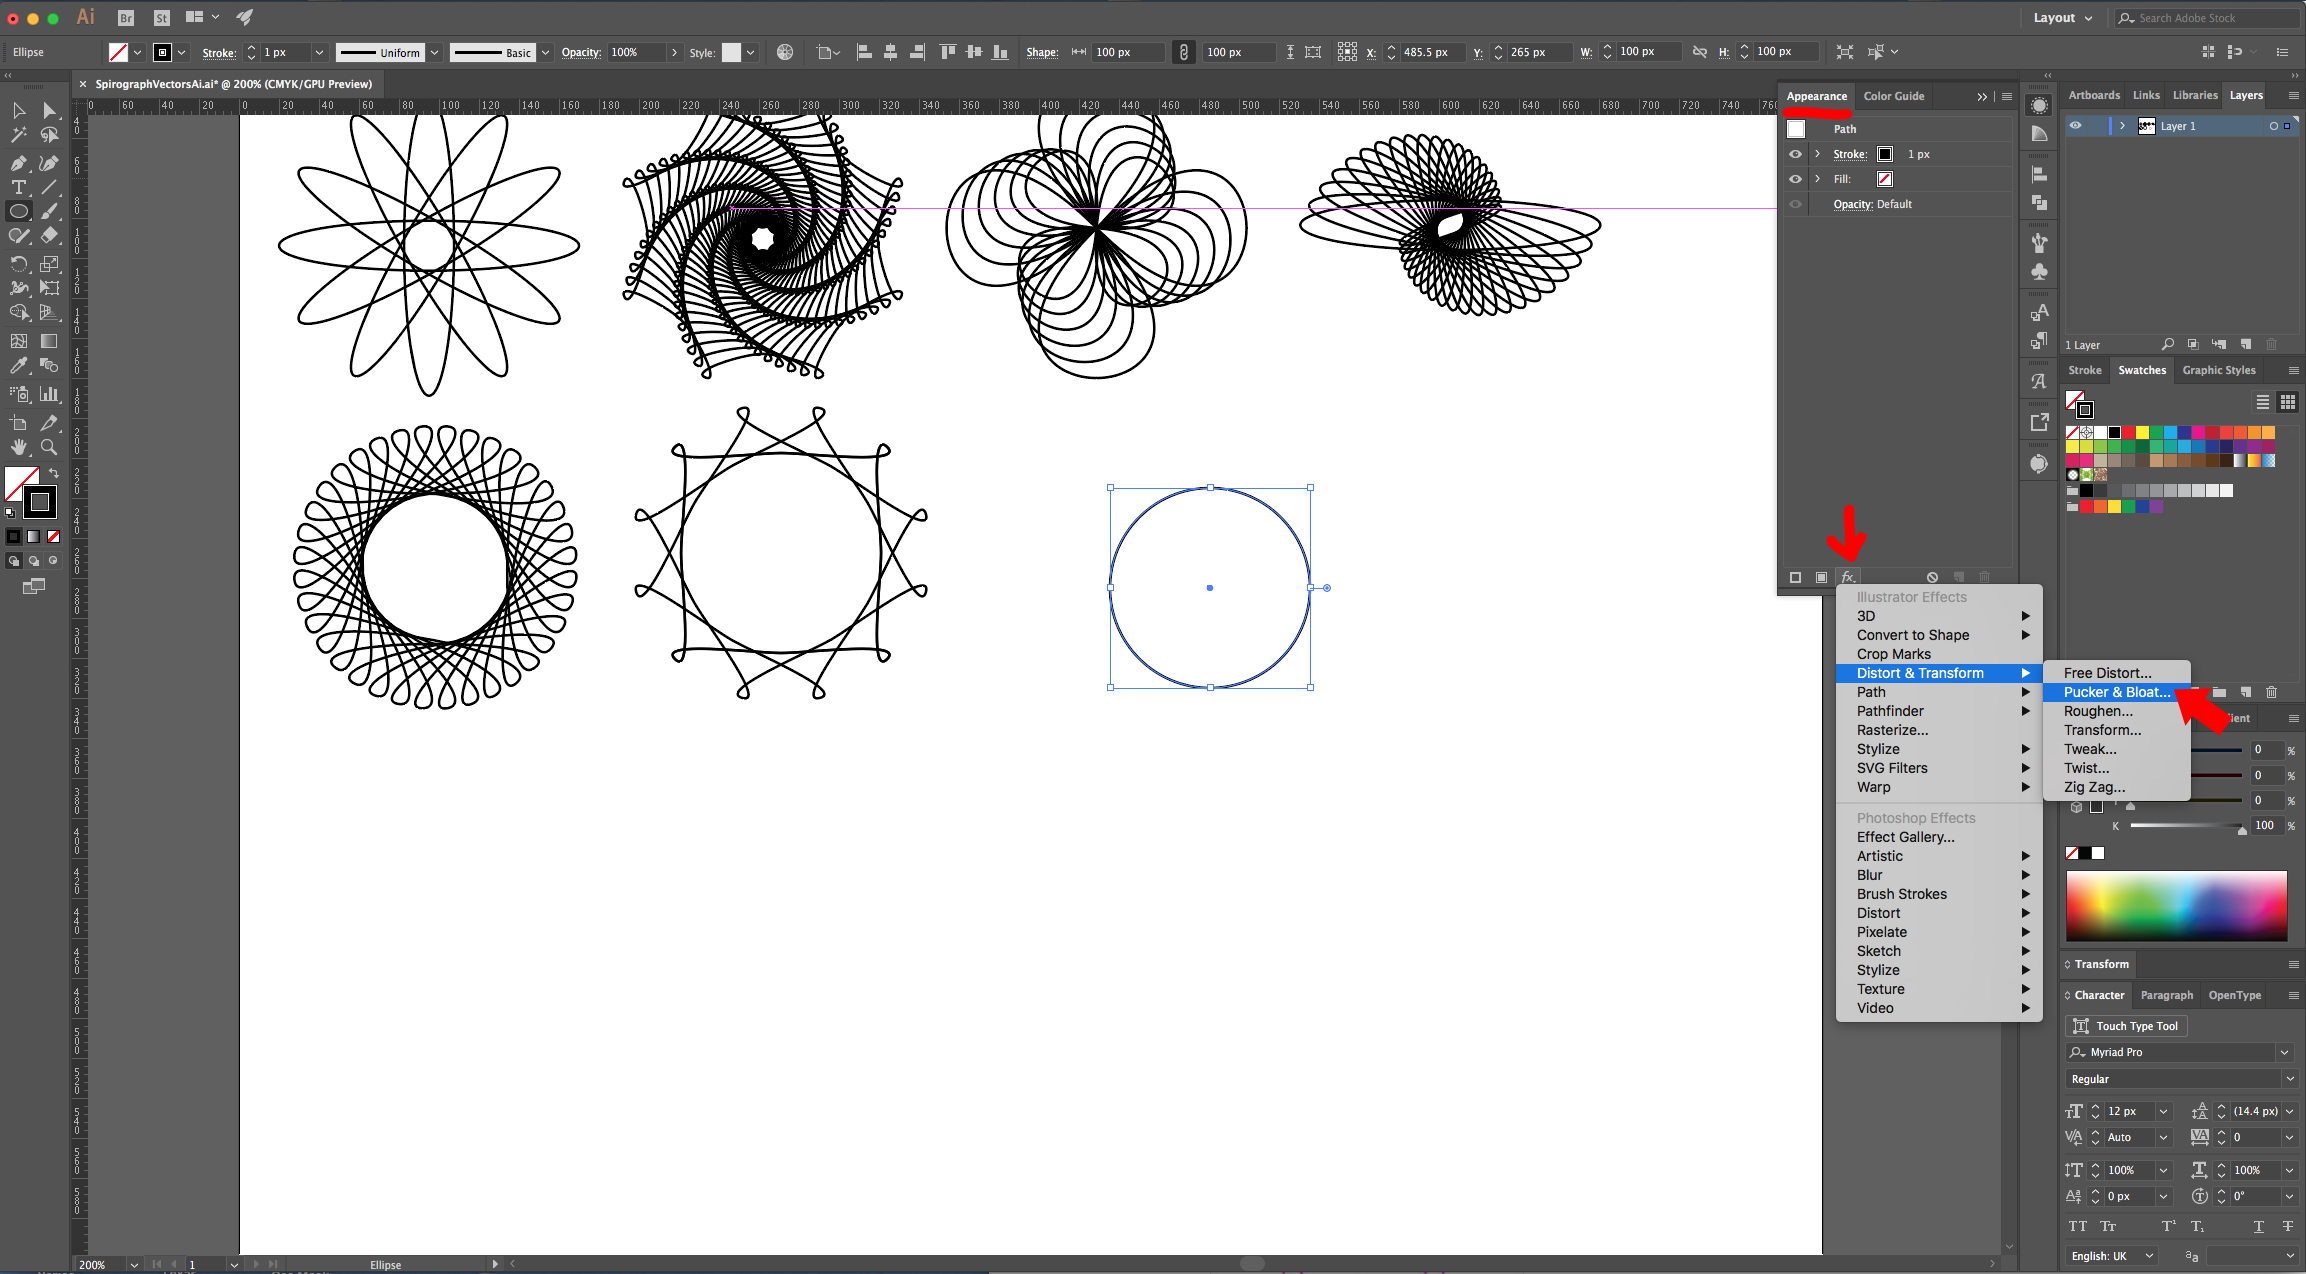
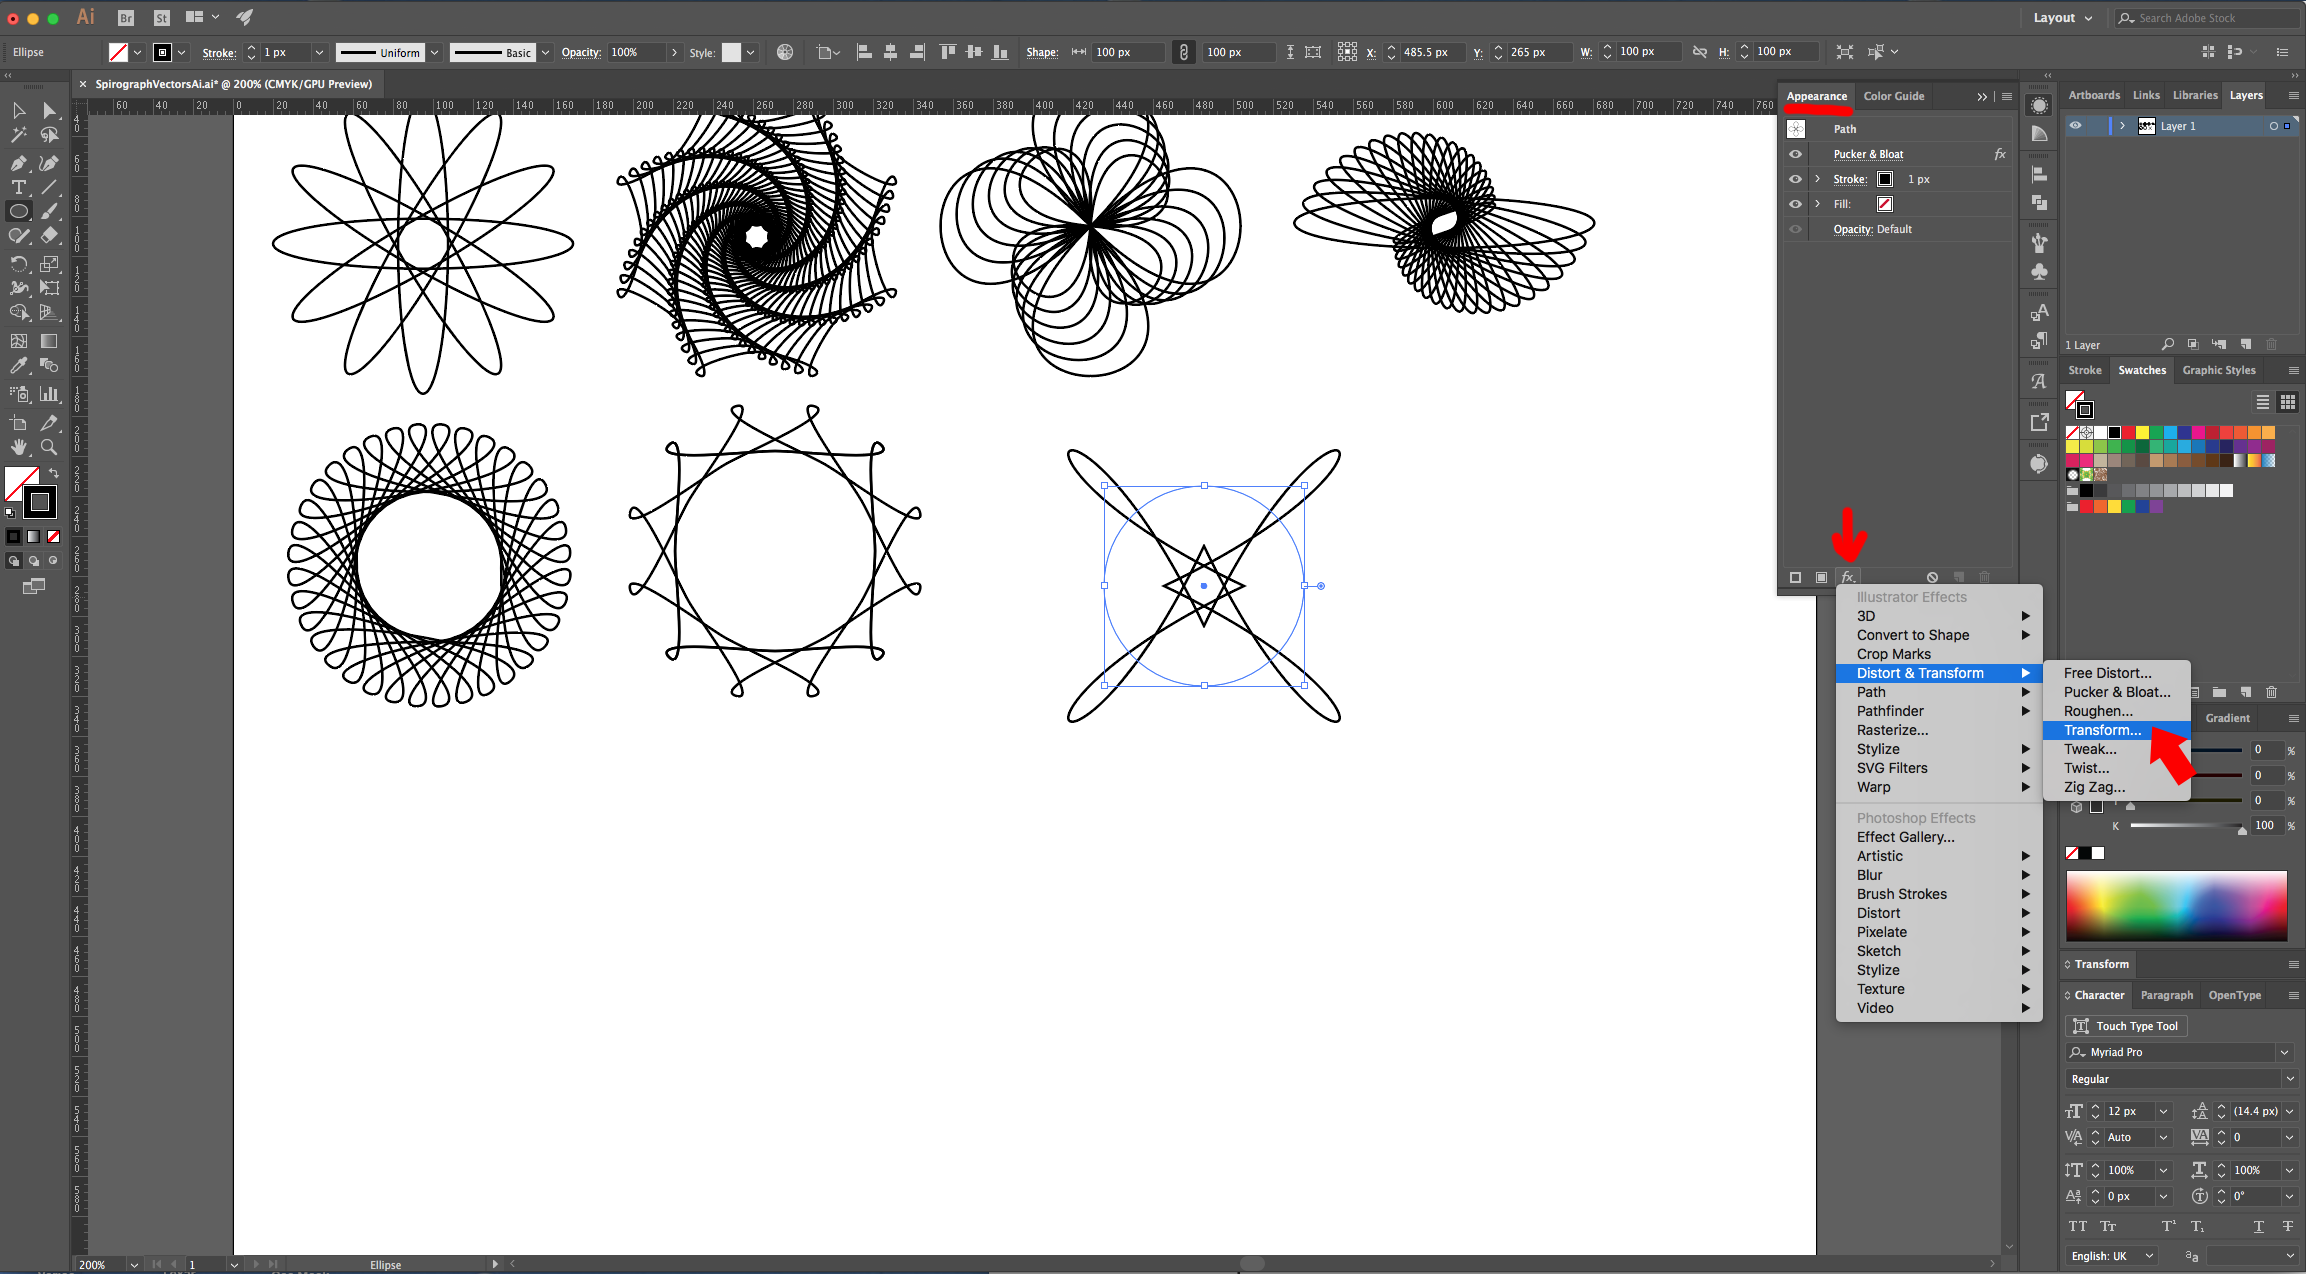
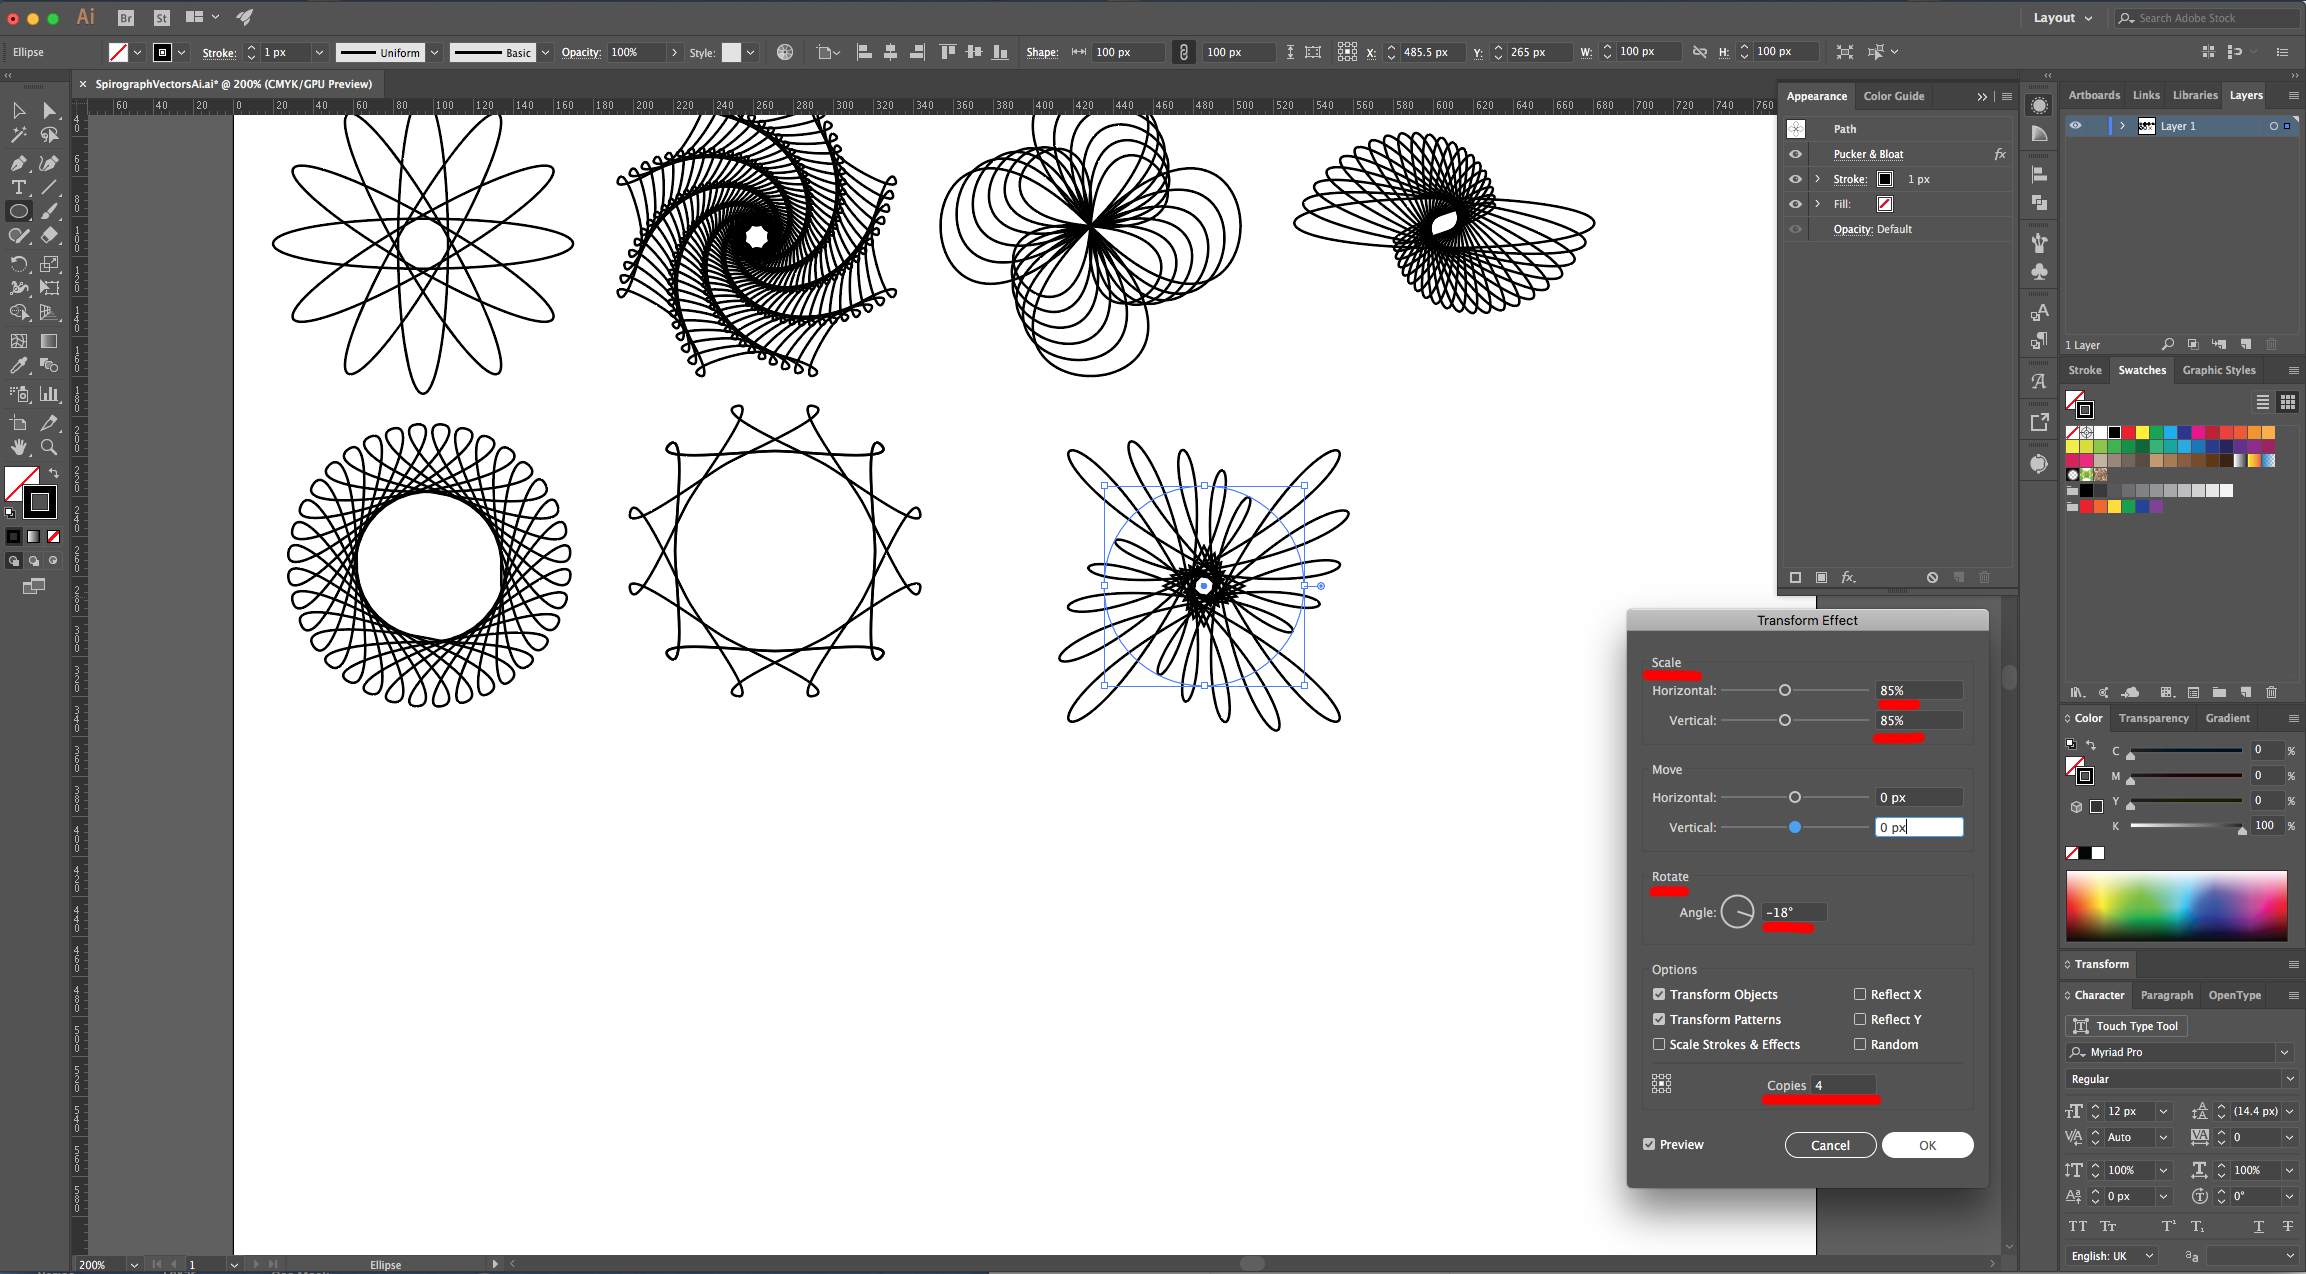
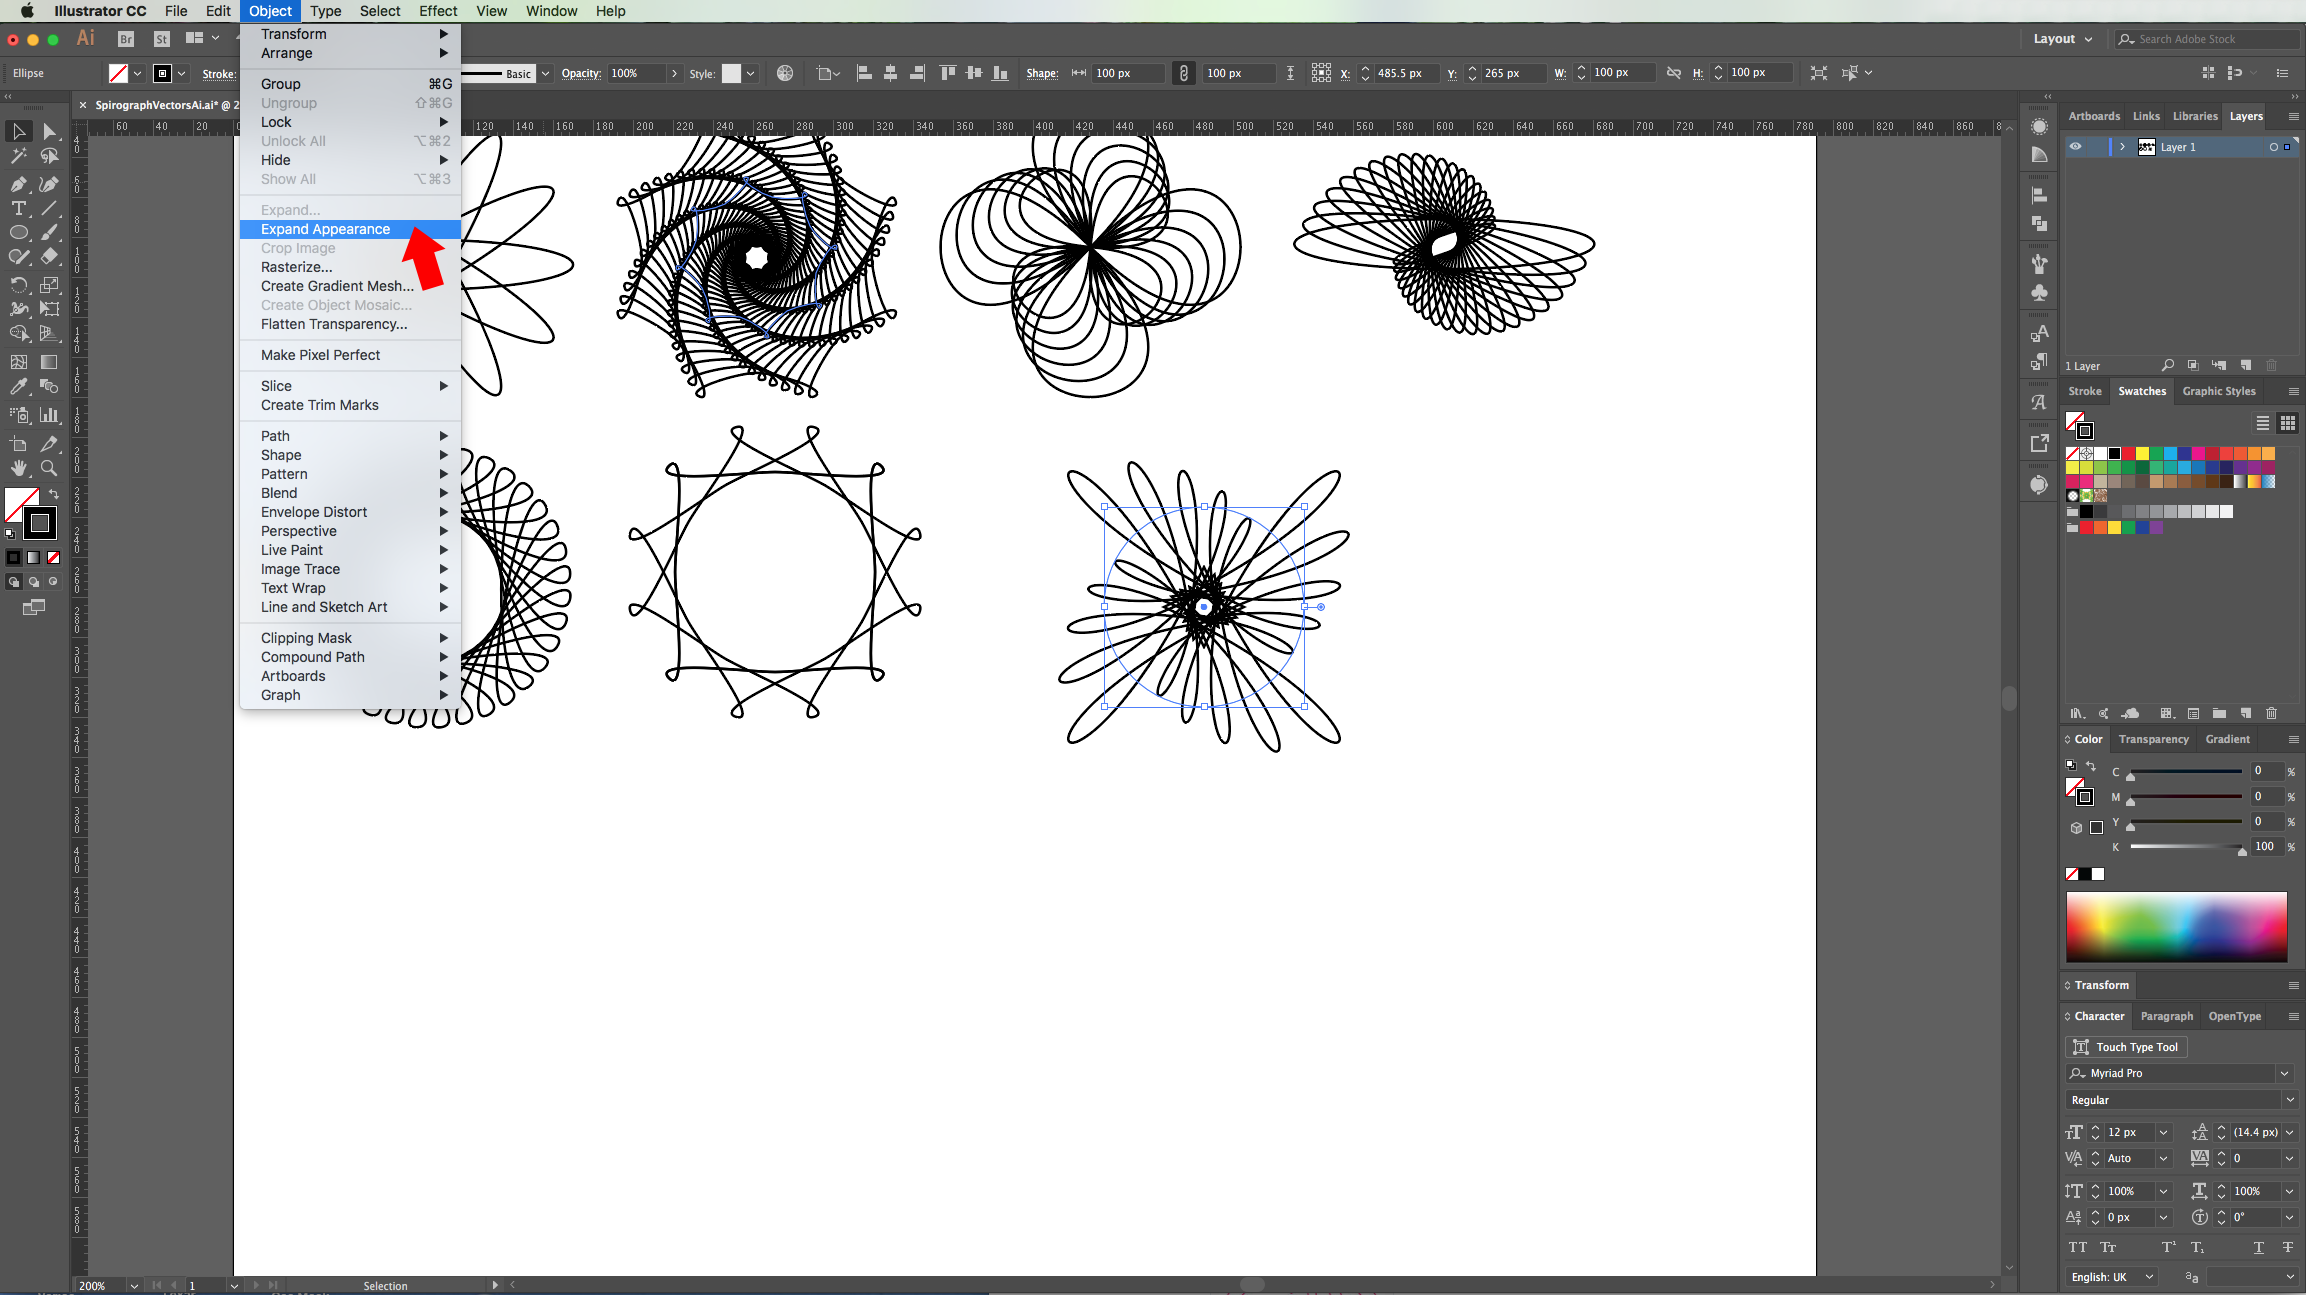
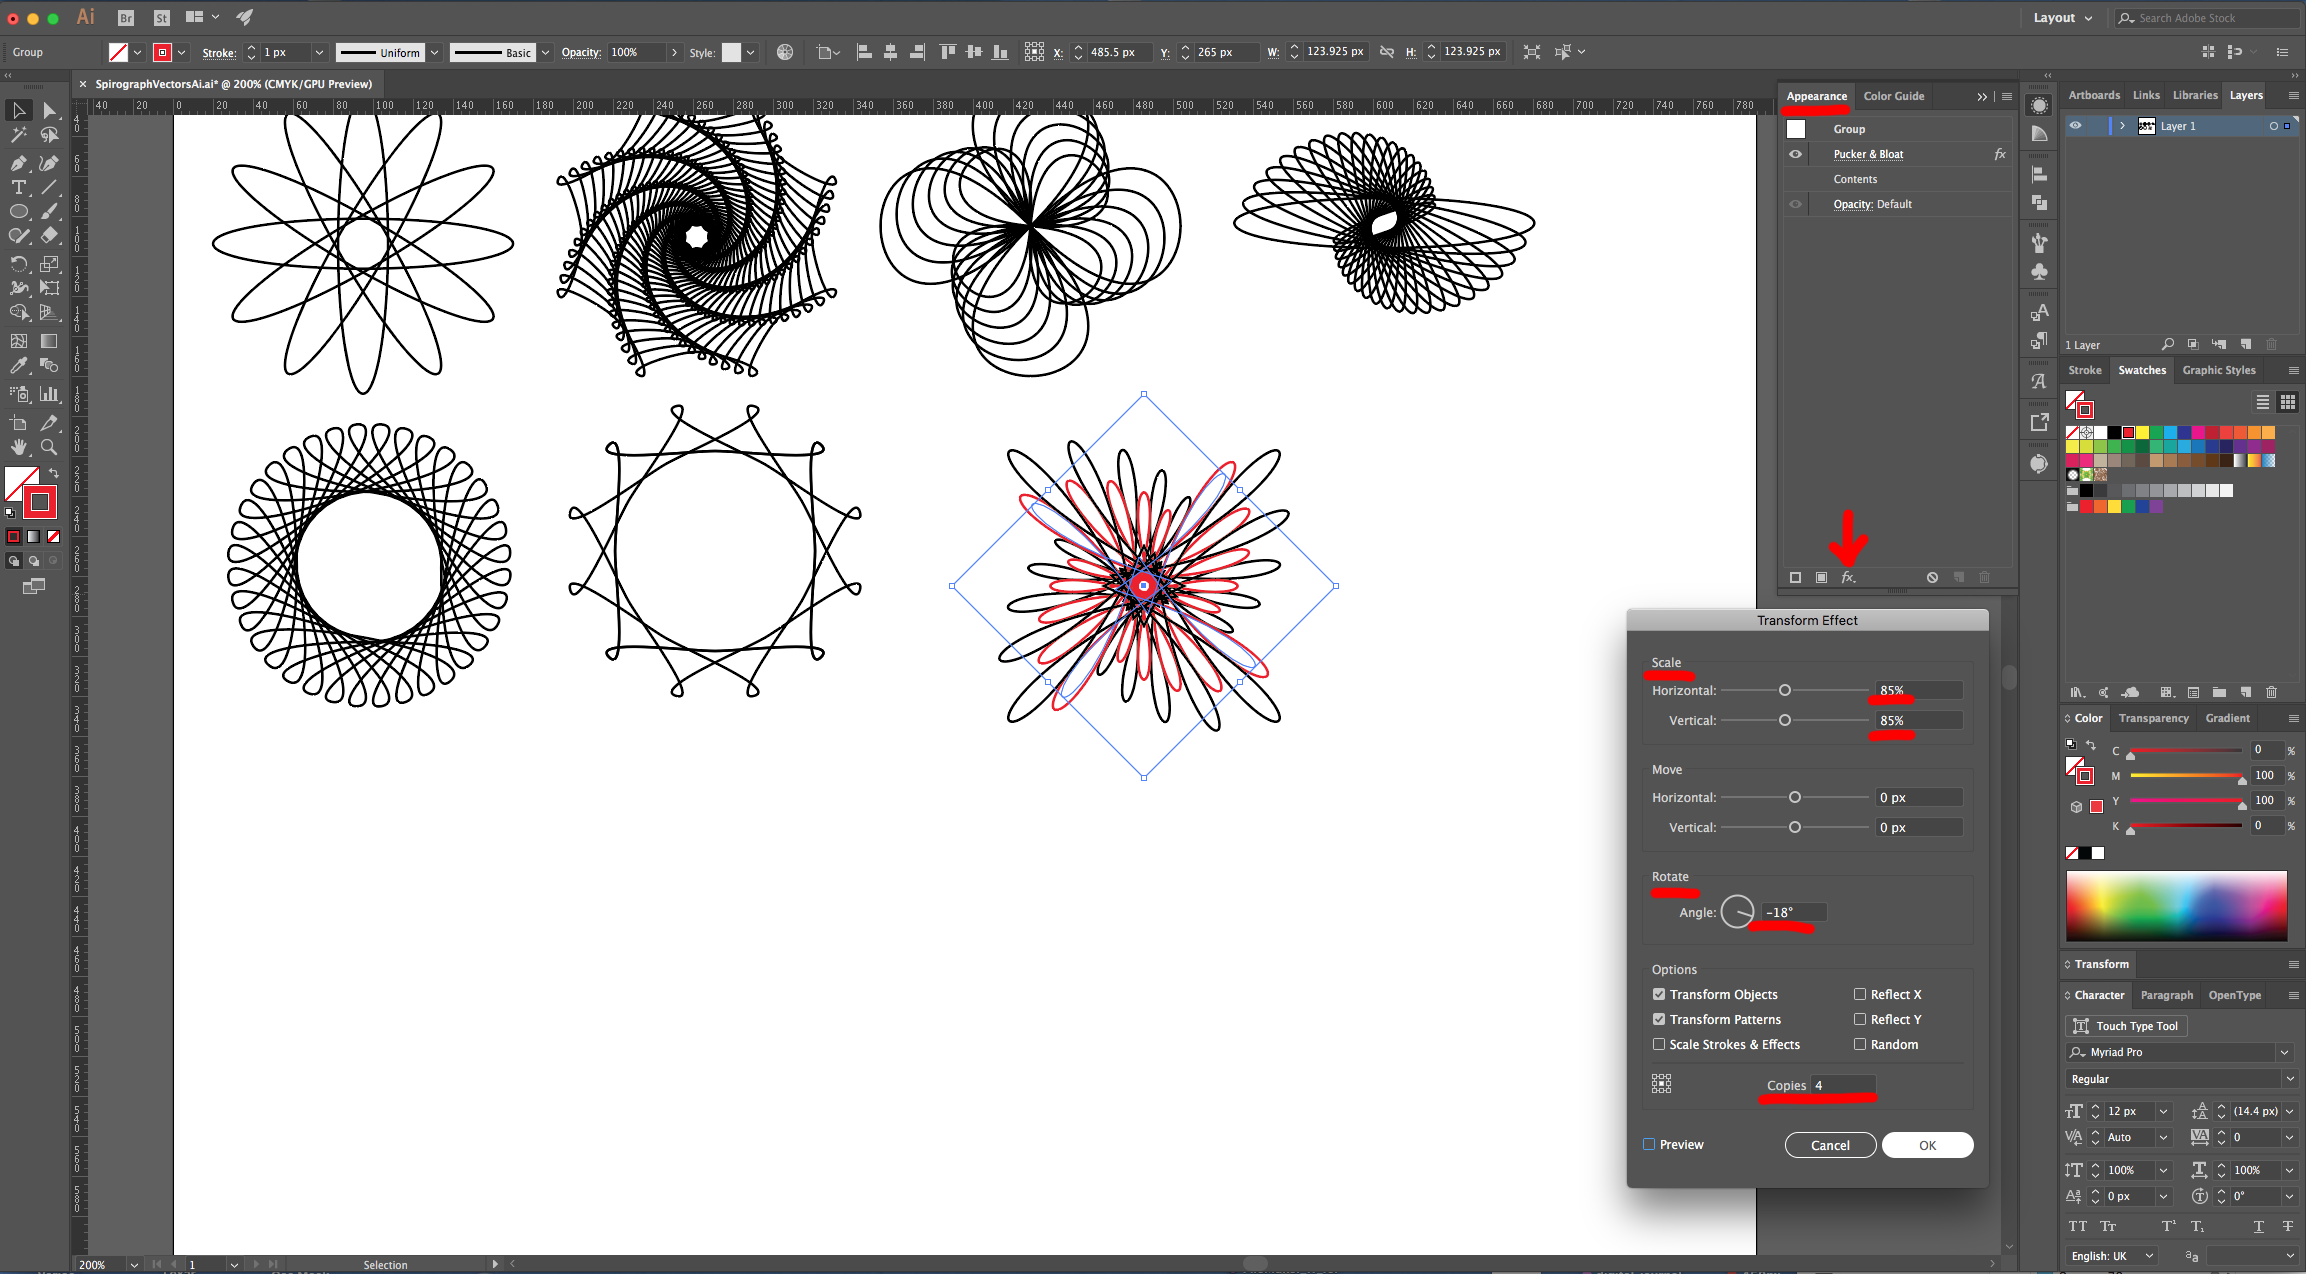
21 - Then go to Distort & Transform > Transform and use and use a “Horizontal and “Vertical Scale” of 85%, a “Rotate Angle” of -18° and make 4 “Copies”. Click “OK”. Then go to Object > Expand Appearance.
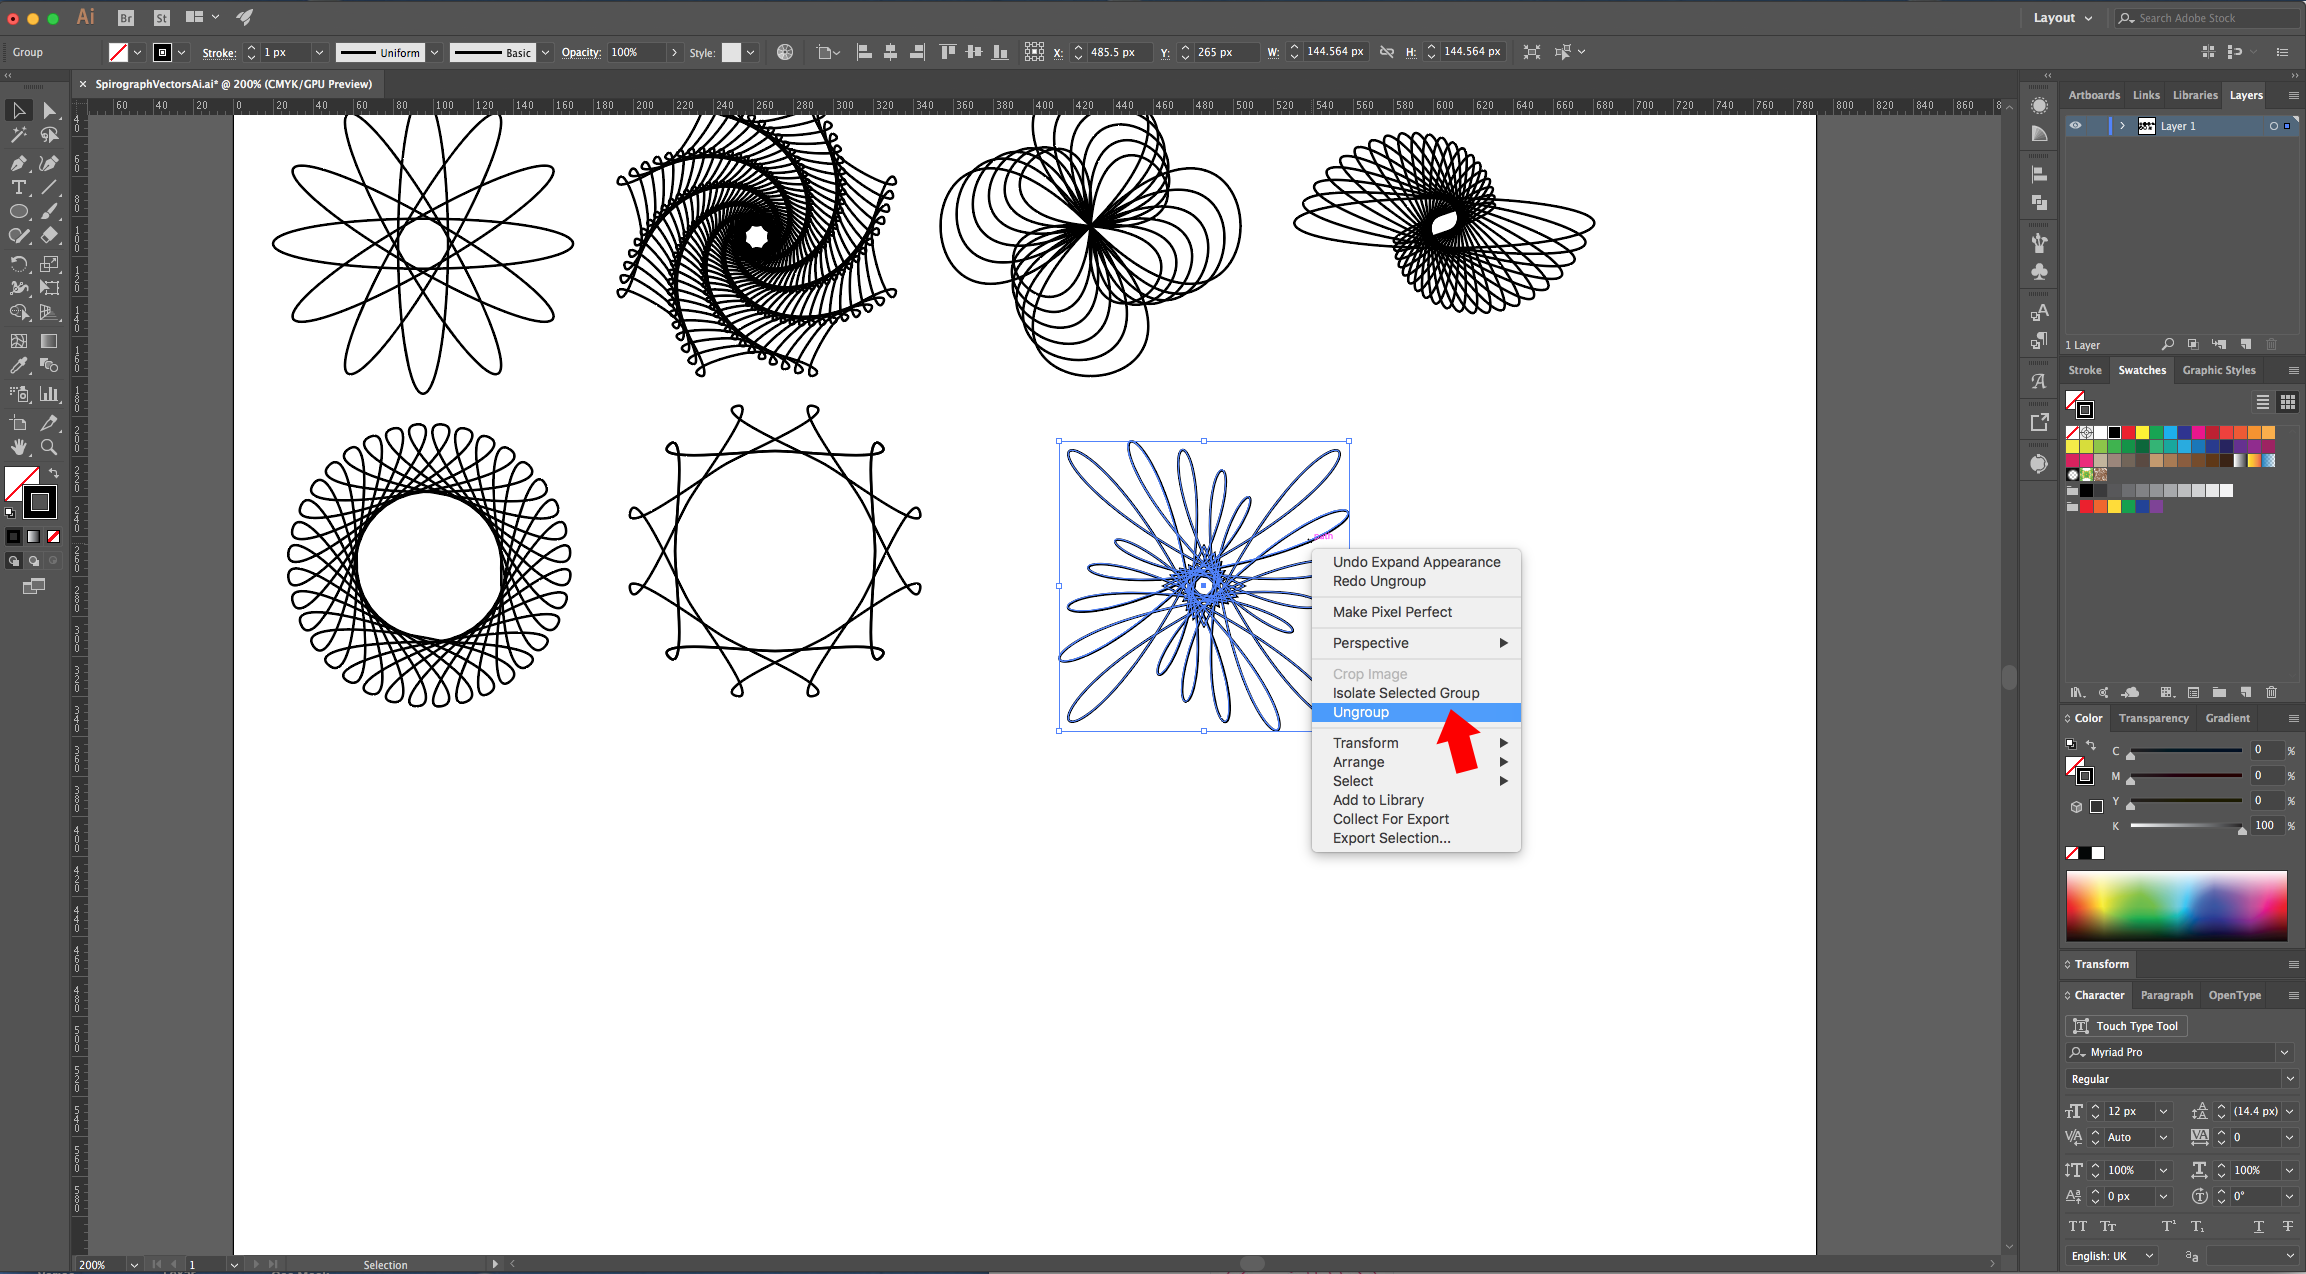
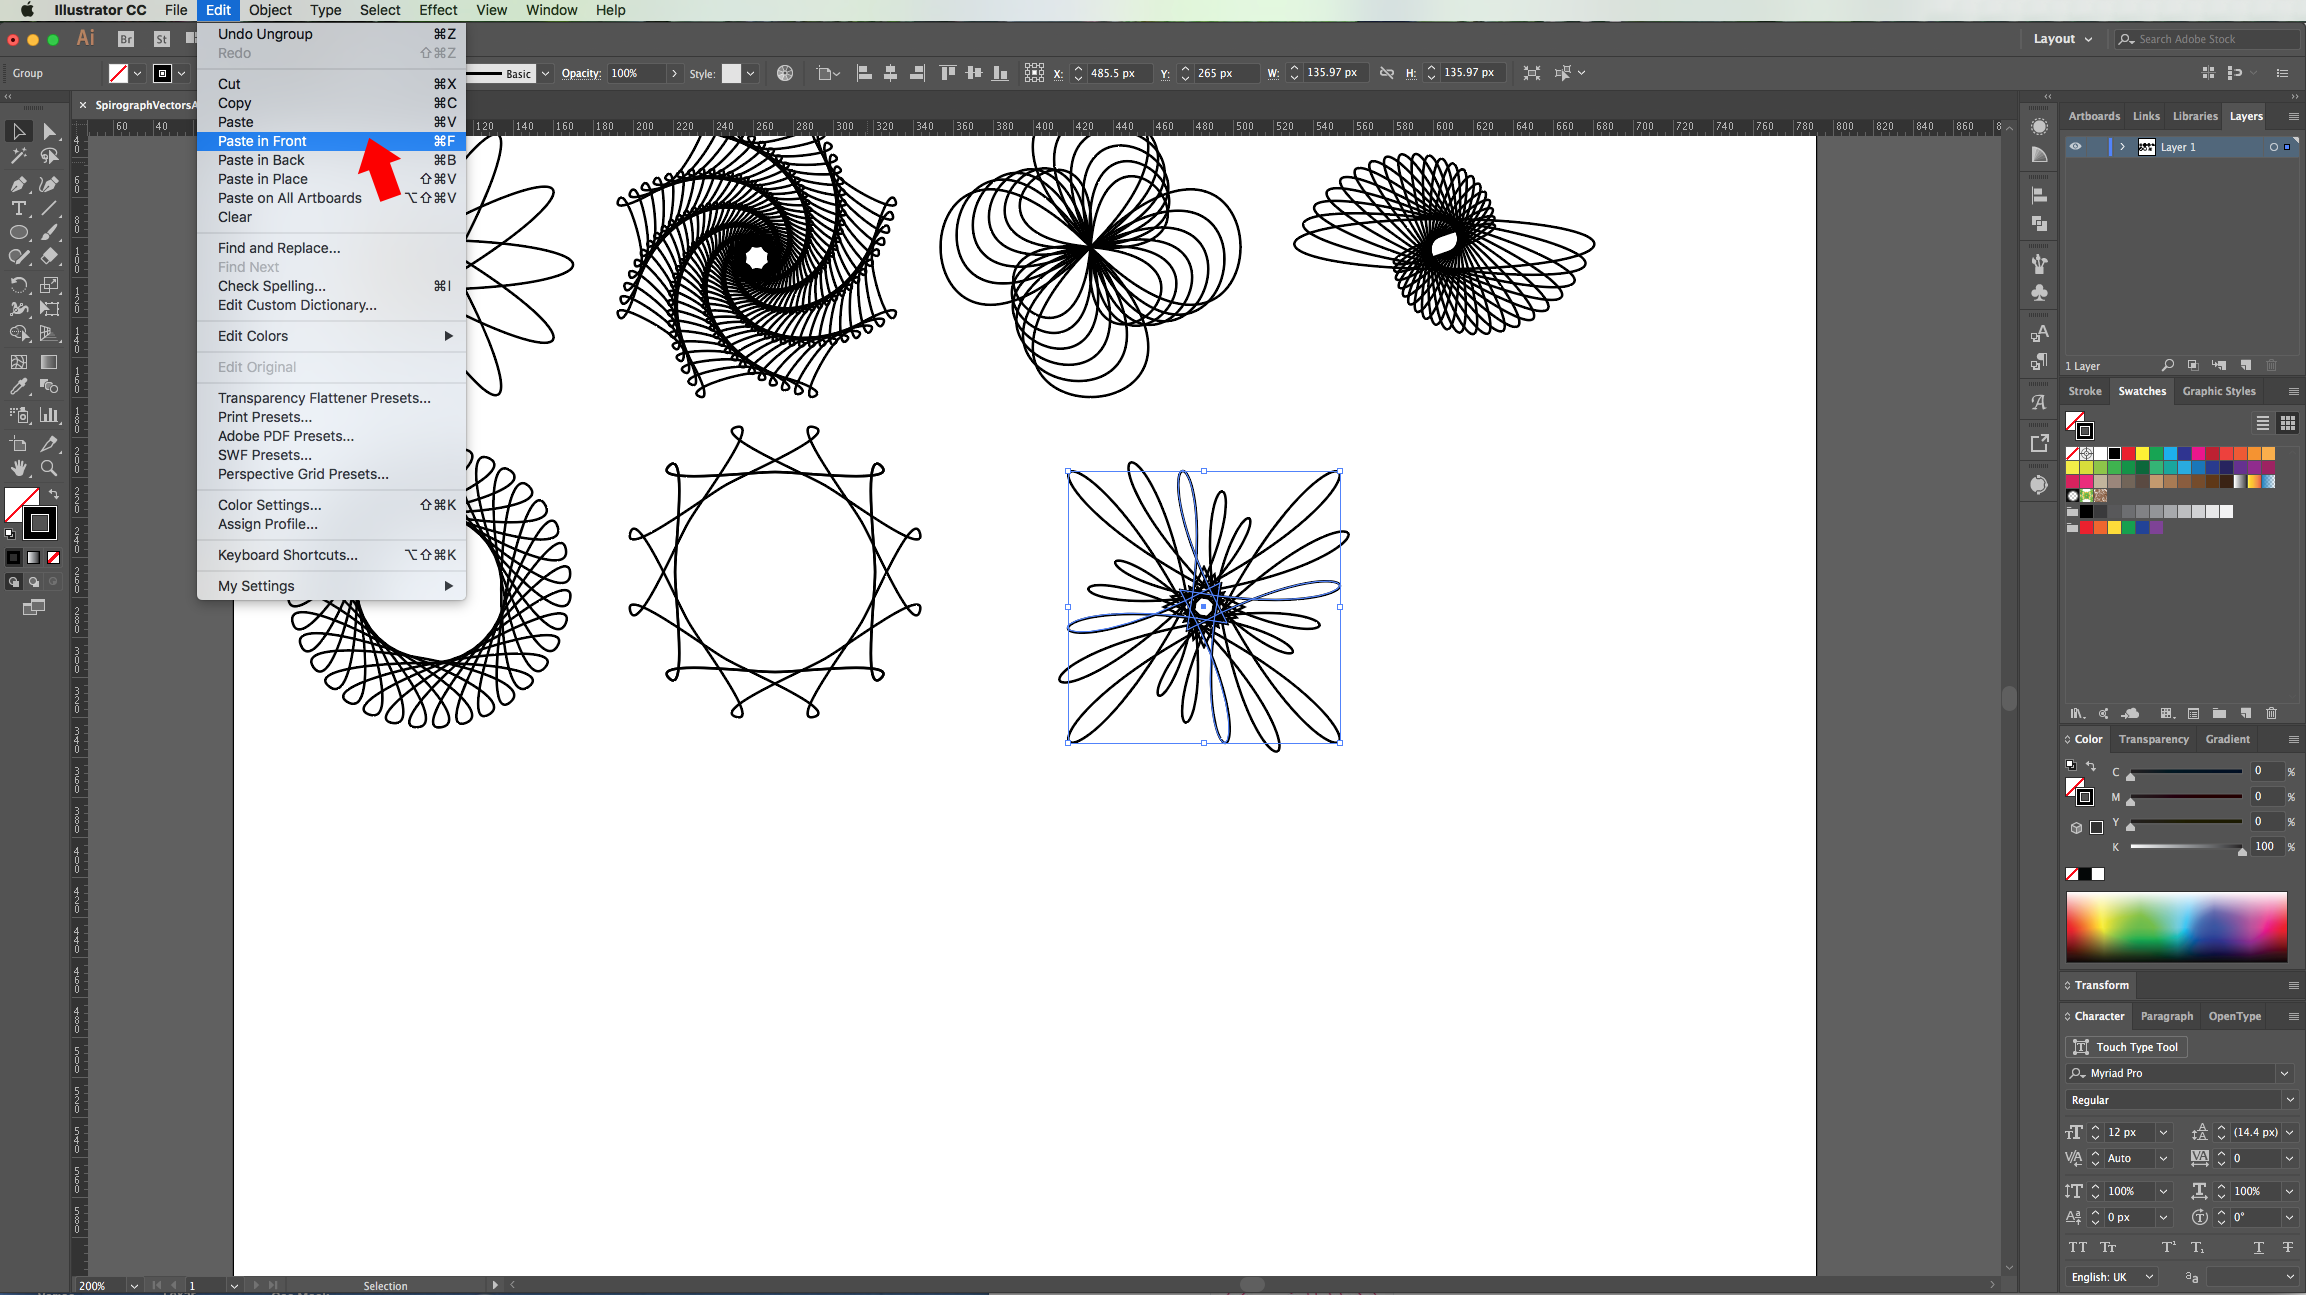
22 - Right-click on top and choose “Ungroup” (Command/Control + U). “Copy” one of your Paths (Command/Control + C) and “Paste in Front” (Command/Control + F).
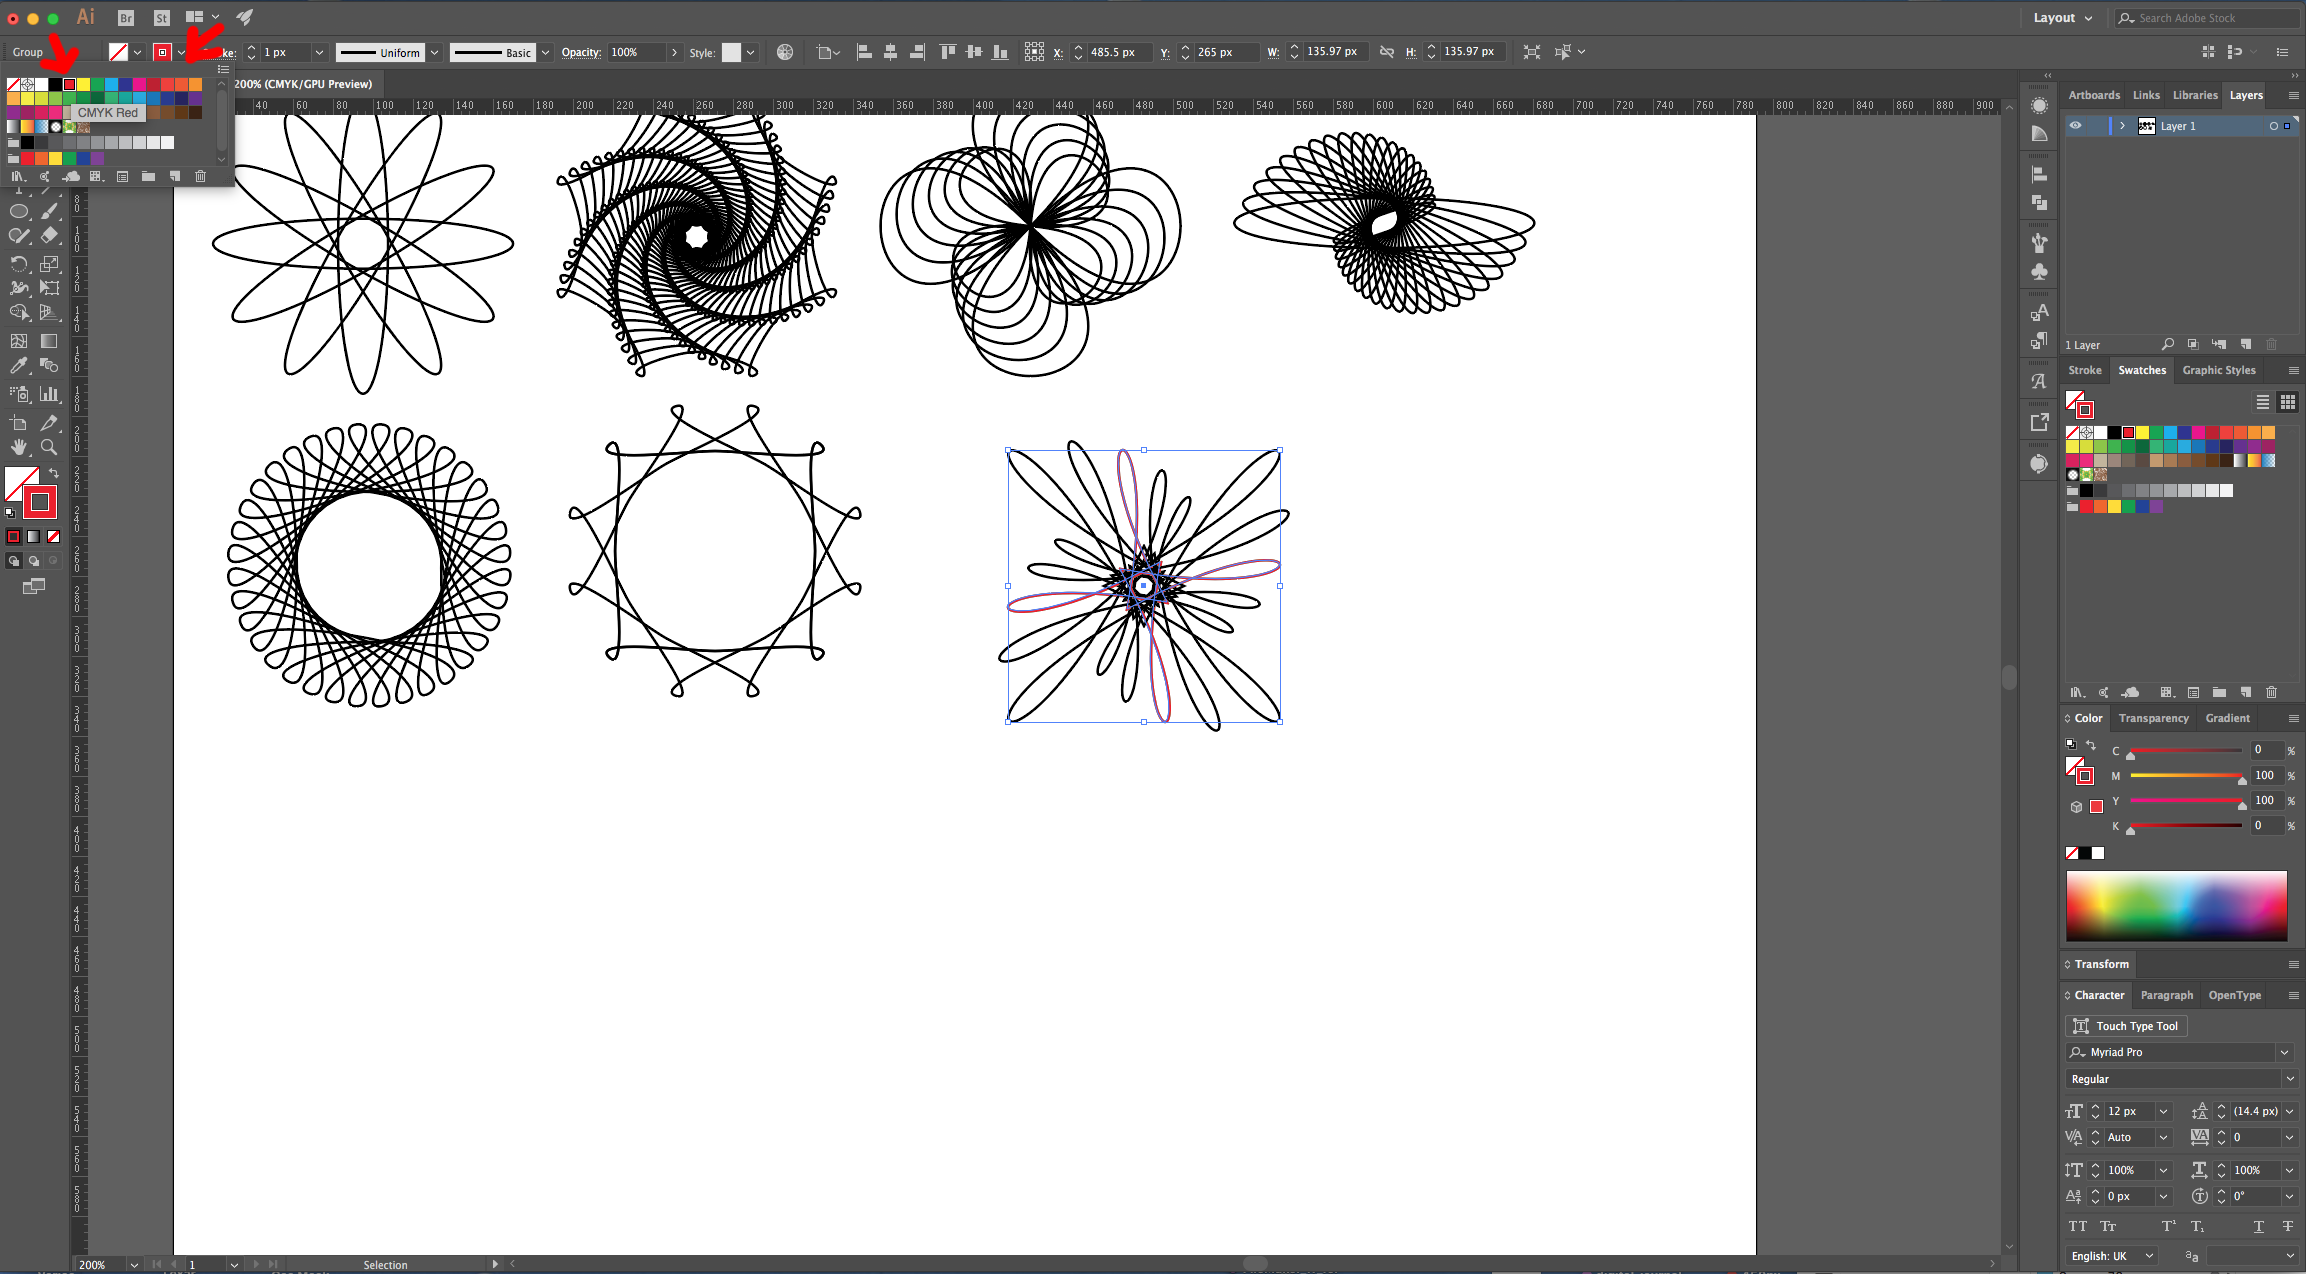
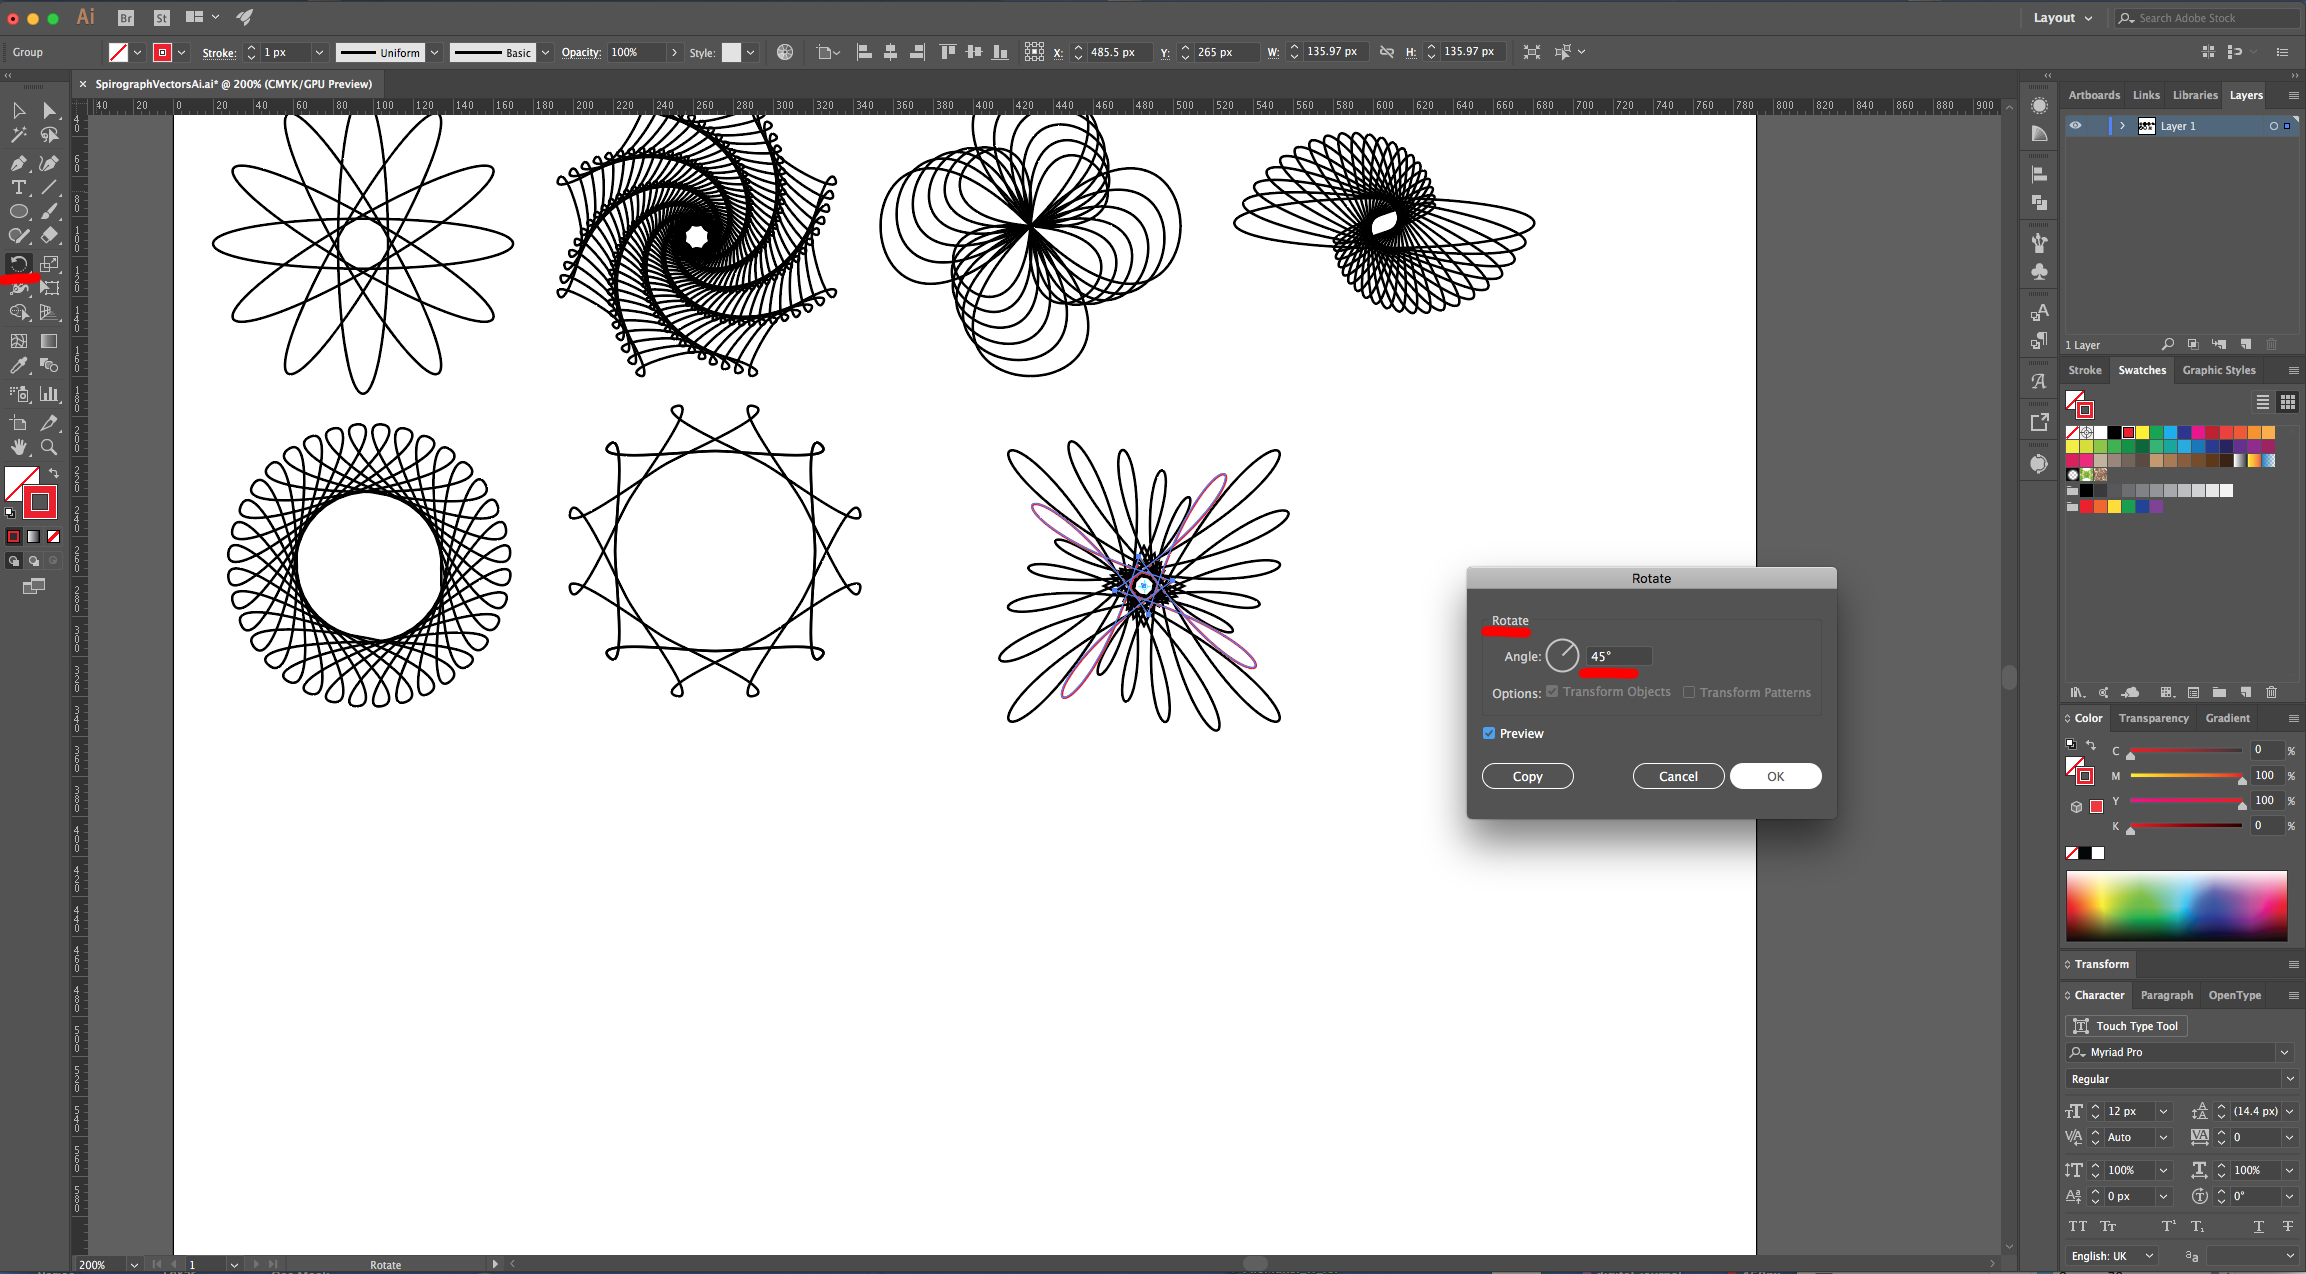
23 - Change the “Stroke” color to Red (or any other color) in the “Swatches Panel”. double-click on the “Rotate Tool” (R) on the Toolbox to open the dialog and use a 45° Angle. Click “OK”. Then go to Distort & Transform > Transform and use and use a “Horizontal and “Vertical Scale” of 85%, a “Rotate Angle” of -18° and make 4 “Copies”. Click “OK”.
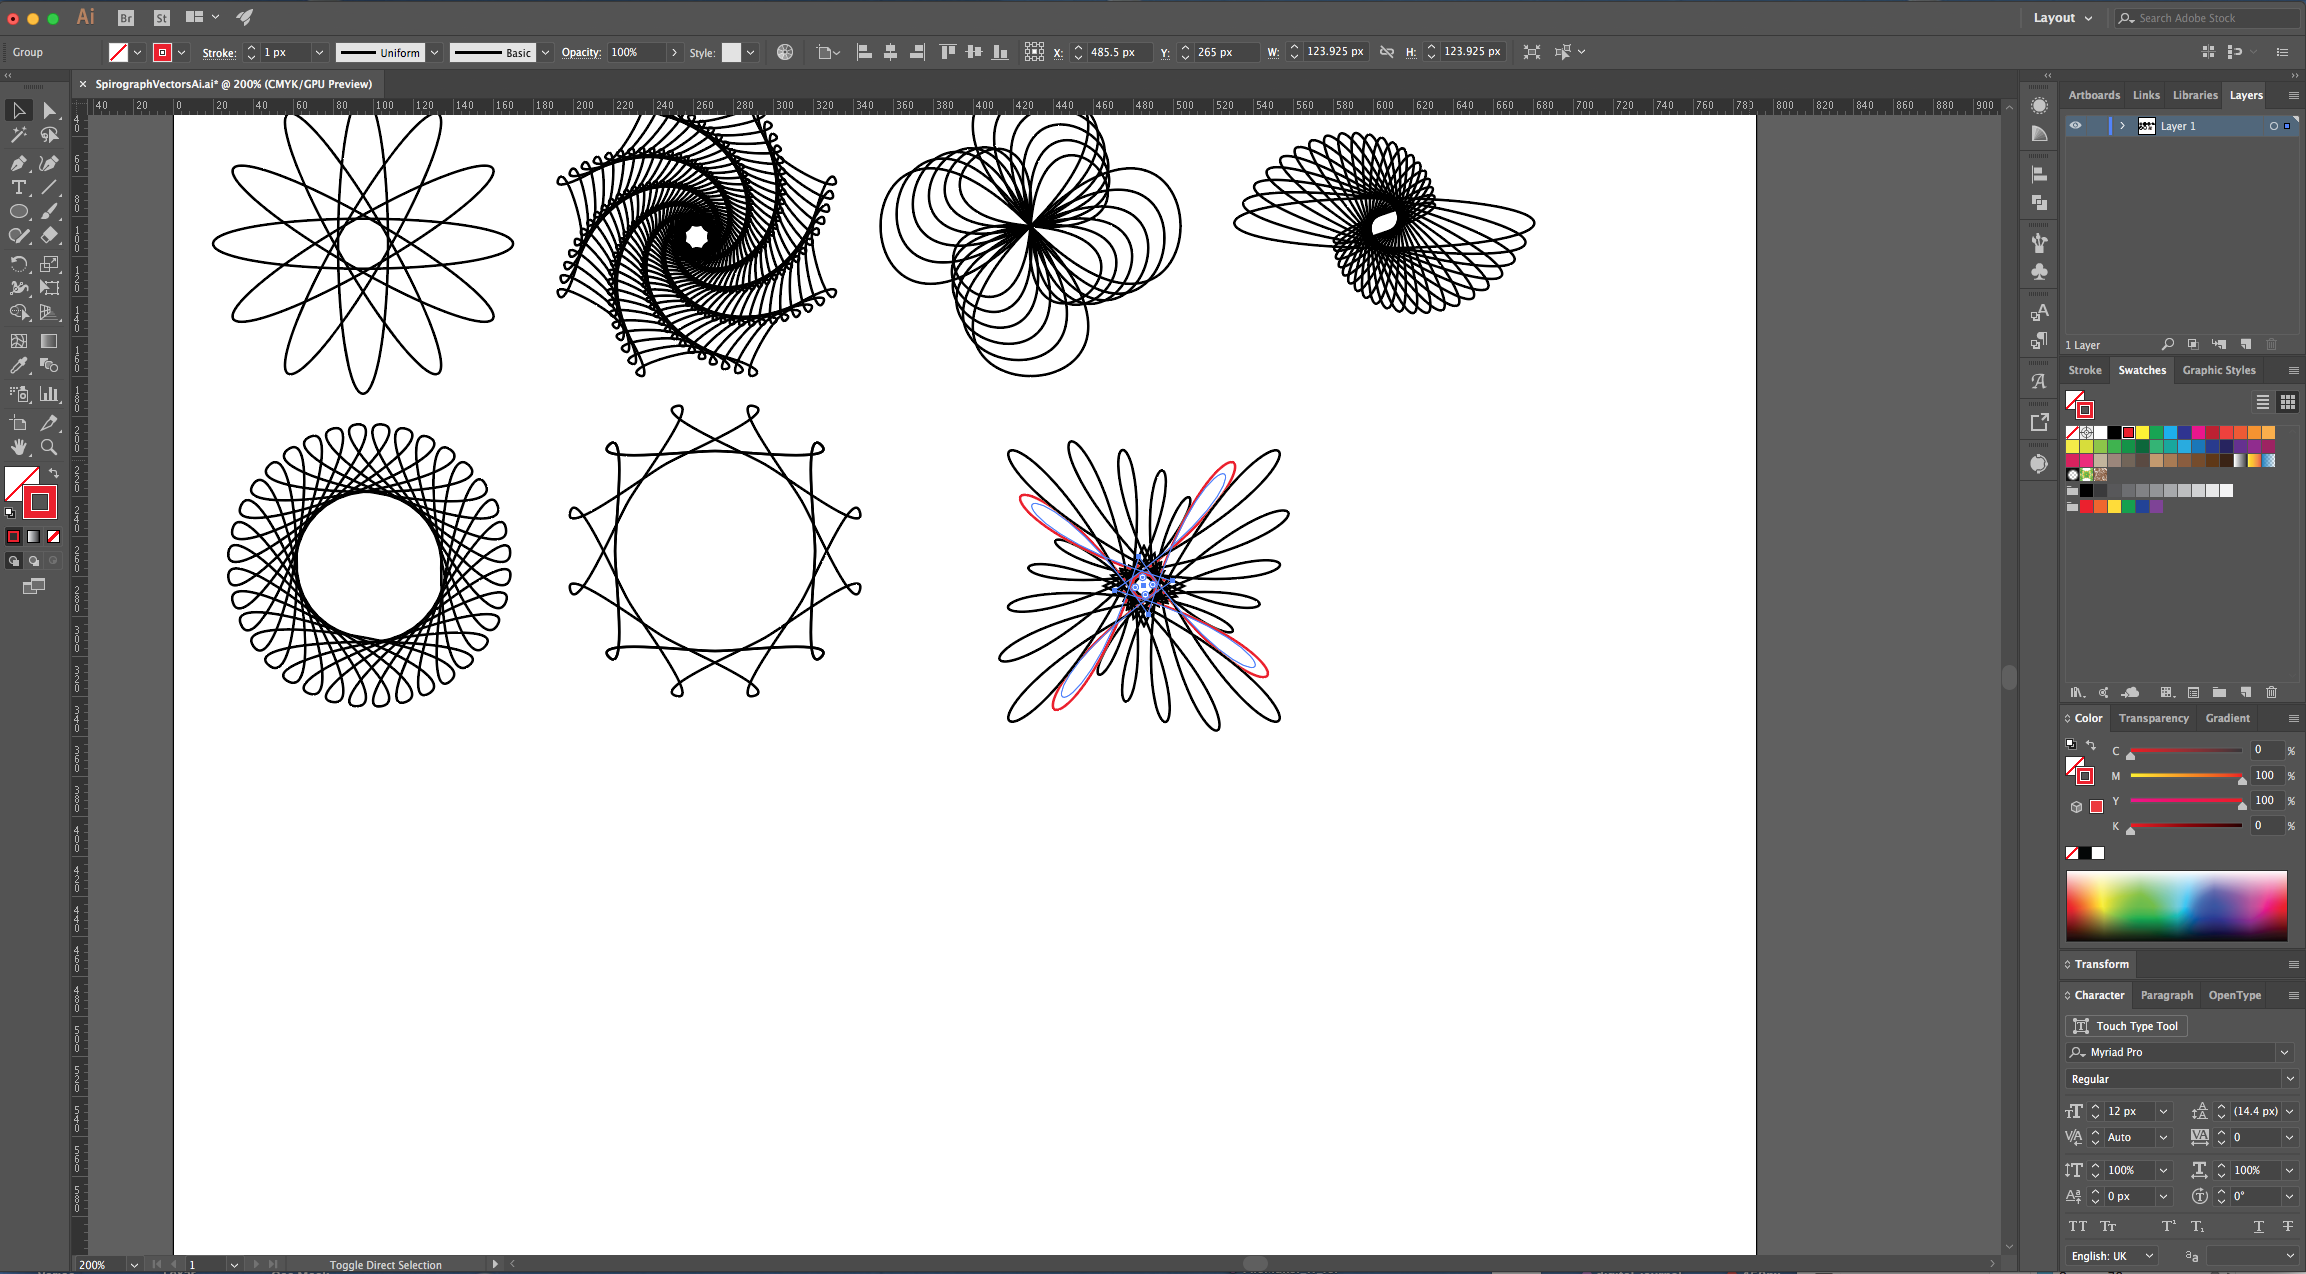
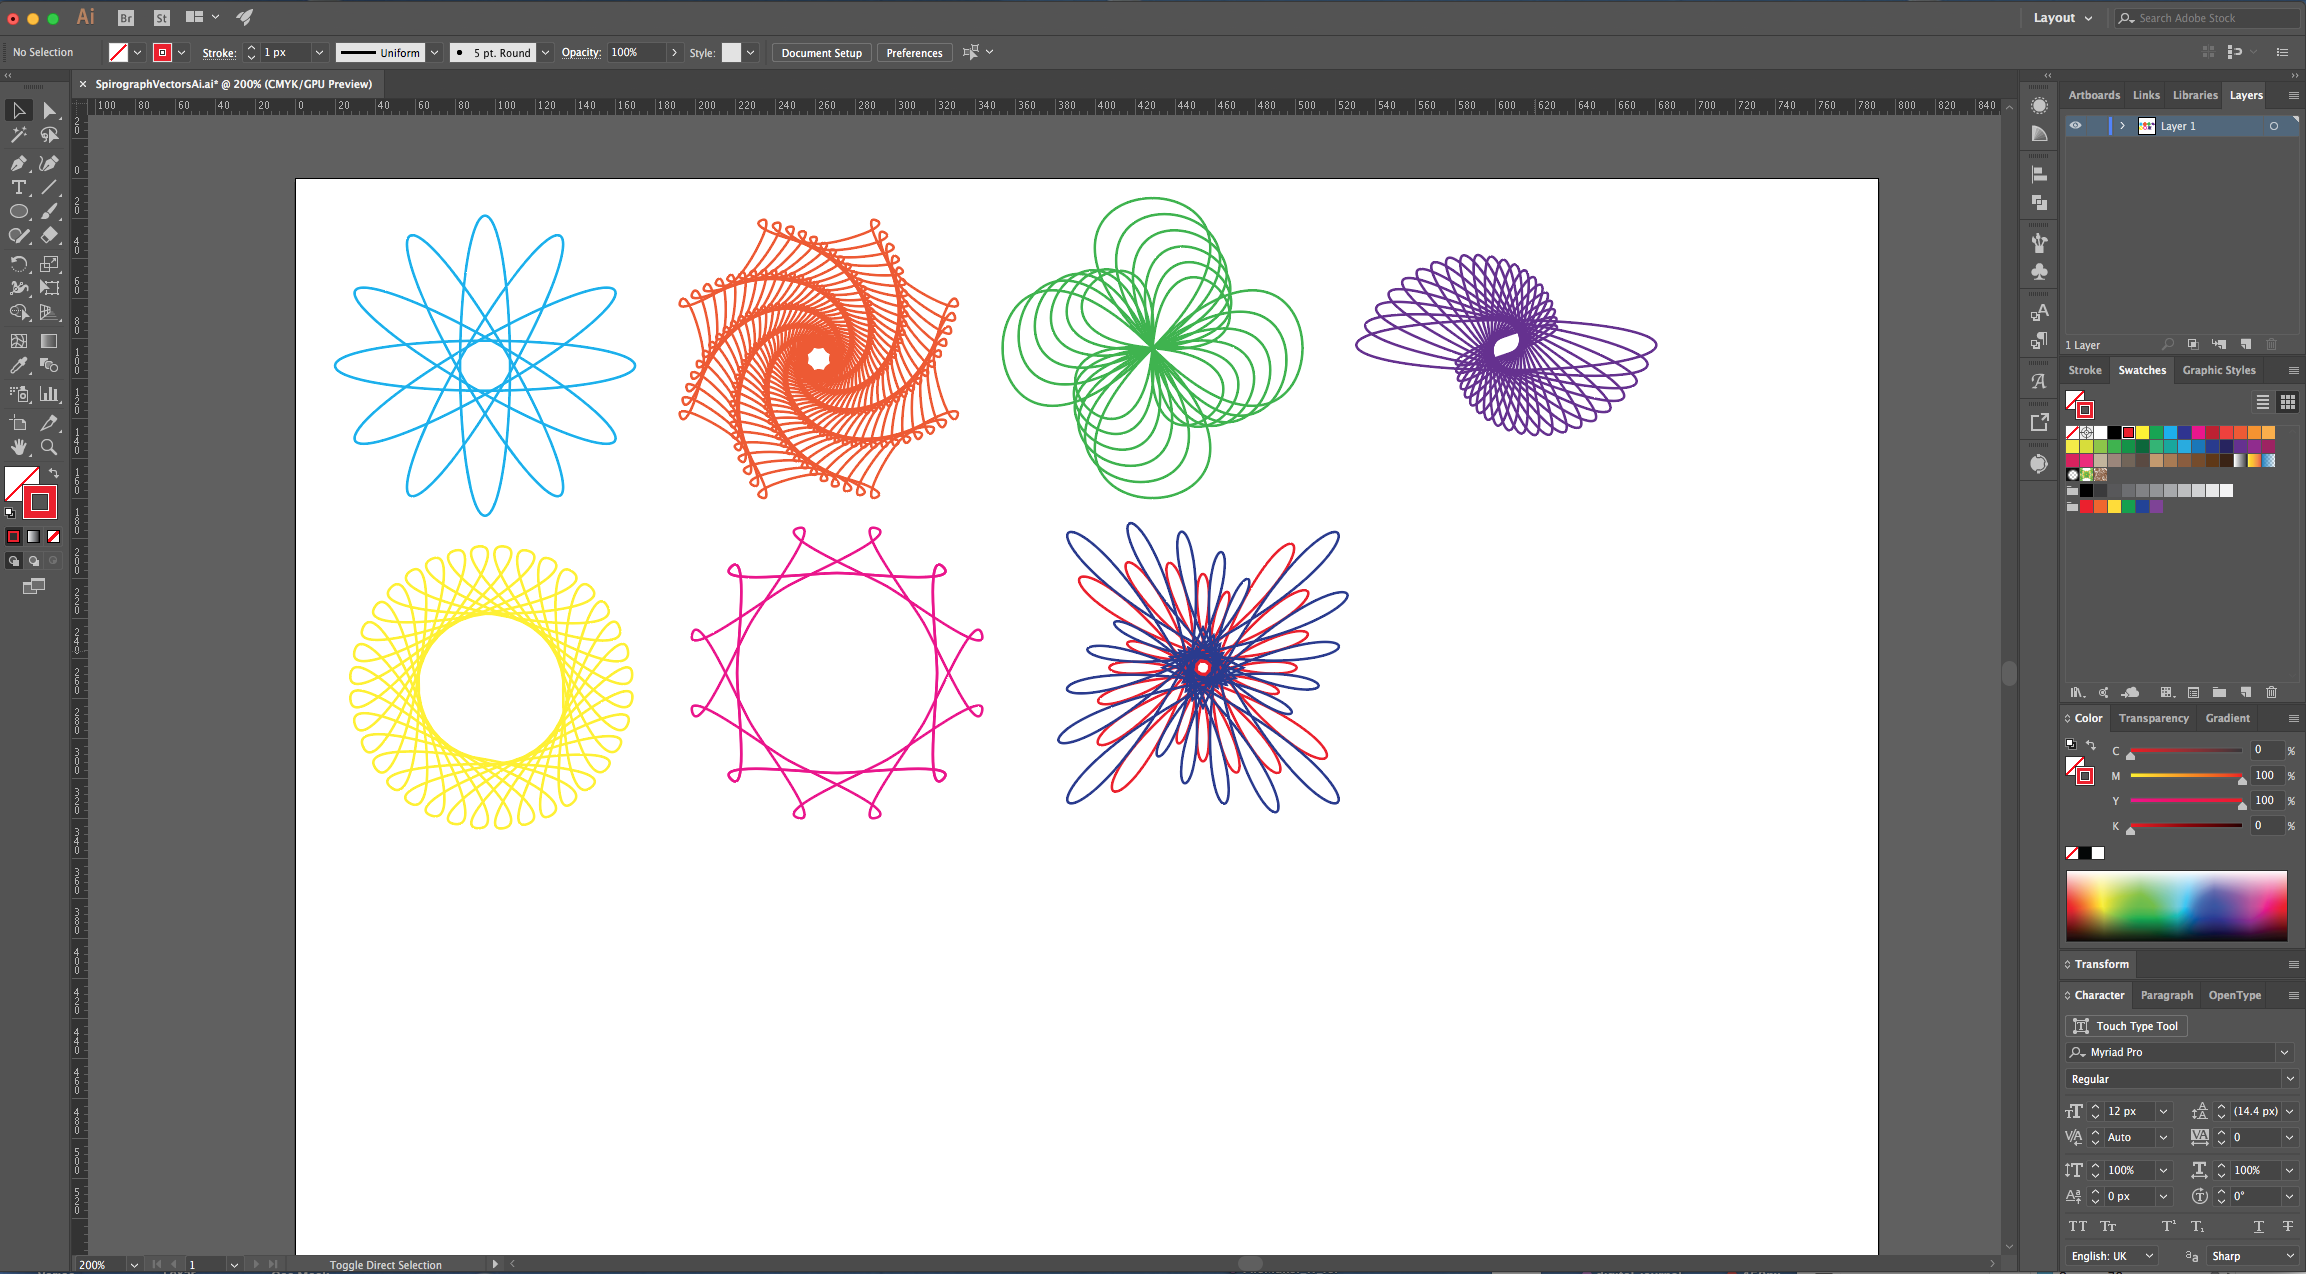
24 - Select each Shape and give it a different color. Now you can overlap a couple of them making their centers coincide and create multiple “Spirograph” designs.
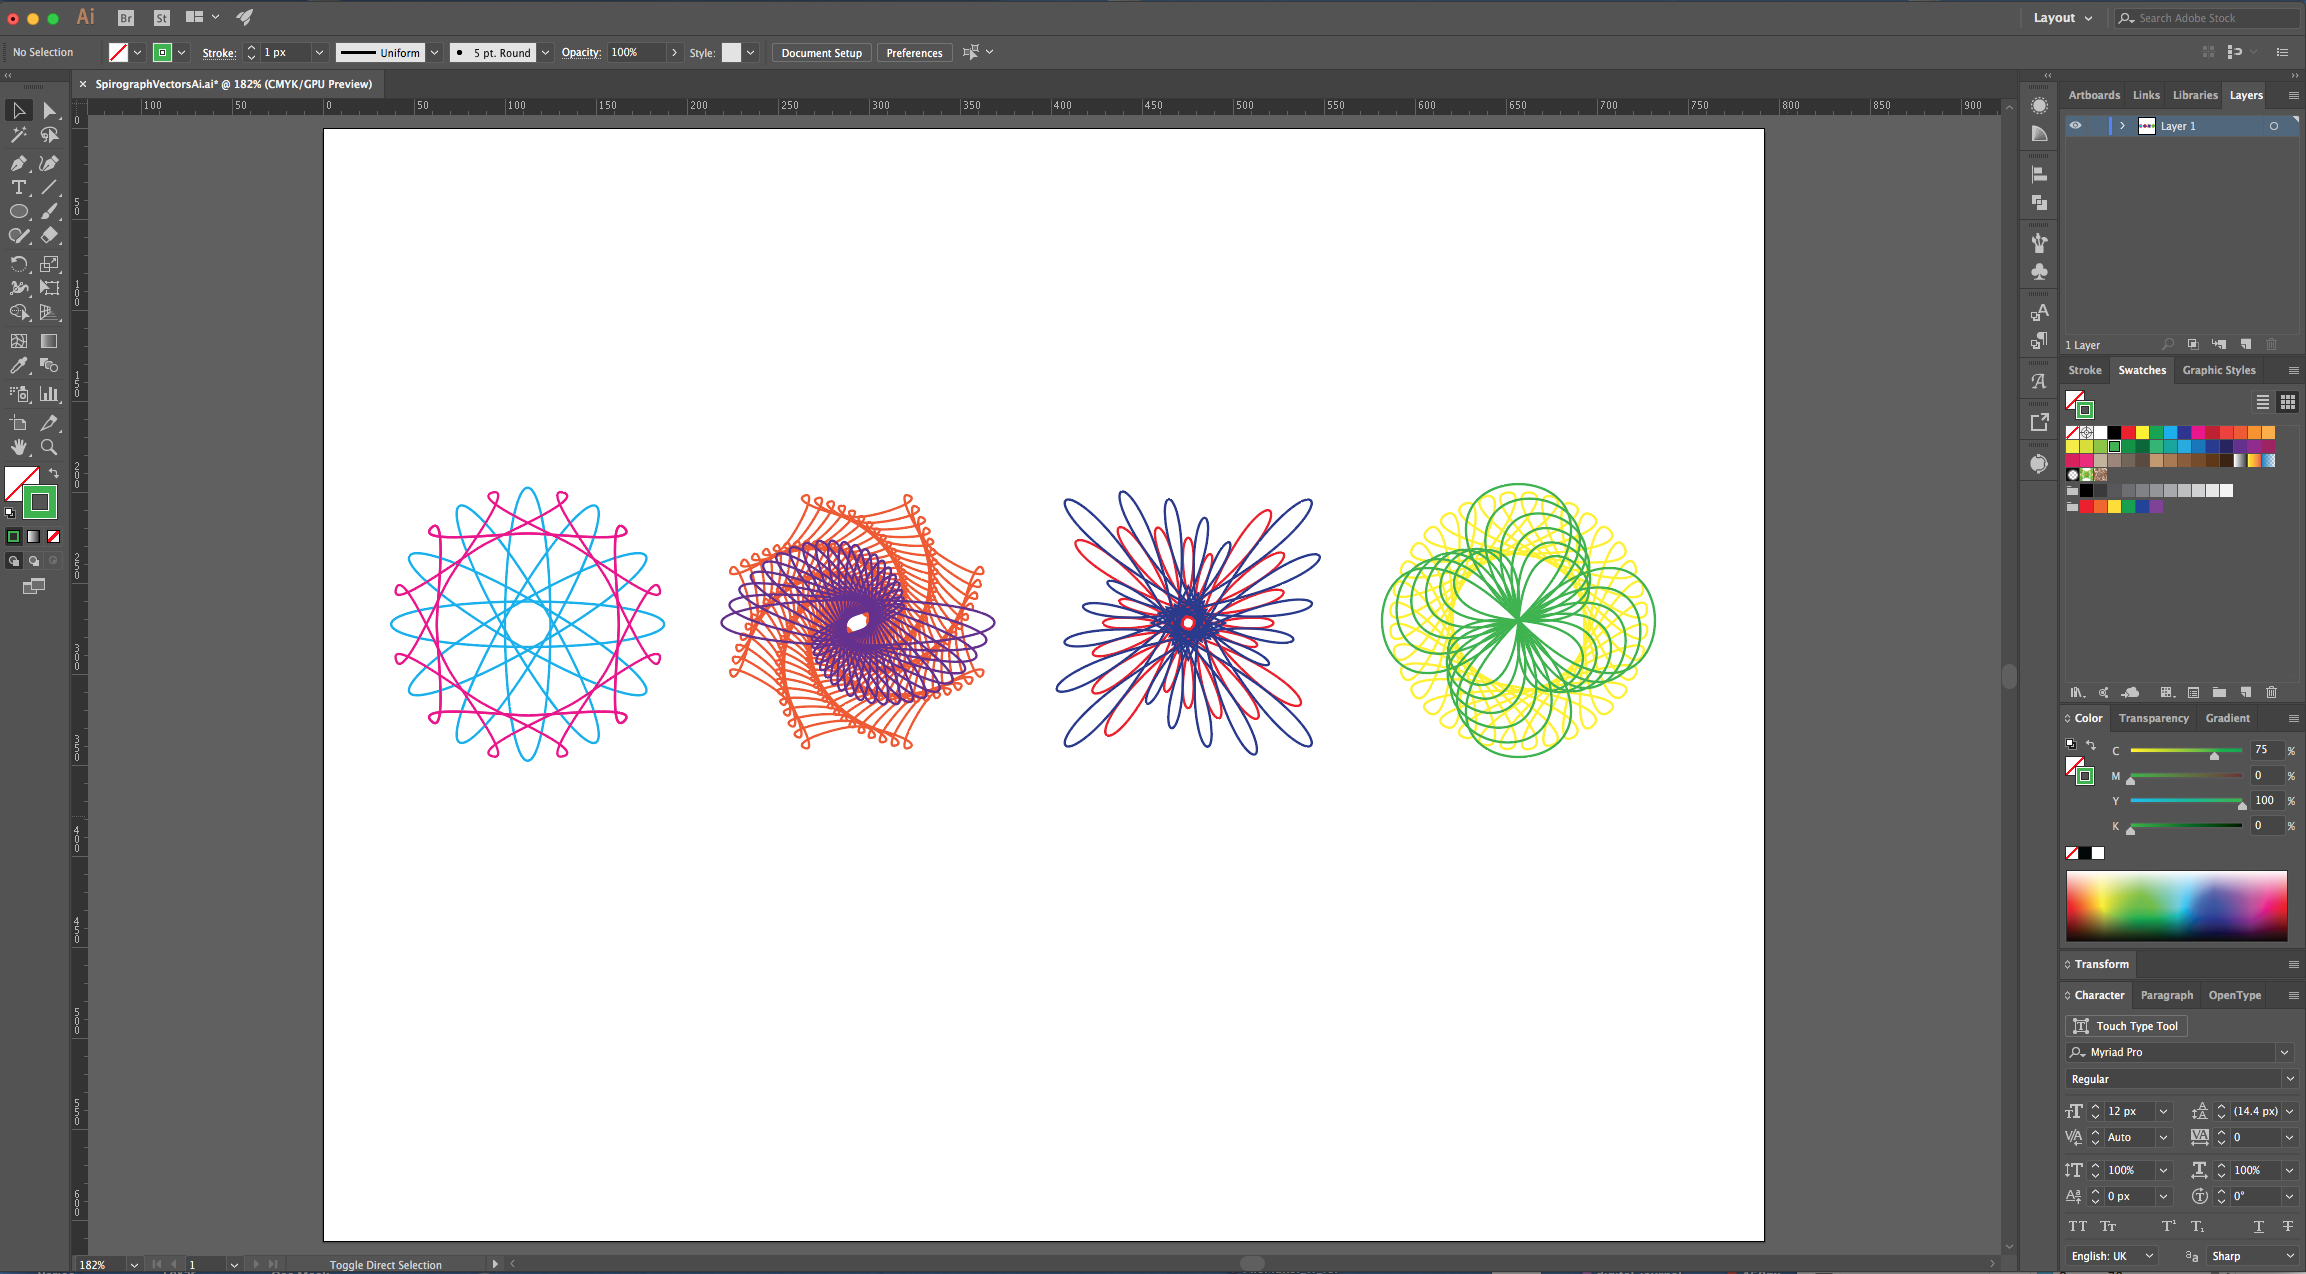
2 - Go to Illustrator > Preferences > General and make sure that the “Scale Strokes & Effects” is not checked.
3 - Select the “Ellipse Tool” (L) click inside of your Canvas and input a “Width” of 150 px and a “Height” of 25 px.
4 - Go to Object > Transform > Transform Each and use a “Rotate Angle” of 30°. Click “Copy” instead of “OK”.
5 - Go to Object > Transform Again (Command/Control + D) to repeat the transformation. Do this other 4 times to complete the circle. Select everything, right-click on top and choose “Group” (Command/Control + G).
6 - Select the “Star Tool”, click inside of your Canvas and input a “Radius 1” of 50 px a “Radius 2” of 75 px and 8 “Points”.
7 - Use the “Direct Selection Tool” (A) (+ “Shift” key) to select the “Anchor Points” that are on the outside of the Star. Click on the “Convert Selected Anchor Points to Smooth” button on the left side of the Top Menu, then deselect and select the ones on the inside of the Star and “Smooth” them too.
8 - With the “Direct Selection Tool” (A) select one of the Outside Anchor Points, double-click on the “Rotate Tool” (R) on the Toolbox to open the dialog and use a 180° Angle. Click “OK”. Repeat with the rest of the Outside Anchor Points.
9 - Now, with the “Direct Selection Tool” (A) select the Inside Anchor Points, double-click on the “Scale Tool” (S) on the Toolbox to open the dialog and use apply an “Uniform Scale” of 115%.
10 - Go to Object > Transform > Transform Each and use a “Horizontal and “Vertical Scale” of 95% and a “Rotate Angle” of -5°. Click “Copy” instead of “OK”. Repeat as many times as you like with Command/Control + D to create a Pattern. Right-click on top and choose “Group” (Command/Control + G).
11 - Select the “Rectangle Tool” (R), click inside of your Canvas and input a “Width” and px and “Height” of 100 px.
12 - Go to the “Appearance Panel”, click on the “Effects Menu” on the Bottom-Left side and navigate to Distort & Transform > Pucker & Bloat… and use a value of 100%. Click “OK” and then go to Object > Expand Appearance. Apply another “Effect” but this time choose Distort & Transform > Transform and use and use a “Horizontal and “Vertical Scale” of 90%, a “Rotate Angle” of -10° and make 5 “Copies”. Click “OK”.
13 - Select the “Ellipse Tool” (L) click inside of your Canvas and input a “Width” of 150 px and a “Height” of 25 px. Go to the “Appearance Panel”, click on the “Effects Menu” on the Bottom-Left side and navigate to Distort & Transform > Transform and use and use a “Horizontal and “Vertical Scale” of 95%, a “Rotate Angle” of -8° and make 20 “Copies”. Click “OK”.
14 - Select the “Rectangle Tool” (R), click inside of your Canvas and input a “Width” and px and “Height” of 100 px. With the “Direct Selection Tool” (A) select the two top Anchor Points, click on the “Convert Selected Anchor Points to Smooth” button on the left side of the Top Menu, then deselect and select the ones on the bottom of the square and “Smooth” them too.
15 - With the “Direct Selection Tool” (A) select one of the Anchor Points, double-click on the “Rotate Tool” (R) on the Toolbox to open the dialog and use a 180° Angle. Click “OK”. Repeat with the rest of the Outside Anchor Points.
16 - Go to the “Appearance Panel”, click on the “Effects Menu” on the Bottom-Left side and navigate to Distort & Transform > Transform and use and use a “Rotate Angle” of 10° and make 8 “Copies”. Click “OK”.
17 - Select the “Star Tool”, click inside of your Canvas and input a “Radius 1” of 50 px a “Radius 2” of 75 px and 4 “Points”. With the “Direct Selection Tool” (A) select the top and middle Anchor Points, click on the “Convert Selected Anchor Points to Smooth” button on the left side of the Top Menu, then deselect and select the ones on the bottom of the square and “Smooth” them too.
18 - With the “Direct Selection Tool” (A) select one of the Anchor Points, double-click on the “Rotate Tool” (R) on the Toolbox to open the dialog and use a 180° Angle. Click “OK”. Repeat with the rest of the Outside Anchor Points.
19 - Go to the “Appearance Panel”, click on the “Effects Menu” on the Bottom-Left side and navigate to Distort & Transform > Transform and use and use a “Rotate Angle” of 30° and make 3 “Copies”. Click “OK”.
20 - Select the “Ellipse Tool” (L) click inside of your Canvas and input a “Width” and “Height” of 100 px. Go to the “Appearance Panel”, click on the “Effects Menu” on the Bottom-Left side and navigate to Distort & Transform > Pucker & Bloat… and use a value of 140%. Click “OK”.
21 - Then go to Distort & Transform > Transform and use and use a “Horizontal and “Vertical Scale” of 85%, a “Rotate Angle” of -18° and make 4 “Copies”. Click “OK”. Then go to Object > Expand Appearance.
22 - Right-click on top and choose “Ungroup” (Command/Control + U). “Copy” one of your Paths (Command/Control + C) and “Paste in Front” (Command/Control + F).
23 - Change the “Stroke” color to Red (or any other color) in the “Swatches Panel”. double-click on the “Rotate Tool” (R) on the Toolbox to open the dialog and use a 45° Angle. Click “OK”. Then go to Distort & Transform > Transform and use and use a “Horizontal and “Vertical Scale” of 85%, a “Rotate Angle” of -18° and make 4 “Copies”. Click “OK”.
24 - Select each Shape and give it a different color. Now you can overlap a couple of them making their centers coincide and create multiple “Spirograph” designs.
by @lornacane
Related Tutorials
Illustrator Tutorials
How to Convert a Drawing to a Vector in Adobe Illustrator
Discover how to convert a drawing to a vector in Adobe Illustrator.
Illustrator Tutorials
Pop Art Vector Images in Illustrator
Discover how to make a pop art inspired design in Illustrator with this step by step tutorial.
Illustrator Tutorials
Flat Vector Diamonds in Illustrator
Learn how to create a simple flat vector Diamond in Illustrator.
Illustrator Tutorials
See Through Vector Window in Illustrator
Illustrator Tutorials
Vector Snowflakes in Illustrator
Illustrator Tutorials