By Design Bundles
Photoshop Tutorials7 min
Cracked Skin and White Eyes in Photoshop Part 2
For this tutorial, we will use the portrait of a person to apply this effect to. We will also use some “Cracked Dirt” and “Grunge” Textures to achieve the effect. The Tutorial is divided it in two parts, "Part 1" shows how to create "Cracked Skin".
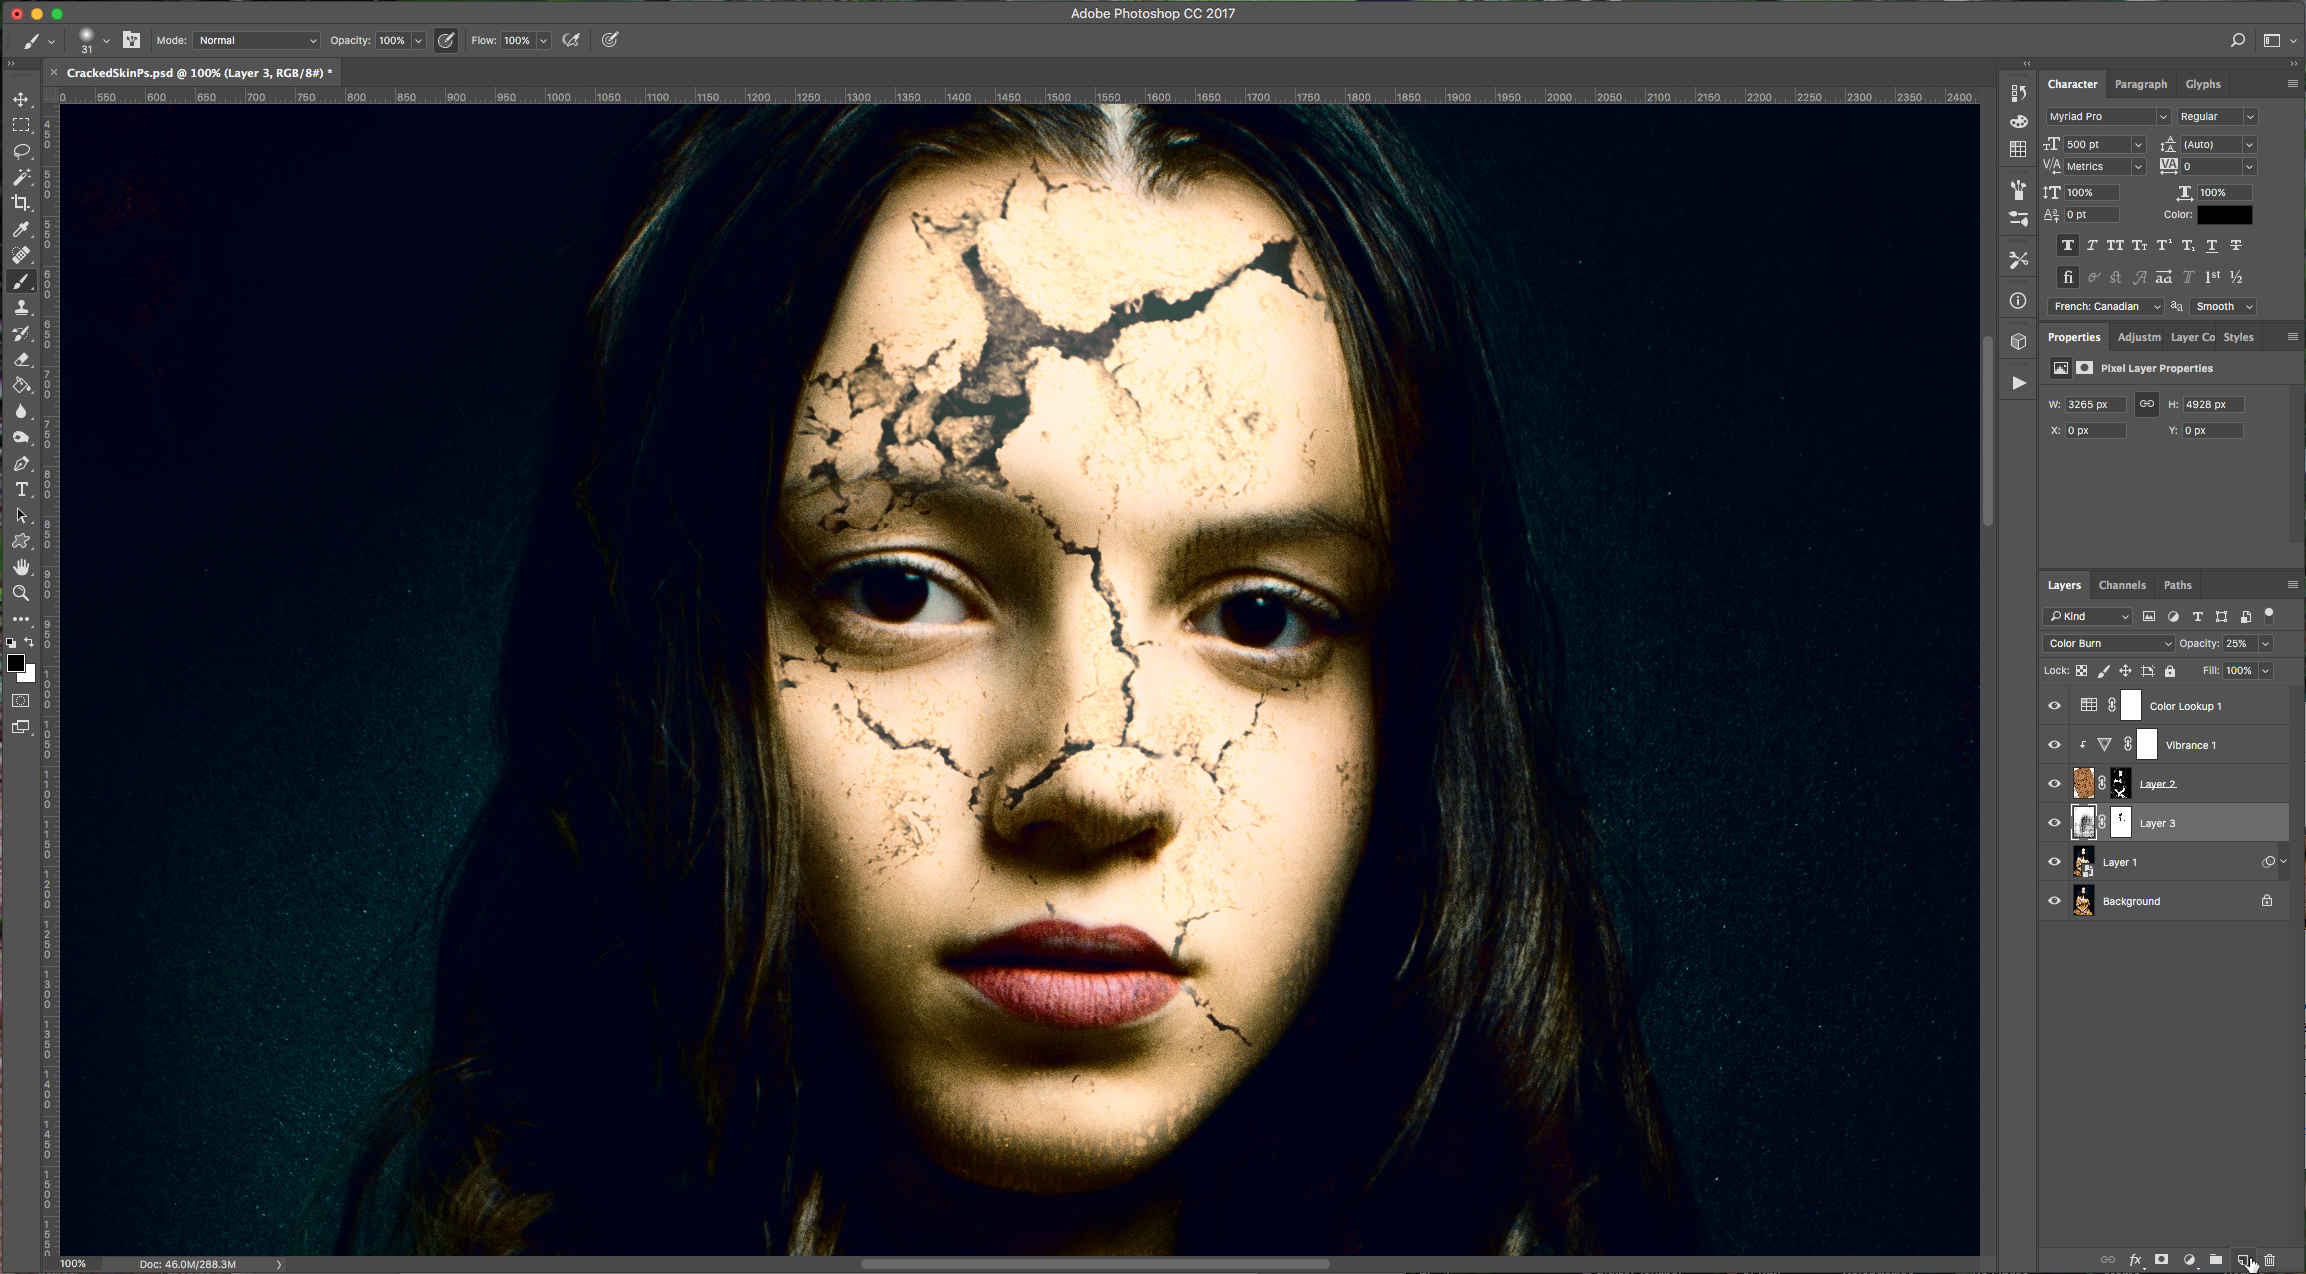
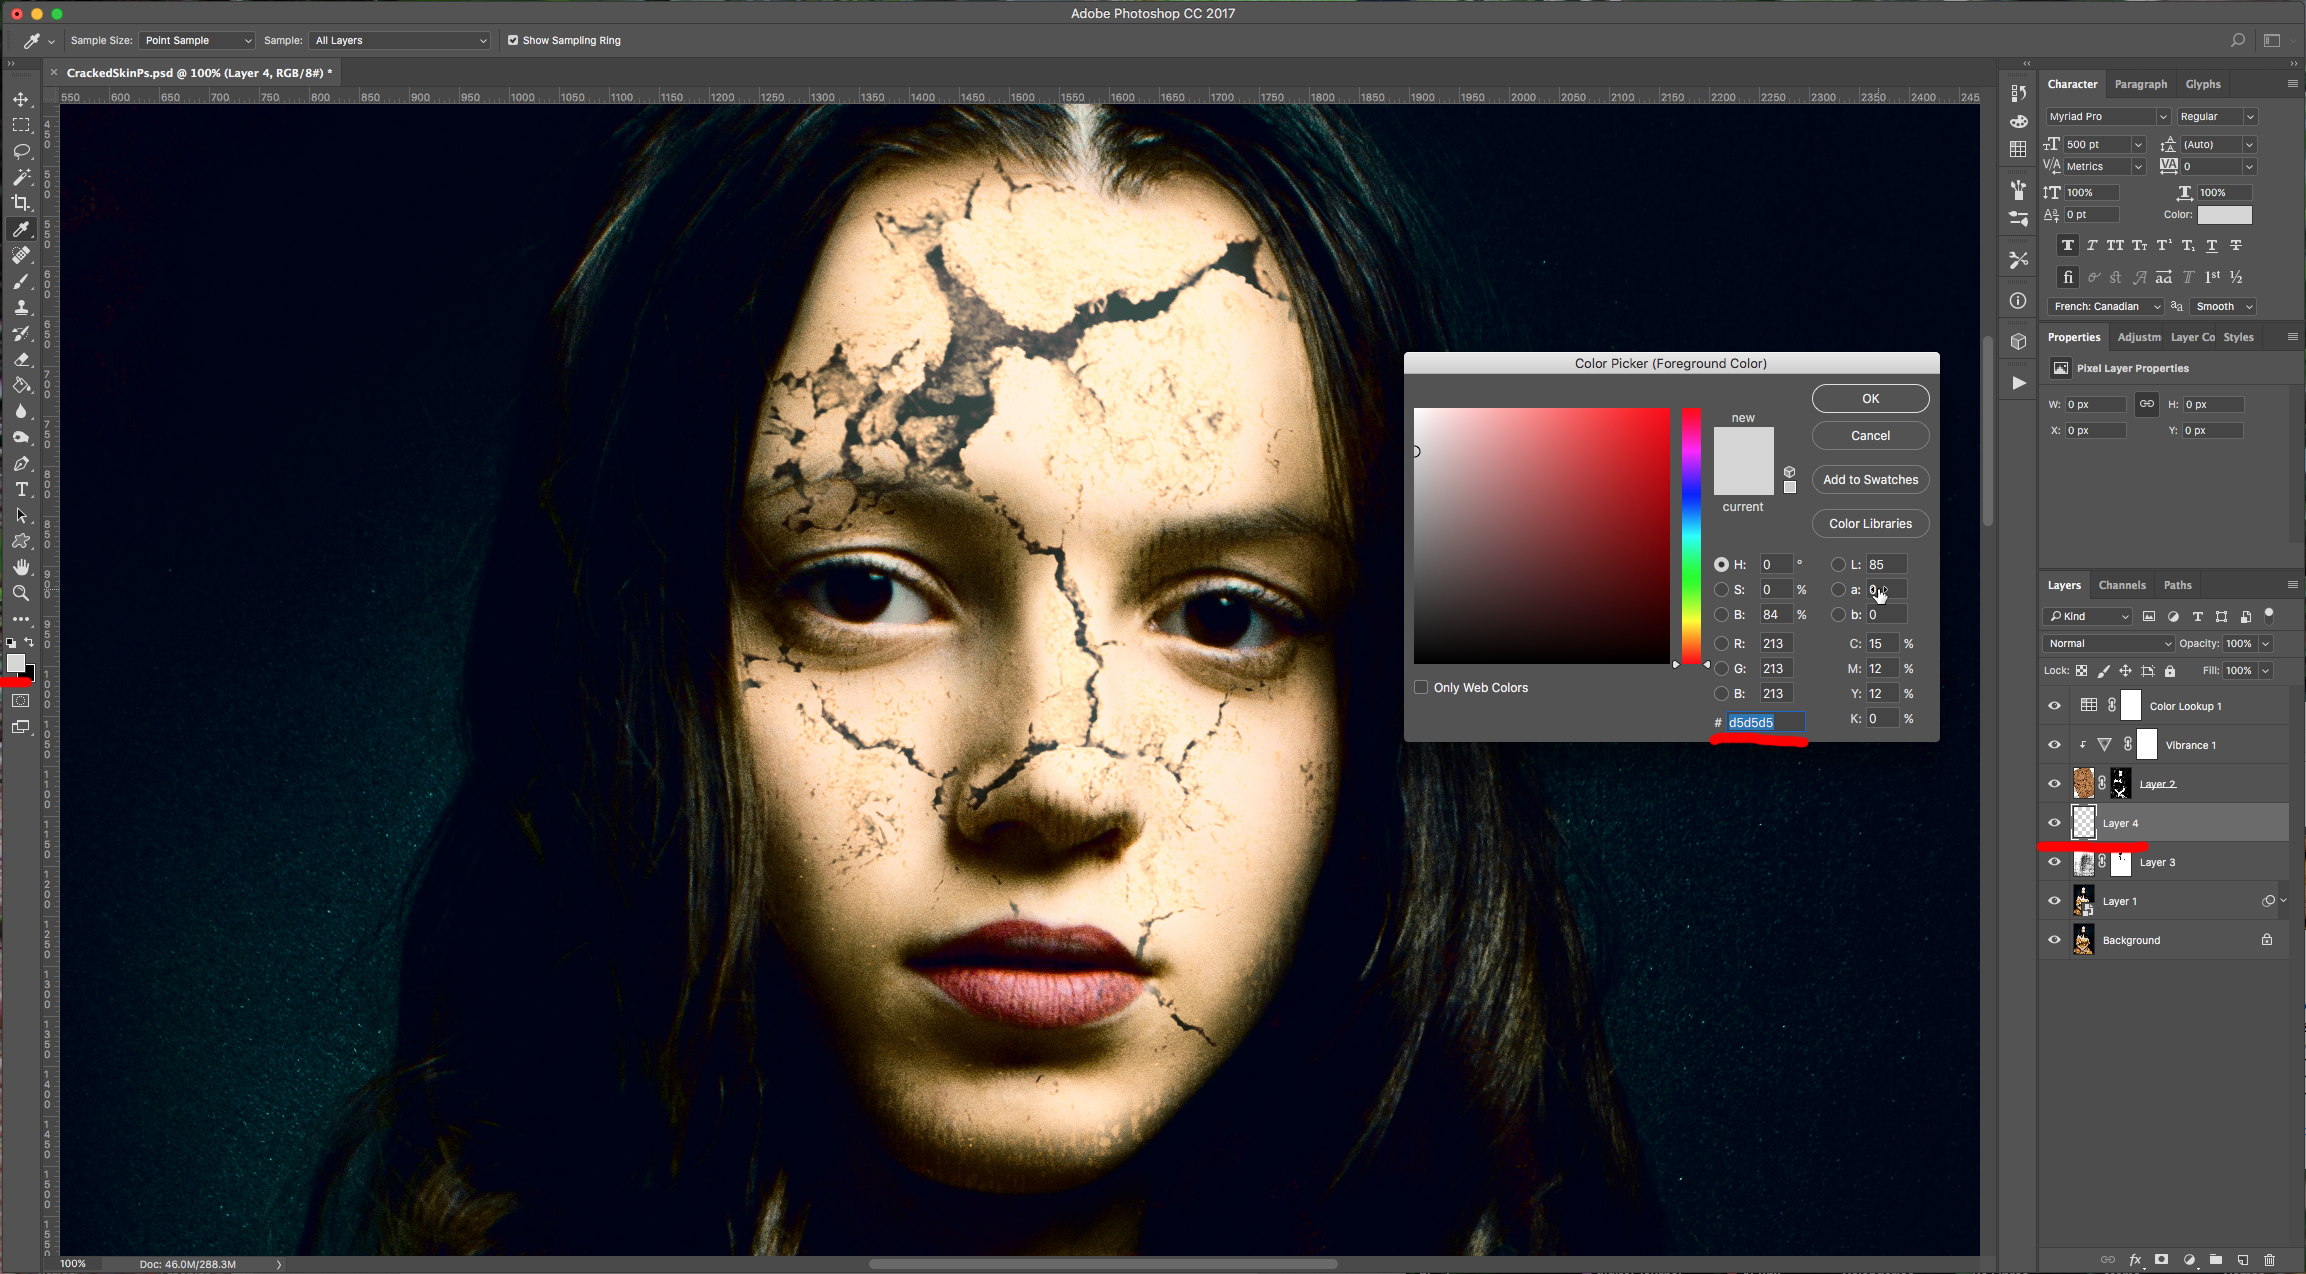
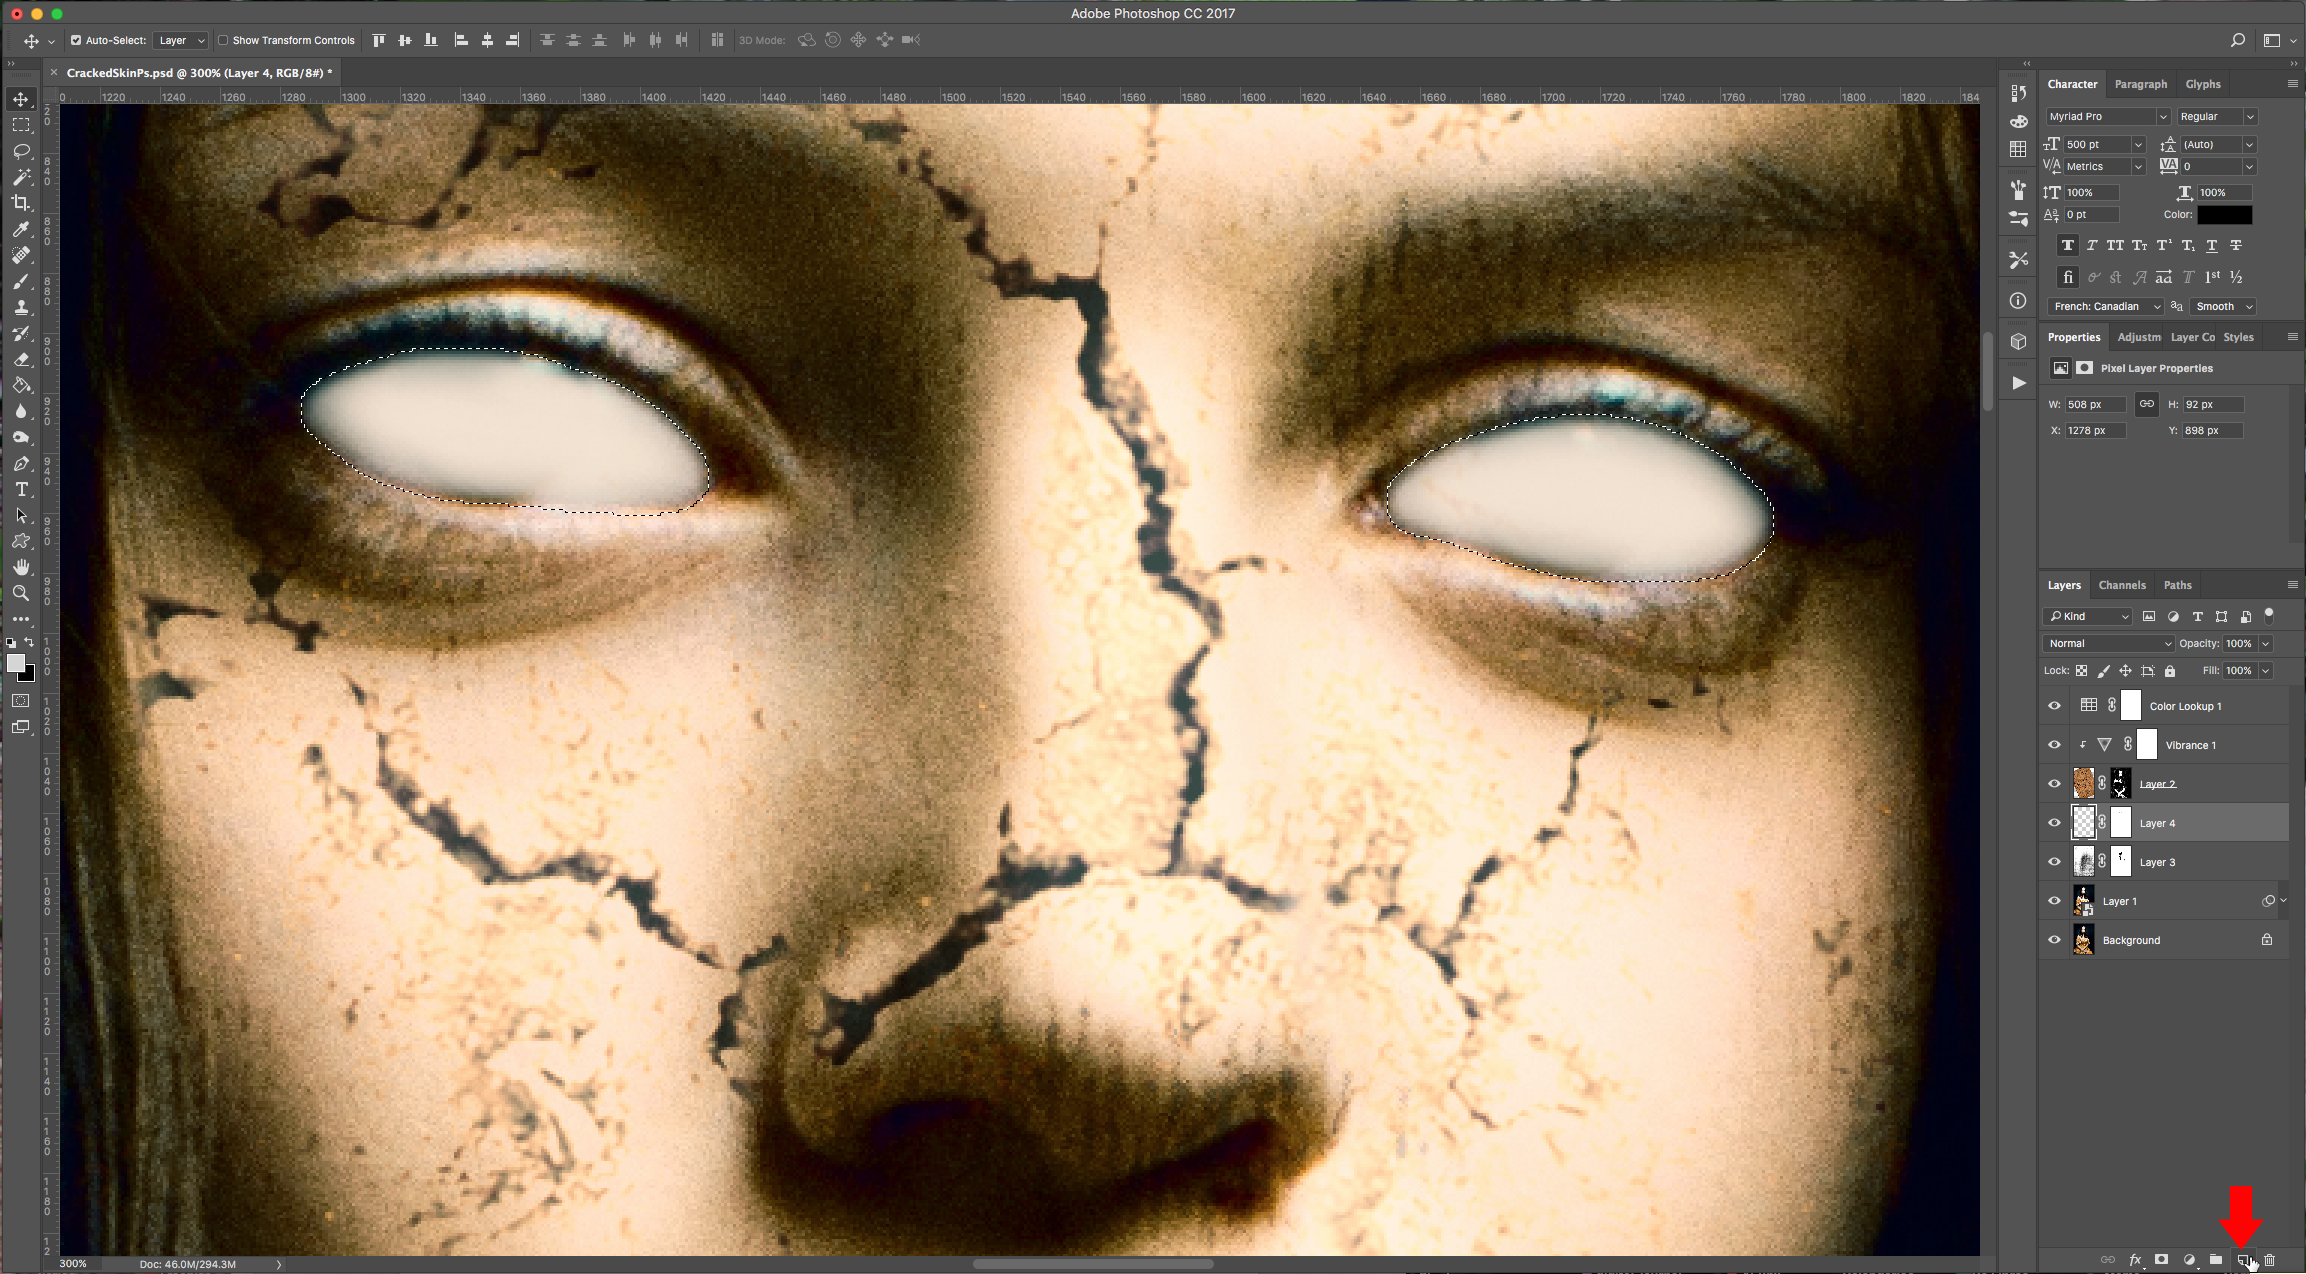
(1) 15 - Create a “New Layer” on top of the “Grunge Texture” (click on the small button at the bottom of the “Layers Panel” and make your “Foreground” color a medium grey (we used #d5d5d5). Or, open the image you chose to work with and then, create the "New layer" on top of it.
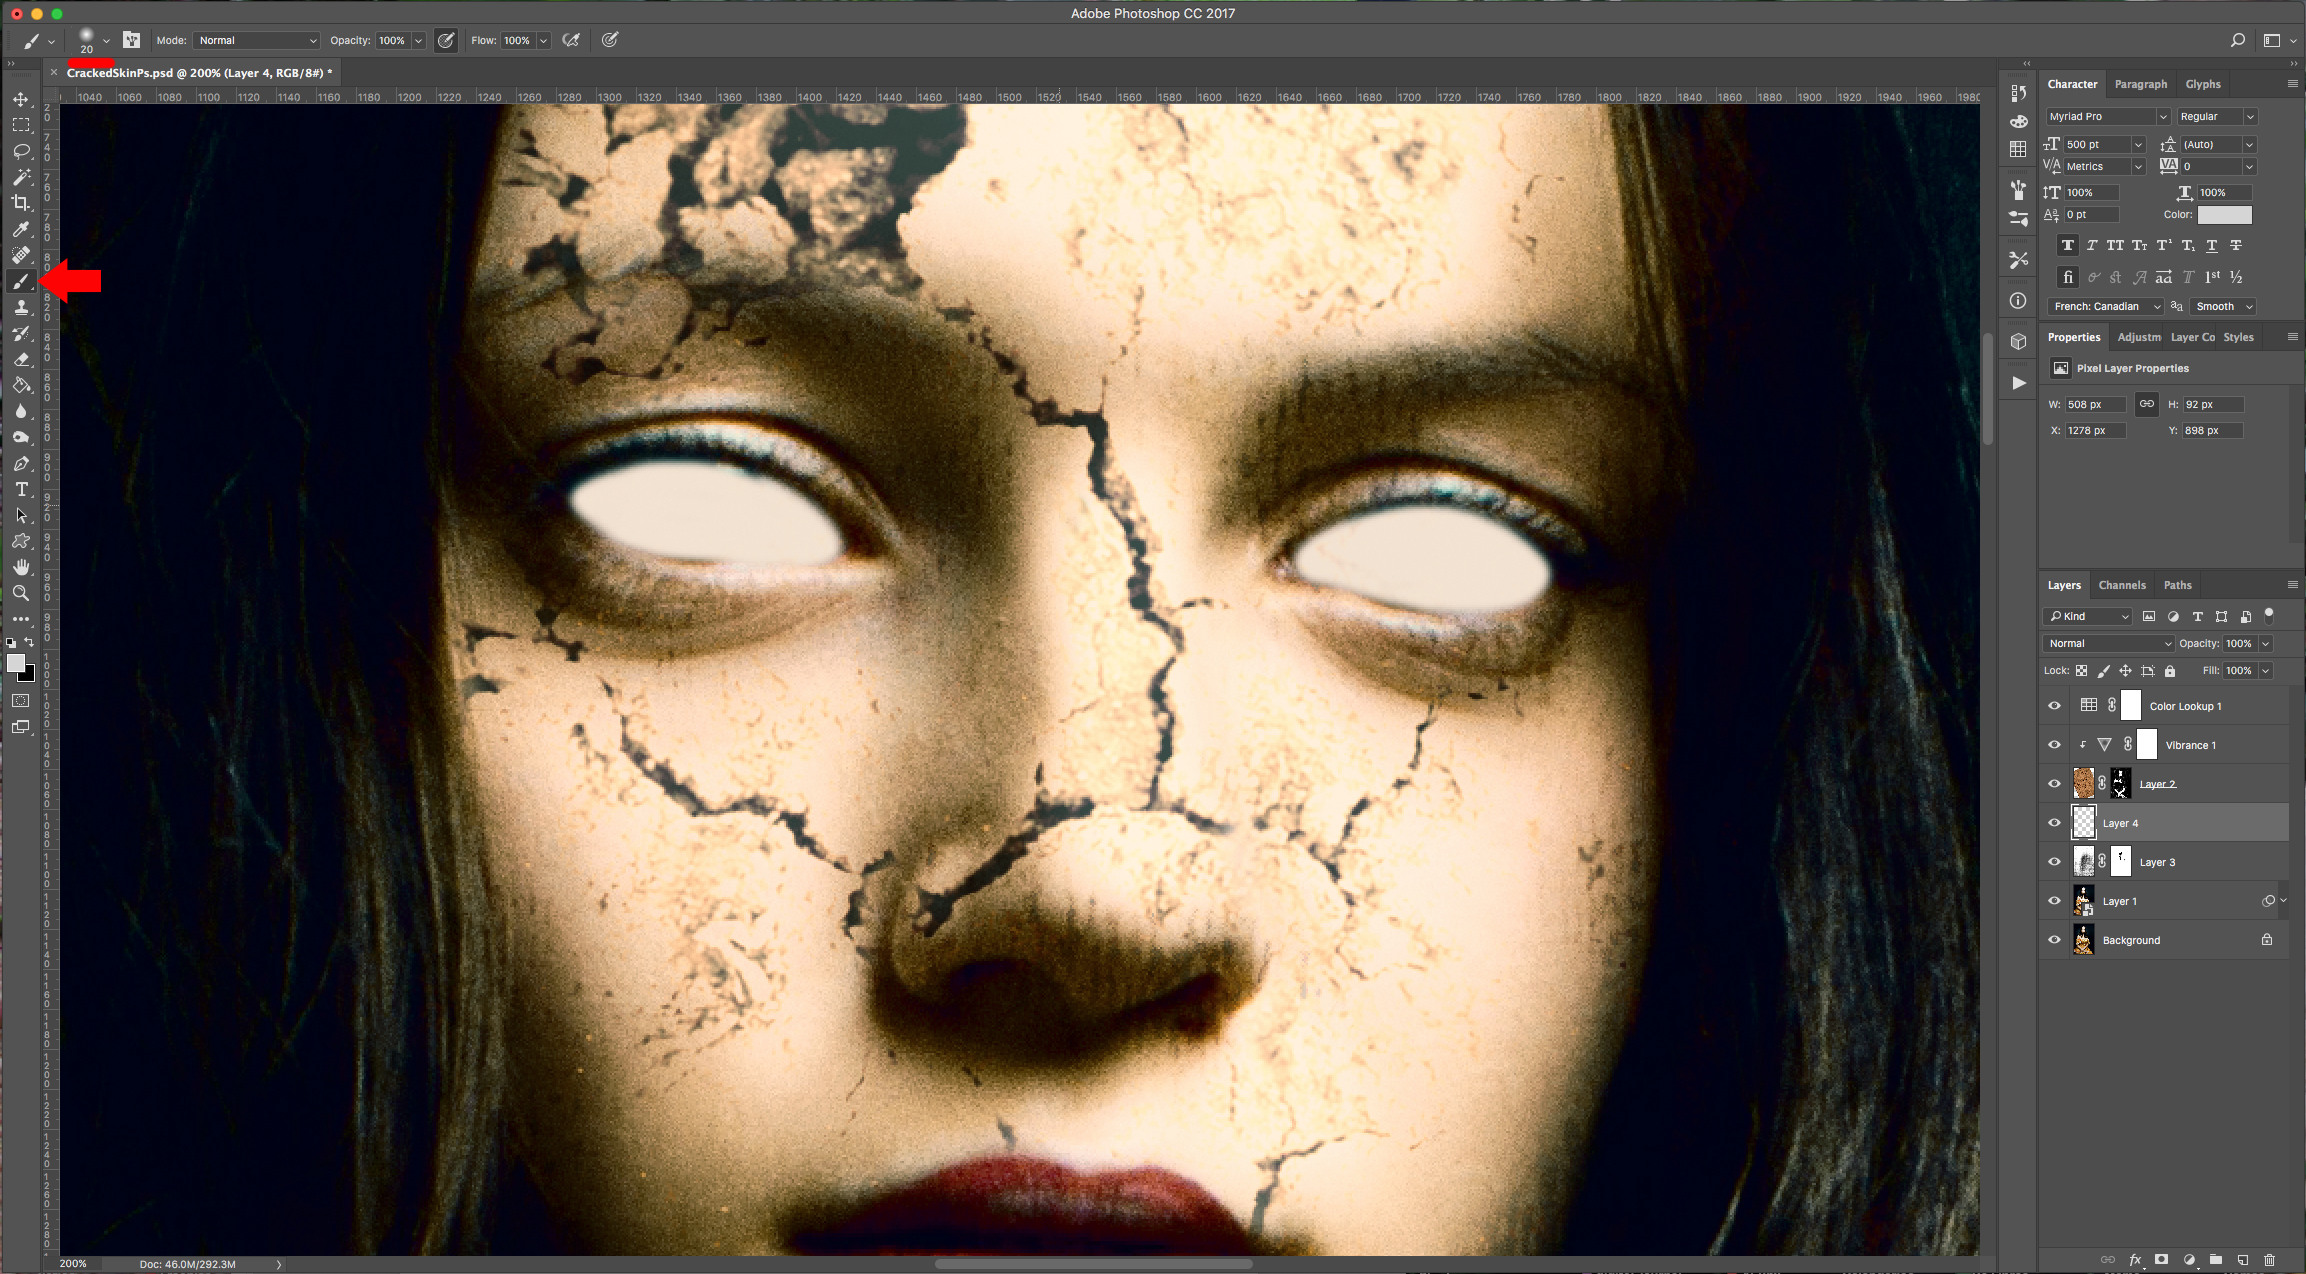
(2) 16 - Use the “Brush Tool” (B) with a small and soft brush (20 px and 0% “Hardness”) to fill the eyes of your subject.
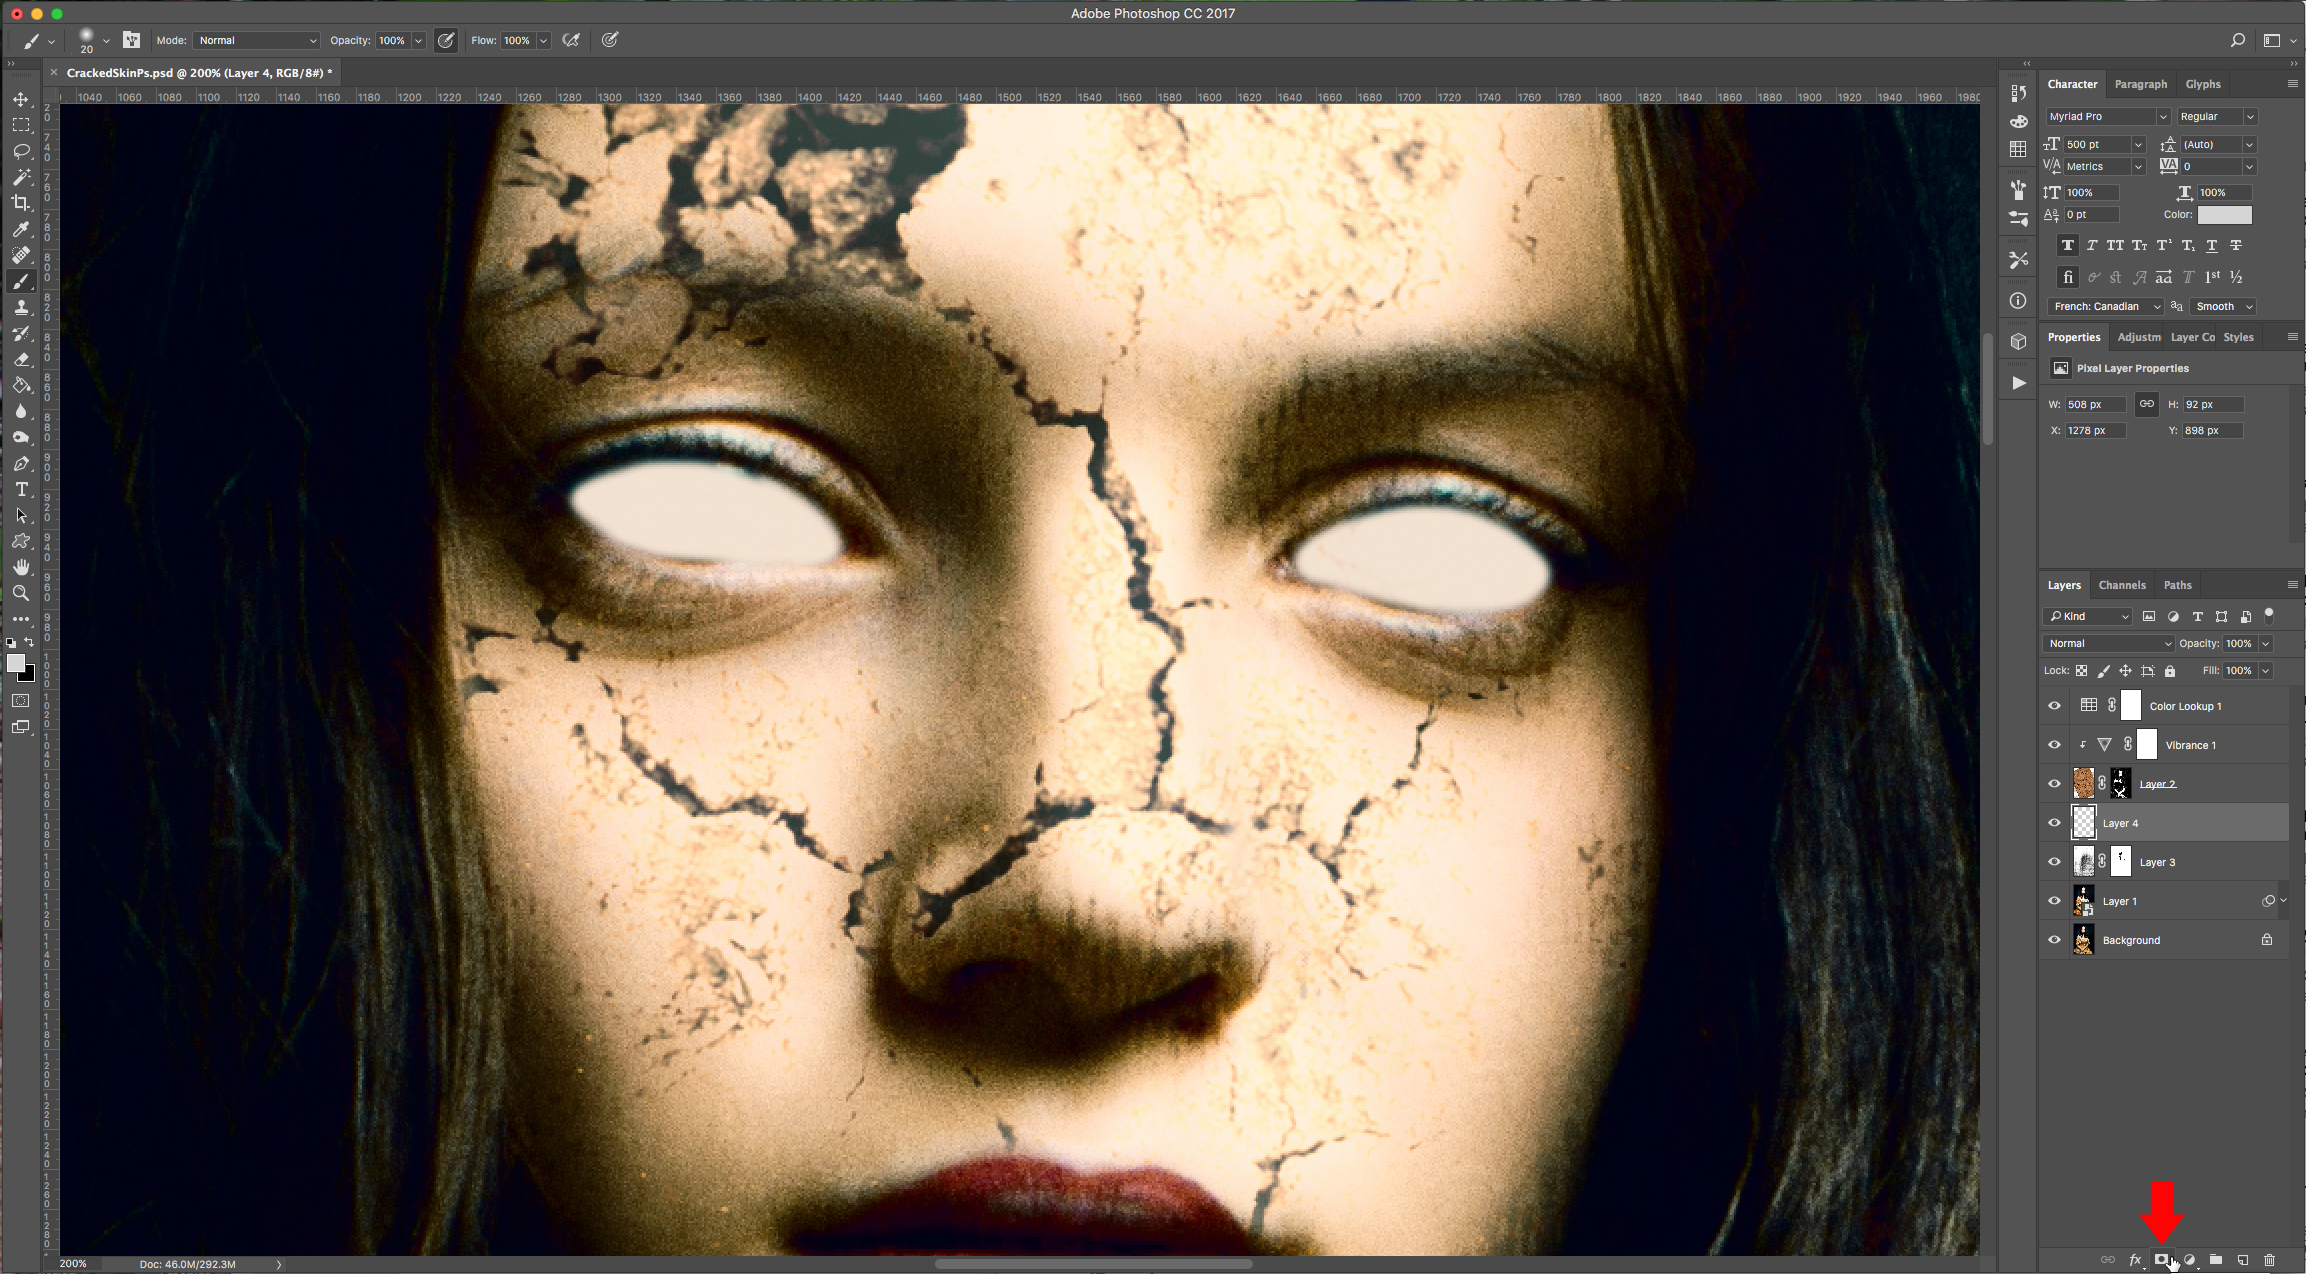
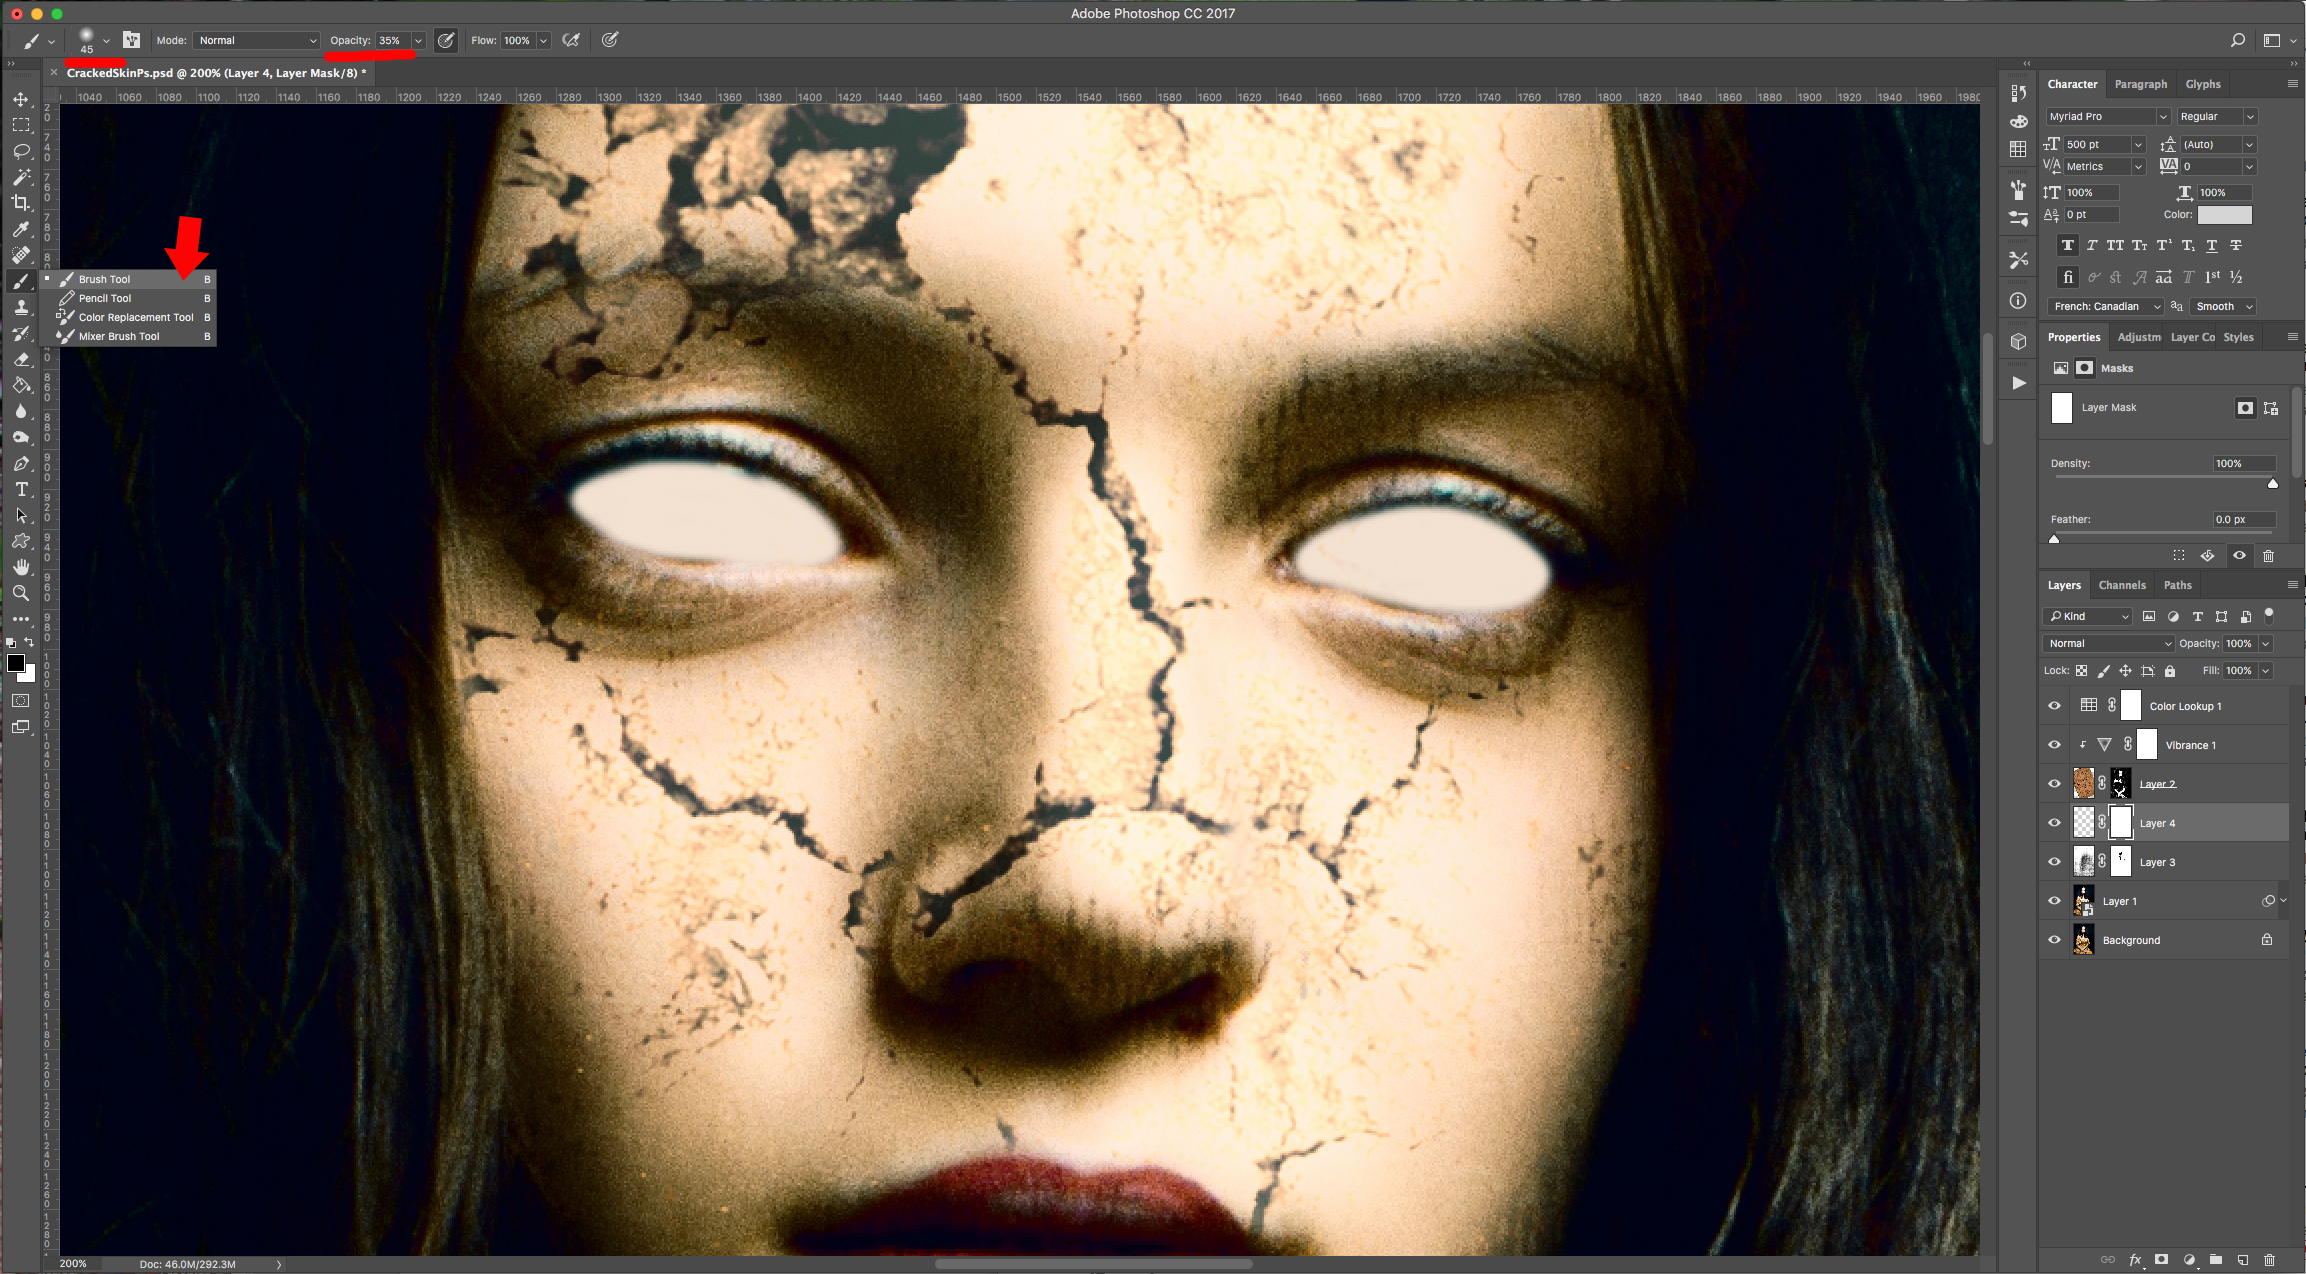
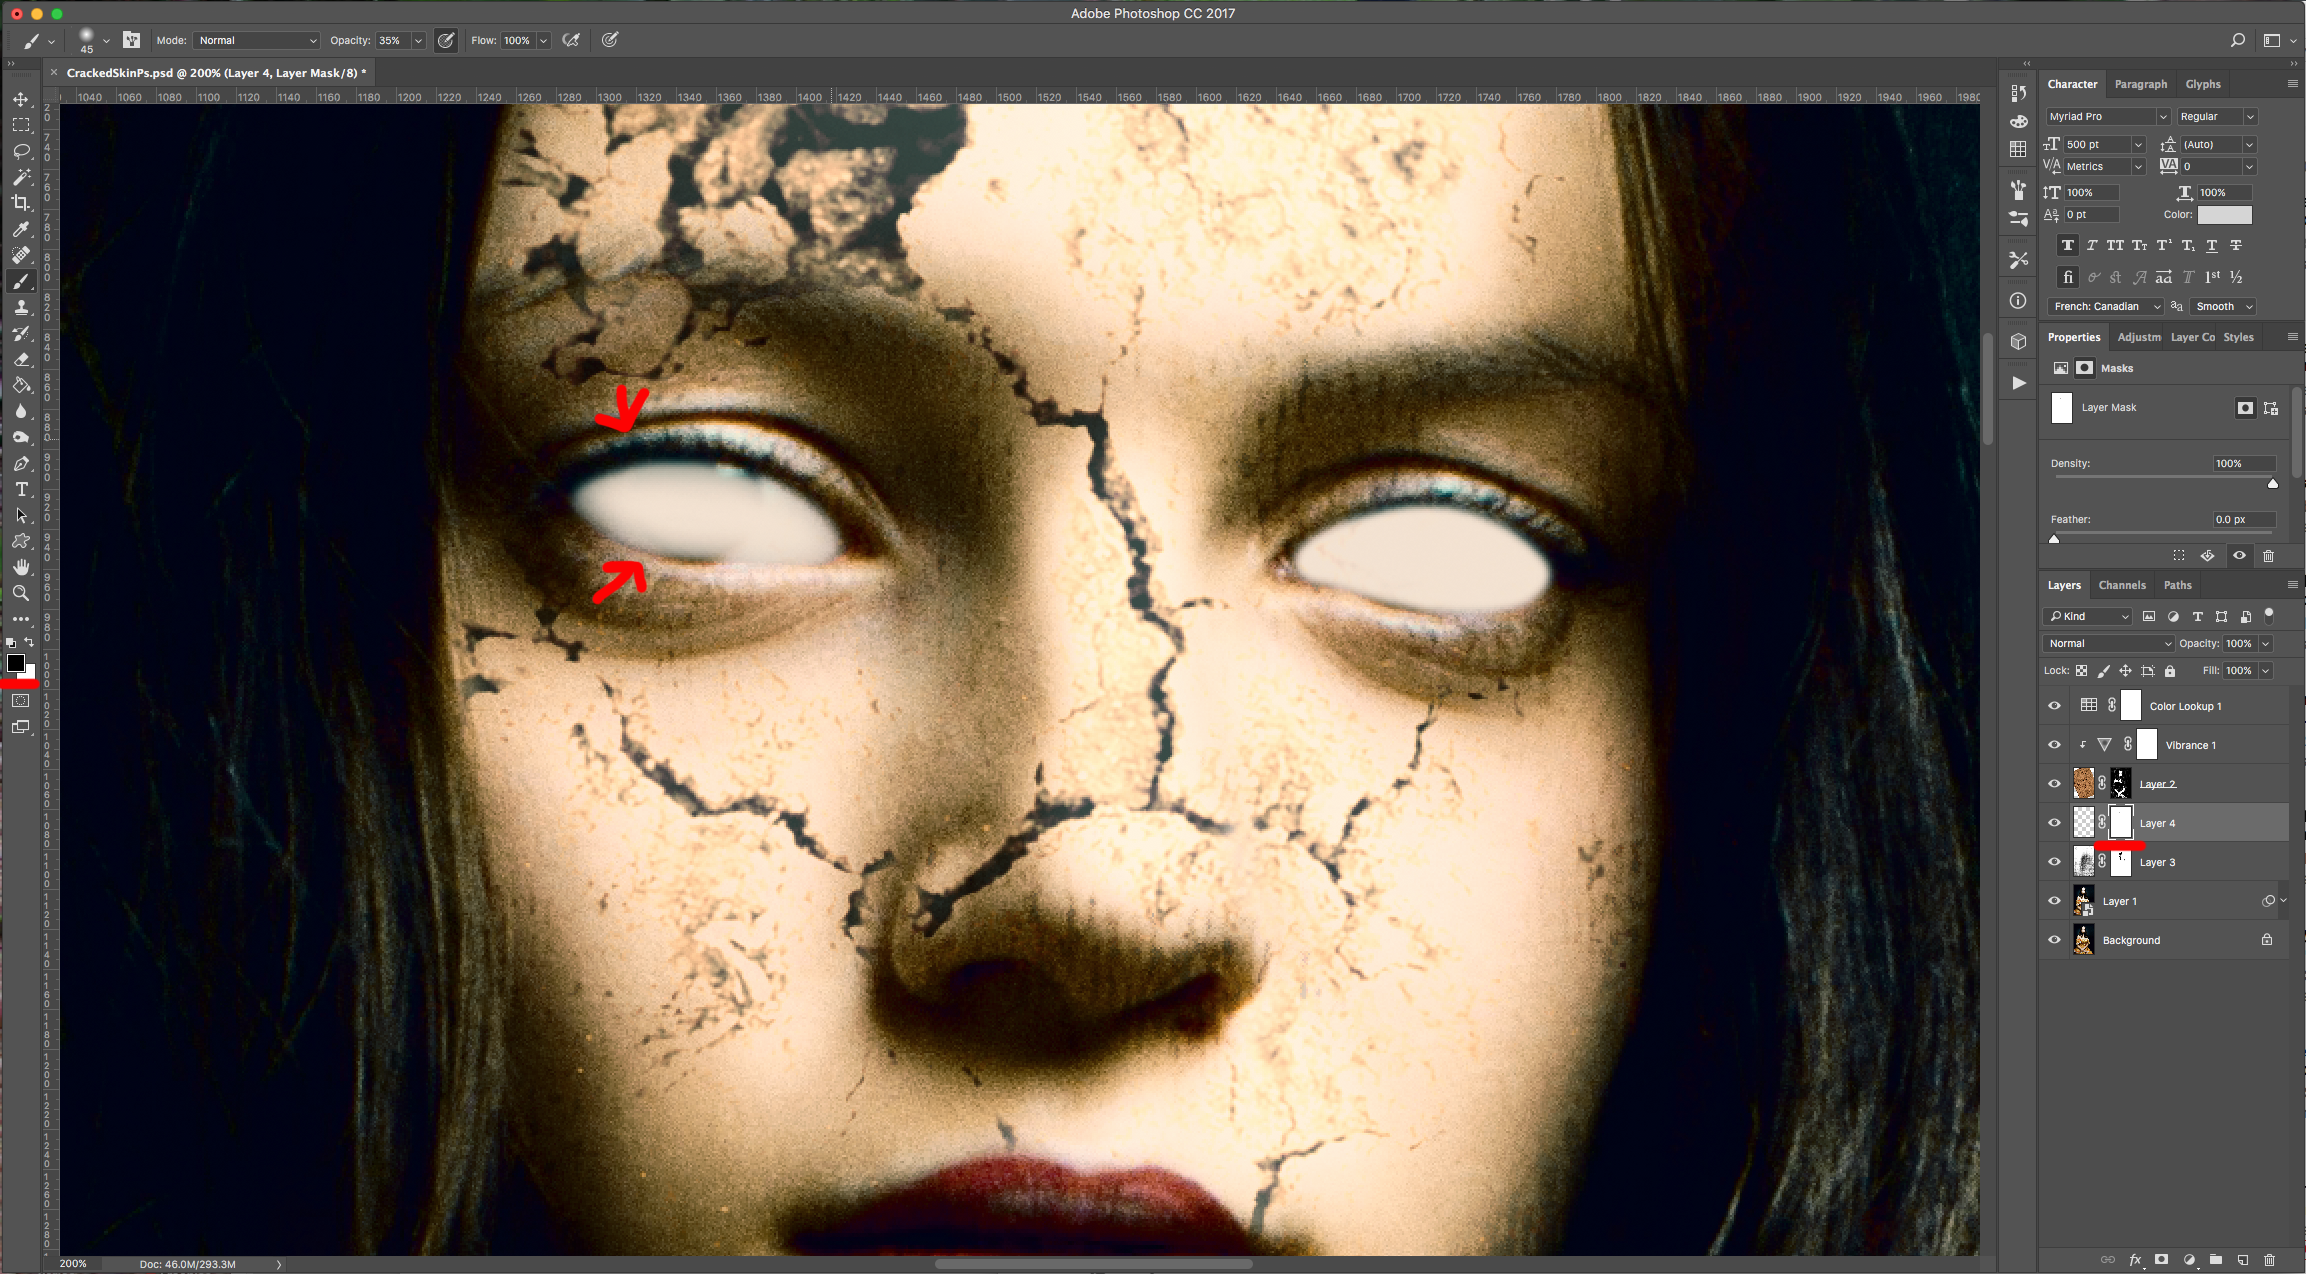
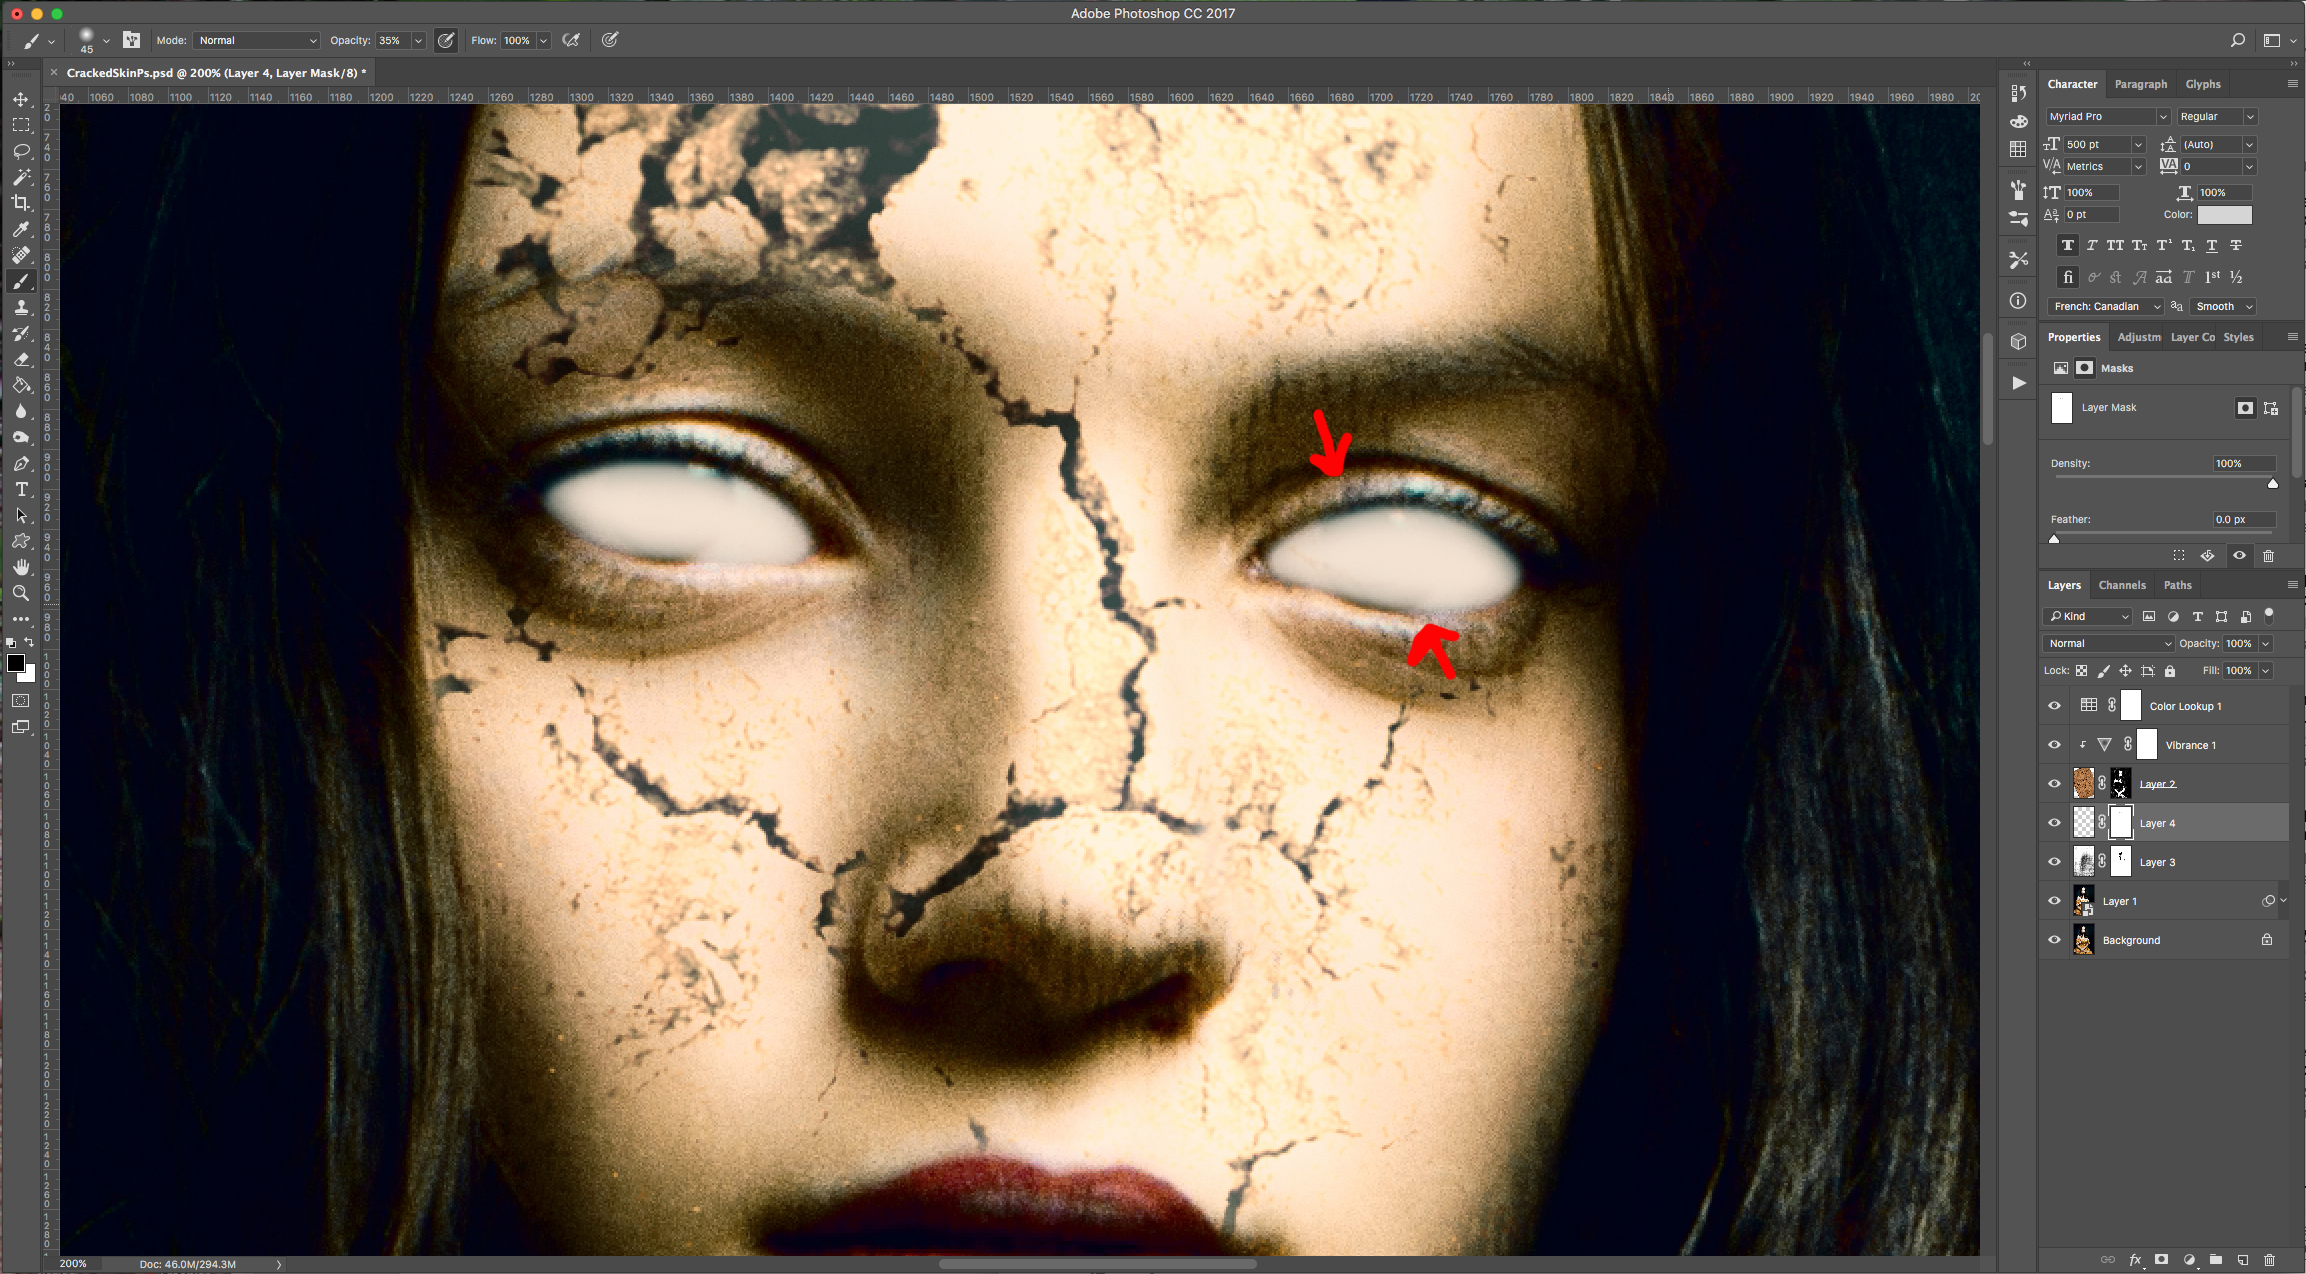
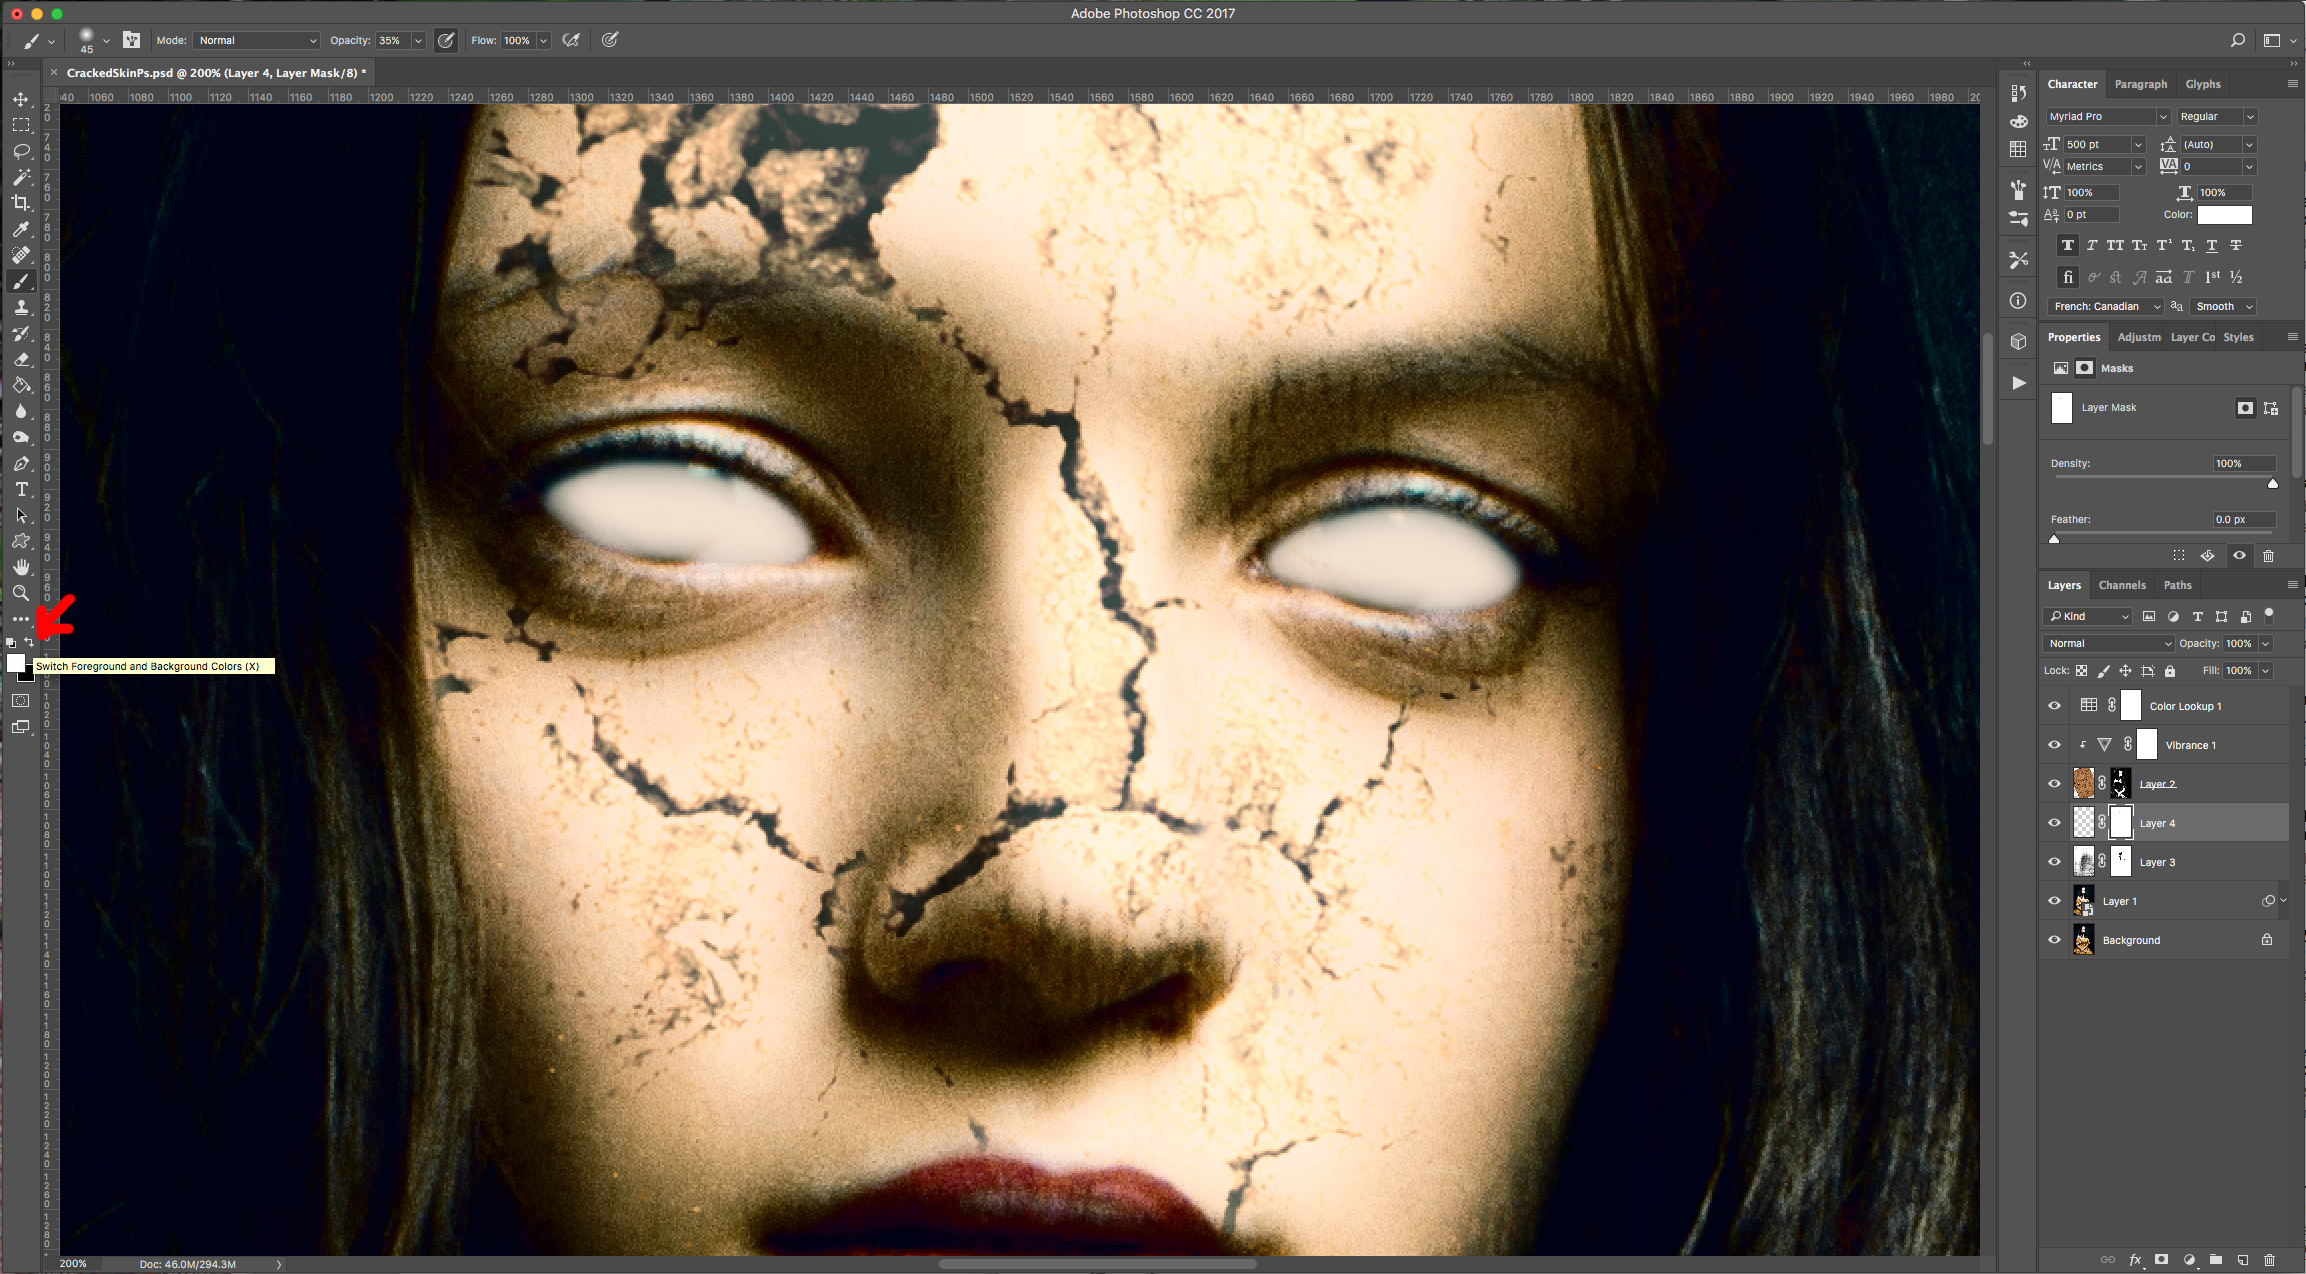
(3) 17 - Add a “Layer Mask” to this New Layer and use the “Brush Tool” (B) with a medium brush (45 px) using Black as “Foreground” color. Lower the “Opacity" of the brush to about 35% and soften the edges of the grey applied on top of the eyes. If you think that you erased too much, just use White instead of Black as “Foreground” color.
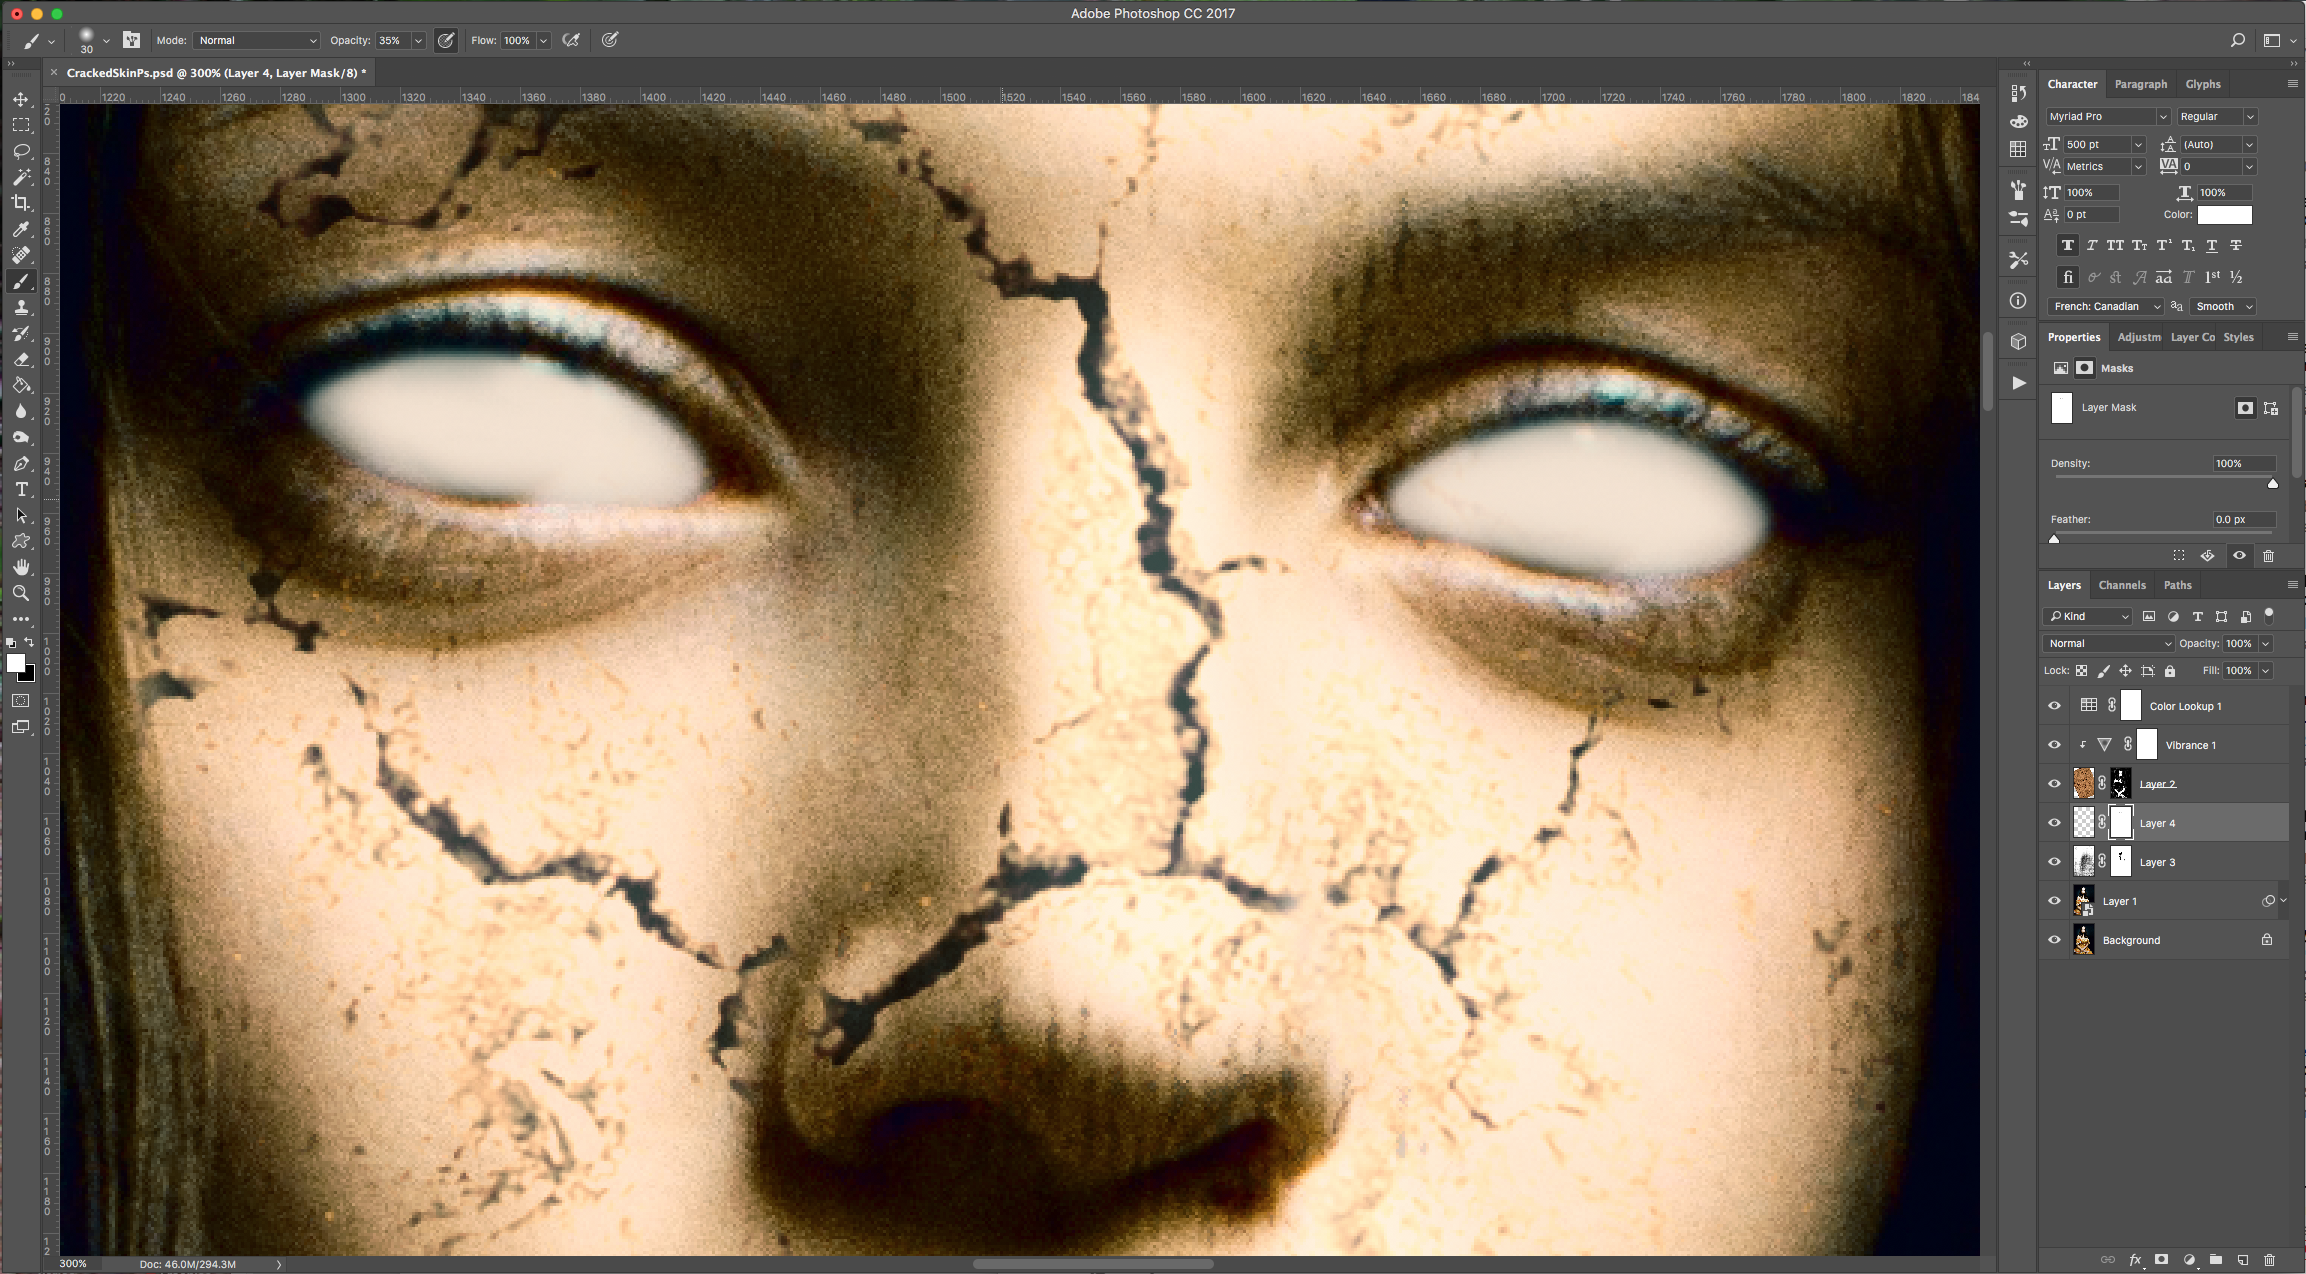
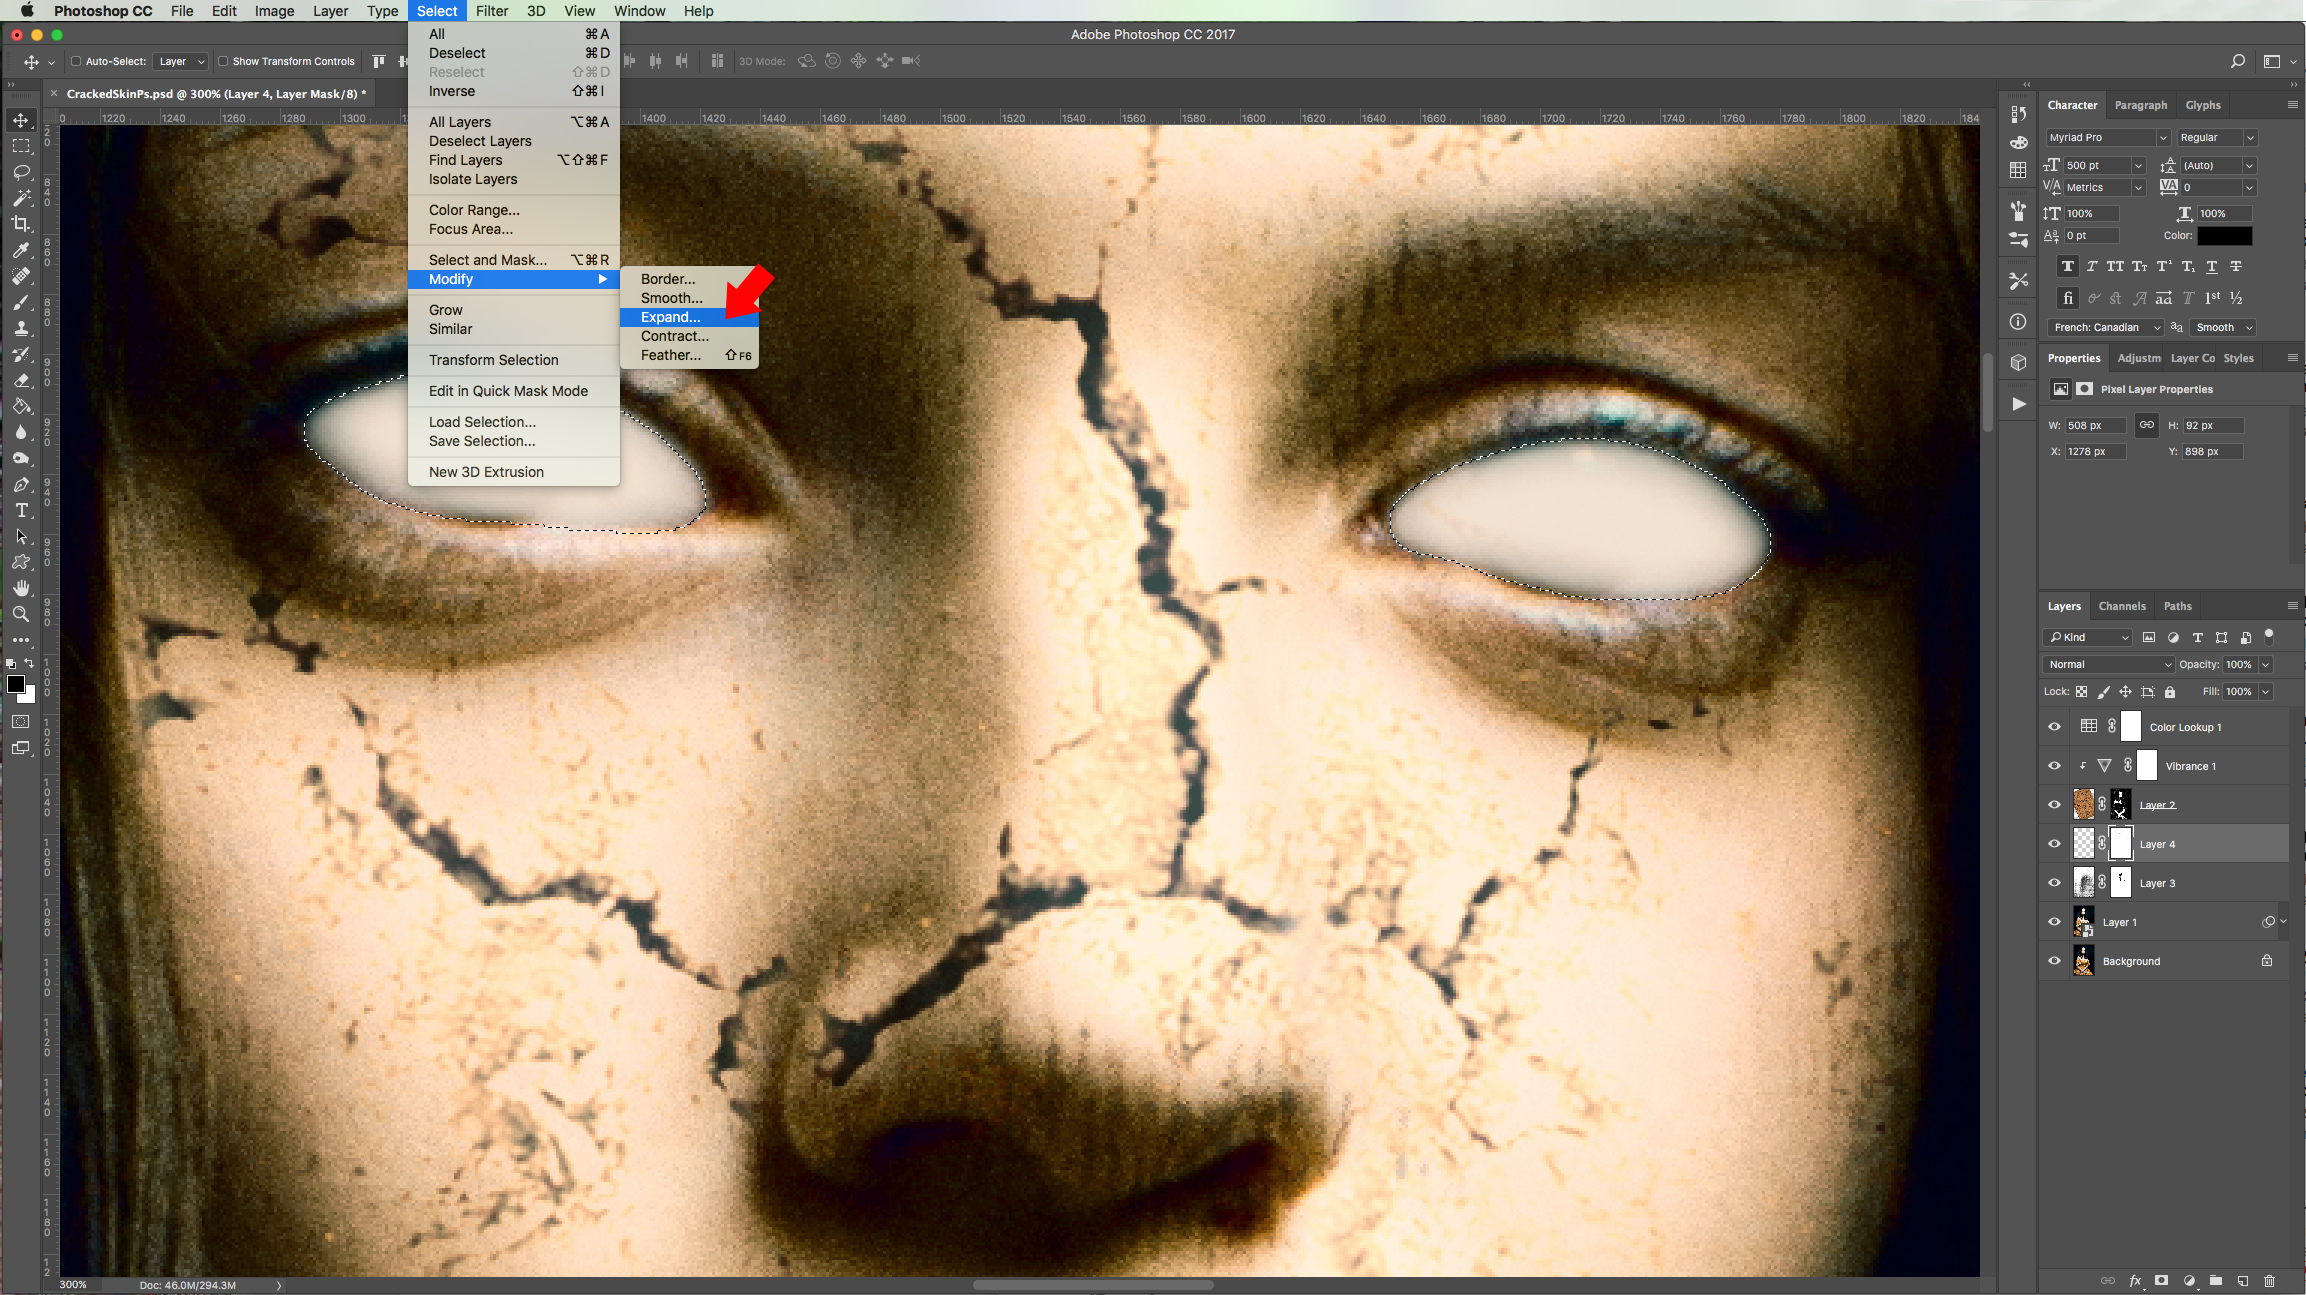
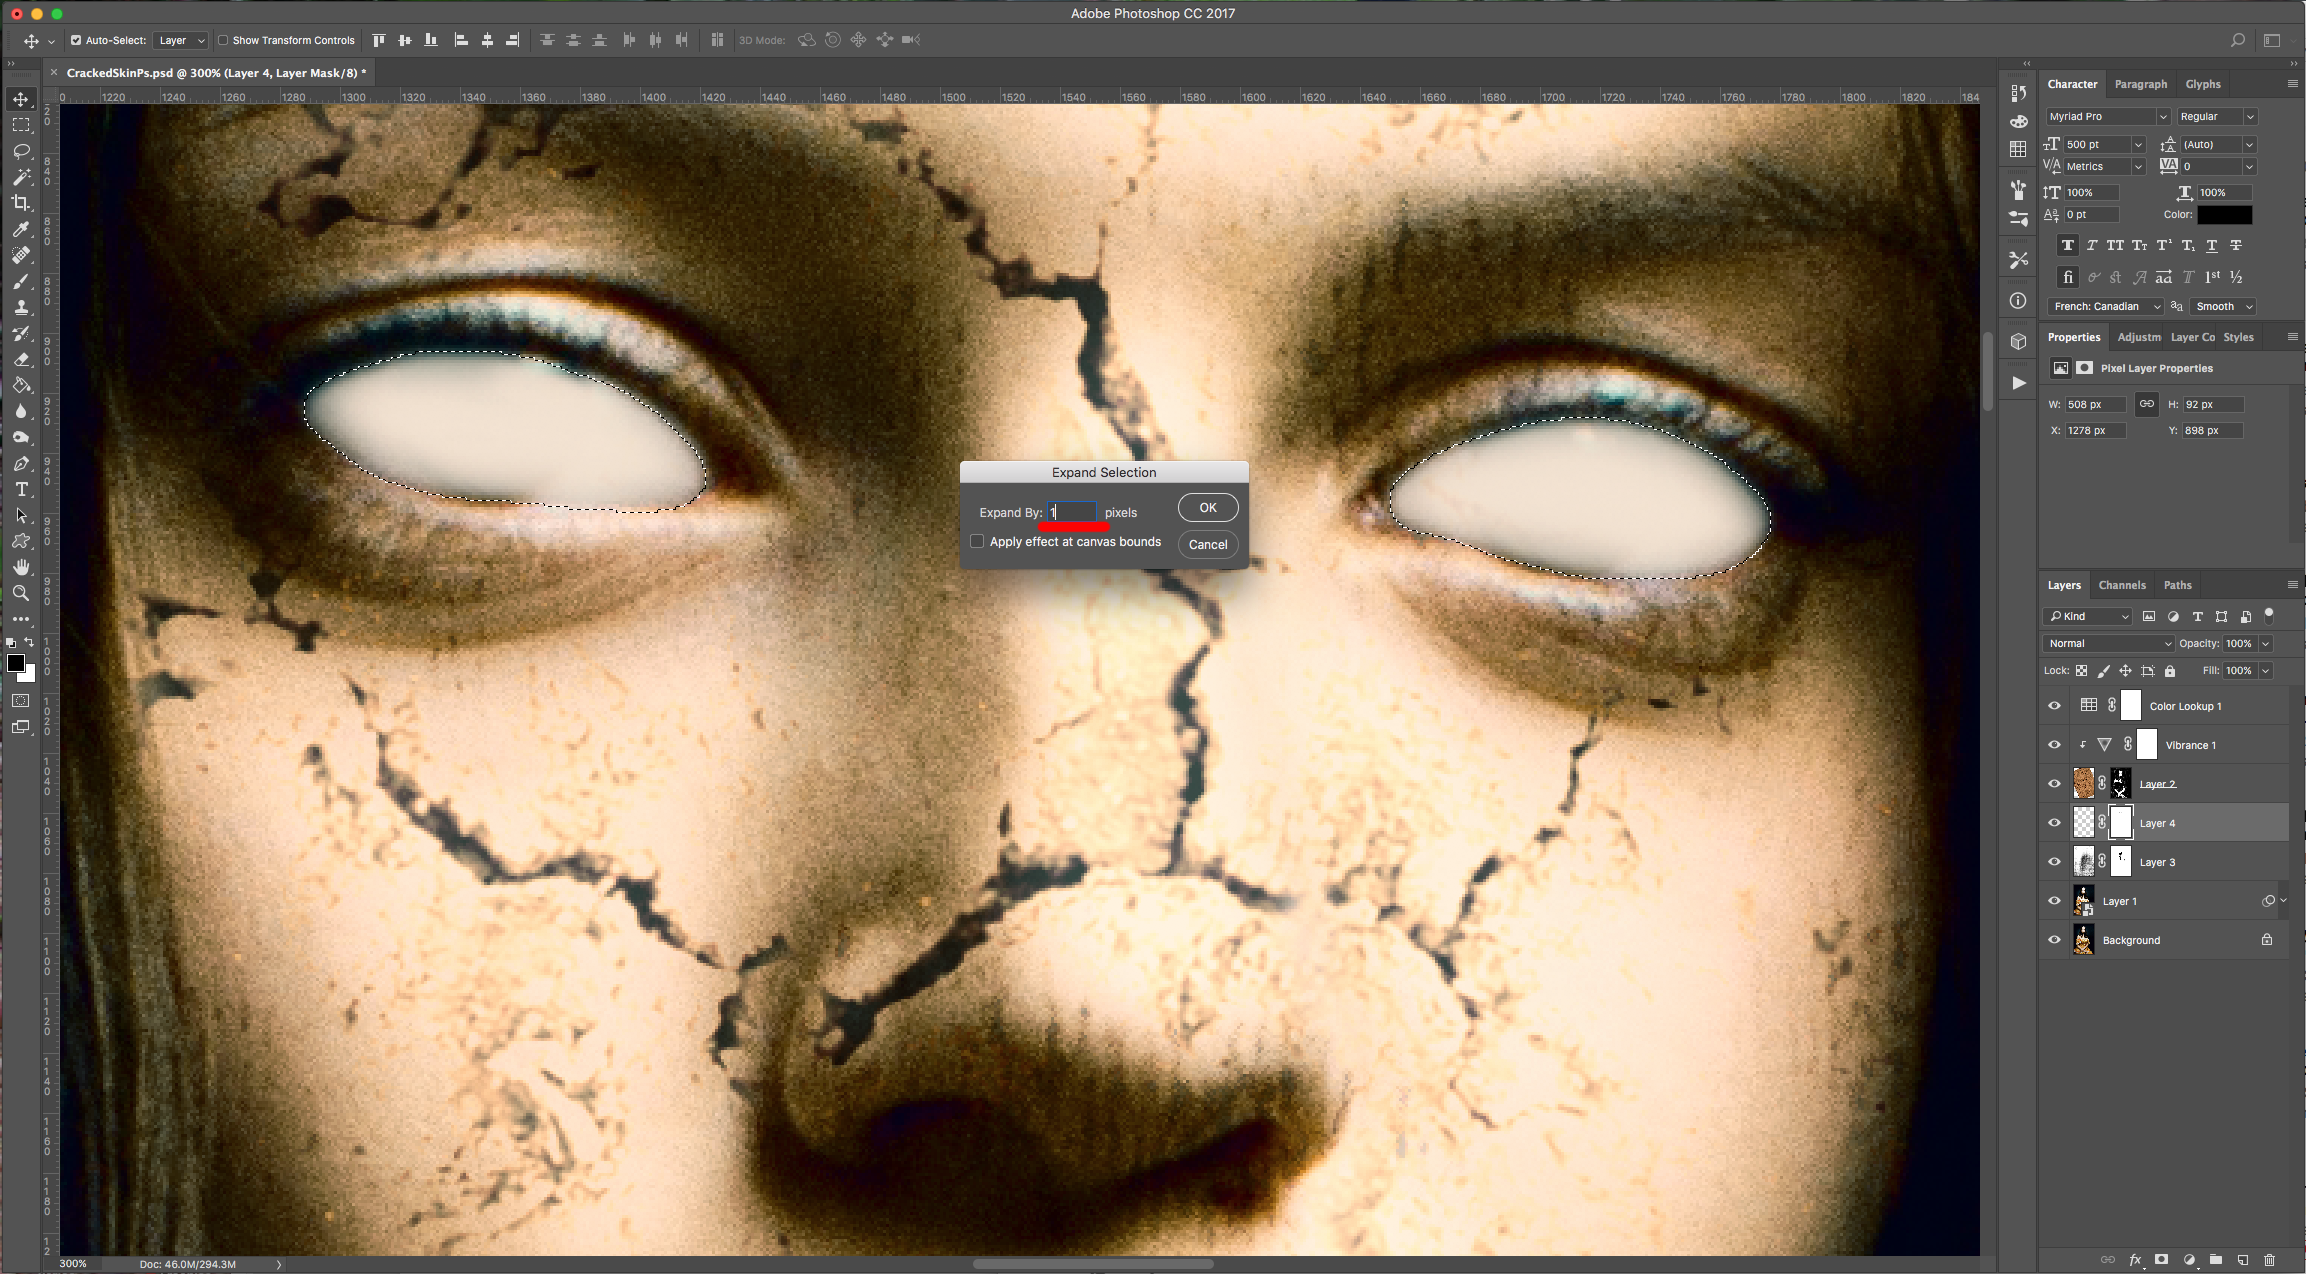
(4) 18 - Click on top of your Layer’s Thumbnail while holding the “Command/Control” key to make a selection, then go to Select > Modify > Expand… and choose a 1 Pixel.
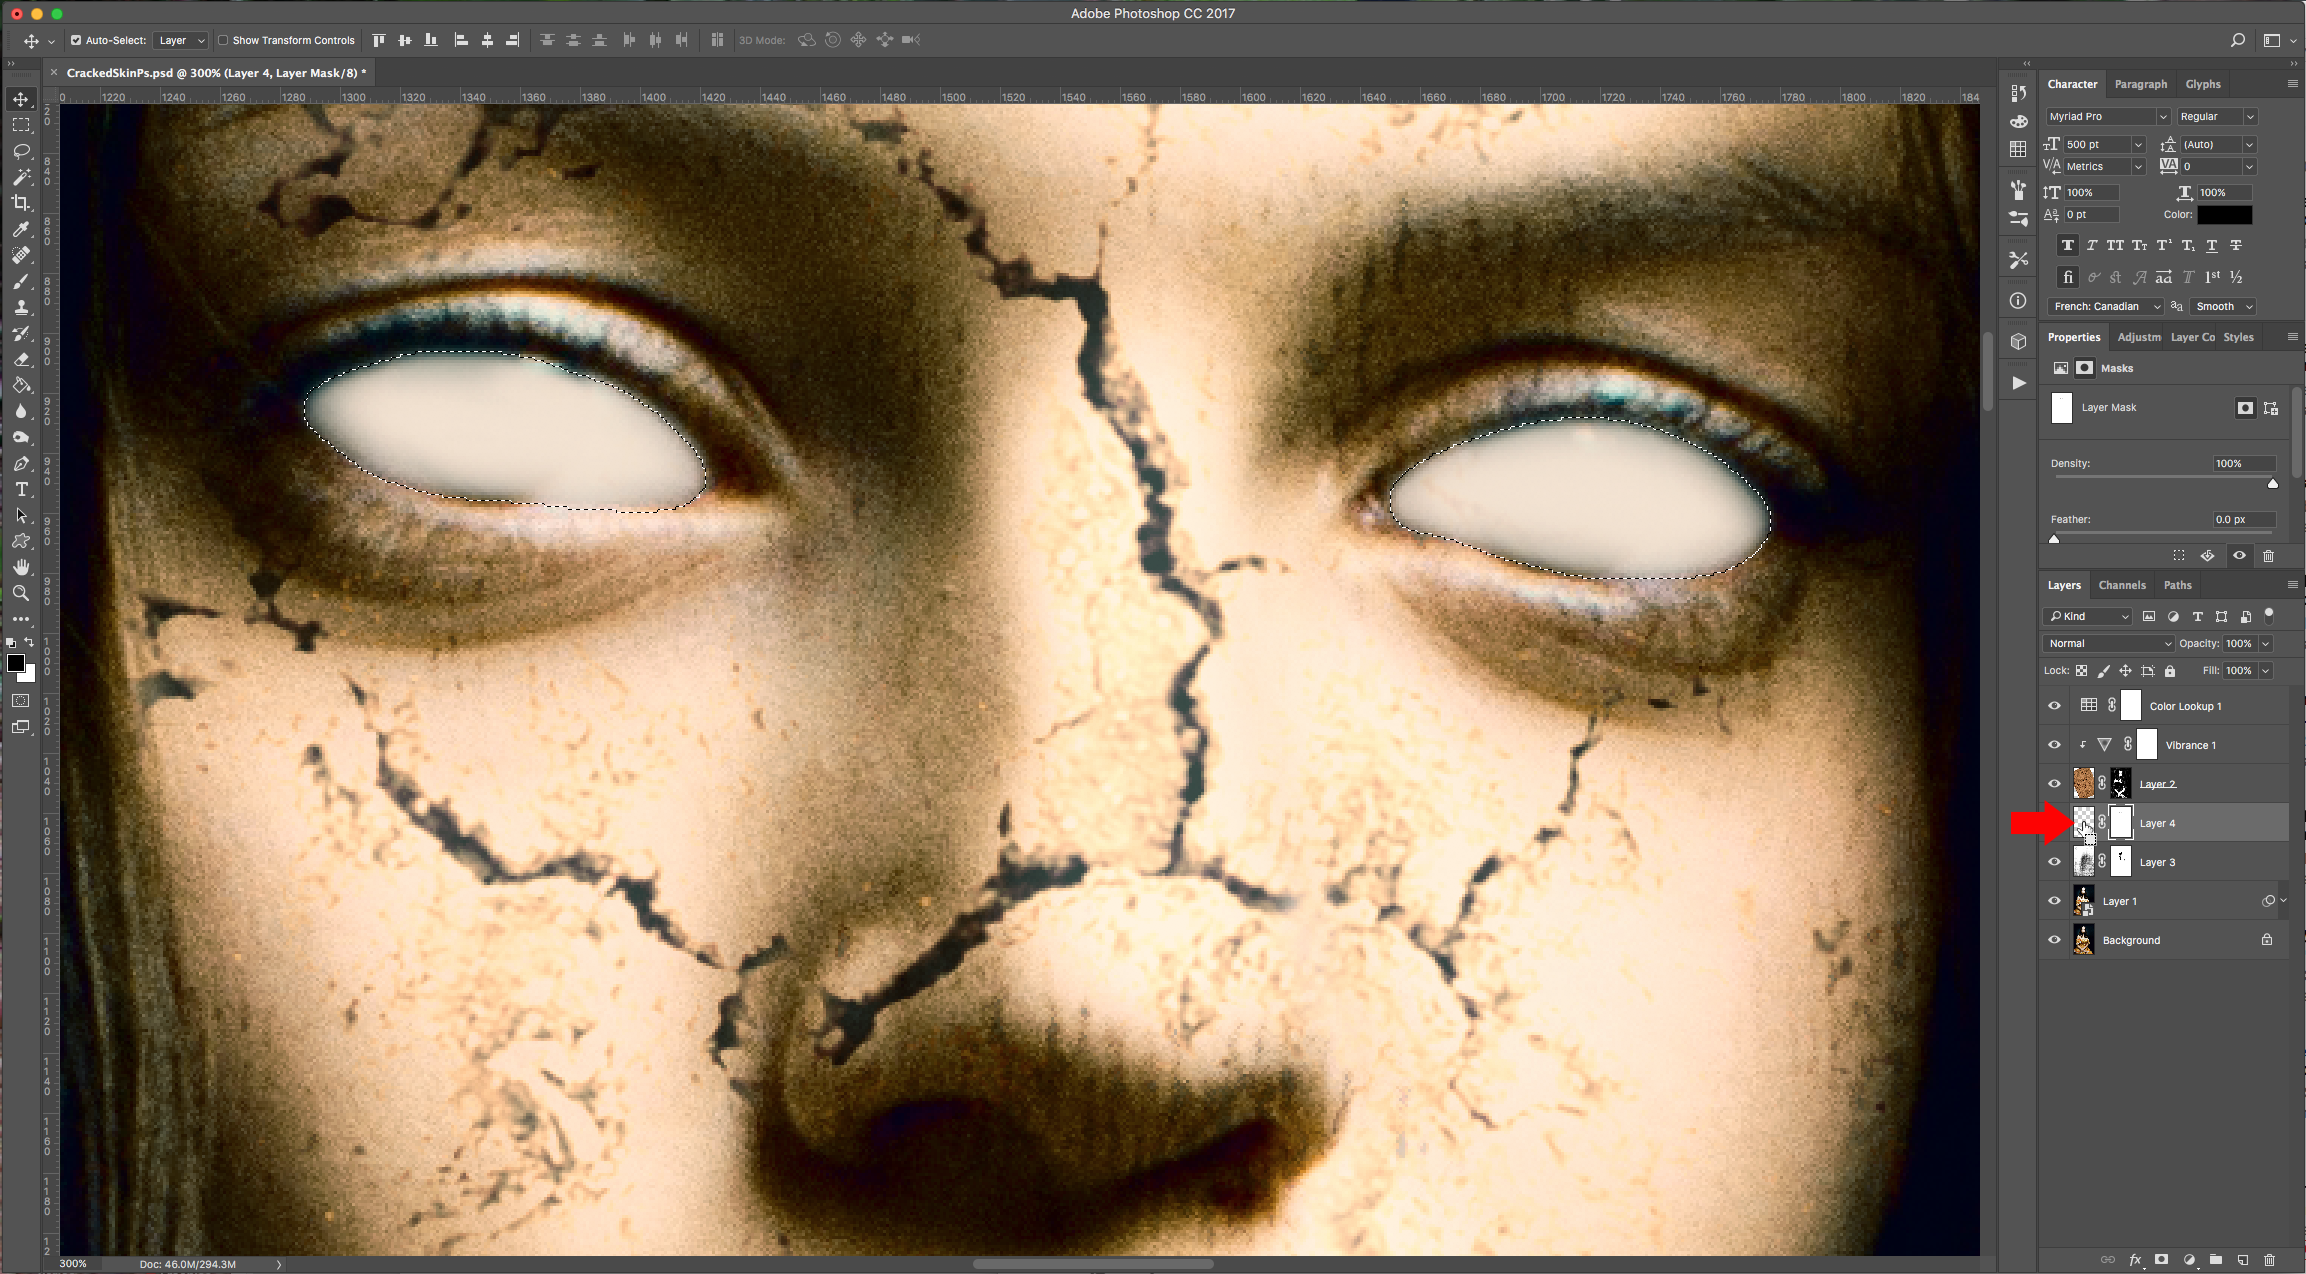
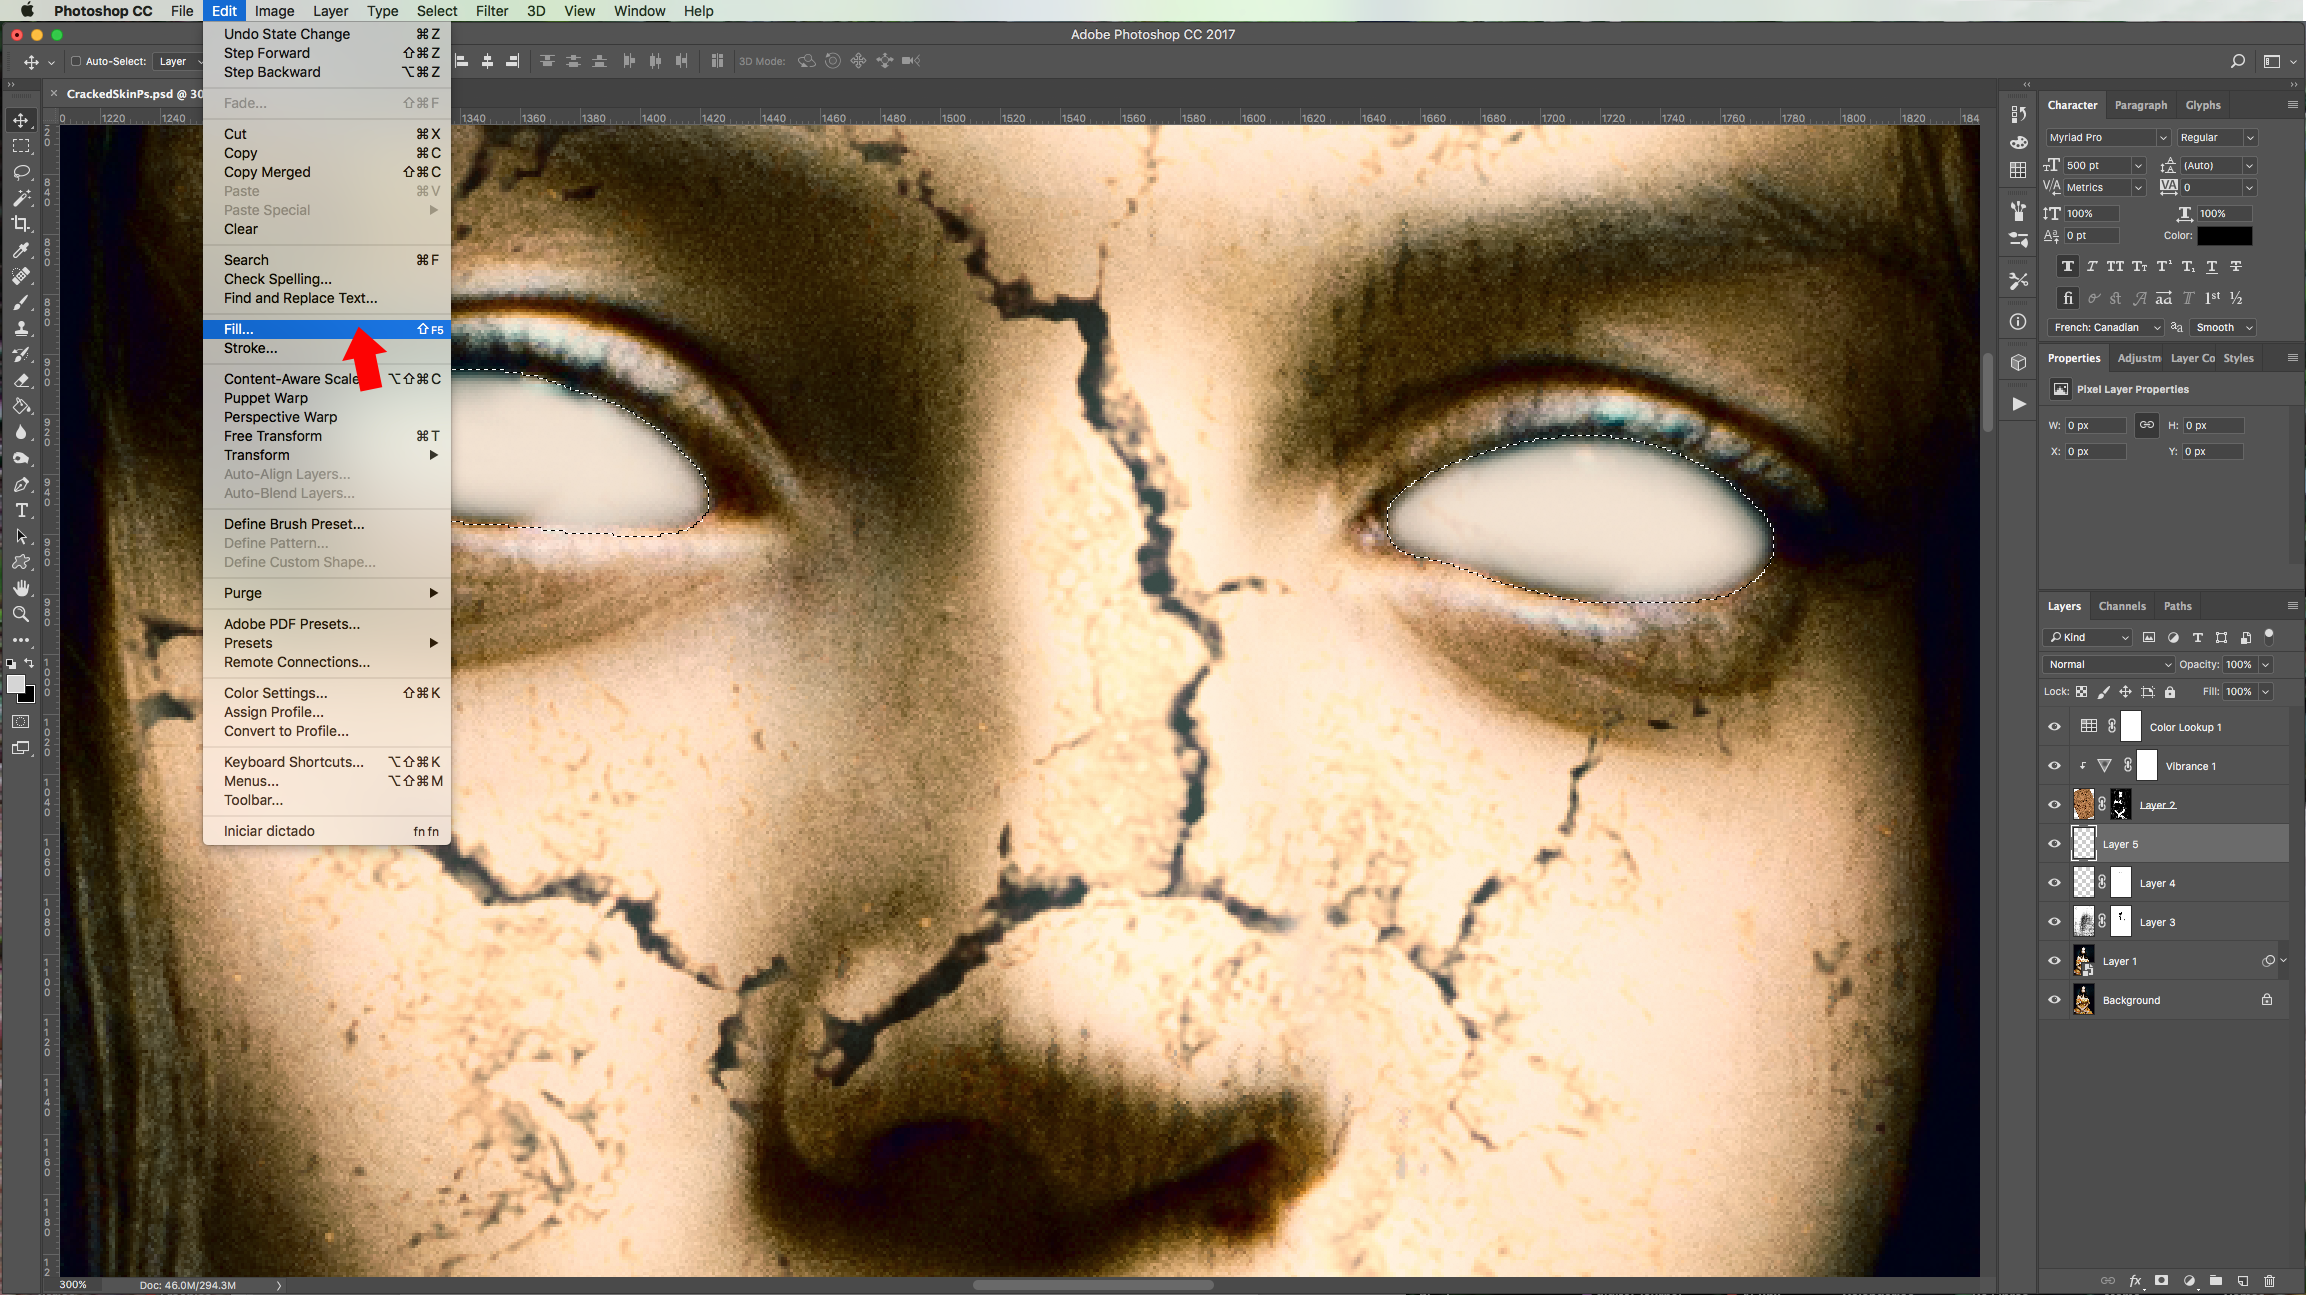
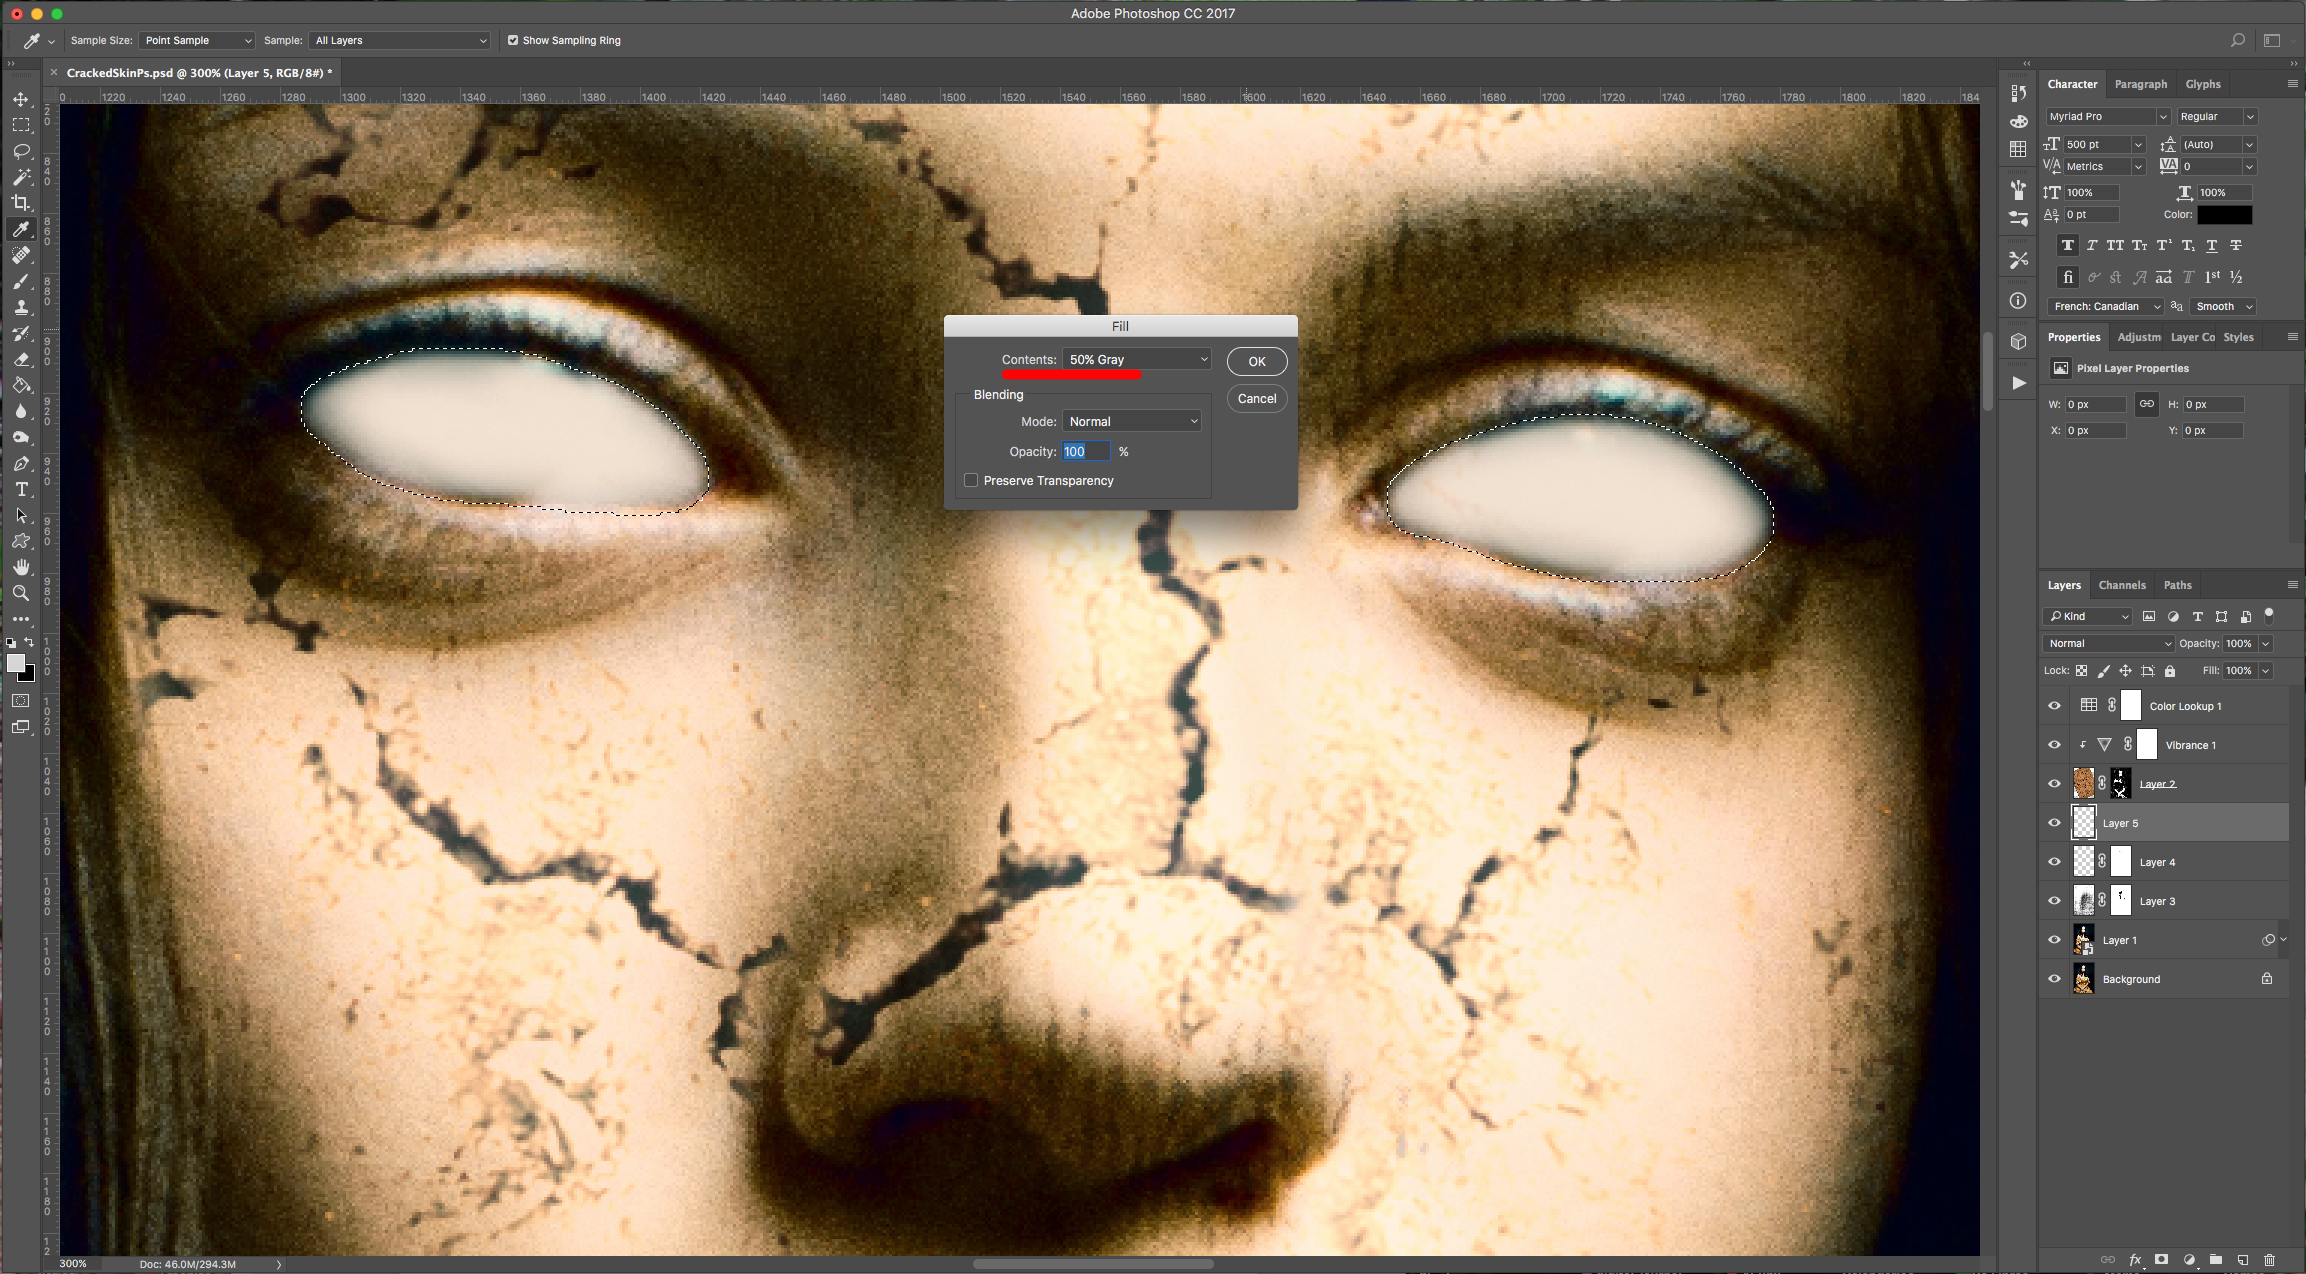
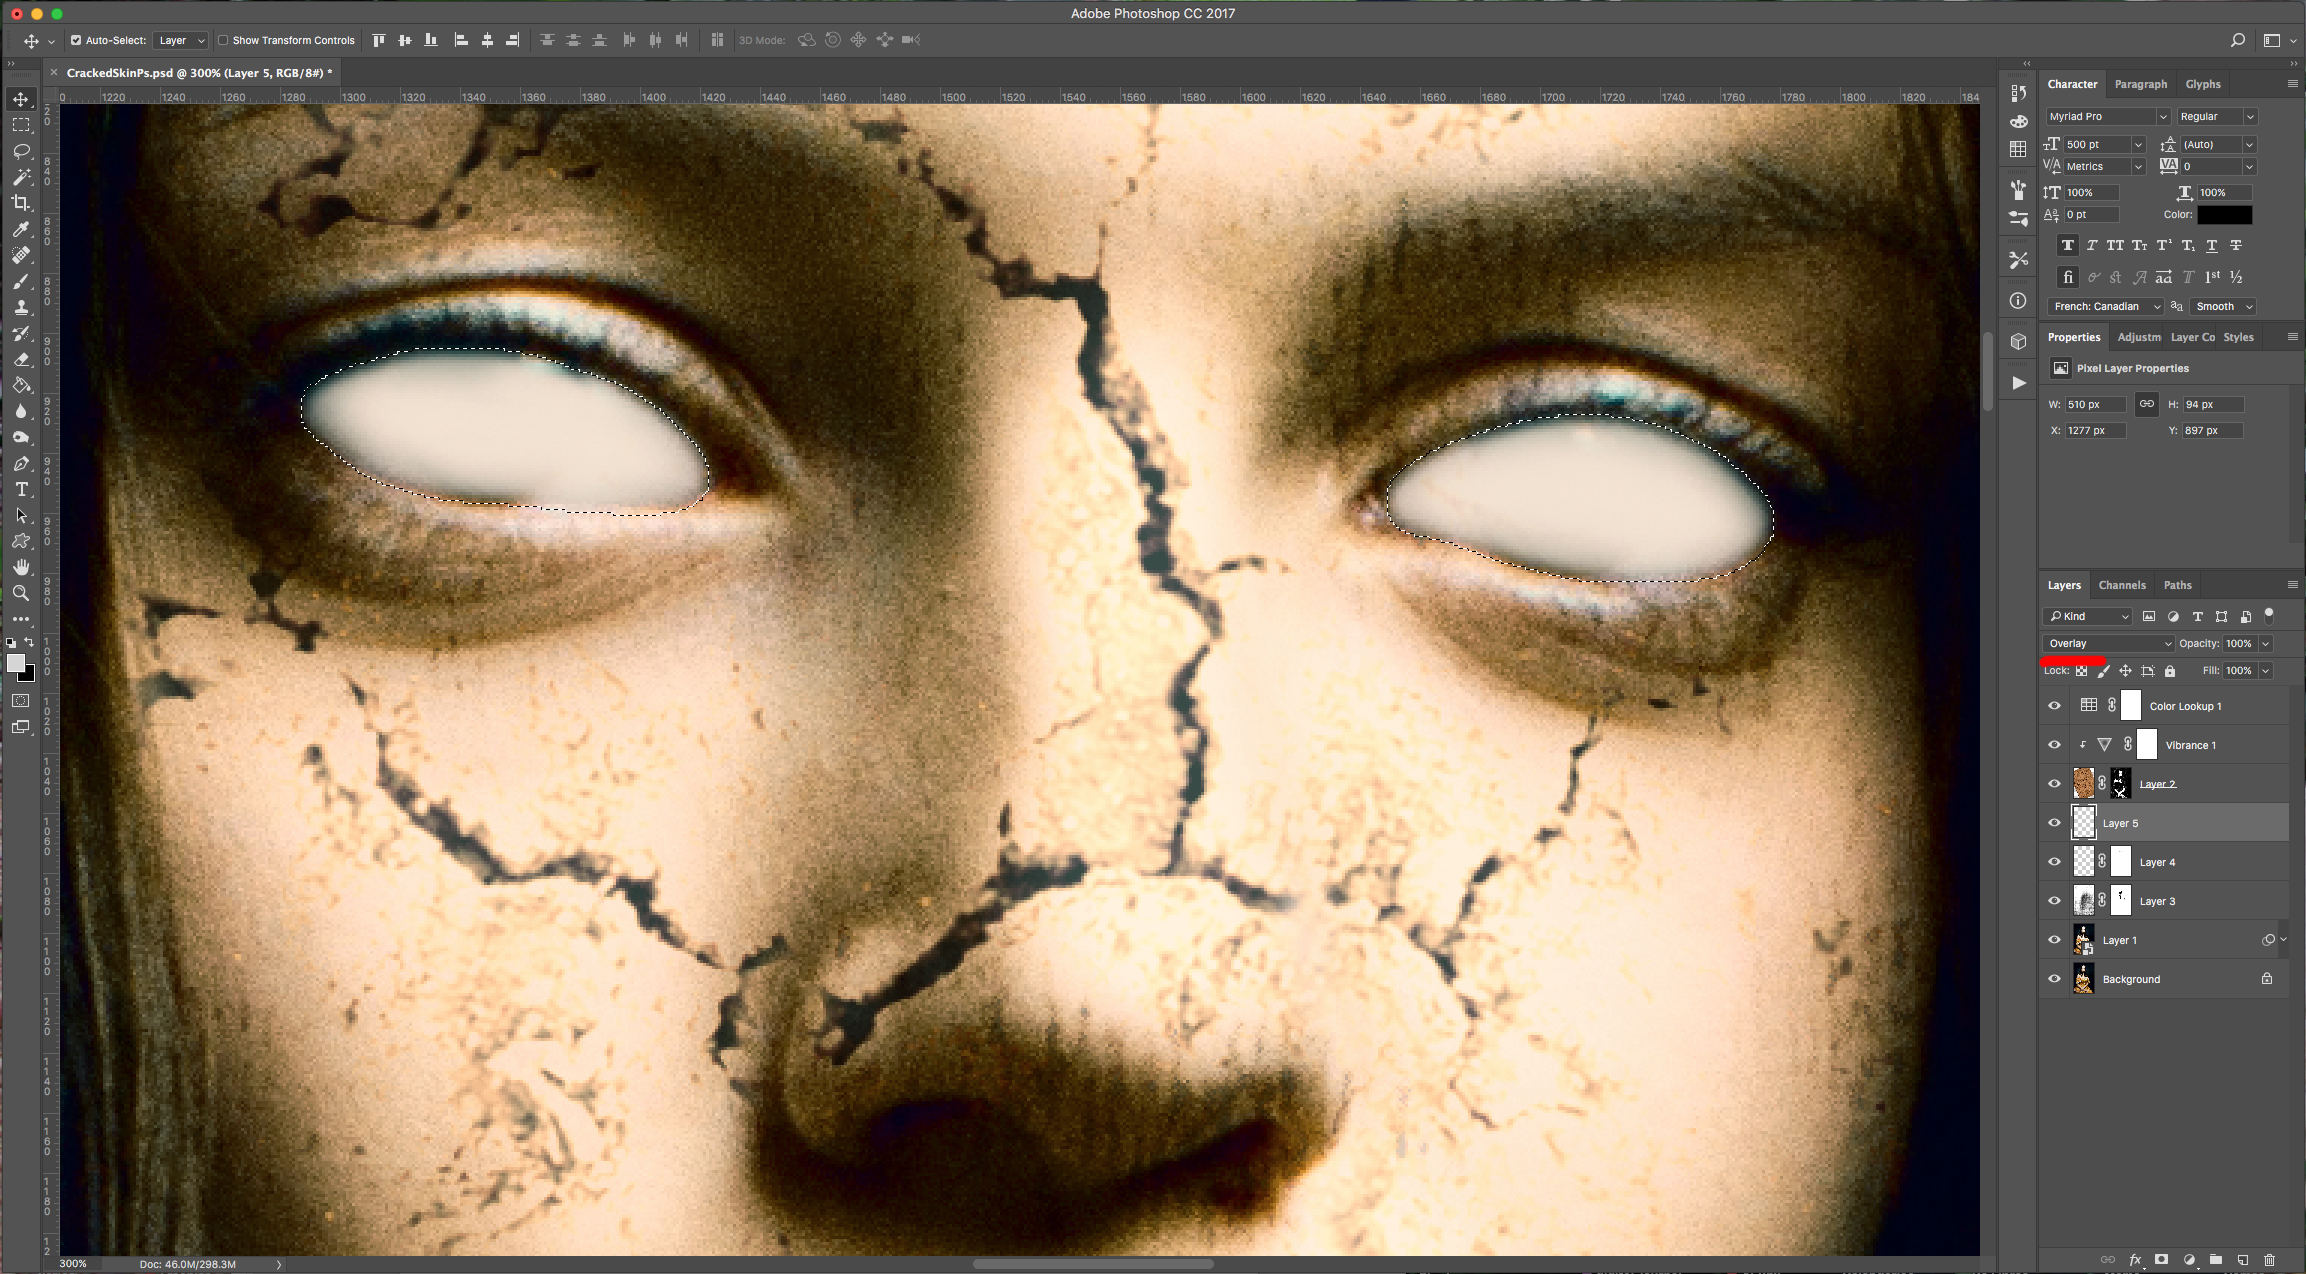
(5) 19 - With your selection still active, create a “New Layer” on top and go to Edit > Fill… (Shift + F5), choose “50% Gray” and change the “Blending Mode” to “Overlay”.
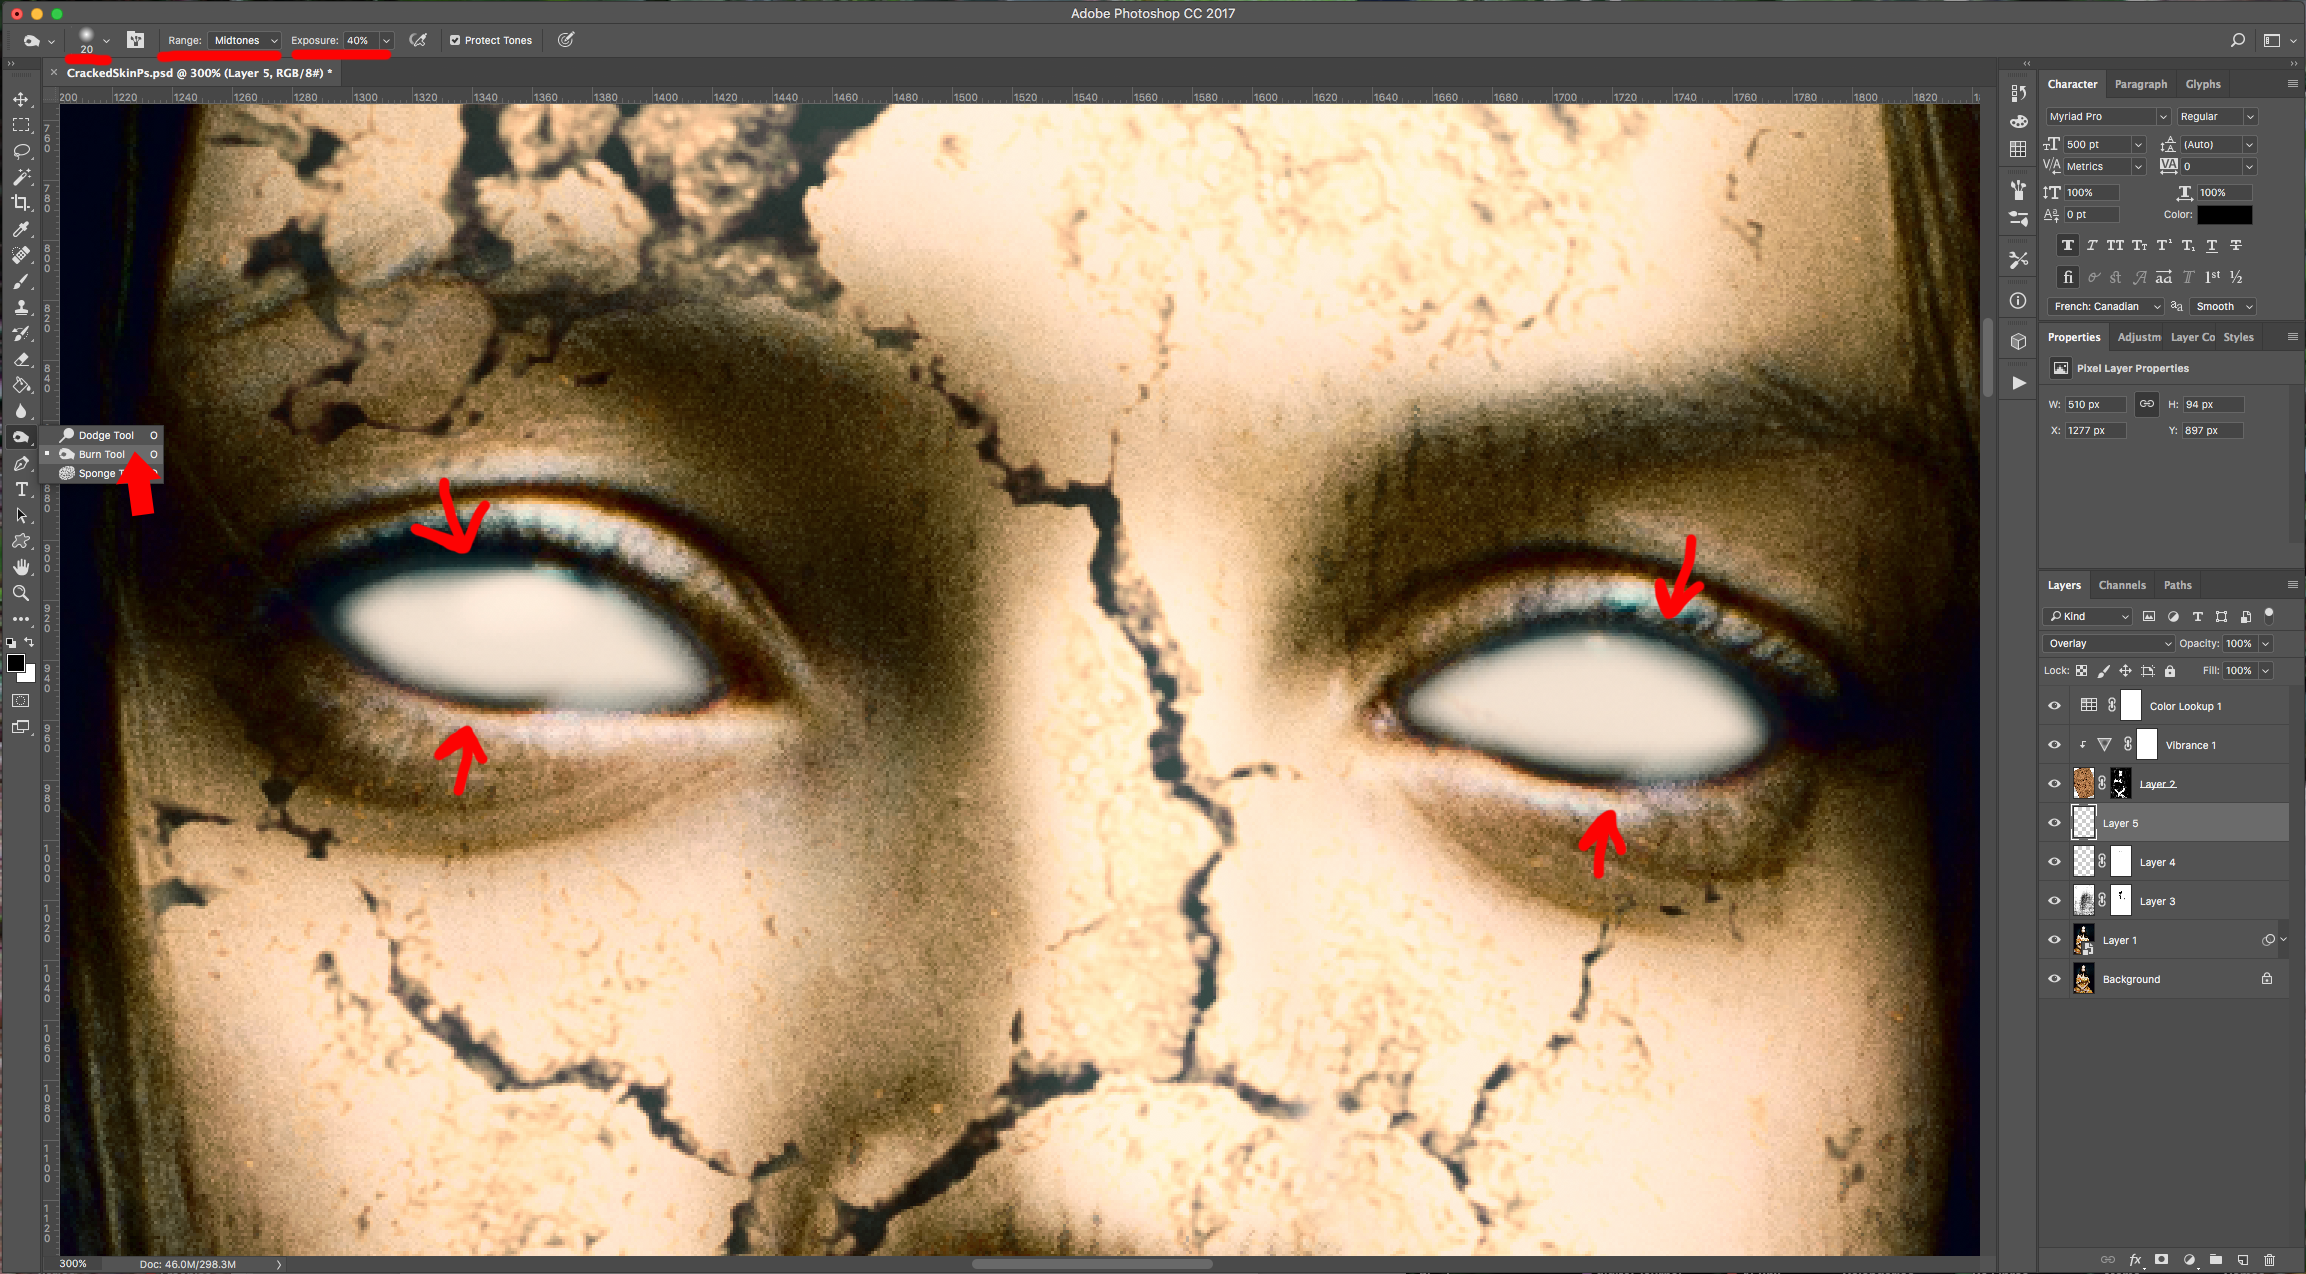
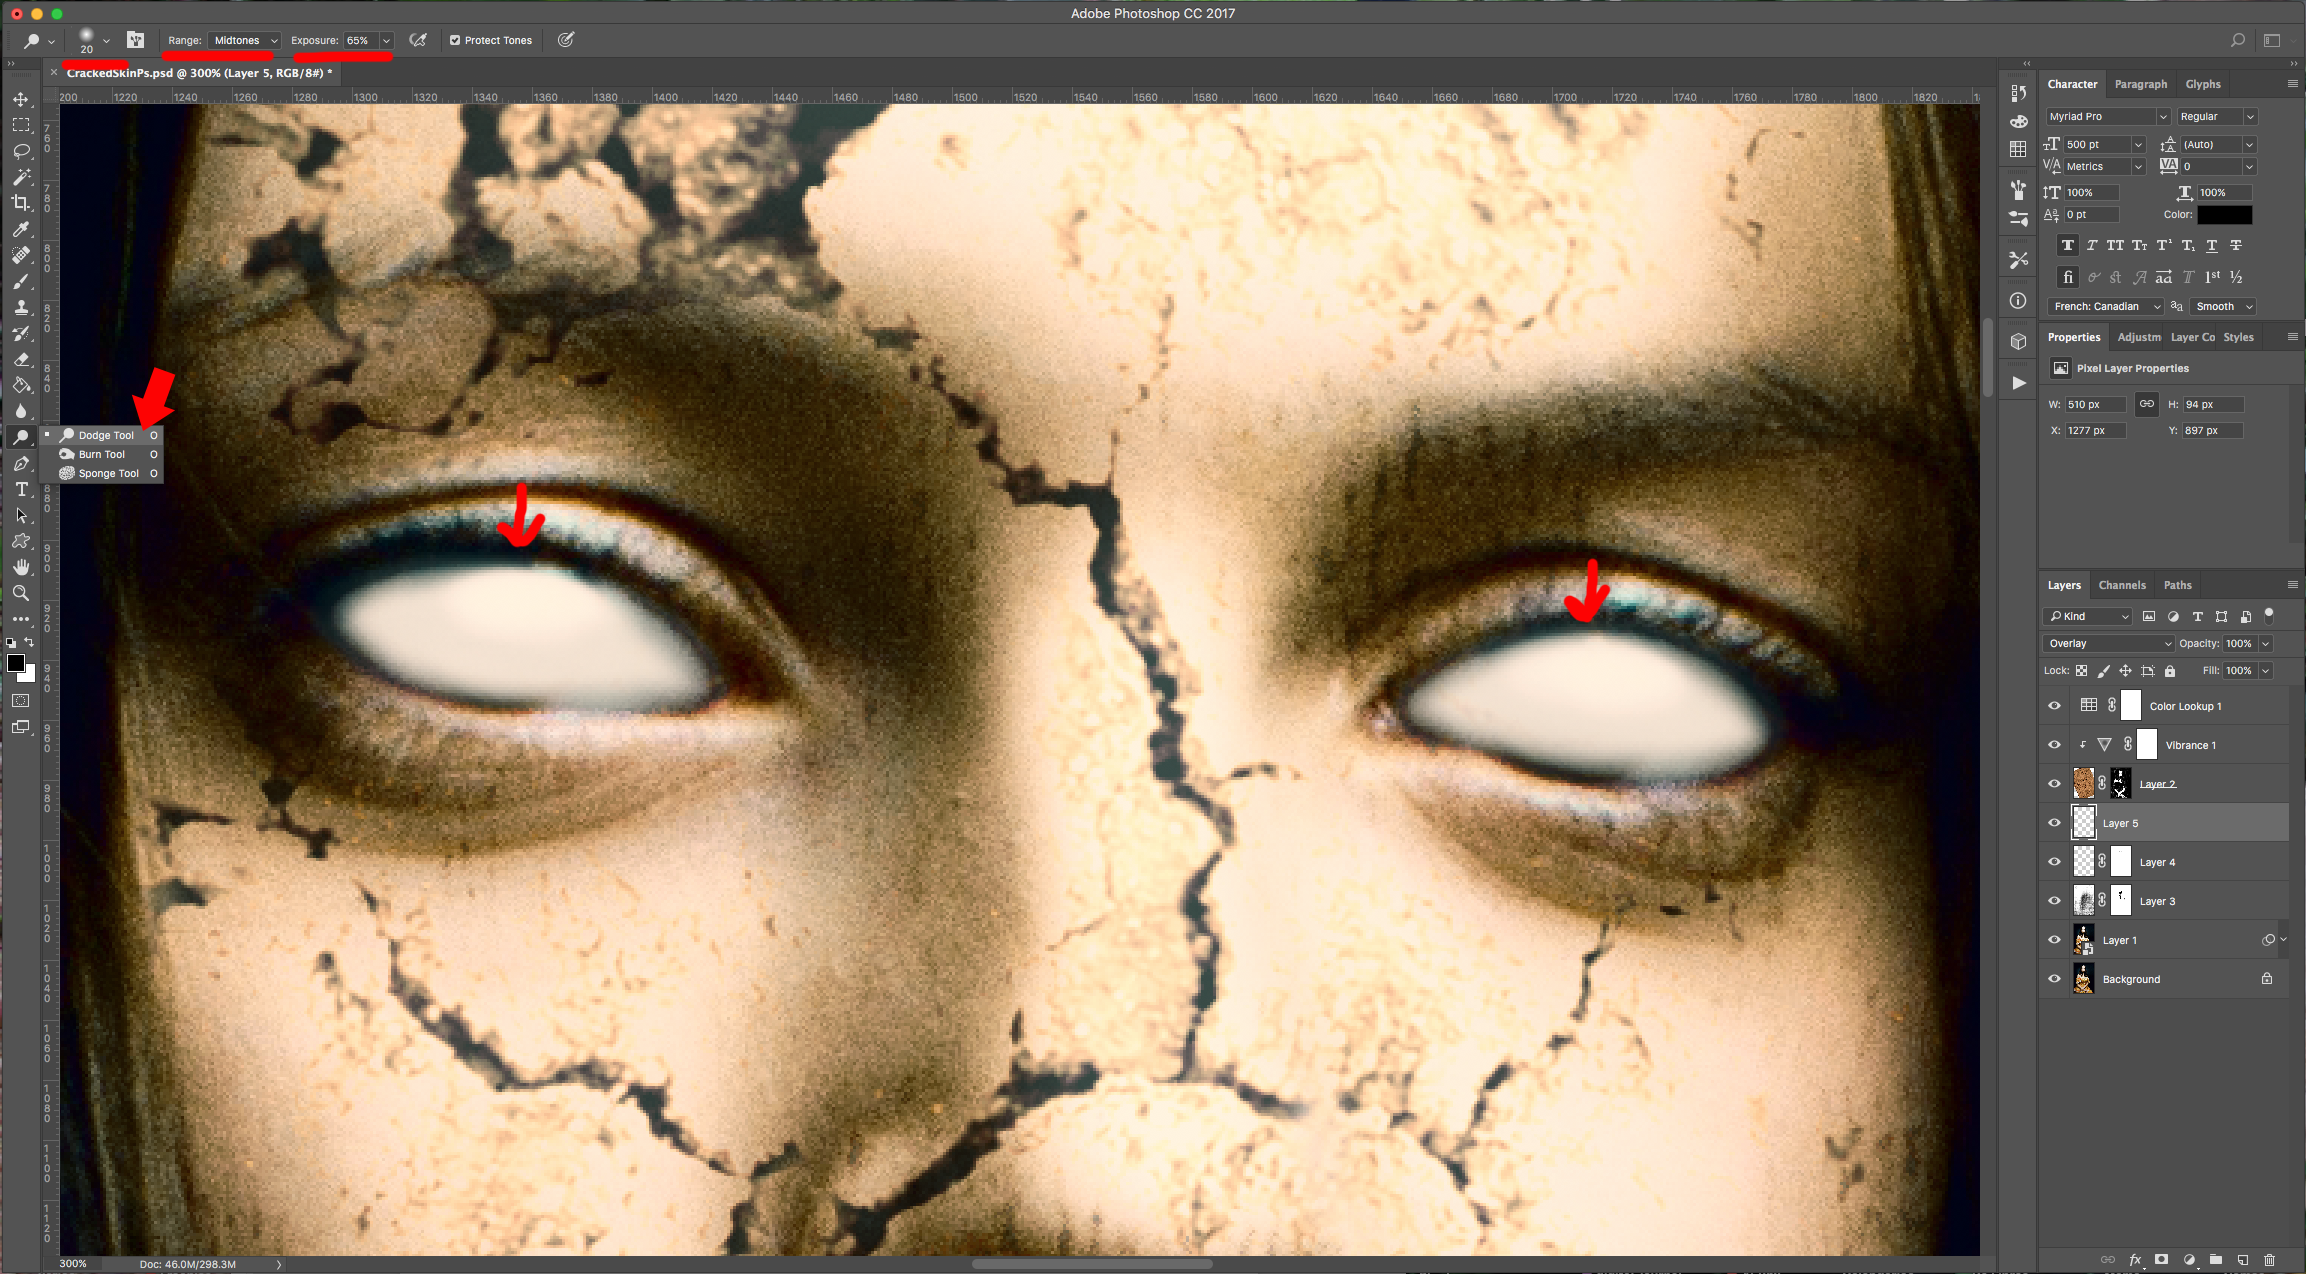
(6) 20 - Select the “Burn Tool” (O), use a 20 Pixels brush, choose “Midtones” for “Range” and an “Exposure” of 40% and work around the edges to give them a bit of depth (this will darken the edges). Change your Tool to “Dodge” (O), keep the 20 Pixels brush, choose “Midtones” for “Range” and an “Exposure” of 65% and check where the real light spots are in your subject’s eyes, then add some strokes in a semi-circular manner on top to keep giving the idea of depth (this will lighten the Top-Center a bit).
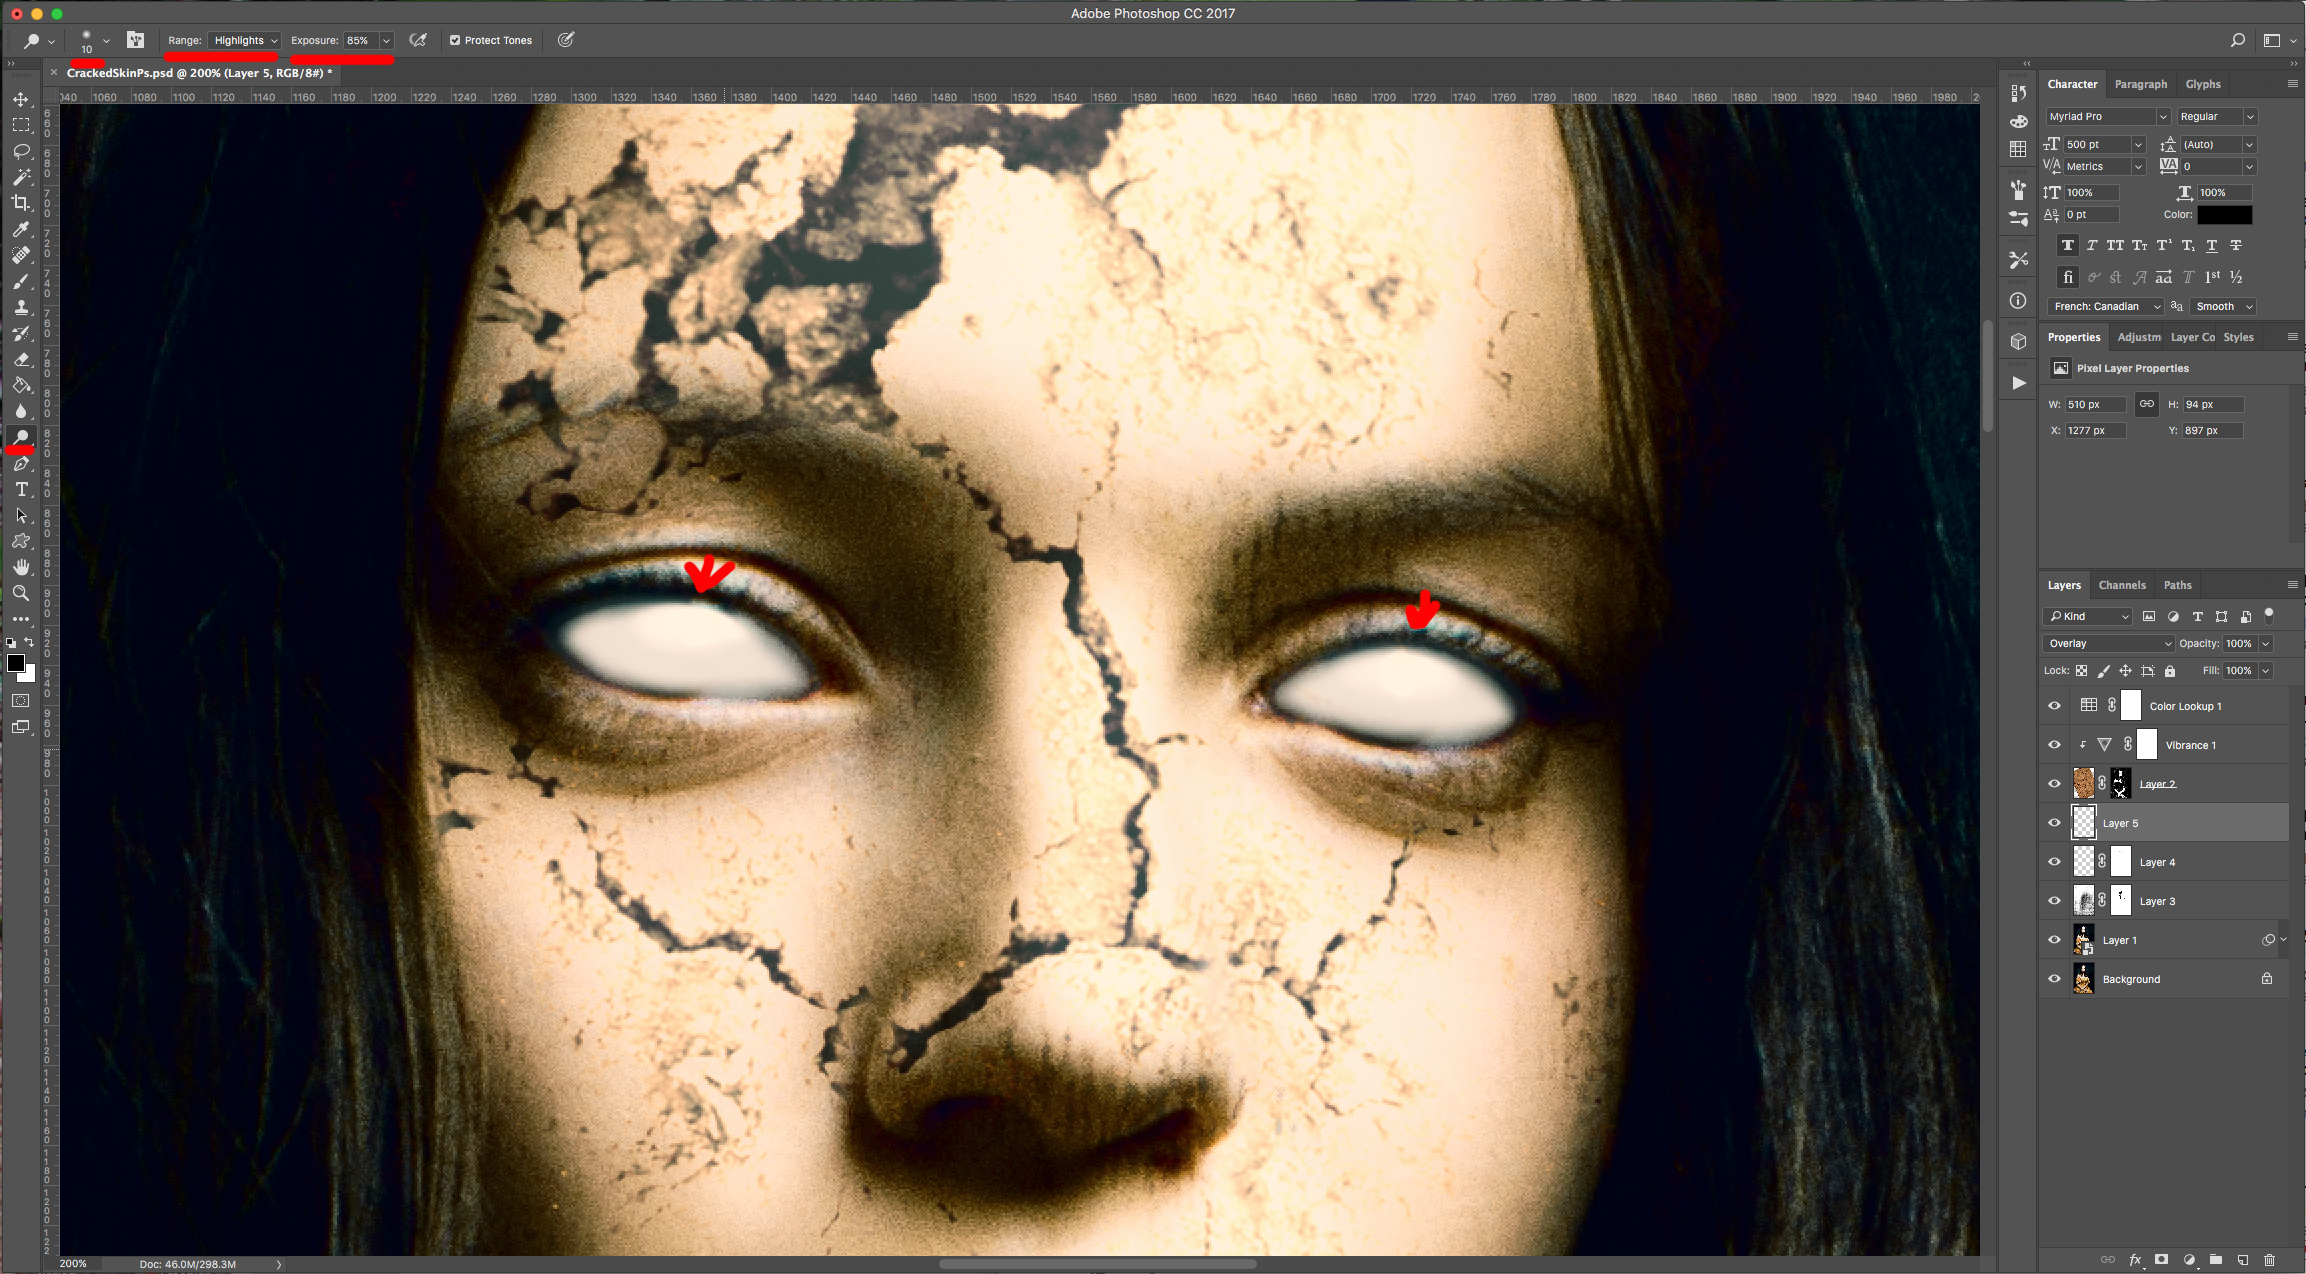
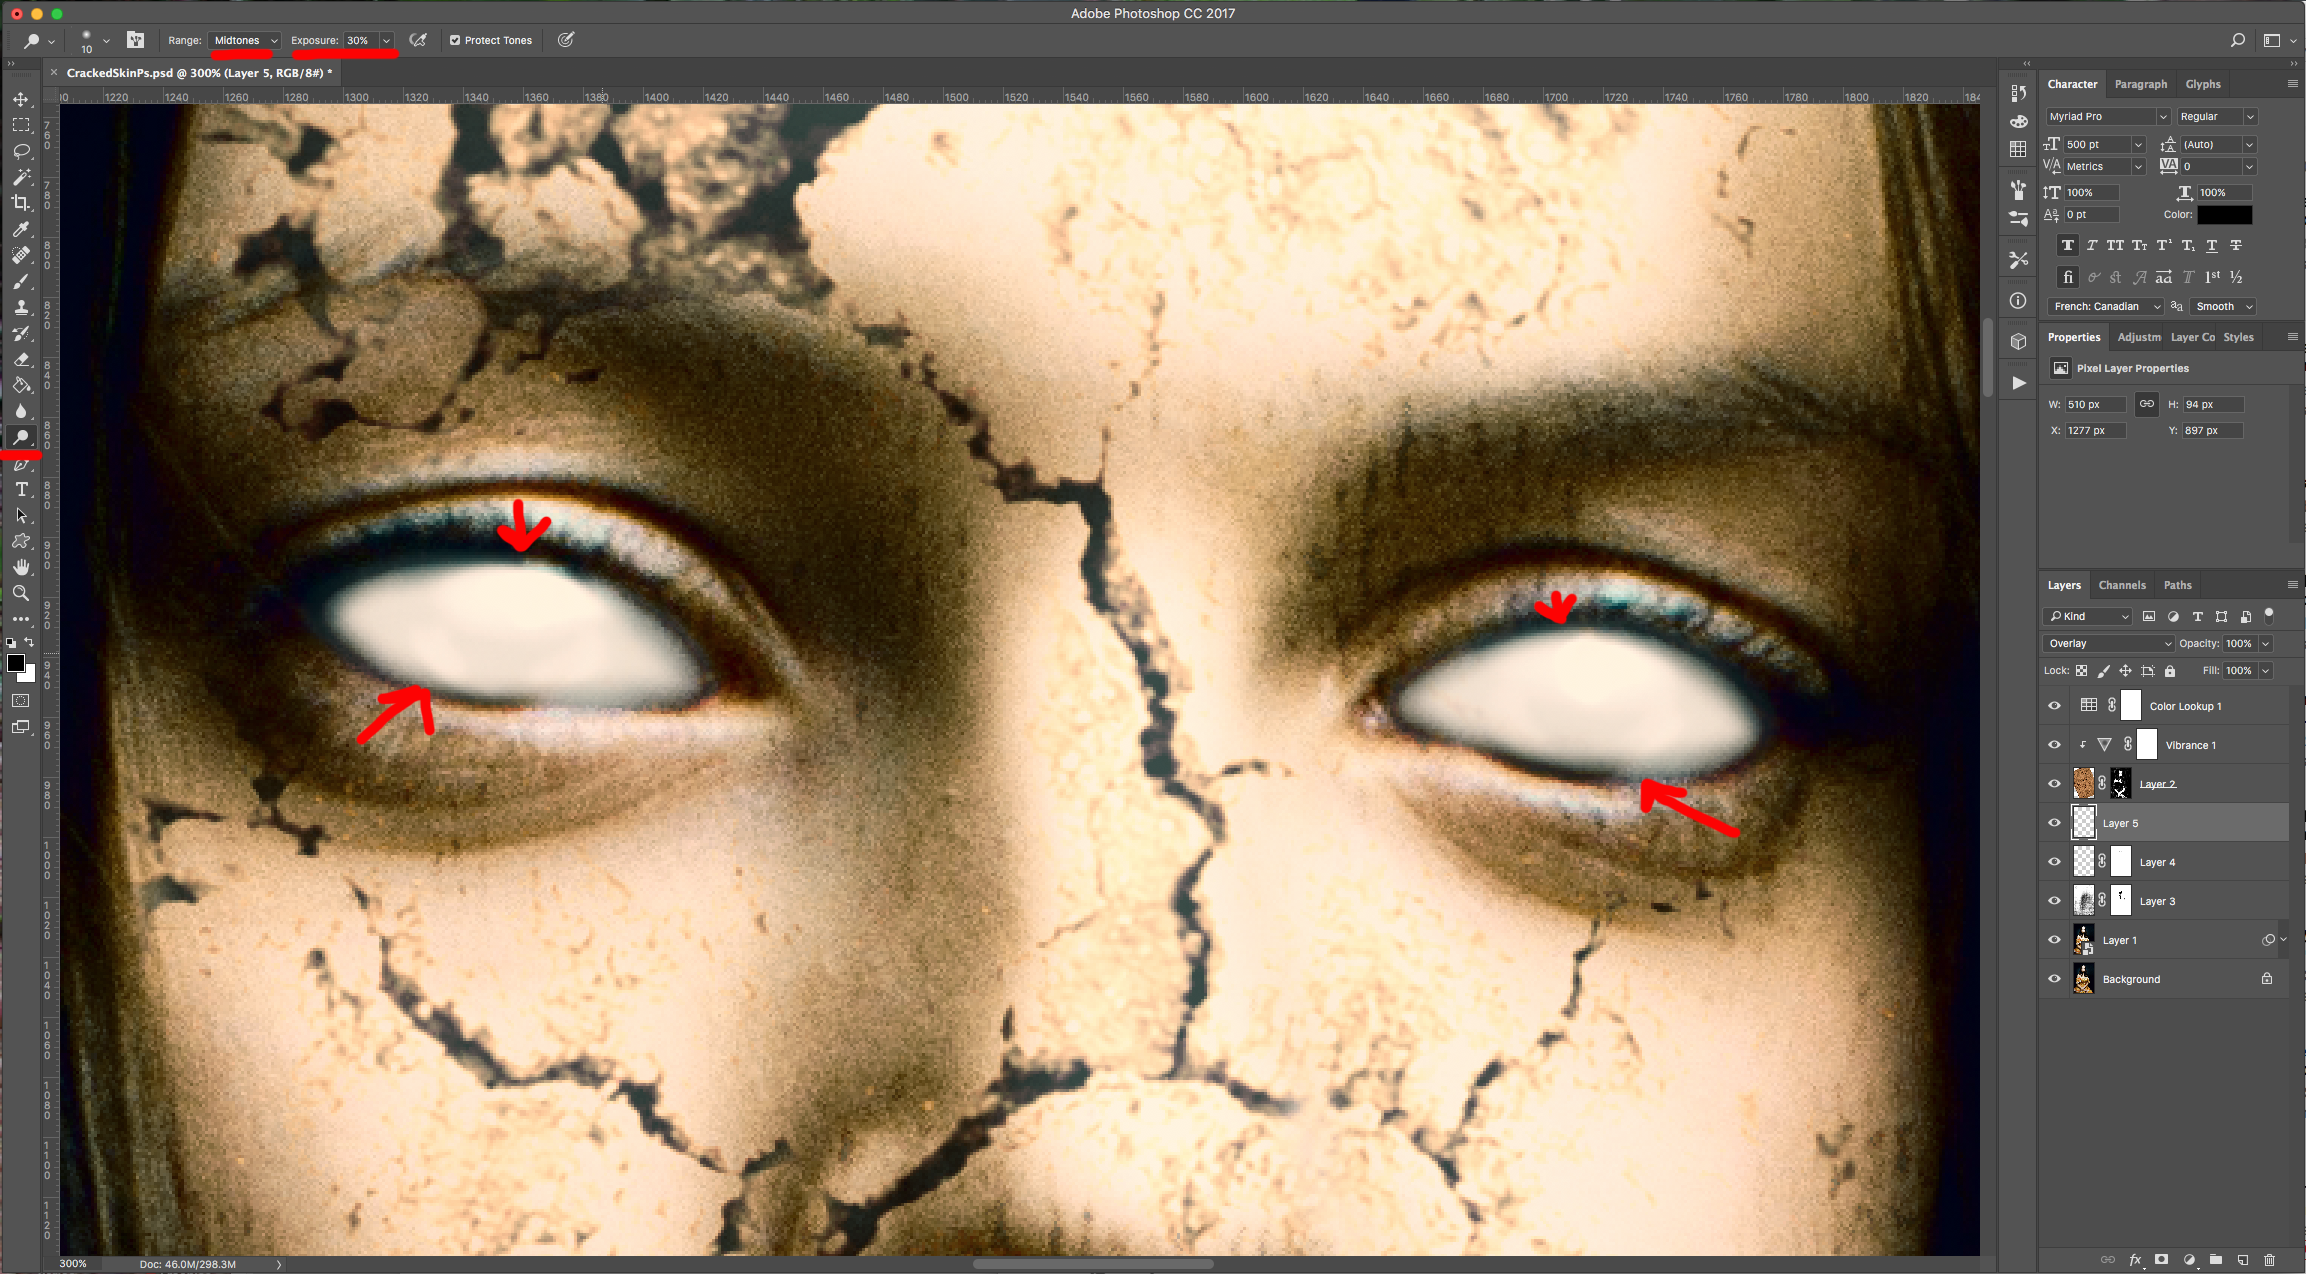
(7) 21 - Make the brush smaller (10 Pixels) and change the “Range” to “Highlights” and the “Exposure” to 55% and add smaller circles on top to make the light more evident. To finish, go back to “Midtones” with a 30% “Exposure” and work a bit on the lower portion of the eye. Go back to the “Burn Tool” (O), change the “Range” to “Highlights” and keep a 40% “Exposure” and work around the edges a bit more.
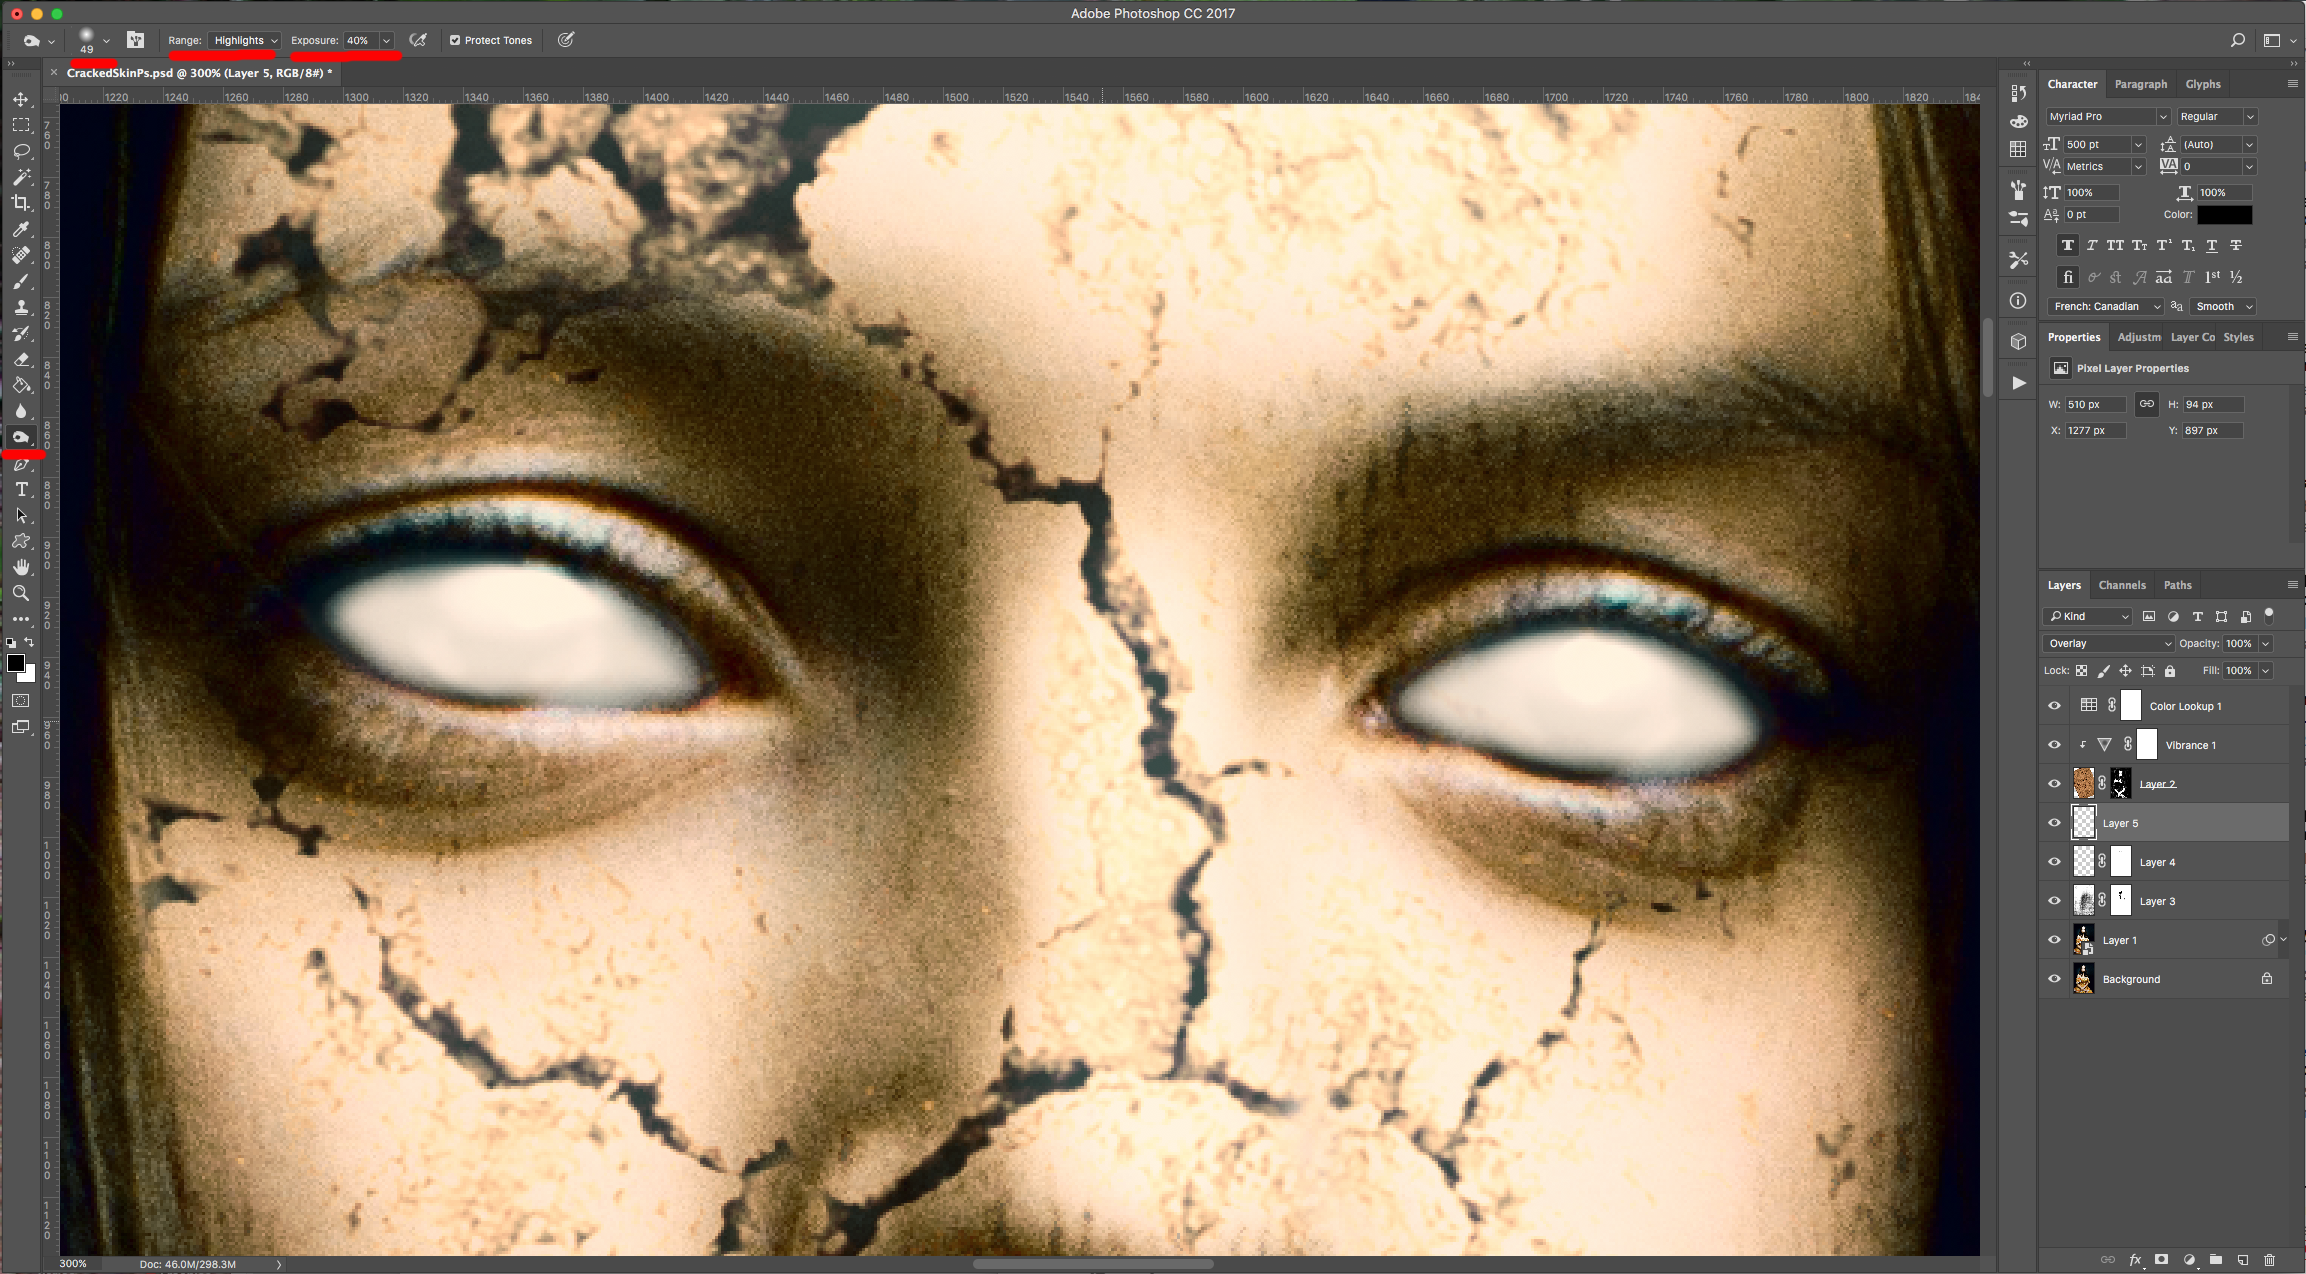
(8) 22 - Check out your Artwork.
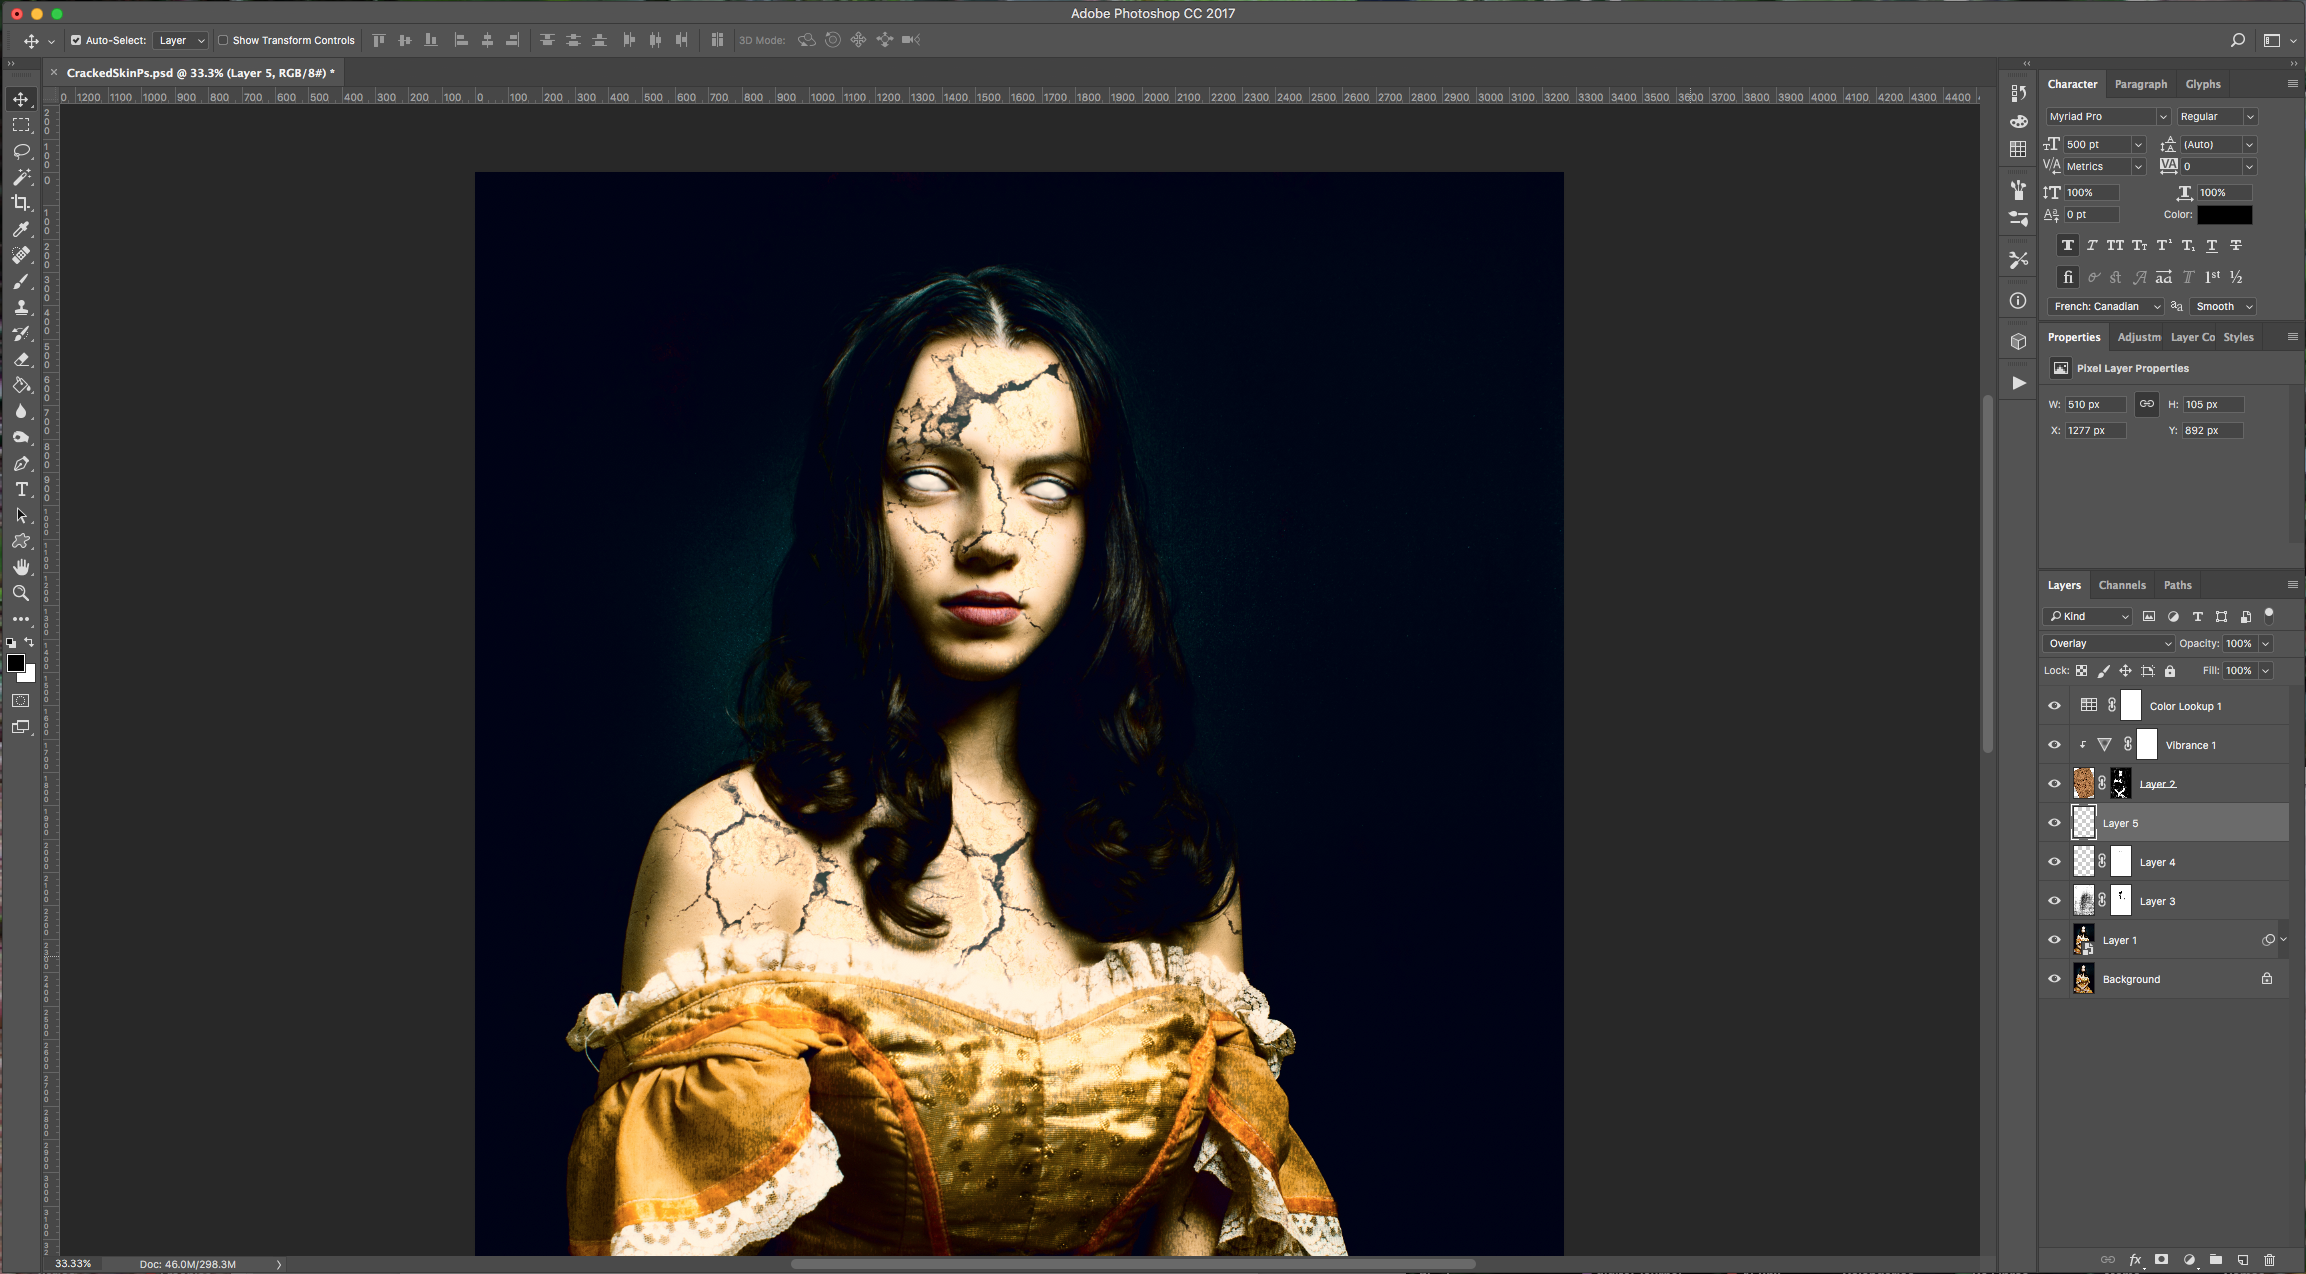
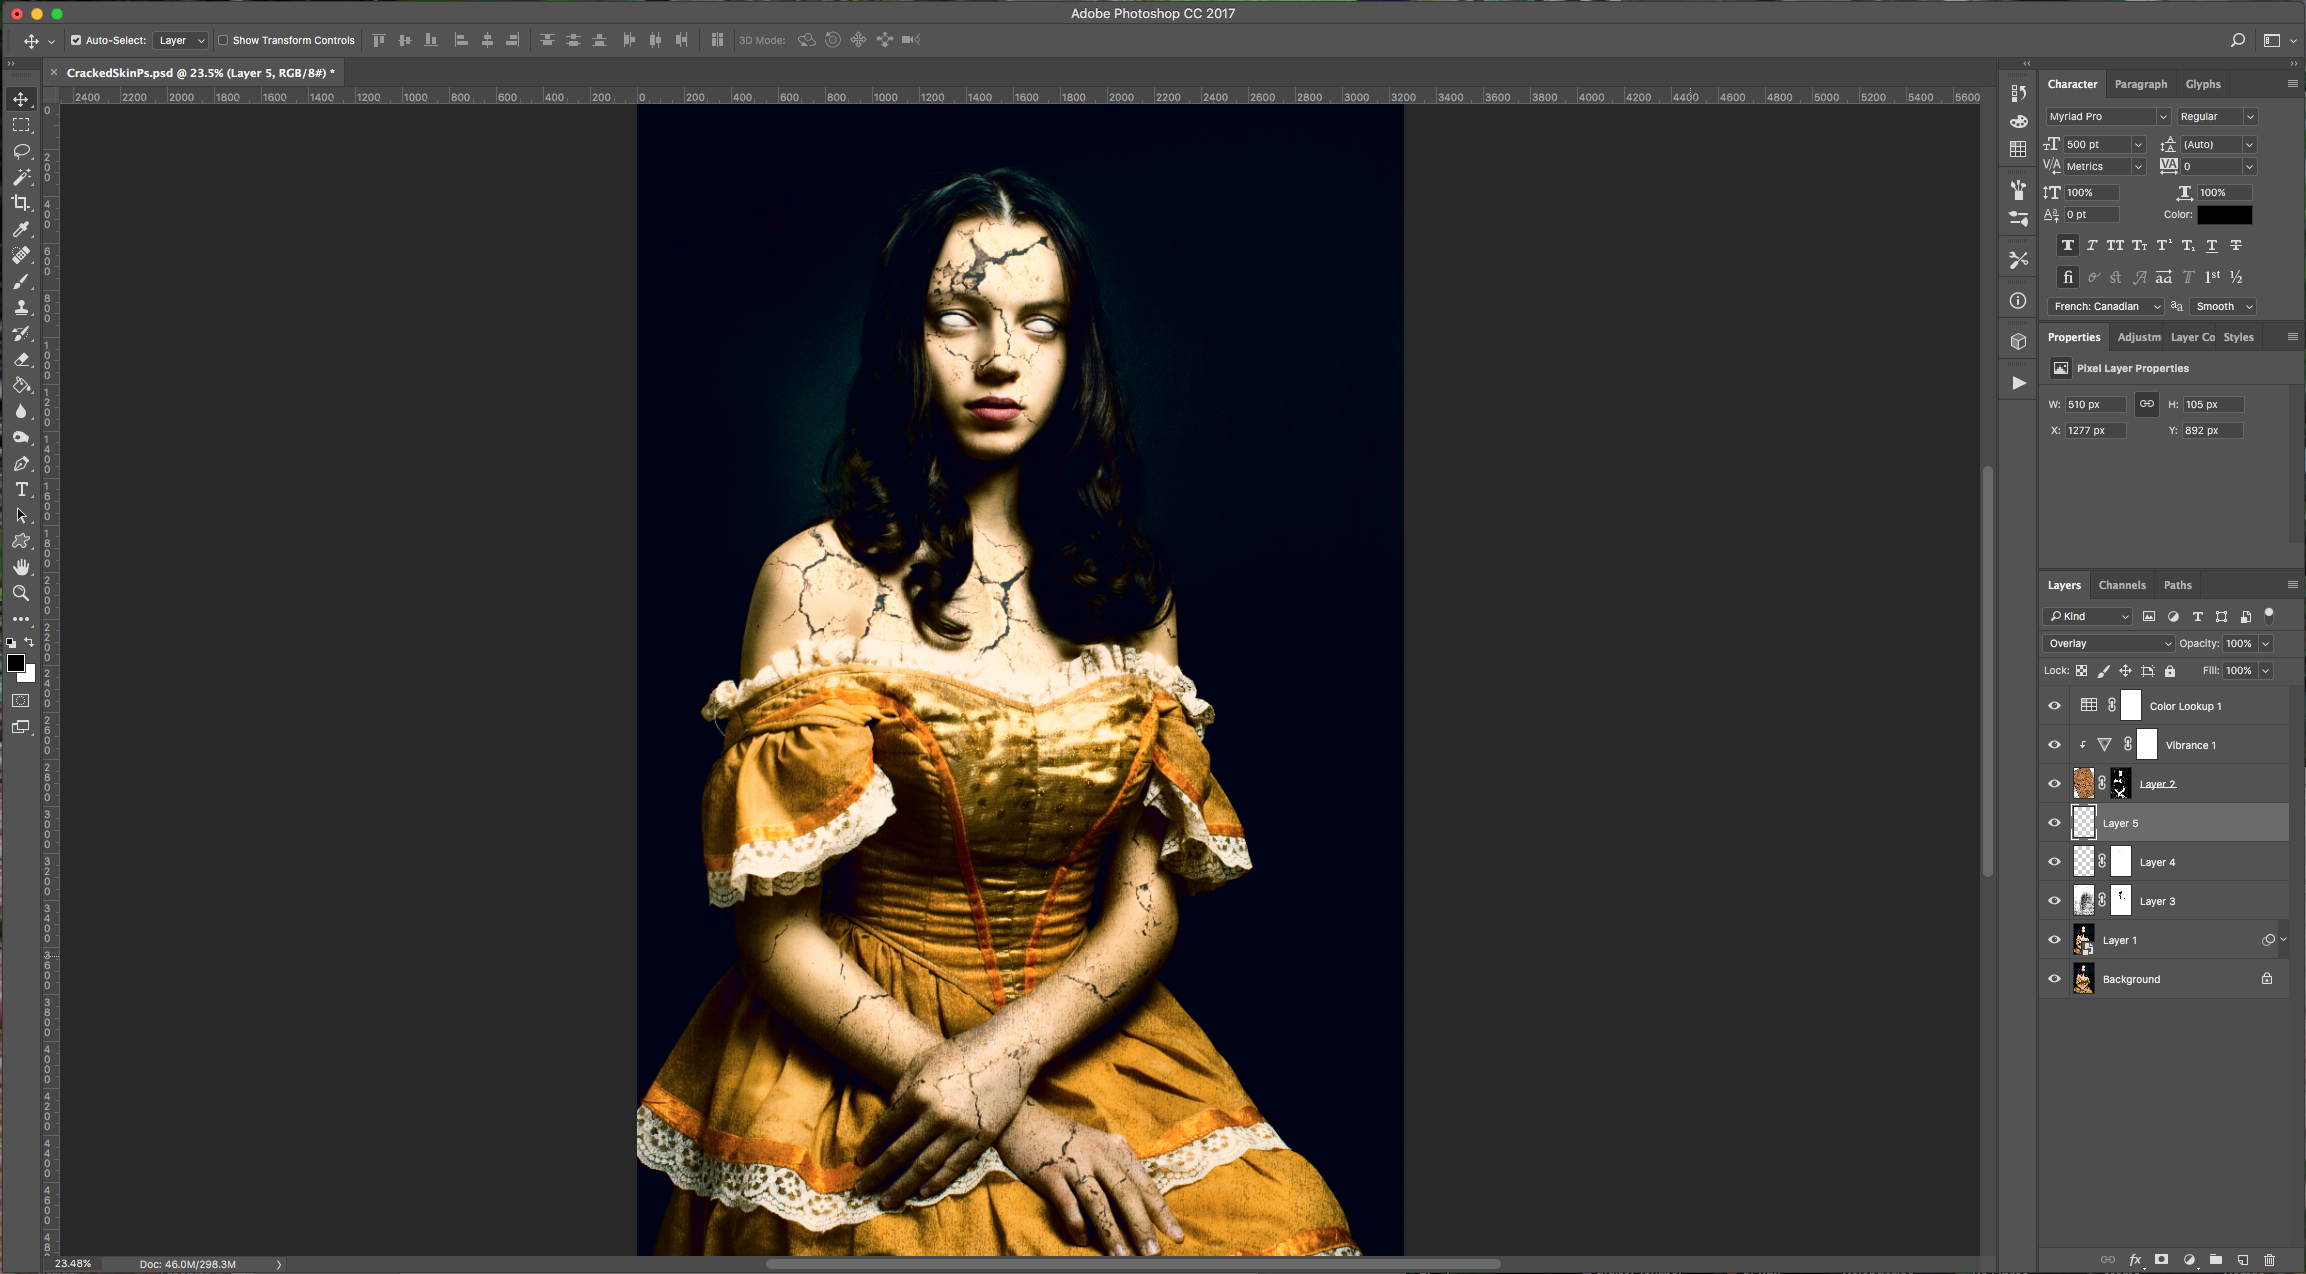
by @lornacane
(1) 15 - Create a “New Layer” on top of the “Grunge Texture” (click on the small button at the bottom of the “Layers Panel” and make your “Foreground” color a medium grey (we used #d5d5d5). Or, open the image you chose to work with and then, create the "New layer" on top of it.
(2) 16 - Use the “Brush Tool” (B) with a small and soft brush (20 px and 0% “Hardness”) to fill the eyes of your subject.
(3) 17 - Add a “Layer Mask” to this New Layer and use the “Brush Tool” (B) with a medium brush (45 px) using Black as “Foreground” color. Lower the “Opacity" of the brush to about 35% and soften the edges of the grey applied on top of the eyes. If you think that you erased too much, just use White instead of Black as “Foreground” color.
(4) 18 - Click on top of your Layer’s Thumbnail while holding the “Command/Control” key to make a selection, then go to Select > Modify > Expand… and choose a 1 Pixel.
(5) 19 - With your selection still active, create a “New Layer” on top and go to Edit > Fill… (Shift + F5), choose “50% Gray” and change the “Blending Mode” to “Overlay”.
(6) 20 - Select the “Burn Tool” (O), use a 20 Pixels brush, choose “Midtones” for “Range” and an “Exposure” of 40% and work around the edges to give them a bit of depth (this will darken the edges). Change your Tool to “Dodge” (O), keep the 20 Pixels brush, choose “Midtones” for “Range” and an “Exposure” of 65% and check where the real light spots are in your subject’s eyes, then add some strokes in a semi-circular manner on top to keep giving the idea of depth (this will lighten the Top-Center a bit).
(7) 21 - Make the brush smaller (10 Pixels) and change the “Range” to “Highlights” and the “Exposure” to 55% and add smaller circles on top to make the light more evident. To finish, go back to “Midtones” with a 30% “Exposure” and work a bit on the lower portion of the eye. Go back to the “Burn Tool” (O), change the “Range” to “Highlights” and keep a 40% “Exposure” and work around the edges a bit more.
(8) 22 - Check out your Artwork.
by @lornacane
Related Tutorials
Photoshop Tutorials
How to Create a Cracked Skin Effect in Photoshop
Photoshop Tutorials
Black Eyes in Photoshop
Photoshop Tutorials
High Contrast Black and White in Photoshop
Learn how to create a high contrast black and white photo in Photoshop.
Photoshop Tutorials
How to Retouch Skin in Photoshop
Photoshop Tutorials
How to Colorize Black and White Images in Photoshop
Photoshop Tutorials