By Design Bundles
Photoshop Tutorials8 min
Day to Night in Photoshop
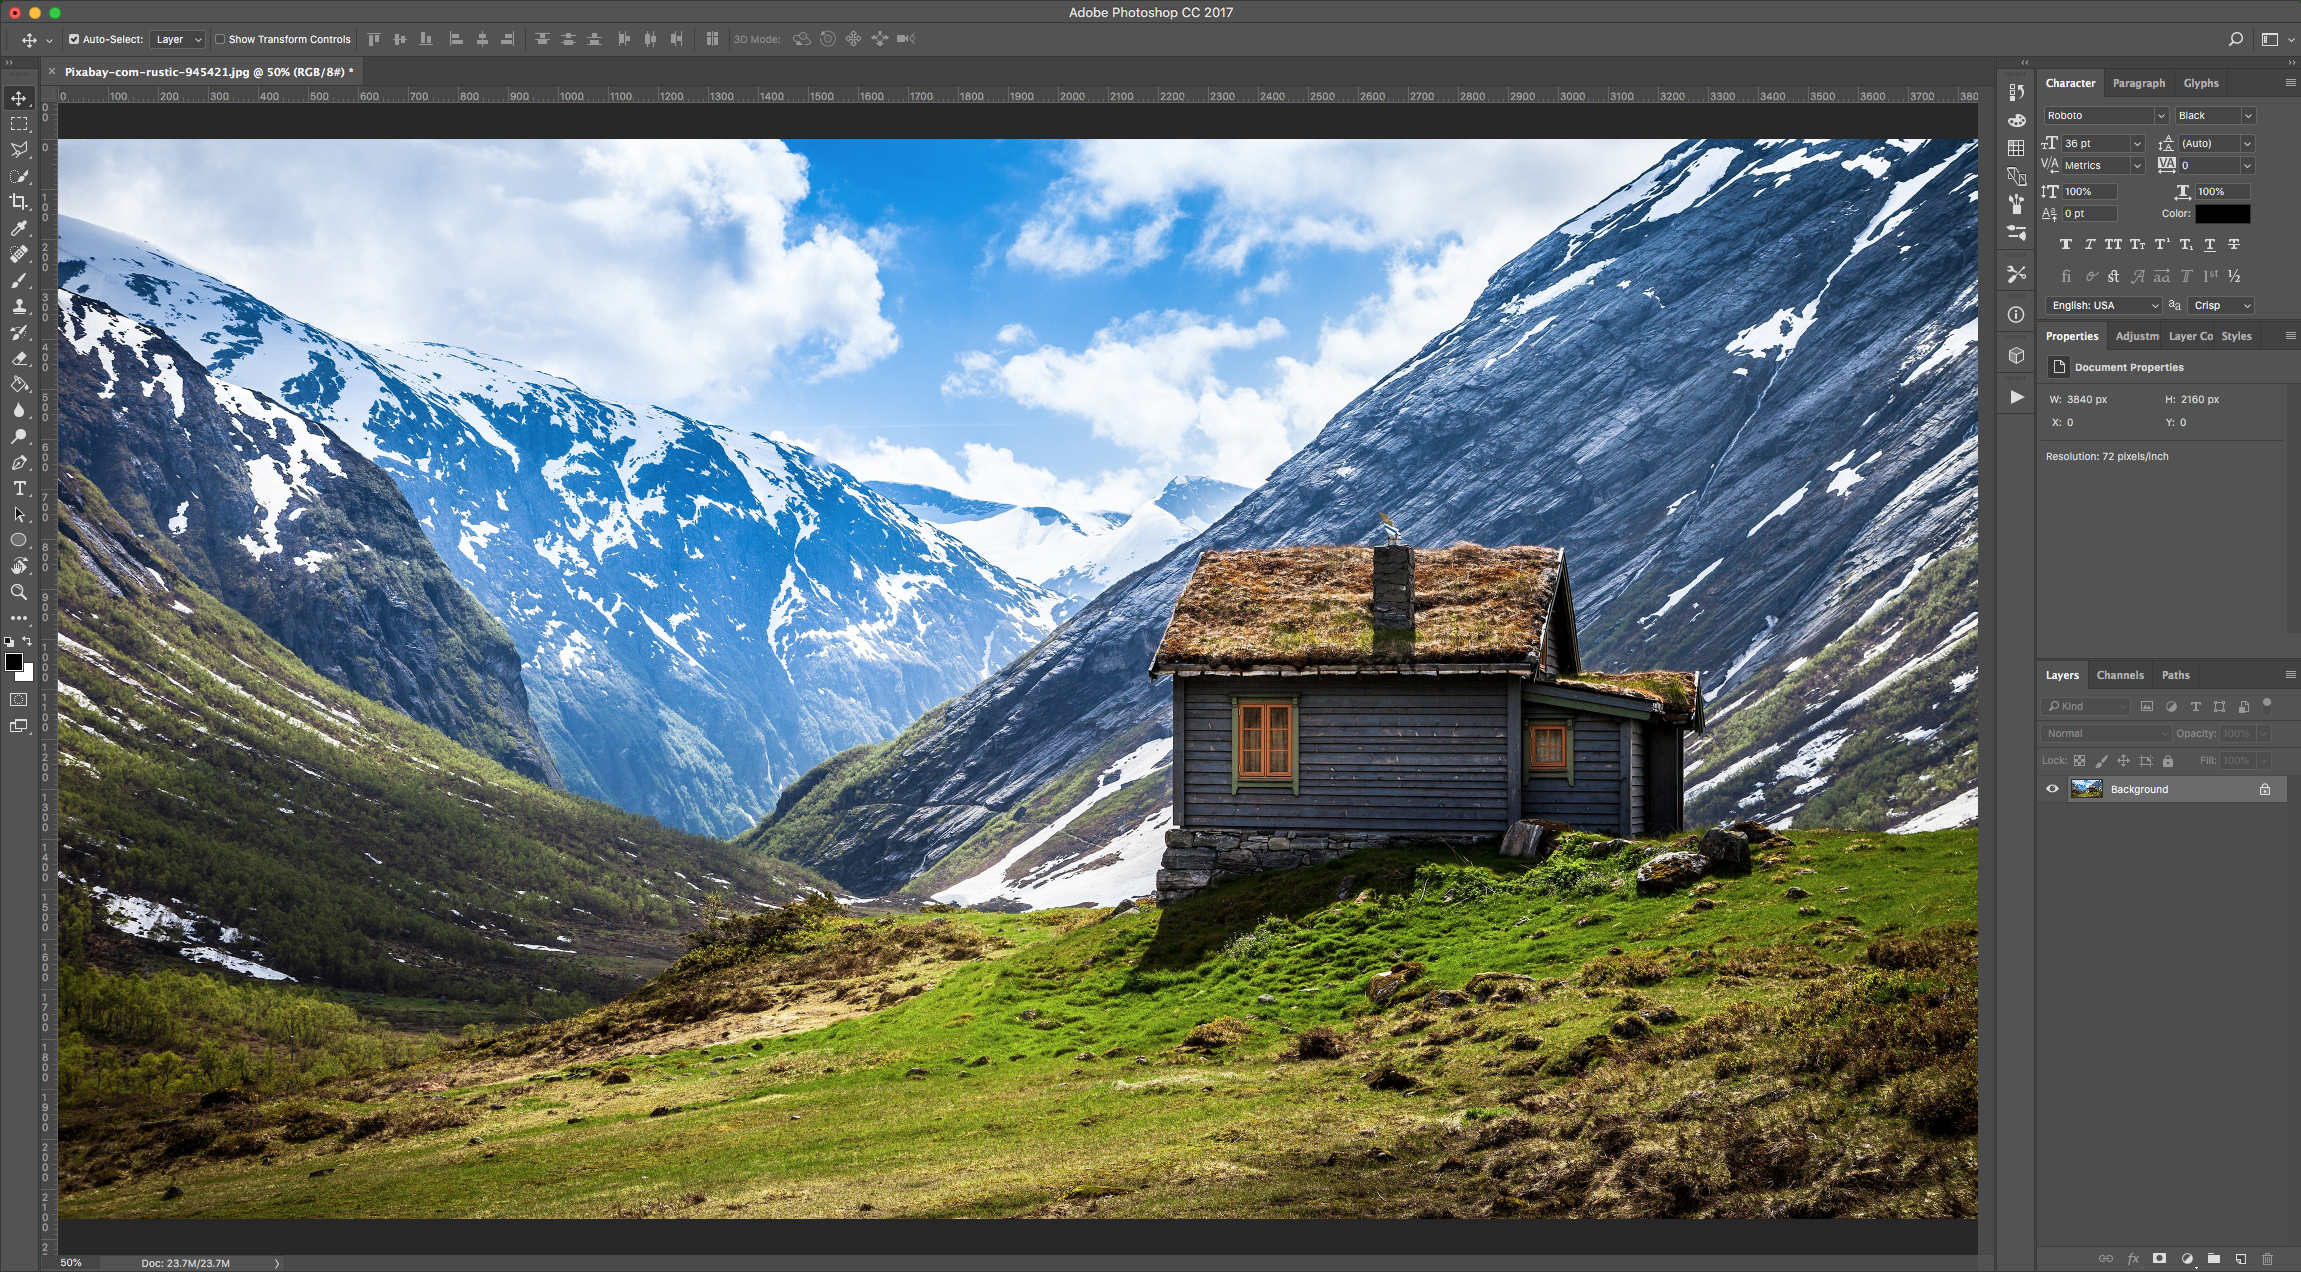
For this tutorial, we will use a daytime Image of a house or building to apply the effect to and another image of the sky with a full moon.
1 - In Photoshop, open the image you wish to use apply the “Effect” to.
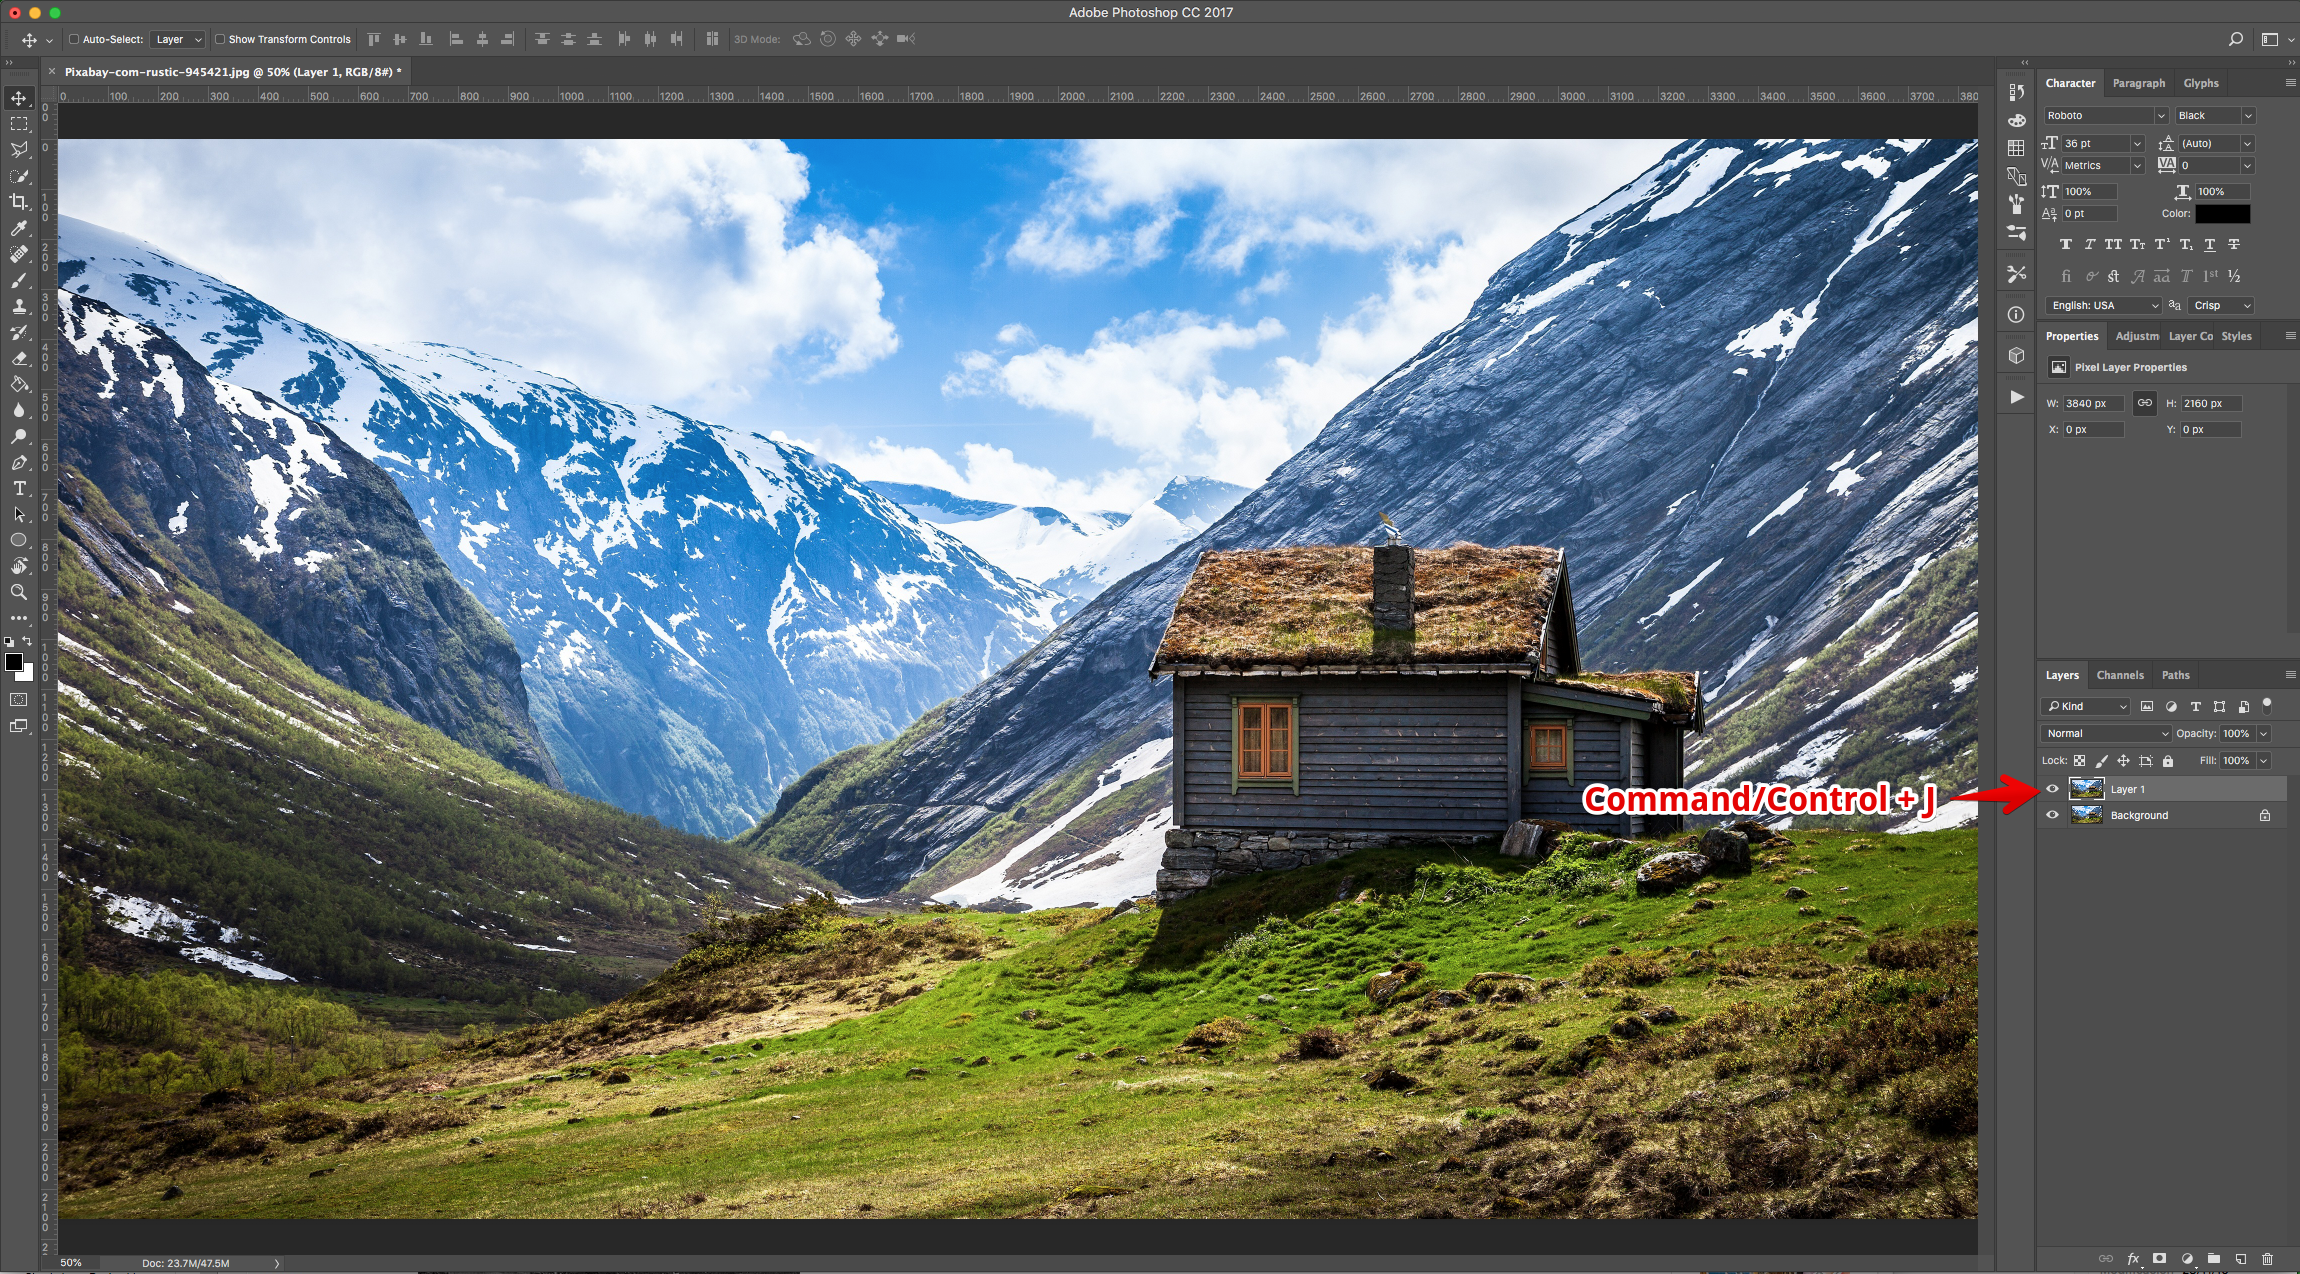
2 - Duplicate the “Background” Layer (Command/Control + J).
3 - Go to the “Adjustments Panel” and create a “Hue/Saturation” Adjustment Layer. Decrease the “Saturation” to -100%.
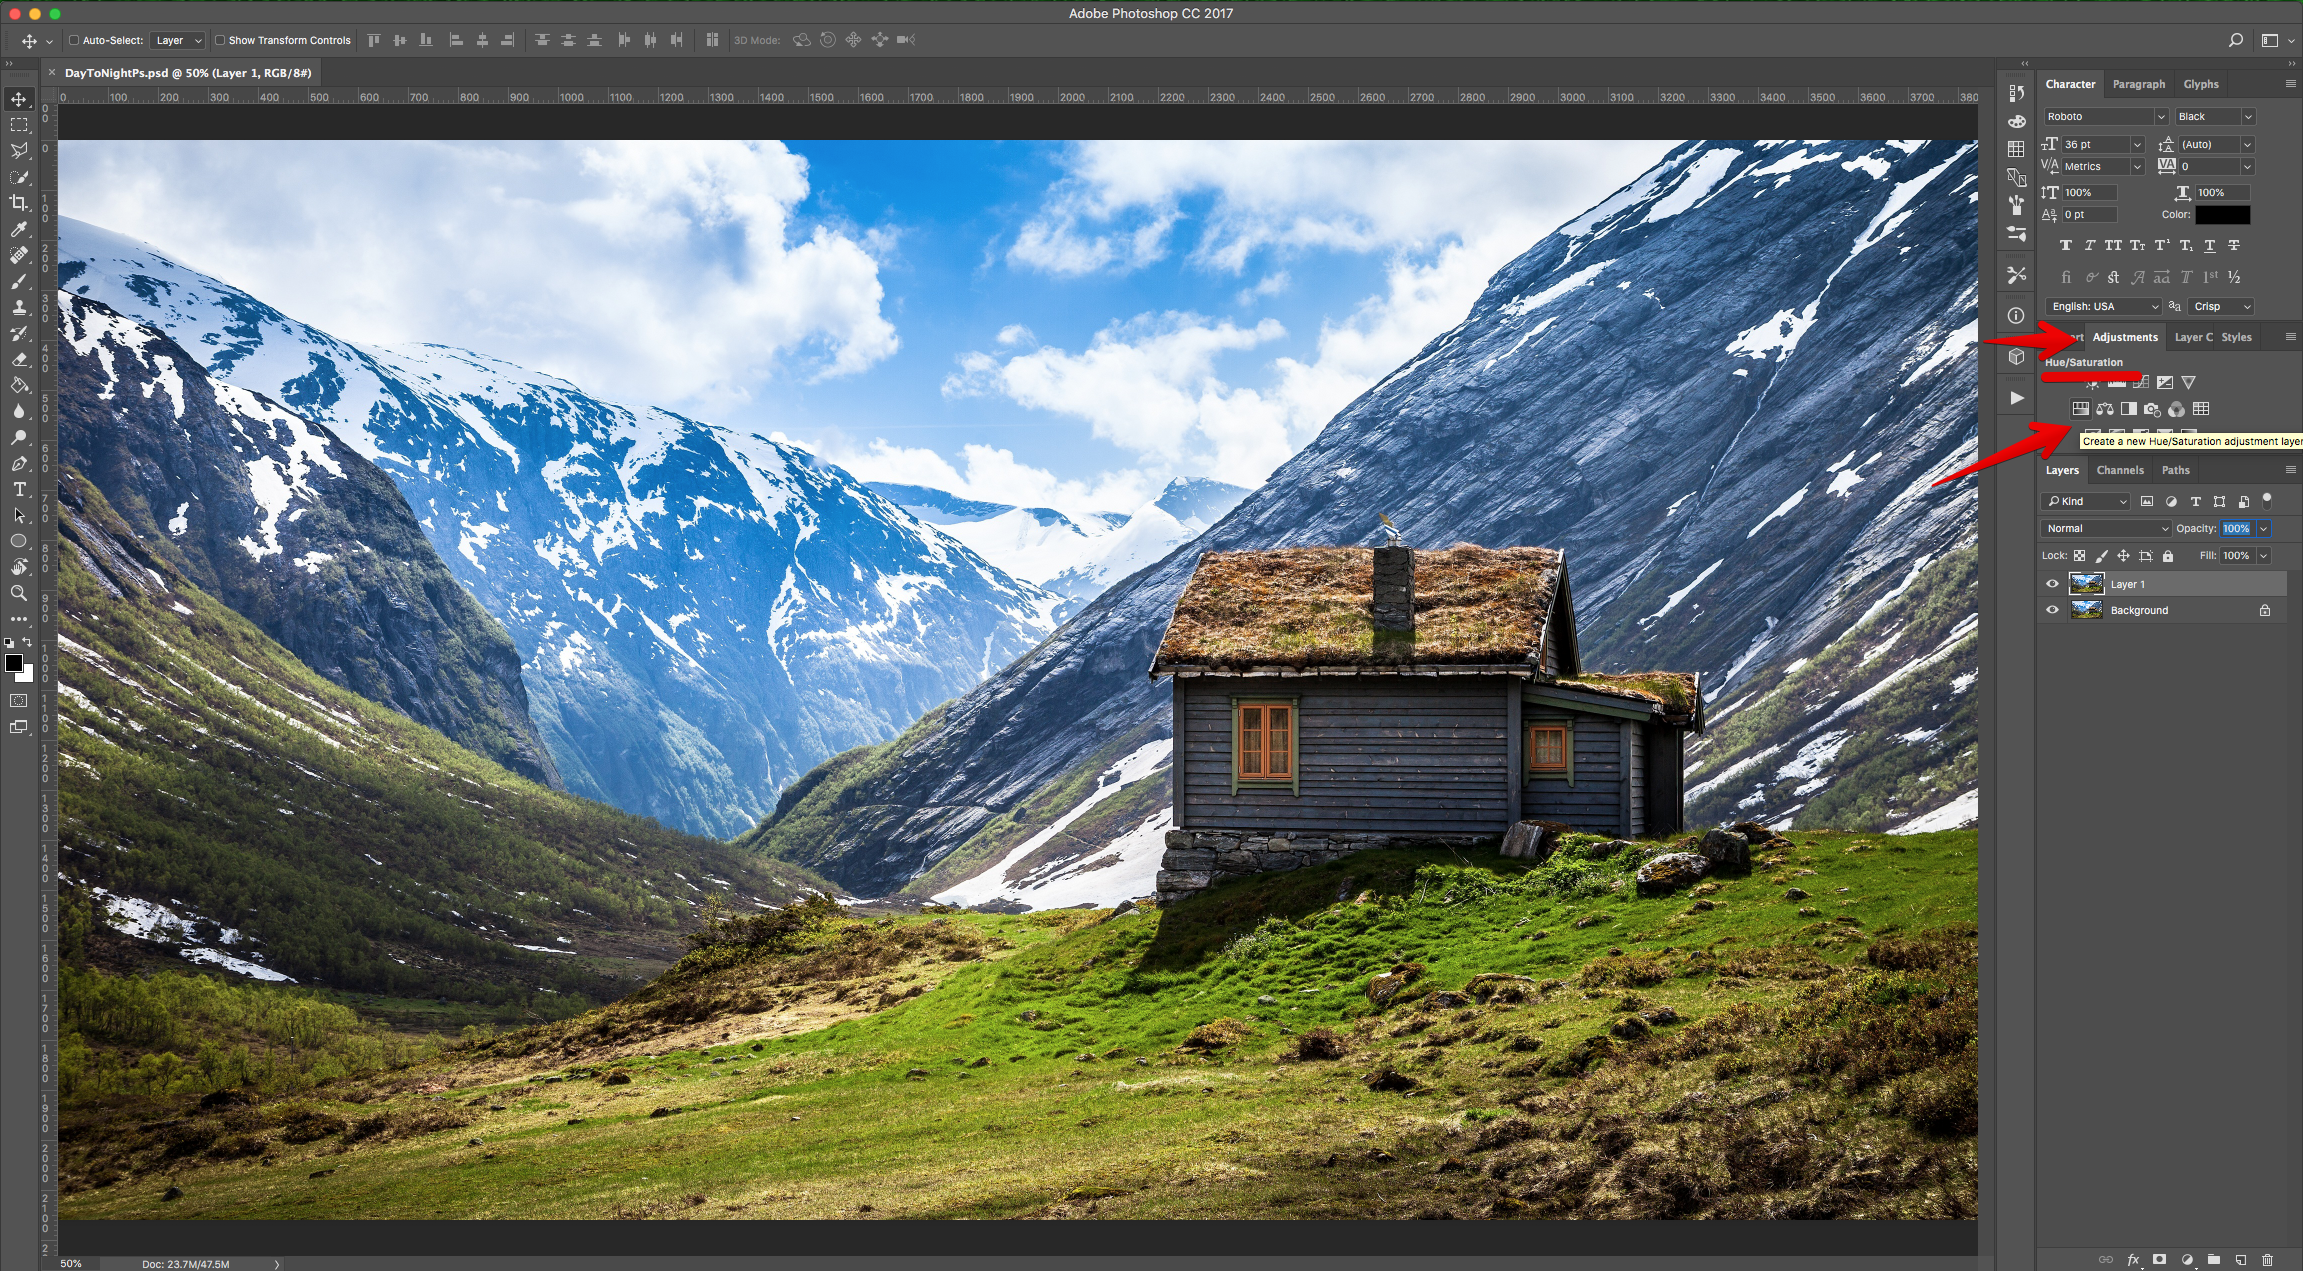
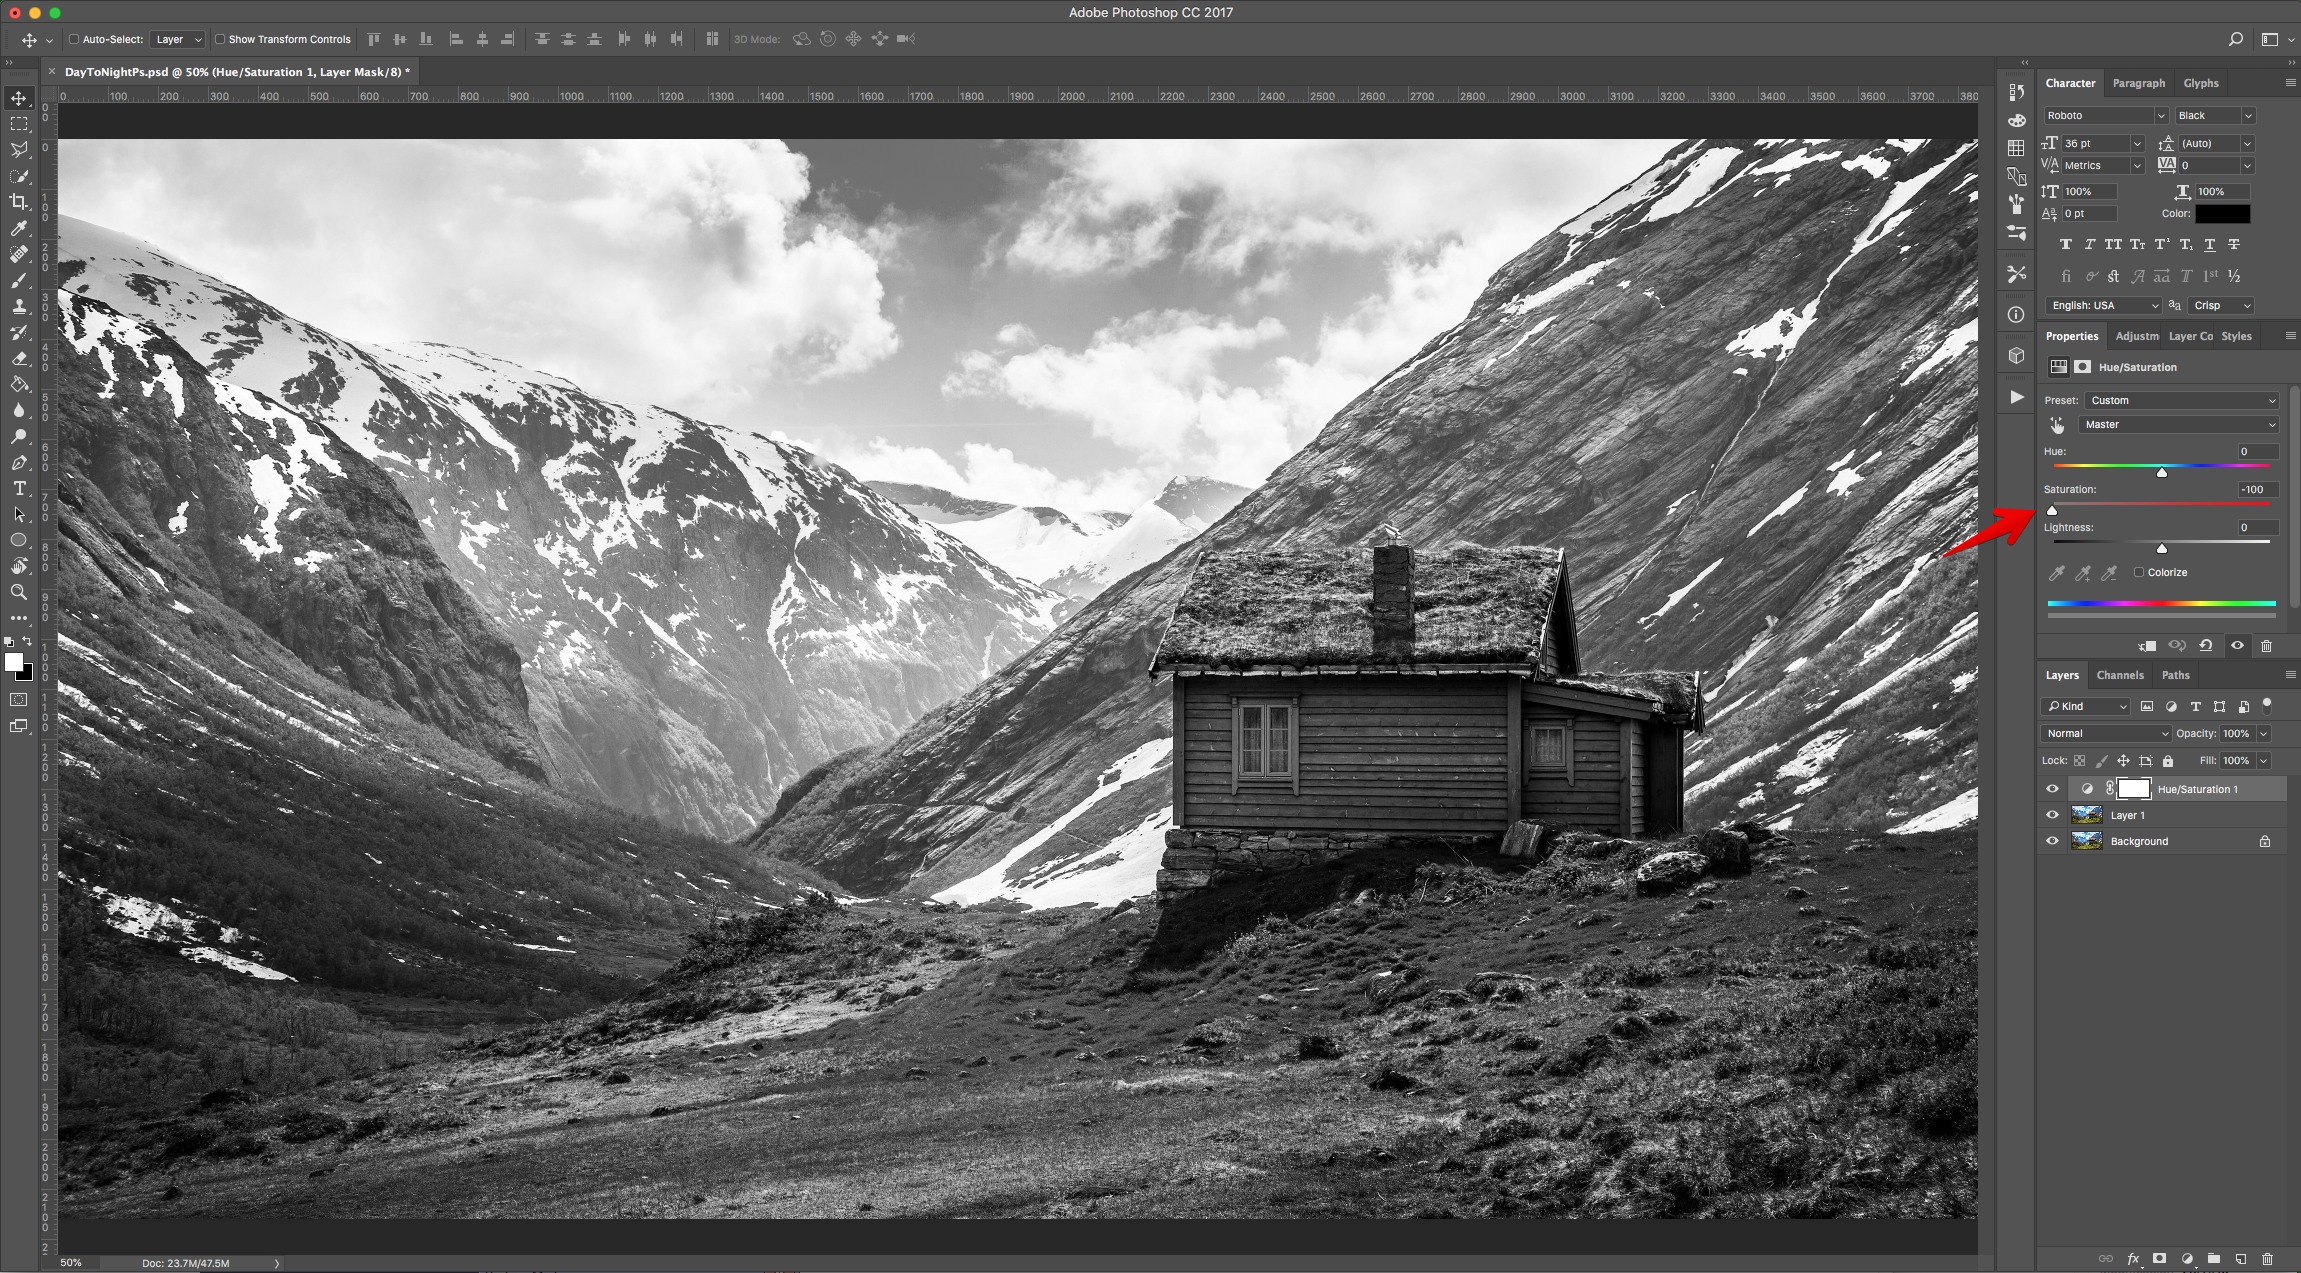
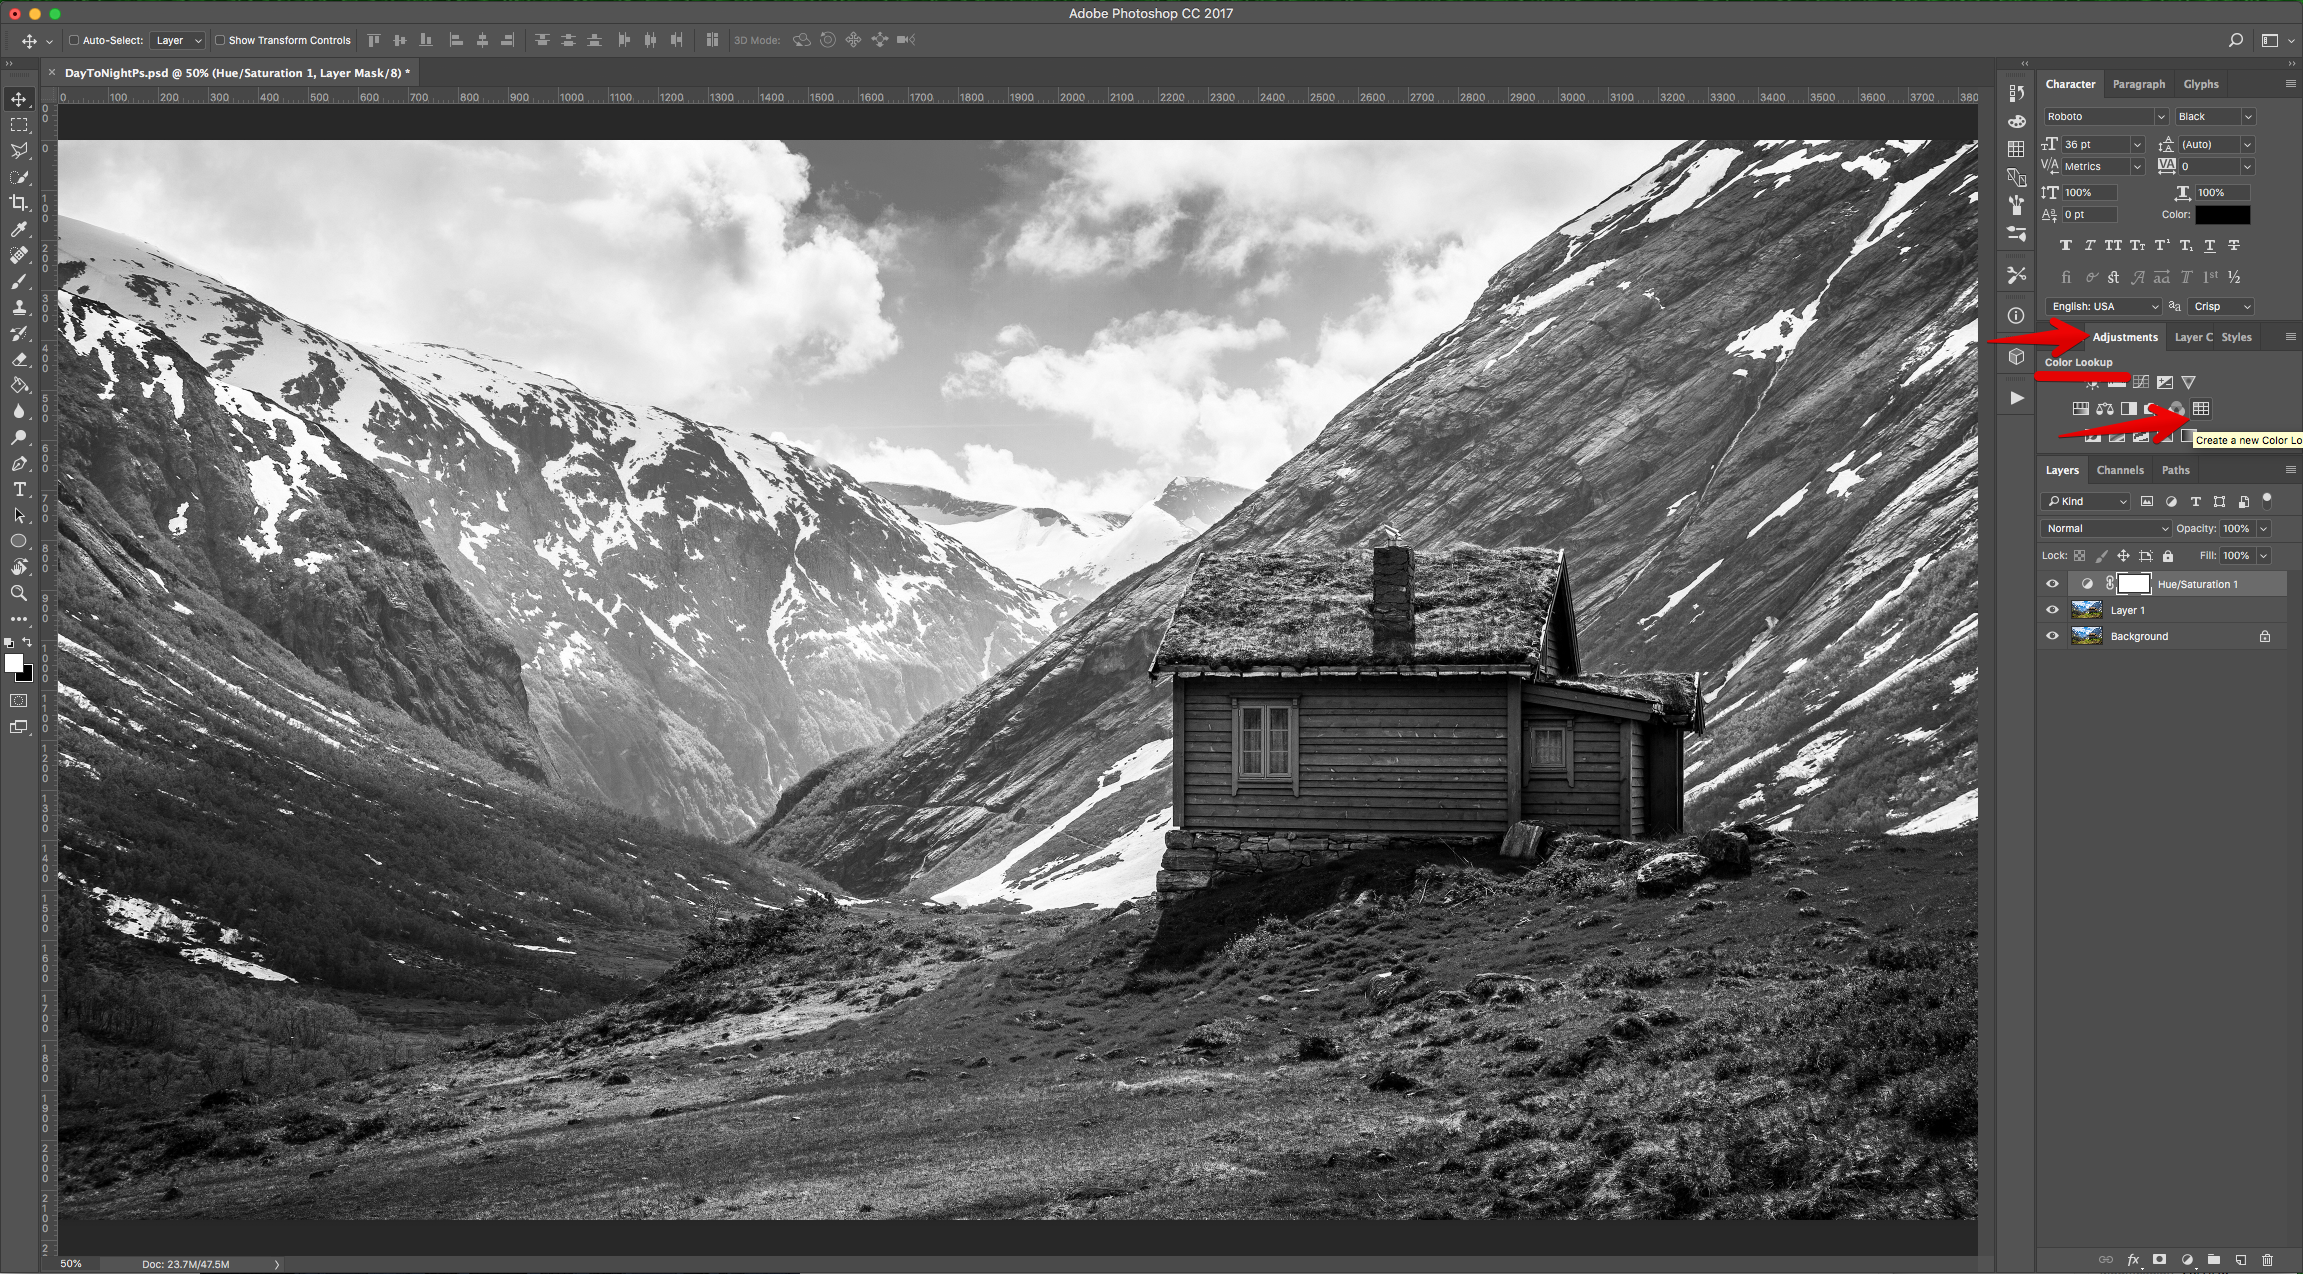
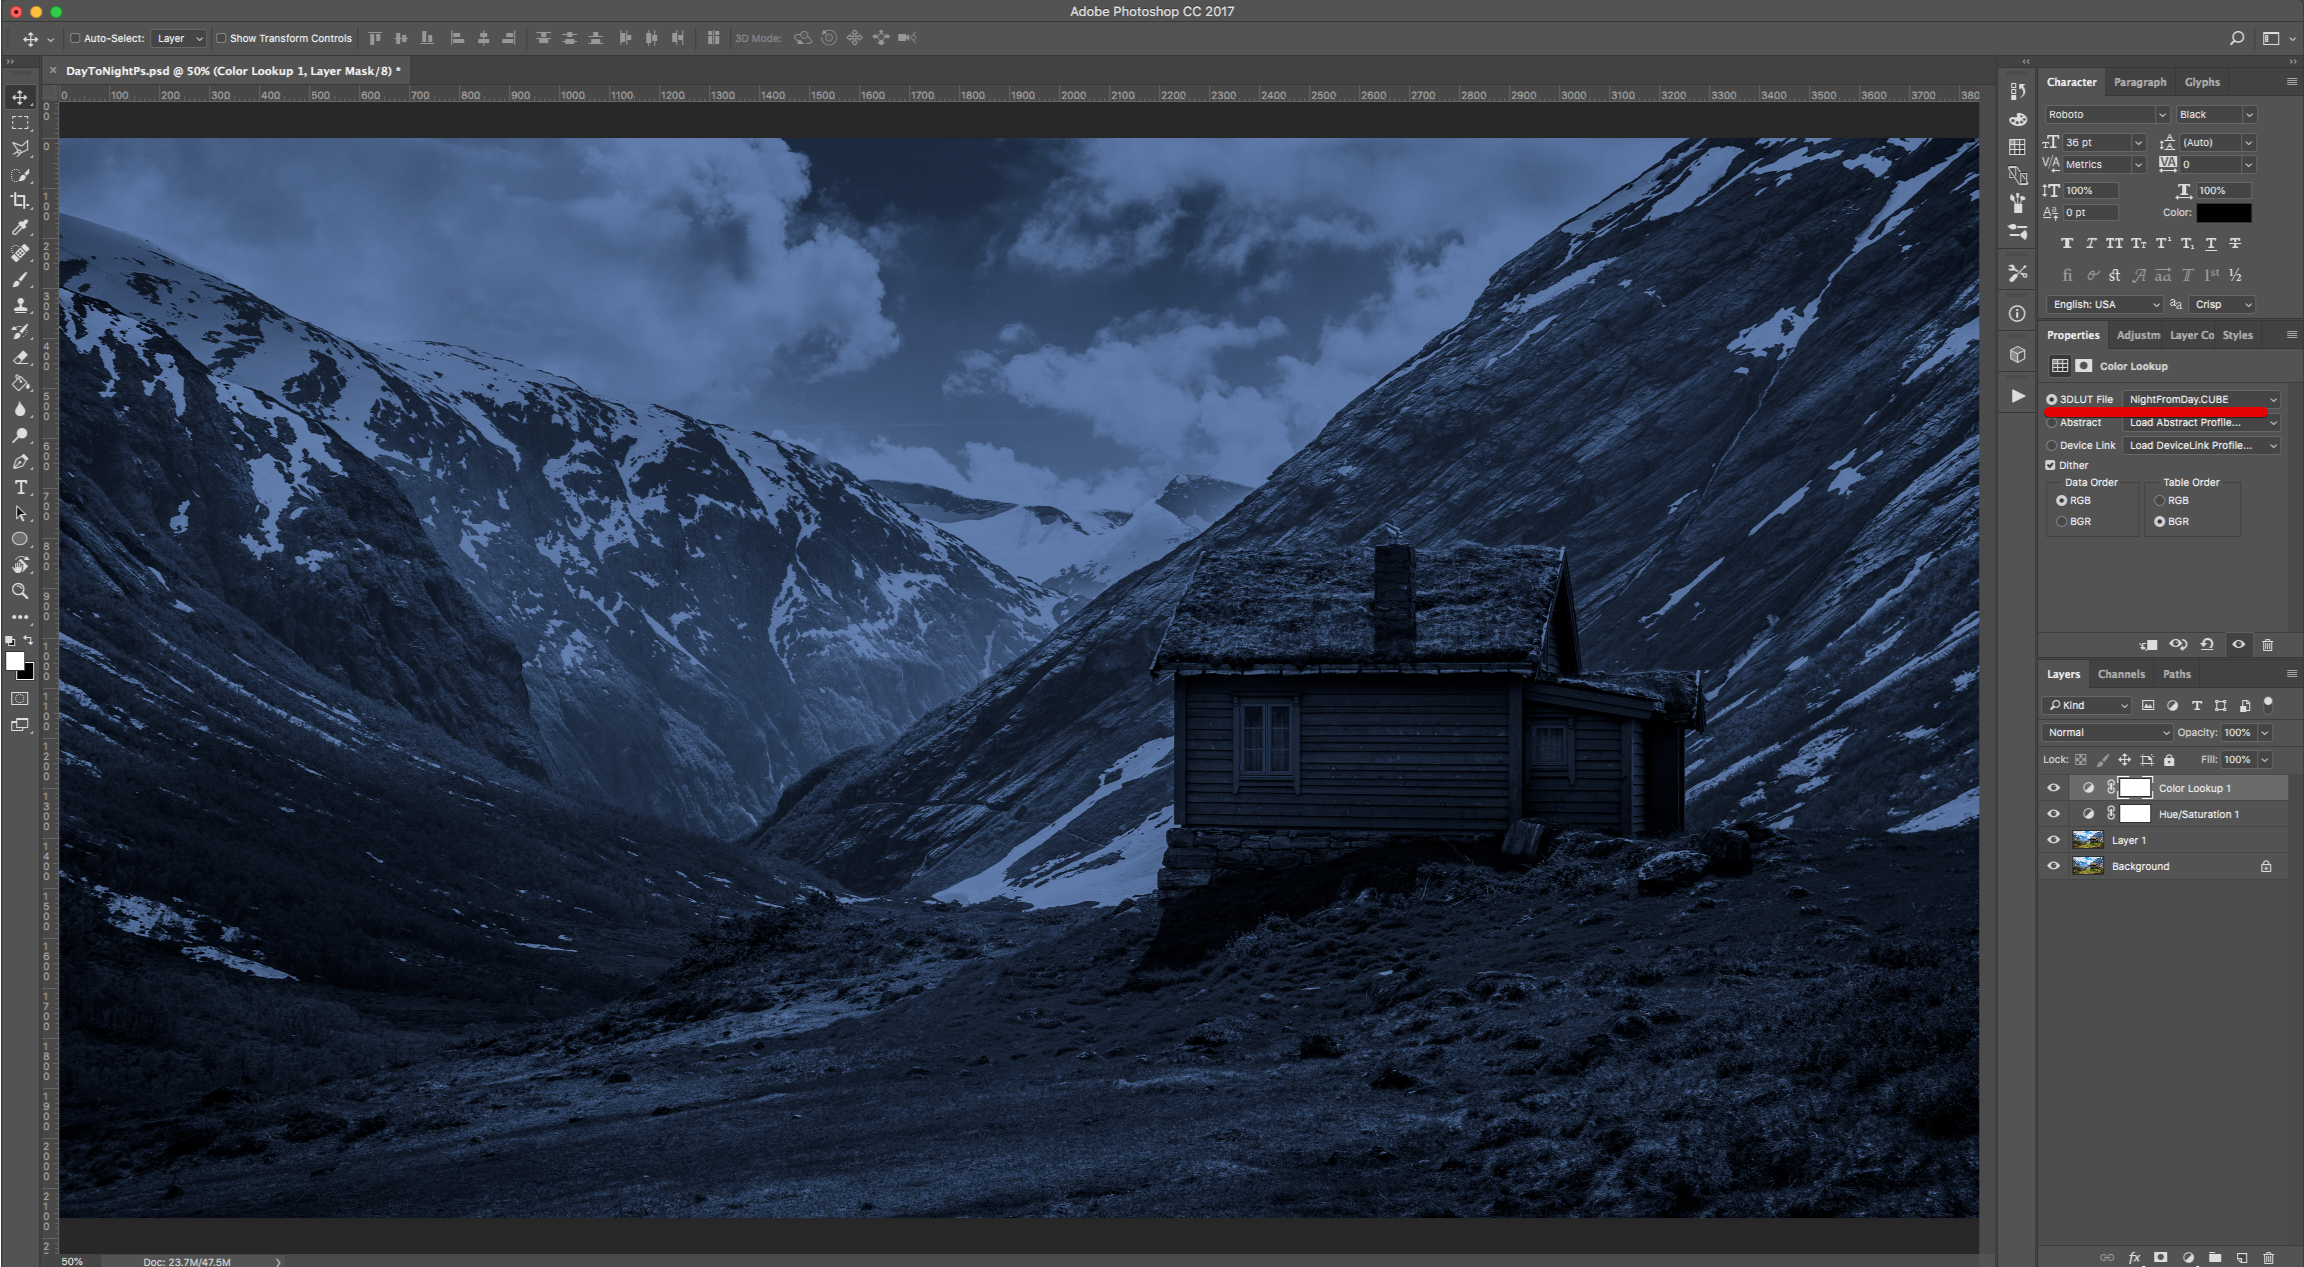
4 - Go to the “Adjustments Panel” and create a “Color Lookup” Adjustment Layer. Choose “NightFromDay.CUBE” from the “3DLUT File” presets.
5 - Open the “Moon” image and bring it into your file. Make sure it is on top of everything.
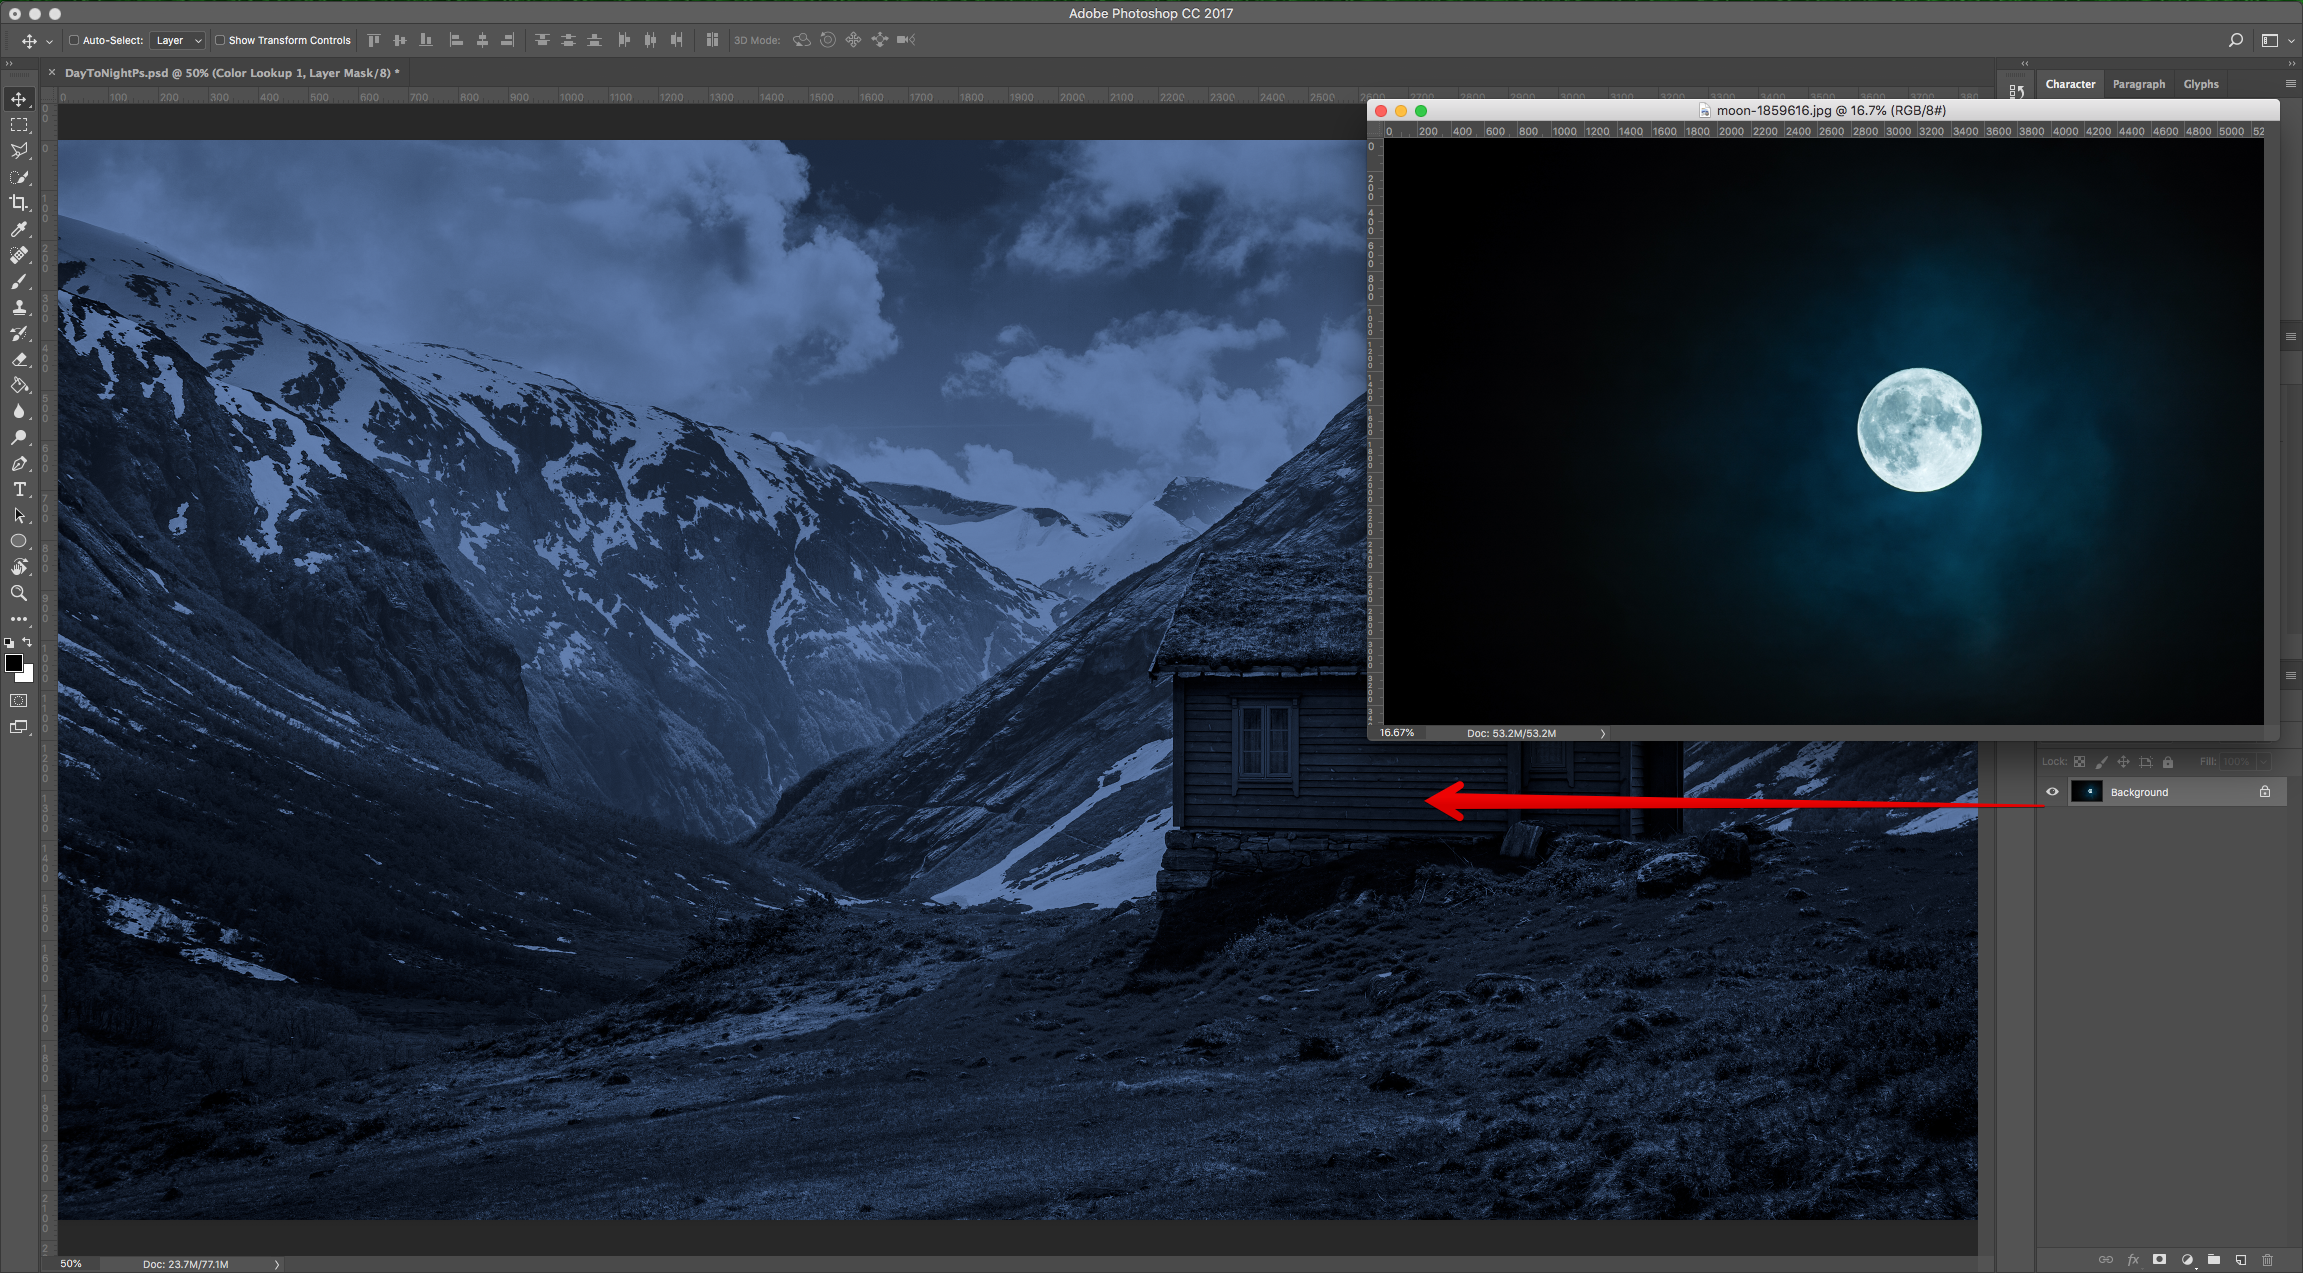
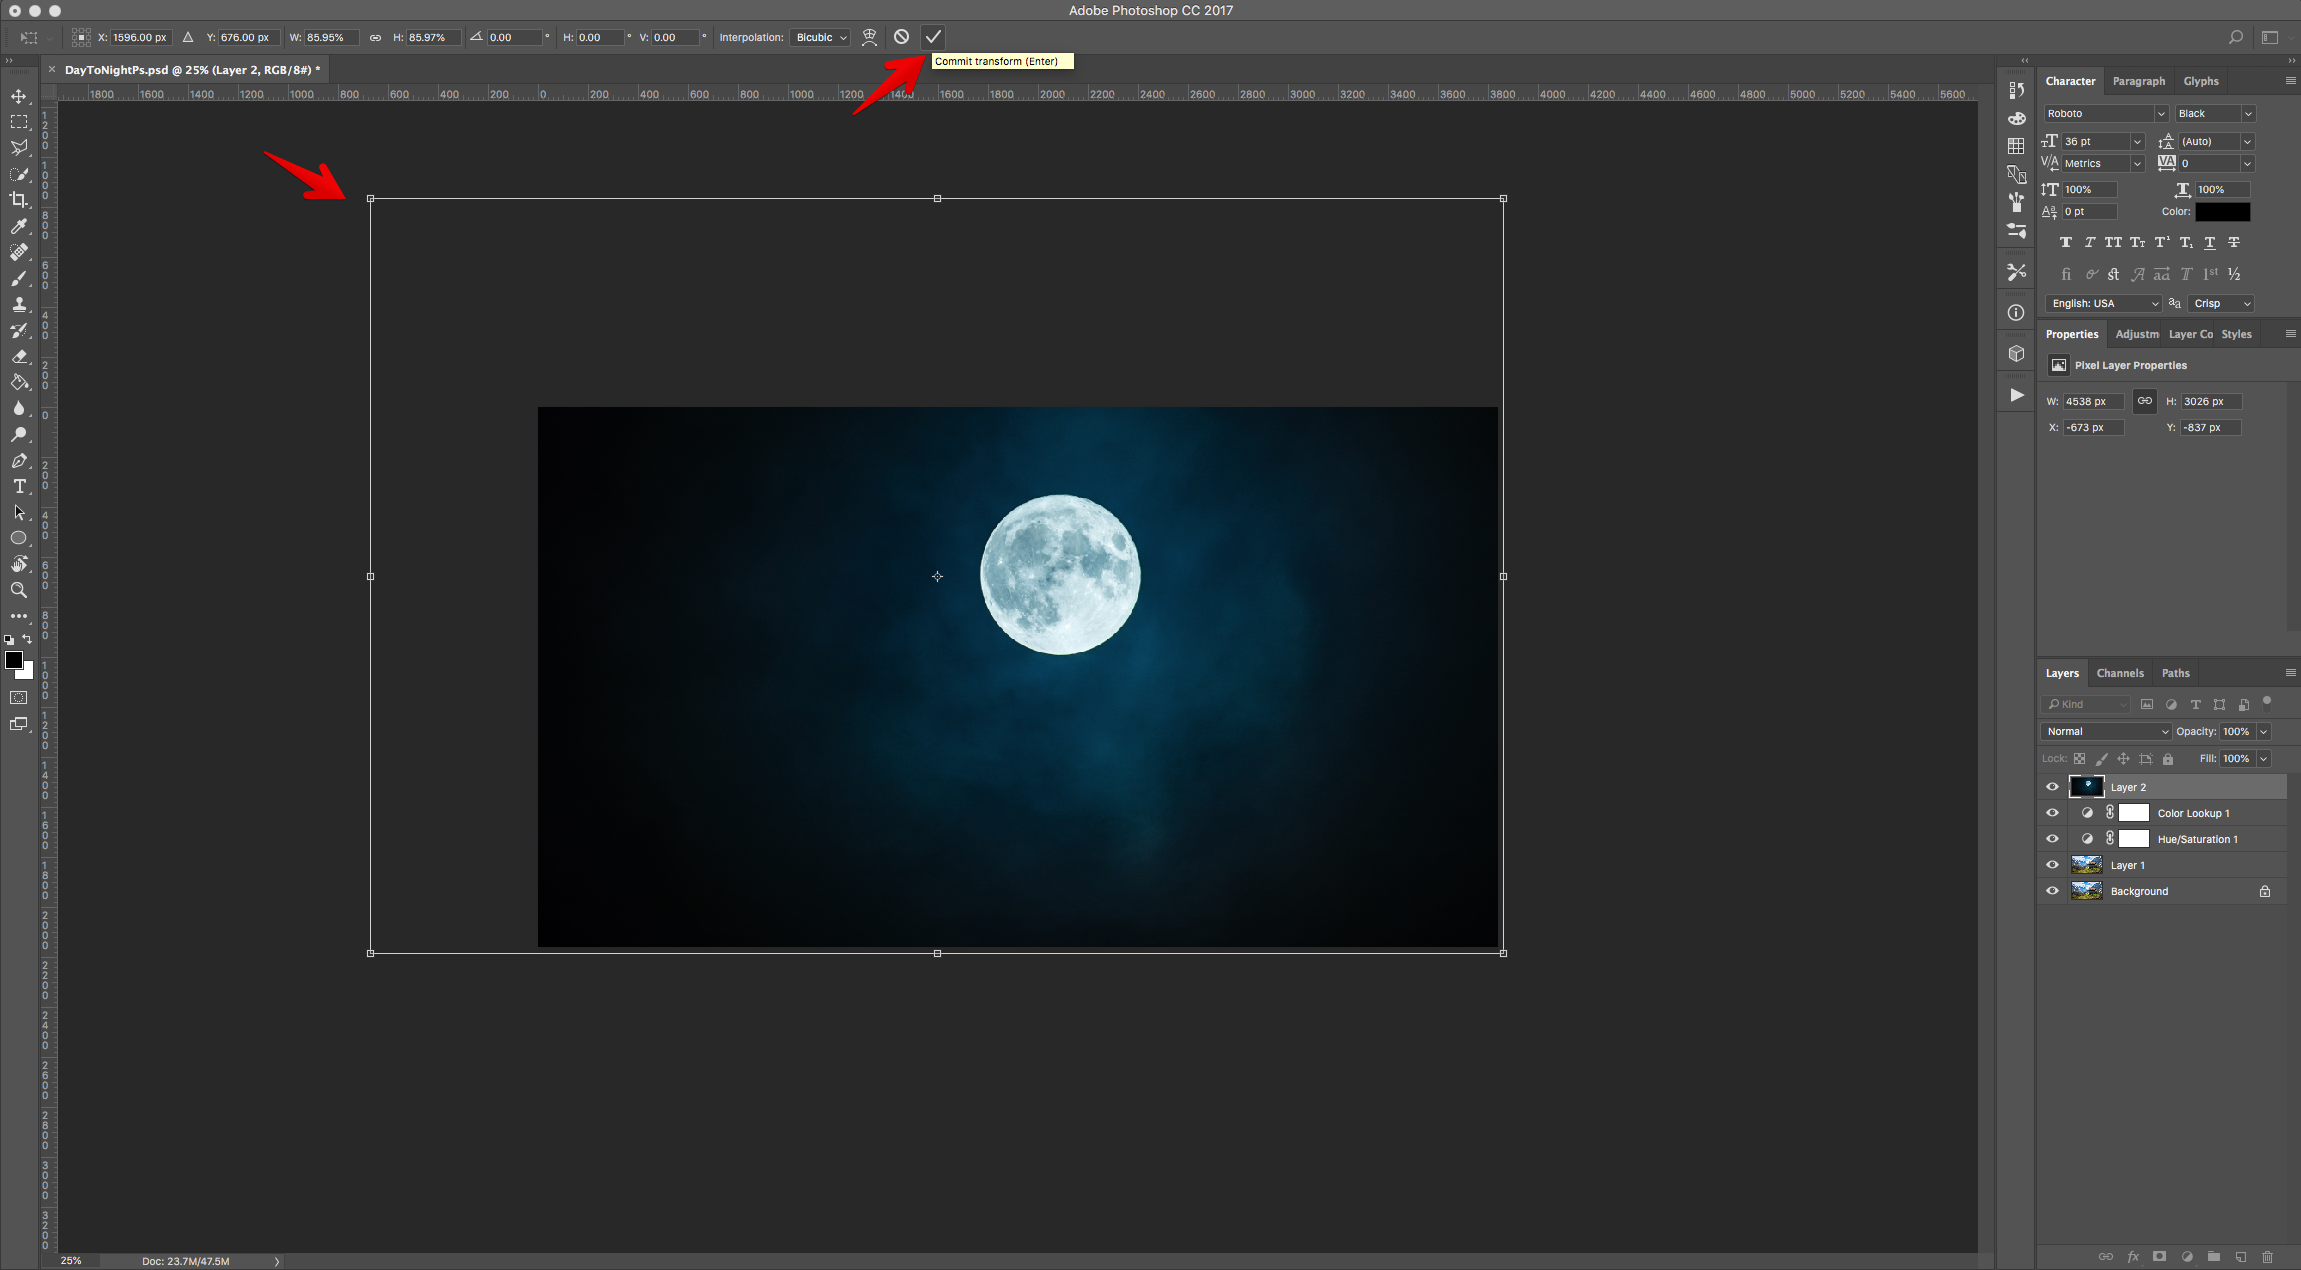
6 - Resize it if needed and once you are done, click the small “Check Mark” on the Top Menu or hit “Enter” to “Commit” the changes.
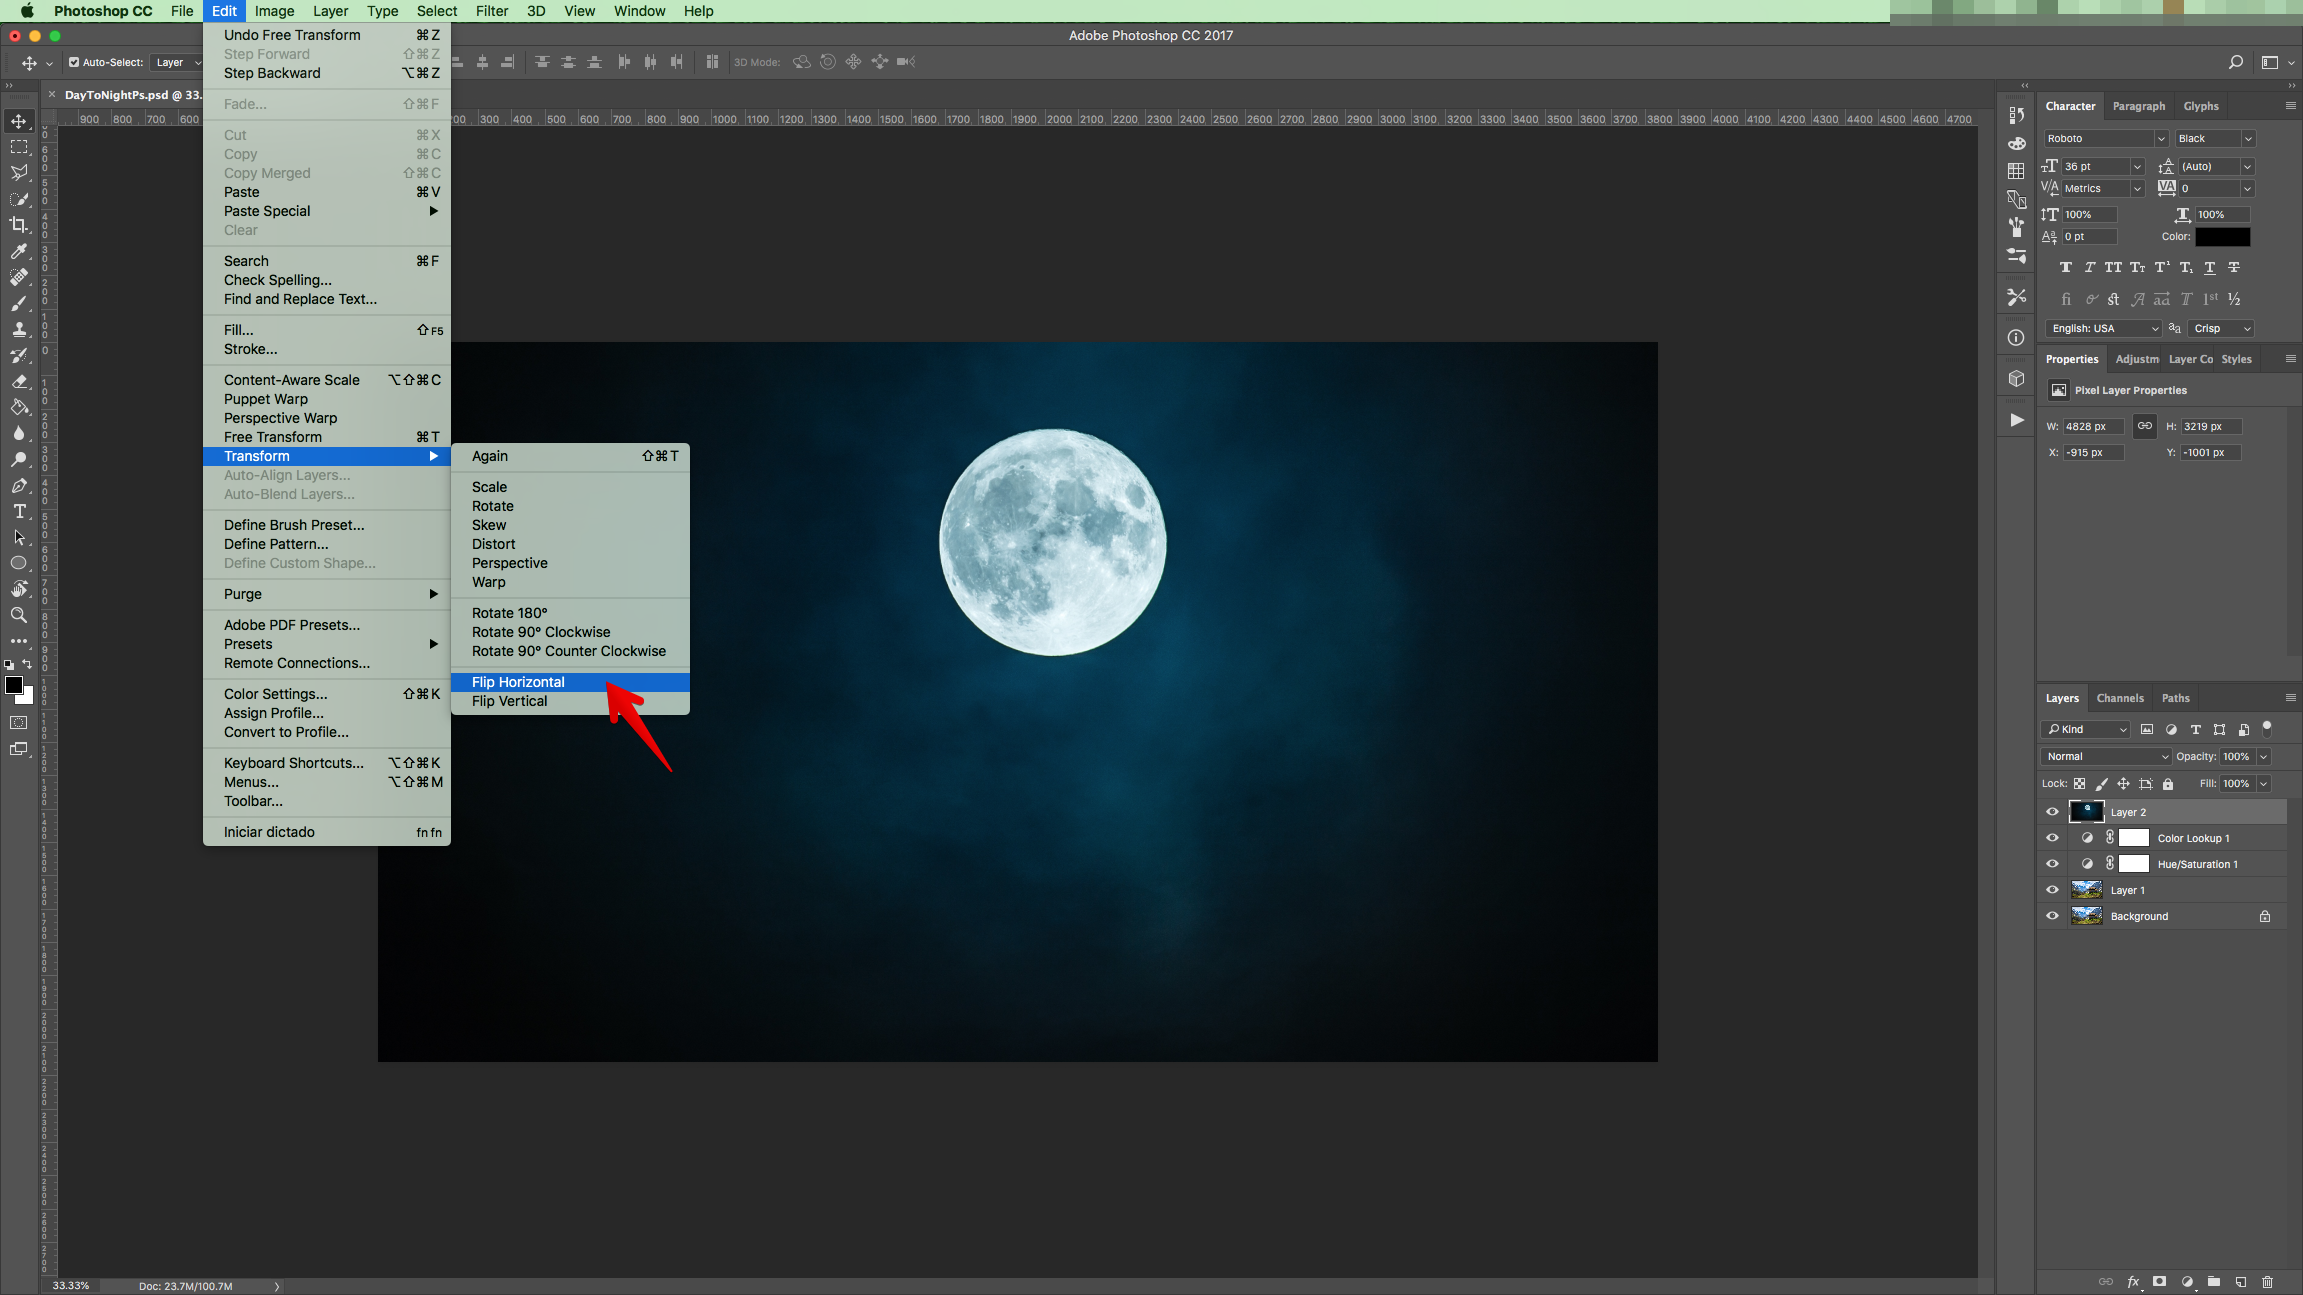
7 - If need to change the position of the “Moon” head to Edit > Transform > Flip Horizontal to flip the image.
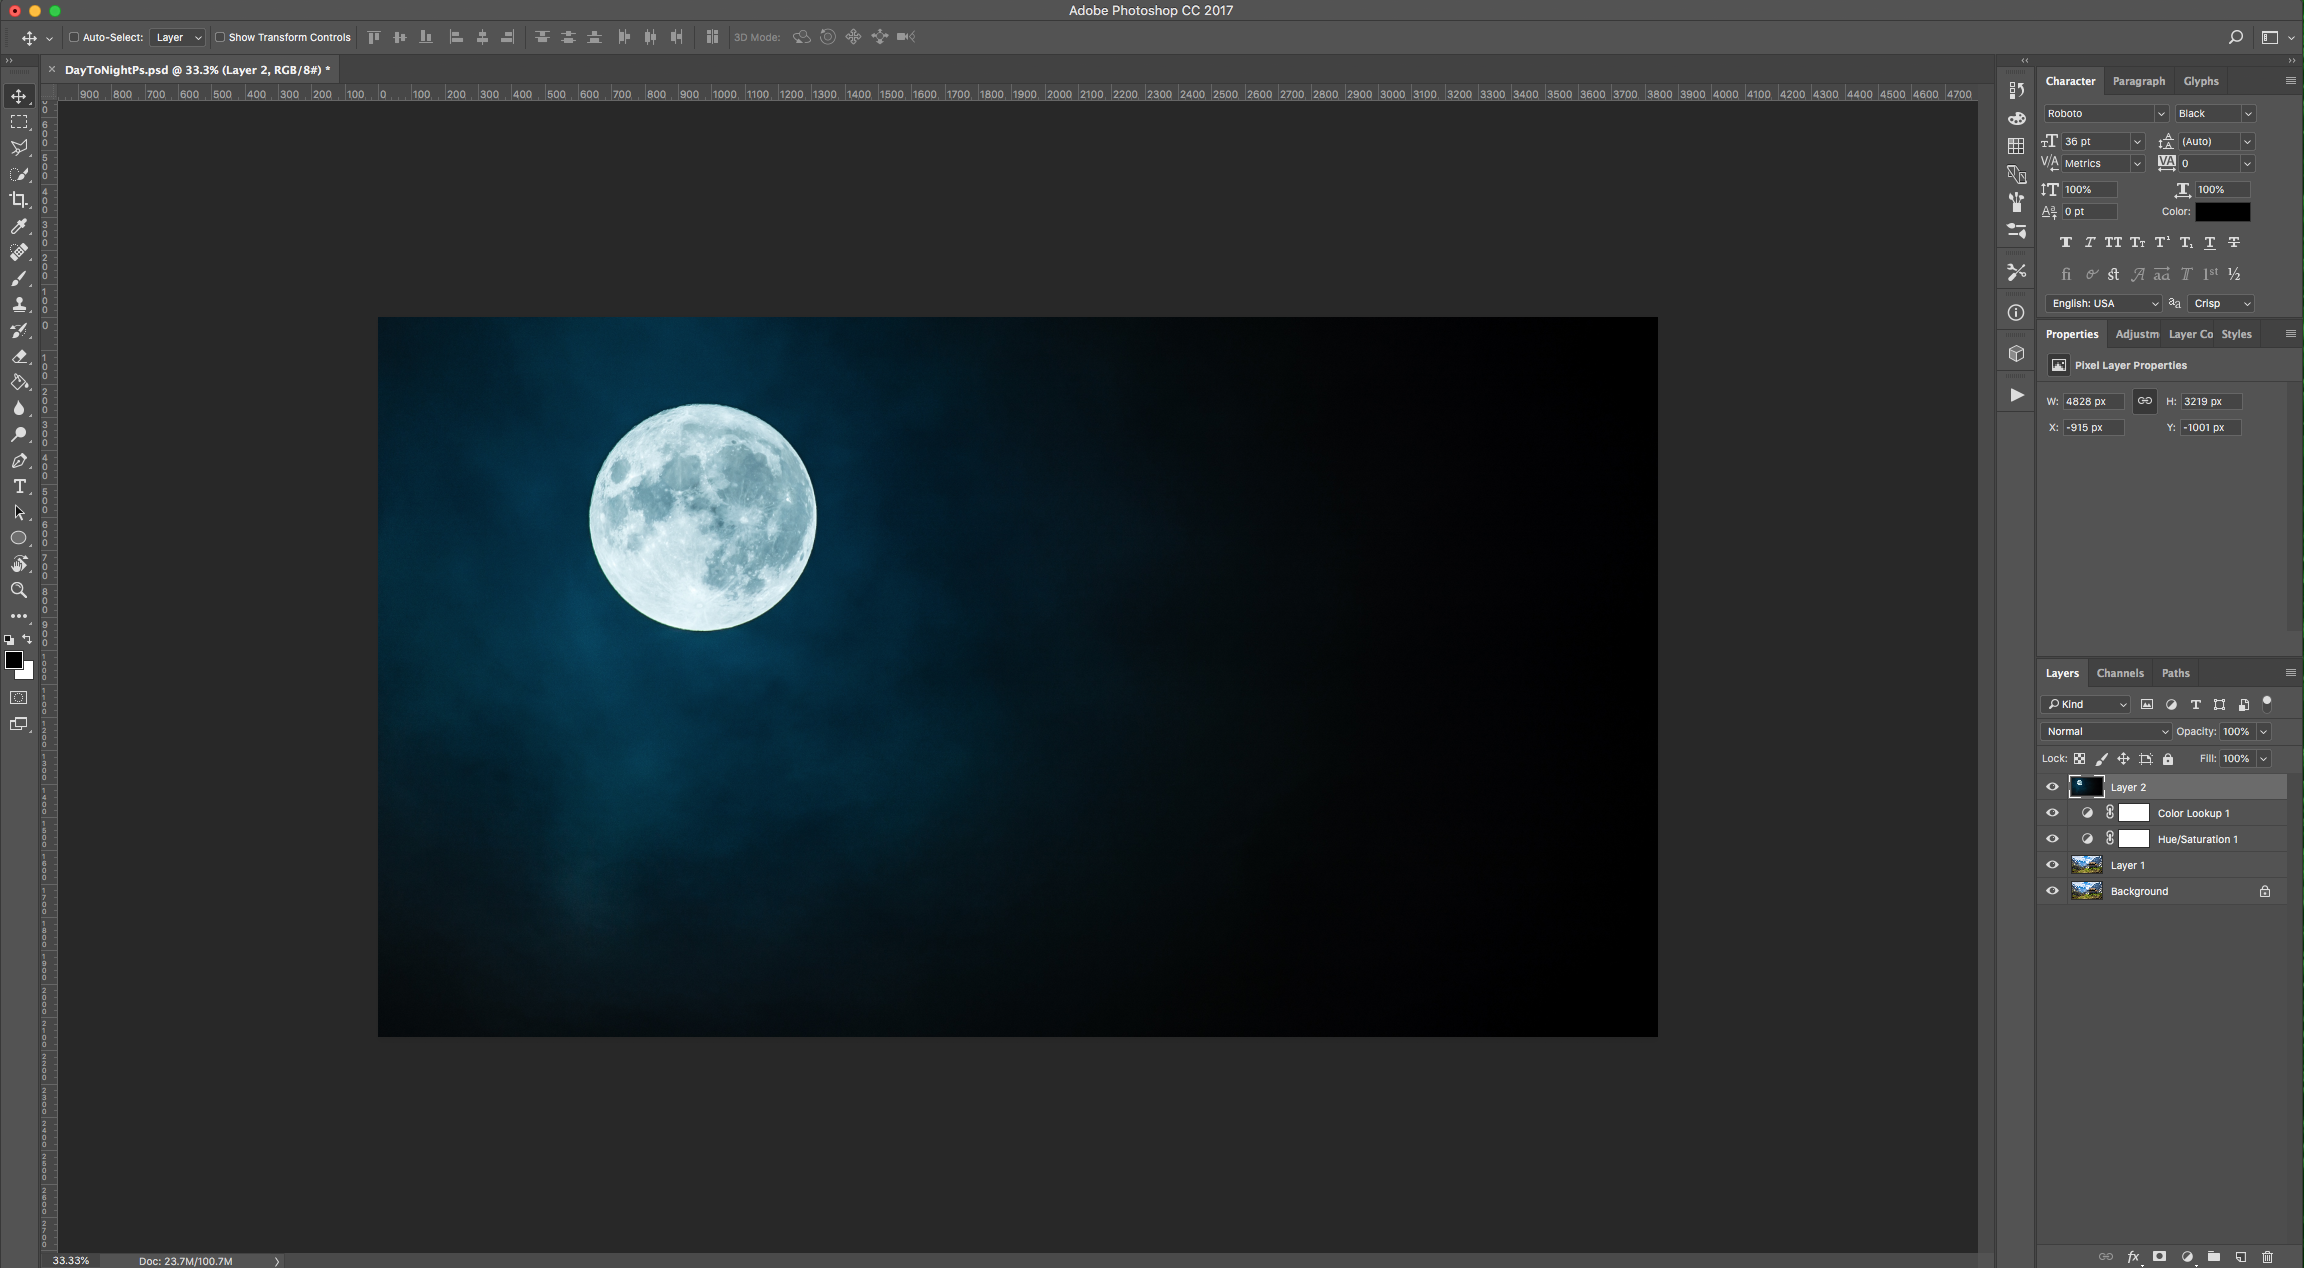
8 - Change the “Blending Mode” of the “Moon” layer to “Lighten”.
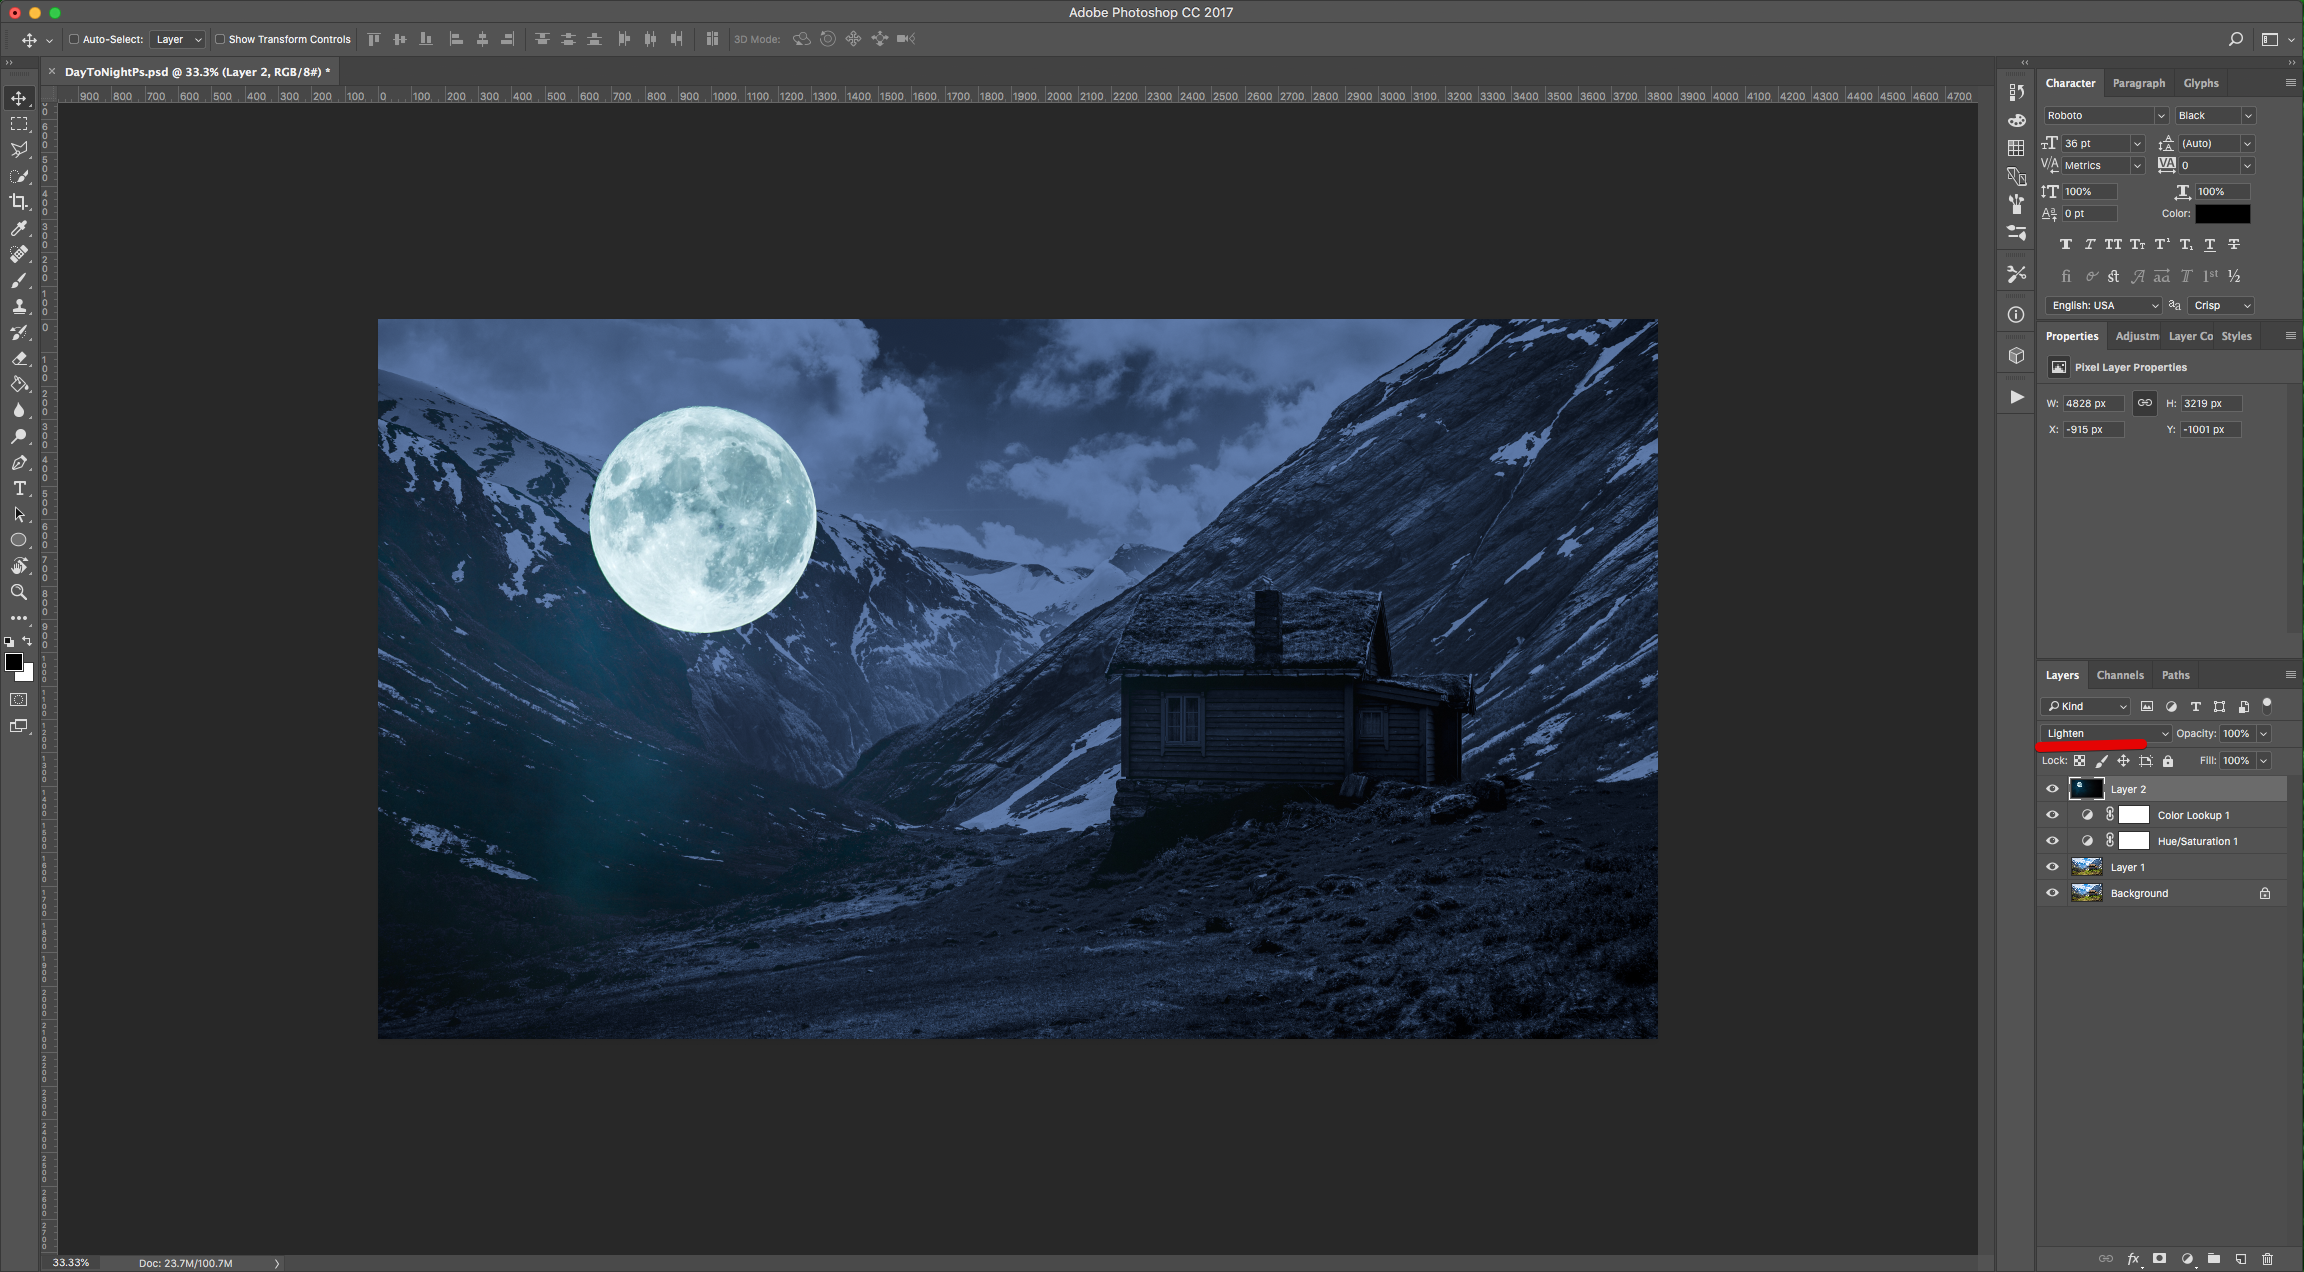
9 - To further adjust the position of the “Moon” layer use “Free Transform” (Command/Control + T) and once you are done, click the small “Check Mark” on the Top Menu or hit “Enter” to “Commit” the changes.
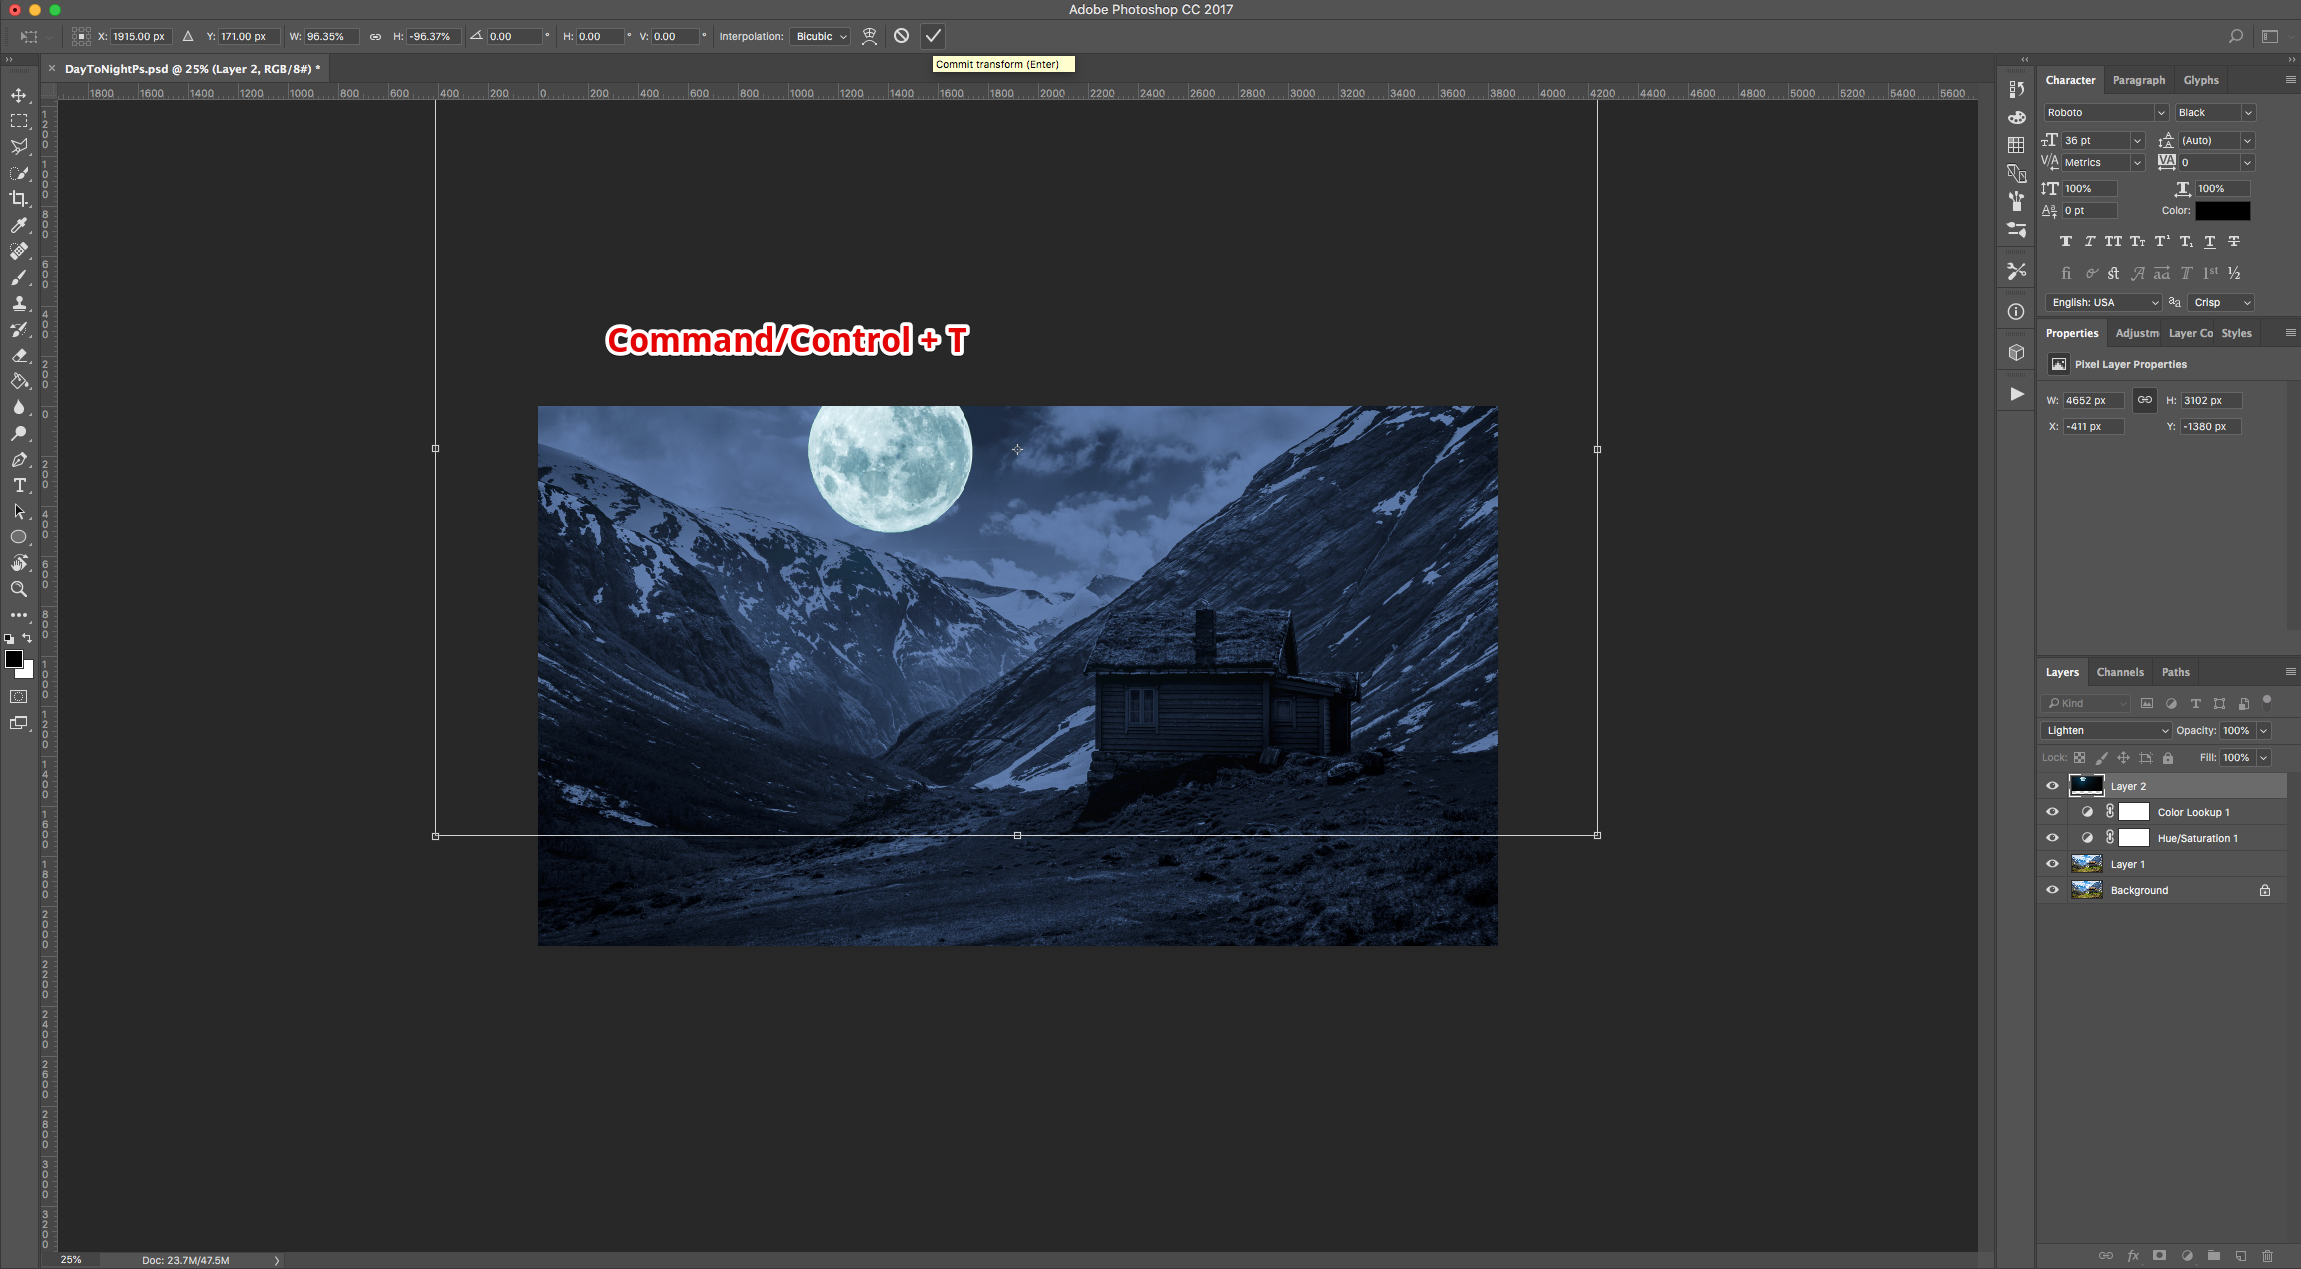
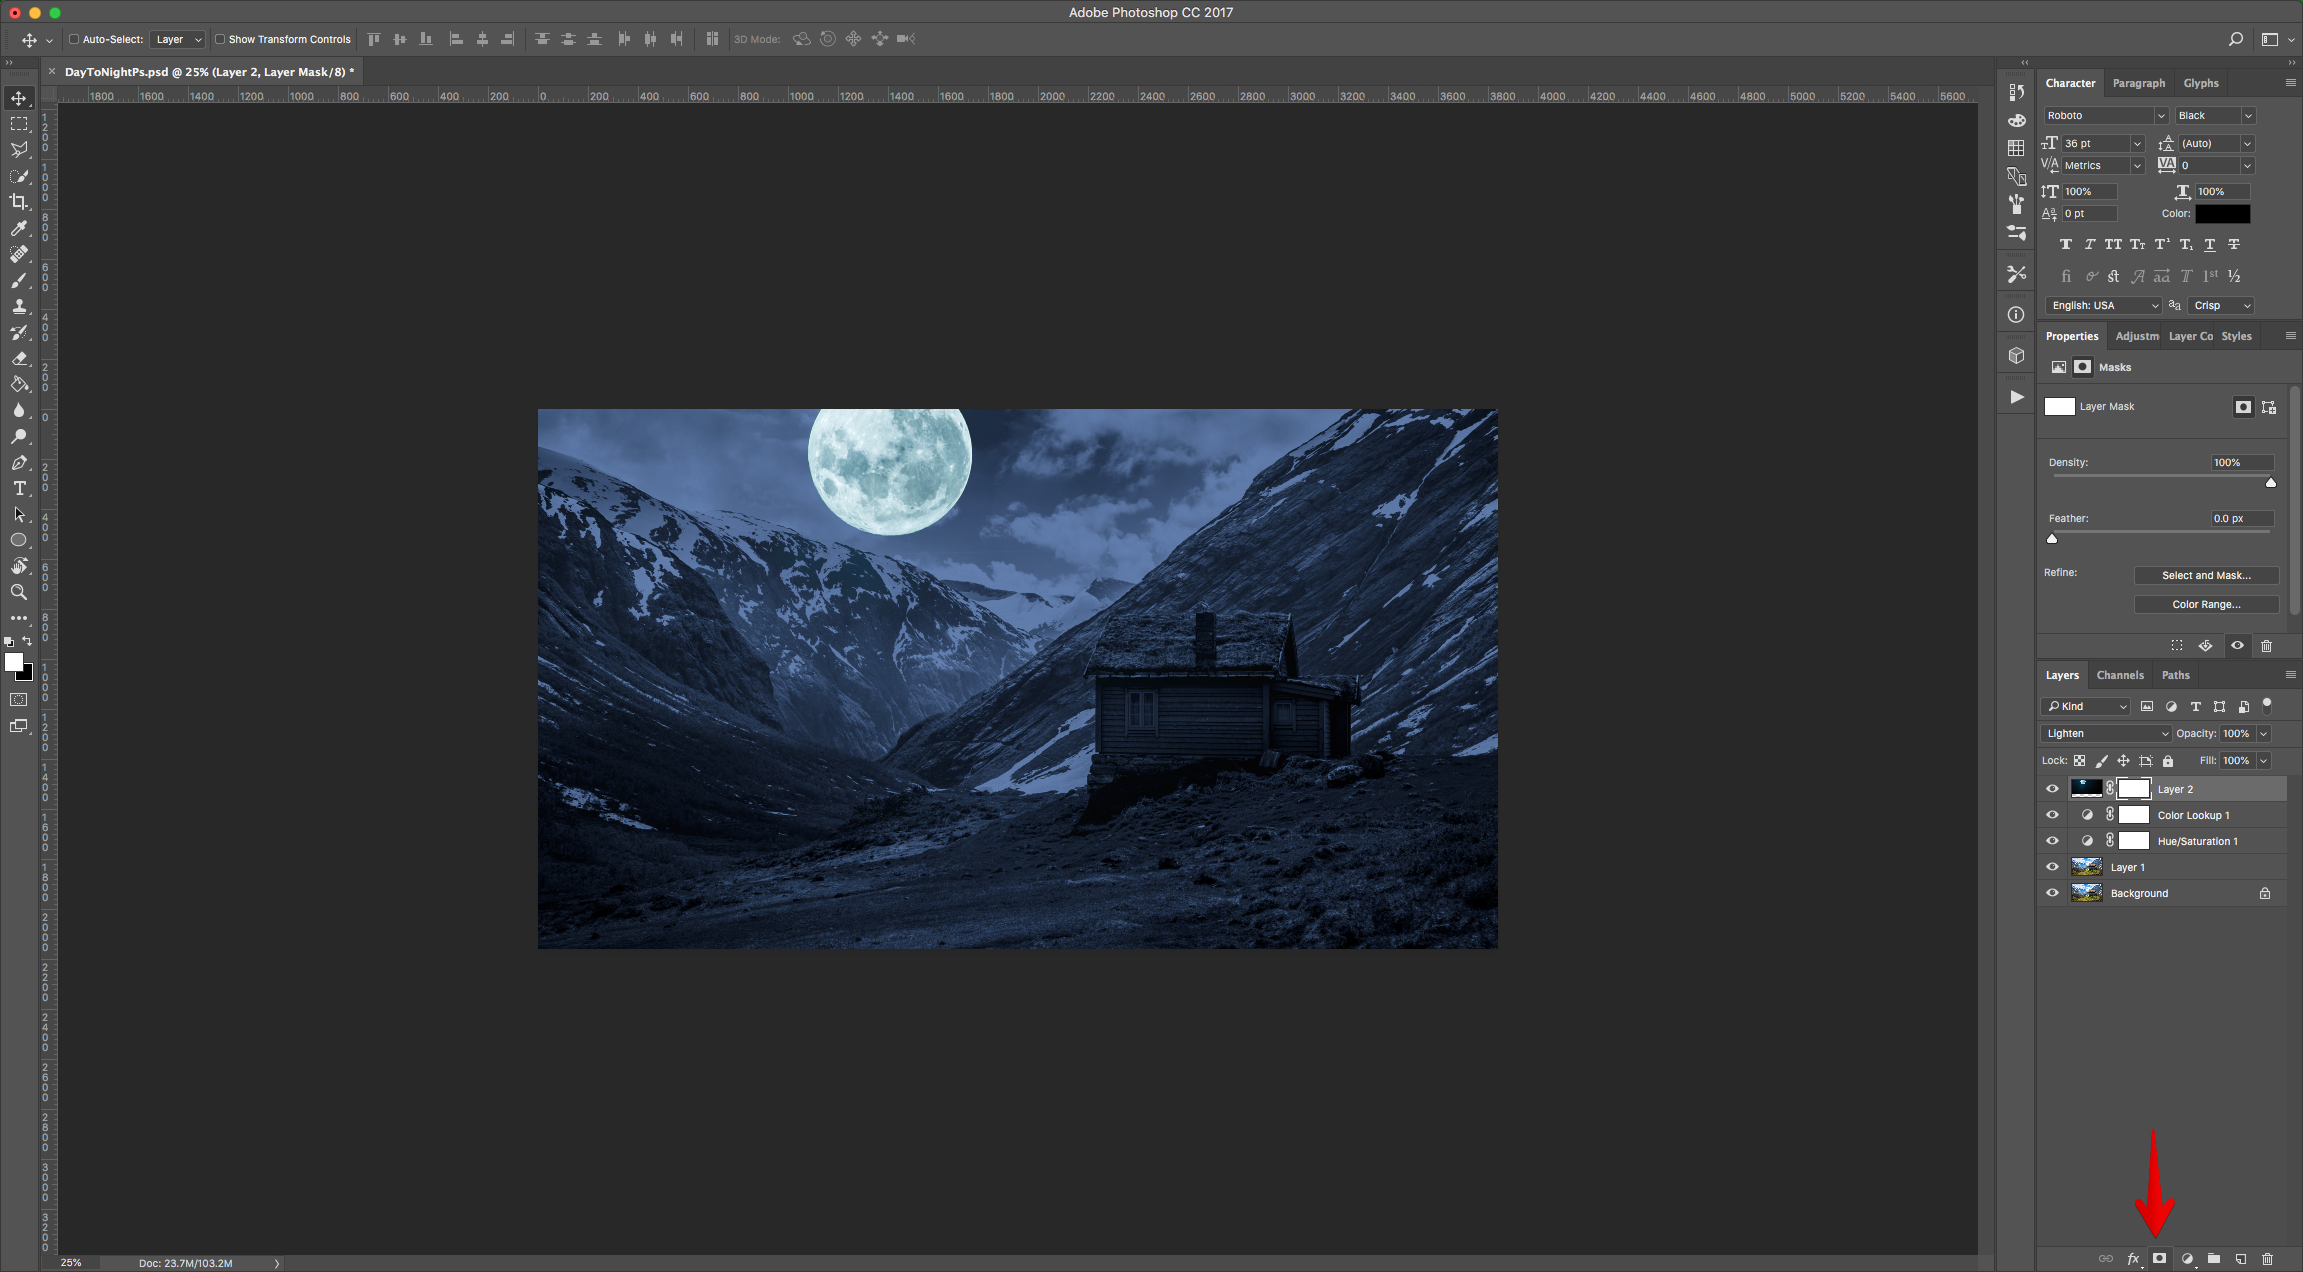
10 - Select the “Moon” layer and add a “Layer Mask” by clicking on the small icon at the bottom of the “Layers Panel”.
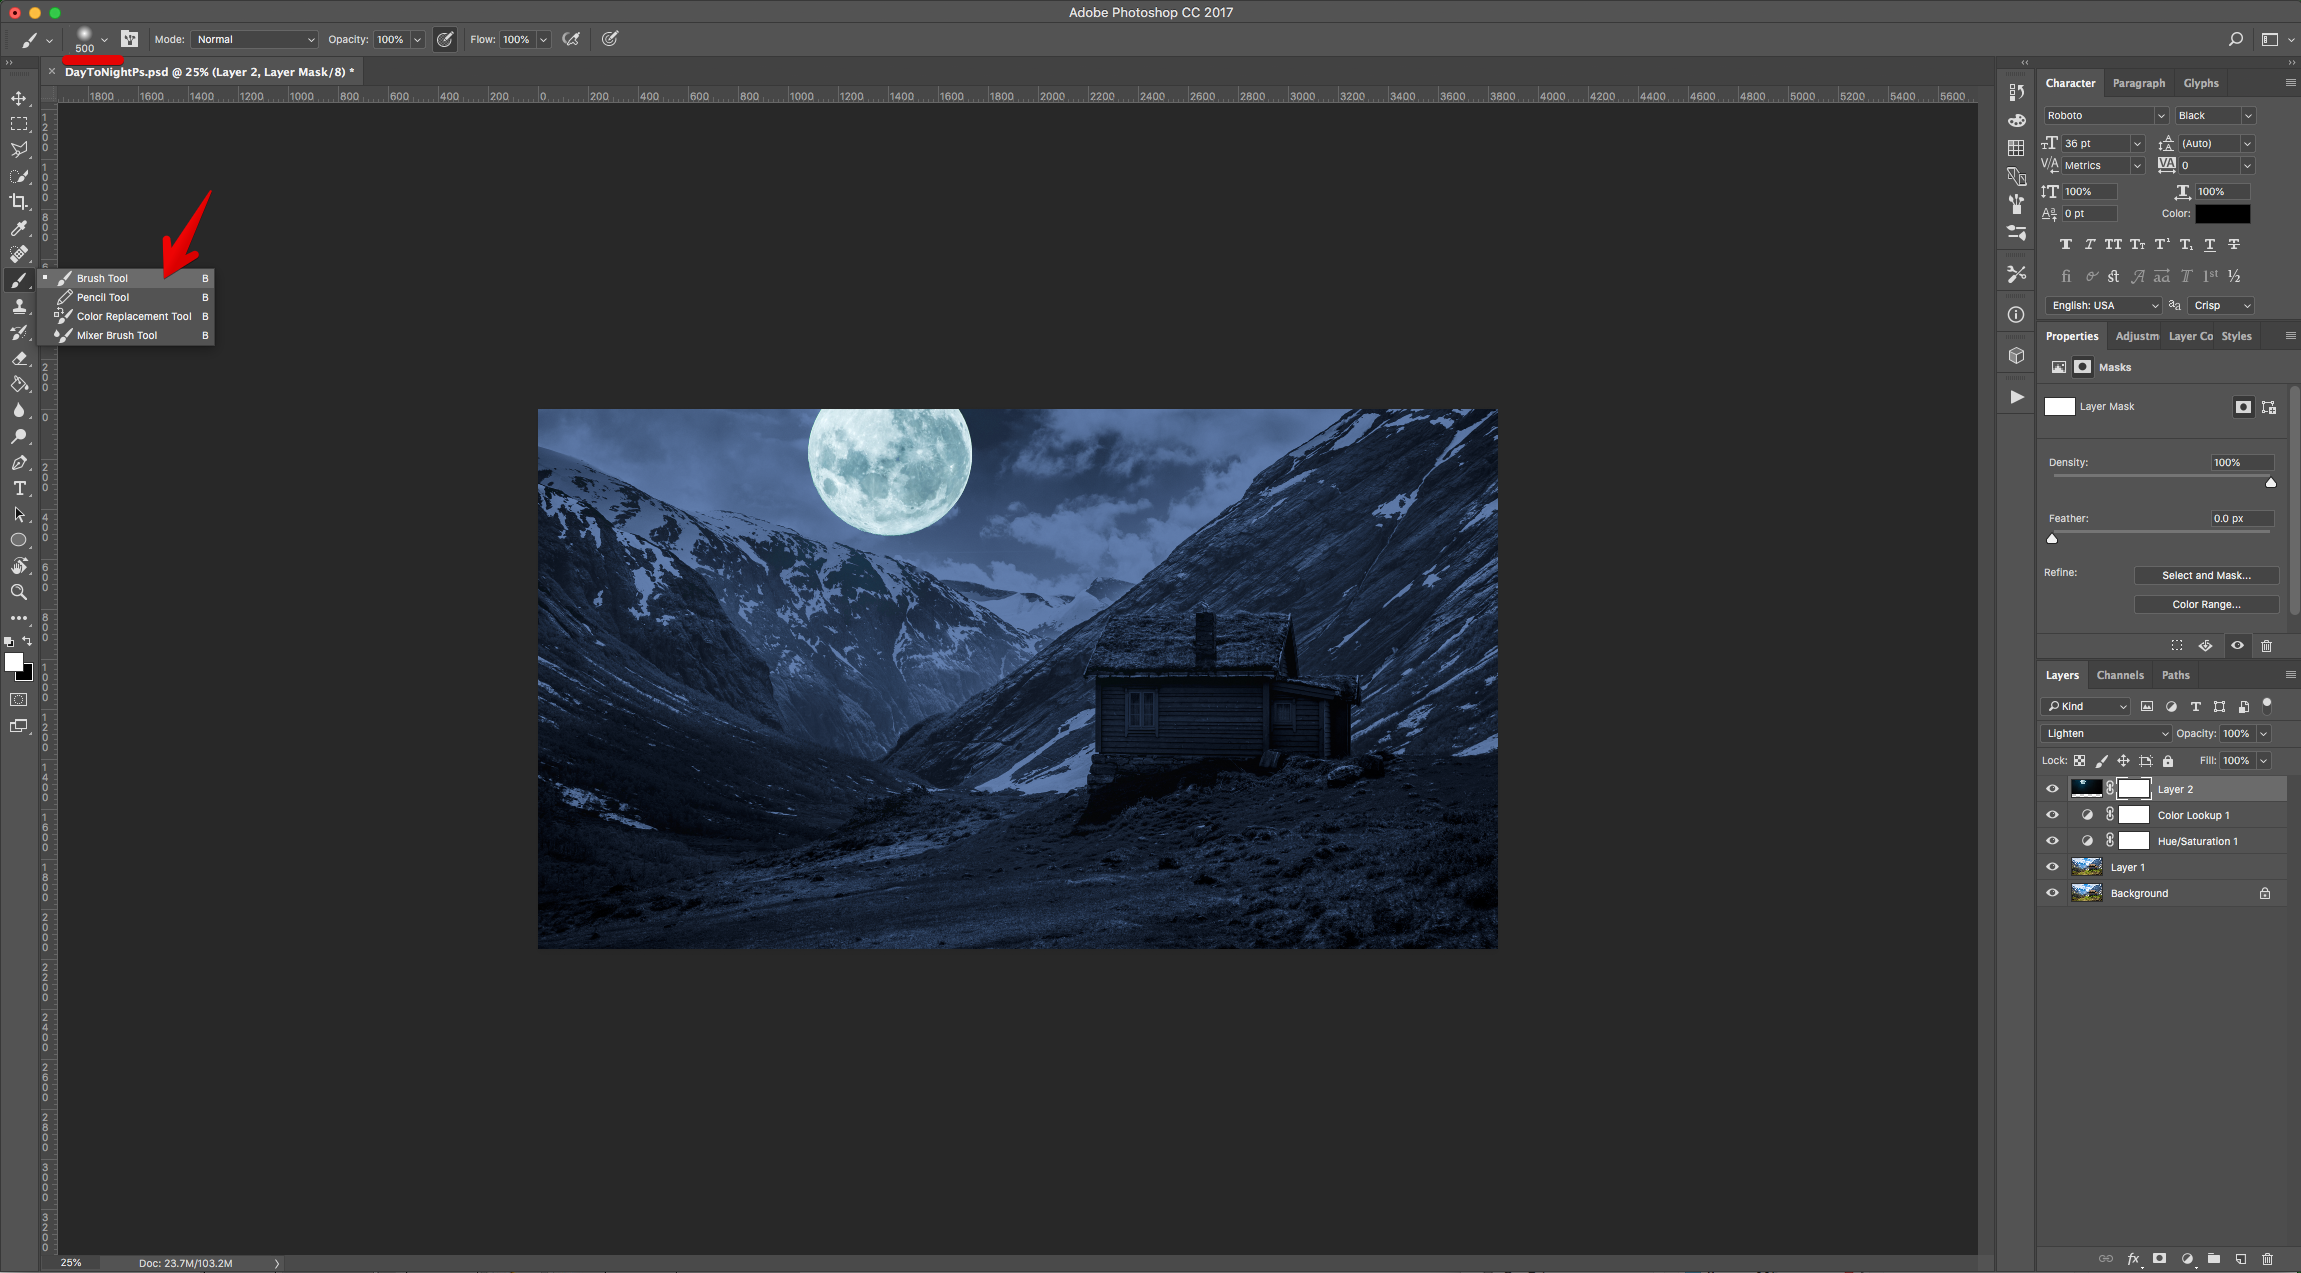
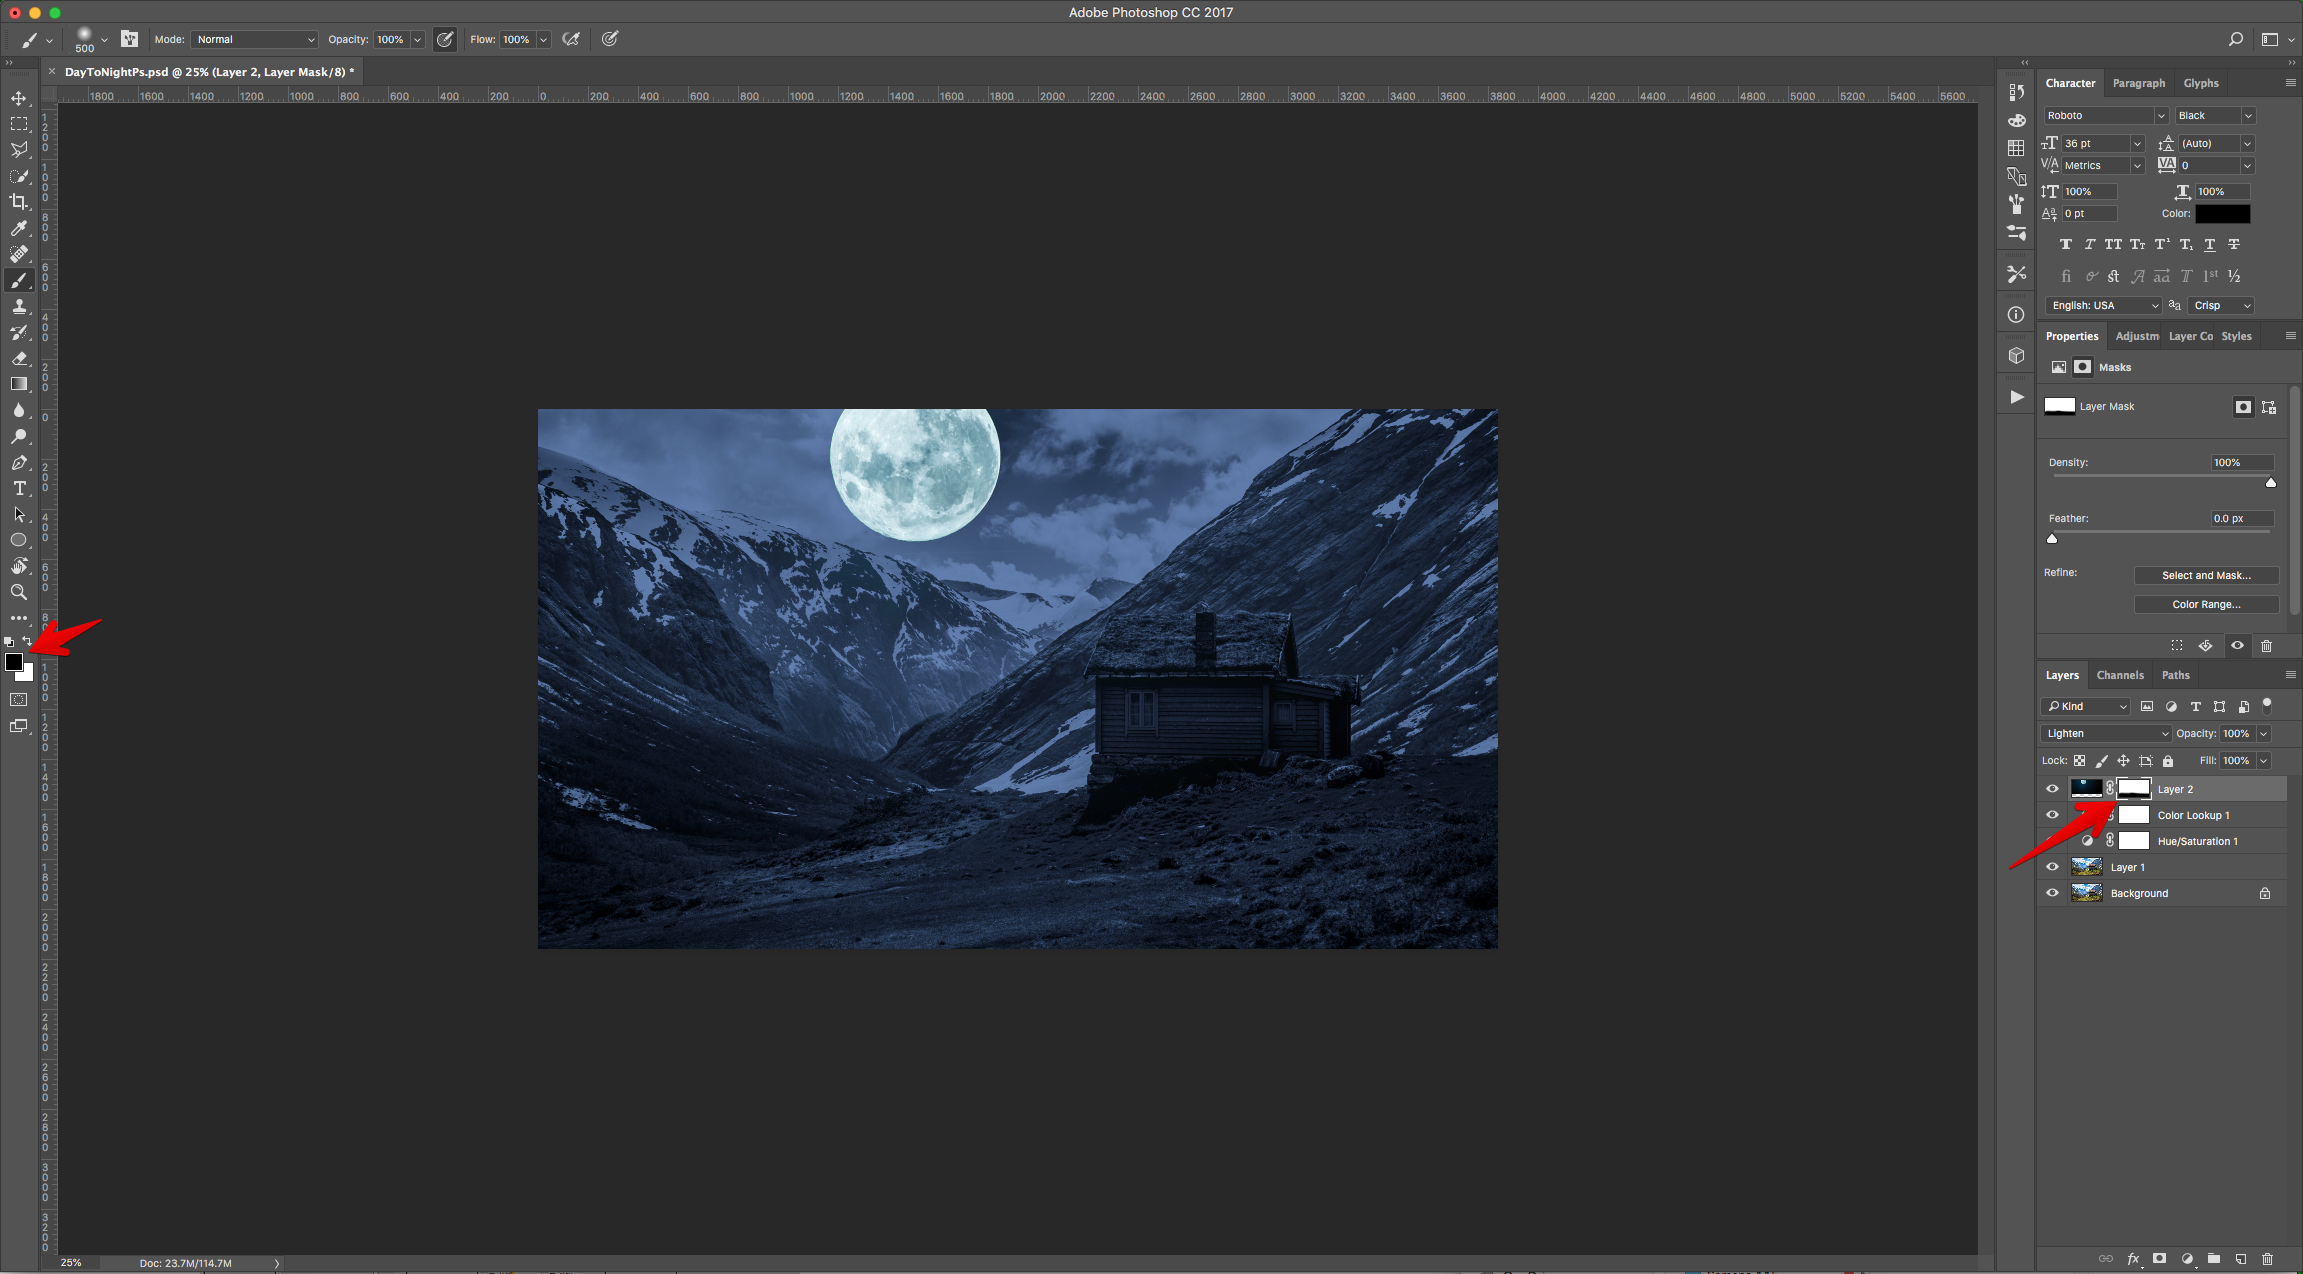
11 - Select the “Brush Tool” (B) and choose a Large and soft brush (500 pt and 0% “Hardness”). Make sure that the “Foreground” color is Black and that the “Mask” Thumbnail is selected and “Erase” some portions if needed.
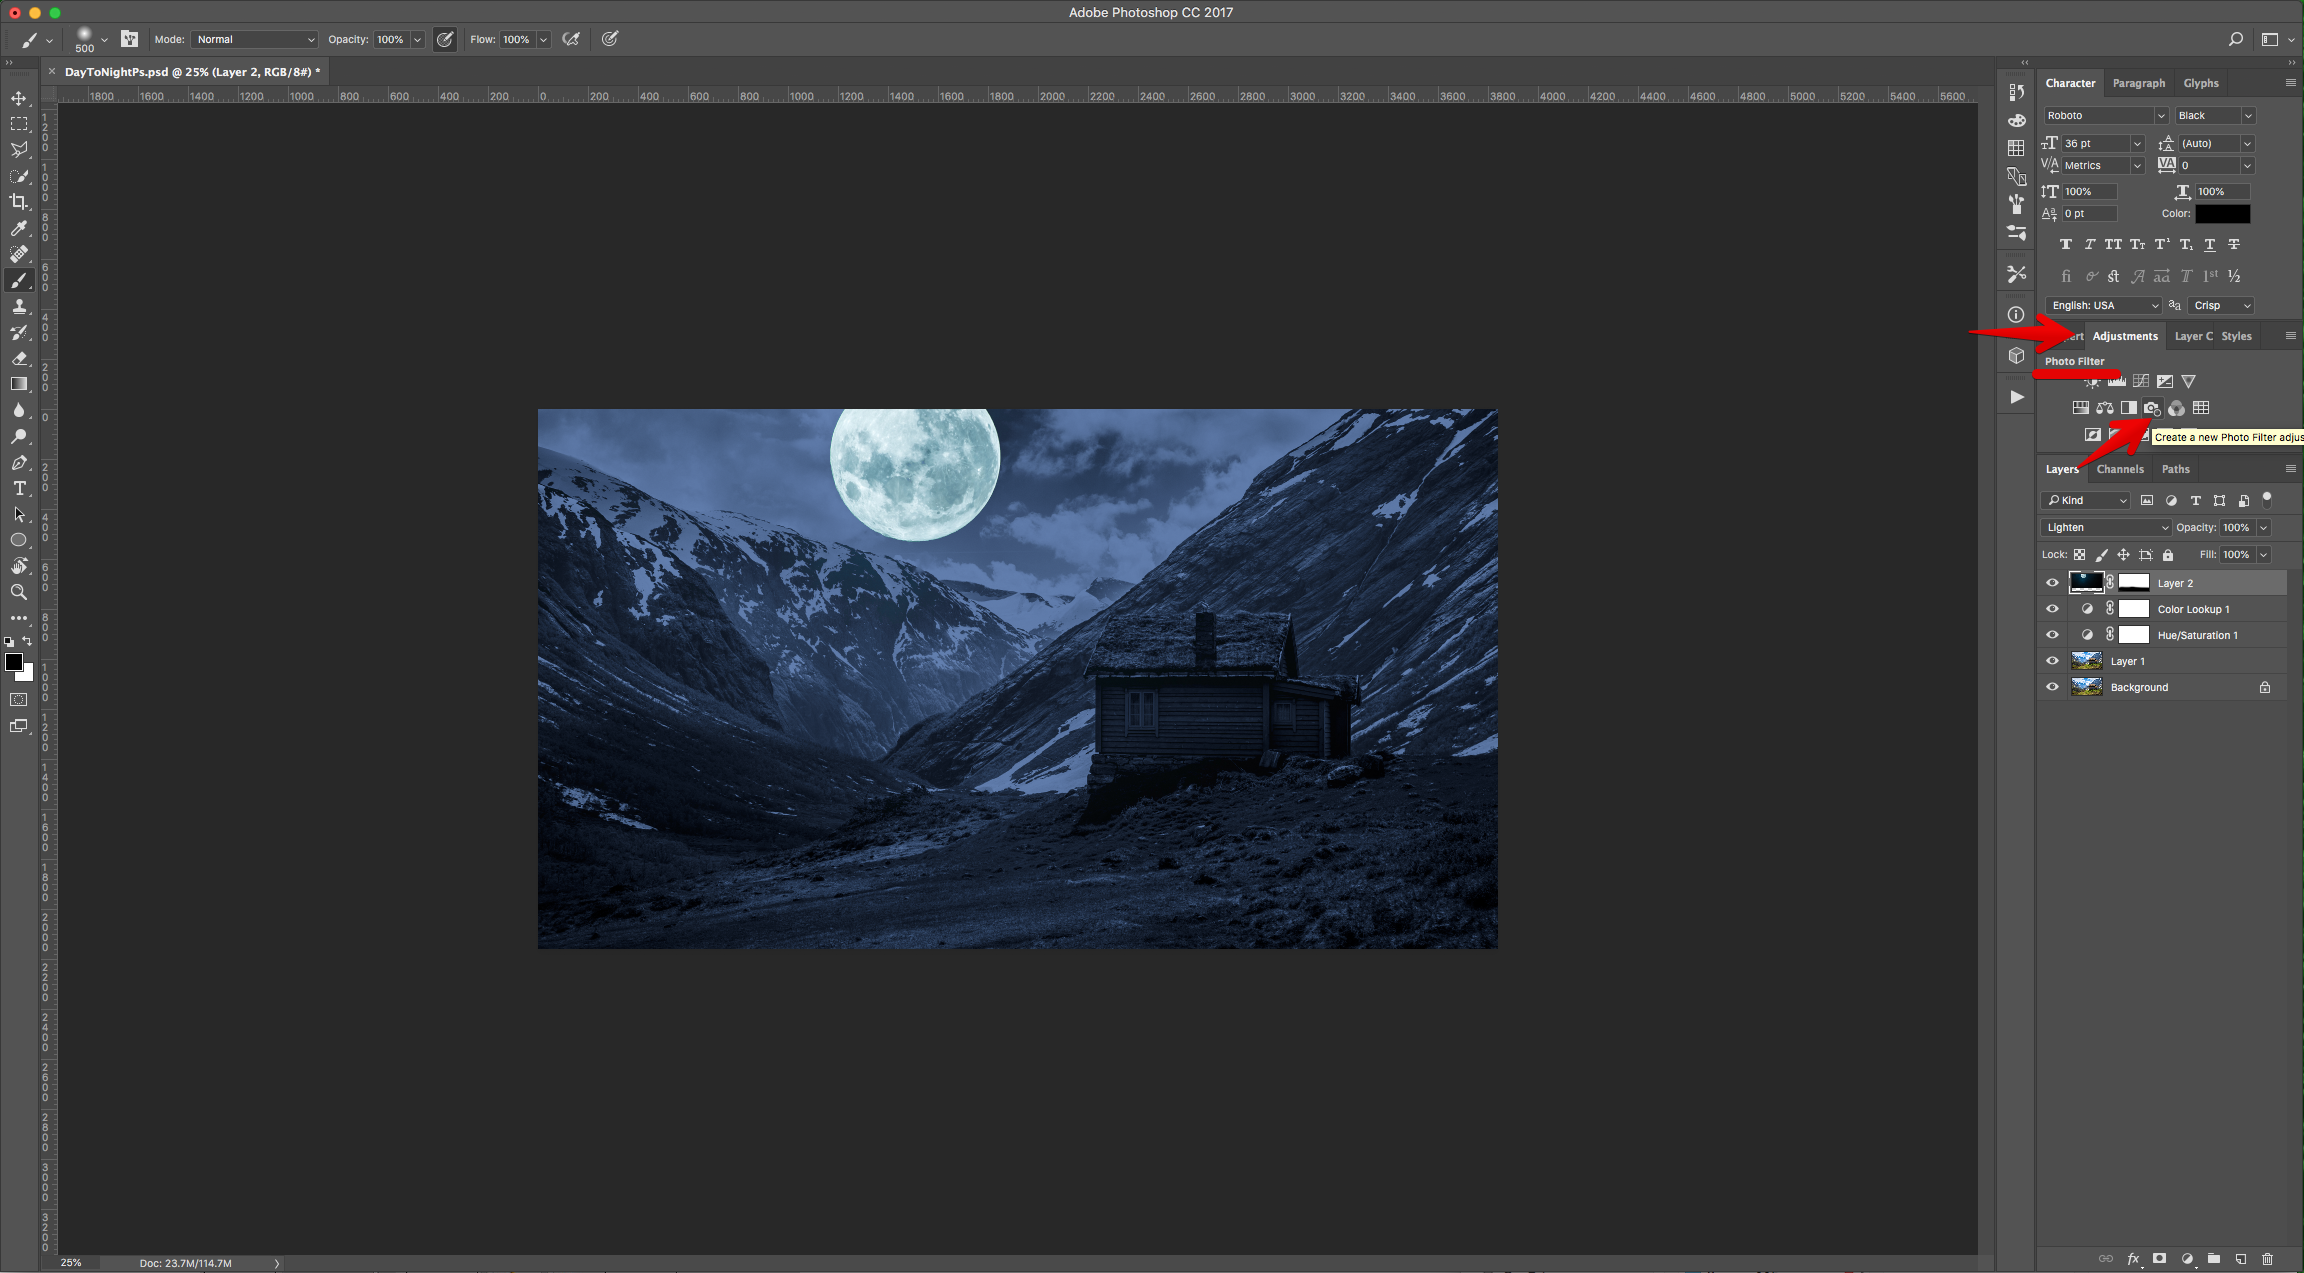
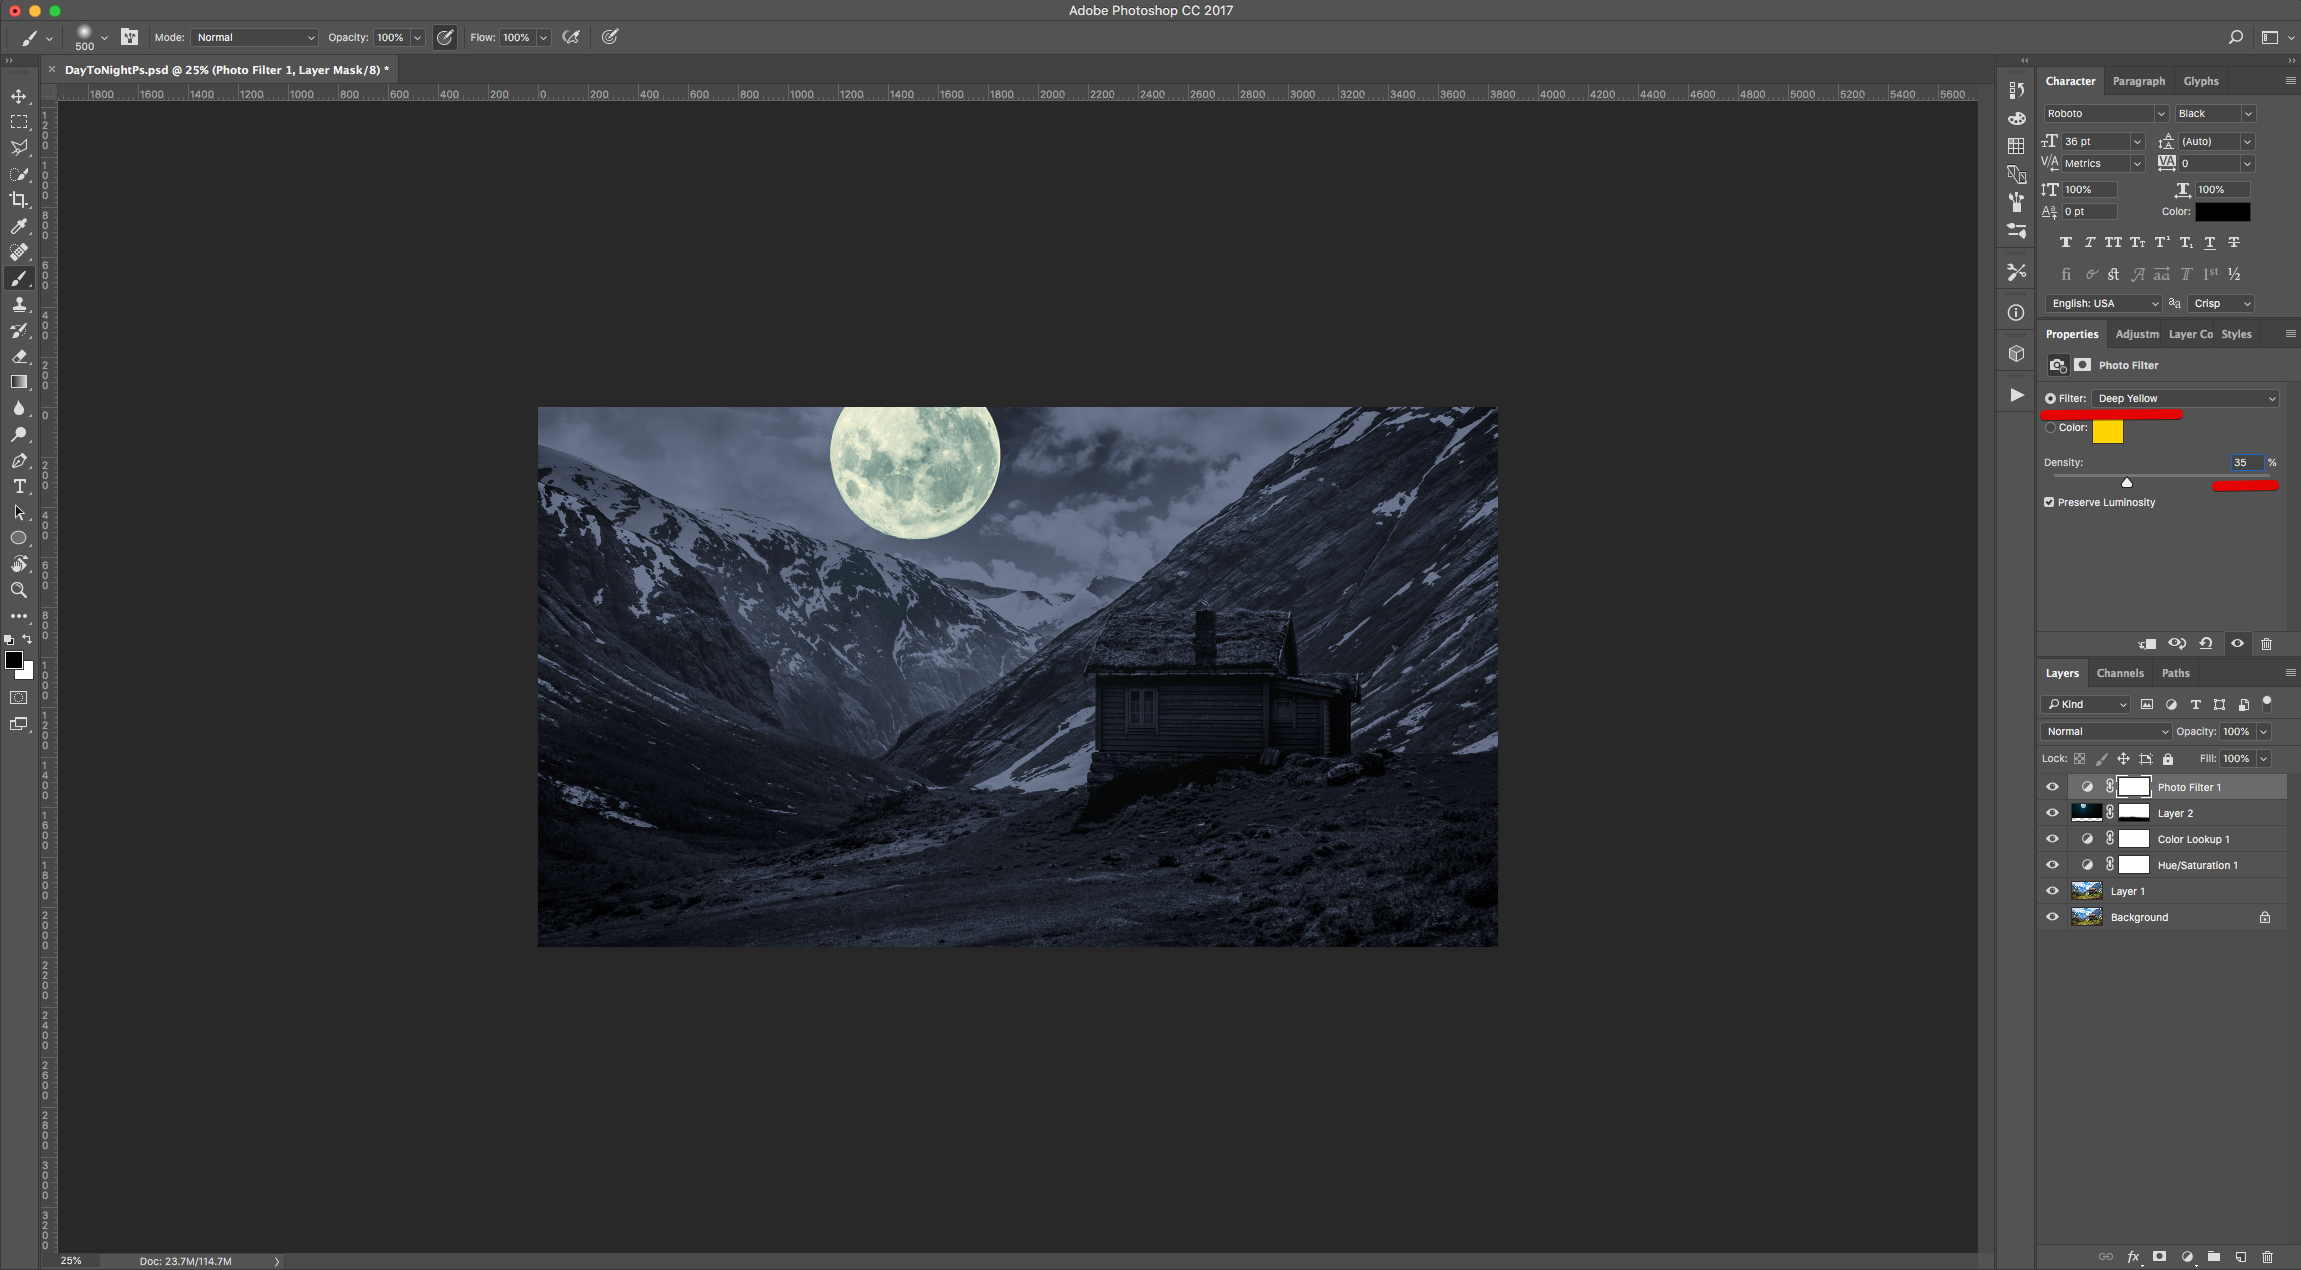
12 - Go to the “Adjustments Panel” and create a “Photo Filter” Adjustment Layer. Choose “Deep Yellow” and reduce the “Density” to 35%.
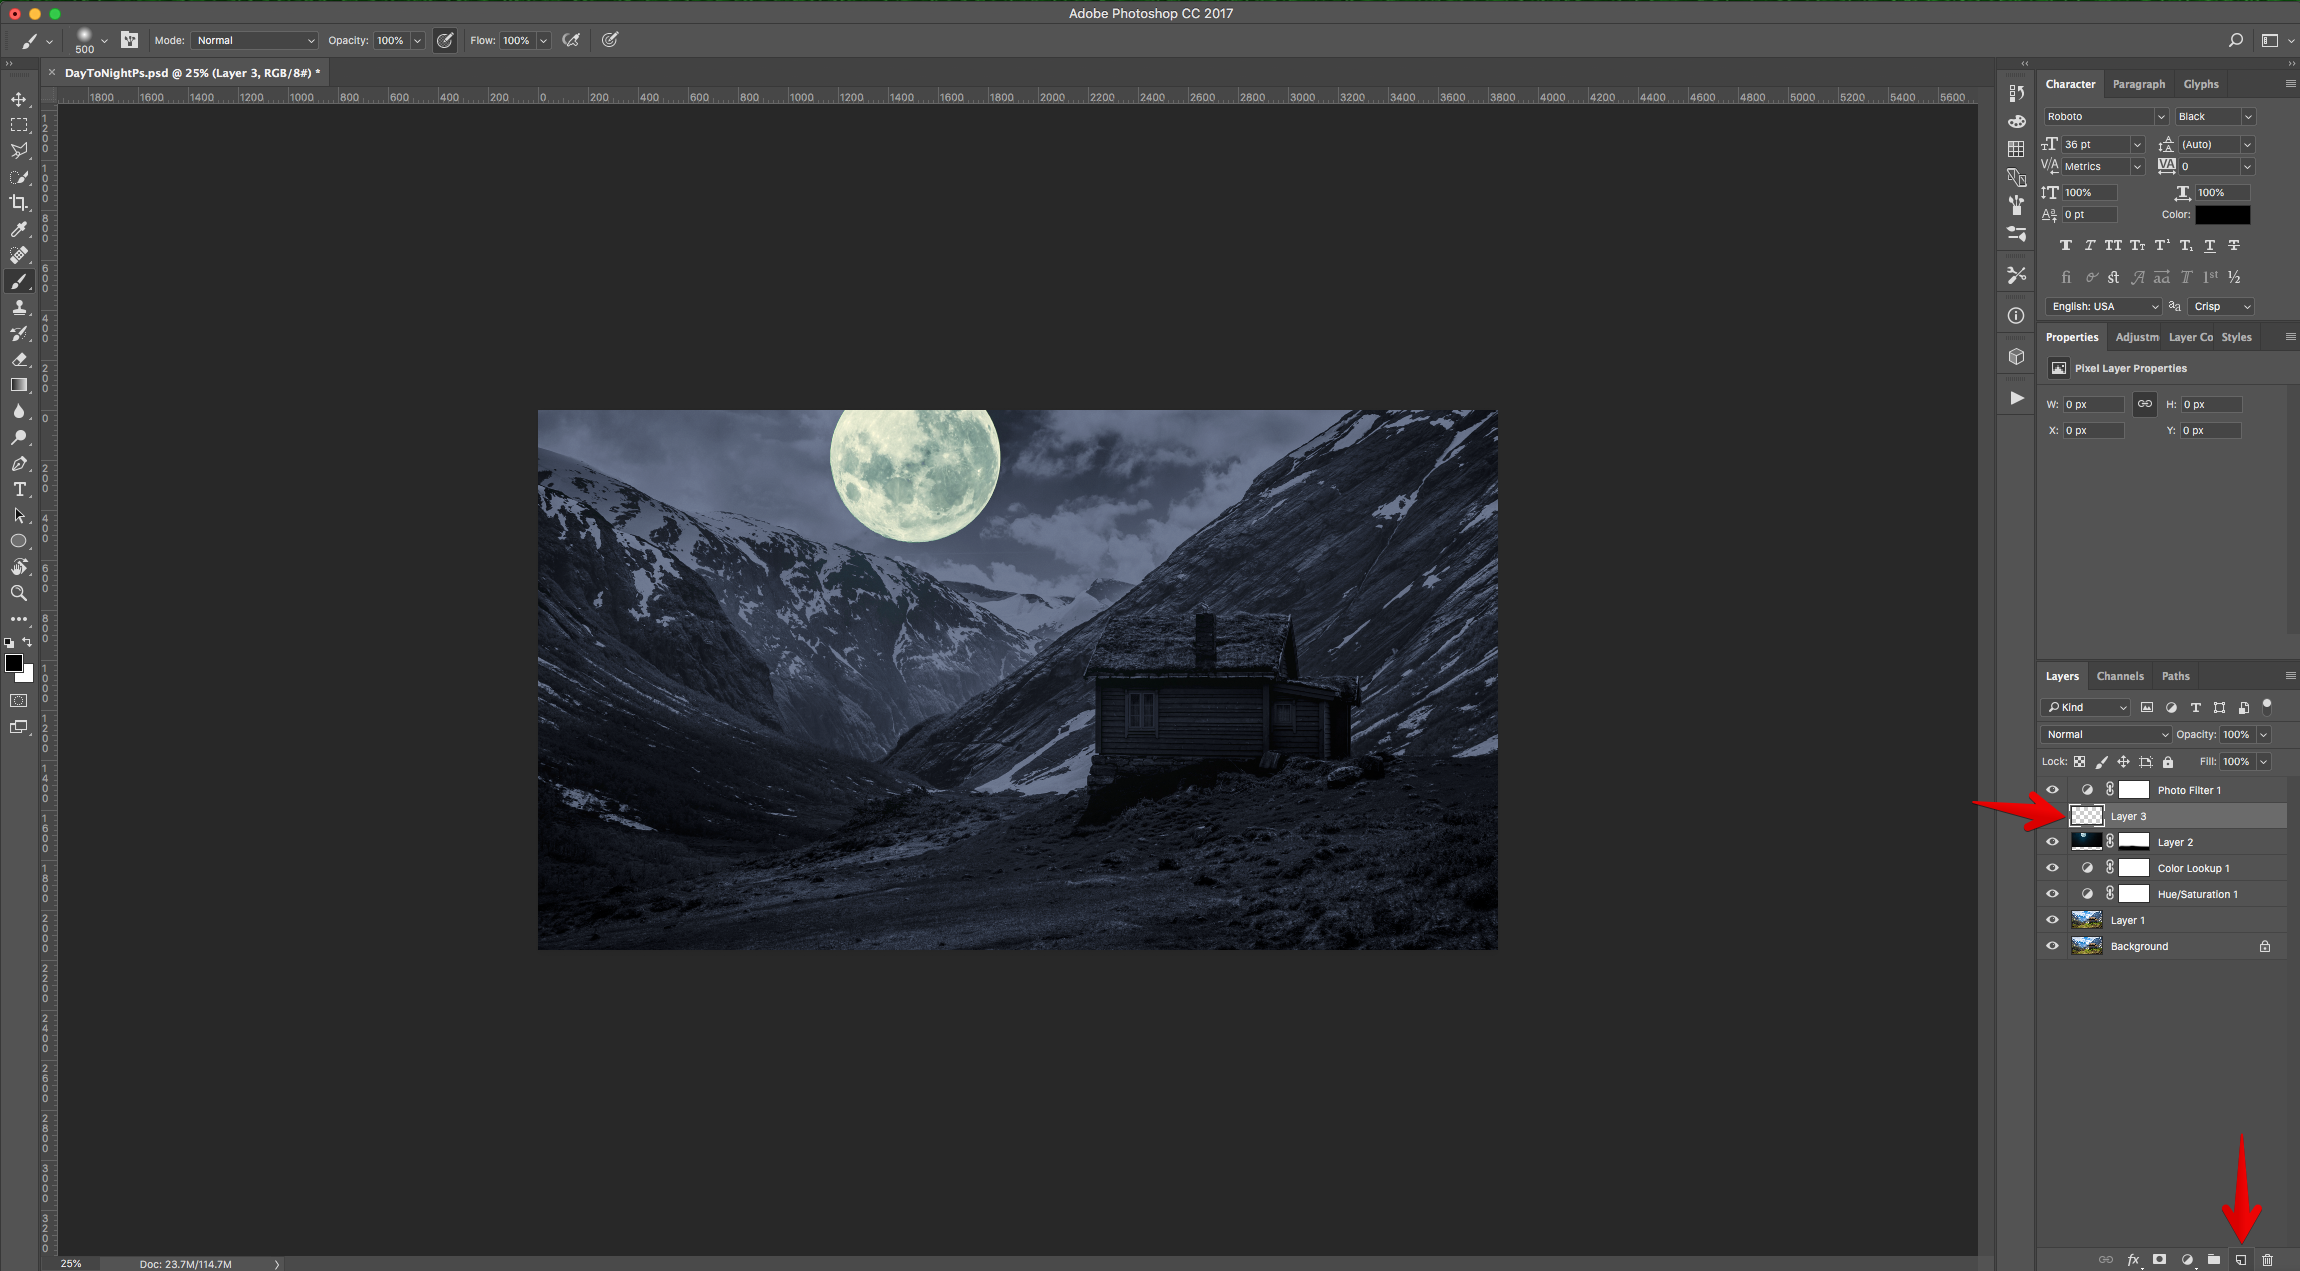
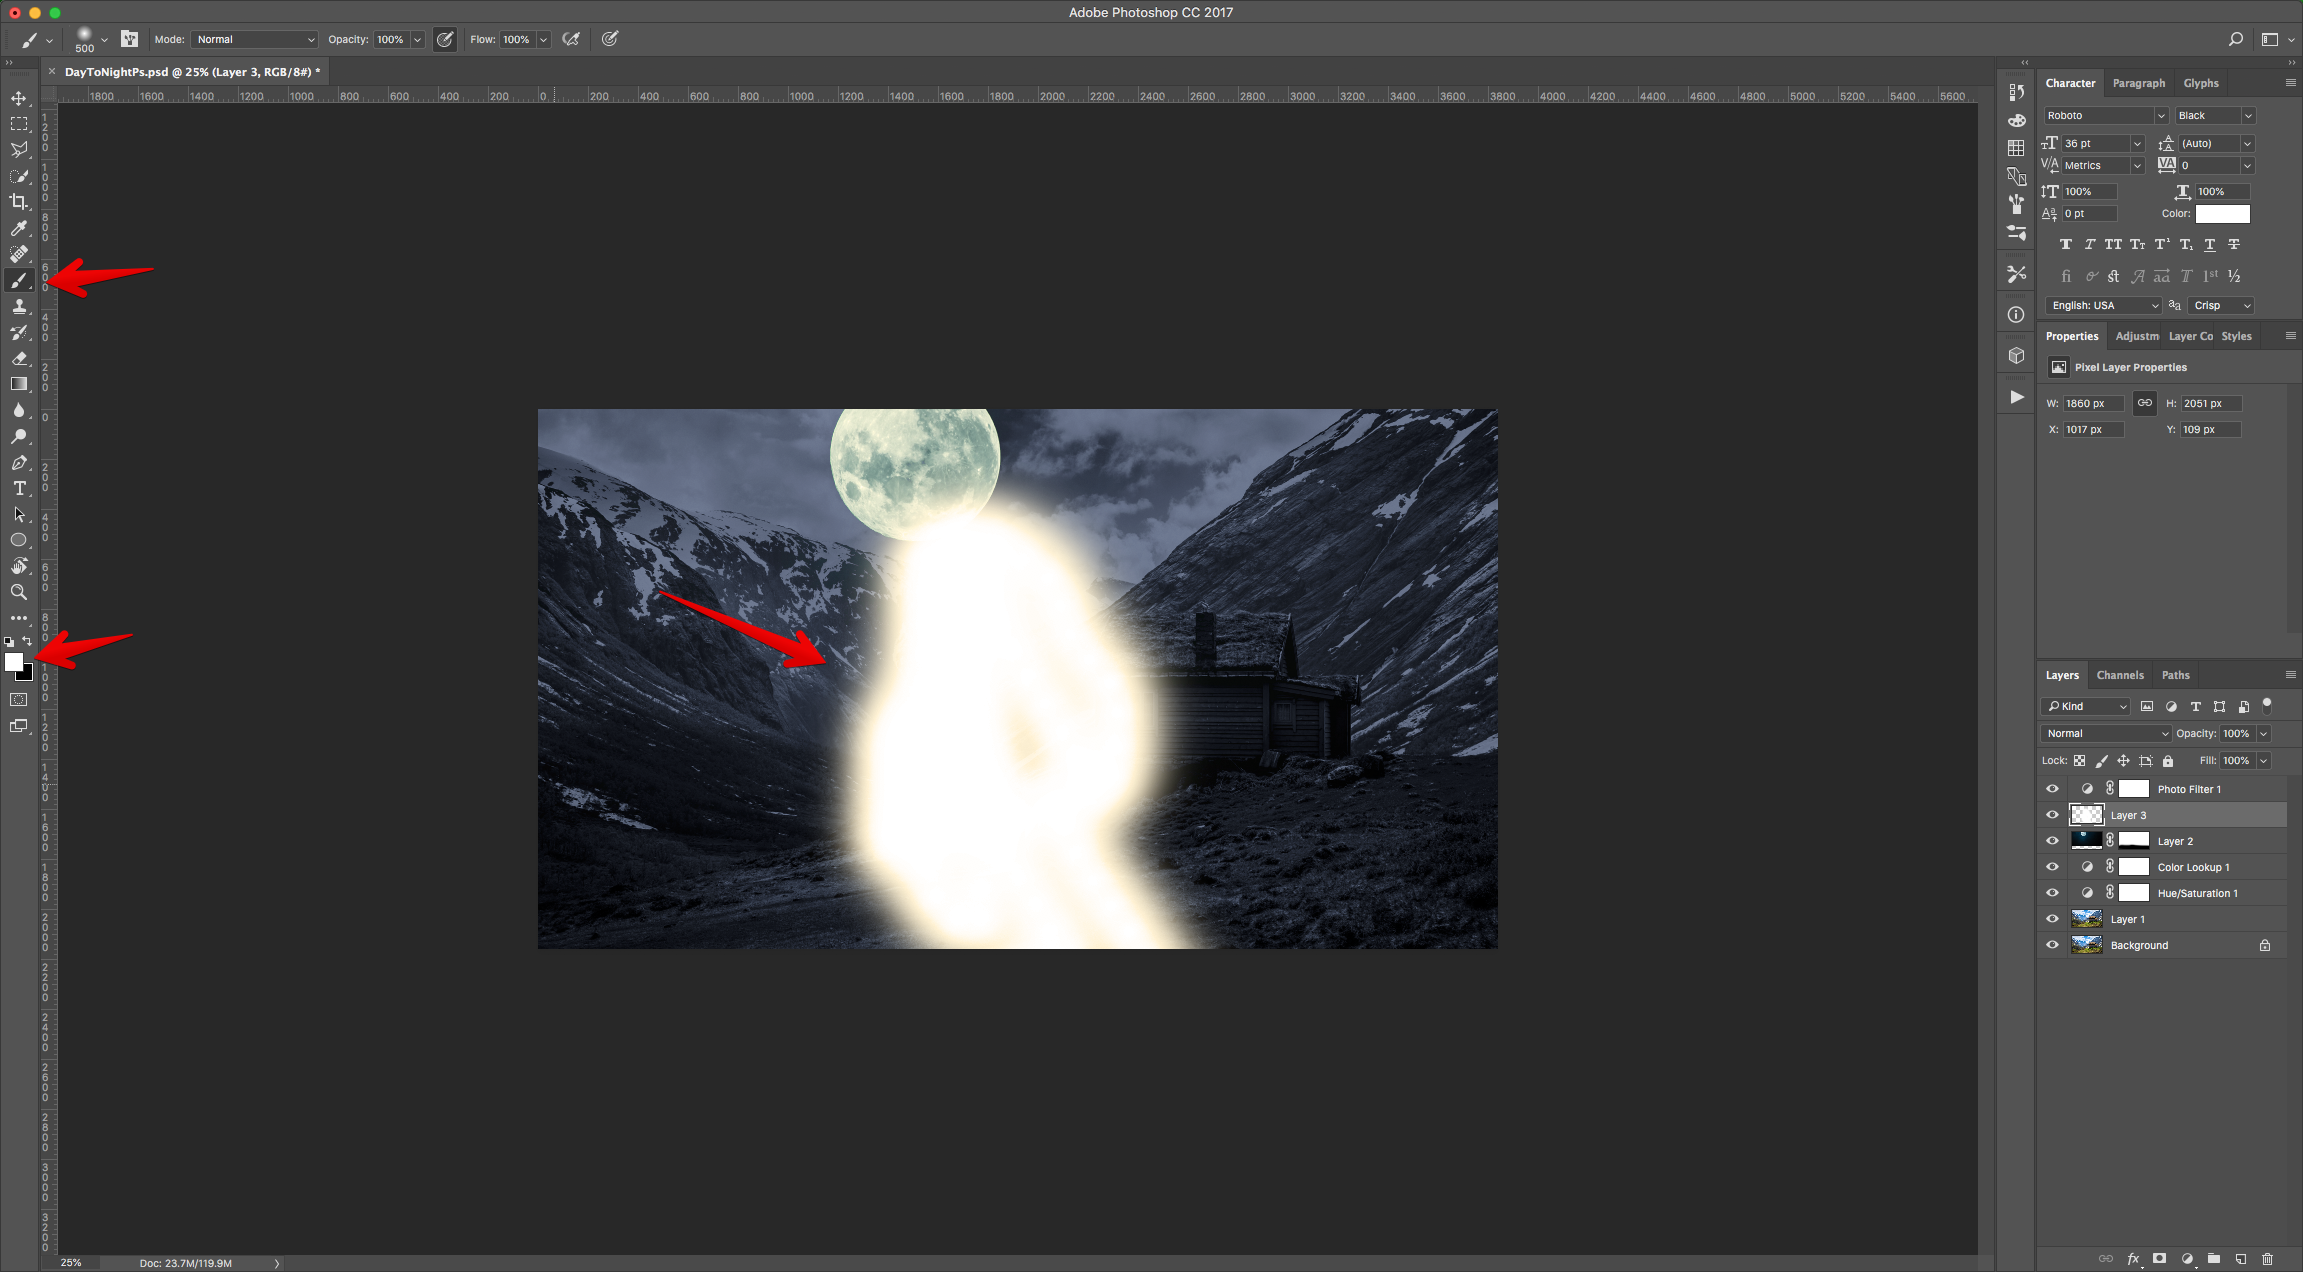
13 - Create a “New Layer” between the “Moon” layer and the “Photo Filter Adjustment Layer” (Click on the small button at the bottom of the “Layers Panel”). Use the “Brush Tool” (B) with the same settings as before but change the “Foreground” color to White and “Paint” some “Light” coming down from the “Moon”.
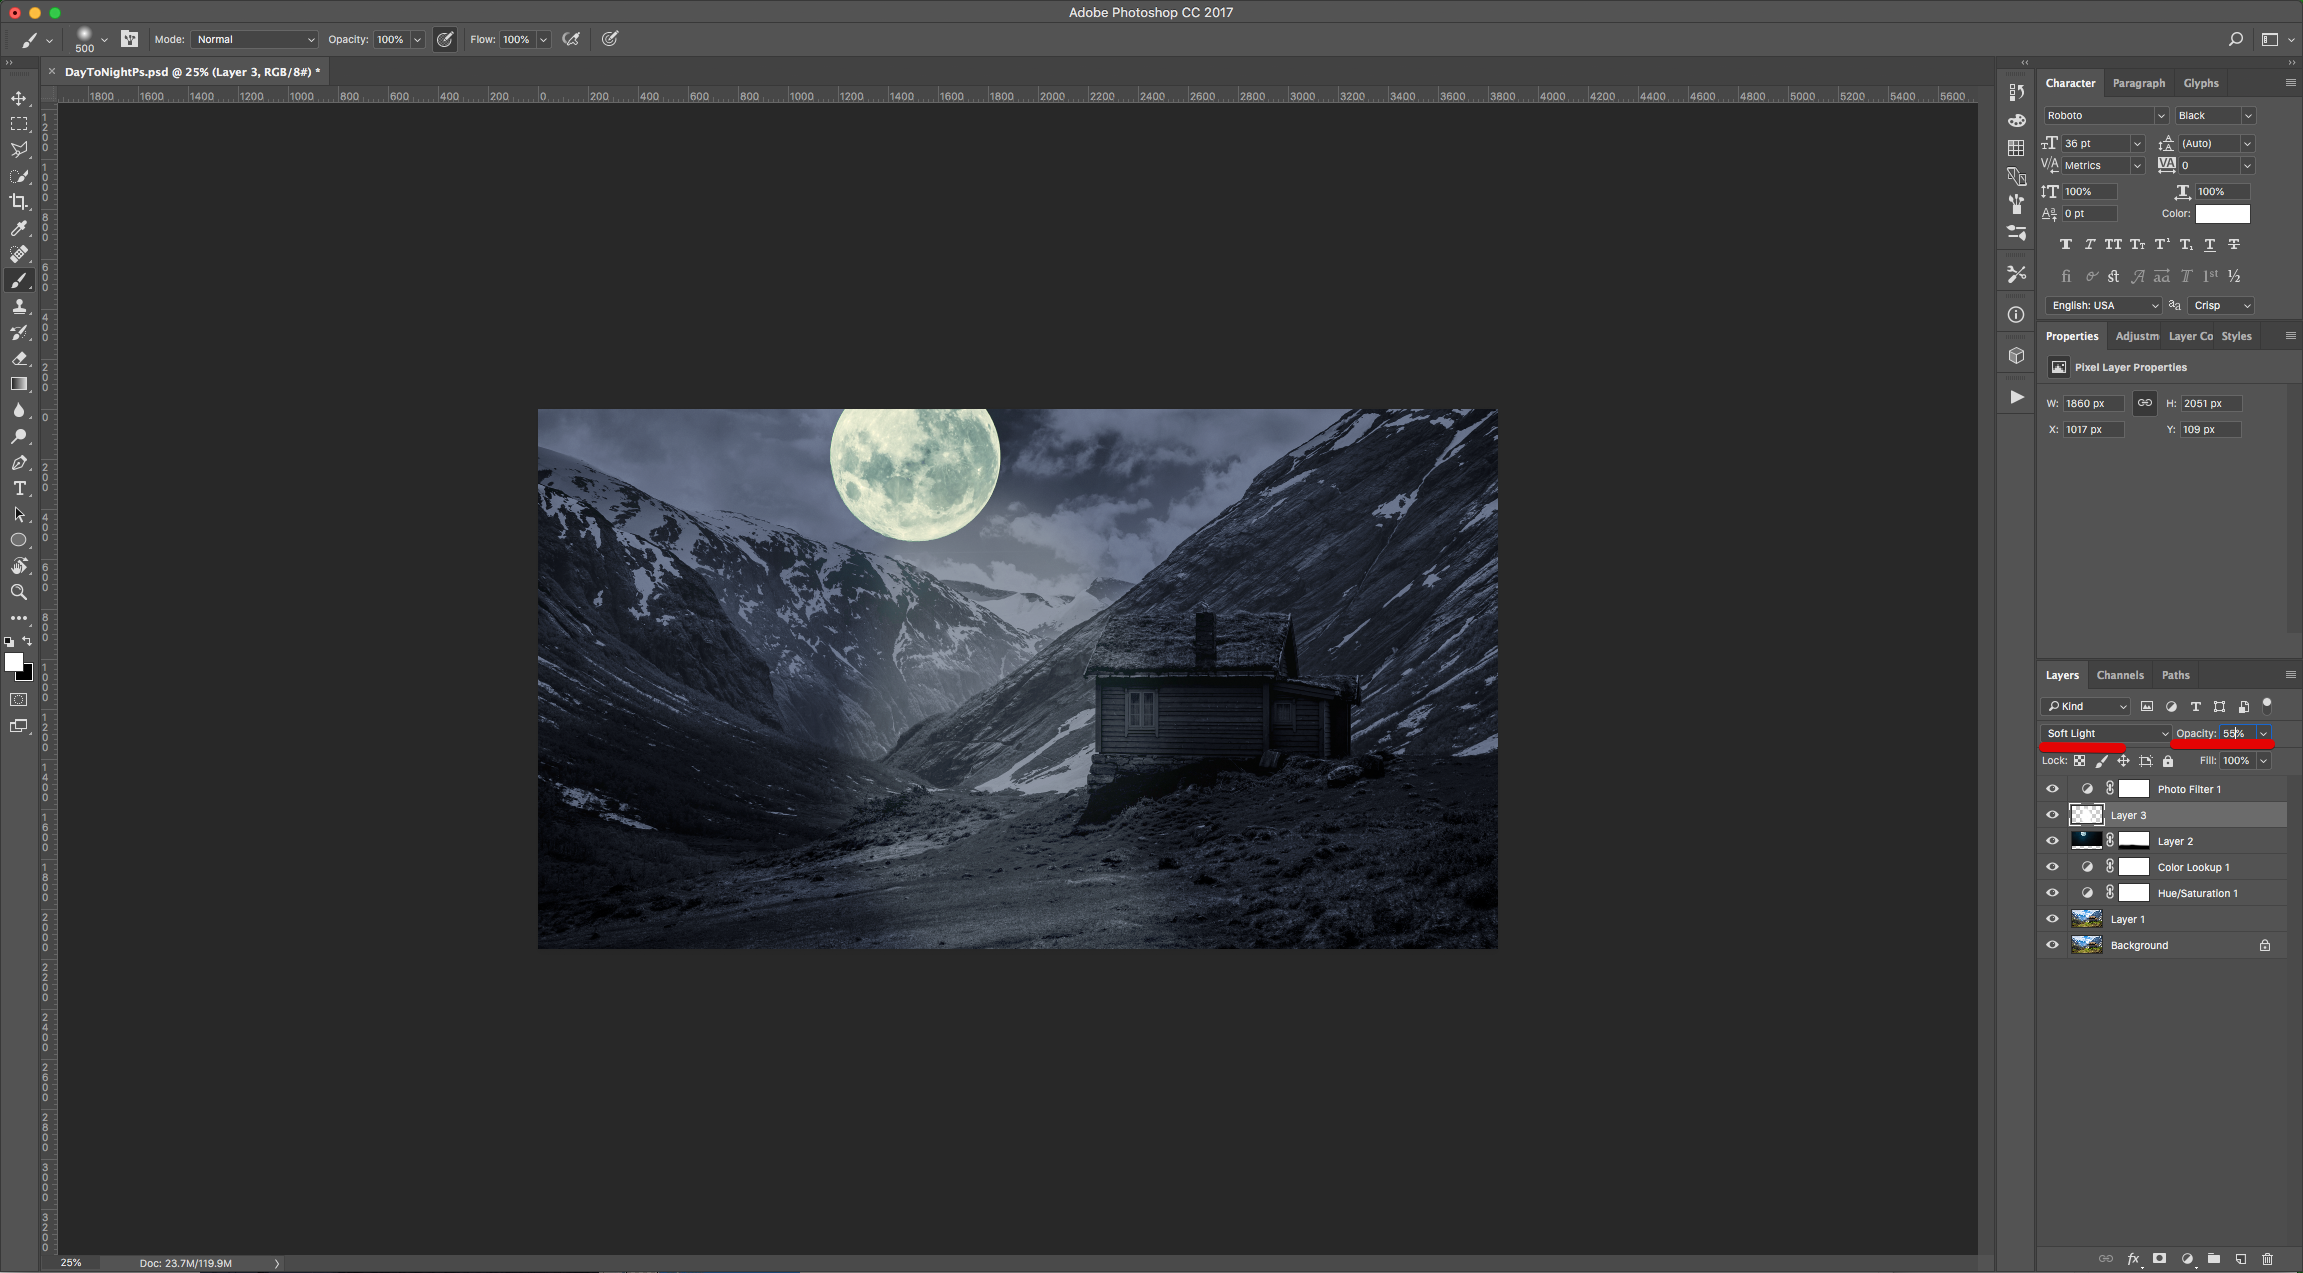
14 - Change the “Blending Mode” to “Soft Light” and the “Opacity” to 55%.
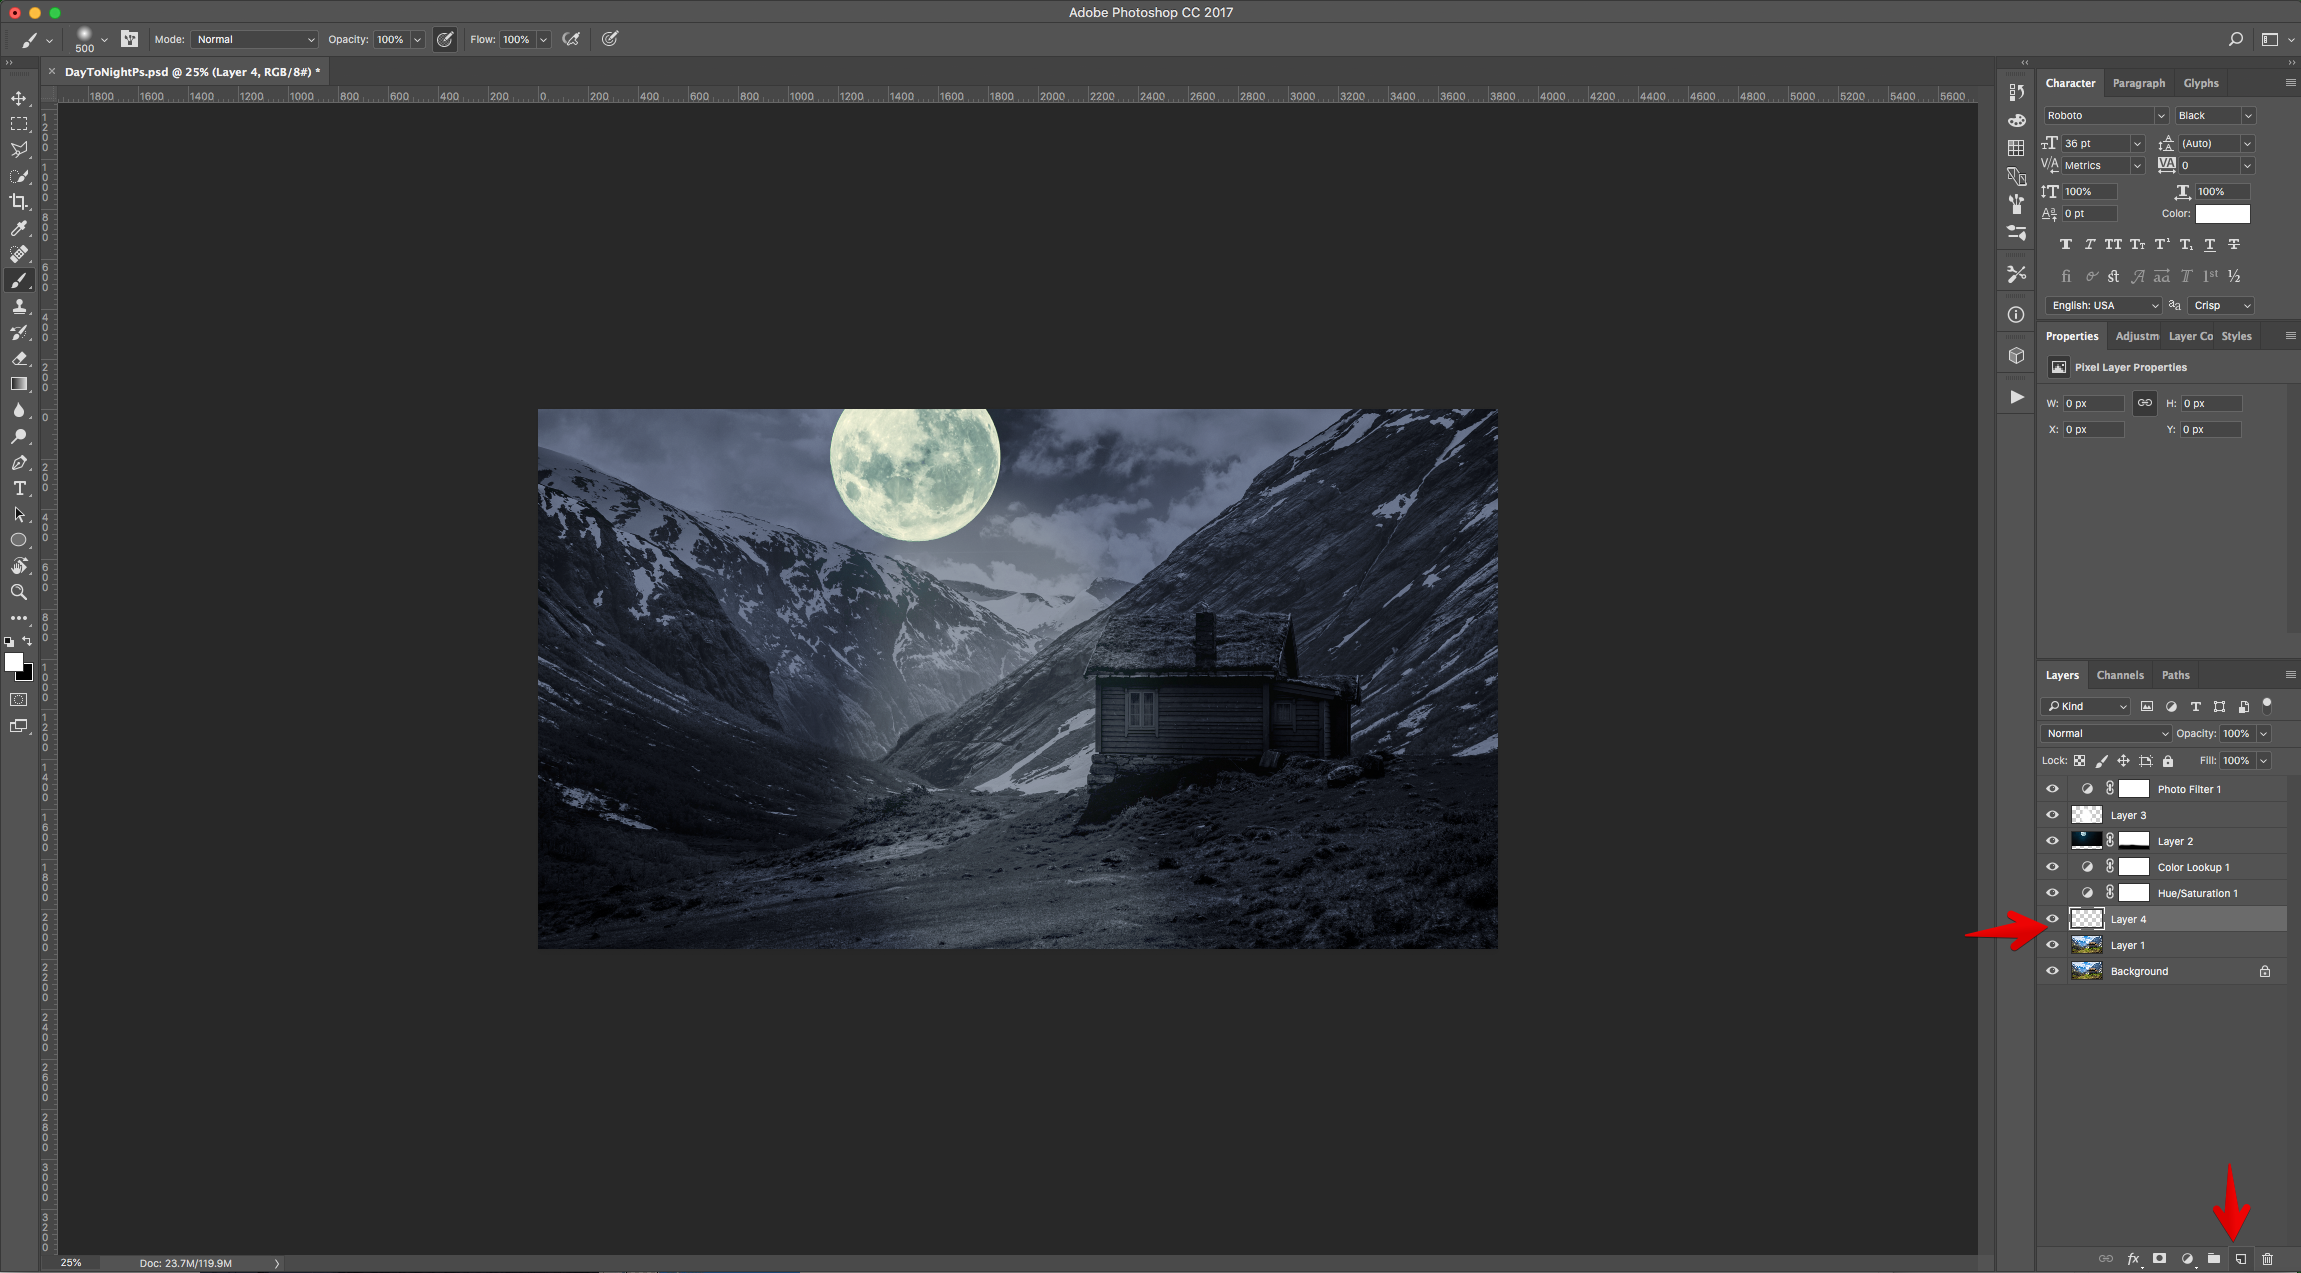
15 - Create a “New Layer” on top of the “Background” Layers (Click on the small button at the bottom of the “Layers Panel”).
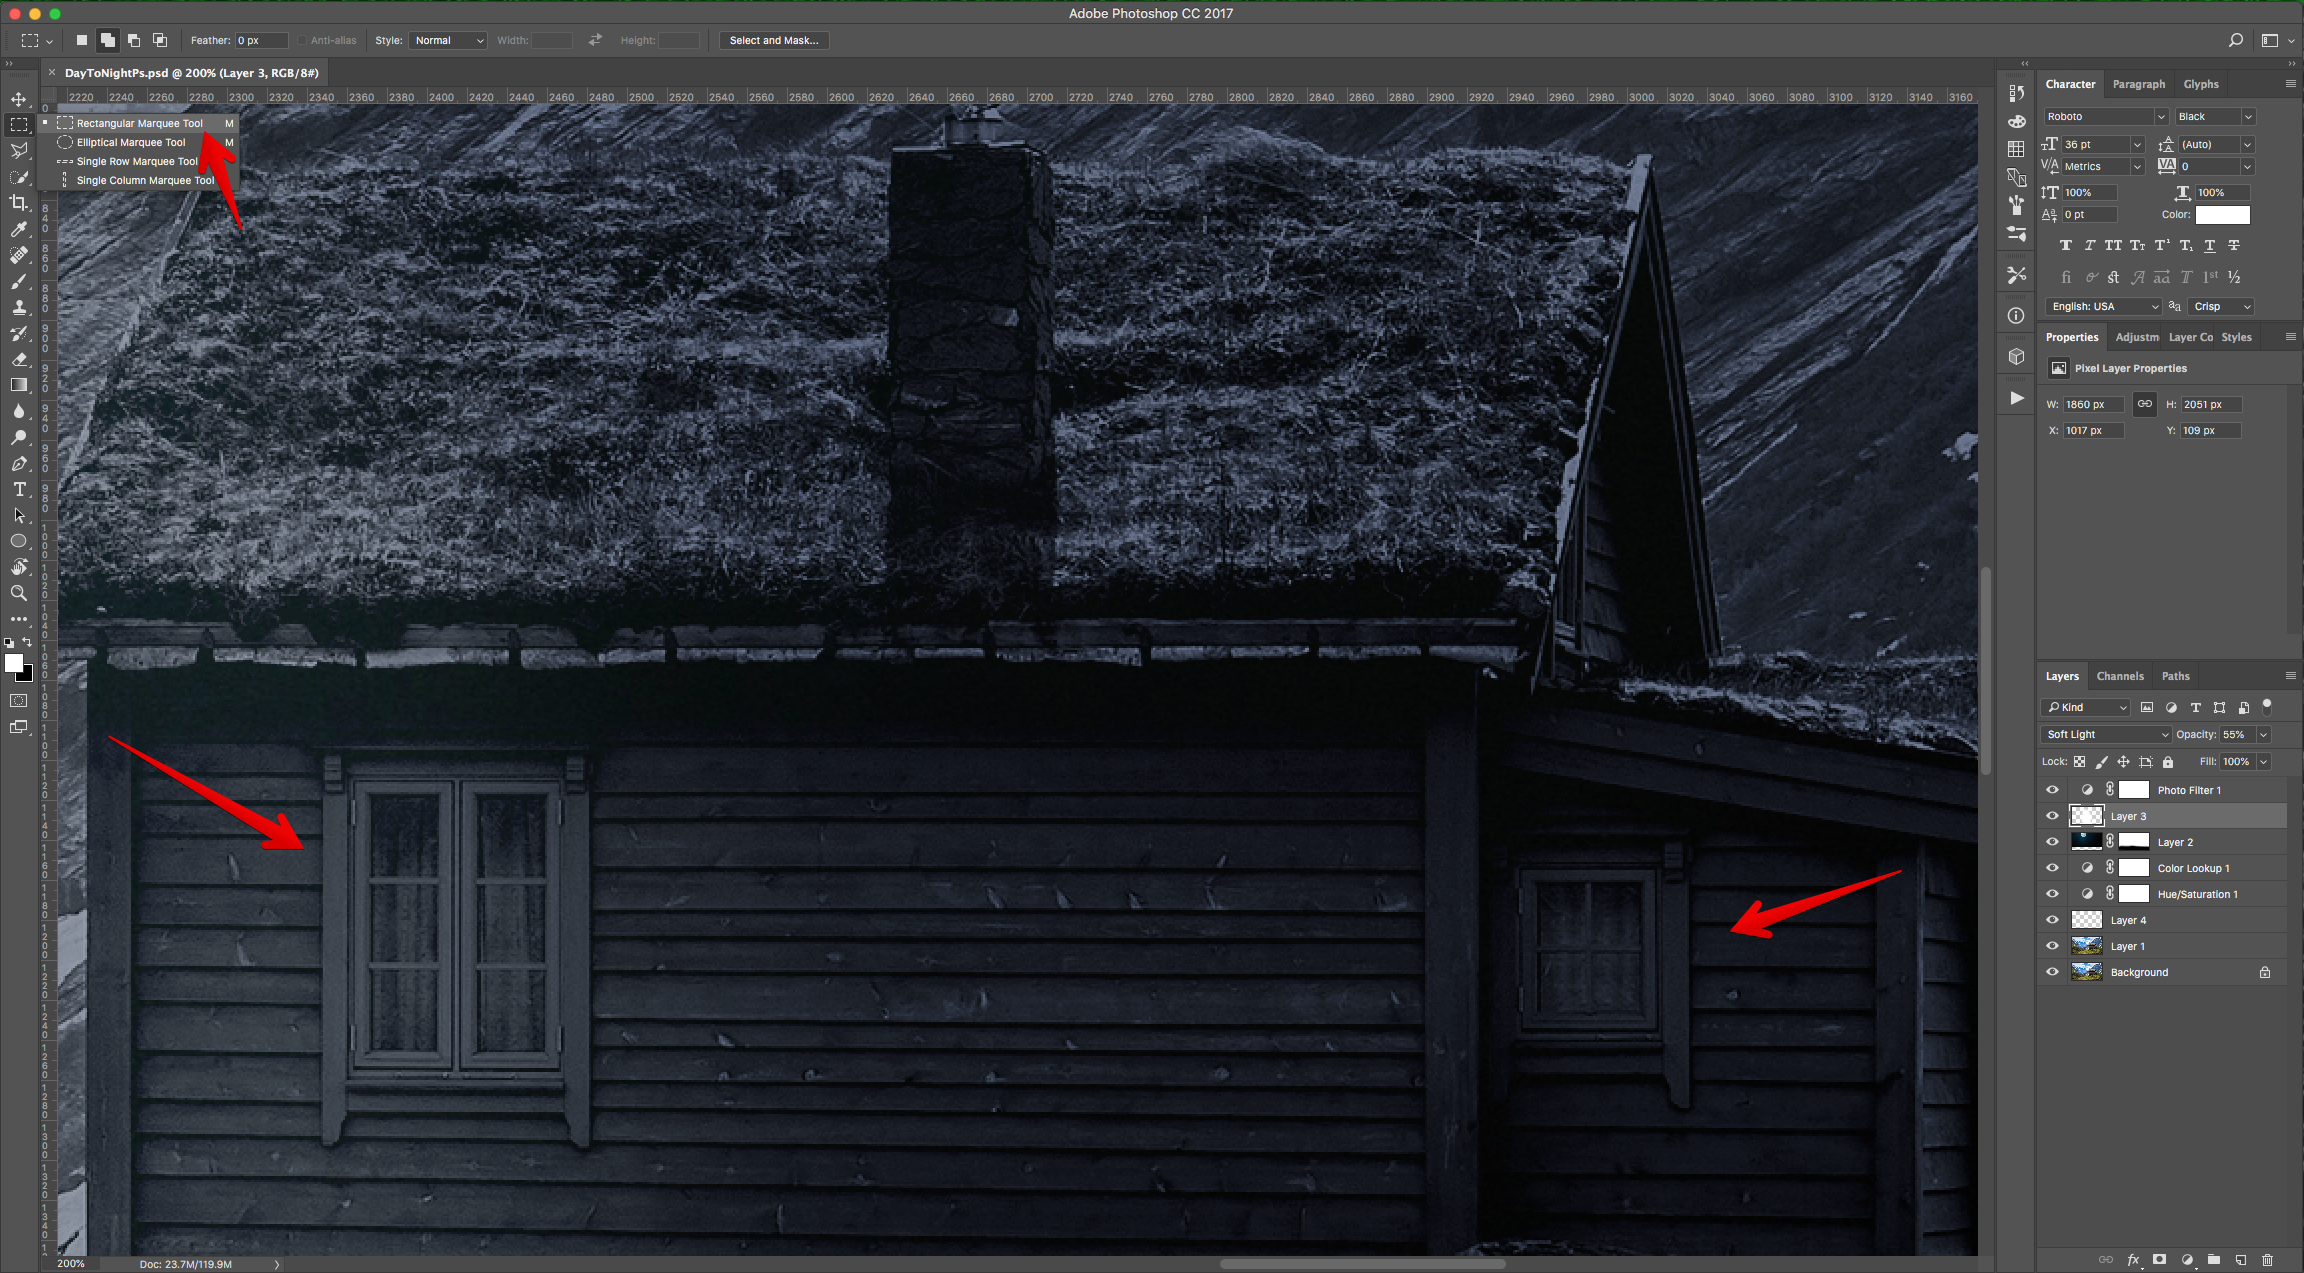
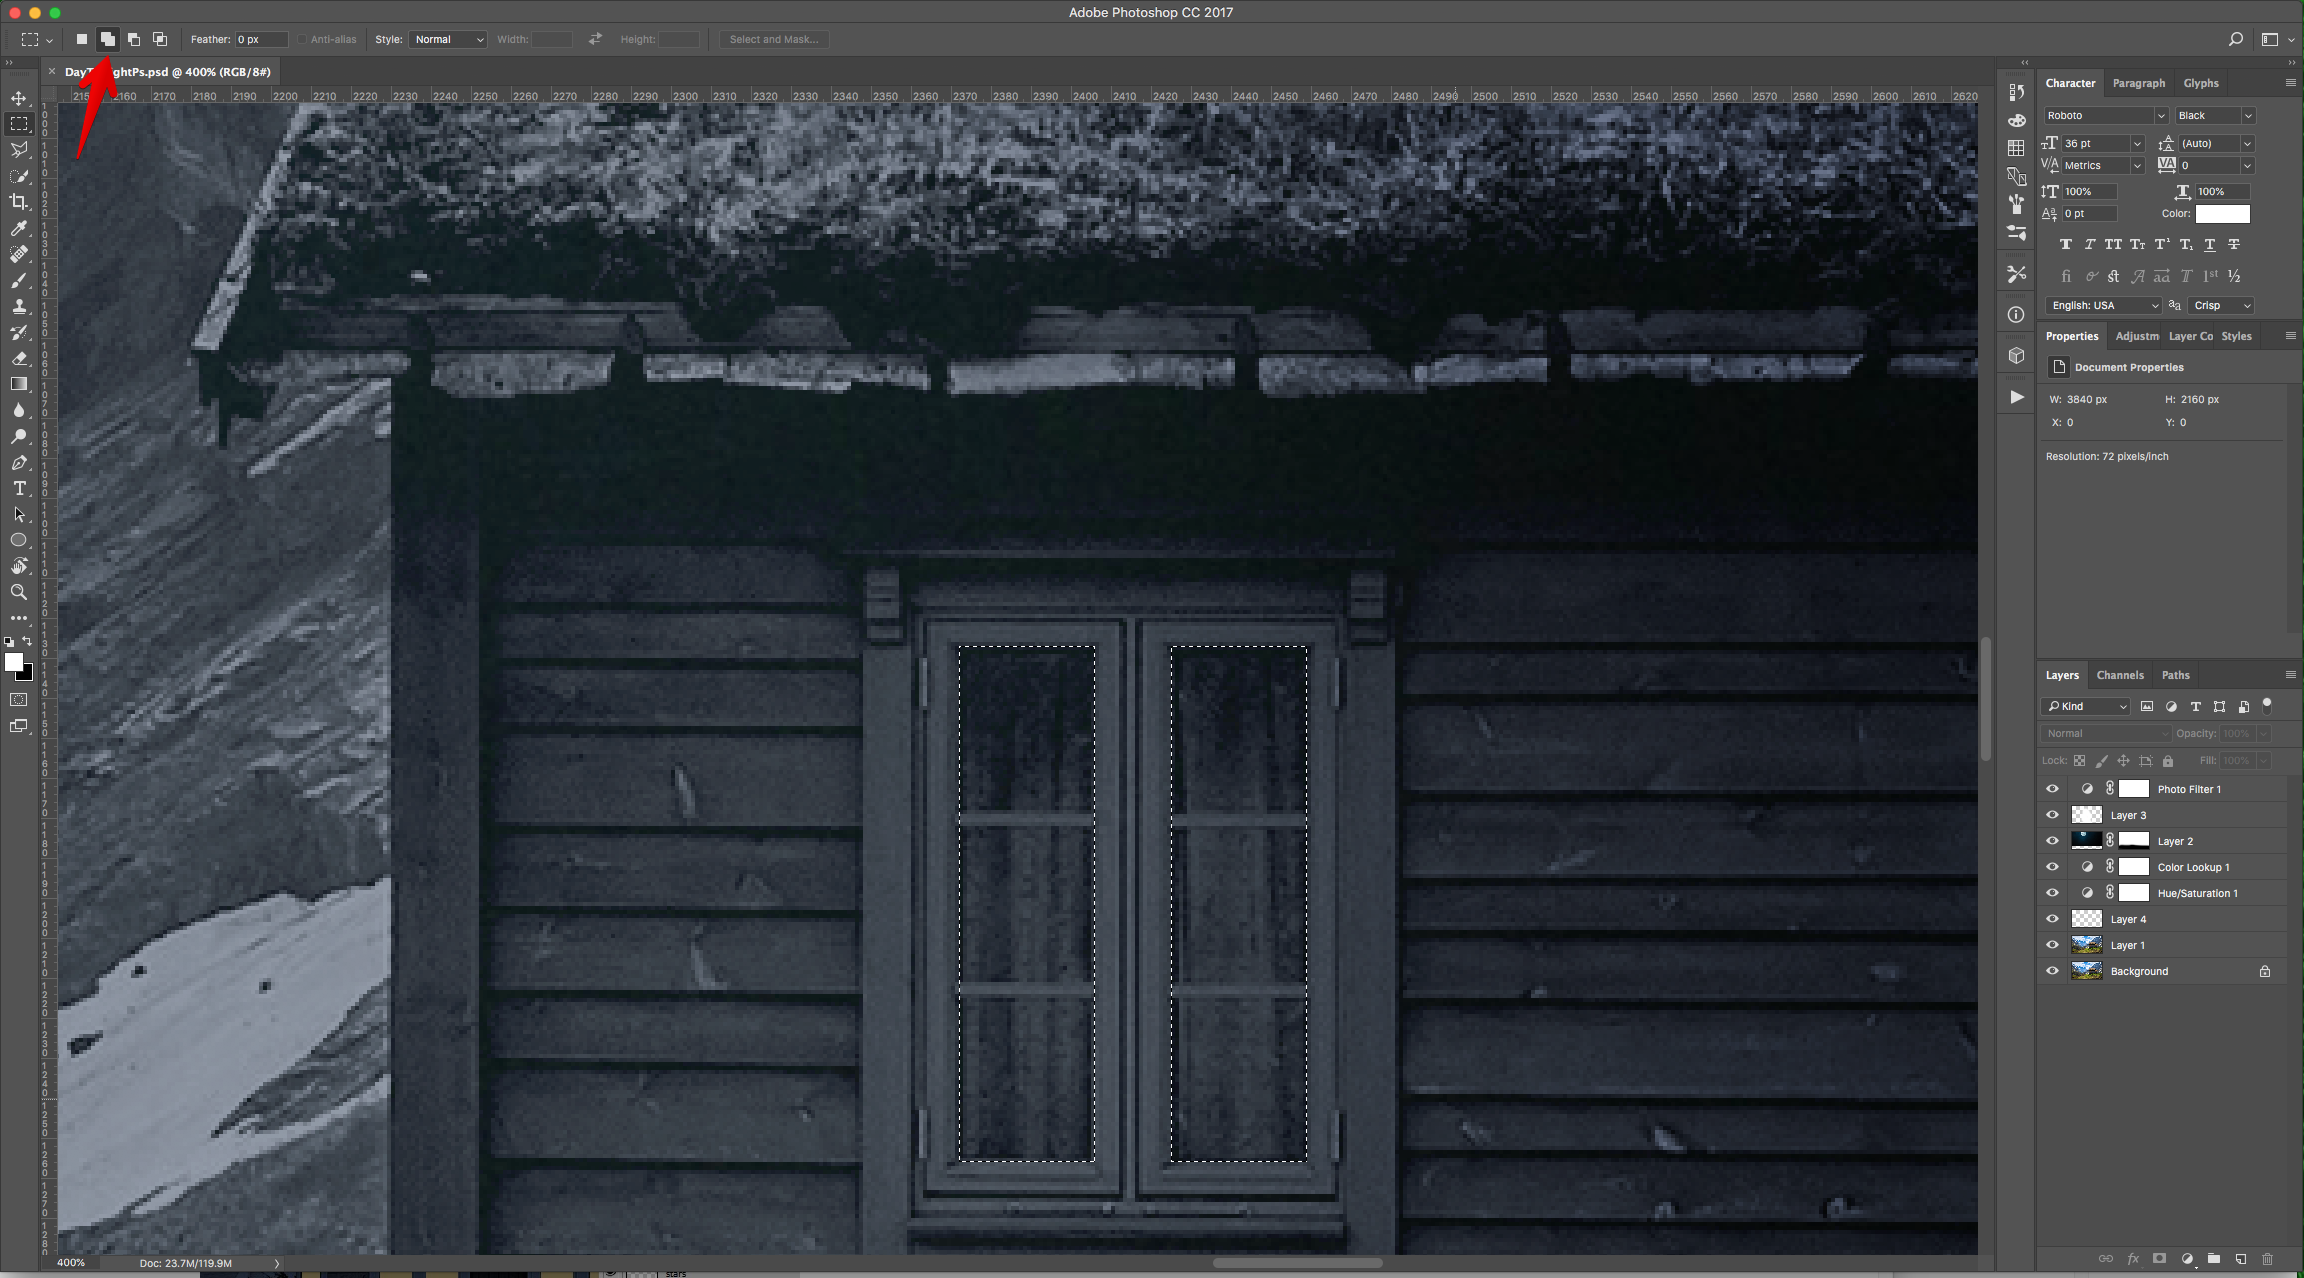
16 - Use the “Rectangular Marquee Tool” (M) to select the inside of the “Windows” of the house (use “Add to Selection” on the top Menu).
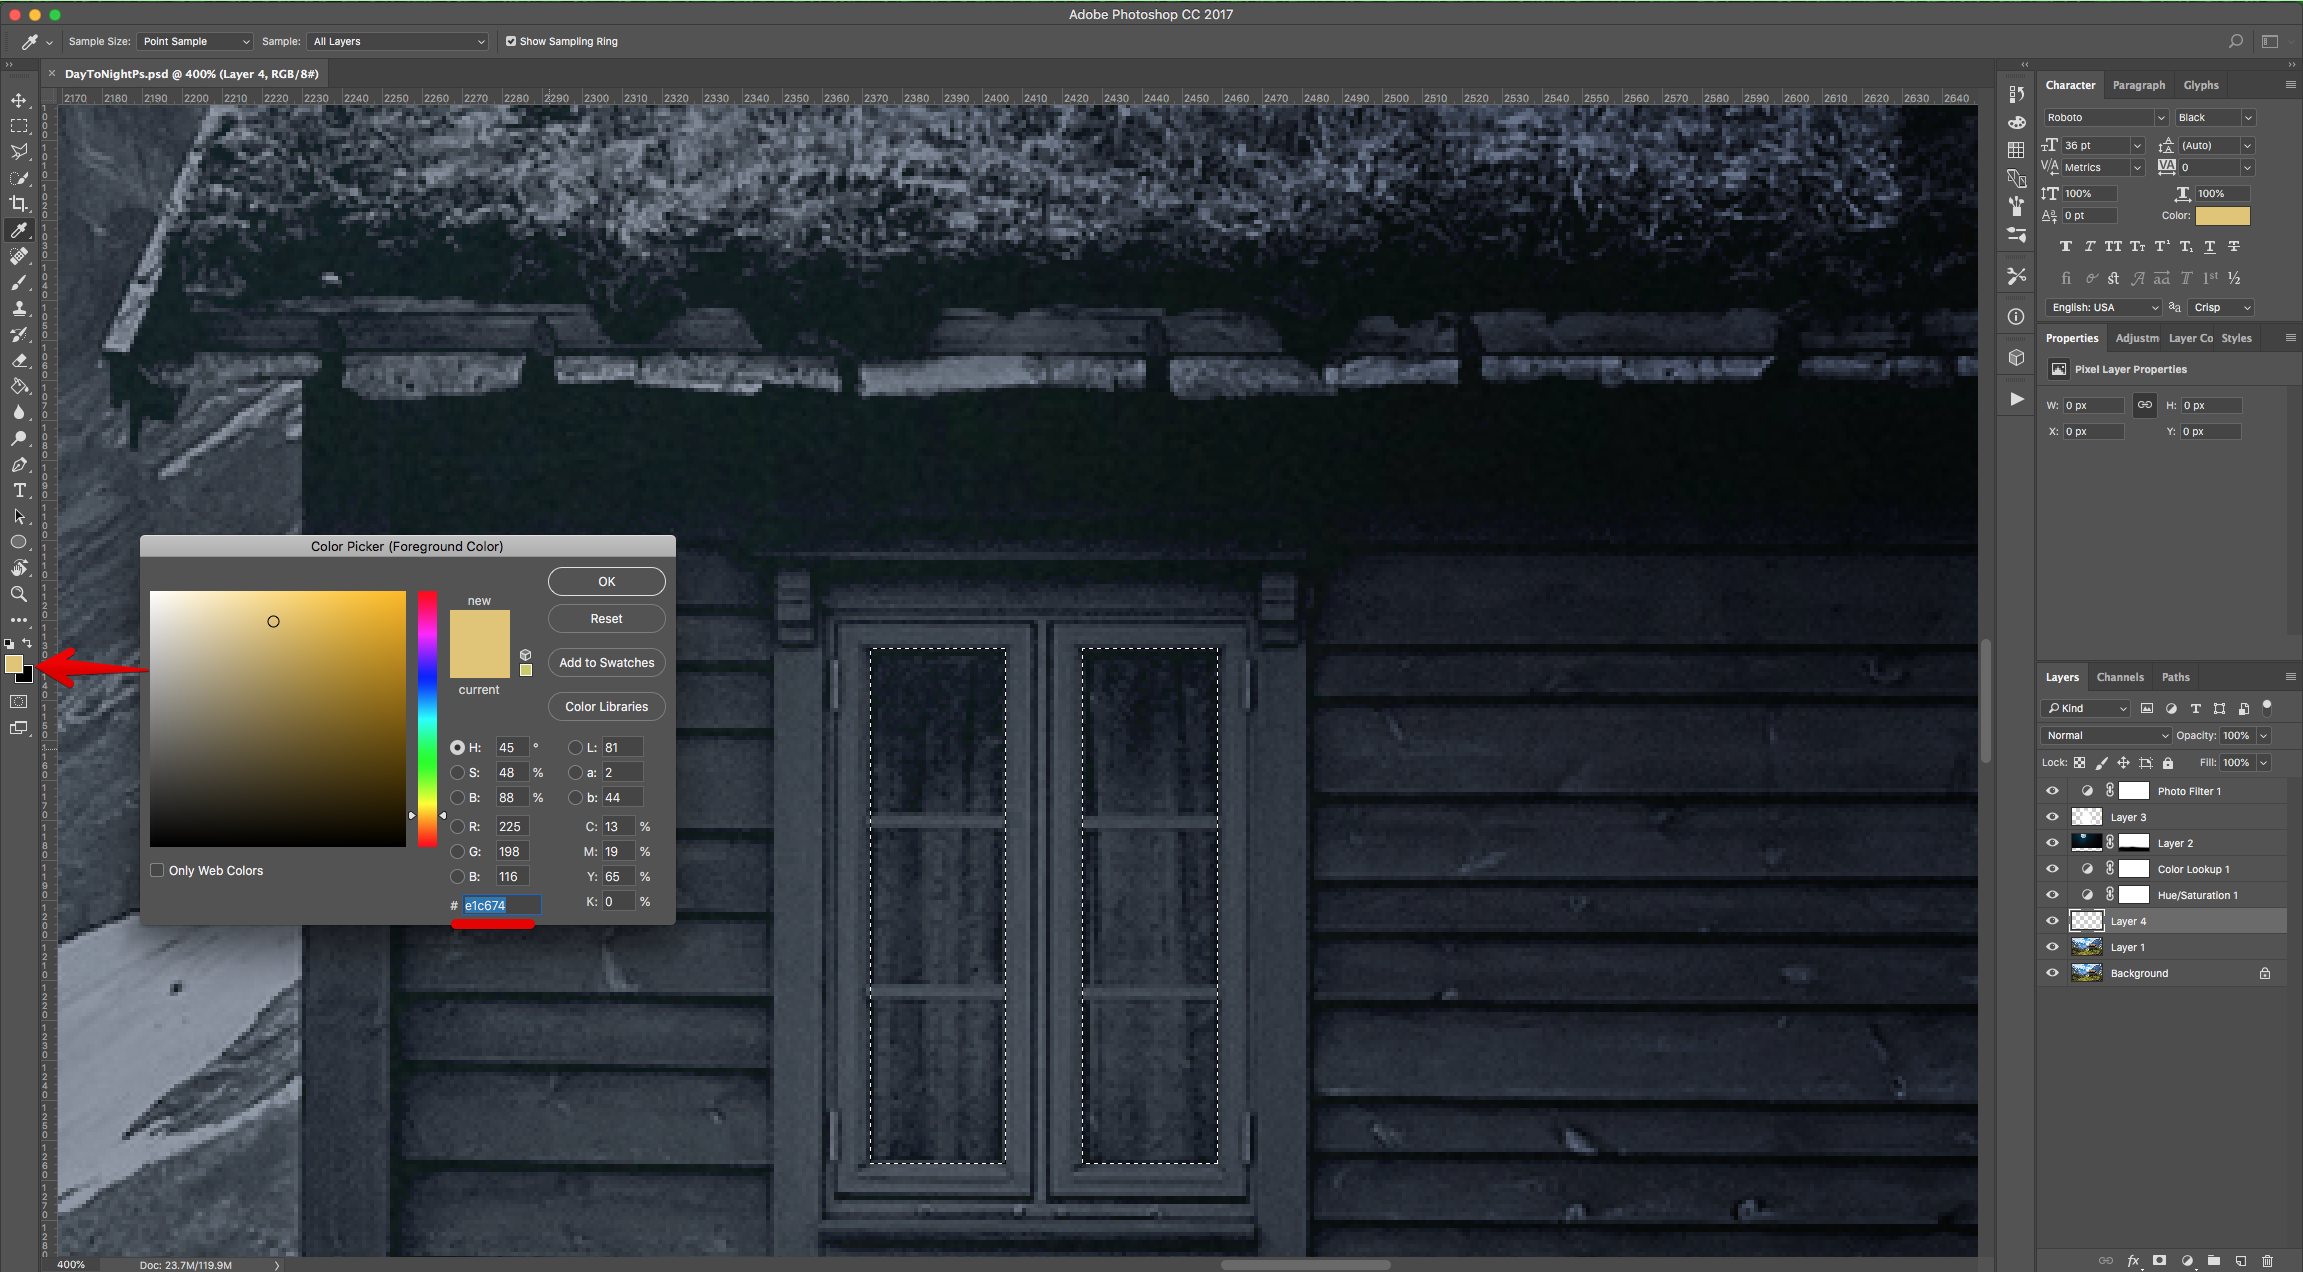
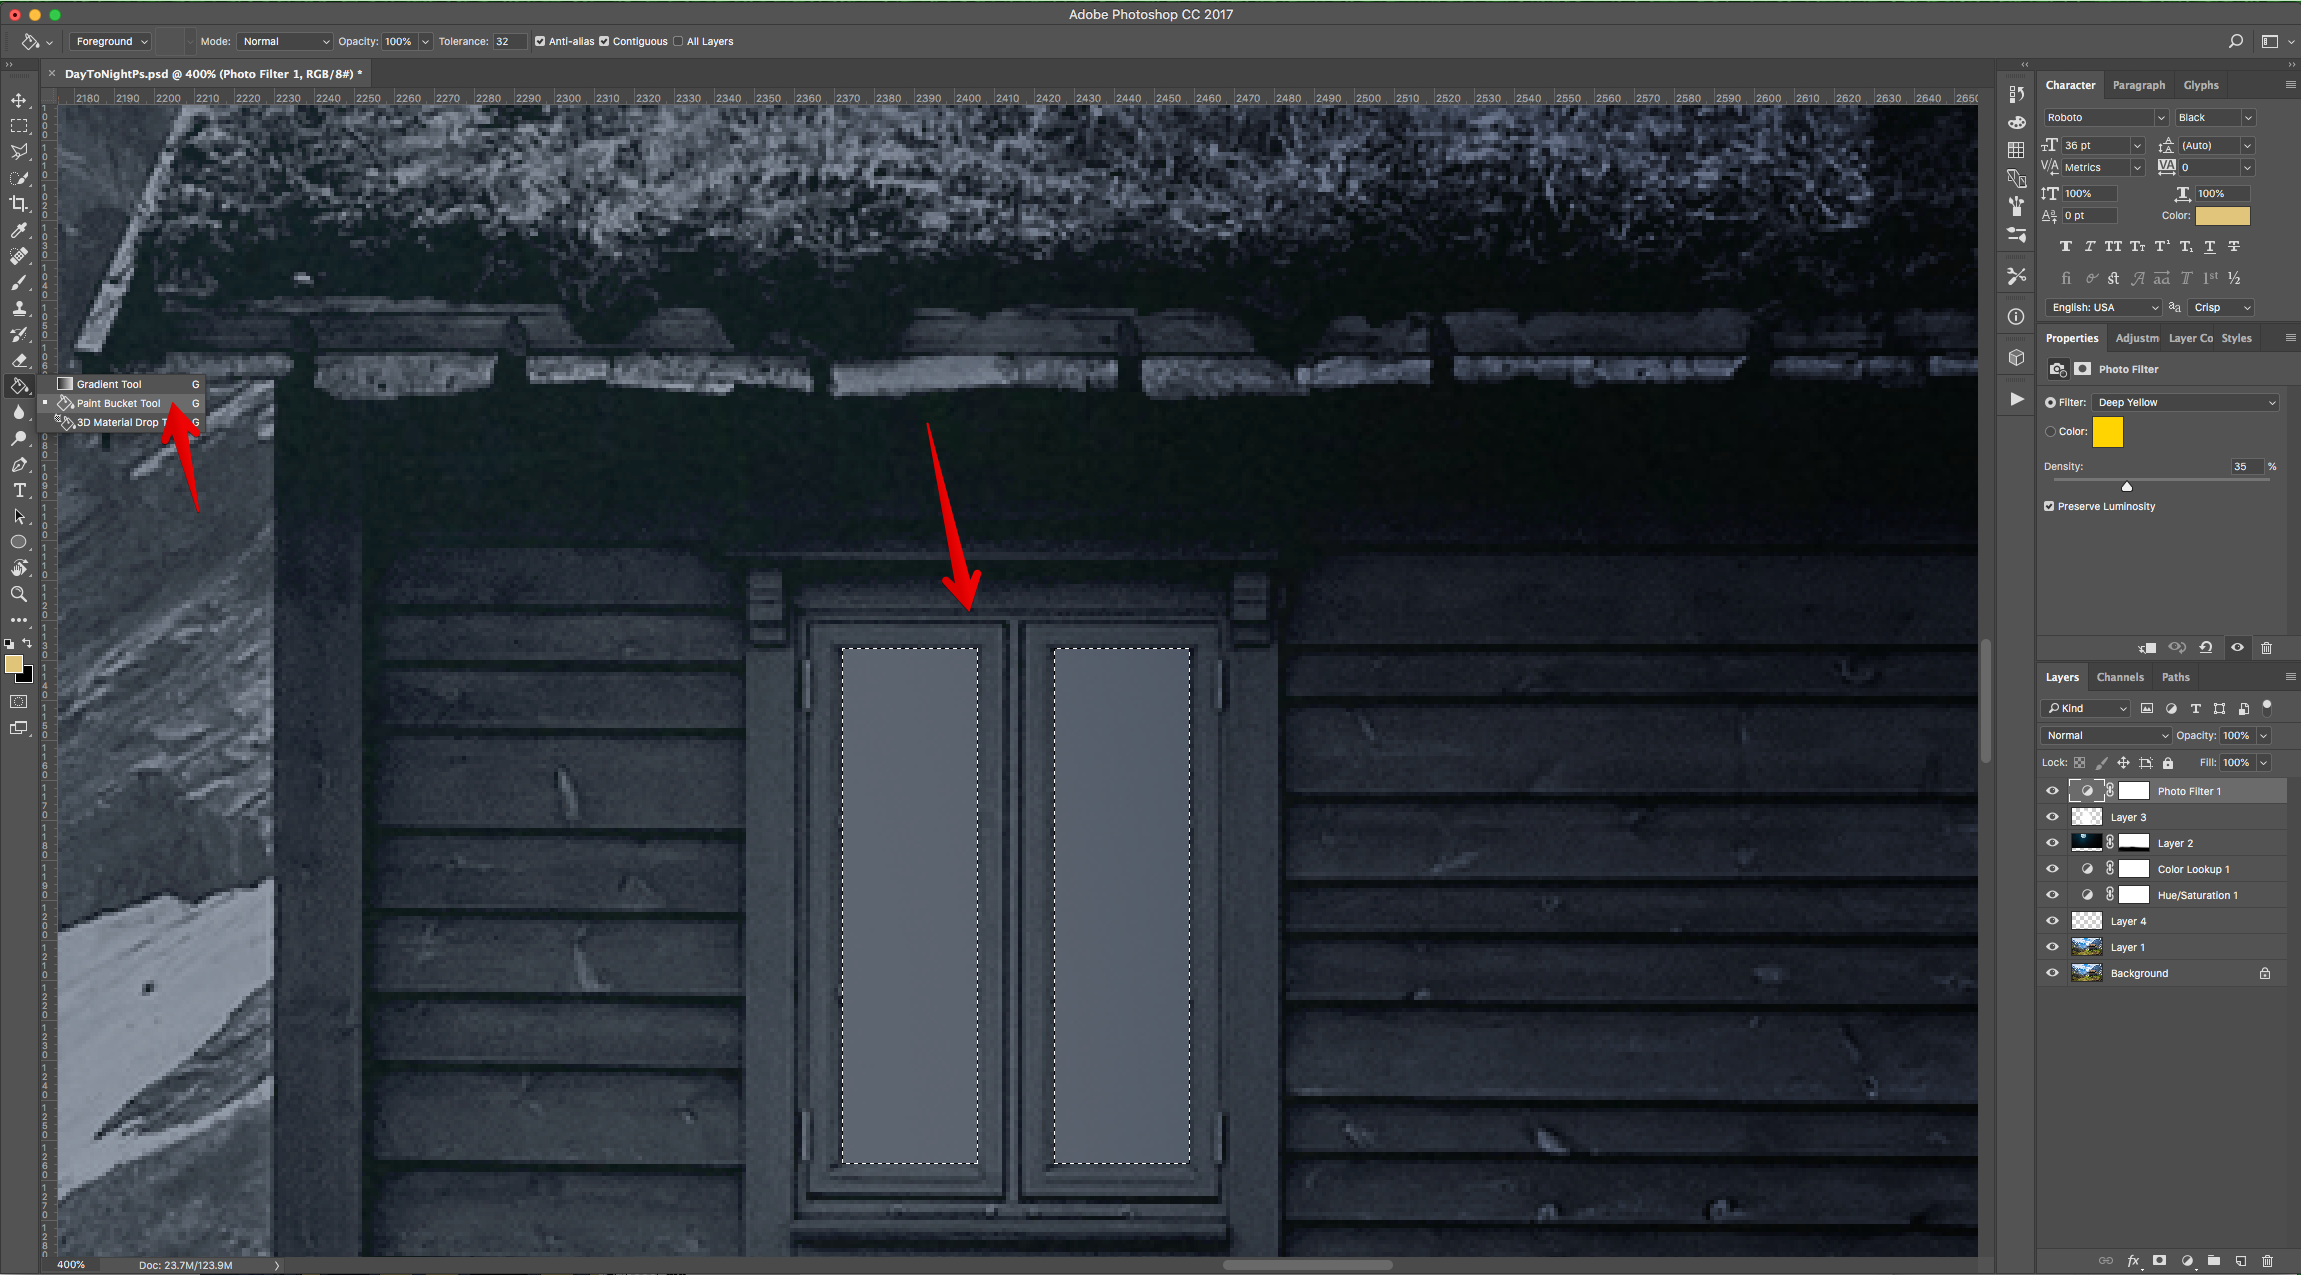
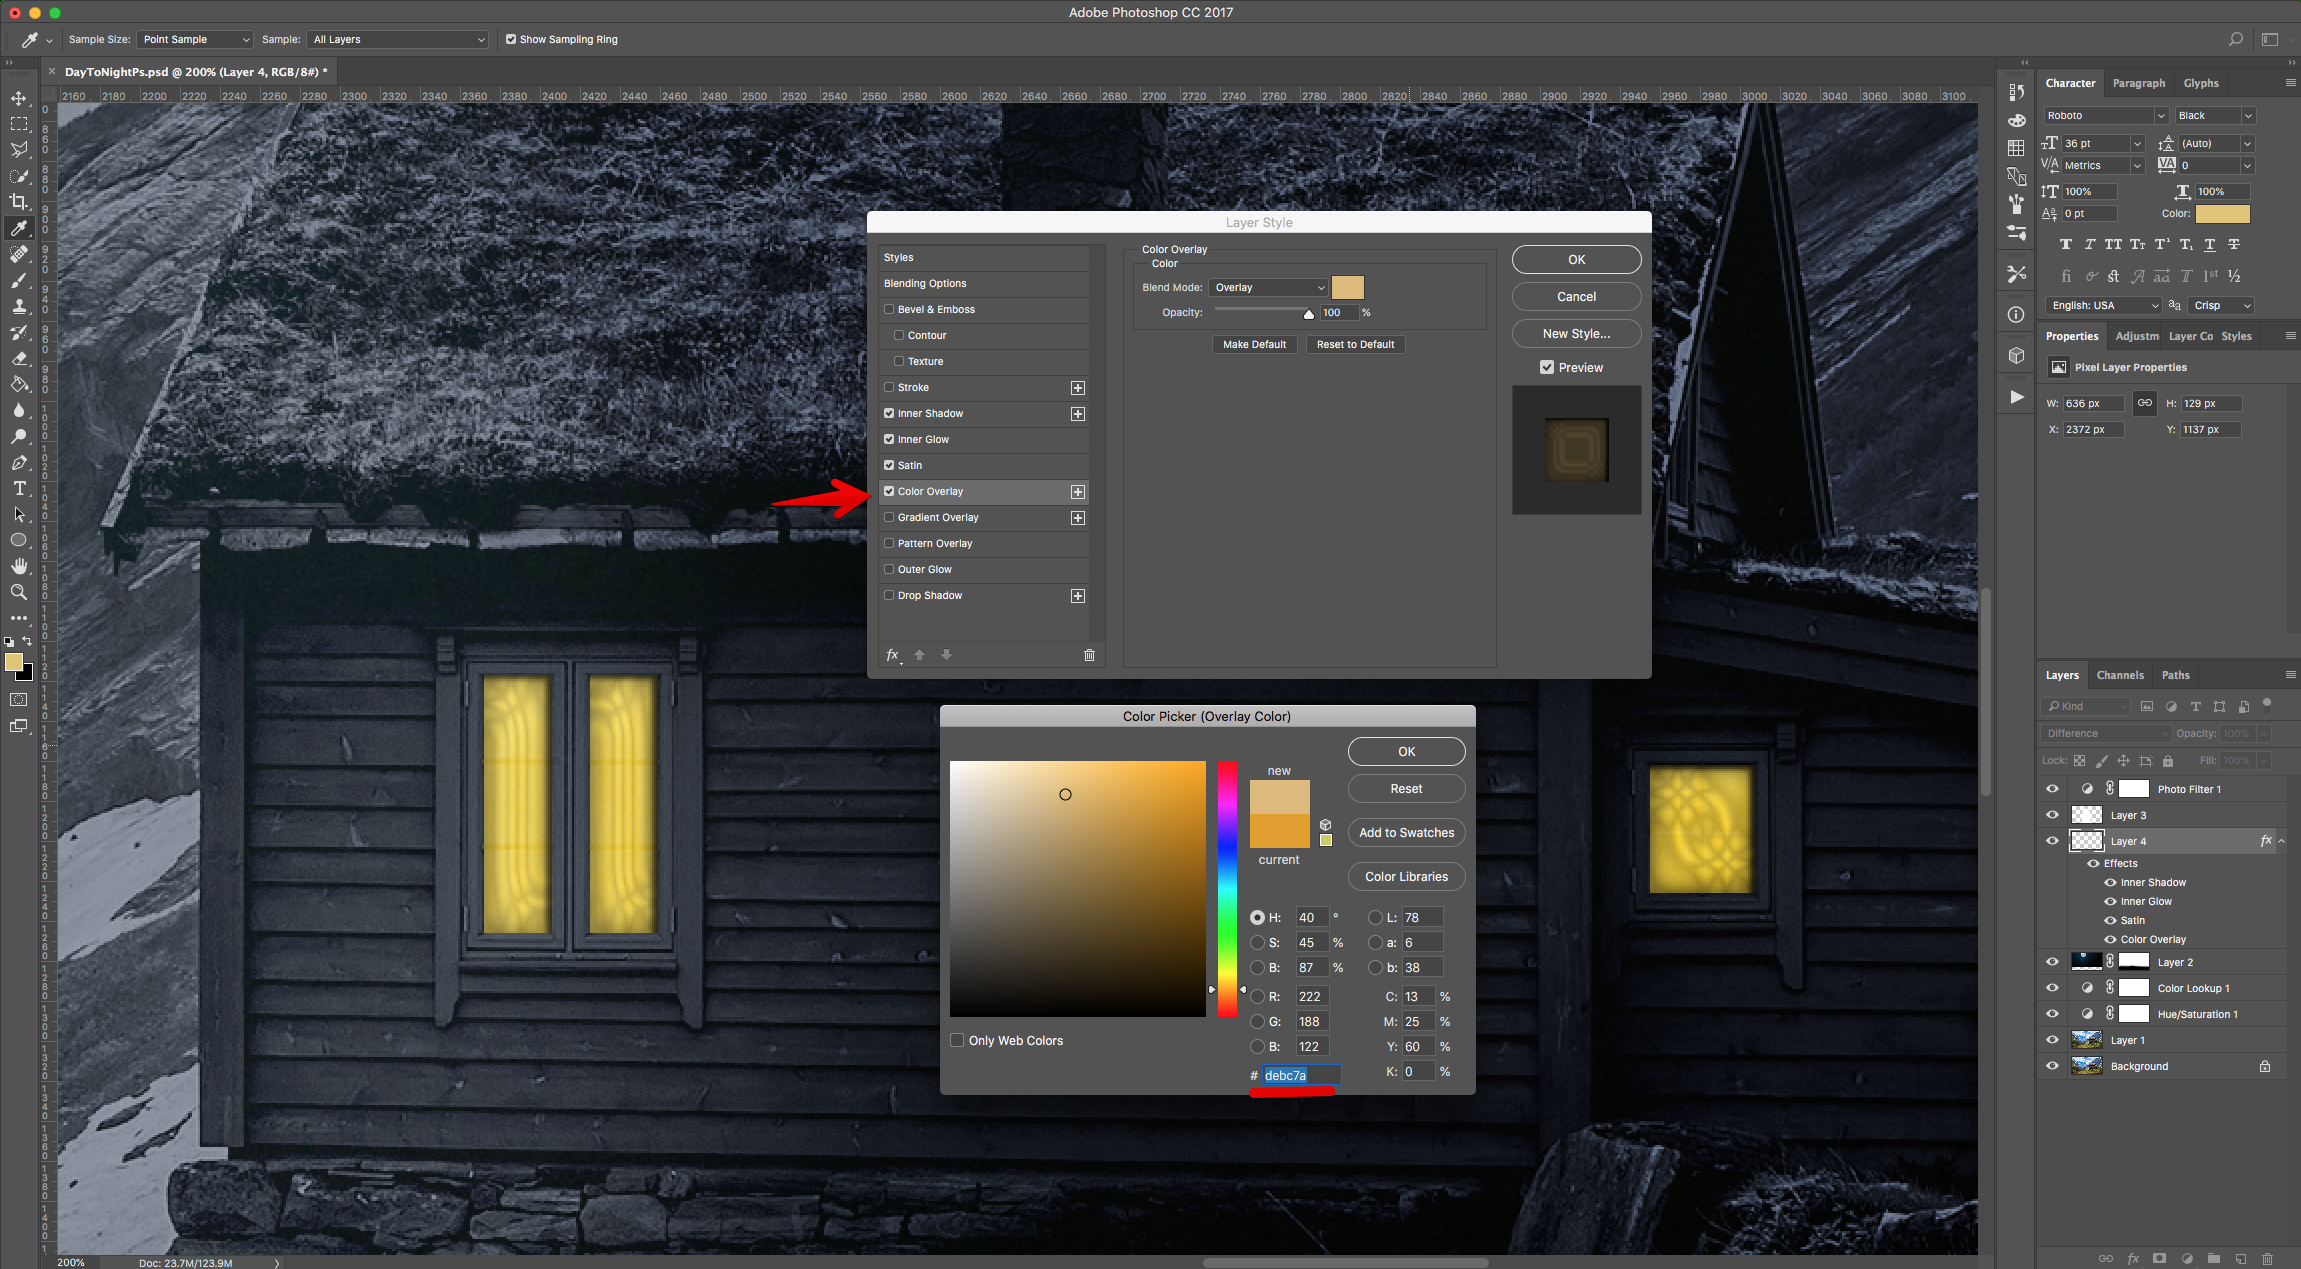
17 - Change the “Foreground” color to #e1c674 and use the “Paint Bucket Tool” (B) to fill the selection (Windows).
18 - Move the Layer and place it between the “Moon” layer and the one with the “Moon Light”.
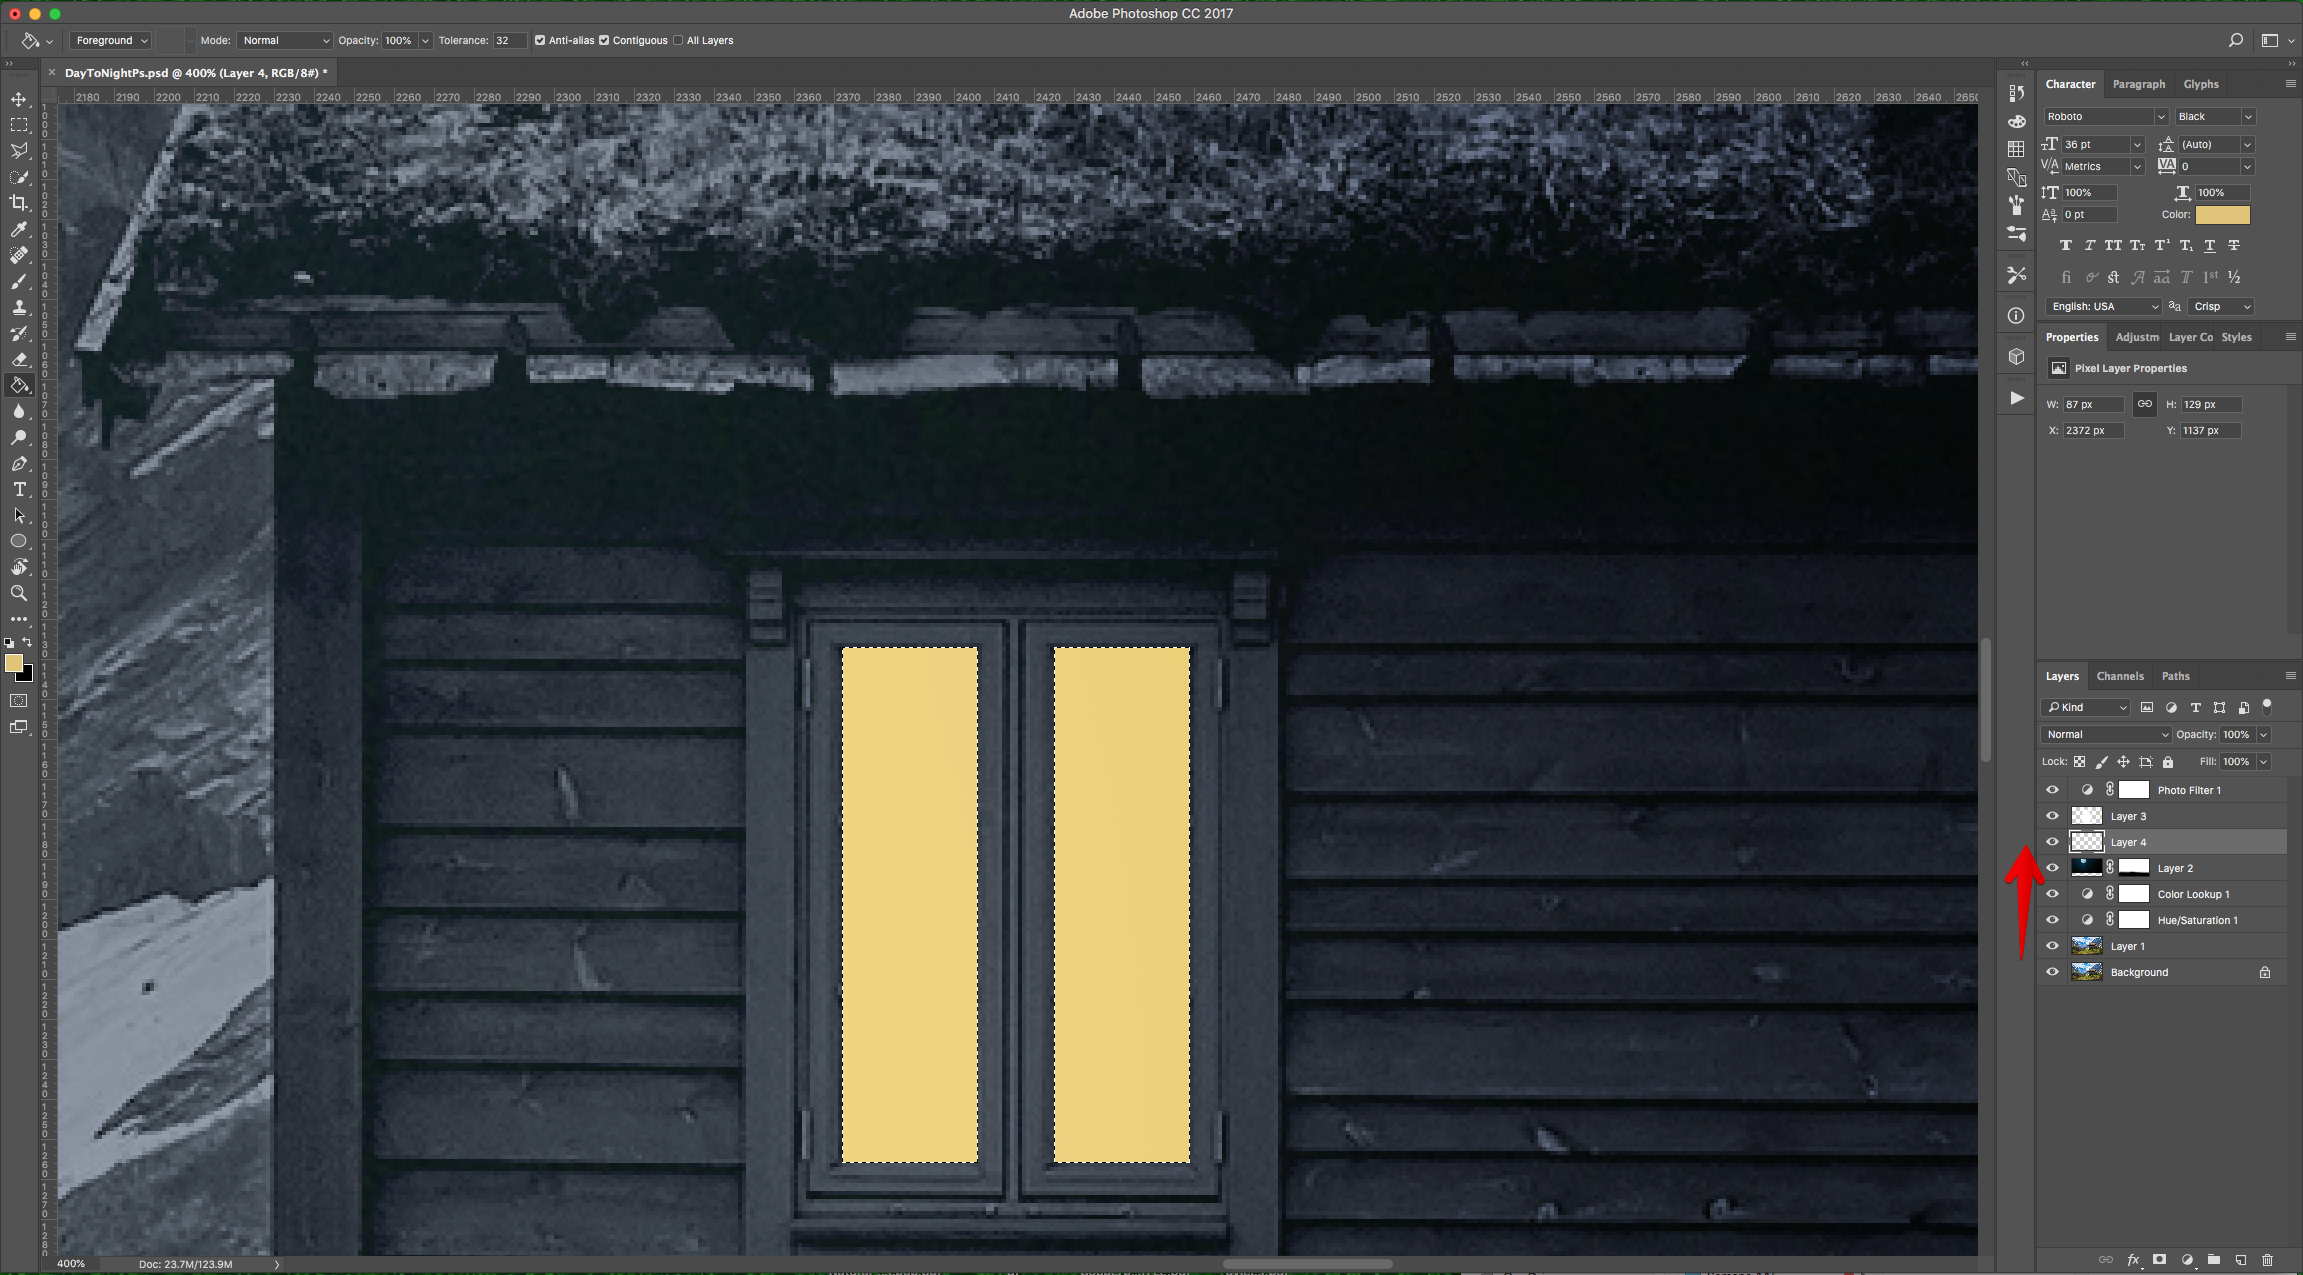
19 - Change the “Blending Mode” of the Layer to “Difference”.
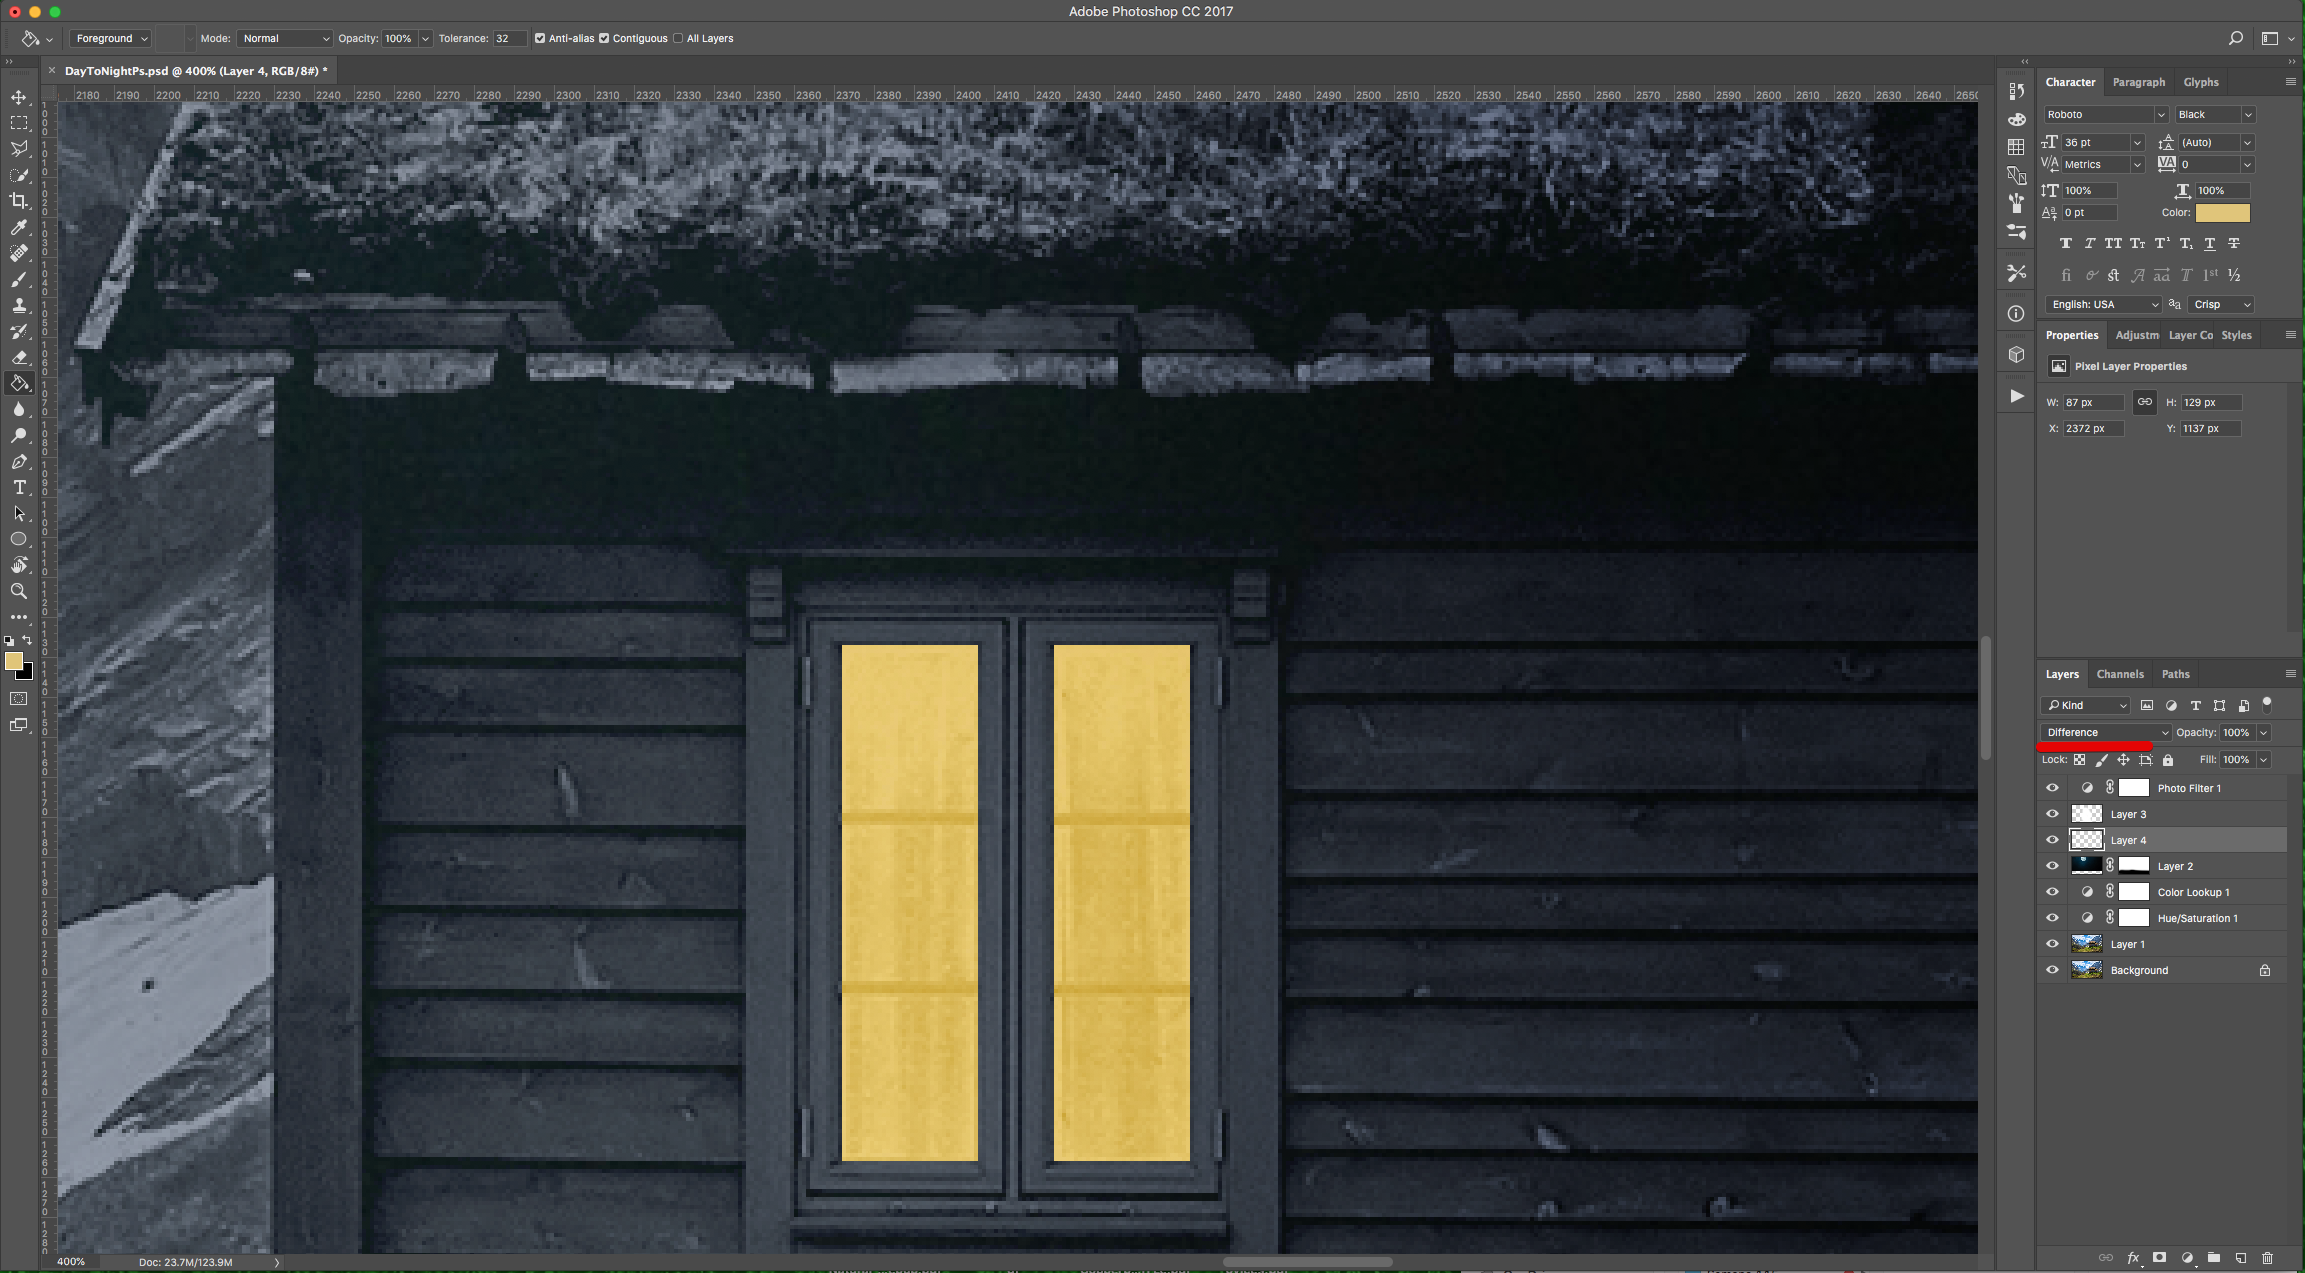
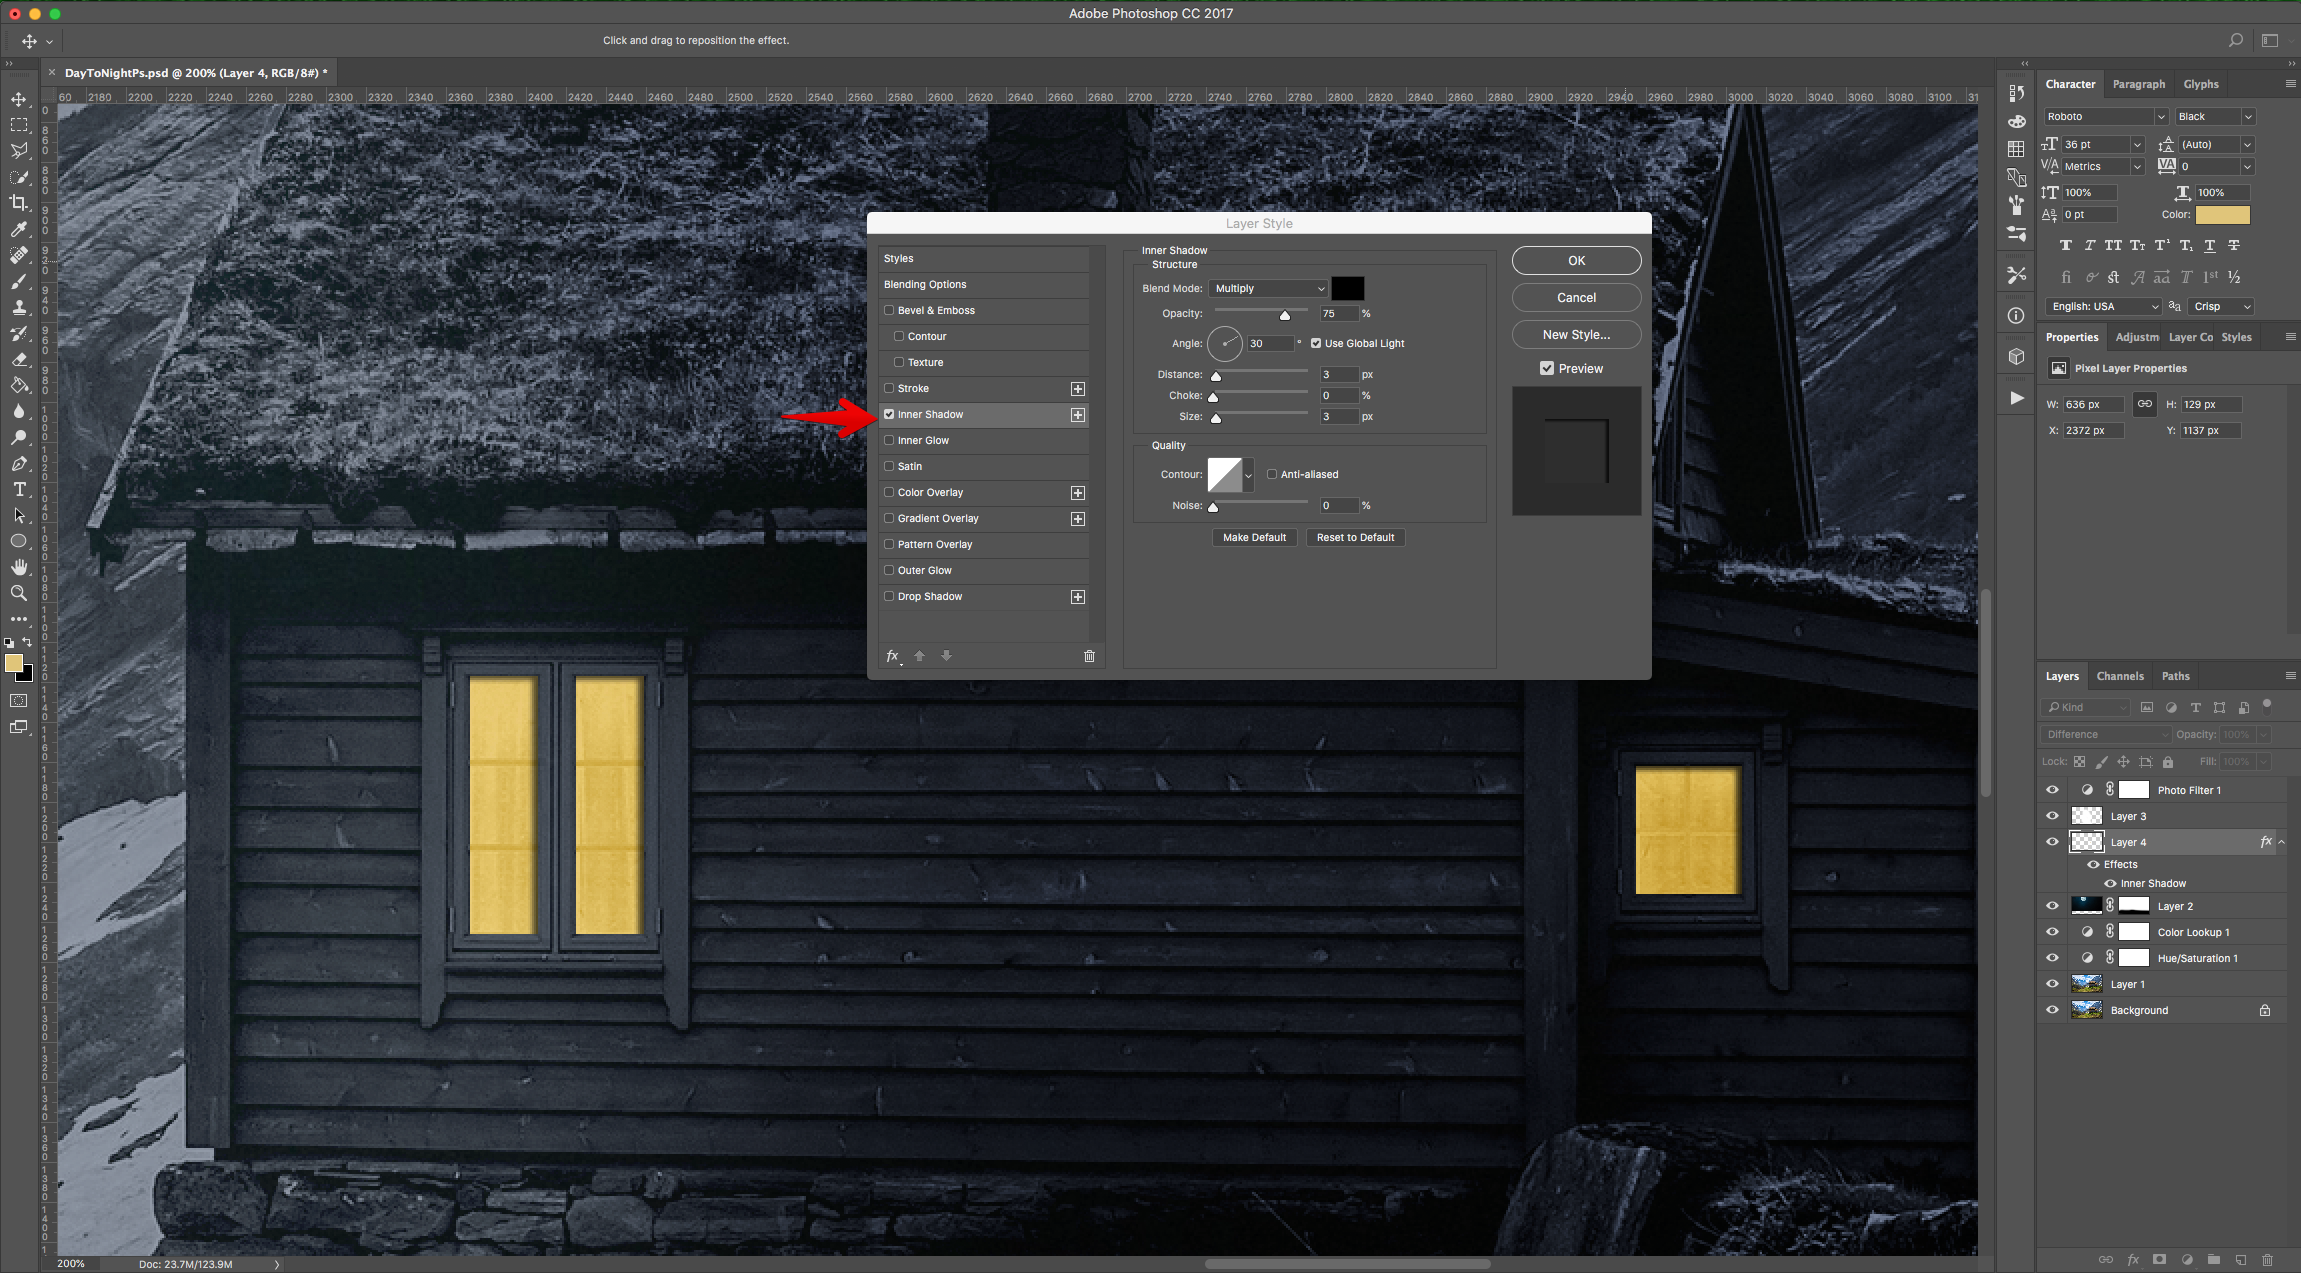
20 - Double-click on top of its thumbnail and apply the following “Layer Styles”:
Inner Shadow:
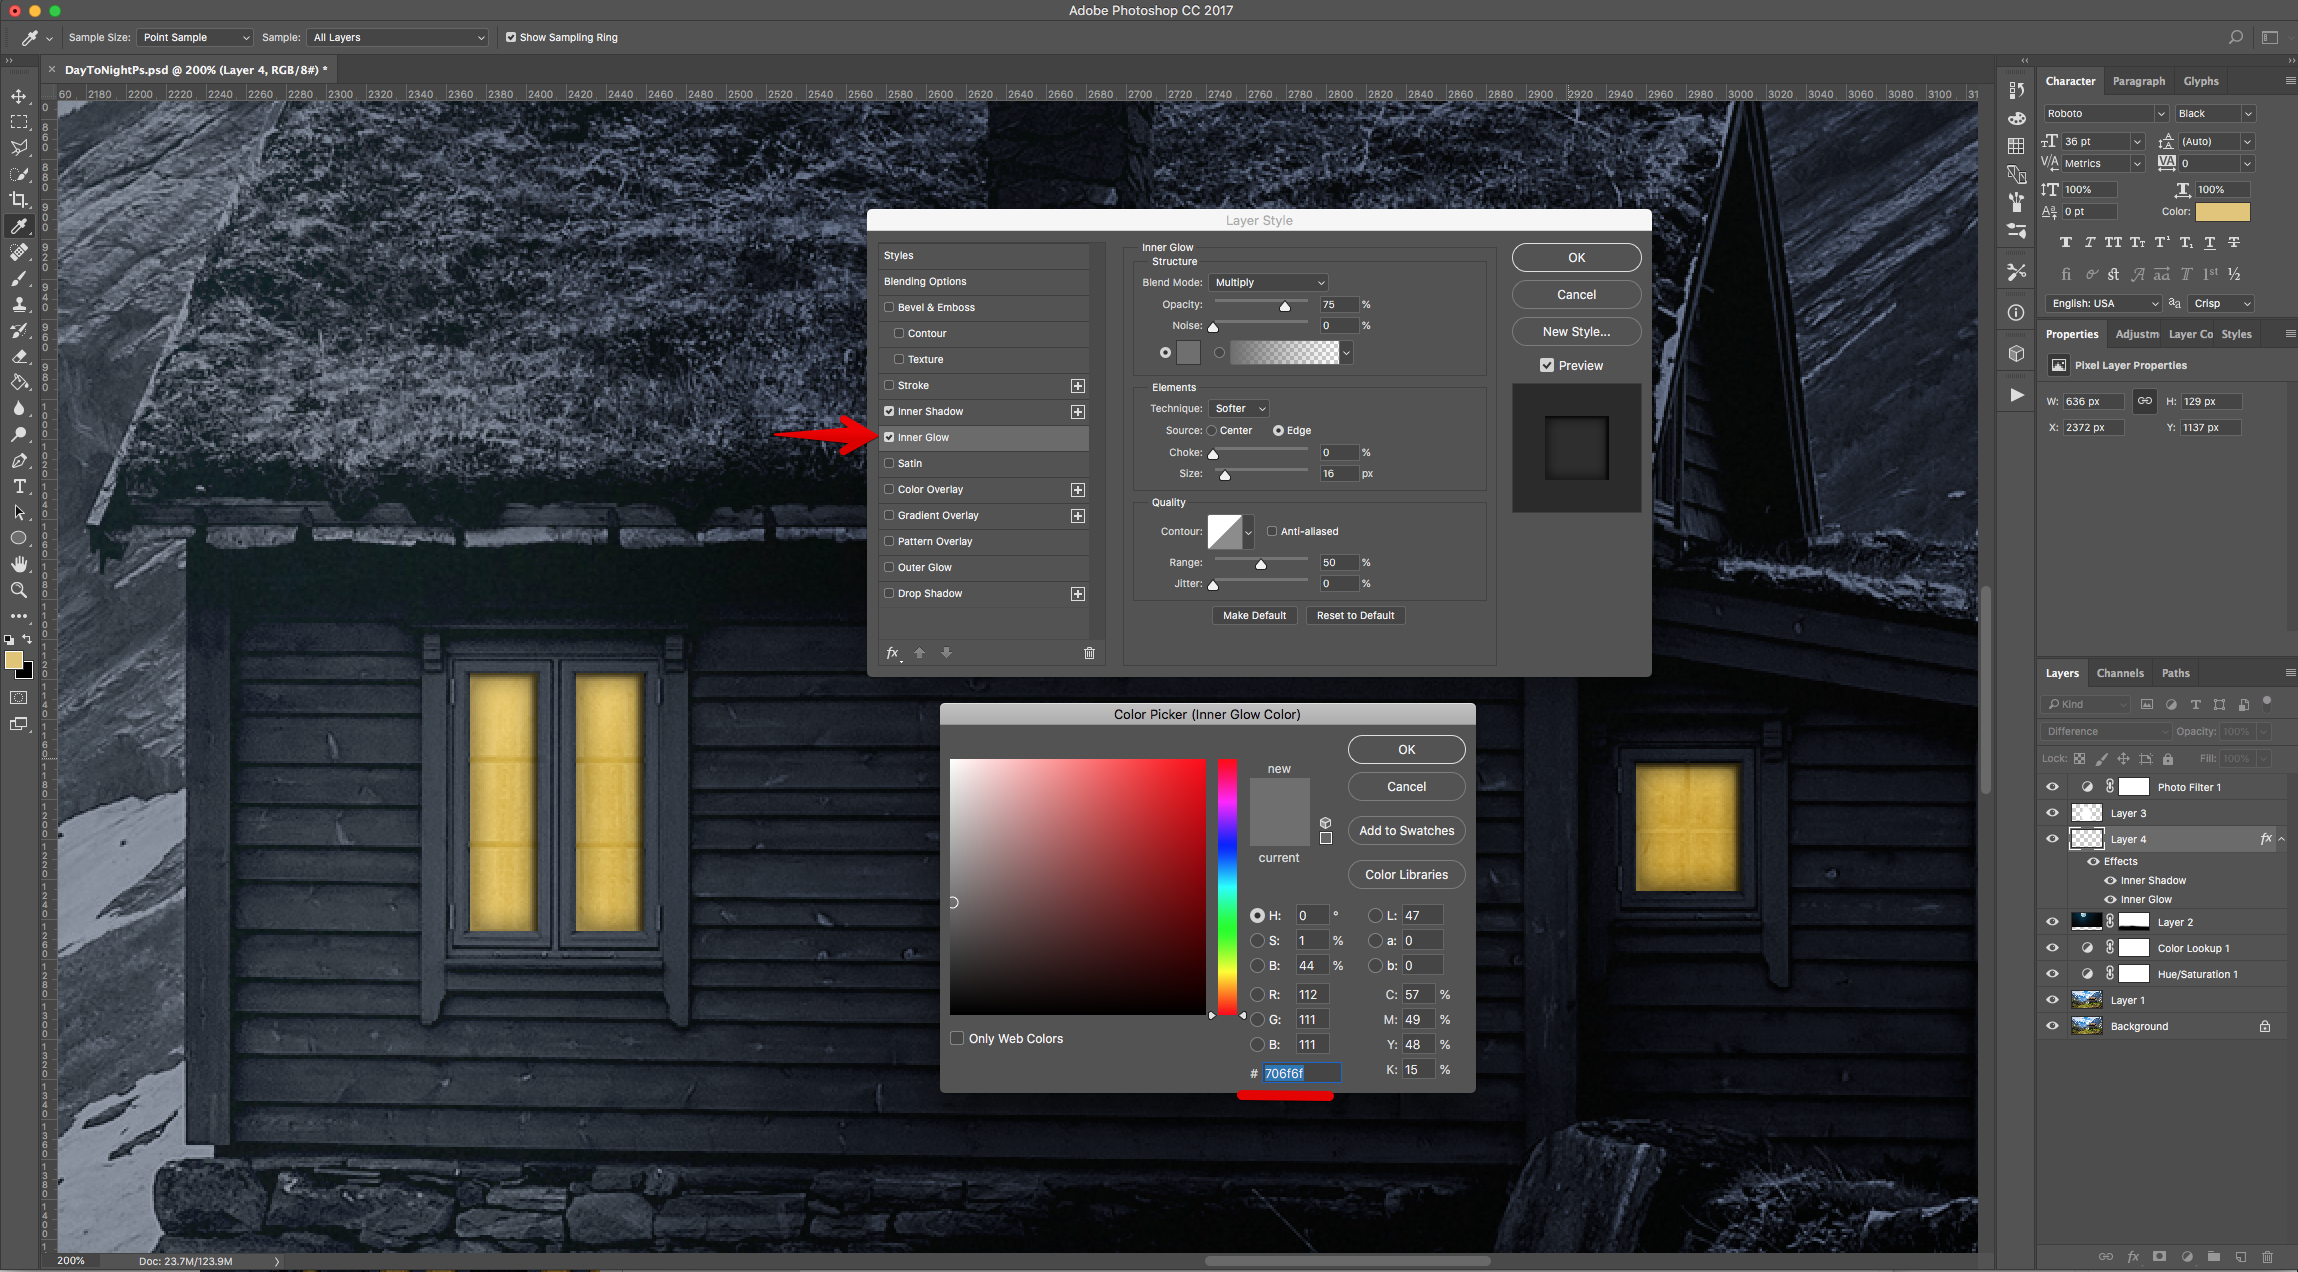
Inner Glow: (#706f6f)
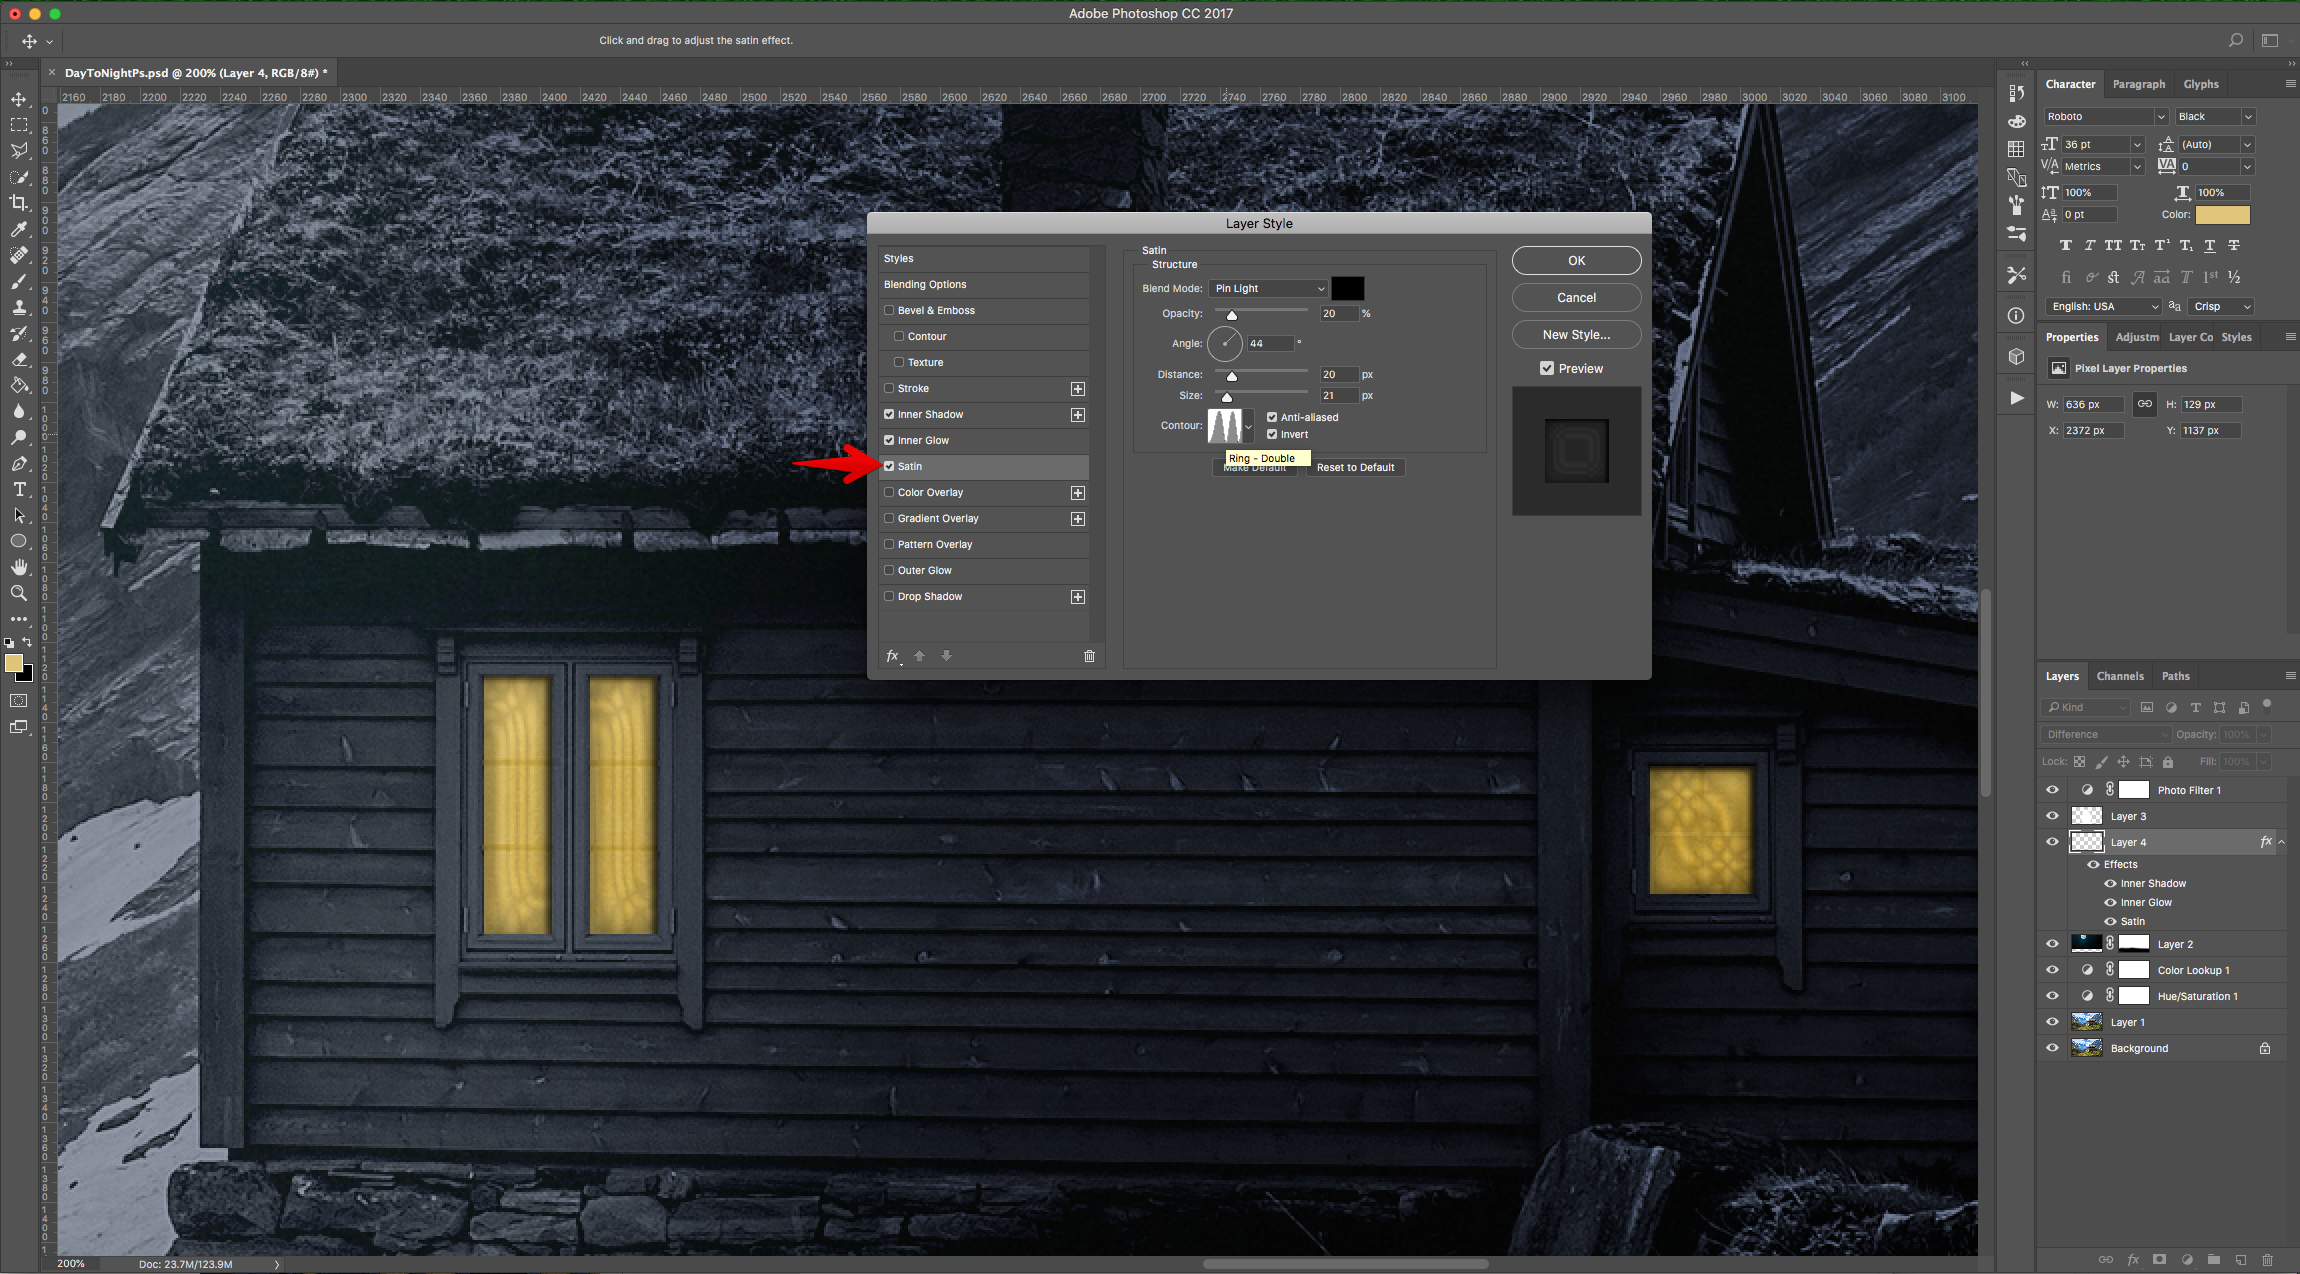
Satin: (Contour: Ring - Double)
Color Overlay: (#debc7a)
21 - Check out your work!
1 - In Photoshop, open the image you wish to use apply the “Effect” to.
2 - Duplicate the “Background” Layer (Command/Control + J).
3 - Go to the “Adjustments Panel” and create a “Hue/Saturation” Adjustment Layer. Decrease the “Saturation” to -100%.
4 - Go to the “Adjustments Panel” and create a “Color Lookup” Adjustment Layer. Choose “NightFromDay.CUBE” from the “3DLUT File” presets.
5 - Open the “Moon” image and bring it into your file. Make sure it is on top of everything.
6 - Resize it if needed and once you are done, click the small “Check Mark” on the Top Menu or hit “Enter” to “Commit” the changes.
7 - If need to change the position of the “Moon” head to Edit > Transform > Flip Horizontal to flip the image.
8 - Change the “Blending Mode” of the “Moon” layer to “Lighten”.
9 - To further adjust the position of the “Moon” layer use “Free Transform” (Command/Control + T) and once you are done, click the small “Check Mark” on the Top Menu or hit “Enter” to “Commit” the changes.
10 - Select the “Moon” layer and add a “Layer Mask” by clicking on the small icon at the bottom of the “Layers Panel”.
11 - Select the “Brush Tool” (B) and choose a Large and soft brush (500 pt and 0% “Hardness”). Make sure that the “Foreground” color is Black and that the “Mask” Thumbnail is selected and “Erase” some portions if needed.
12 - Go to the “Adjustments Panel” and create a “Photo Filter” Adjustment Layer. Choose “Deep Yellow” and reduce the “Density” to 35%.
13 - Create a “New Layer” between the “Moon” layer and the “Photo Filter Adjustment Layer” (Click on the small button at the bottom of the “Layers Panel”). Use the “Brush Tool” (B) with the same settings as before but change the “Foreground” color to White and “Paint” some “Light” coming down from the “Moon”.
14 - Change the “Blending Mode” to “Soft Light” and the “Opacity” to 55%.
15 - Create a “New Layer” on top of the “Background” Layers (Click on the small button at the bottom of the “Layers Panel”).
16 - Use the “Rectangular Marquee Tool” (M) to select the inside of the “Windows” of the house (use “Add to Selection” on the top Menu).
17 - Change the “Foreground” color to #e1c674 and use the “Paint Bucket Tool” (B) to fill the selection (Windows).
18 - Move the Layer and place it between the “Moon” layer and the one with the “Moon Light”.
19 - Change the “Blending Mode” of the Layer to “Difference”.
20 - Double-click on top of its thumbnail and apply the following “Layer Styles”:
Inner Shadow:
Inner Glow: (#706f6f)
Satin: (Contour: Ring - Double)
Color Overlay: (#debc7a)
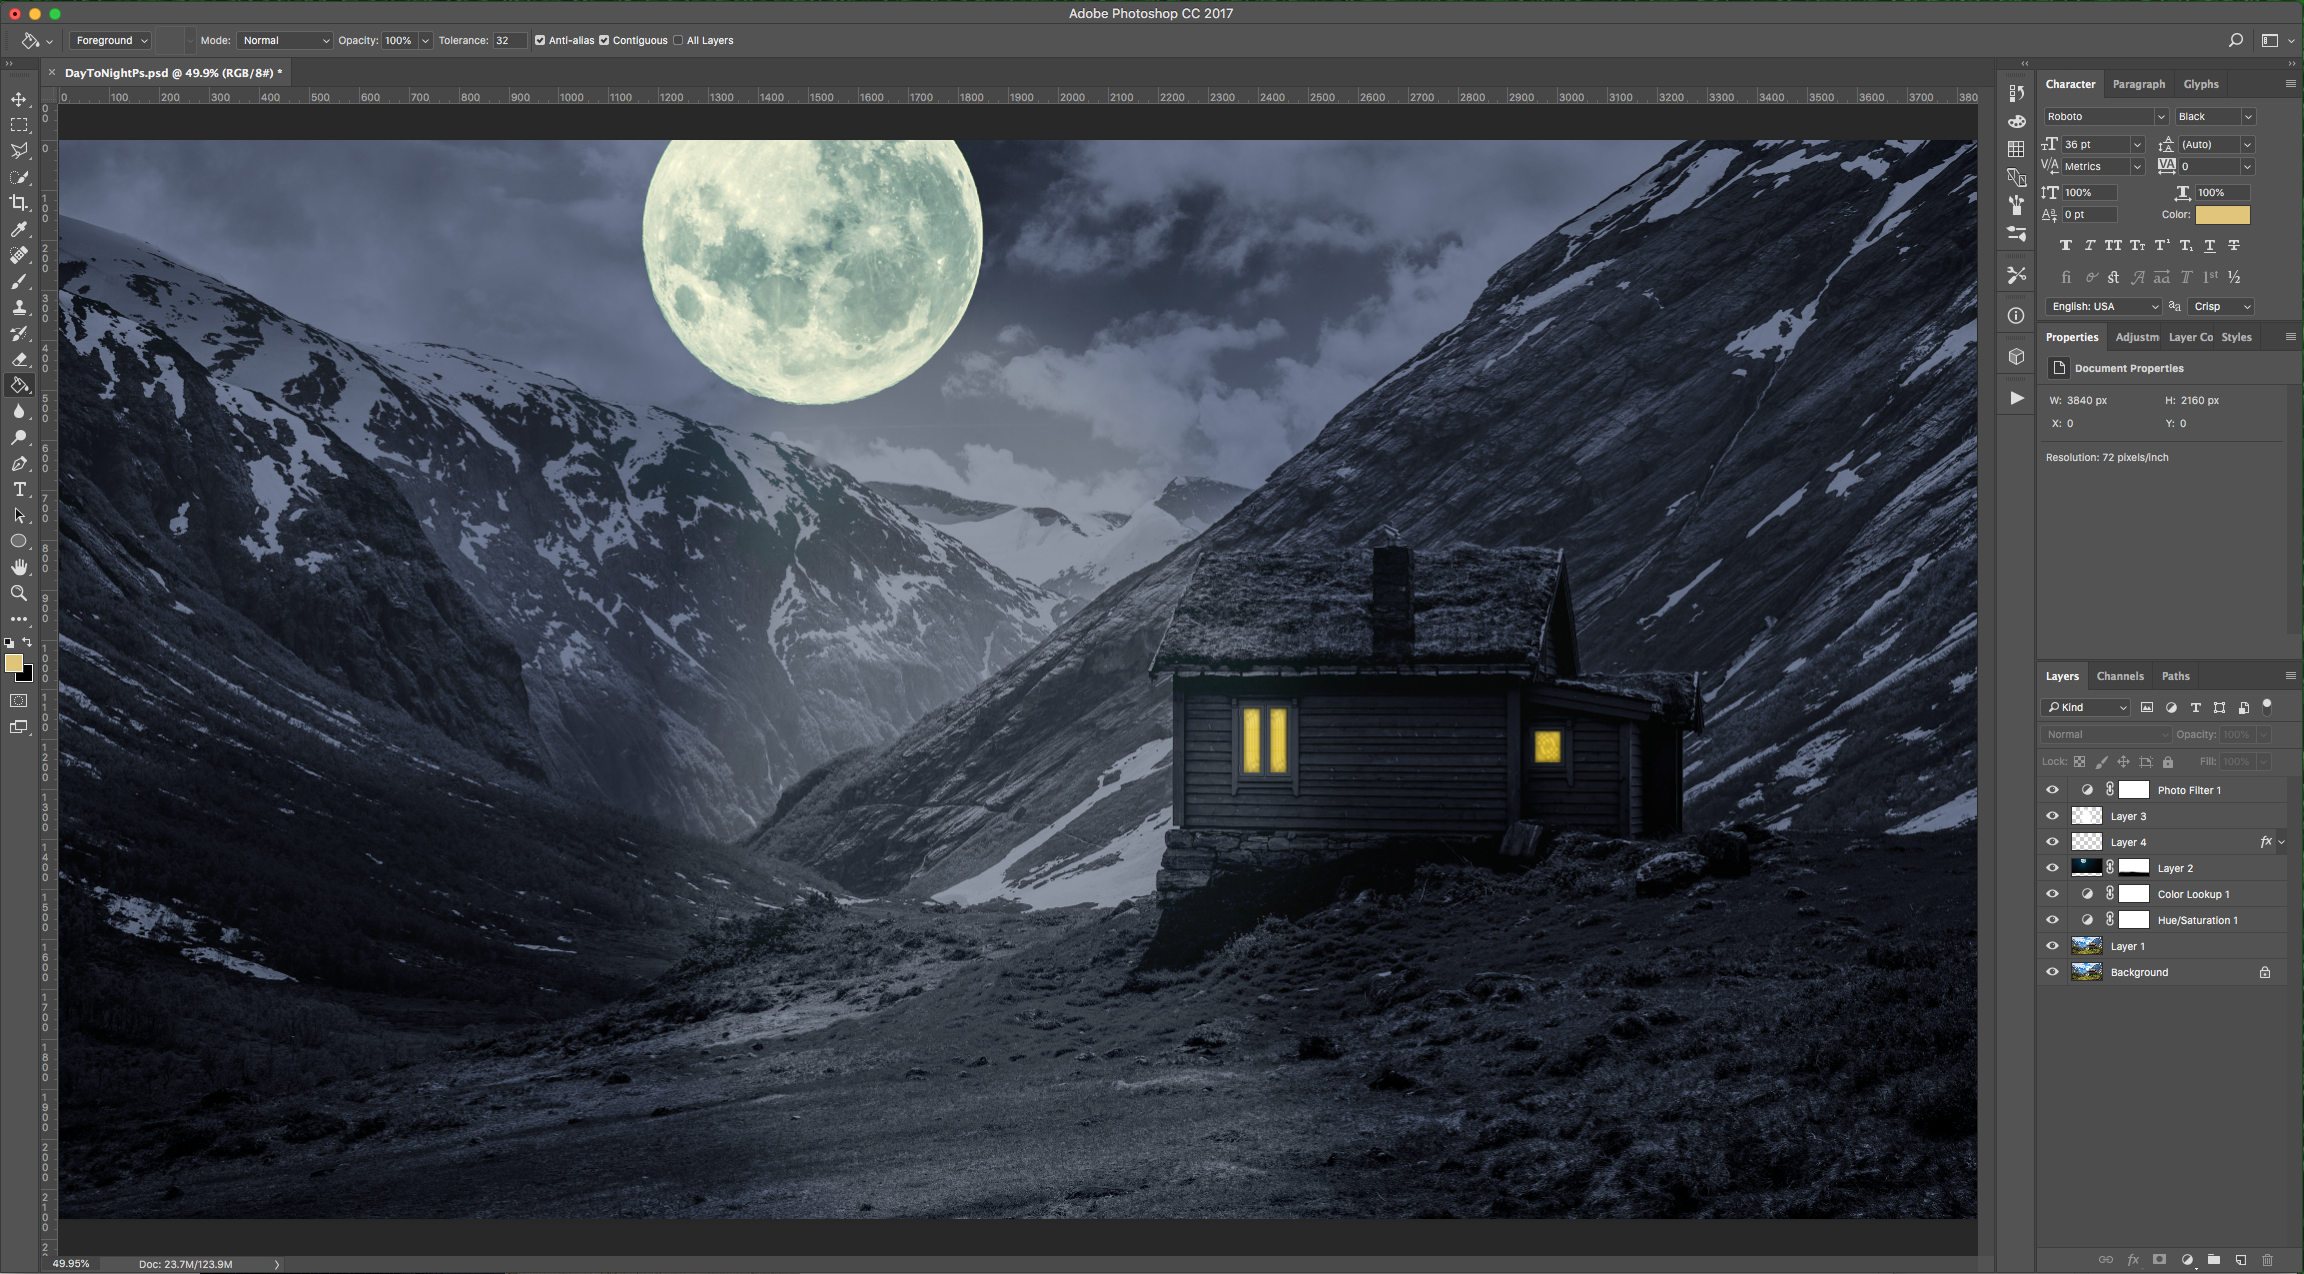
21 - Check out your work!
by @lornacane
Related Tutorials
Affinity Tutorials
How to Turn Day to Night in Affinity Photo
In this tutorial learn how to turn a day picture into night with a magical moon in Affinity Photo.
Photoshop Tutorials
How to Use Text Effects in Photoshop
With Photoshop Text Effects, you can create text with impact in just a few steps.
Photoshop Tutorials
How to Create Speech Bubbles in Photoshop
Learn how to create and edit fun speech bubbles in Photoshop using custom shapes.
Photoshop Tutorials
How to Make Sublimation Designs in Photoshop
Discover how to make sublimation designs in Photoshop that you can use to create beautiful gifts.
Photoshop Tutorials
How to Use EPS Files in Photoshop
In this tutorial, learn how to use EPS files in Photoshop as Smart Objects to maintain image quality
Photoshop Tutorials
Image Burned in Wood in Photoshop
In this tutorial, discover how to create a realistic wood burned effect in Adobe Photoshop.