By Design Bundles
Photoshop Tutorials9 min
Eraser in Photoshop
For this tutorial, we will use a background image of paper or a desk.
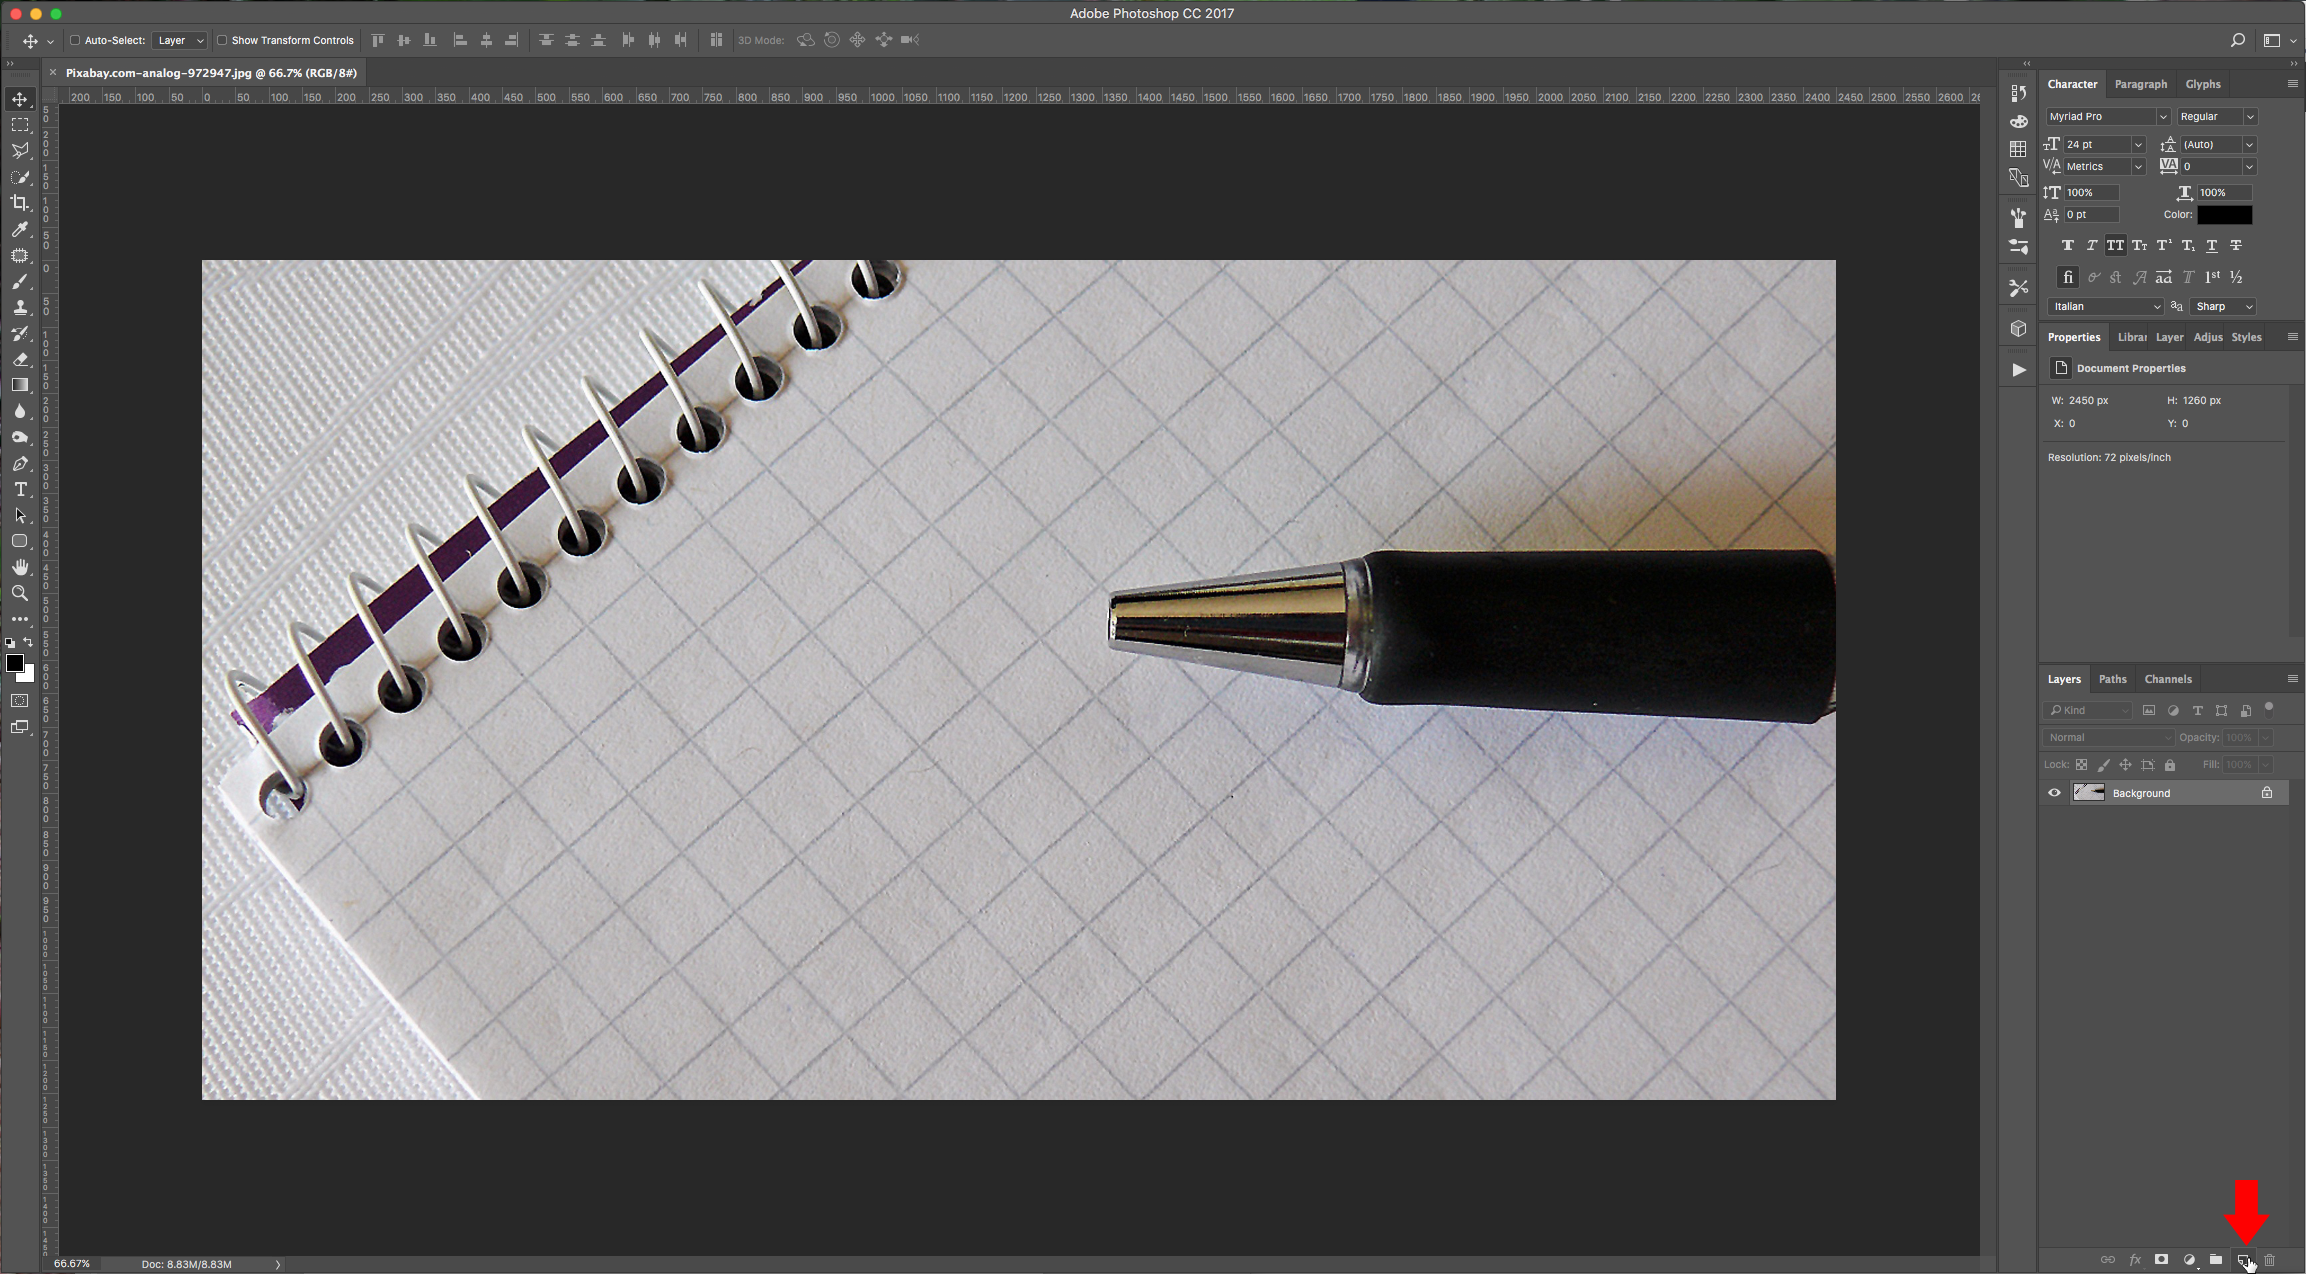
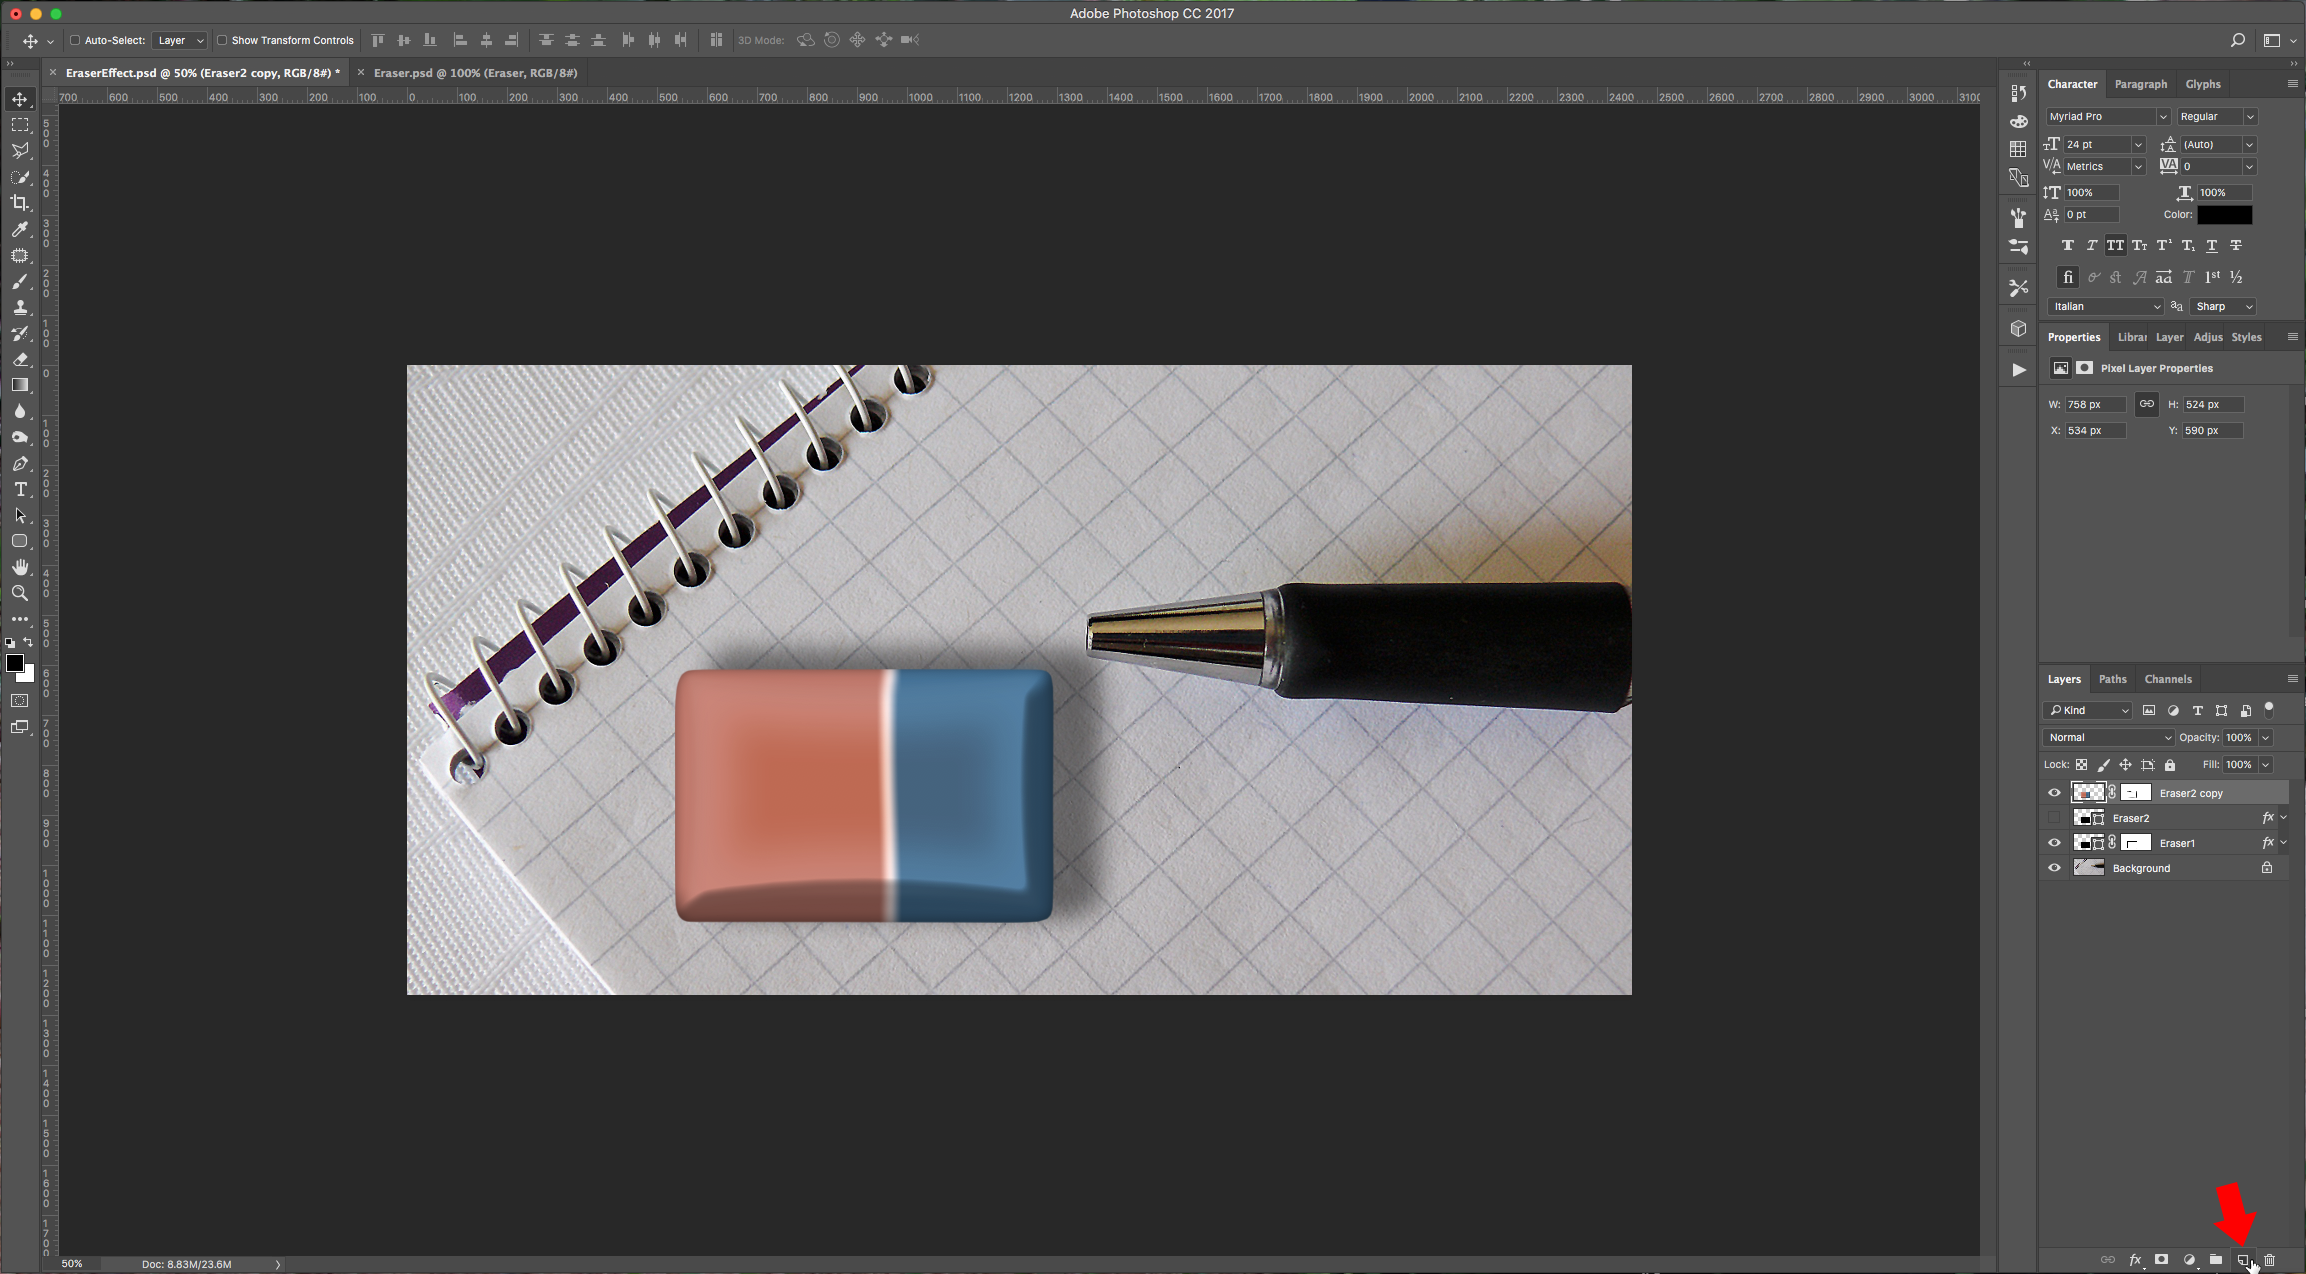
1 - In Photoshop, open the image you chose as “Background”, then create a “New Layer” by clicking on the button at the bottom of the “Layers” Panel.
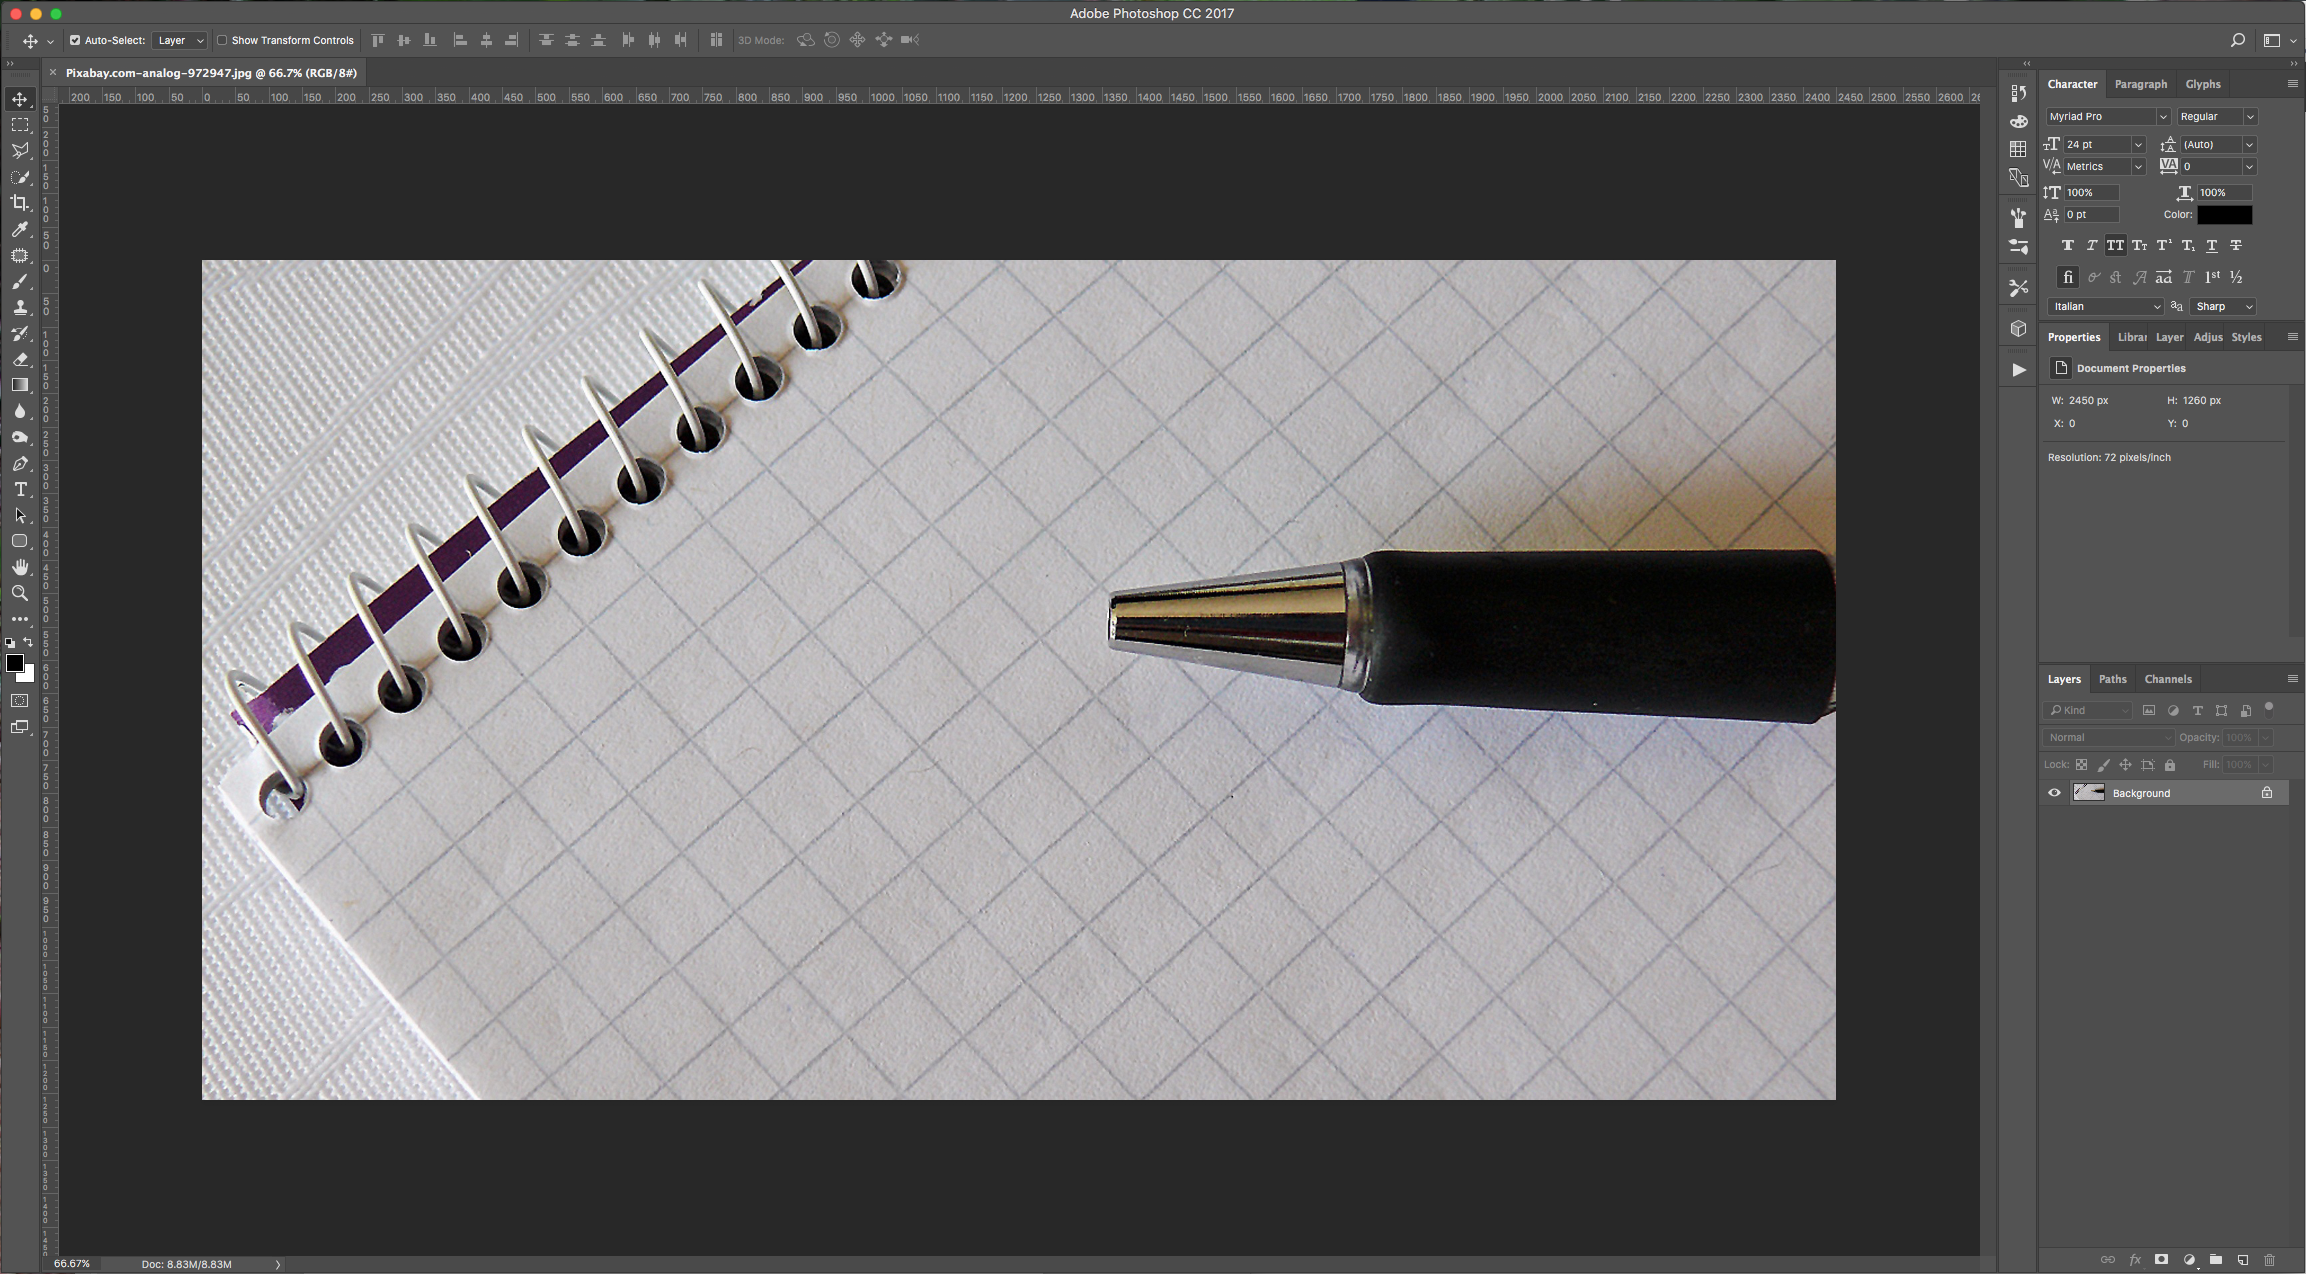
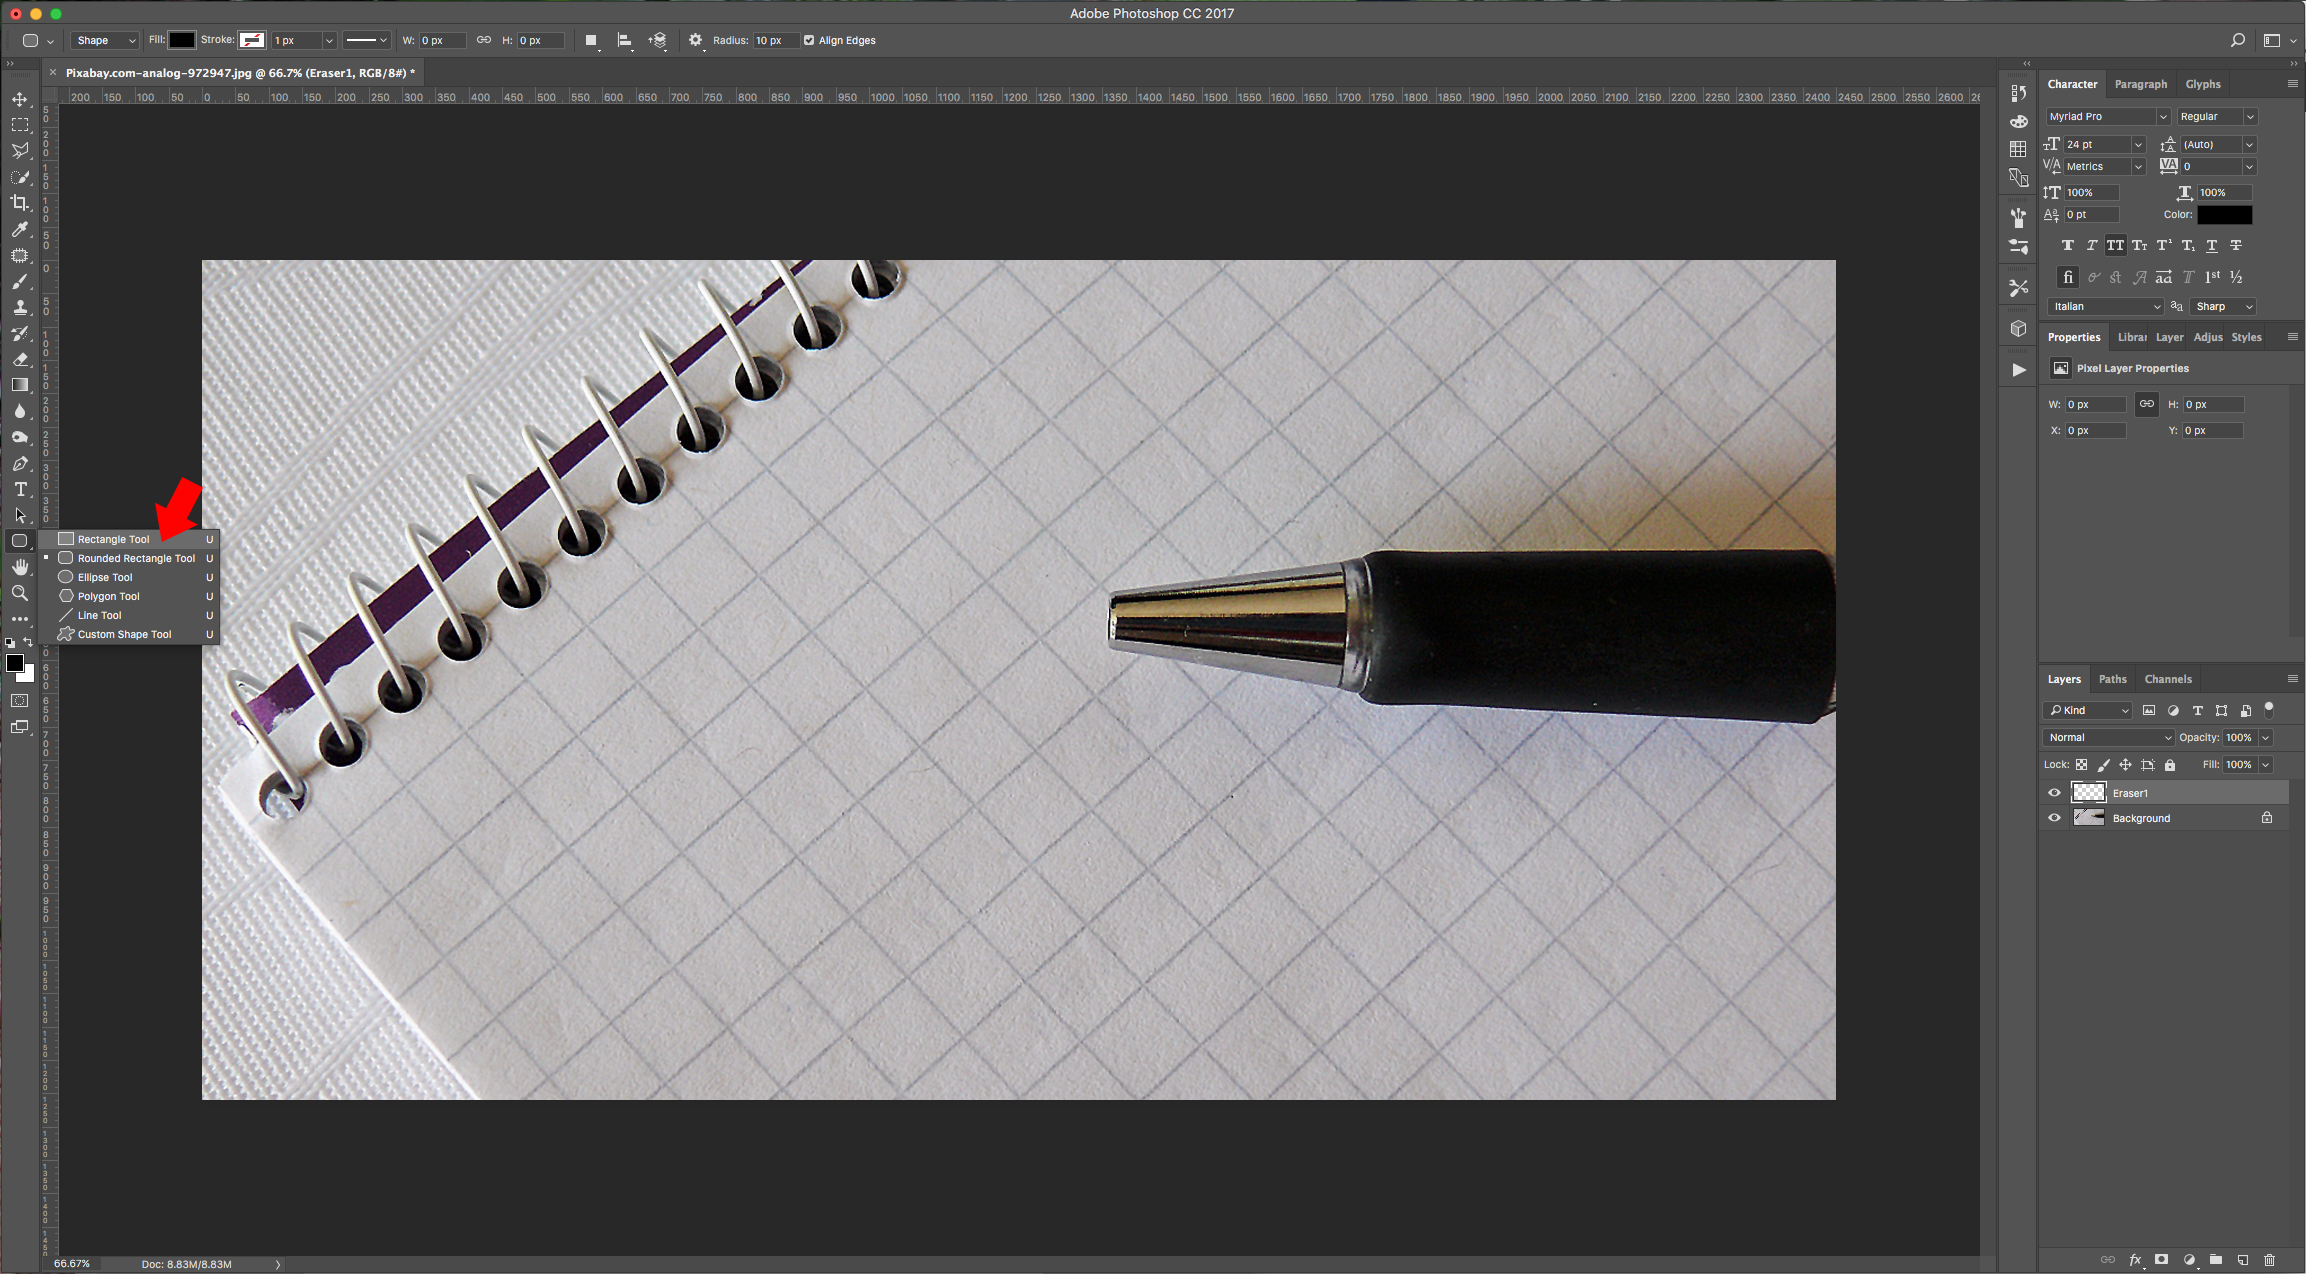
2 - Select the “Rectangle Tool” (U) and draw a rectangle of the size and proportions you wish your eraser to be. You can use any other shape or text if you want.
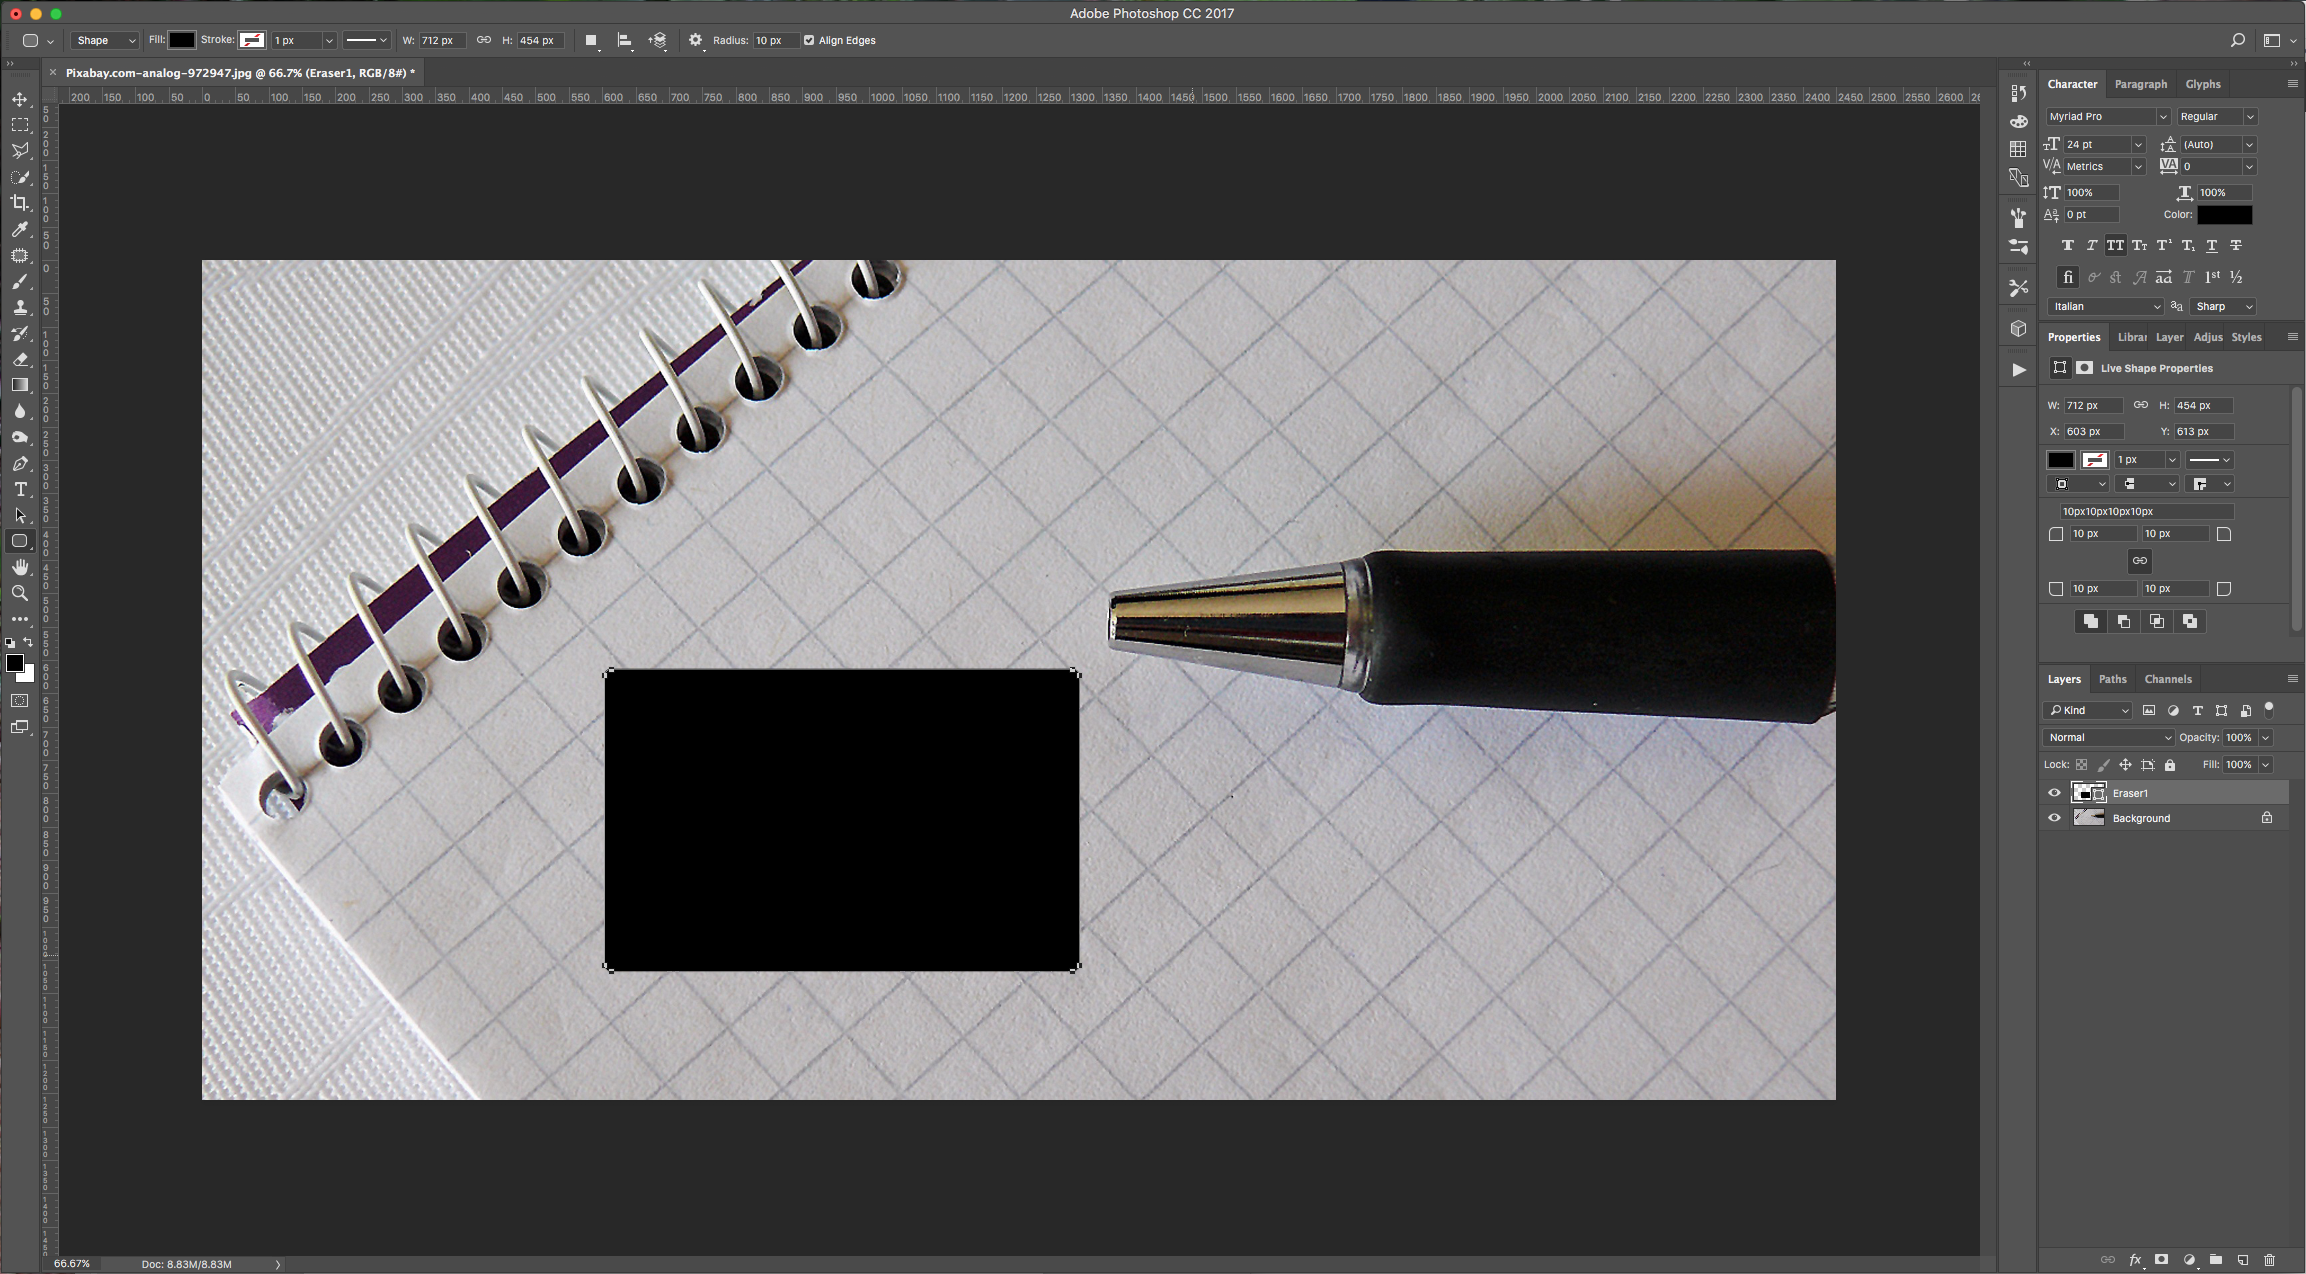
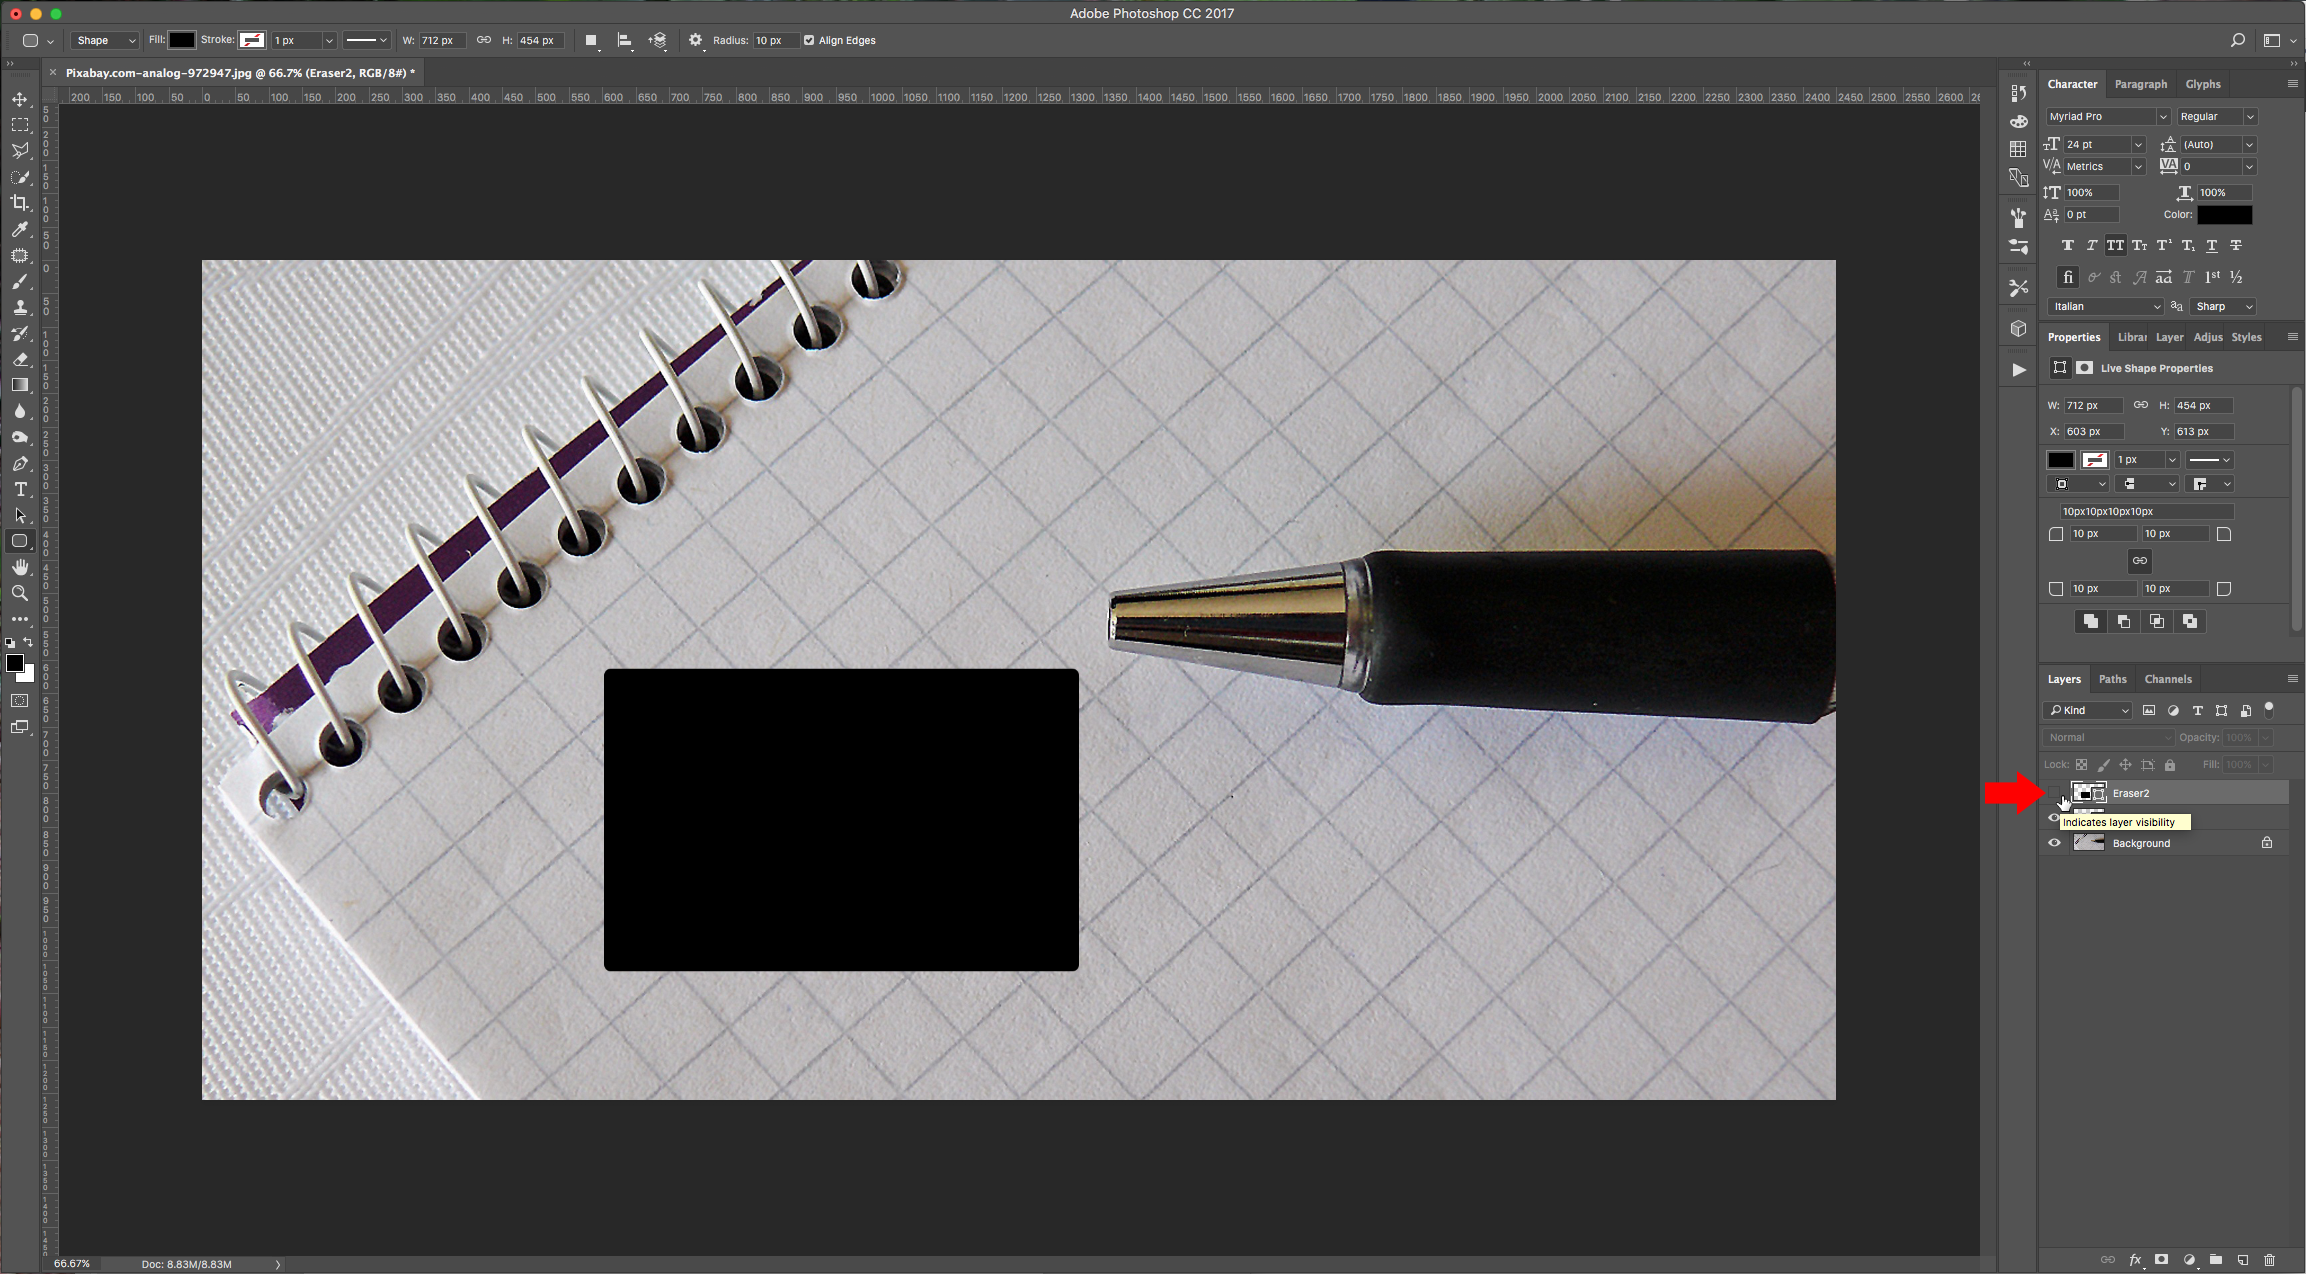
3 - Duplicate your layer (Command/Control + J), hide your duplicate by clicking on the small eye button on the left side of the thumbnail, and then double-click on the original shape layer to apply the following “Layer Styles”:
Bevel & Emboss:
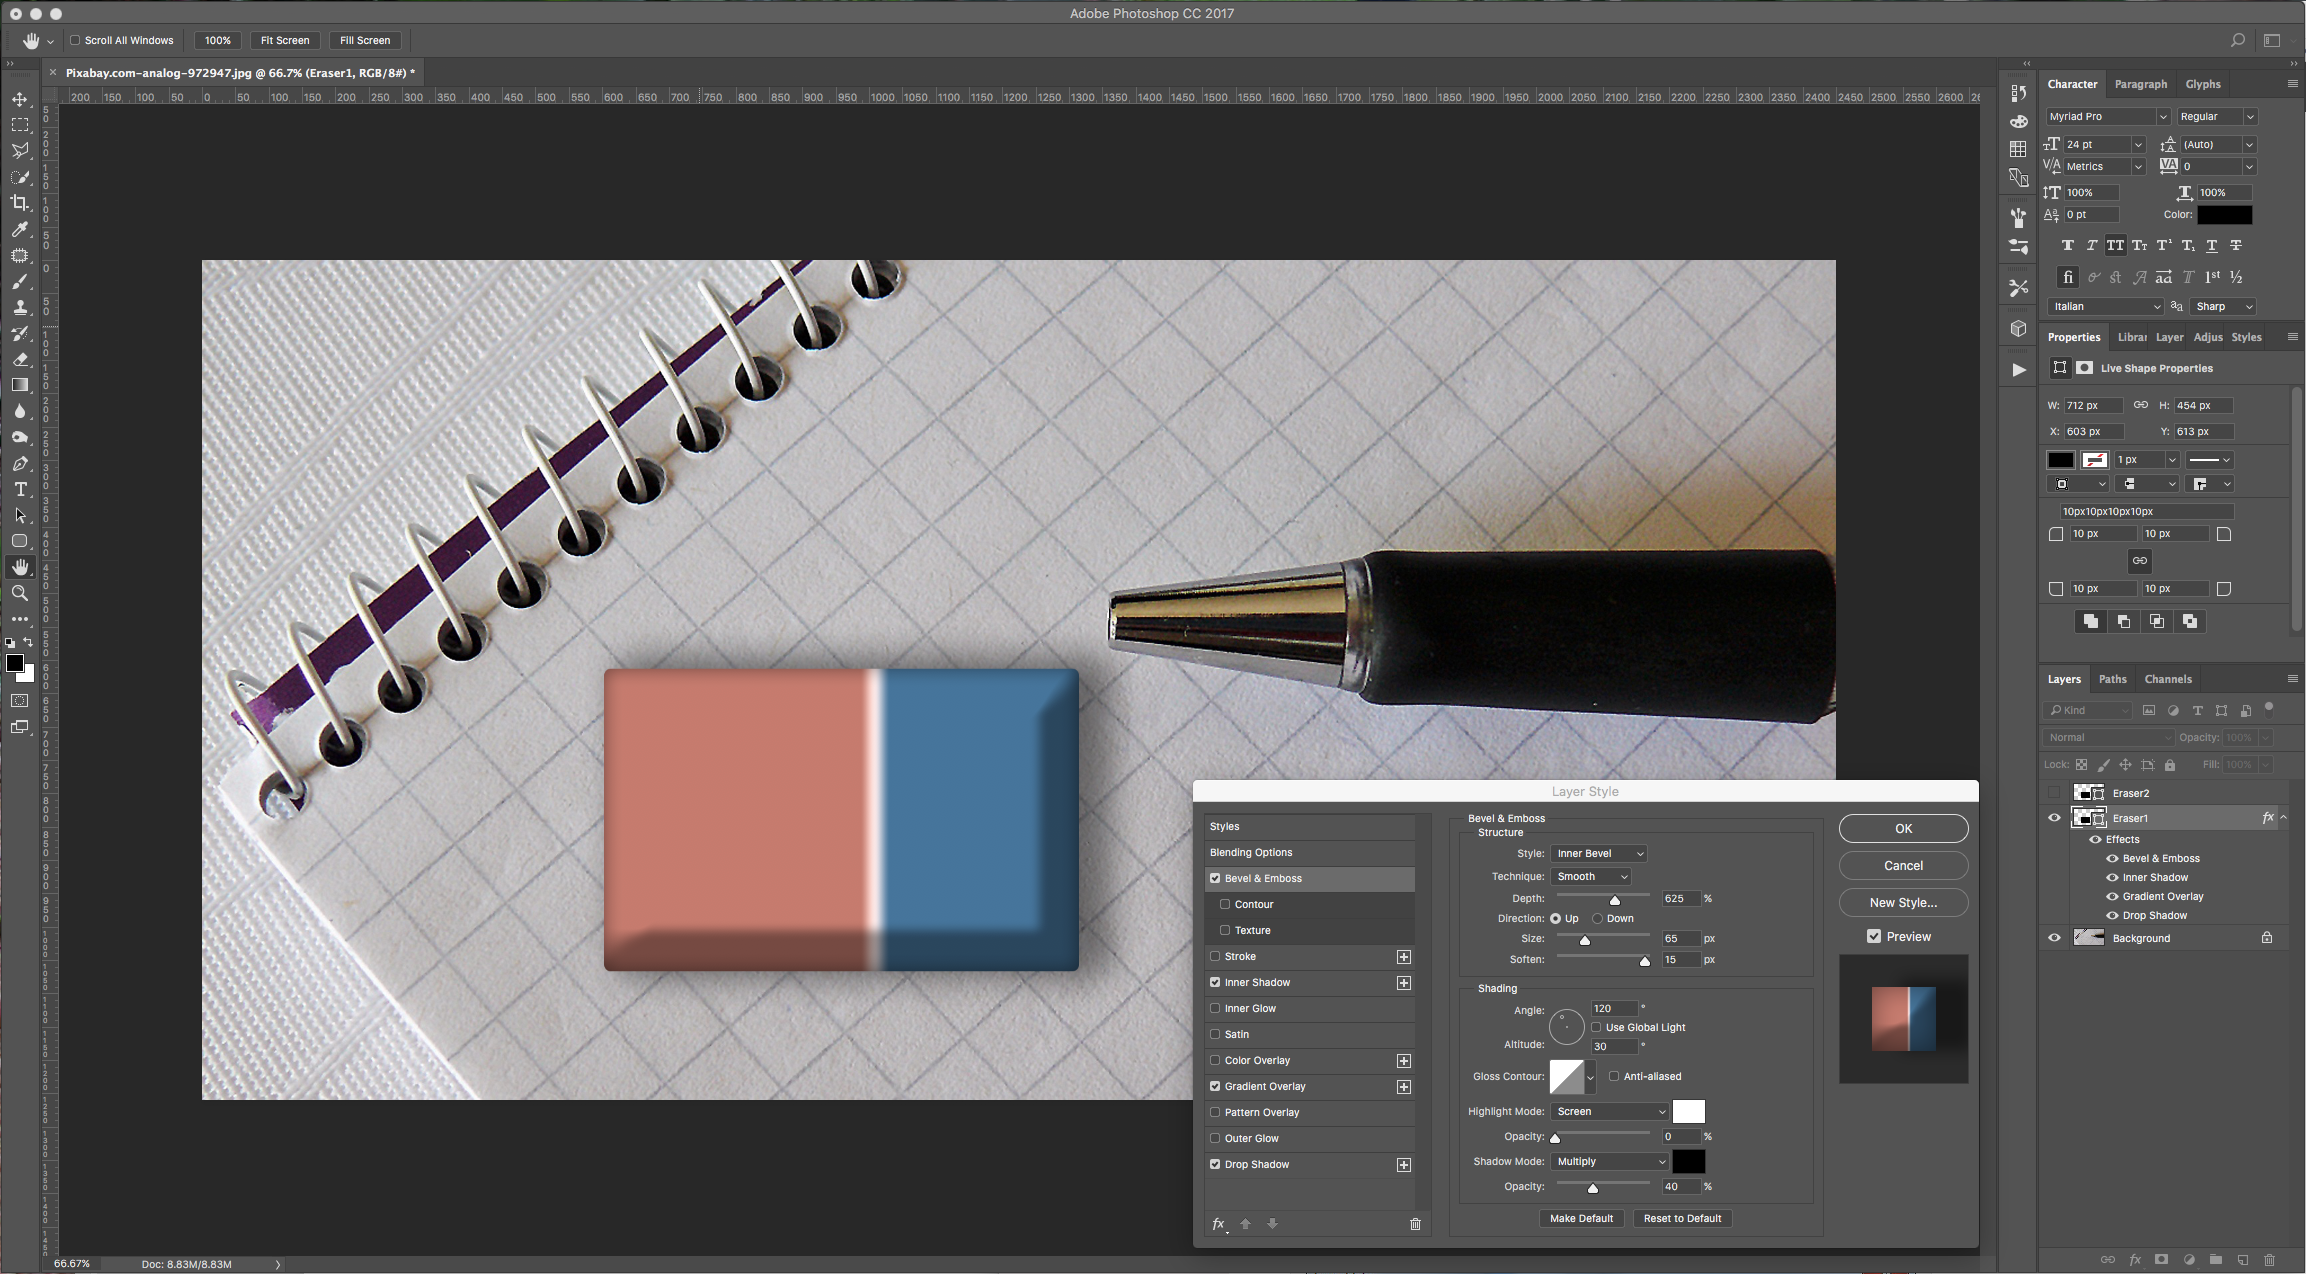
Inner Shadow:
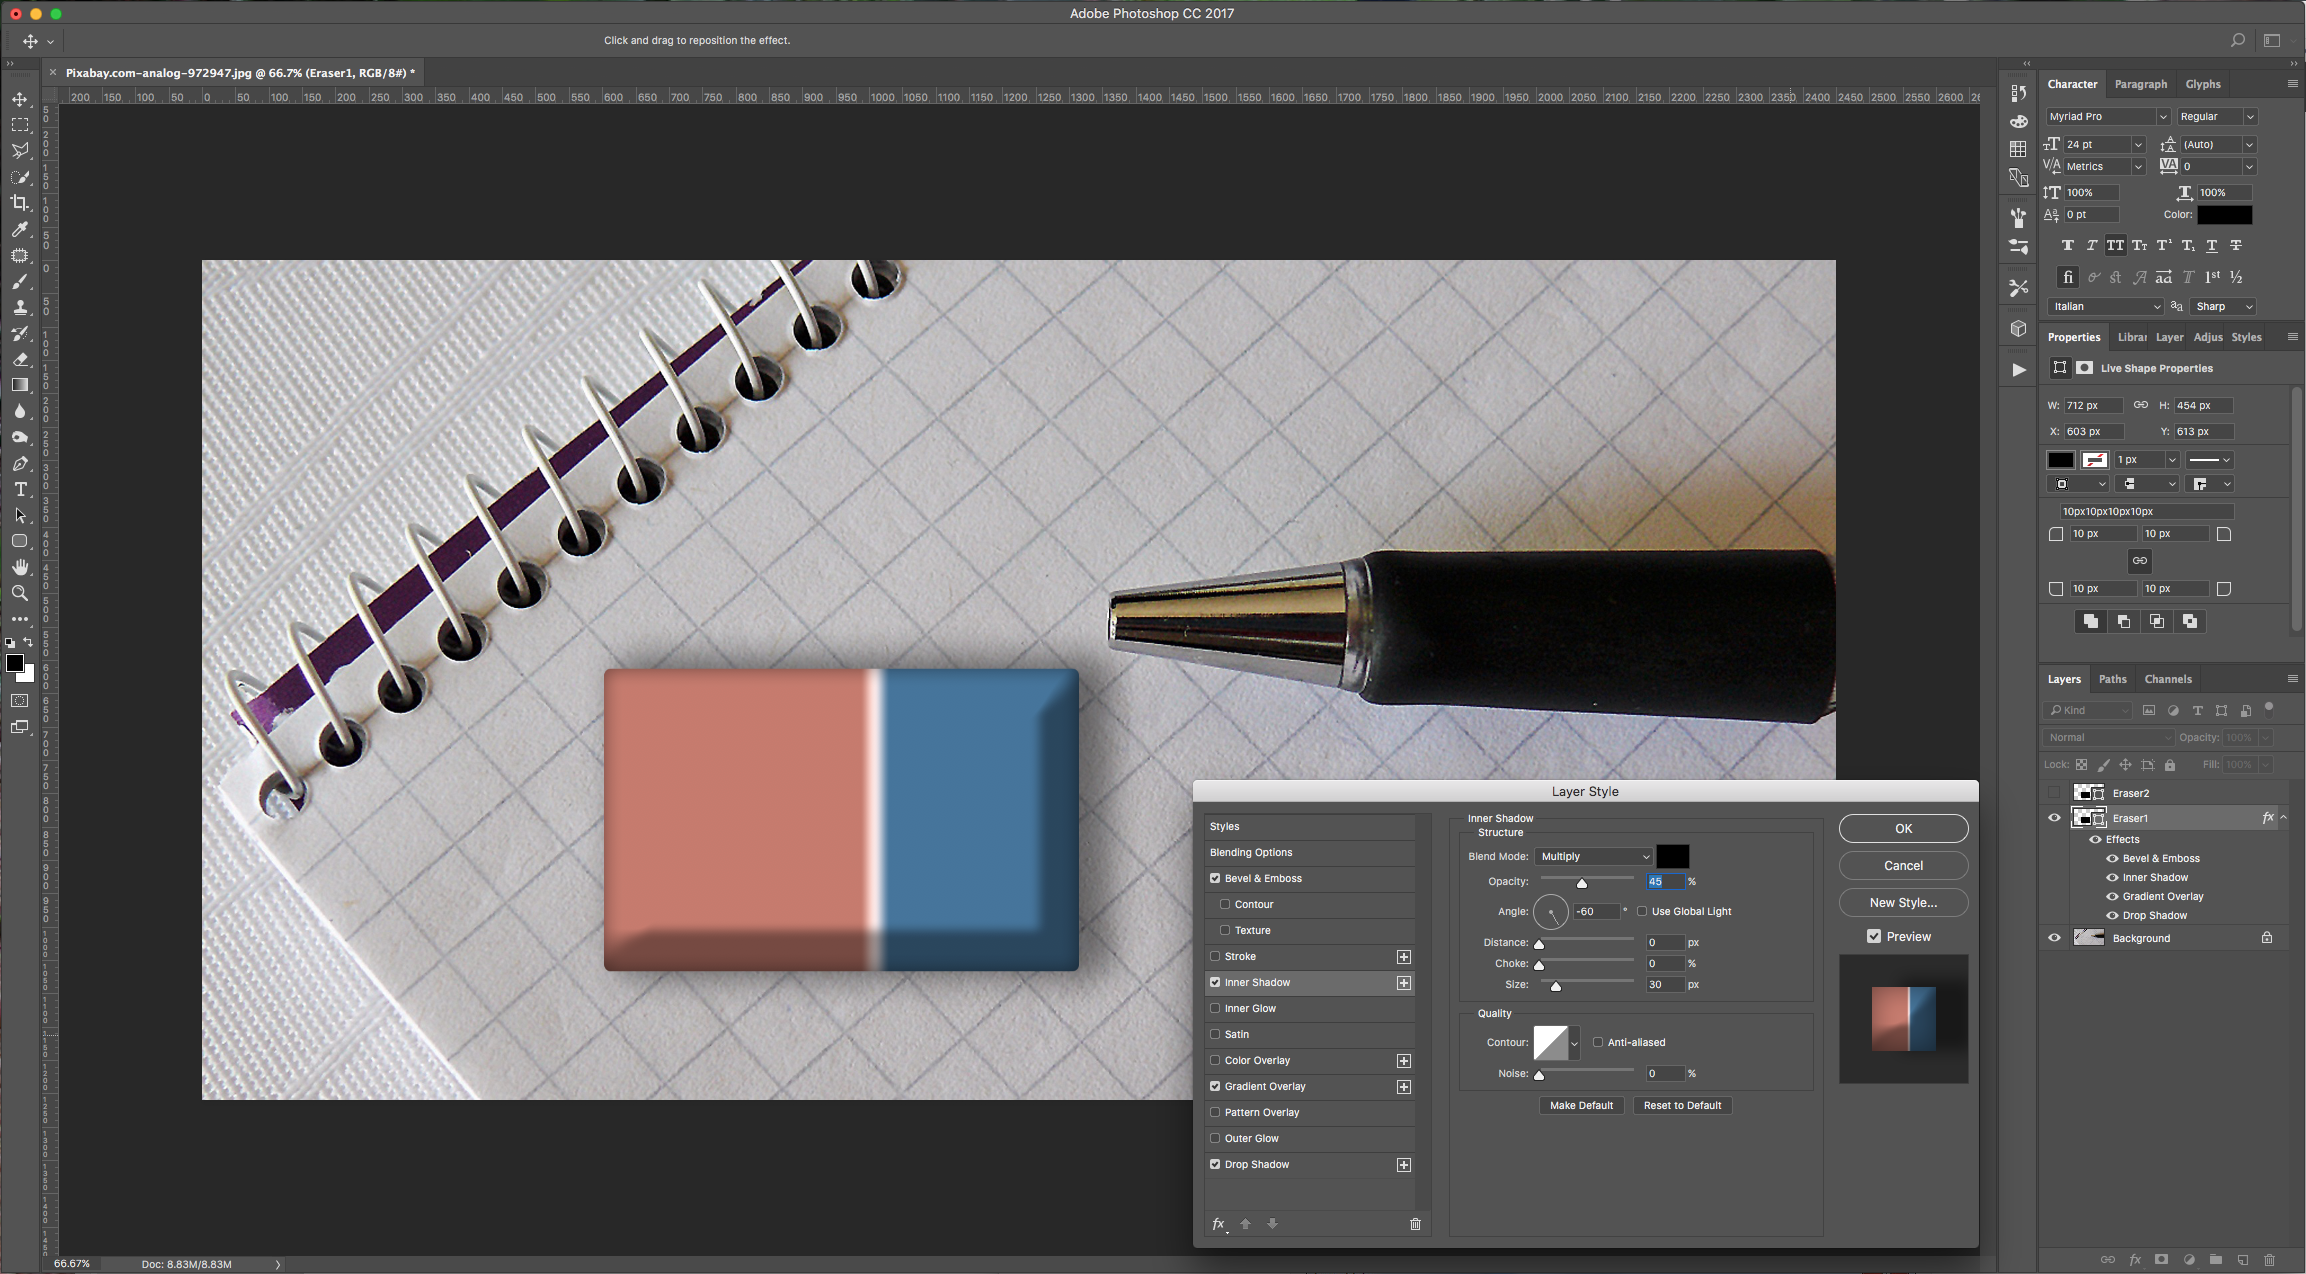
Gradient Overlay: (color 1: #c77b6c, color 2: # fbe6e6, color 3: # 44749d. Location 1: 54%, Location 2: 57%, Location 3: 60%)
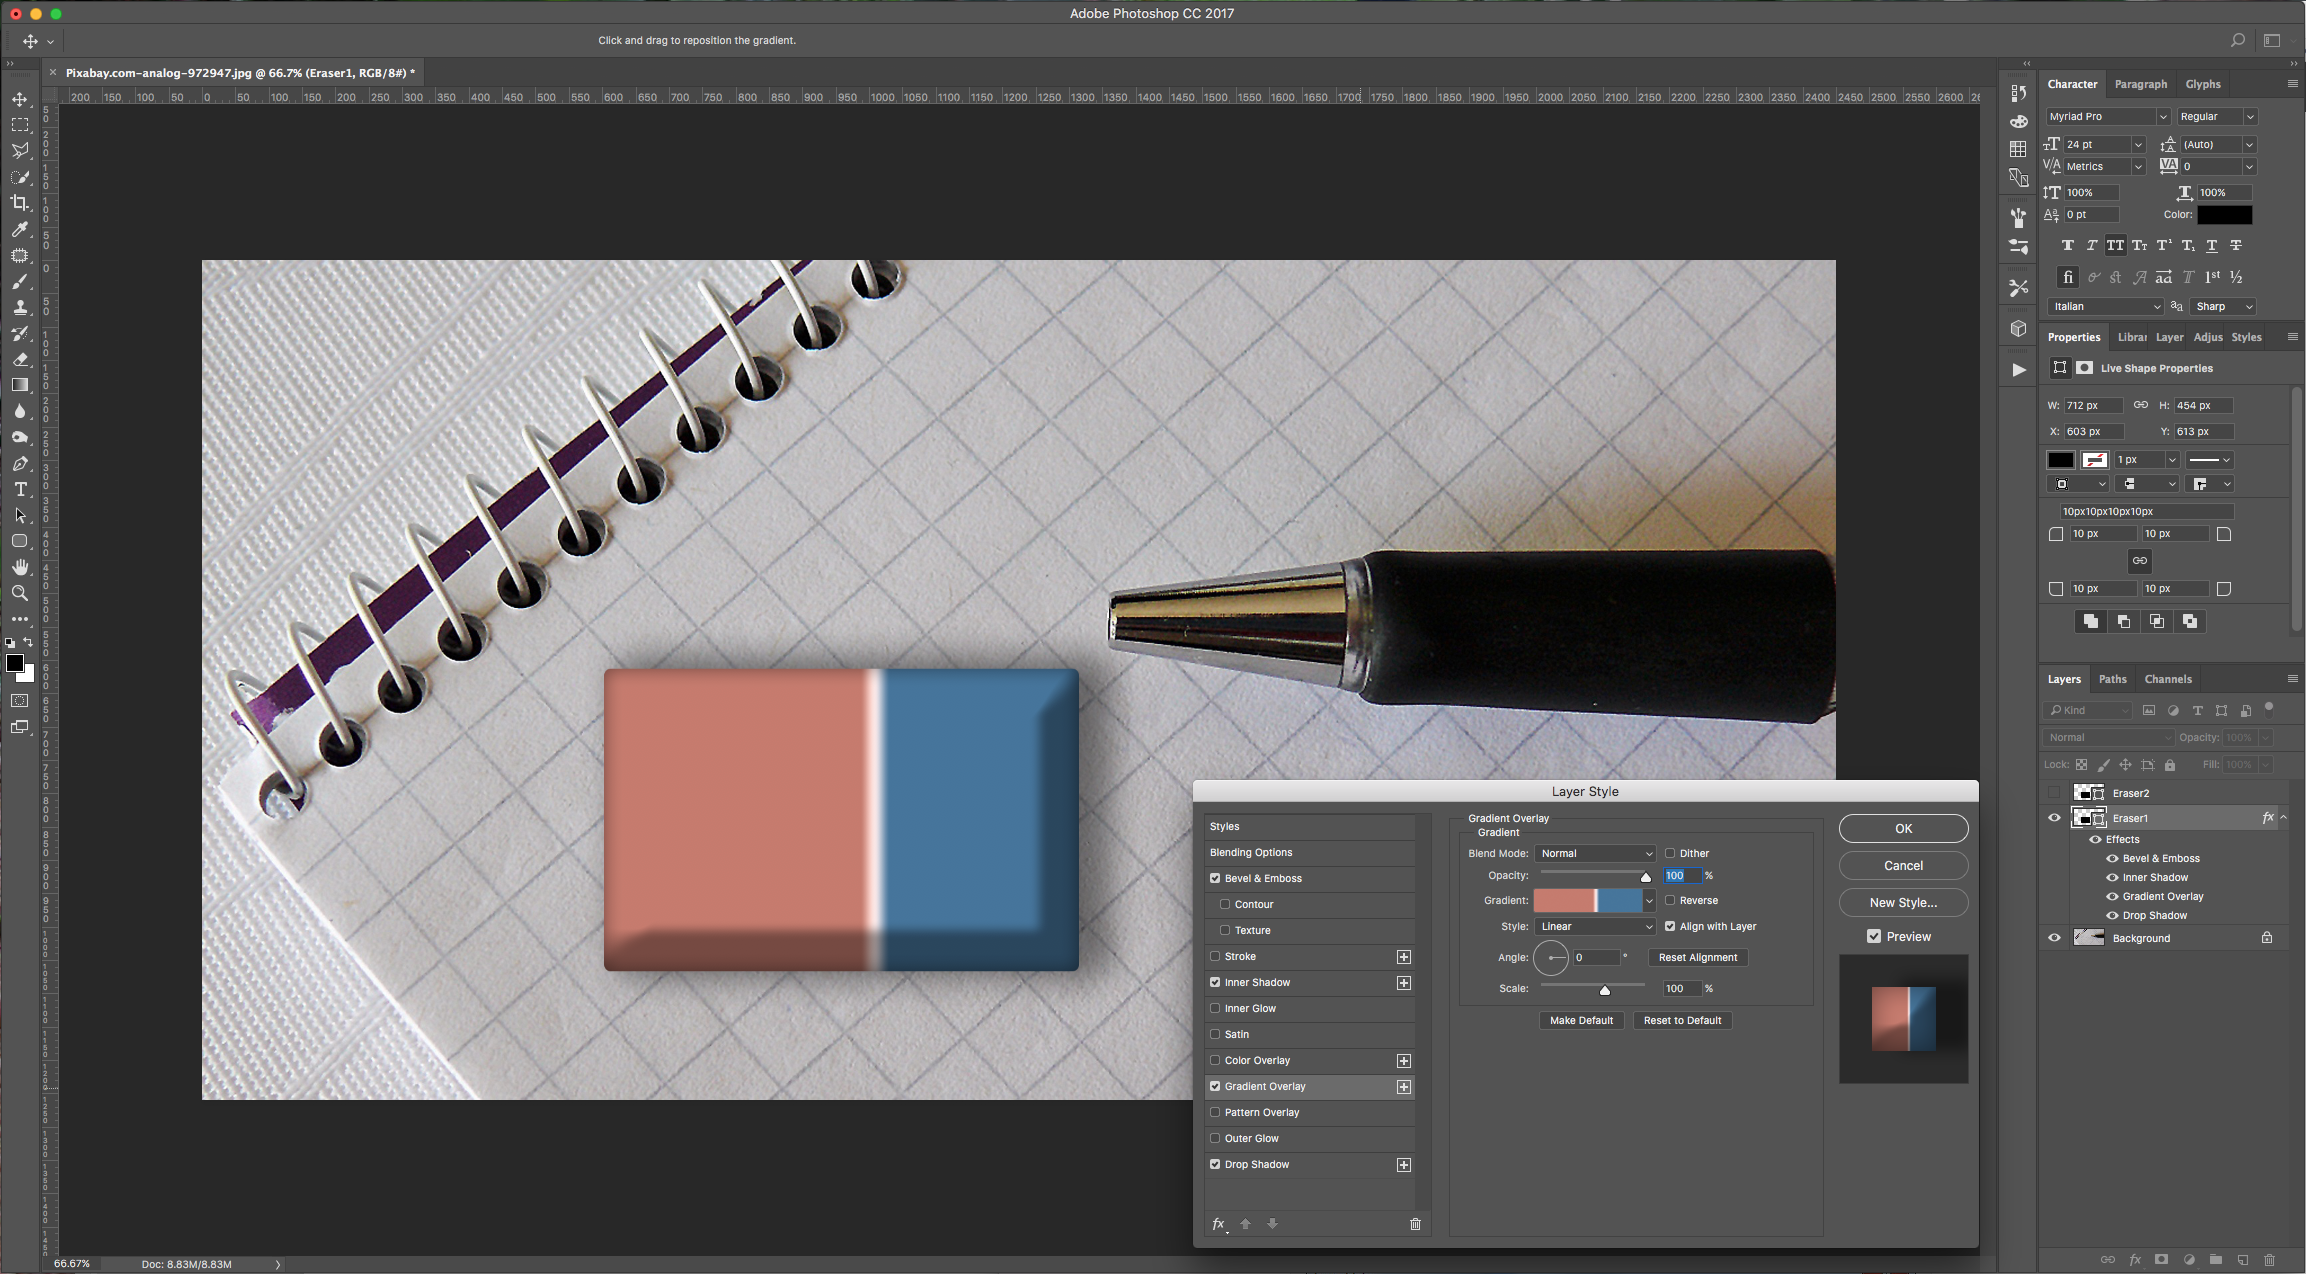
Drop Shadow:
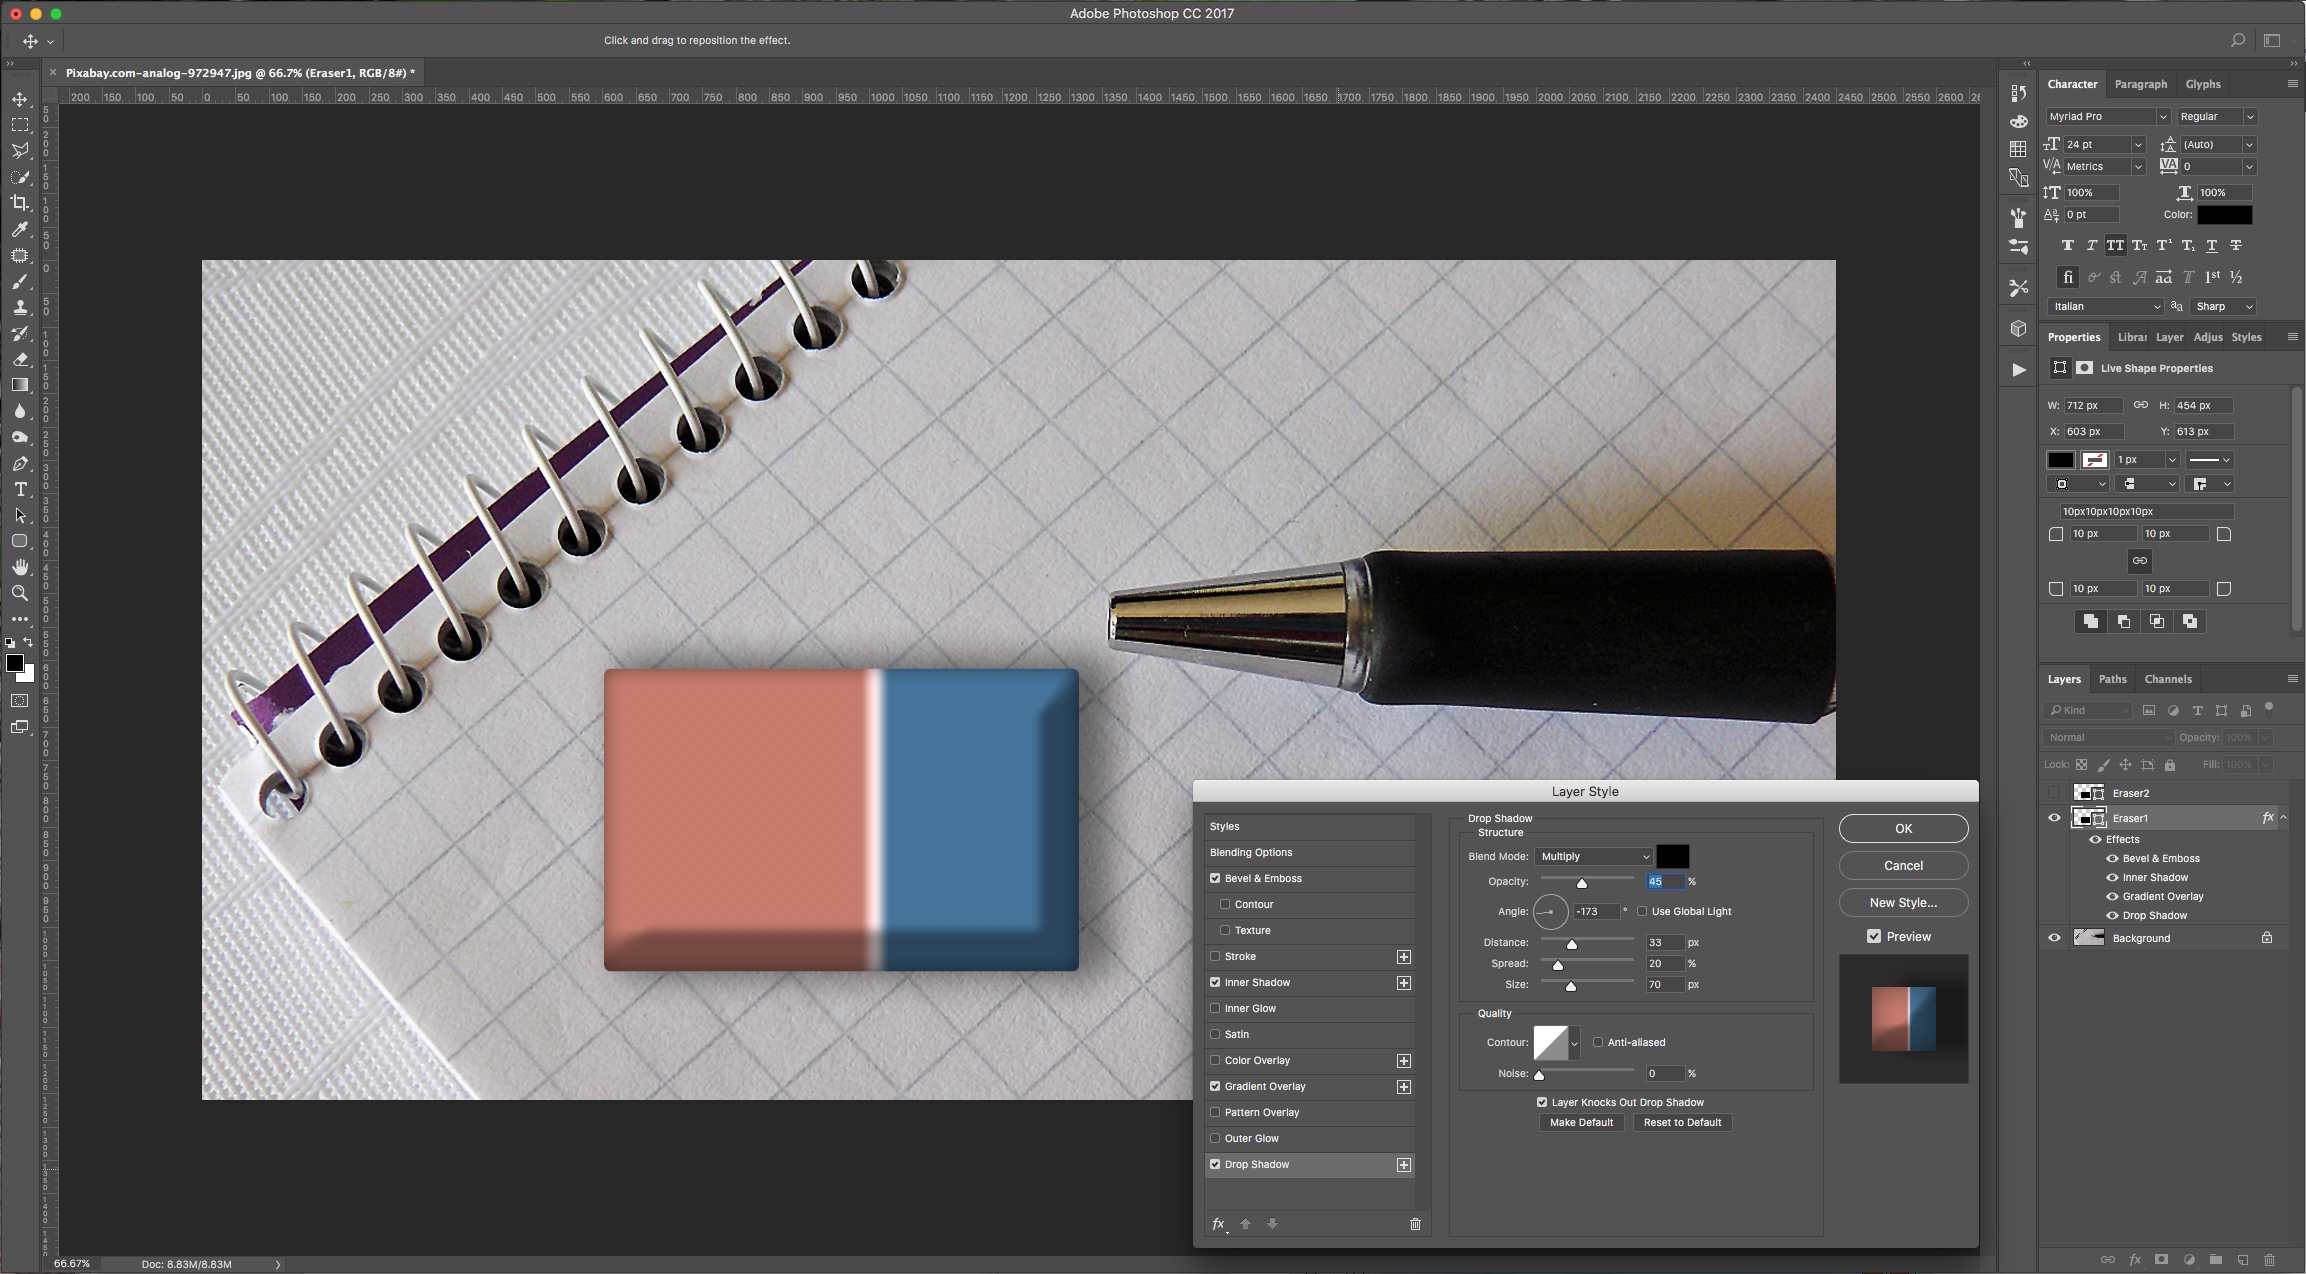
4 - Now, turn back on the visibility for your “Eraser 2” Layer and apply the following “Layer Styles”:
Bevel & Emboss:
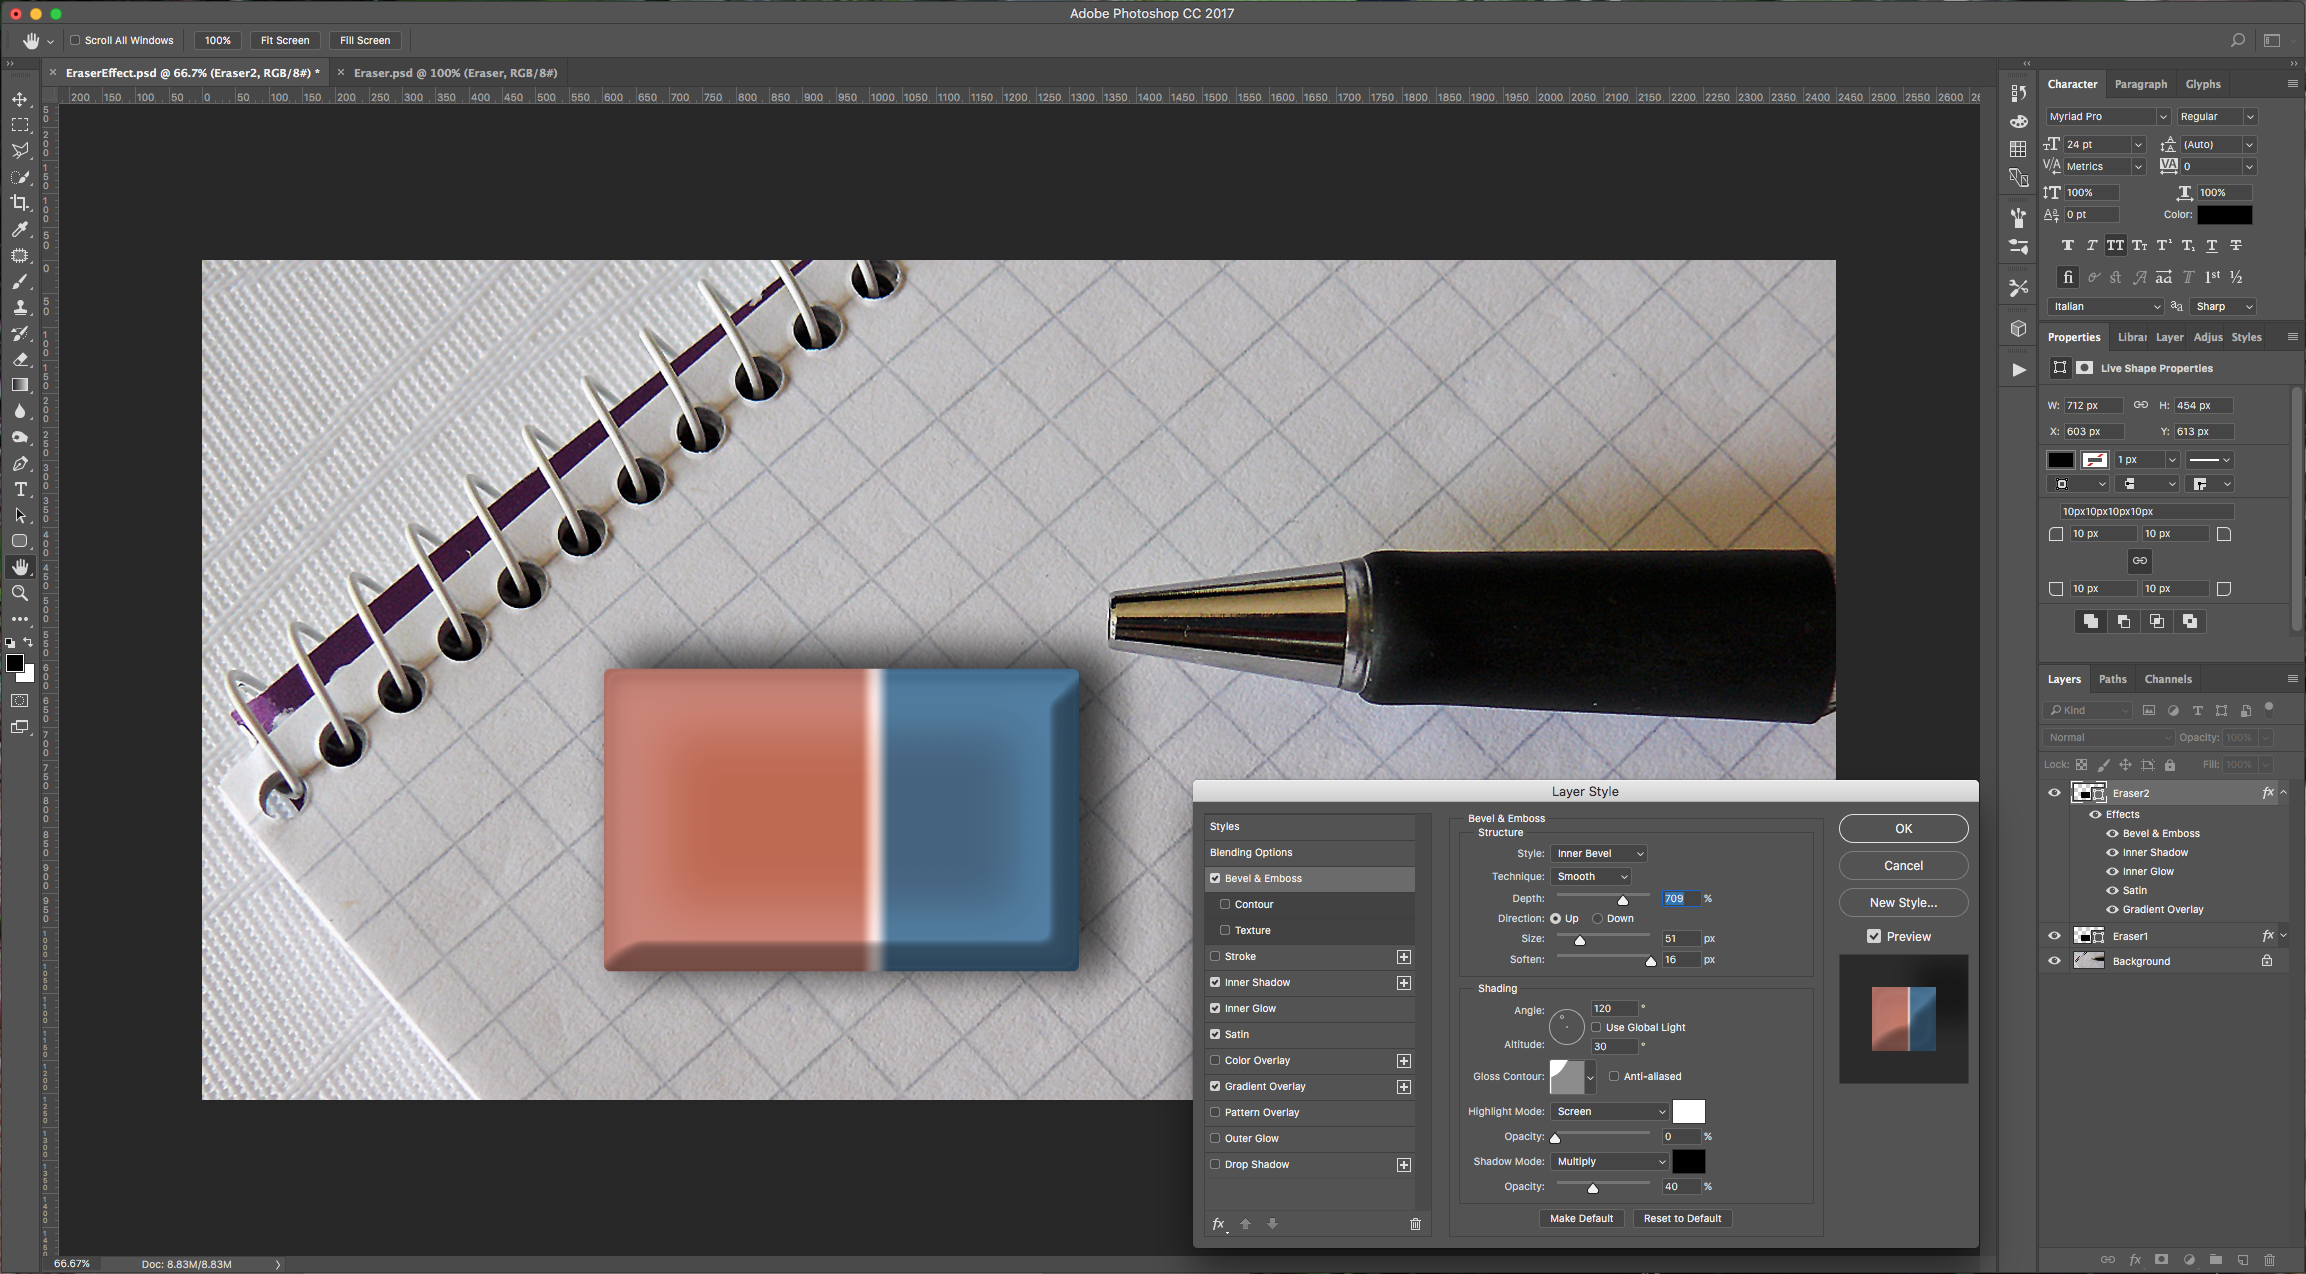
Inner Shadow:
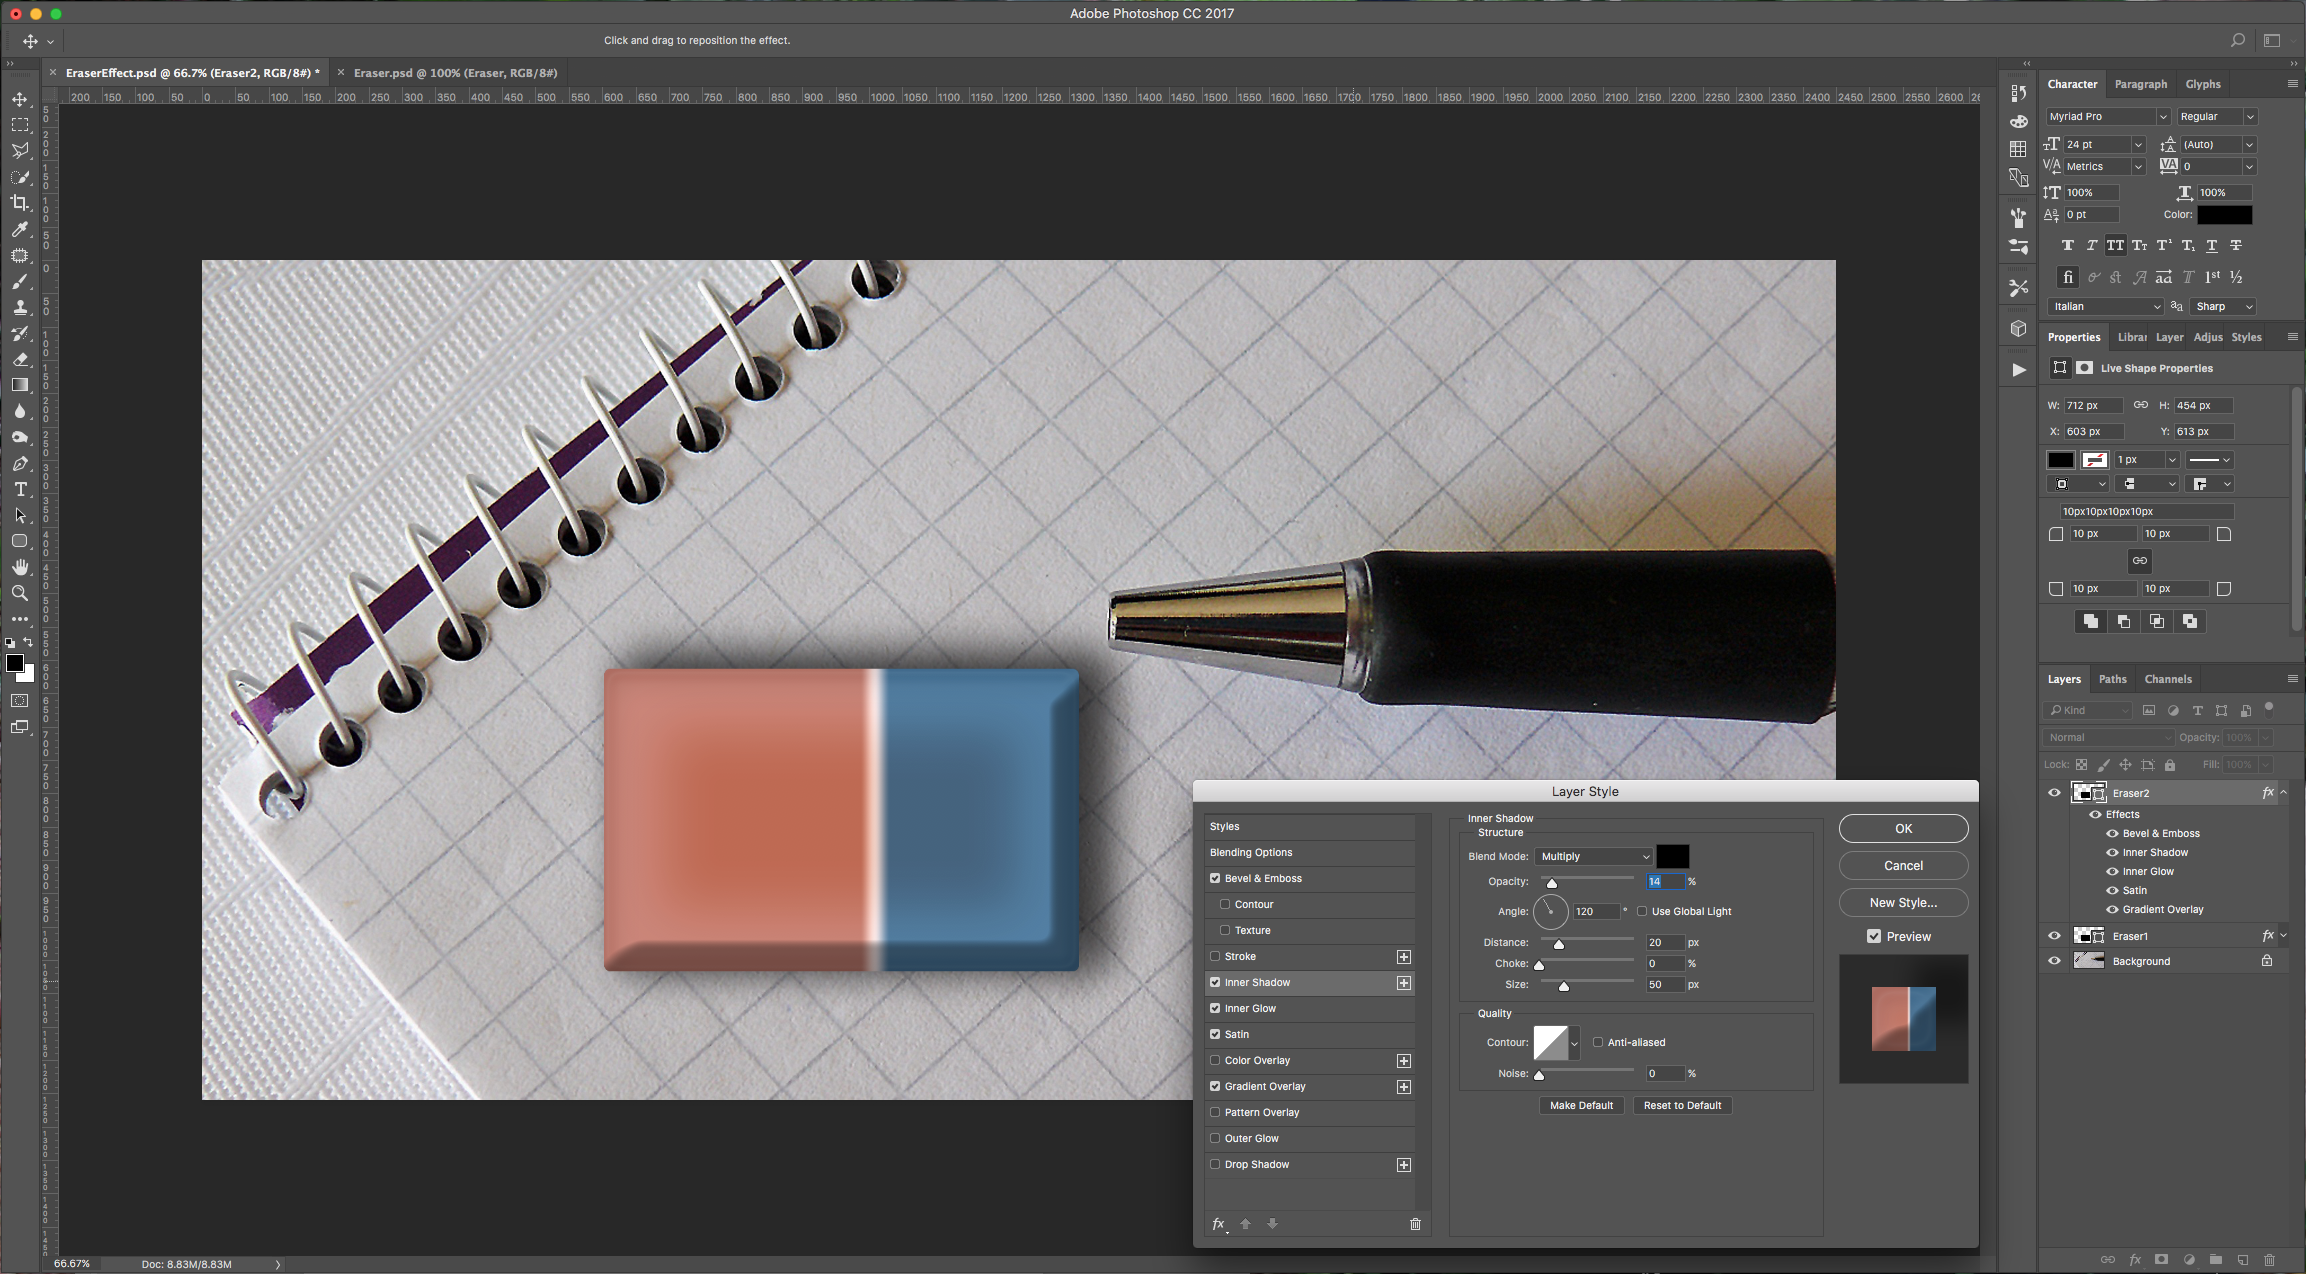
Inner Glow: (#3f92cc)
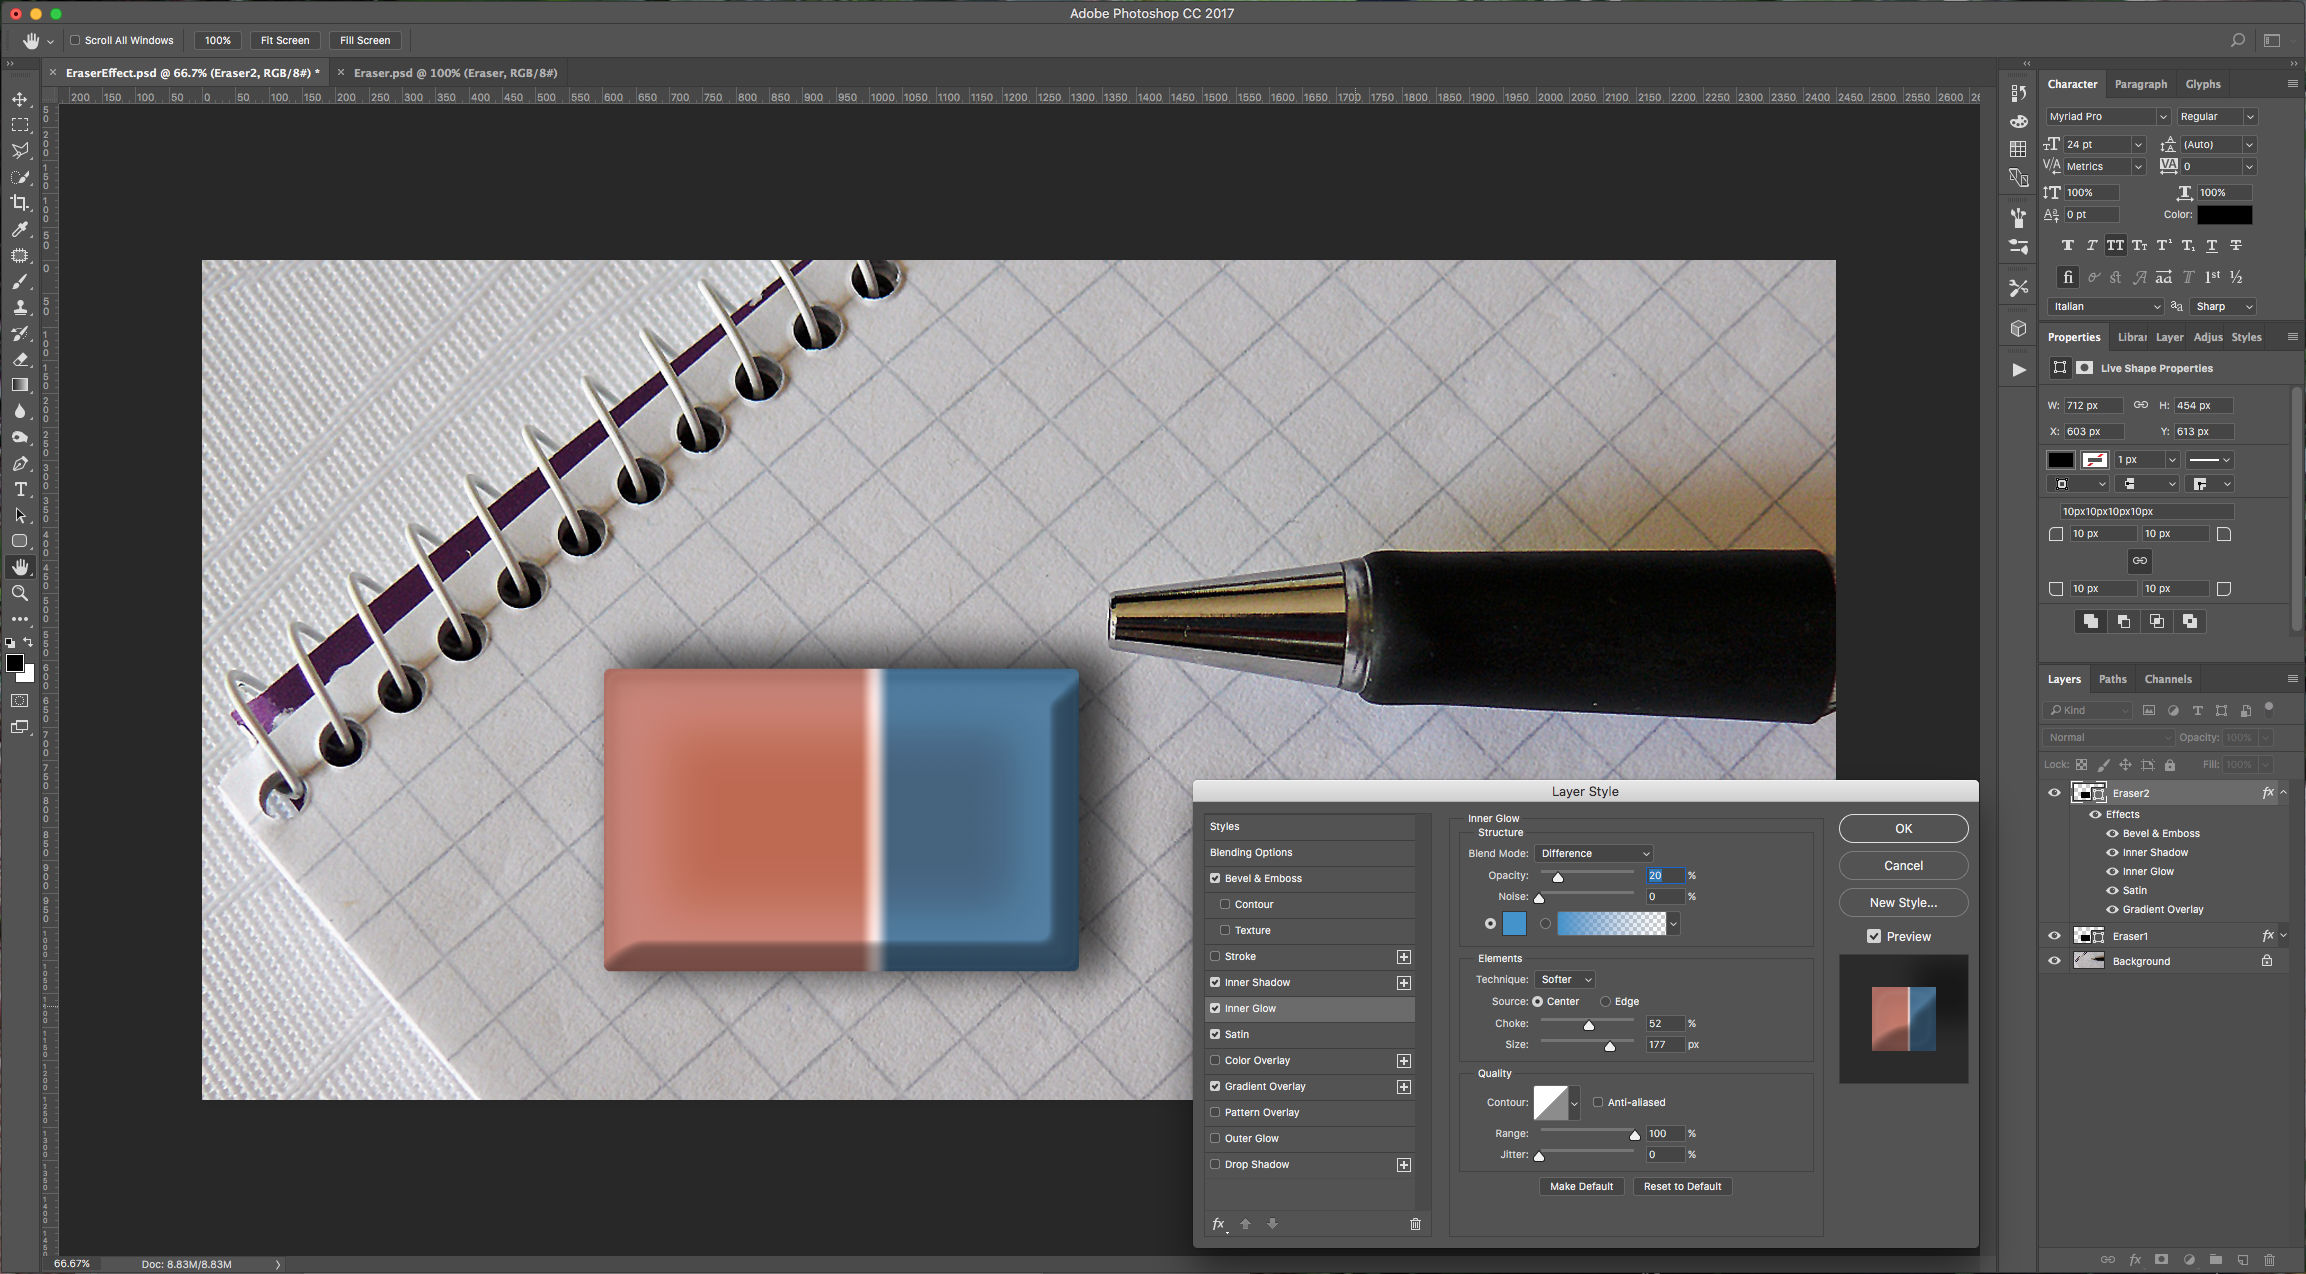
Satin:
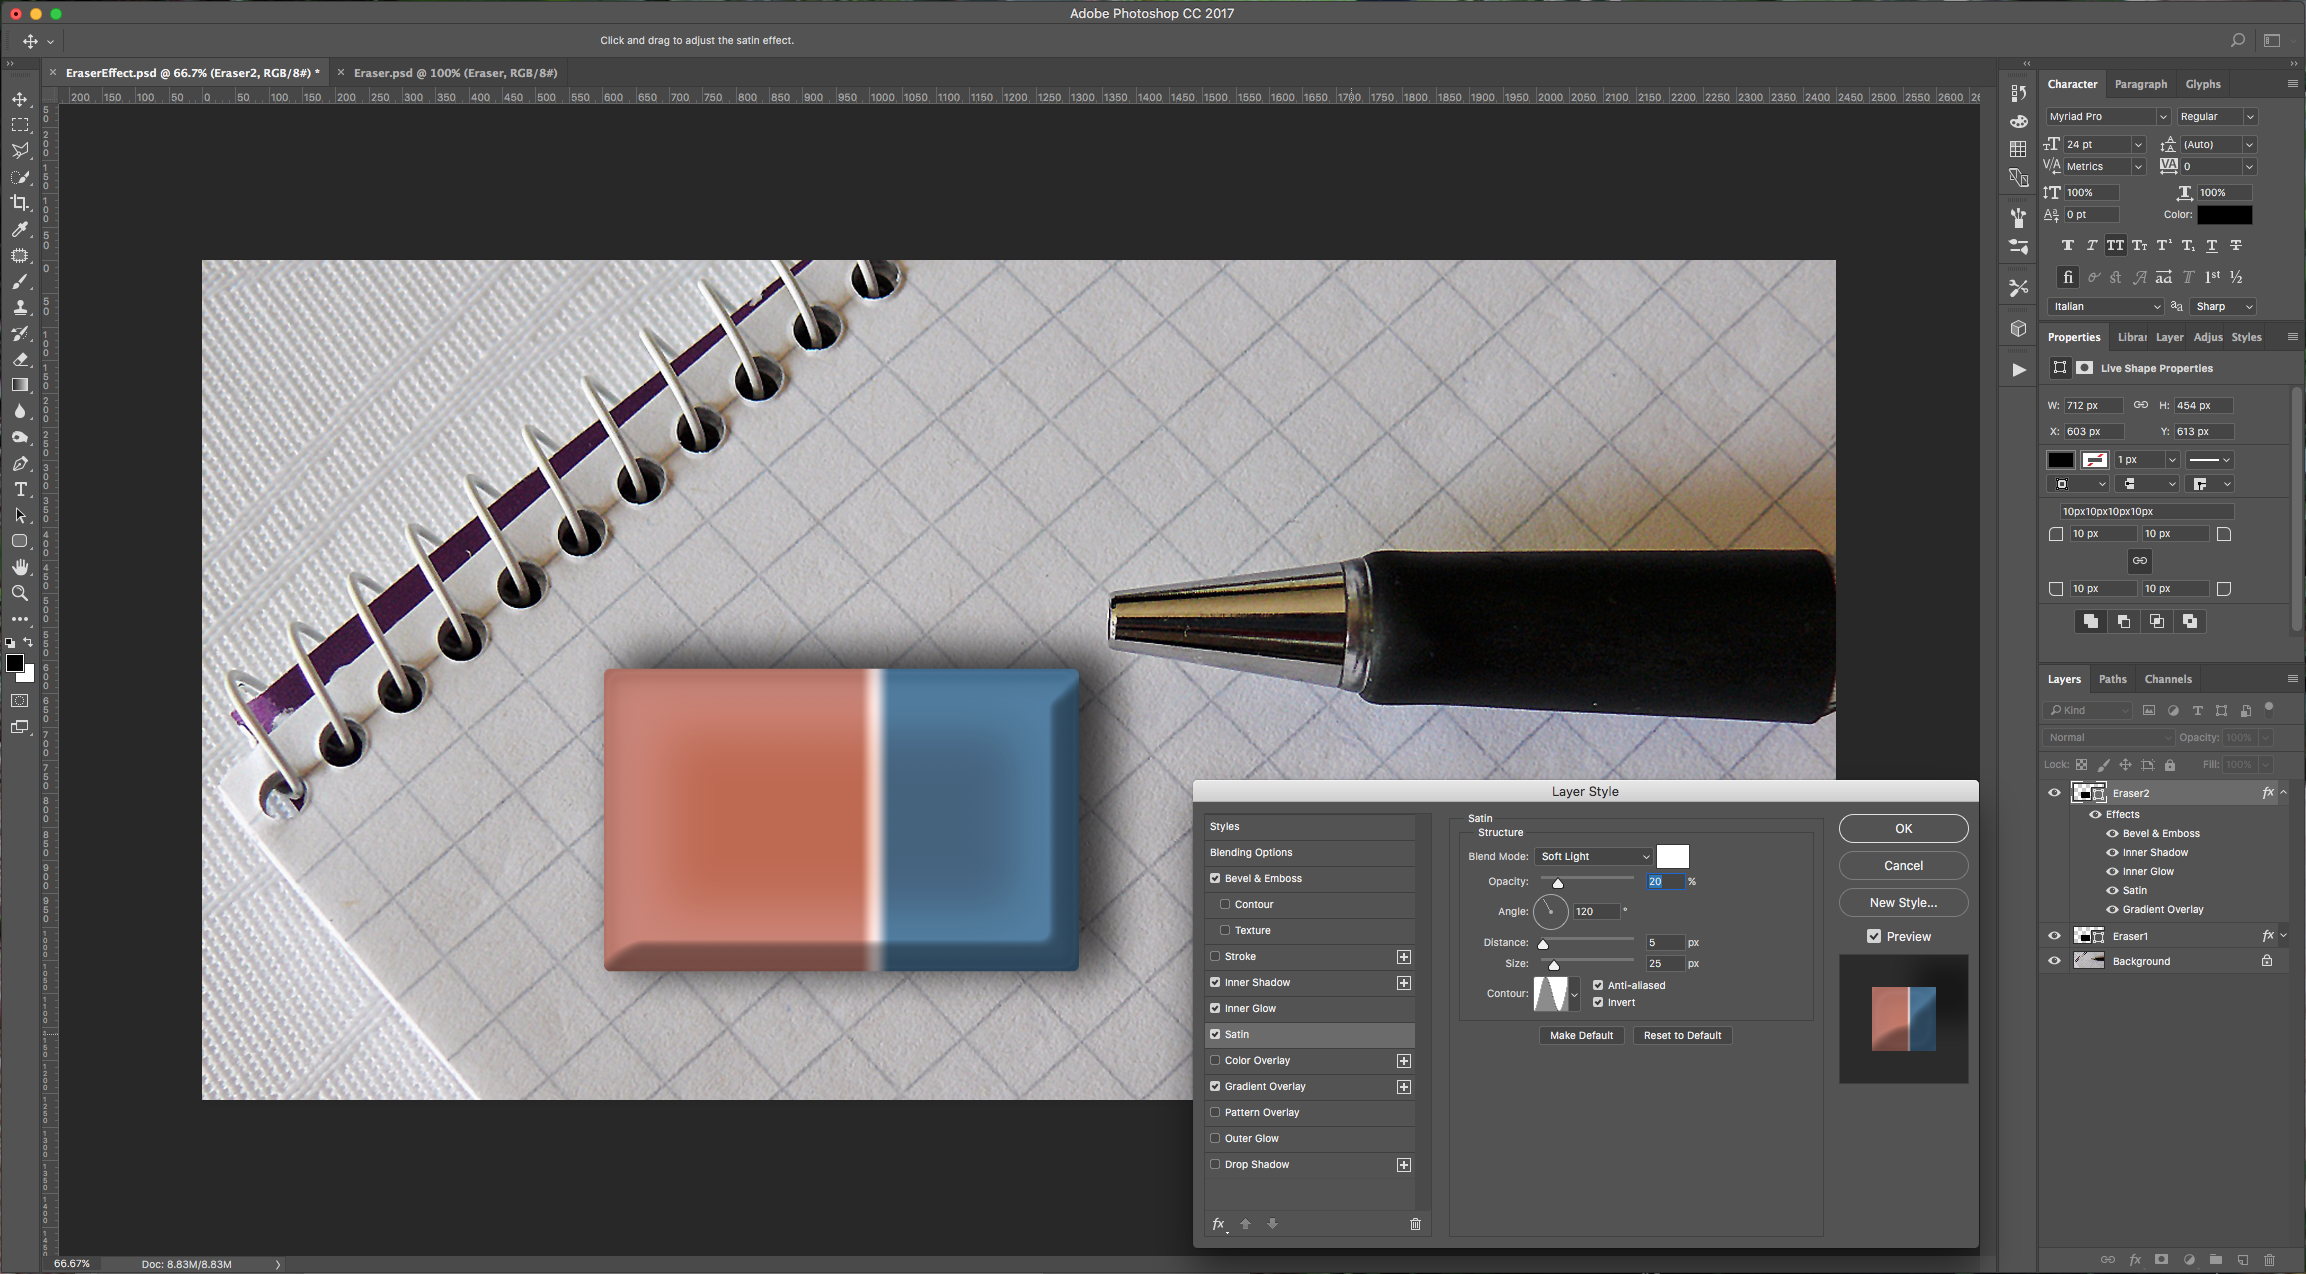
Gradient Overlay: (same as before)
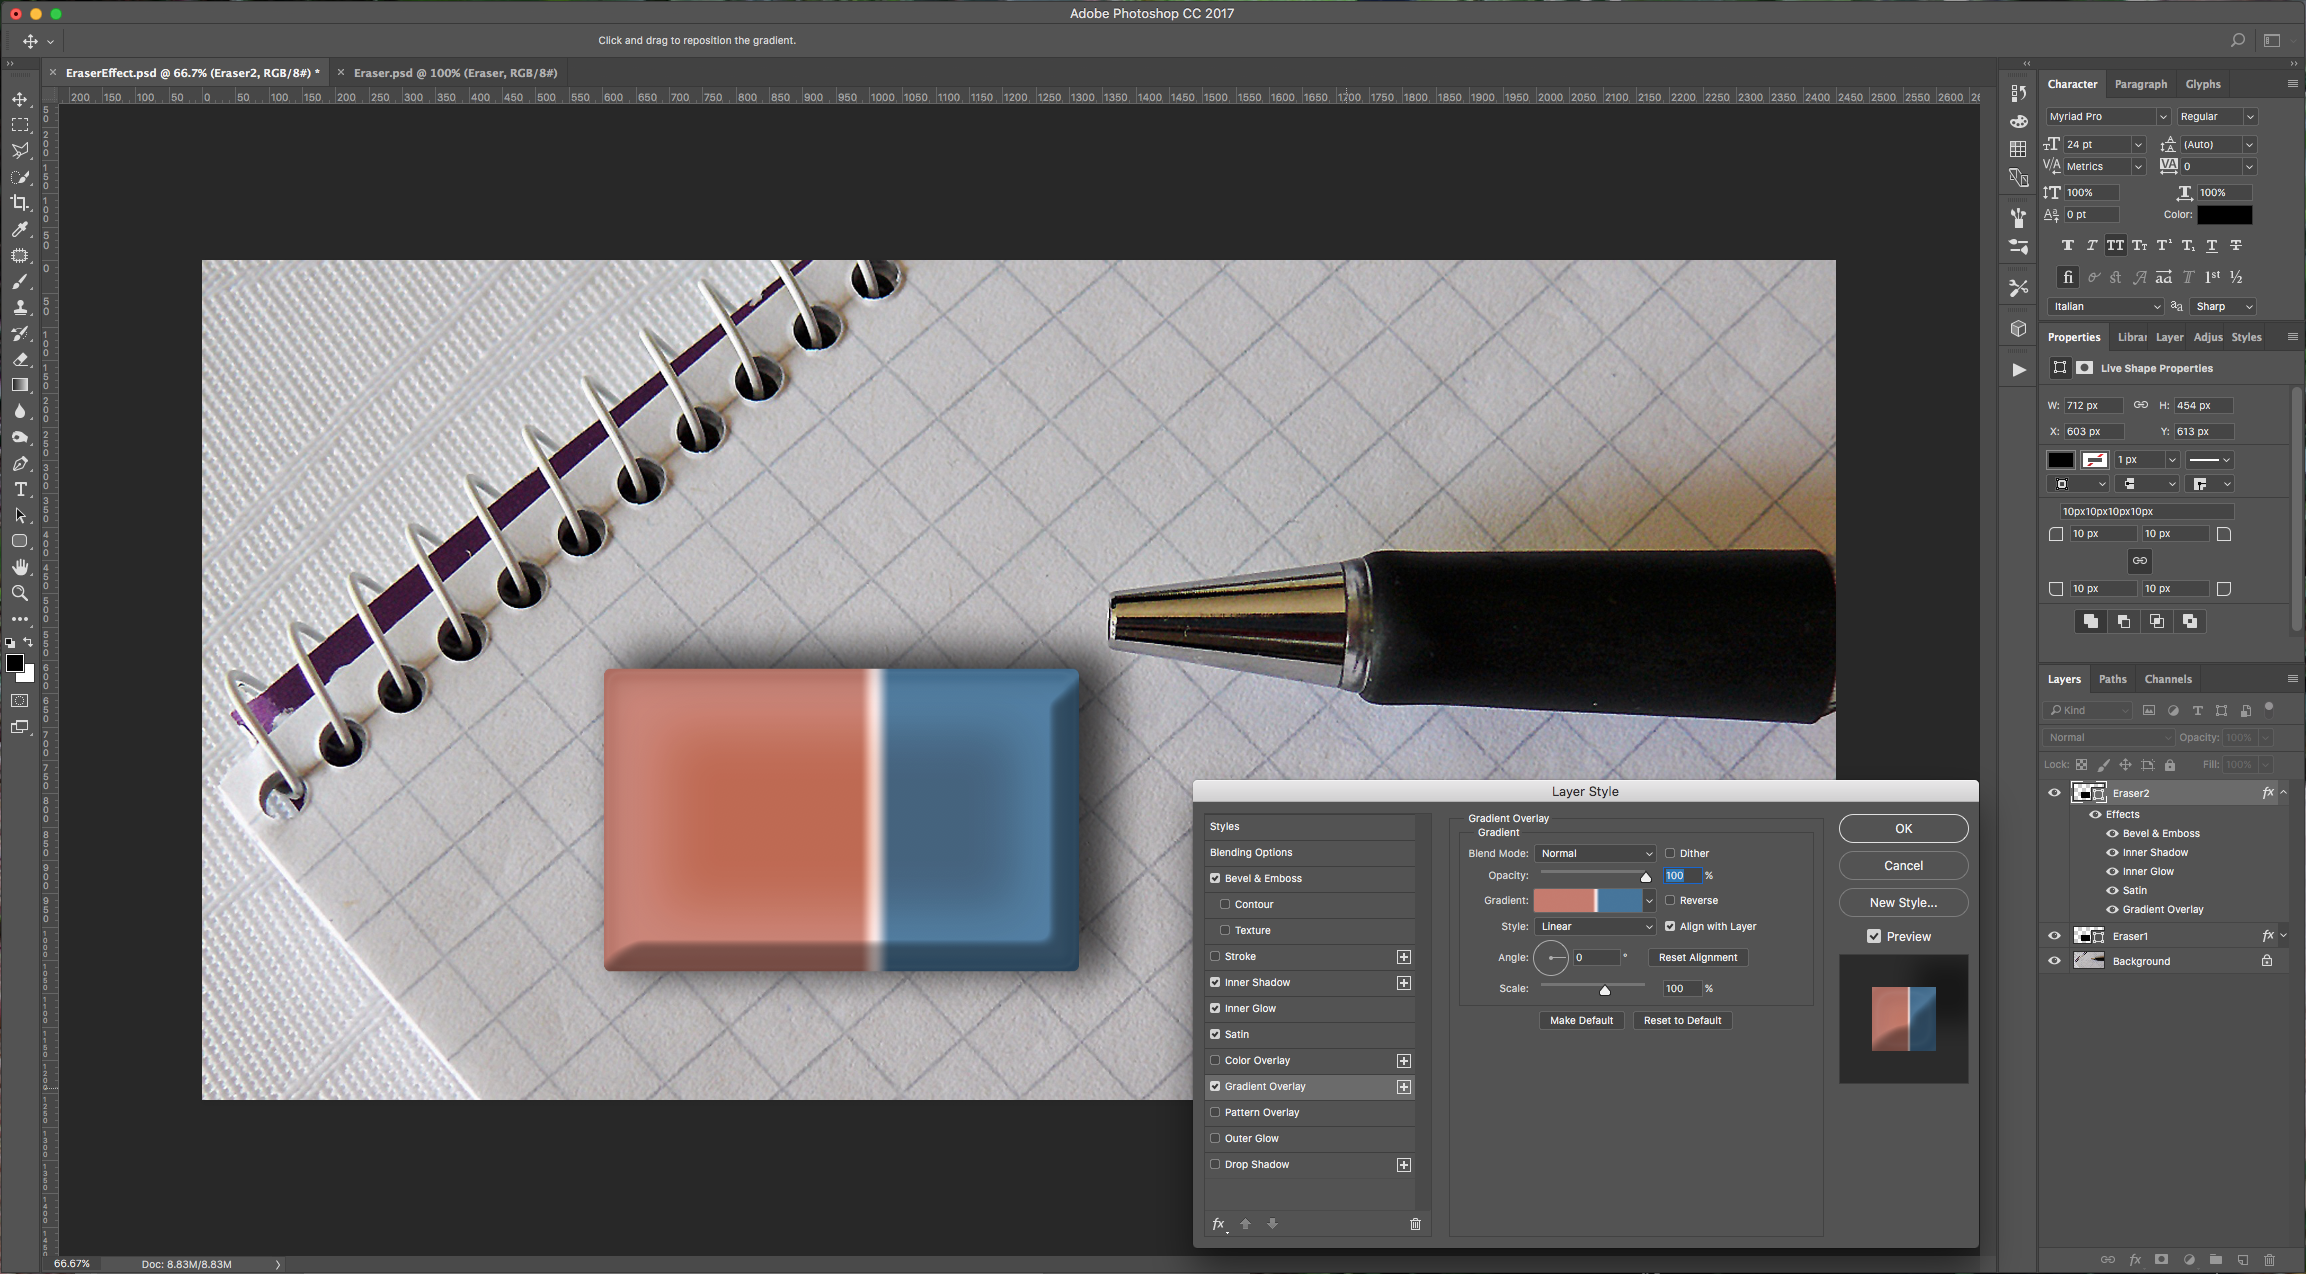
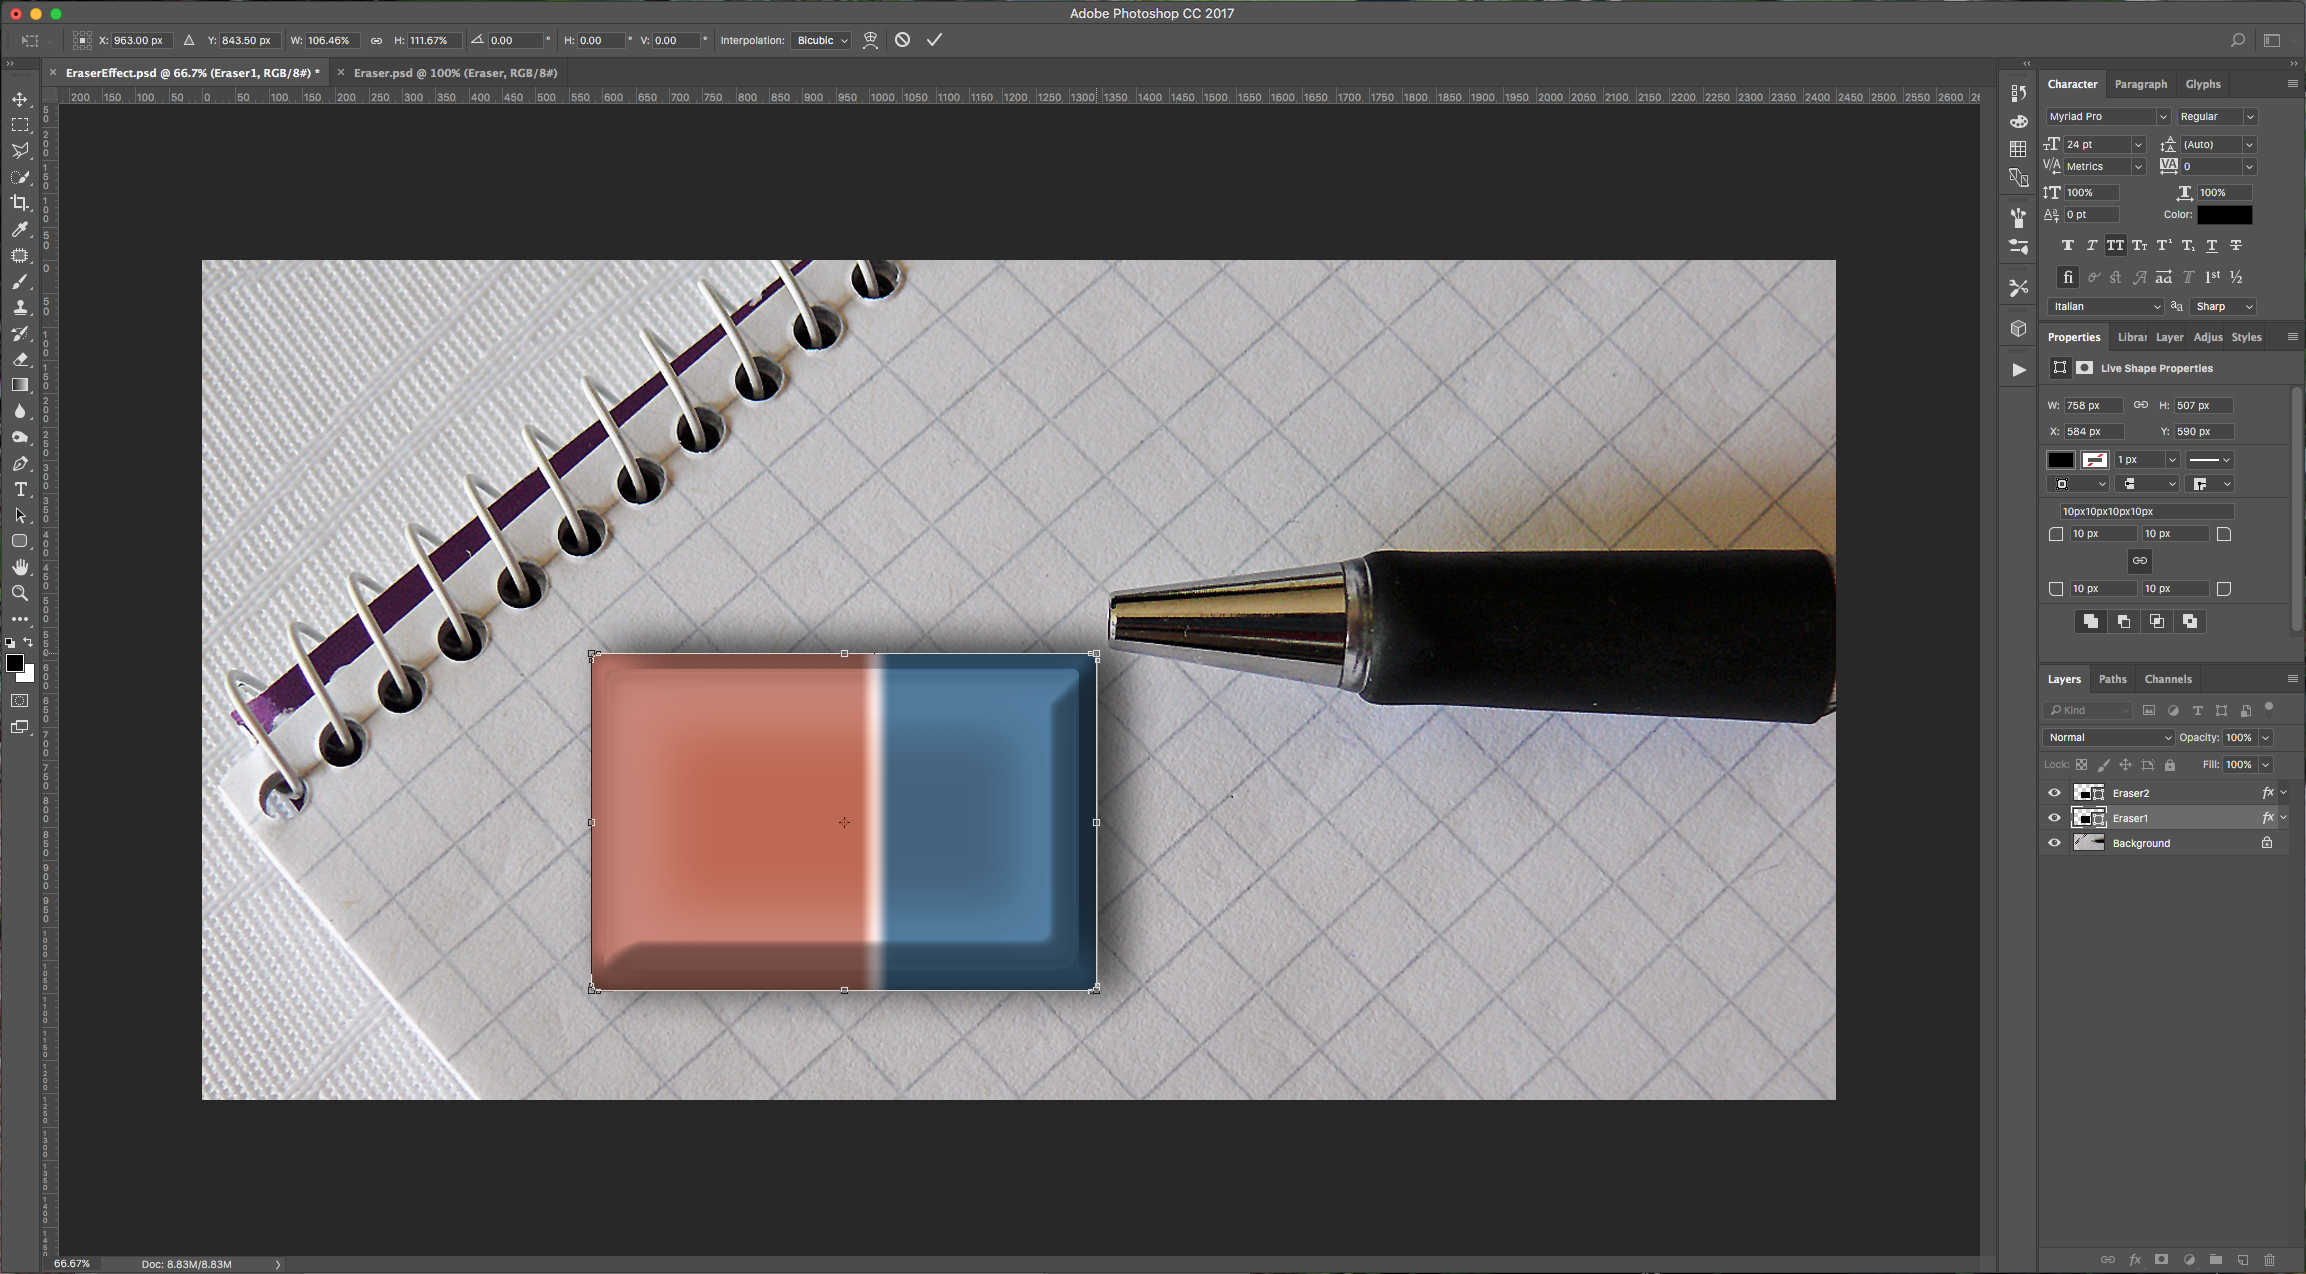
5 - Select your “Eraser1” Layer and using the “Transform” command (Command/Control + T) to enlarge your shape until it looks right.
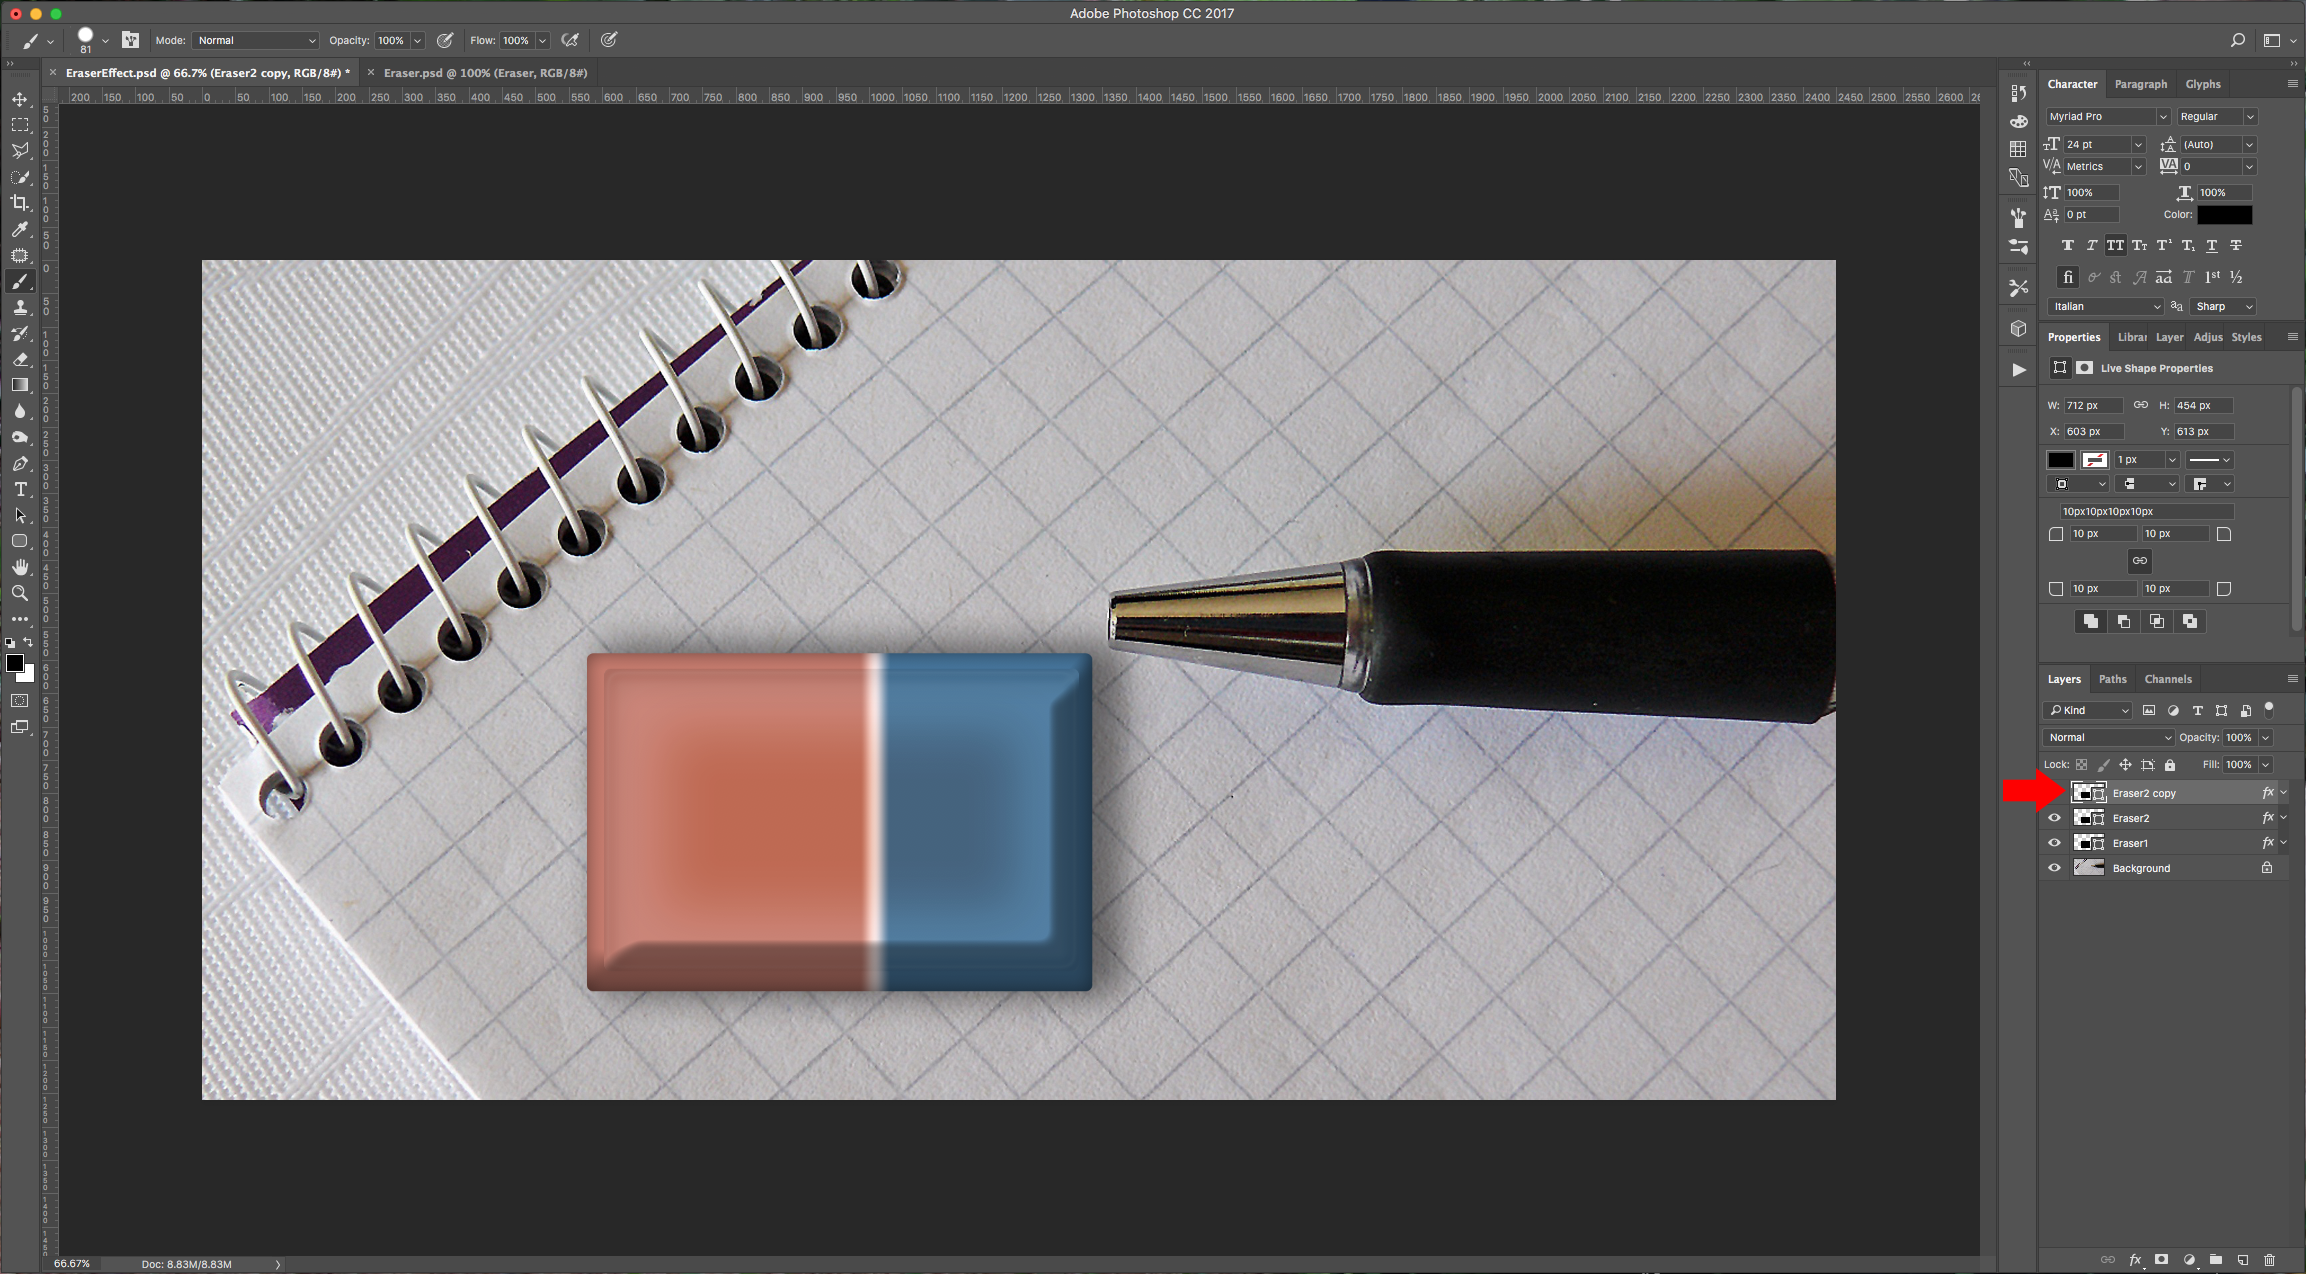
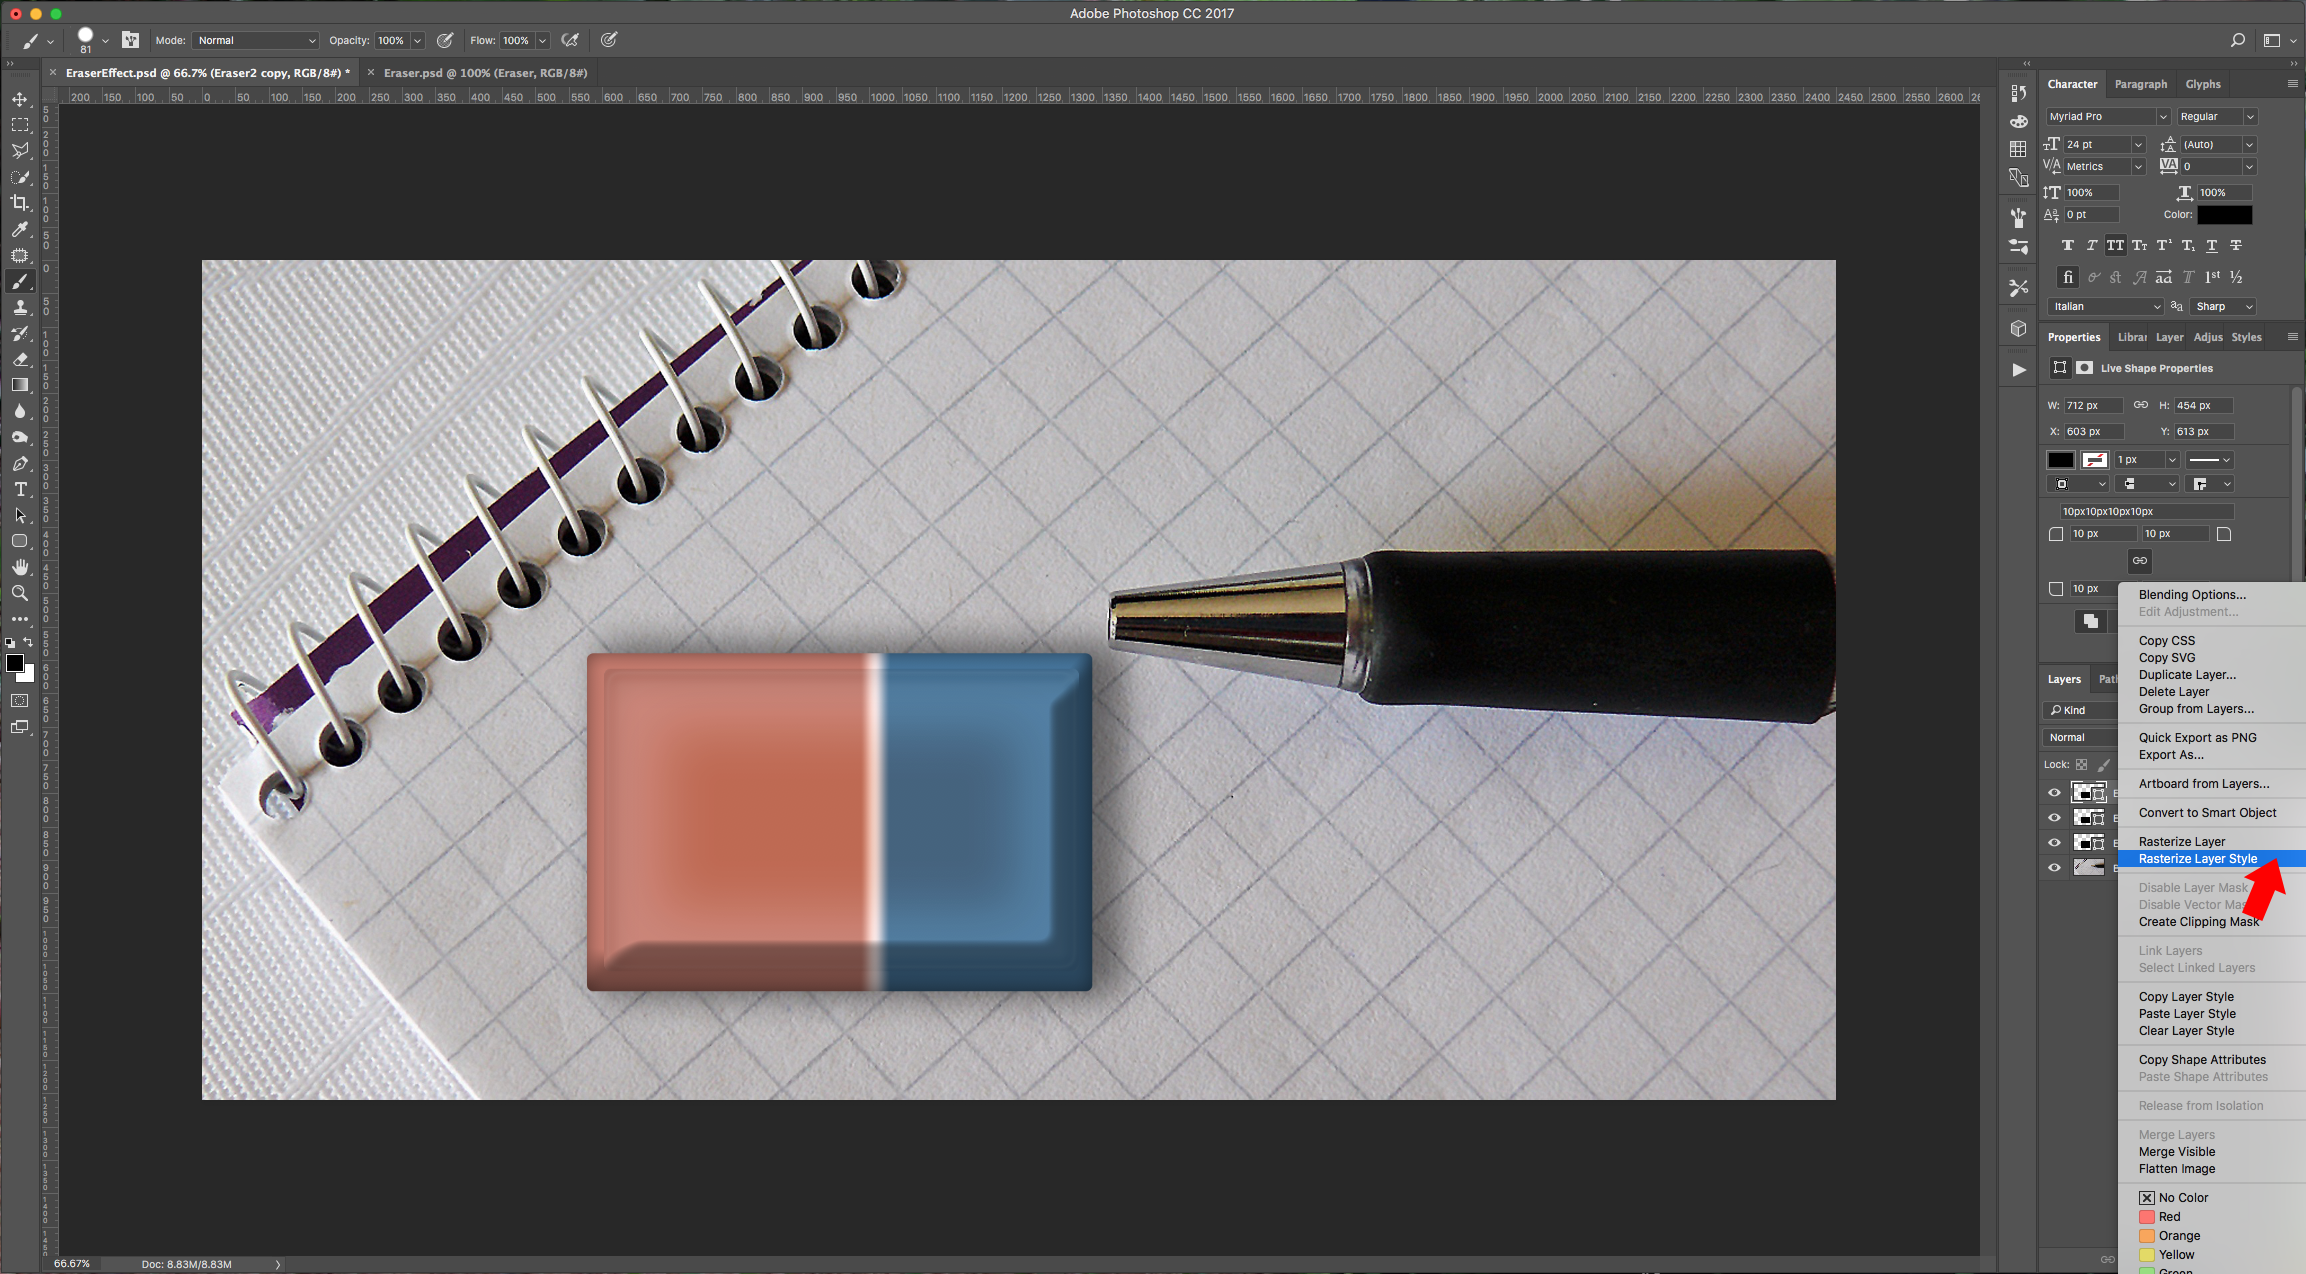
6 - Duplicate the “Eraser2” Layer, right-click on it and choose “Rasterize Layer Styles”. Hide or delete your original “Eraser2” Layer.
7 - Click on the “Add Layer Mask” button at the bottom of the “Layers” Panel, select the “Brush Tool” (B) and with a “Soft” brush (0% Hardness) erase the edges of your image to smooth it out.
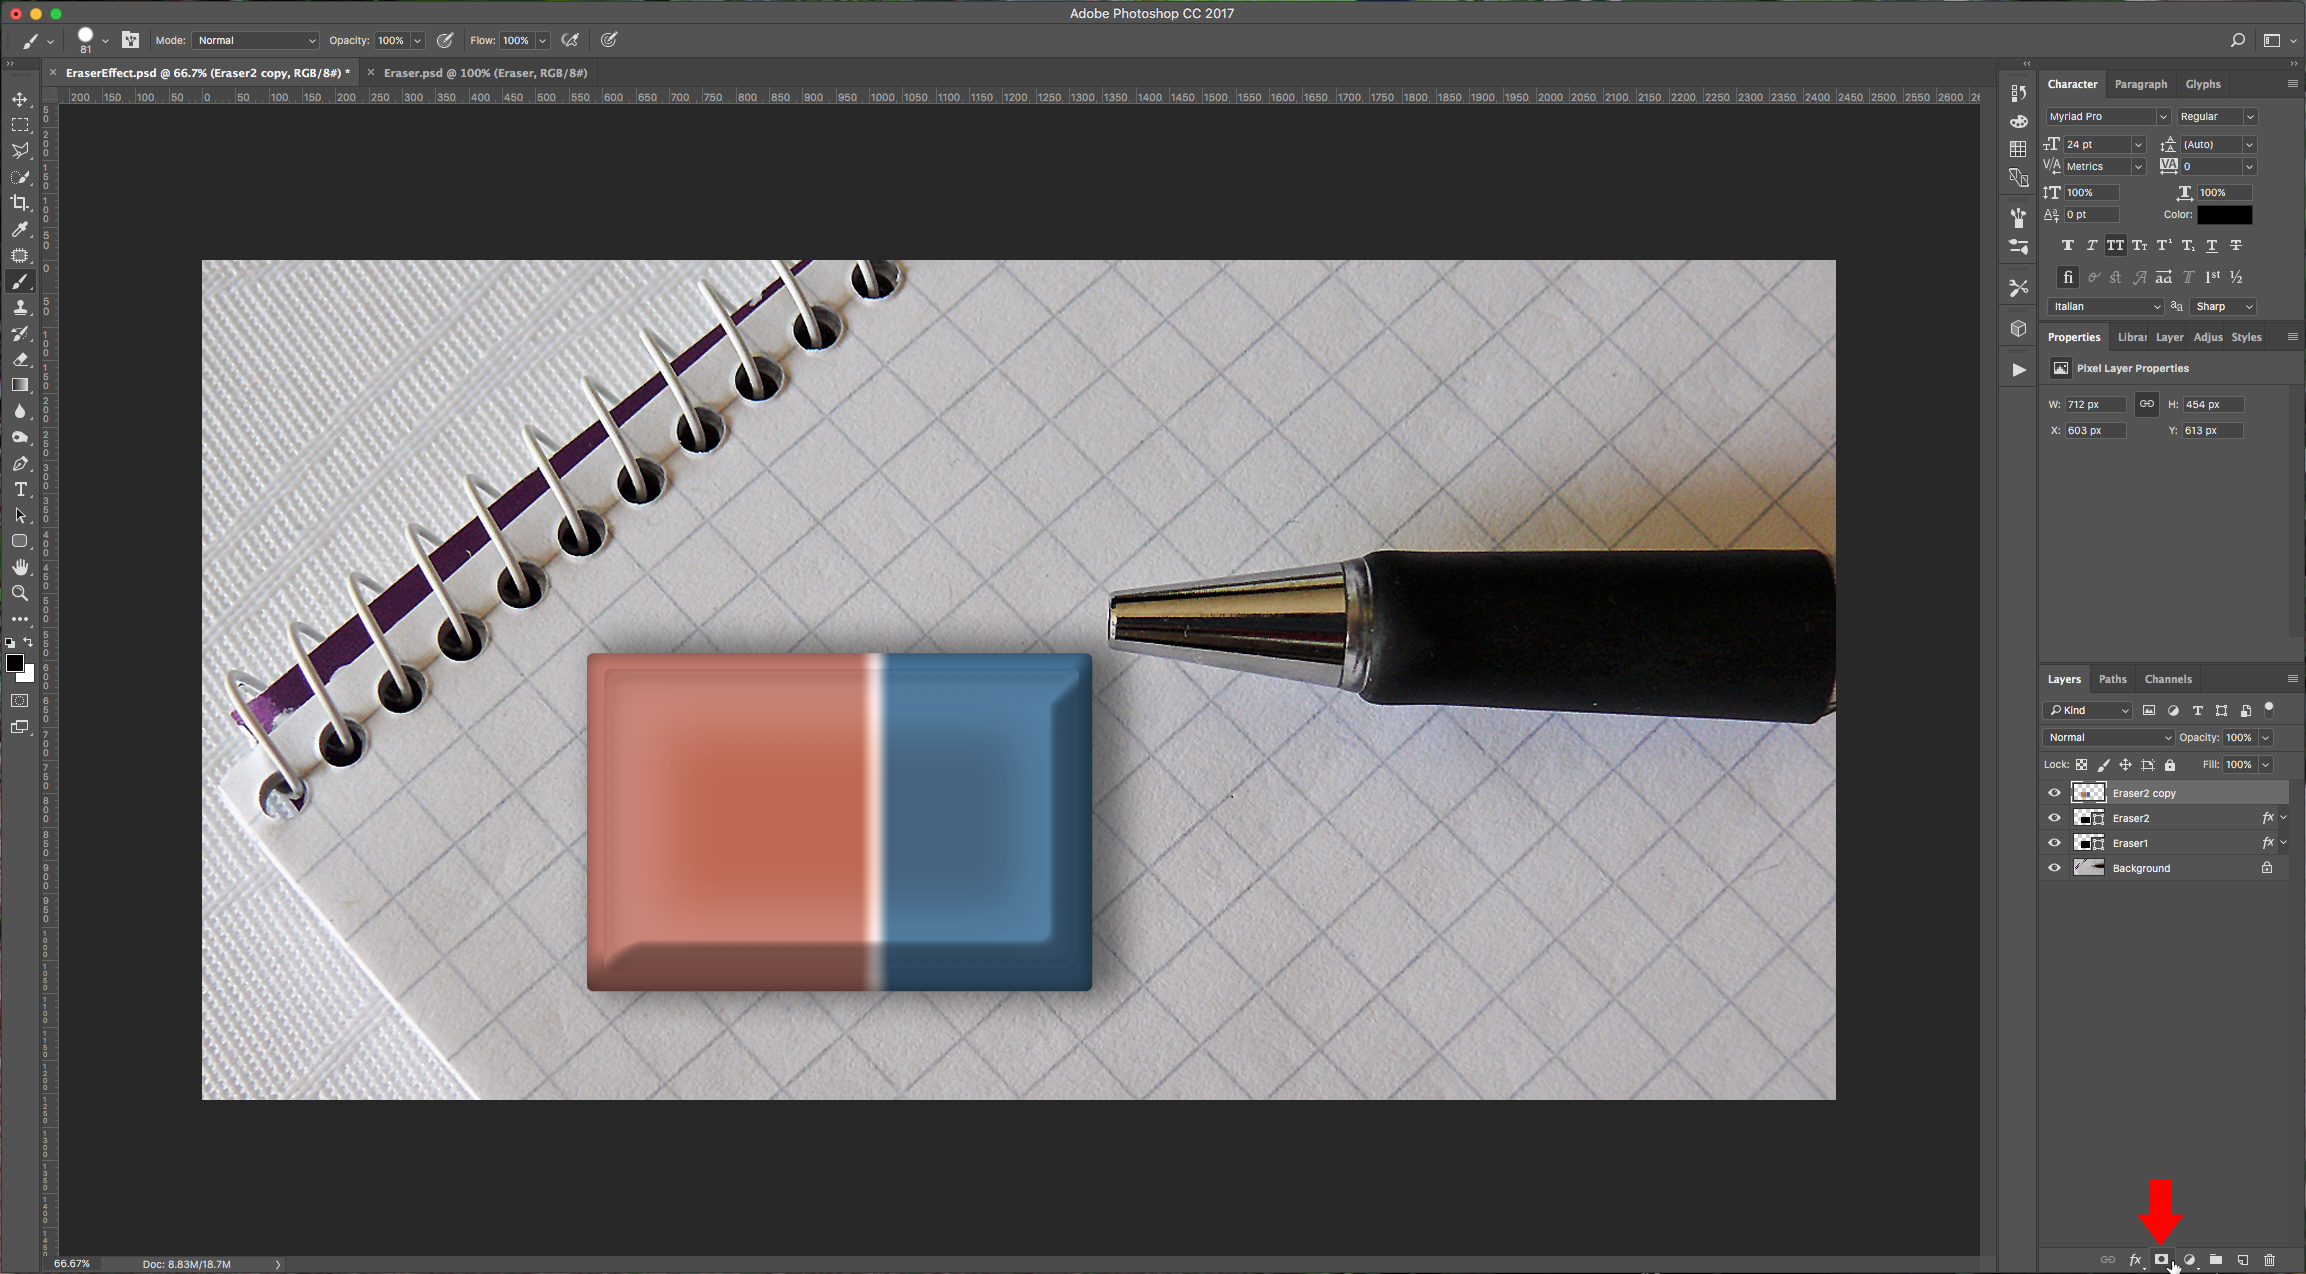
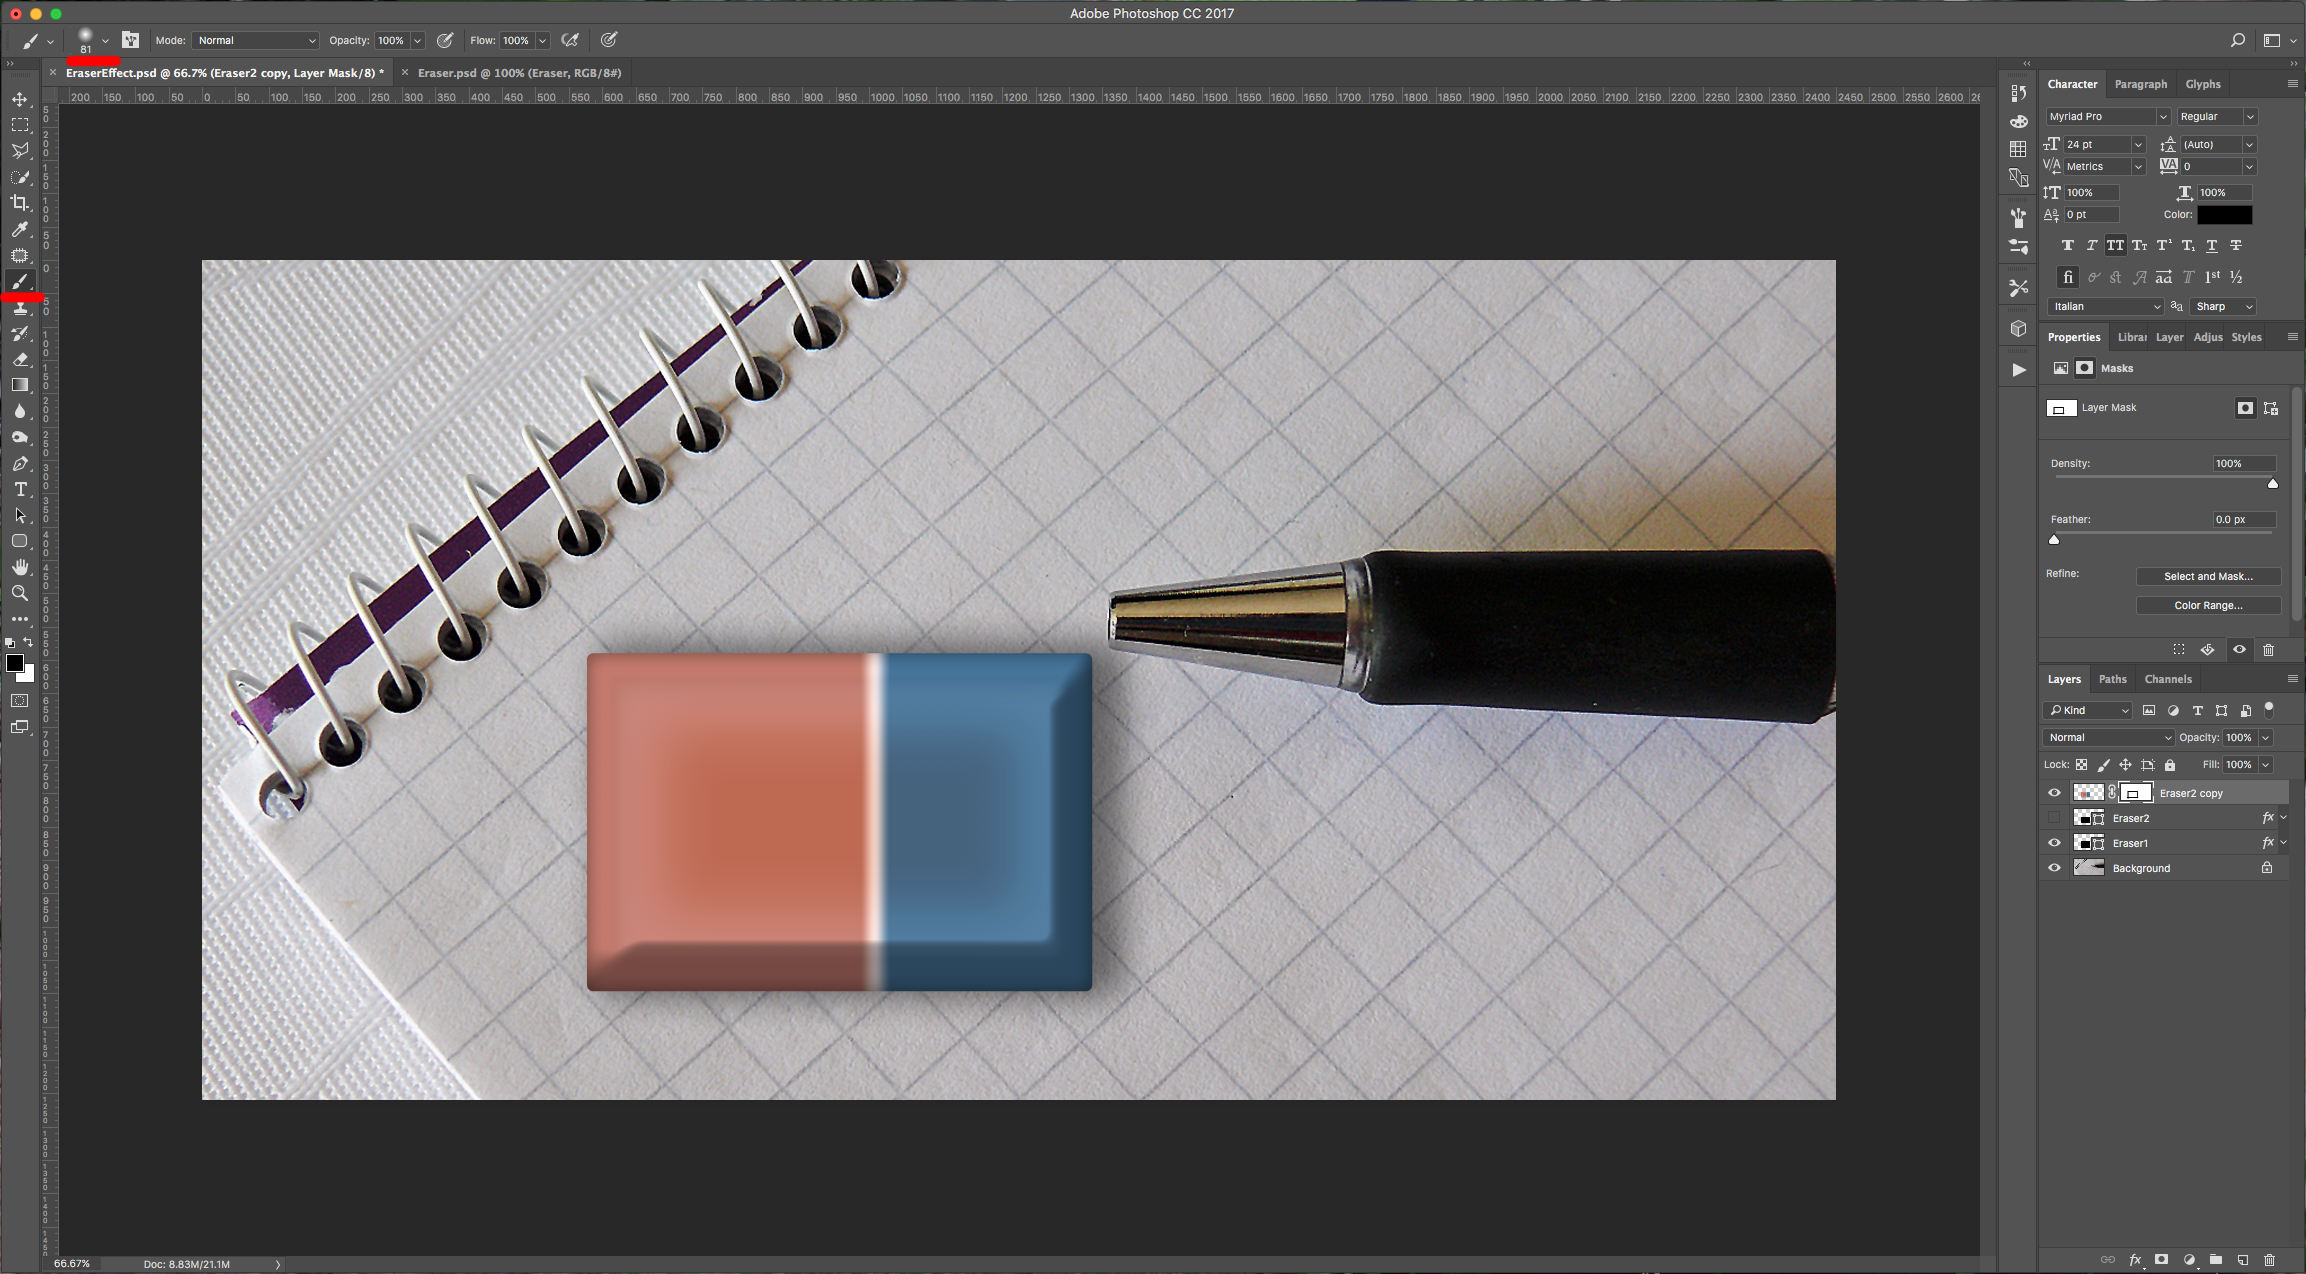
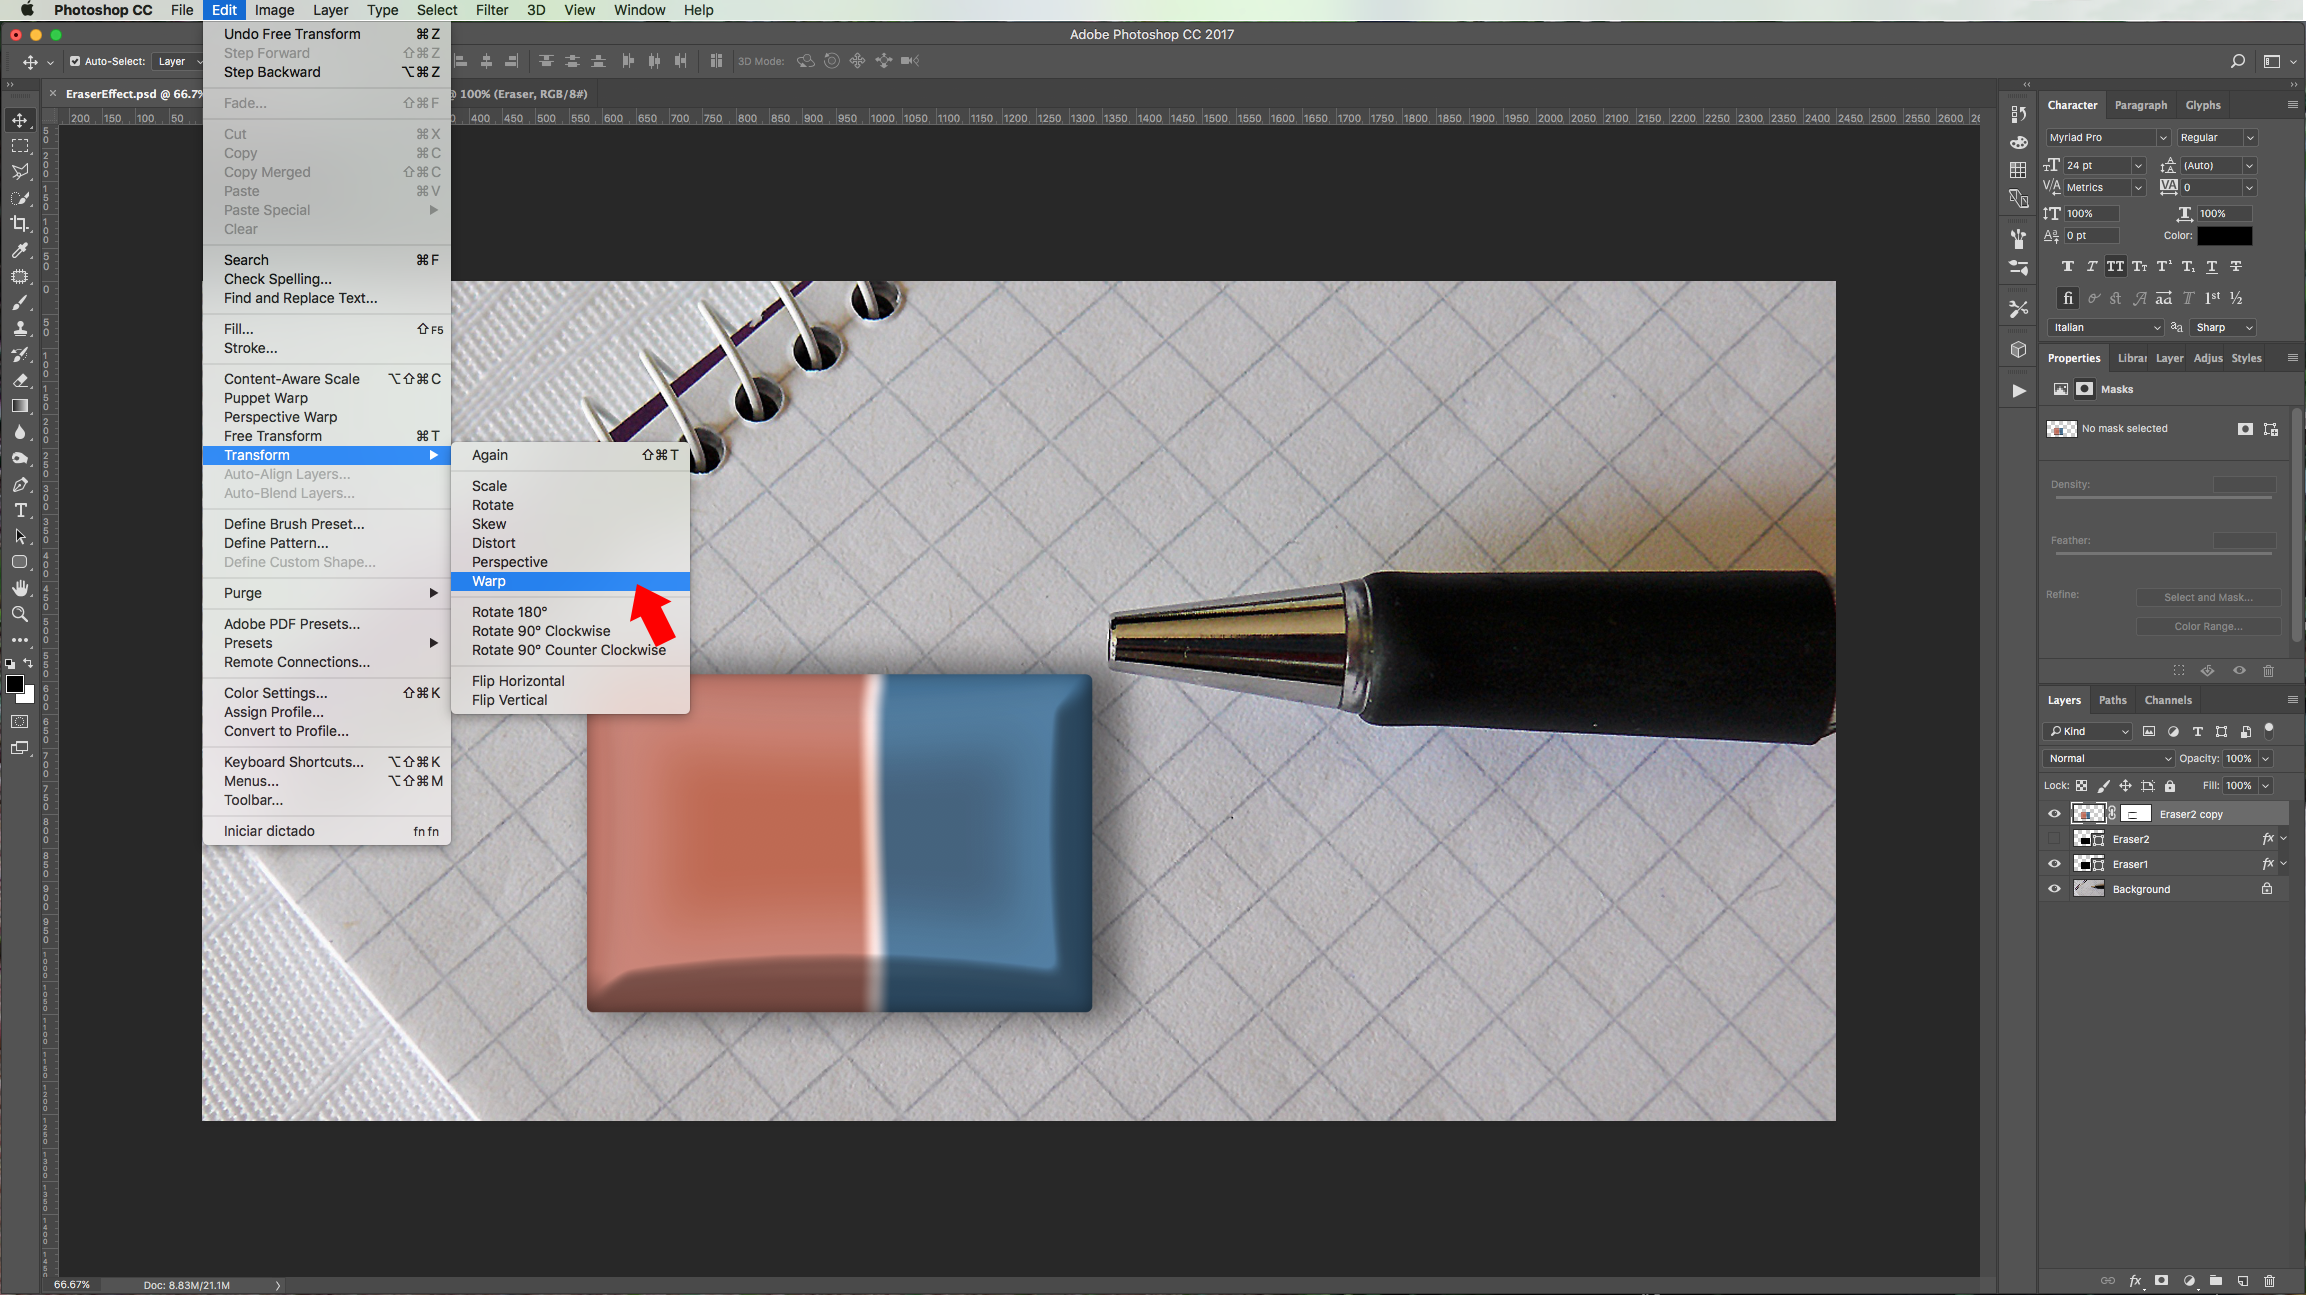
8 - Go to Edit > Transform > Warp and play around with your image until you get a more tridimensional look. Once you are happy, click “Enter” or on the little check mark button on the top menu.
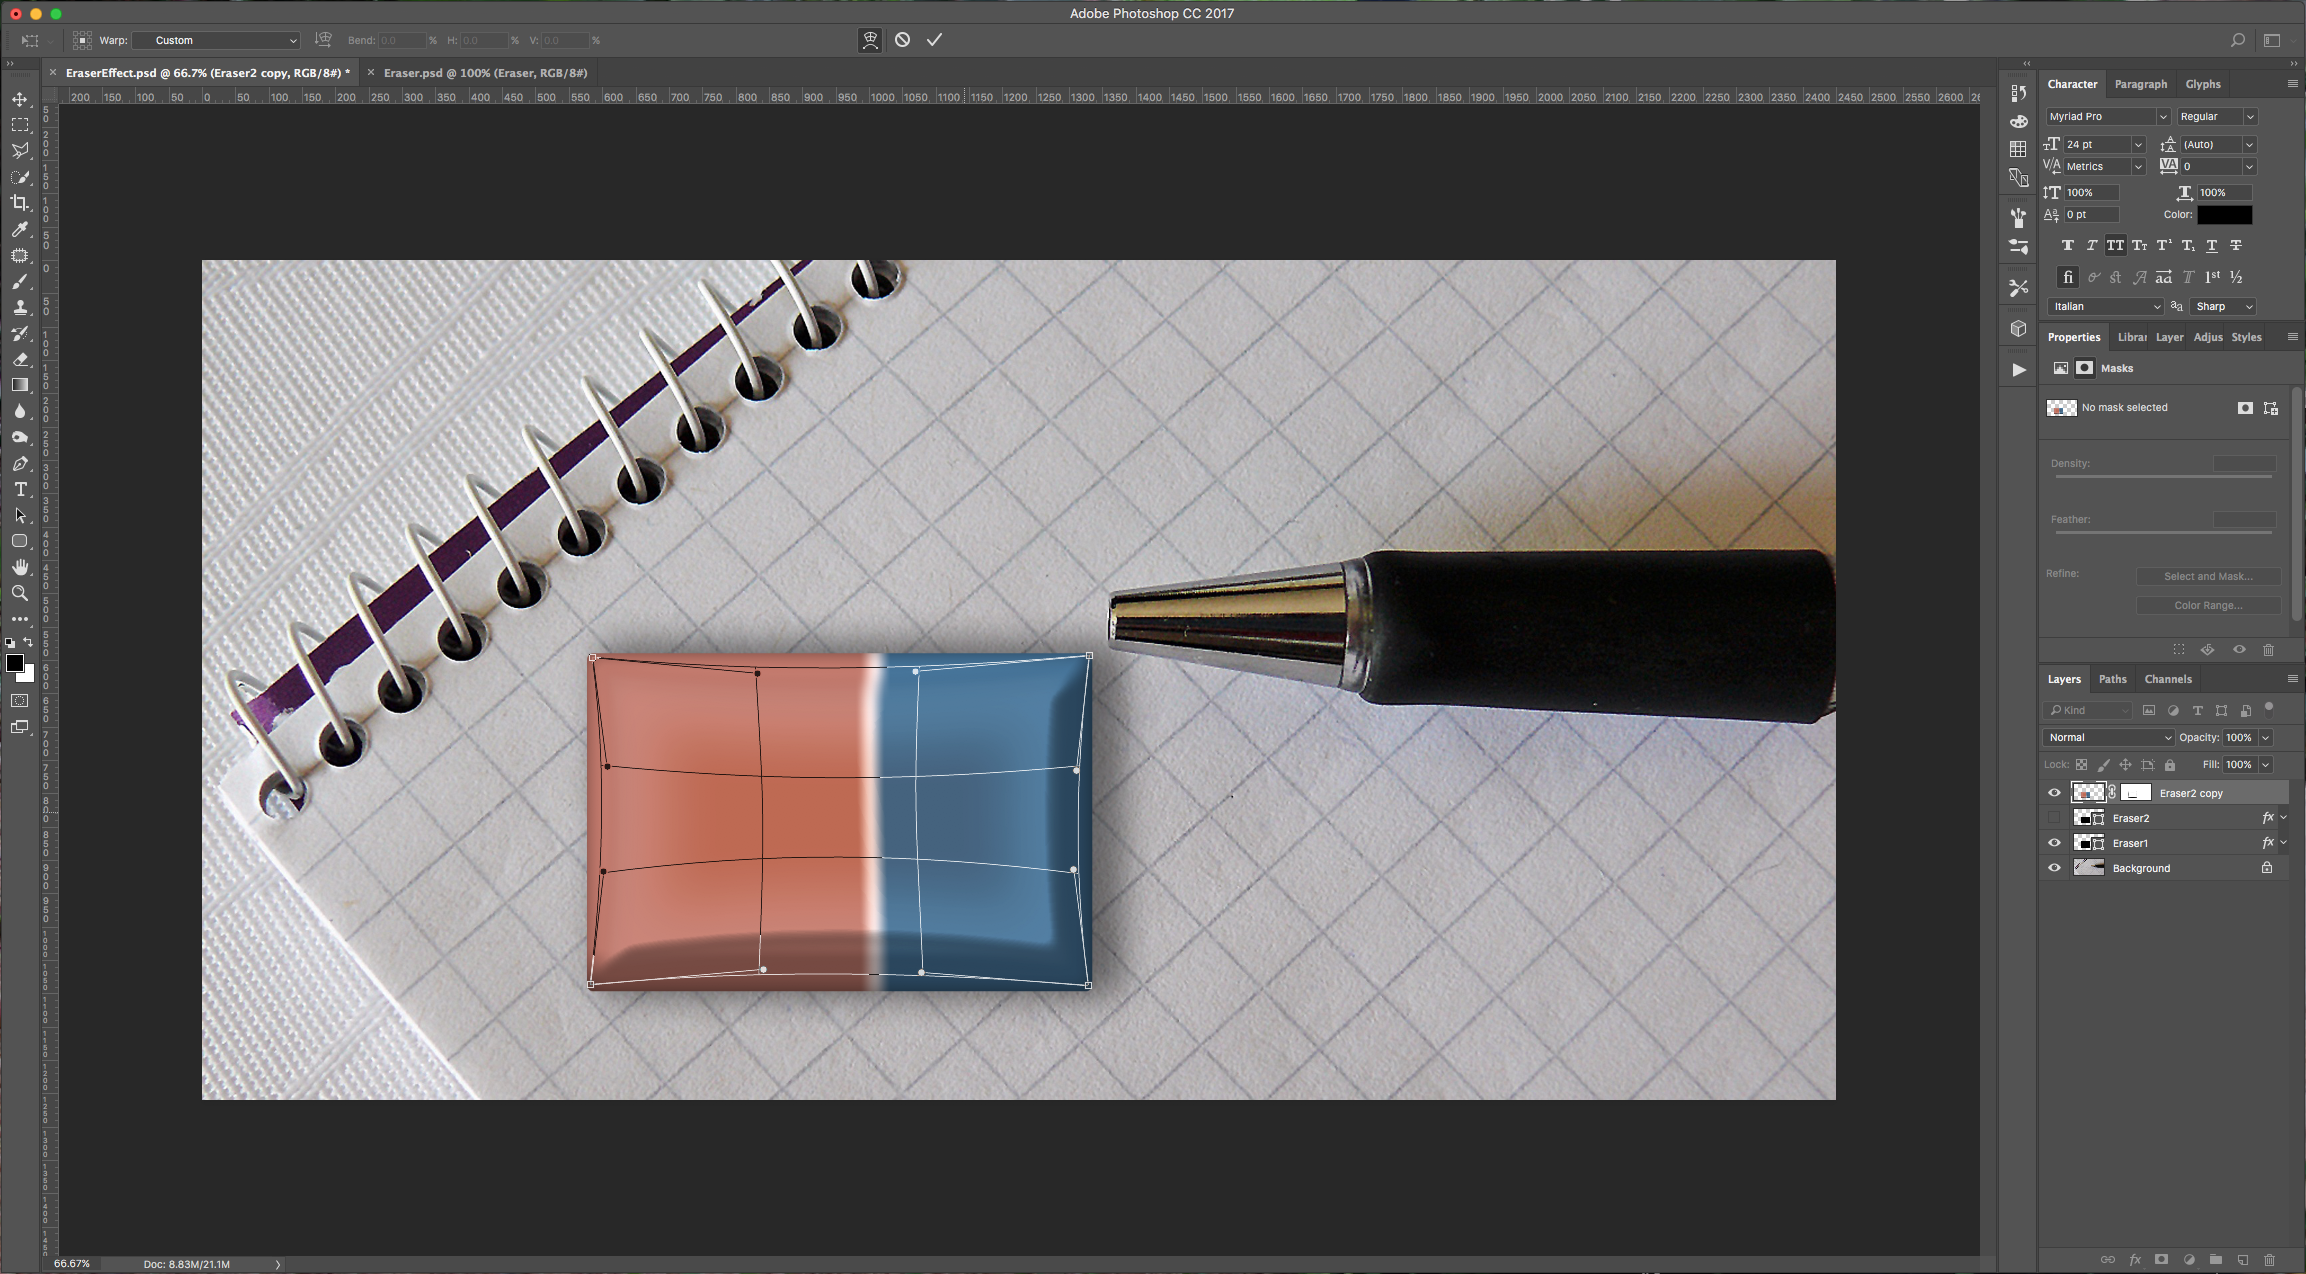
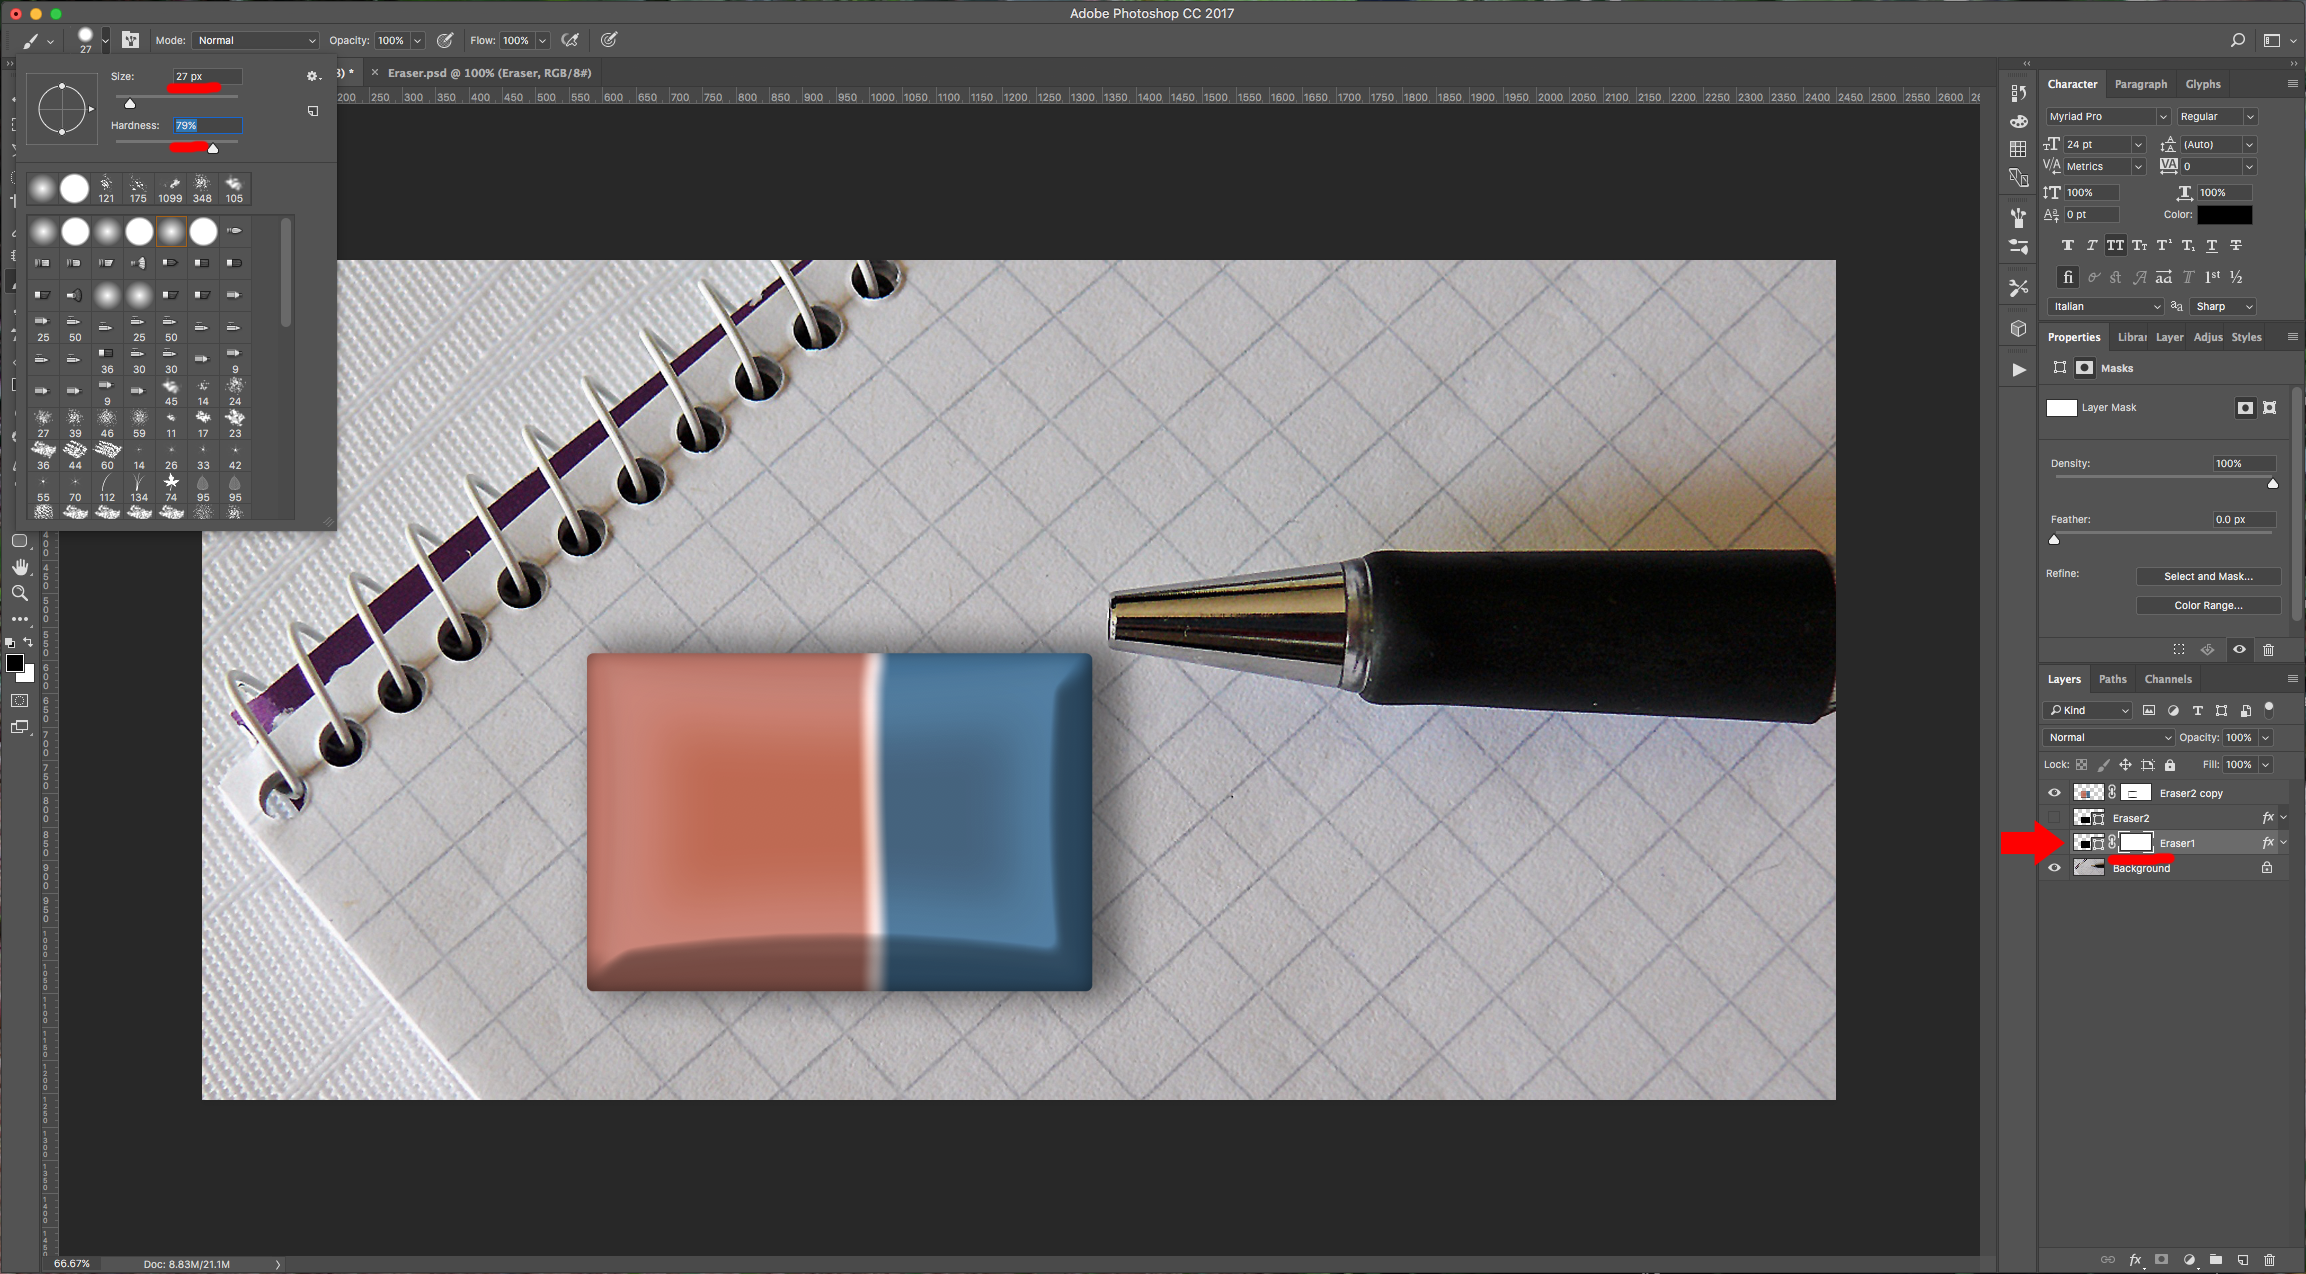
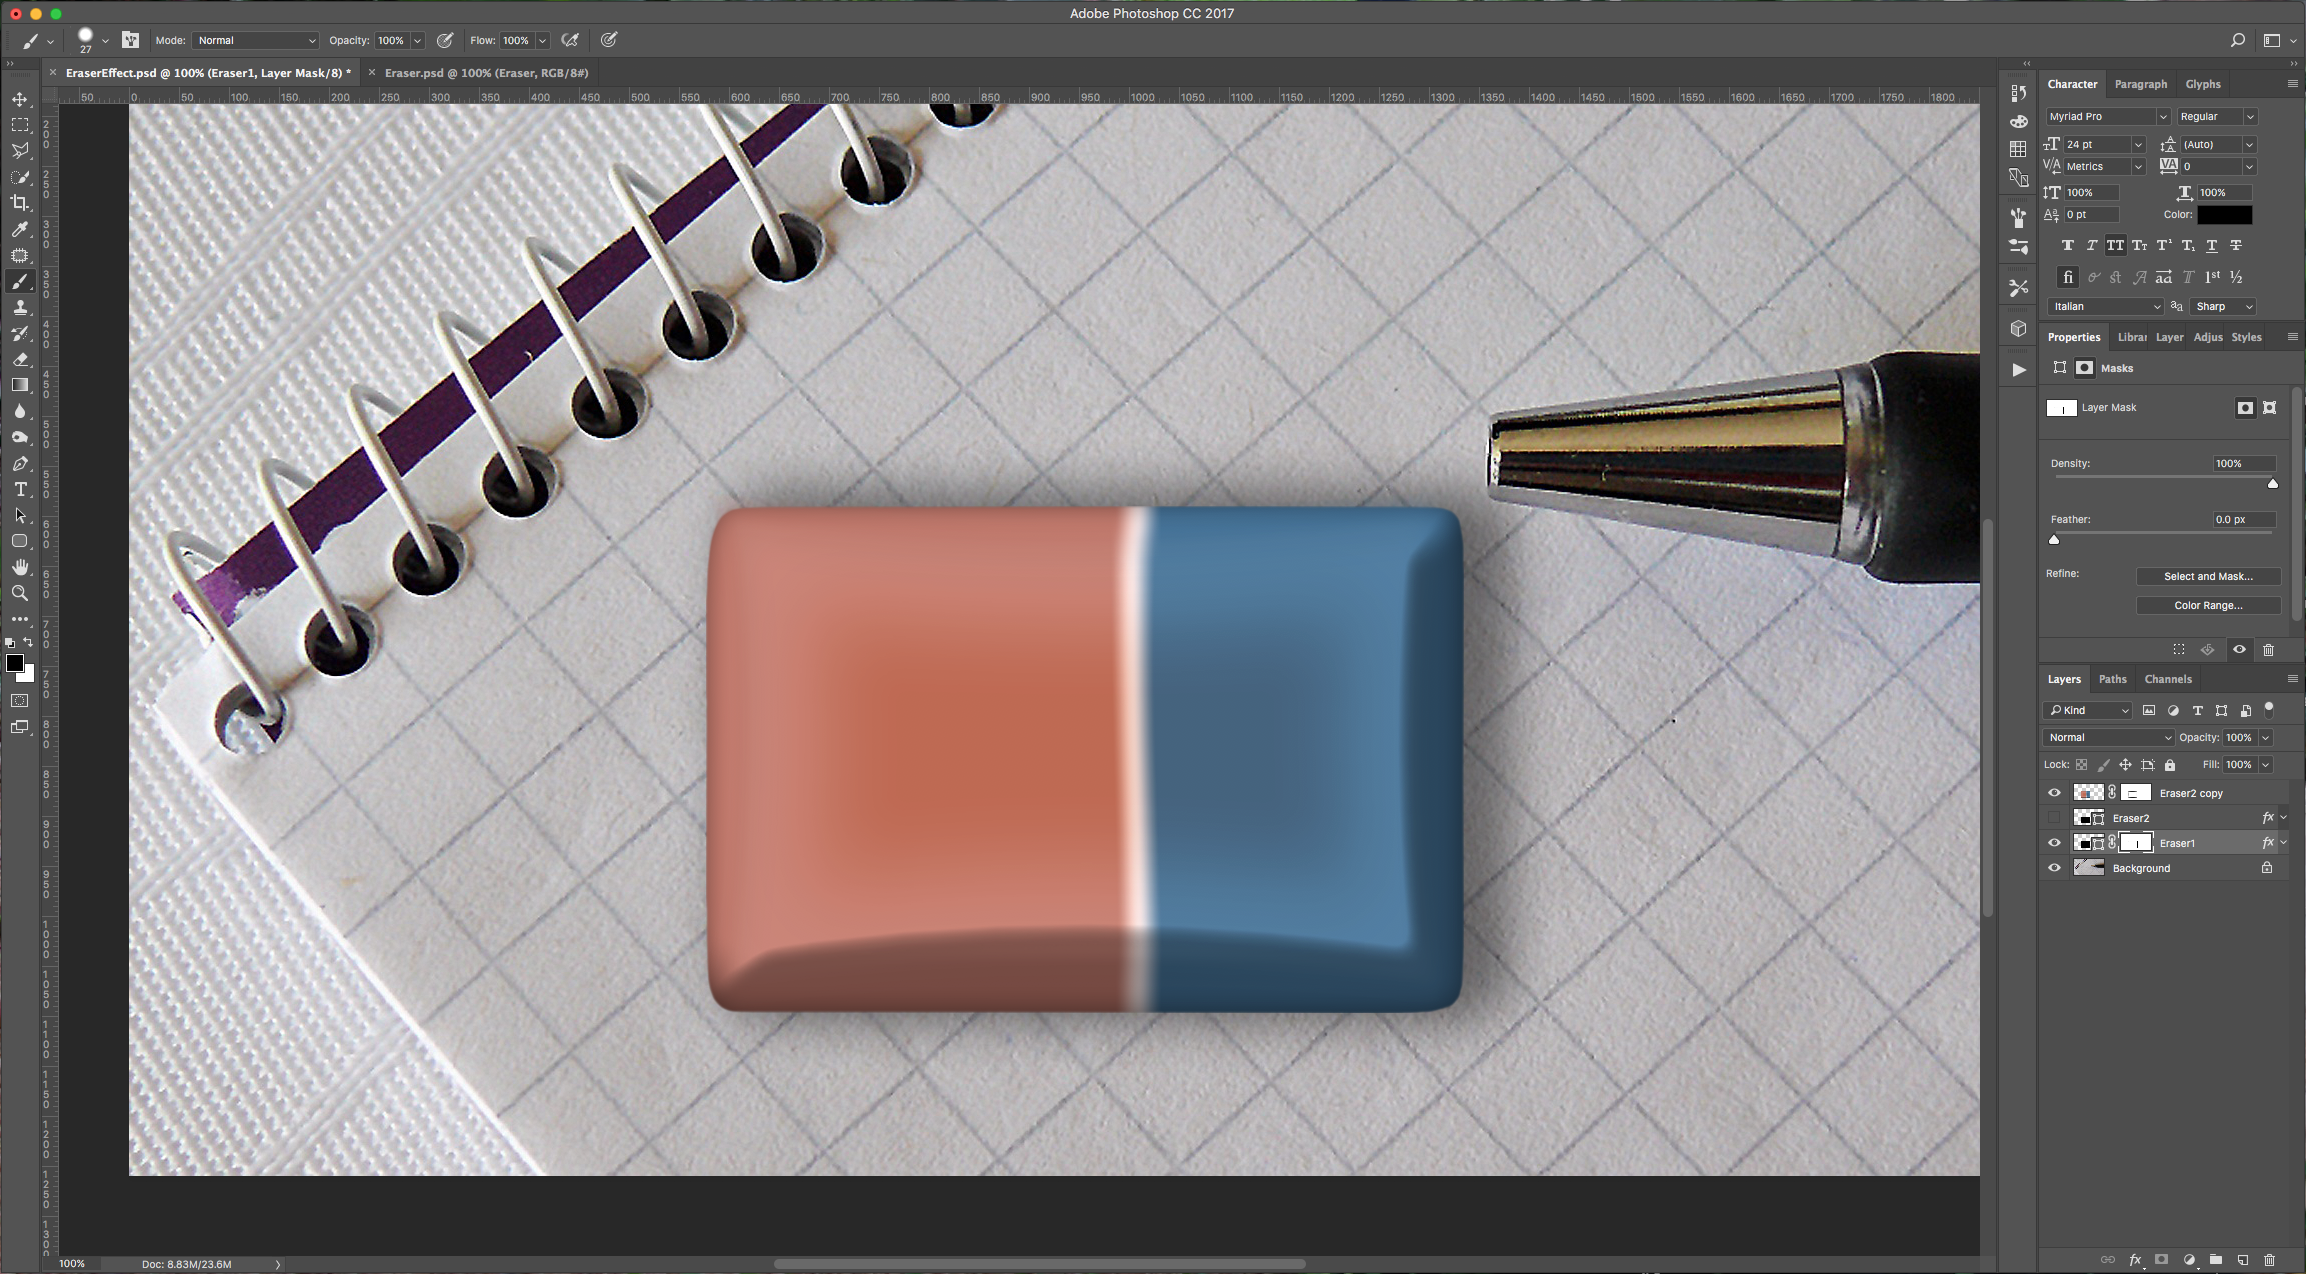
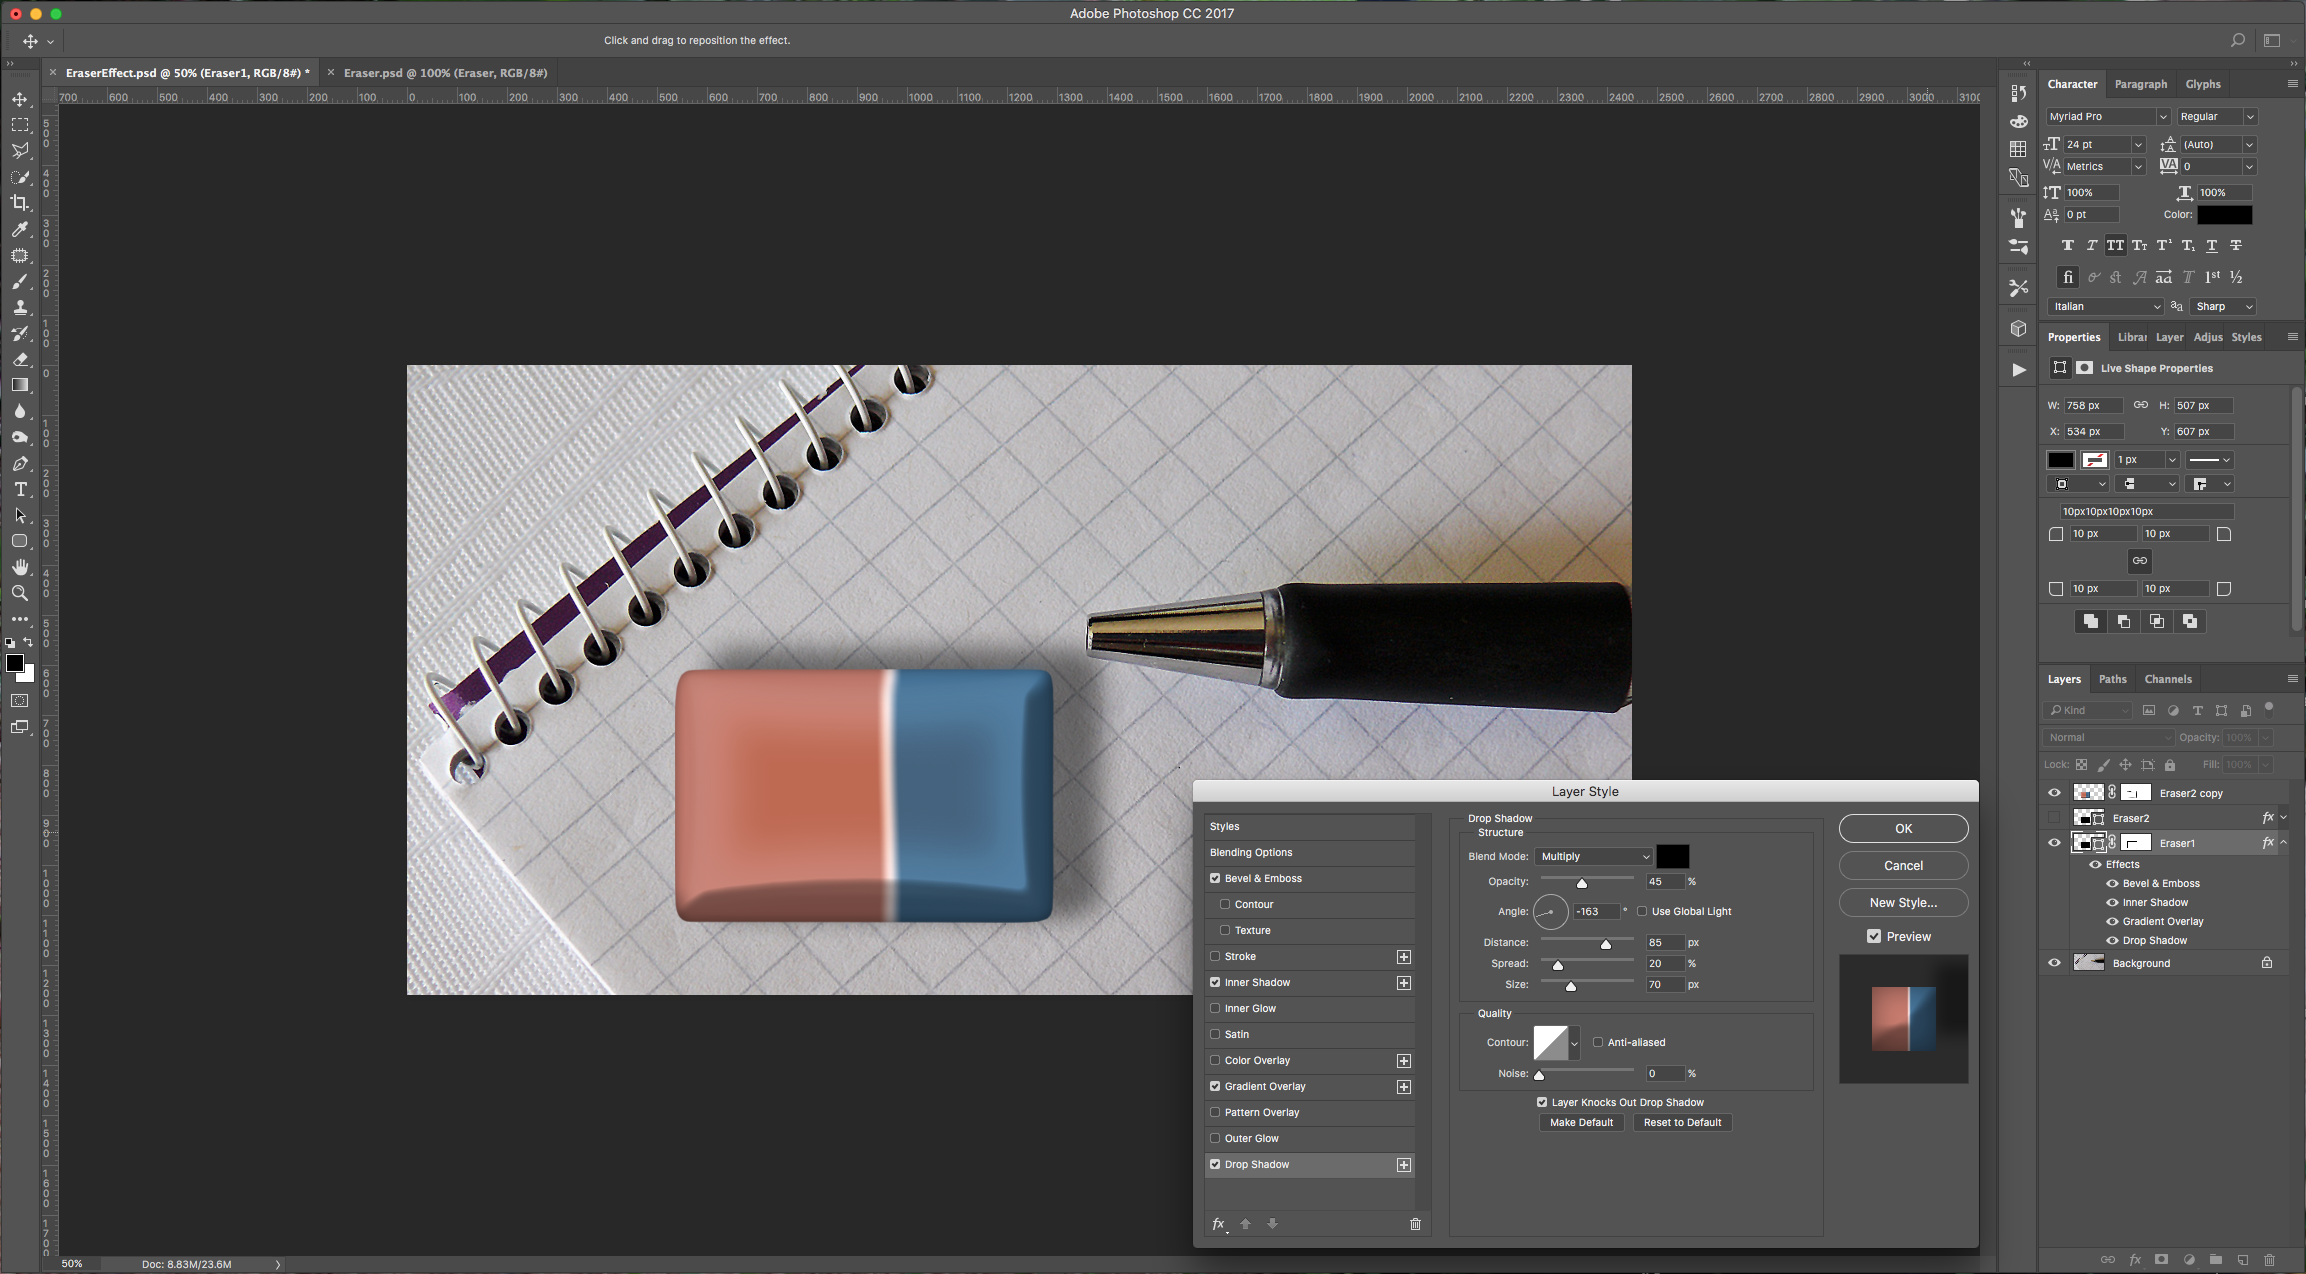
9 - Select your “Eraser1” Layer and add a “Layer Mask”. This time use a smaller brush with an intermediate “Hardness” (we used one with 27 Pixels in Size and 79% in “Hardness”). Fix the corners of your eraser to make more realistic. Double-click on the “Eraser1” Layer and change the “Drop Shadow” if needed.
10 - Create a “New Layer” by clicking the button at the bottom of the “Layers” Panel. Select the “Type Tool” (T), choose a font (we used Myriad Pro Bold) and type some text using black as “Fill” color.
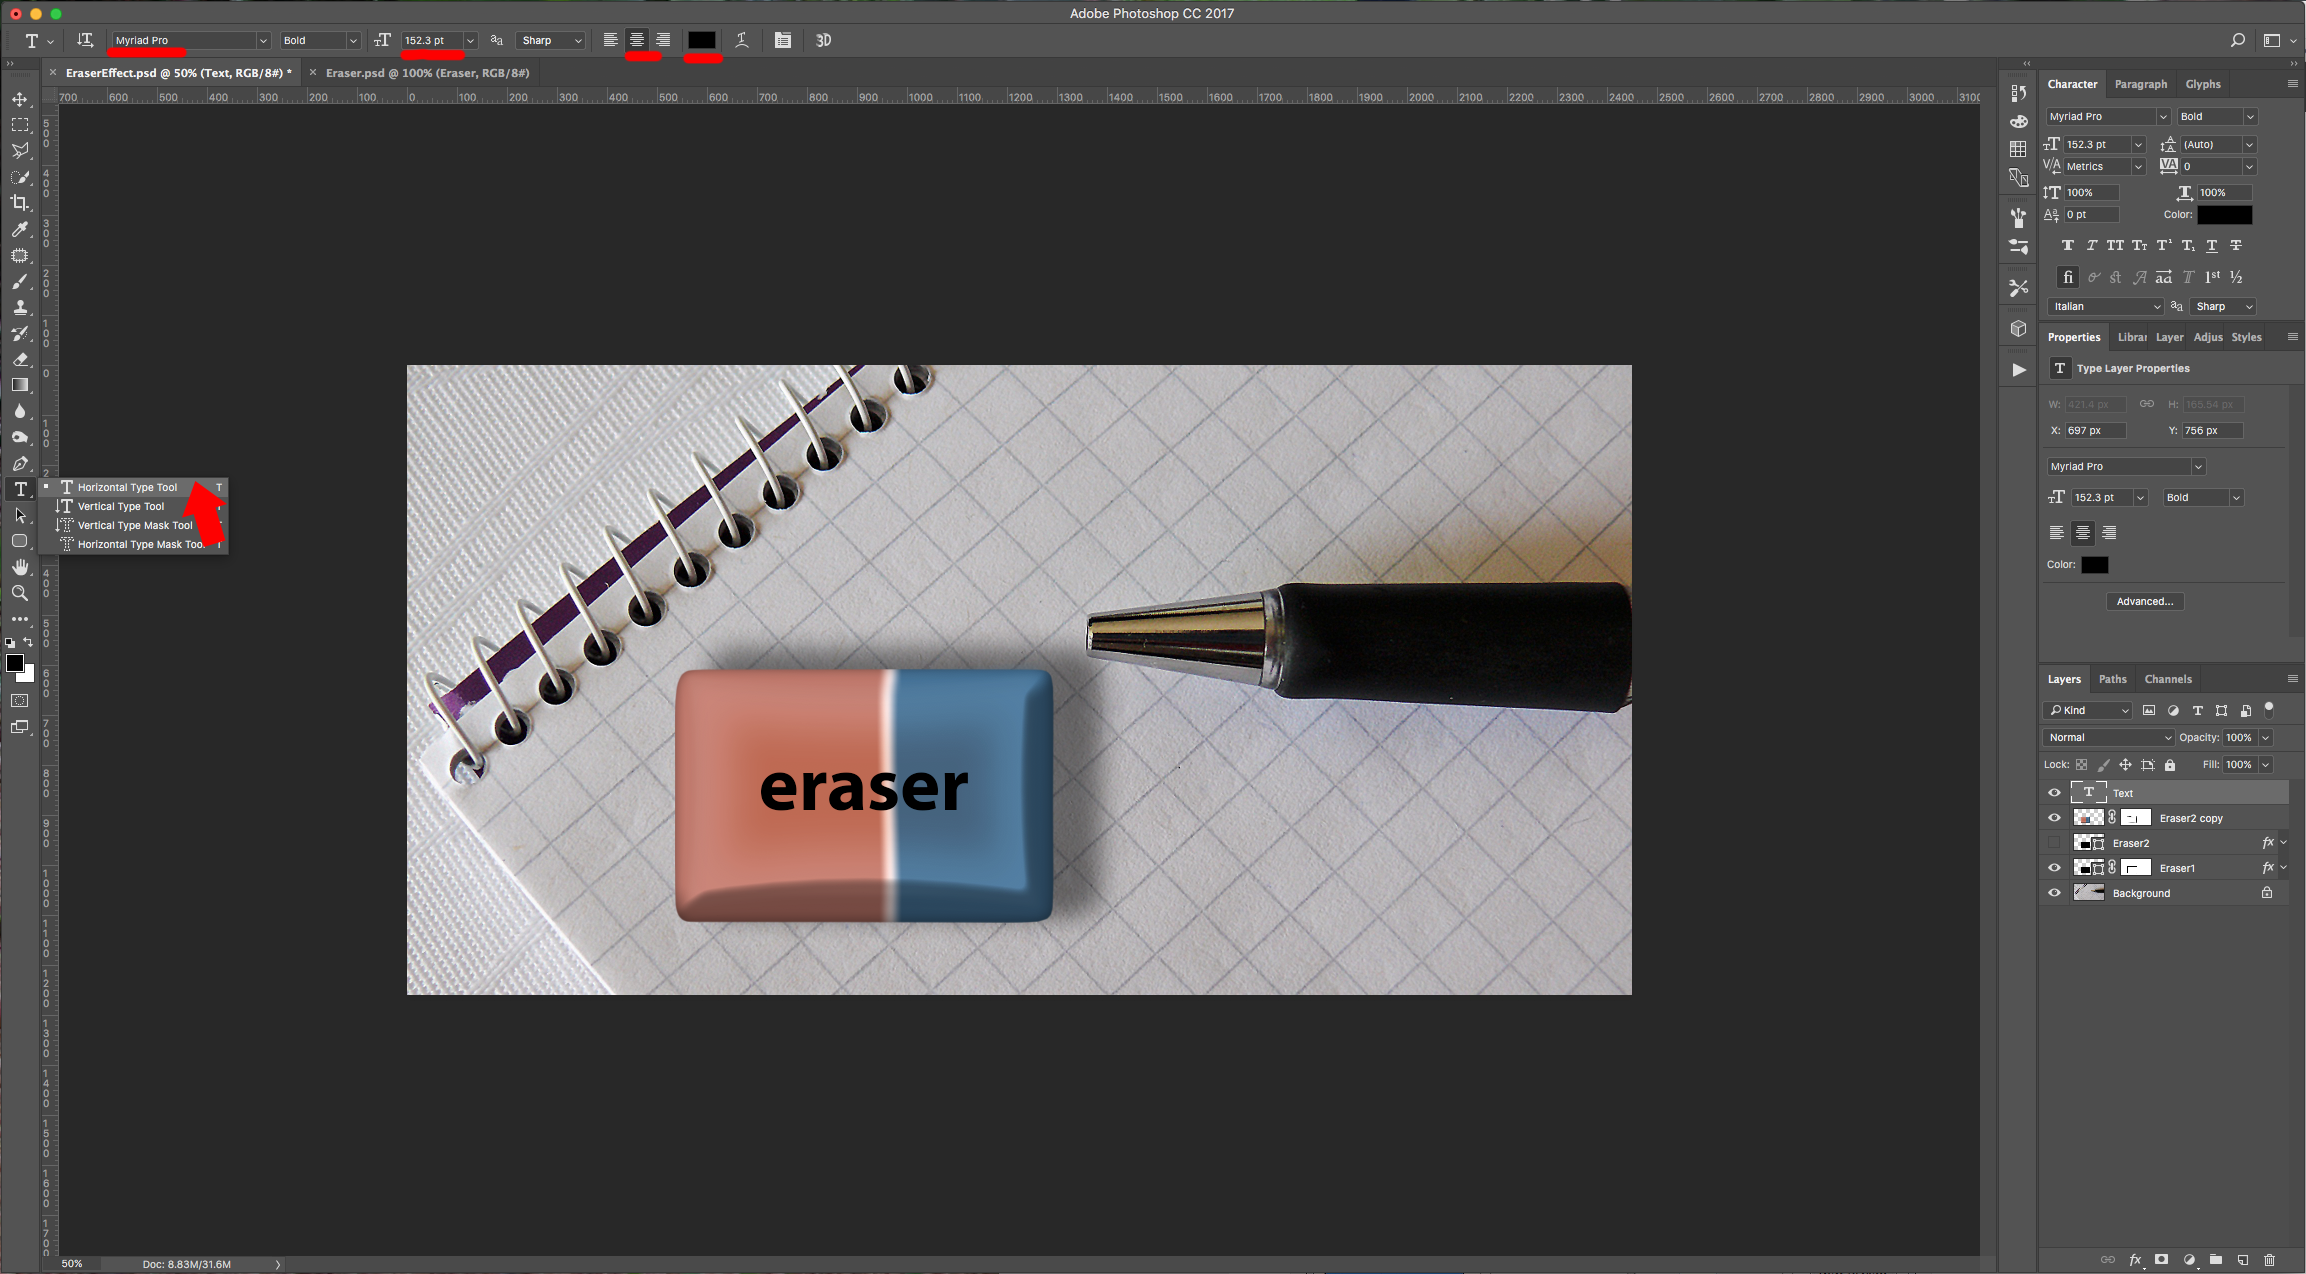
11 - Double-click on your Text Layer and apply the following “Layer Styles:
Stroke: (#393838 y #797878)
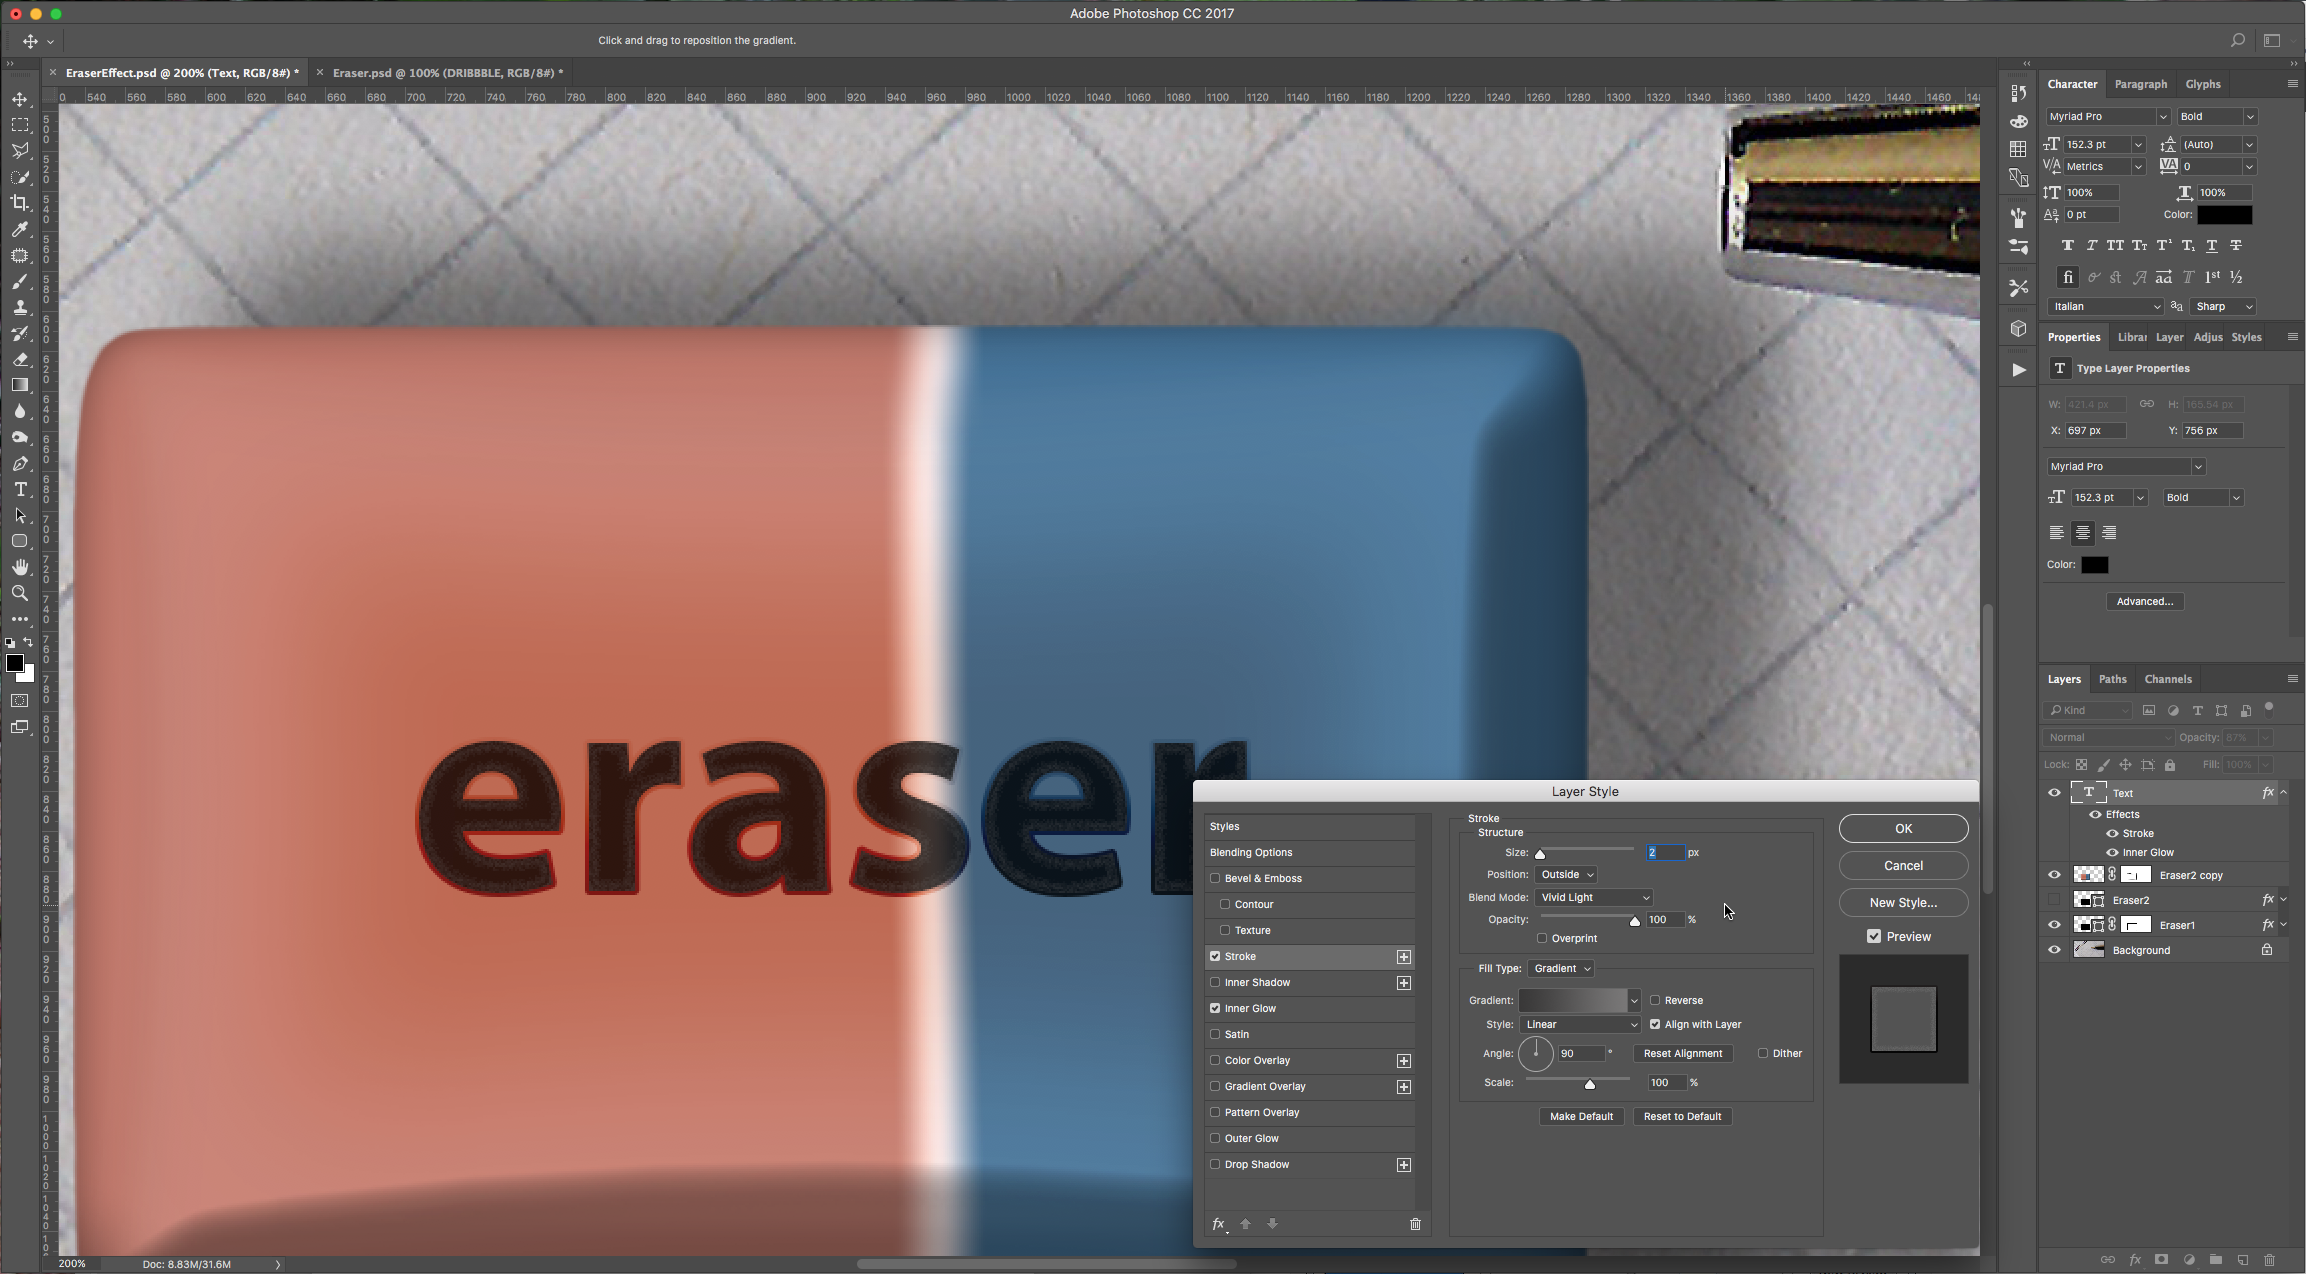
Inner Glow:
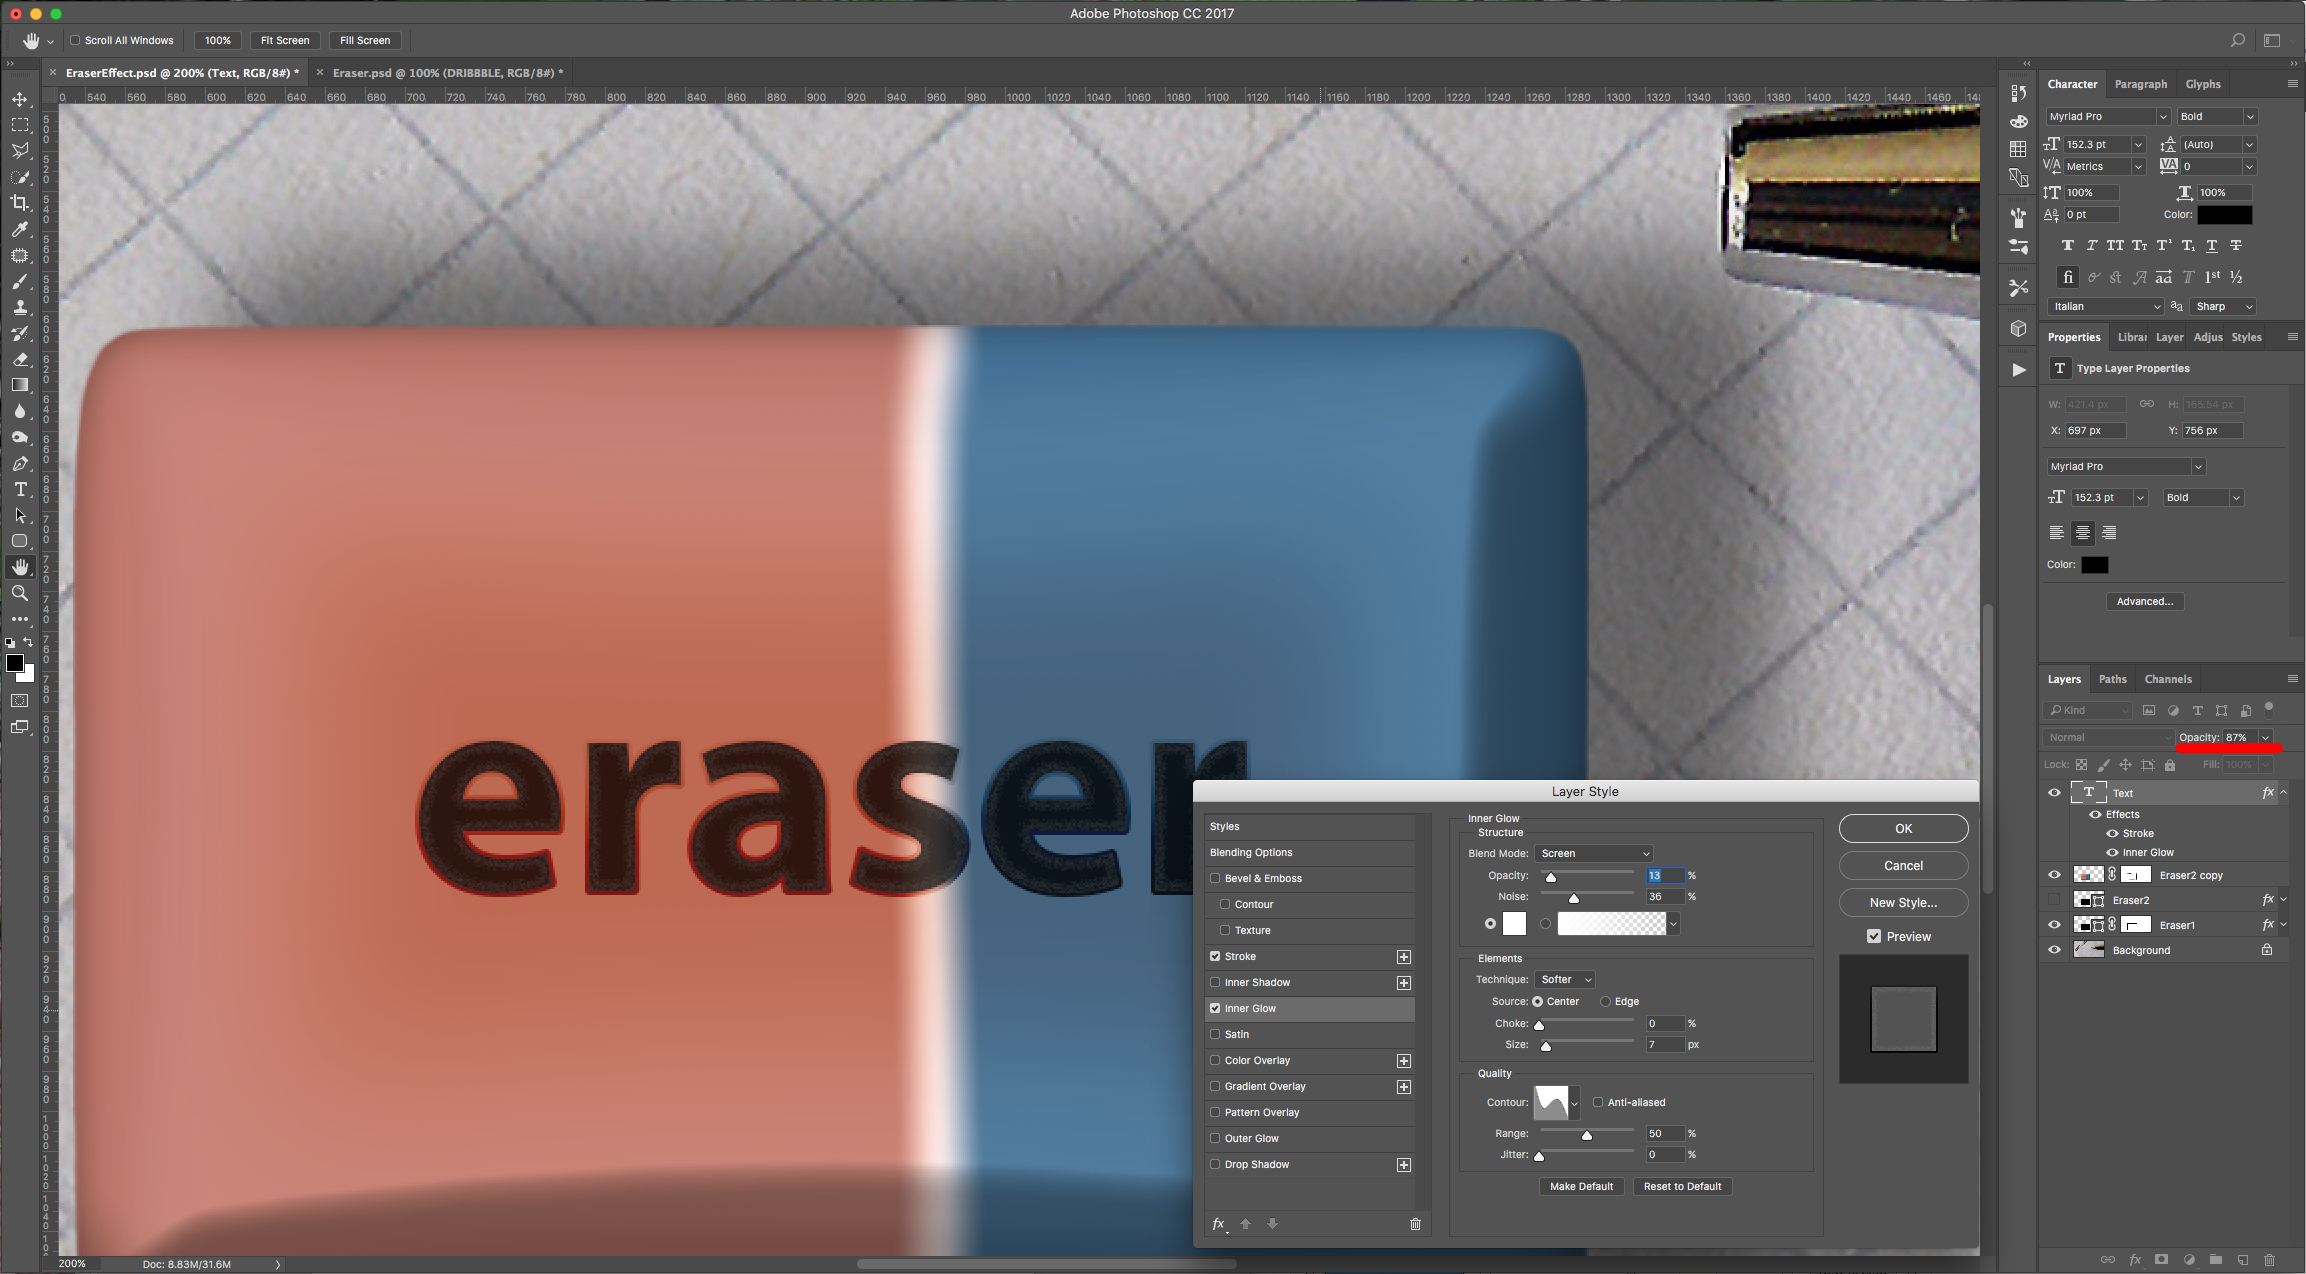
Lower the “Opacity” to 87%.
12 - Duplicate your Text Layer, erase the “Layer Styles” of your original “Text” layer and change the “Fill” color to white. Change the “Blending Mode” to “Soft Light” and move it a few clicks down and right.
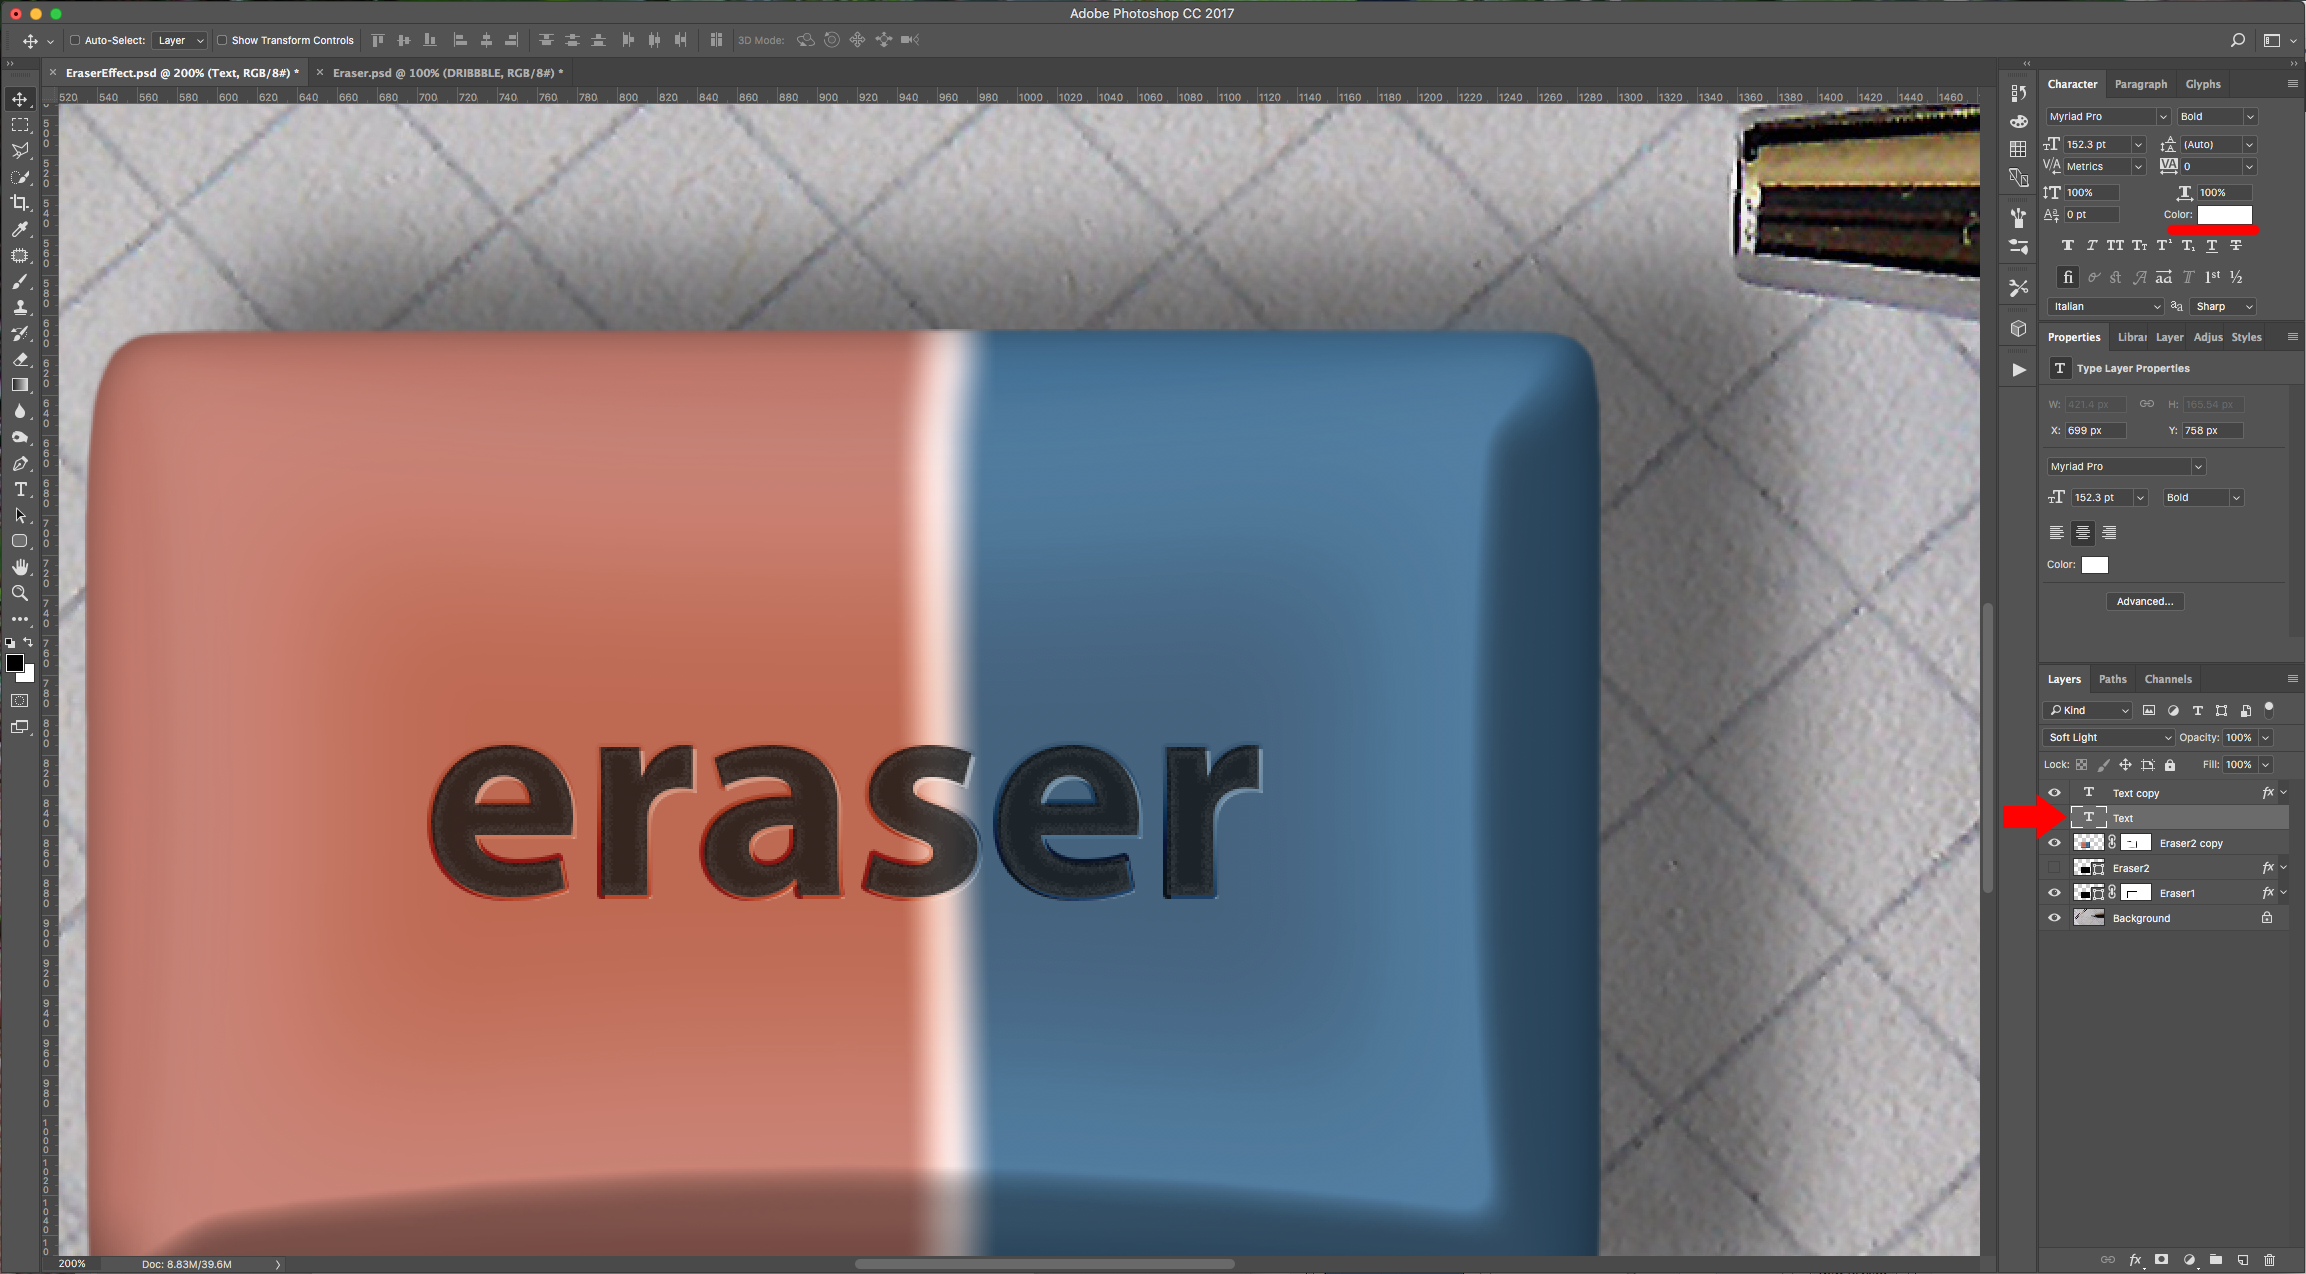
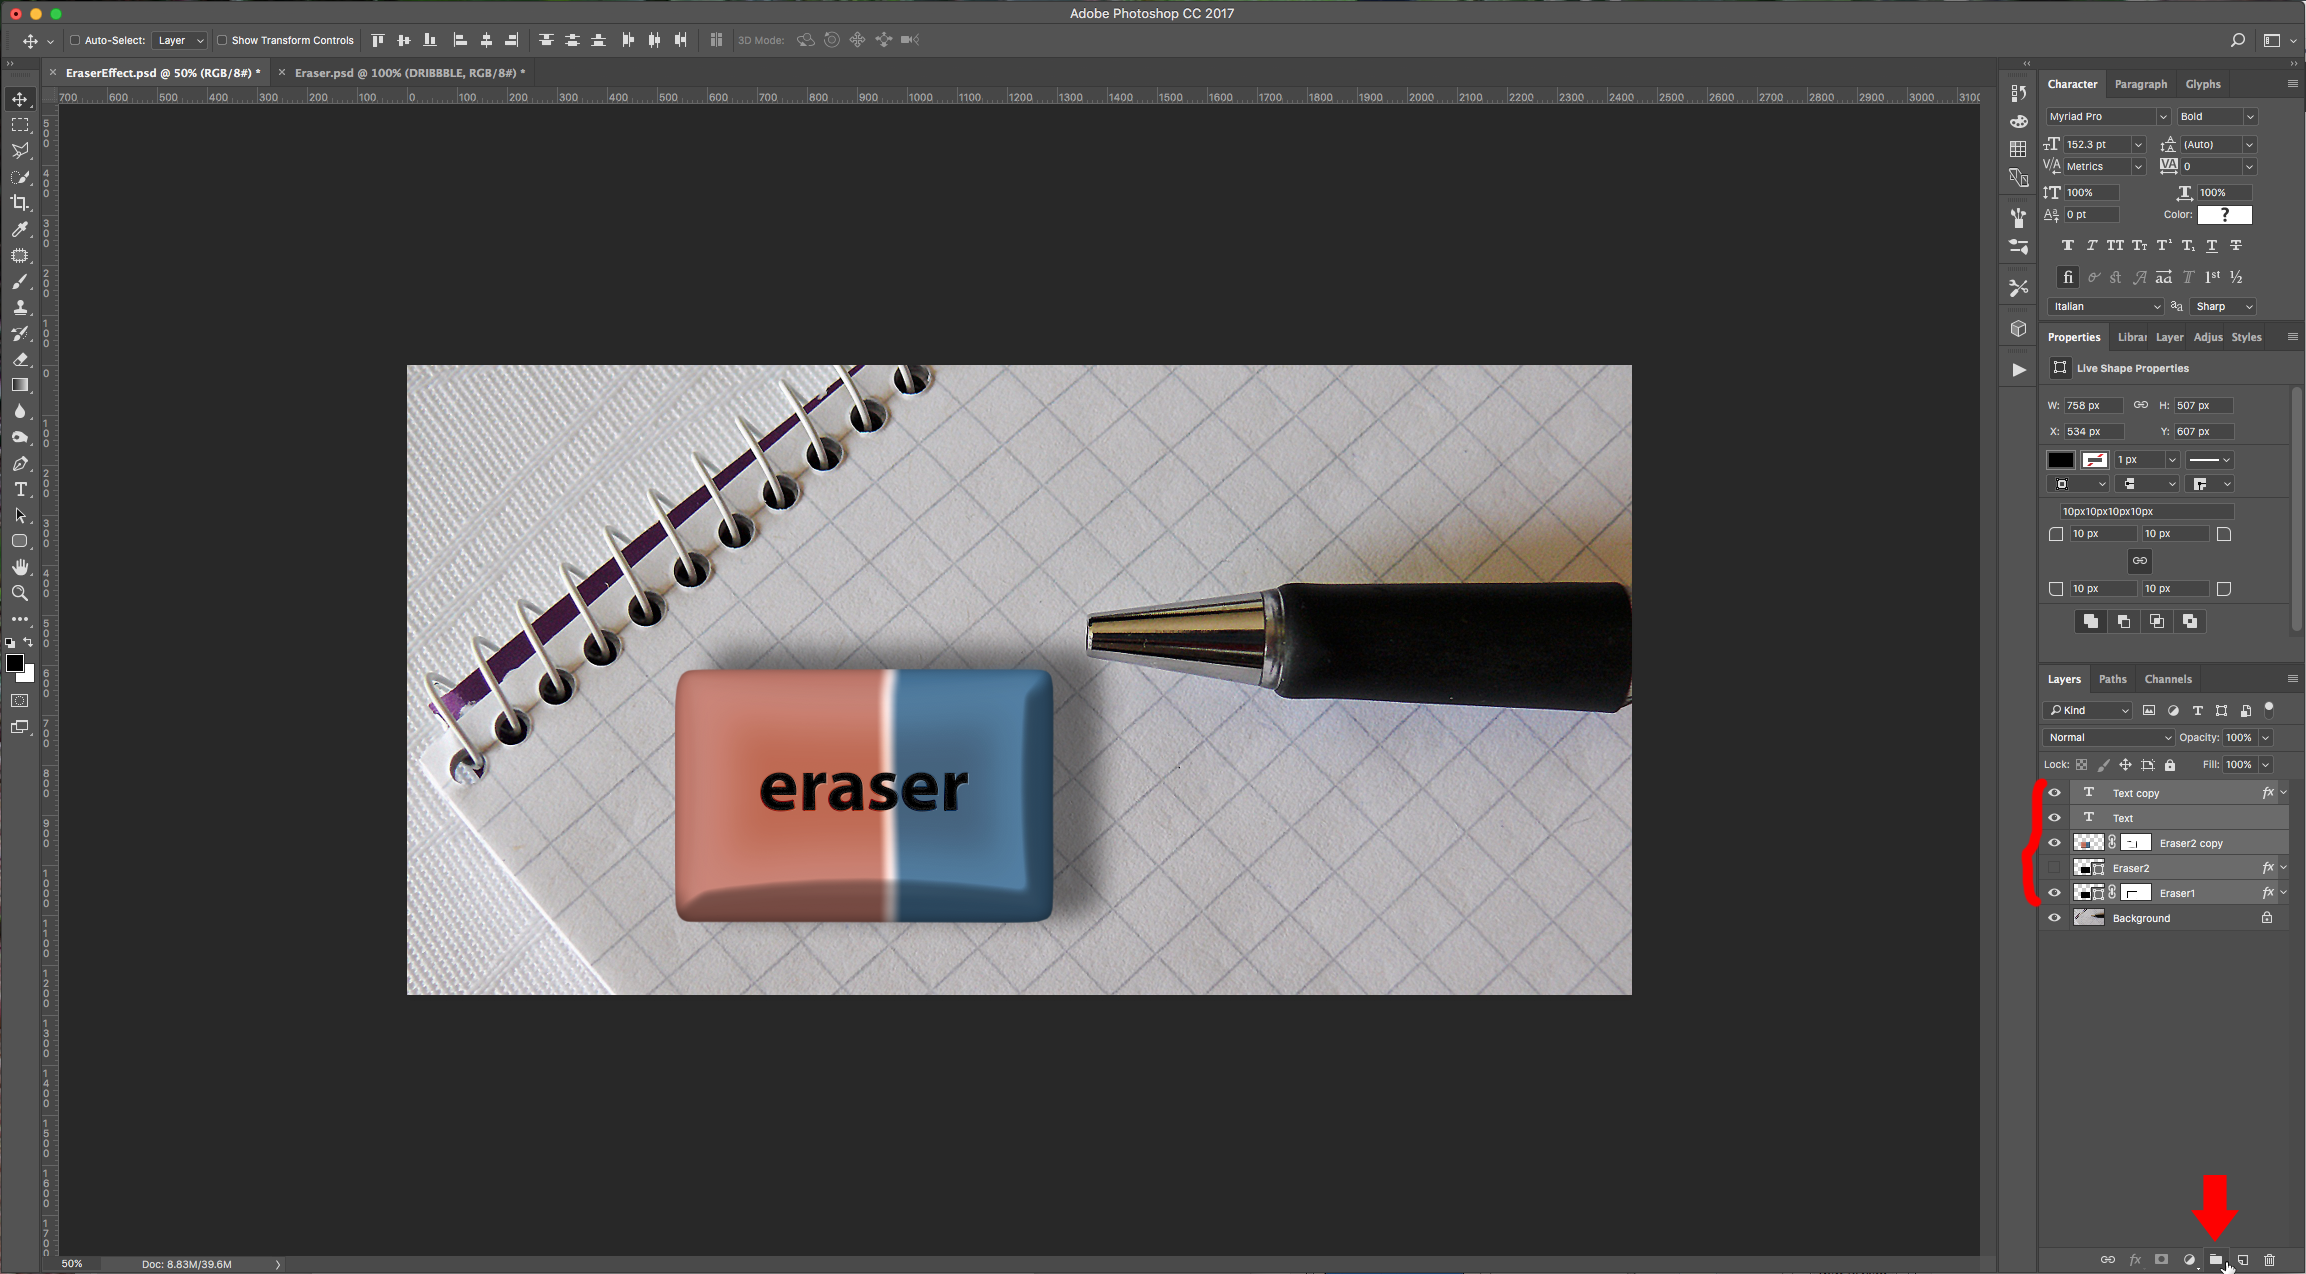
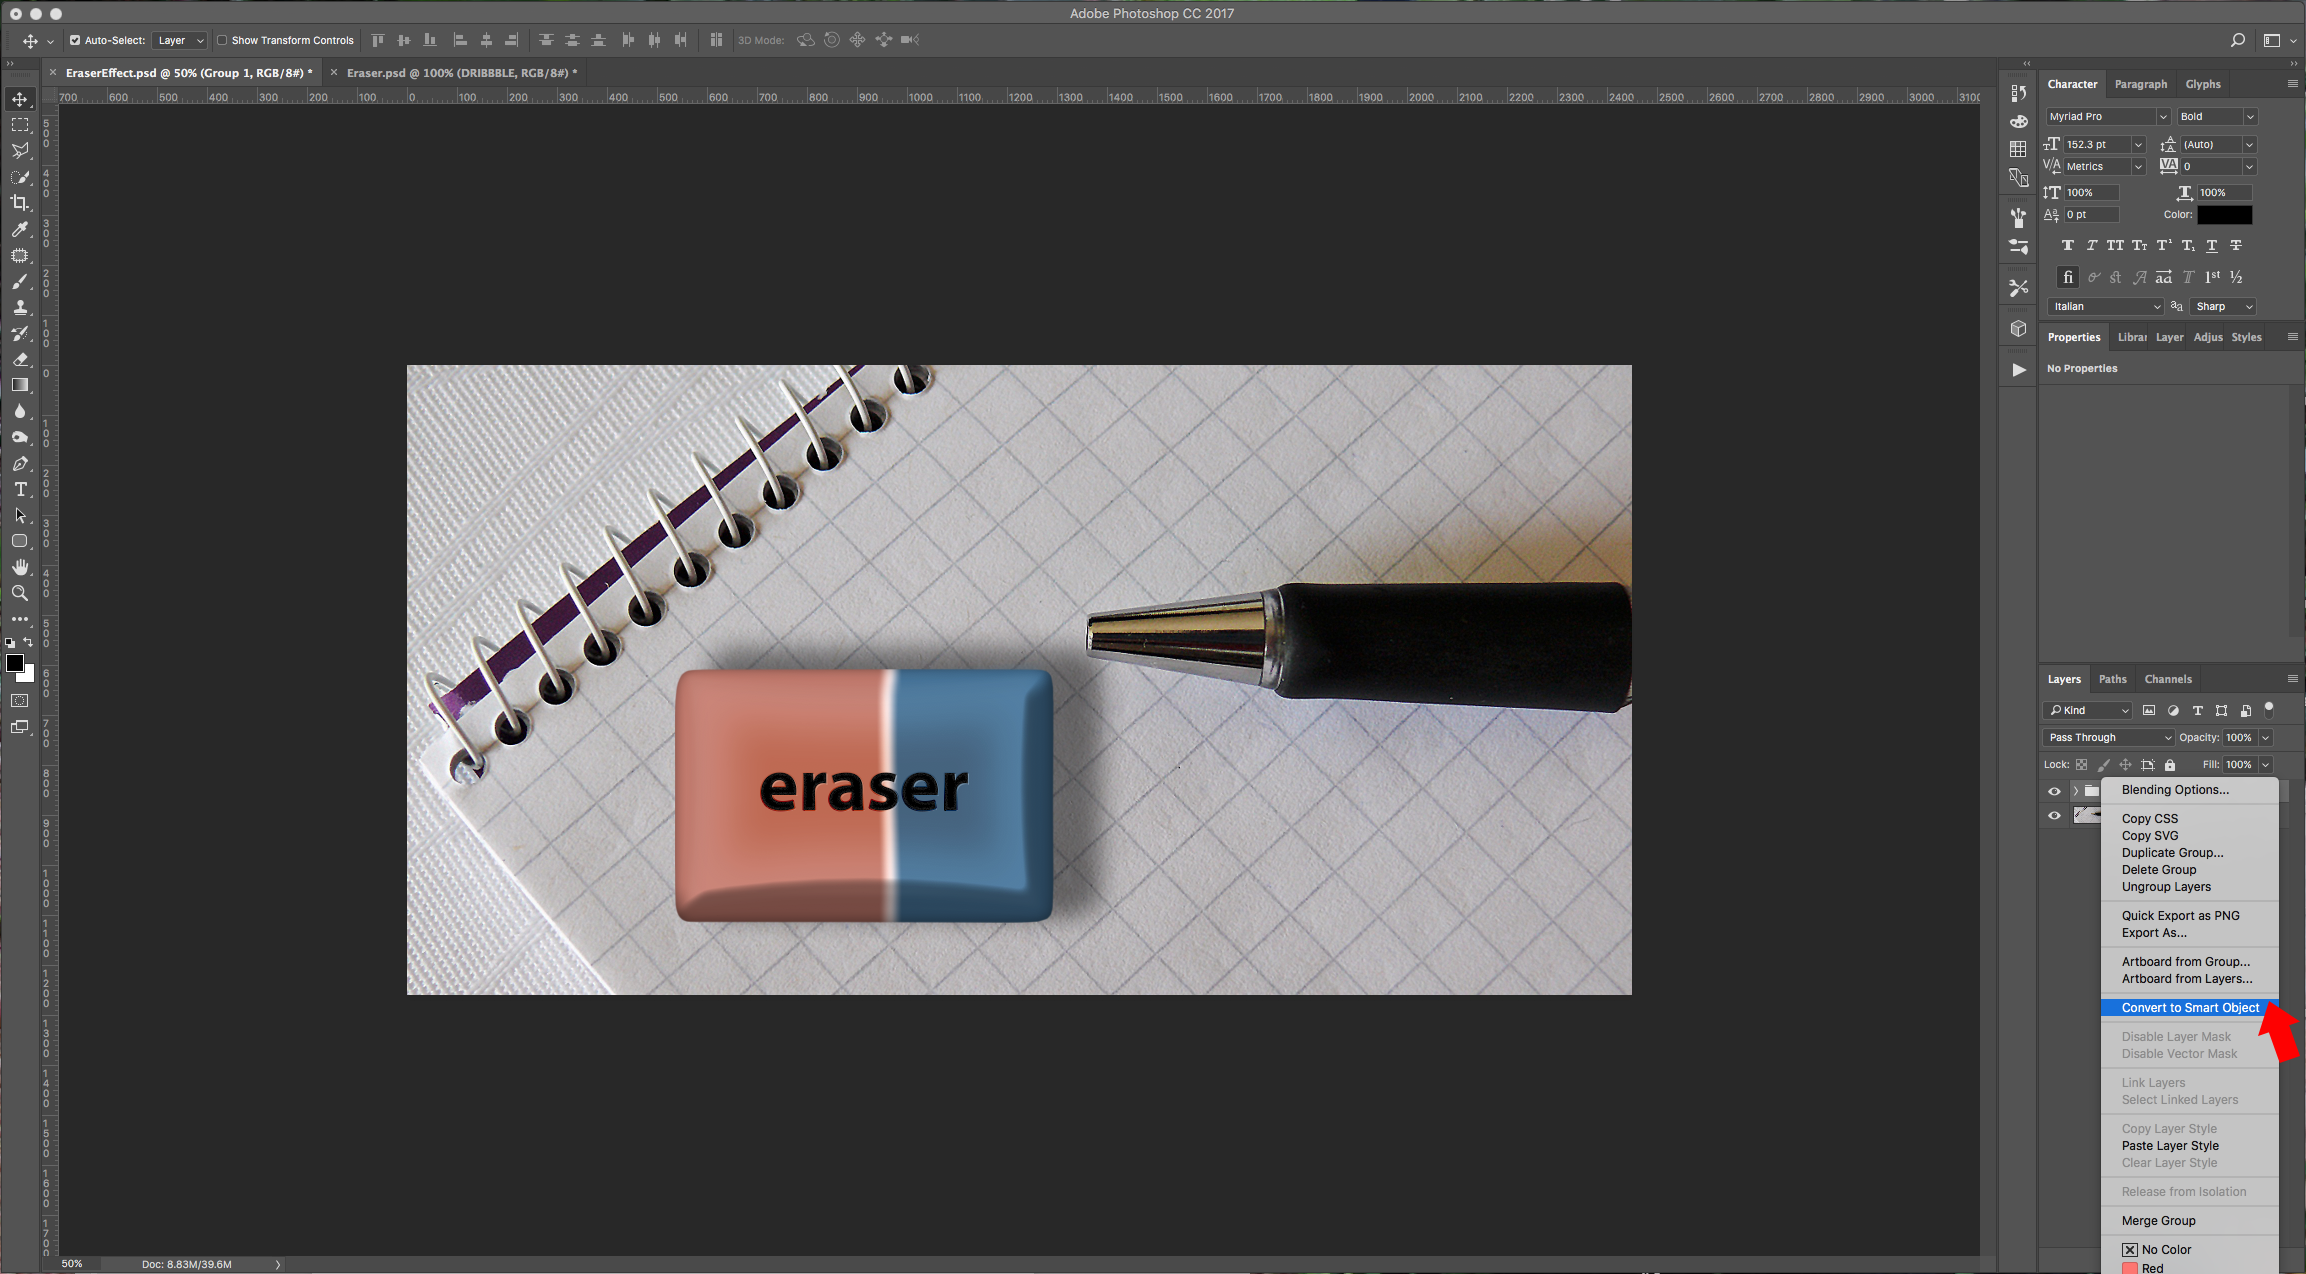
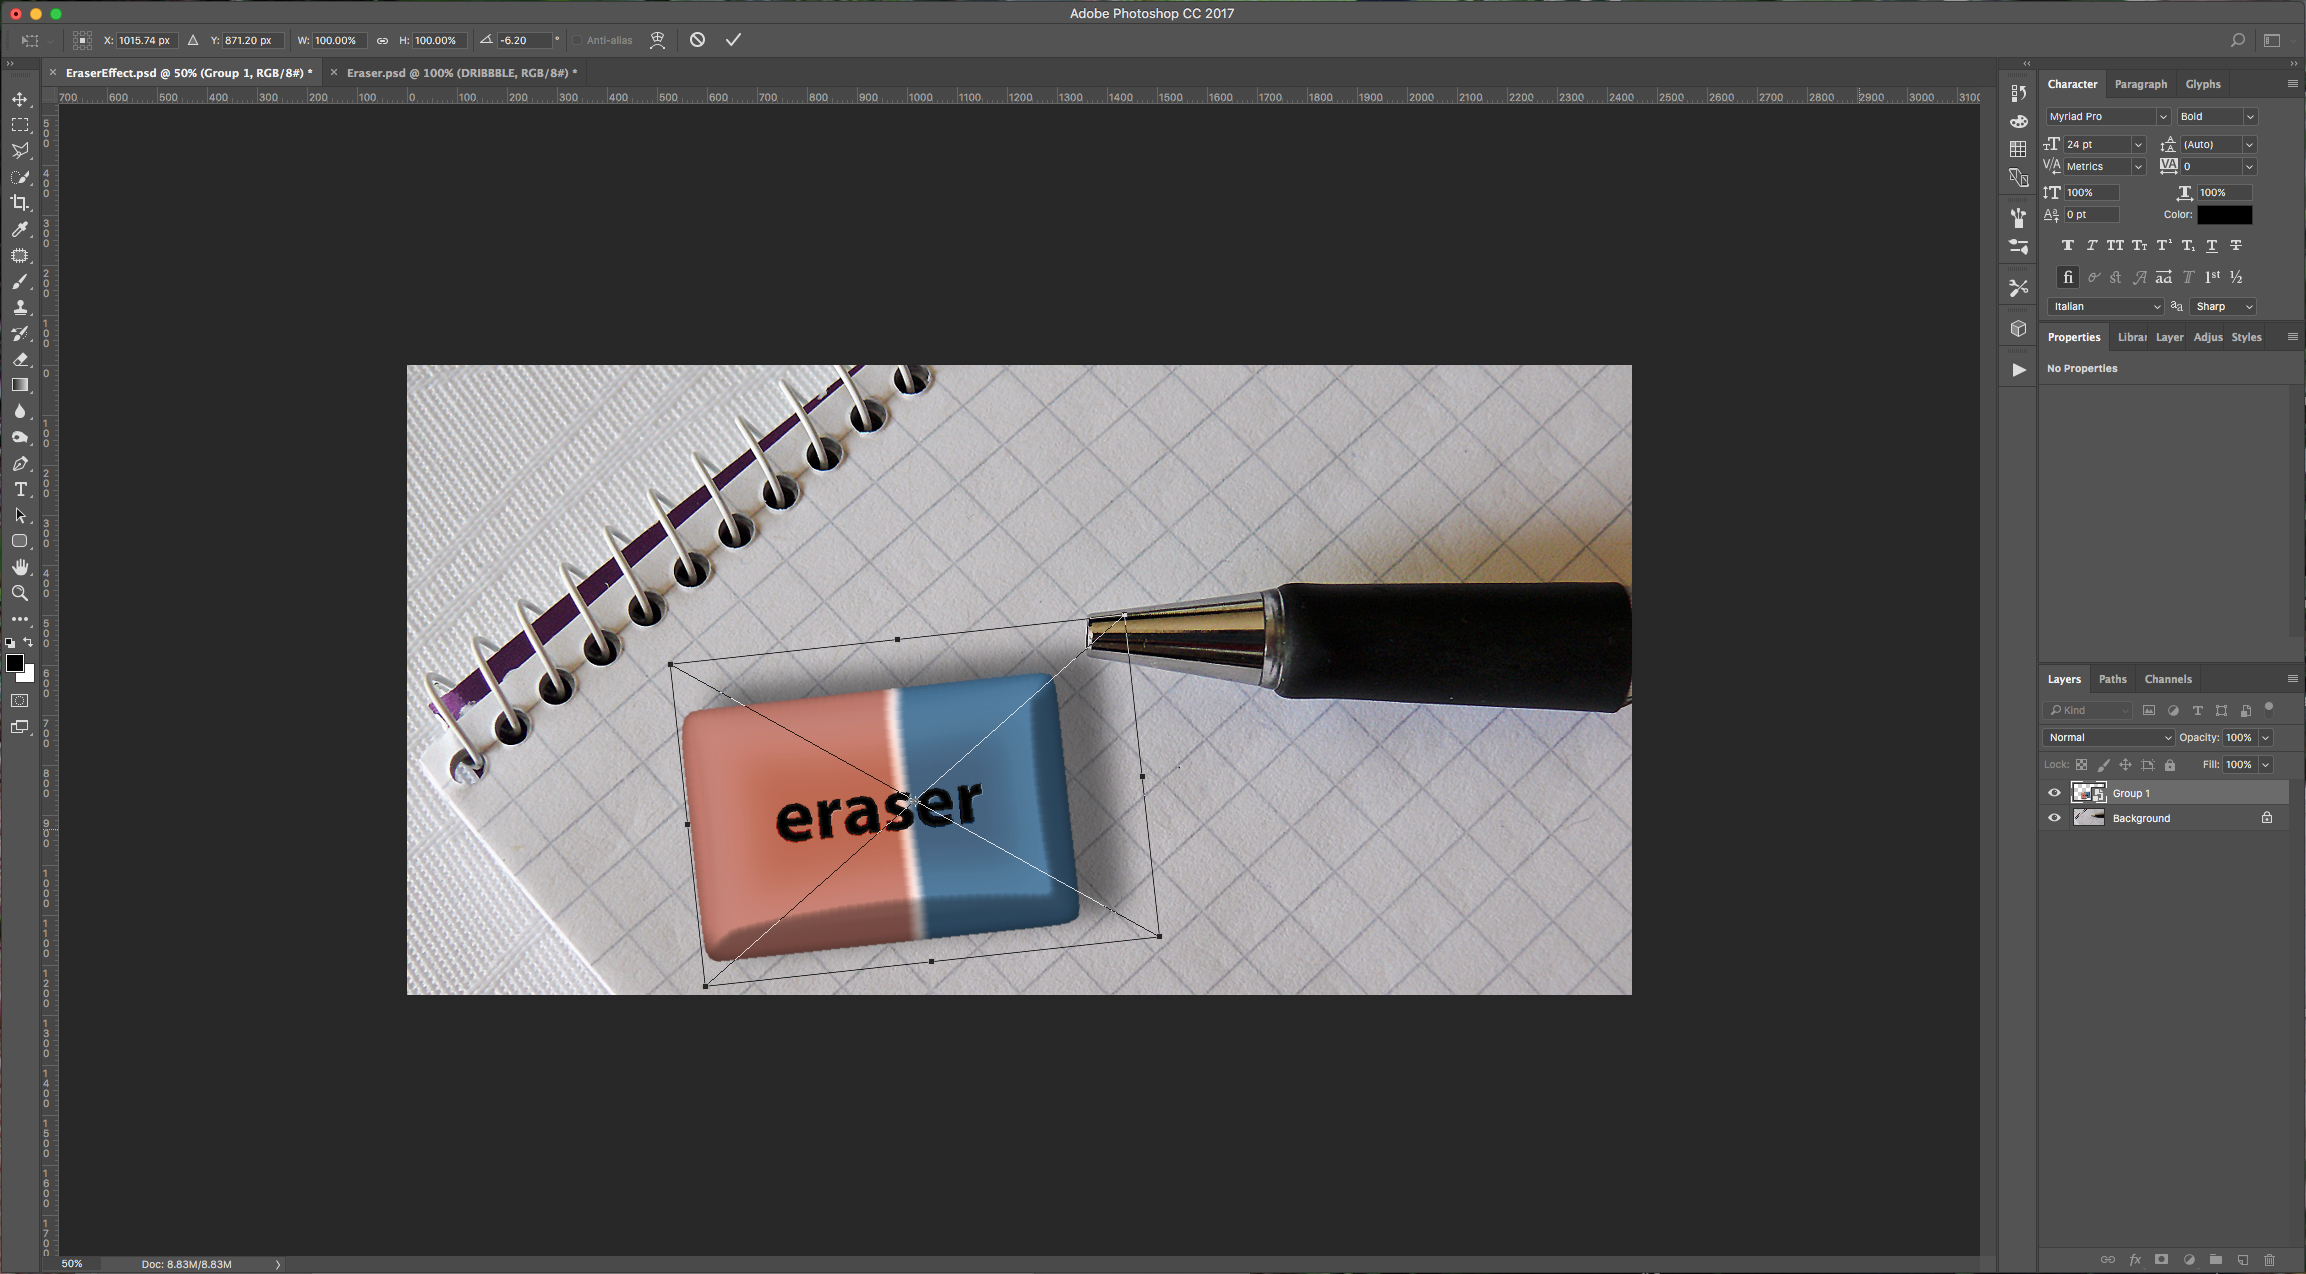
13 - Select all your layers except for the “Background” and click on the small folder icon at the bottom of the “Layers” Panel to create a “Group”. Then right-click on top of the thumbnail and choose “Convert to Smart Object”. Now you can rotate, scale or move around your eraser without messing up your “Layer Styles”.
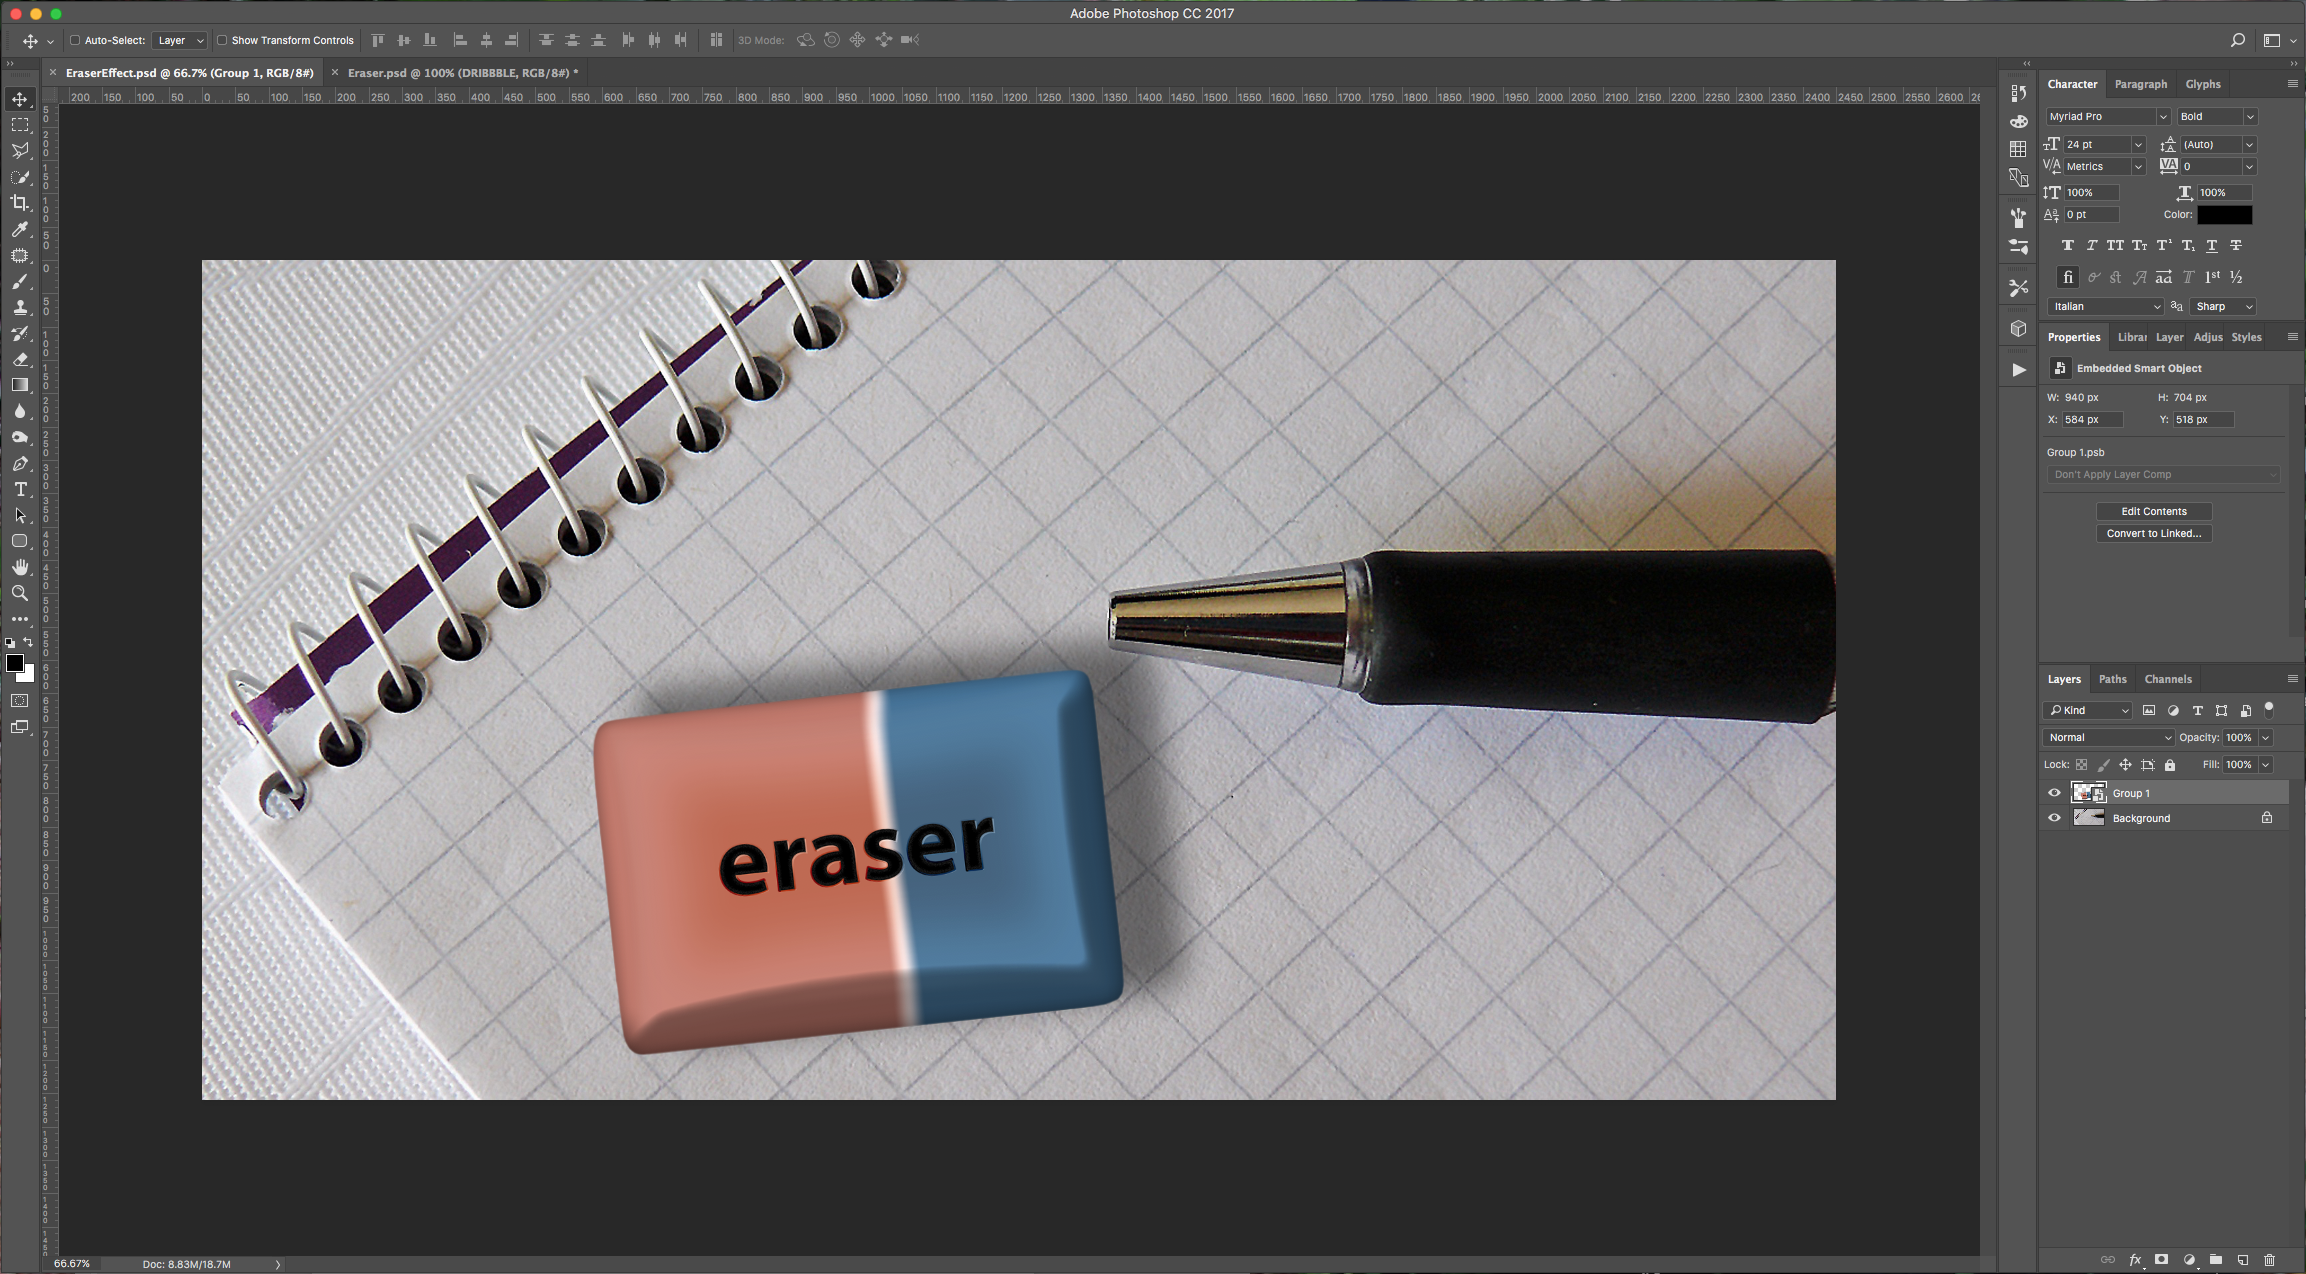
14: It should look something like this:
1 - In Photoshop, open the image you chose as “Background”, then create a “New Layer” by clicking on the button at the bottom of the “Layers” Panel.
2 - Select the “Rectangle Tool” (U) and draw a rectangle of the size and proportions you wish your eraser to be. You can use any other shape or text if you want.
3 - Duplicate your layer (Command/Control + J), hide your duplicate by clicking on the small eye button on the left side of the thumbnail, and then double-click on the original shape layer to apply the following “Layer Styles”:
Bevel & Emboss:
Inner Shadow:
Gradient Overlay: (color 1: #c77b6c, color 2: # fbe6e6, color 3: # 44749d. Location 1: 54%, Location 2: 57%, Location 3: 60%)
Drop Shadow:
4 - Now, turn back on the visibility for your “Eraser 2” Layer and apply the following “Layer Styles”:
Bevel & Emboss:
Inner Shadow:
Inner Glow: (#3f92cc)
Satin:
Gradient Overlay: (same as before)
5 - Select your “Eraser1” Layer and using the “Transform” command (Command/Control + T) to enlarge your shape until it looks right.
6 - Duplicate the “Eraser2” Layer, right-click on it and choose “Rasterize Layer Styles”. Hide or delete your original “Eraser2” Layer.
7 - Click on the “Add Layer Mask” button at the bottom of the “Layers” Panel, select the “Brush Tool” (B) and with a “Soft” brush (0% Hardness) erase the edges of your image to smooth it out.
8 - Go to Edit > Transform > Warp and play around with your image until you get a more tridimensional look. Once you are happy, click “Enter” or on the little check mark button on the top menu.
9 - Select your “Eraser1” Layer and add a “Layer Mask”. This time use a smaller brush with an intermediate “Hardness” (we used one with 27 Pixels in Size and 79% in “Hardness”). Fix the corners of your eraser to make more realistic. Double-click on the “Eraser1” Layer and change the “Drop Shadow” if needed.
10 - Create a “New Layer” by clicking the button at the bottom of the “Layers” Panel. Select the “Type Tool” (T), choose a font (we used Myriad Pro Bold) and type some text using black as “Fill” color.
11 - Double-click on your Text Layer and apply the following “Layer Styles:
Stroke: (#393838 y #797878)
Inner Glow:
Lower the “Opacity” to 87%.
12 - Duplicate your Text Layer, erase the “Layer Styles” of your original “Text” layer and change the “Fill” color to white. Change the “Blending Mode” to “Soft Light” and move it a few clicks down and right.
13 - Select all your layers except for the “Background” and click on the small folder icon at the bottom of the “Layers” Panel to create a “Group”. Then right-click on top of the thumbnail and choose “Convert to Smart Object”. Now you can rotate, scale or move around your eraser without messing up your “Layer Styles”.
14: It should look something like this:
by @lornacane
Related Tutorials
Photoshop Tutorials
How to Use Text Effects in Photoshop
With Photoshop Text Effects, you can create text with impact in just a few steps.
Photoshop Tutorials
How to Create Speech Bubbles in Photoshop
Learn how to create and edit fun speech bubbles in Photoshop using custom shapes.
Photoshop Tutorials
How to Make Sublimation Designs in Photoshop
Discover how to make sublimation designs in Photoshop that you can use to create beautiful gifts.
Photoshop Tutorials
How to Use EPS Files in Photoshop
In this tutorial, learn how to use EPS files in Photoshop as Smart Objects to maintain image quality
Photoshop Tutorials
Image Burned in Wood in Photoshop
In this tutorial, discover how to create a realistic wood burned effect in Adobe Photoshop.
Photoshop Tutorials
Easy See through Cut Out Text in Photoshop
Create a see-through cut out text design in Photoshop with these easy to follow steps.