By Design Bundles
Photoshop Tutorials11 min
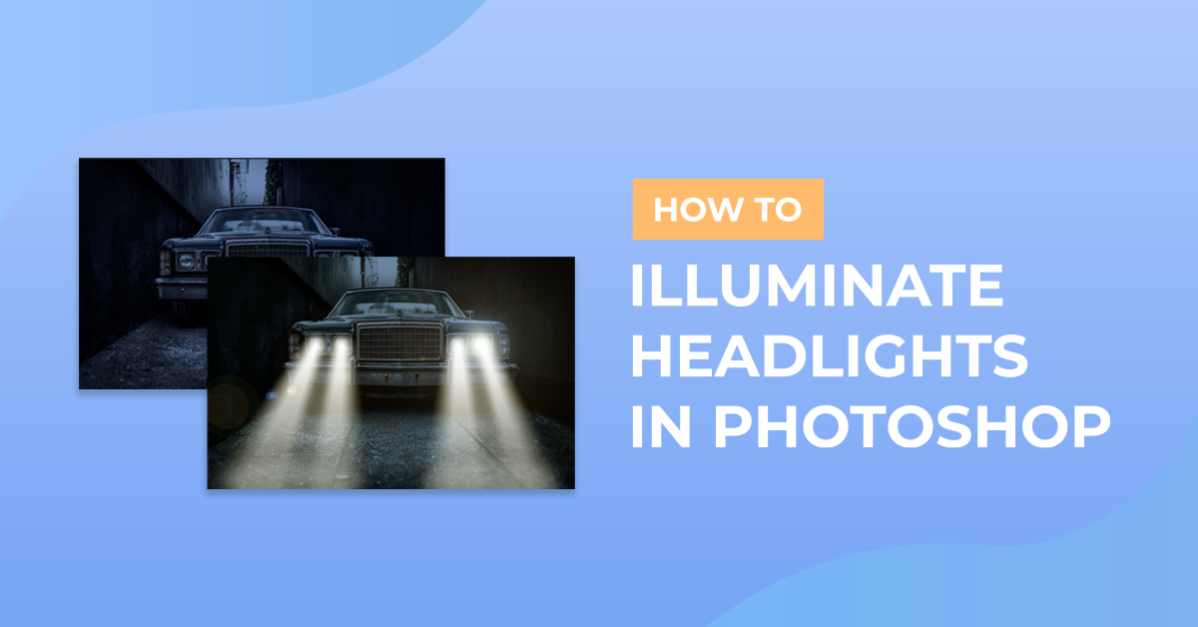
Illuminate Headlights in Photoshop
For this tutorial, we will use the image of a car or truck, or something that should have light.
1 - In Photoshop, open the image you chose to work with.
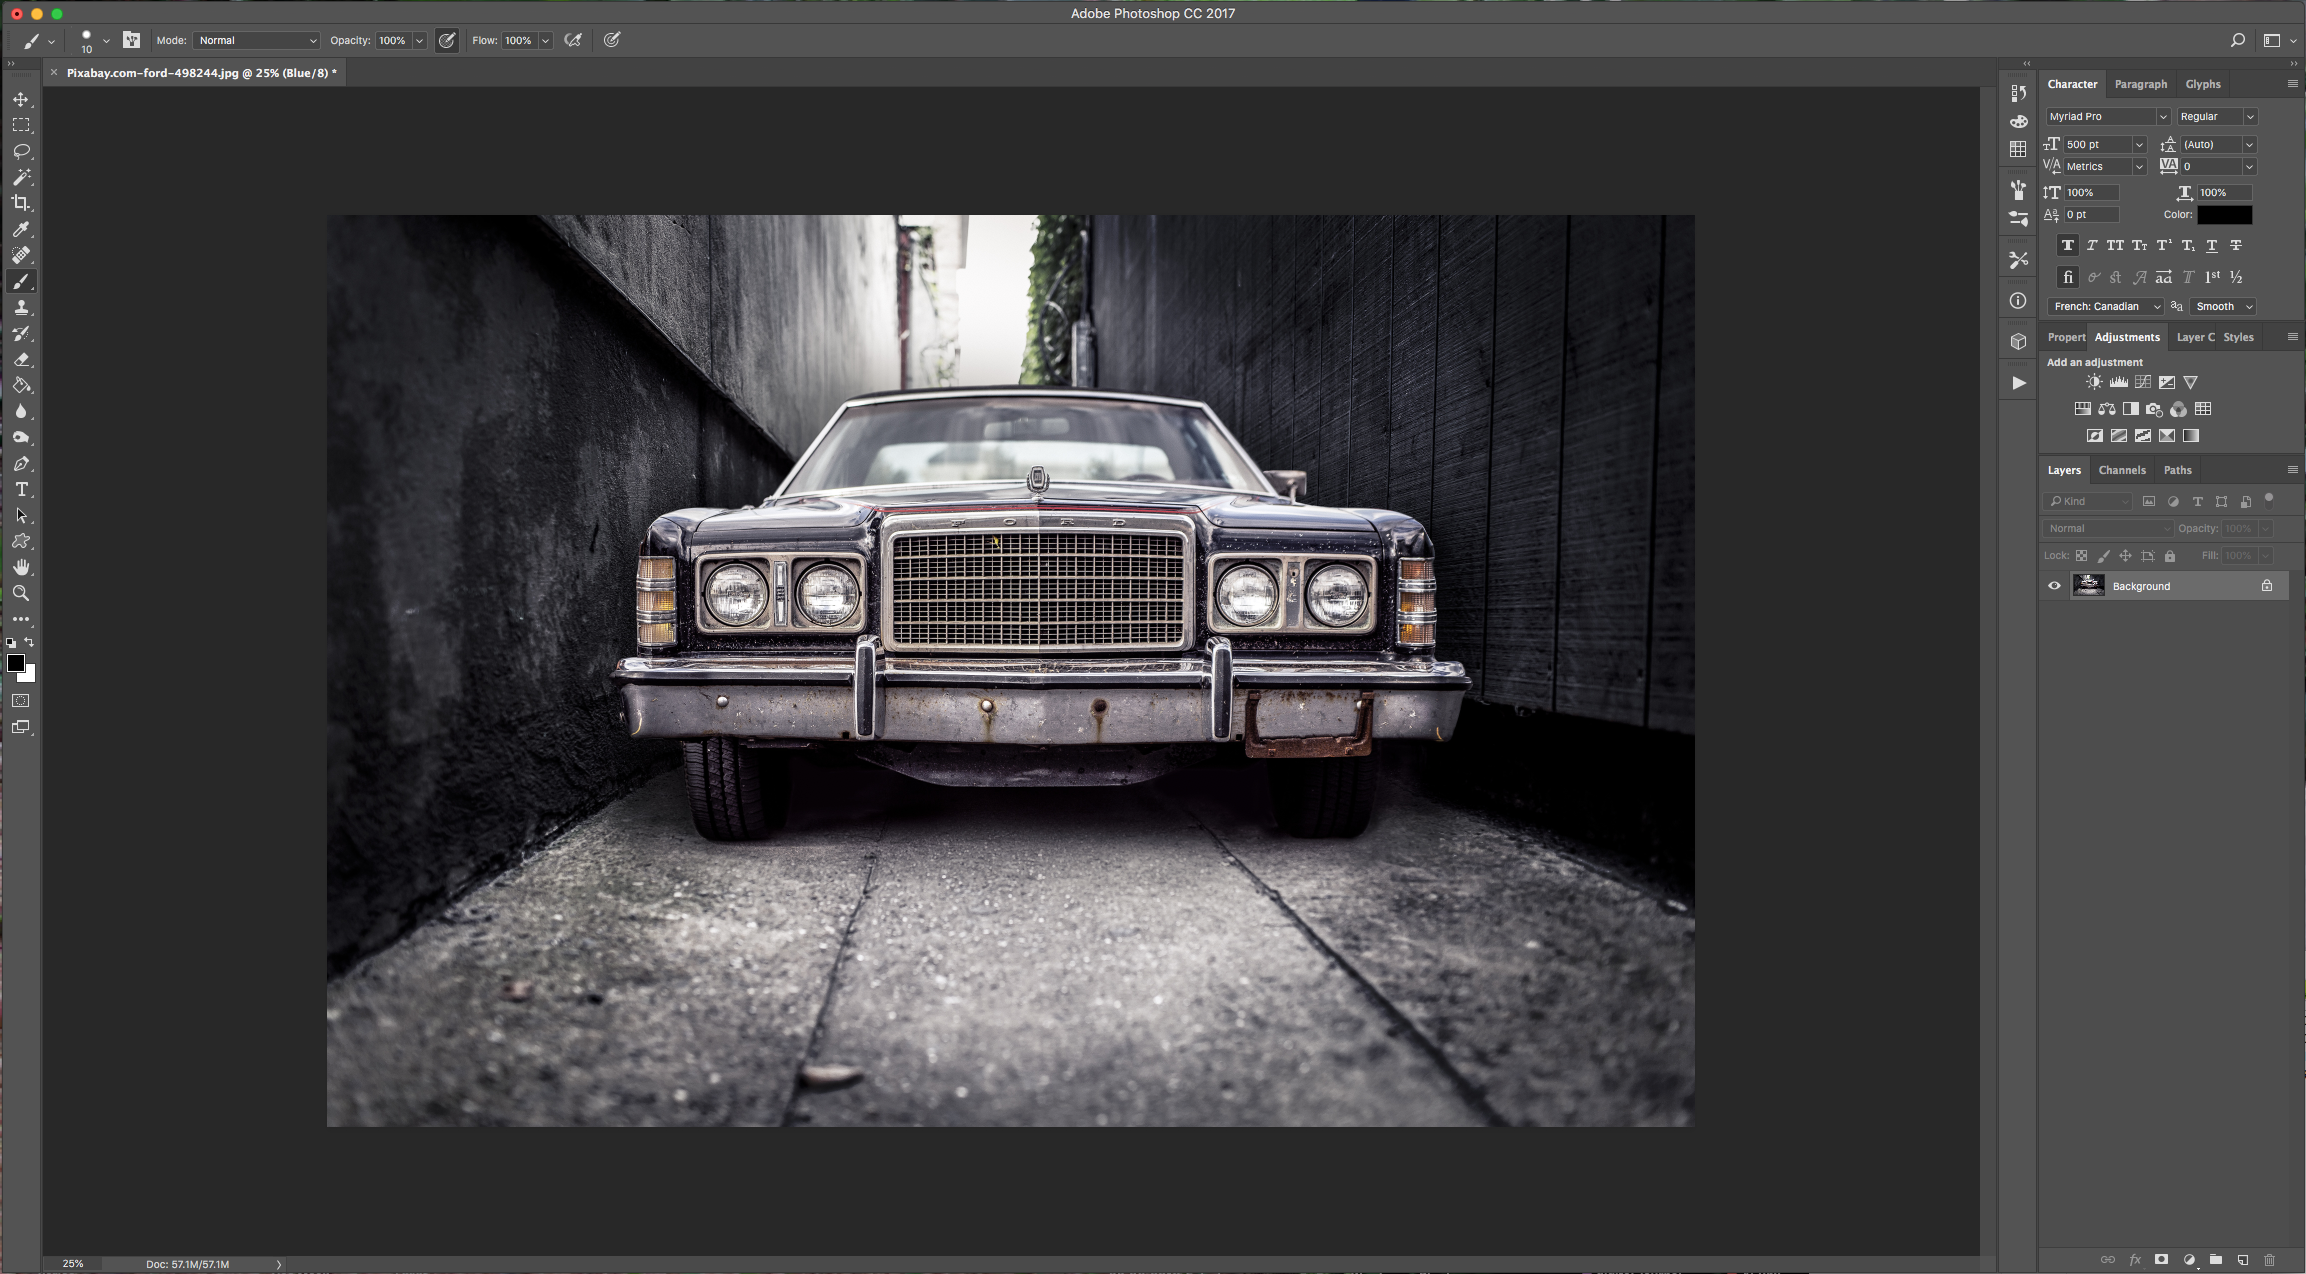
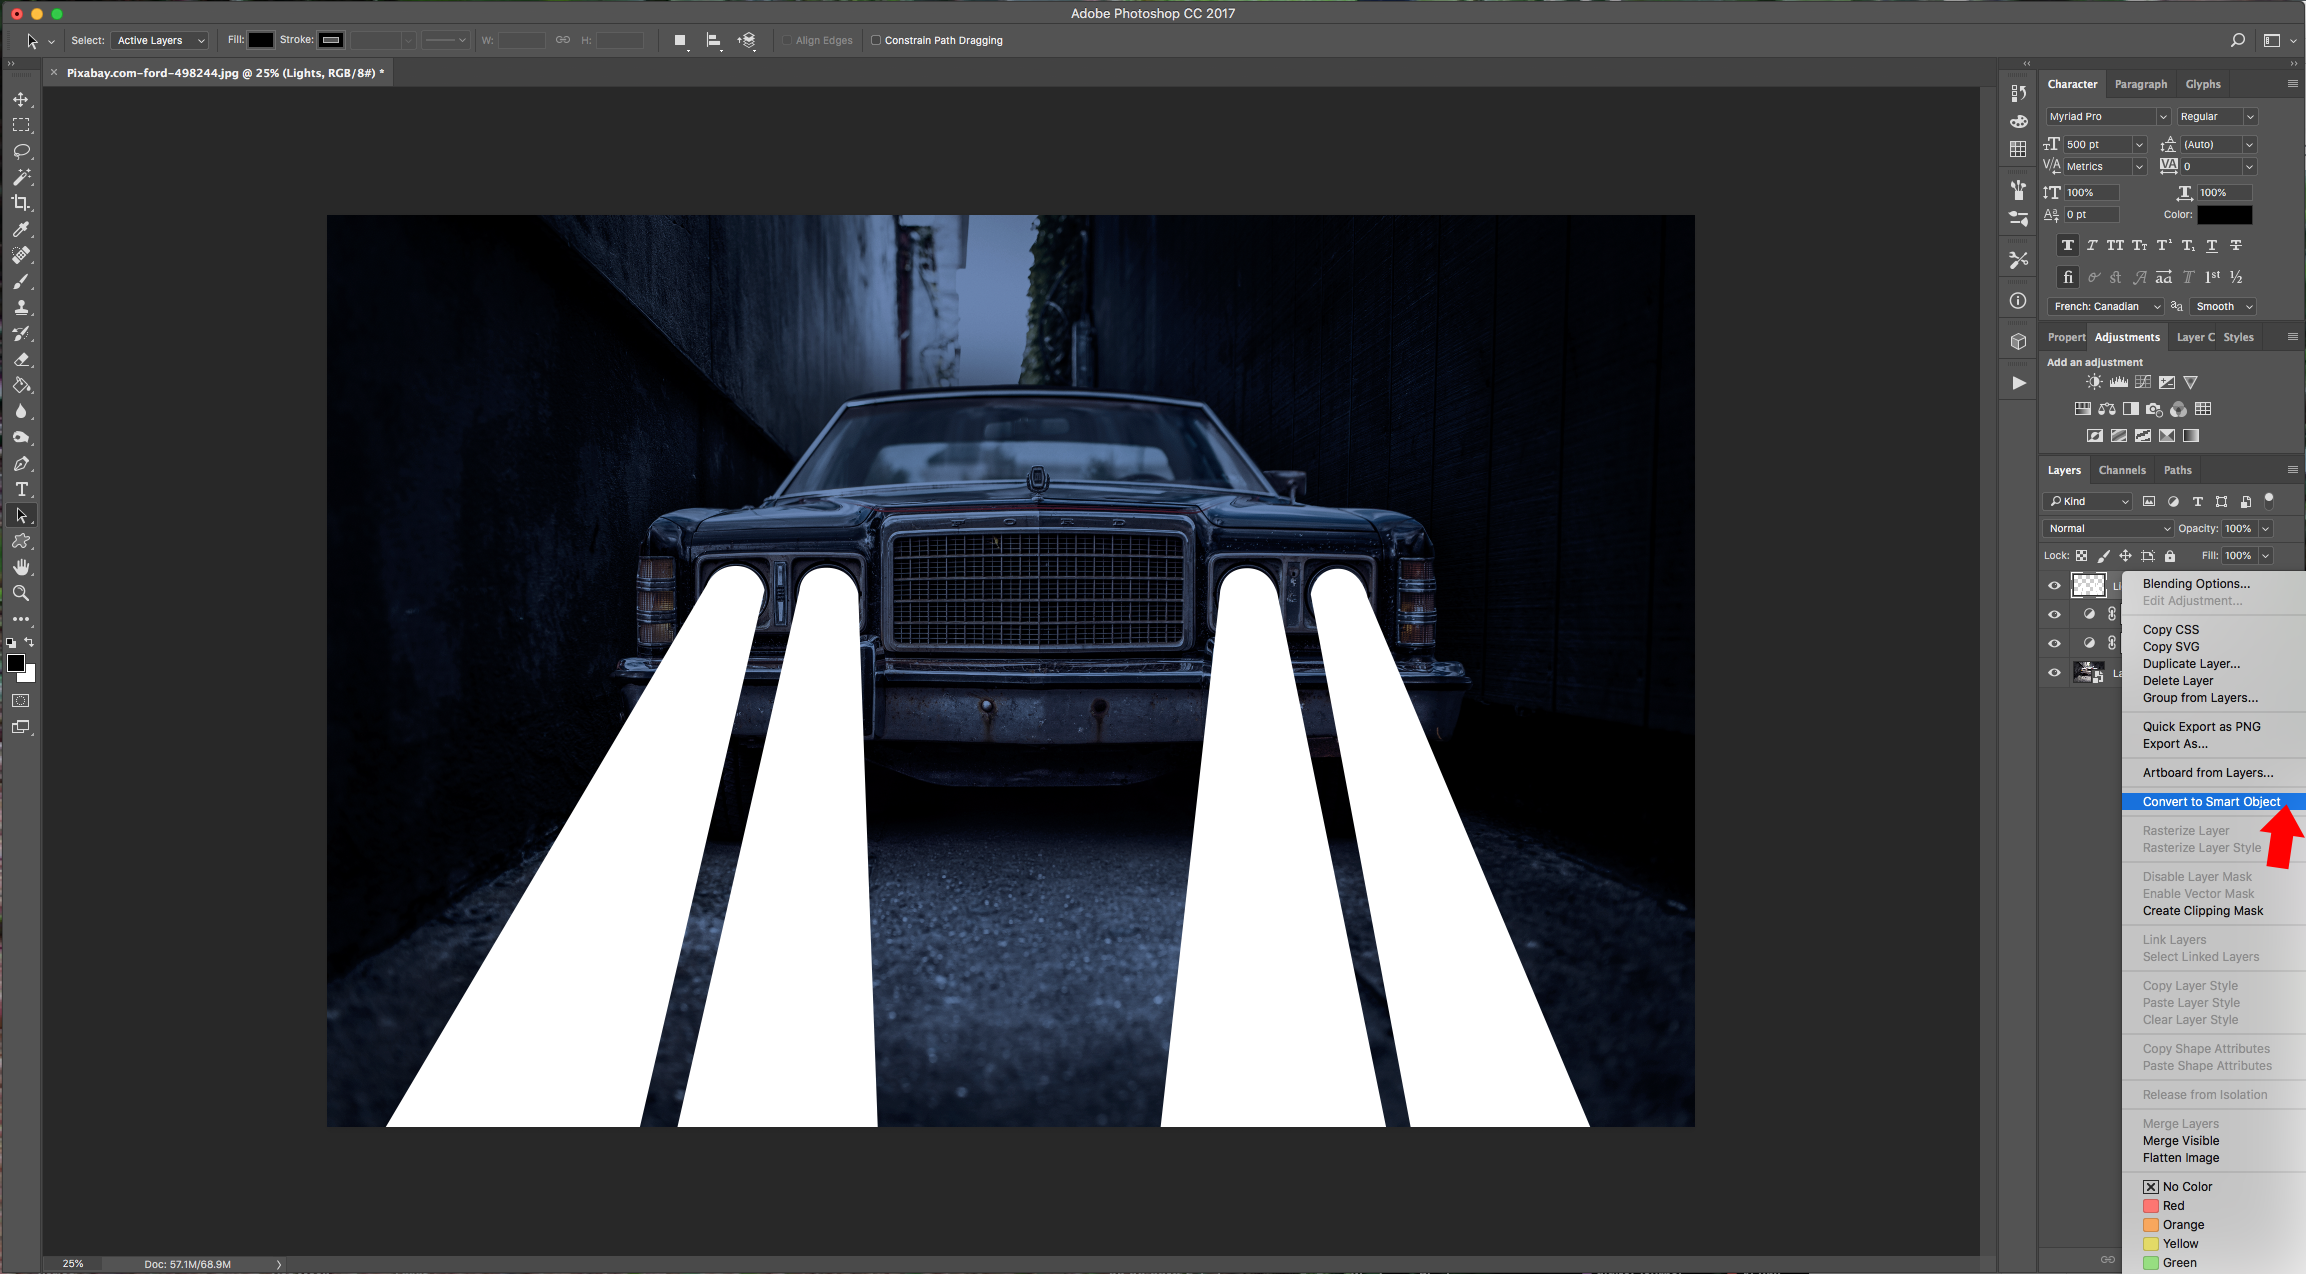
2 - Right-click on top of its Thumbnail and choose “Convert to Smart Object”.
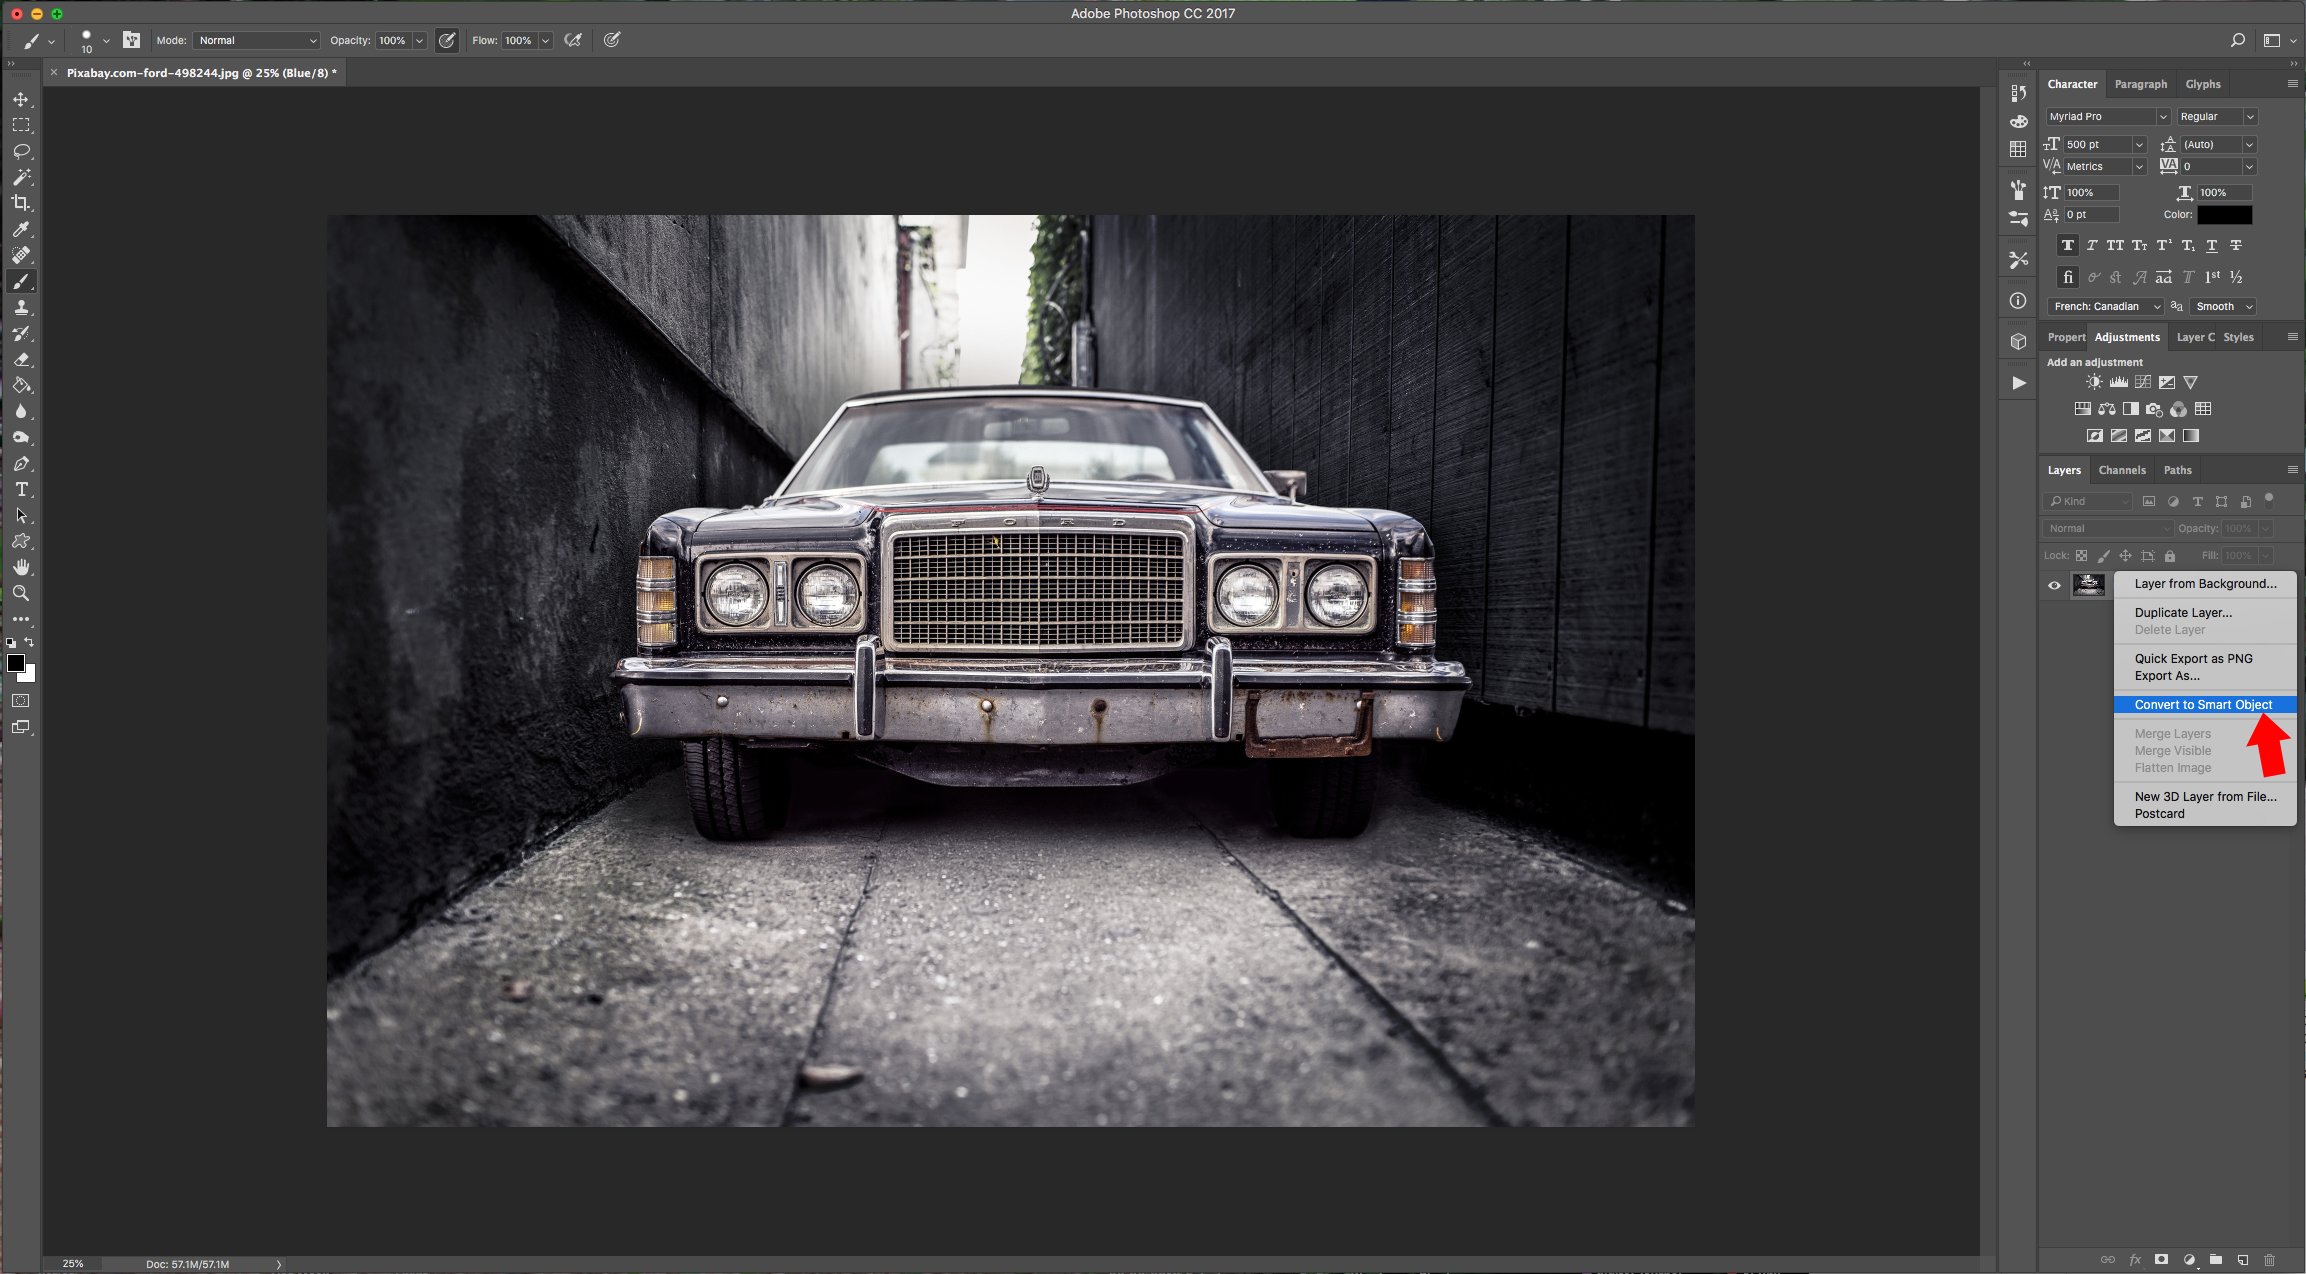
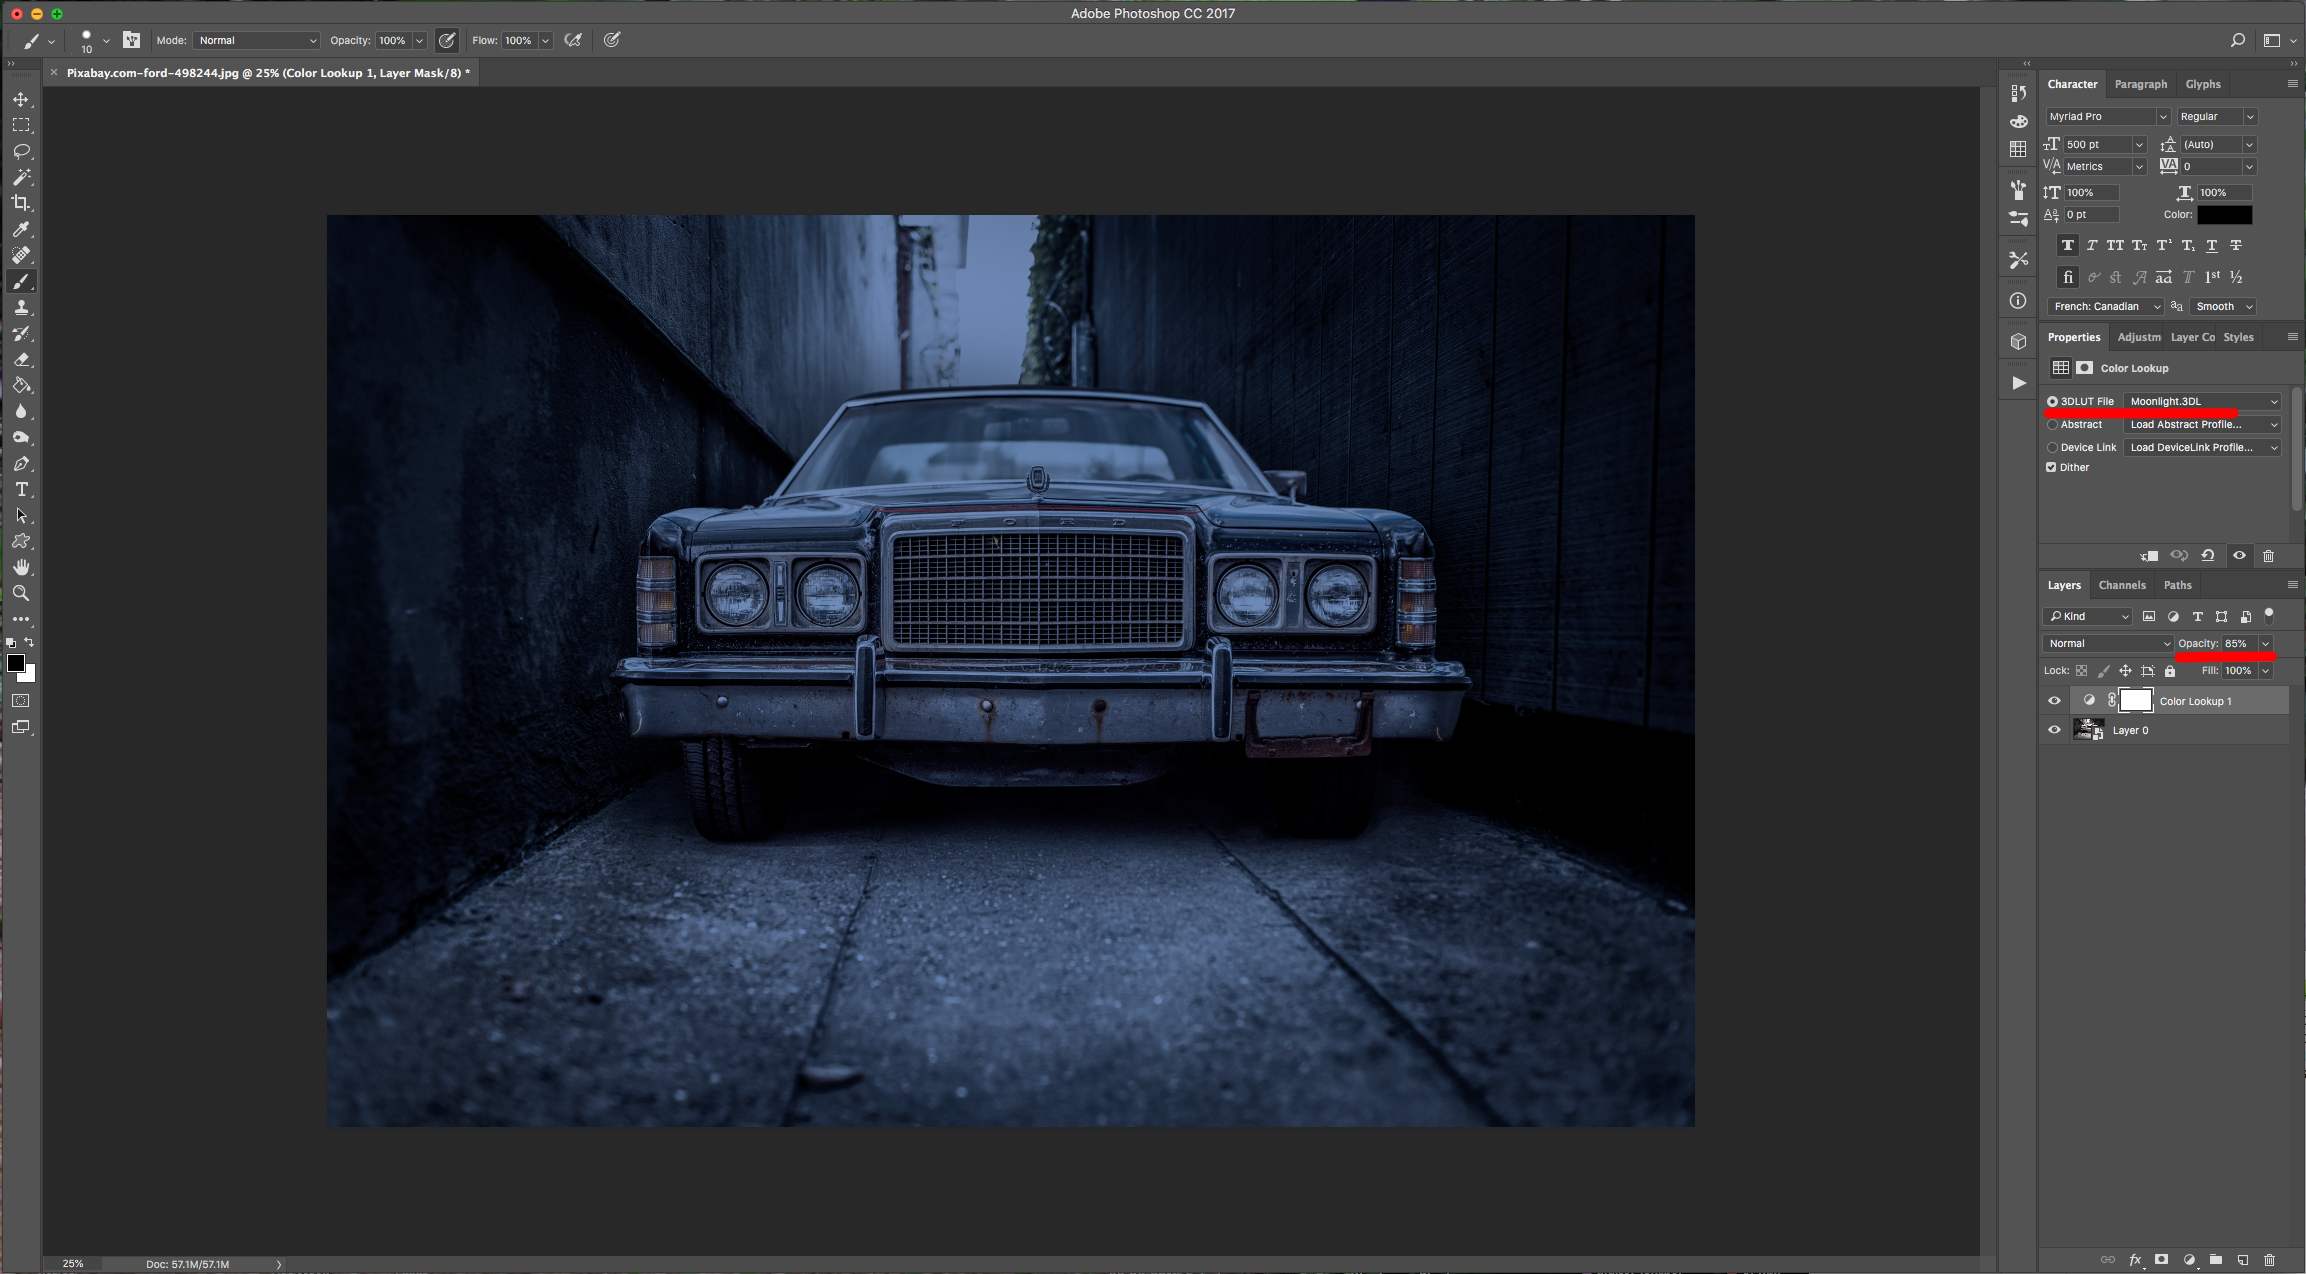
3 - Go to the “Adjustments Panel” create e “New Color Lookup Adjustment Layer” and use “Moonlight.3DL” as “3DLUT File”.
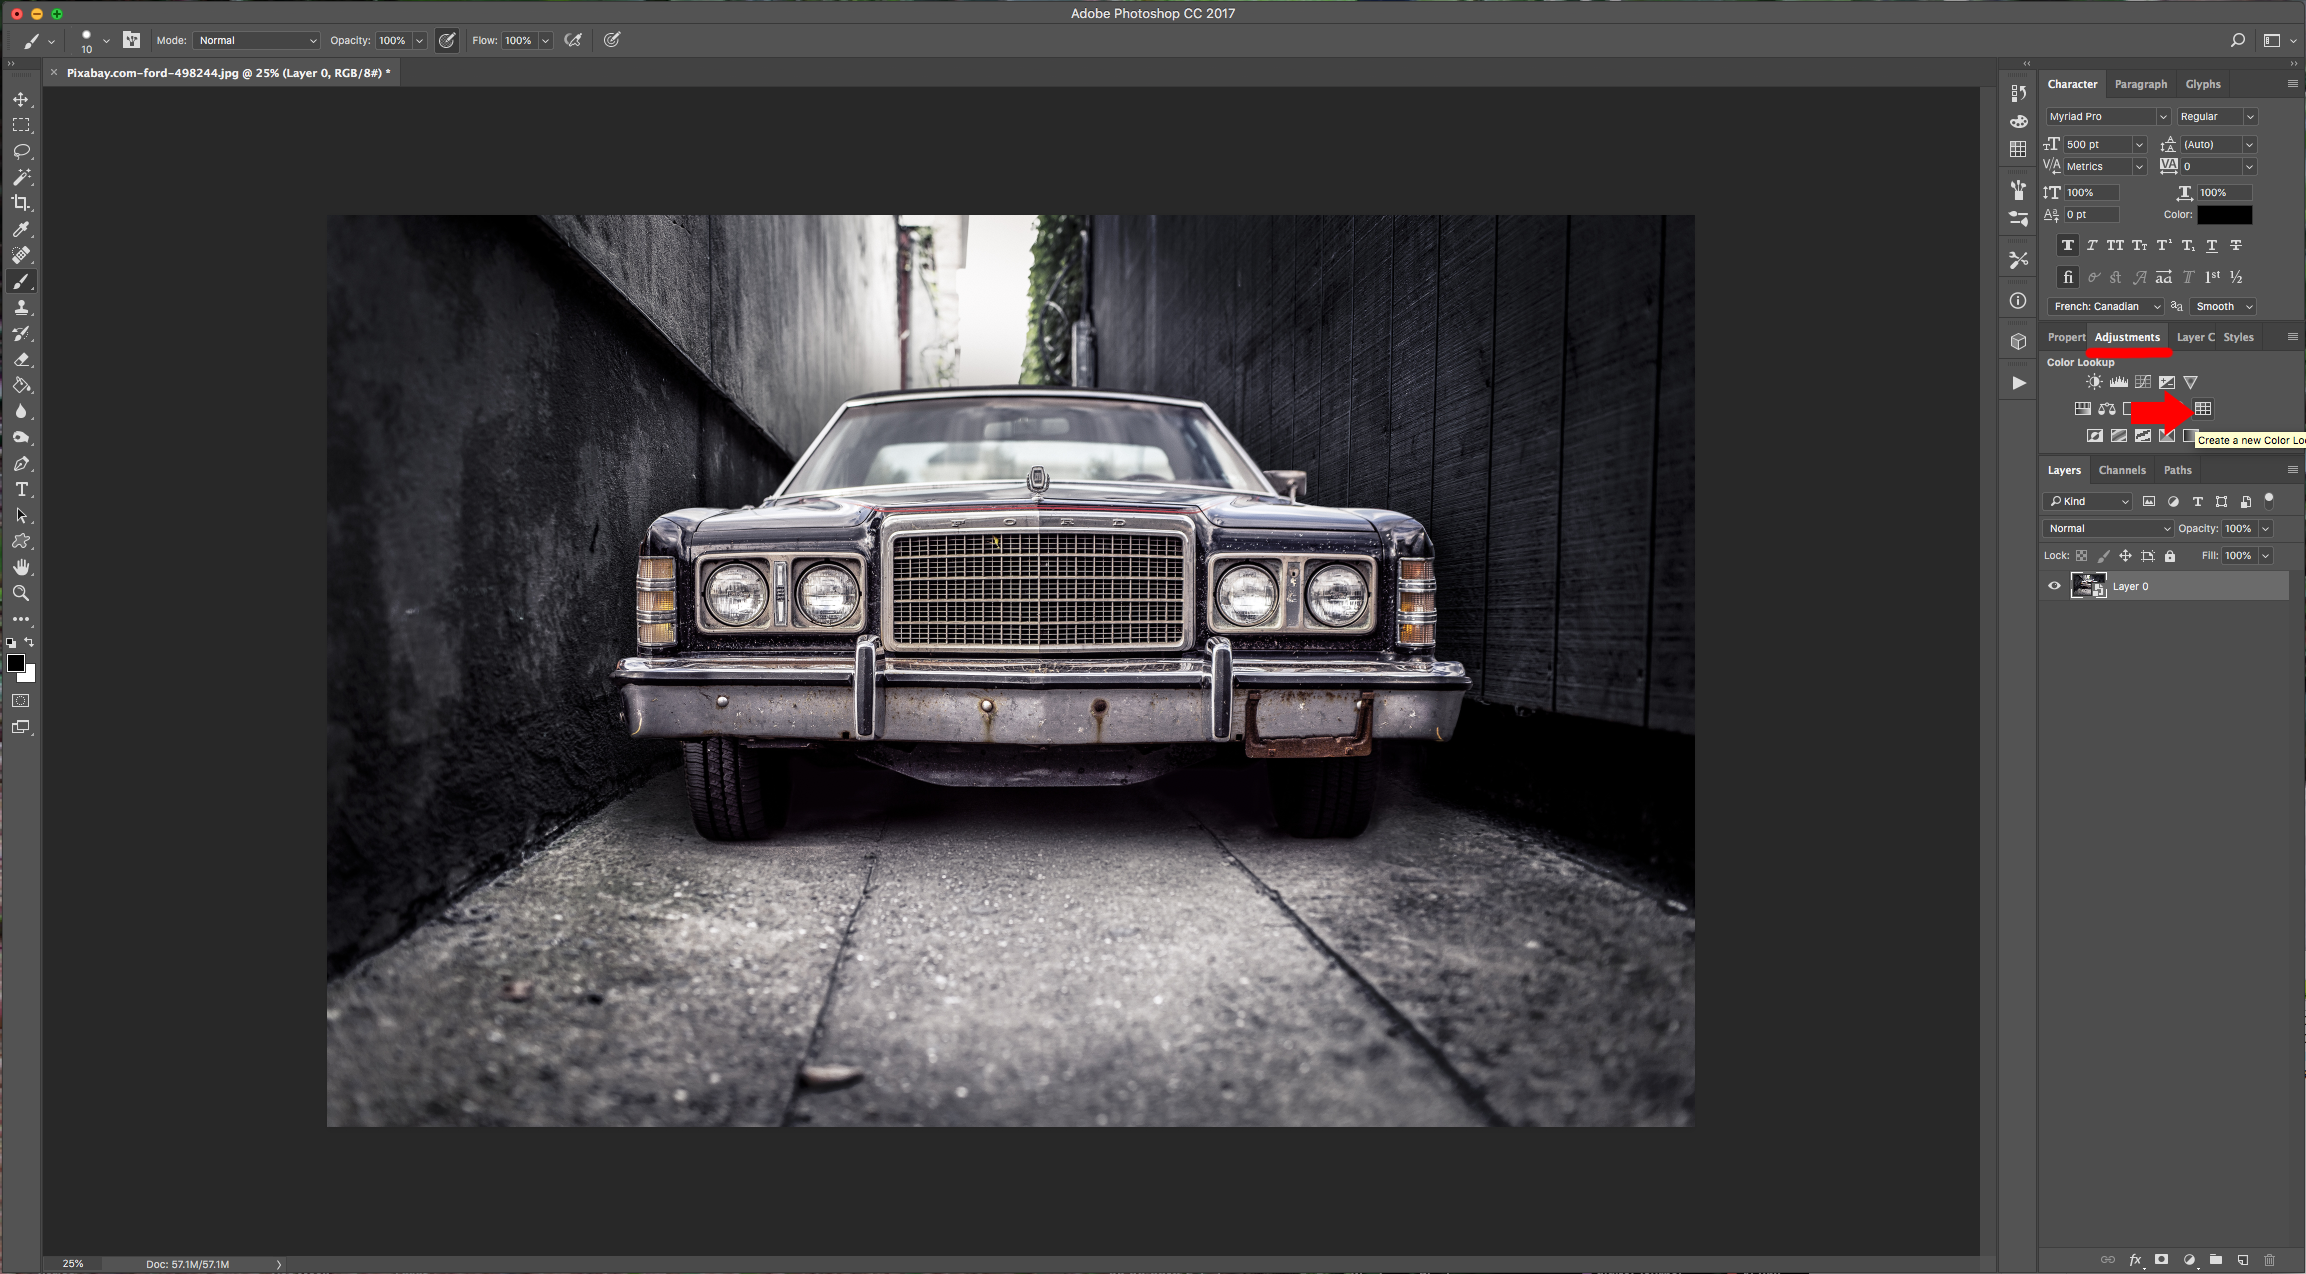
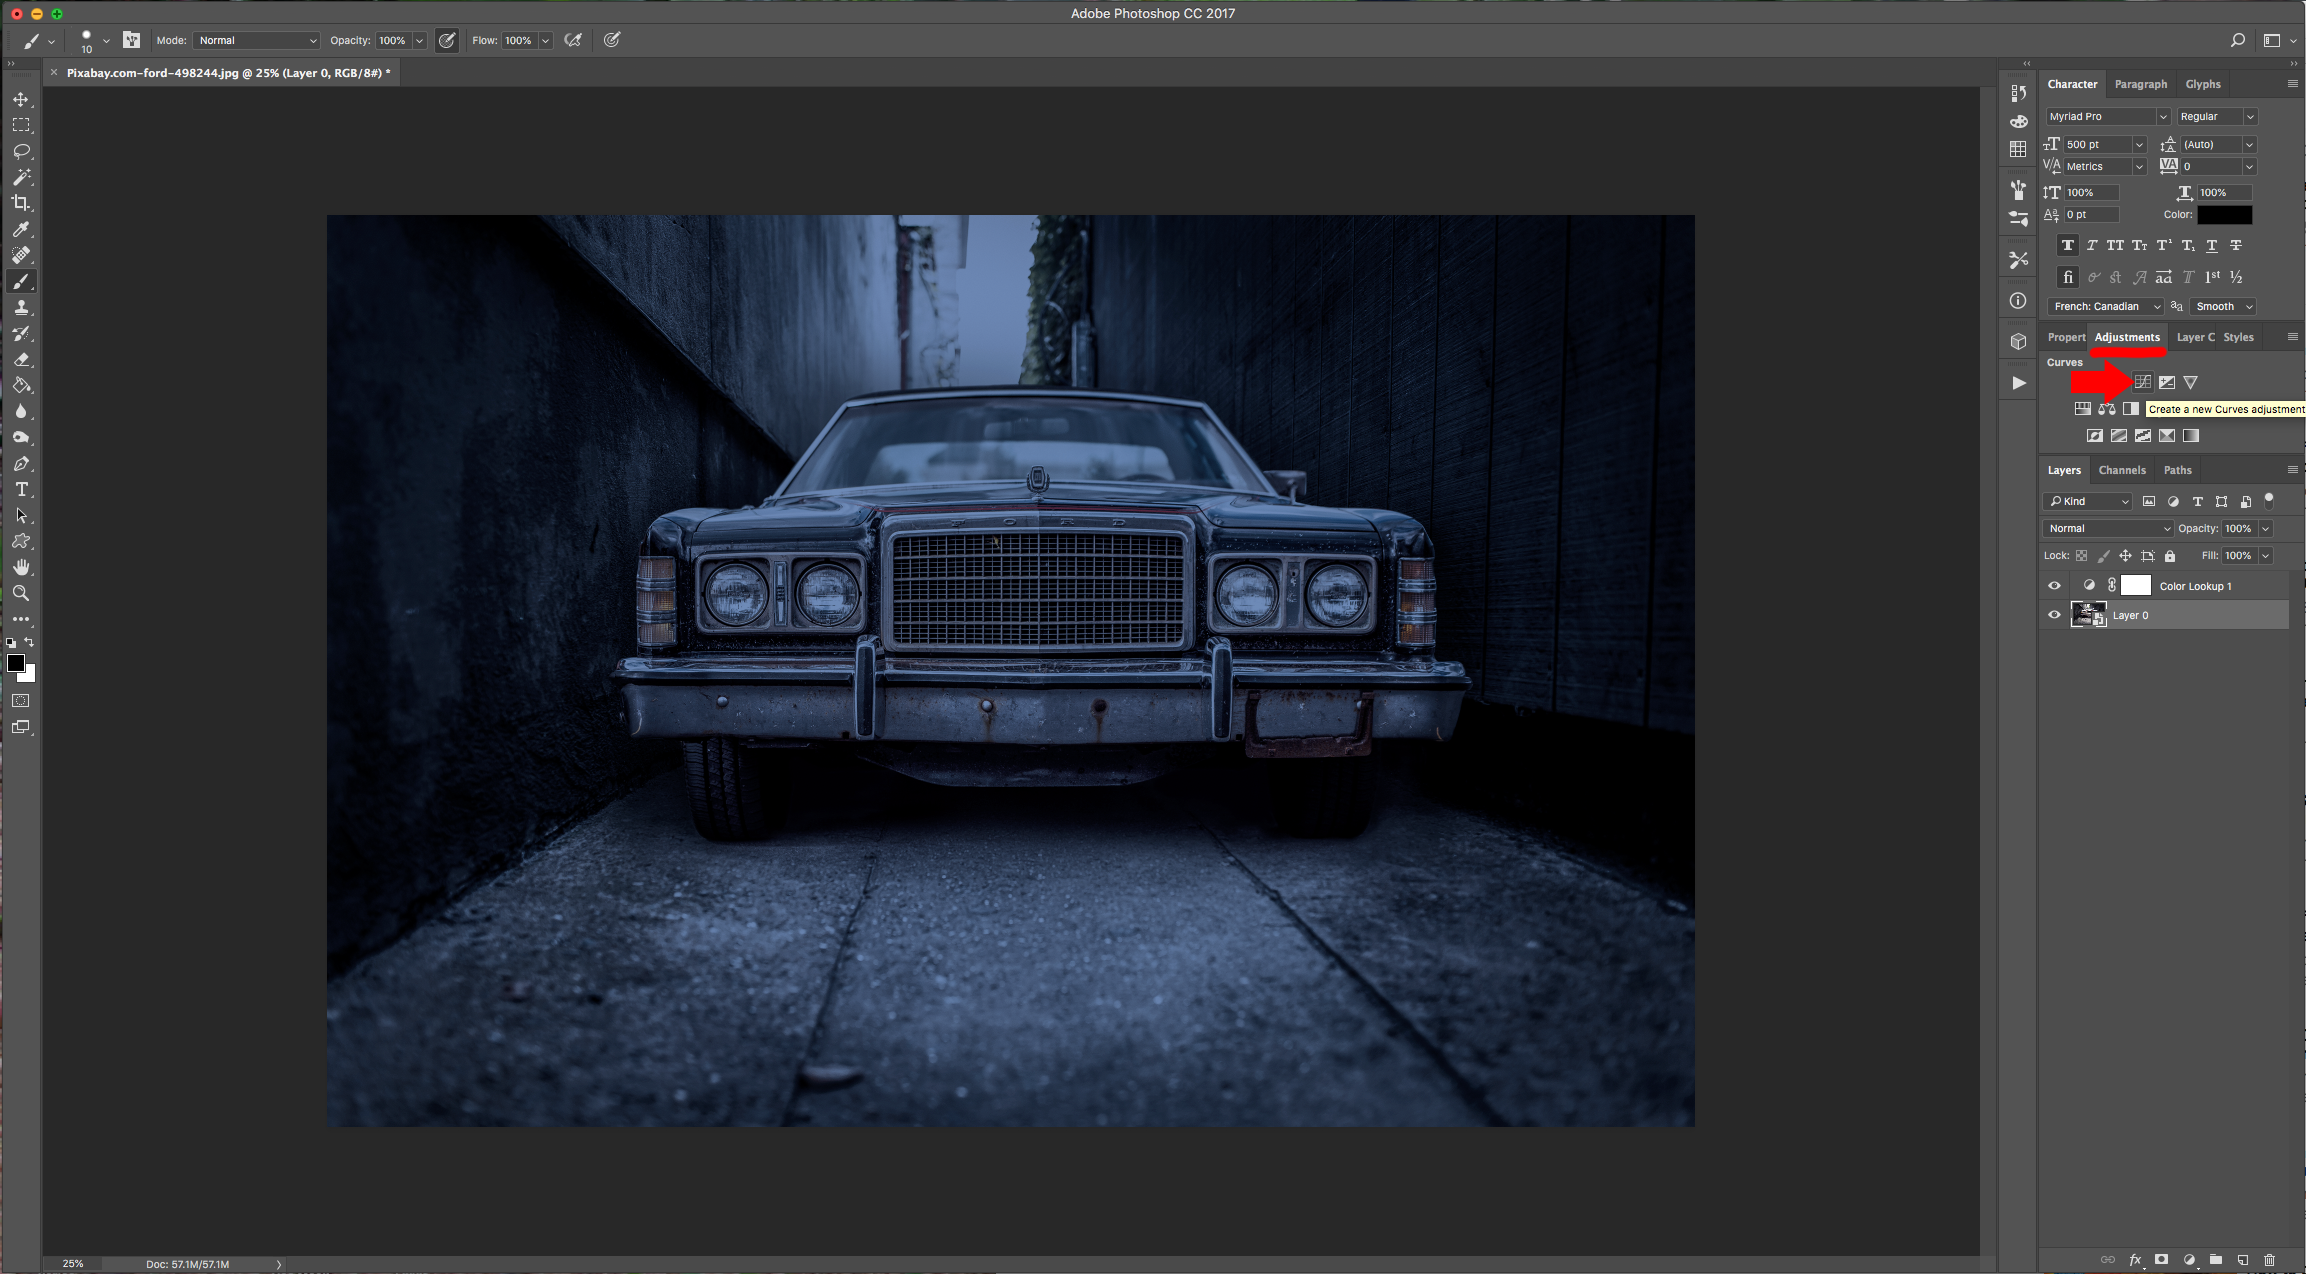
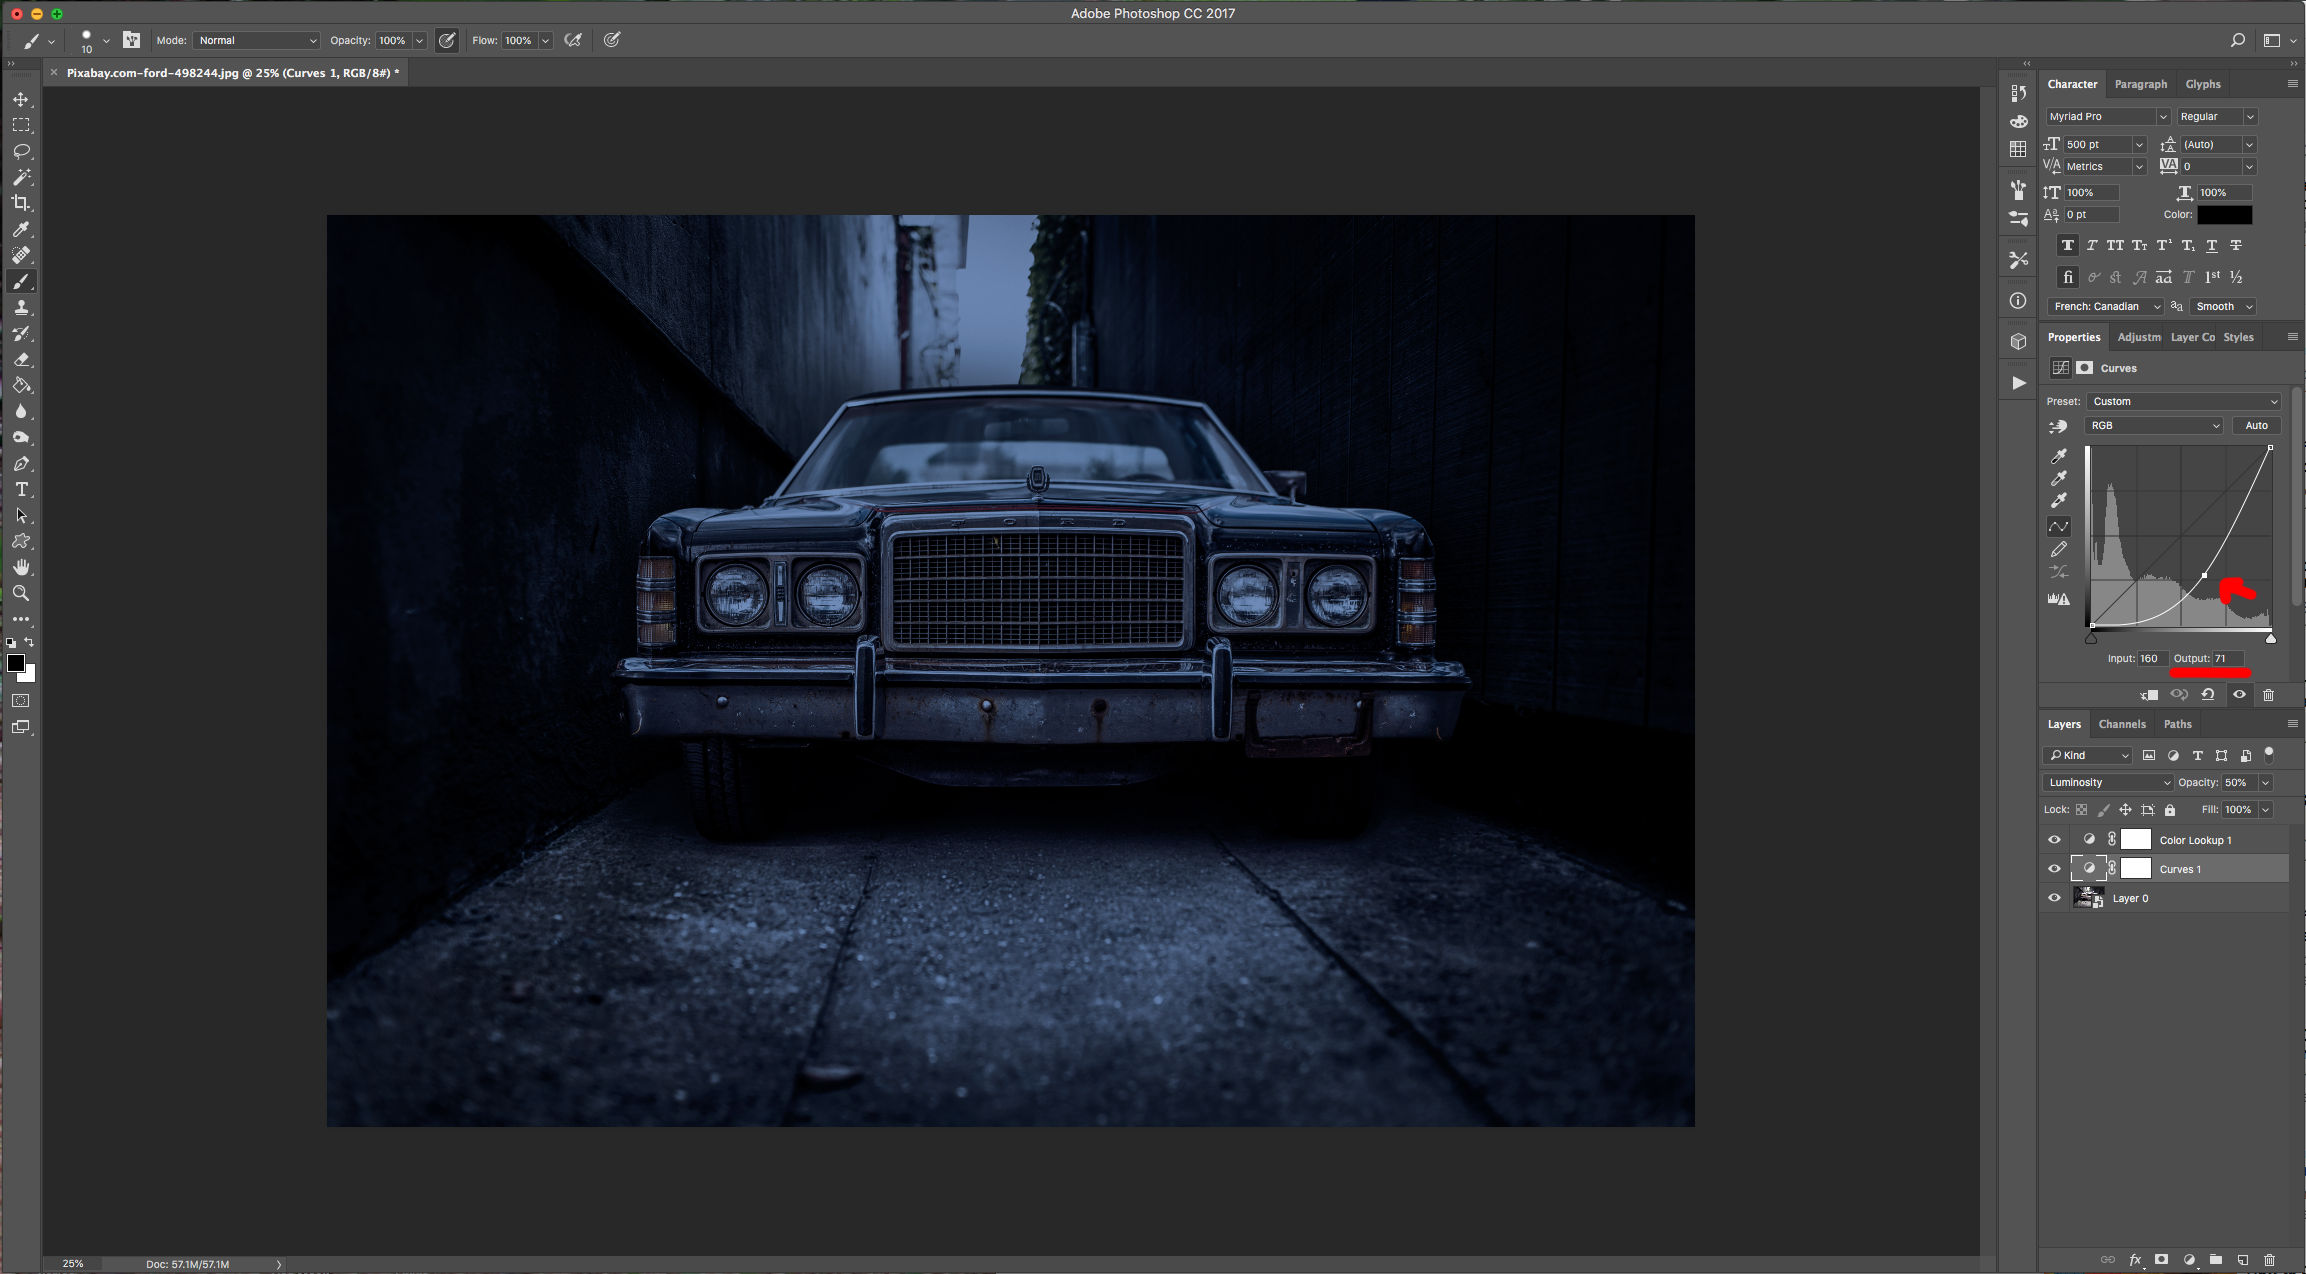
4 - Select your “Background” Layer again and add a “New Curves Adjustment Layer” (Adjustments Panel). Click the “Midpoint” and use an “Input” of 160 and an “Output” of about 71. You may need to use different values in both “Adjustment Layers” depending on your original image.
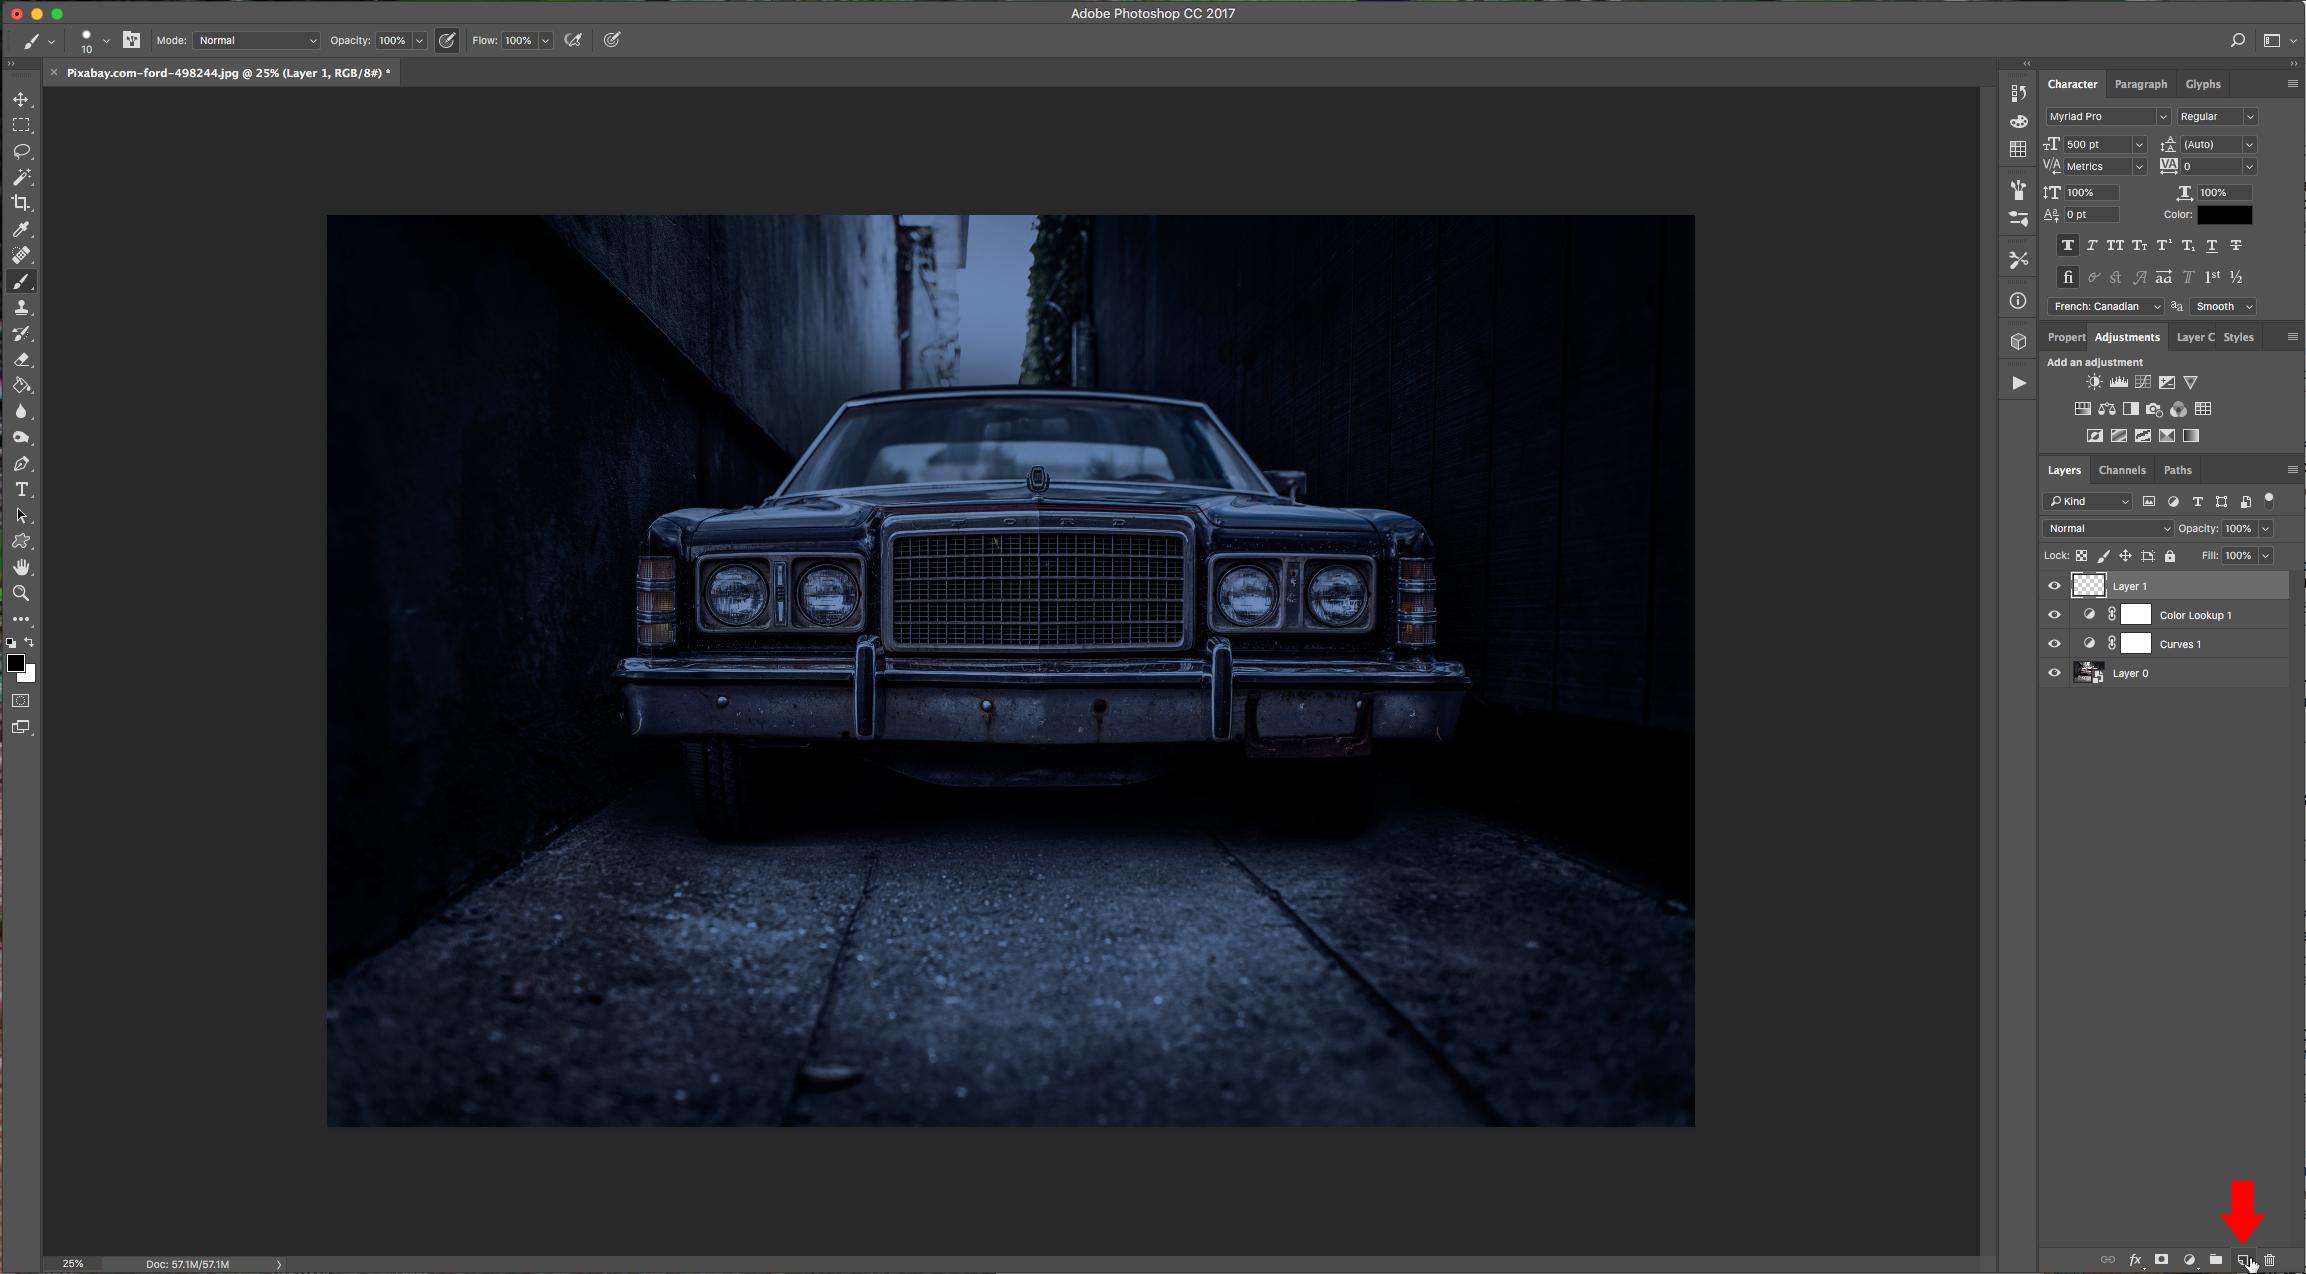
5 - Create a “New Layer” on top of everything.
6 - Select the “pen Tool” (P) choose “Path” and add the first “Point” at about half of the “Height” of the “Headlight” on one side. Add the second and third ones just outside the “Canvas” but leaving more space horizontally, then return to the other side of the “Headlight” and finally close the “Path”. The idea is to make a “Light Beam” replicating what it should look like in real life.
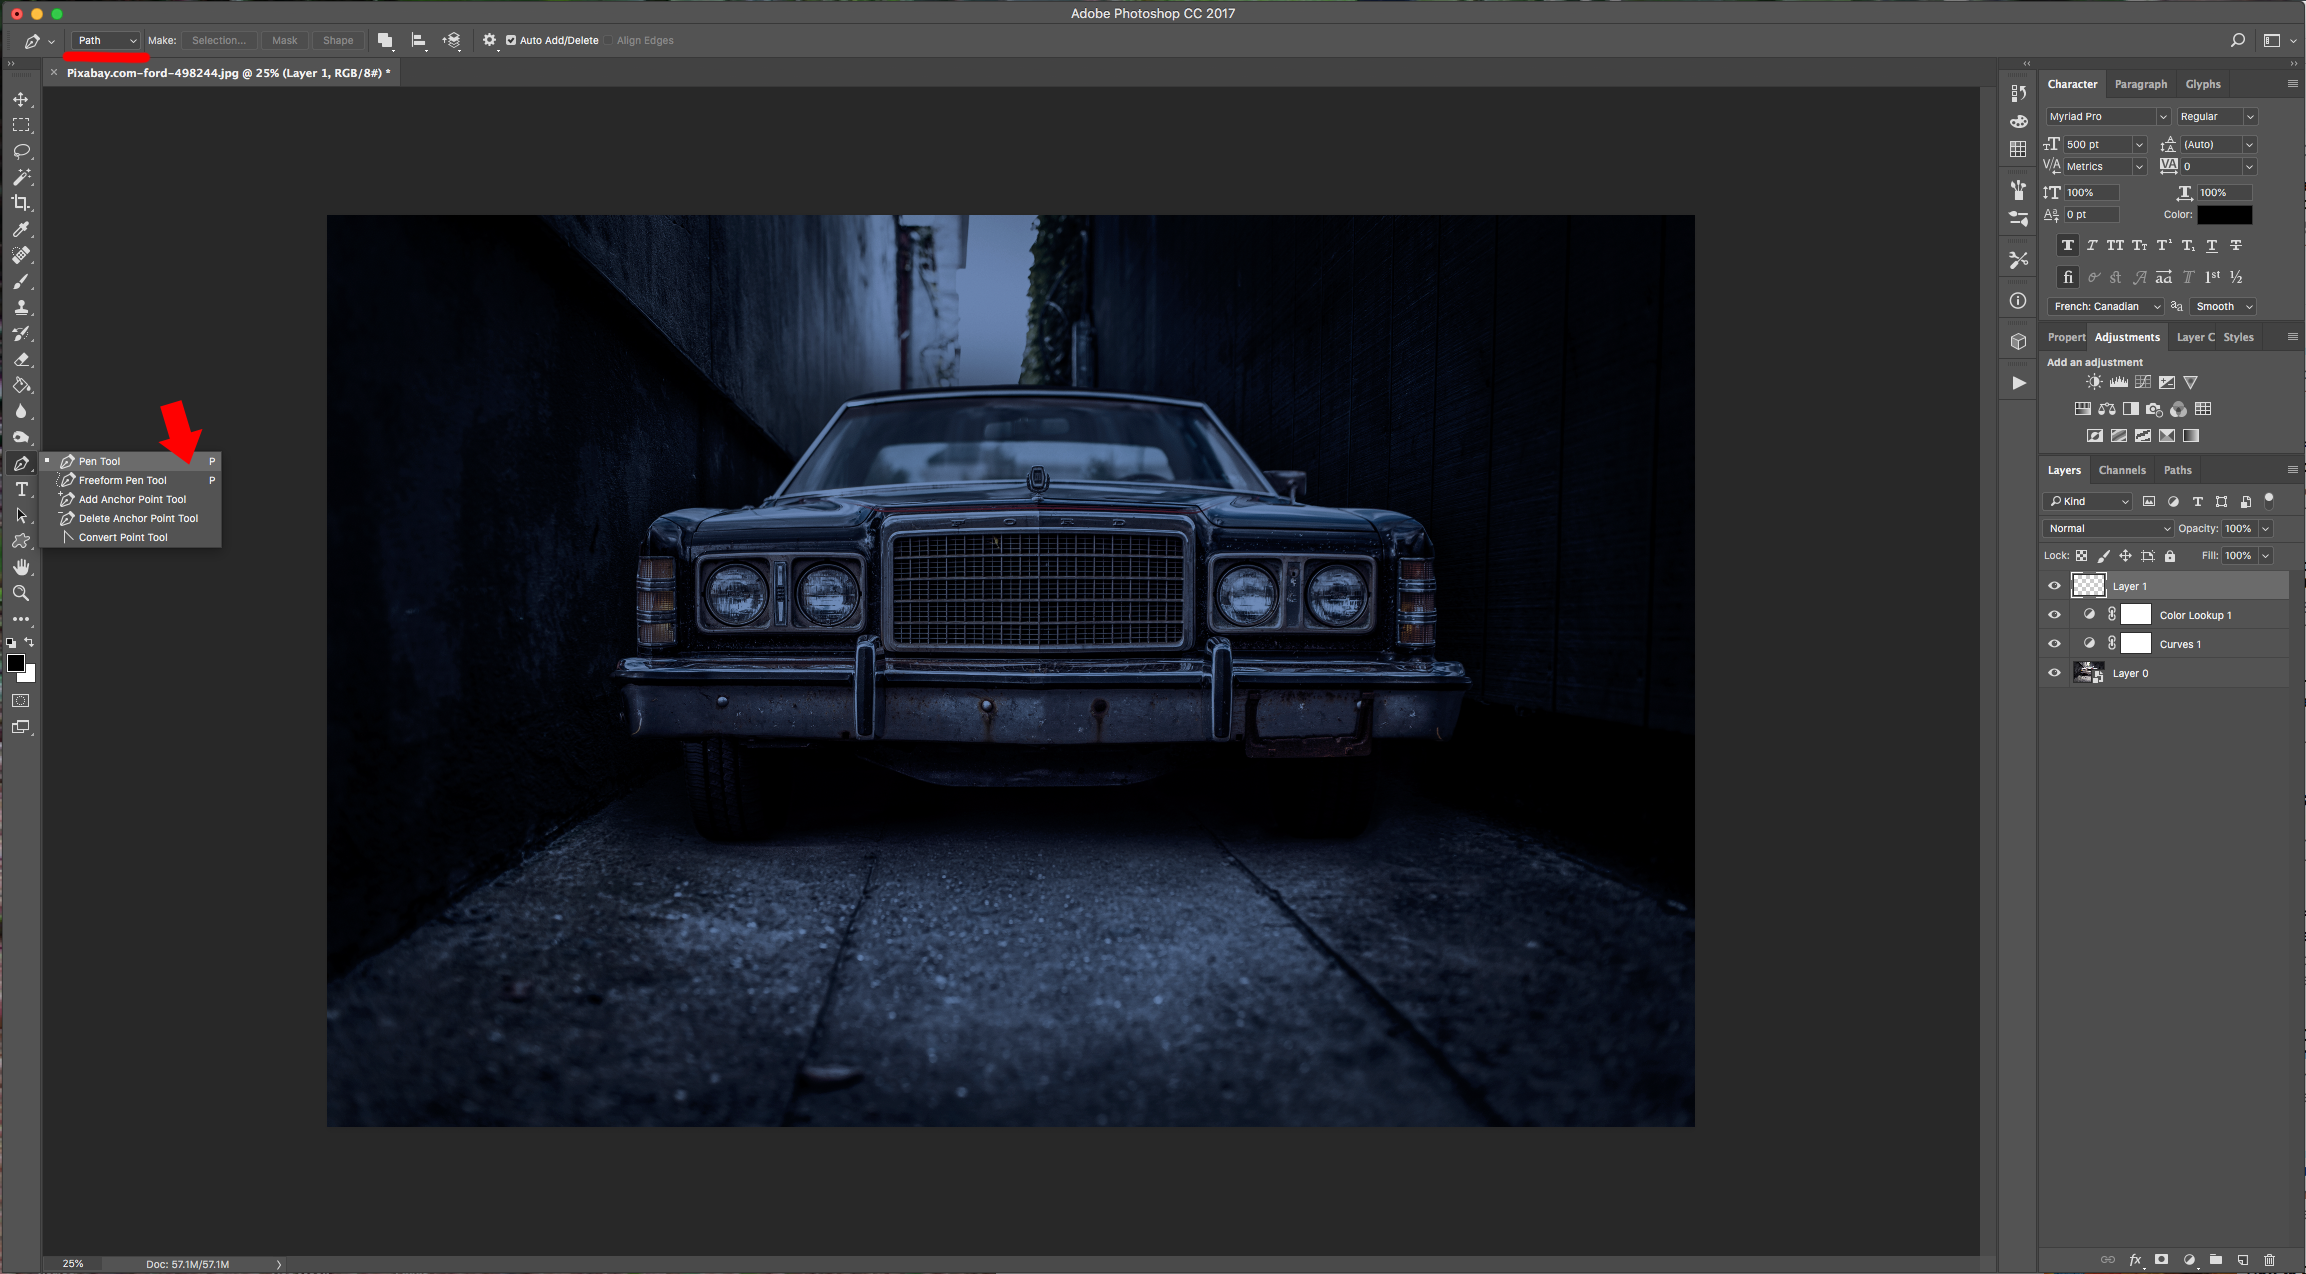
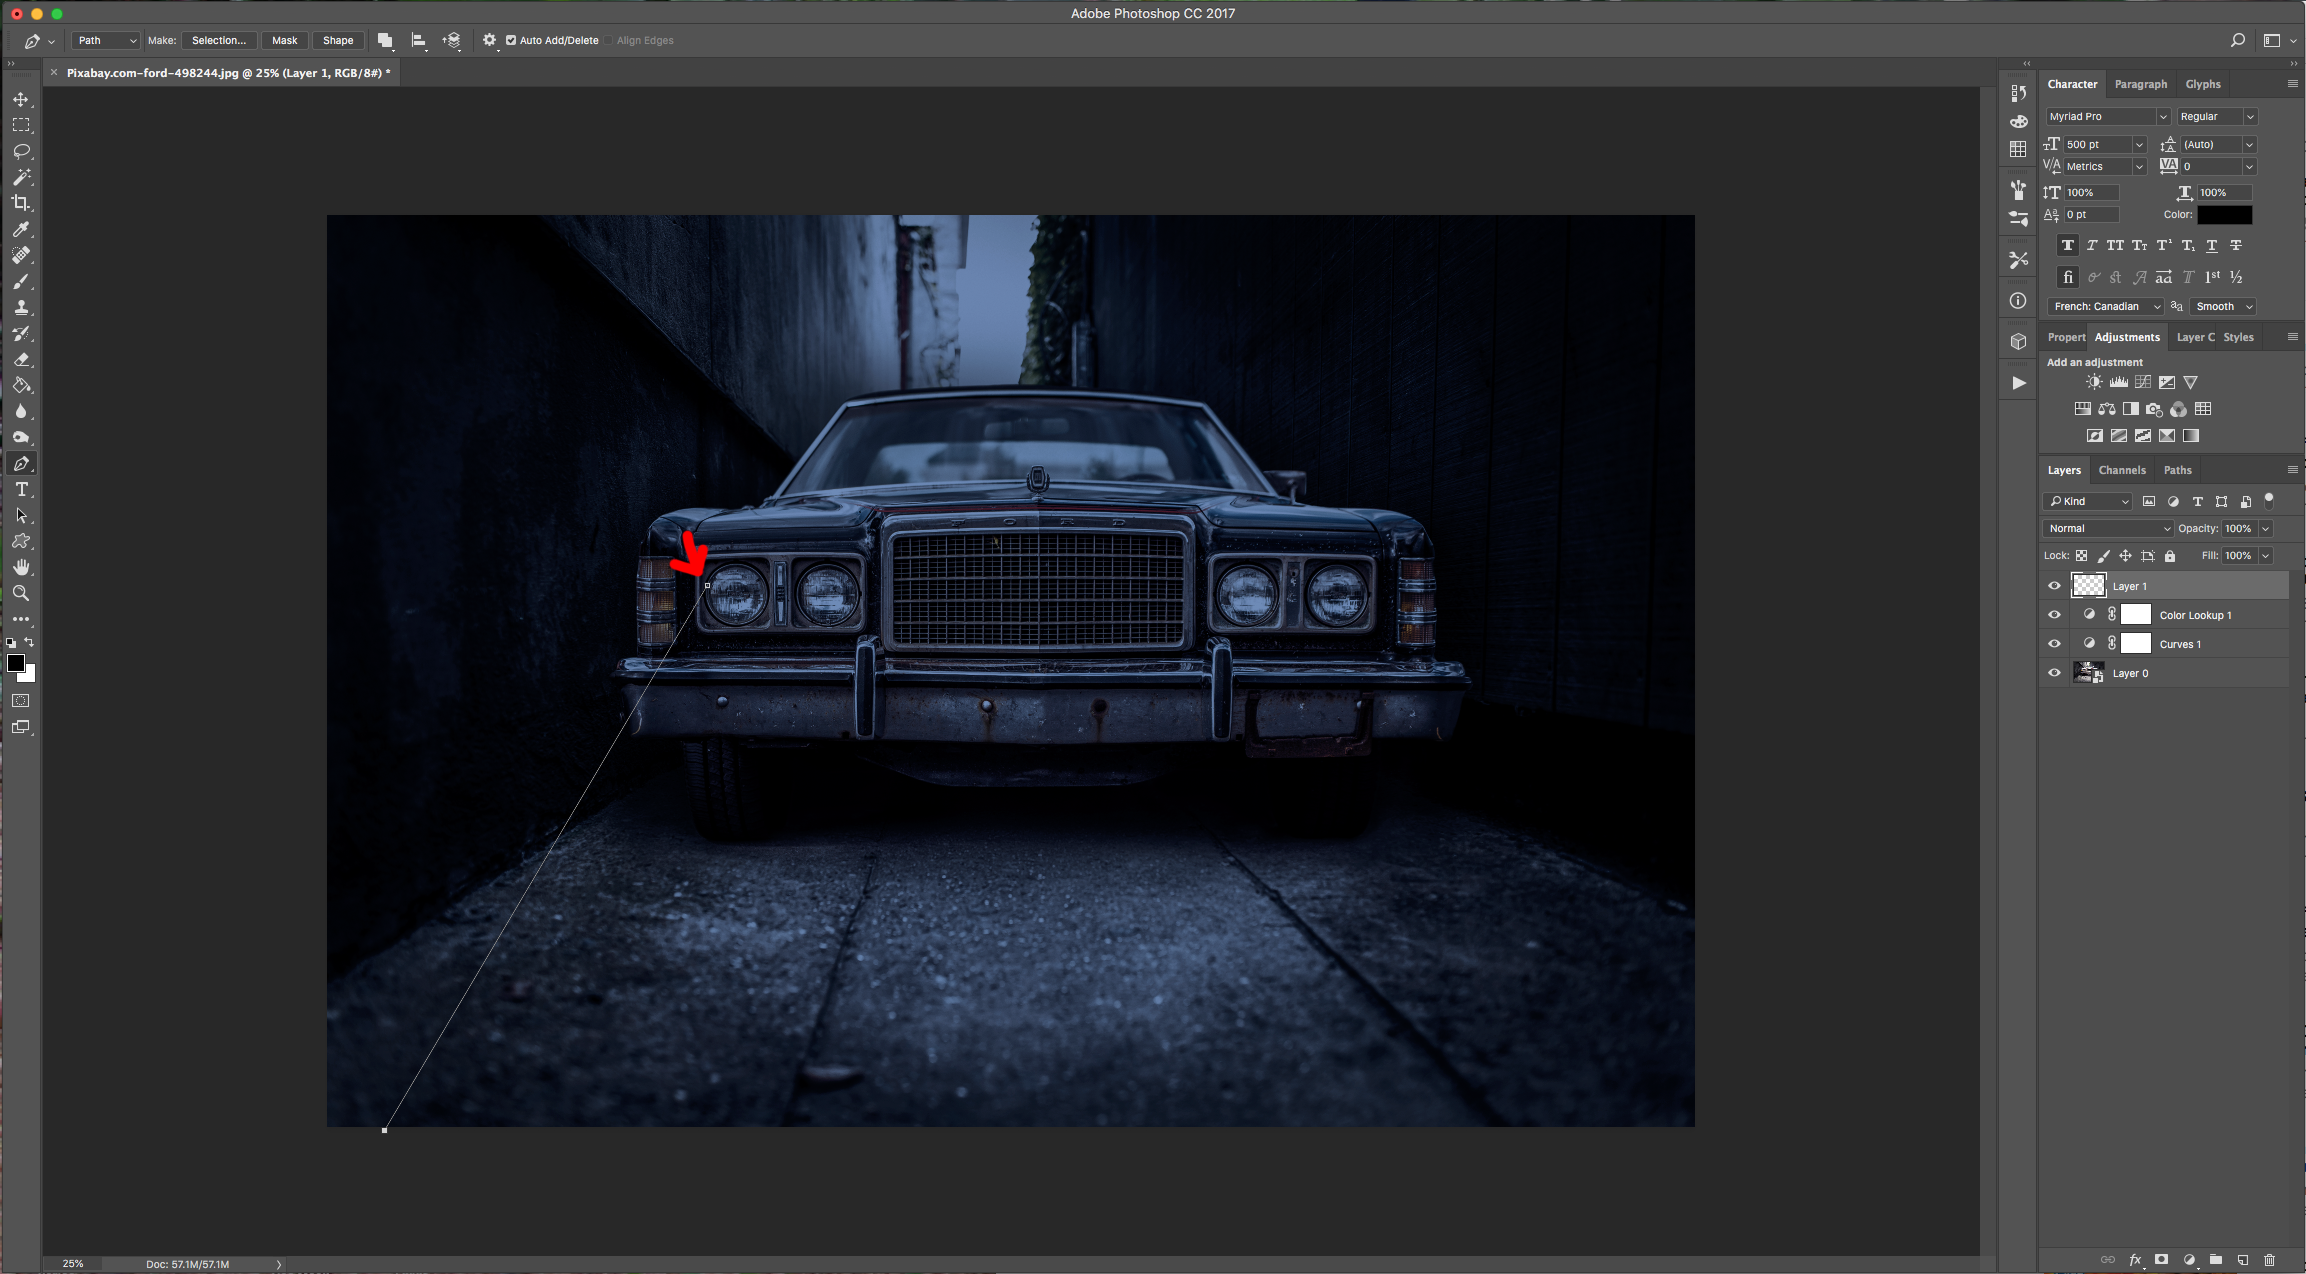
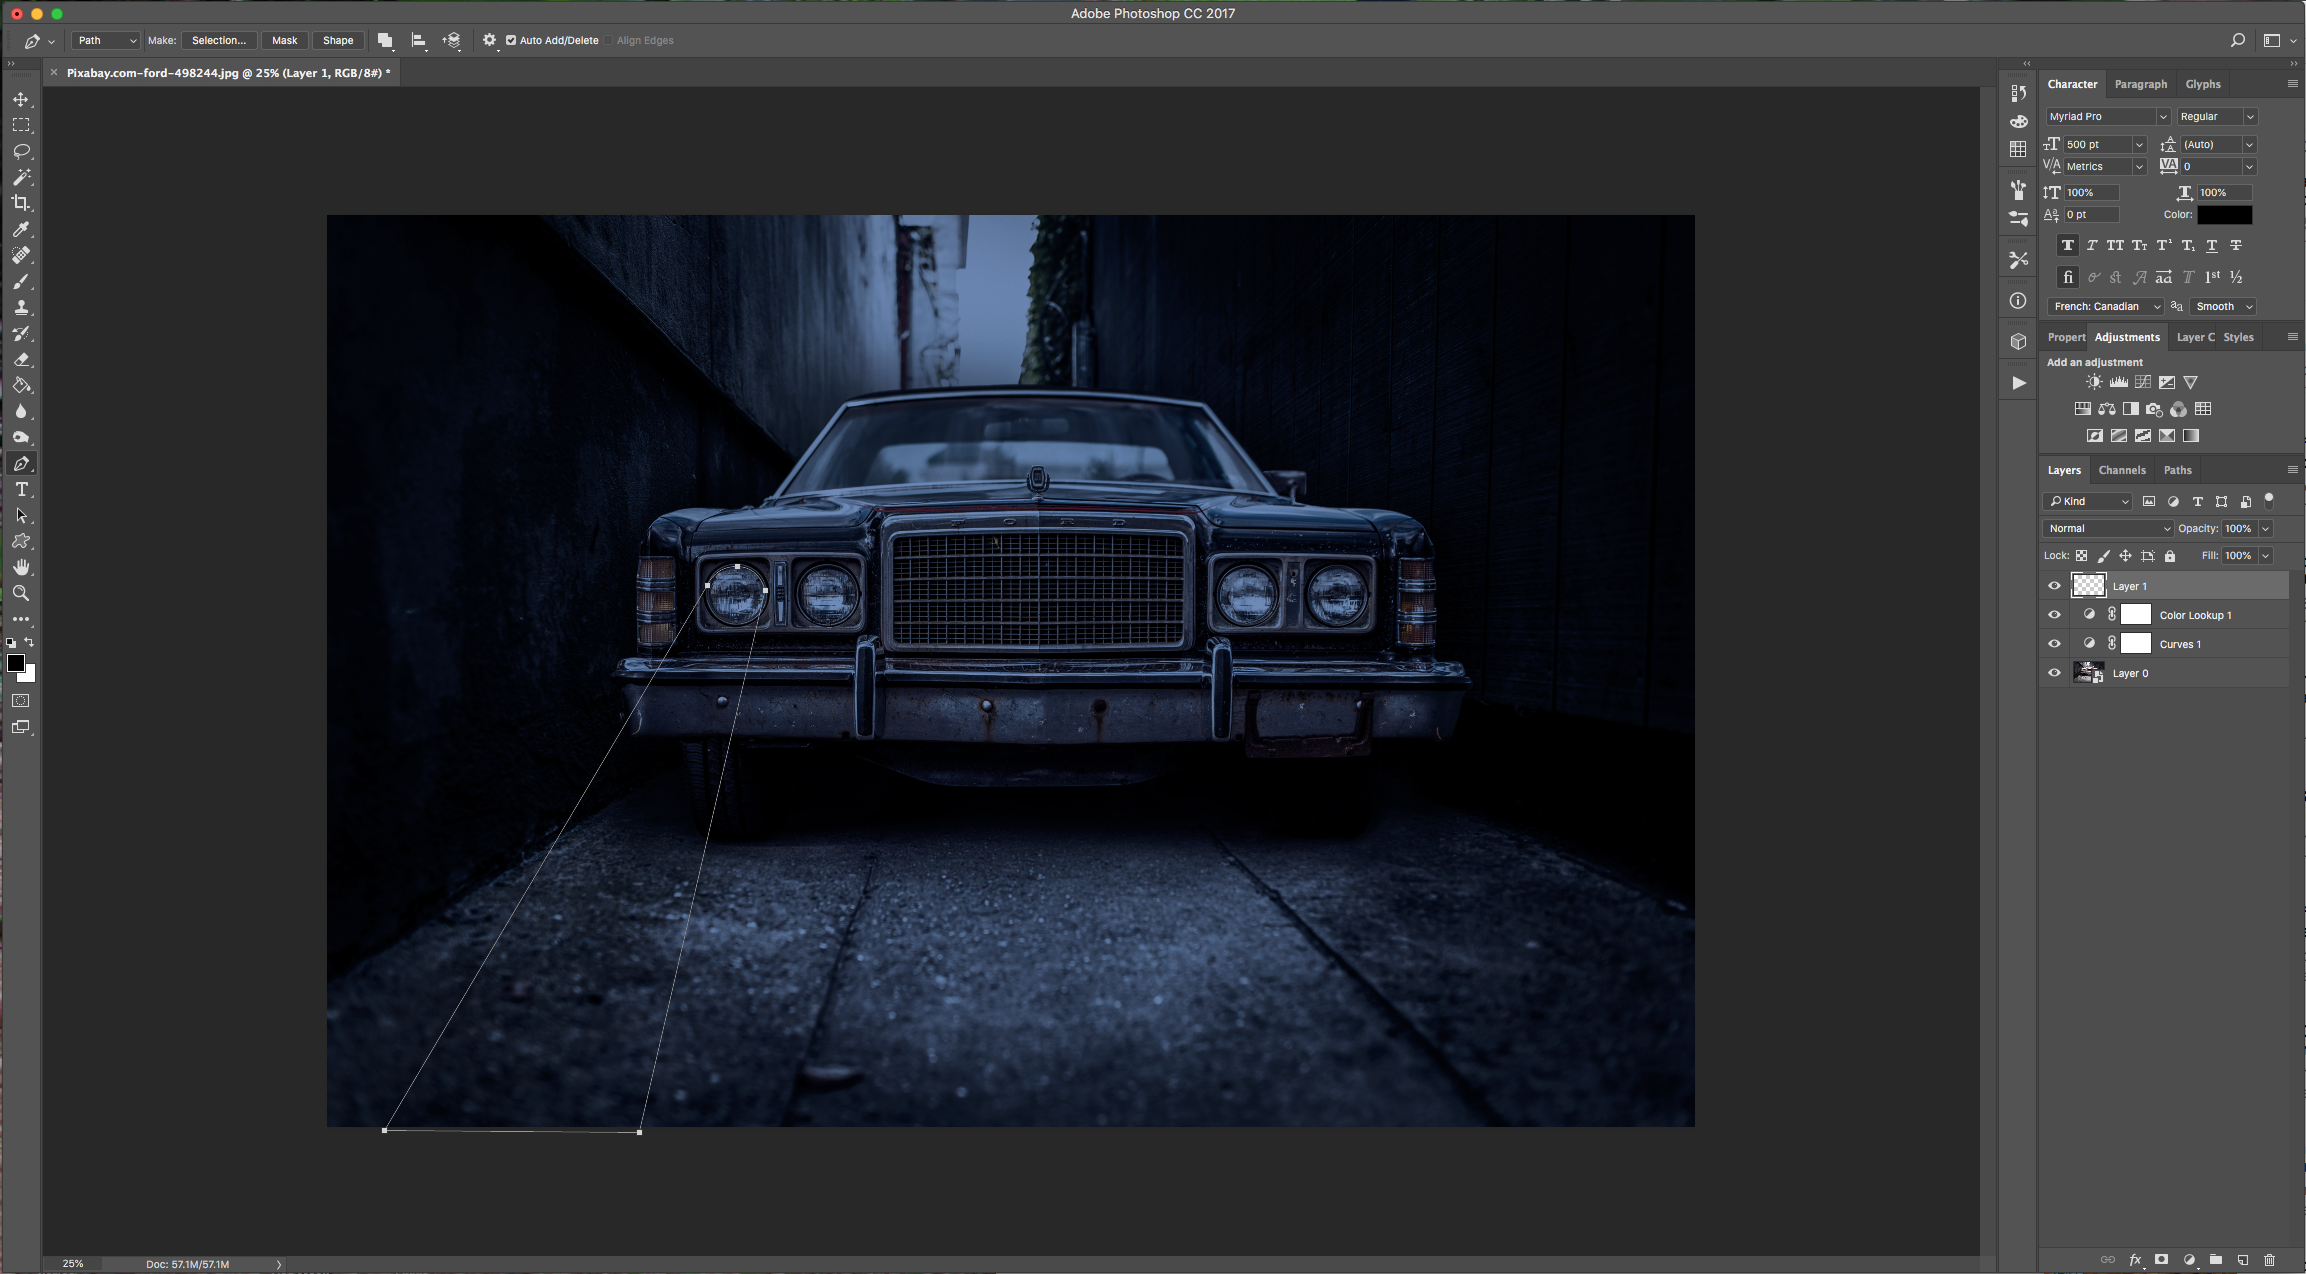
7 - Repeat and create “Light Beams” for as many “Headlights” as needed.
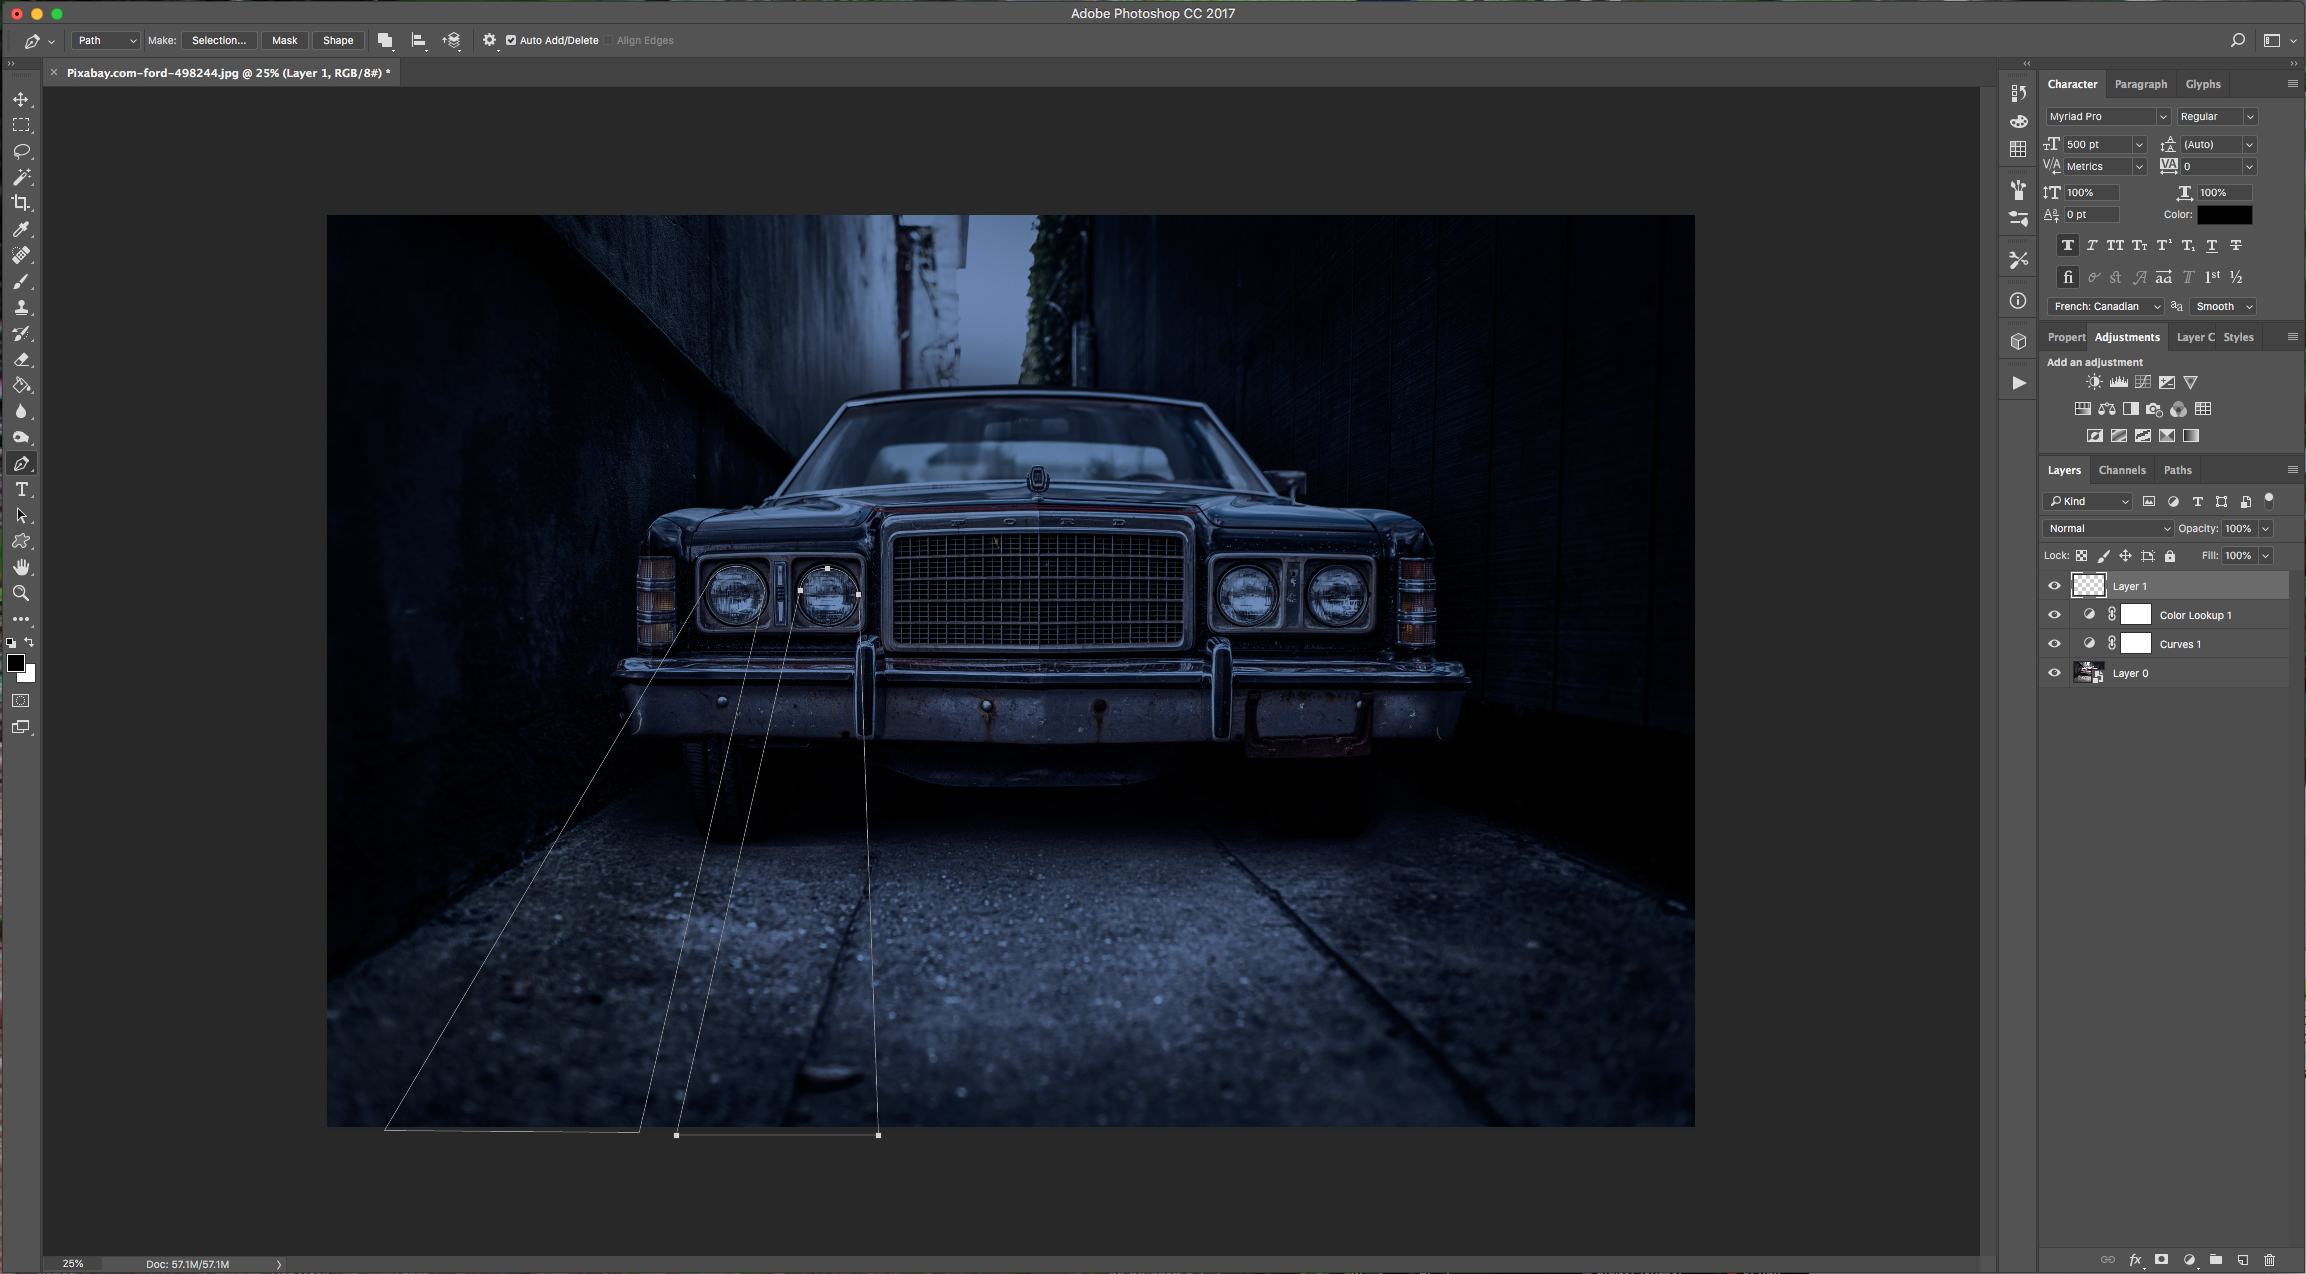
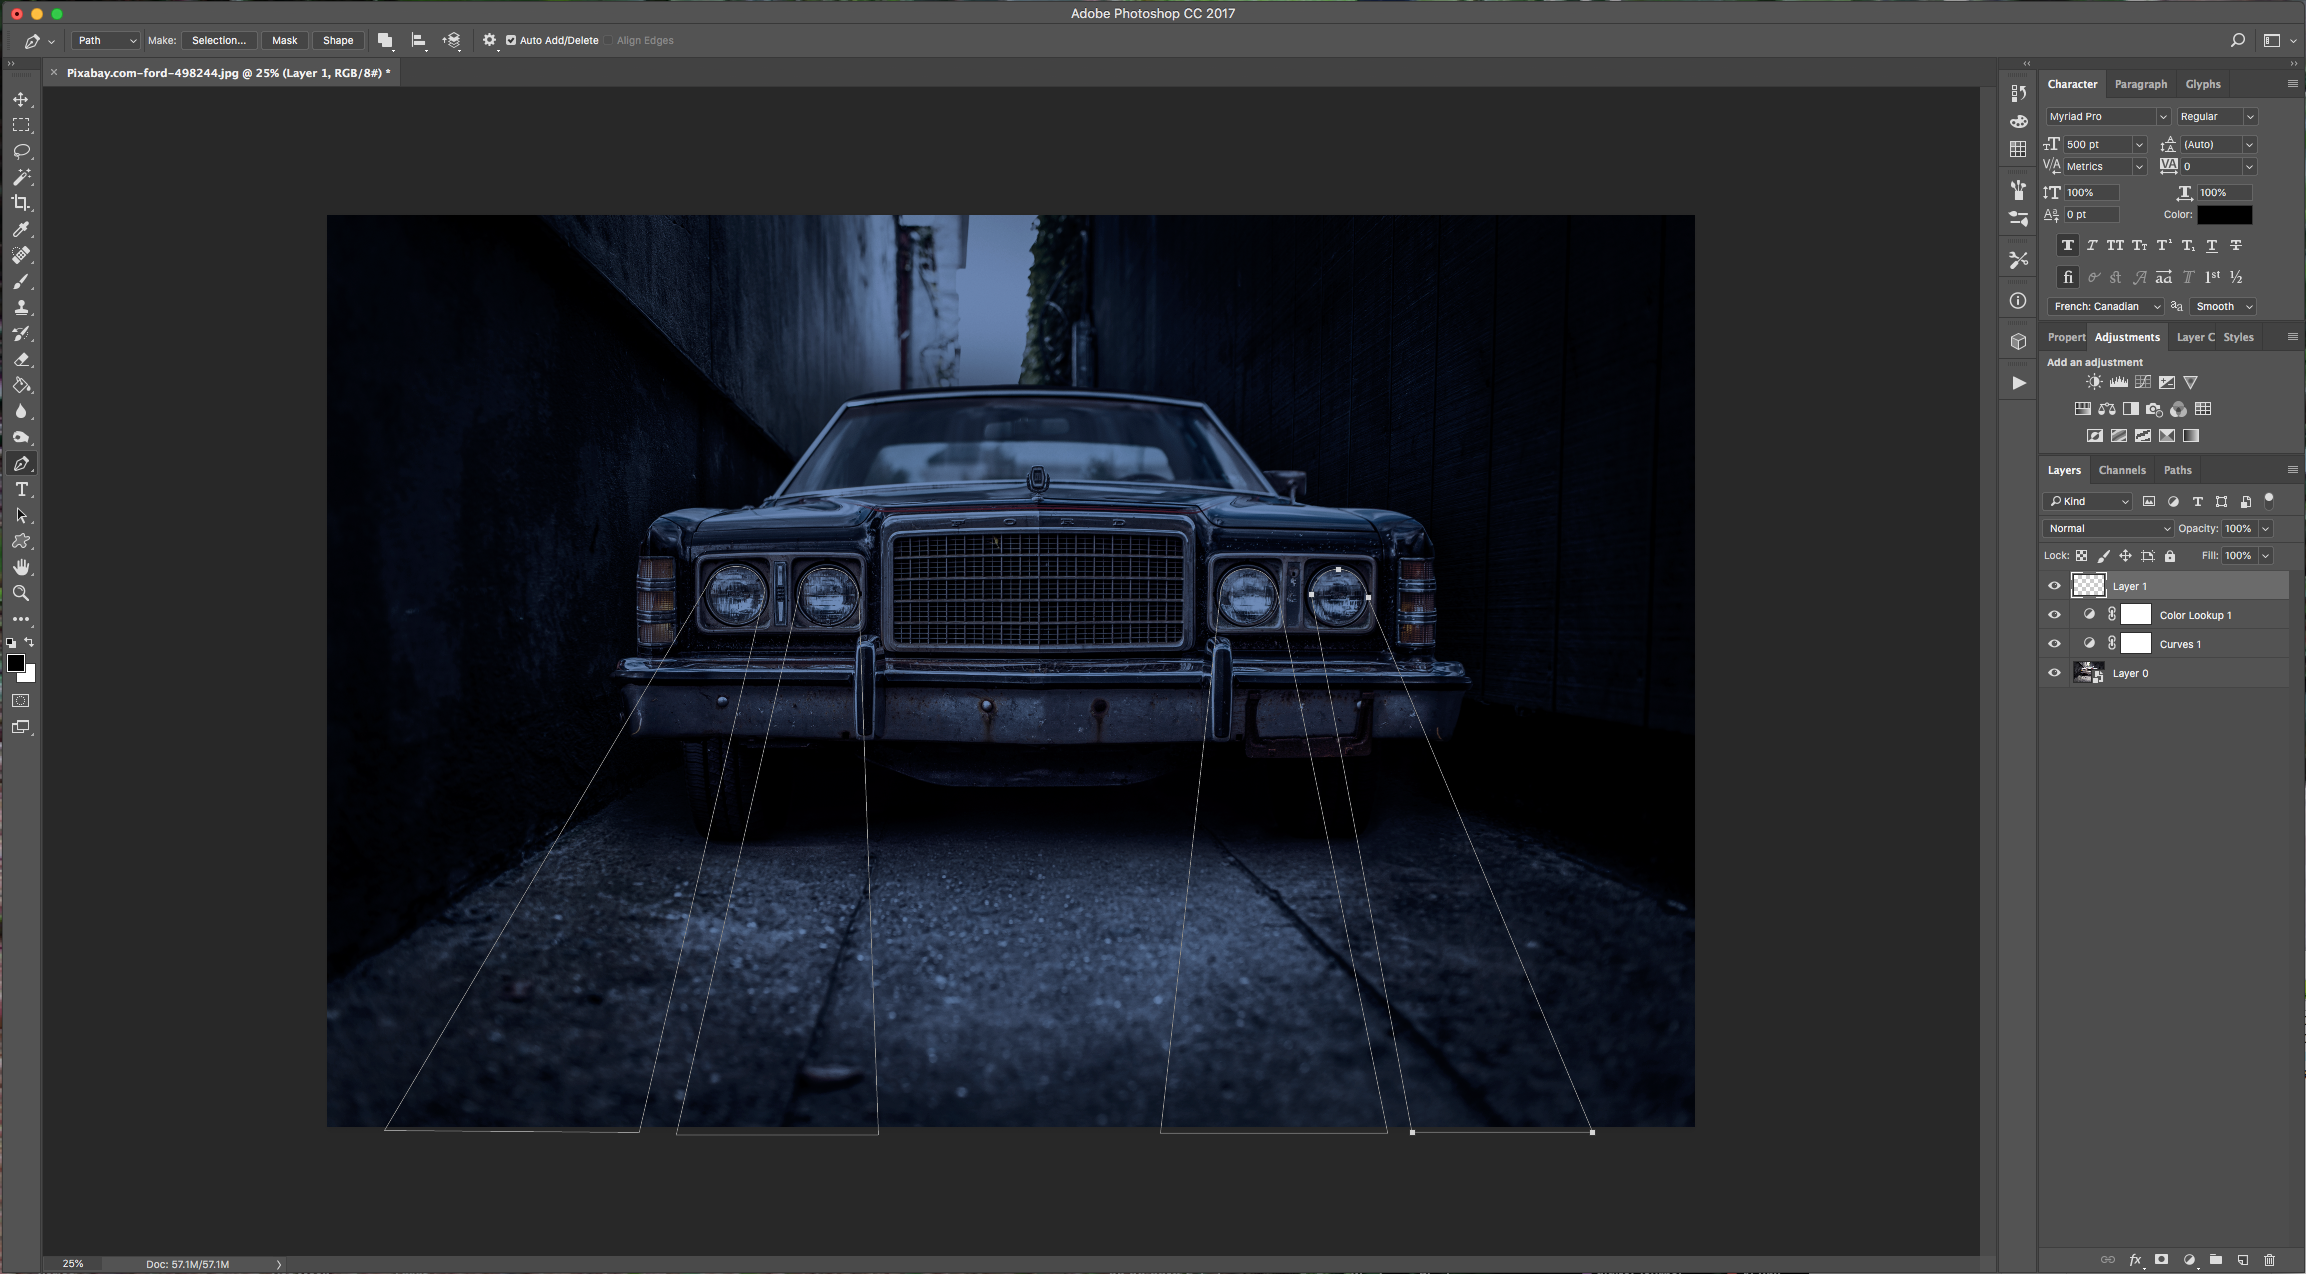
8 - Use the “Path Selection Tool” (A) to select all your paths.
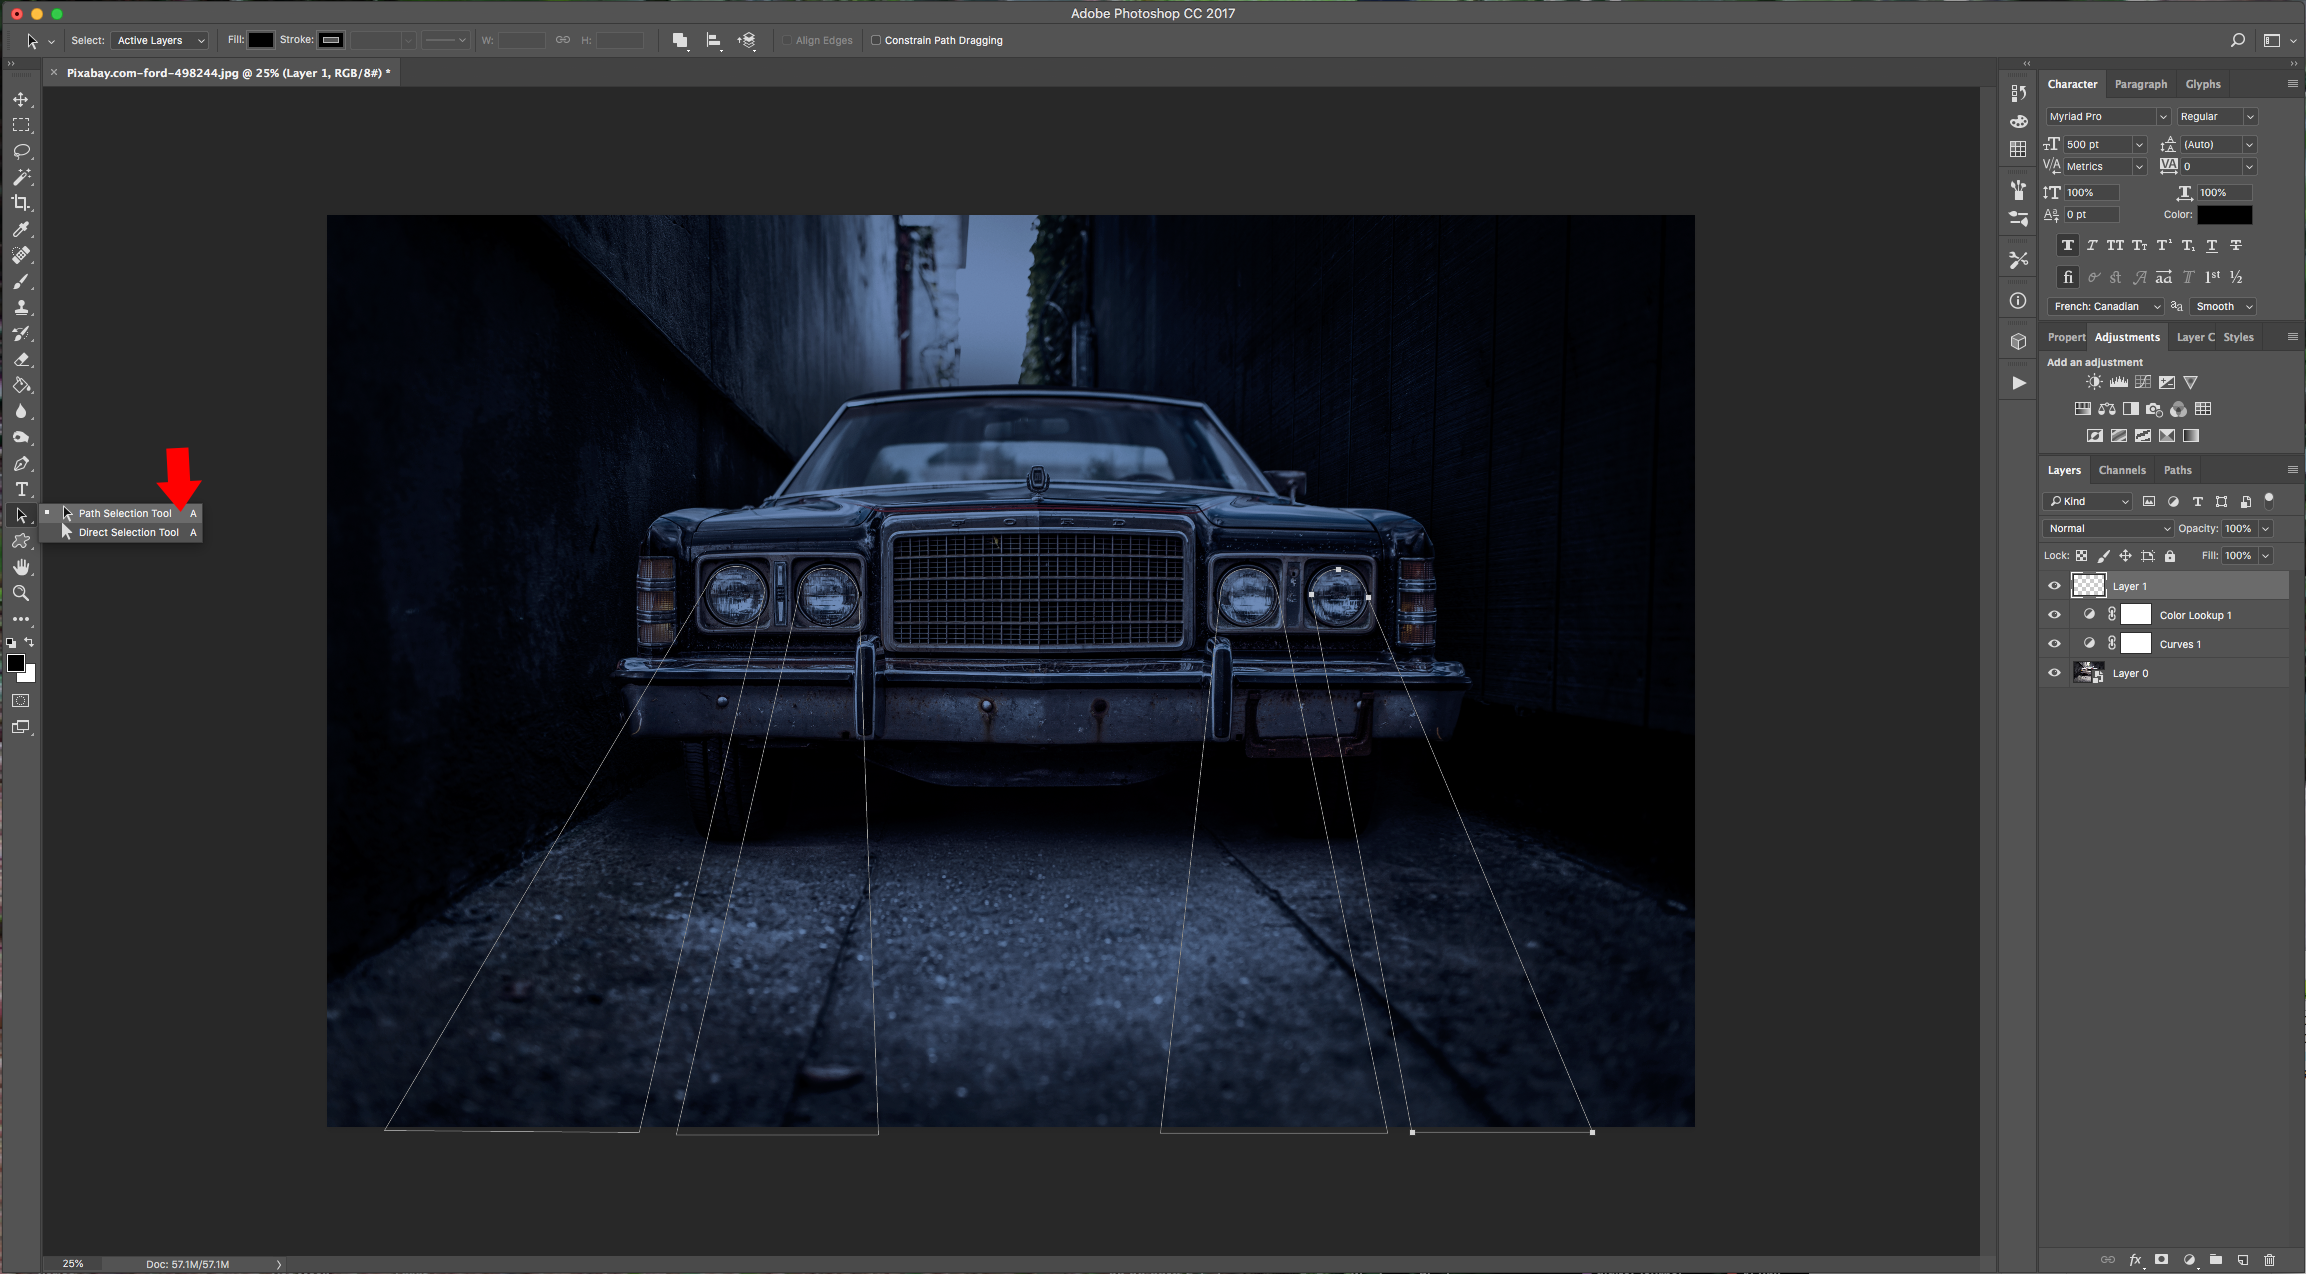
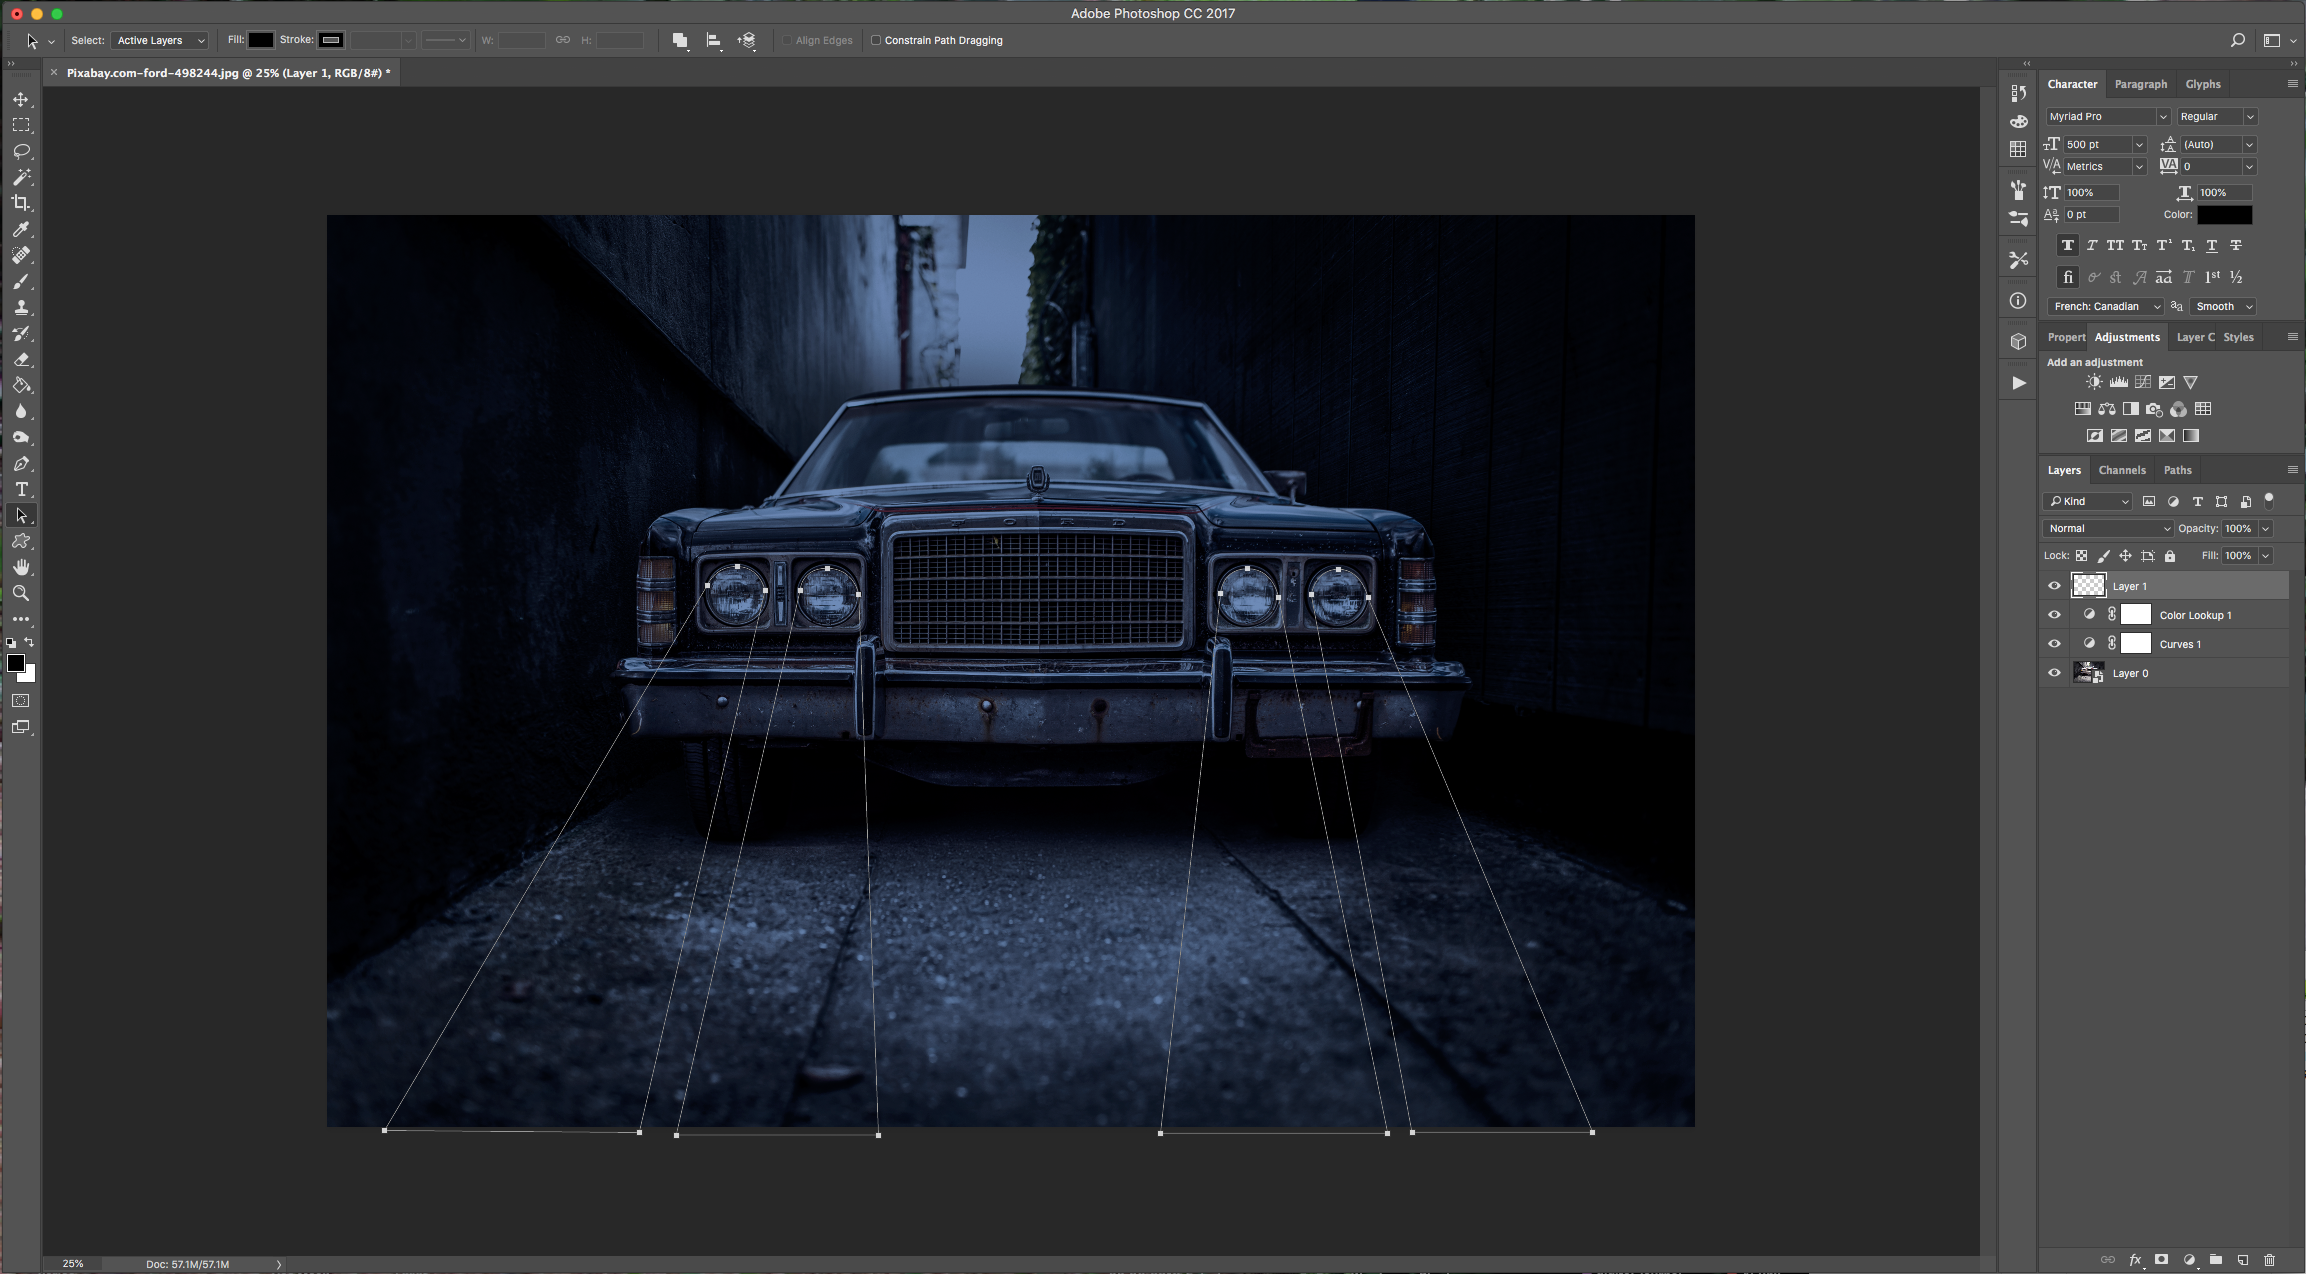
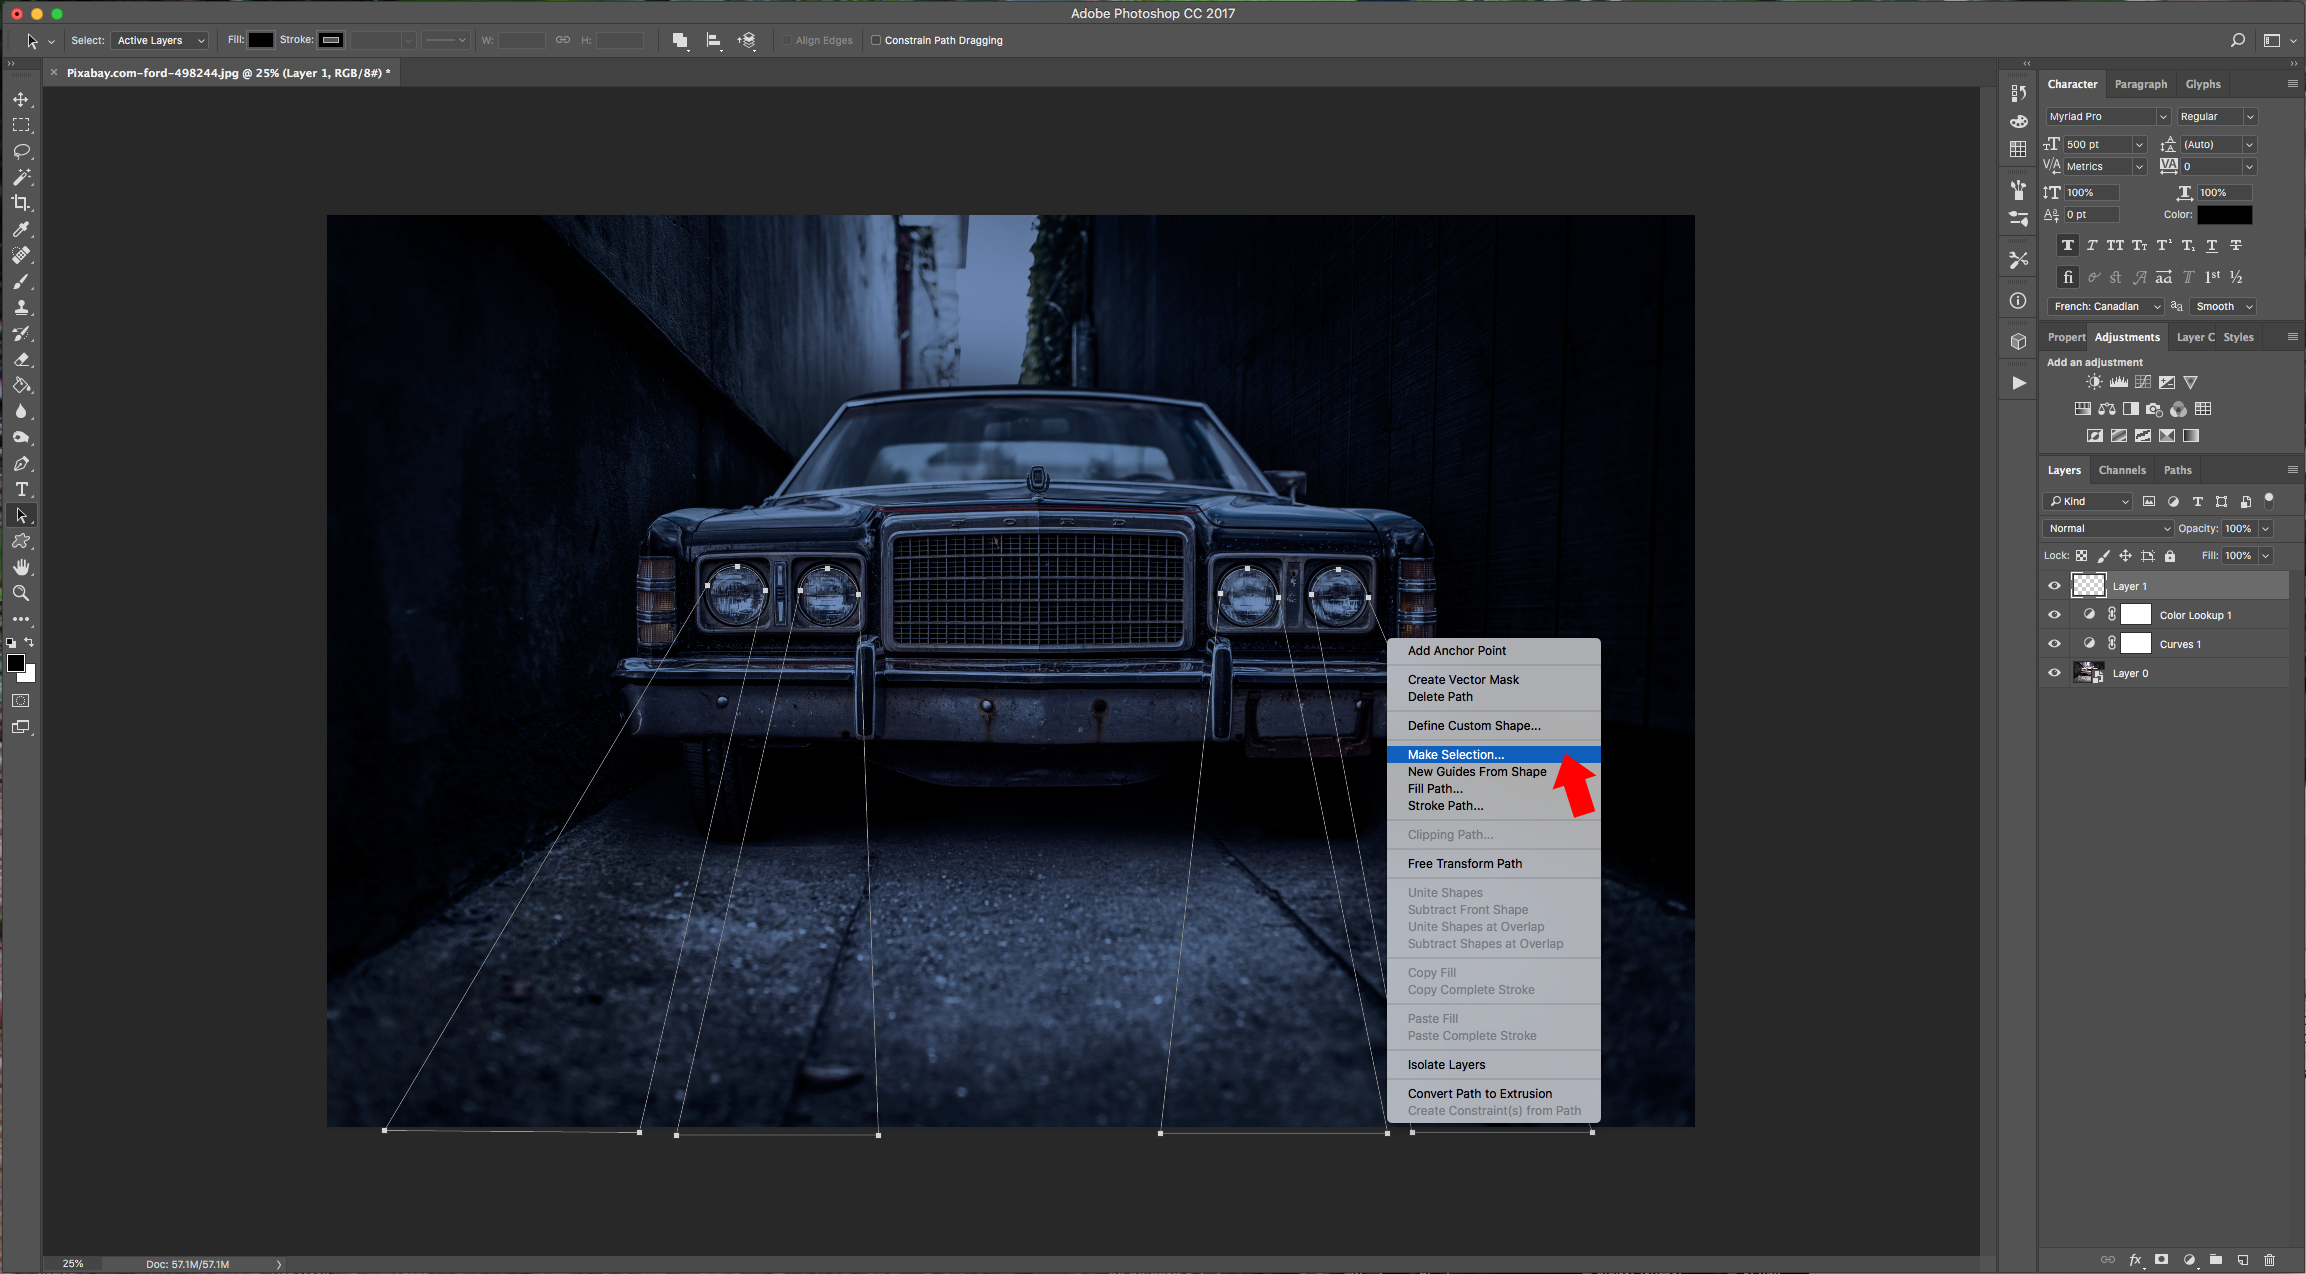
9 - Right-click on top of them and choose “Make Selection” and use a 0 pixels “Feather”.
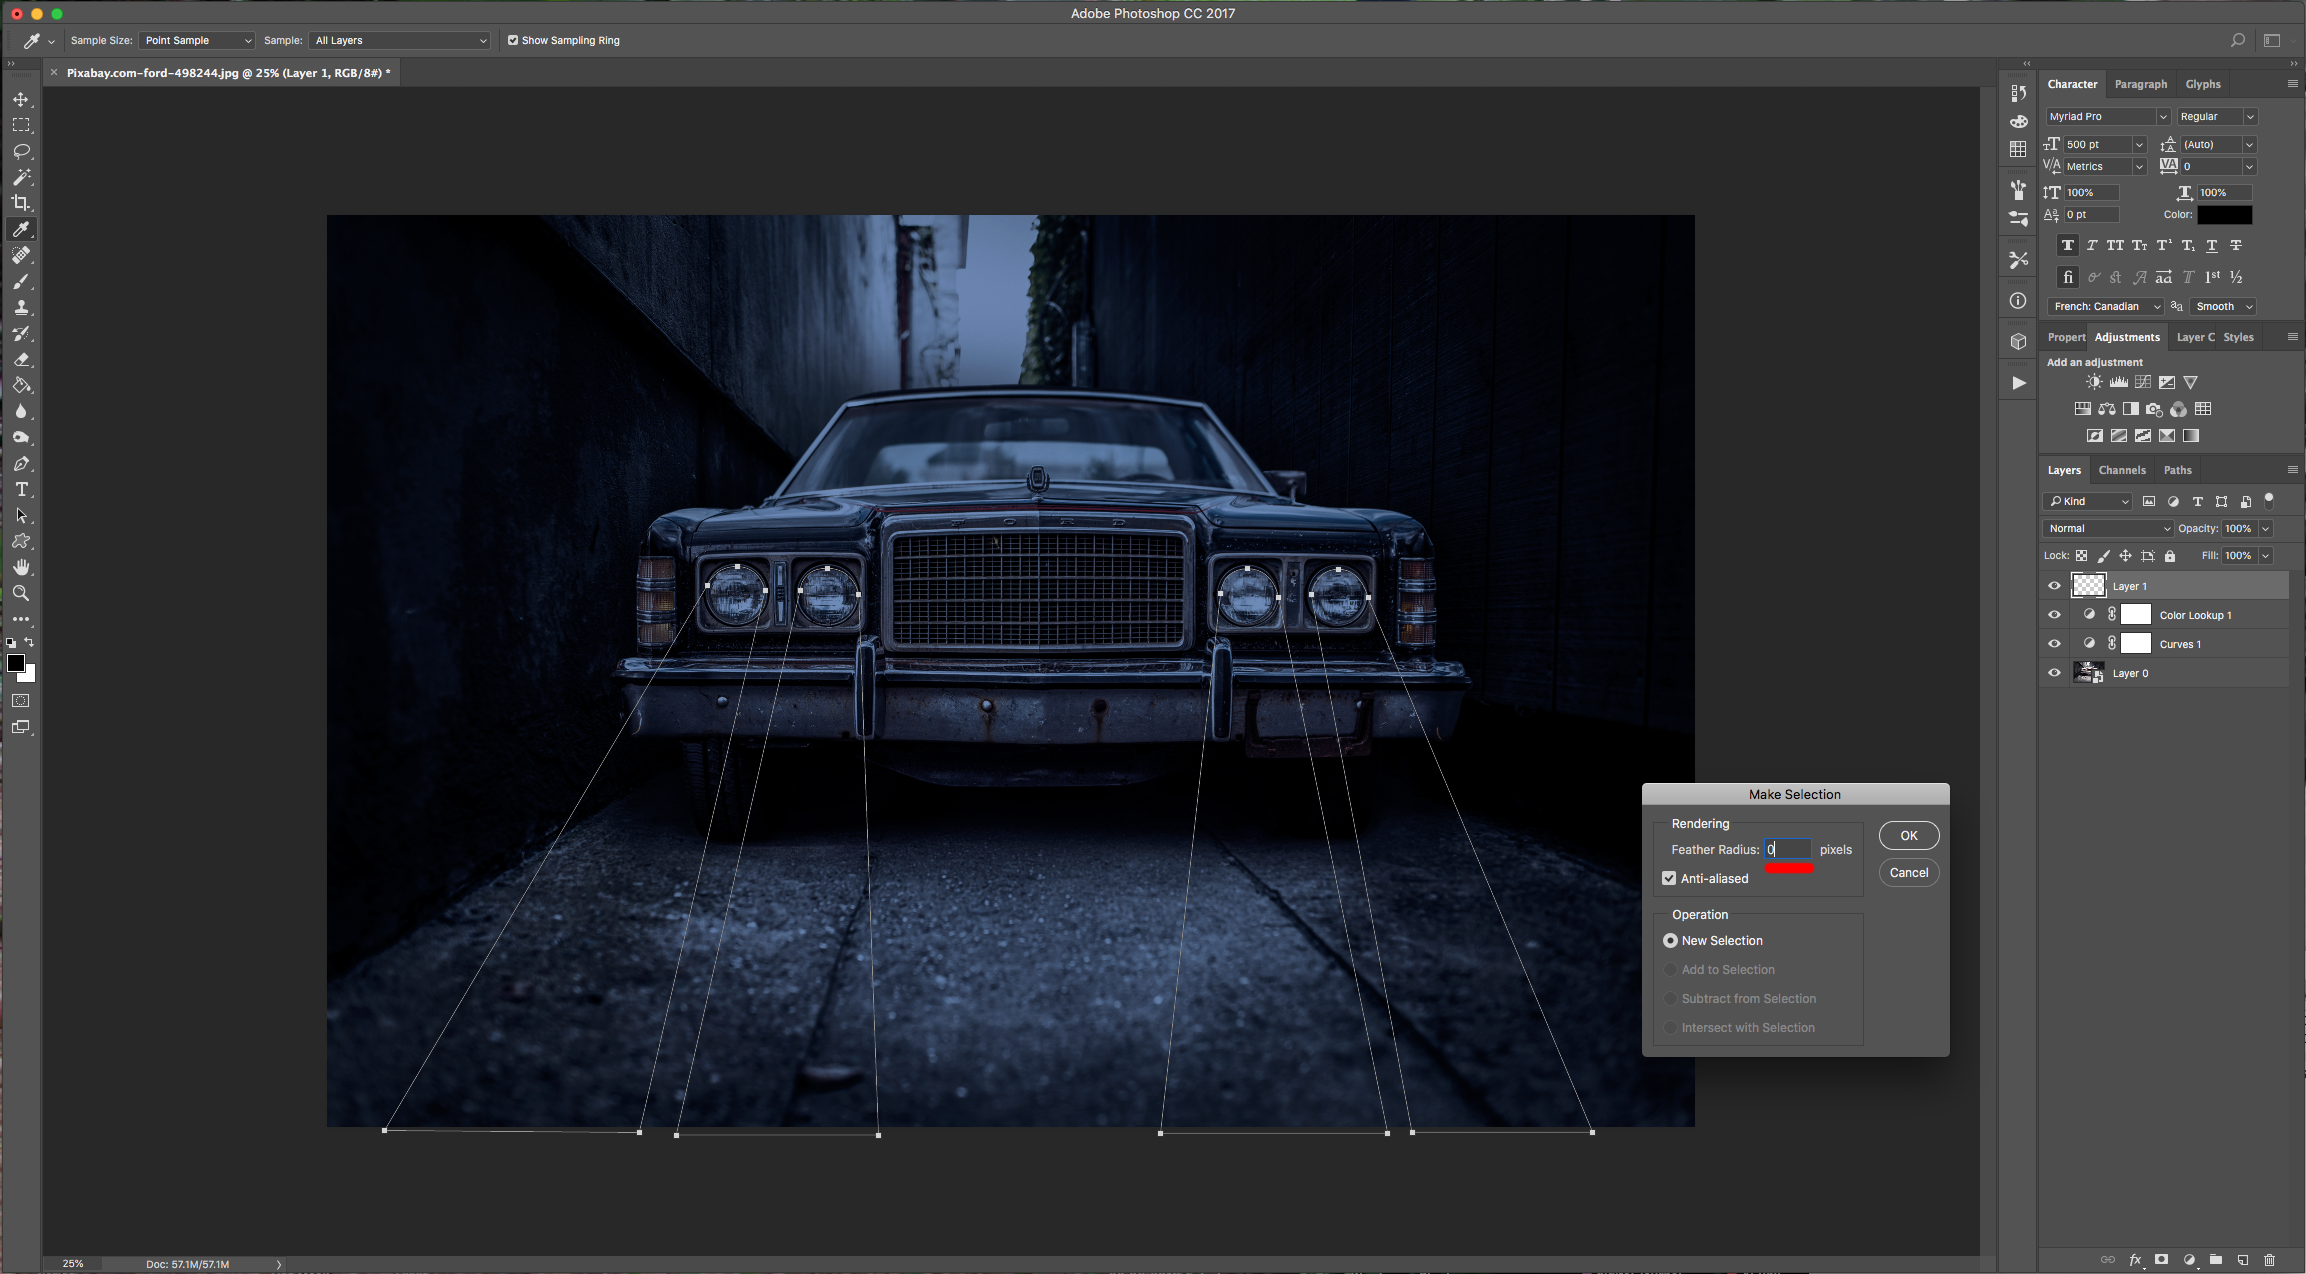
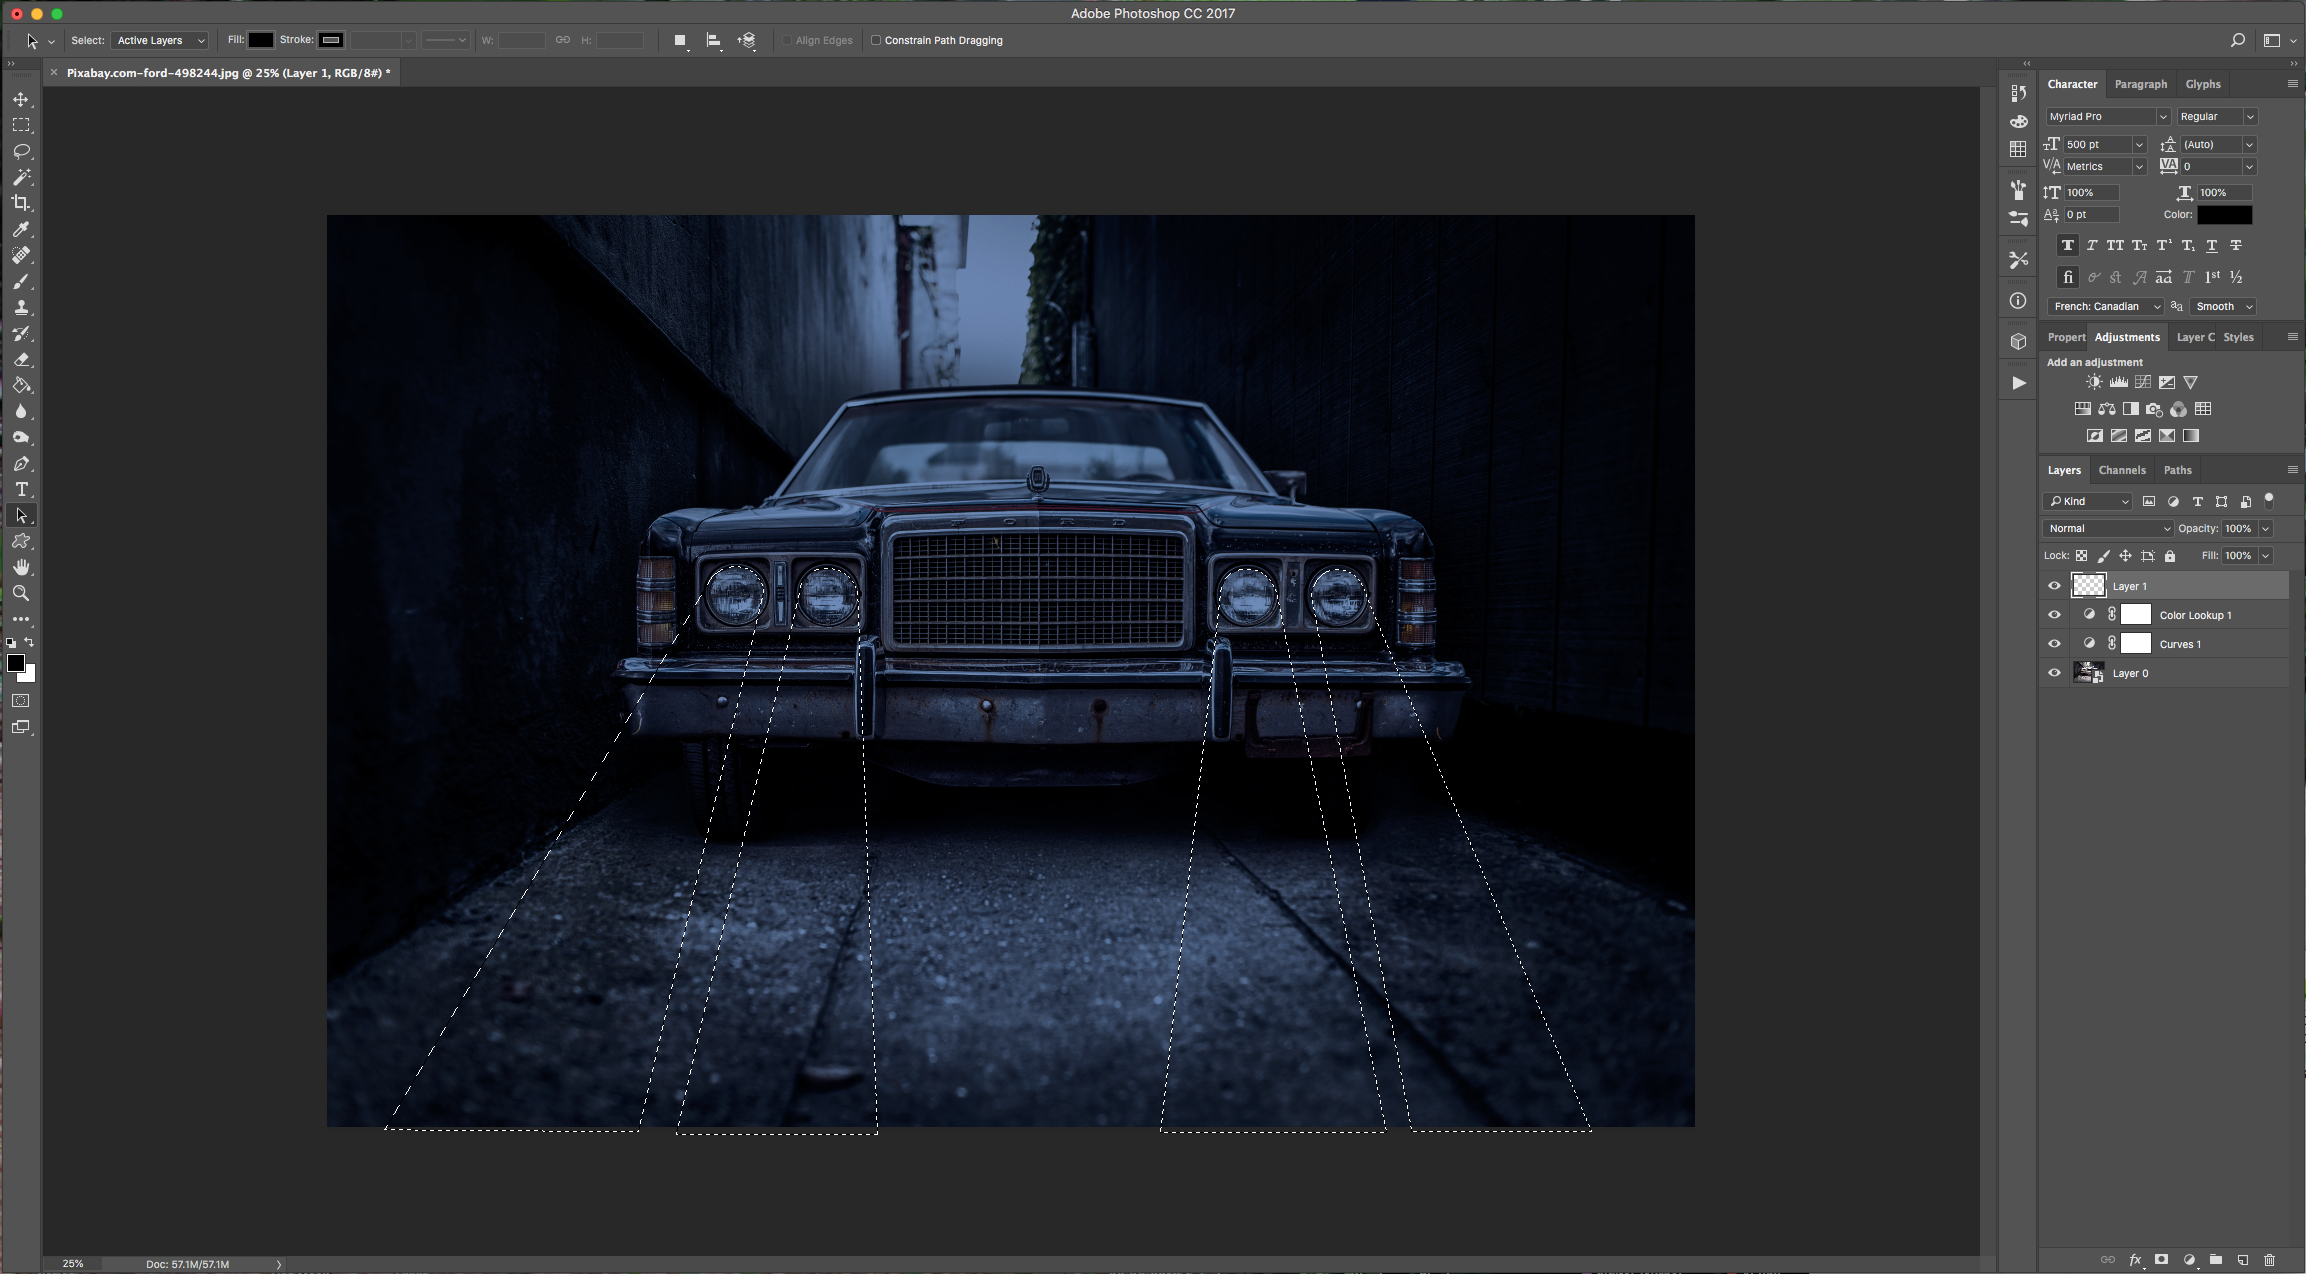
10 - Fill your selection with White or “Background” Color (Command/Control + Delete) and “Deselect” (Command/Control + D).
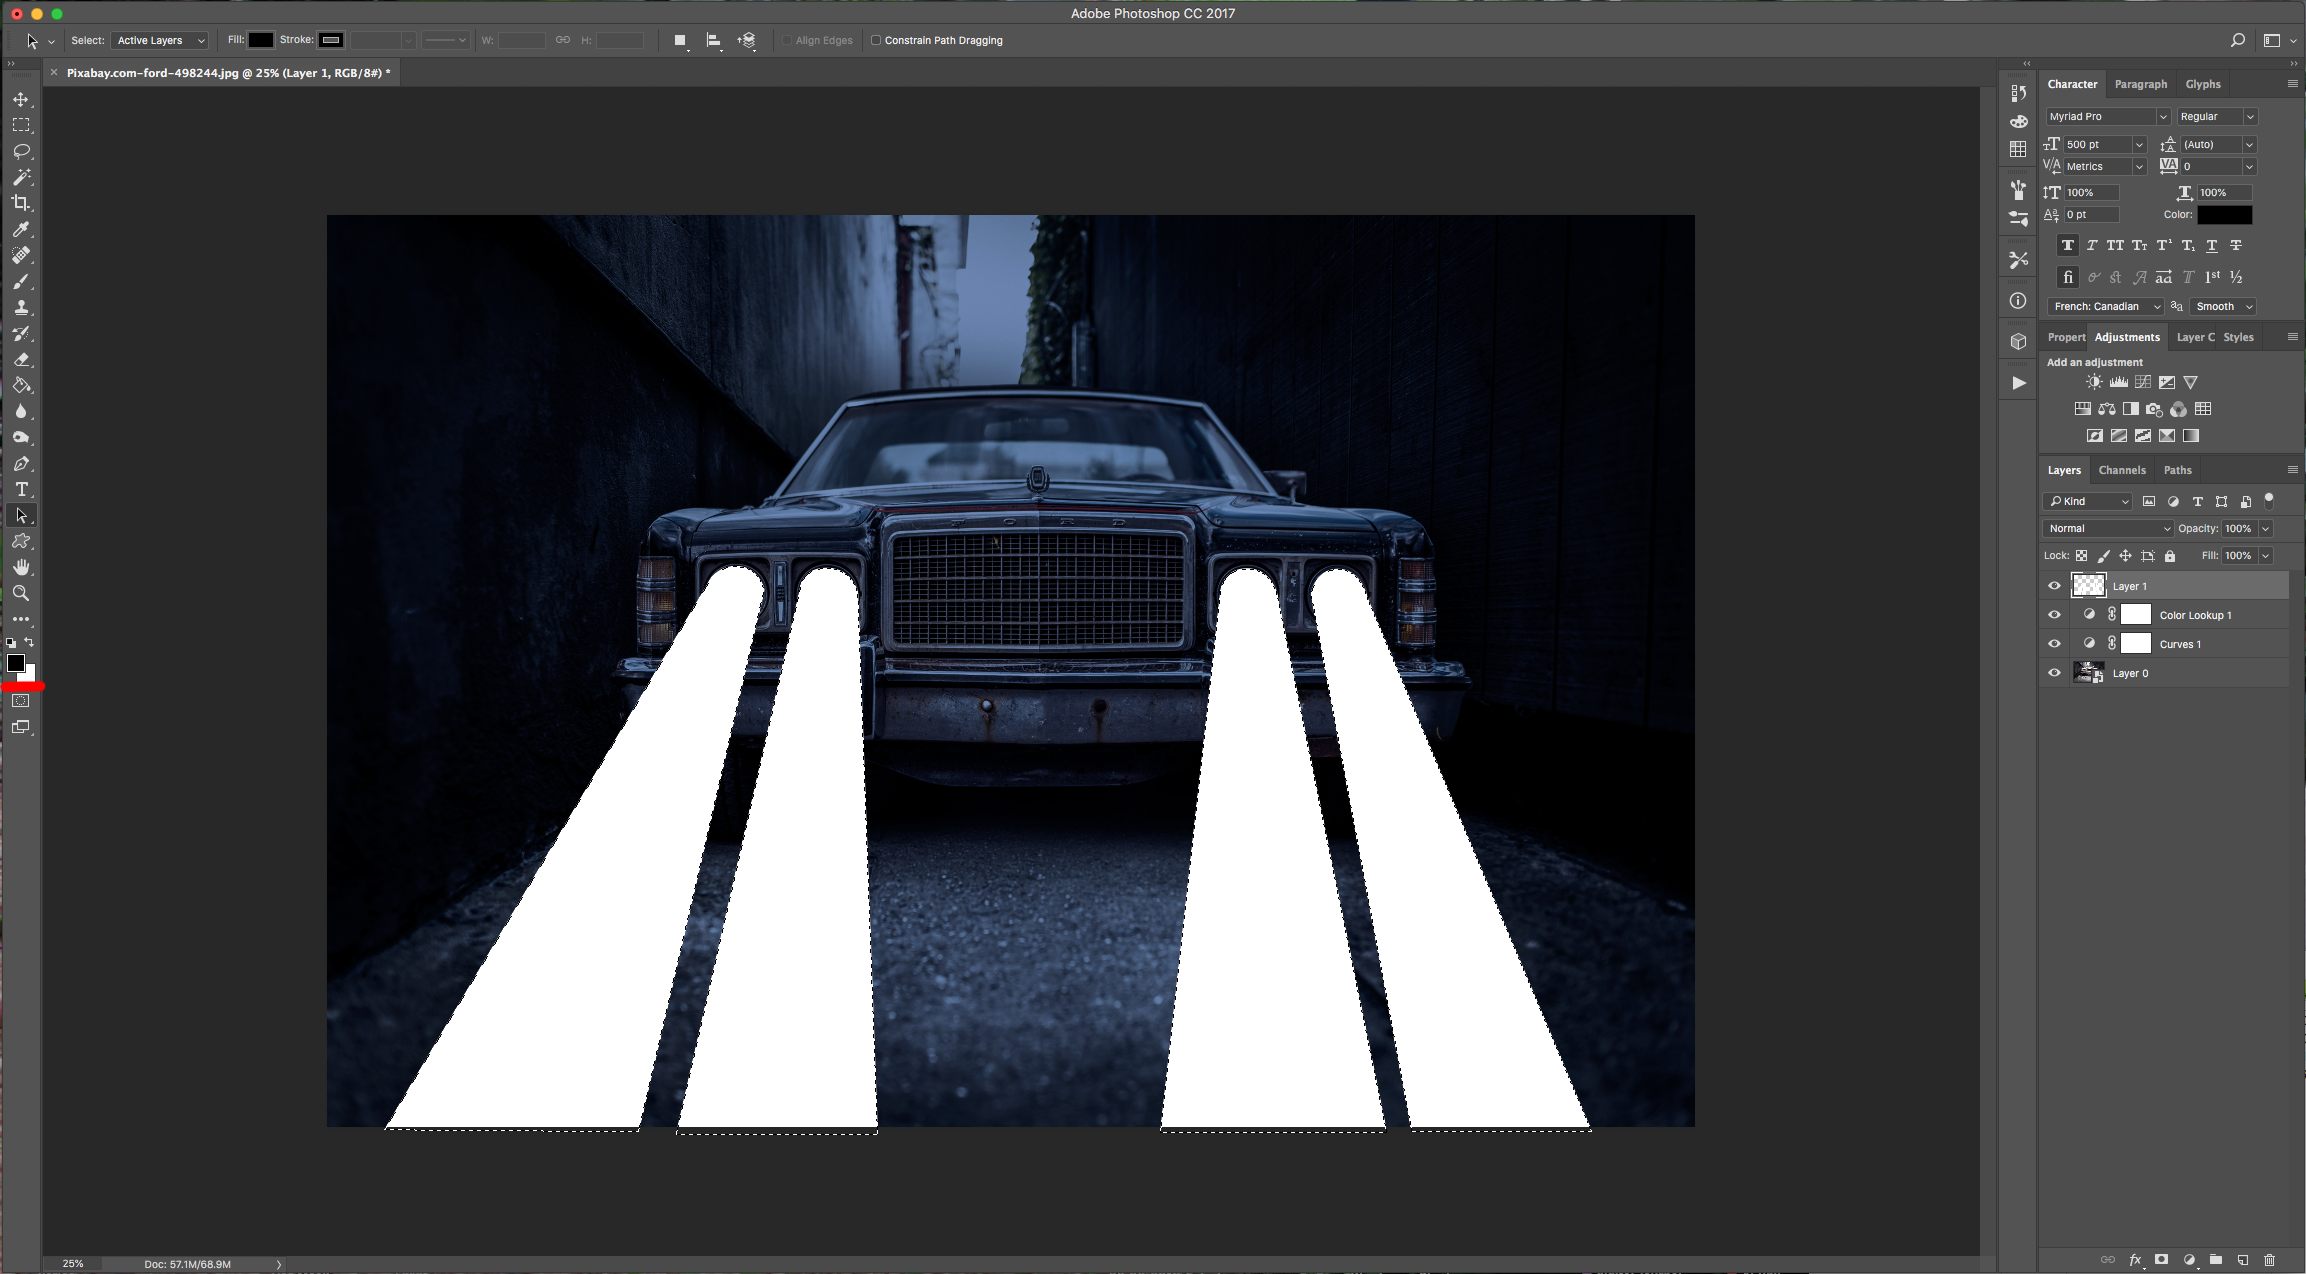
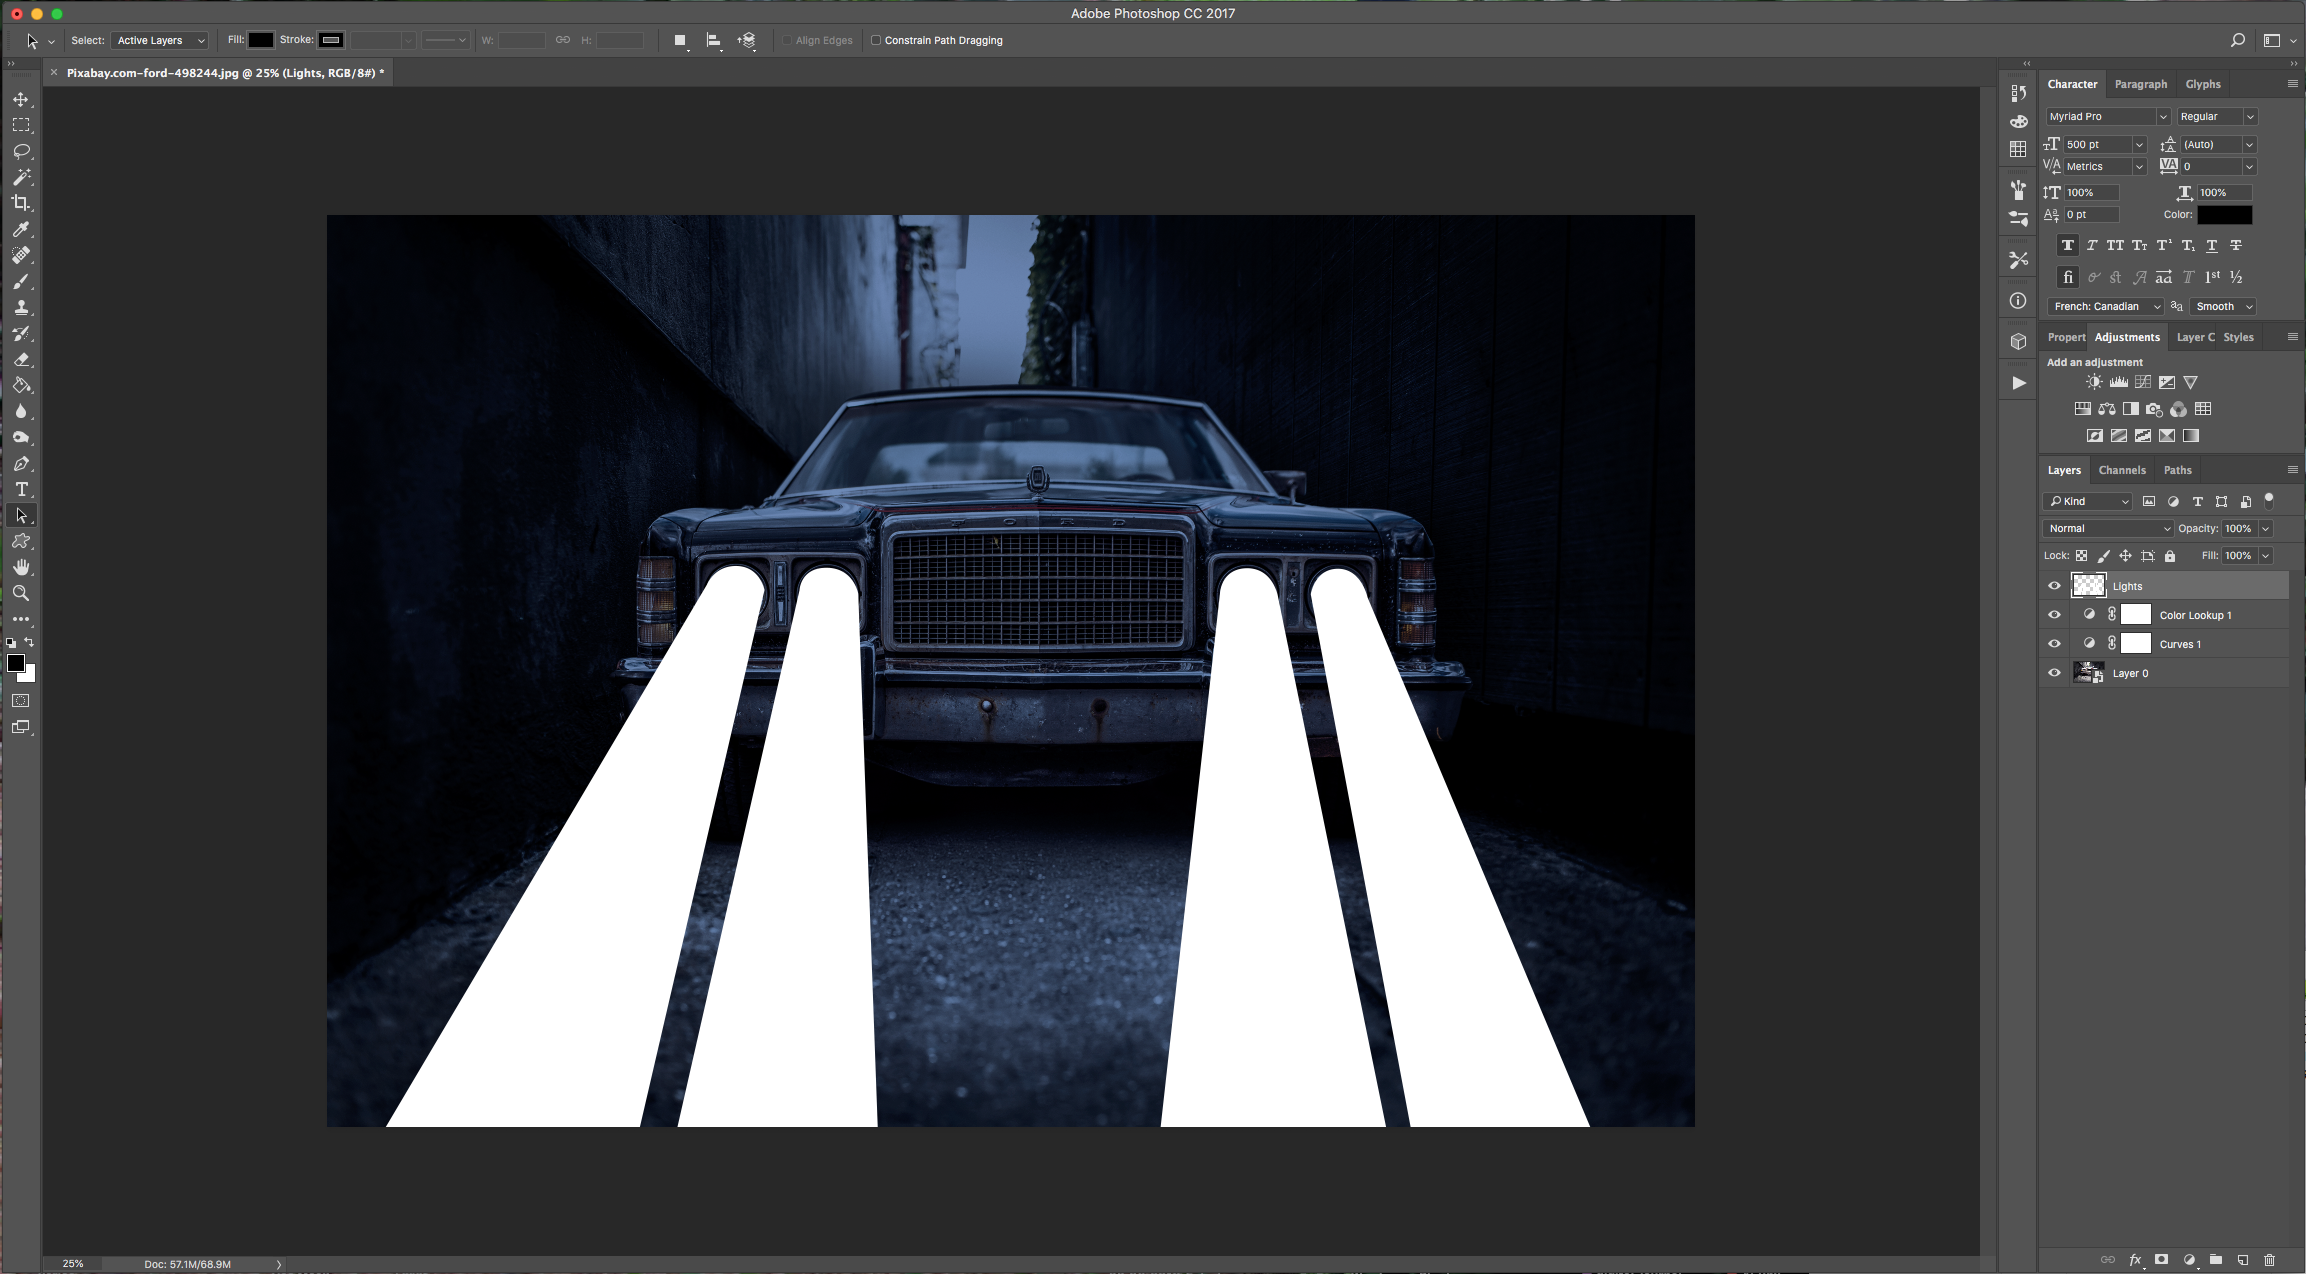
11 - Right-click on top of its Thumbnail and choose “Convert to Smart Object”.
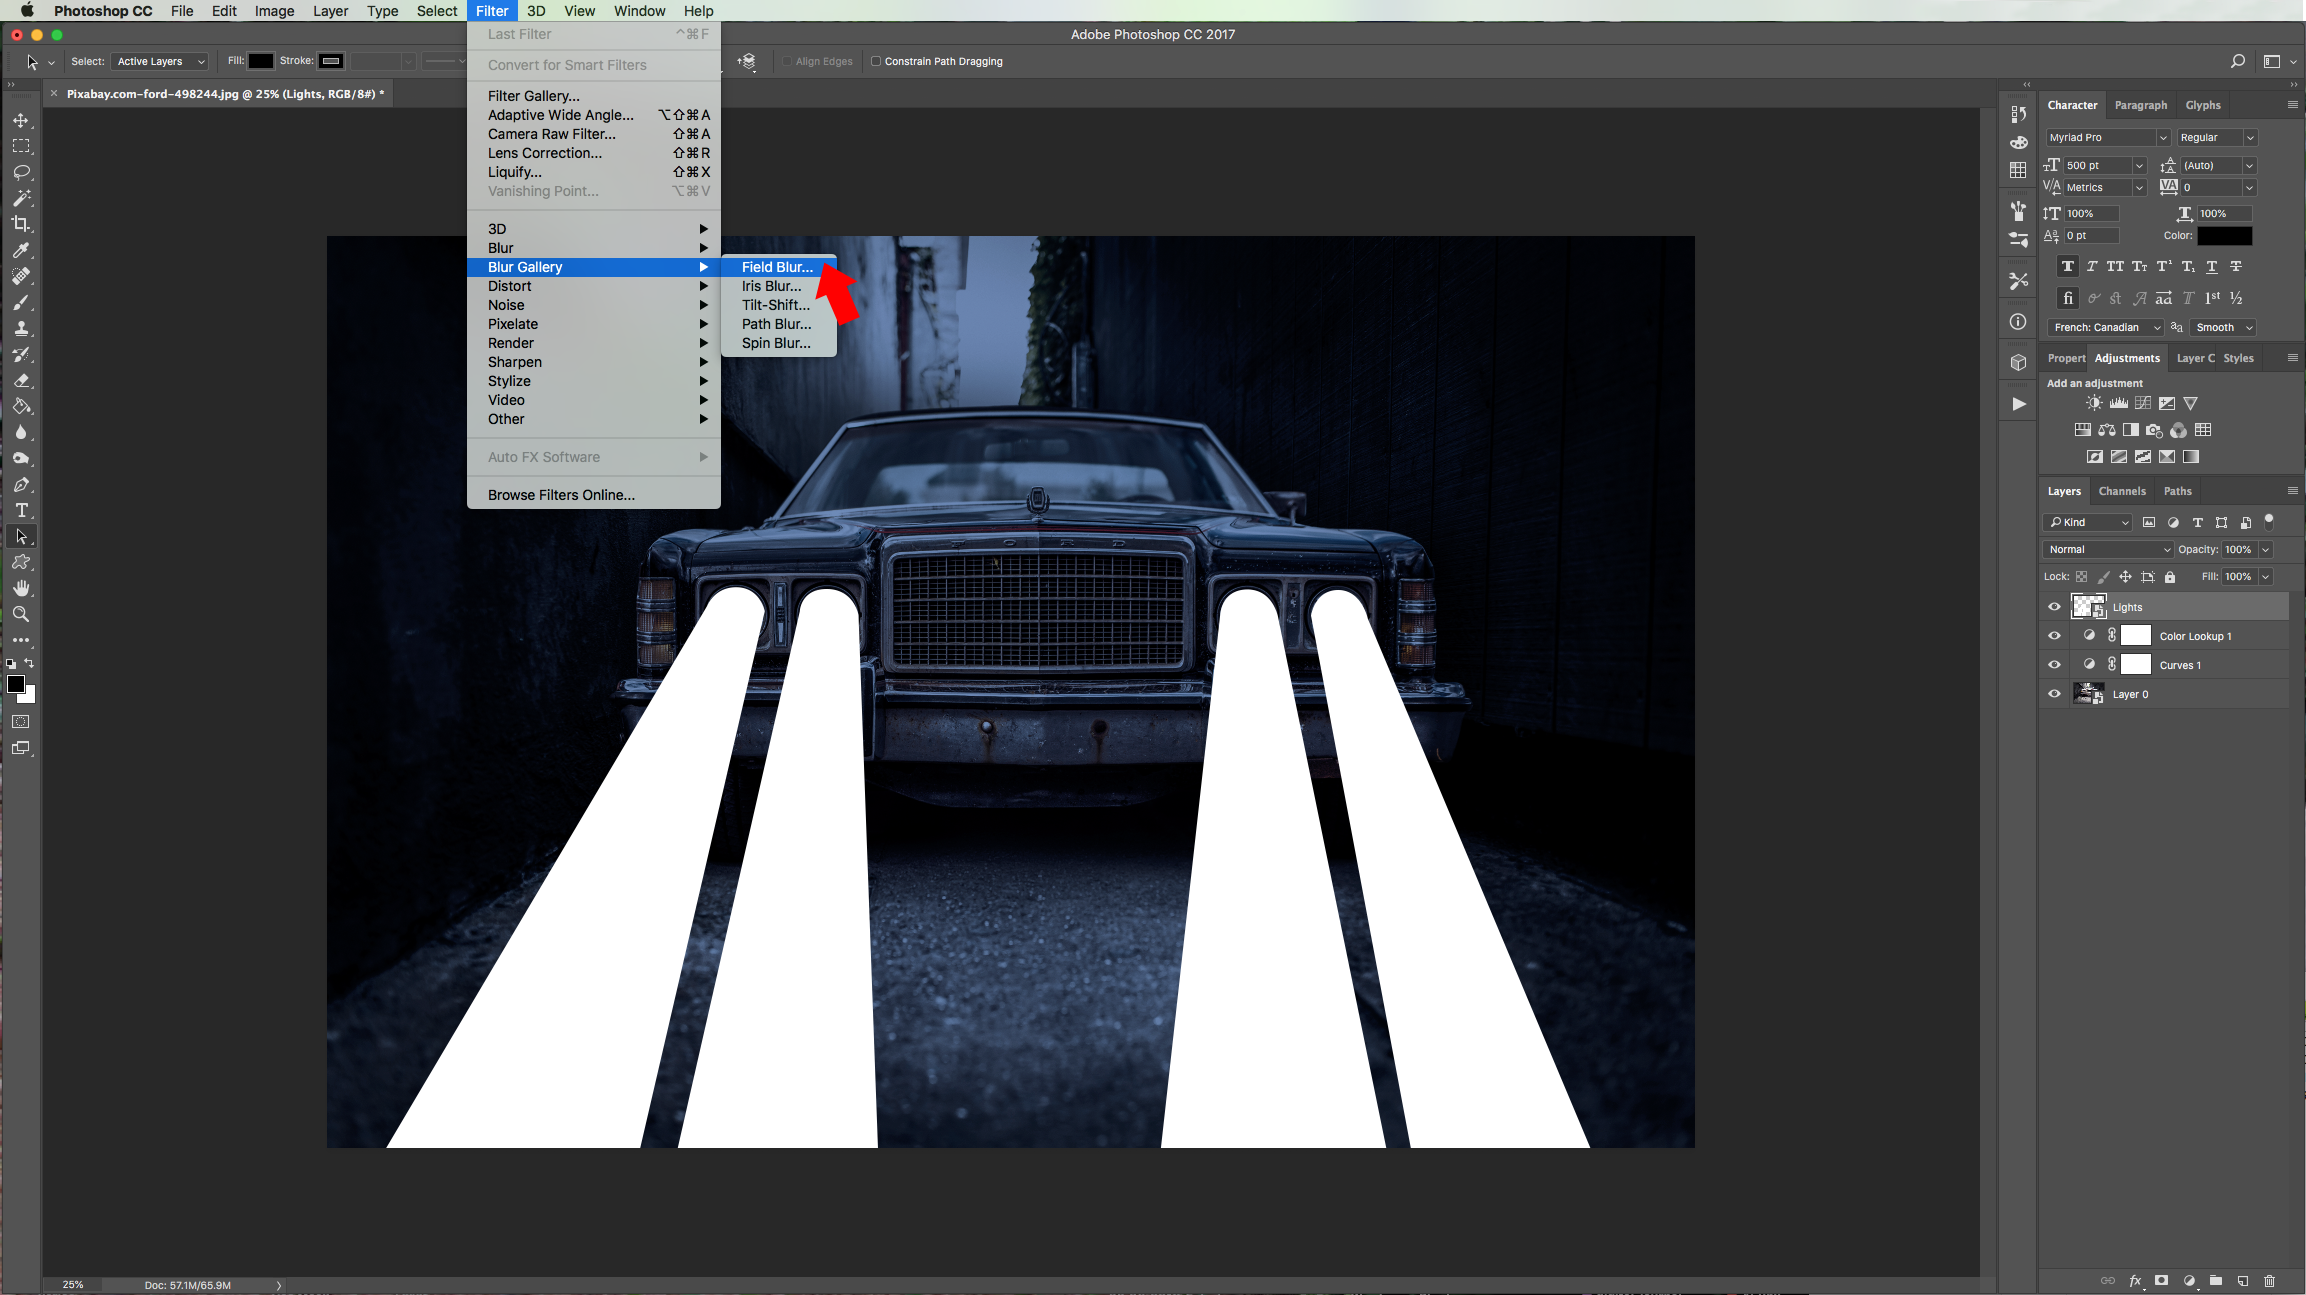
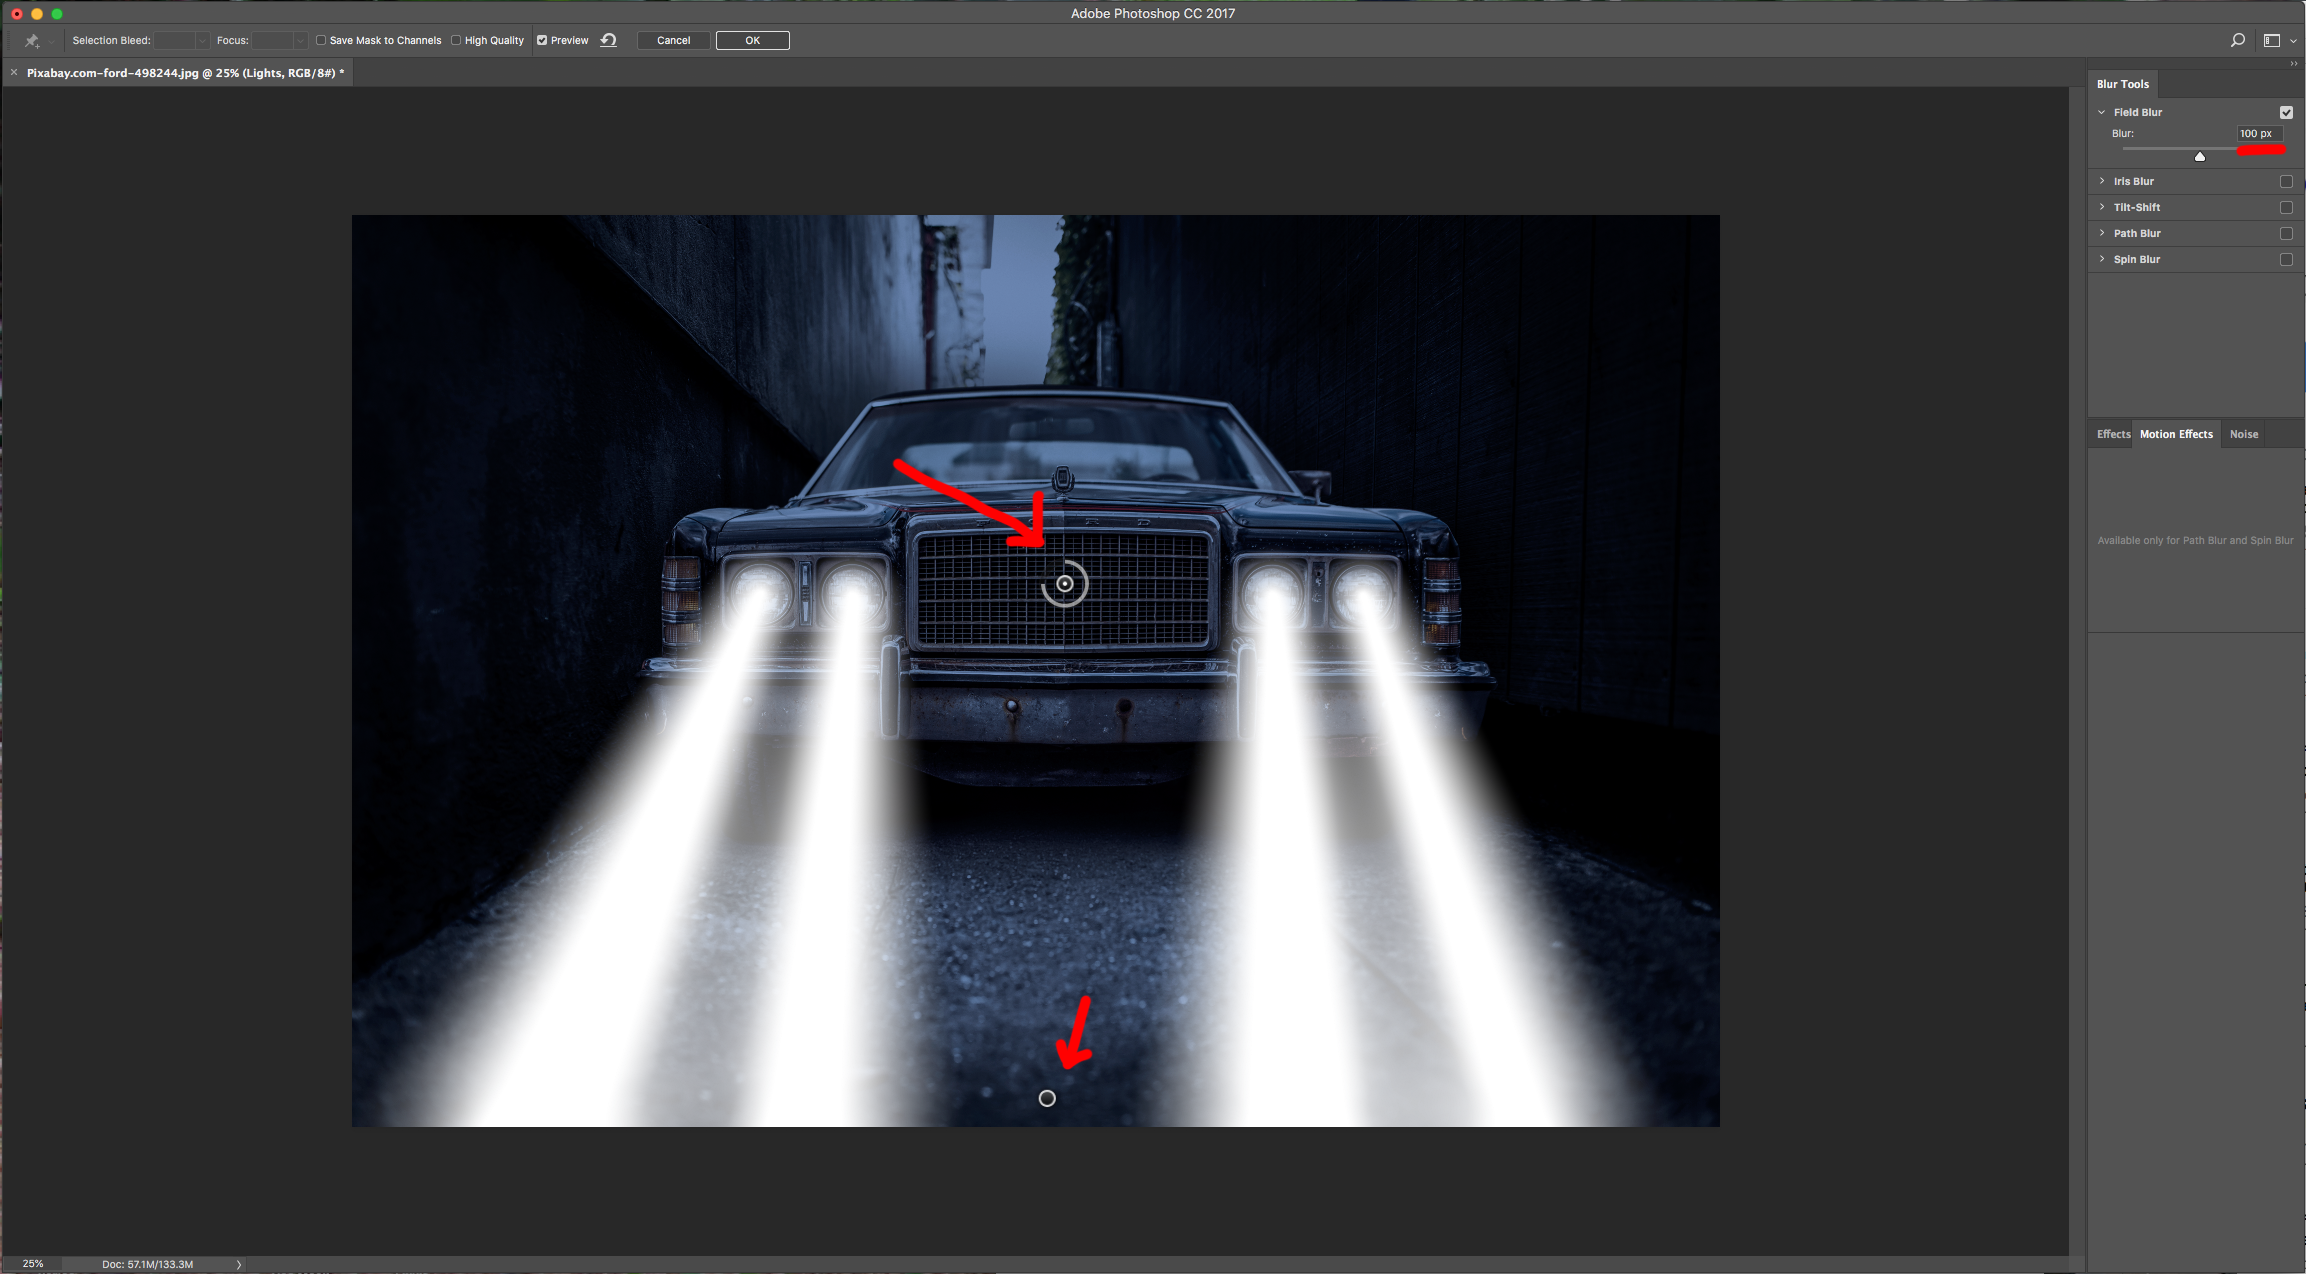
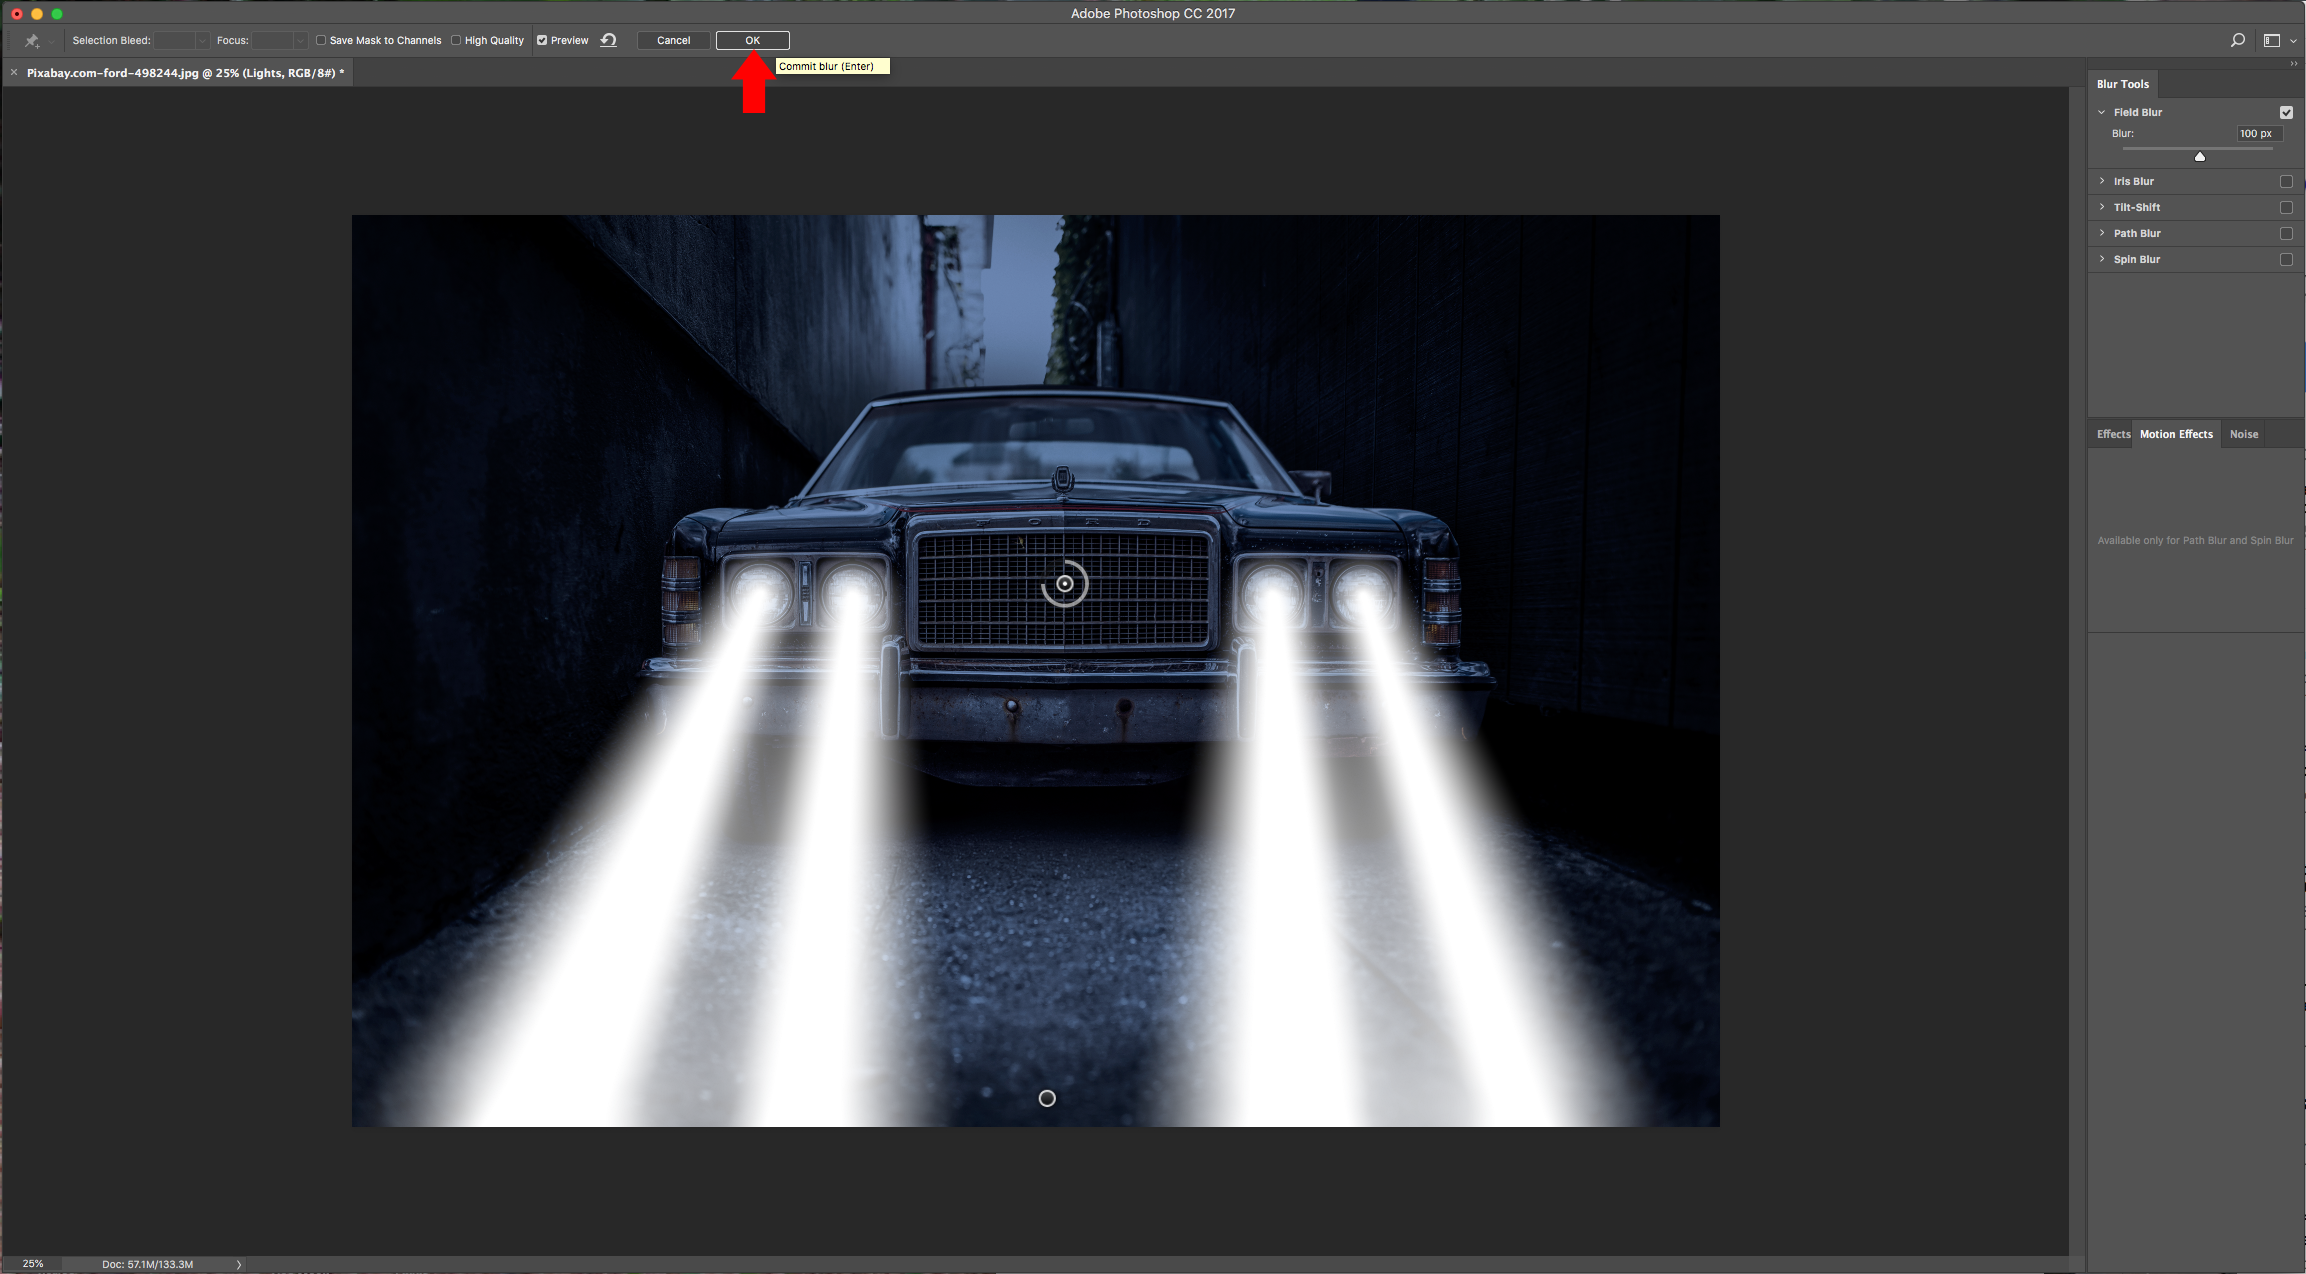
12 - Go to Filter > Blur Gallery > Field Blur… Pin one side centered between “Headlights” and the other centered at the bottom close to the edge of the “Canvas.” Use a “Blur” value of 100 px and click “Ok” on the Top Menu once you are done.
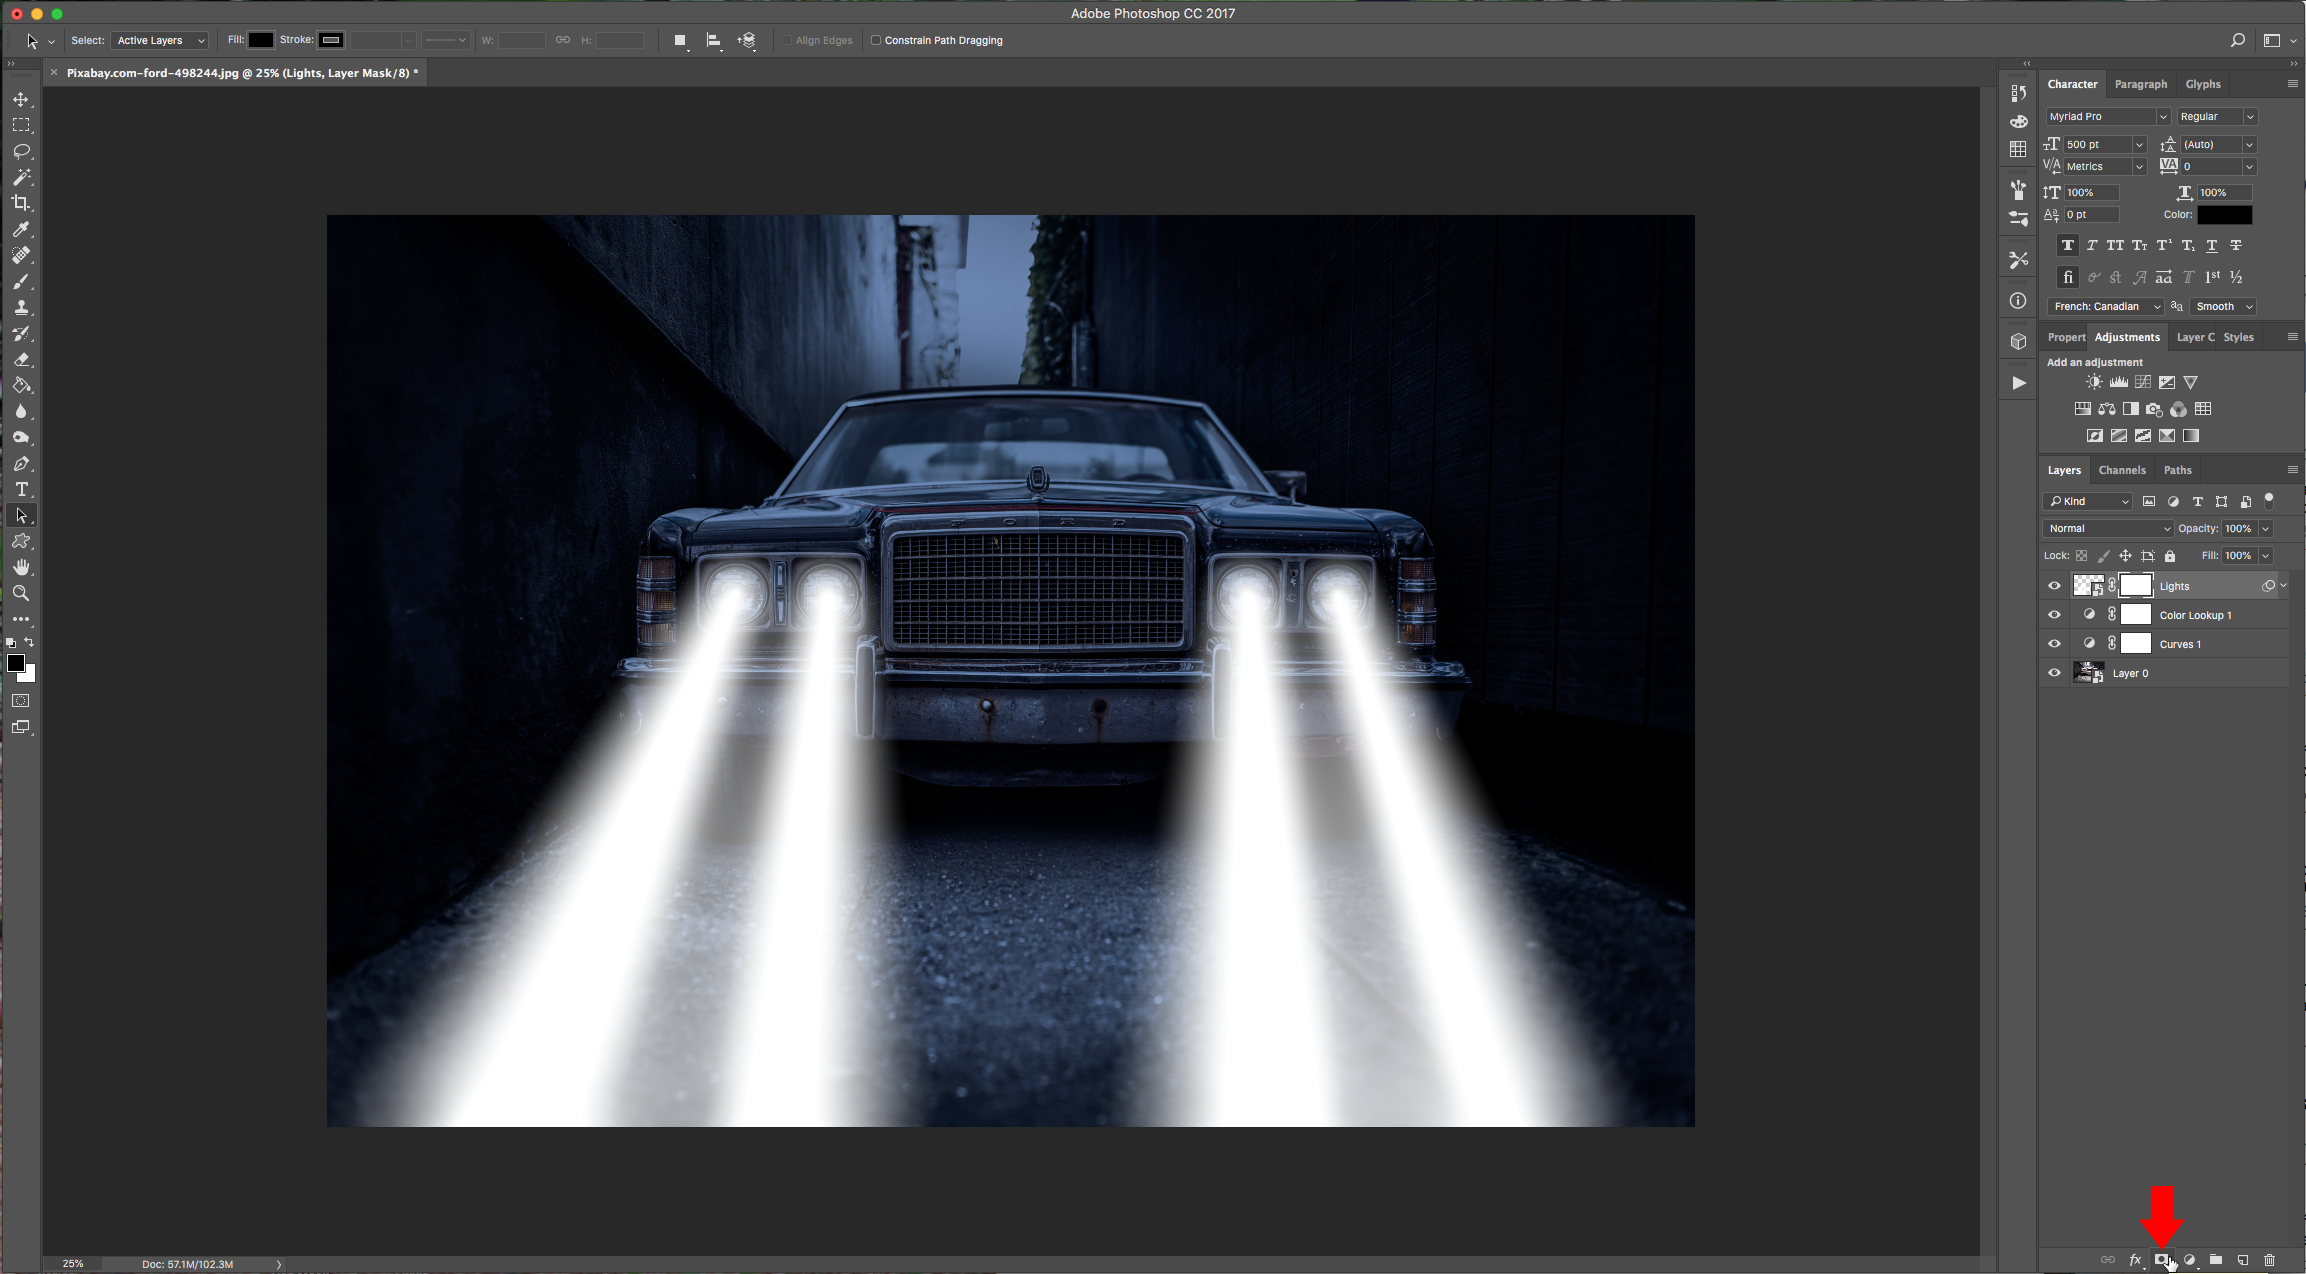
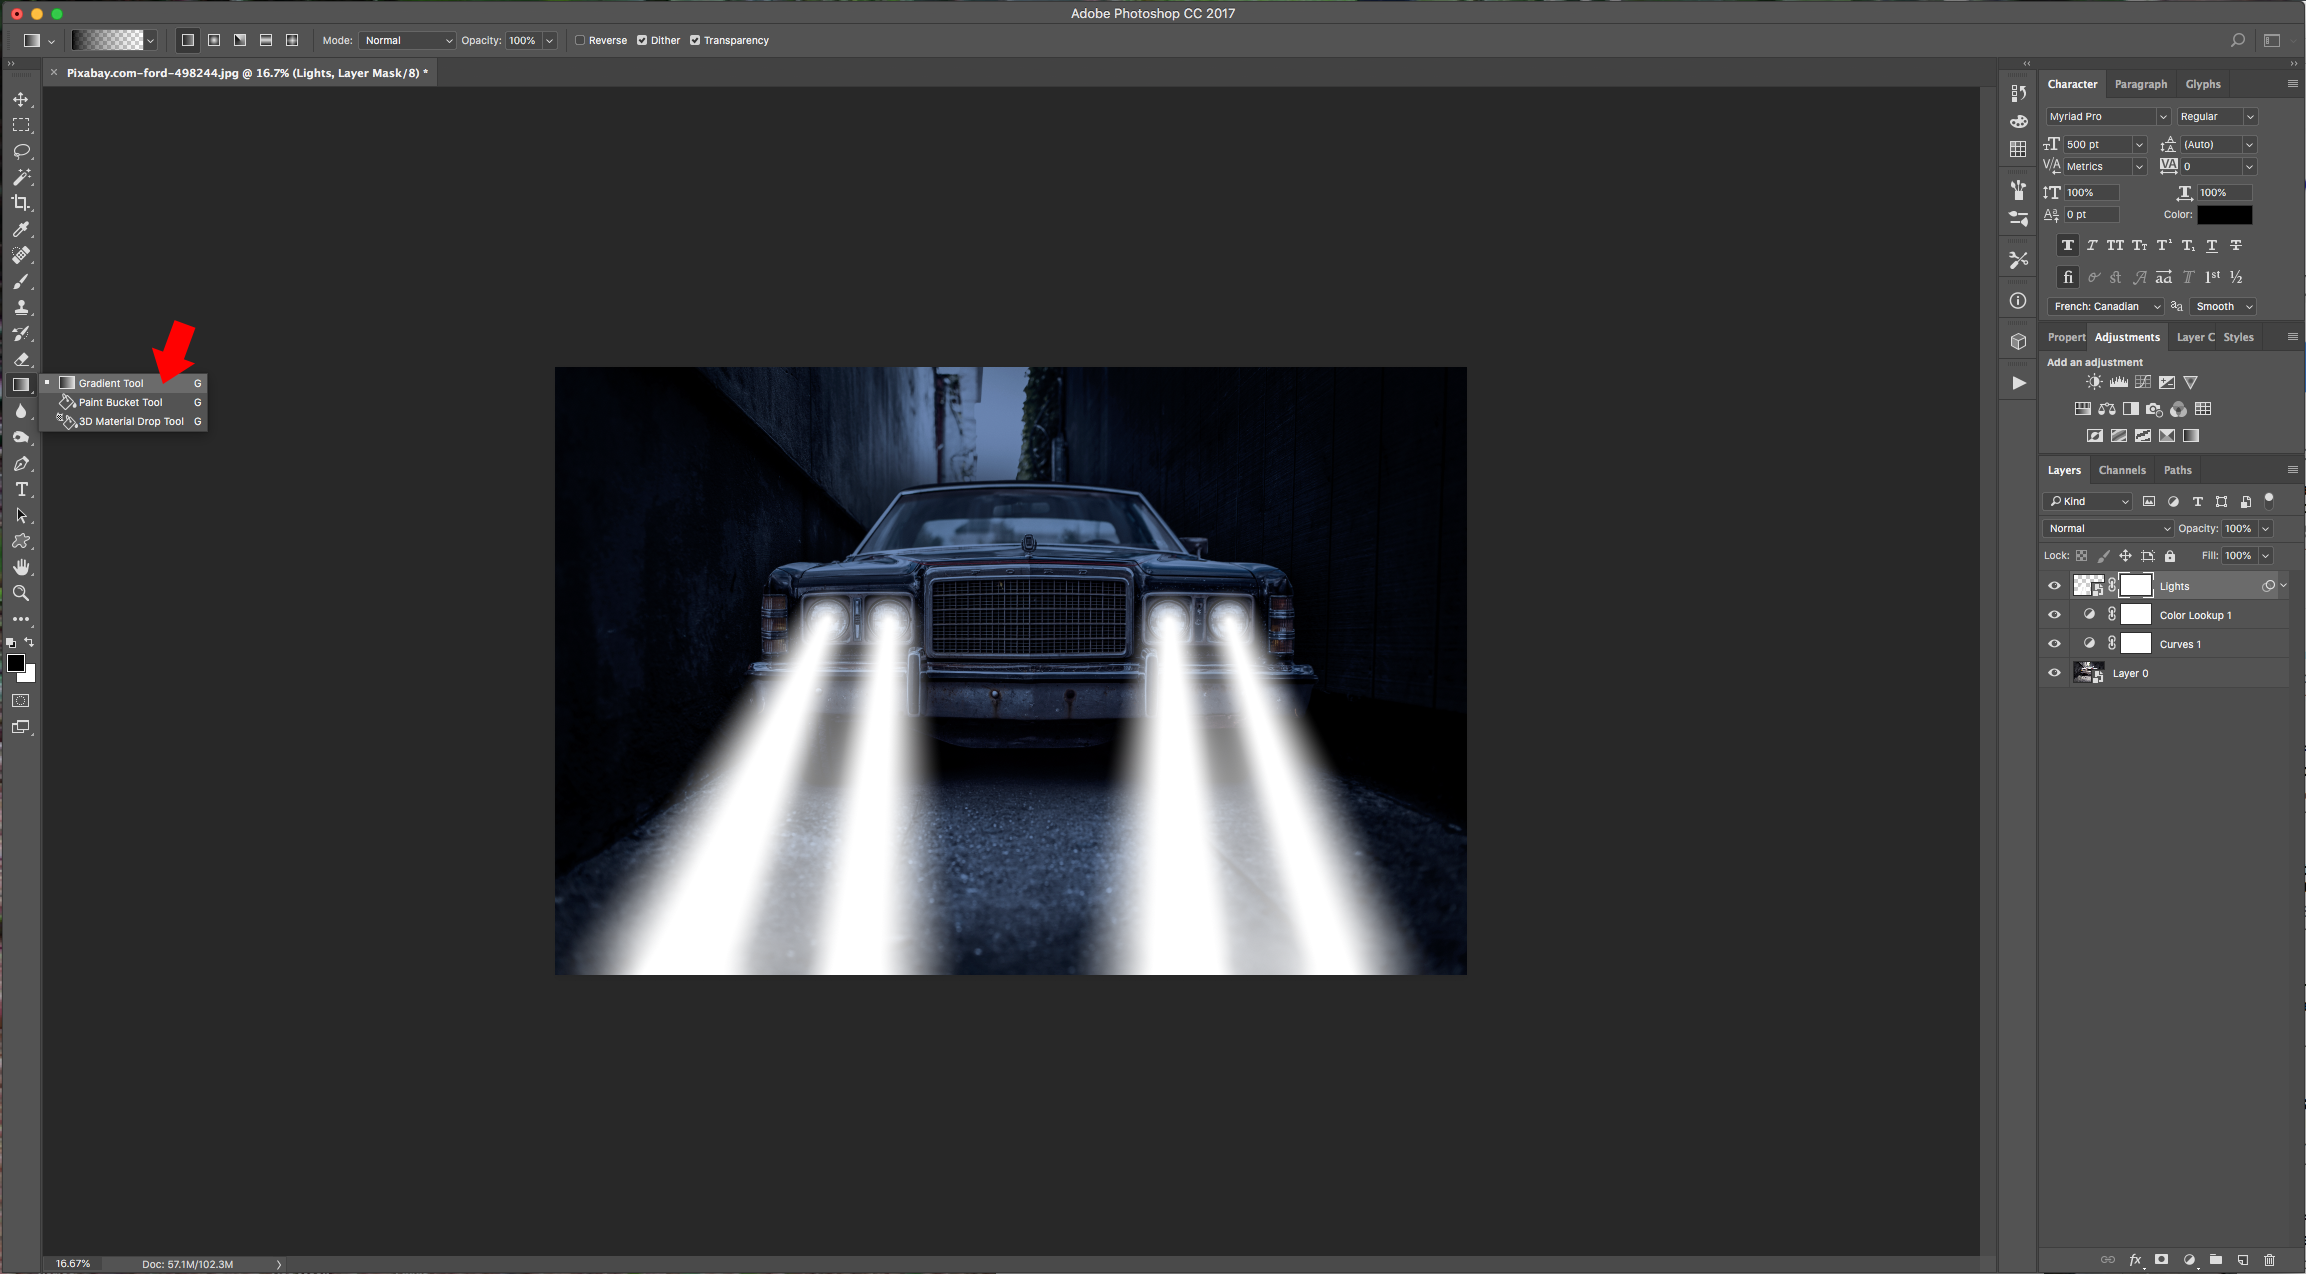
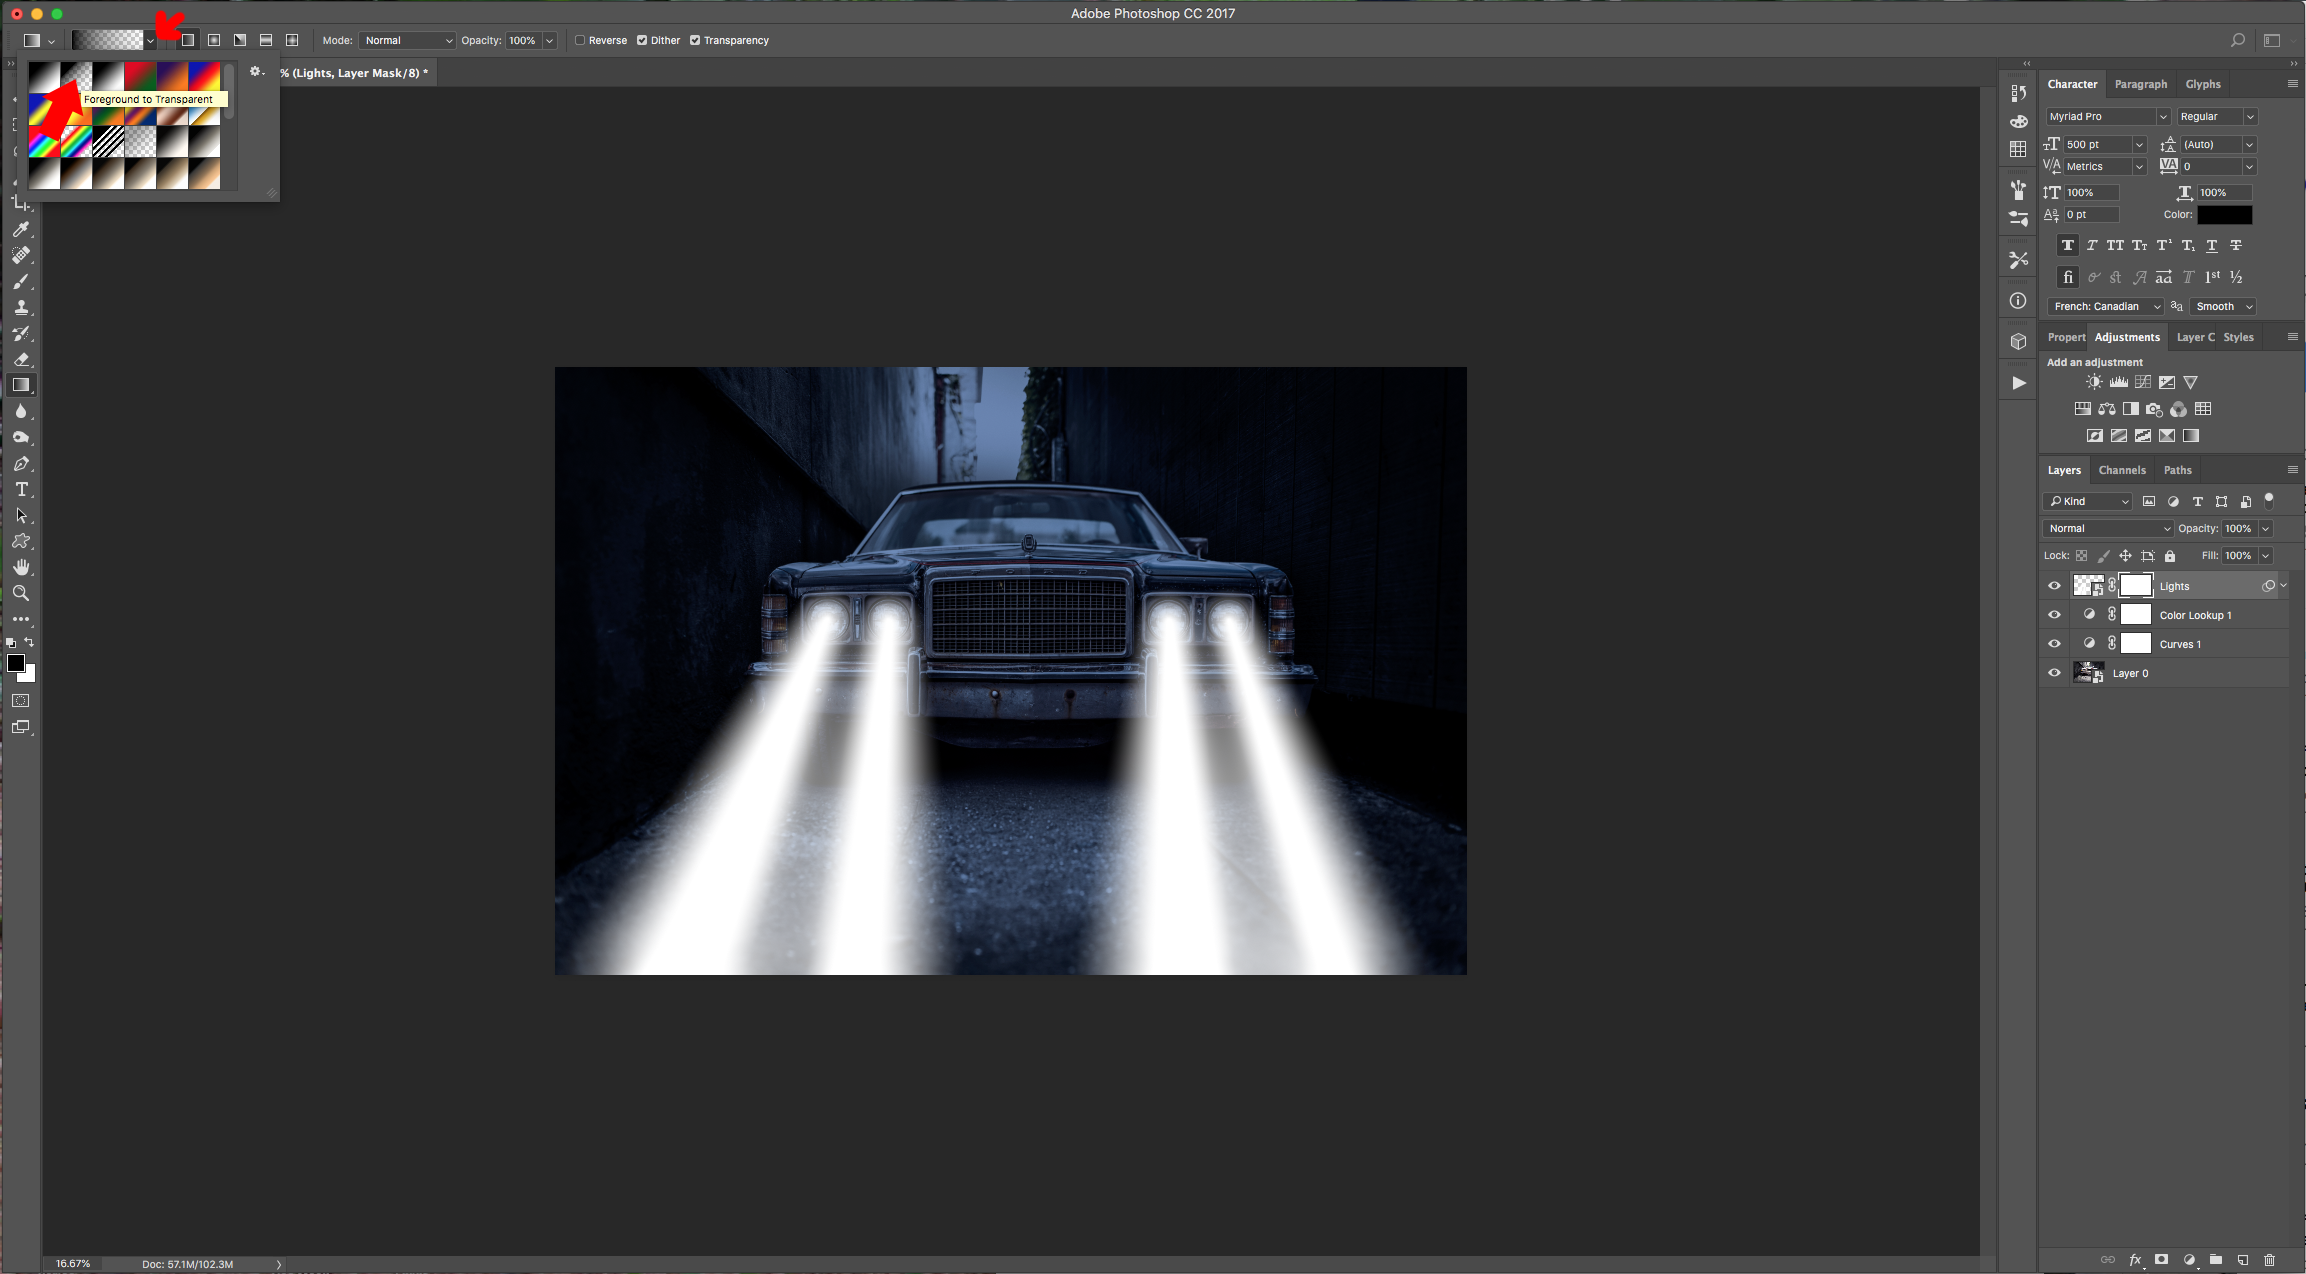
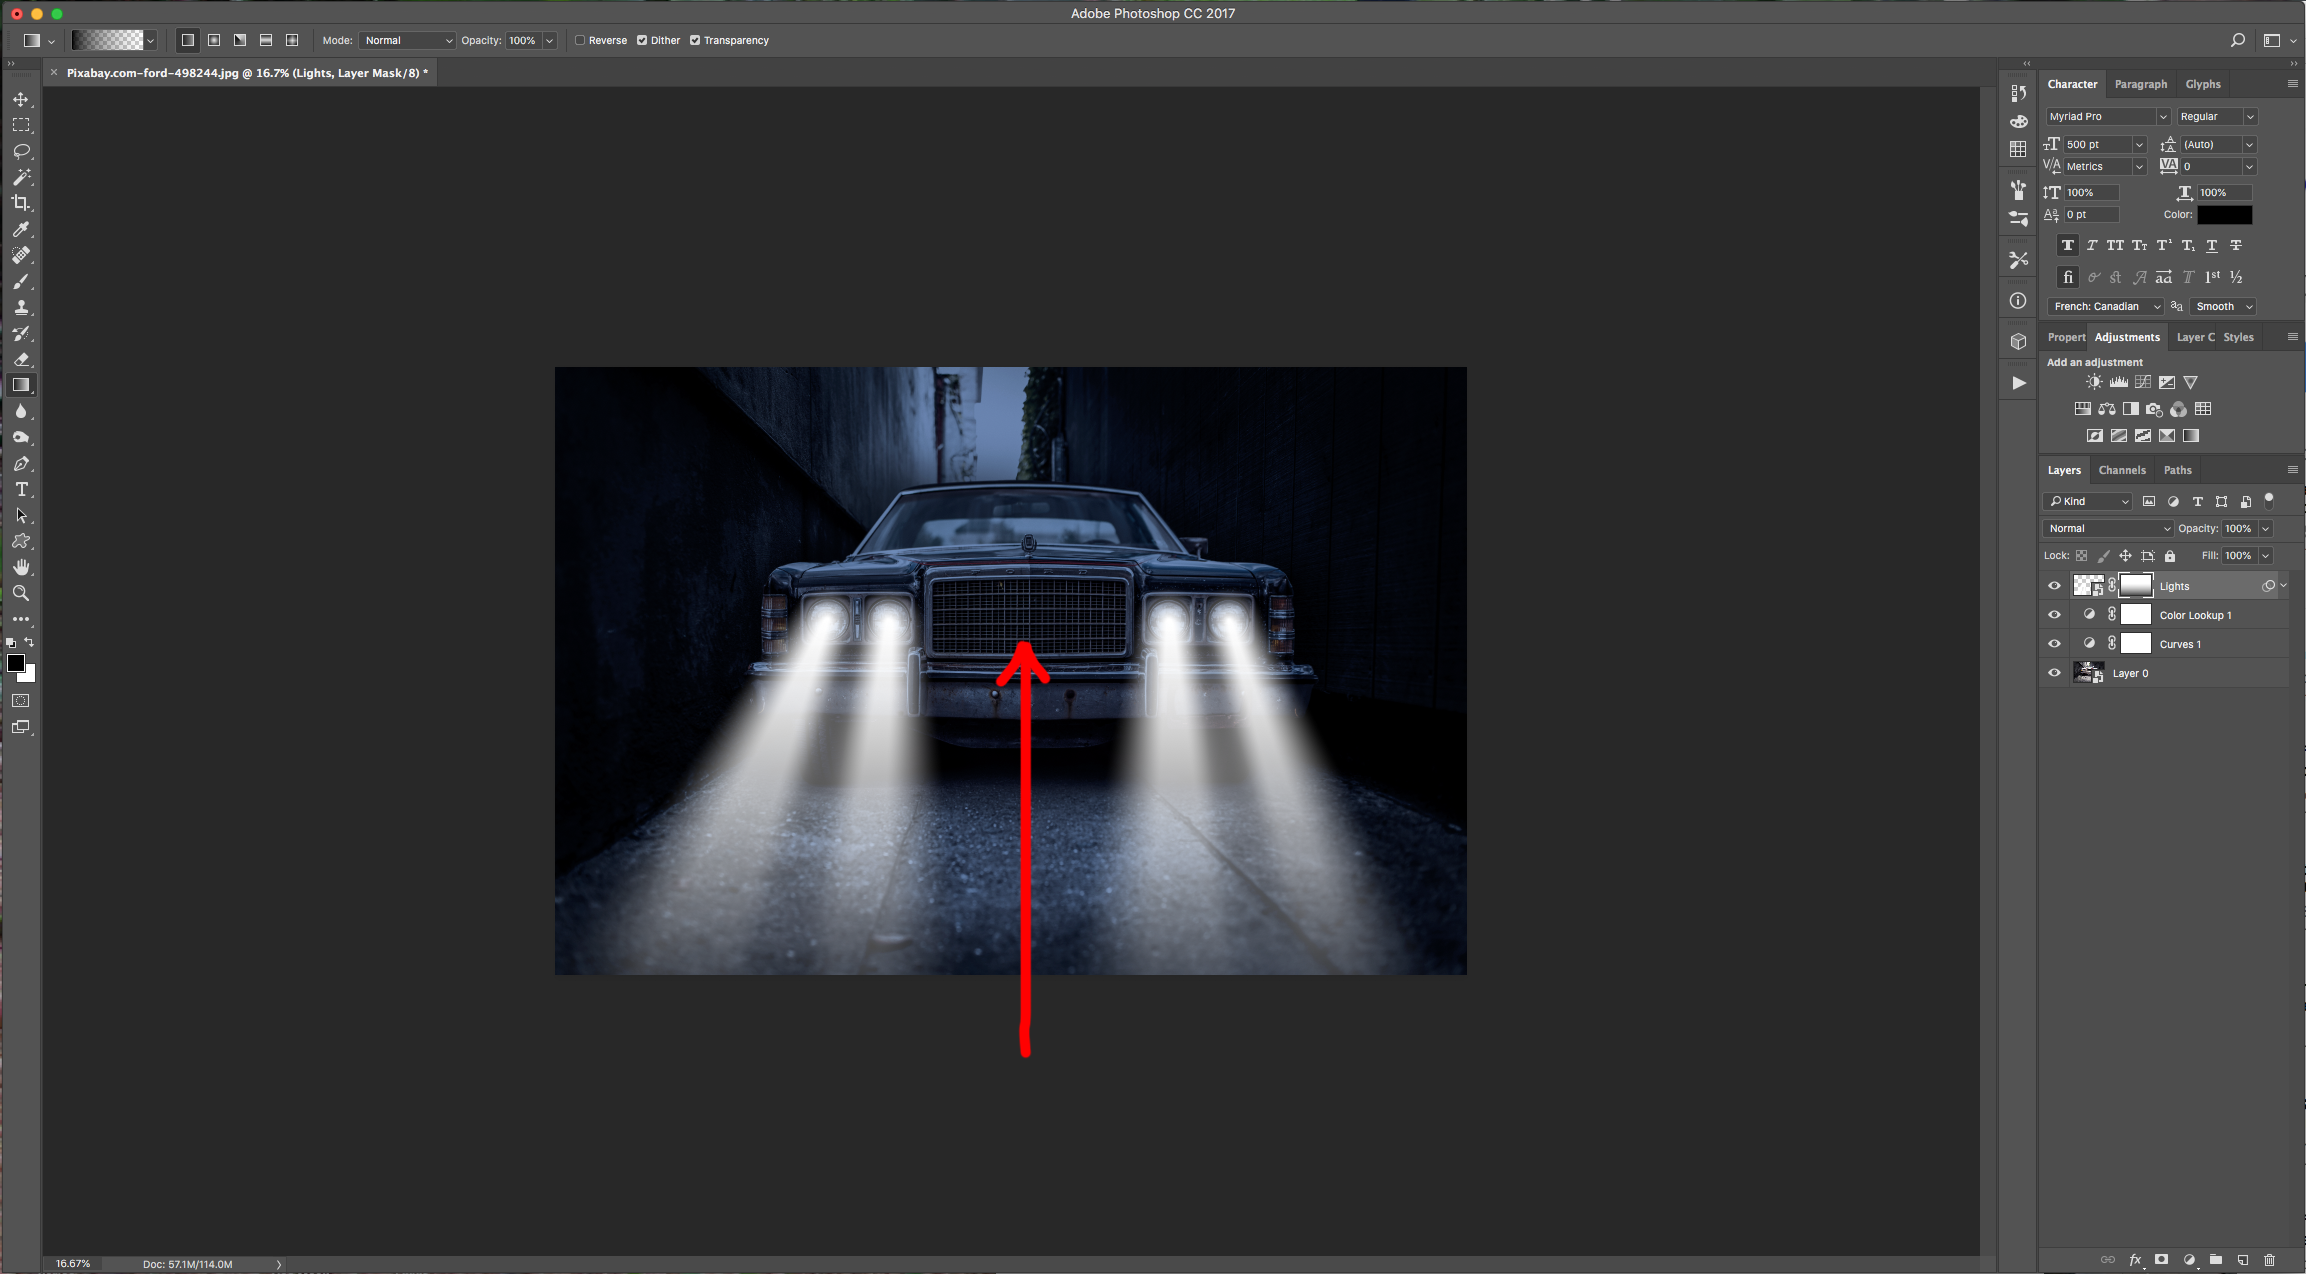
13 - Click on the small button at the bottom of your “Smart Object” and “Add Layer Mask”. Select the “Gradient Tool” (G), choose a “Foreground” (Black) to “Transparent” gradient and click about 1 cm outside the “Canvas” then drag your cursor in a straight upwards line and release about 1 cm under the top of the “Headlights”.
14 - Create a “New Color Balance Adjustment Layer” (Adjustments Panel) on top of everything. Choose “Highlights” in the “Tones” tab and move the “Yellow-Blue” Lever to - 60. The value in your case may be different depending on your image.
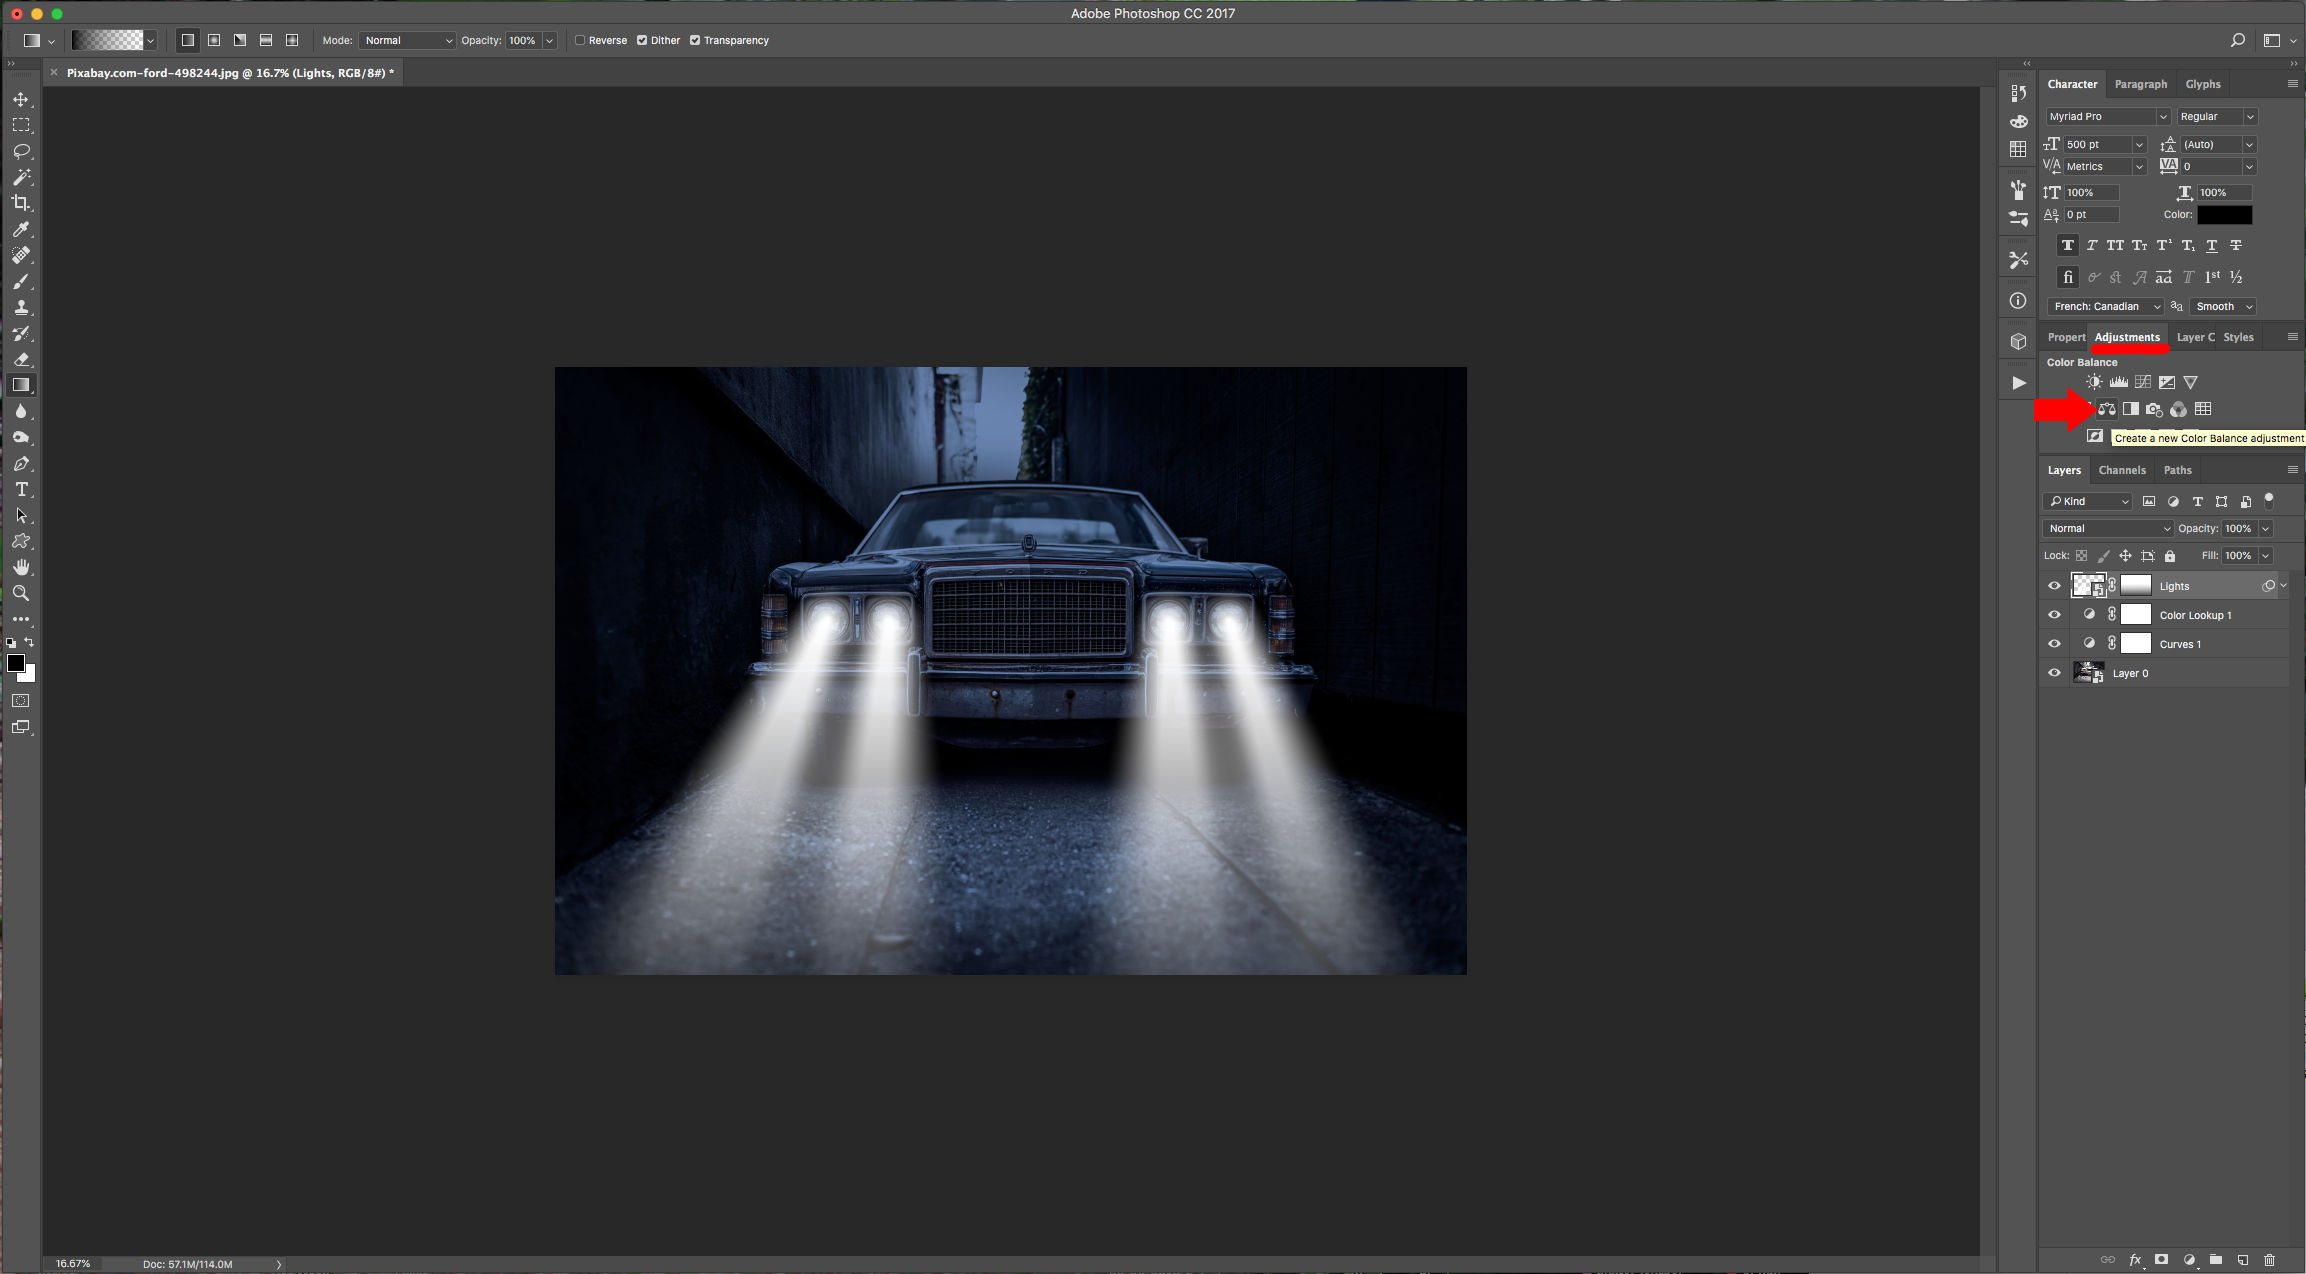
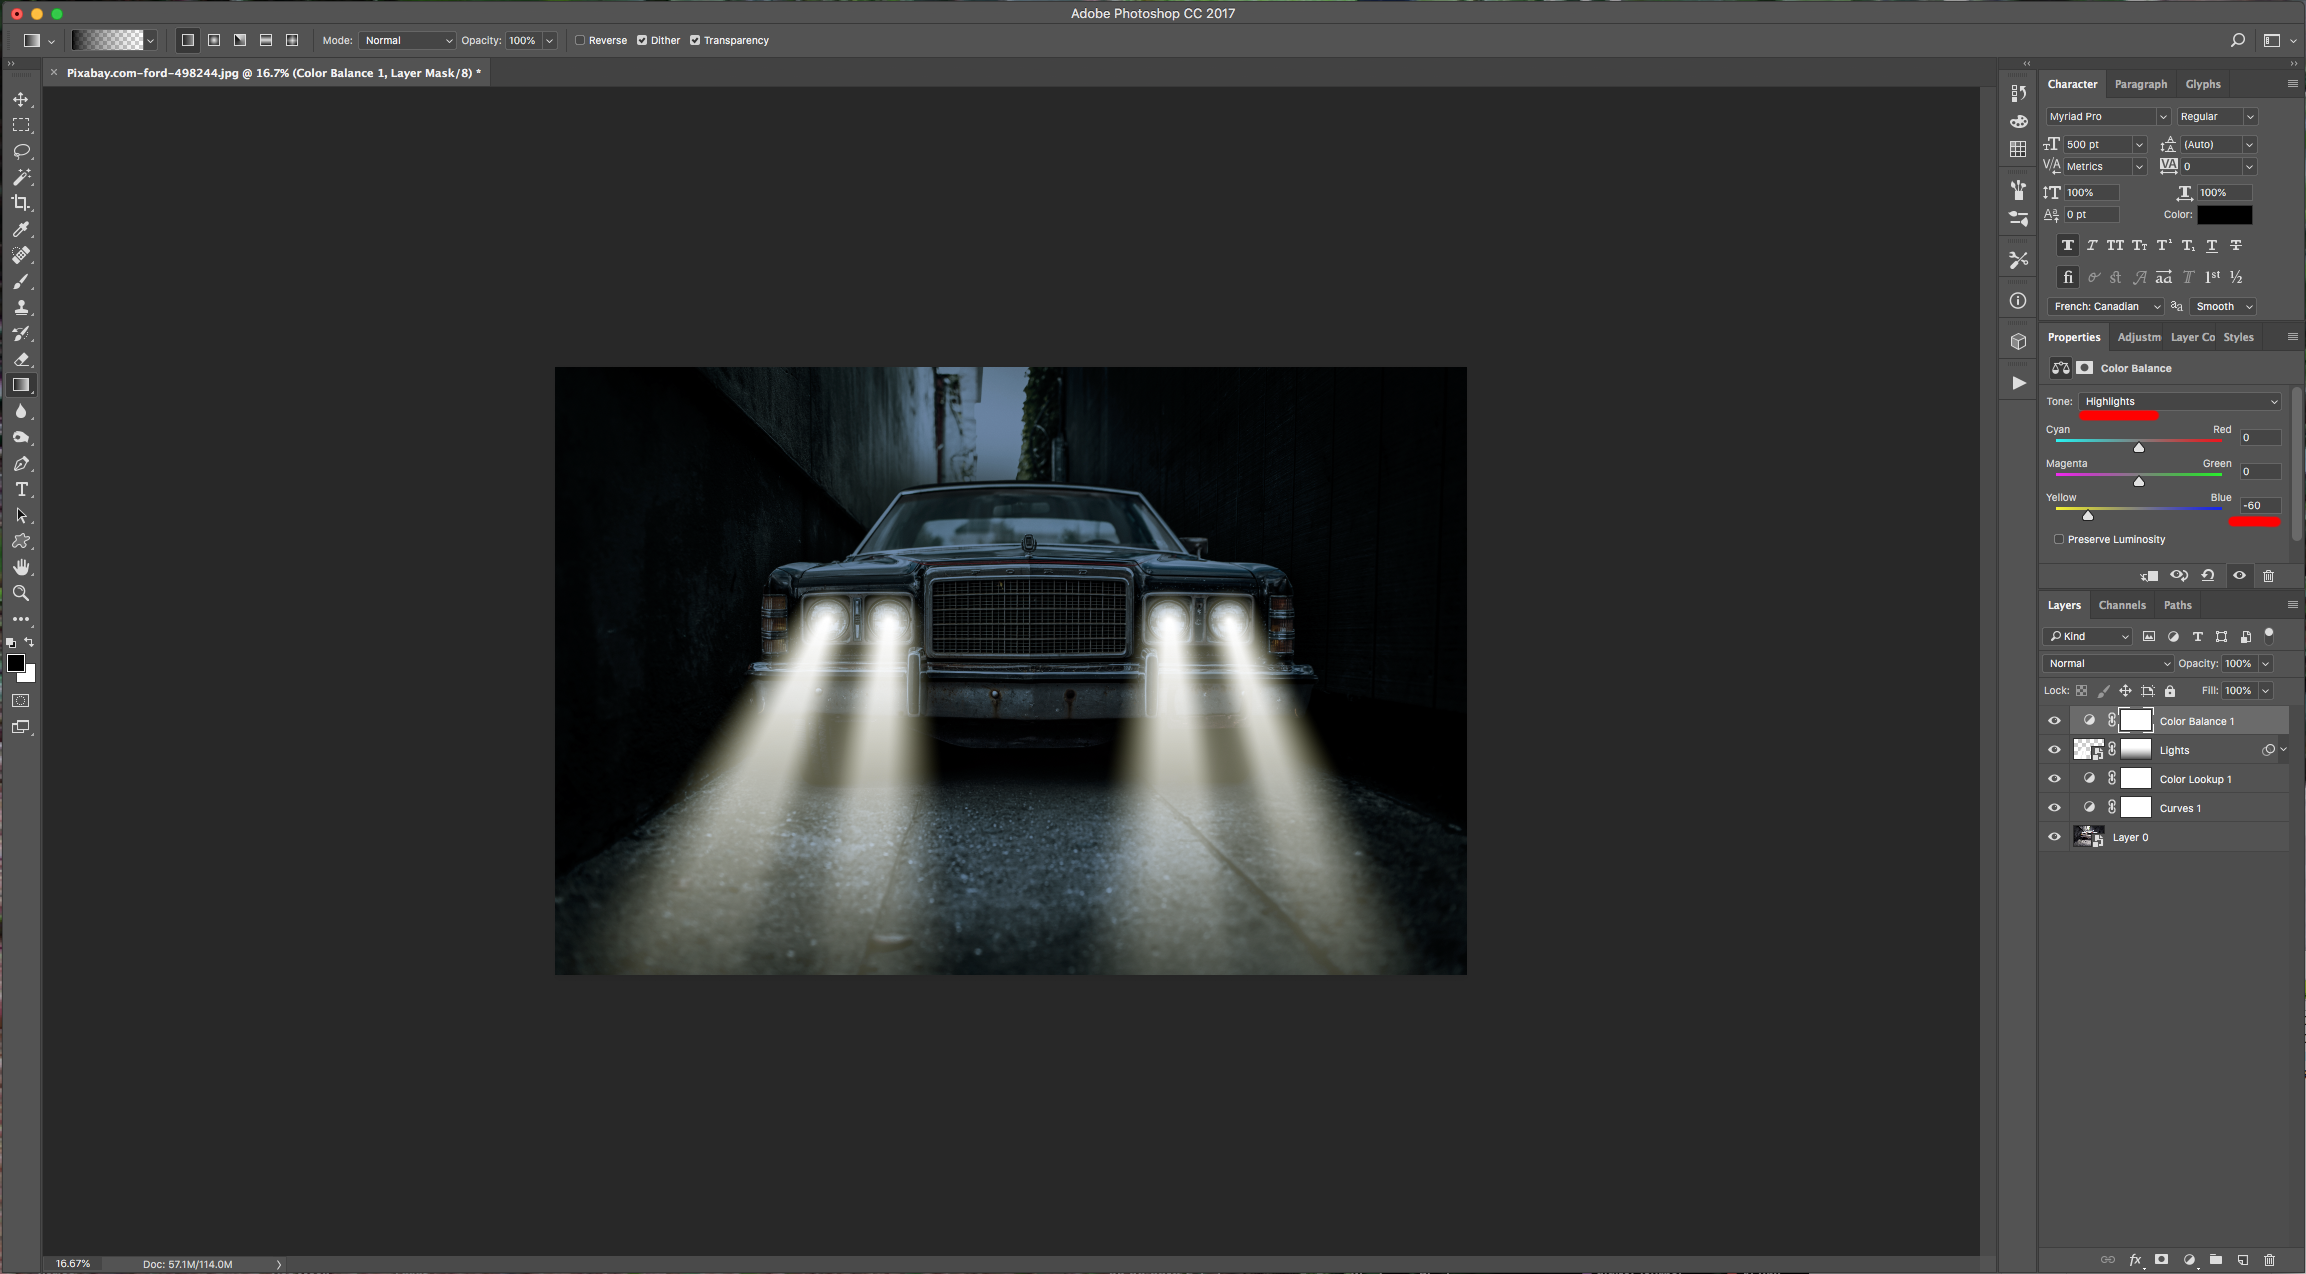
15 - Create a “New Layer” under the “Color Balance Adjustment Layer” (click on the small button at the bottom of the “Layers Panel”). Fill it with “Black”, name it “Flare” and change the “Blending Mode” to “Screen”.
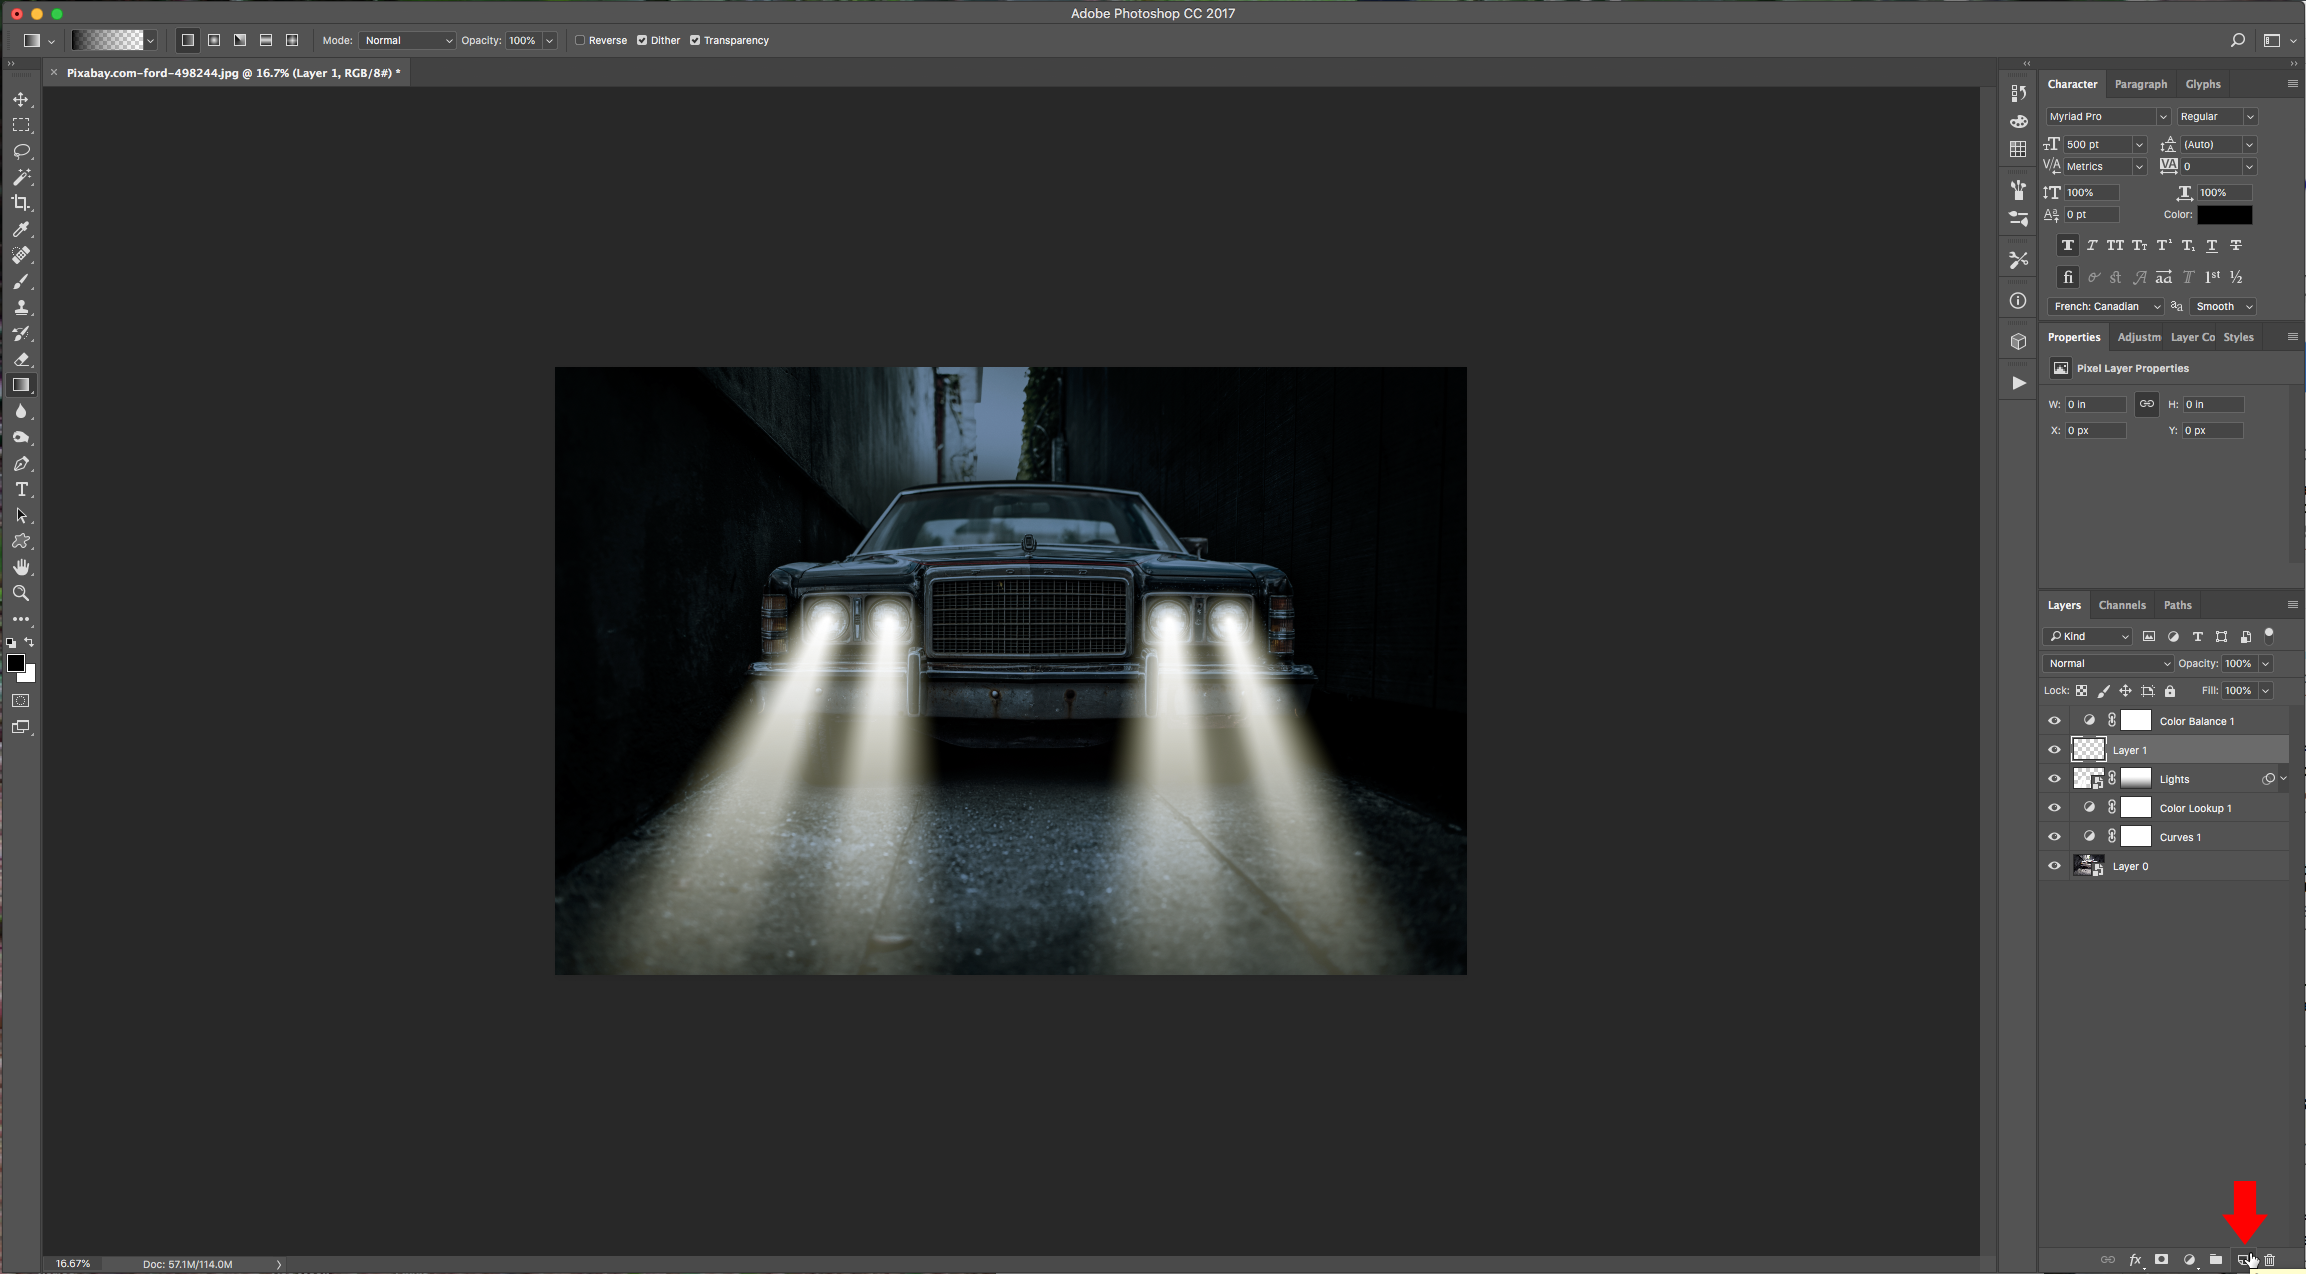
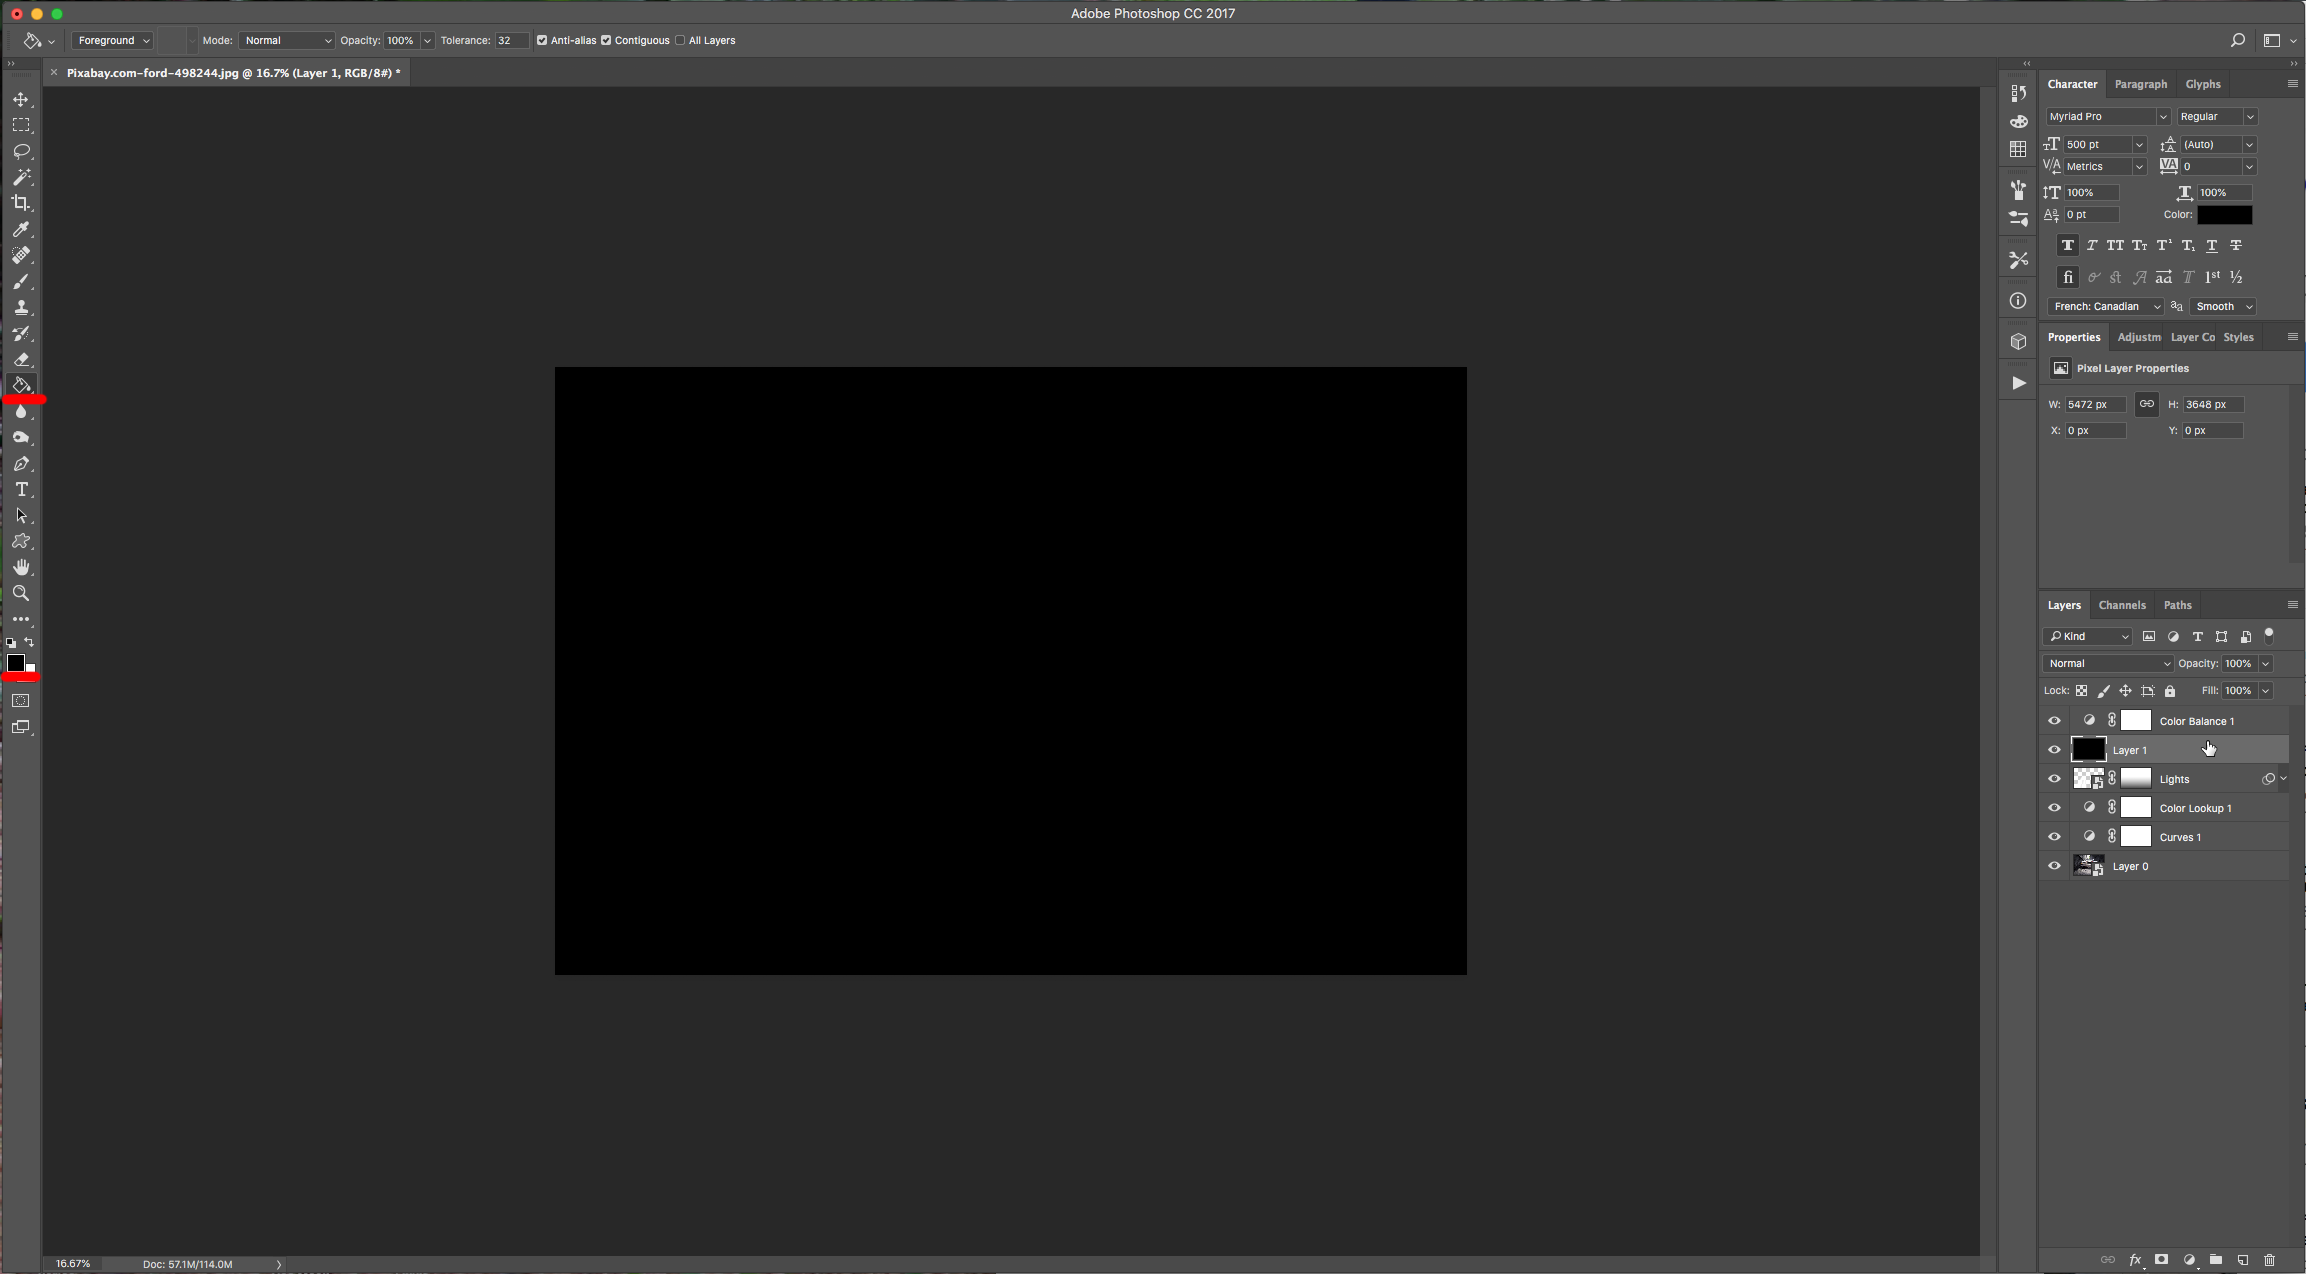
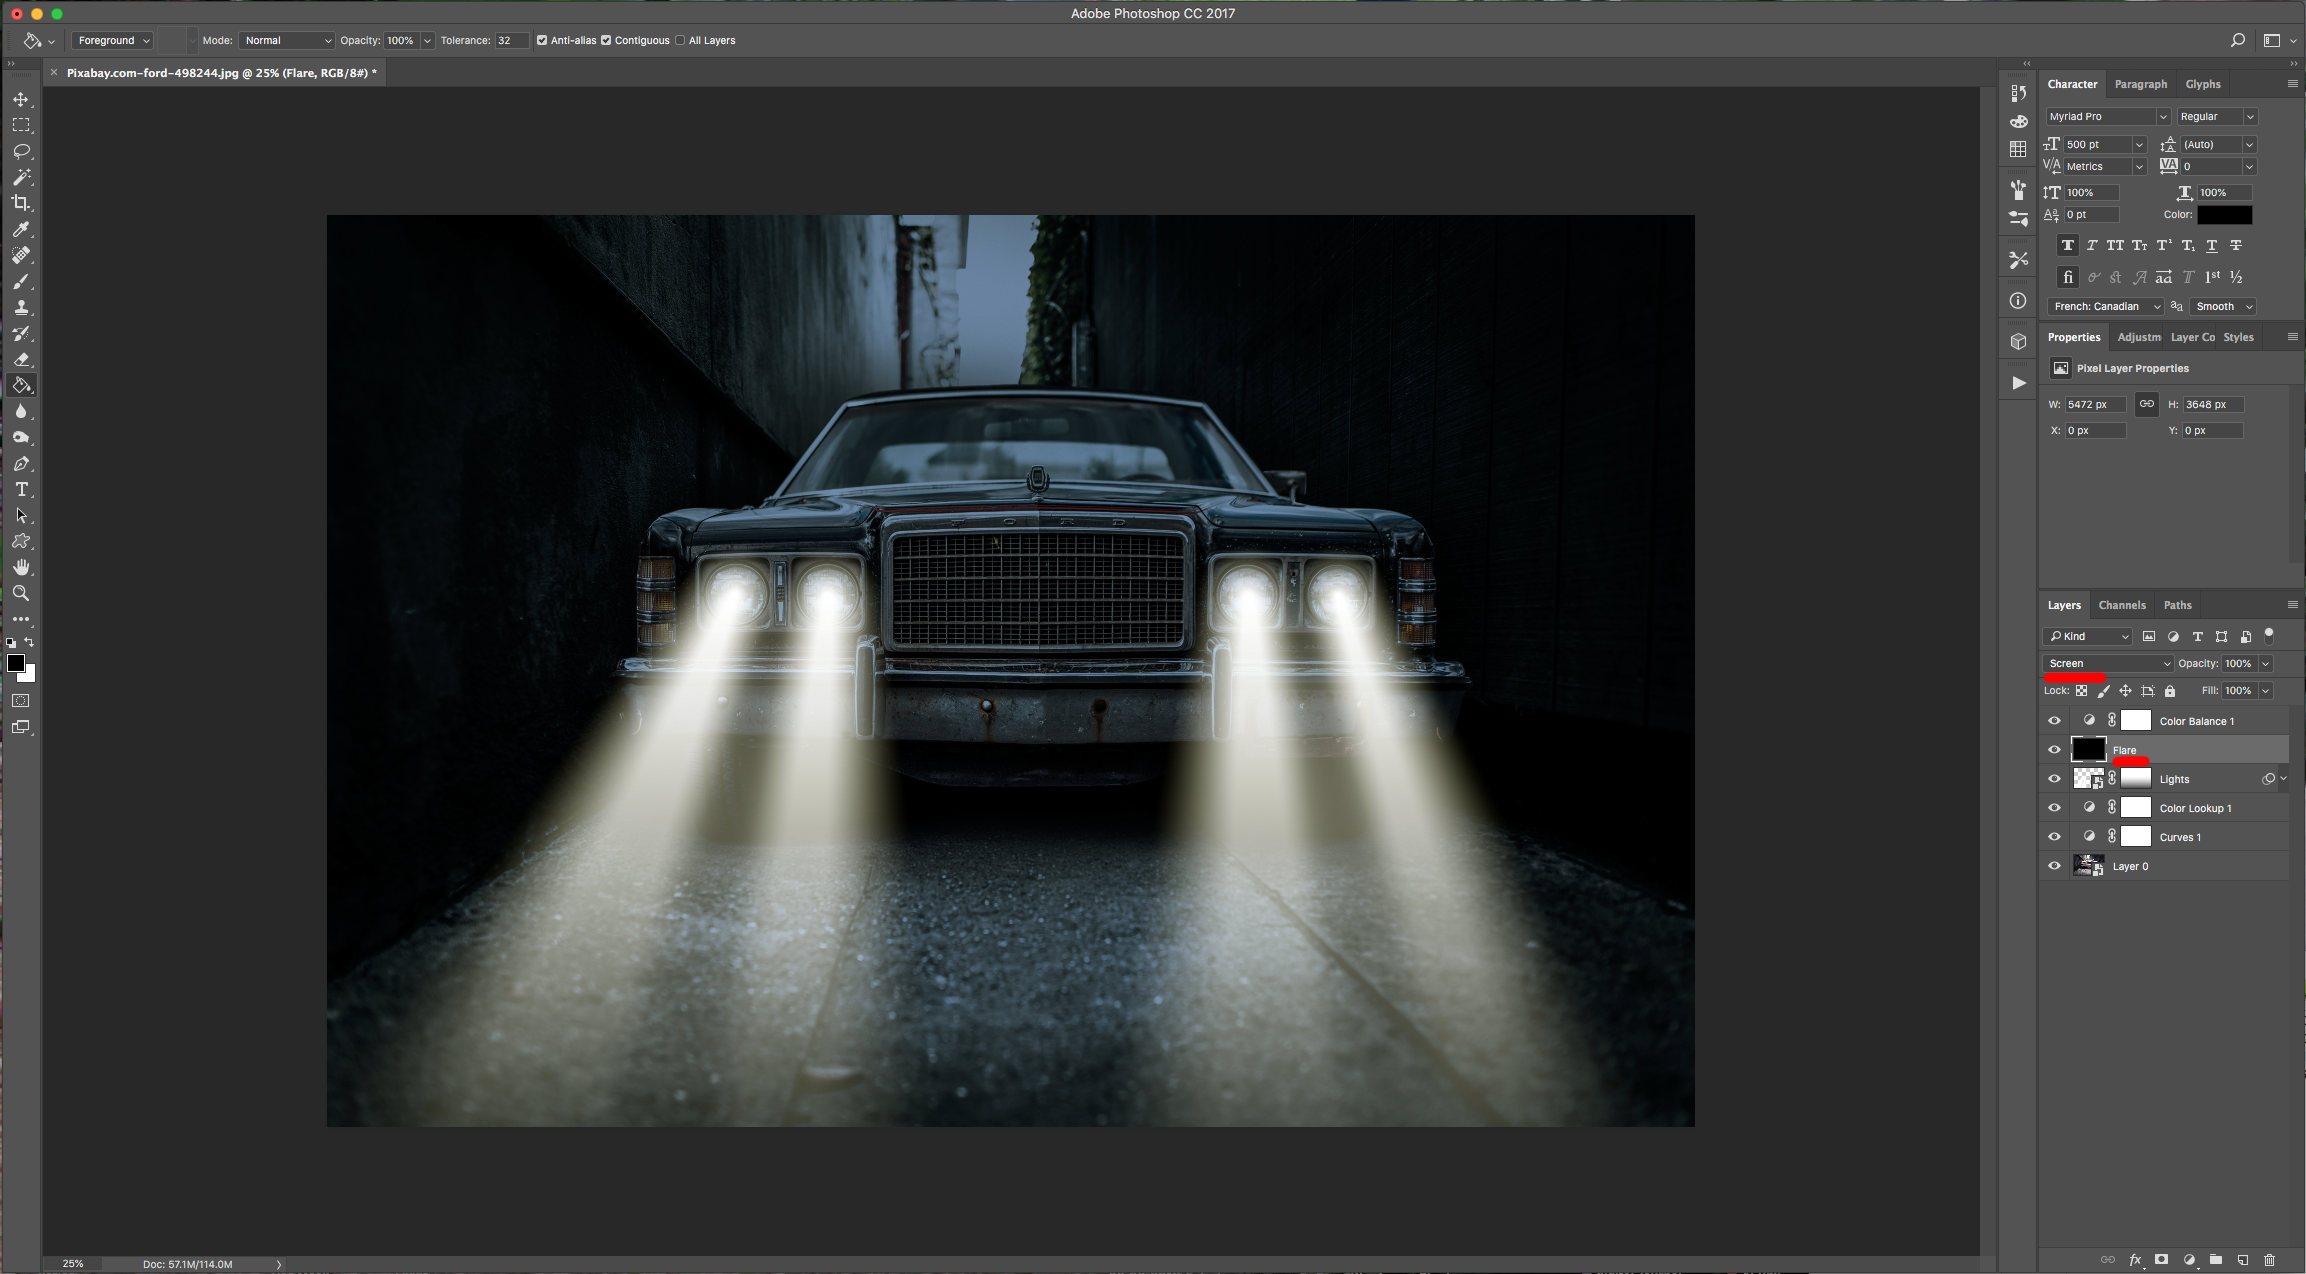
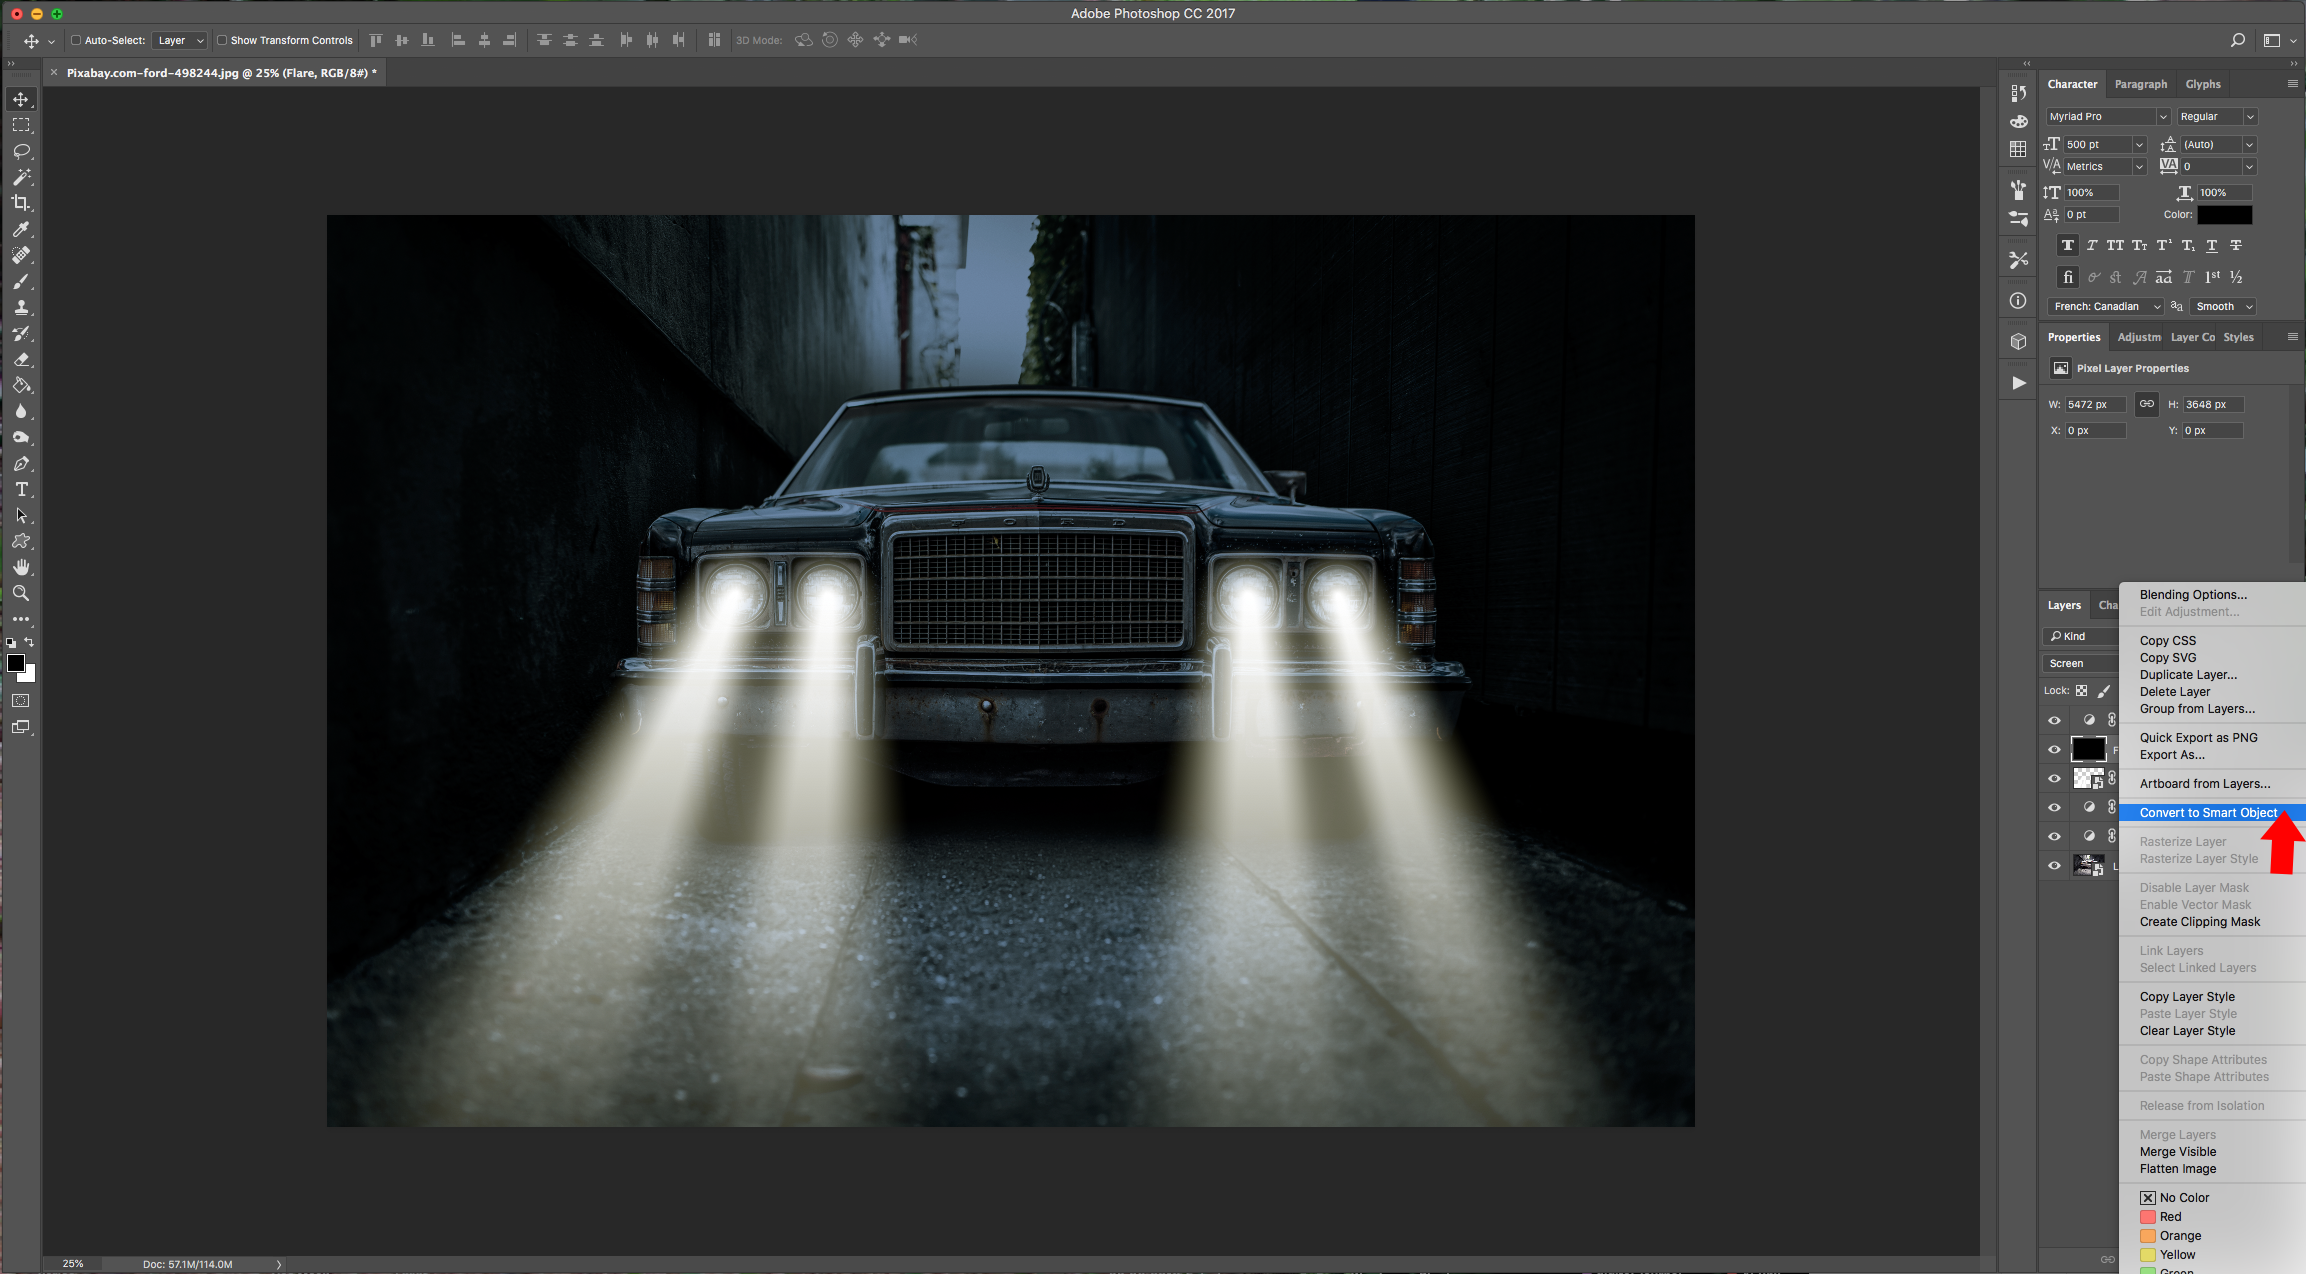
16 - Right-click on top of the Flare’s Layer Thumbnail and choose “Convert to Smart Object”.
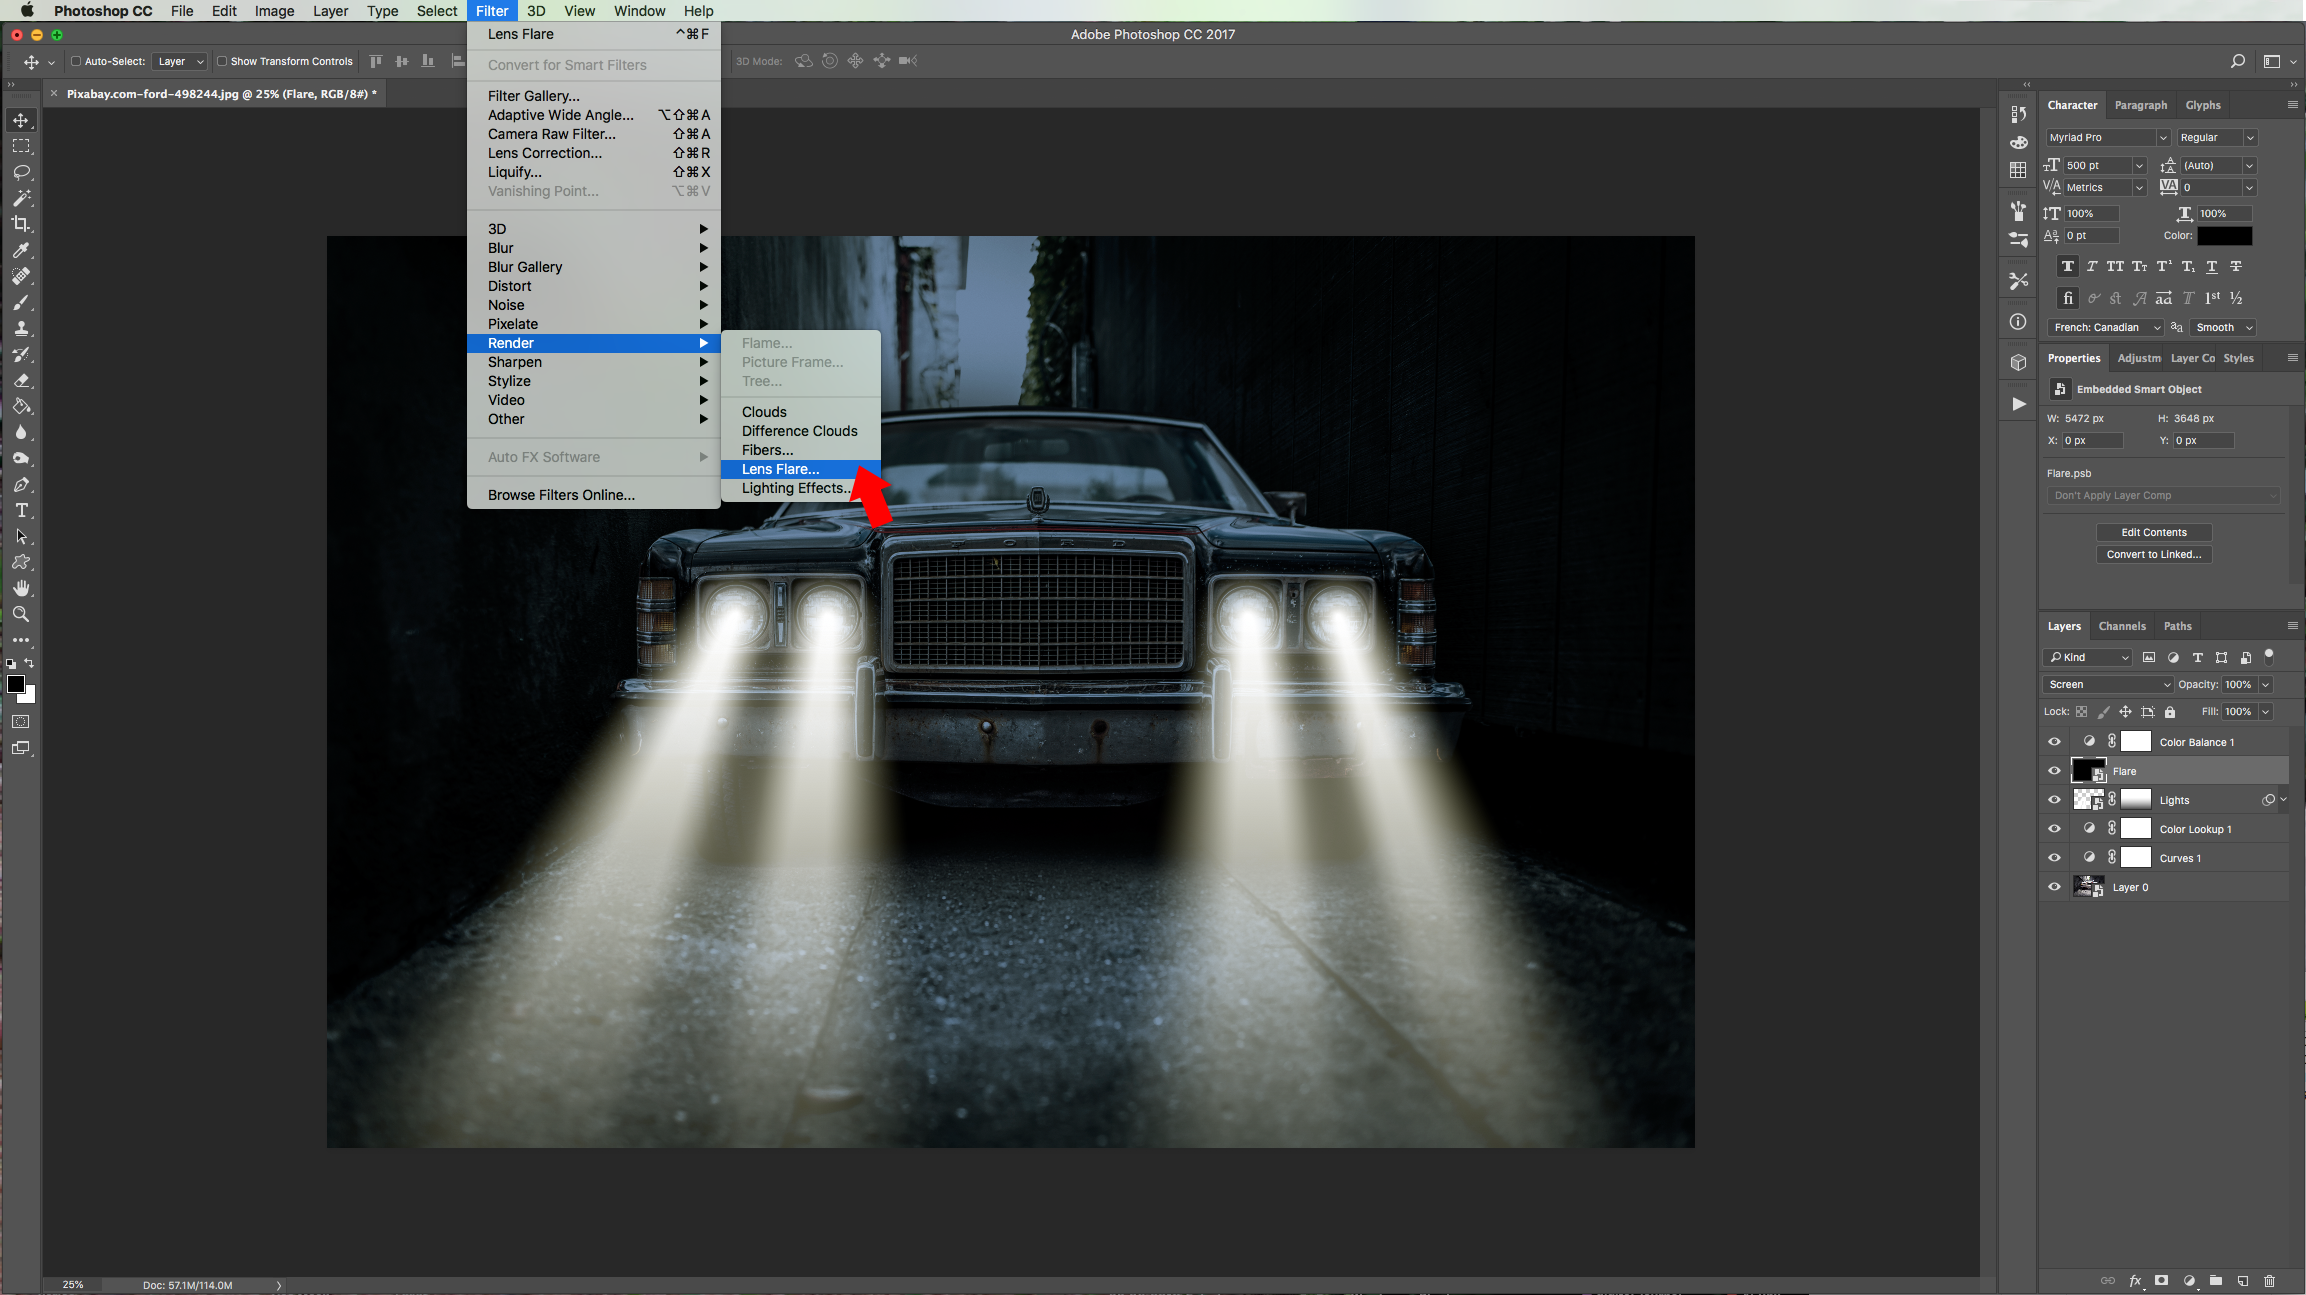
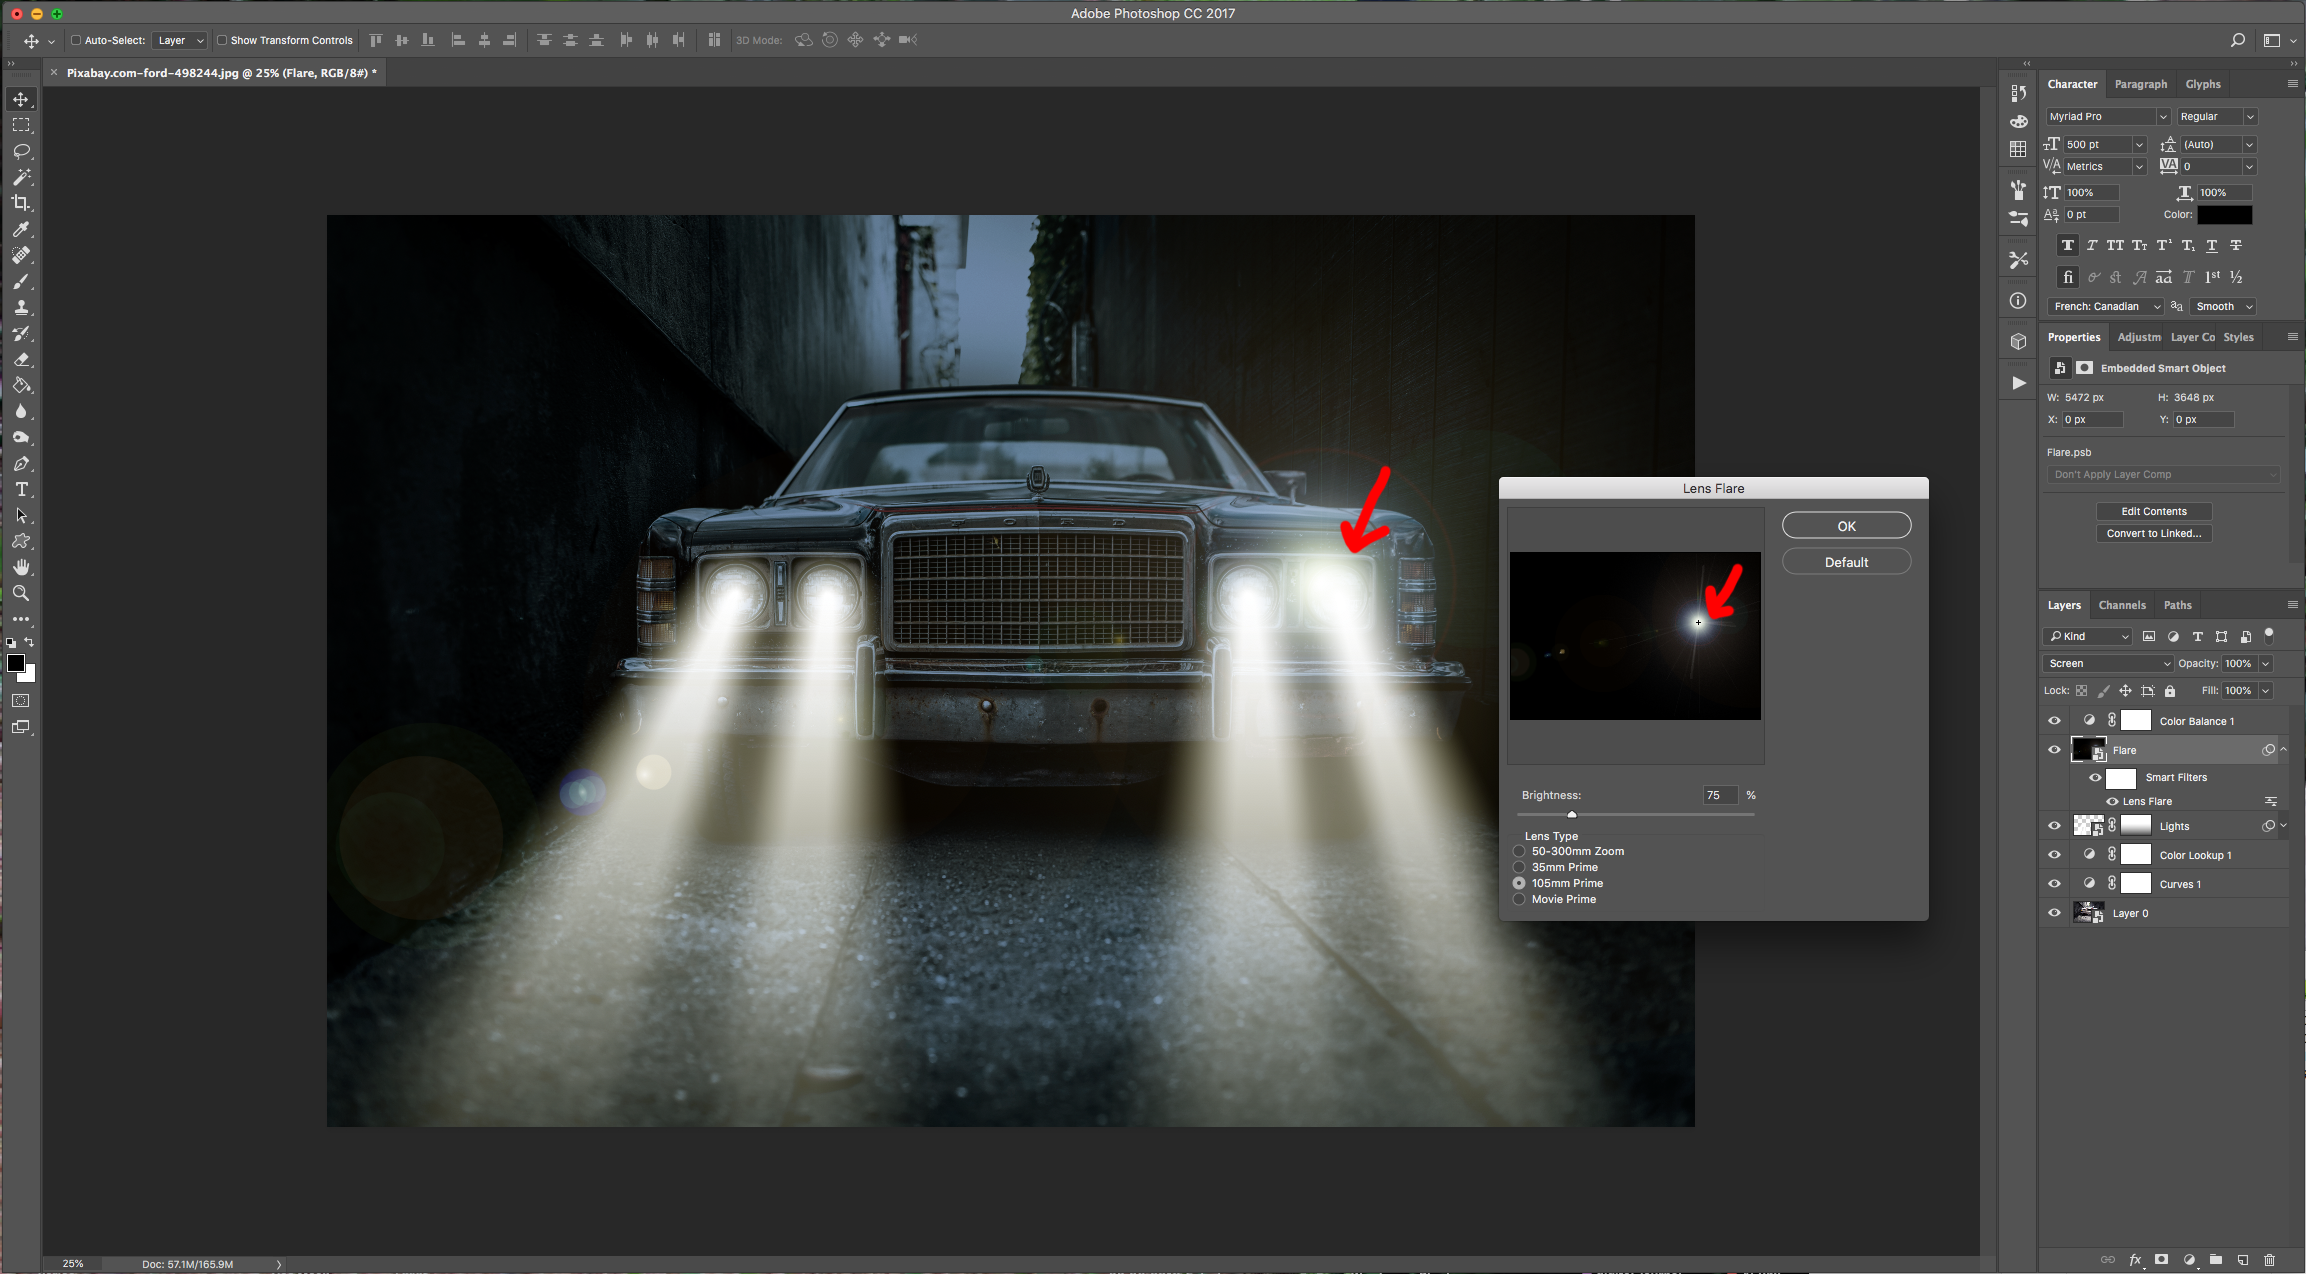
17 - Select your “Smart Object”, go to Filter > Render > Lens Flare… and place your Point where one of the “Headlights” should be. Select “105mm Prime” and a “Brightness” value of 75%.
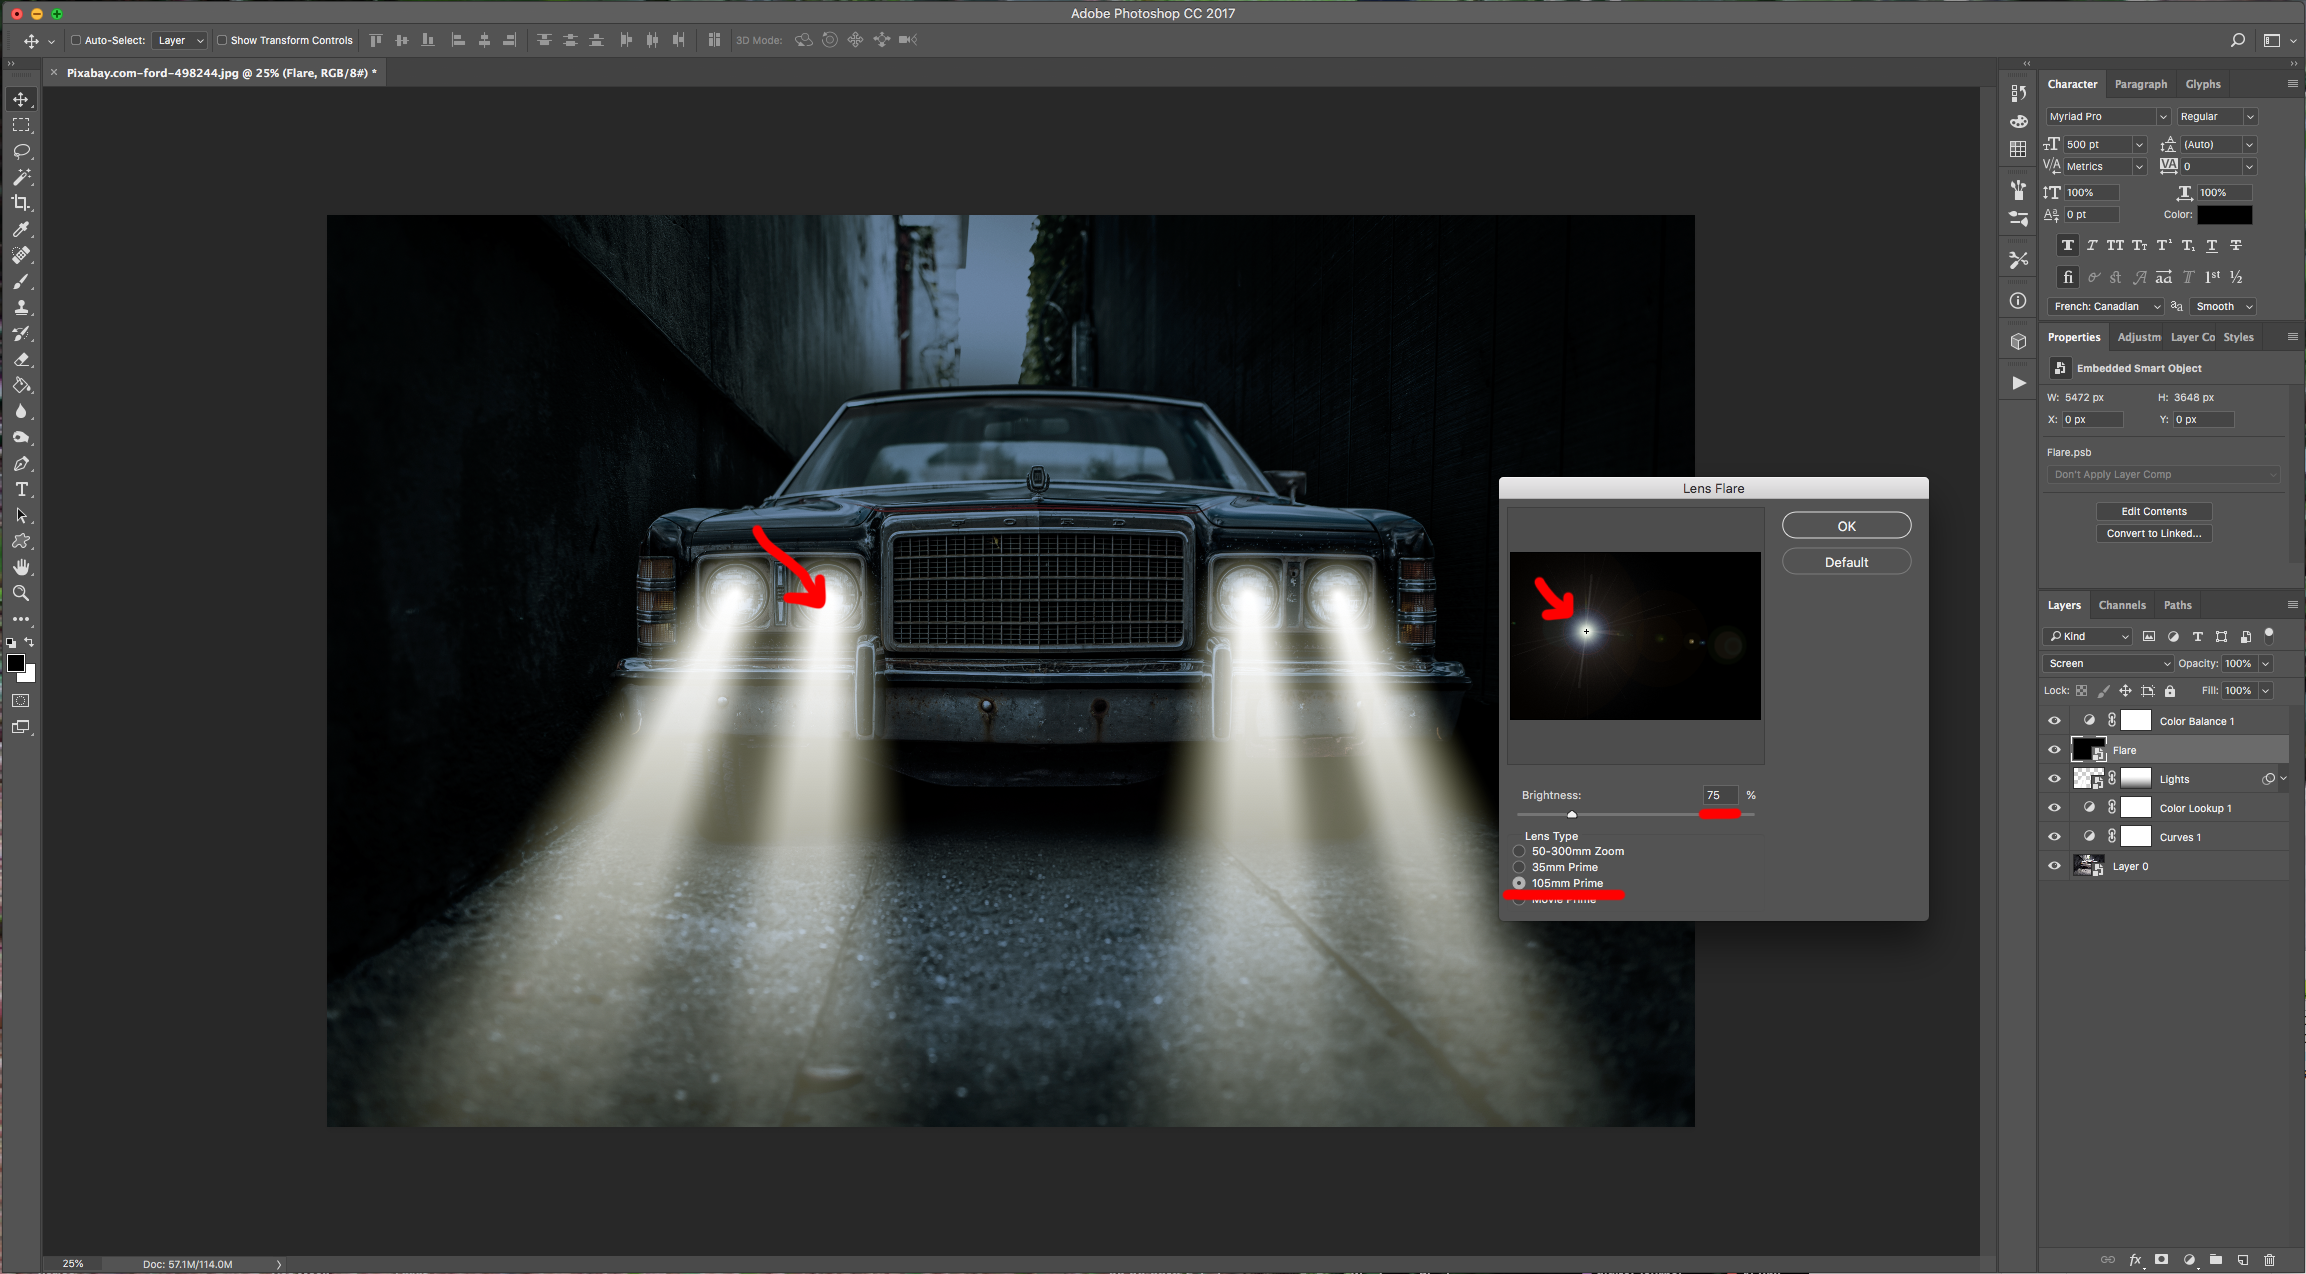
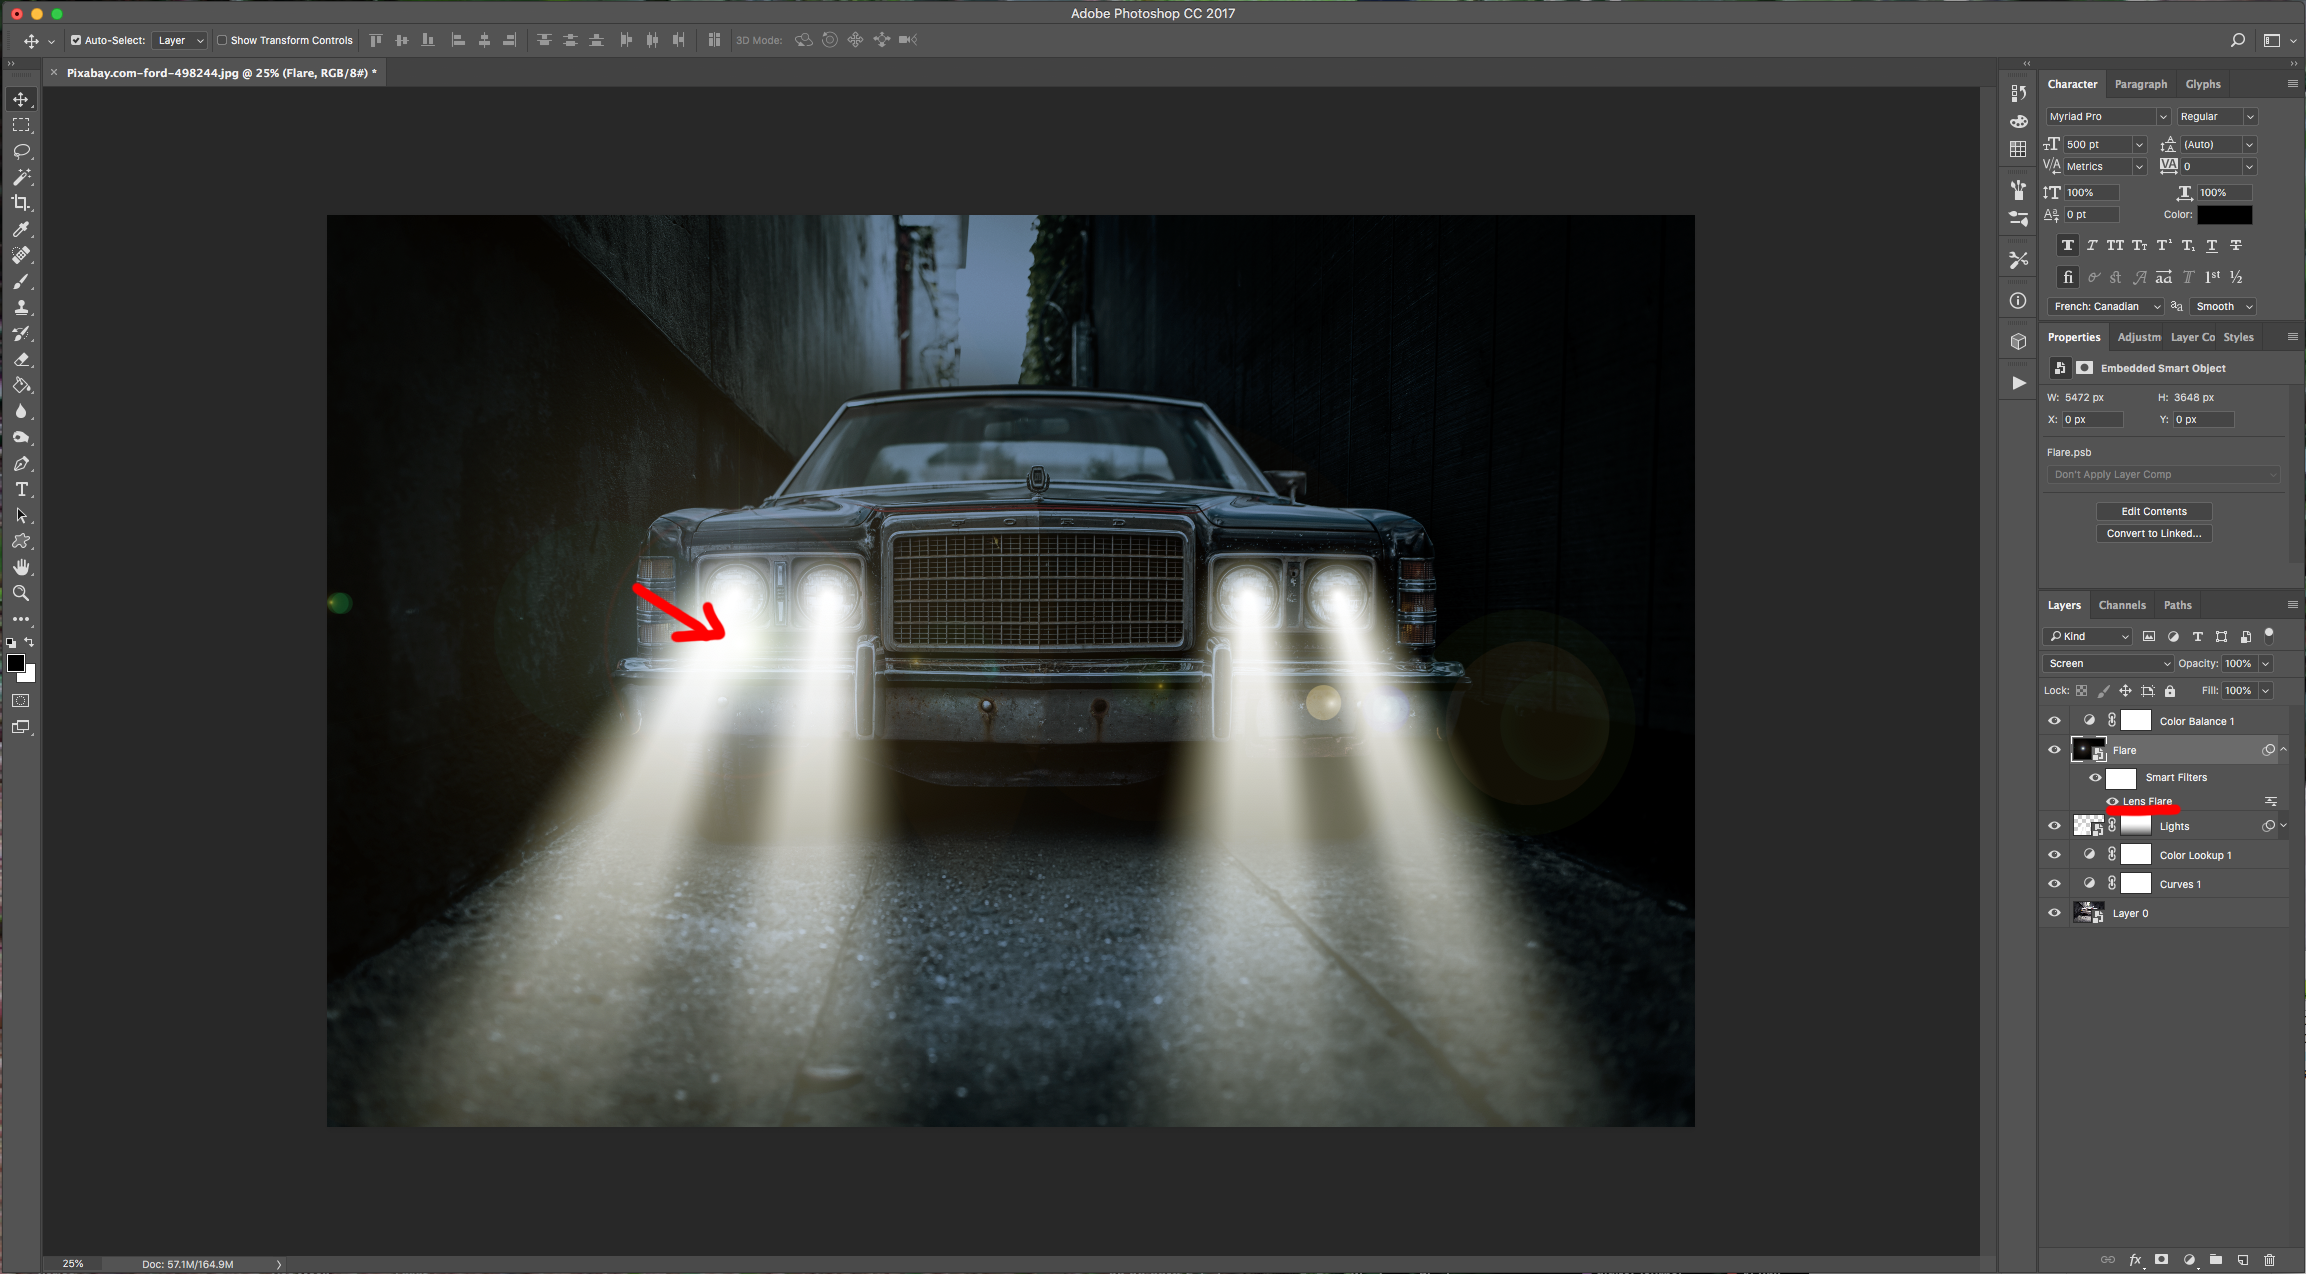
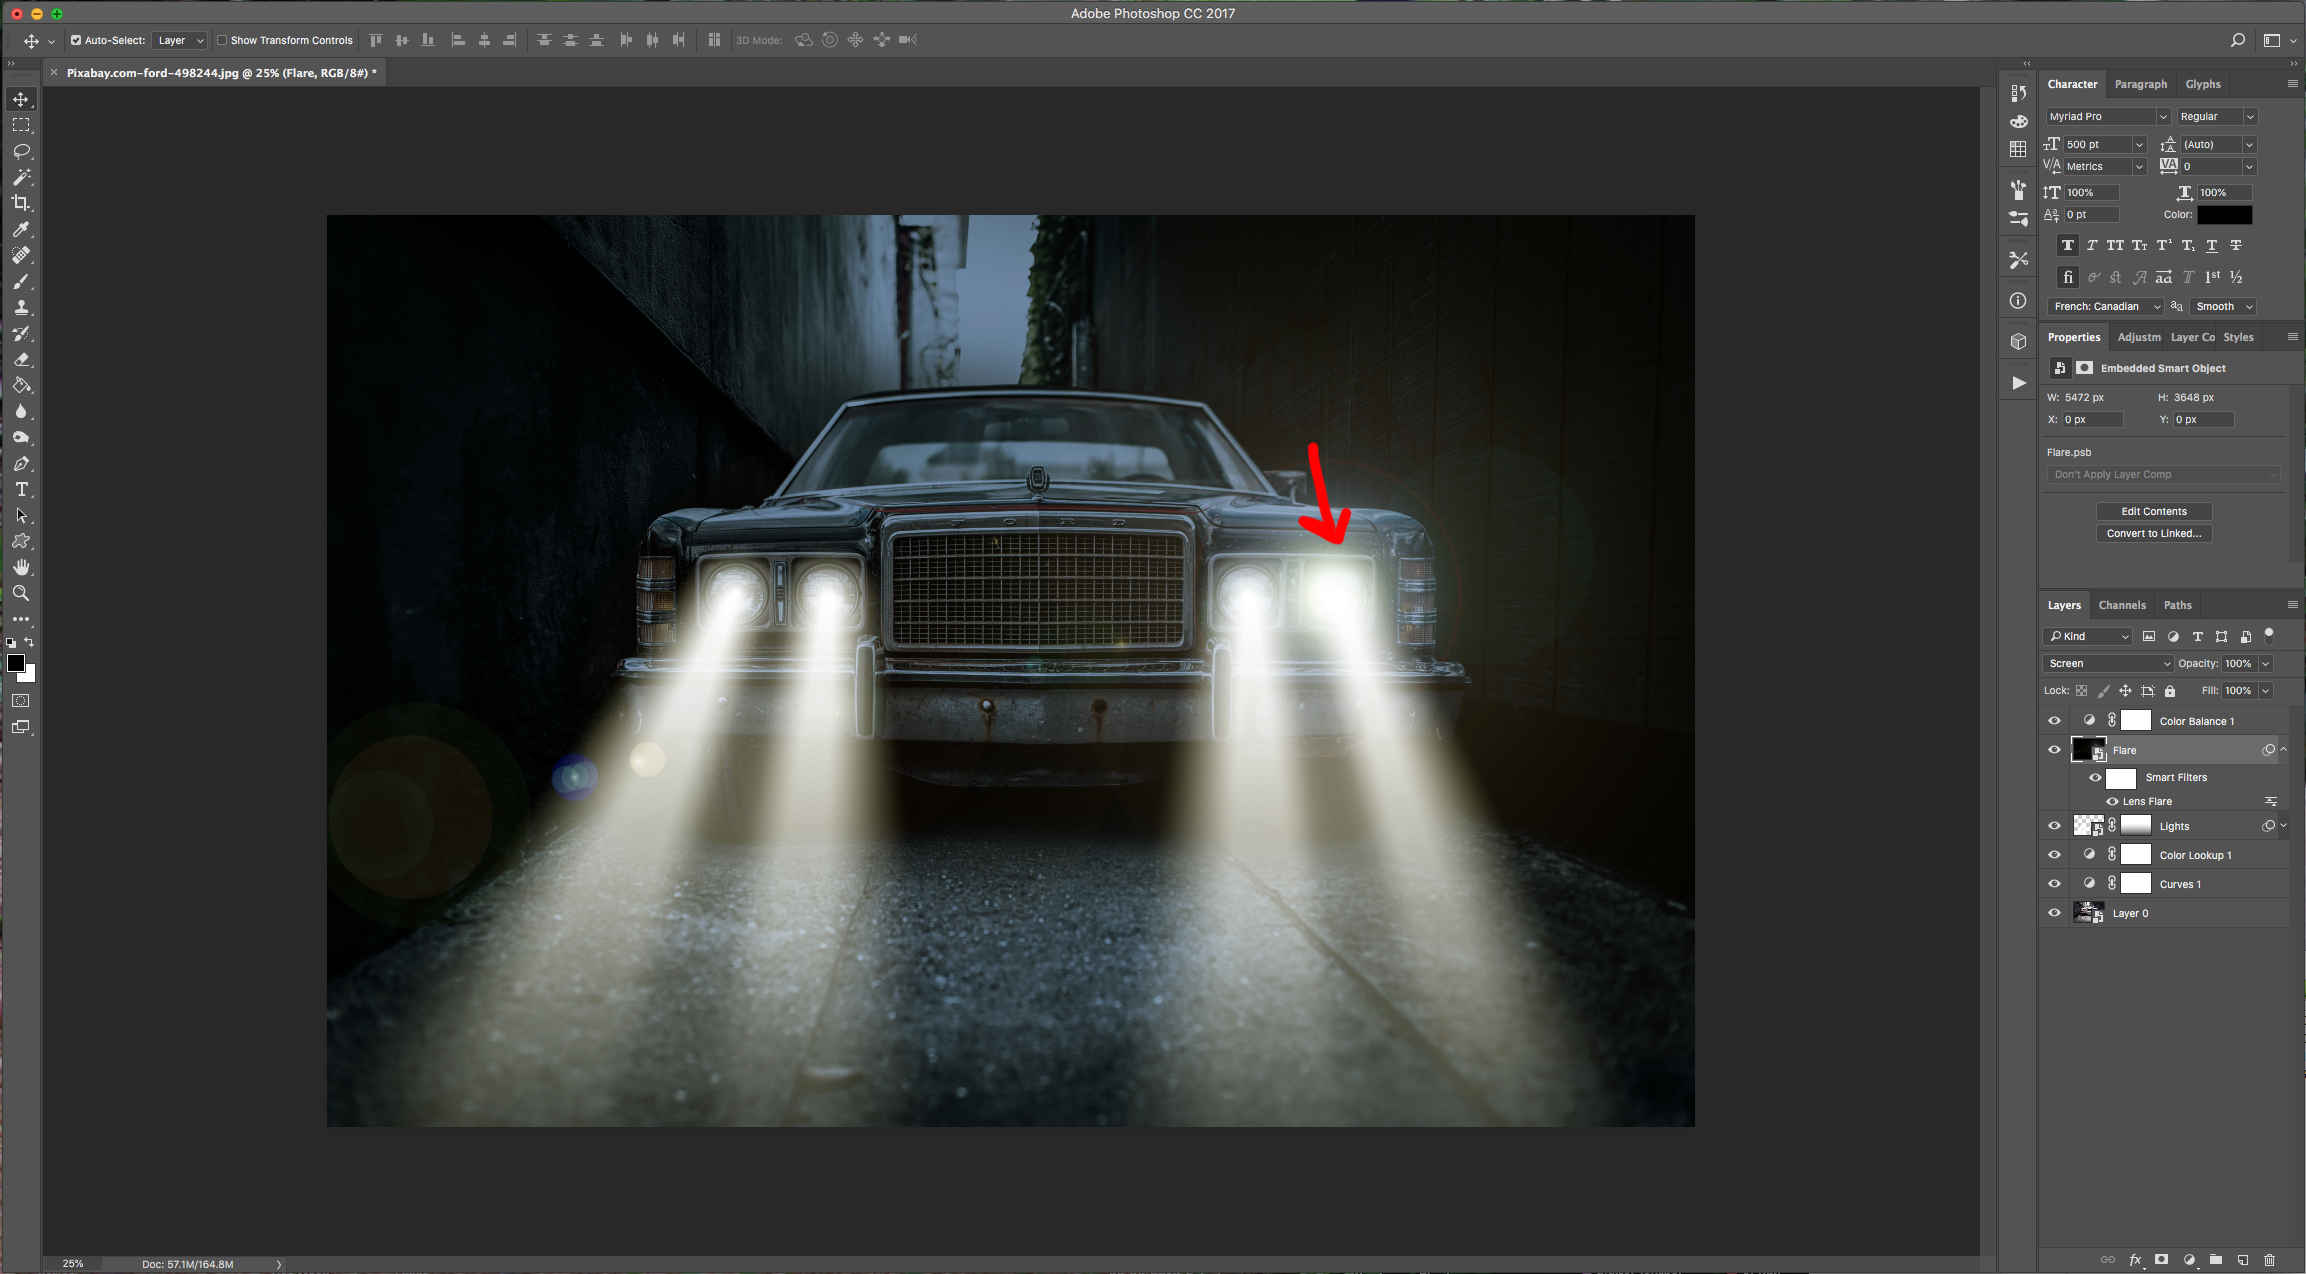
18 - If you notice your Focus Point is not placed correctly you can always double-click on your “Smart Filter” Thumbnail” and fix it.
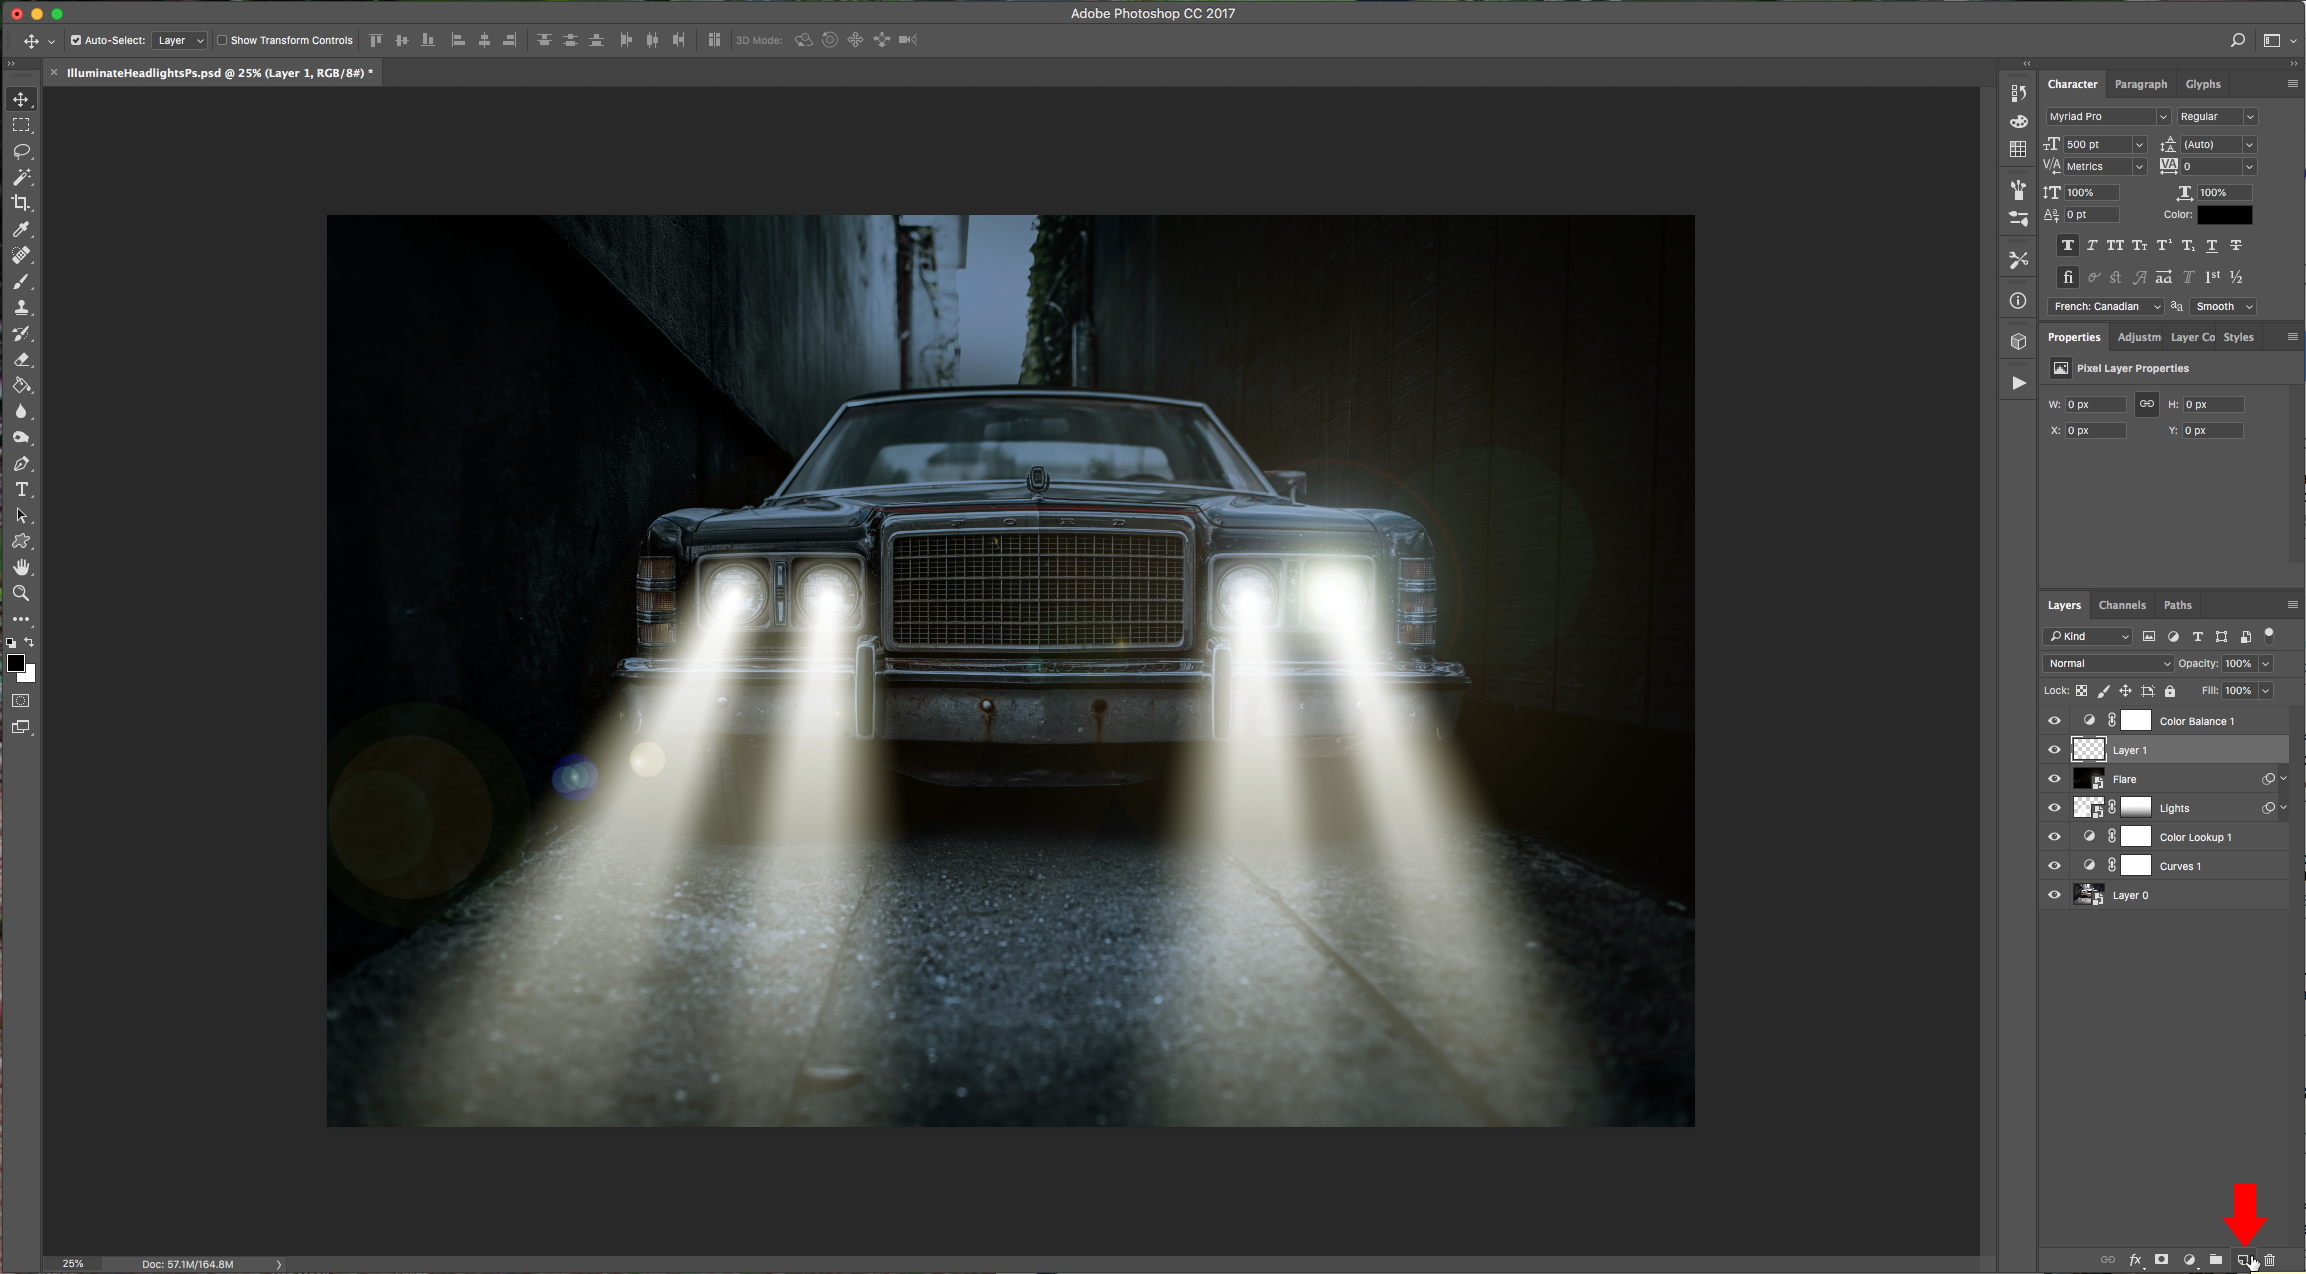
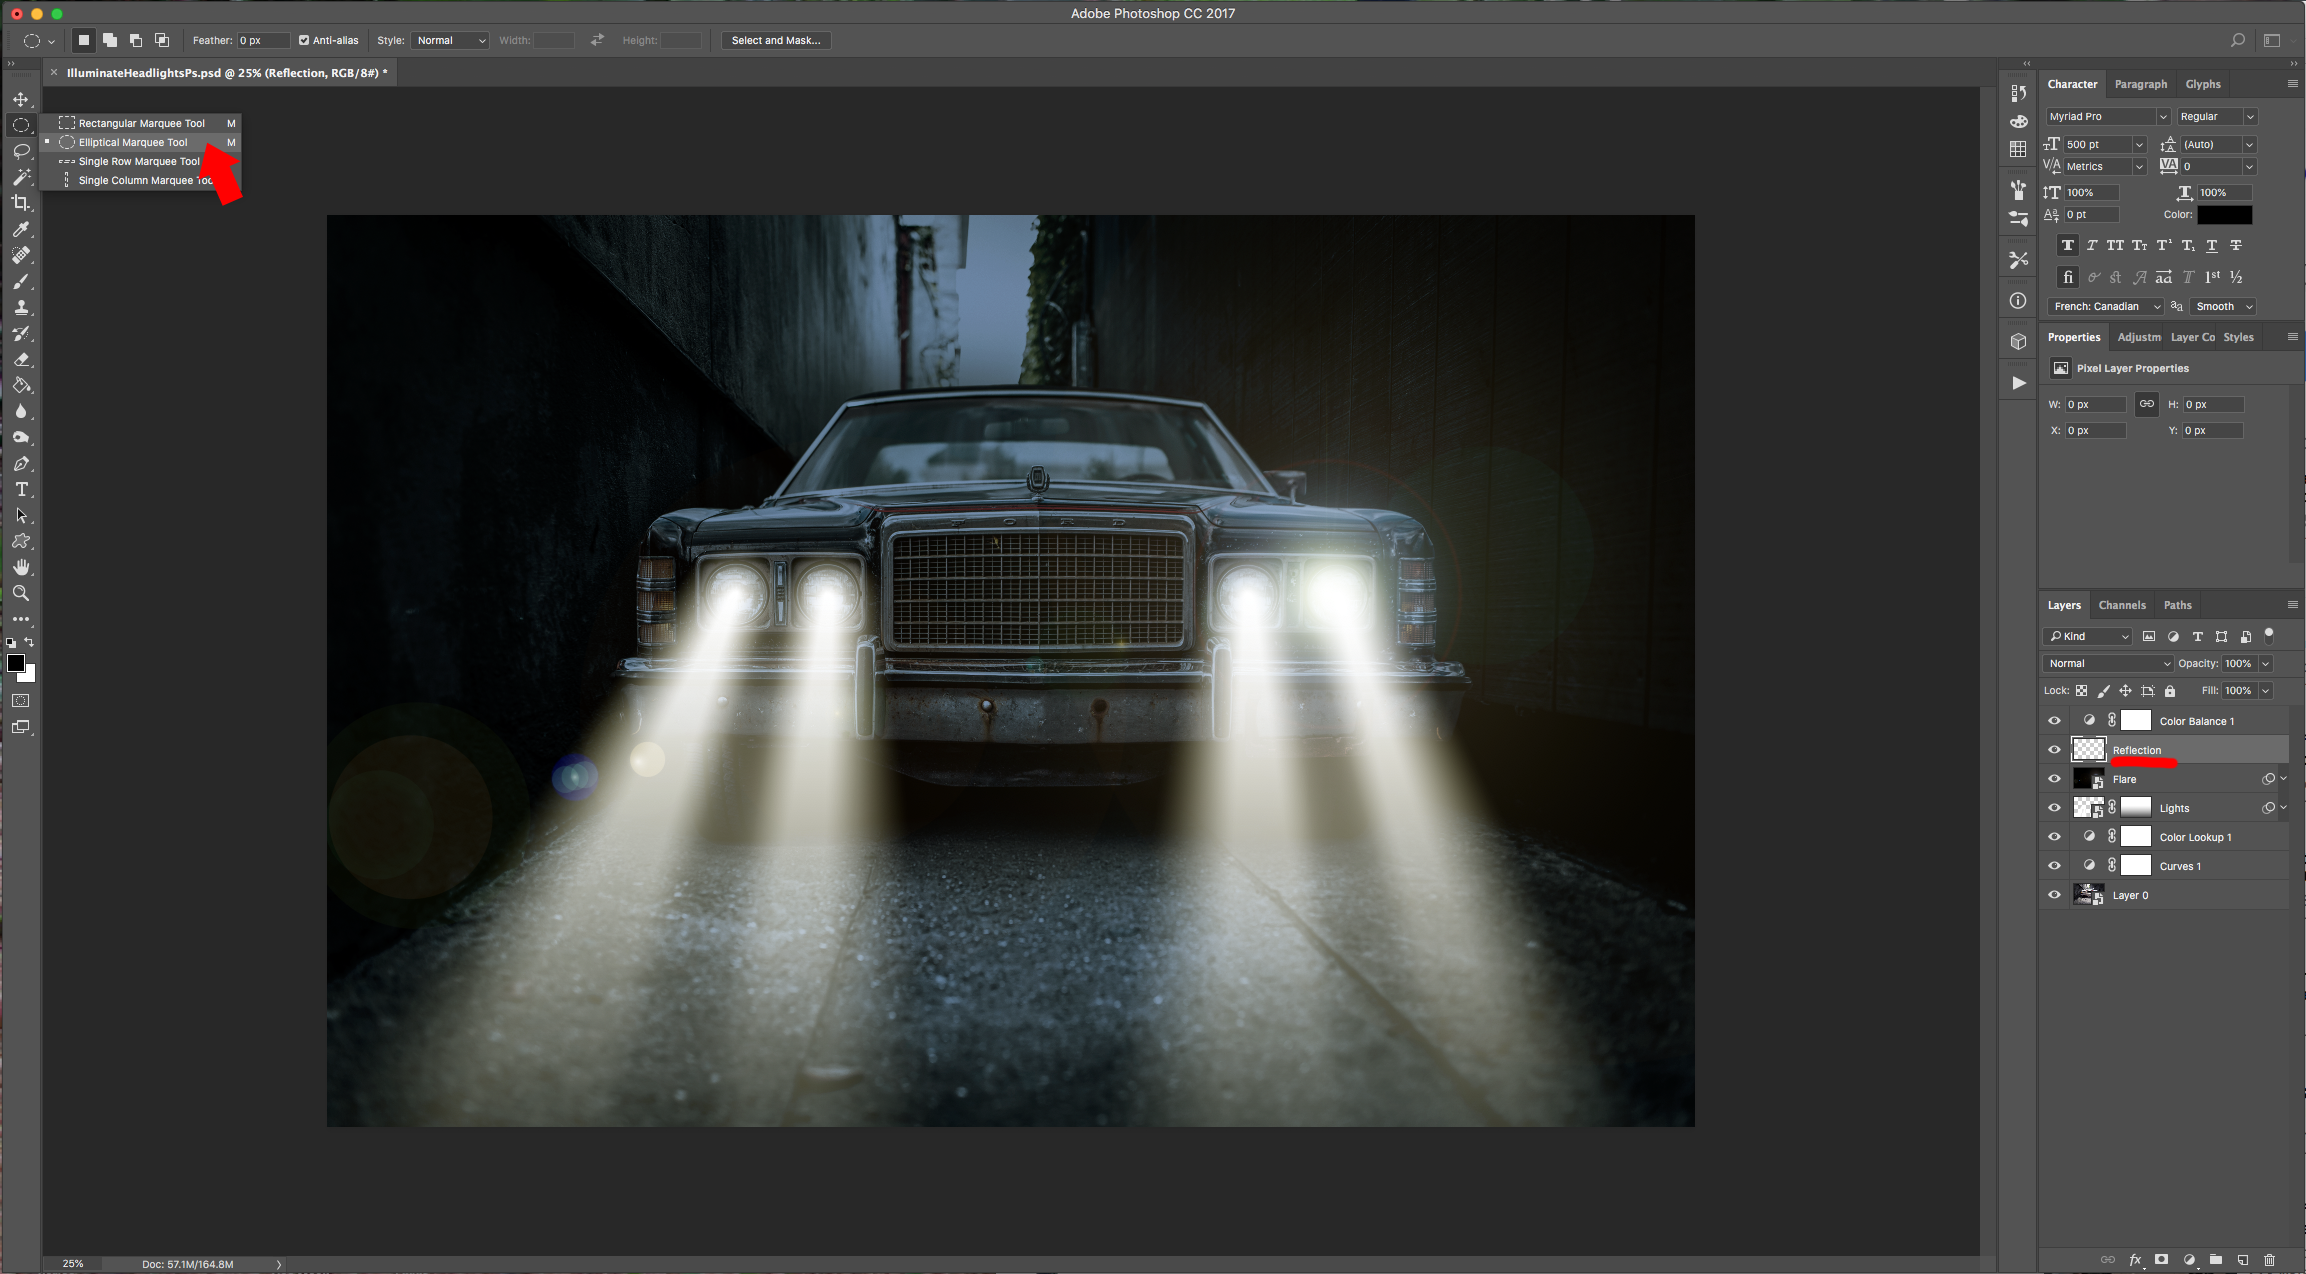
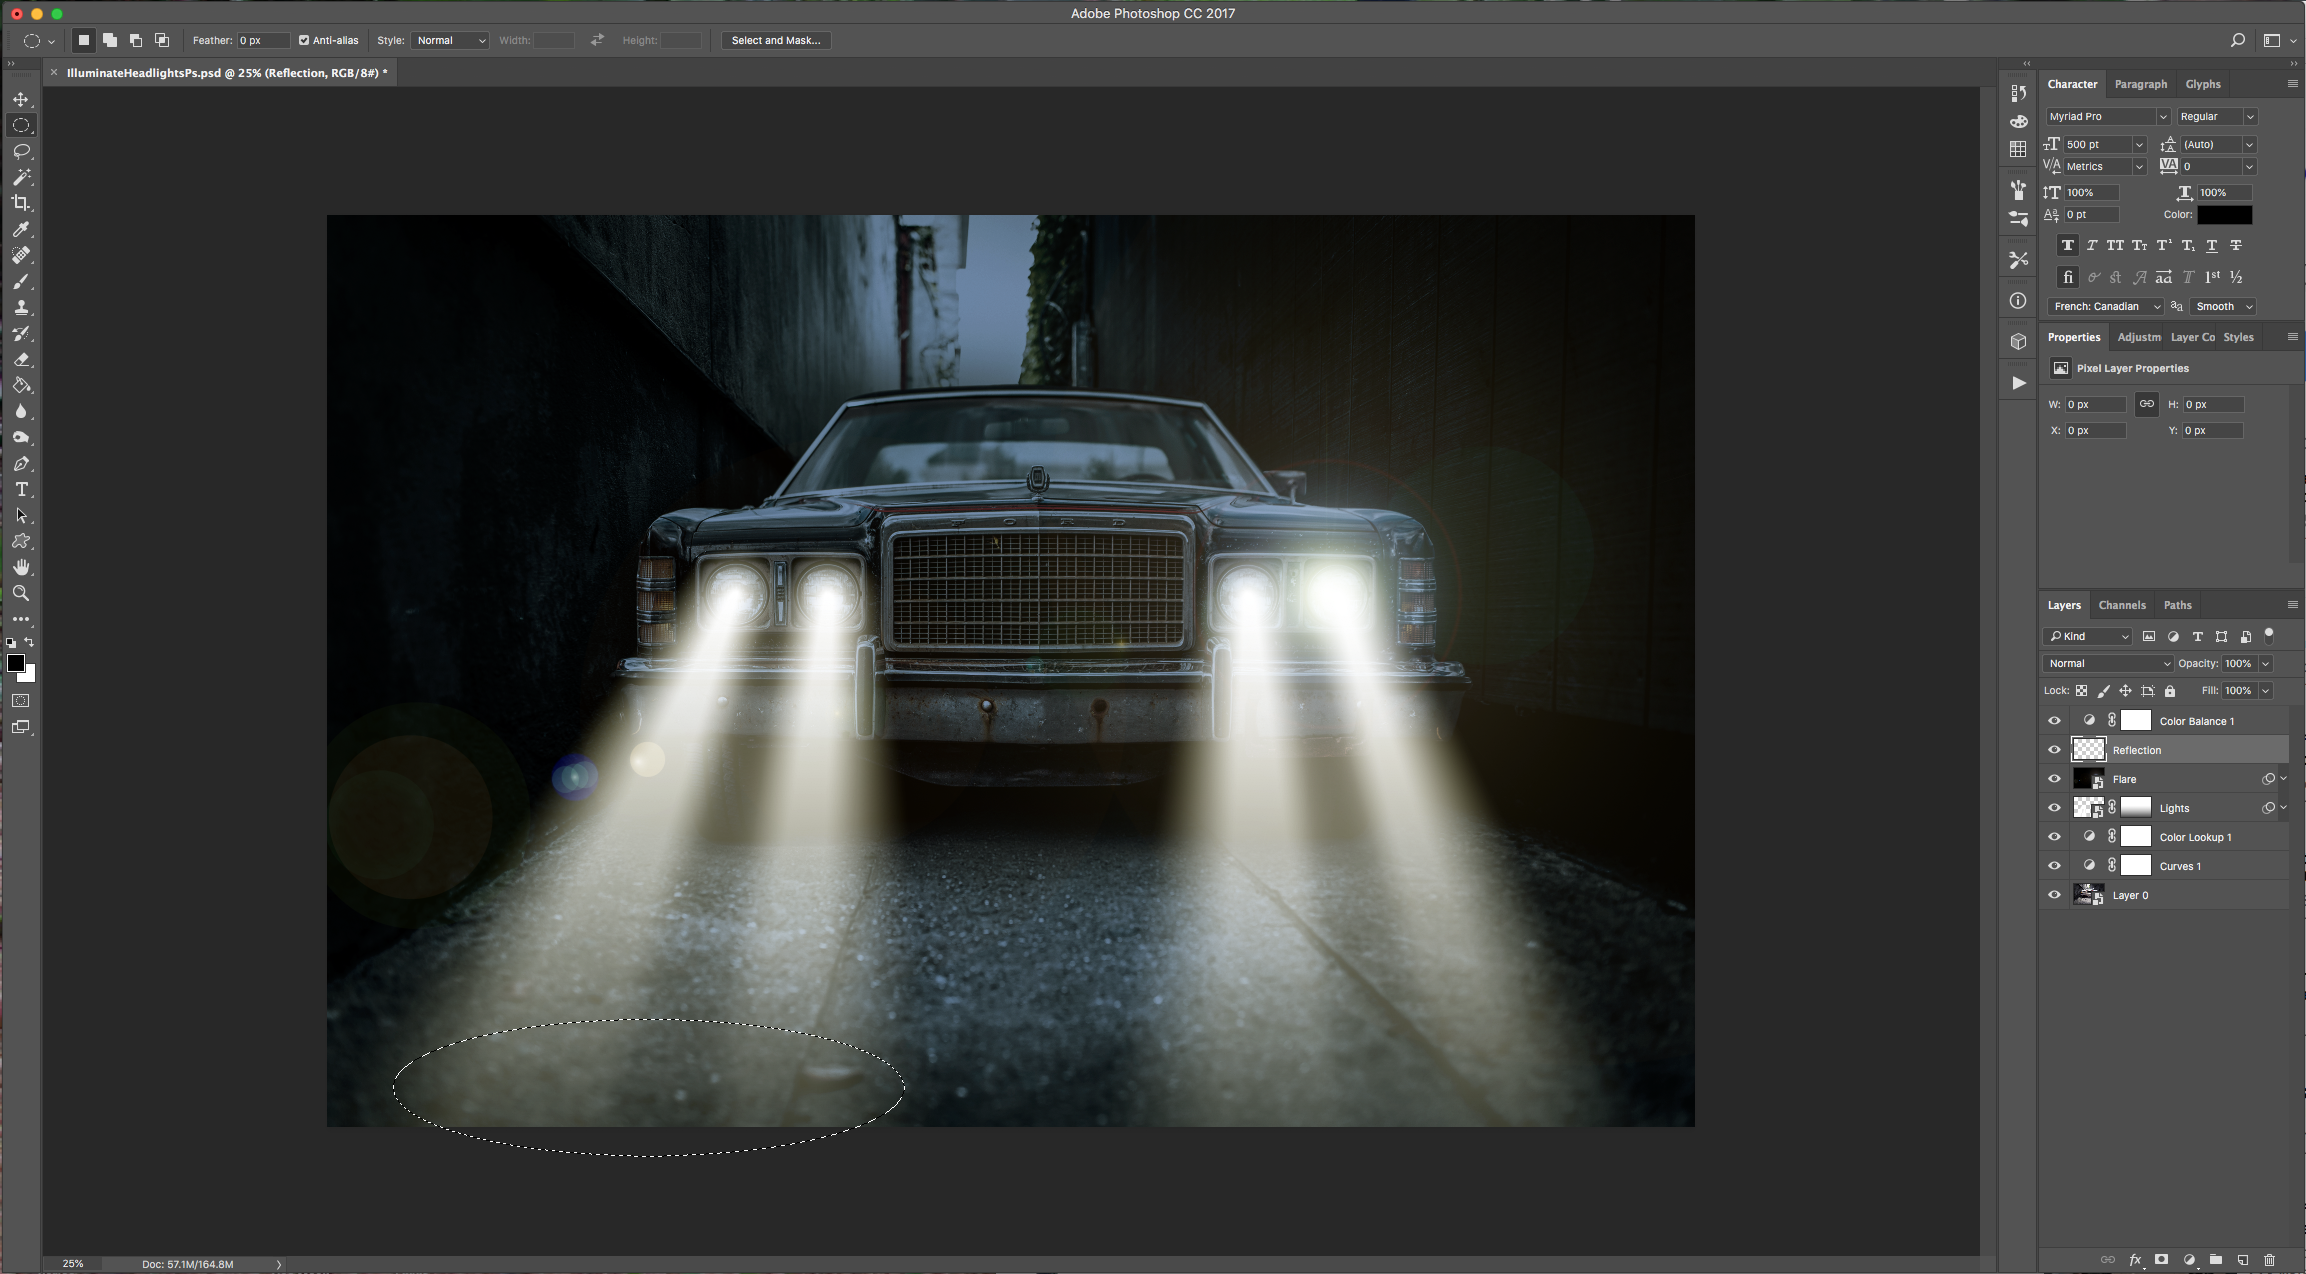
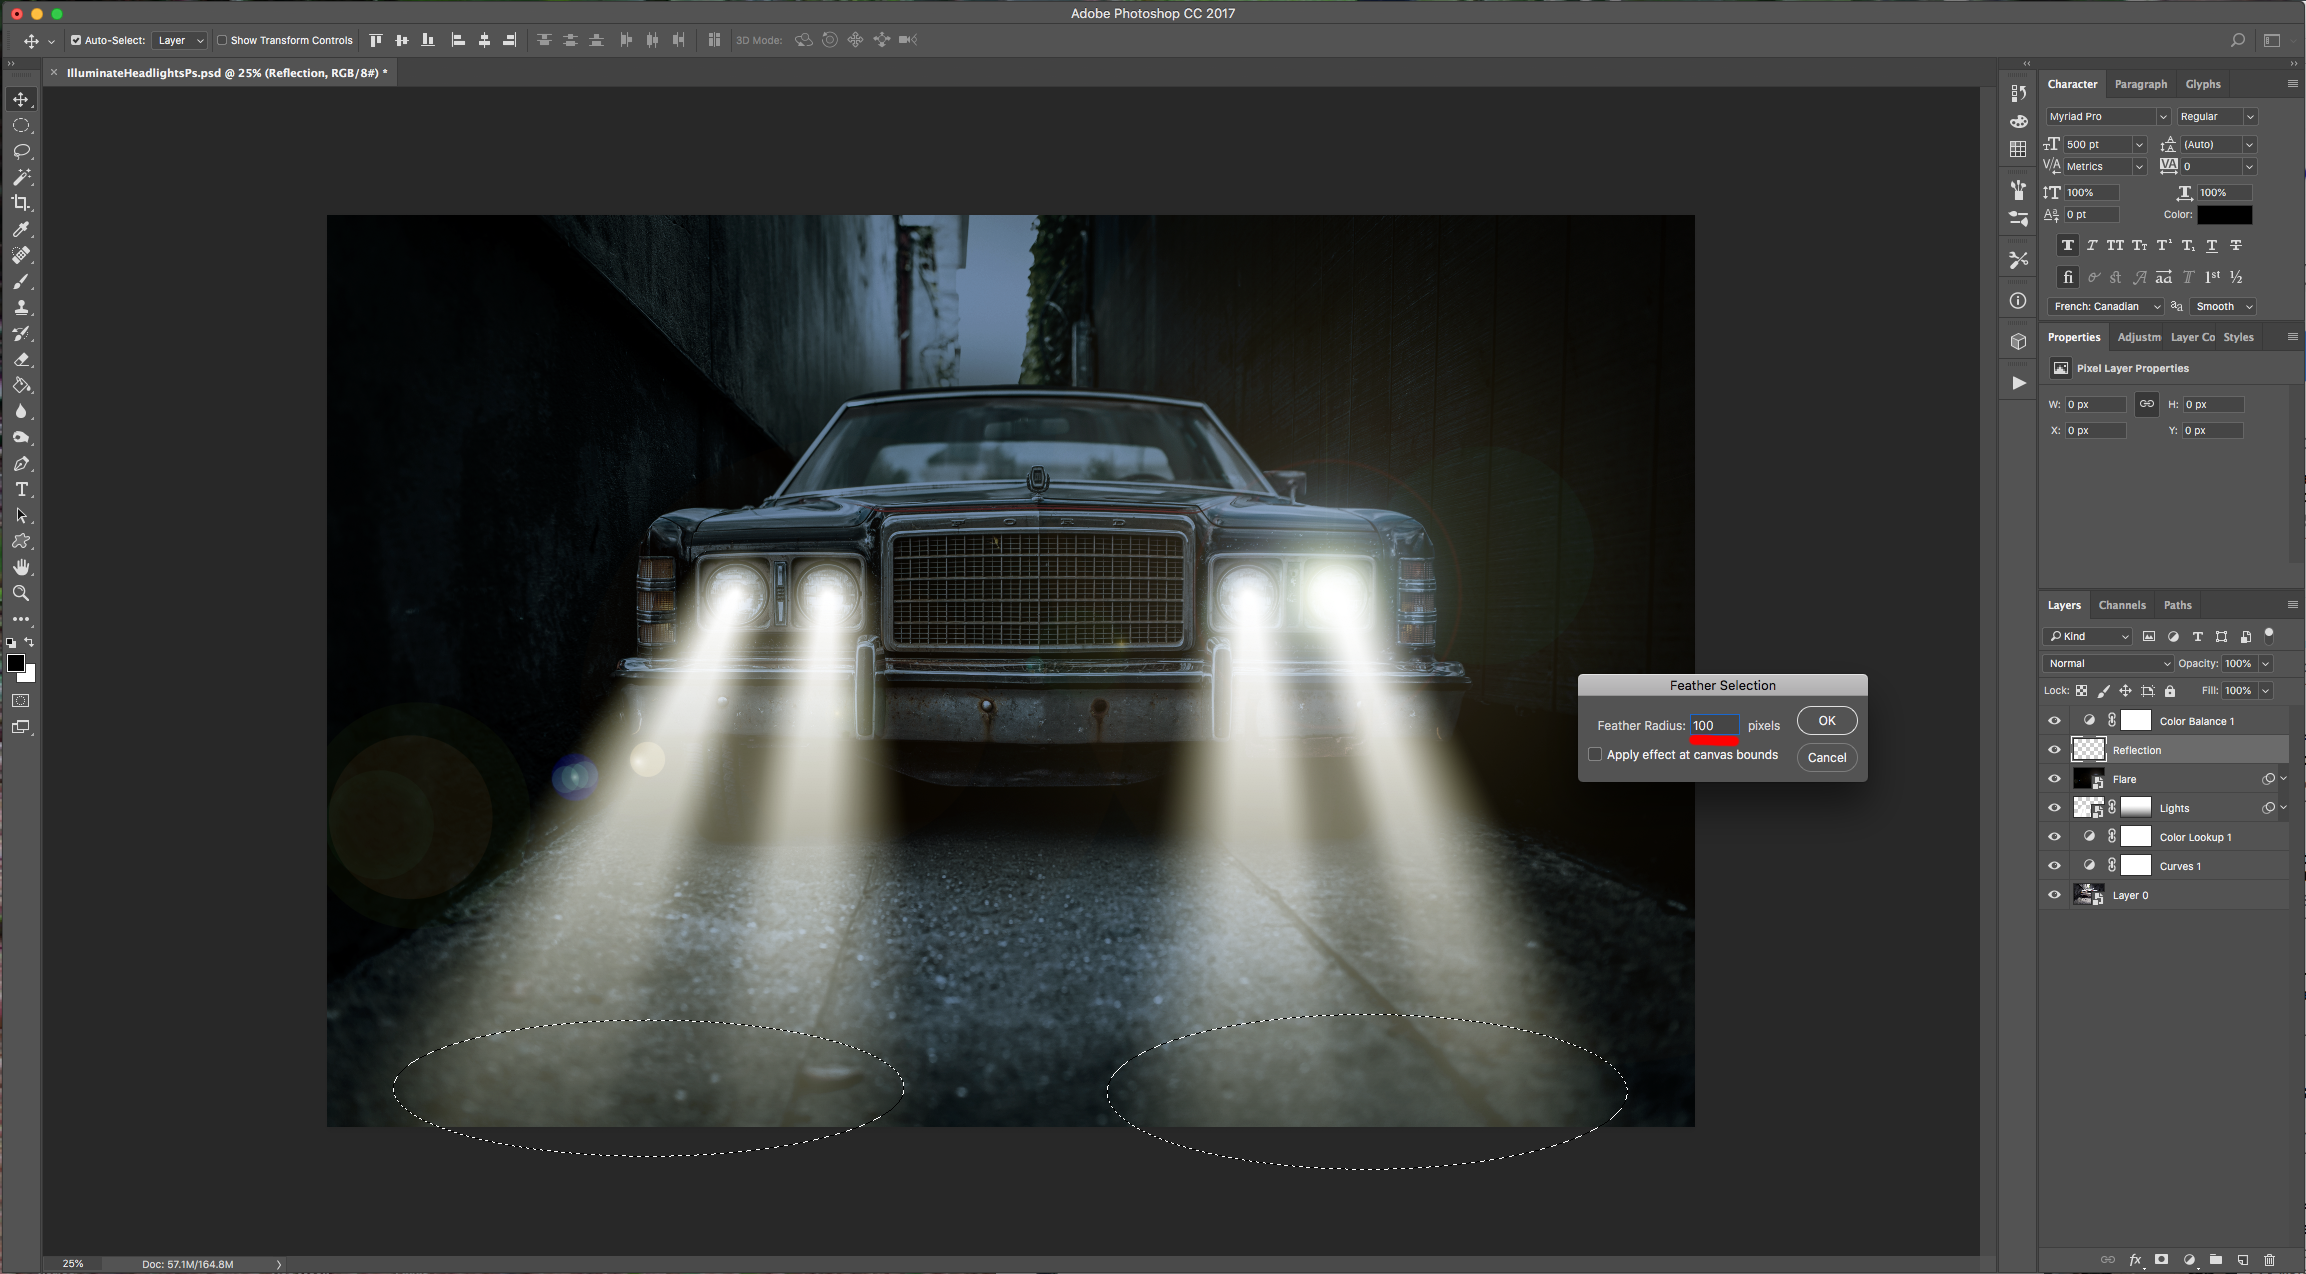
19 - Create another “Layer” on top of everything, name it “reflection” and select the “Elliptical Marquee Tool” (M). Drag your cursor on the bottom left part of your image, just where one of your “Light Beams” end and create an Oval Selection (some of it can be outside the “Canvas”).
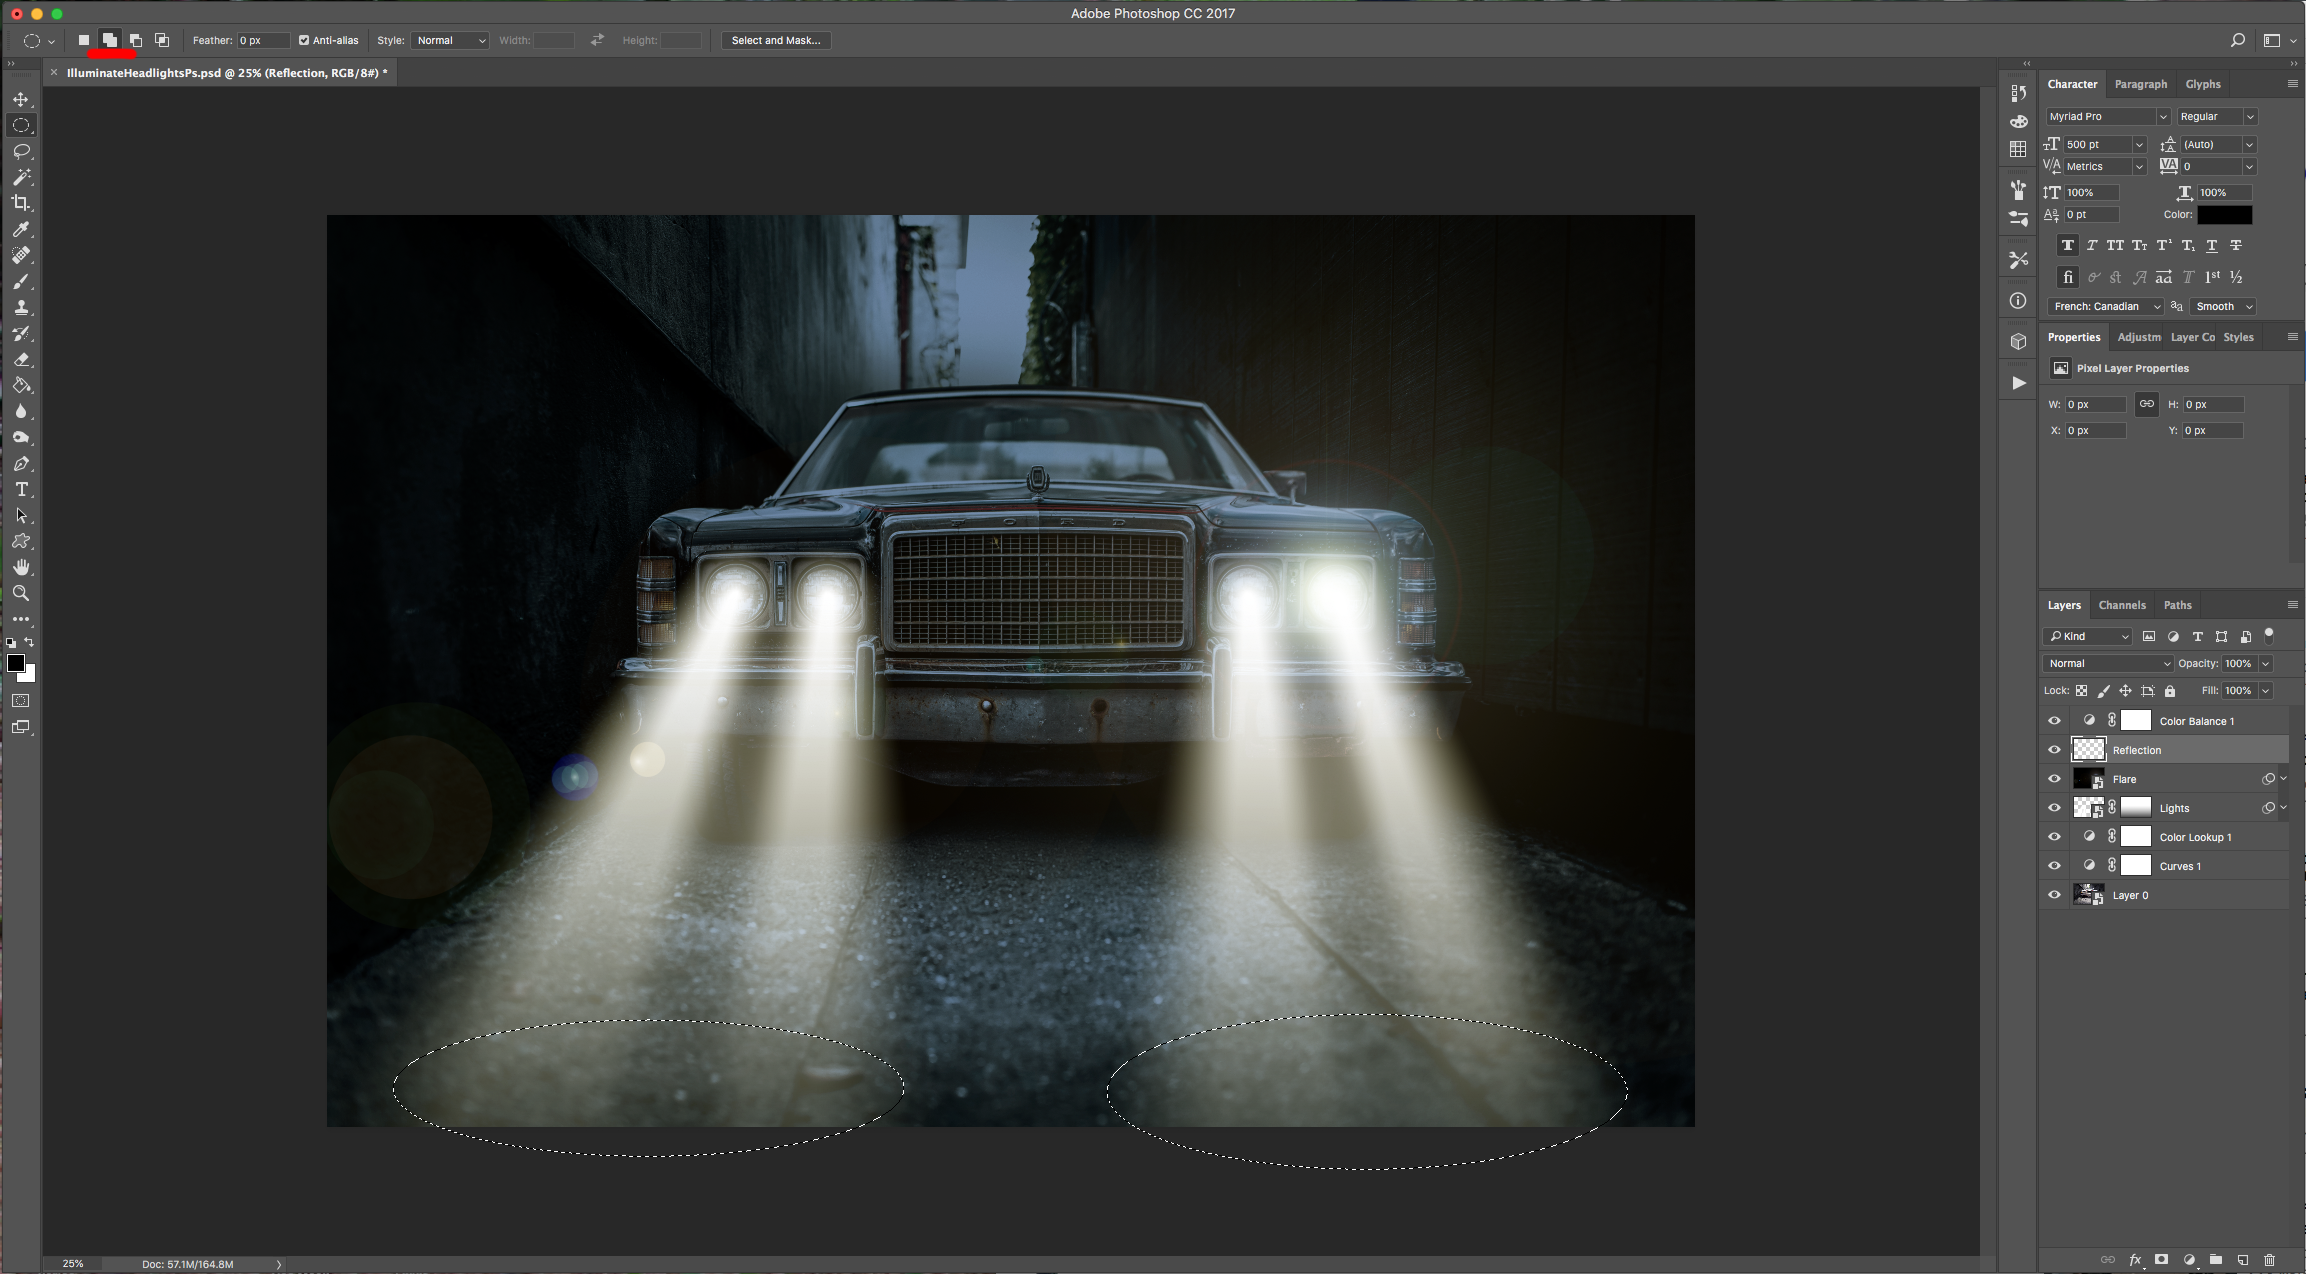
20 - Choose “Add to Selection” on the Top Menu and add another Oval selection to the other side.
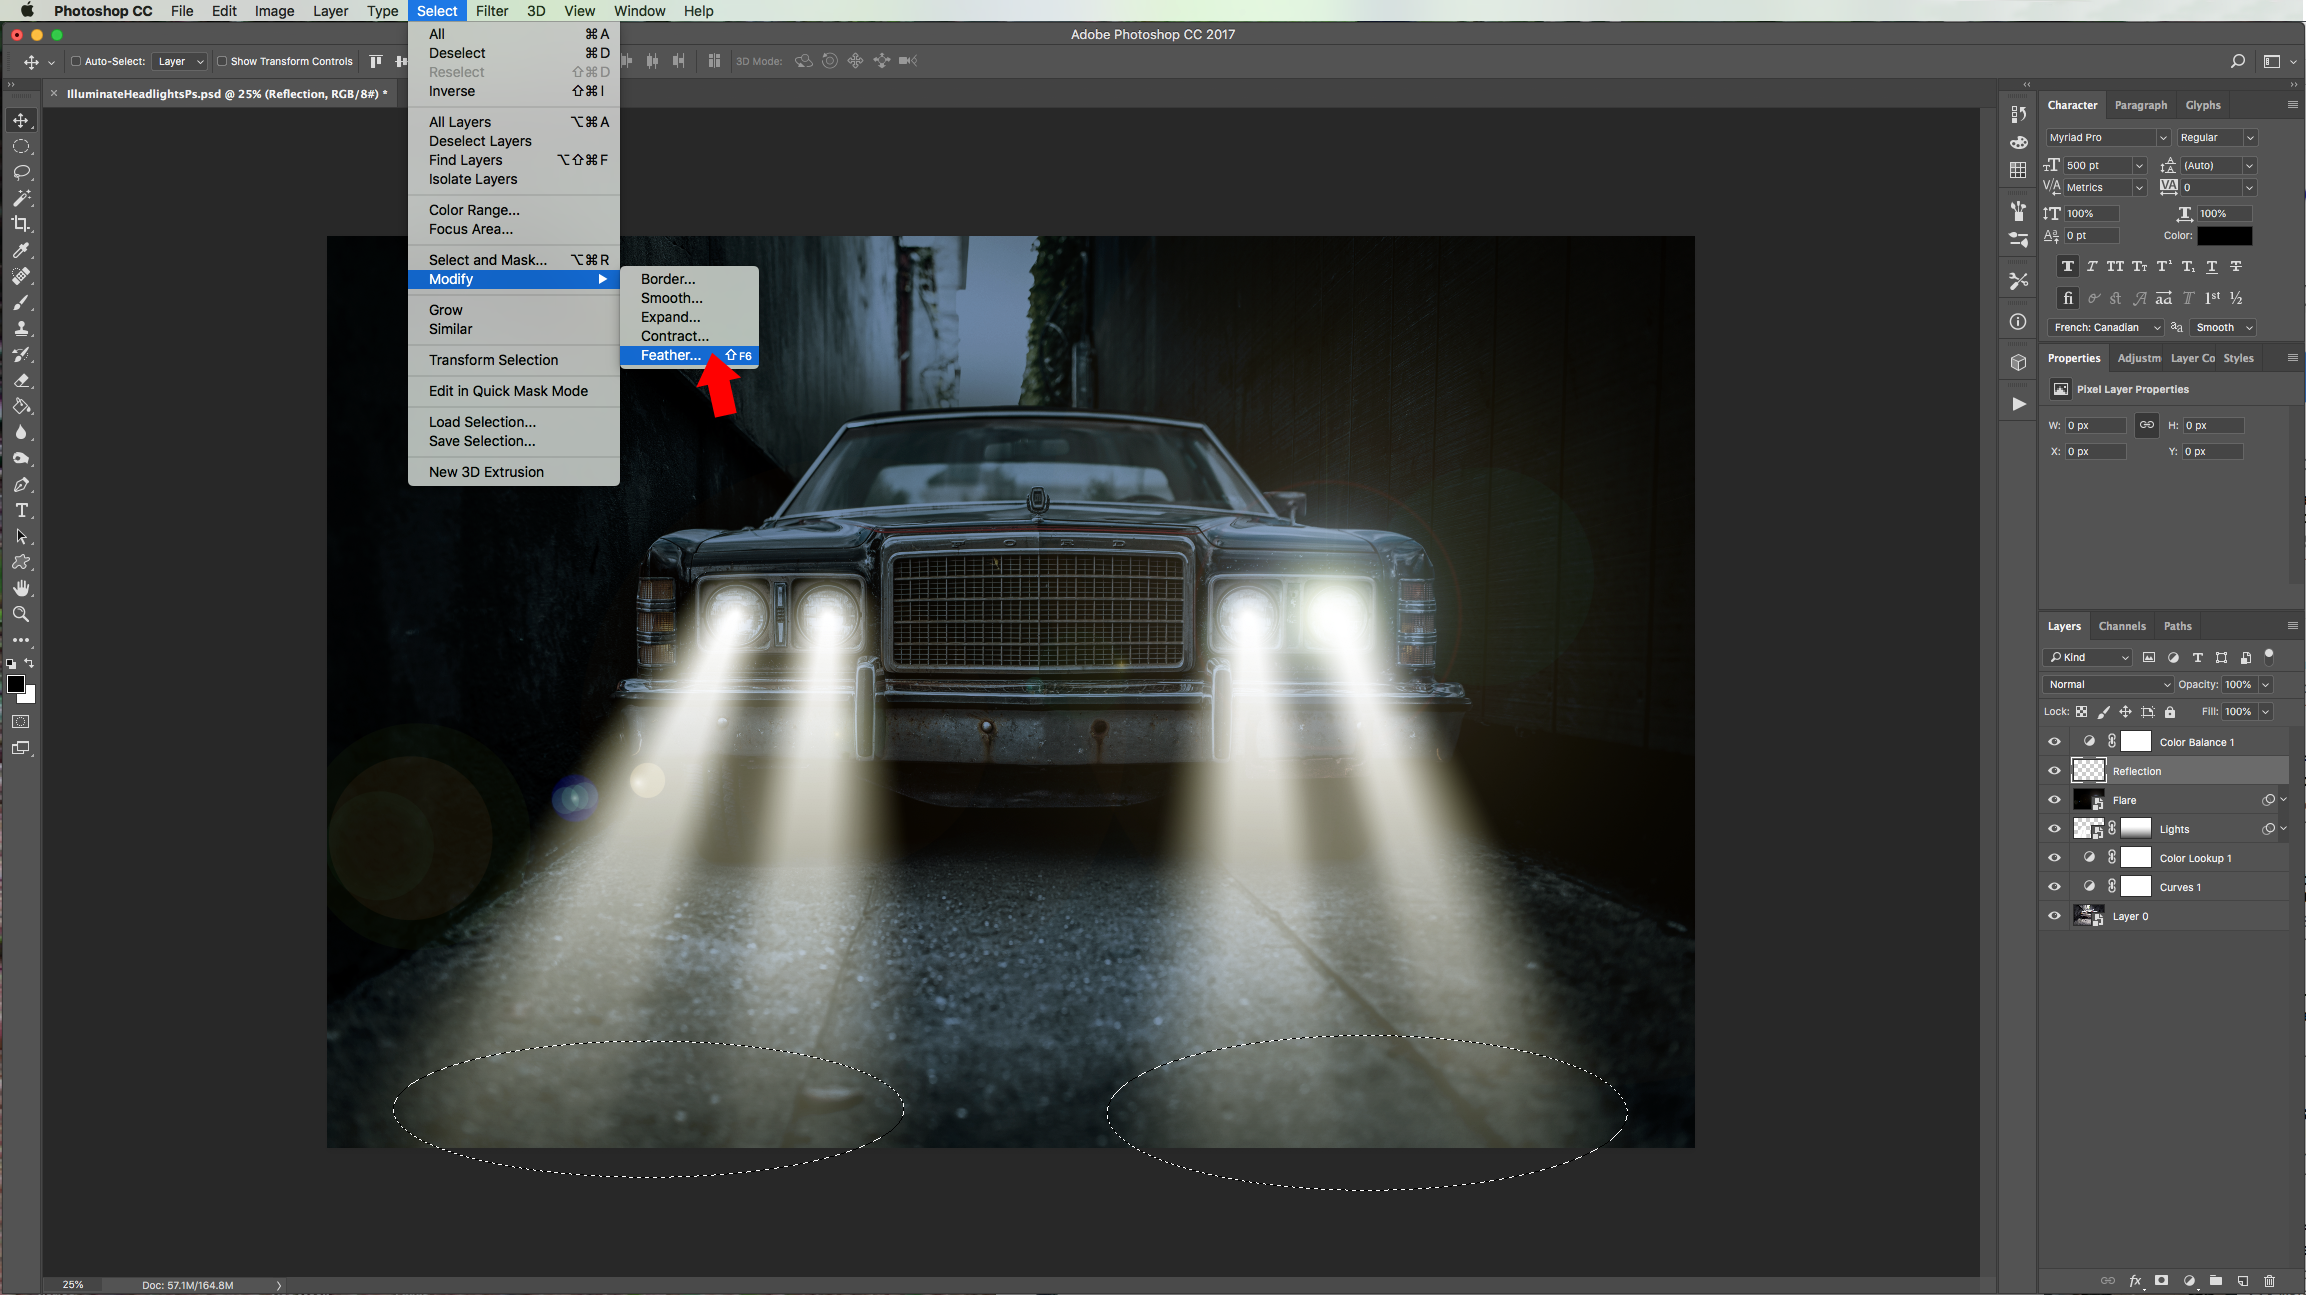
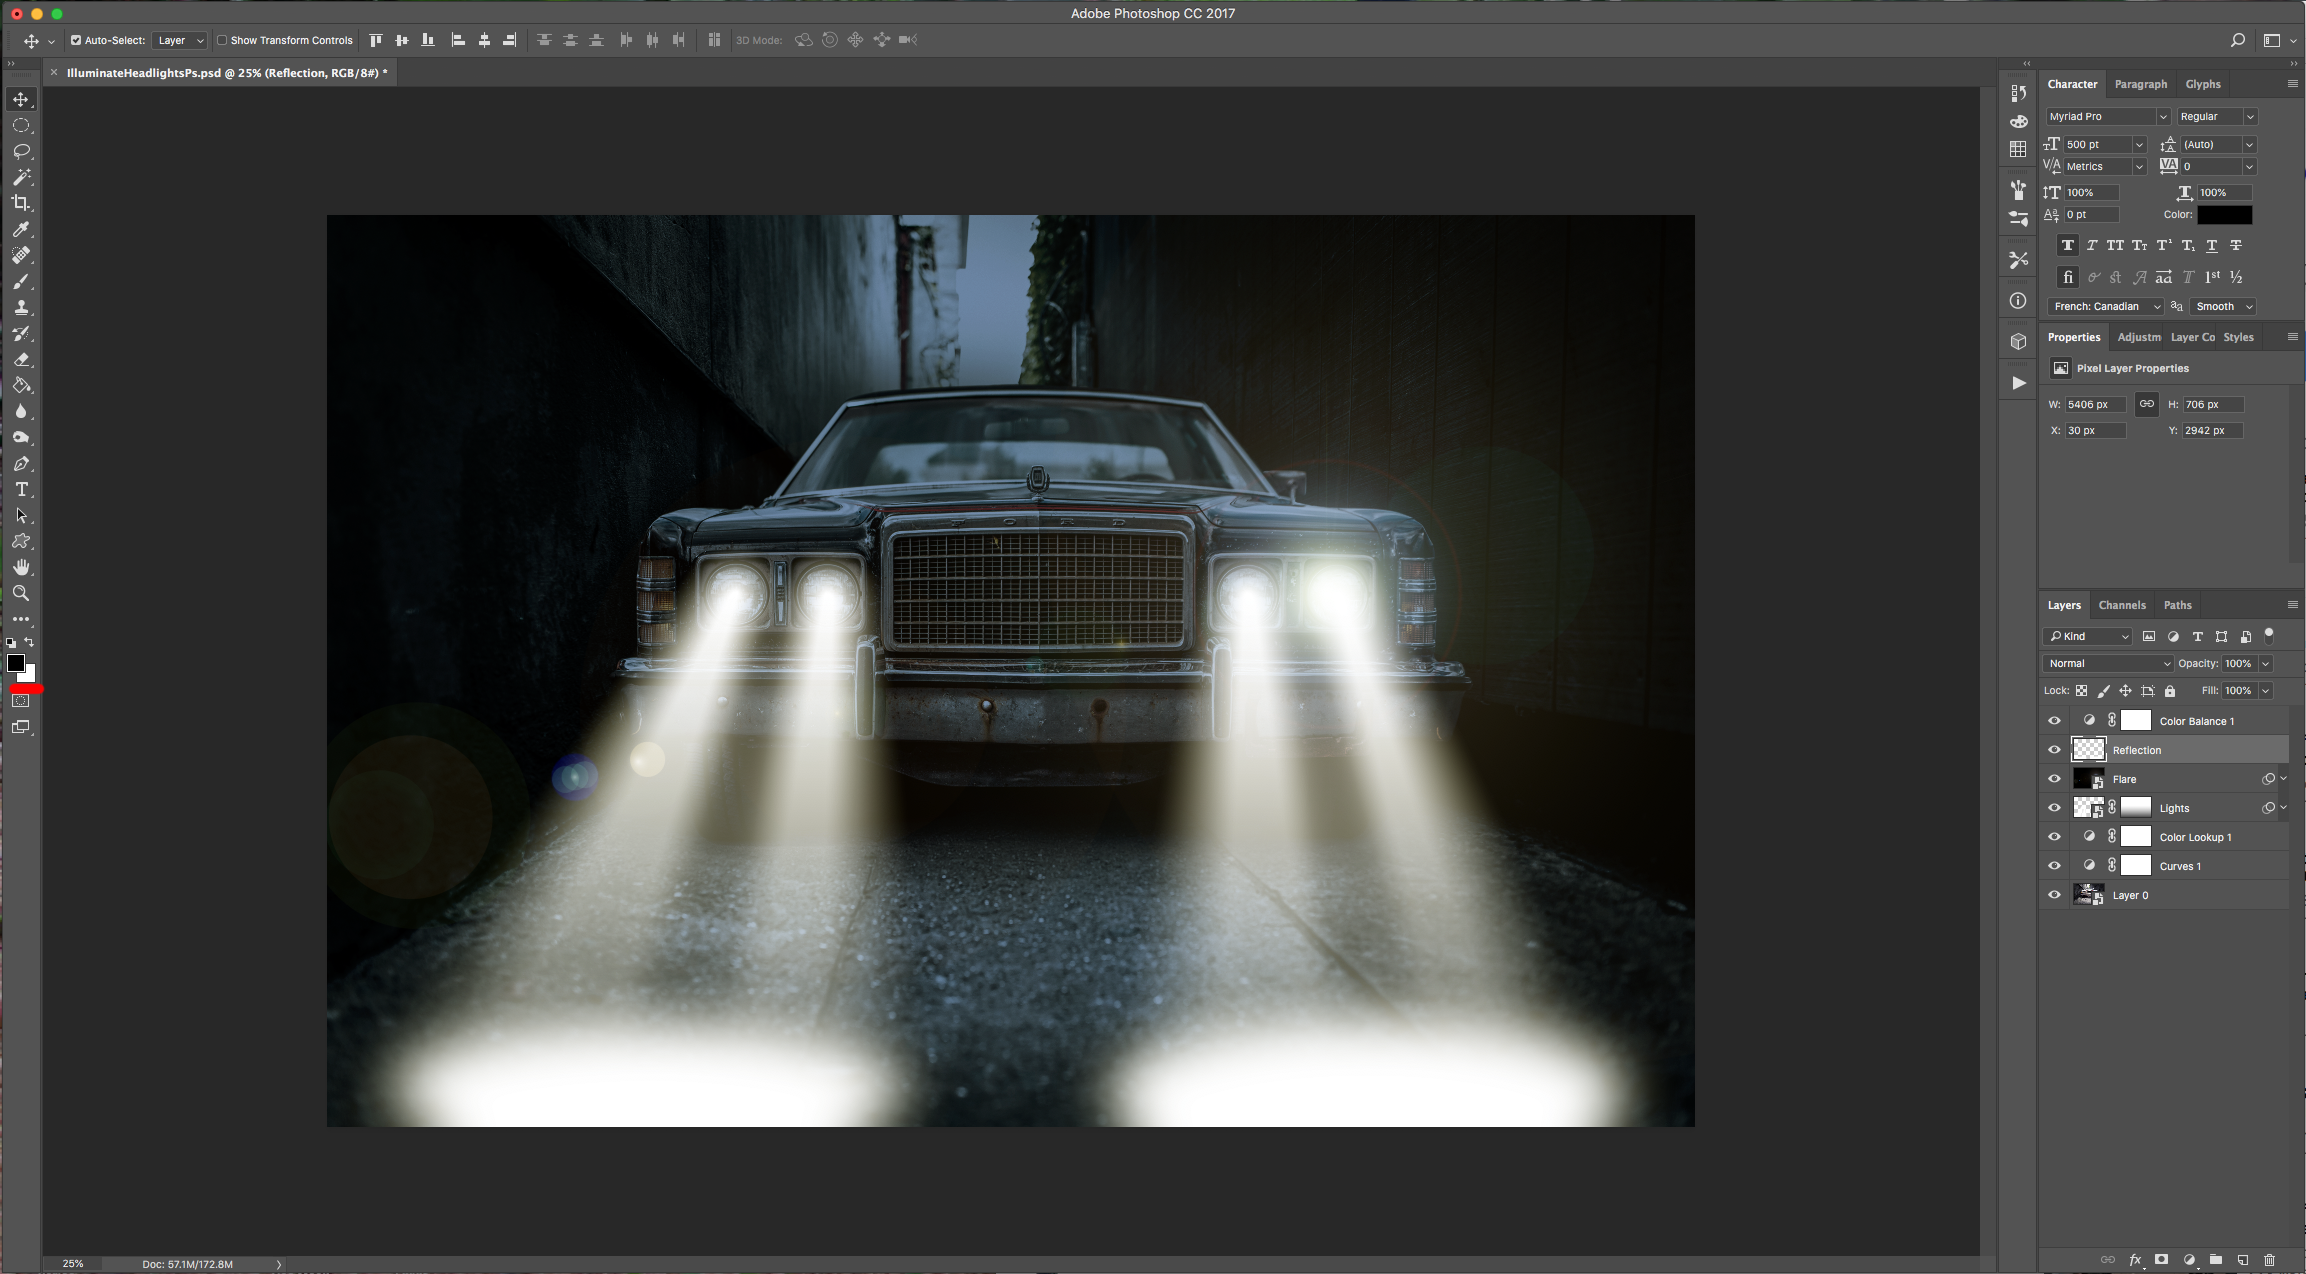
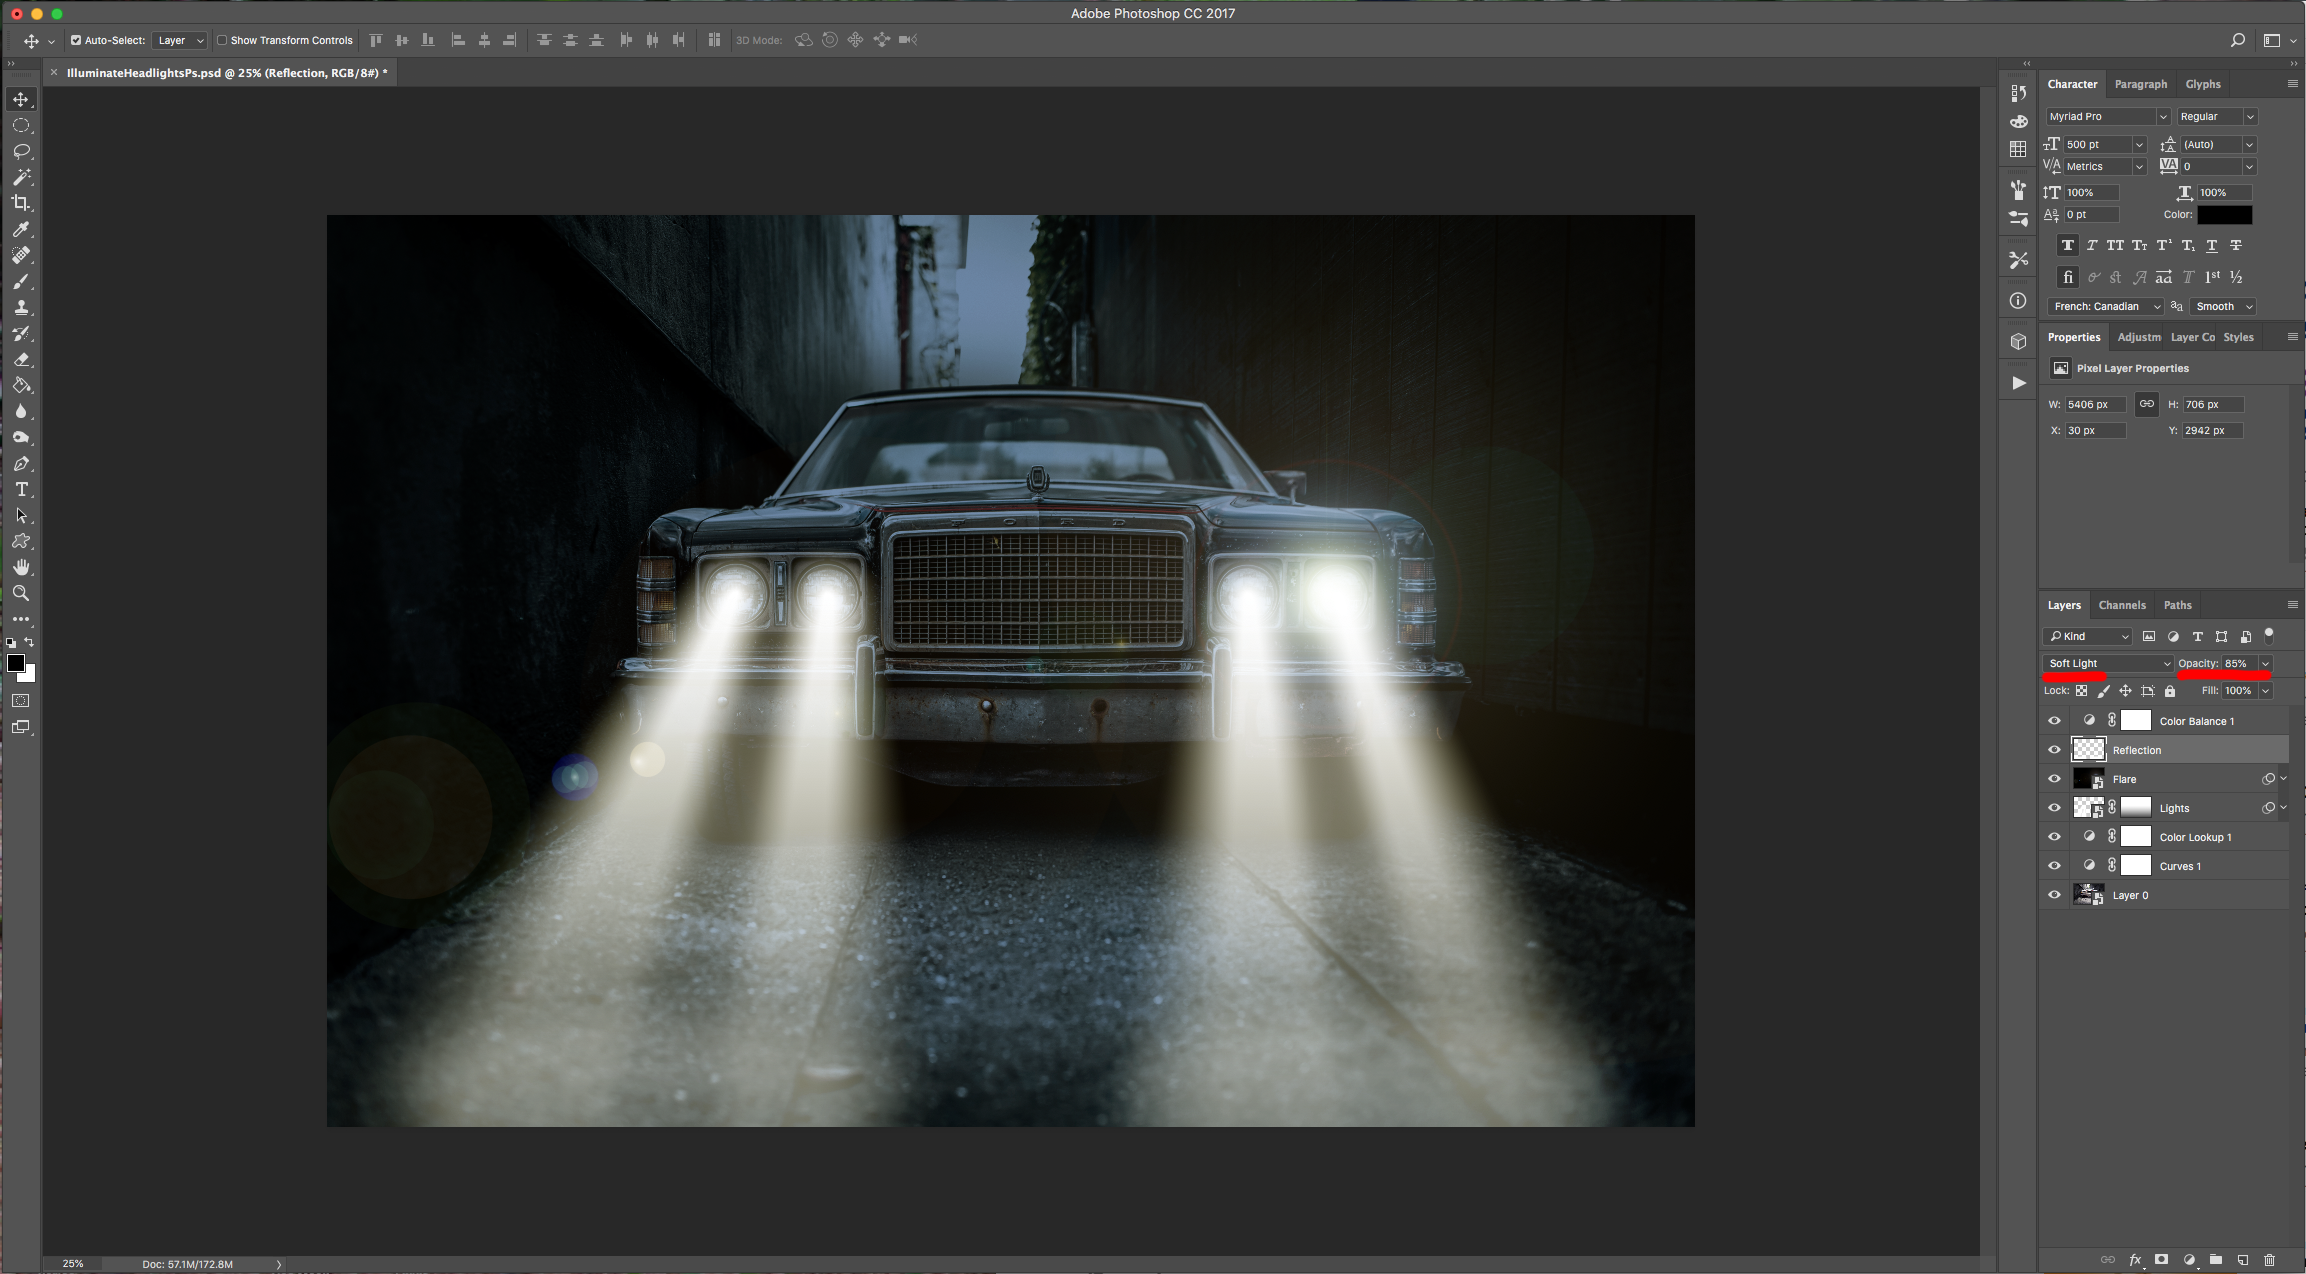
21 - Go to Select > Modify > Feather… (Shift + F6) and use a value of 100 Pixels. Fill your selection with White or “Background” Color (Command/Control + Delete), change the “Blending Mode” to “Soft Light” and lower the “Opacity” to 85%.
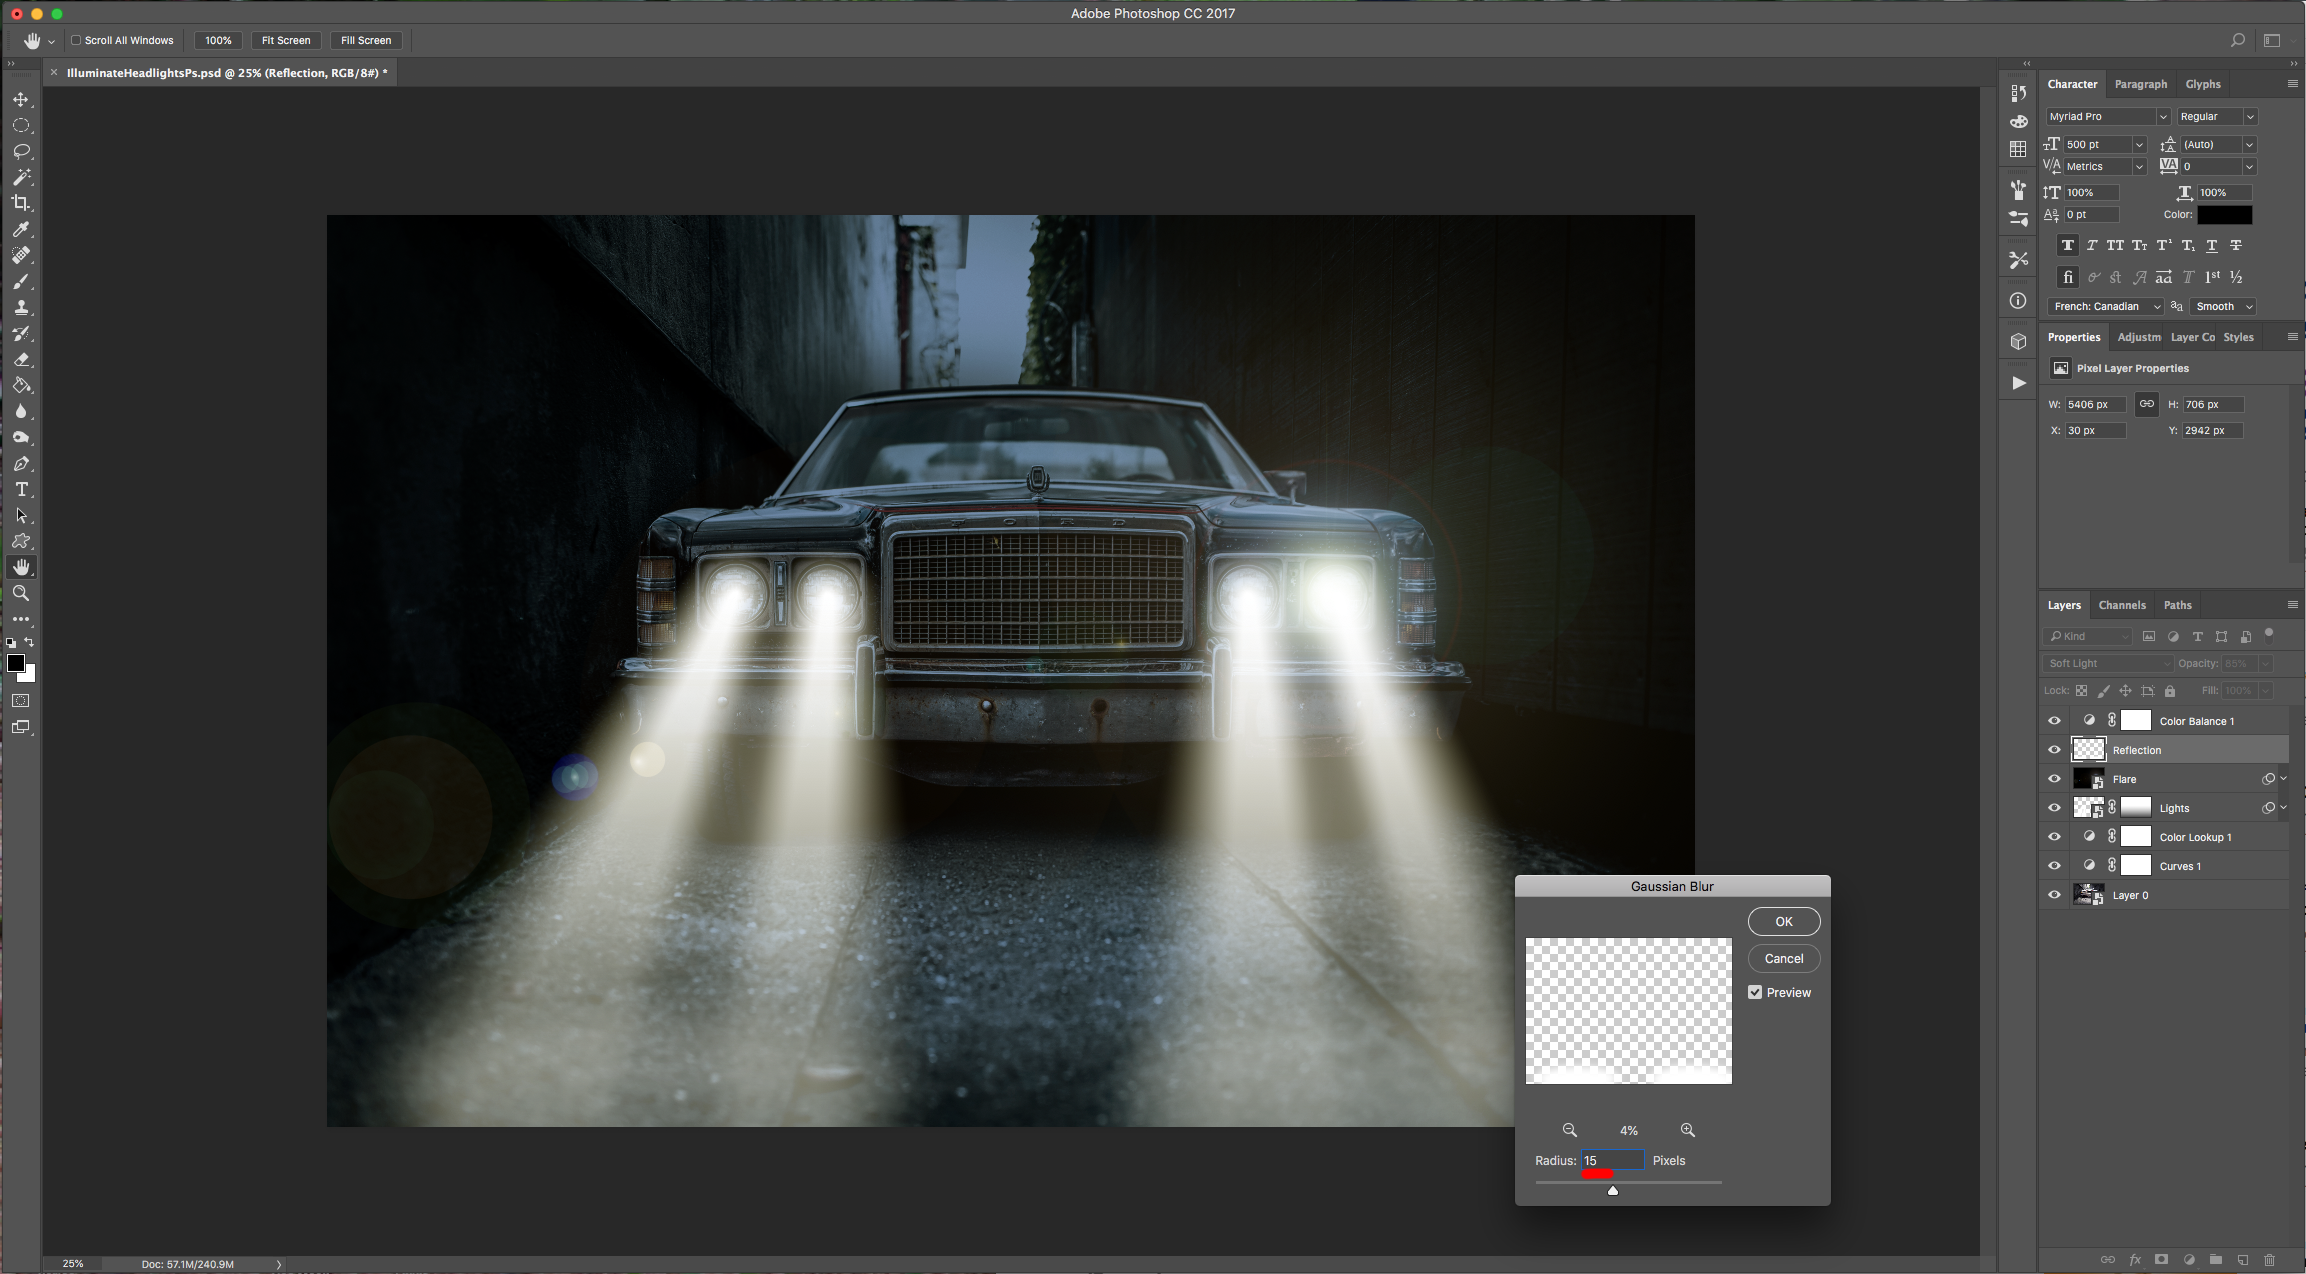
22 - Go to Filter > Blur > Gaussian Blur… and use a “Radius” of 15 Pixels.
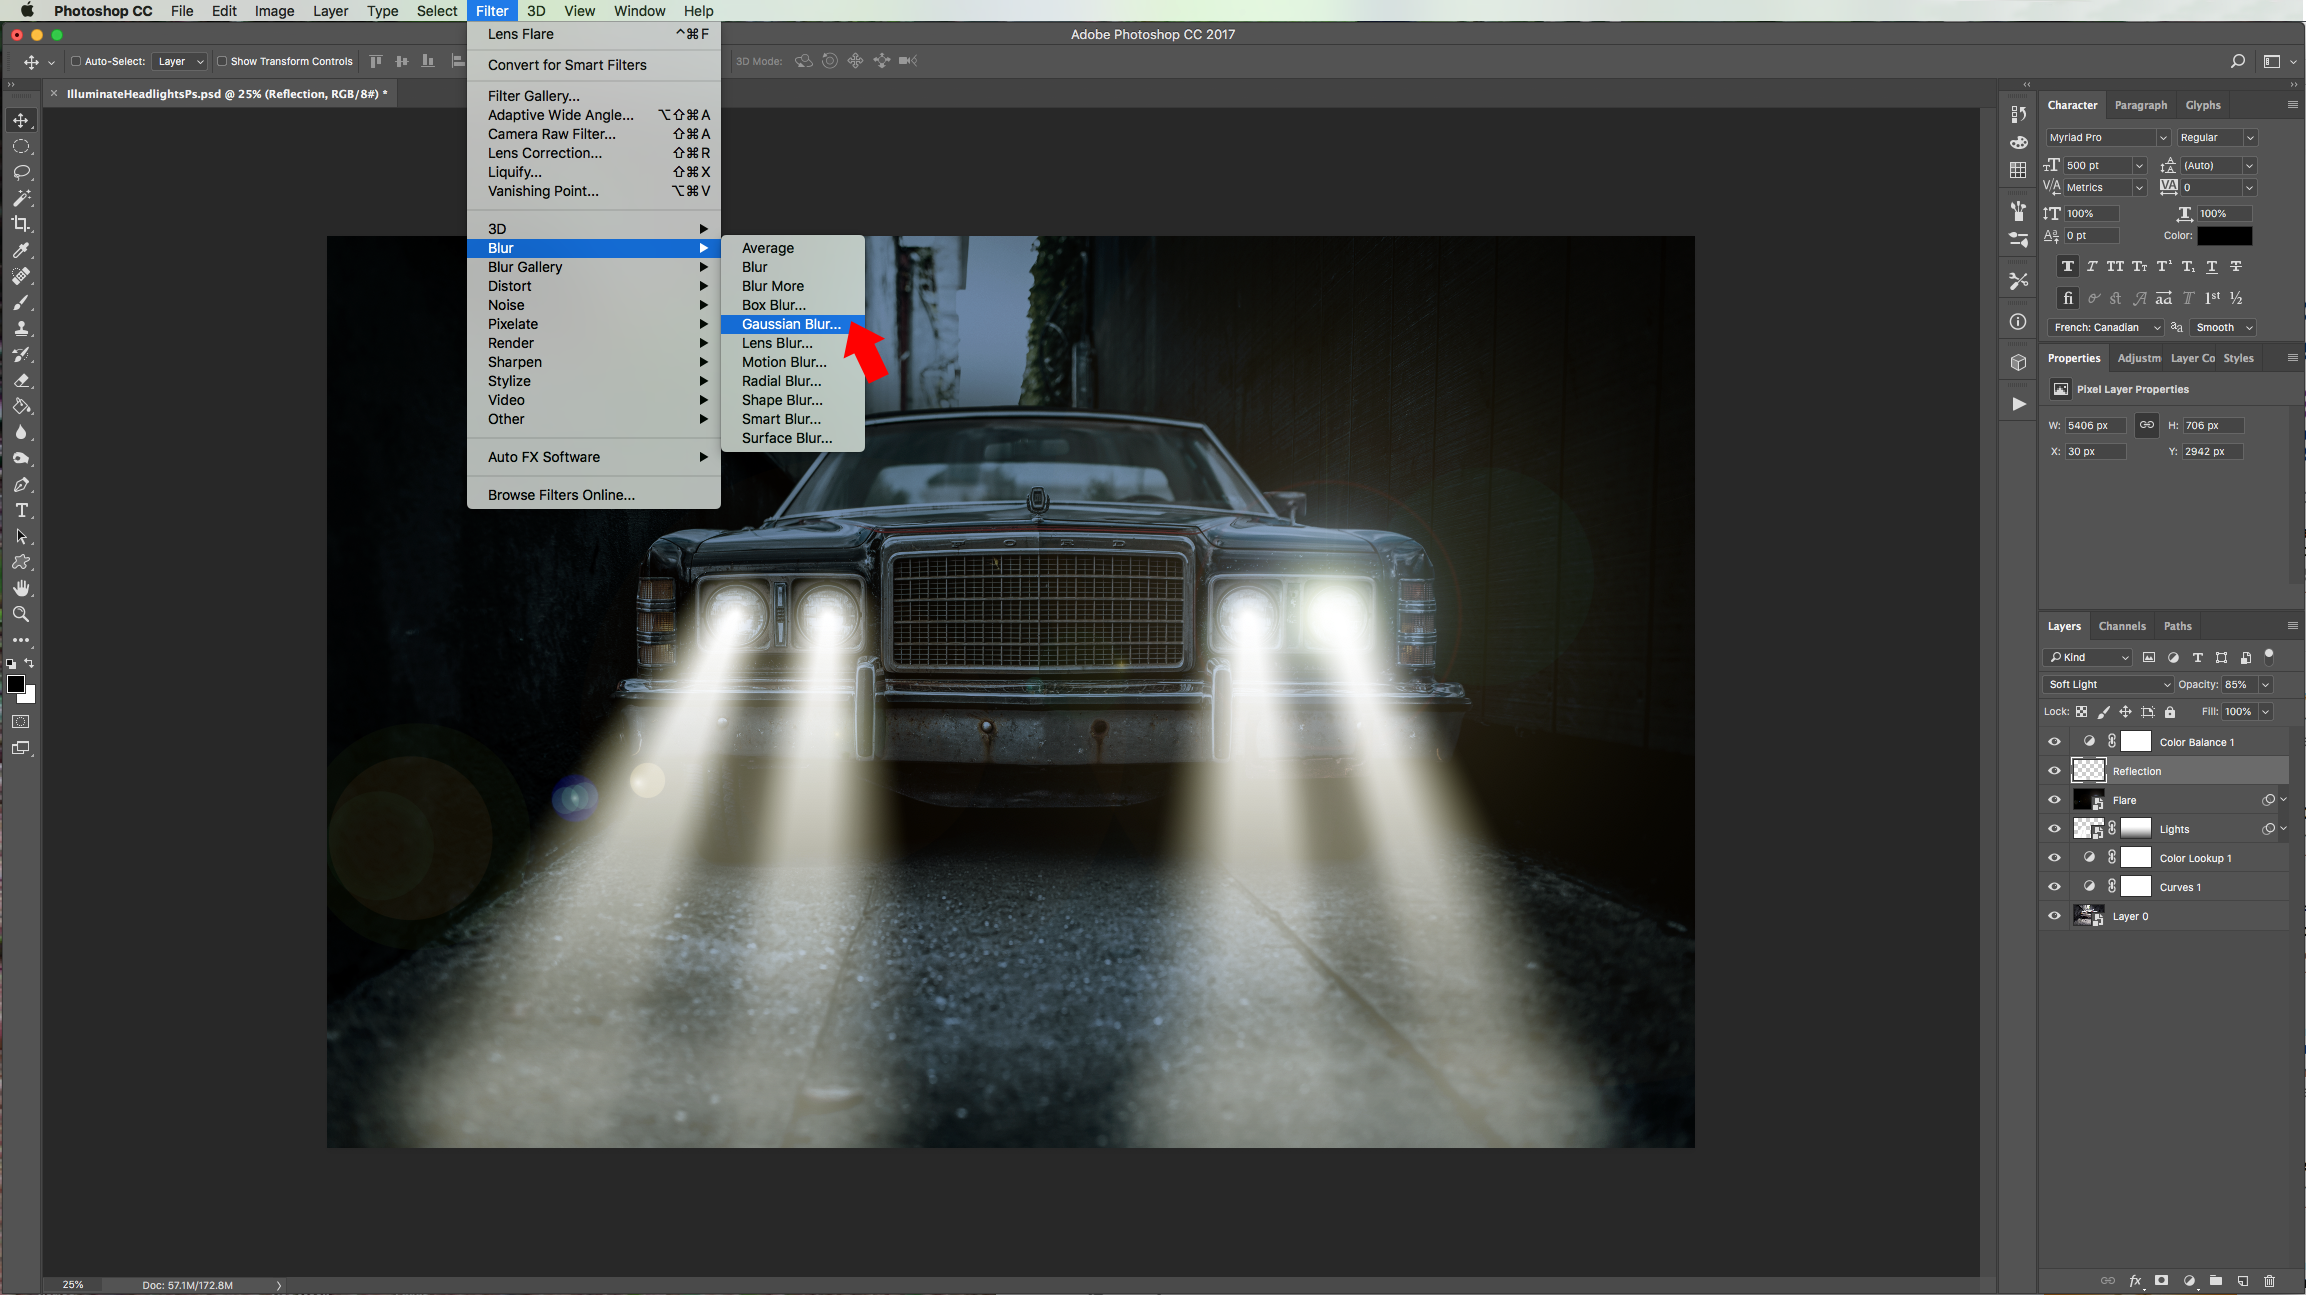
23 - Check out your “Artwork”.
1 - In Photoshop, open the image you chose to work with.
2 - Right-click on top of its Thumbnail and choose “Convert to Smart Object”.
3 - Go to the “Adjustments Panel” create e “New Color Lookup Adjustment Layer” and use “Moonlight.3DL” as “3DLUT File”.
4 - Select your “Background” Layer again and add a “New Curves Adjustment Layer” (Adjustments Panel). Click the “Midpoint” and use an “Input” of 160 and an “Output” of about 71. You may need to use different values in both “Adjustment Layers” depending on your original image.
5 - Create a “New Layer” on top of everything.
6 - Select the “pen Tool” (P) choose “Path” and add the first “Point” at about half of the “Height” of the “Headlight” on one side. Add the second and third ones just outside the “Canvas” but leaving more space horizontally, then return to the other side of the “Headlight” and finally close the “Path”. The idea is to make a “Light Beam” replicating what it should look like in real life.
7 - Repeat and create “Light Beams” for as many “Headlights” as needed.
8 - Use the “Path Selection Tool” (A) to select all your paths.
9 - Right-click on top of them and choose “Make Selection” and use a 0 pixels “Feather”.
10 - Fill your selection with White or “Background” Color (Command/Control + Delete) and “Deselect” (Command/Control + D).
11 - Right-click on top of its Thumbnail and choose “Convert to Smart Object”.
12 - Go to Filter > Blur Gallery > Field Blur… Pin one side centered between “Headlights” and the other centered at the bottom close to the edge of the “Canvas.” Use a “Blur” value of 100 px and click “Ok” on the Top Menu once you are done.
13 - Click on the small button at the bottom of your “Smart Object” and “Add Layer Mask”. Select the “Gradient Tool” (G), choose a “Foreground” (Black) to “Transparent” gradient and click about 1 cm outside the “Canvas” then drag your cursor in a straight upwards line and release about 1 cm under the top of the “Headlights”.
14 - Create a “New Color Balance Adjustment Layer” (Adjustments Panel) on top of everything. Choose “Highlights” in the “Tones” tab and move the “Yellow-Blue” Lever to - 60. The value in your case may be different depending on your image.
15 - Create a “New Layer” under the “Color Balance Adjustment Layer” (click on the small button at the bottom of the “Layers Panel”). Fill it with “Black”, name it “Flare” and change the “Blending Mode” to “Screen”.
16 - Right-click on top of the Flare’s Layer Thumbnail and choose “Convert to Smart Object”.
17 - Select your “Smart Object”, go to Filter > Render > Lens Flare… and place your Point where one of the “Headlights” should be. Select “105mm Prime” and a “Brightness” value of 75%.
18 - If you notice your Focus Point is not placed correctly you can always double-click on your “Smart Filter” Thumbnail” and fix it.
19 - Create another “Layer” on top of everything, name it “reflection” and select the “Elliptical Marquee Tool” (M). Drag your cursor on the bottom left part of your image, just where one of your “Light Beams” end and create an Oval Selection (some of it can be outside the “Canvas”).
20 - Choose “Add to Selection” on the Top Menu and add another Oval selection to the other side.
21 - Go to Select > Modify > Feather… (Shift + F6) and use a value of 100 Pixels. Fill your selection with White or “Background” Color (Command/Control + Delete), change the “Blending Mode” to “Soft Light” and lower the “Opacity” to 85%.
22 - Go to Filter > Blur > Gaussian Blur… and use a “Radius” of 15 Pixels.
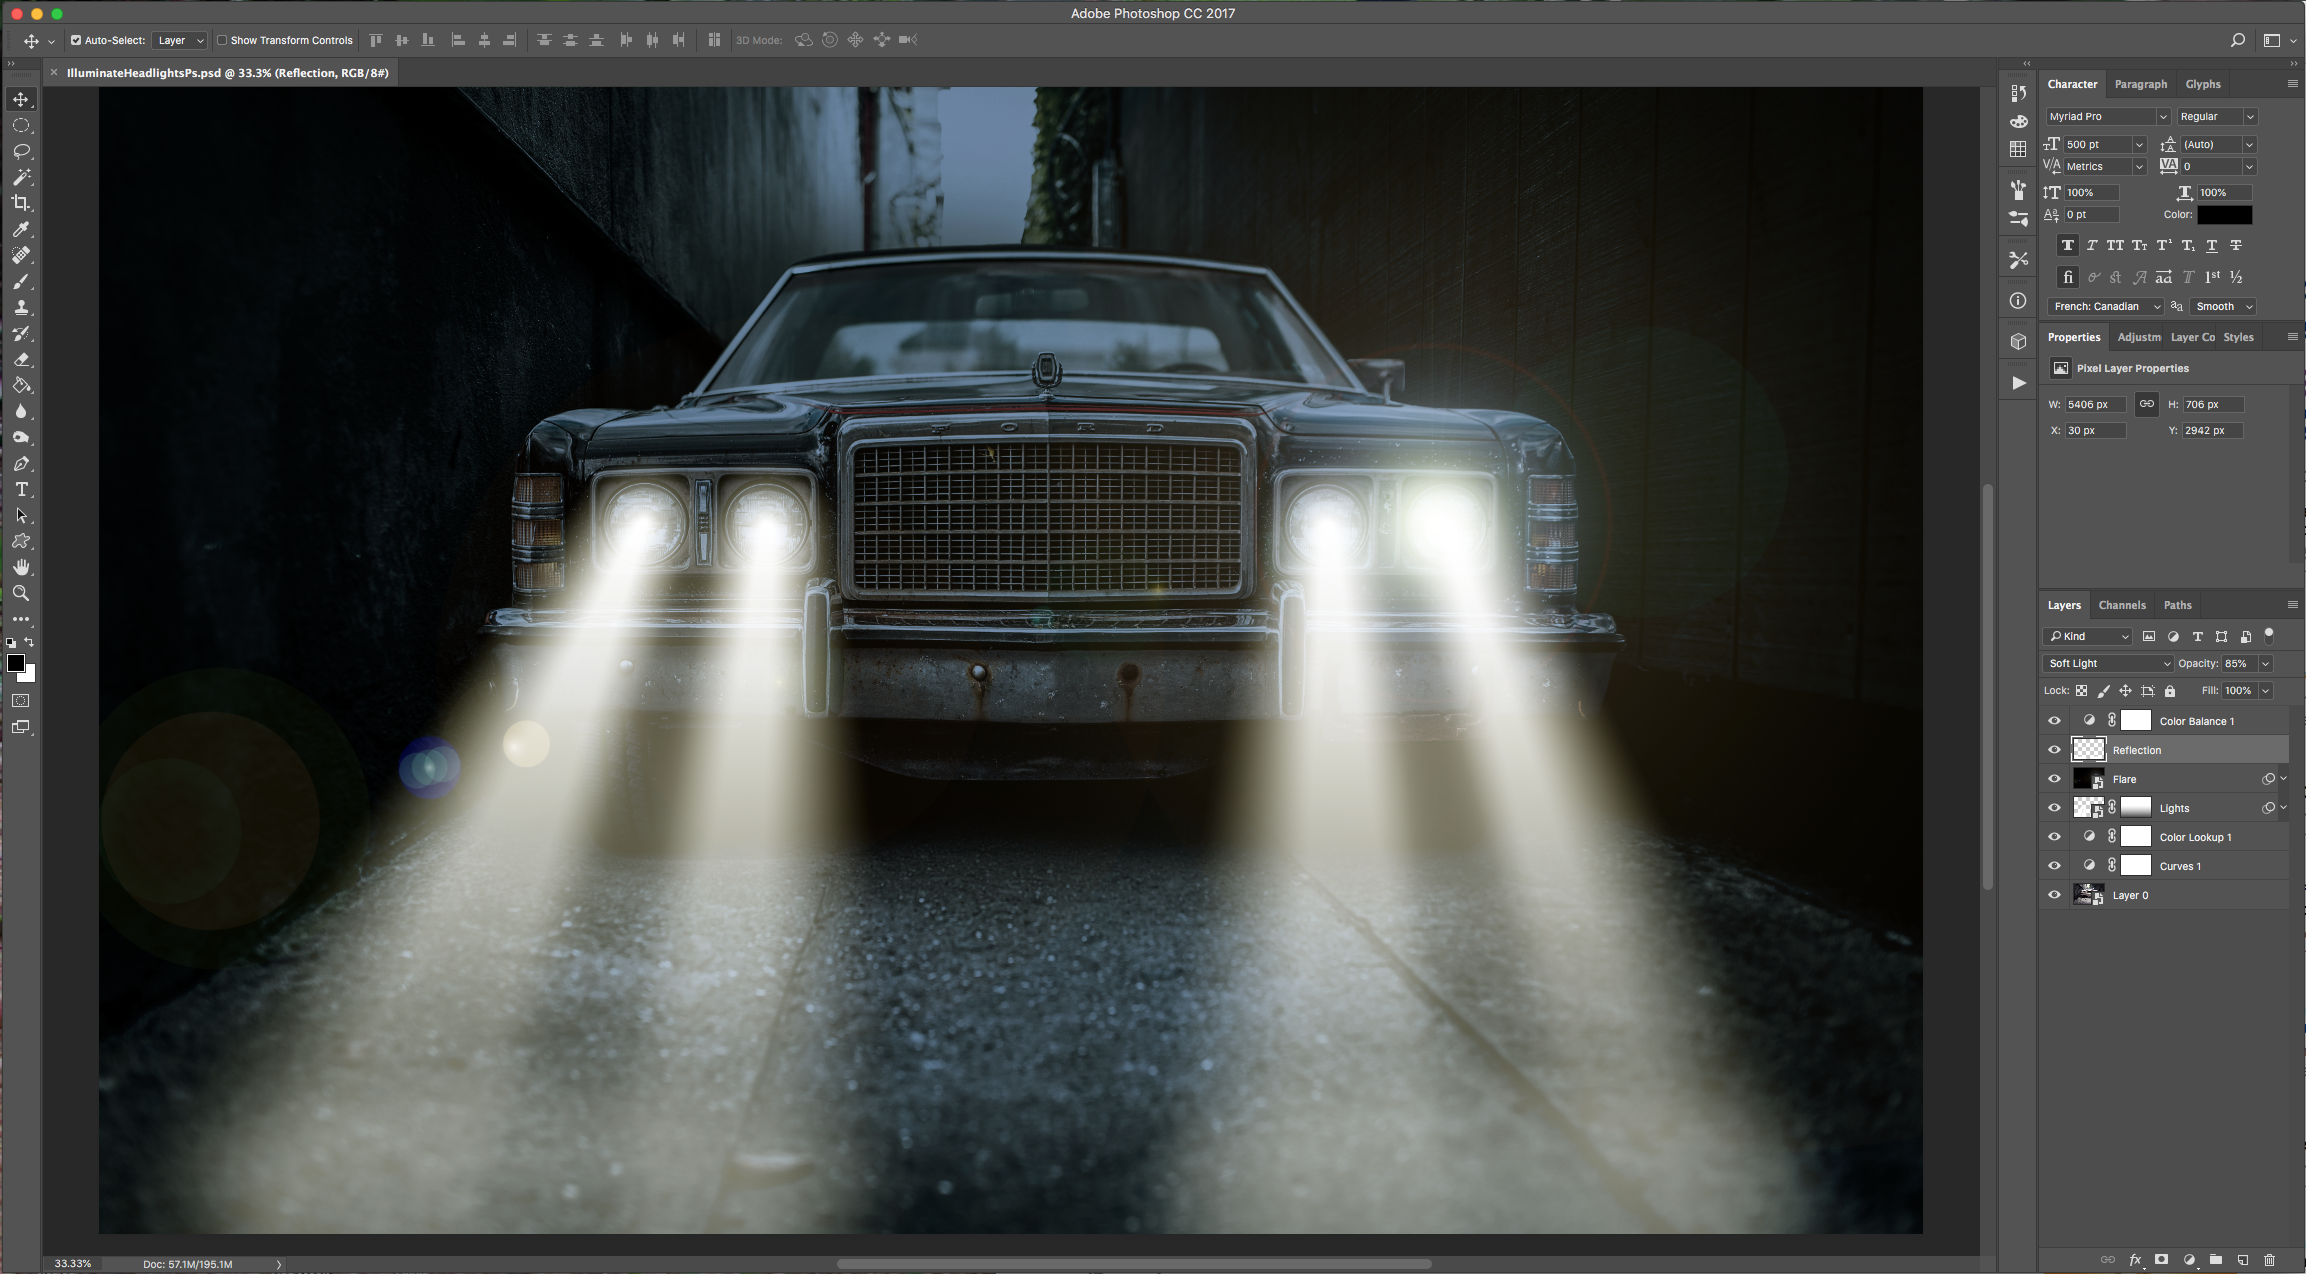
23 - Check out your “Artwork”.
by @lornacane
Related Tutorials
Photoshop Tutorials
How to Use Text Effects in Photoshop
With Photoshop Text Effects, you can create text with impact in just a few steps.
Photoshop Tutorials
How to Create Speech Bubbles in Photoshop
Learn how to create and edit fun speech bubbles in Photoshop using custom shapes.
Photoshop Tutorials
How to Make Sublimation Designs in Photoshop
Discover how to make sublimation designs in Photoshop that you can use to create beautiful gifts.
Photoshop Tutorials
How to Use EPS Files in Photoshop
In this tutorial, learn how to use EPS files in Photoshop as Smart Objects to maintain image quality
Photoshop Tutorials
Image Burned in Wood in Photoshop
In this tutorial, discover how to create a realistic wood burned effect in Adobe Photoshop.
Photoshop Tutorials
Easy See through Cut Out Text in Photoshop
Create a see-through cut out text design in Photoshop with these easy to follow steps.