By Design Bundles
Photoshop Tutorials12 min
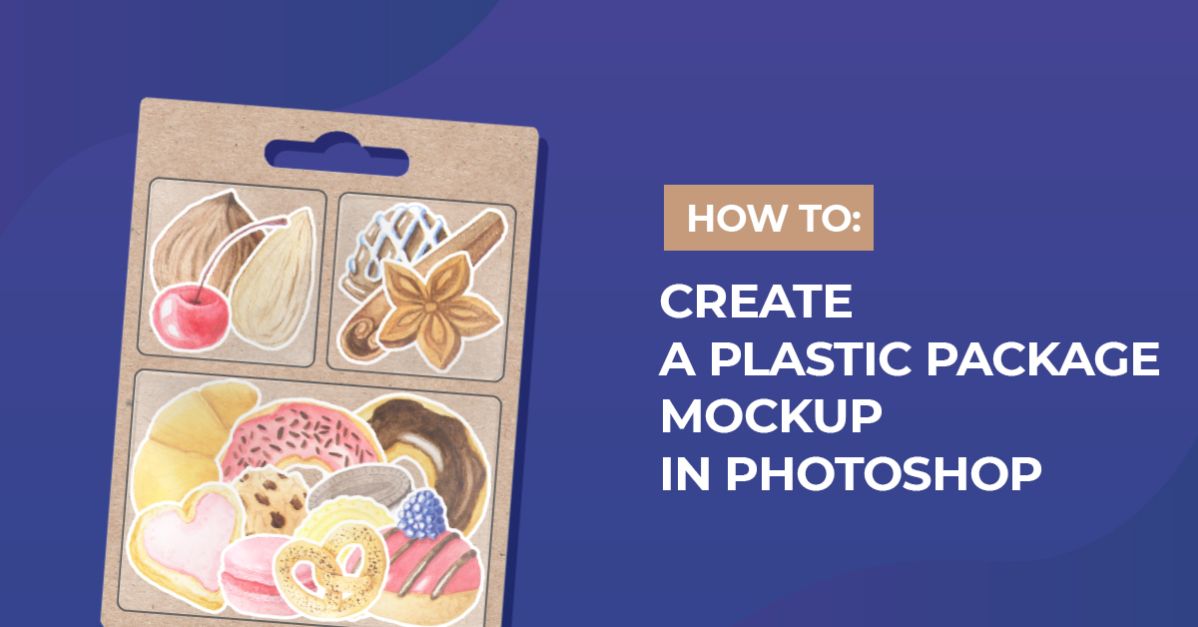
Plastic Package in Photoshop
For this tutorial, we are going to use the design Bakery Set and a cardboard background image.
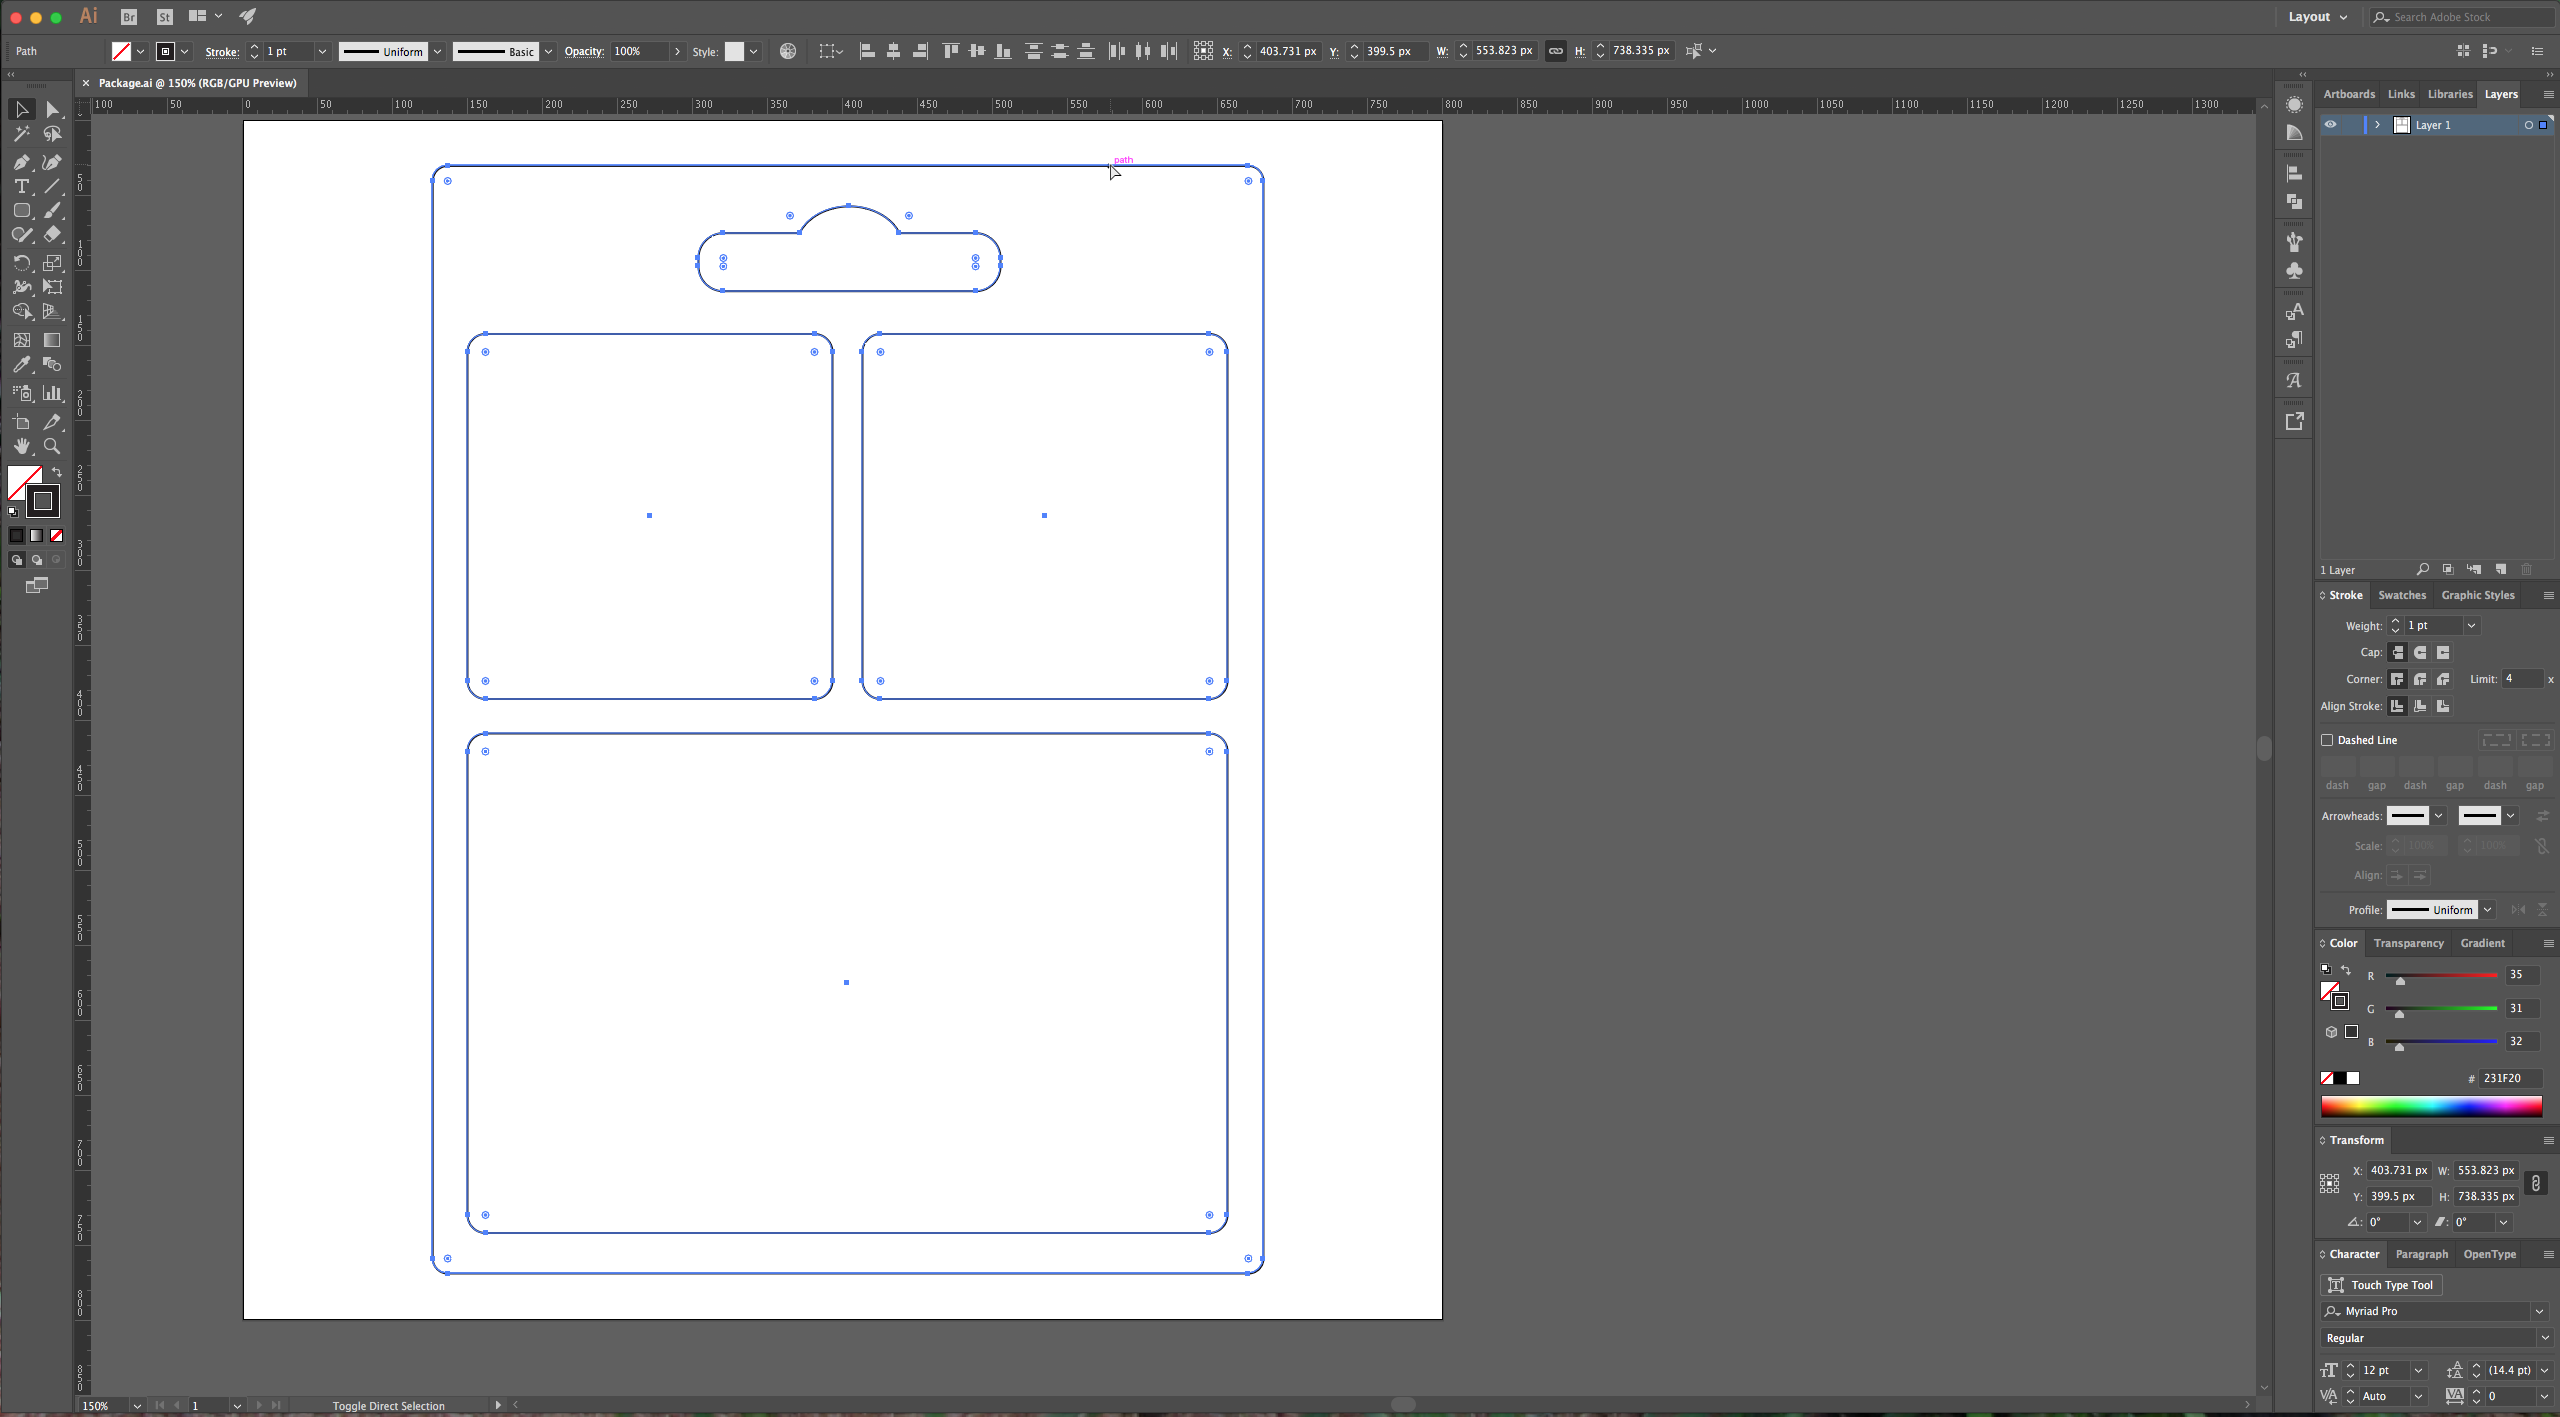
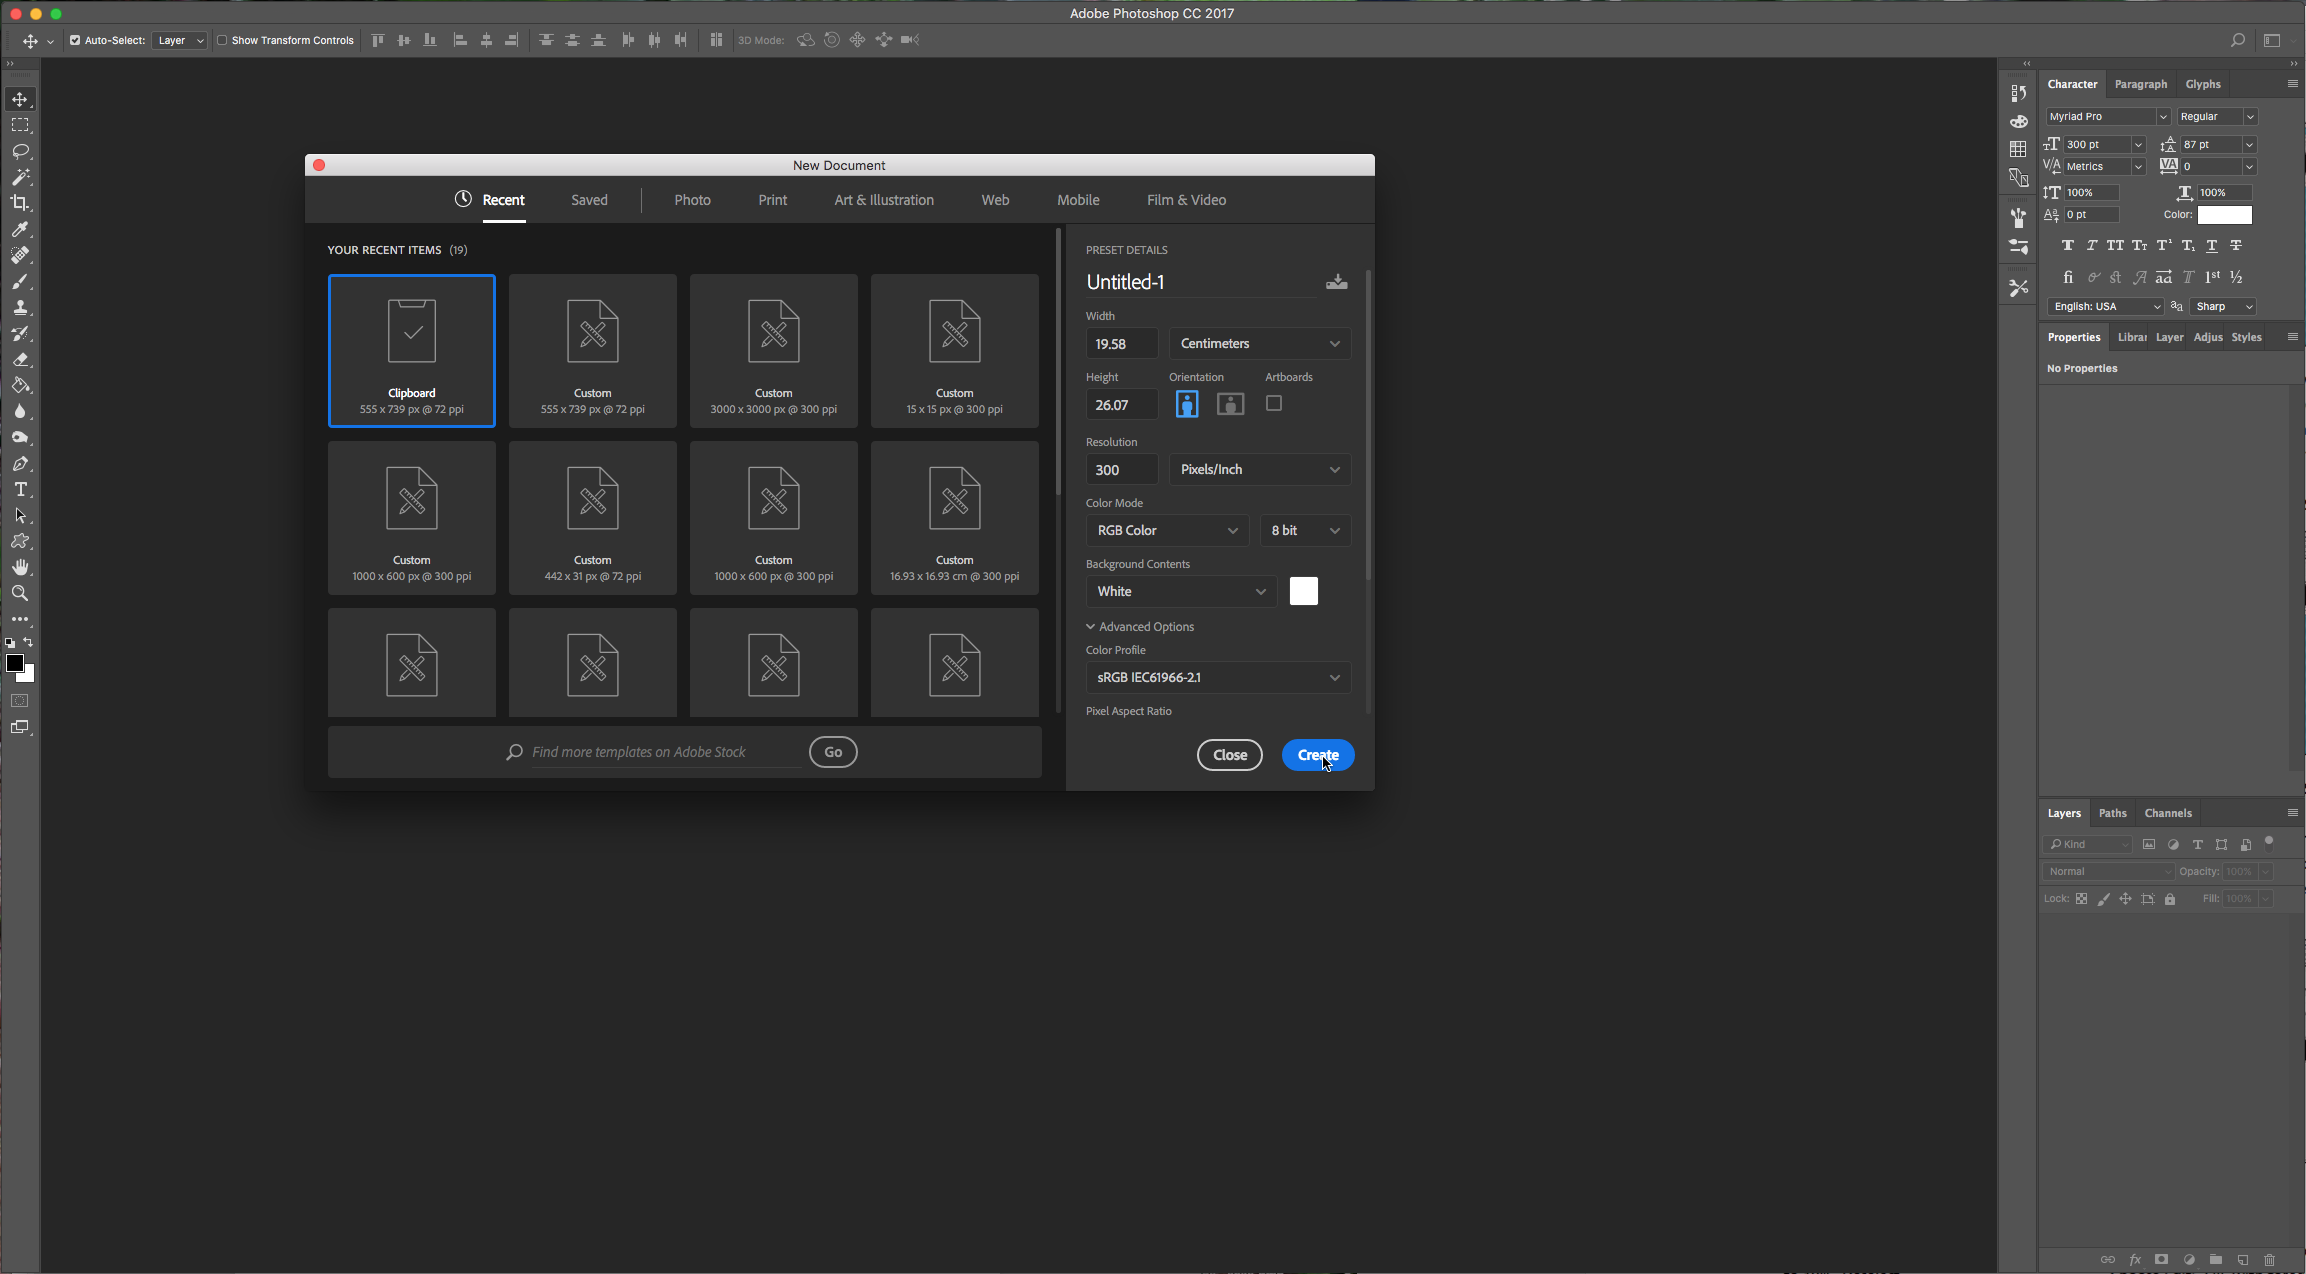
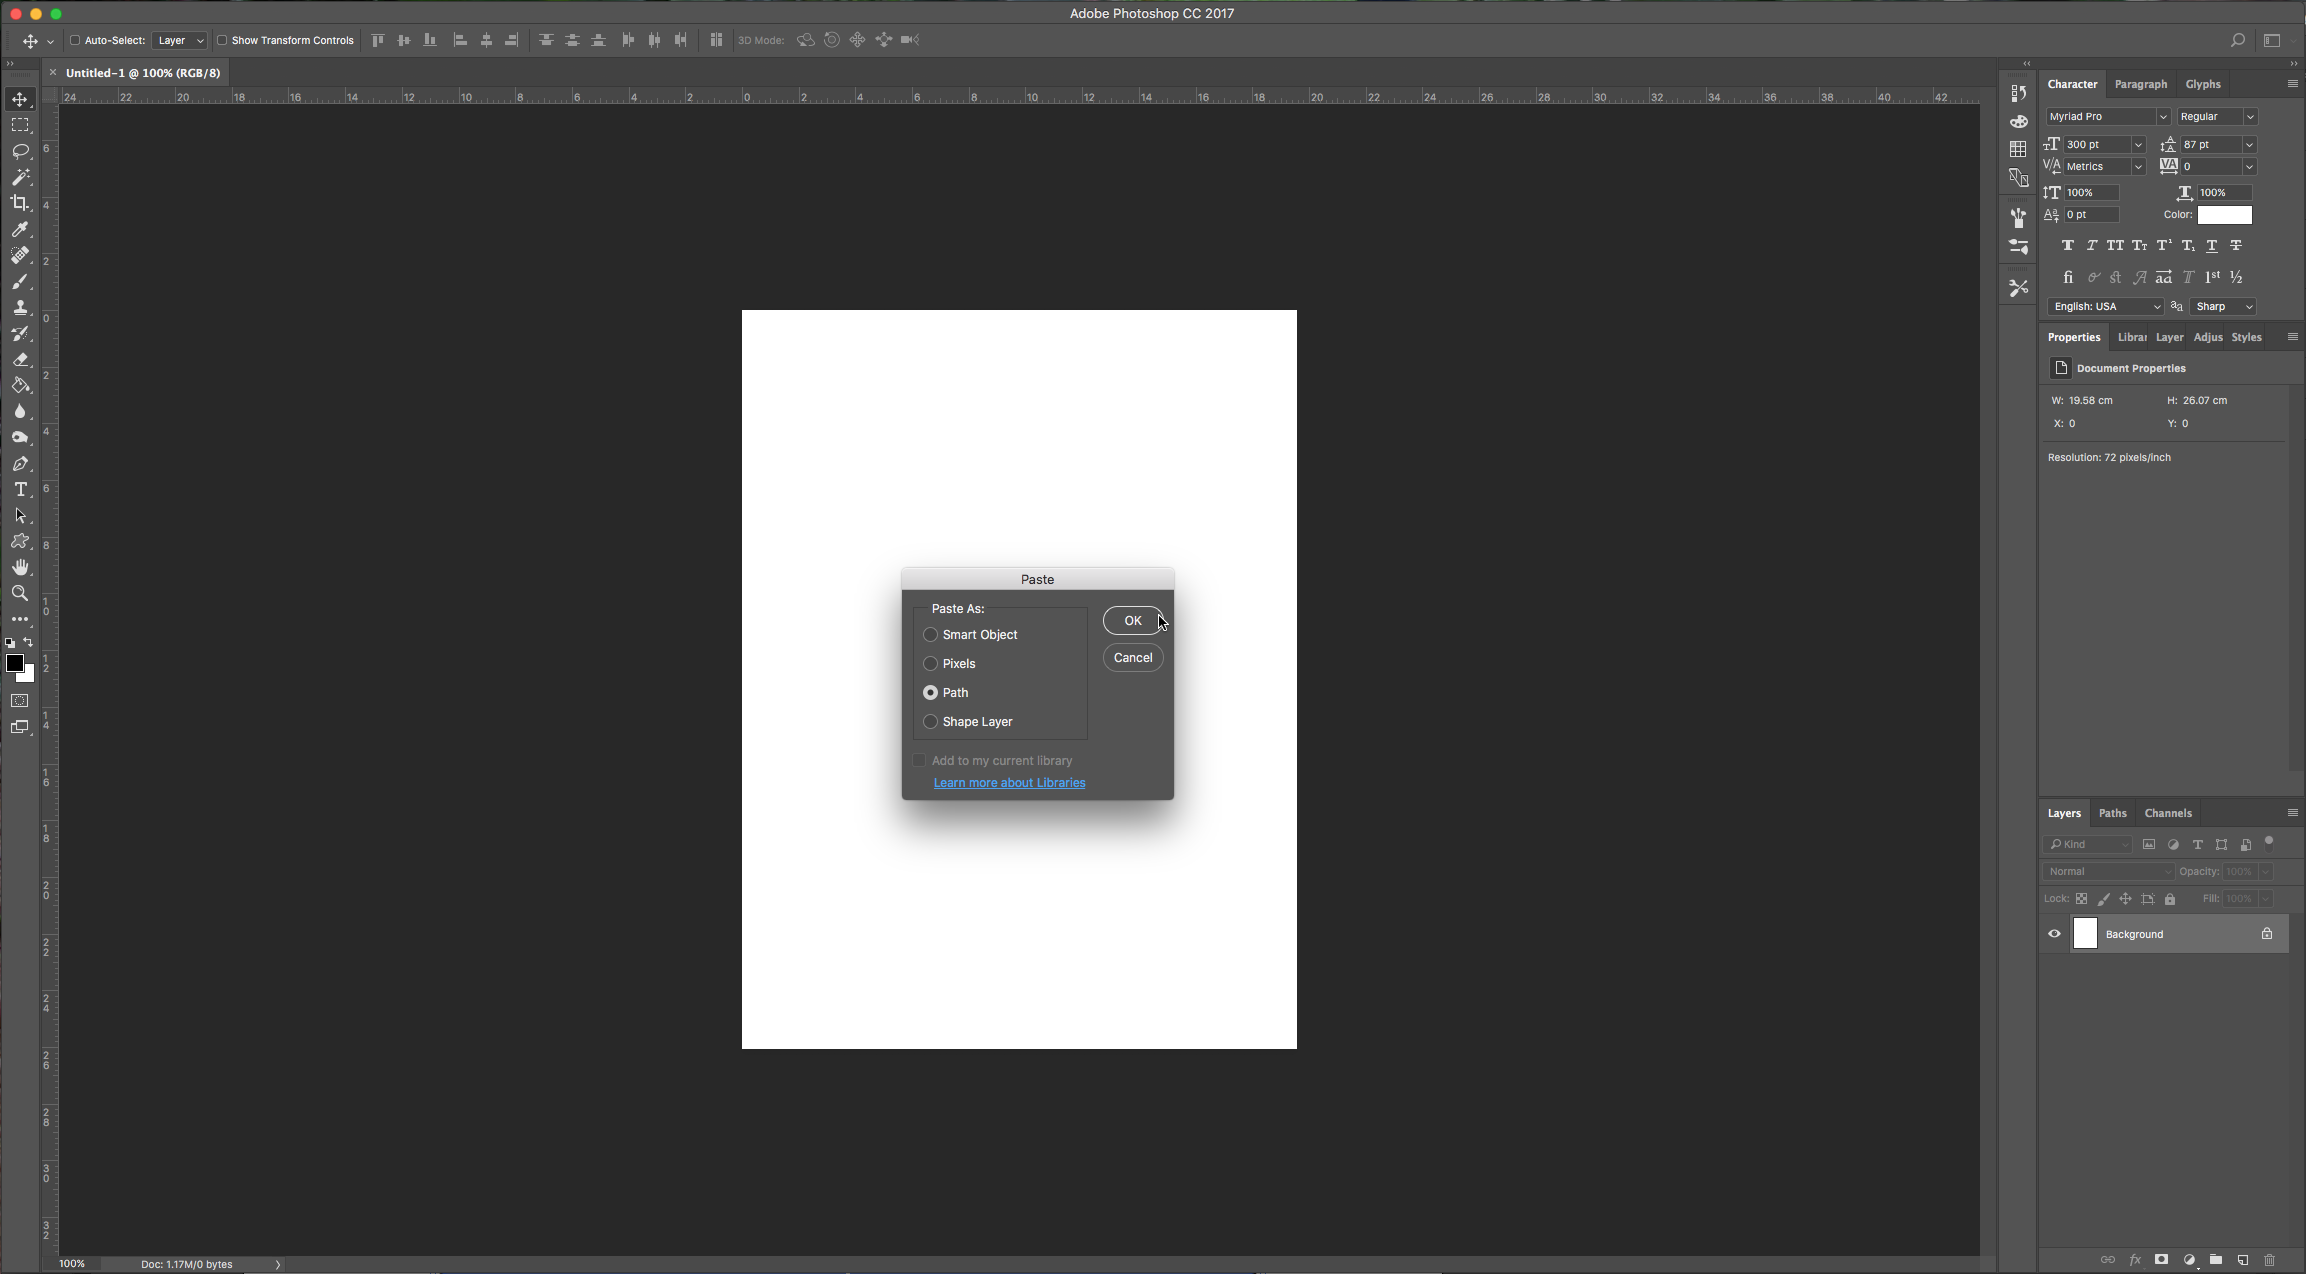
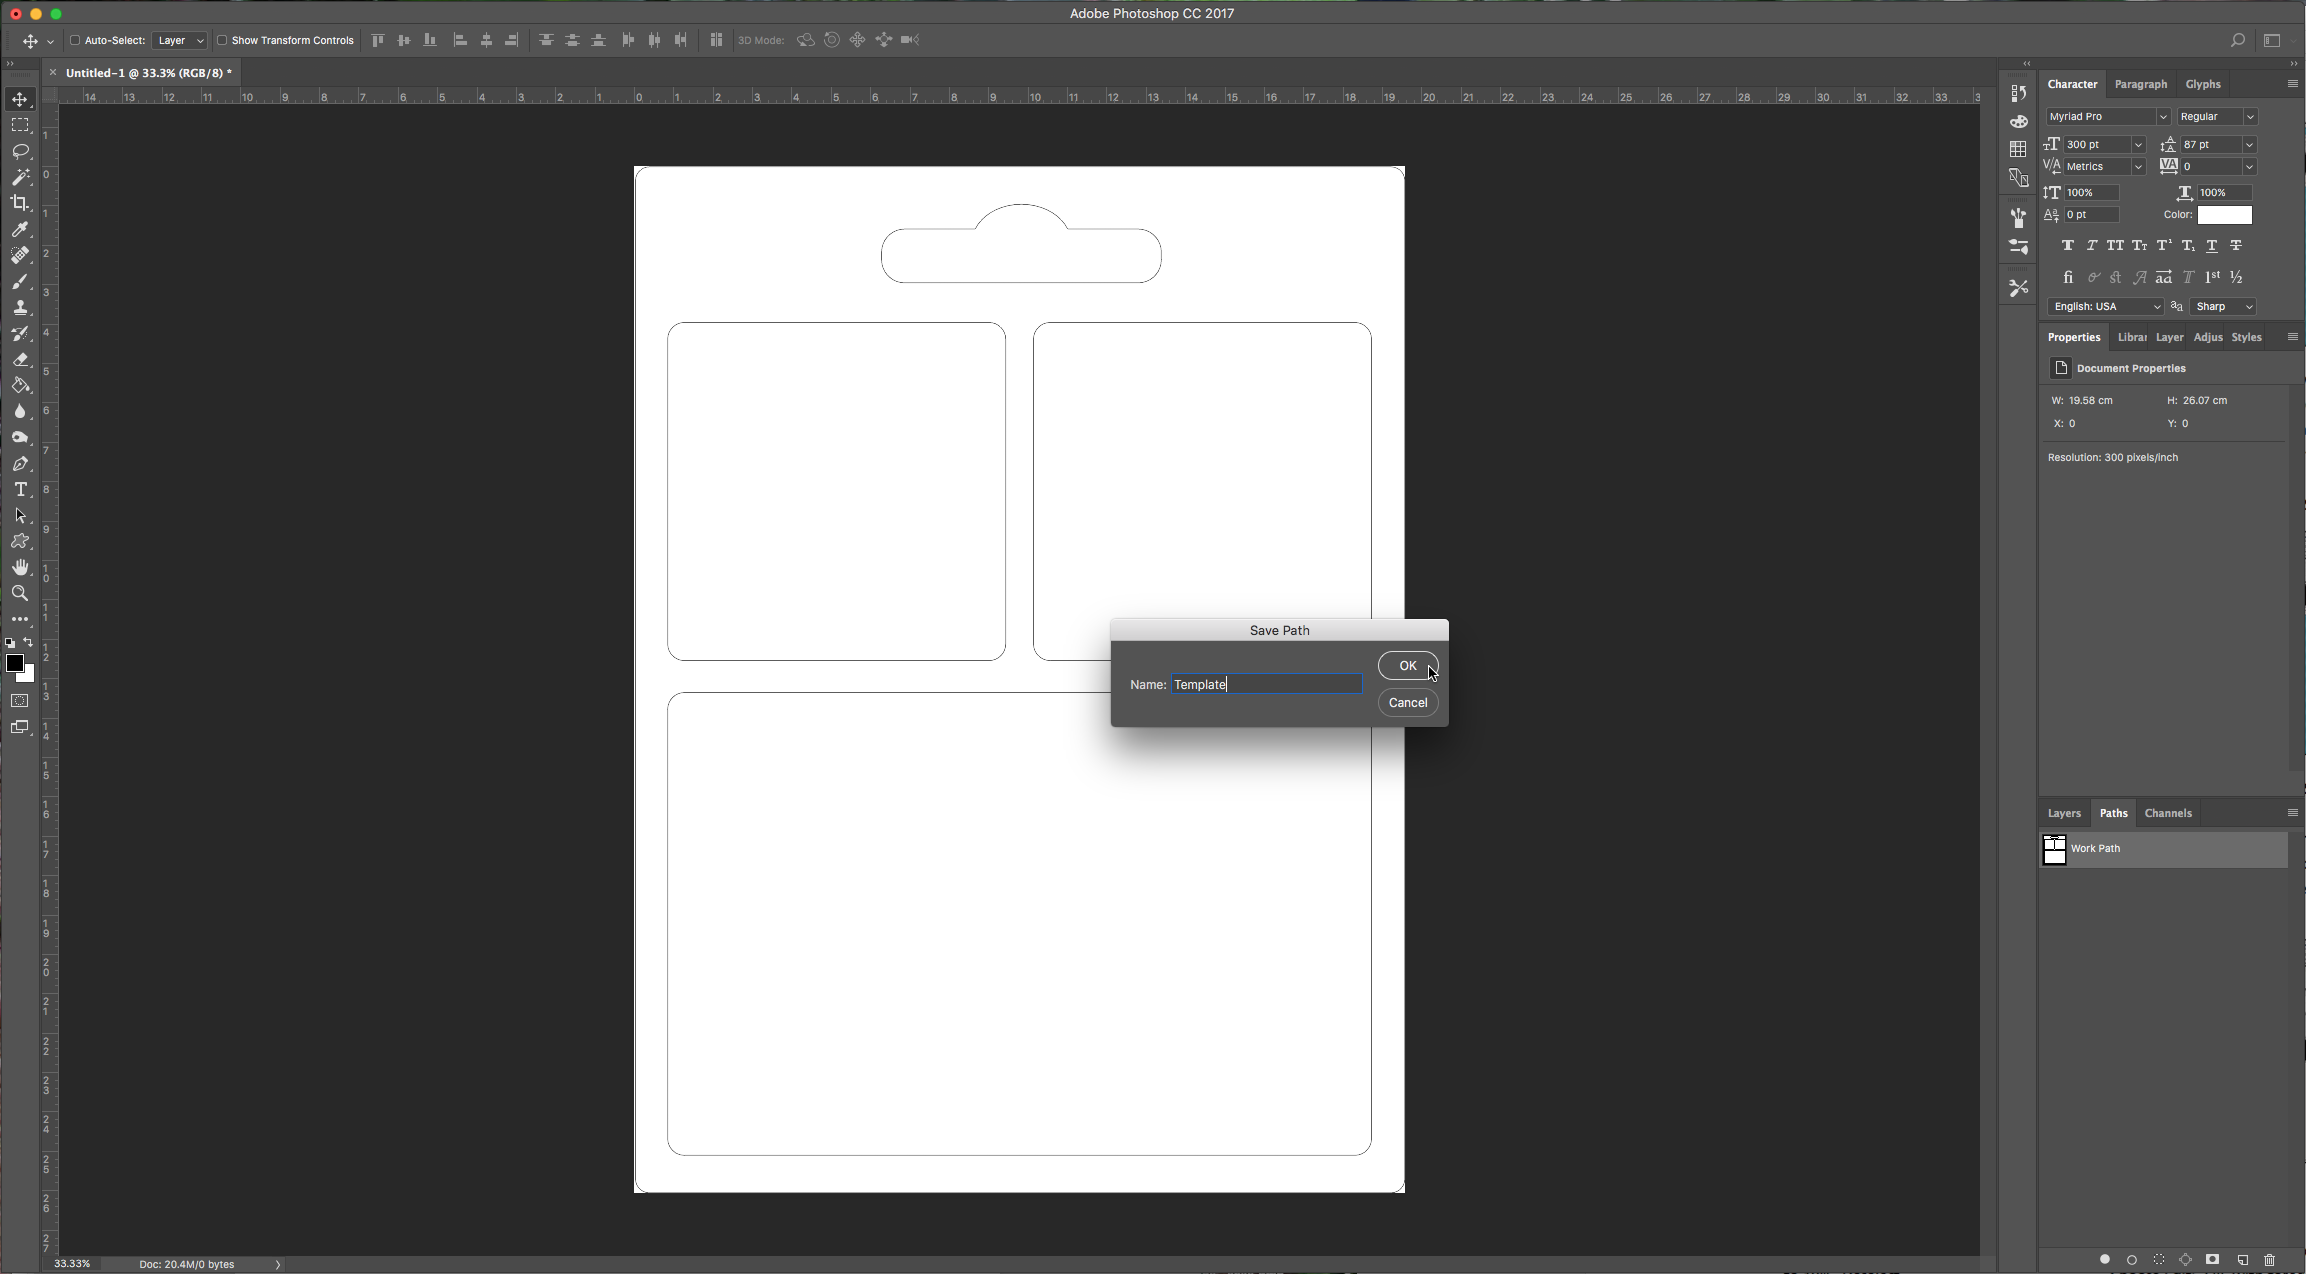
1 – In Illustrator draw the outlines of your package. Or maybe you can find an existing vector to work with. Copy (Command/Control + C) the vector and head to Photoshop. There, create a “New Document” and use the “Clipboard” settings but make the resolution 300 dpi. Then paste (Command/Control + V) and choose “Path” as the paste format.
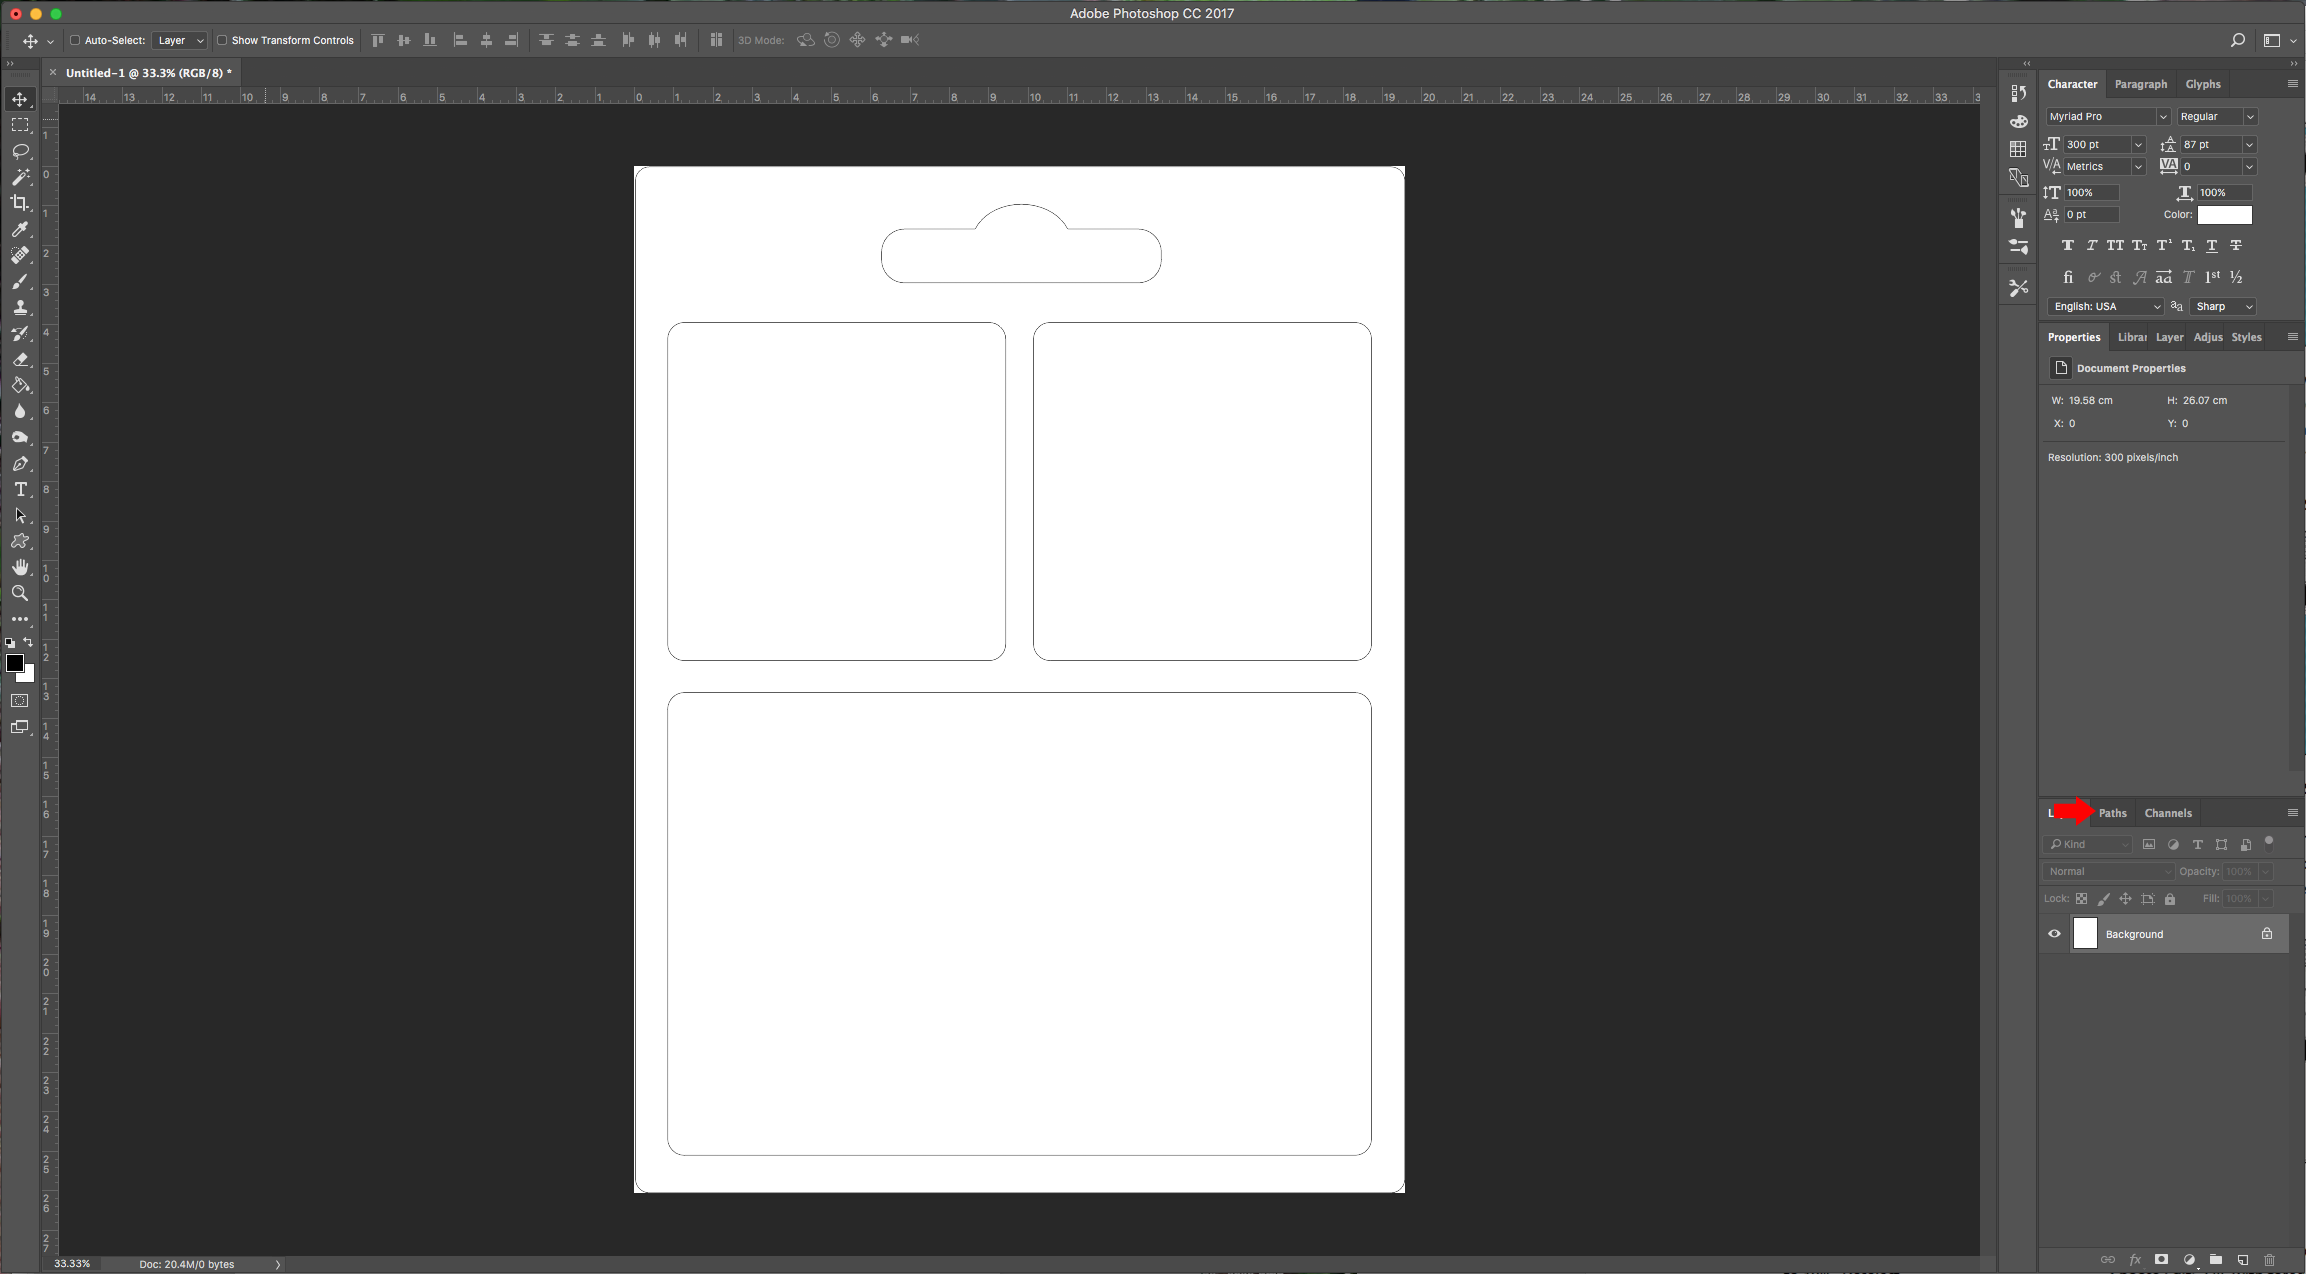
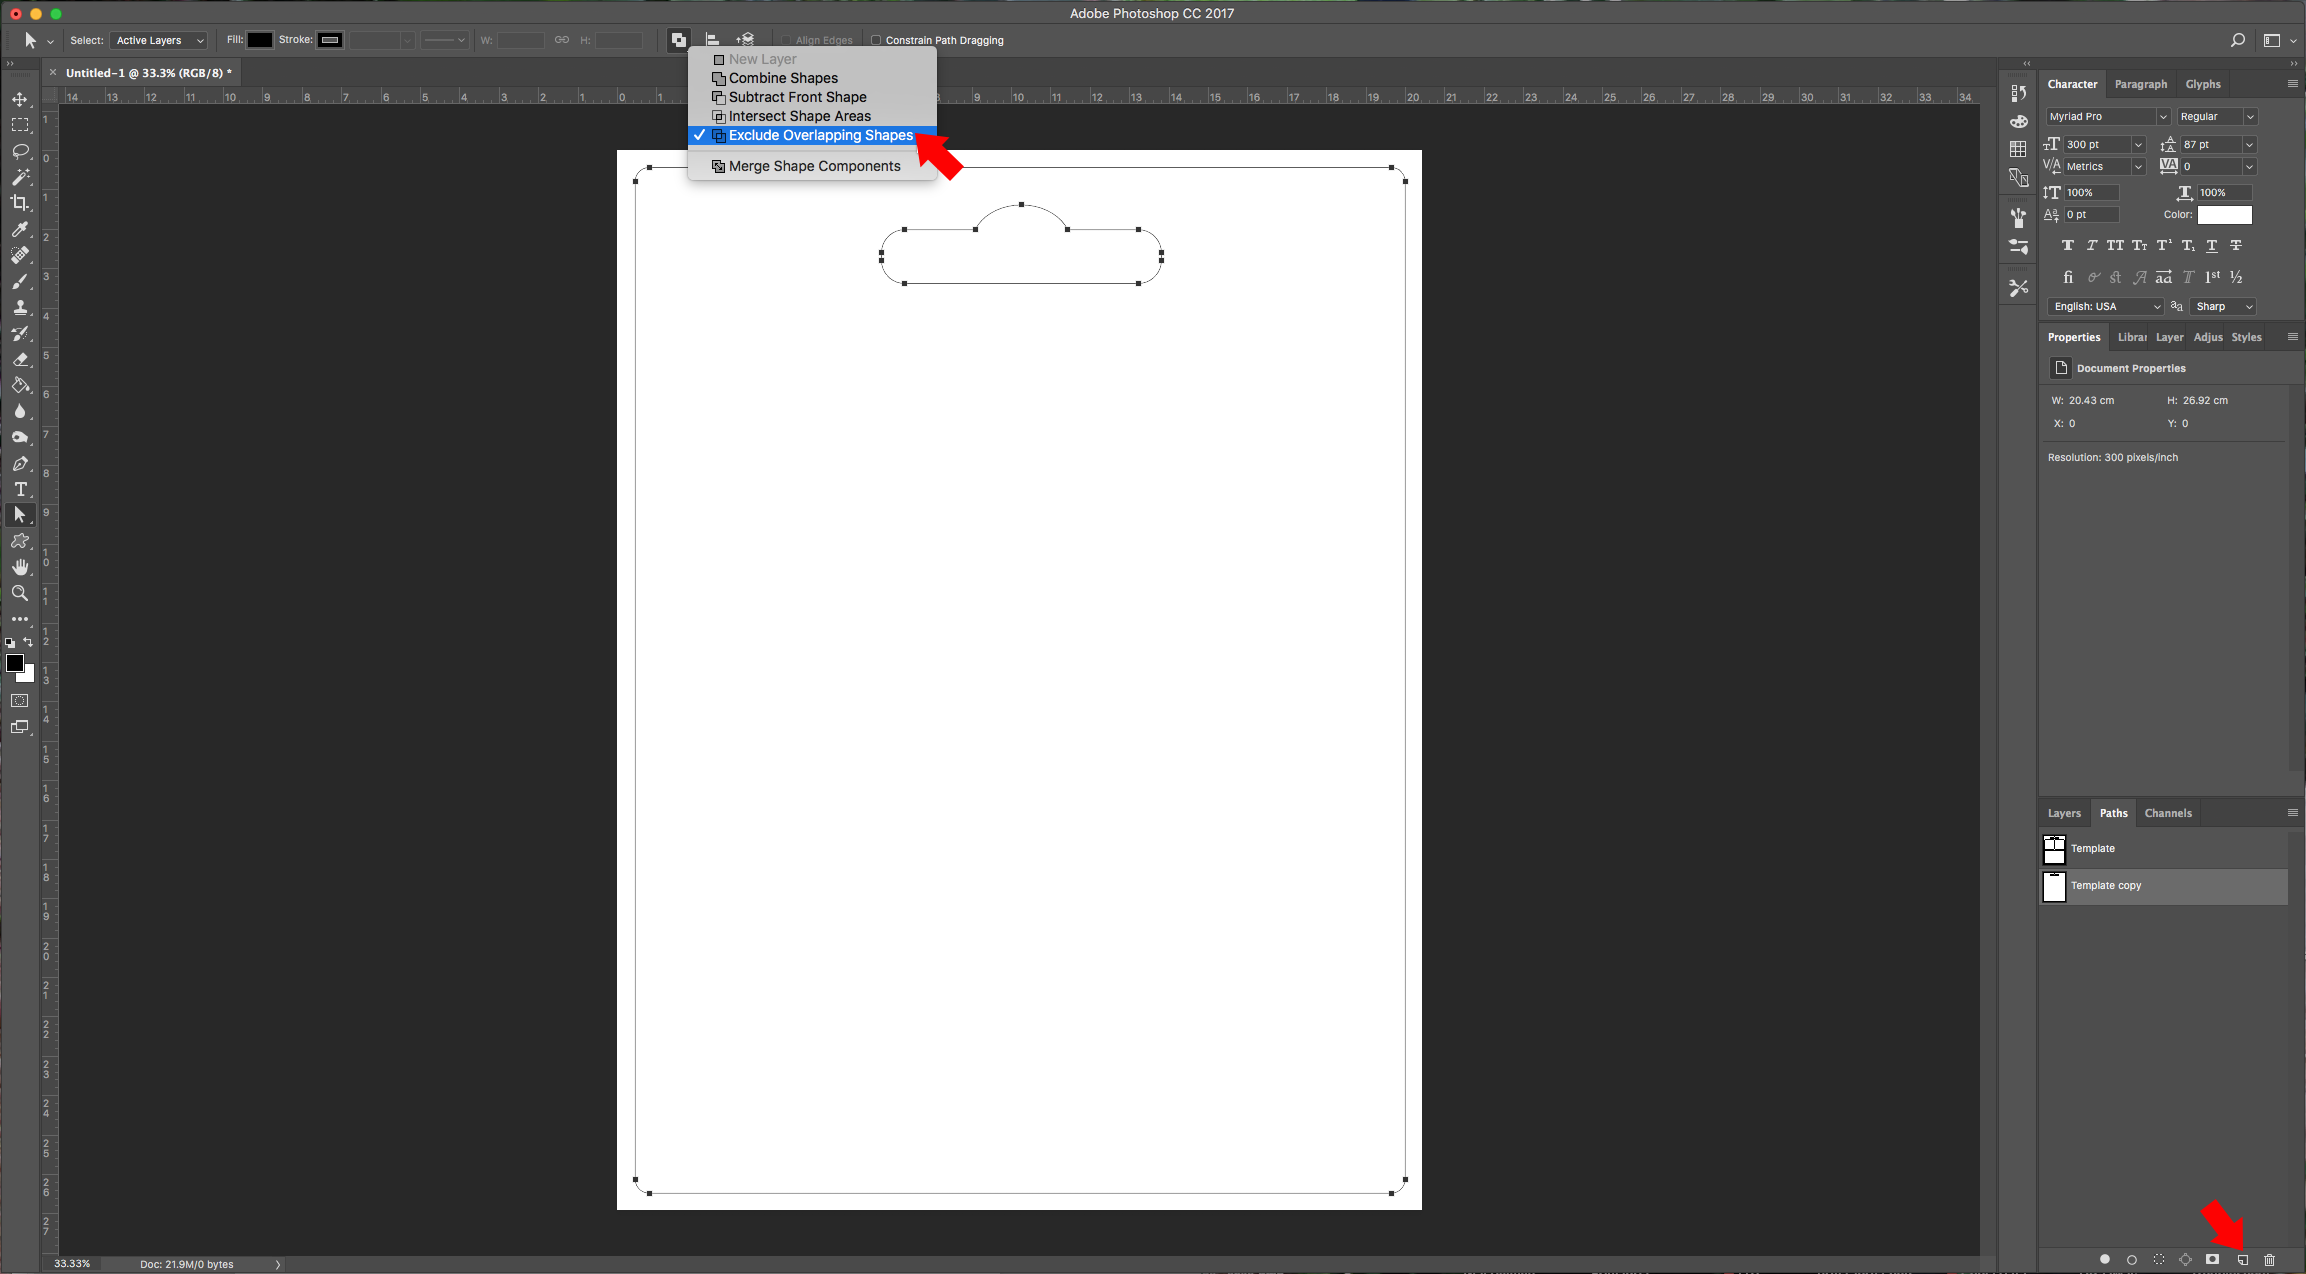
2 – Go to the “Paths” menu and double-click on the “Work Path” and name it “Template”. Then duplicate the path by dragging it on top of the “New Page” button at the bottom of the “Paths” menu. Delete the inner squares, select the remaining parts with the “Path Selection Tool” (A) and choose “Exclude Overlapping Shapes” in “Path Operations” in the top left menu.
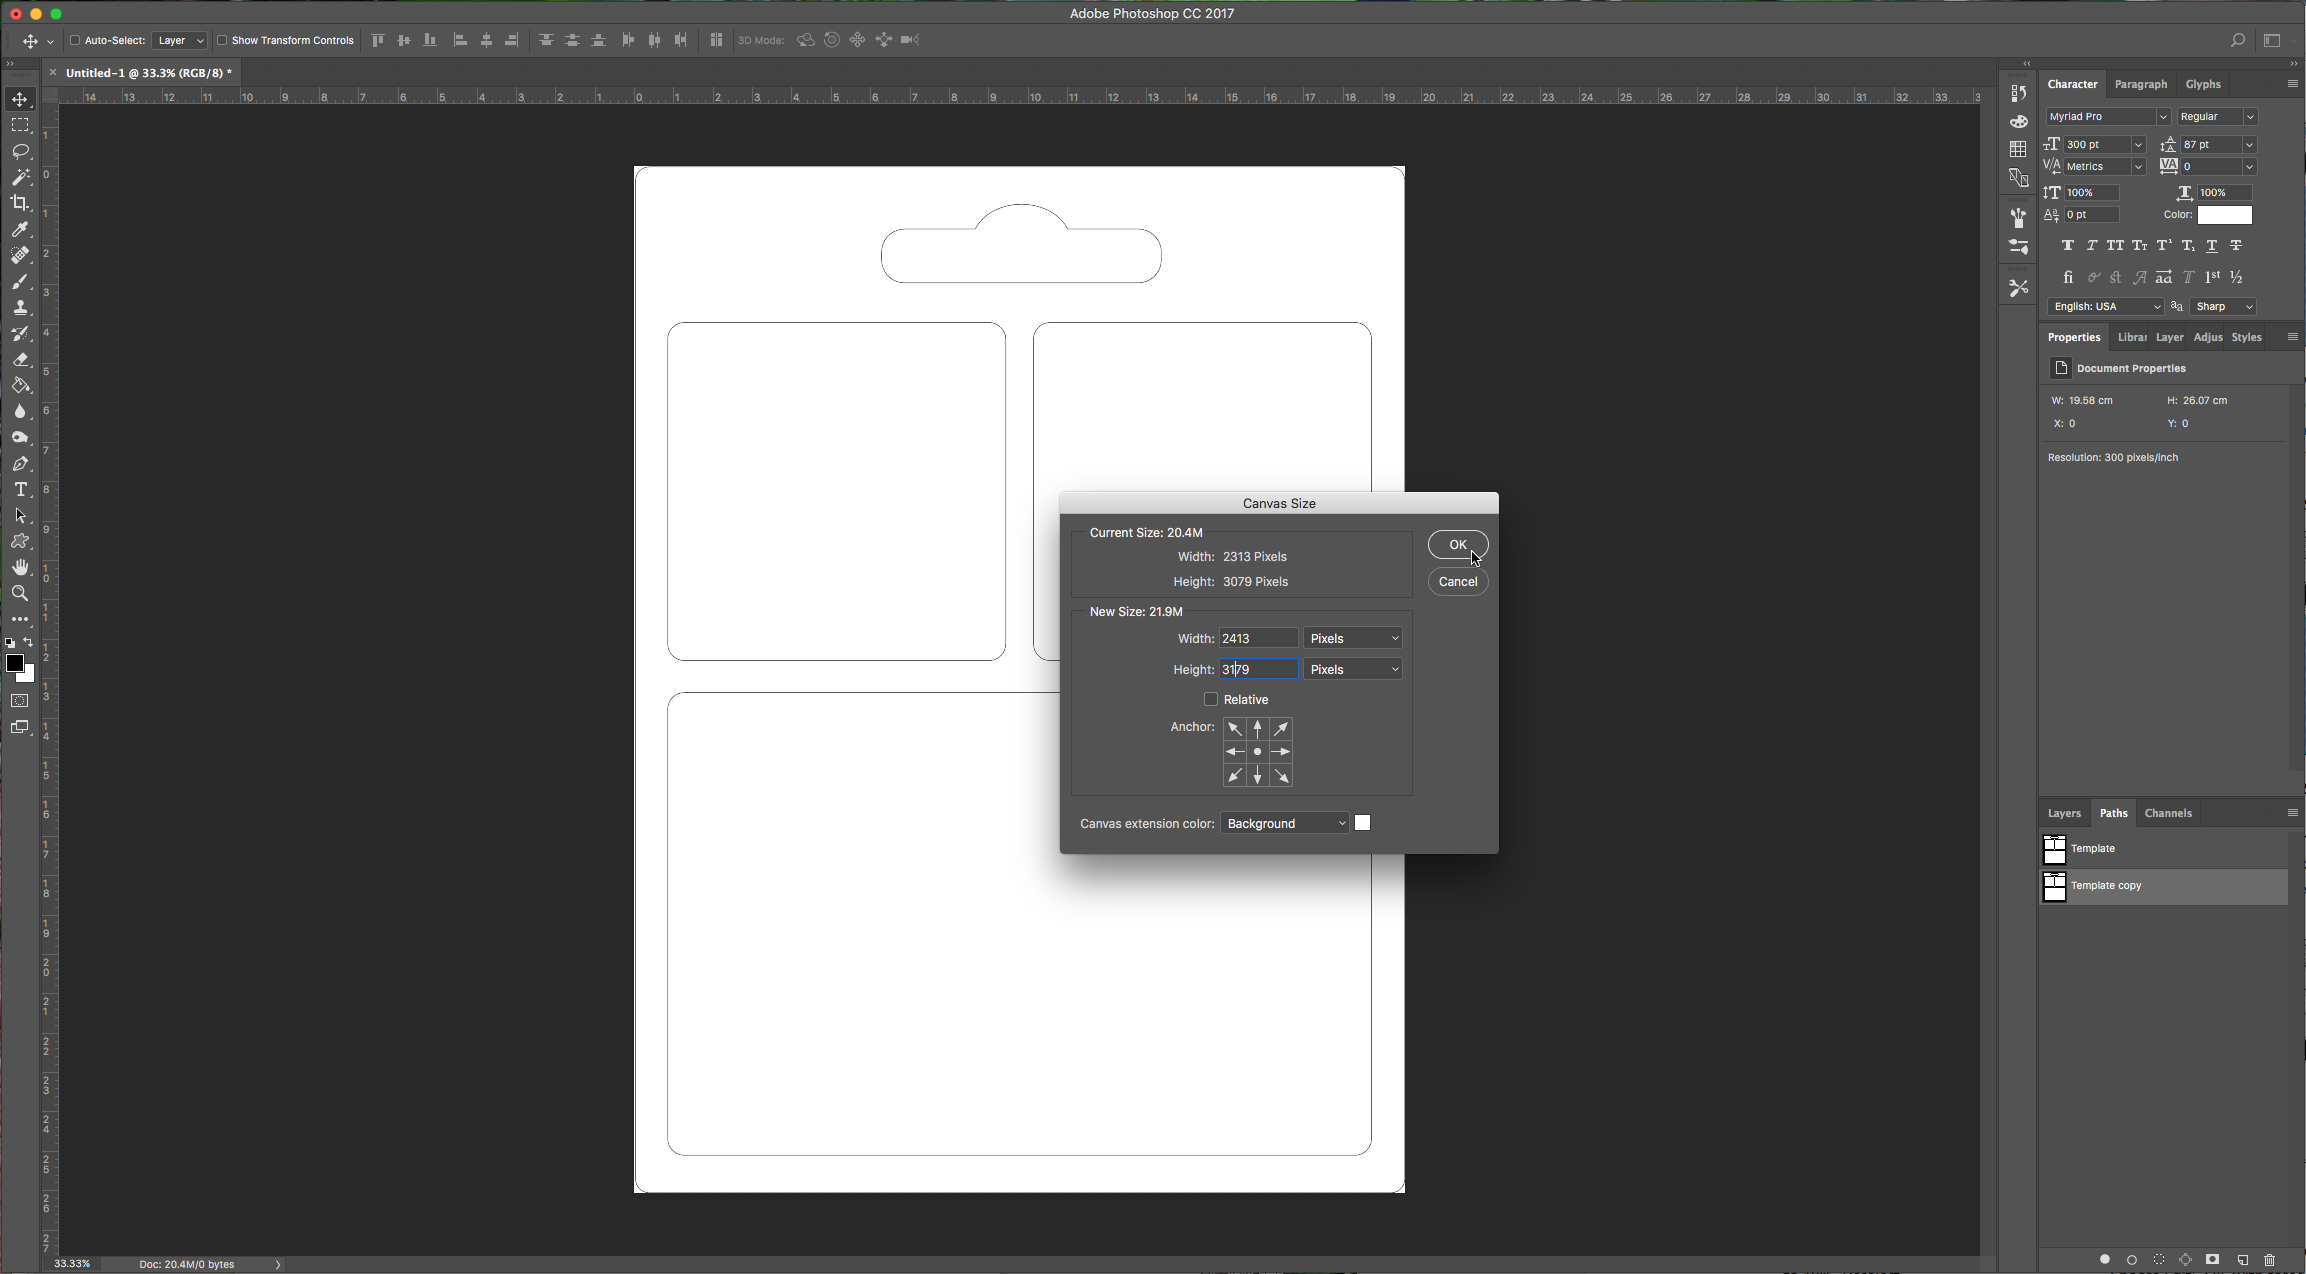
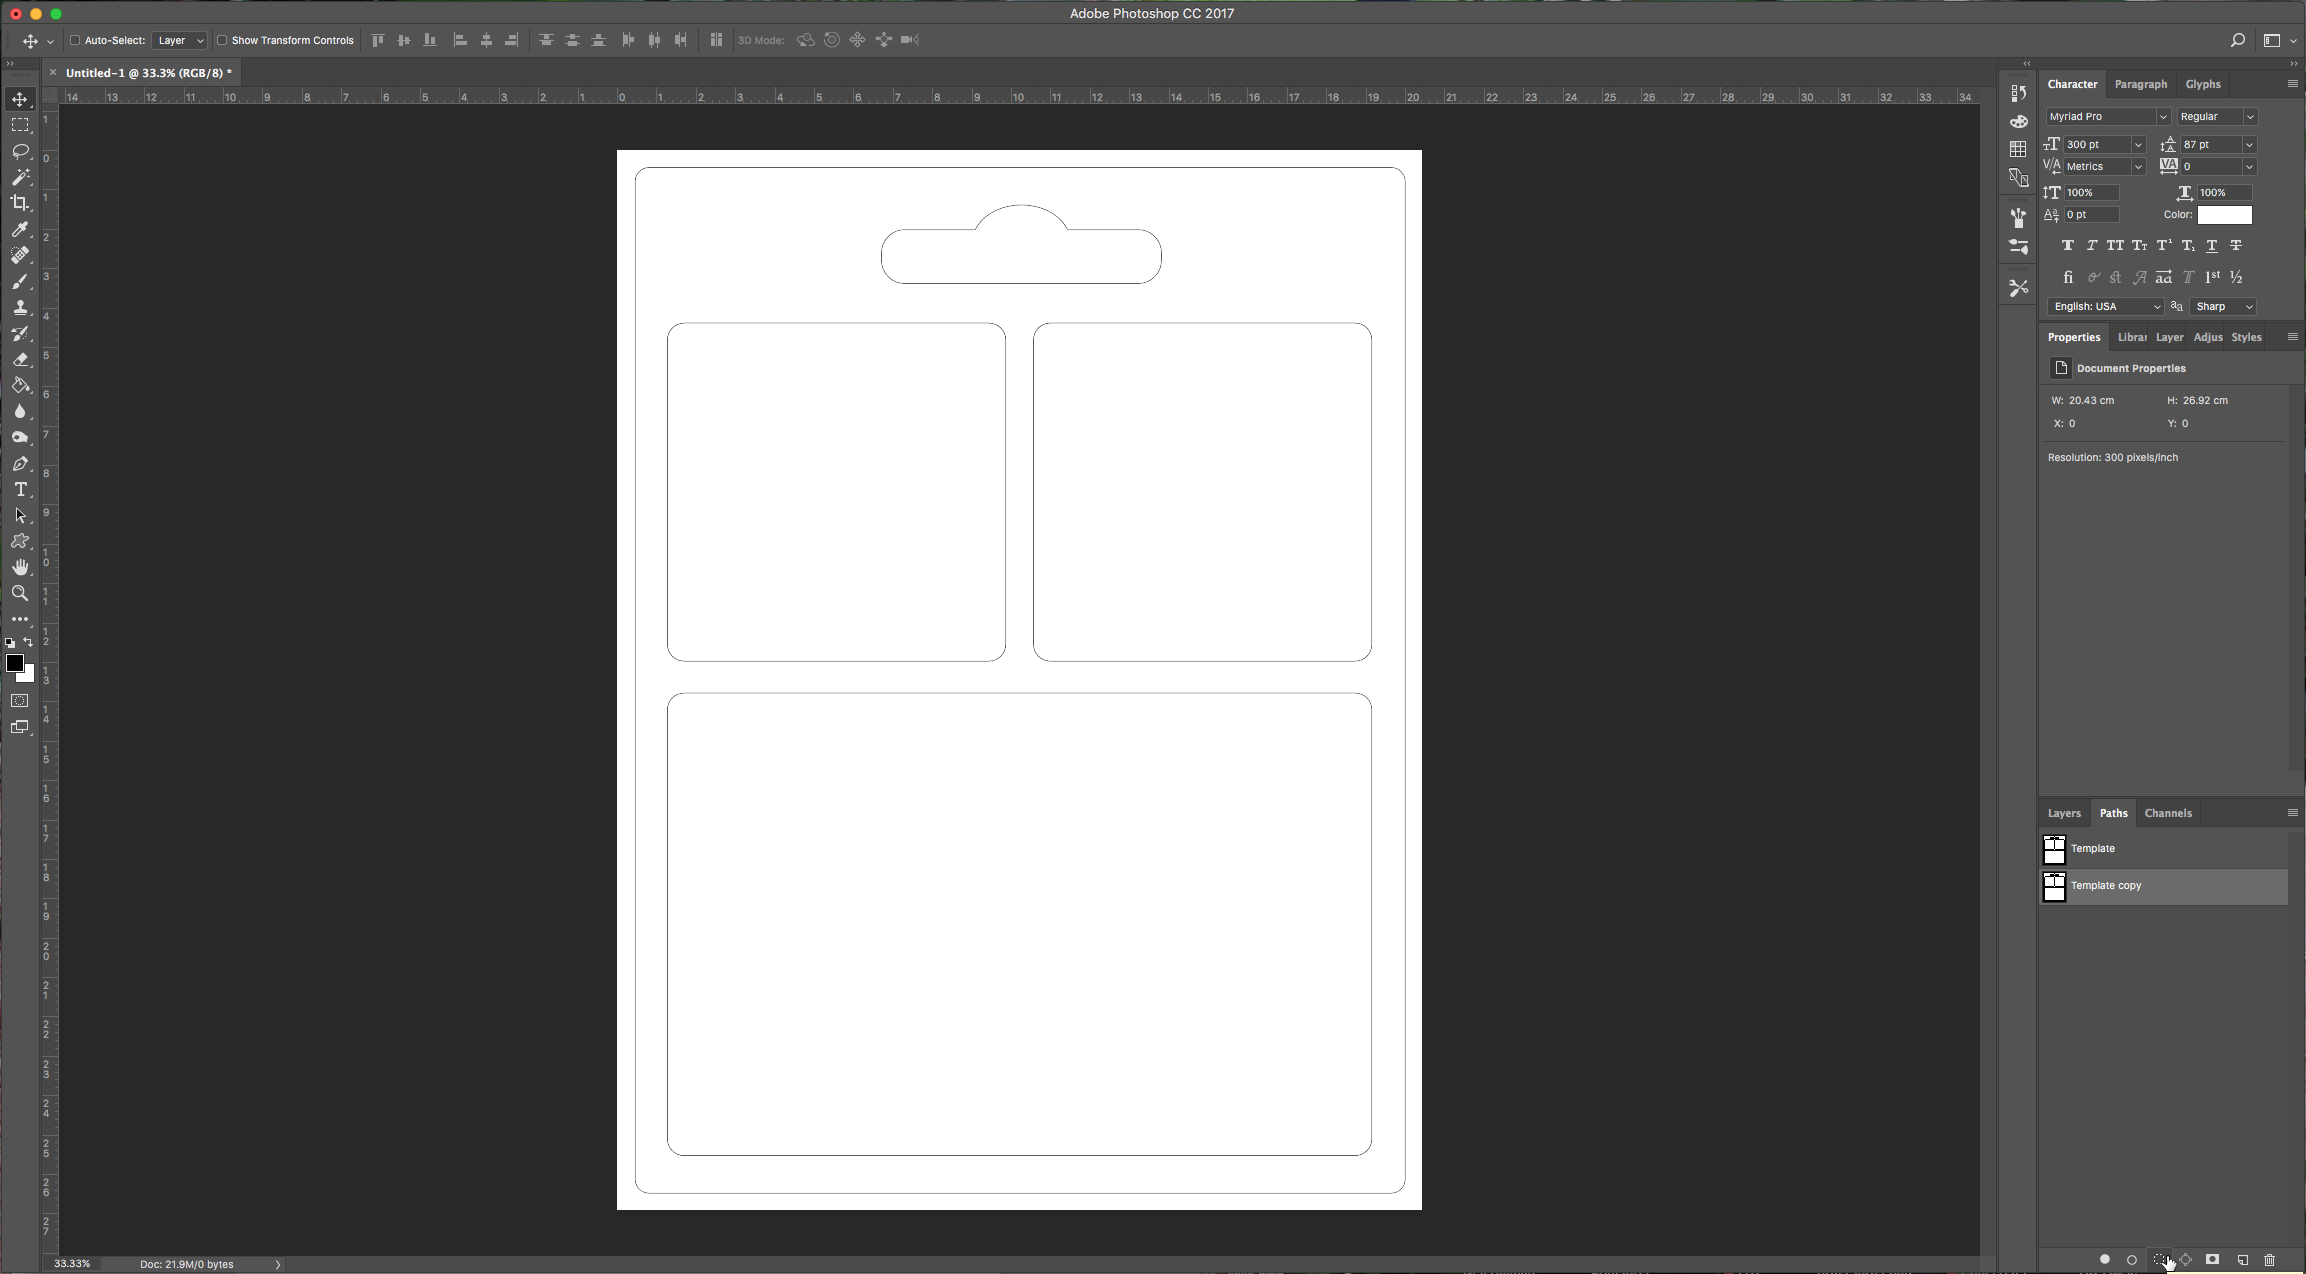
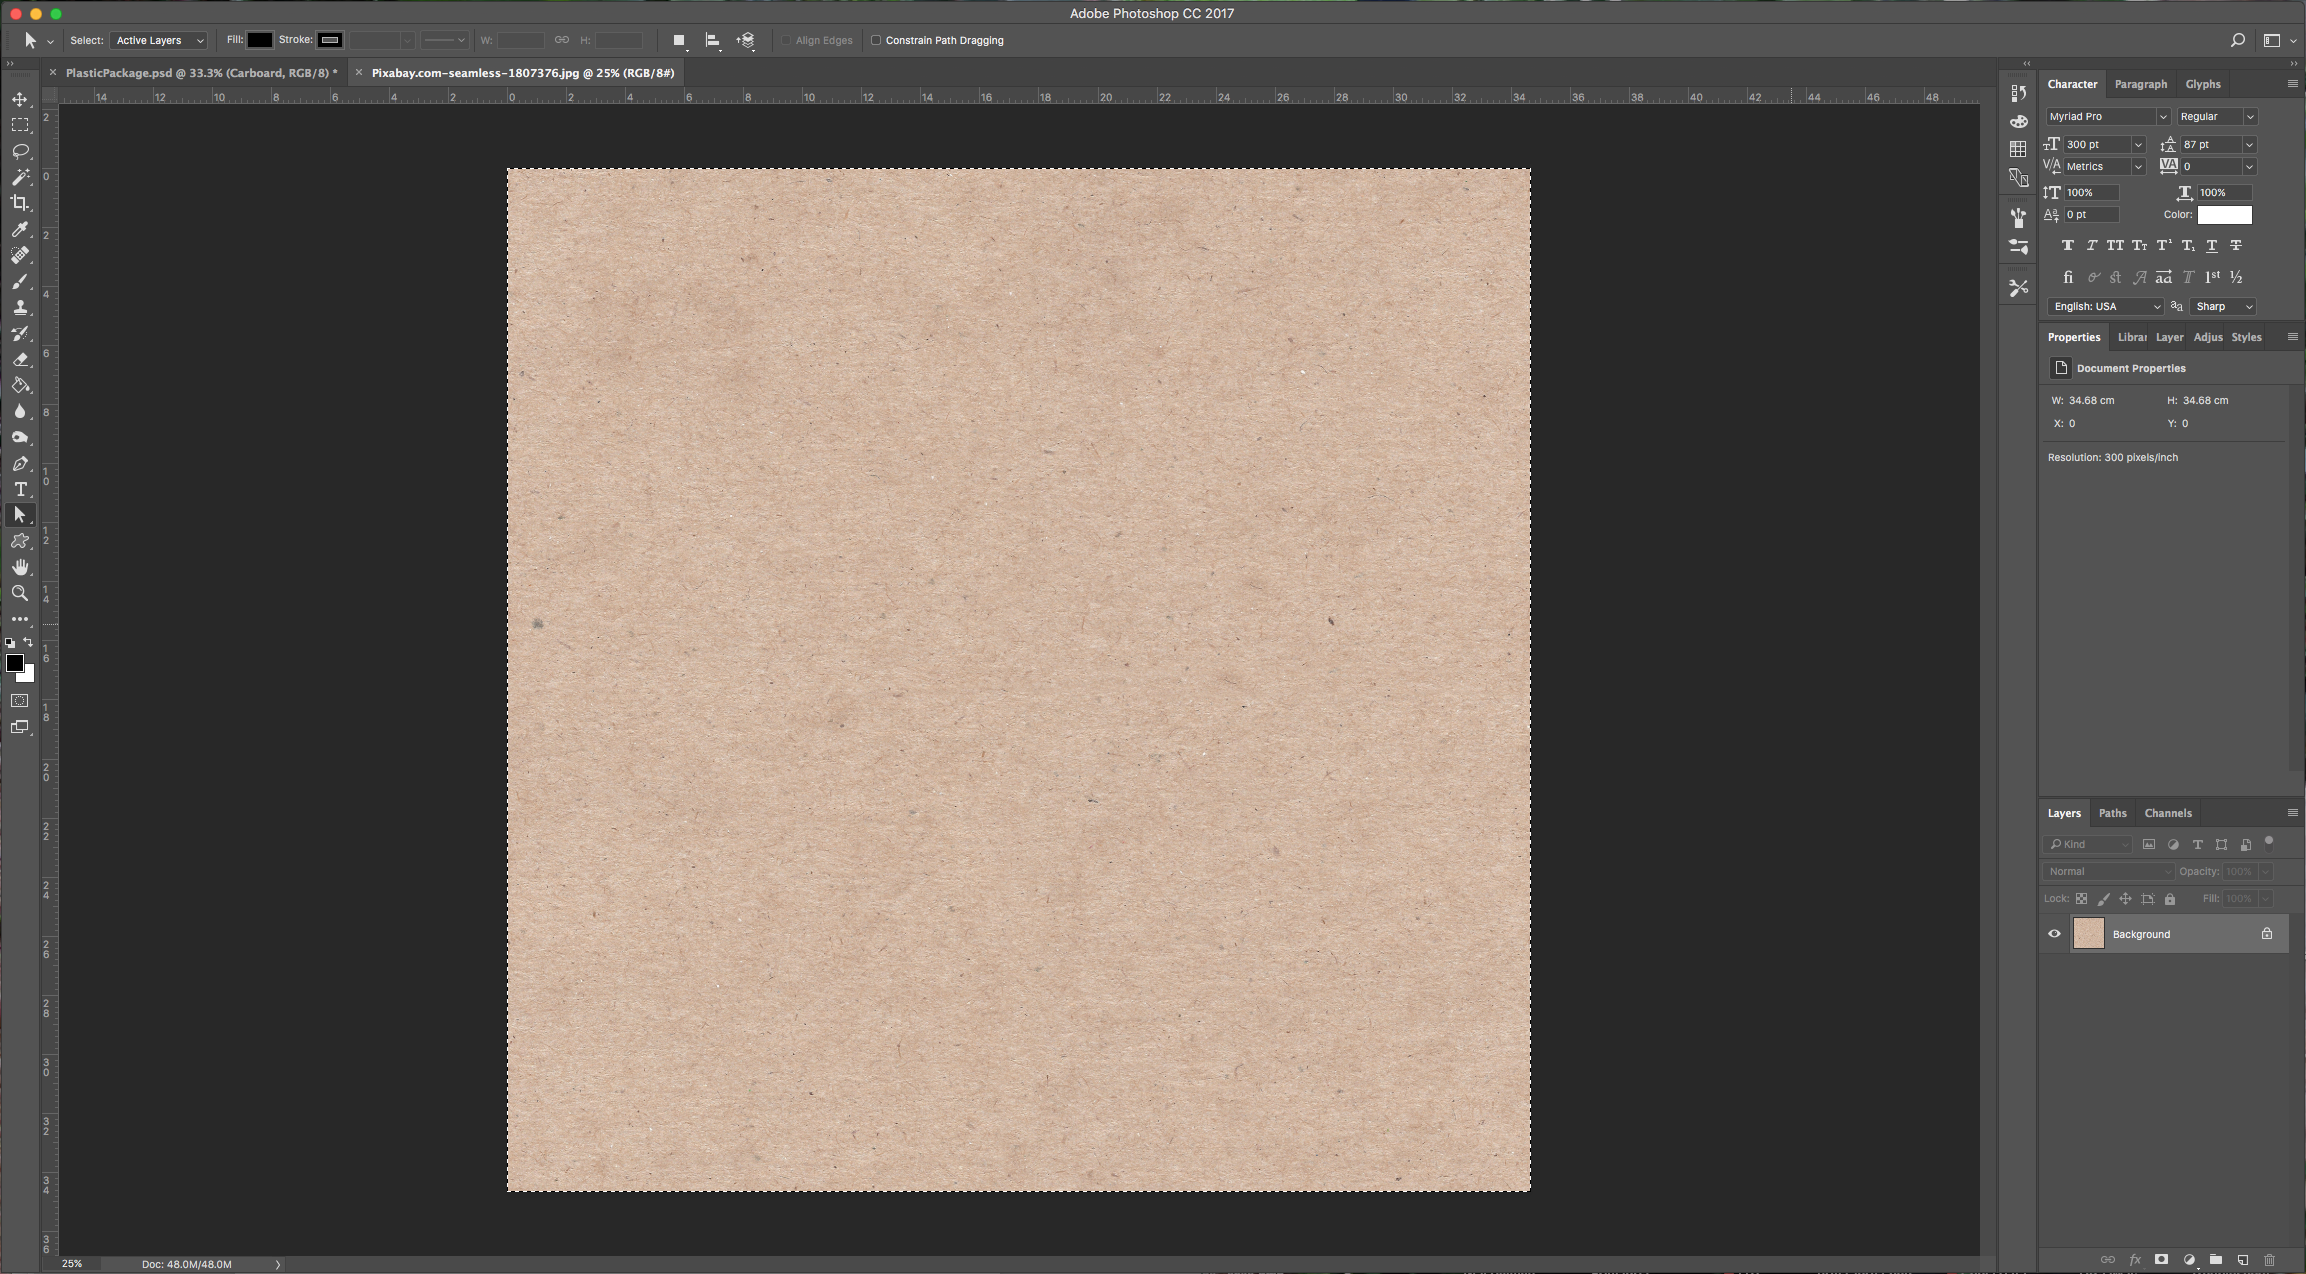
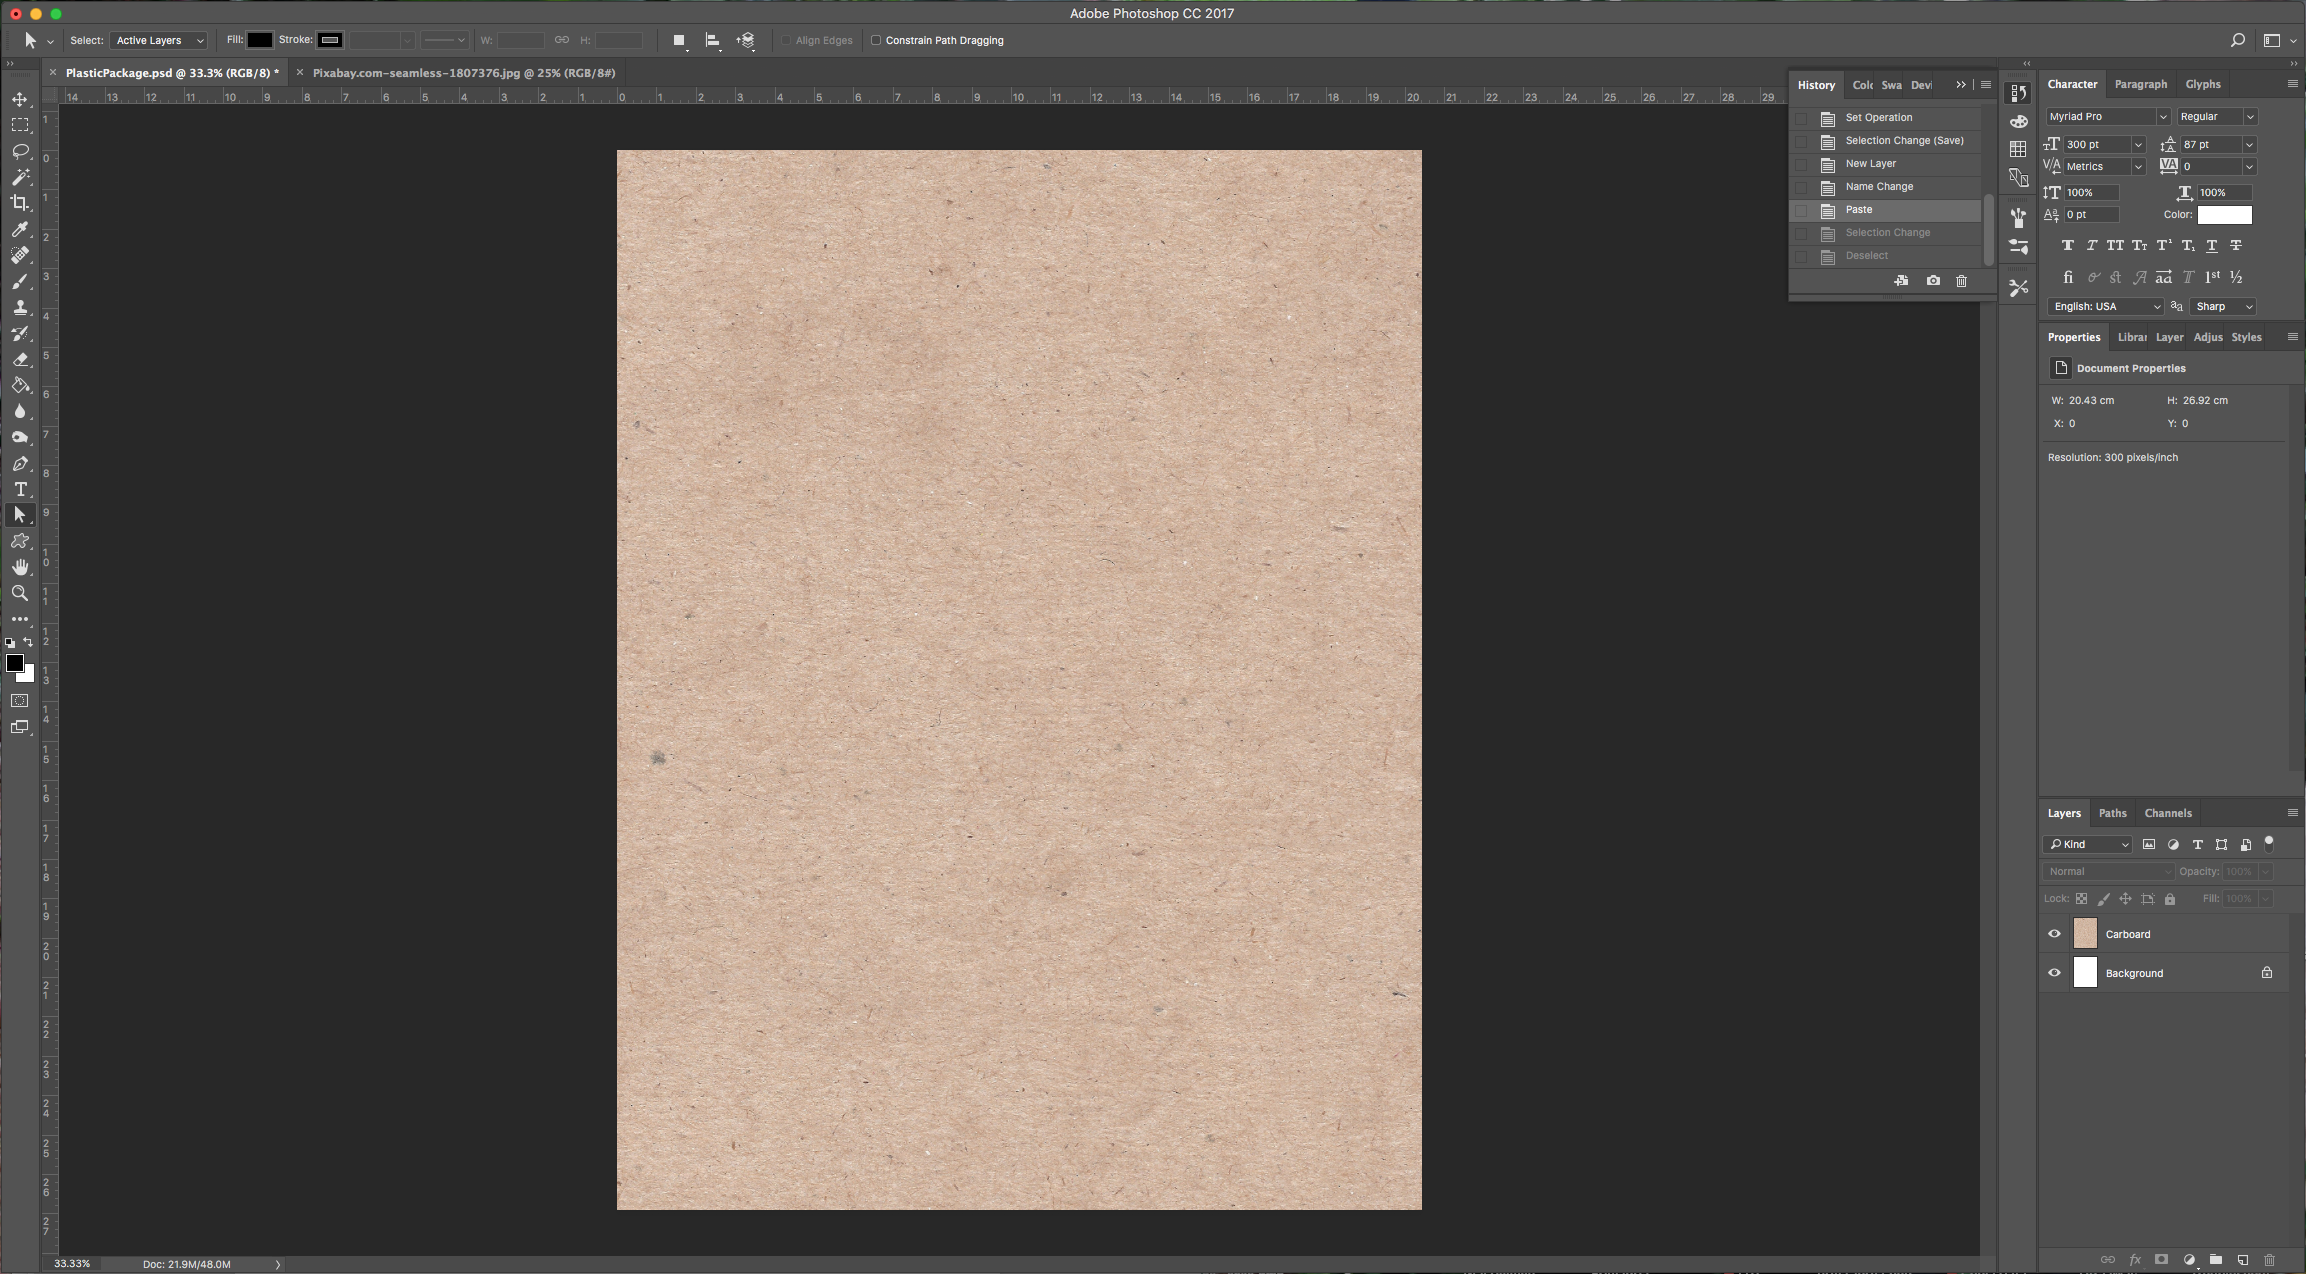
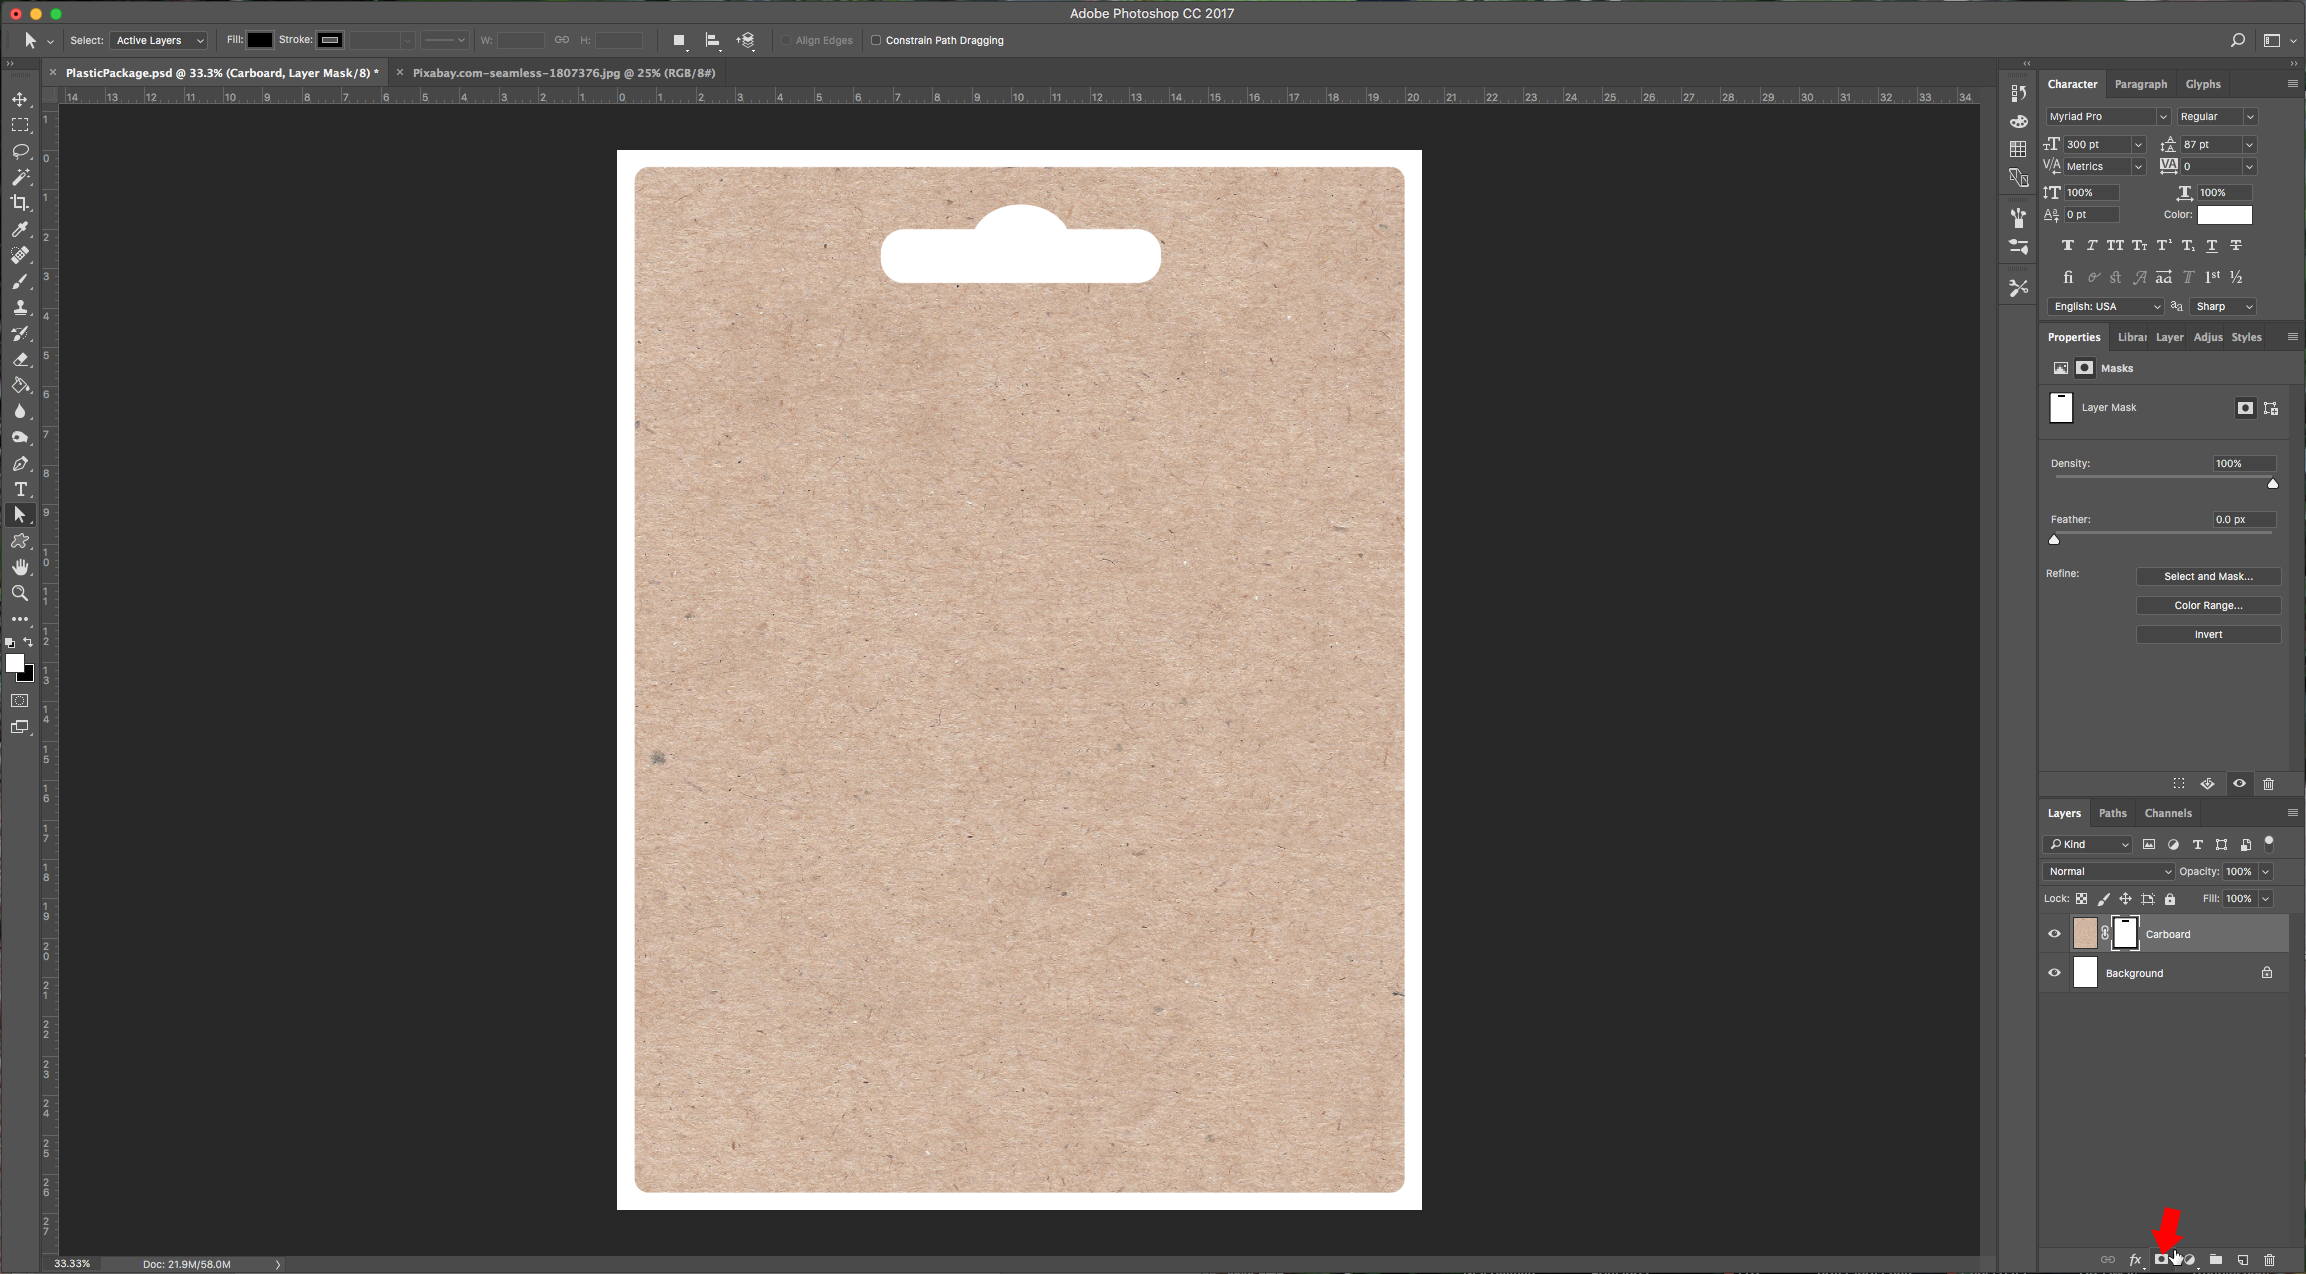
3 – Go to Image > Canvas Size (Shift + Alt + C) and add 100 pixels on each side. Select and paste the Cardboard background. Go to “Paths” and make a selection of the “Cardboard” path by clicking the “Load Path as Selection” button at the bottom of the menu. Go back to “Layers” and create a “Clipping Mask” by clicking on the button at the bottom of the menu.
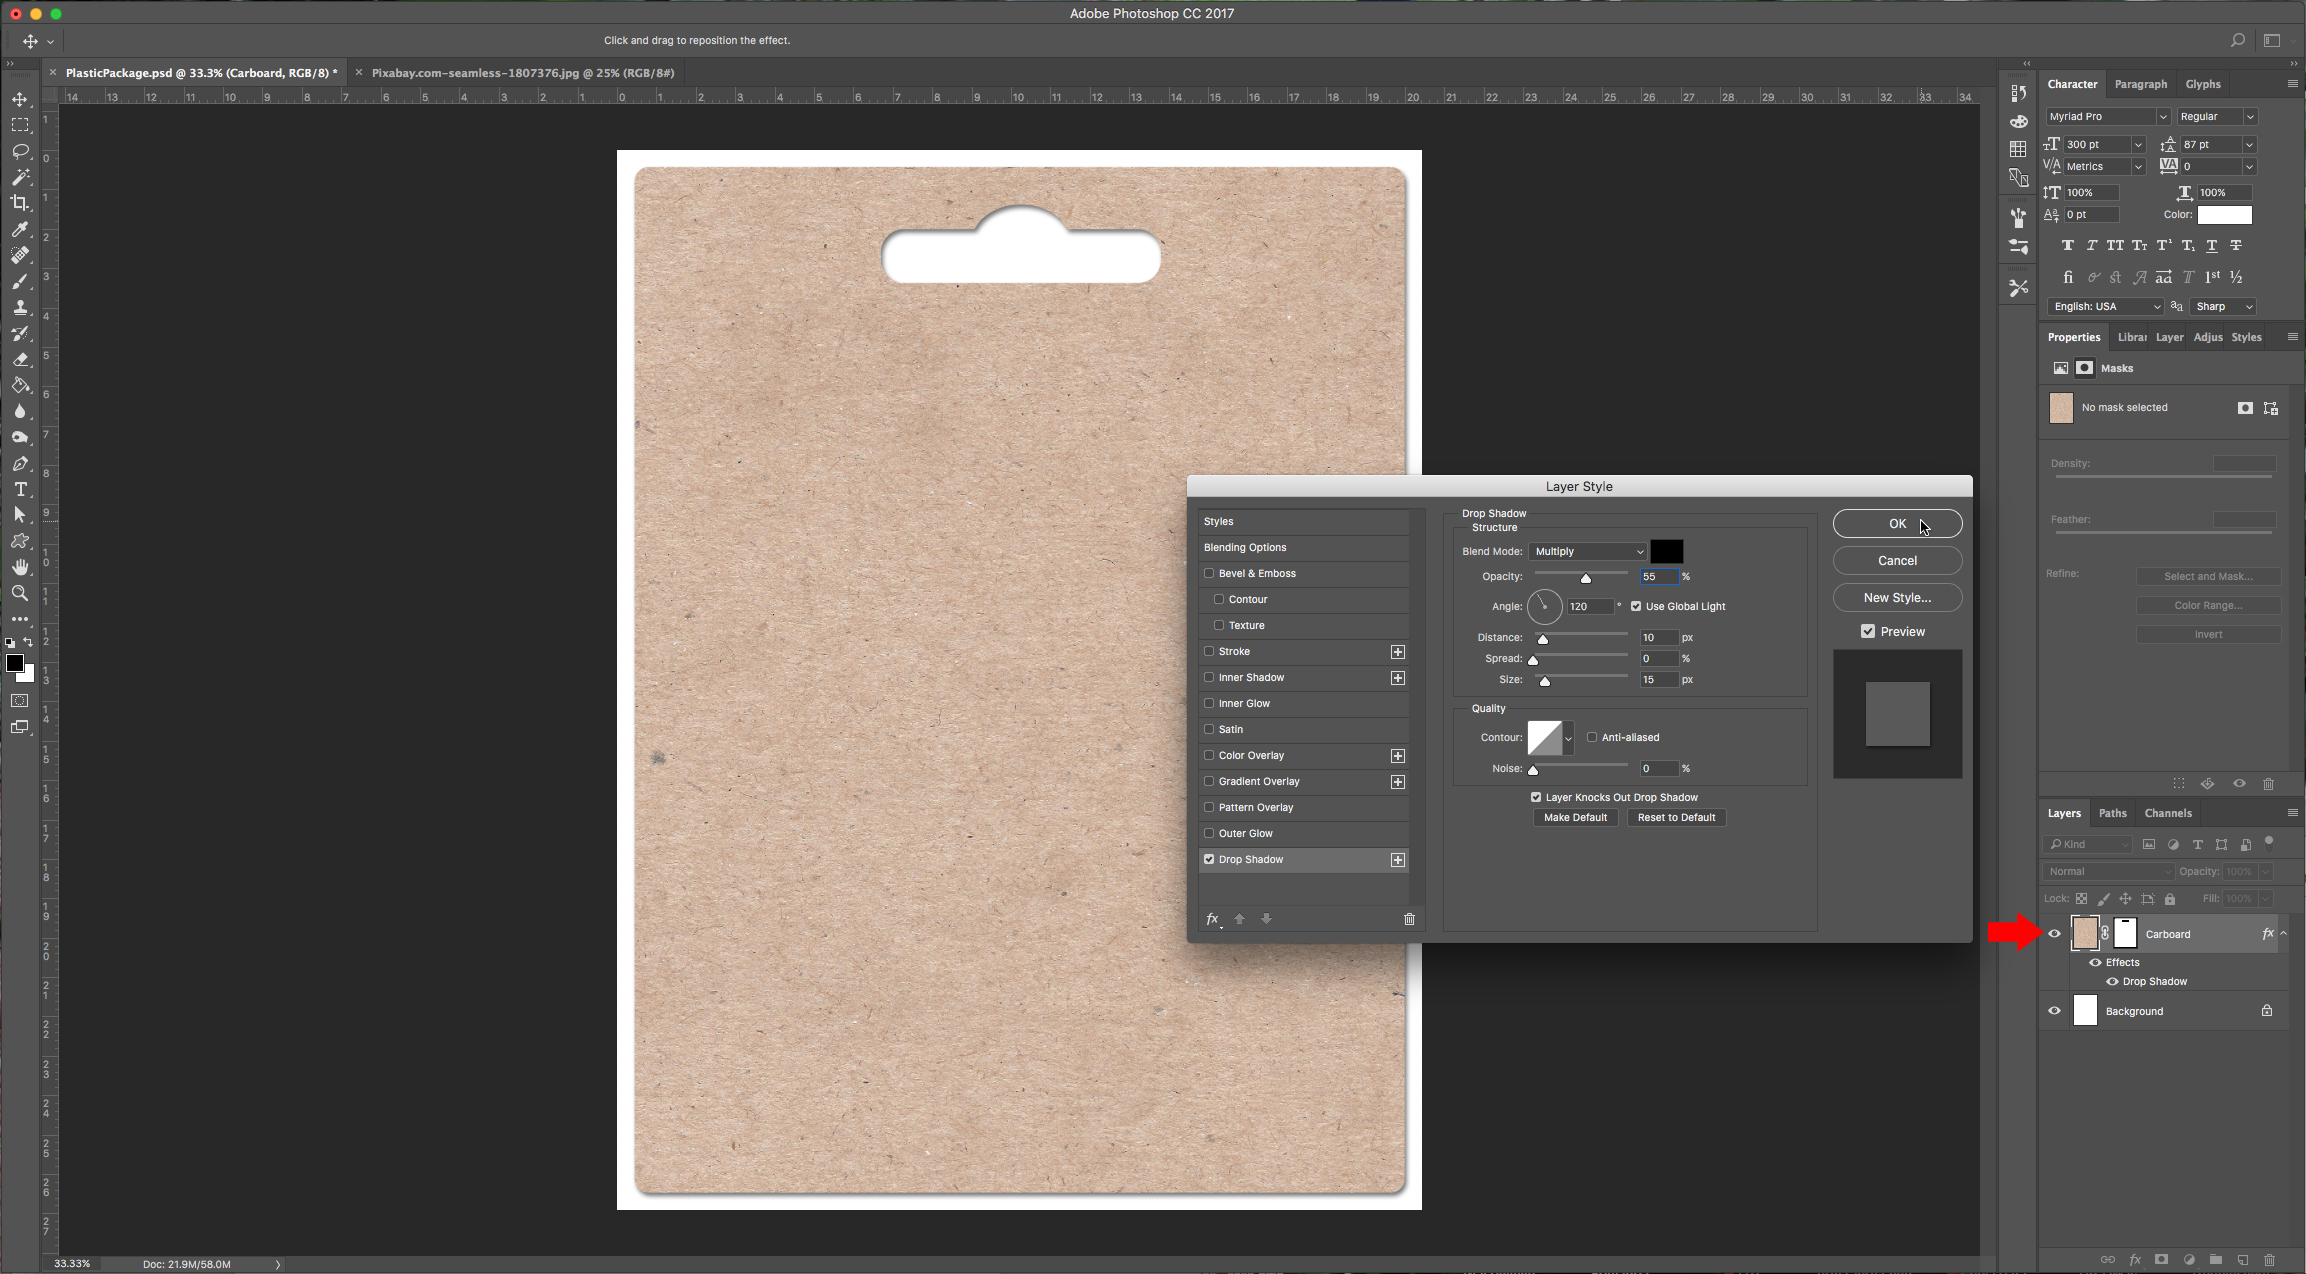
4 – Double-click on the “Cardboard” layer to invoke the “Blending Options” dialog and apply the following values to the “Drop Shadow”:
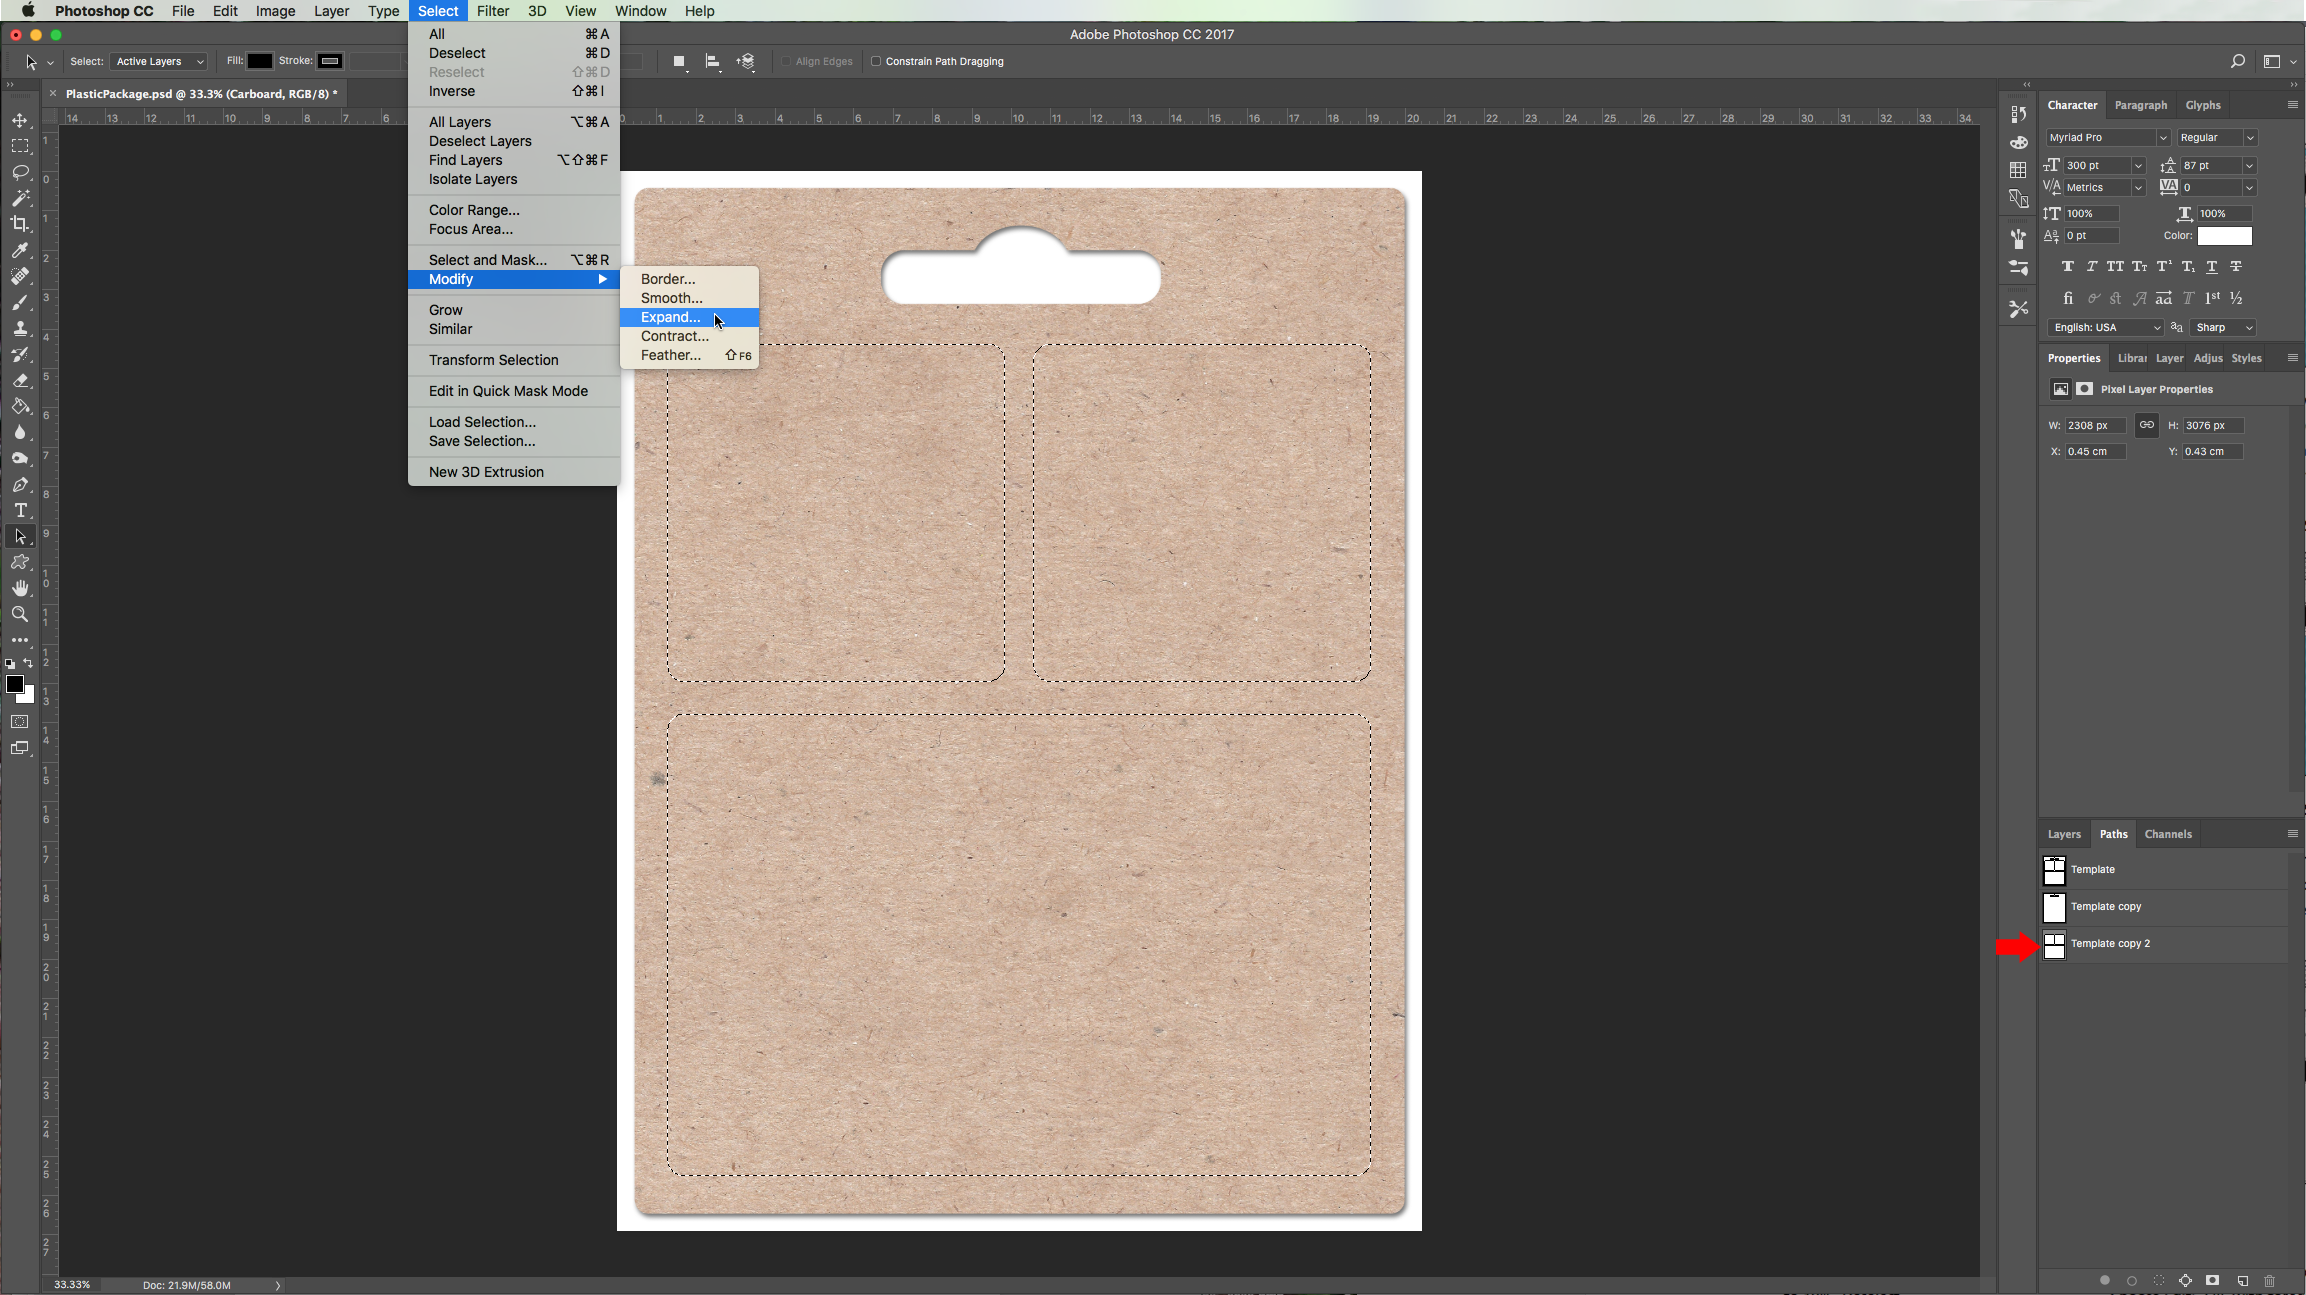
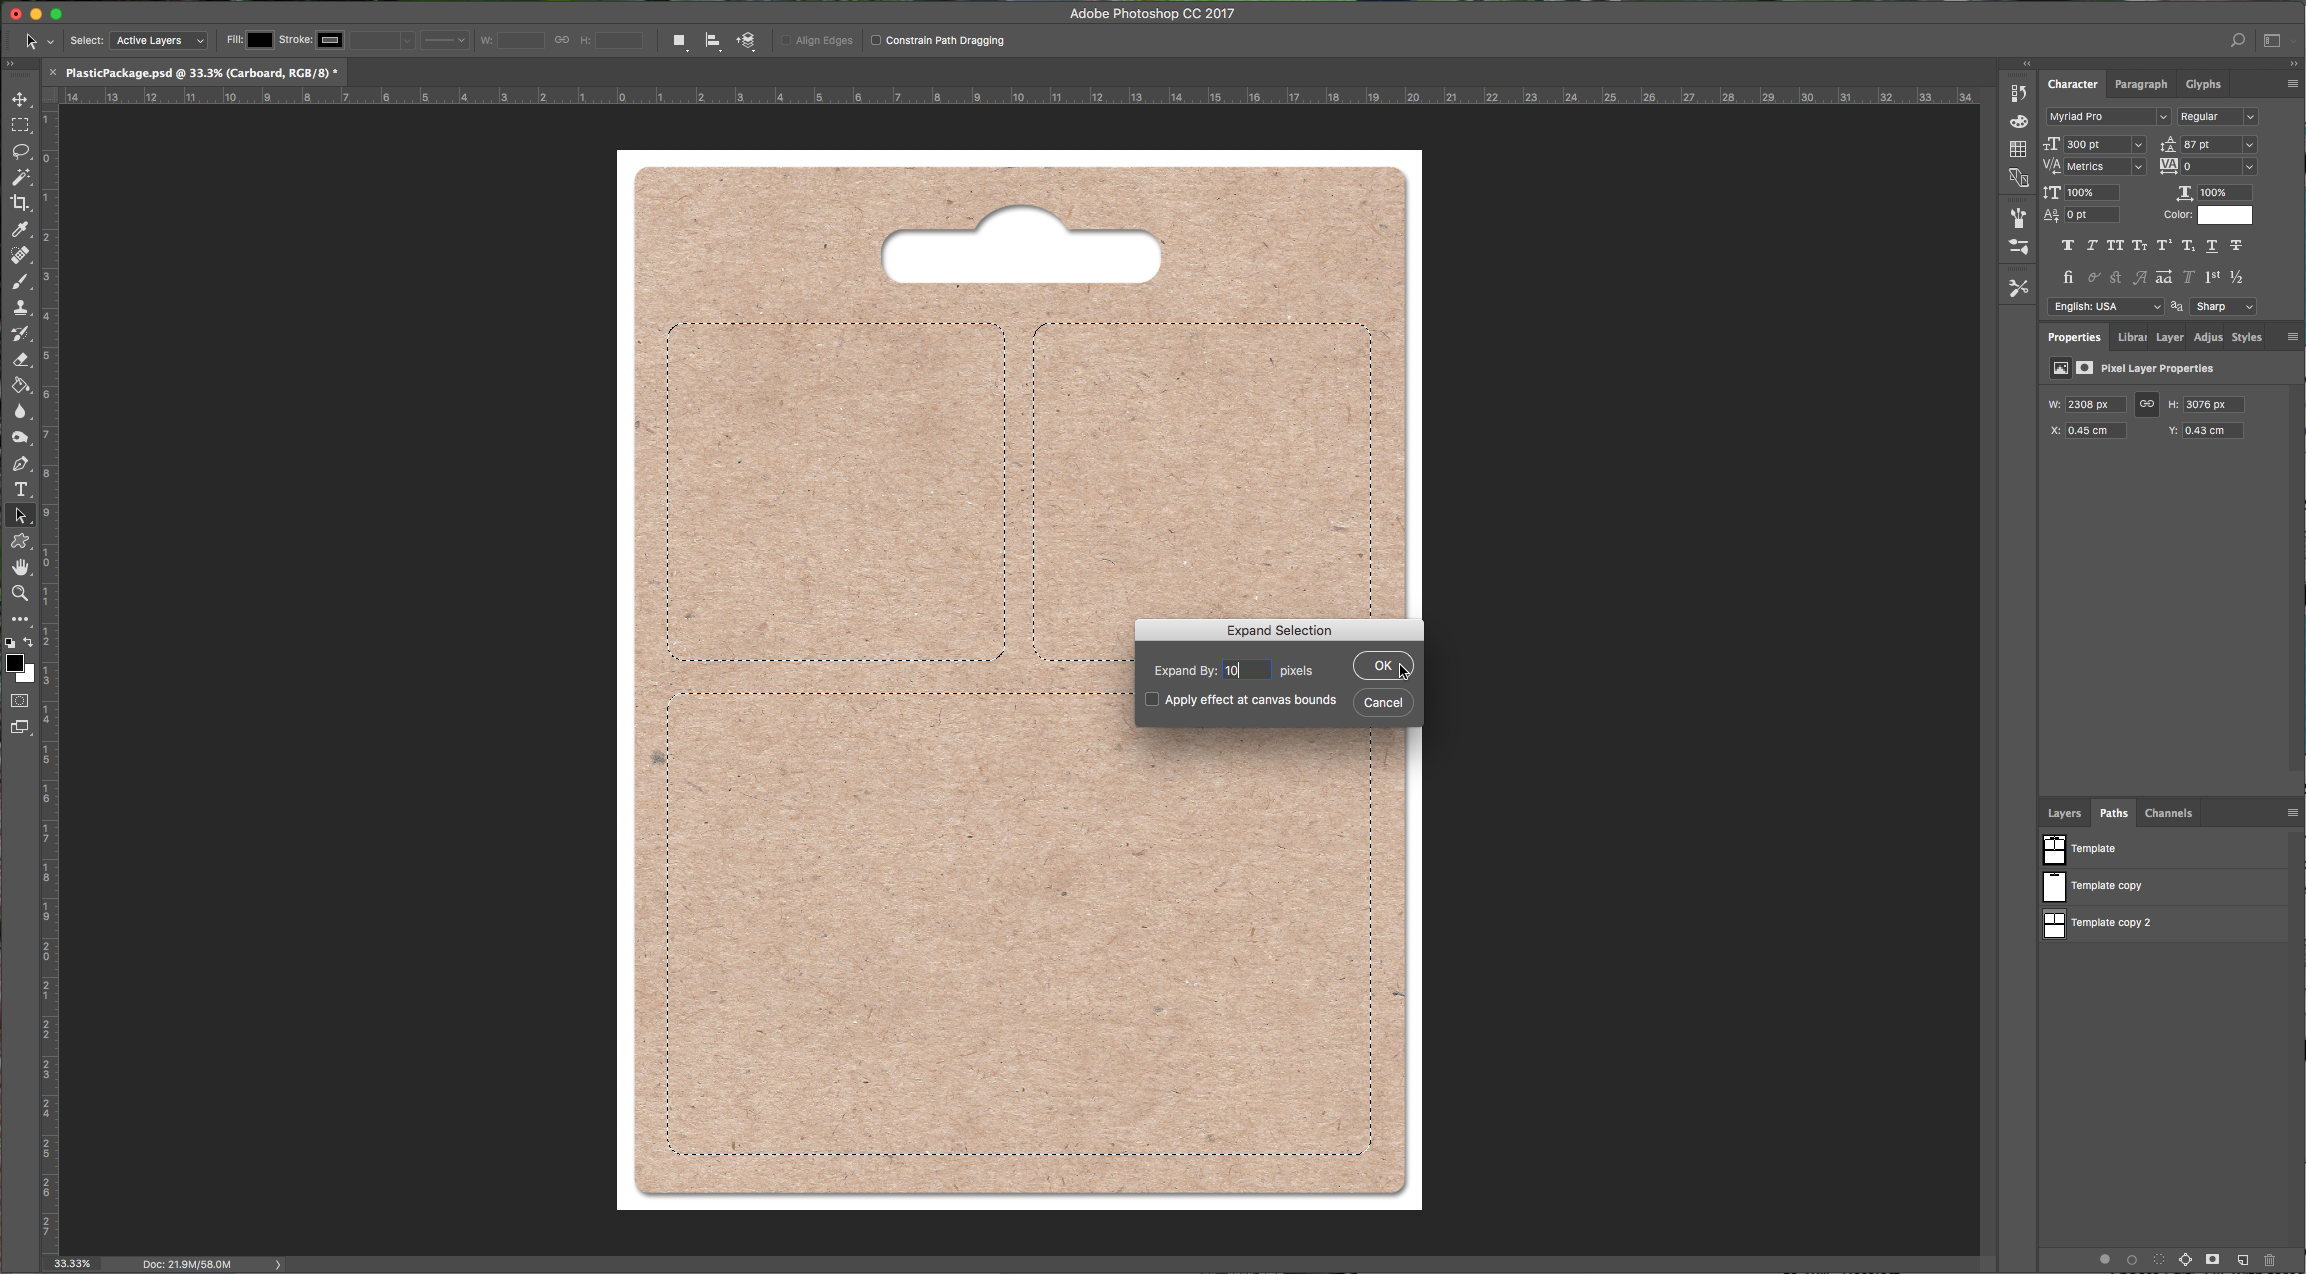
5 – Create another copy of the “Template” path and this time delete the outer and upper paths and just keep the inner squares and make it a selection. Then choose Select > Modify > Expand and expand the selection by 10 pixels.
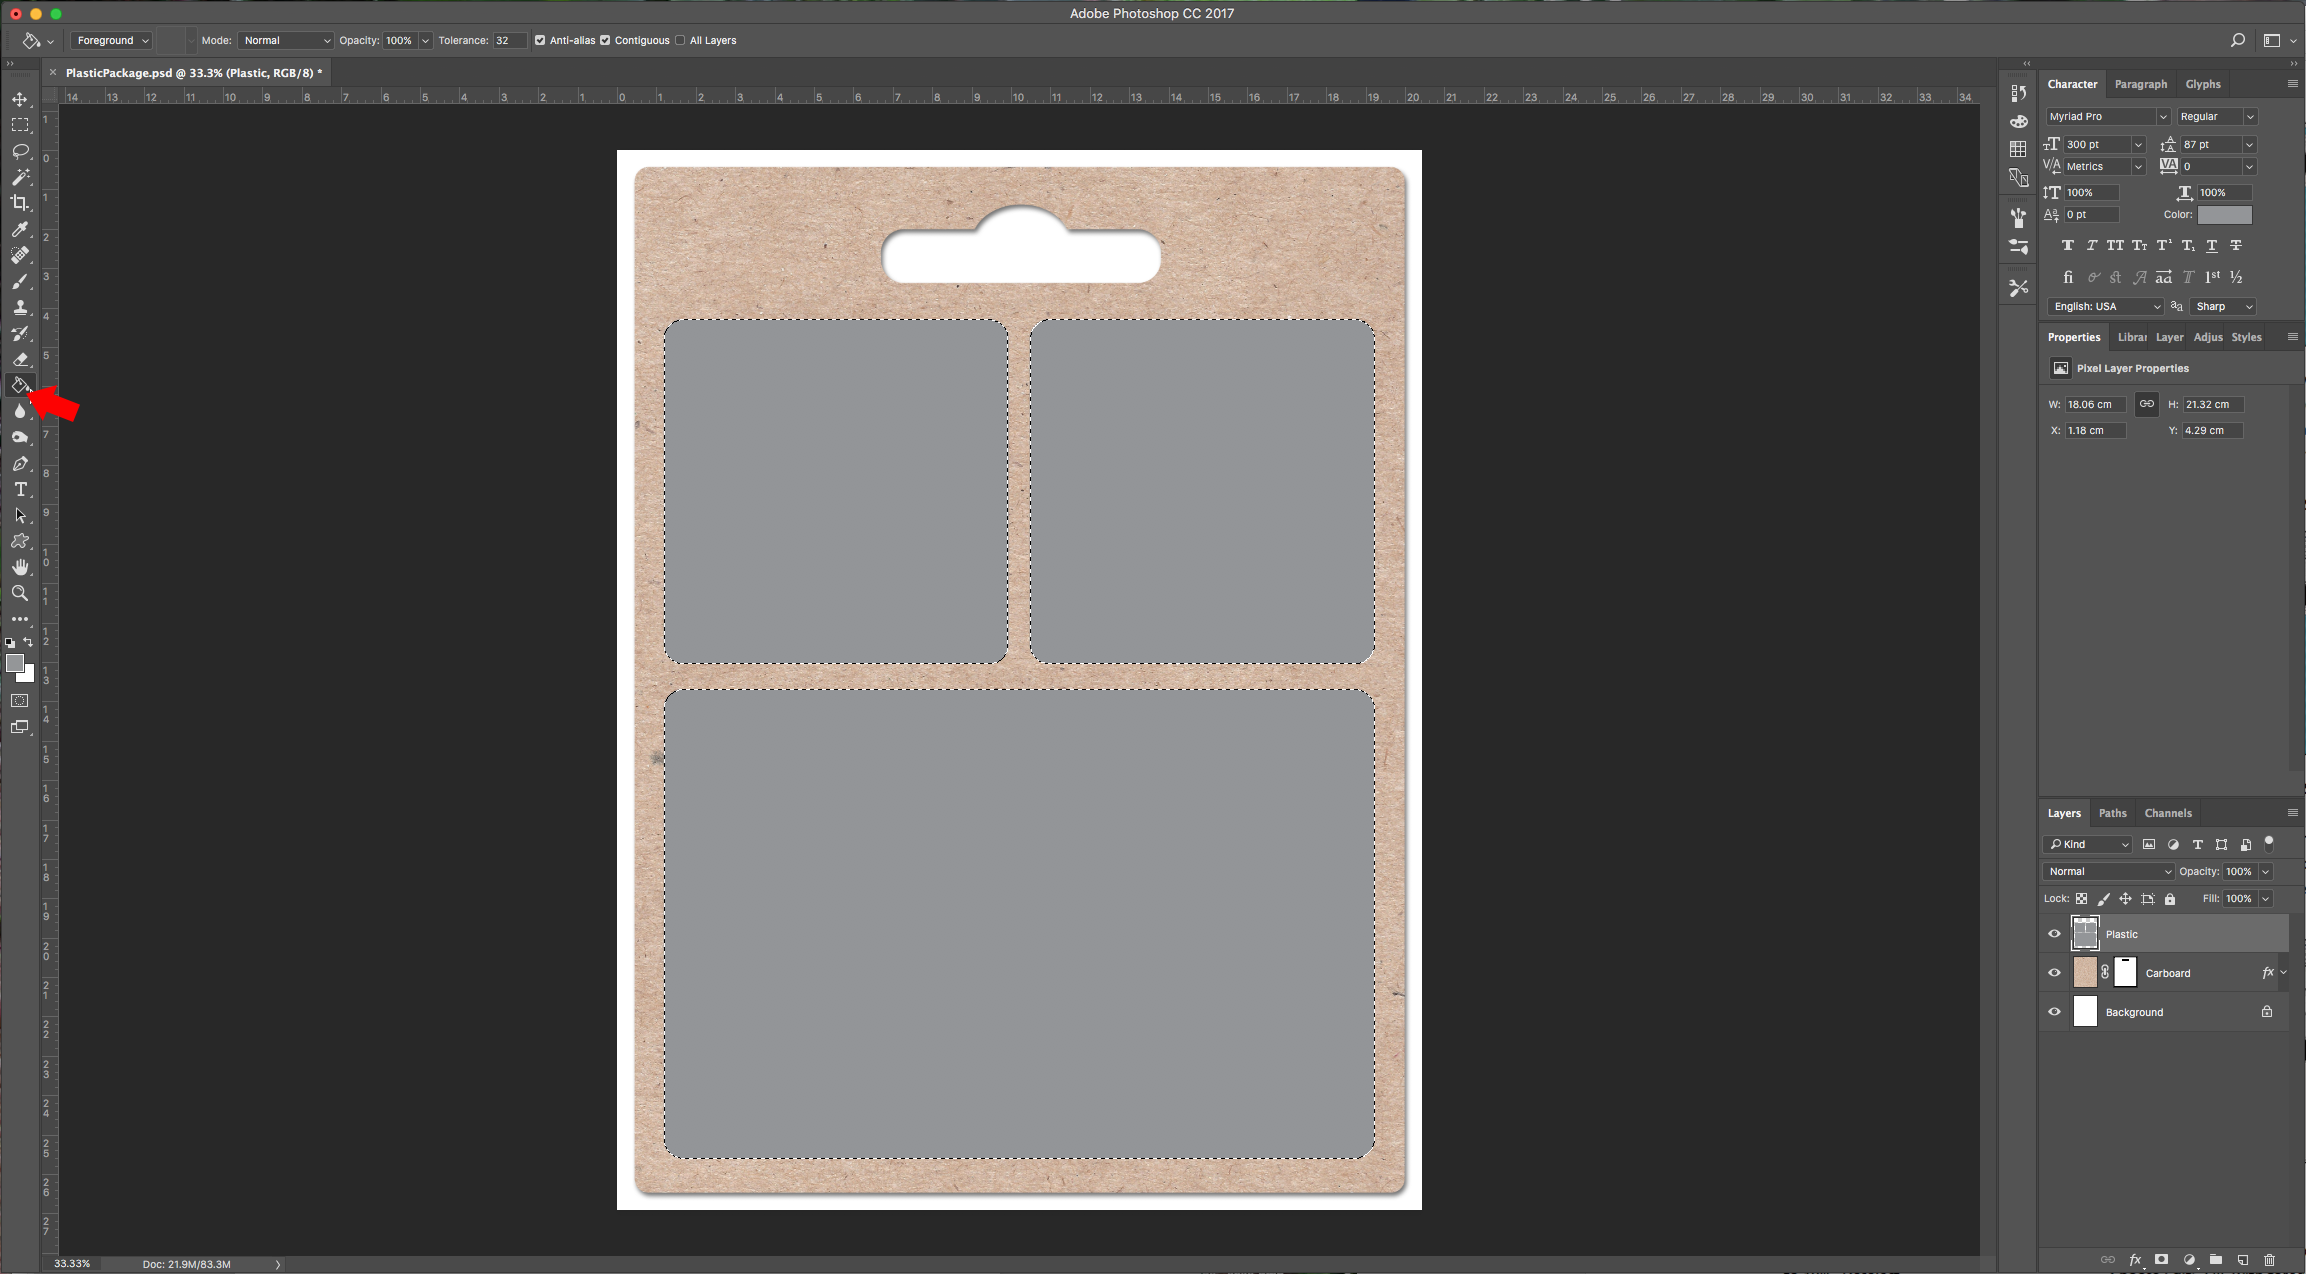
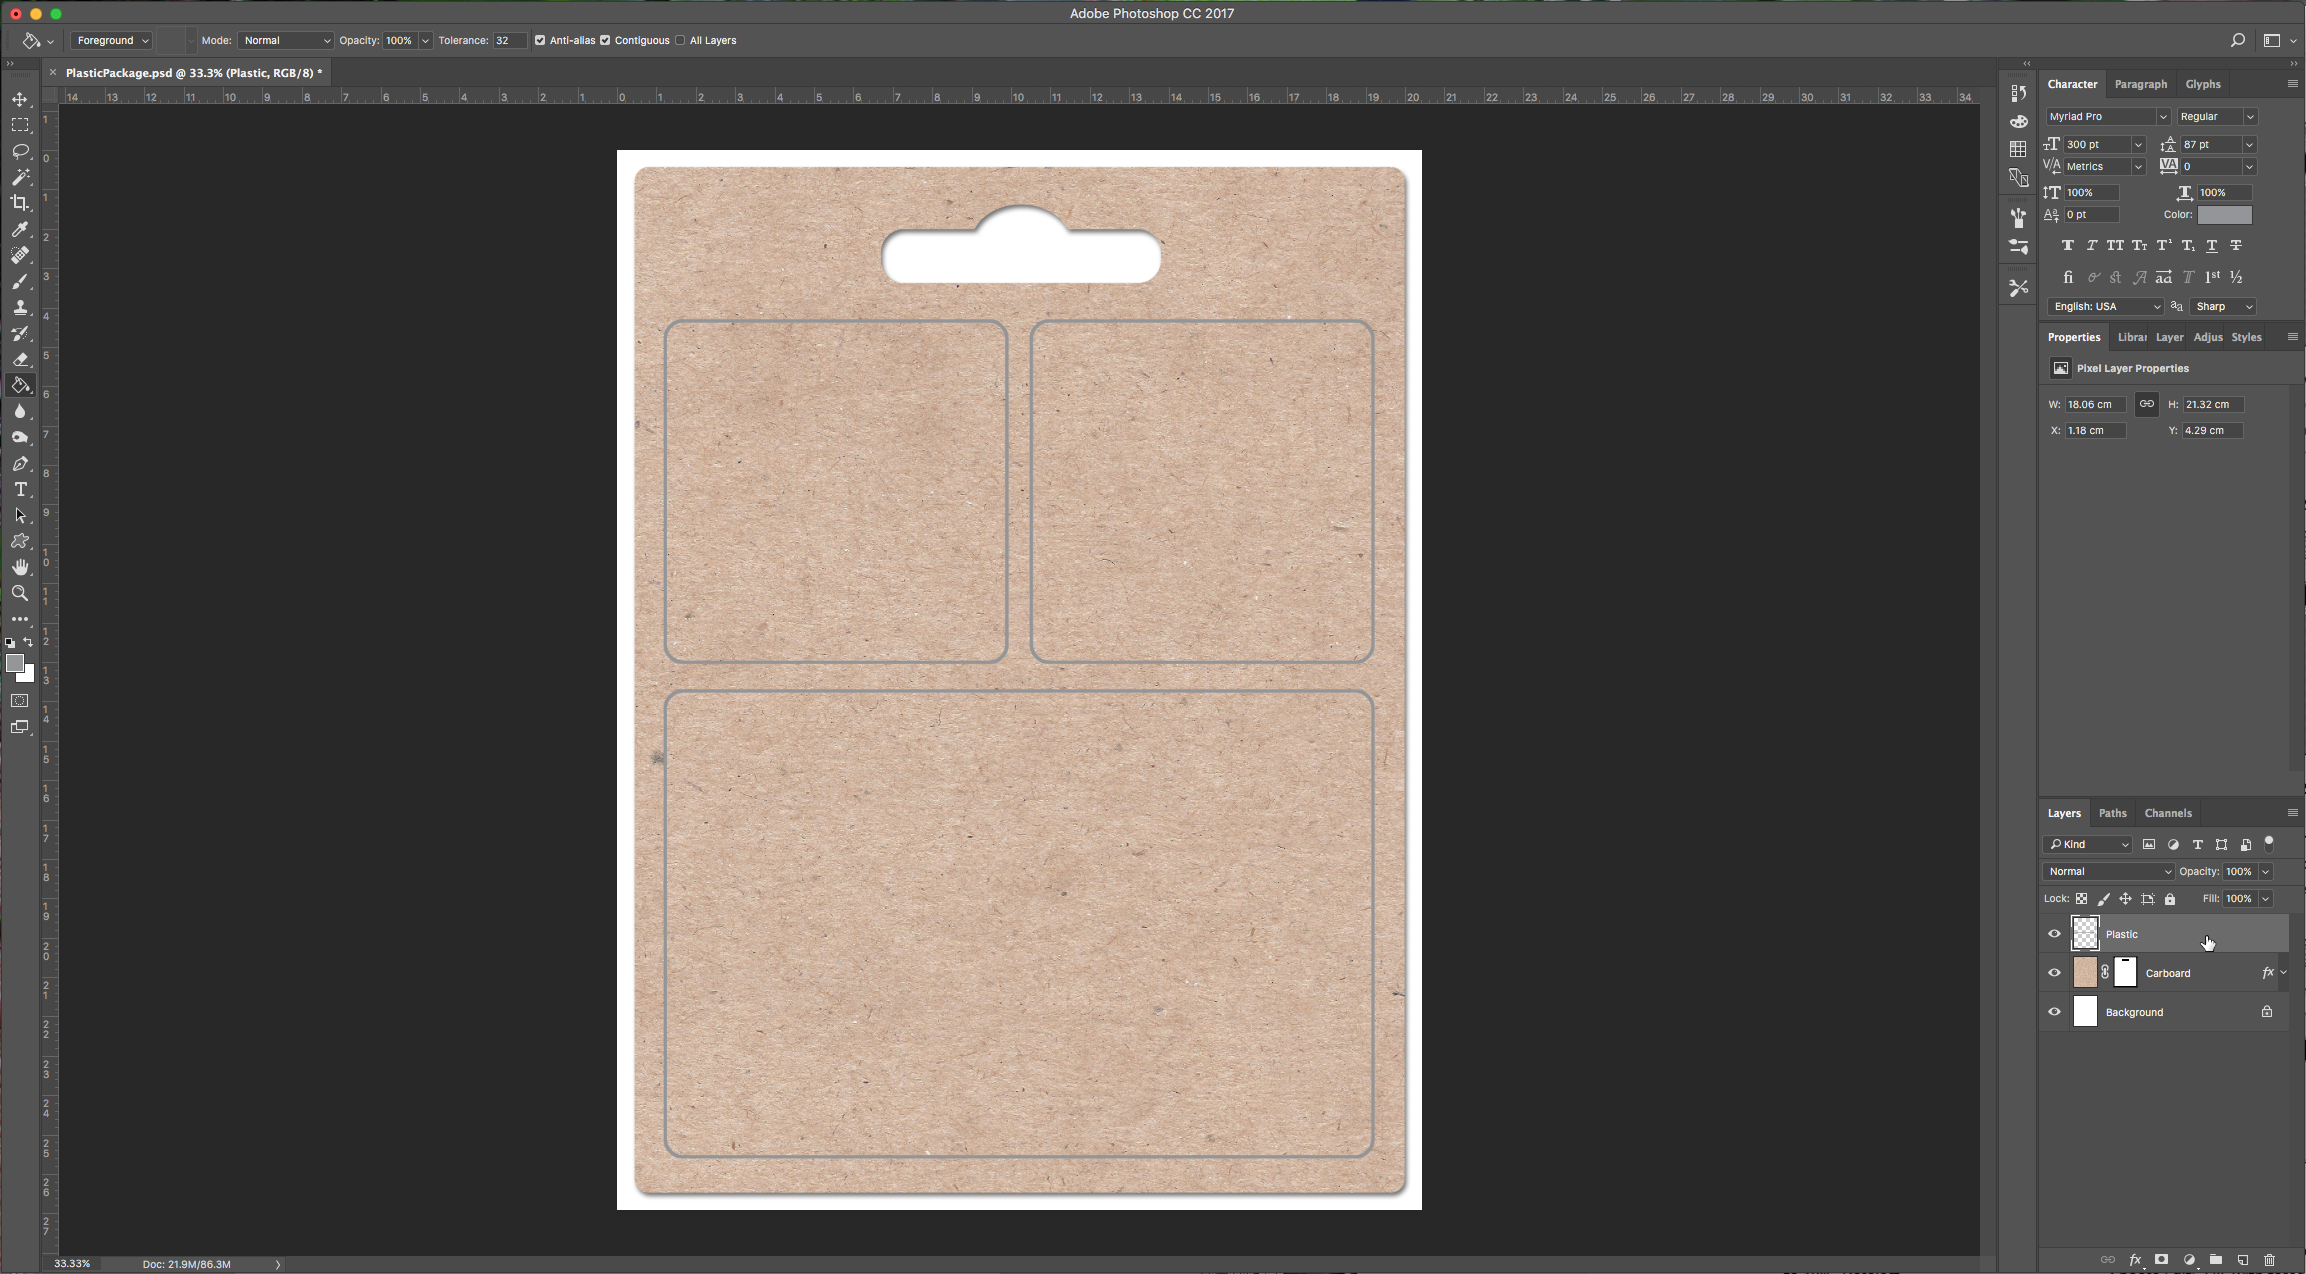
6 – Create a New Layer, name it “Plastic” and set the “Foreground” color to # 939598 (50% Black). Select the “Paint Bucket Tool” (P) and fill your selection with the gray. Go to the “Paths” menu and make “Template copy 2” a selection, and making sure that the actual path is not selected and that you are in your “Plastic” layer press “Delete” and deselect.
7 - Create a New Layer, name it “Plastic Fill” go to the “Paths” menu and make “Template copy 2” a selection again. Fill it with white and set the “opacity” to 10 %. Deselect.
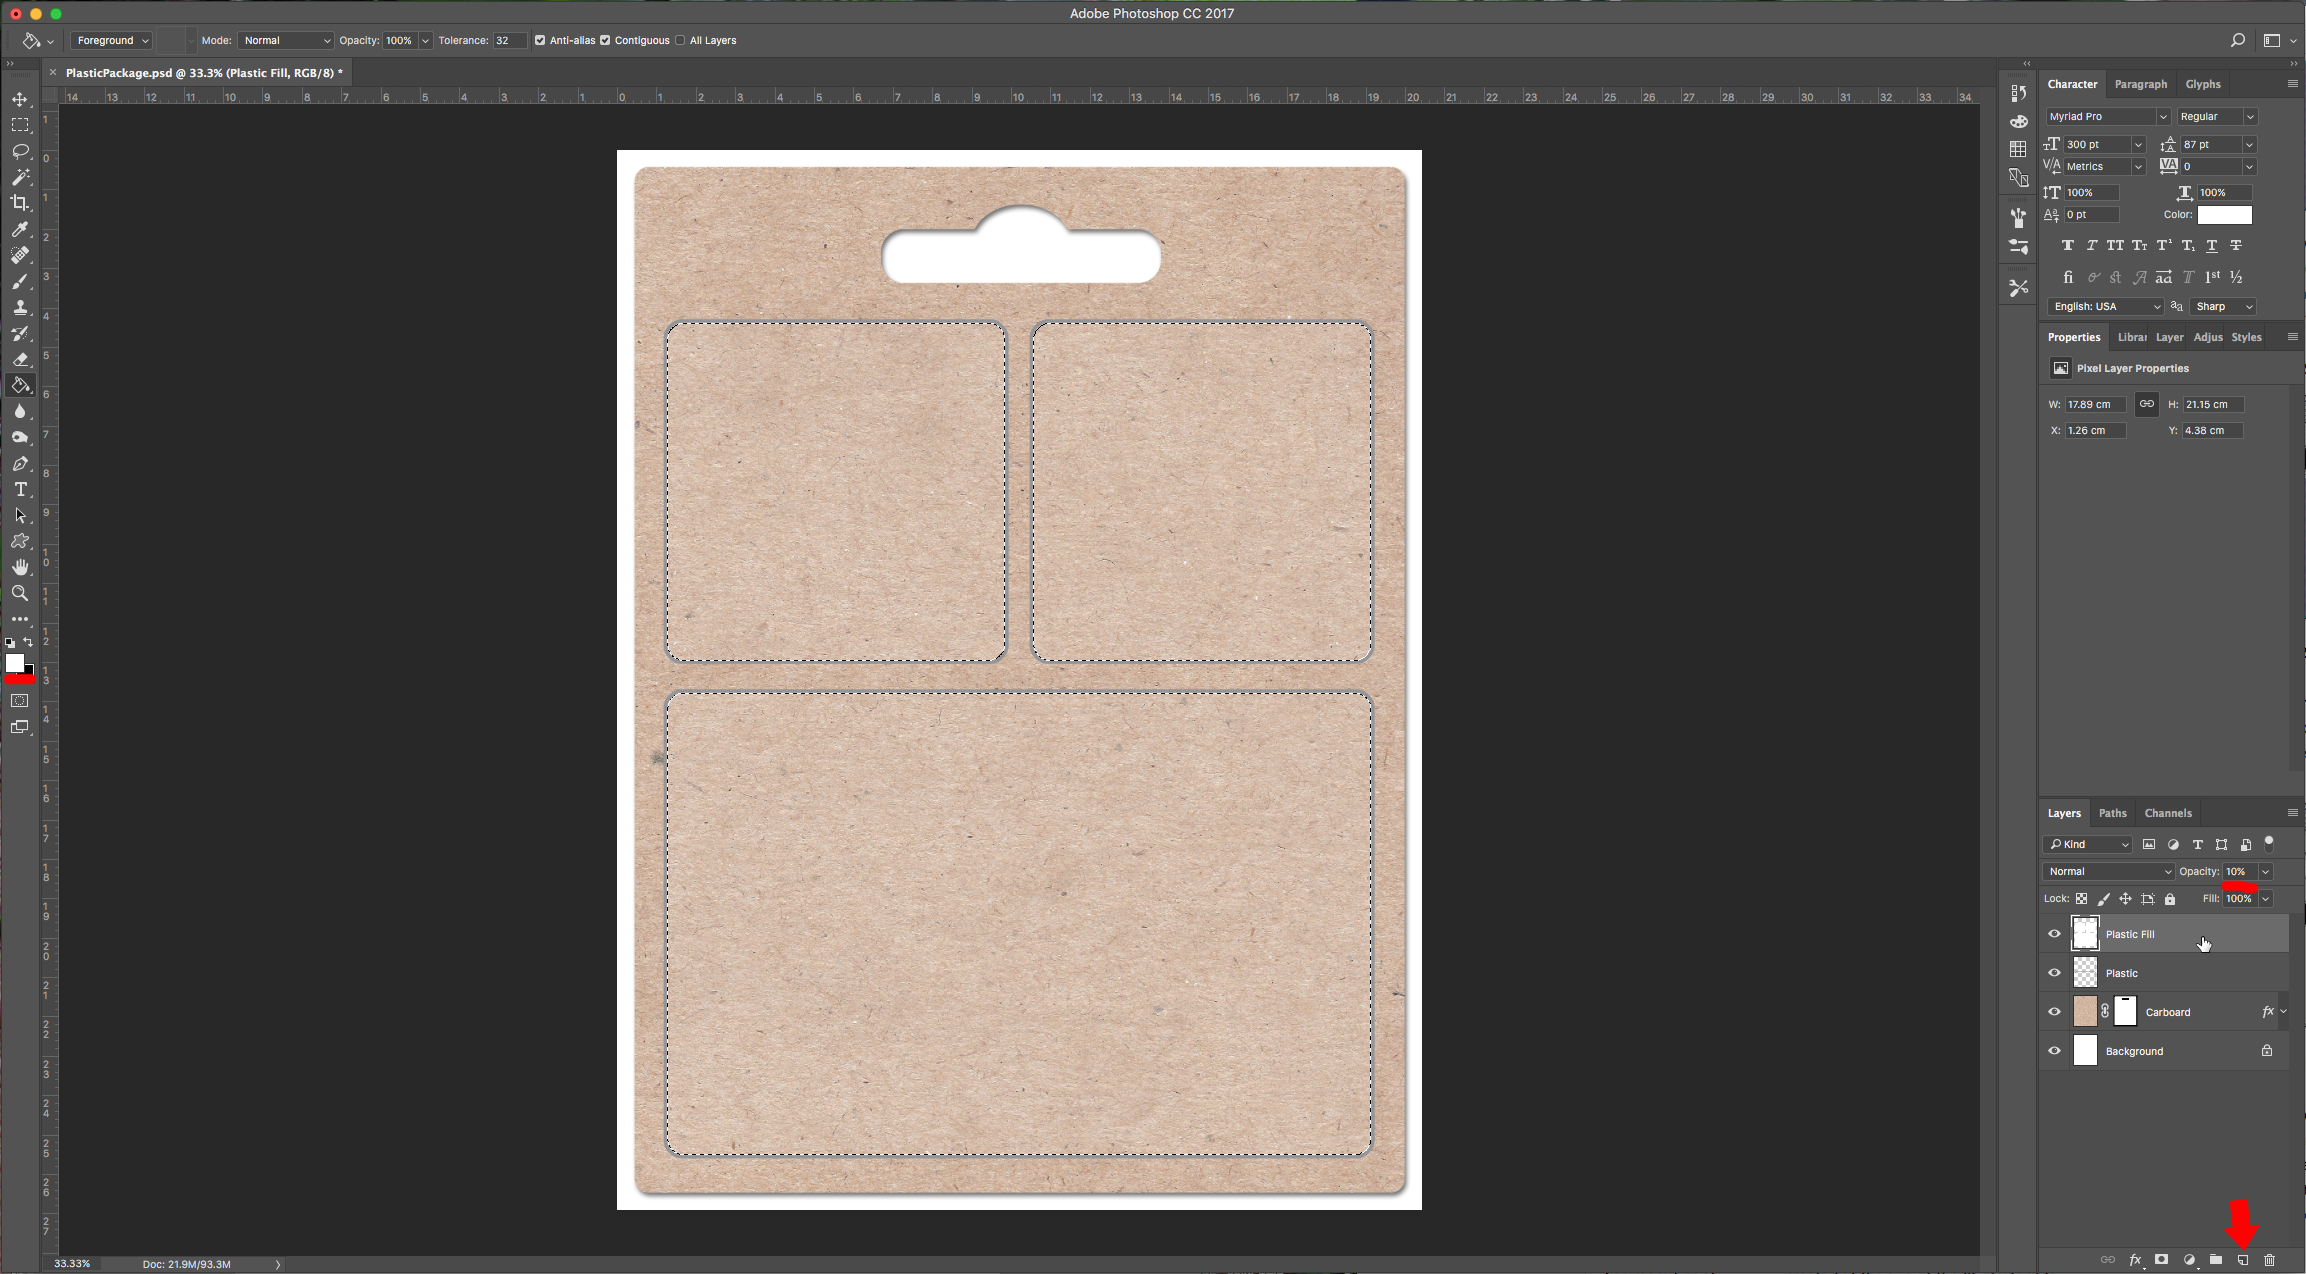
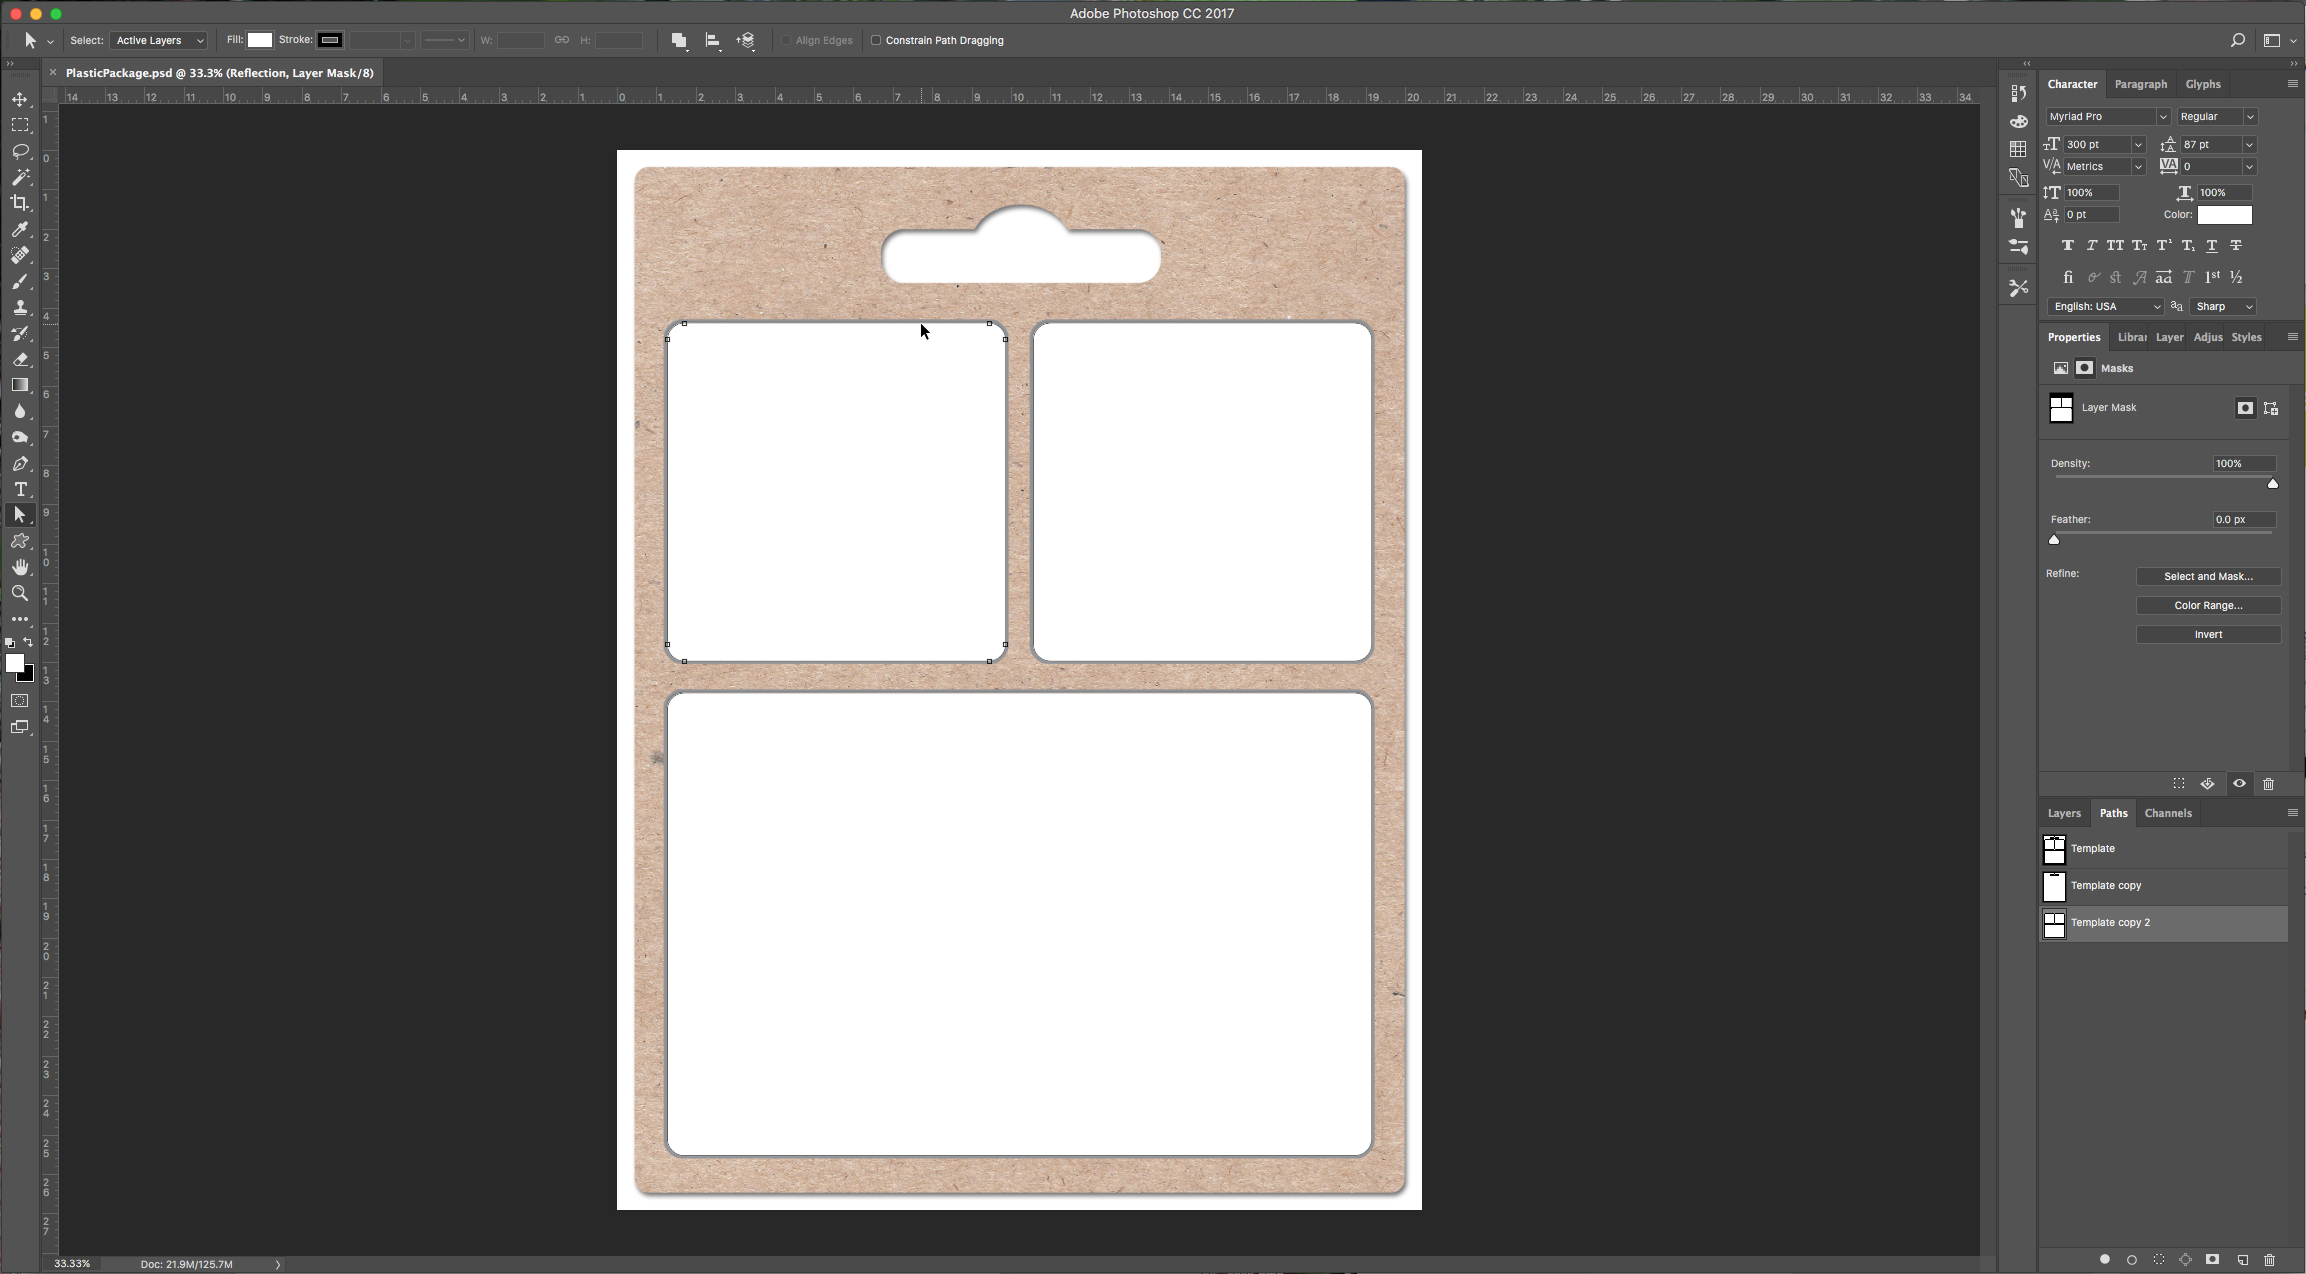
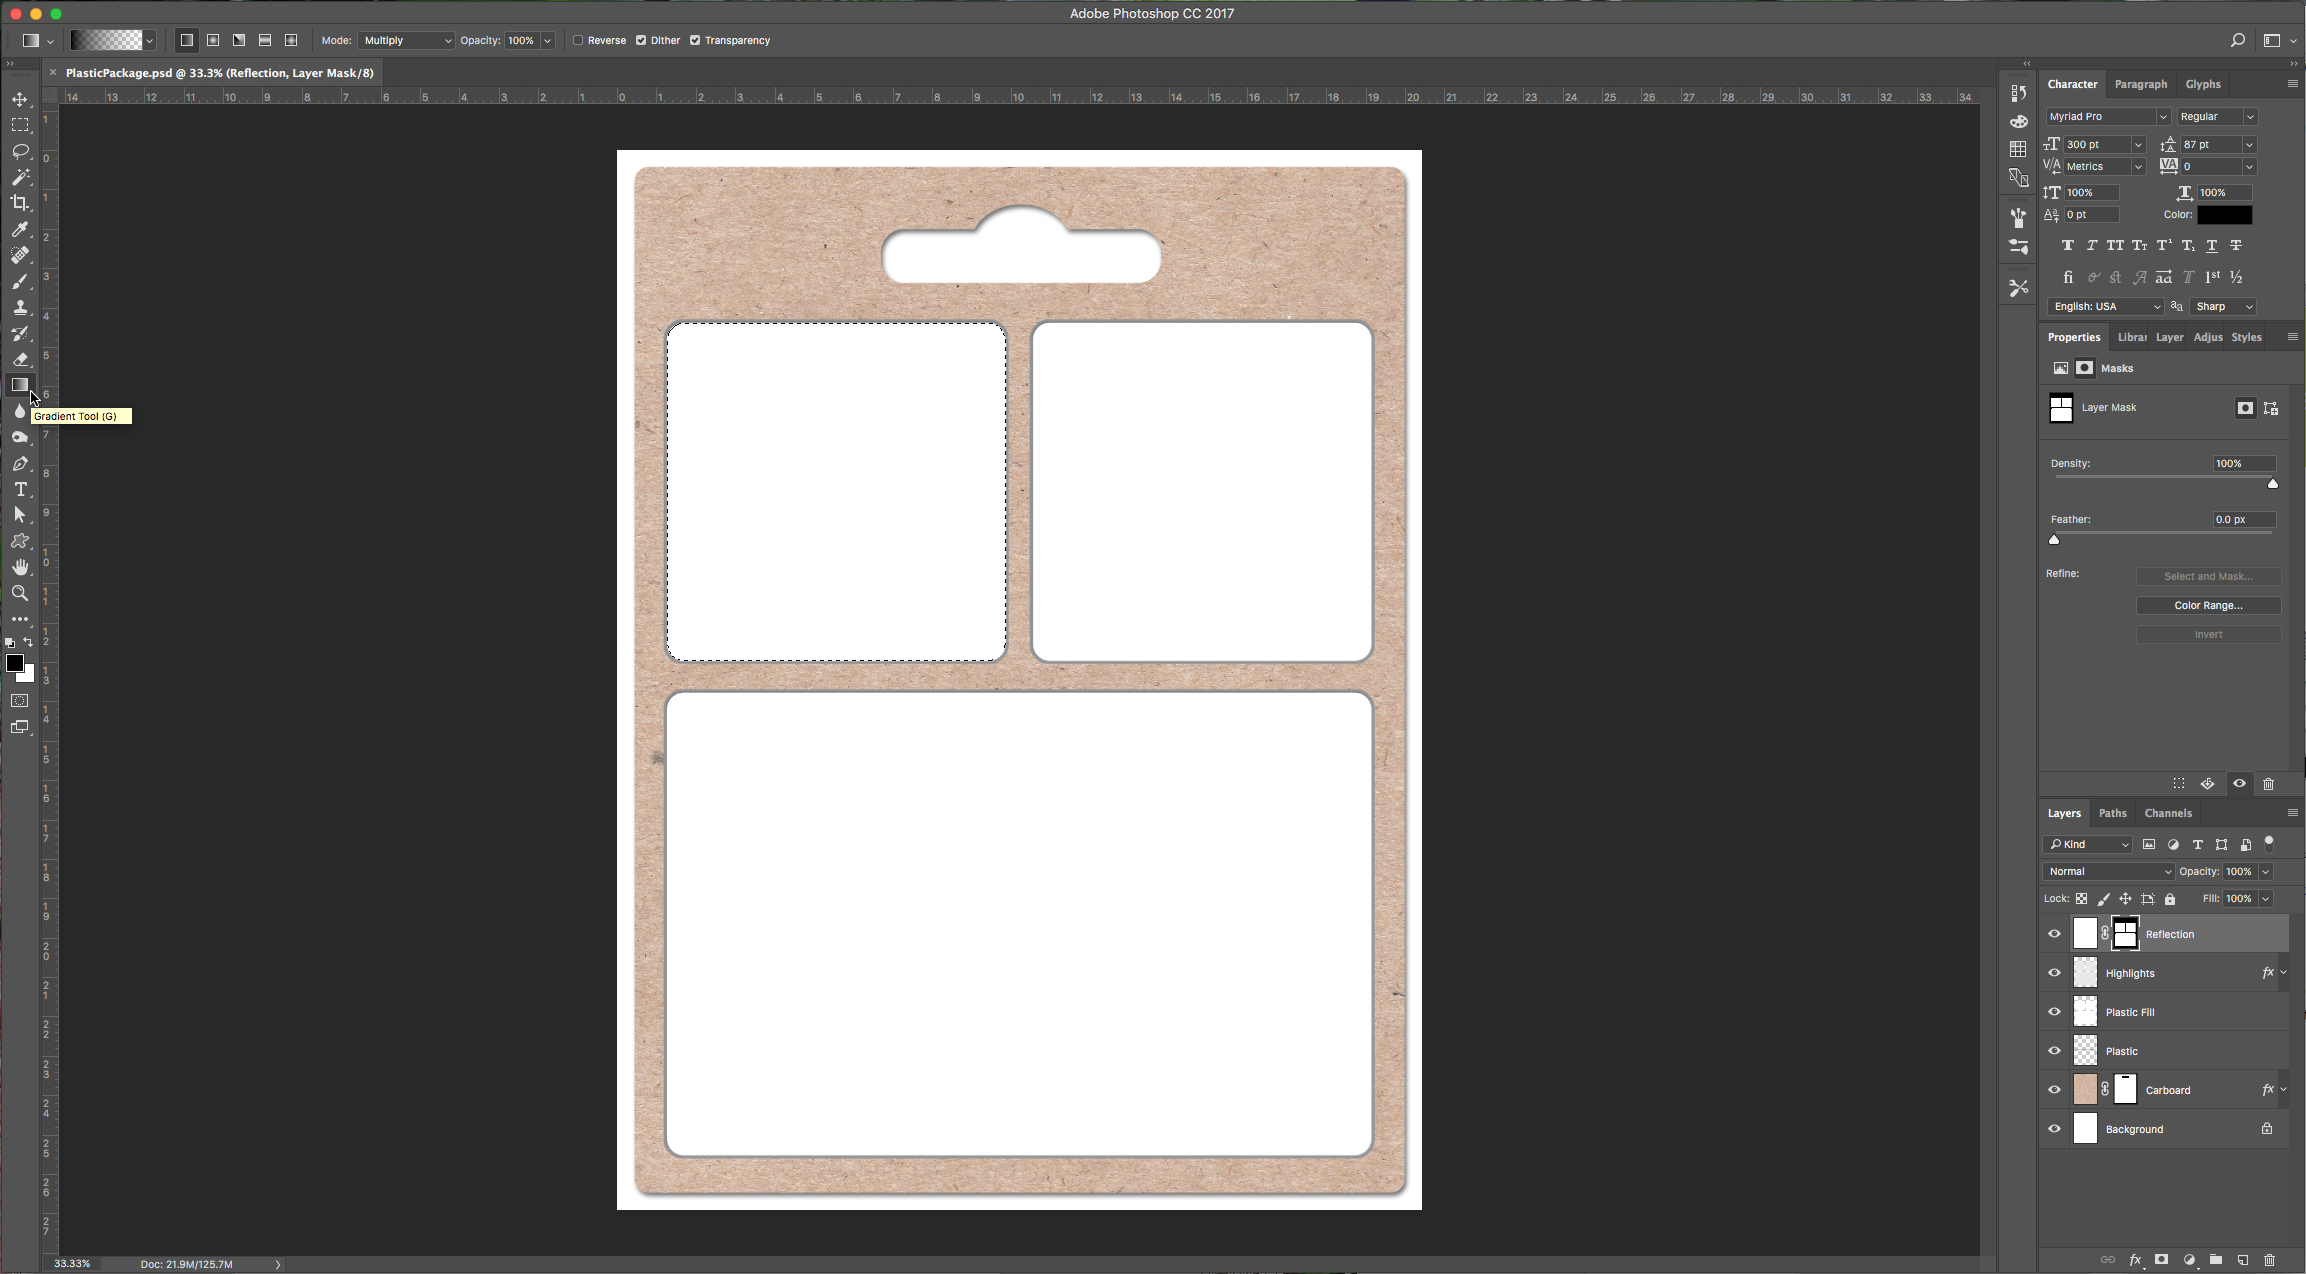
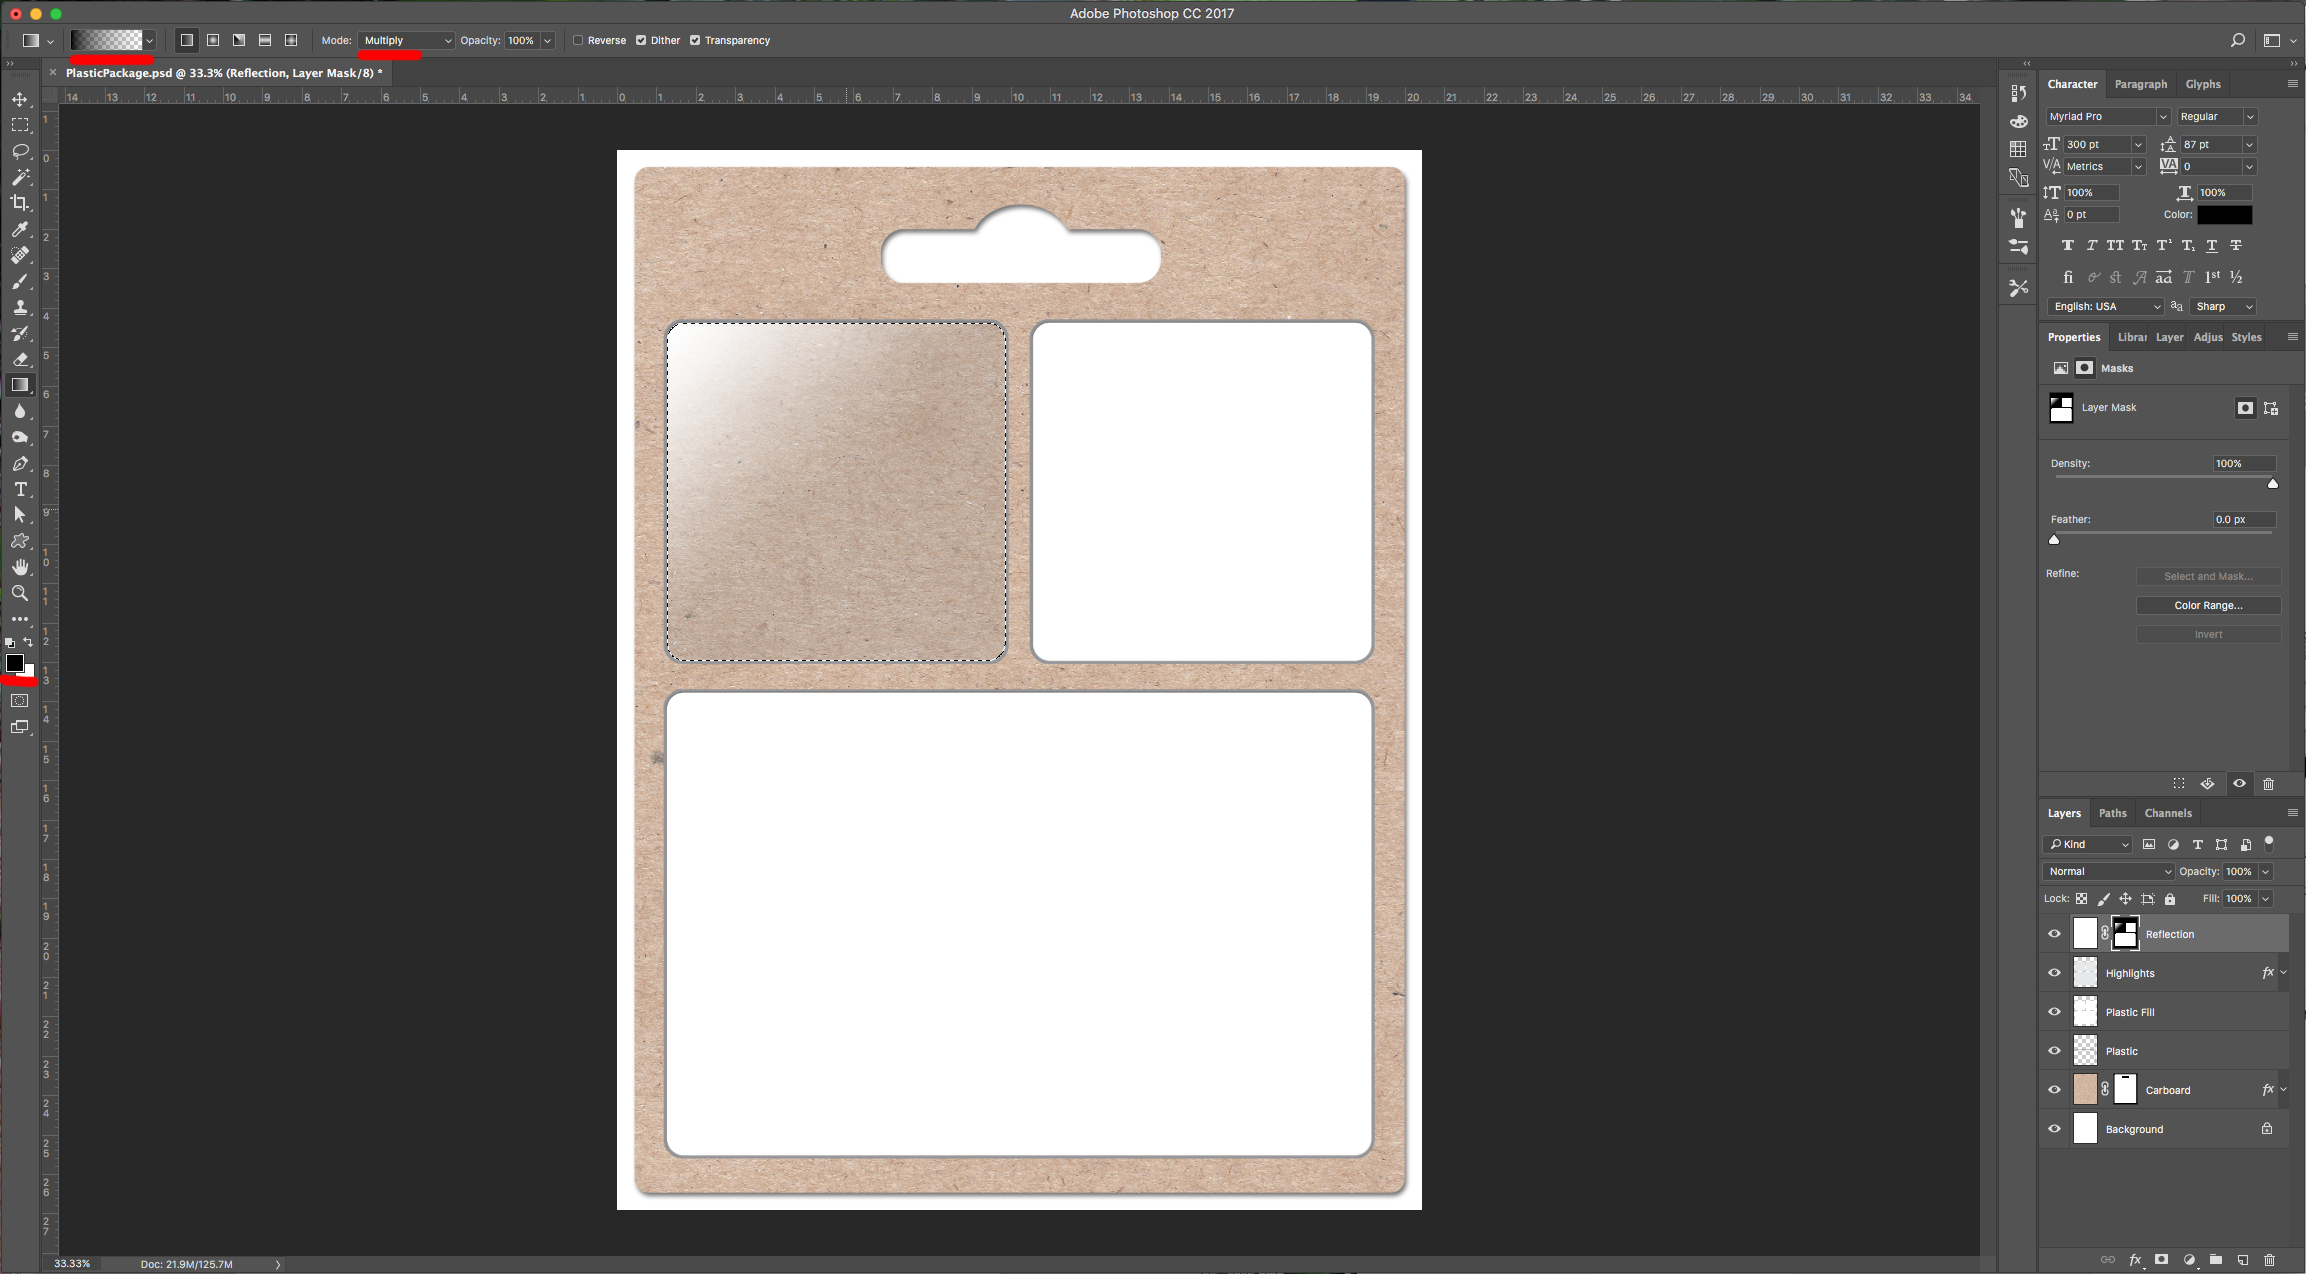
8 – Create another layer and fill it with white. Make “Template copy 2” a selection and click on the “Layer Mask” button at the bottom of the “Layers” menu. Use the “Direct Selection Tool” (A) and select the path of one of the plastic windows, make it a selection. Go to the “Gradient Tool” (G) and select “Linear”, make black your “Foreground” color, choose “Foreground to Transparent” and set the mode to “Multiply” then draw from the center to the top left corner. Repeat this with each plastic window.
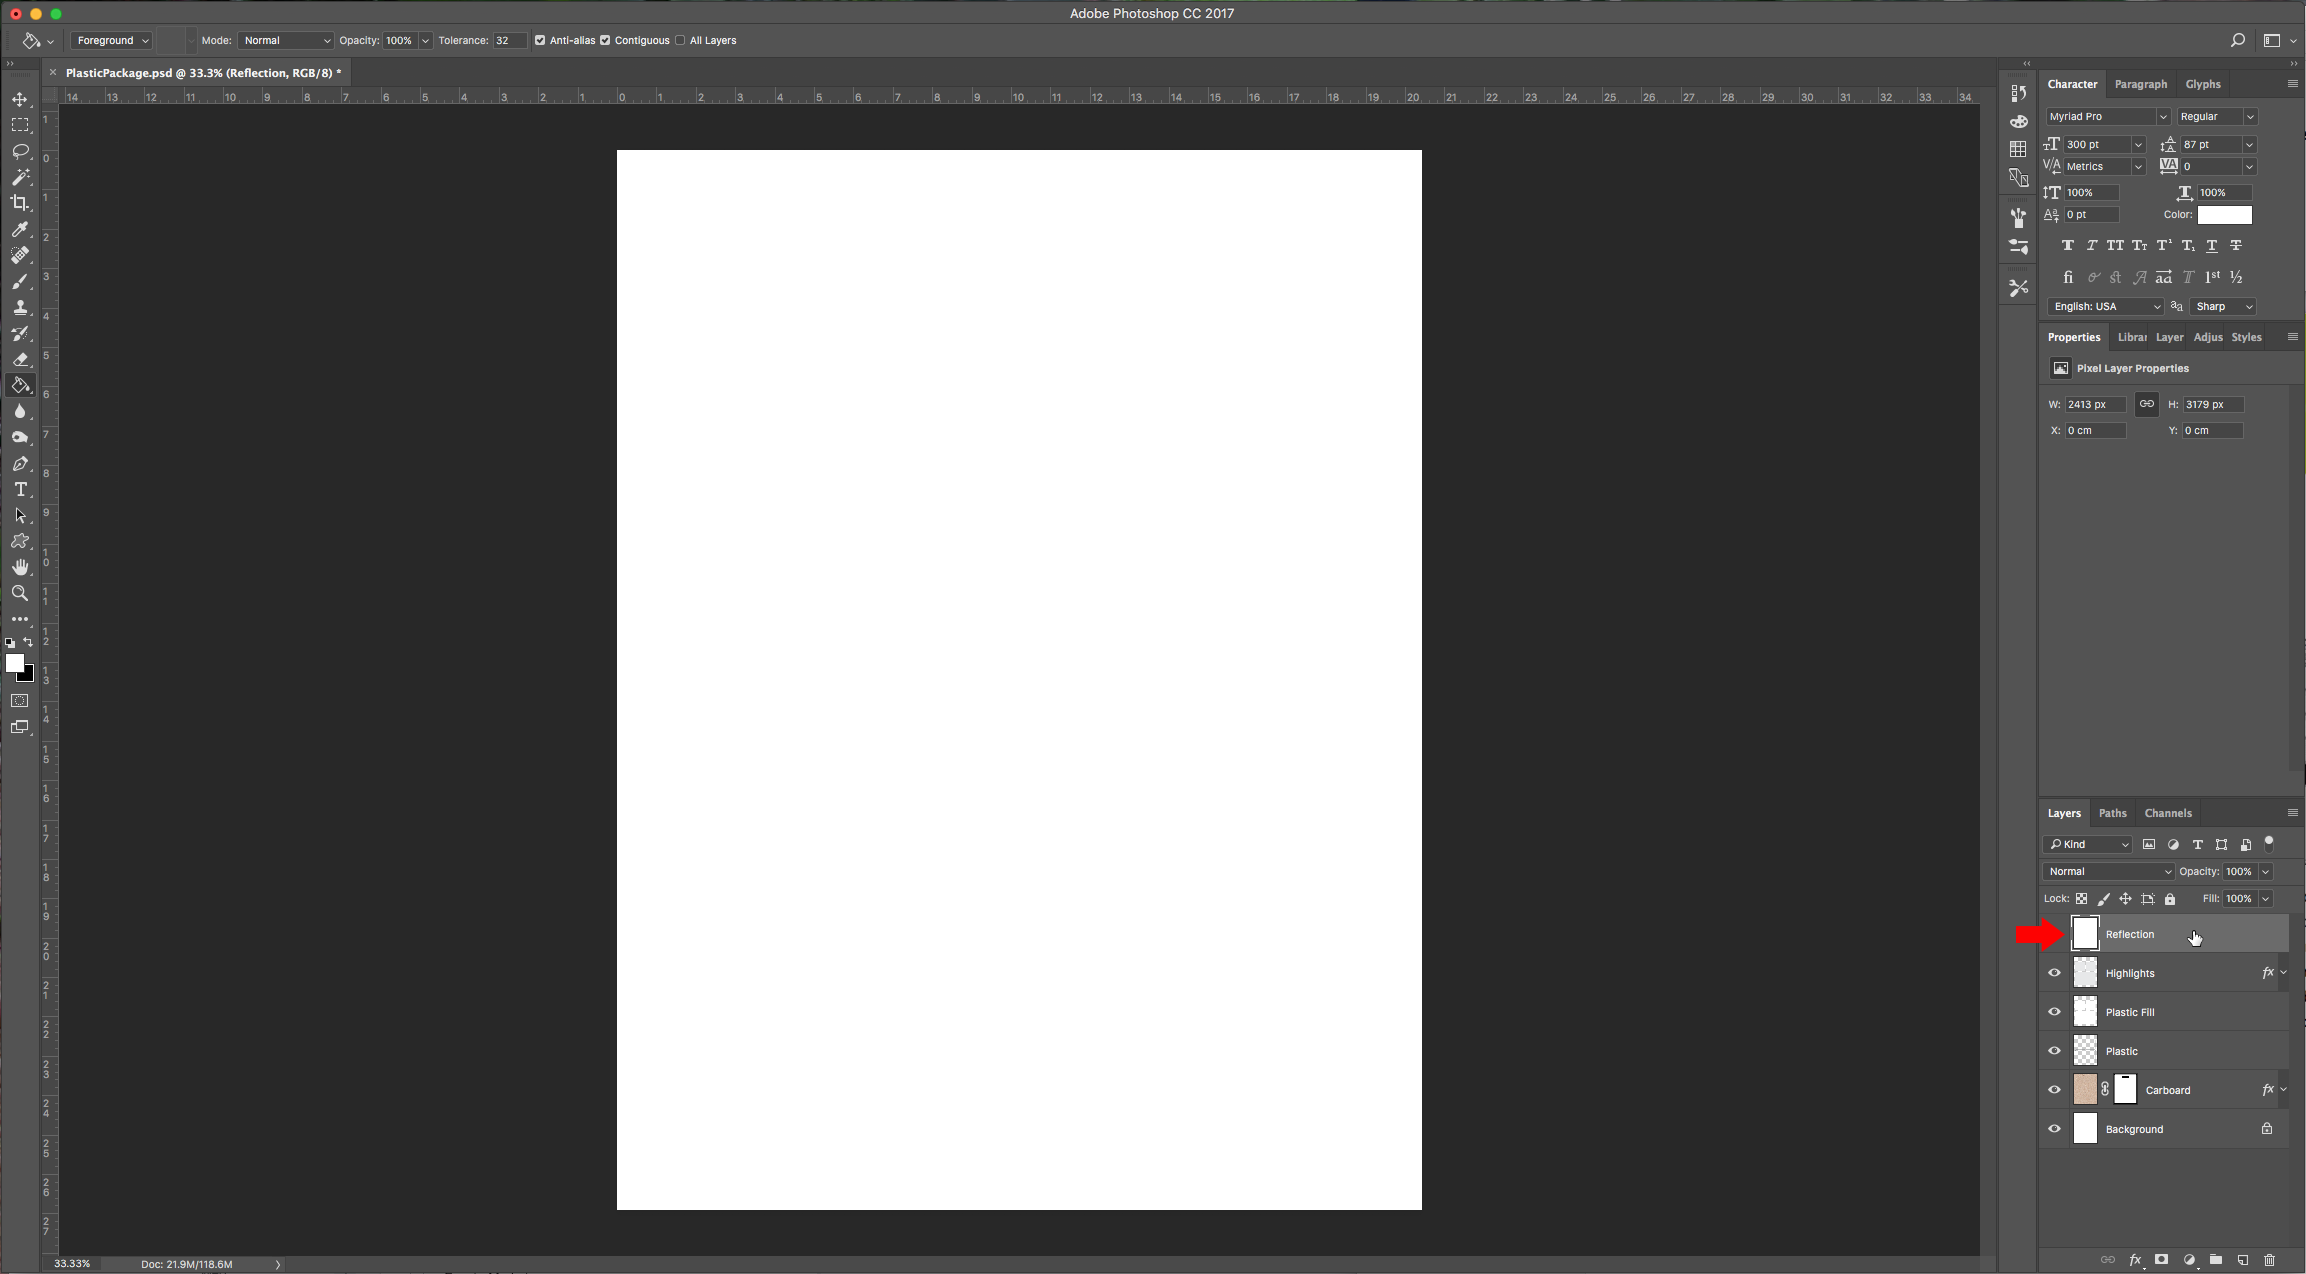
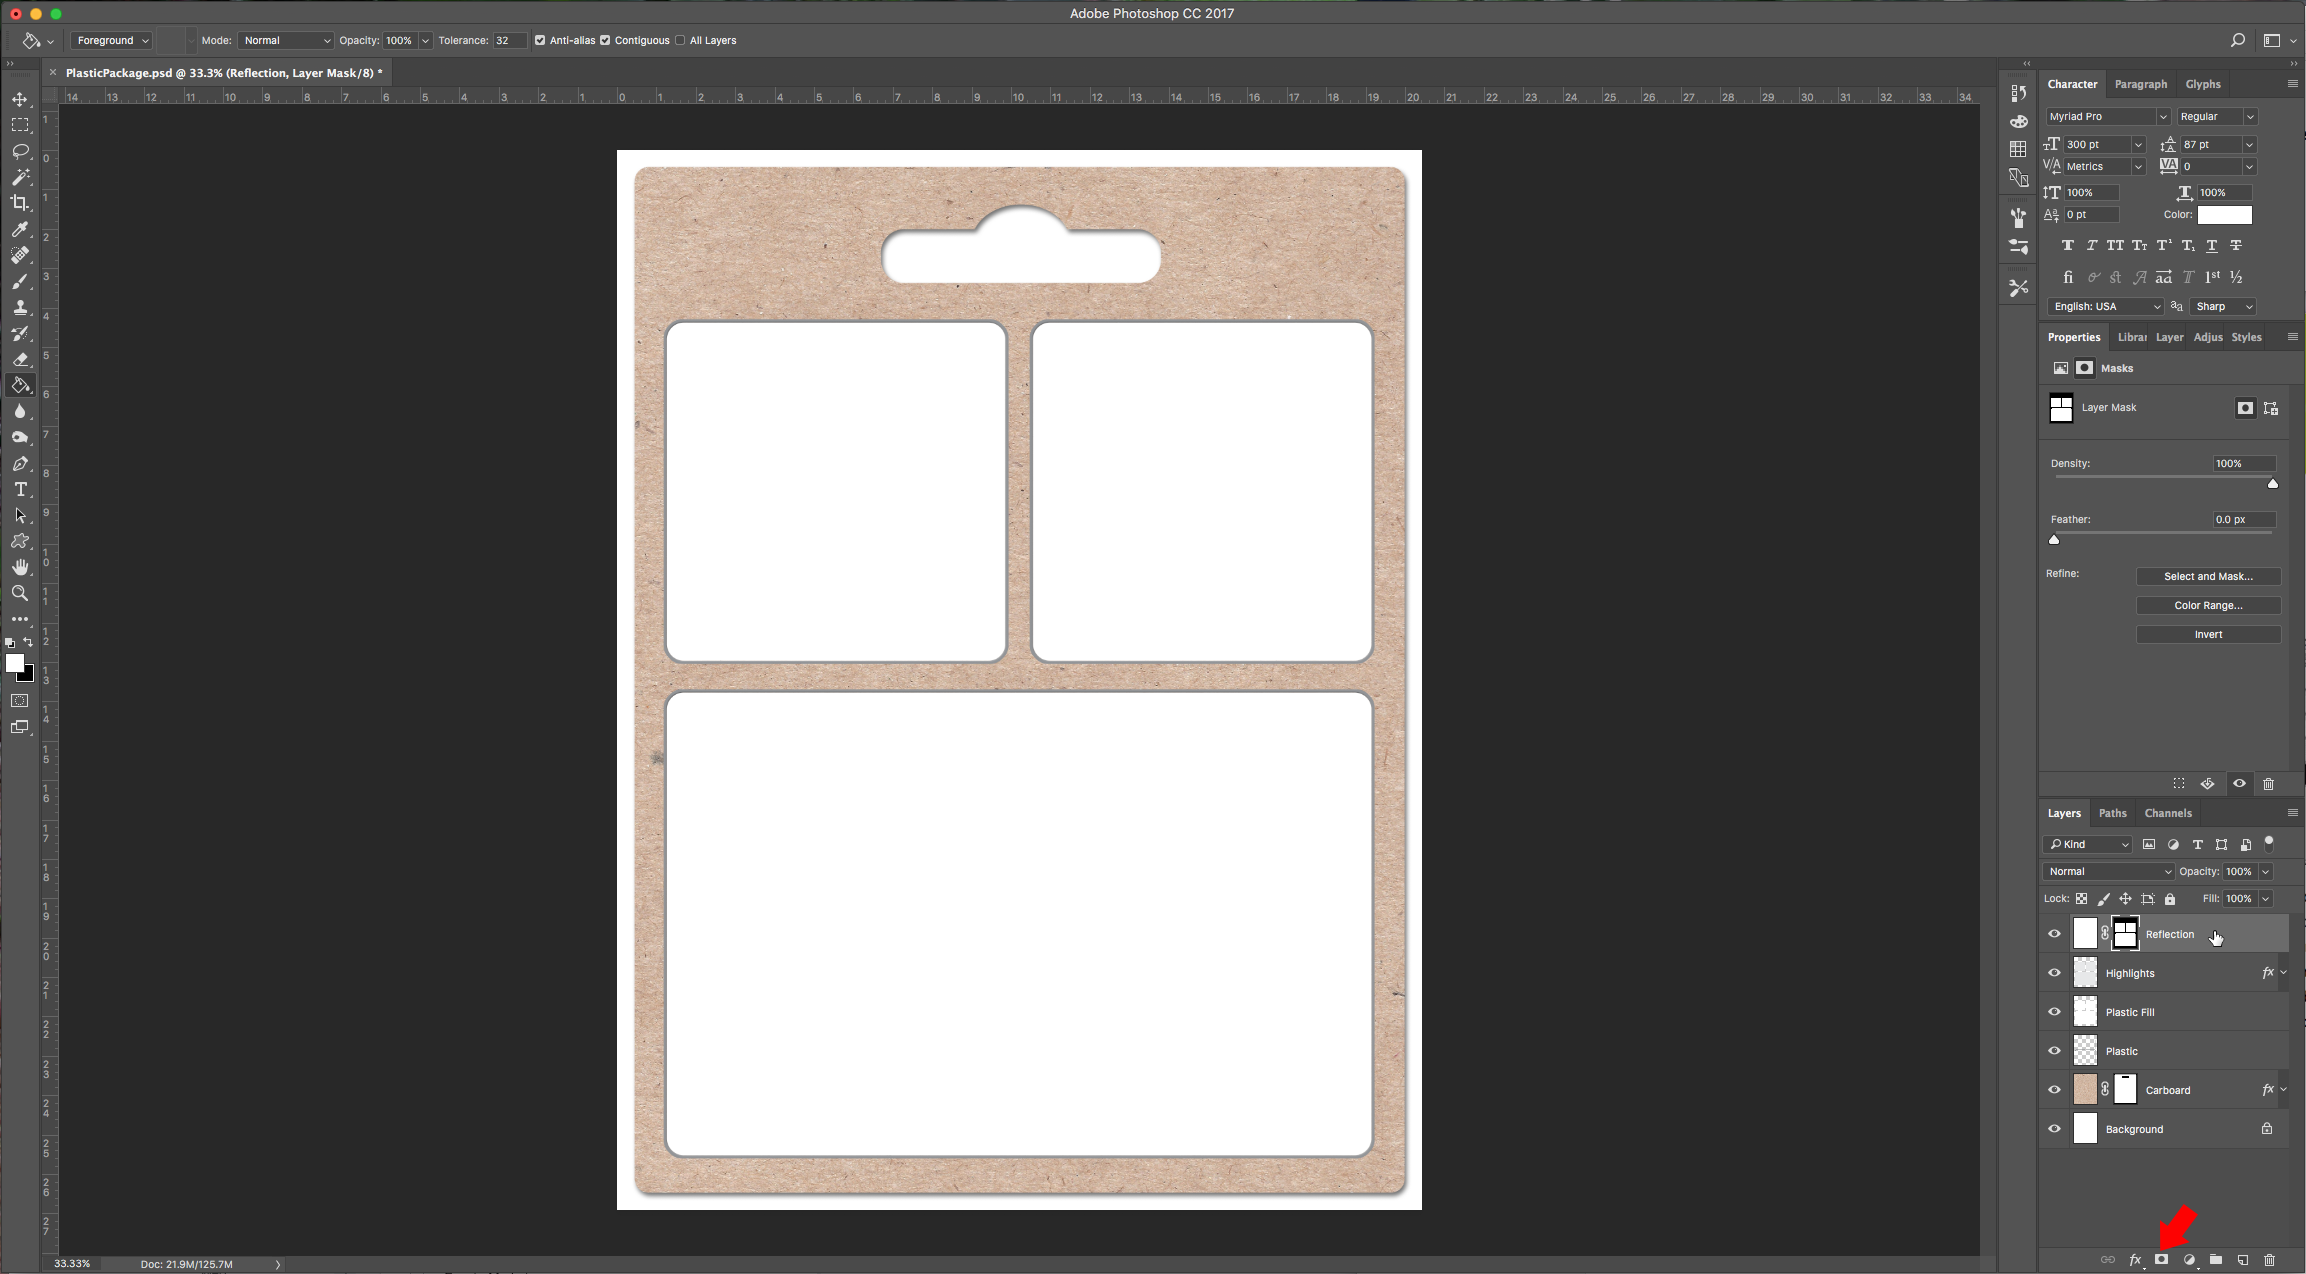
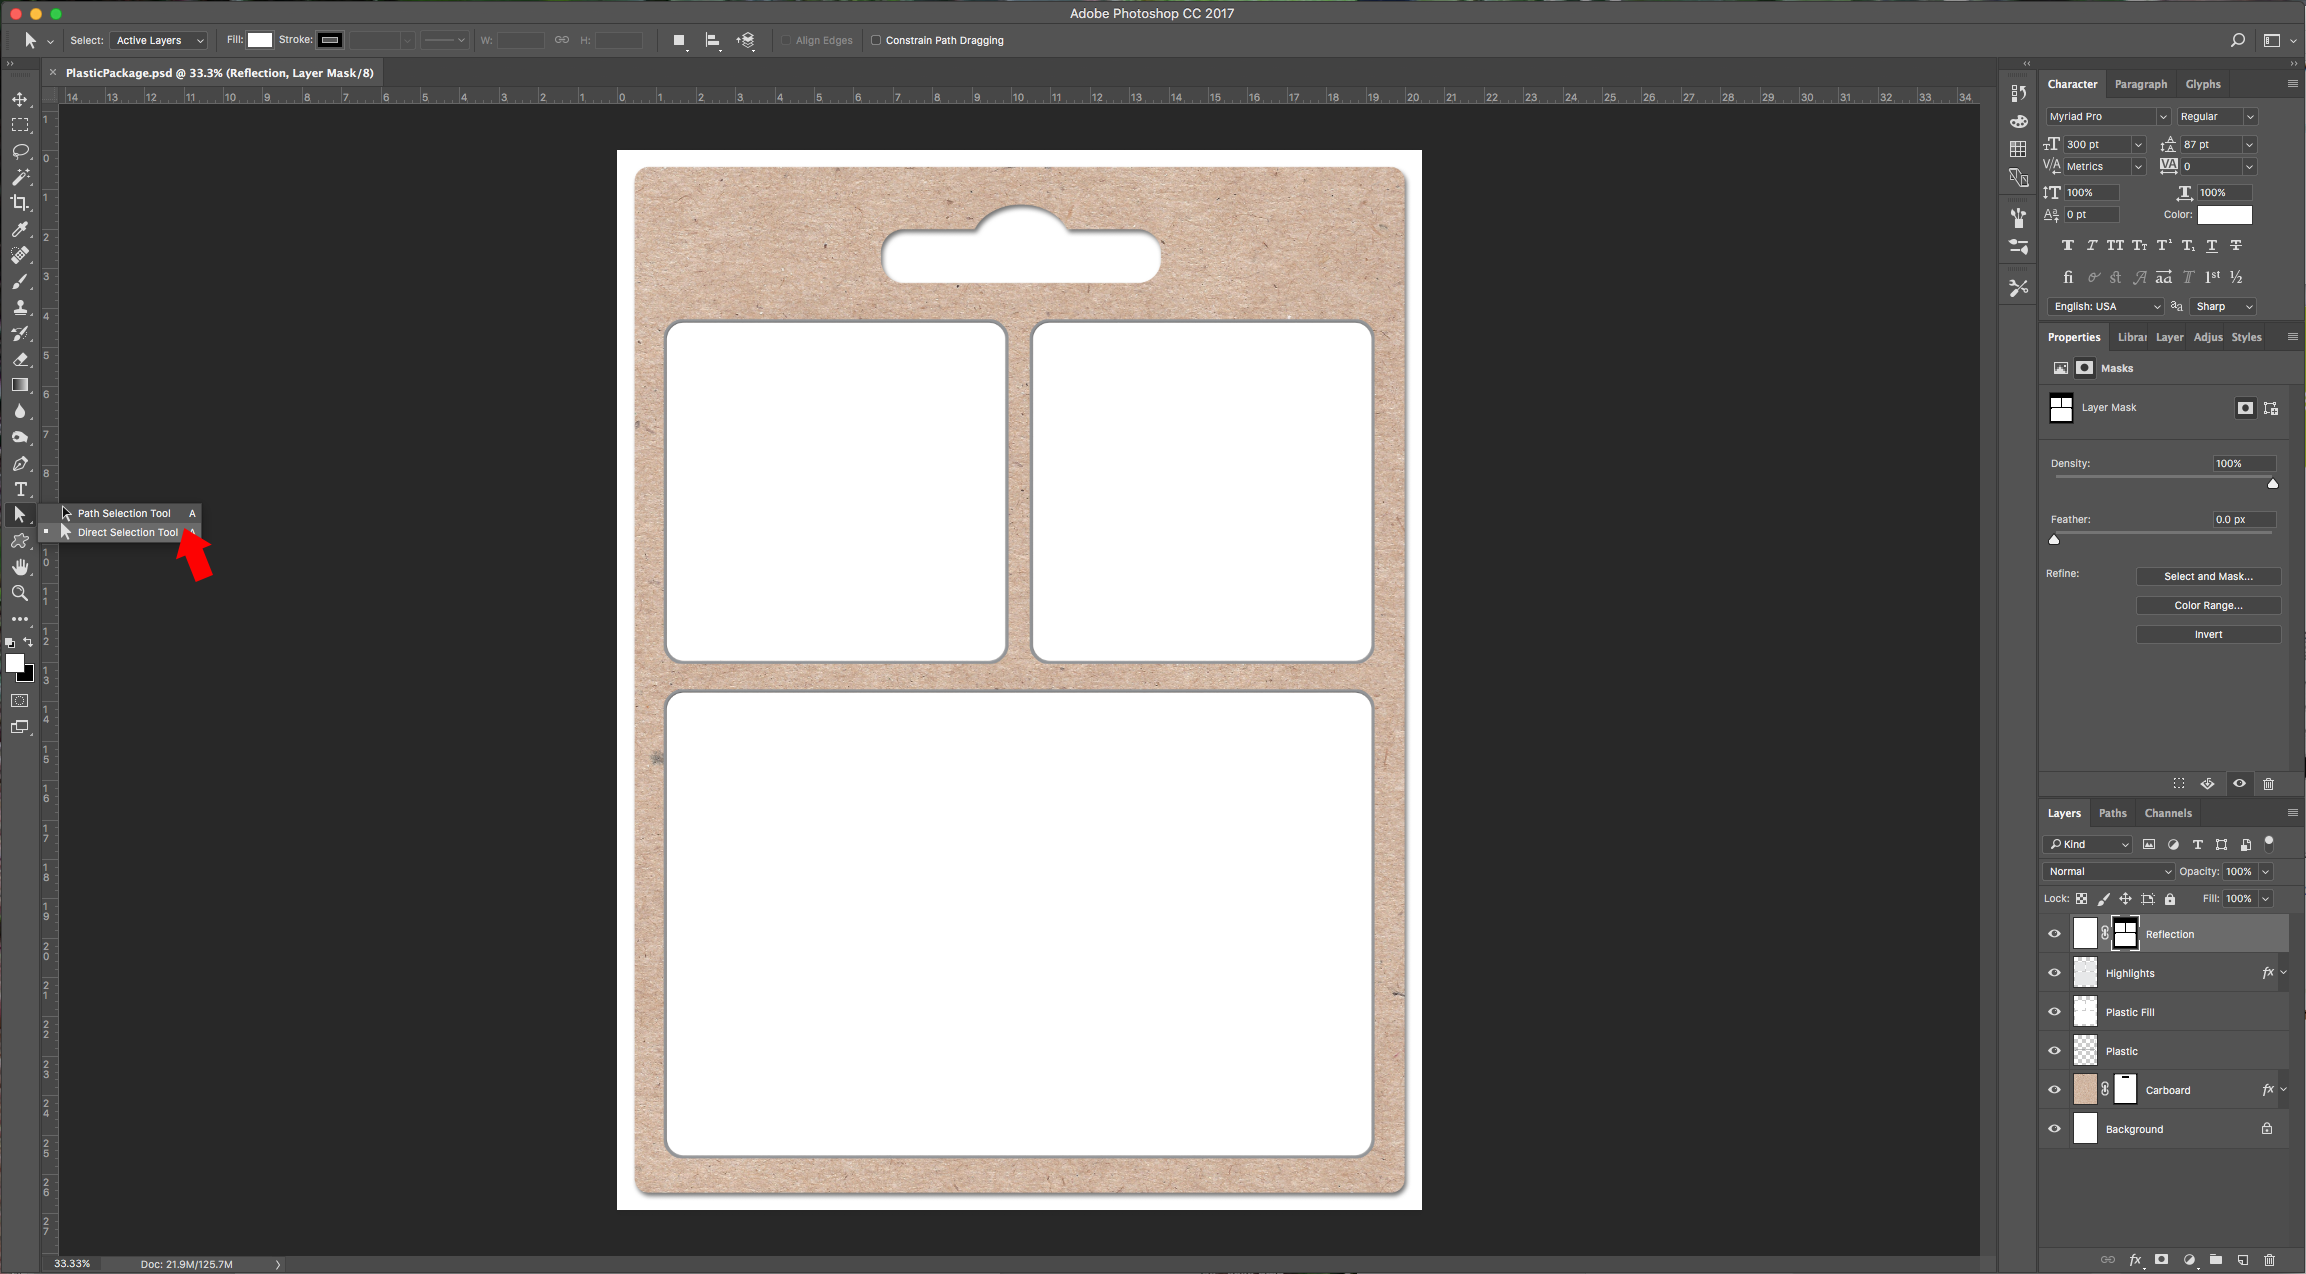
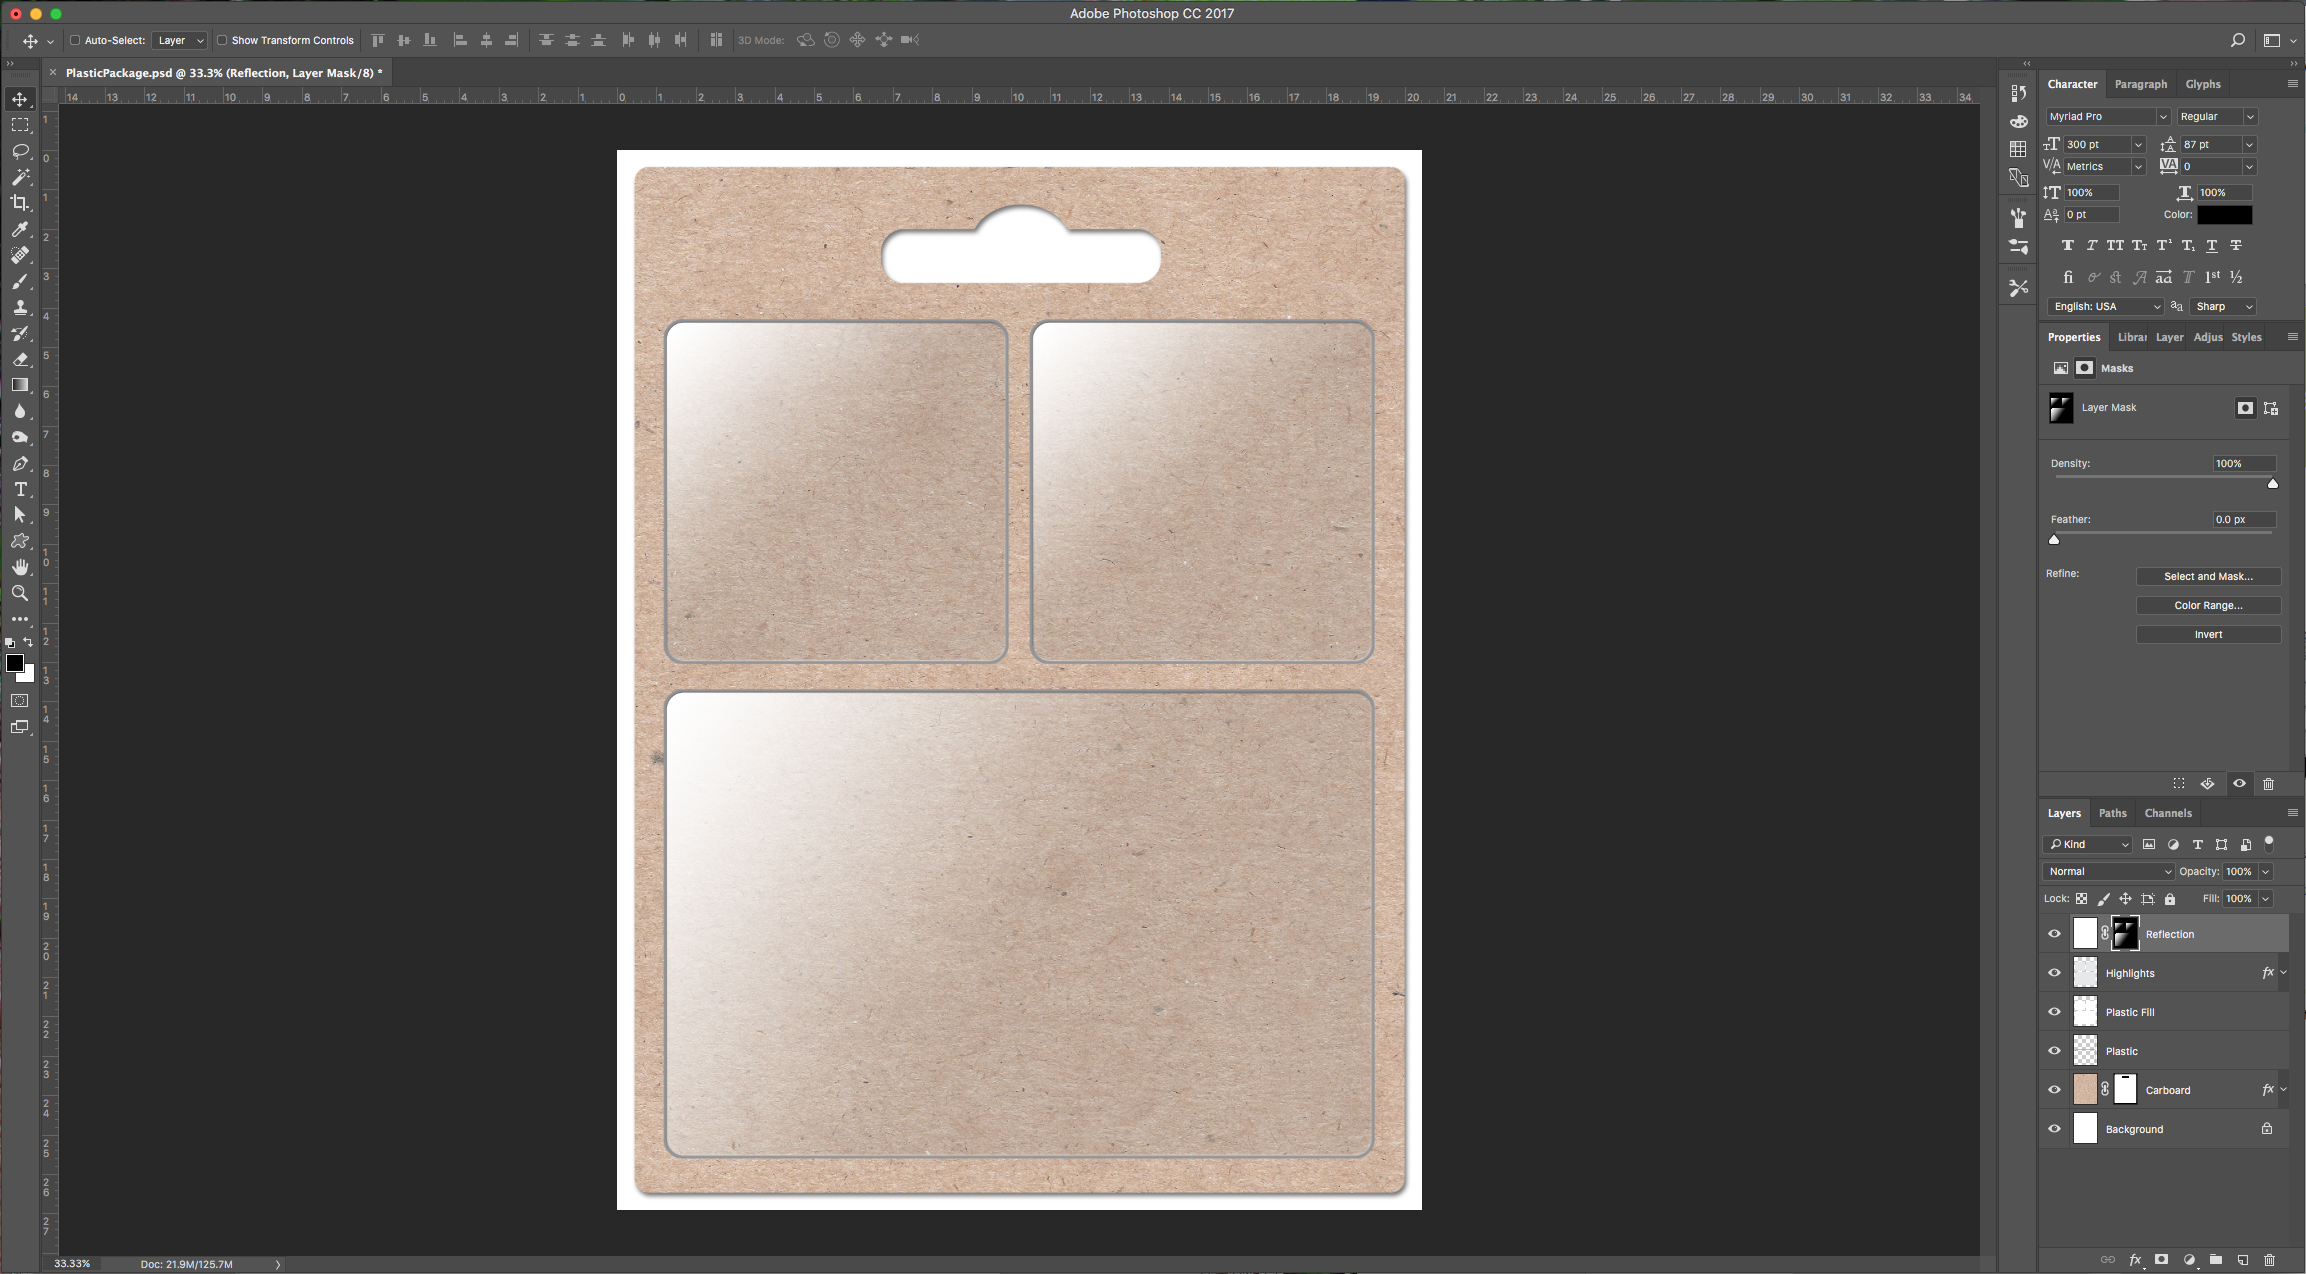
9 – Change the “Gradient Options” mode to “Normal” and the “Foreground” color to white. And repeat the process from the last step but apply the gradient from the bottom right corner to the center.
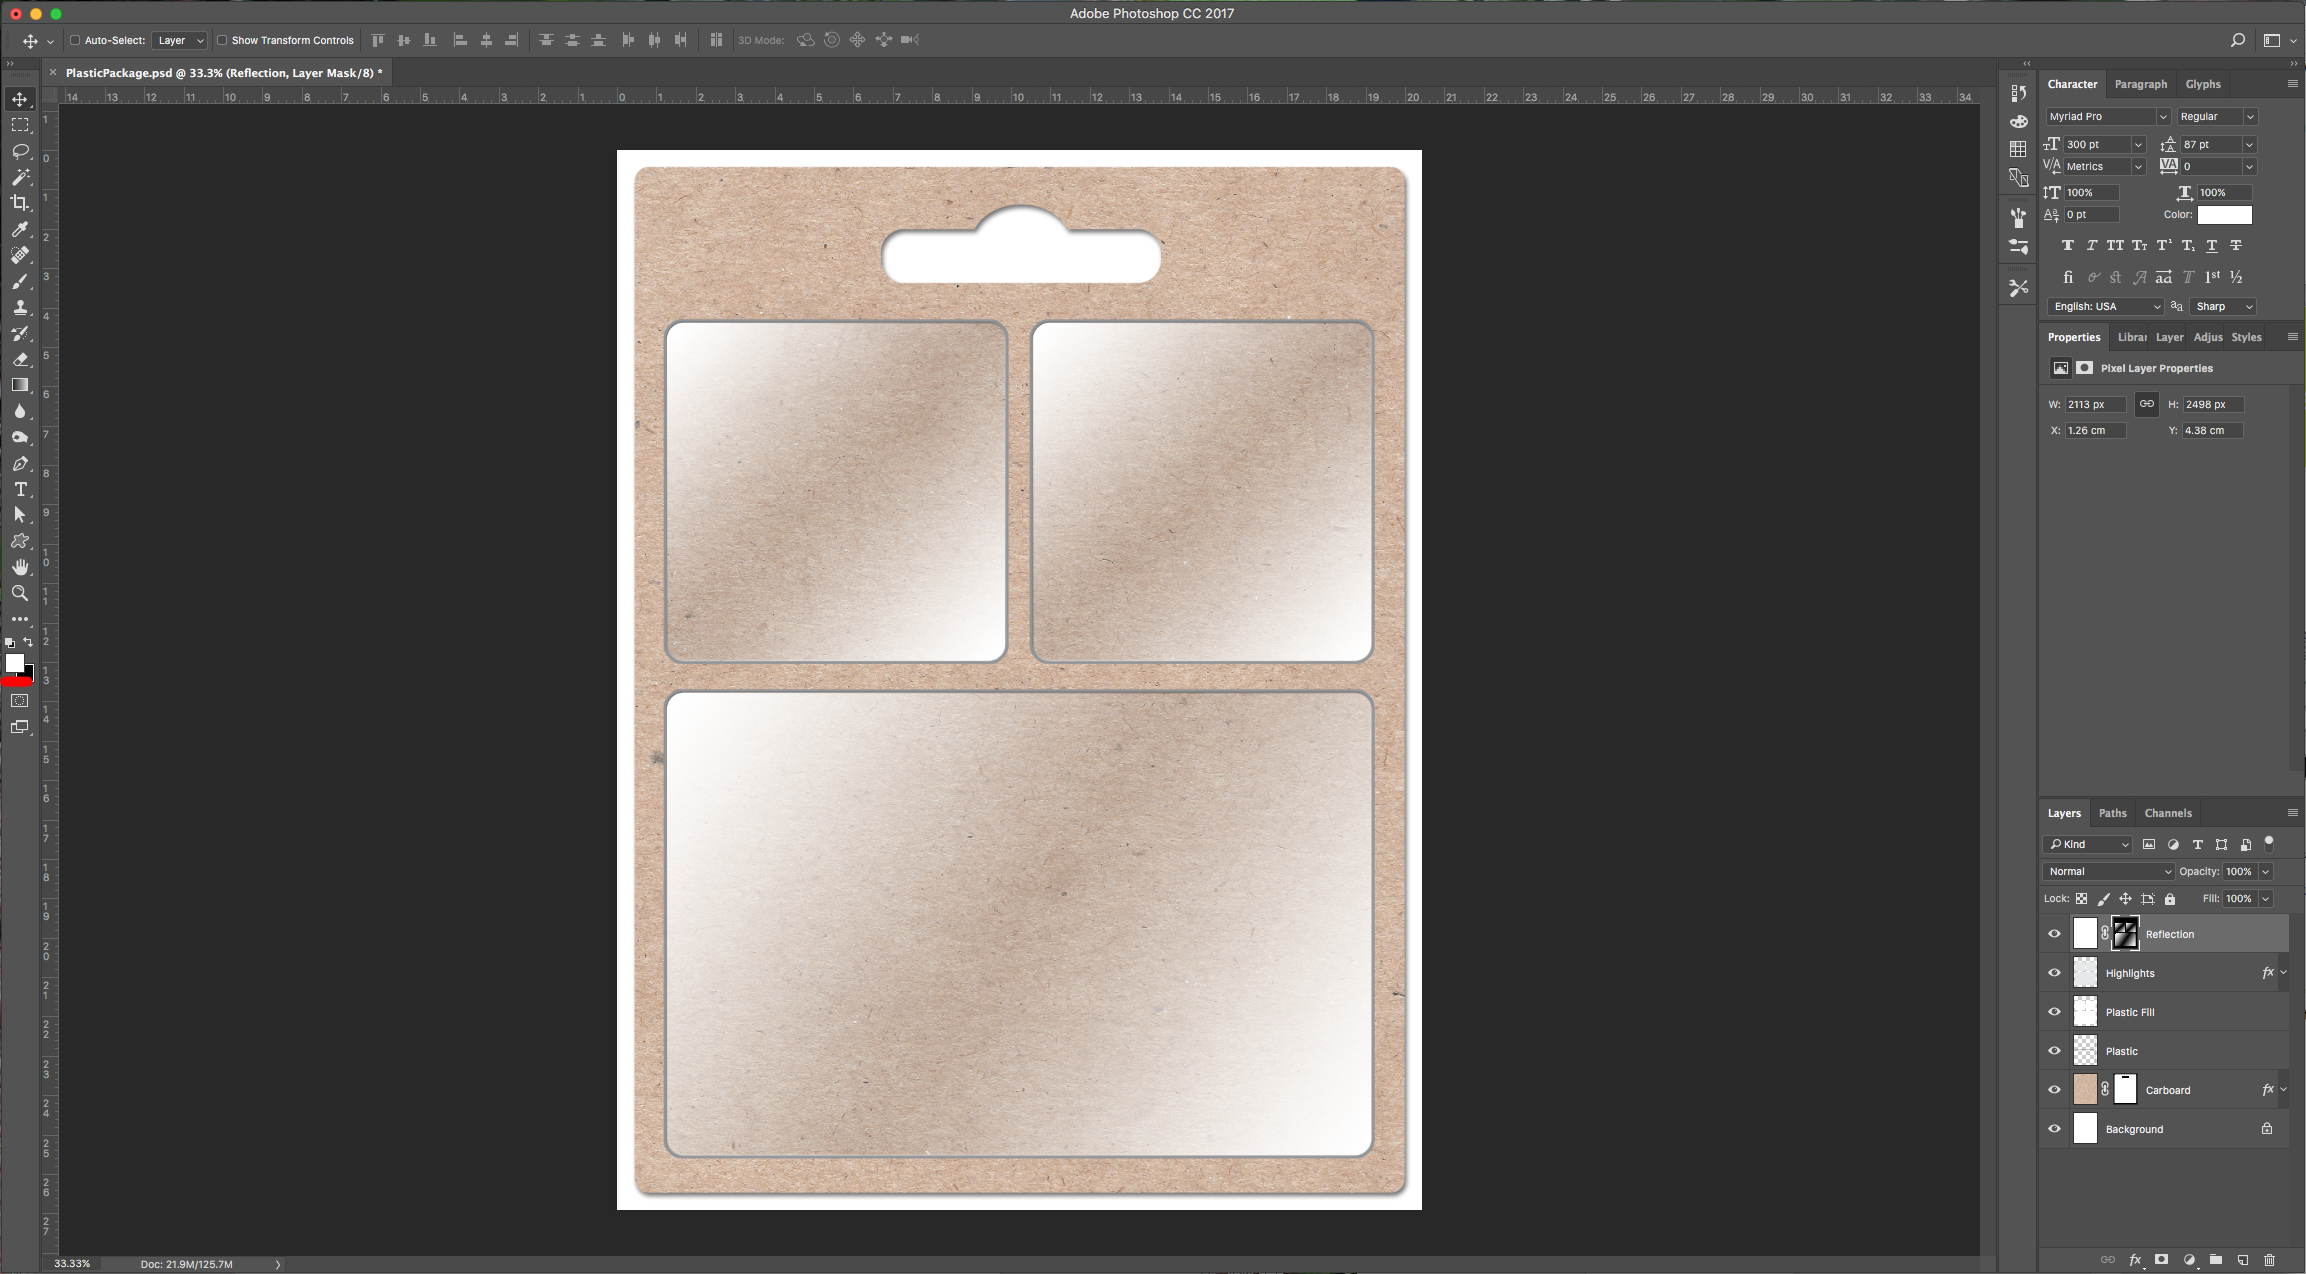
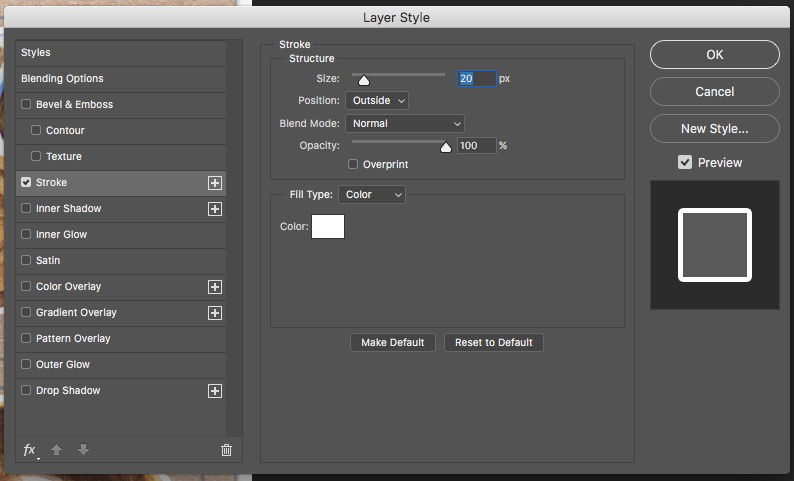
10 – Open the images you wish to “package” and bring them into your file (we chose many from the Watercolor Bakery Set). Make them the size you like and position them where you wish them to be in the package. Then double-click on one of them and apply the following “Blending Options”:
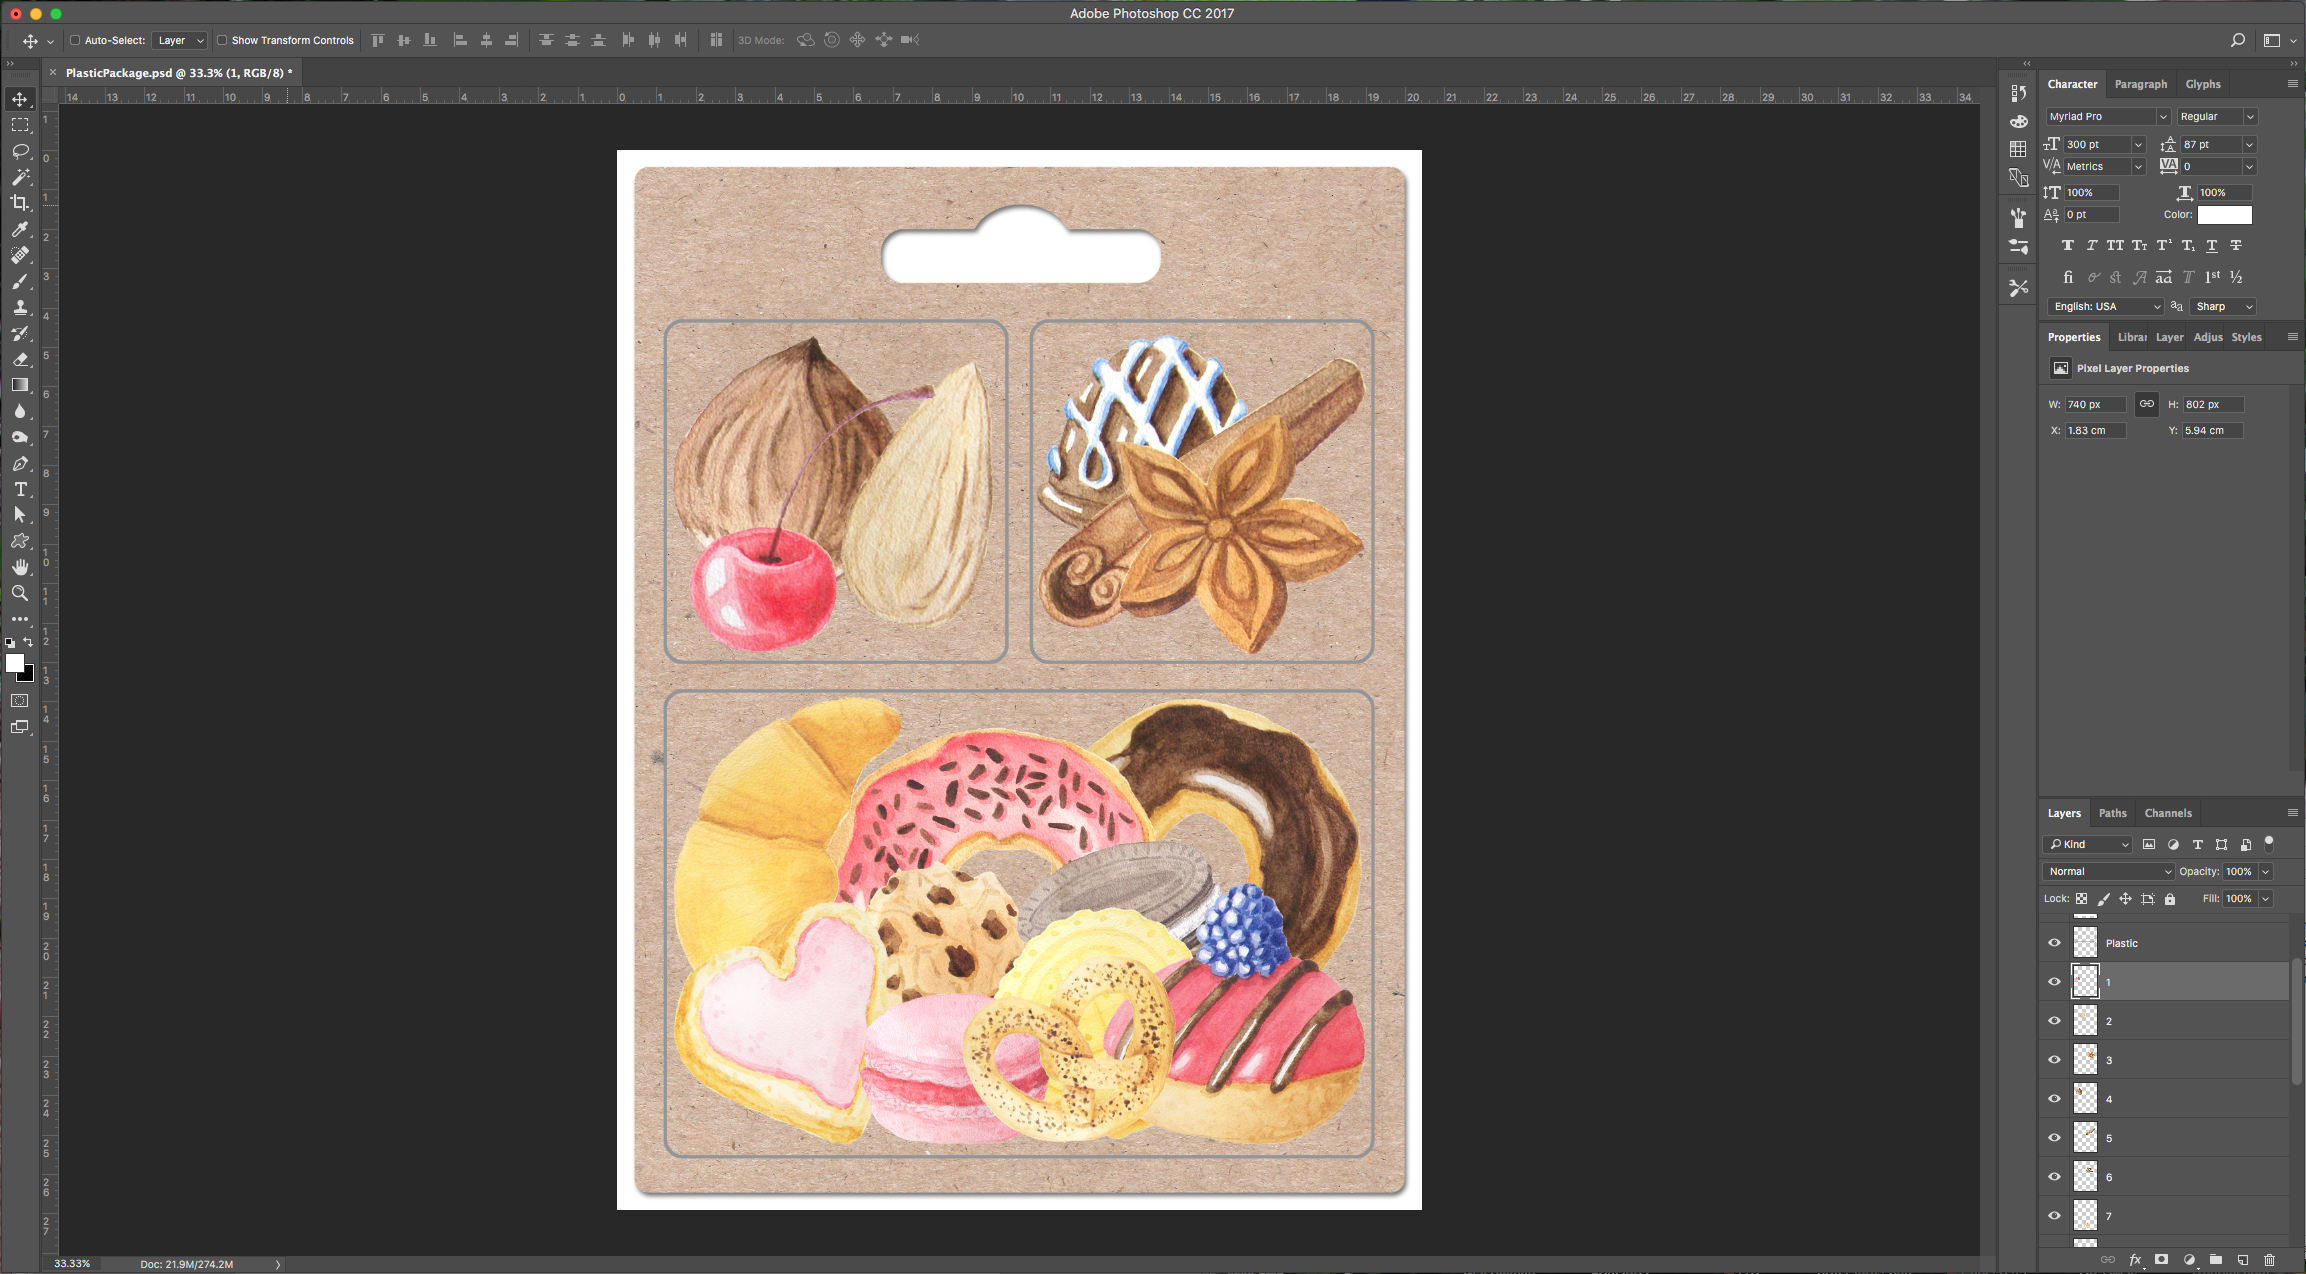
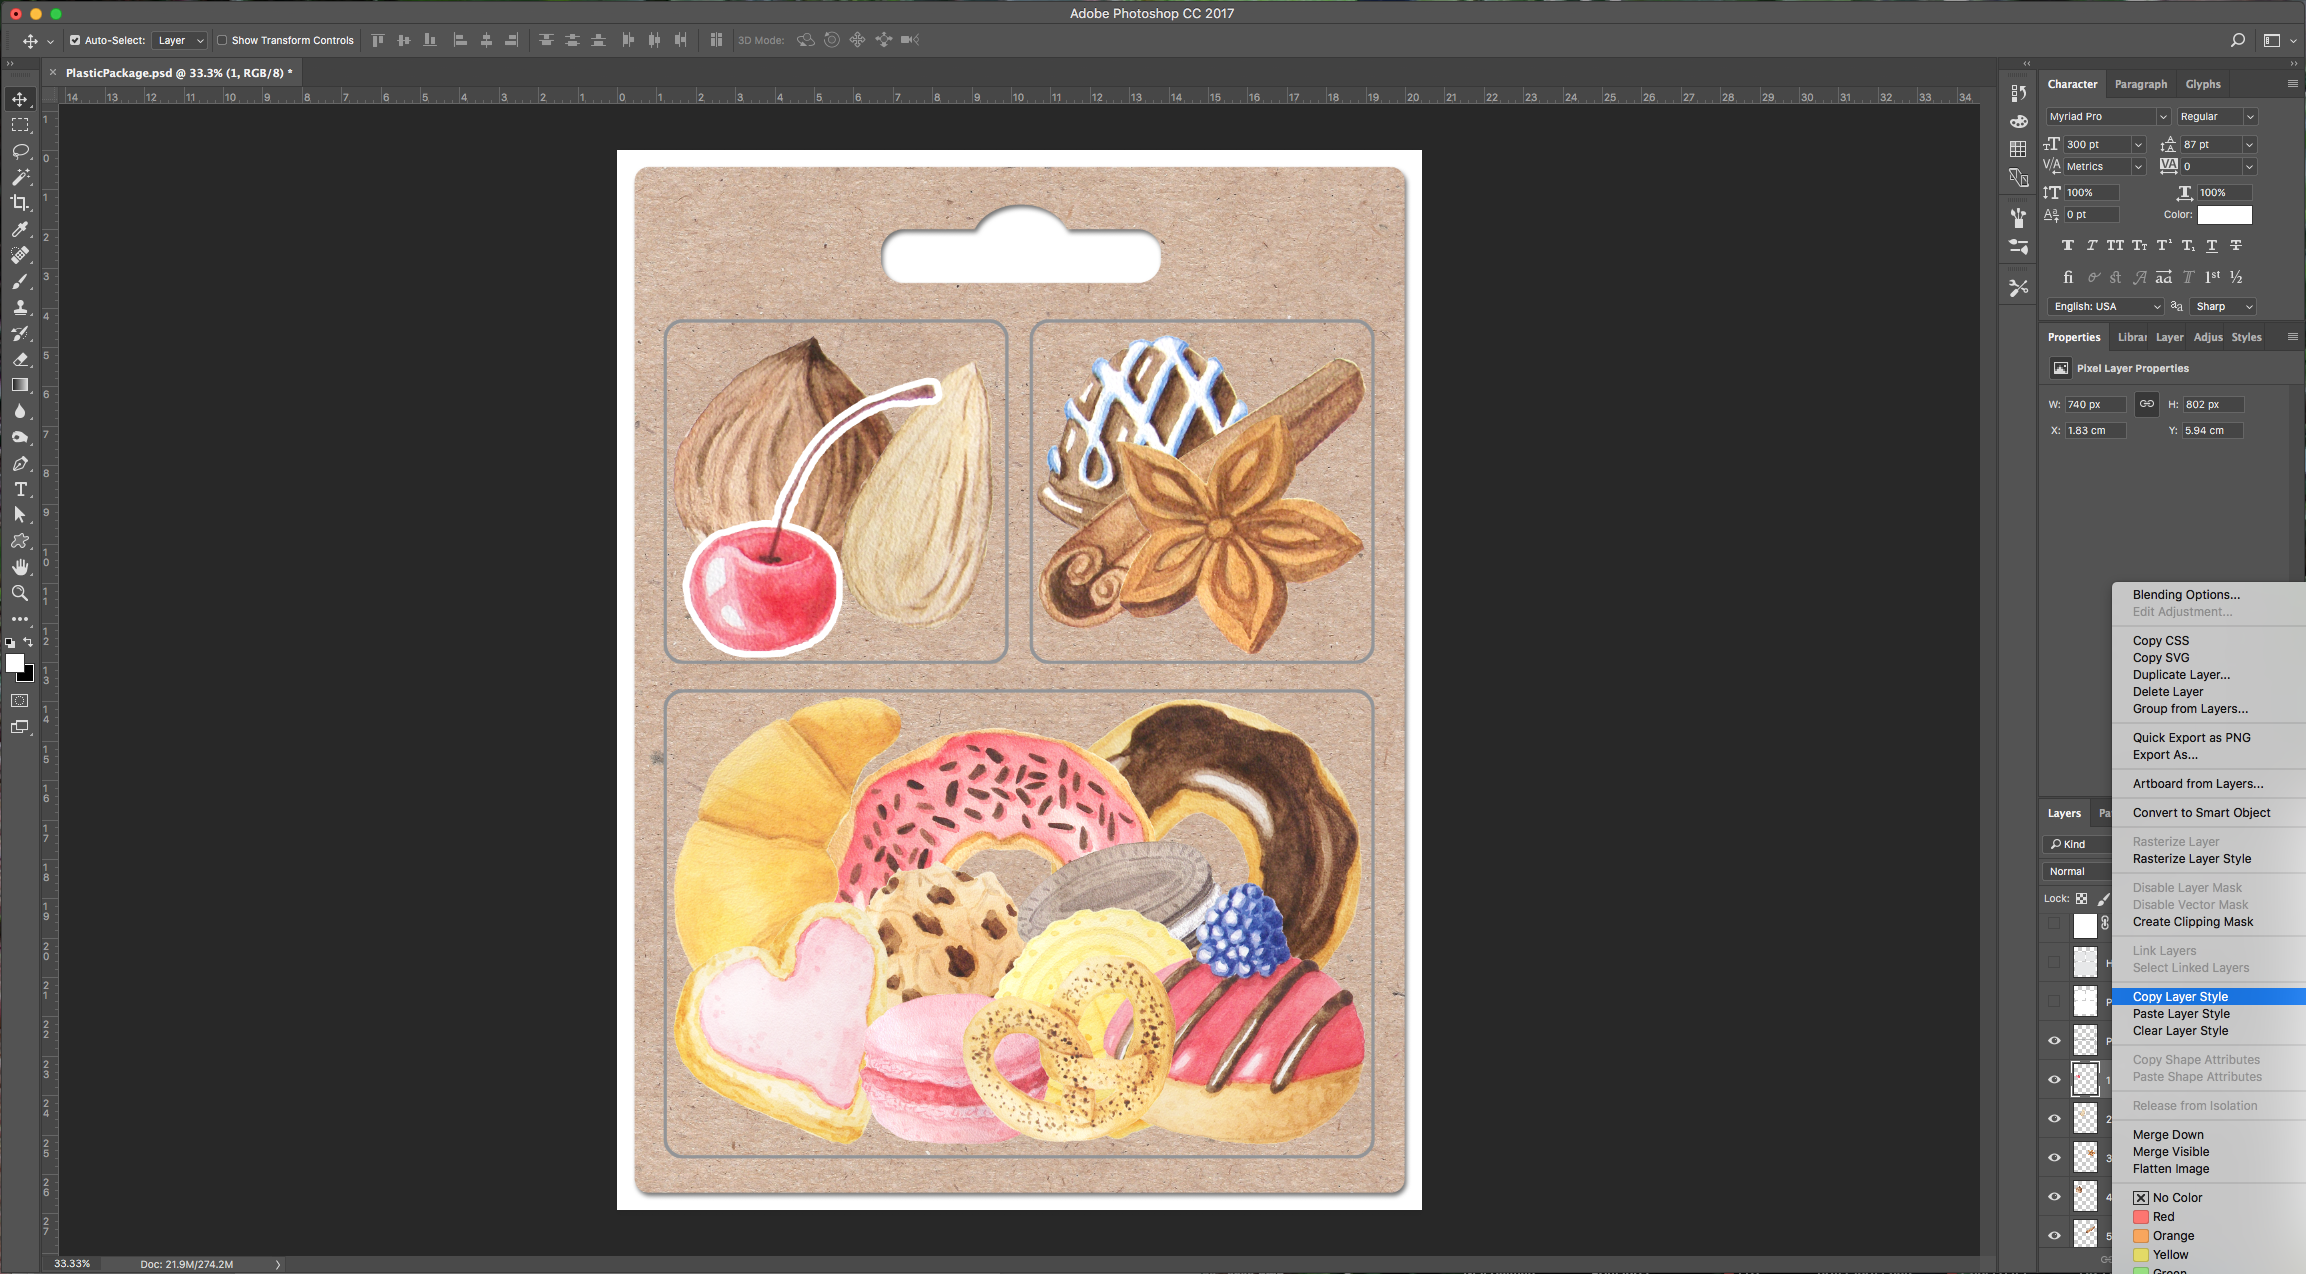
11 - Right-click on that layer and “Copy Layer Style” then select all of your images and “Paste Layer Style”. You can select them and click on the “Create New Group” button on the bottom of the “Layers” menu to group them together. Position them on top of your “Cardboard” layer.
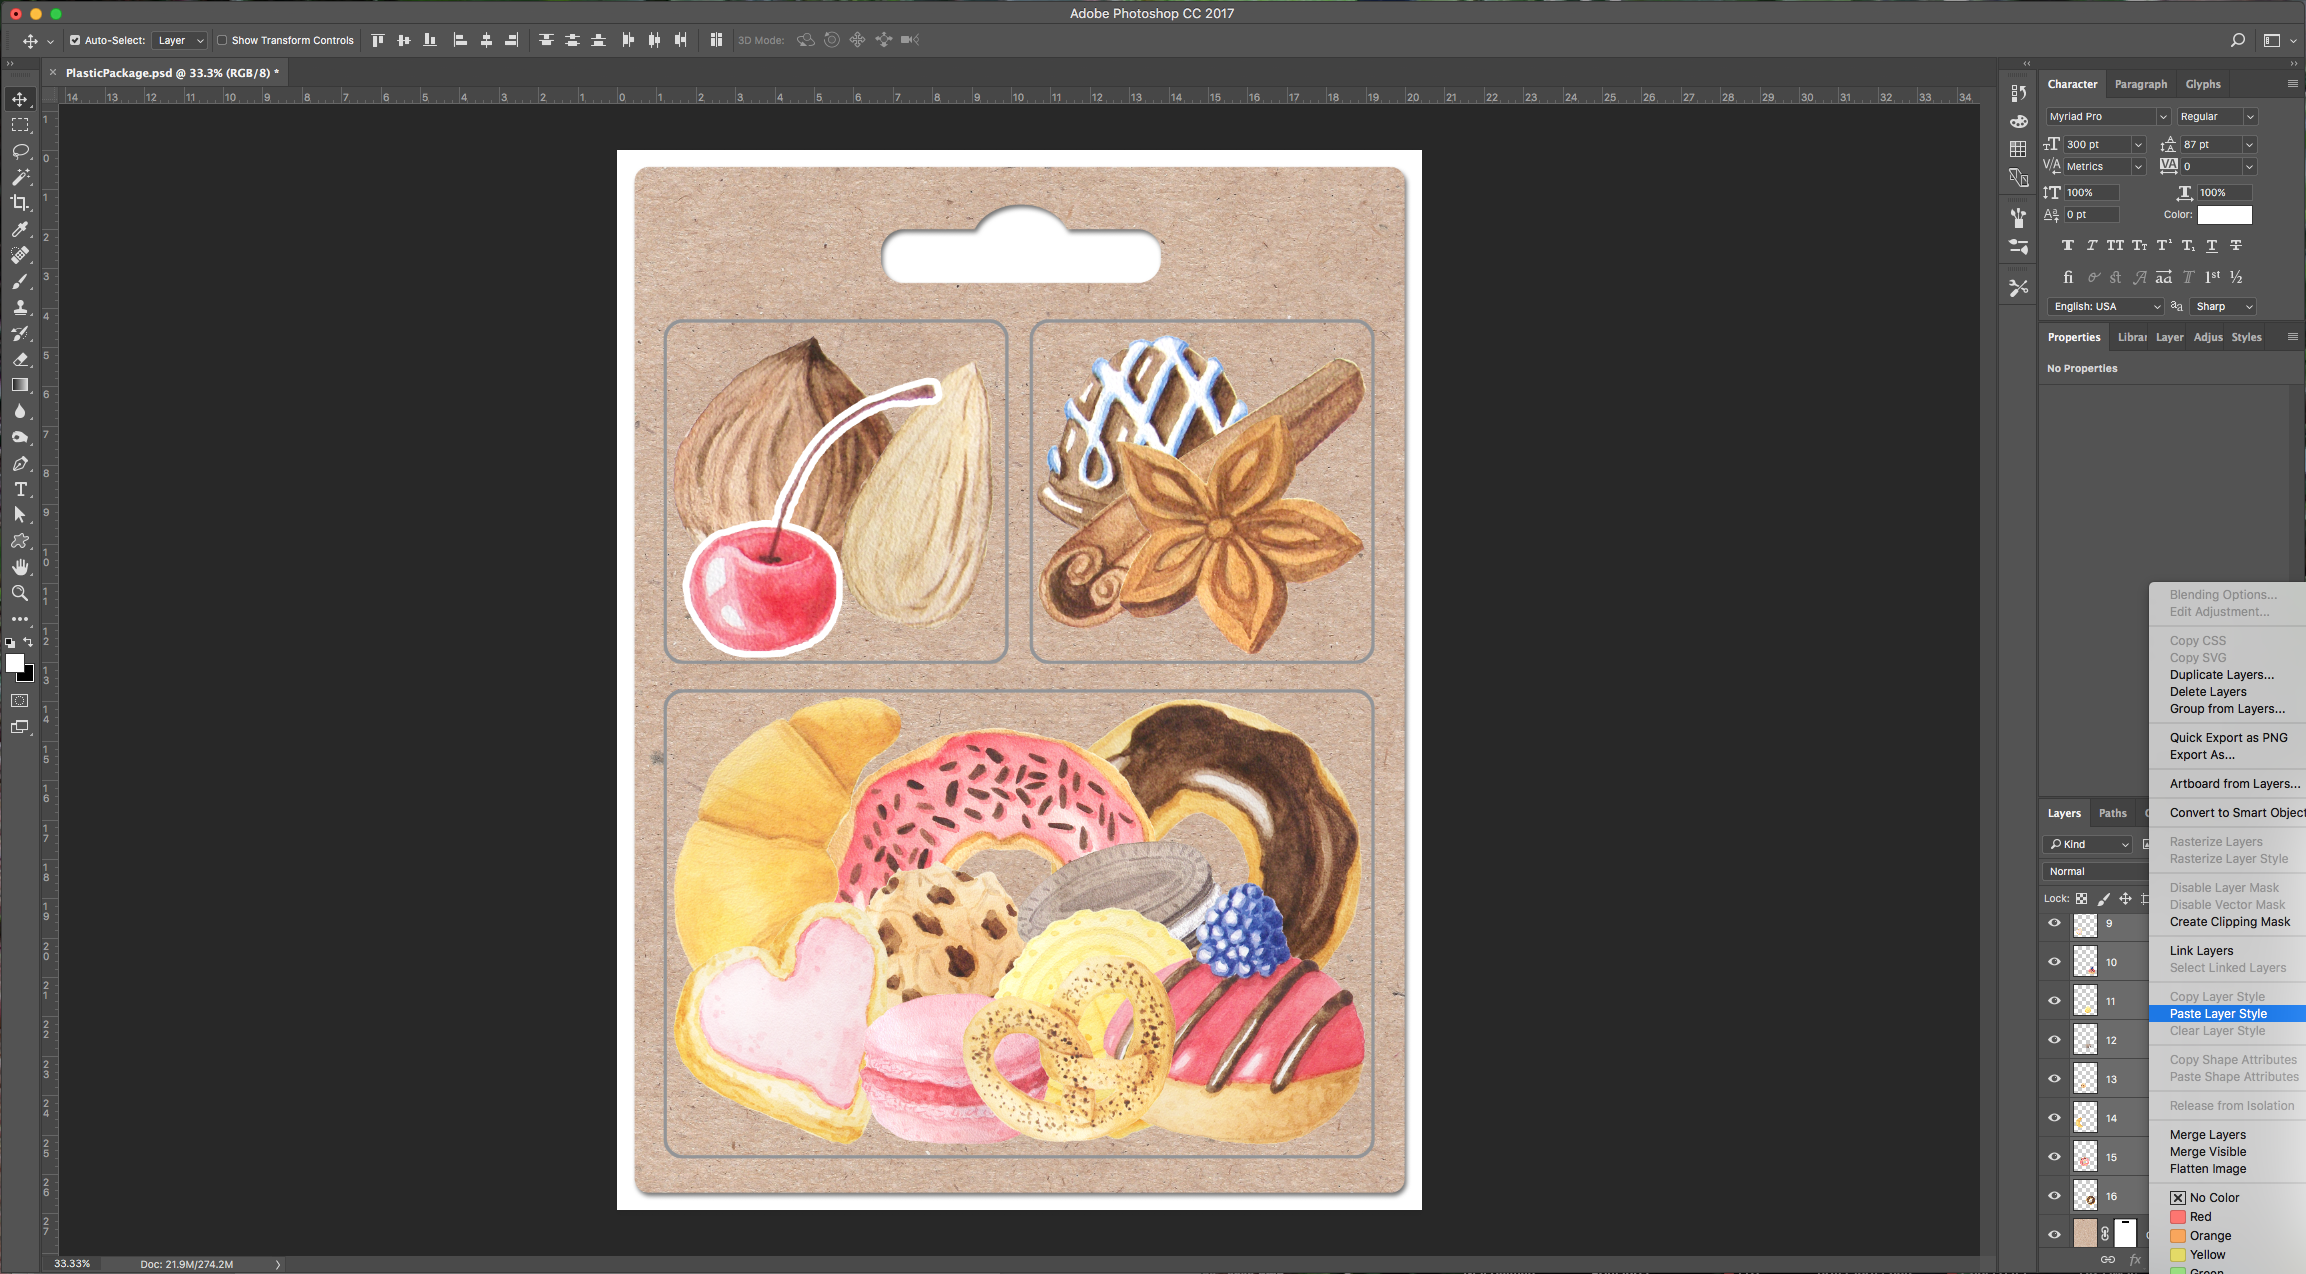
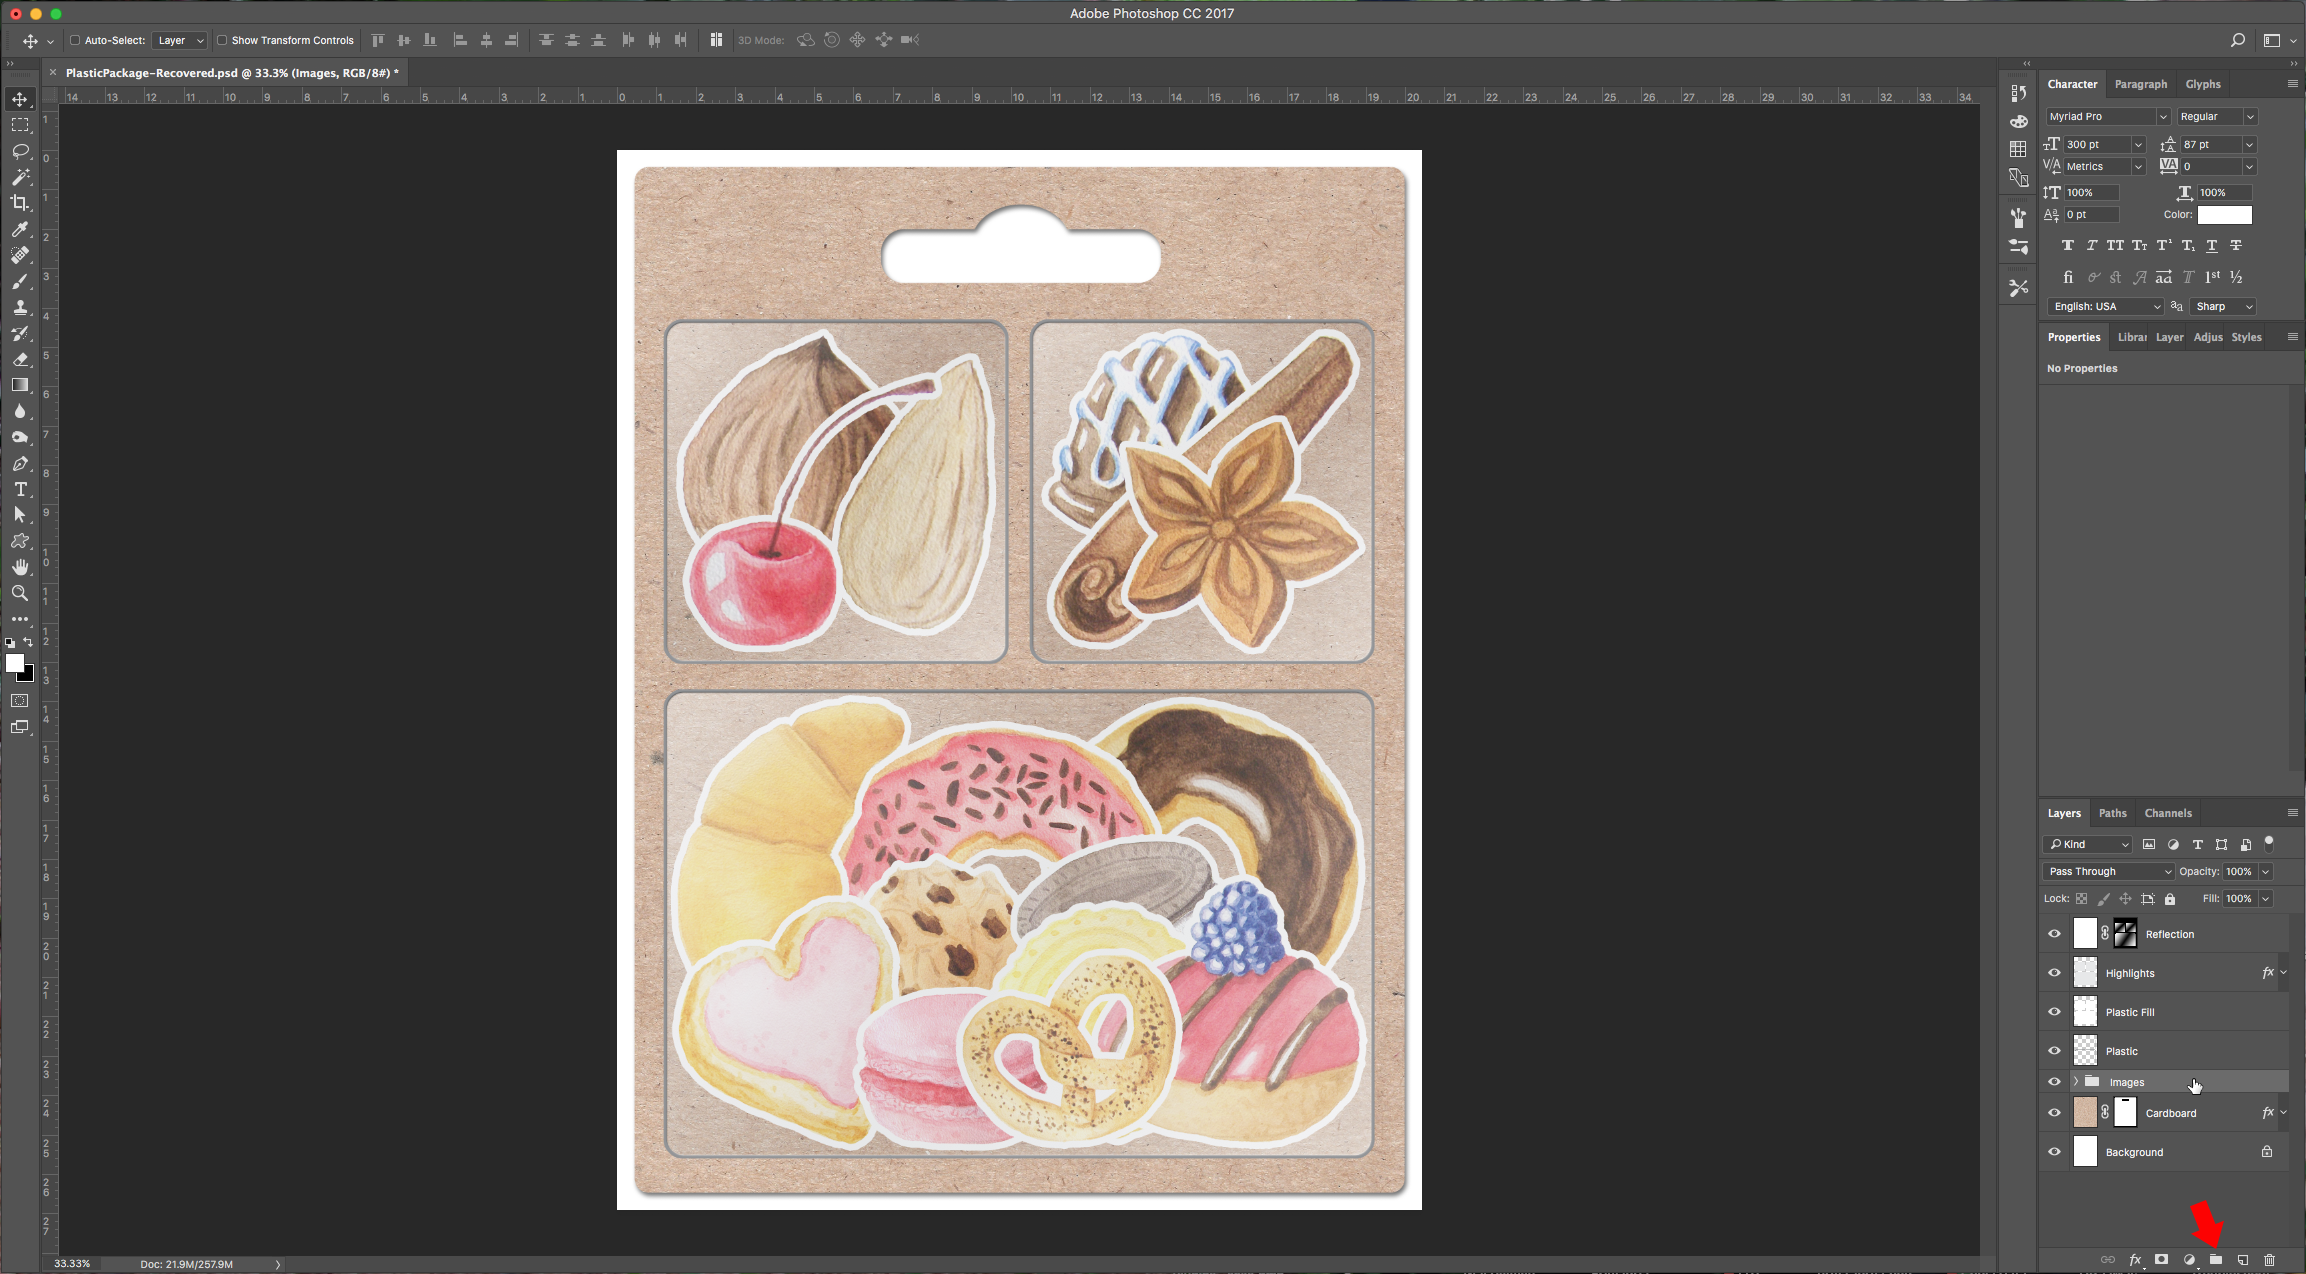
12 – Select your top layer (“Reflection”) and change the “Blending Mode” to “Soft Light”. Select your “Reflection”, “Plastic Fill” and “Plastic” layers, duplicate them by dragging them on to the “New Layer” button at the bottom of the menu and then right-click on the layers and select “Merge Layers” to flatten them. Name this layer “Flat”.
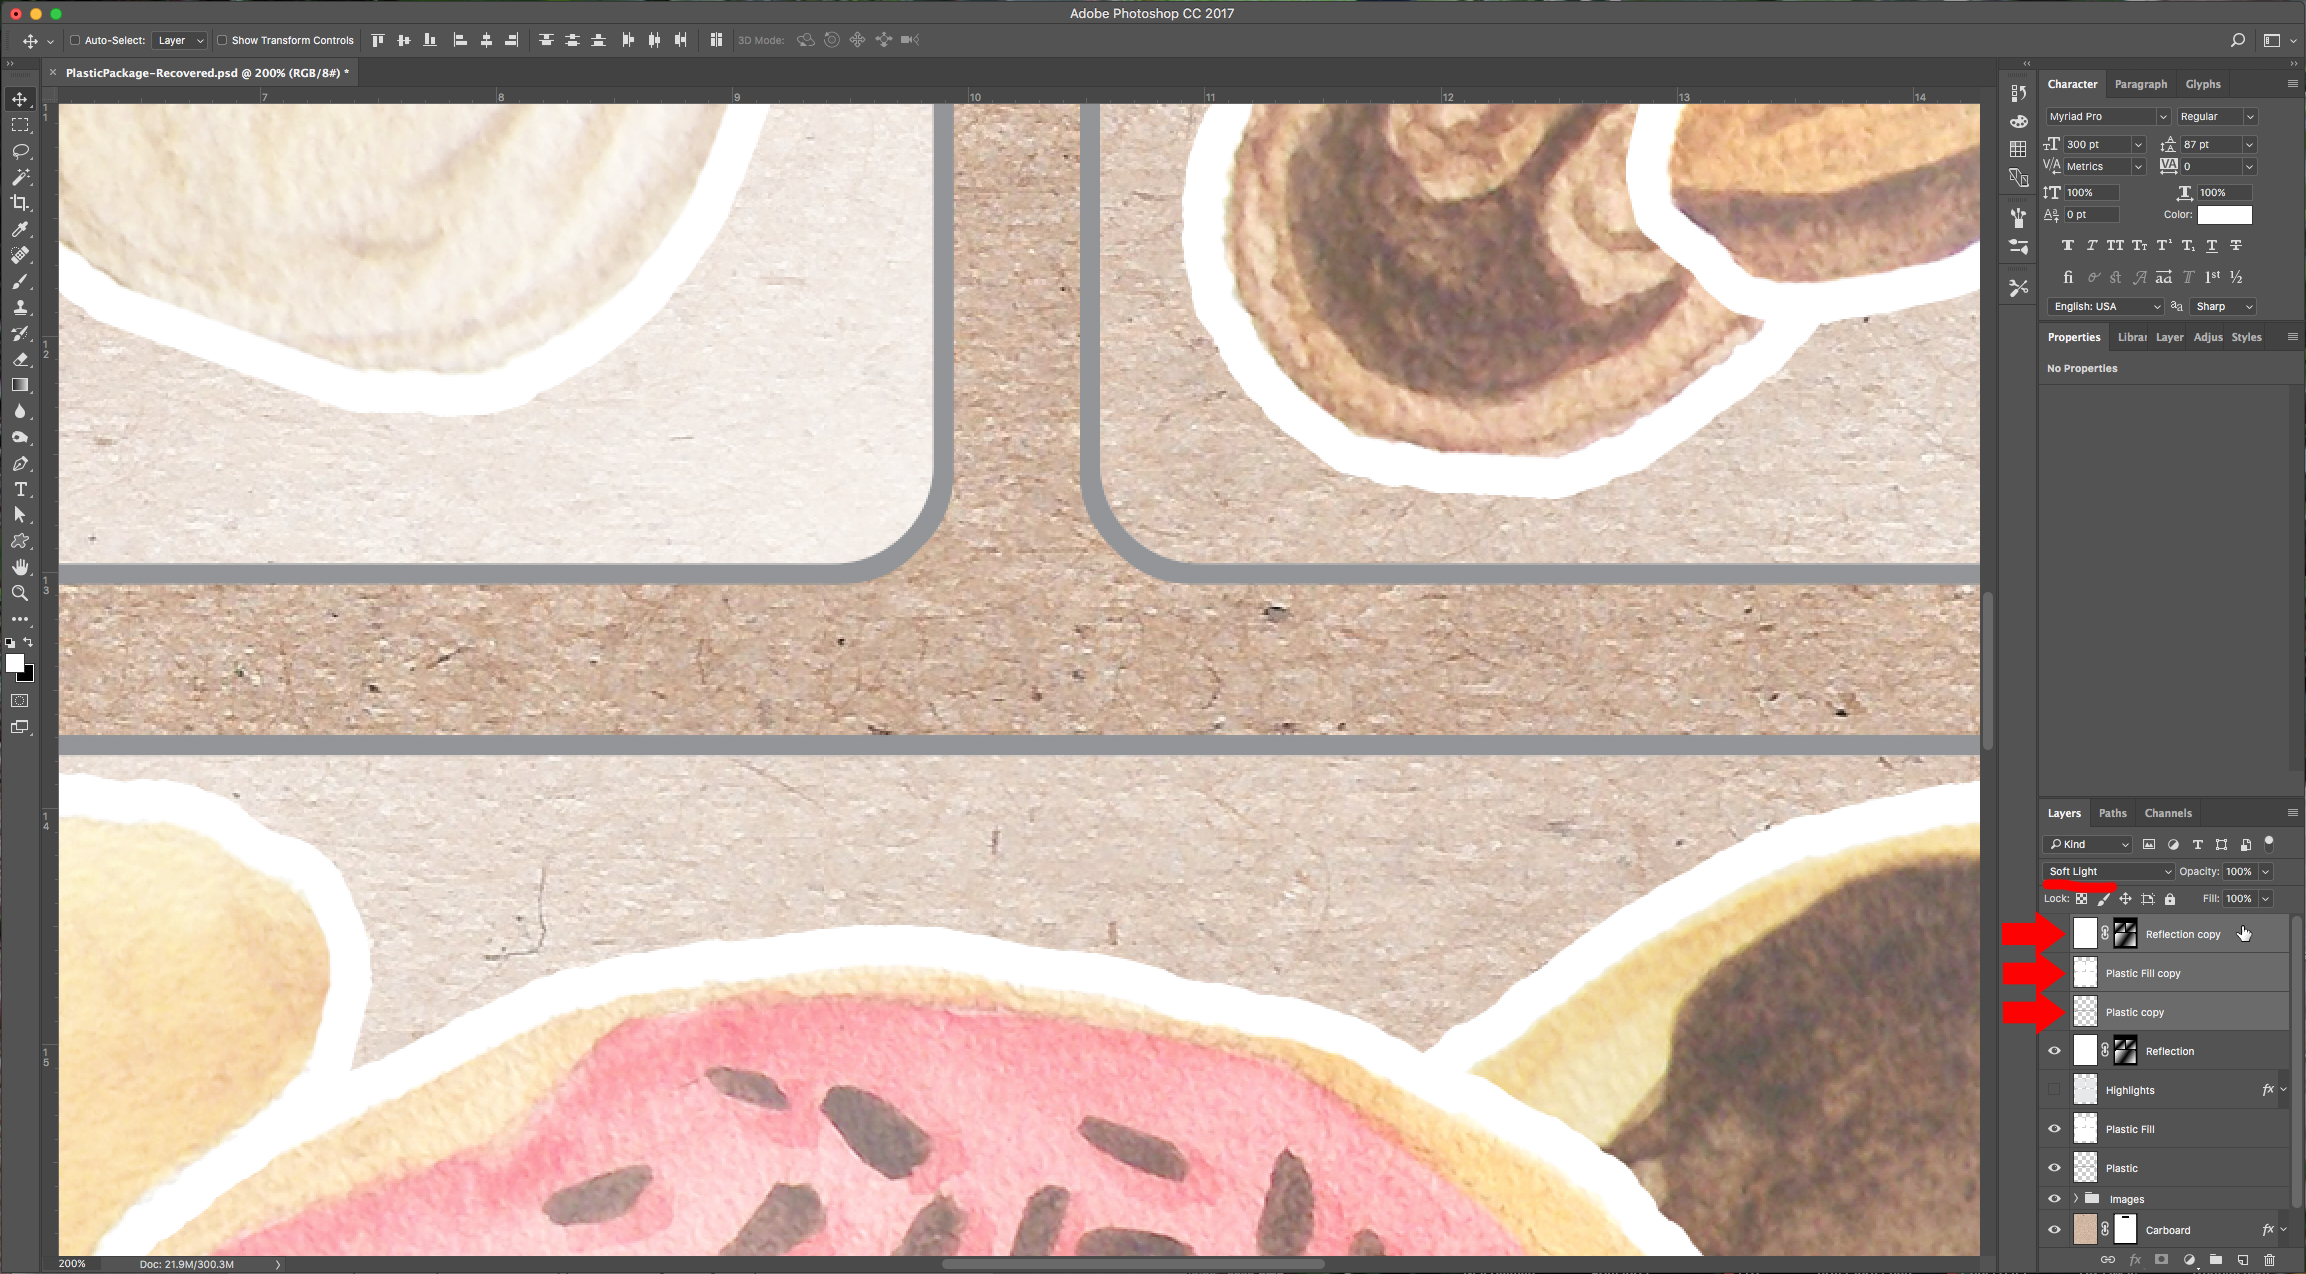
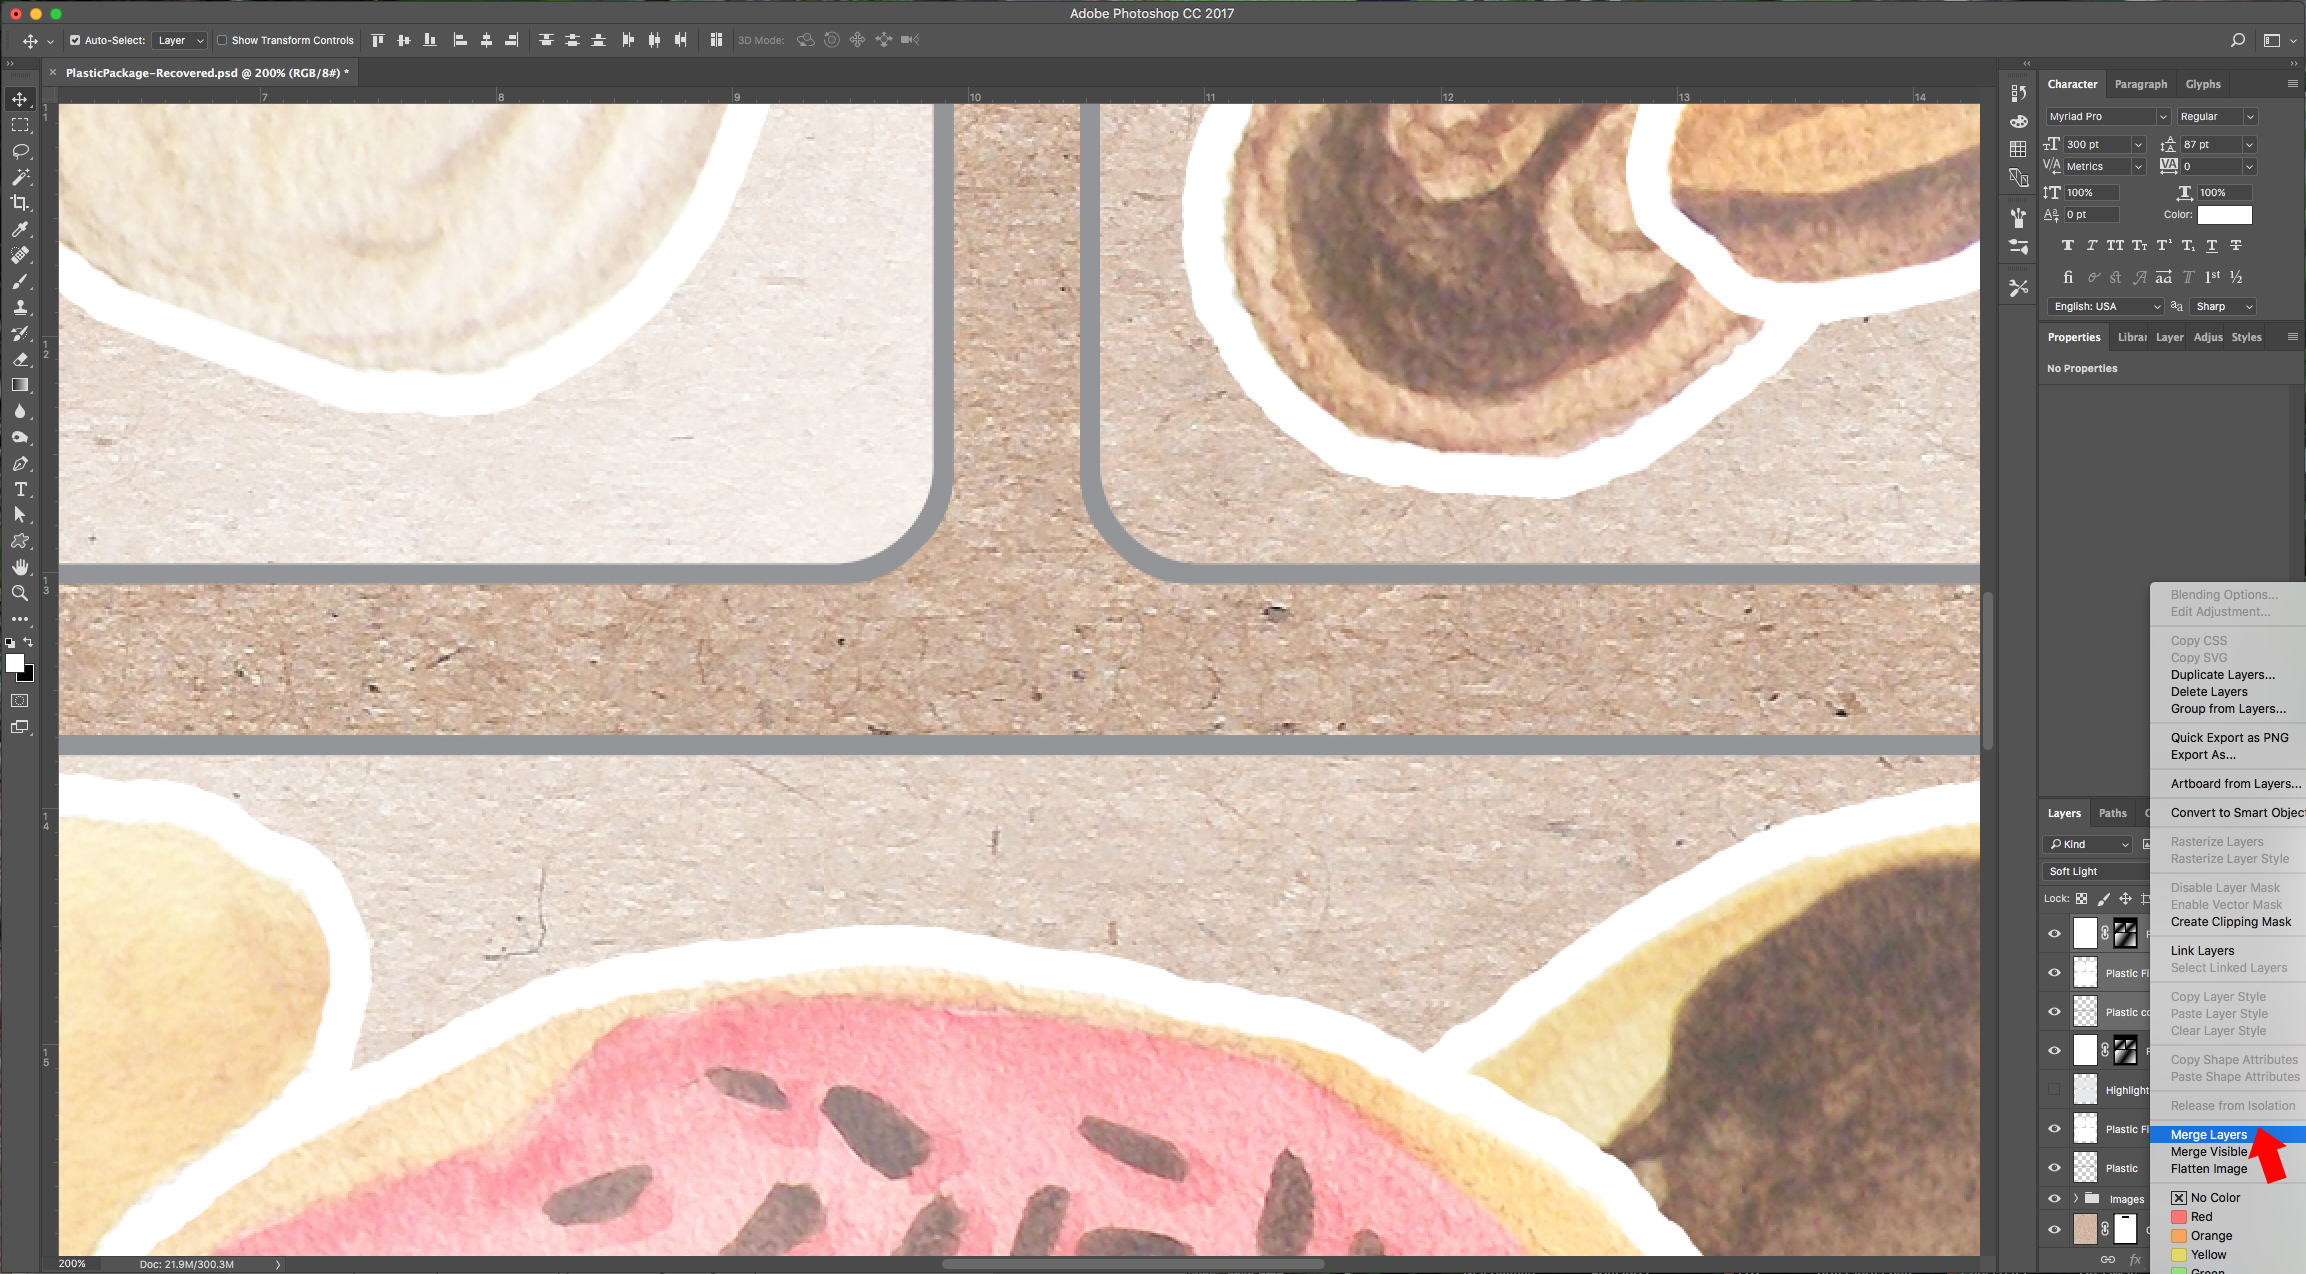
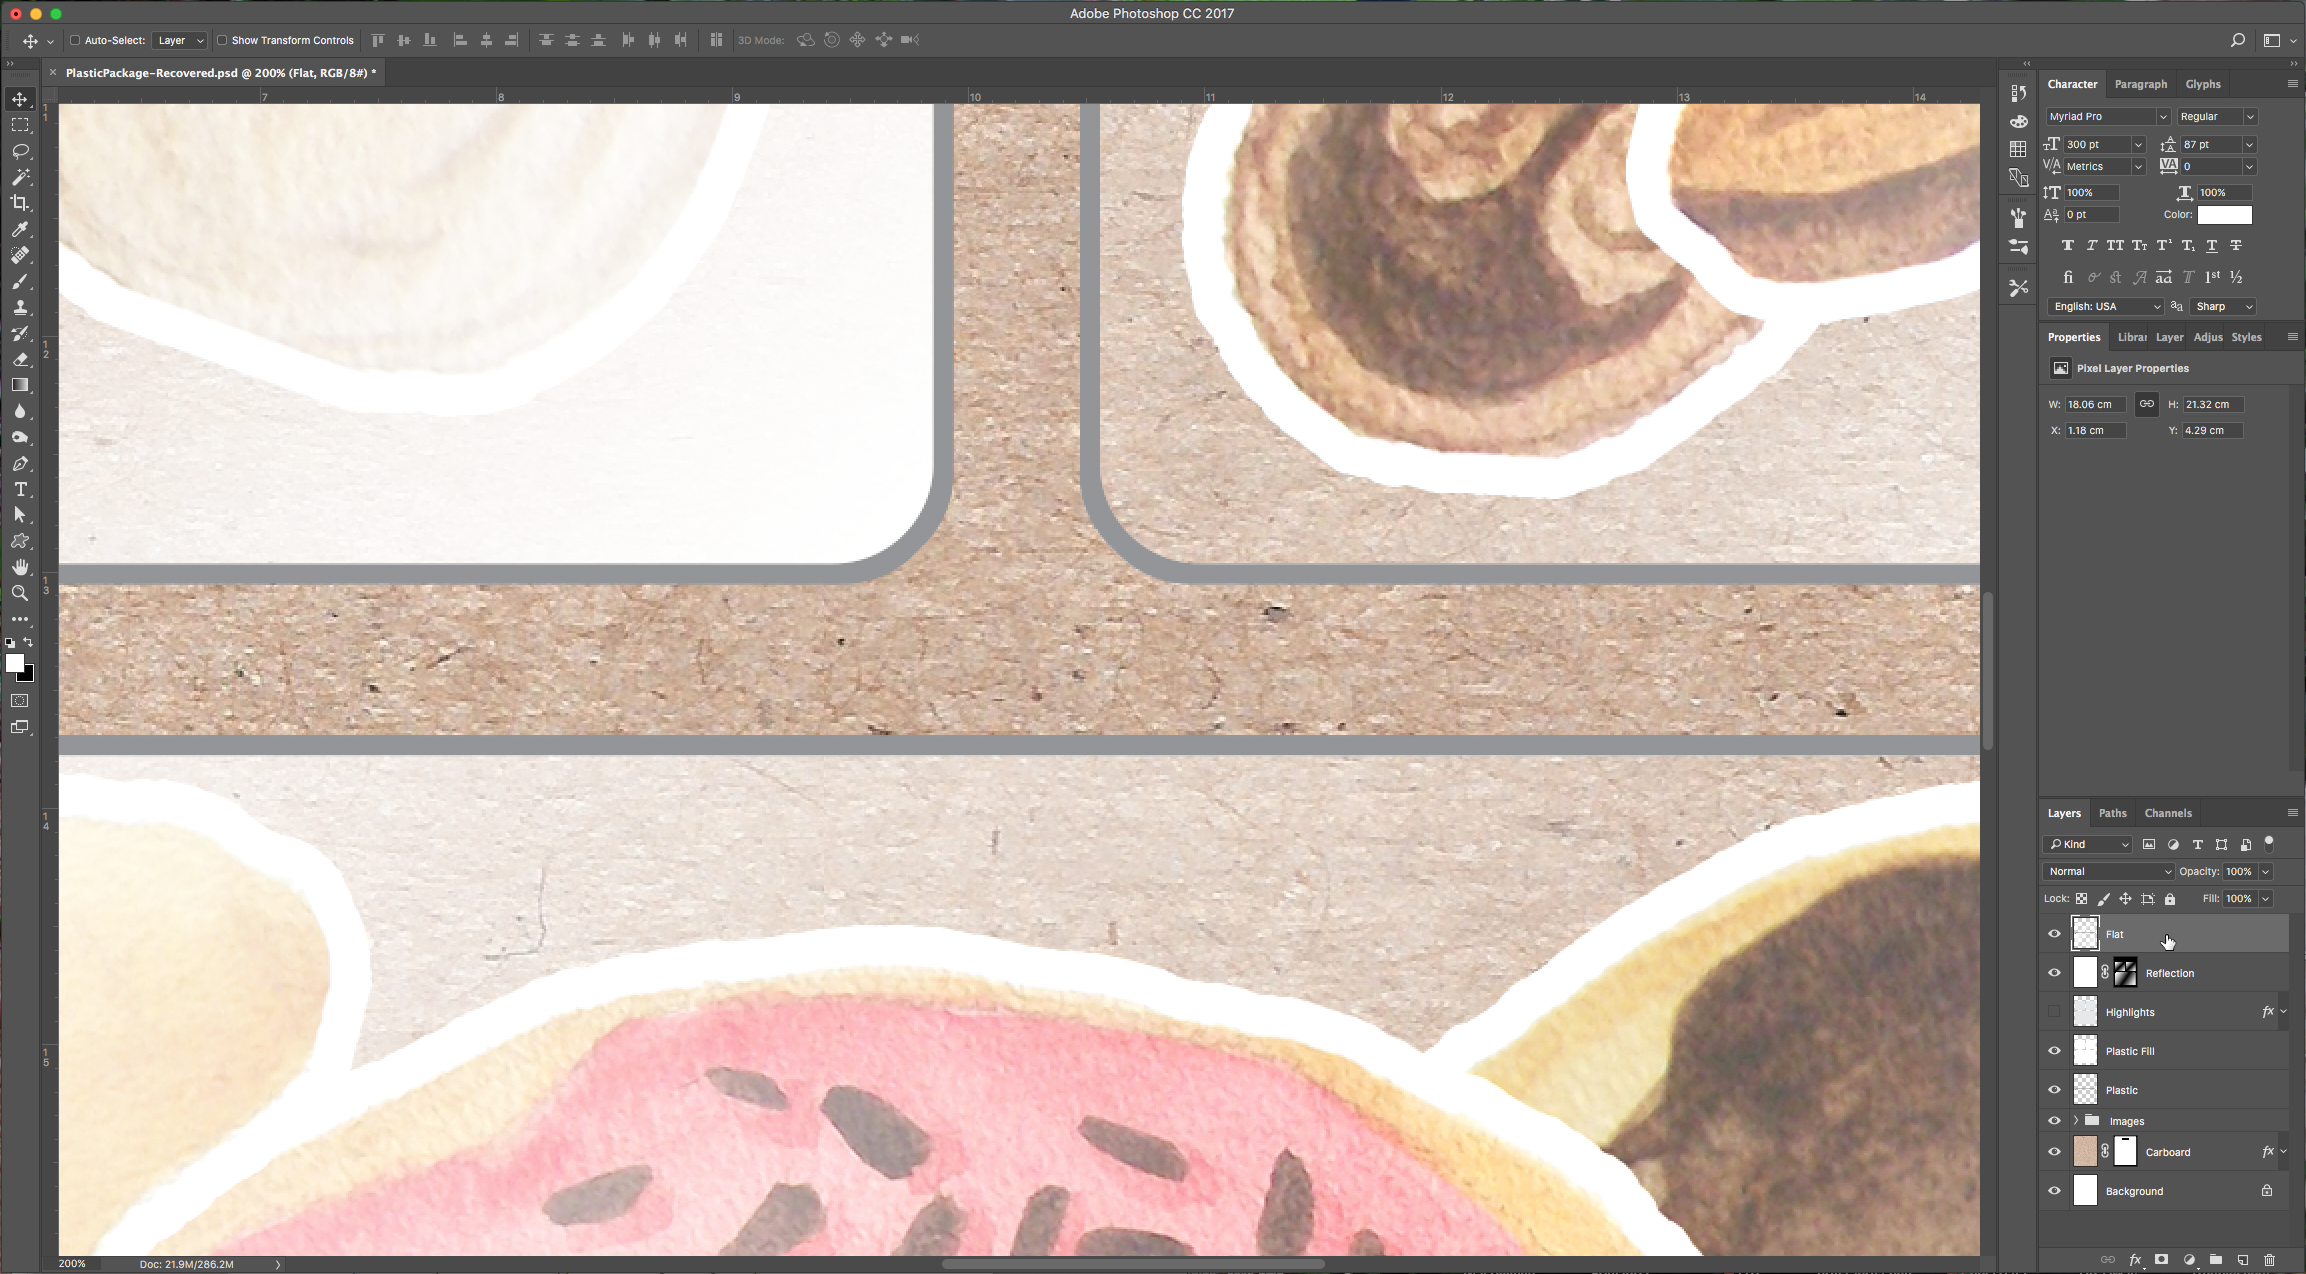
13 – Select the “Flat” layer and go to Filter > Filter Gallery > Artistic > Plastic Wrap and apply the following values:
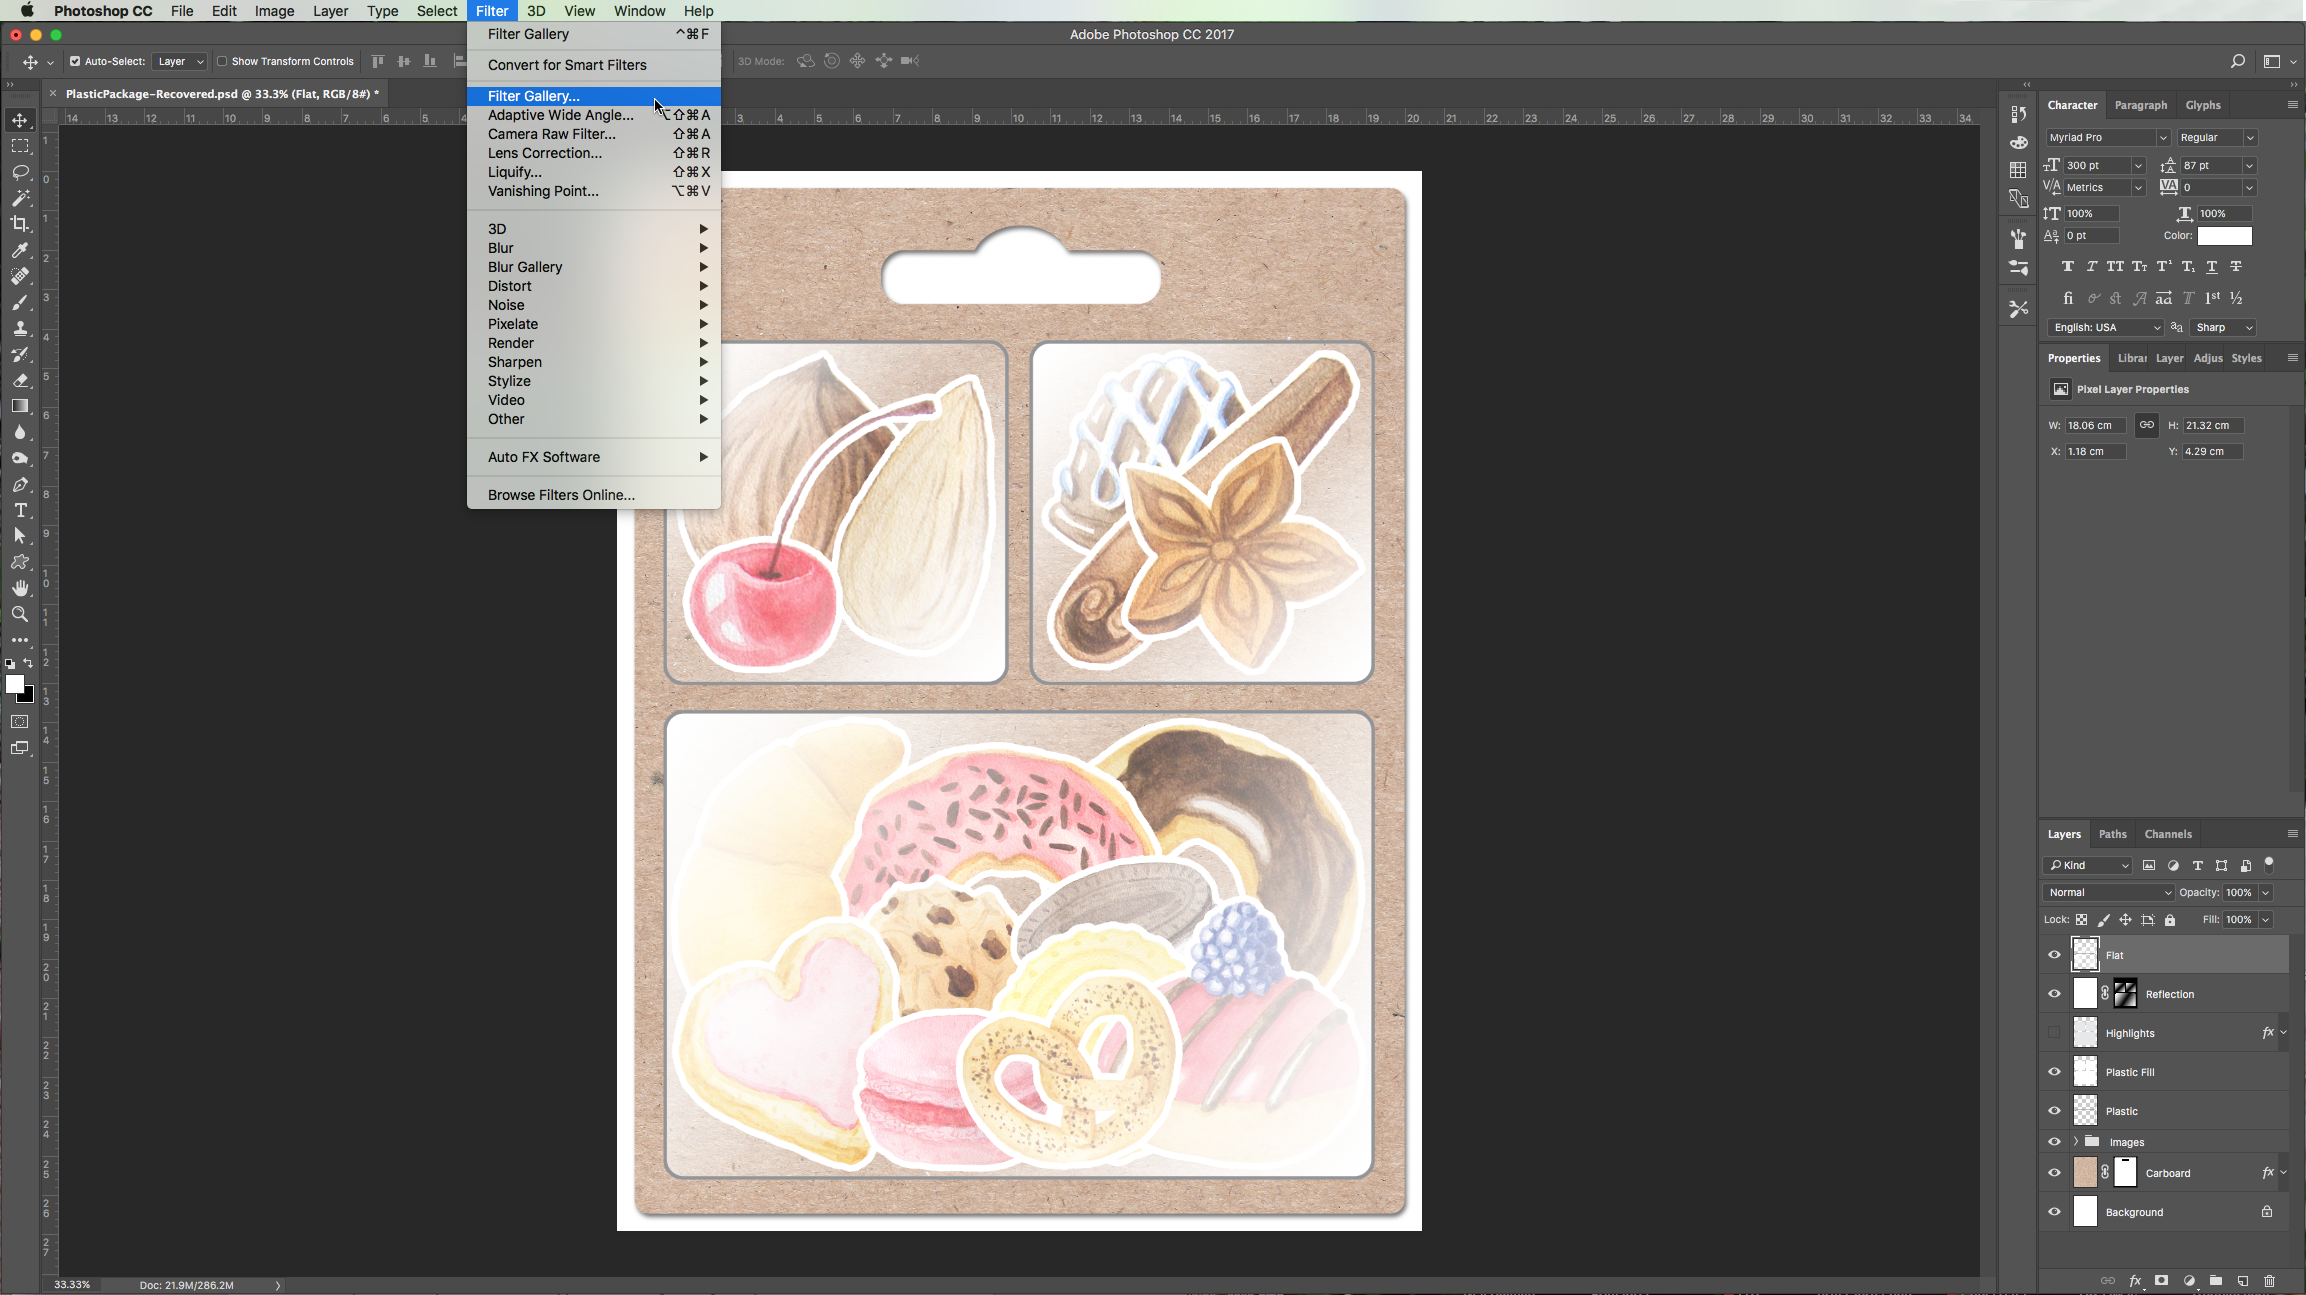
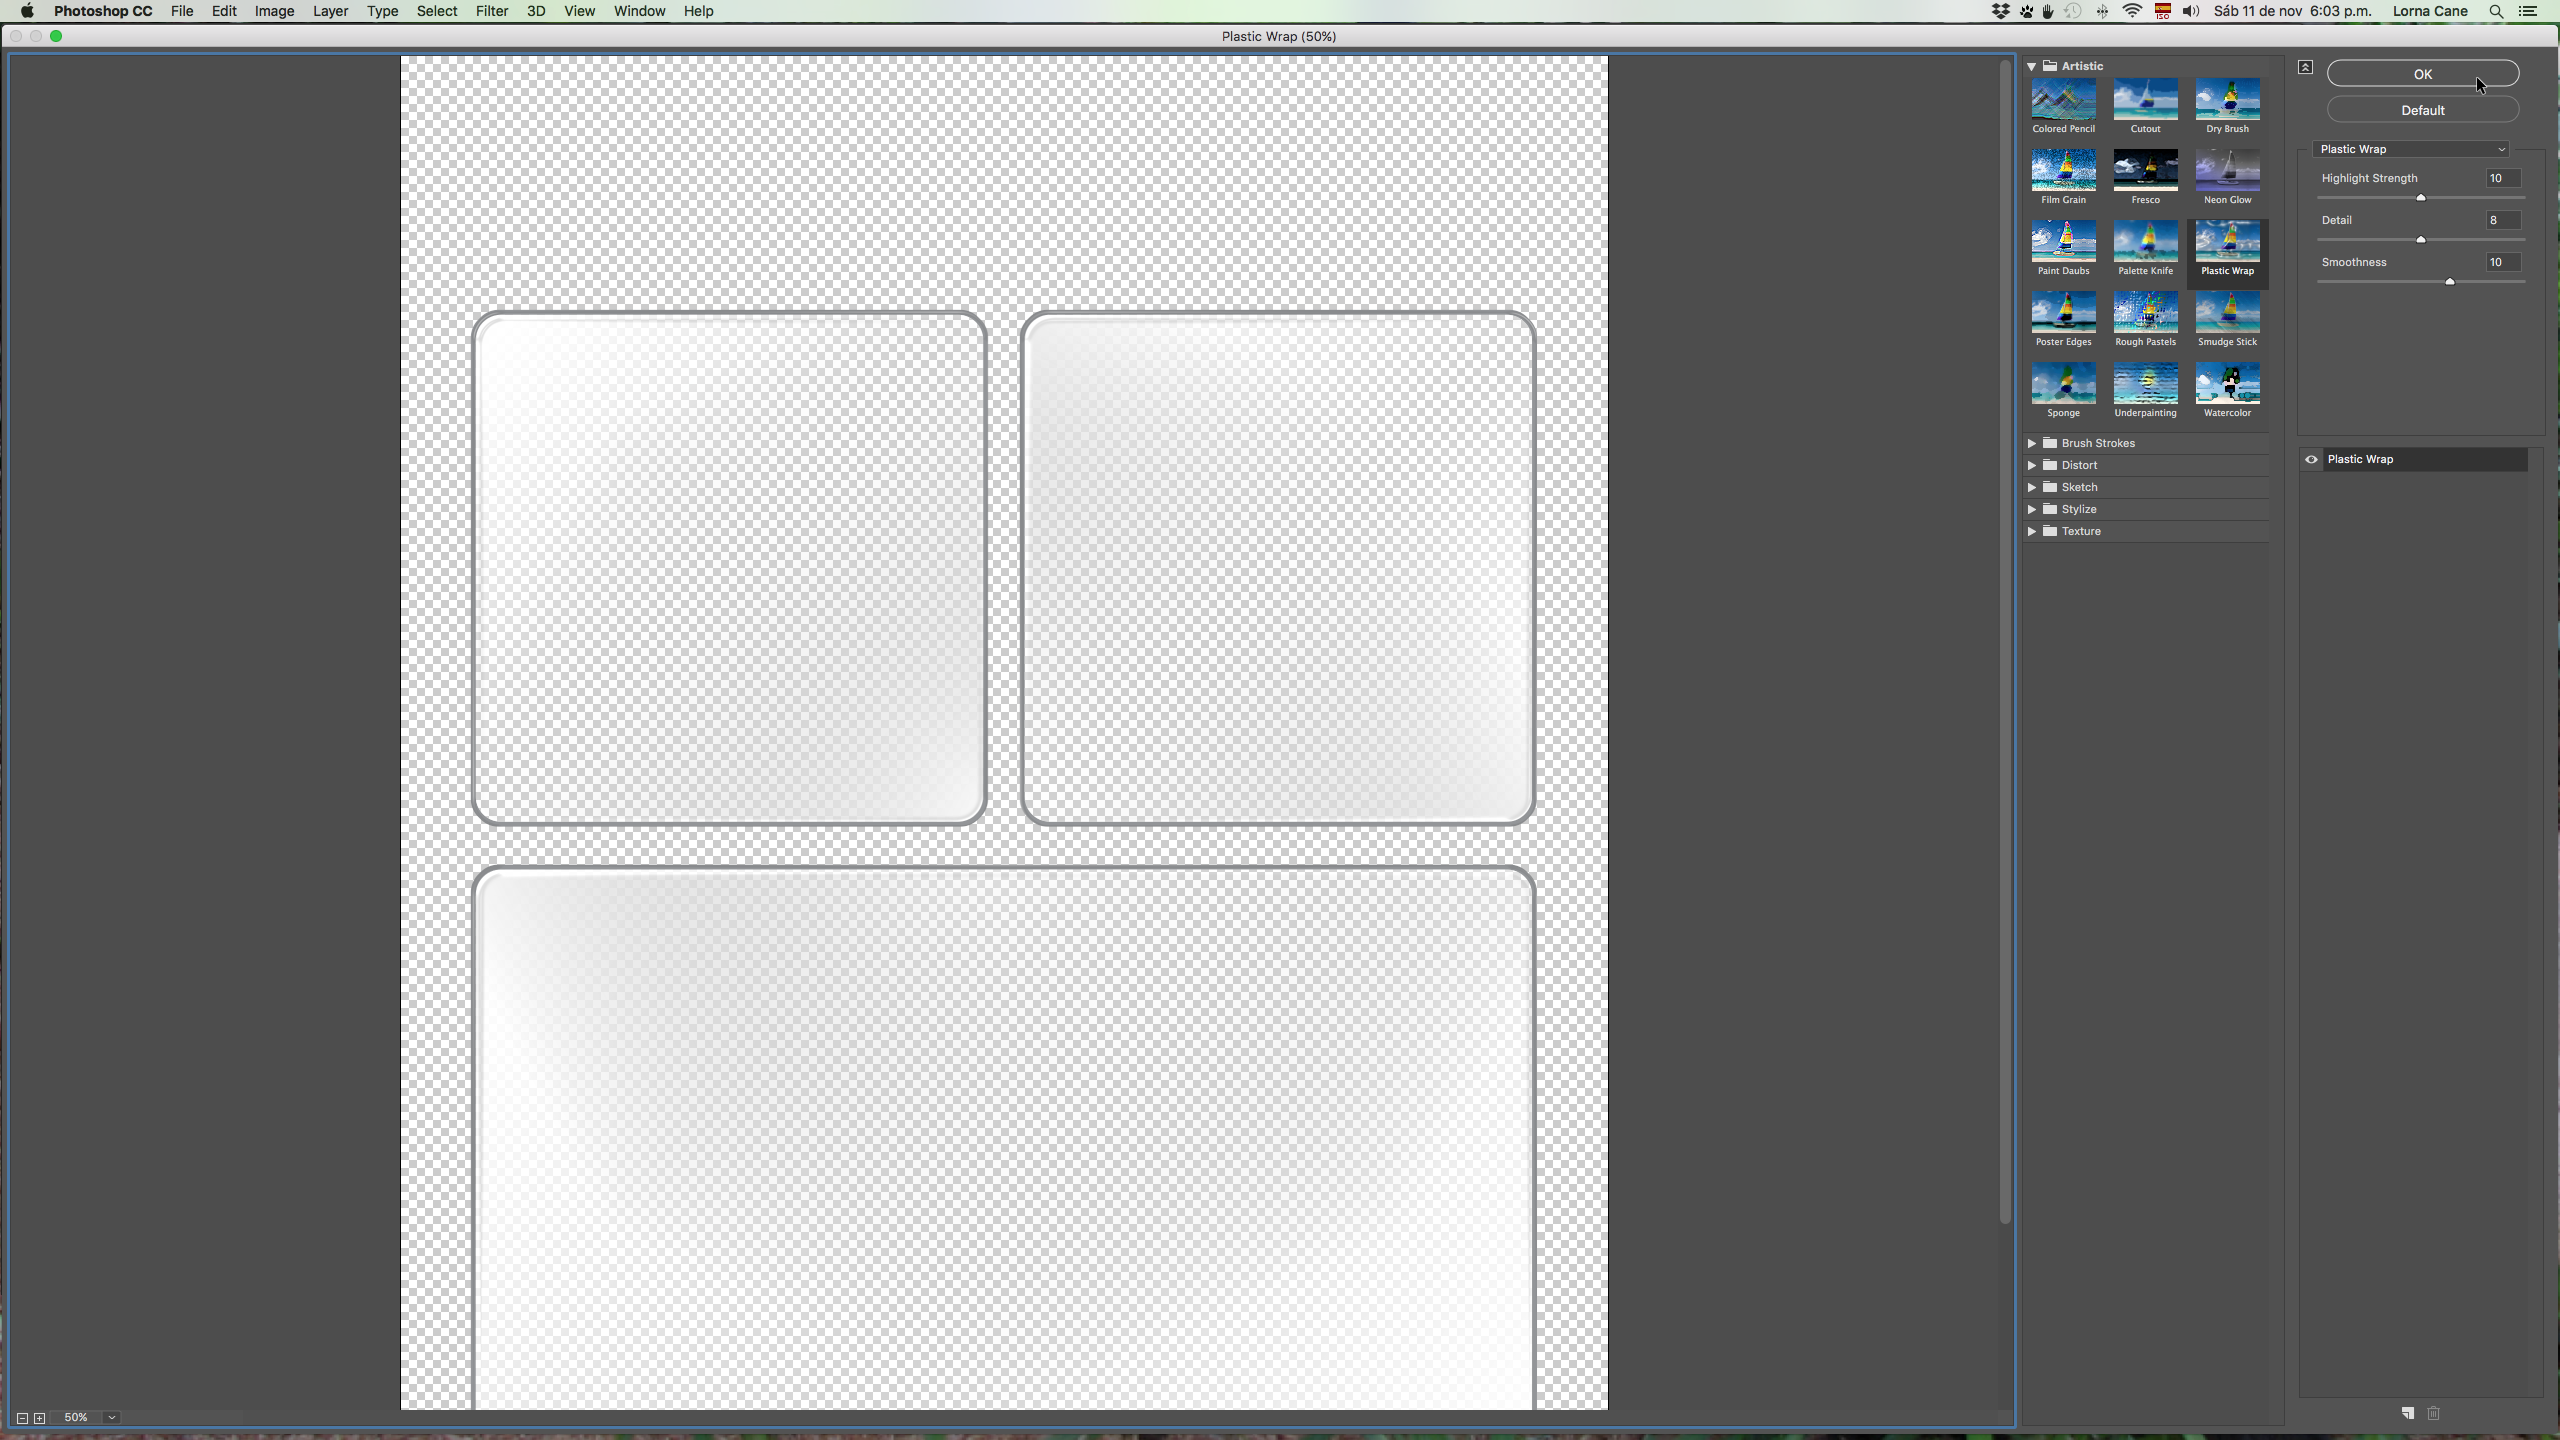
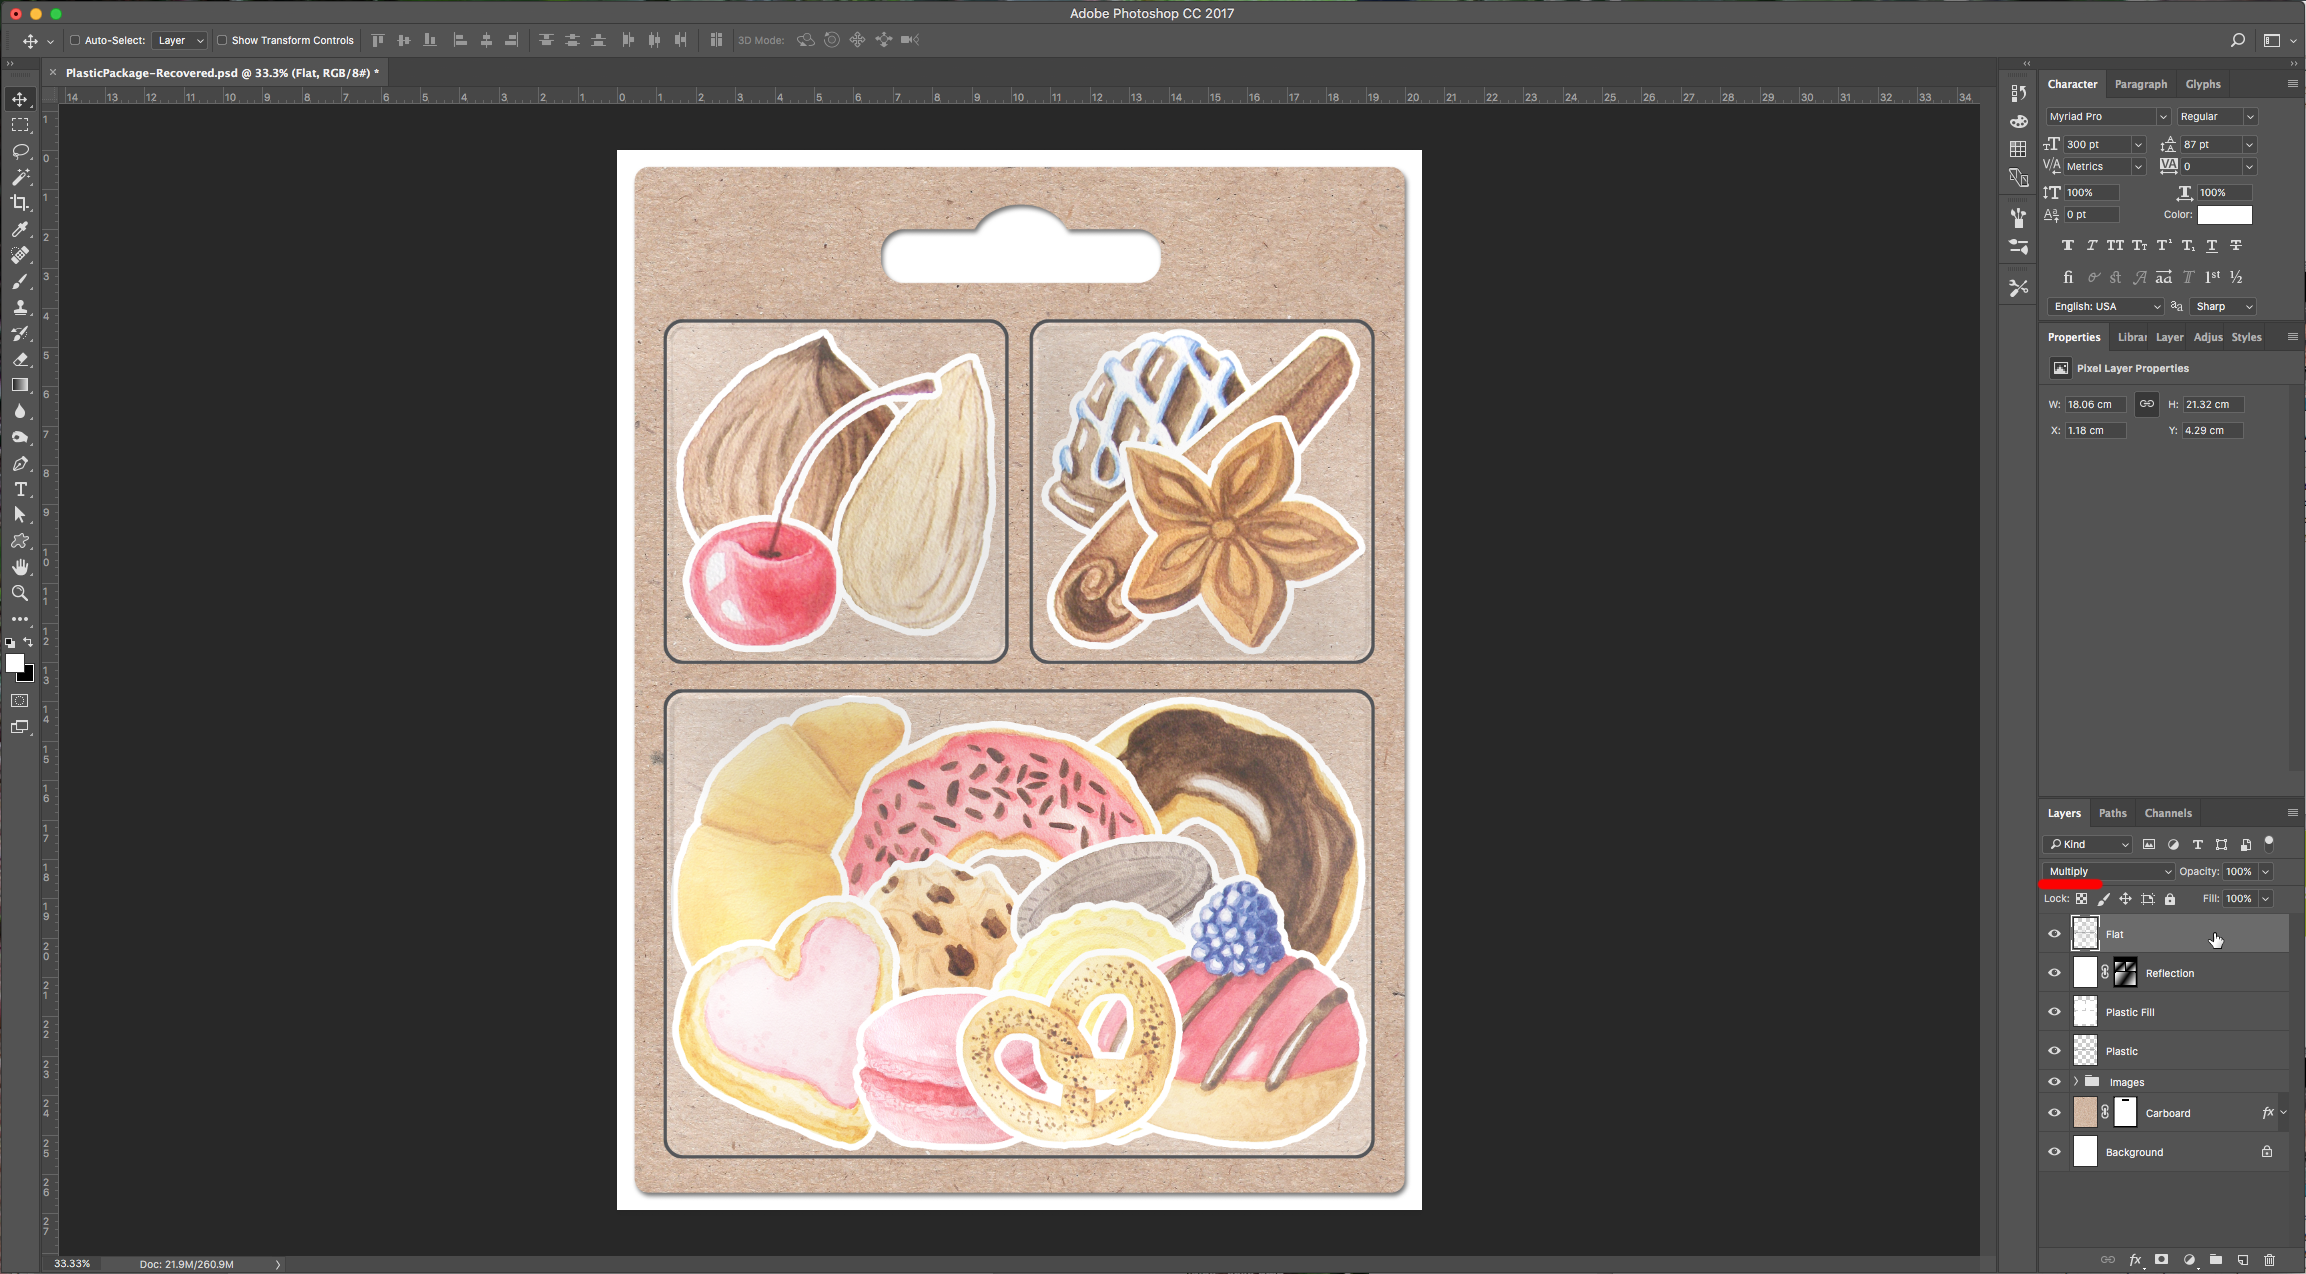
Then change “Flat” “Blending Mode” to Multiply and “Reflection” to “Soft Light” with and “Opacity” of 75%
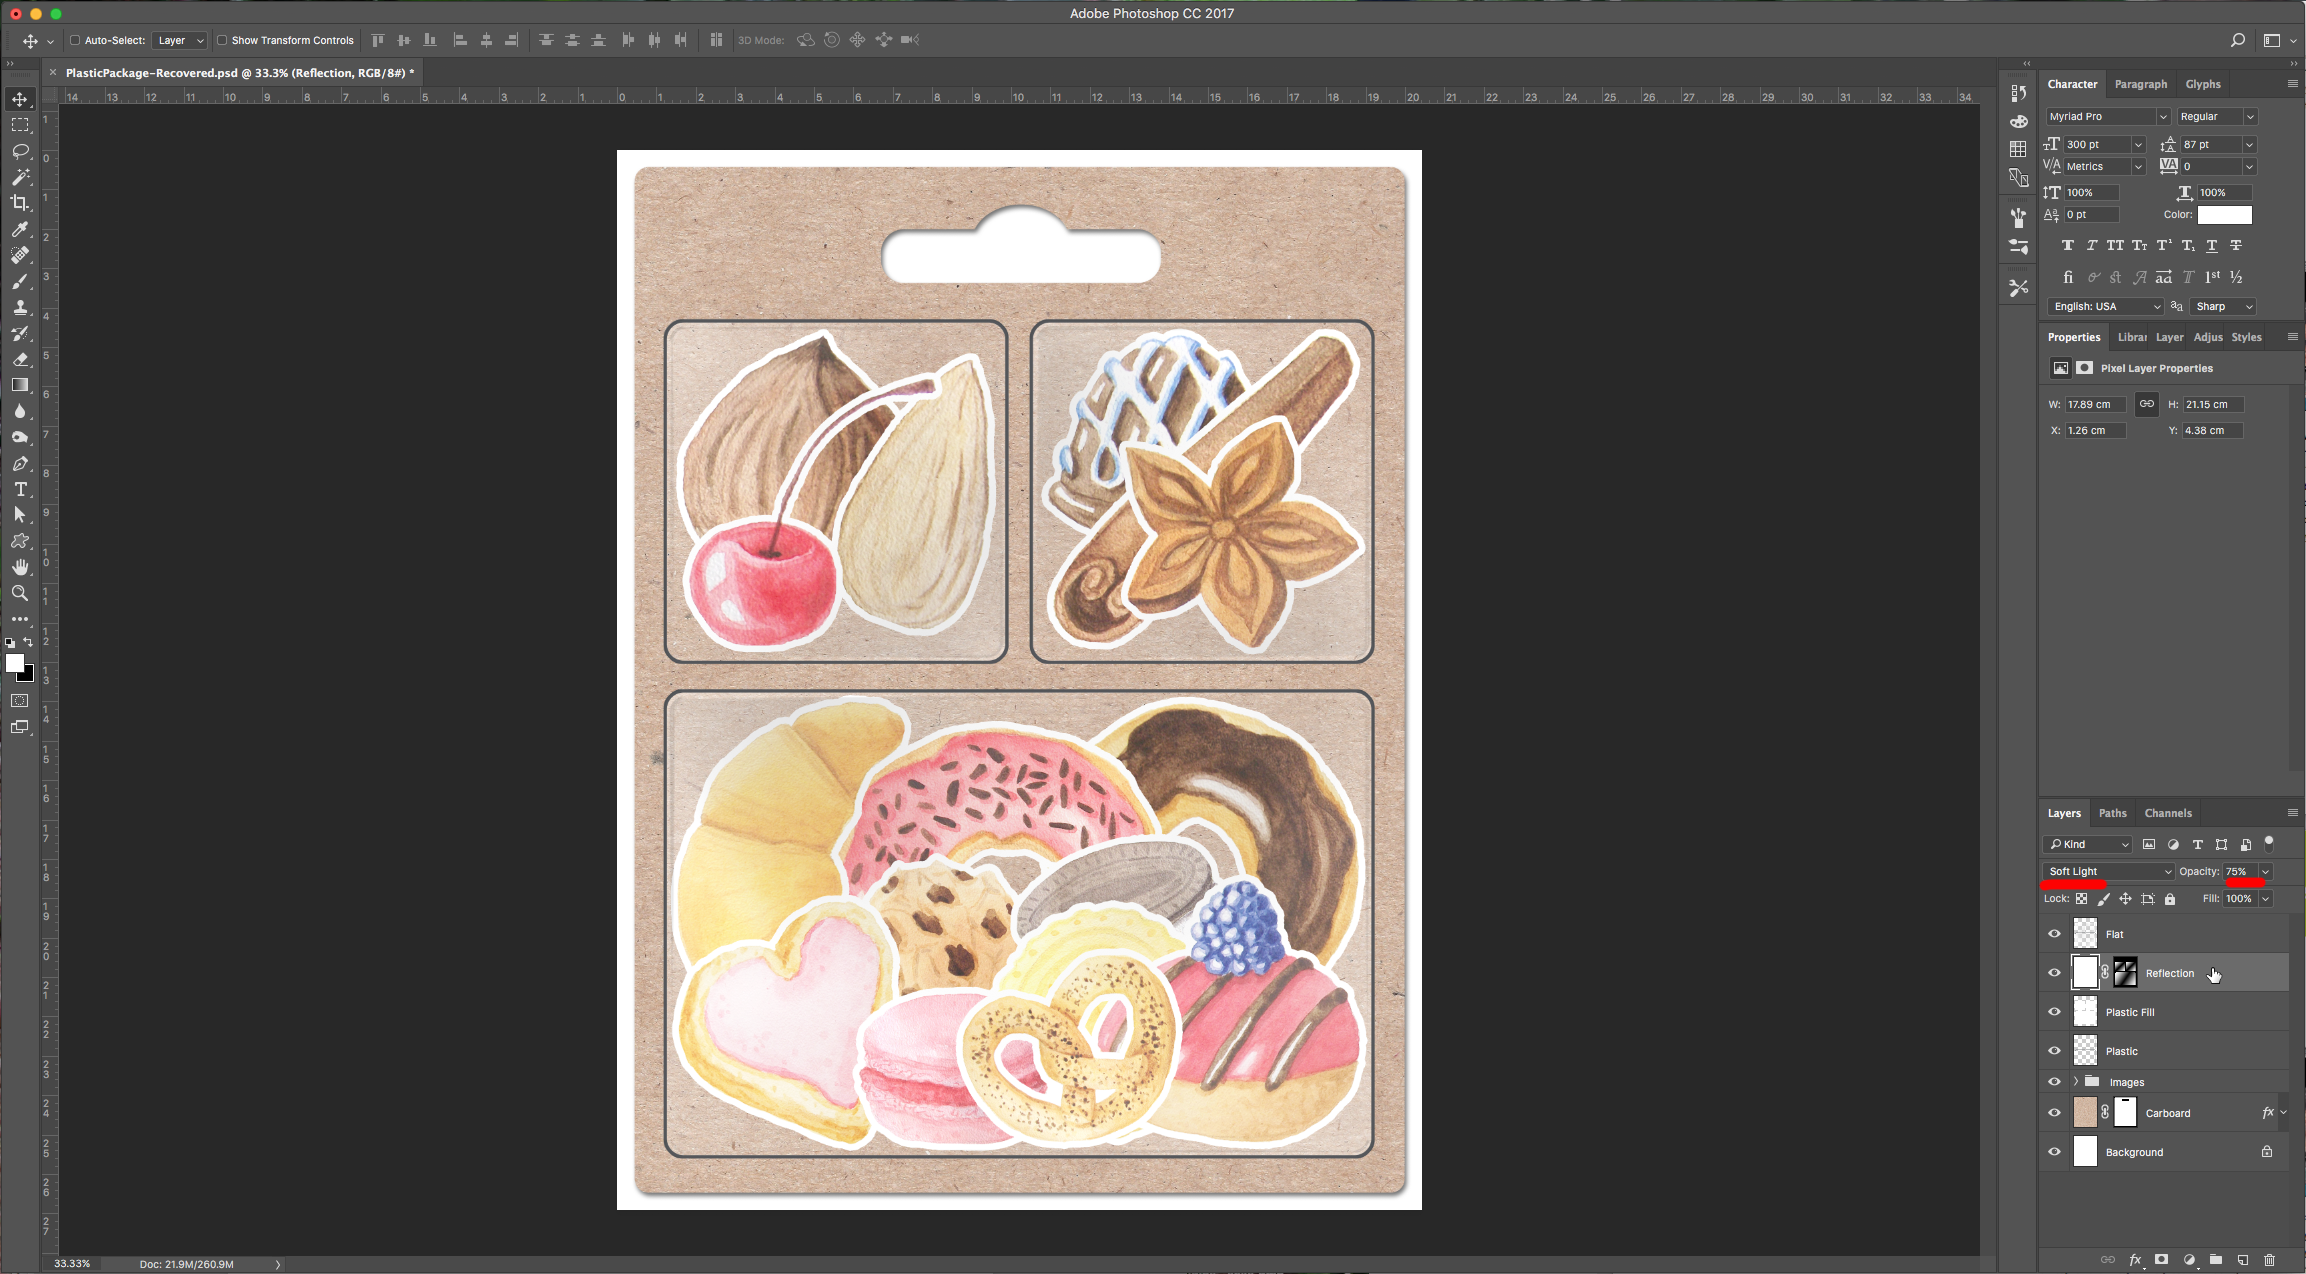
14 – Final result.
1 – In Illustrator draw the outlines of your package. Or maybe you can find an existing vector to work with. Copy (Command/Control + C) the vector and head to Photoshop. There, create a “New Document” and use the “Clipboard” settings but make the resolution 300 dpi. Then paste (Command/Control + V) and choose “Path” as the paste format.
2 – Go to the “Paths” menu and double-click on the “Work Path” and name it “Template”. Then duplicate the path by dragging it on top of the “New Page” button at the bottom of the “Paths” menu. Delete the inner squares, select the remaining parts with the “Path Selection Tool” (A) and choose “Exclude Overlapping Shapes” in “Path Operations” in the top left menu.
3 – Go to Image > Canvas Size (Shift + Alt + C) and add 100 pixels on each side. Select and paste the Cardboard background. Go to “Paths” and make a selection of the “Cardboard” path by clicking the “Load Path as Selection” button at the bottom of the menu. Go back to “Layers” and create a “Clipping Mask” by clicking on the button at the bottom of the menu.
4 – Double-click on the “Cardboard” layer to invoke the “Blending Options” dialog and apply the following values to the “Drop Shadow”:
5 – Create another copy of the “Template” path and this time delete the outer and upper paths and just keep the inner squares and make it a selection. Then choose Select > Modify > Expand and expand the selection by 10 pixels.
6 – Create a New Layer, name it “Plastic” and set the “Foreground” color to # 939598 (50% Black). Select the “Paint Bucket Tool” (P) and fill your selection with the gray. Go to the “Paths” menu and make “Template copy 2” a selection, and making sure that the actual path is not selected and that you are in your “Plastic” layer press “Delete” and deselect.
7 - Create a New Layer, name it “Plastic Fill” go to the “Paths” menu and make “Template copy 2” a selection again. Fill it with white and set the “opacity” to 10 %. Deselect.
8 – Create another layer and fill it with white. Make “Template copy 2” a selection and click on the “Layer Mask” button at the bottom of the “Layers” menu. Use the “Direct Selection Tool” (A) and select the path of one of the plastic windows, make it a selection. Go to the “Gradient Tool” (G) and select “Linear”, make black your “Foreground” color, choose “Foreground to Transparent” and set the mode to “Multiply” then draw from the center to the top left corner. Repeat this with each plastic window.
9 – Change the “Gradient Options” mode to “Normal” and the “Foreground” color to white. And repeat the process from the last step but apply the gradient from the bottom right corner to the center.
10 – Open the images you wish to “package” and bring them into your file (we chose many from the Watercolor Bakery Set). Make them the size you like and position them where you wish them to be in the package. Then double-click on one of them and apply the following “Blending Options”:
11 - Right-click on that layer and “Copy Layer Style” then select all of your images and “Paste Layer Style”. You can select them and click on the “Create New Group” button on the bottom of the “Layers” menu to group them together. Position them on top of your “Cardboard” layer.
12 – Select your top layer (“Reflection”) and change the “Blending Mode” to “Soft Light”. Select your “Reflection”, “Plastic Fill” and “Plastic” layers, duplicate them by dragging them on to the “New Layer” button at the bottom of the menu and then right-click on the layers and select “Merge Layers” to flatten them. Name this layer “Flat”.
13 – Select the “Flat” layer and go to Filter > Filter Gallery > Artistic > Plastic Wrap and apply the following values:
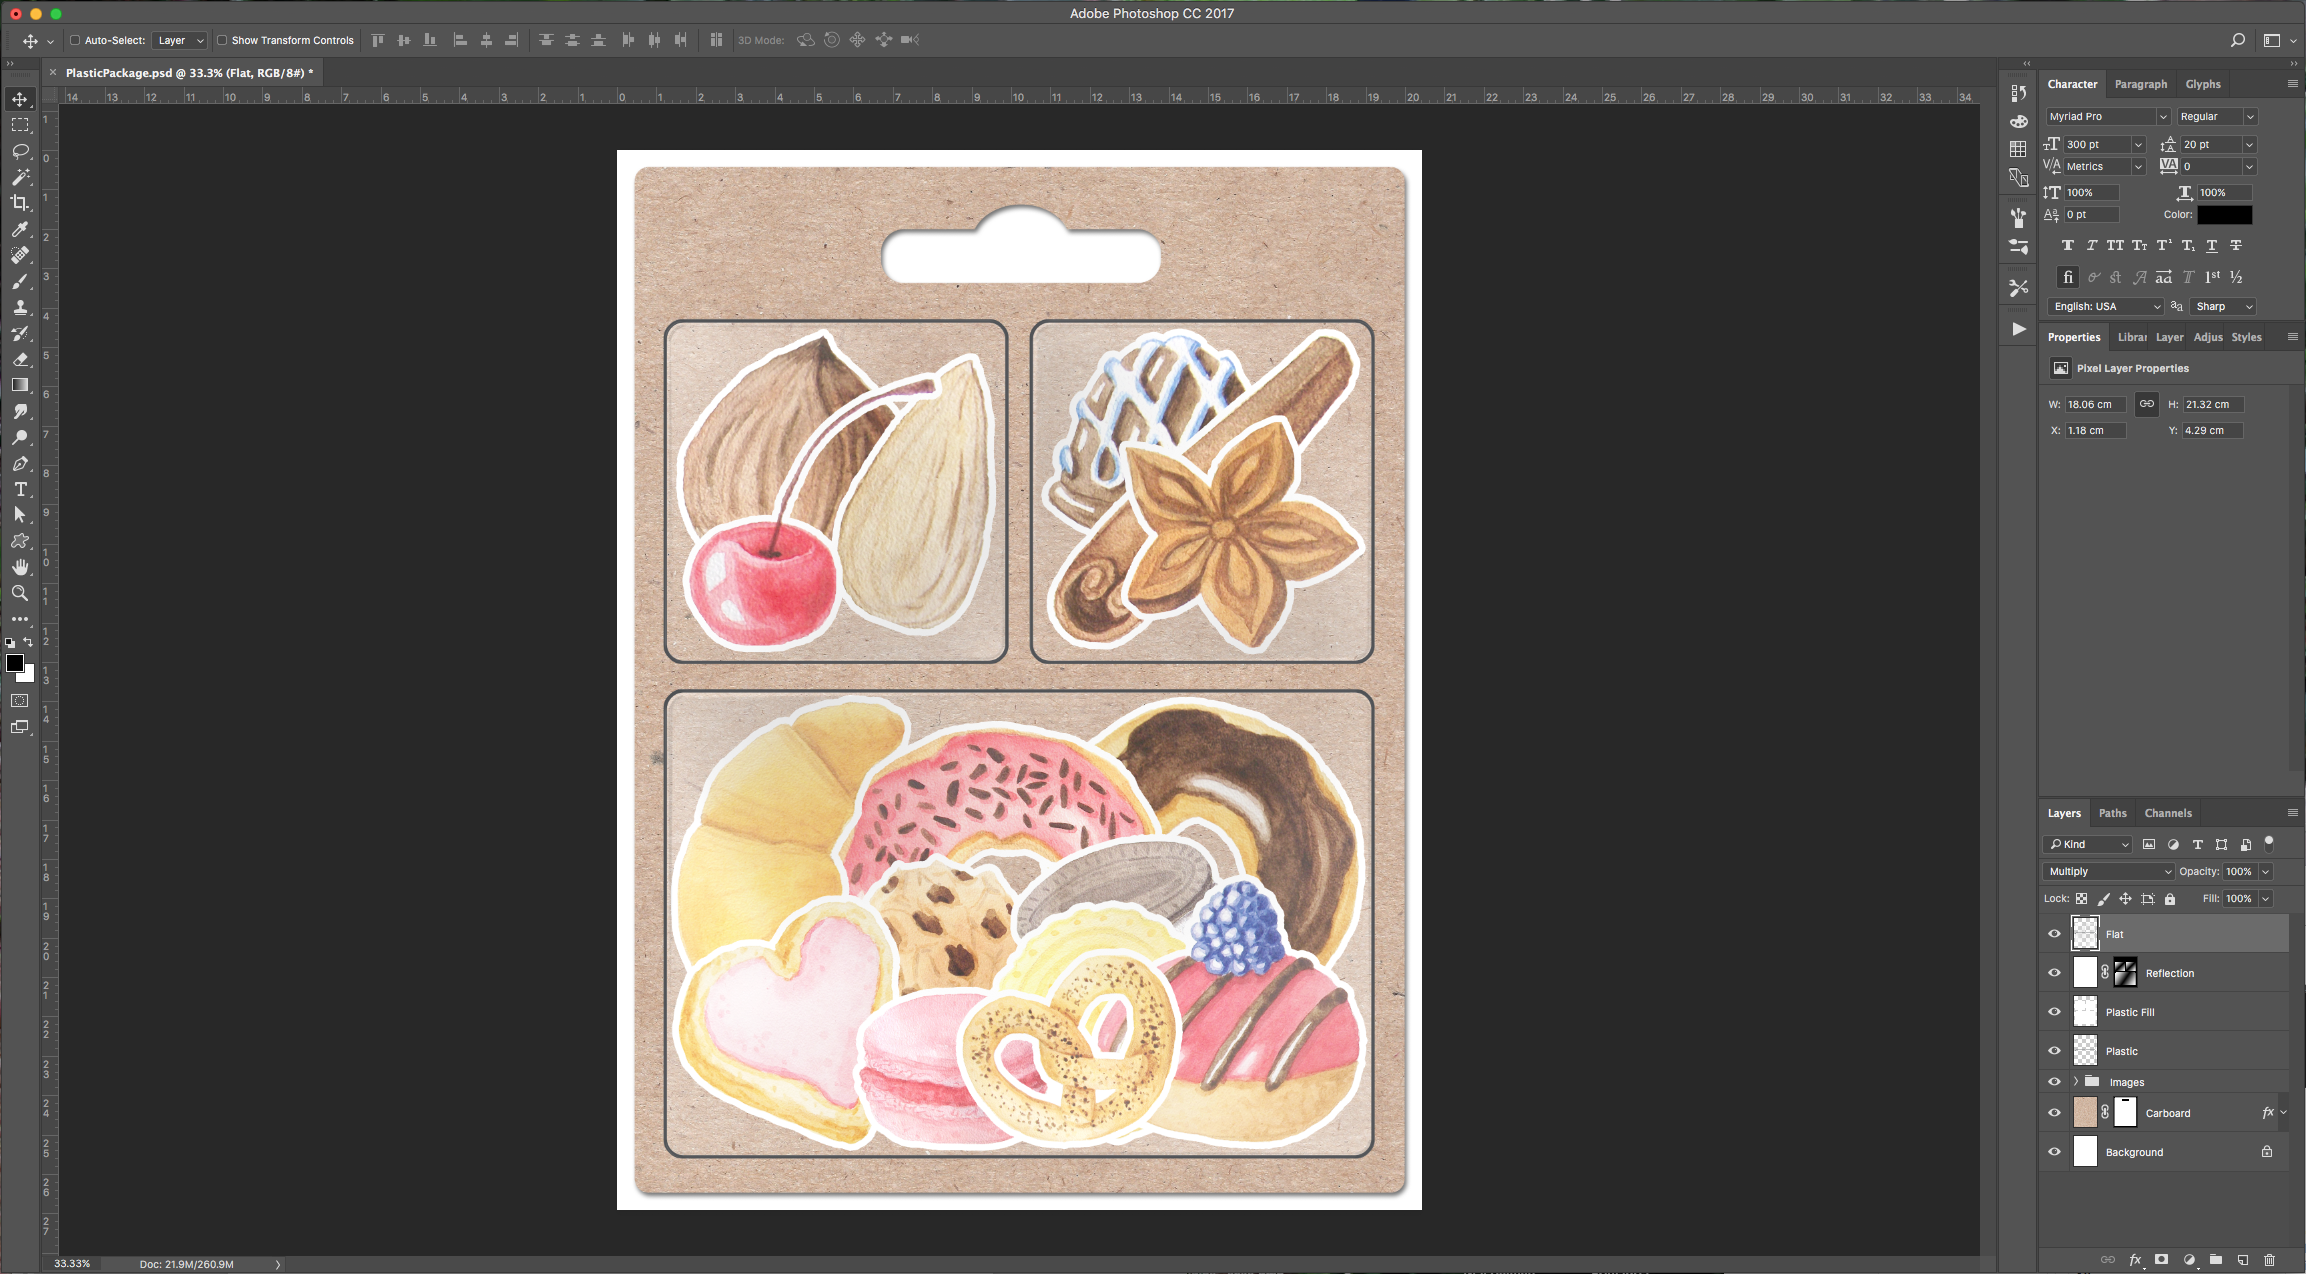
Then change “Flat” “Blending Mode” to Multiply and “Reflection” to “Soft Light” with and “Opacity” of 75%
14 – Final result.
Related Tutorials
Photoshop Tutorials
How to Use Text Effects in Photoshop
With Photoshop Text Effects, you can create text with impact in just a few steps.
Photoshop Tutorials
How to Create Speech Bubbles in Photoshop
Learn how to create and edit fun speech bubbles in Photoshop using custom shapes.
Photoshop Tutorials
How to Make Sublimation Designs in Photoshop
Discover how to make sublimation designs in Photoshop that you can use to create beautiful gifts.
Photoshop Tutorials
How to Use EPS Files in Photoshop
In this tutorial, learn how to use EPS files in Photoshop as Smart Objects to maintain image quality
Photoshop Tutorials
Image Burned in Wood in Photoshop
In this tutorial, discover how to create a realistic wood burned effect in Adobe Photoshop.
Photoshop Tutorials
Easy See through Cut Out Text in Photoshop
Create a see-through cut out text design in Photoshop with these easy to follow steps.