By Design Bundles
Photoshop Tutorials11 min
Realistic Notebook in Photoshop
For this tutorial, you will need a “Background” image.
1 - In Photoshop, open the image you chose as “Background”.
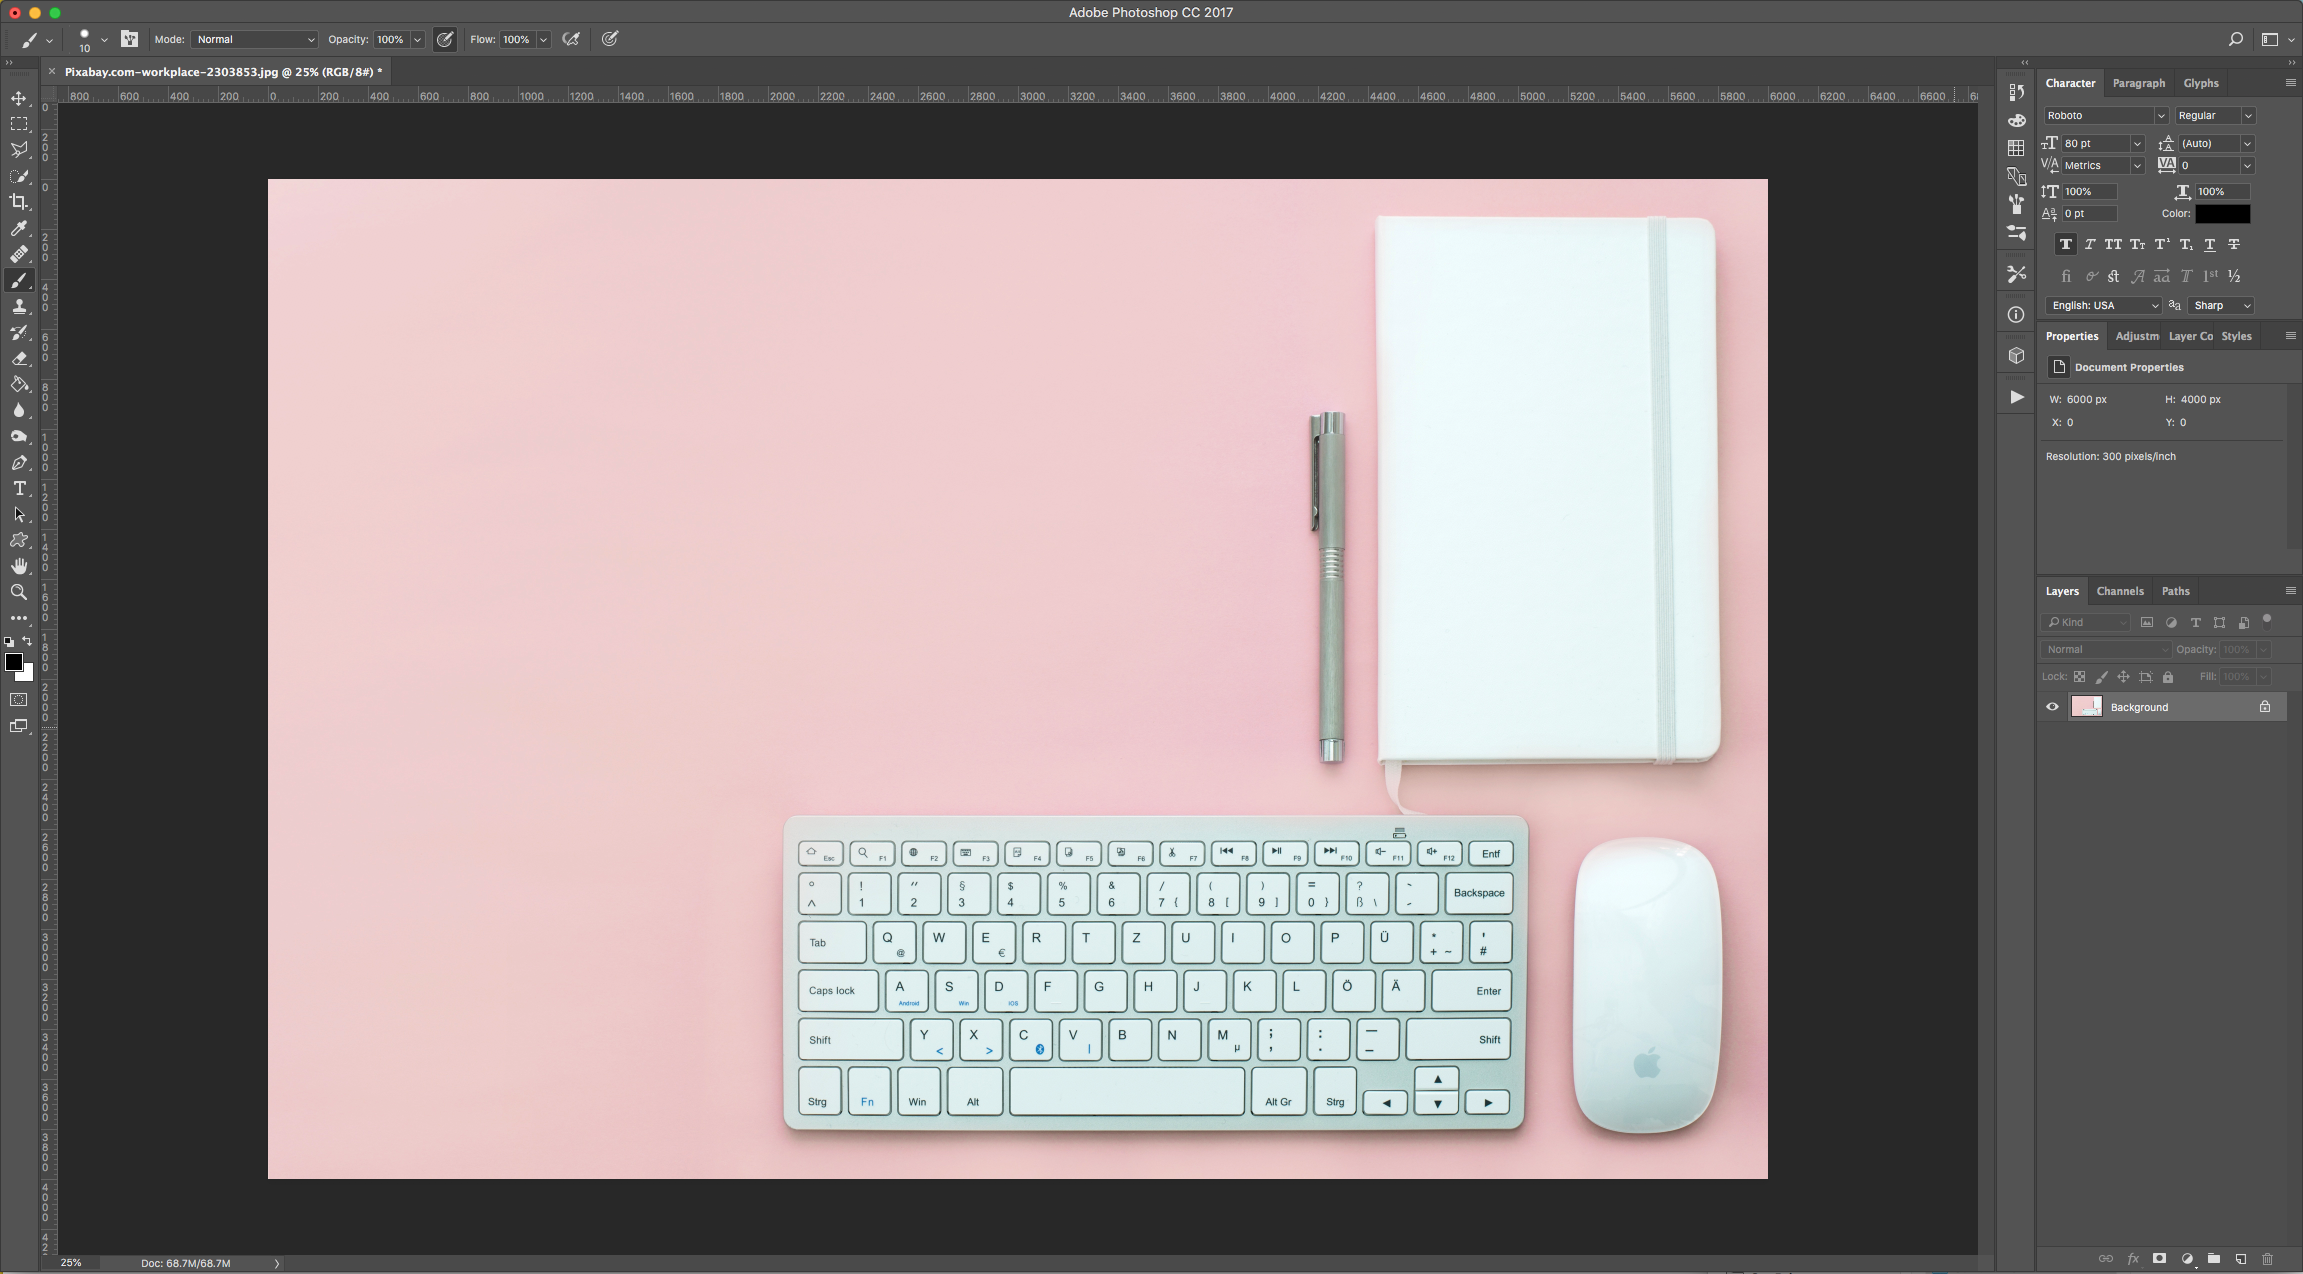
2 - Use the “Rounded Rectangle Tool” (U), to create a “Rectangular” shape. Fill it with White.
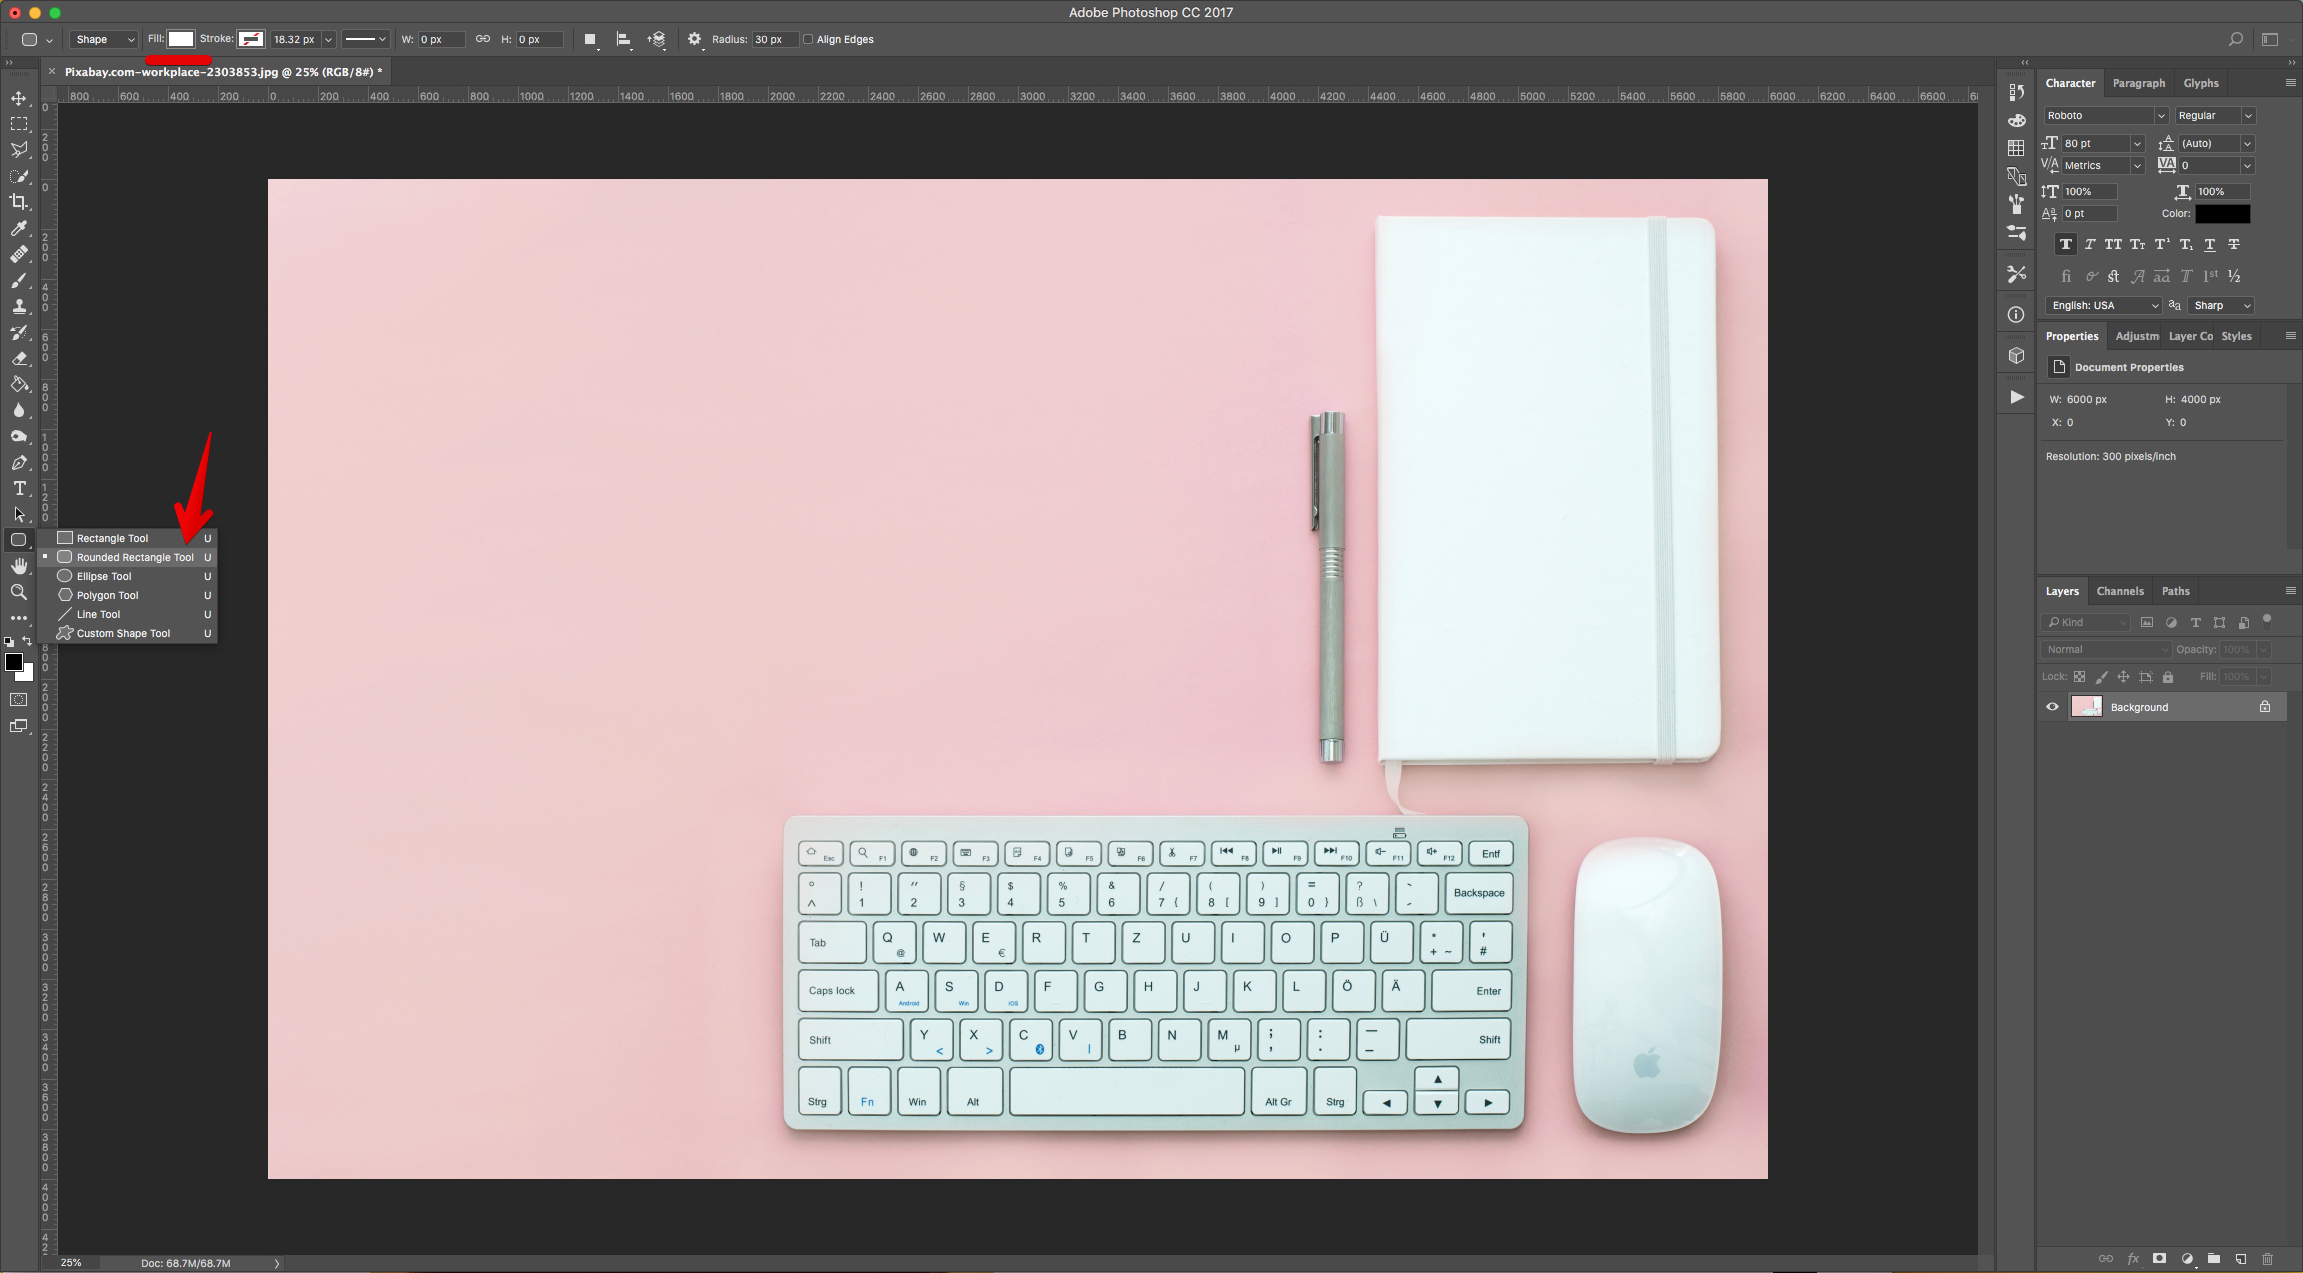
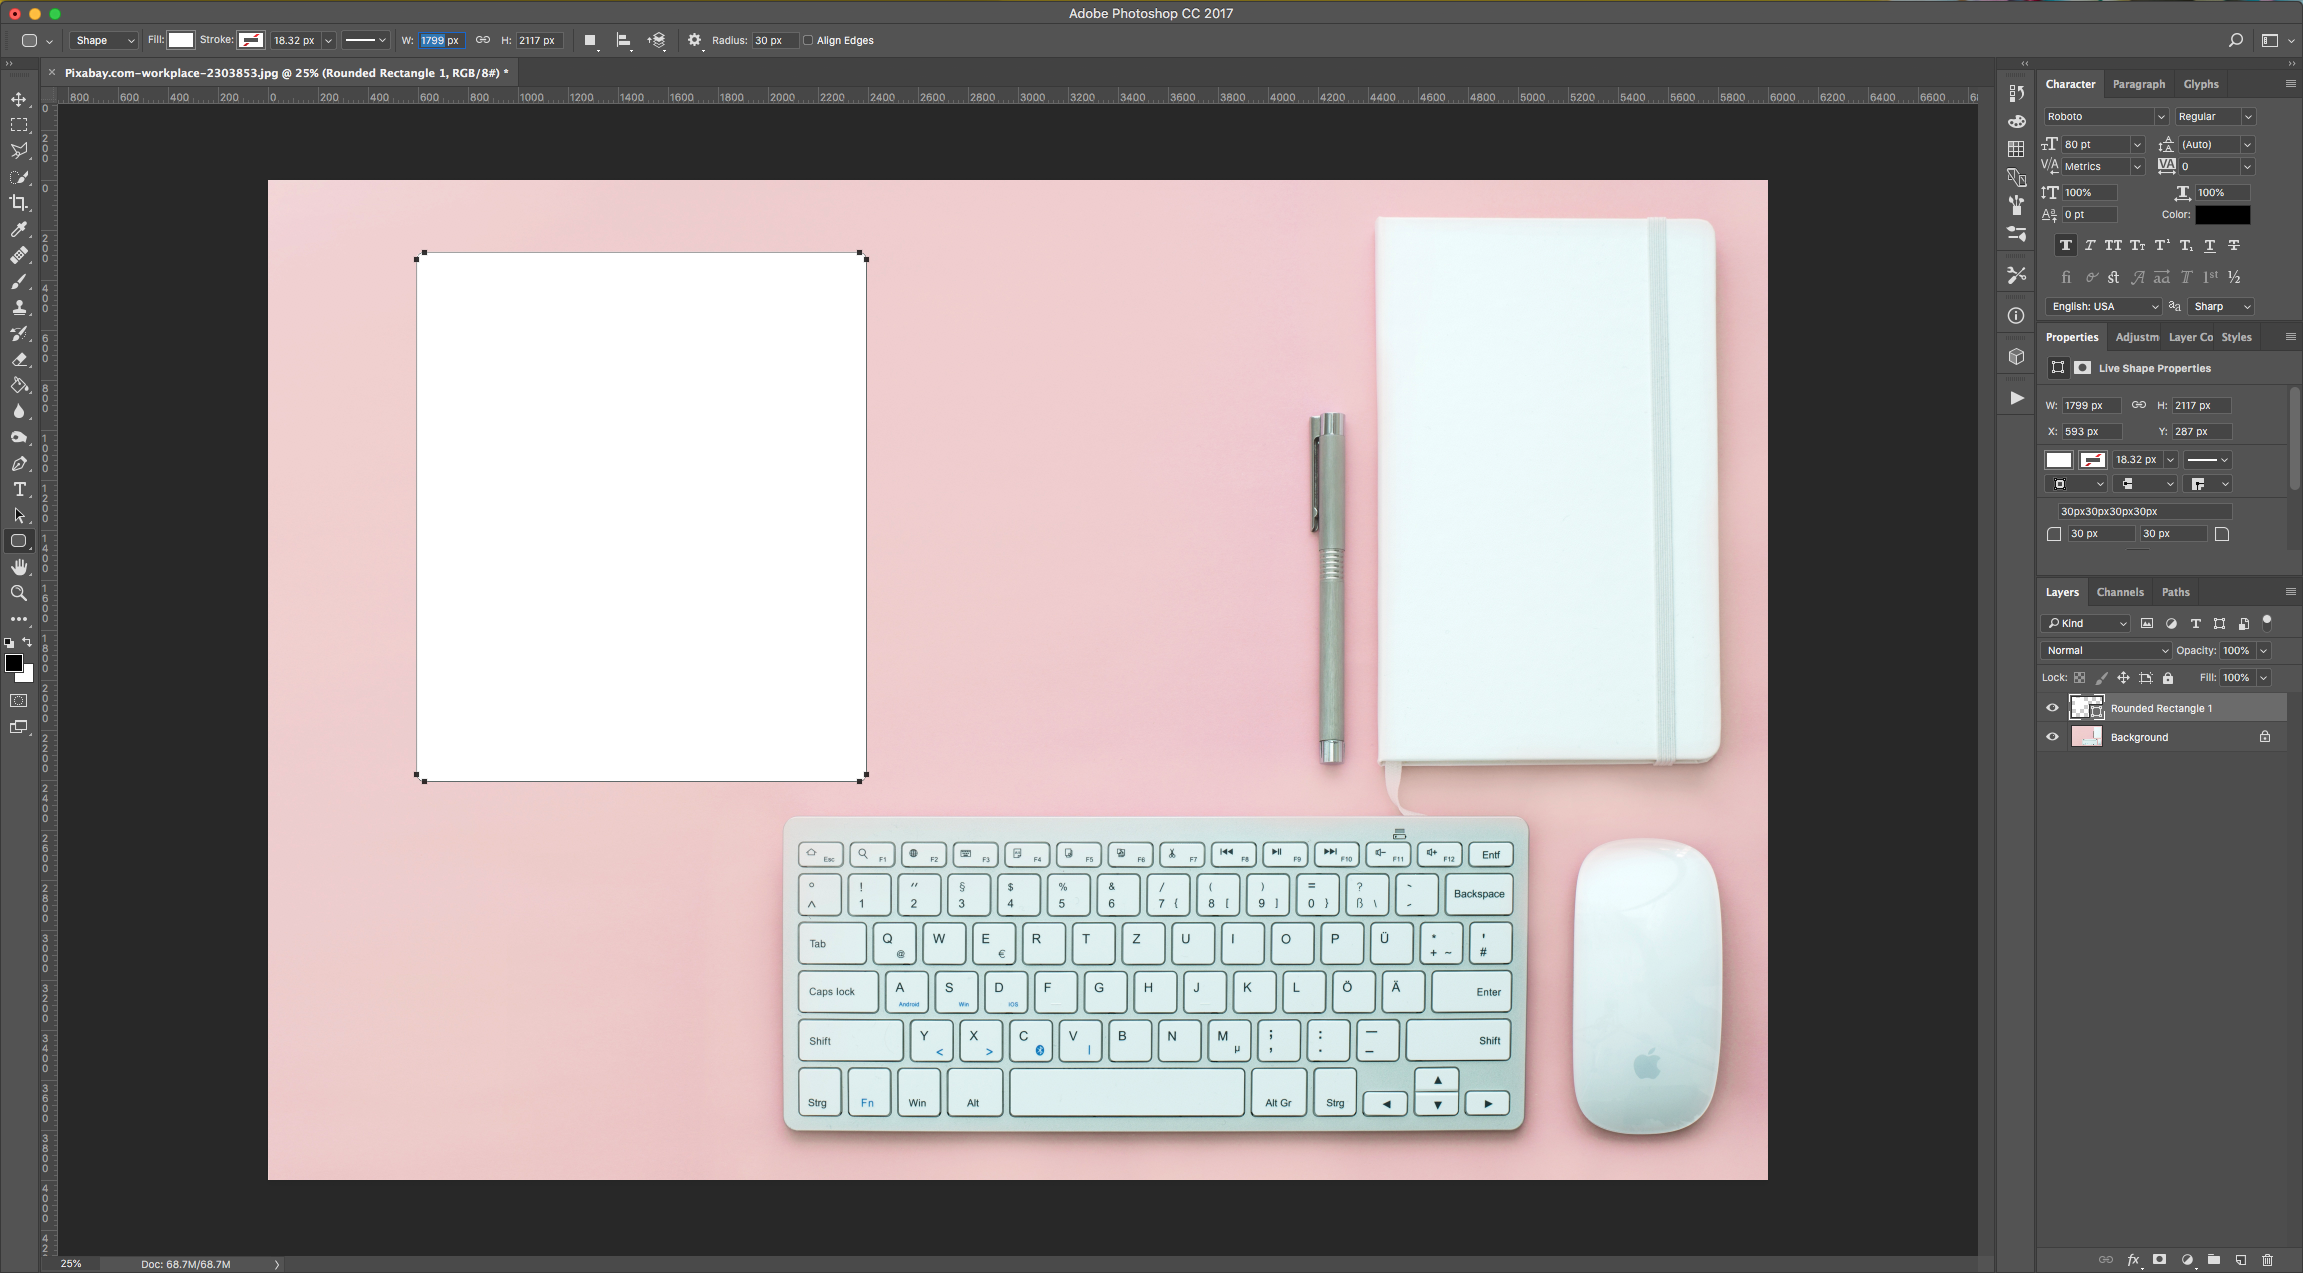
3 - Double-click on top of its Thumbnail and apply the following “Layer Styles”:
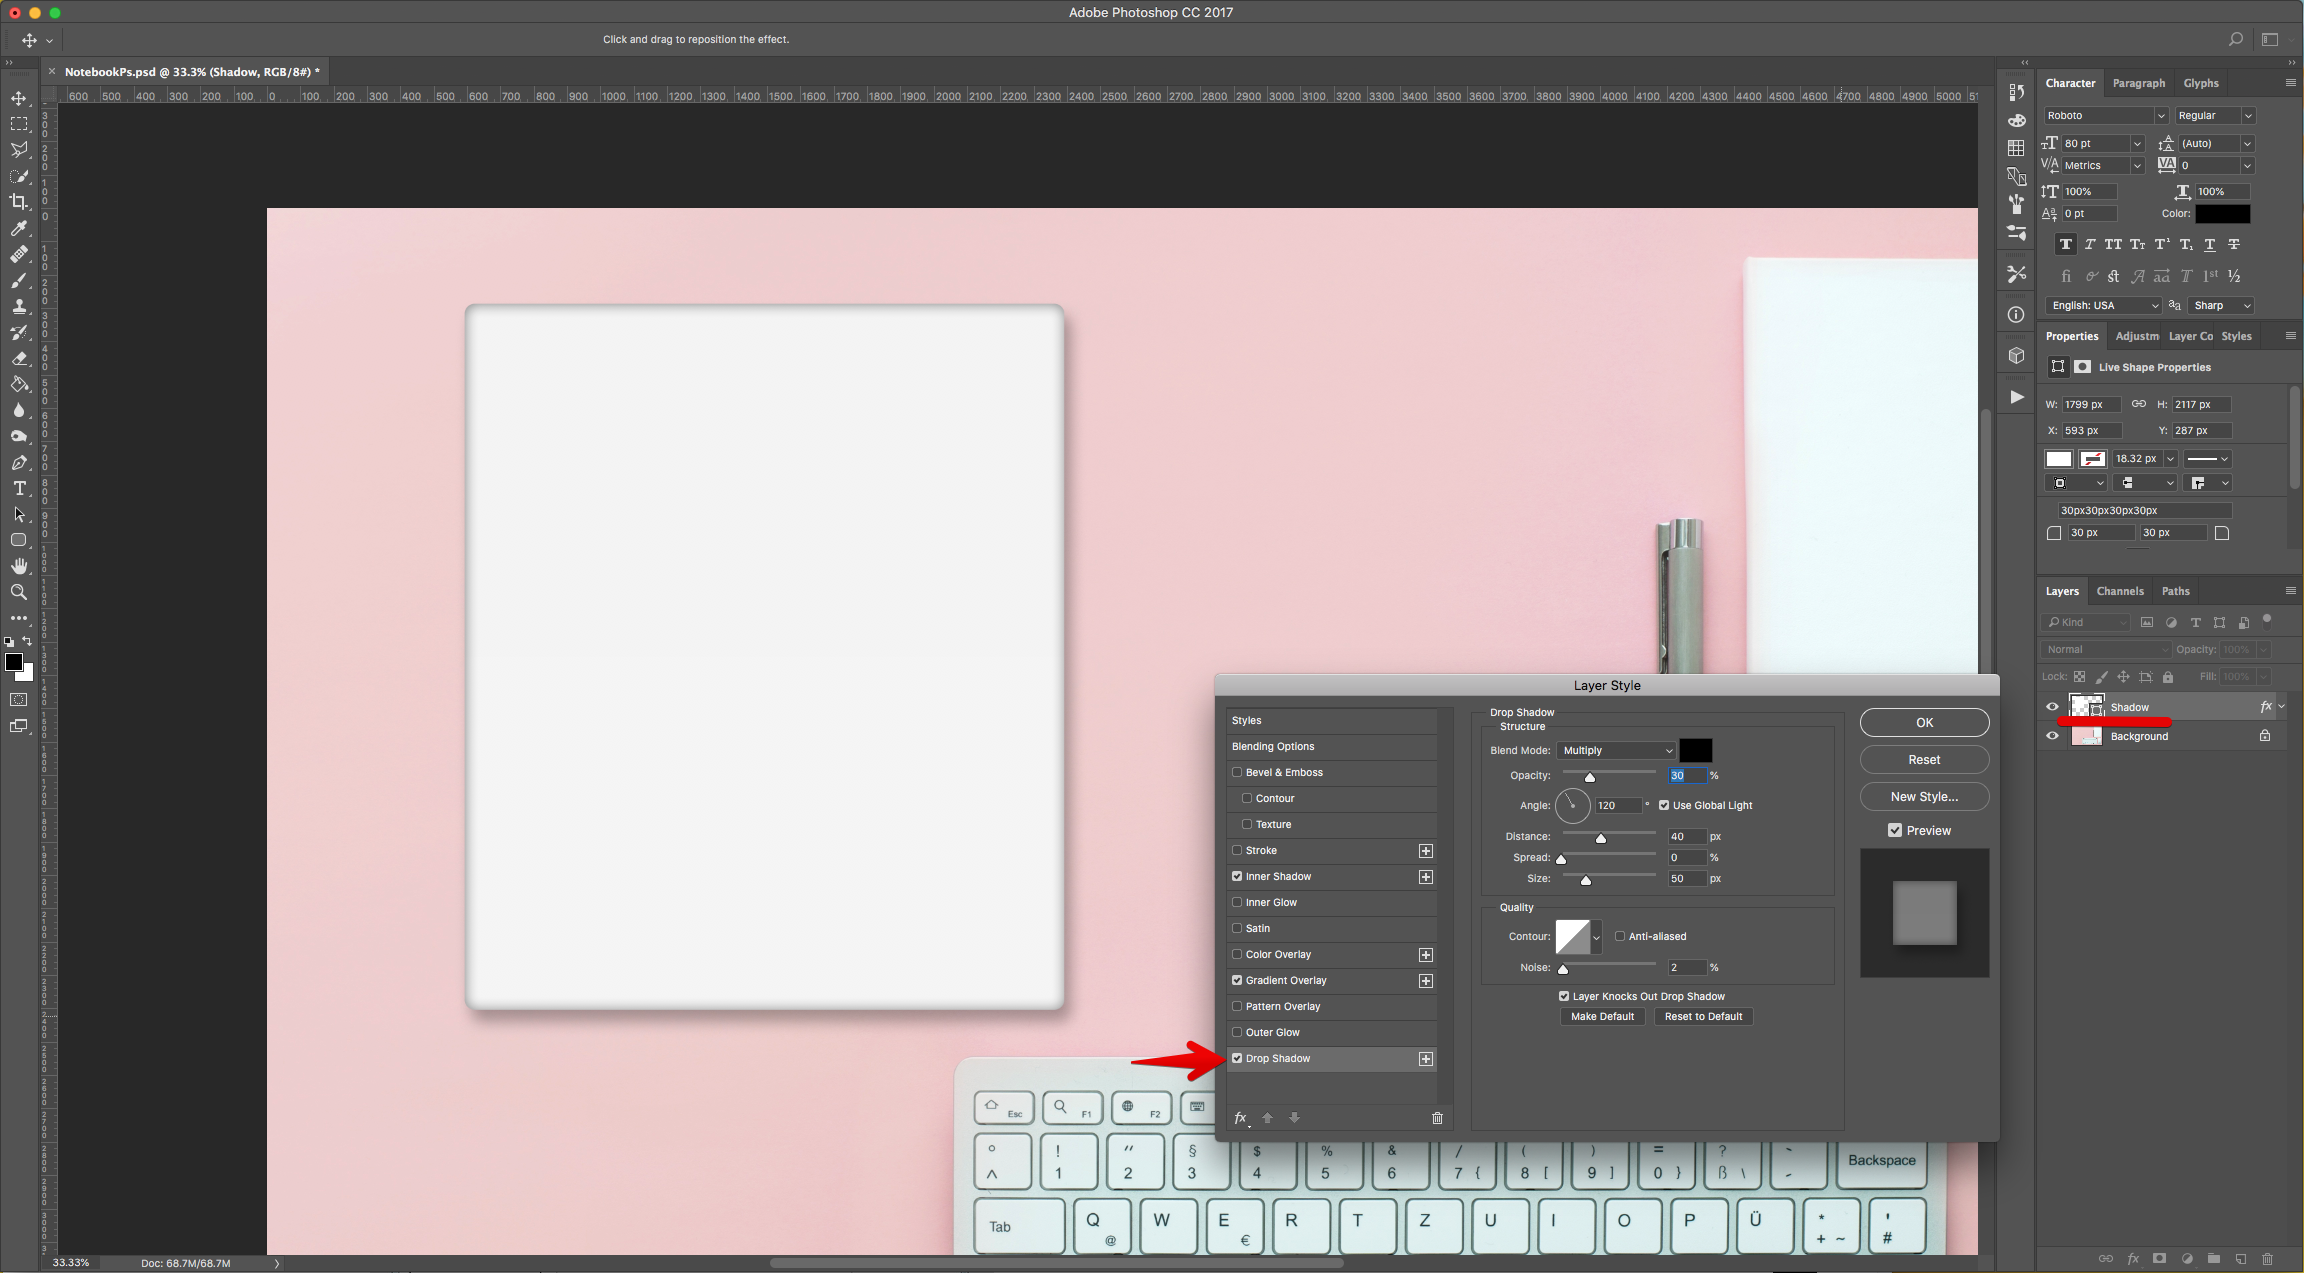
Drop Shadow:
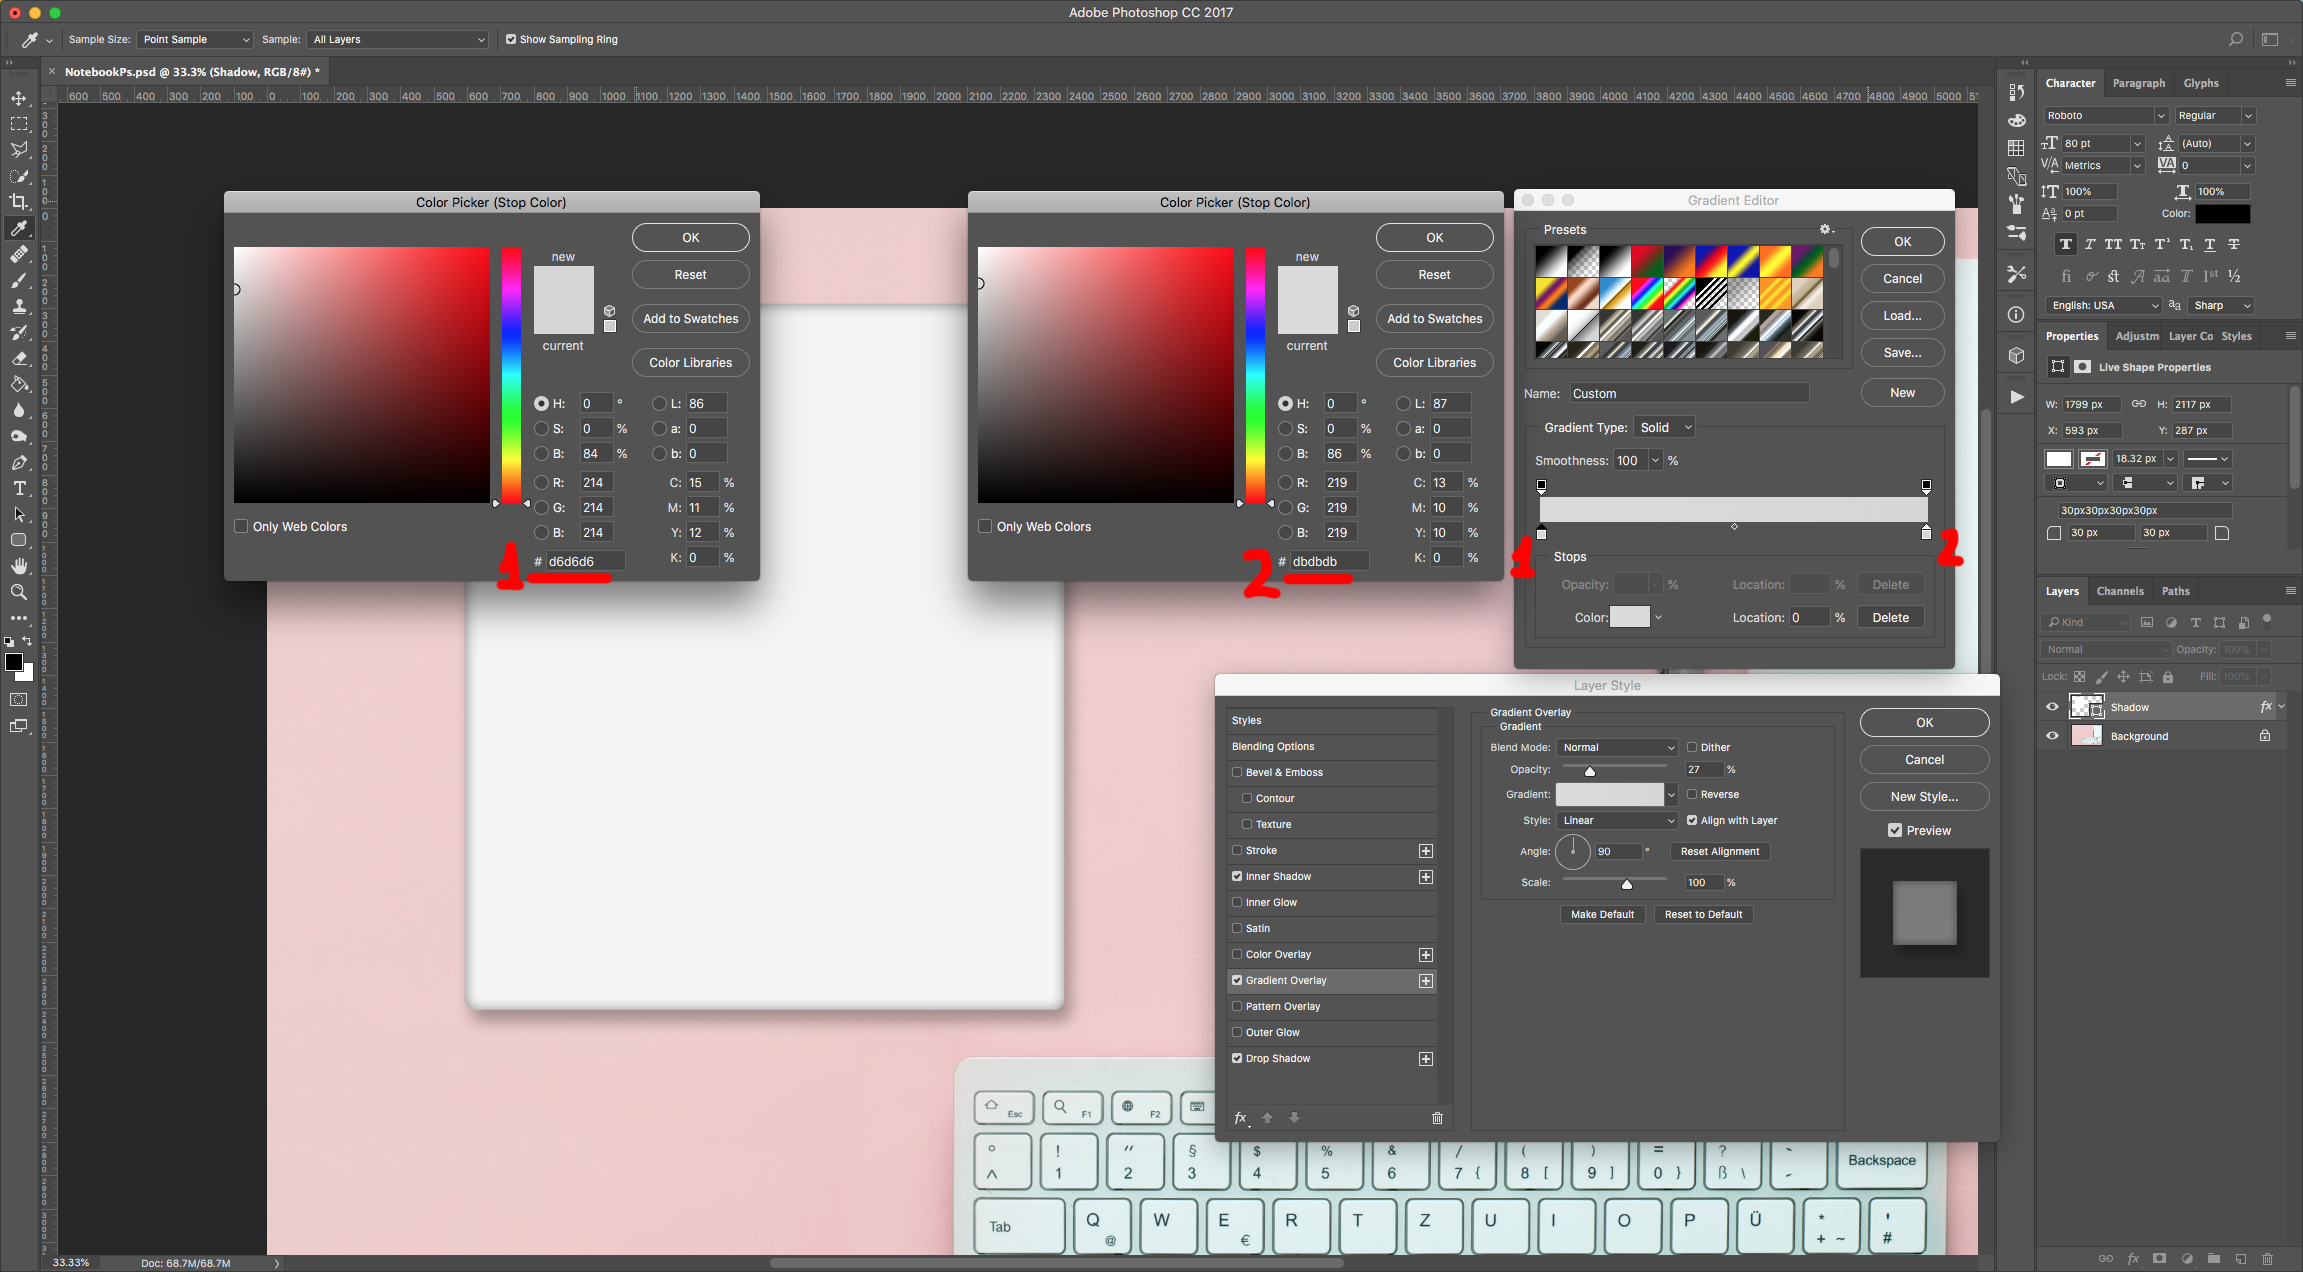
Gradient Overlay: (from #d6d6d6 to #dbdbdb)
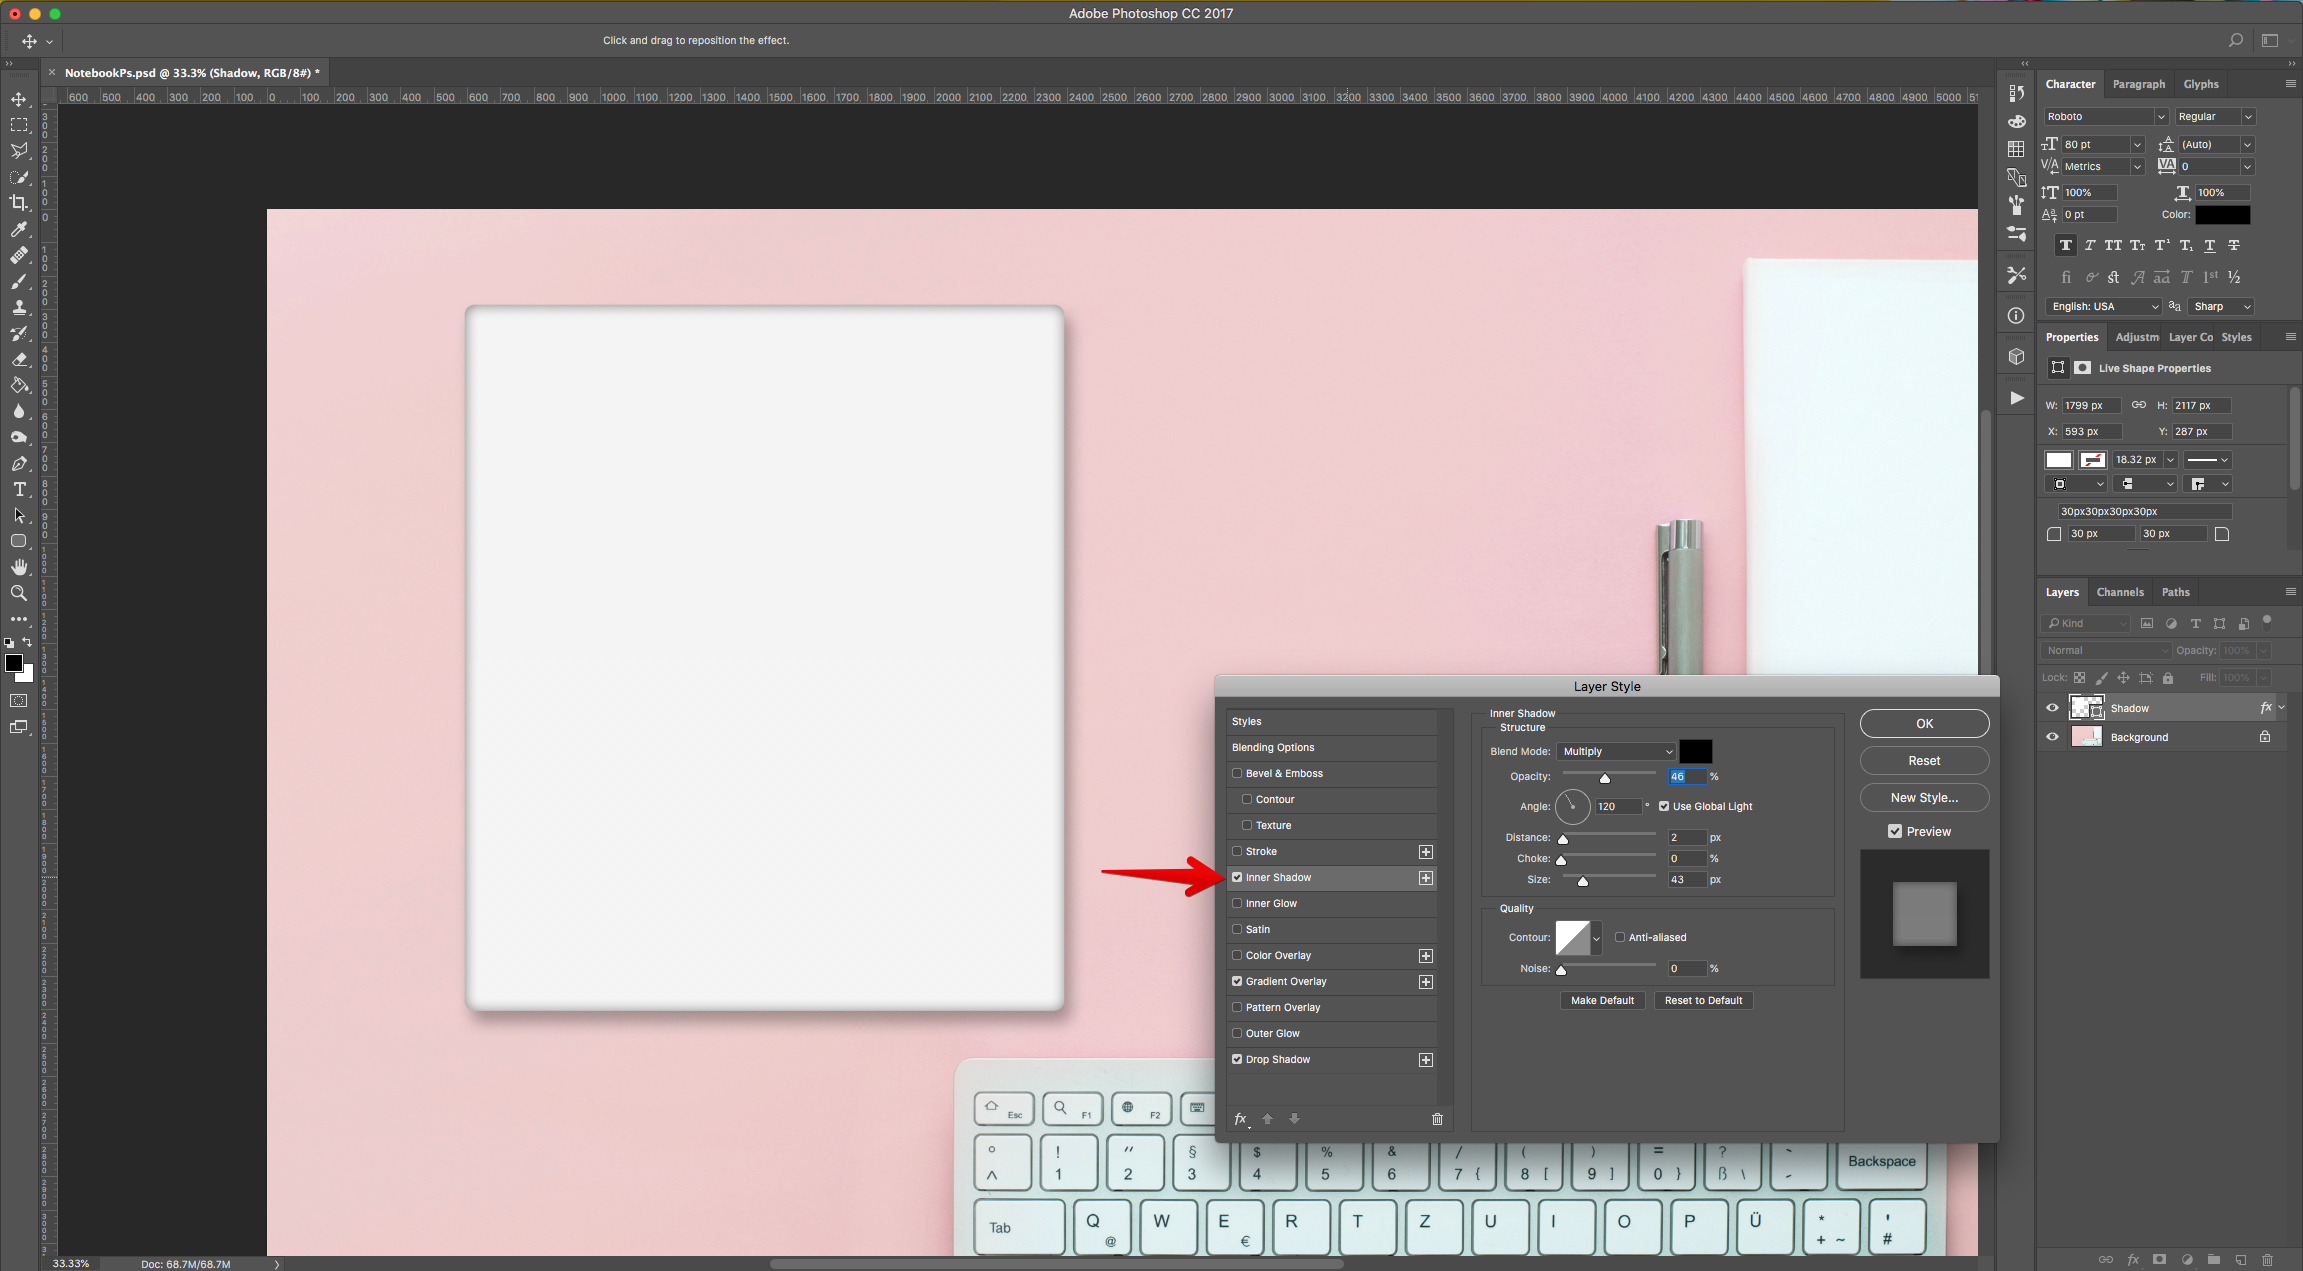
Inner Shadow:
4 - “Duplicate” the layer (Command/Control + J) or by dragging its Thumbnail to the “Create New Layer” button at the bottom of the “Layers Panel” and name it “Paper”. Name the original one “Shadow”.
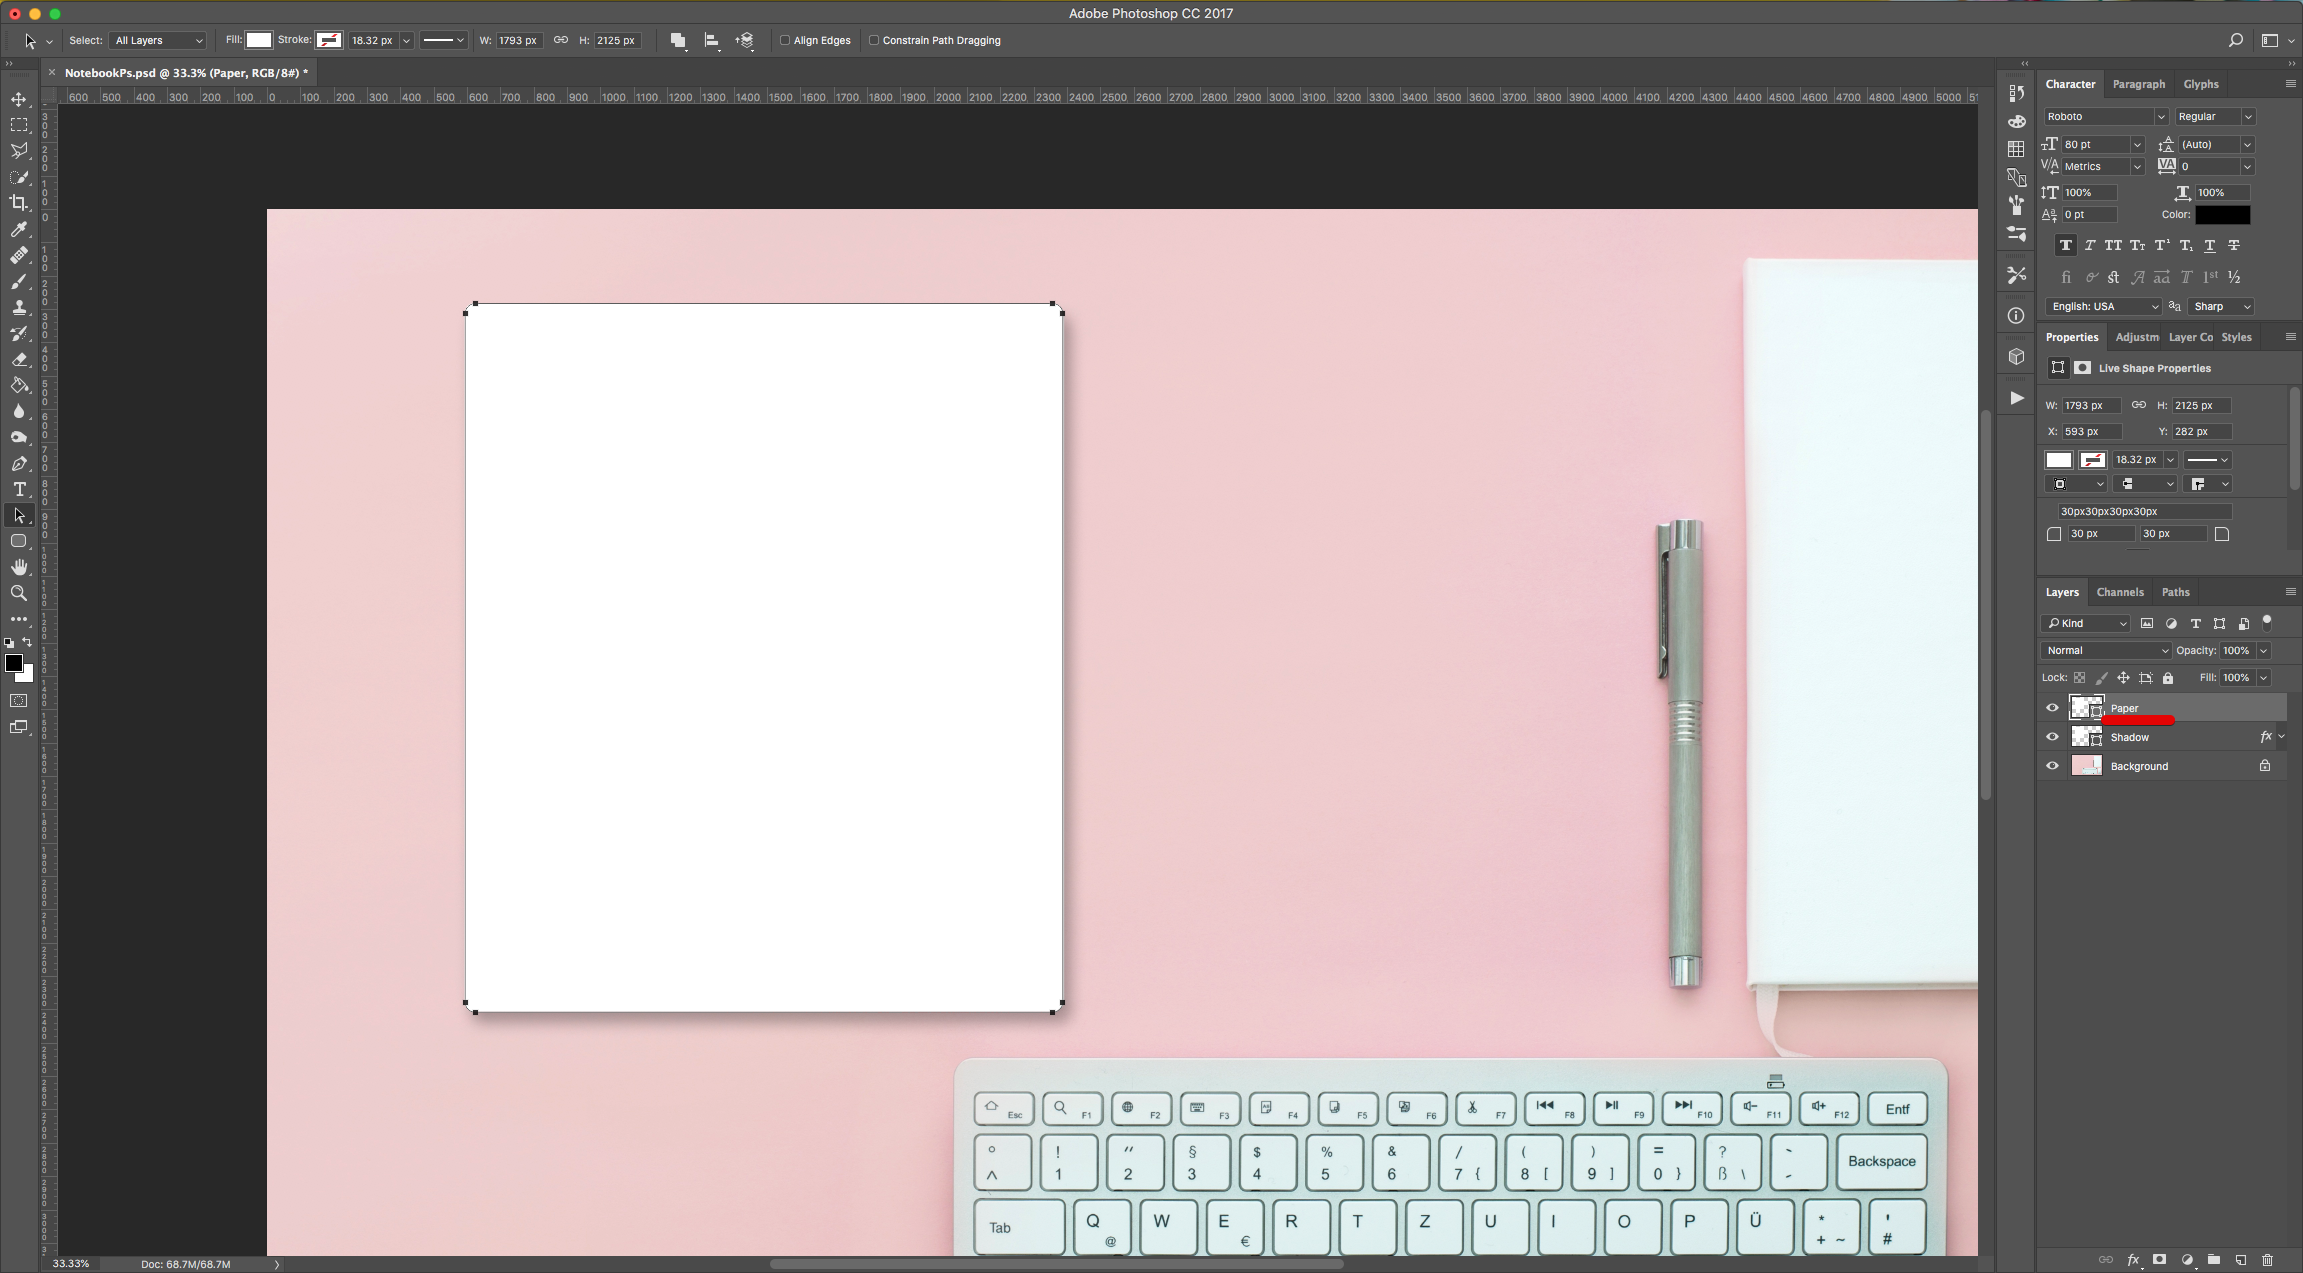
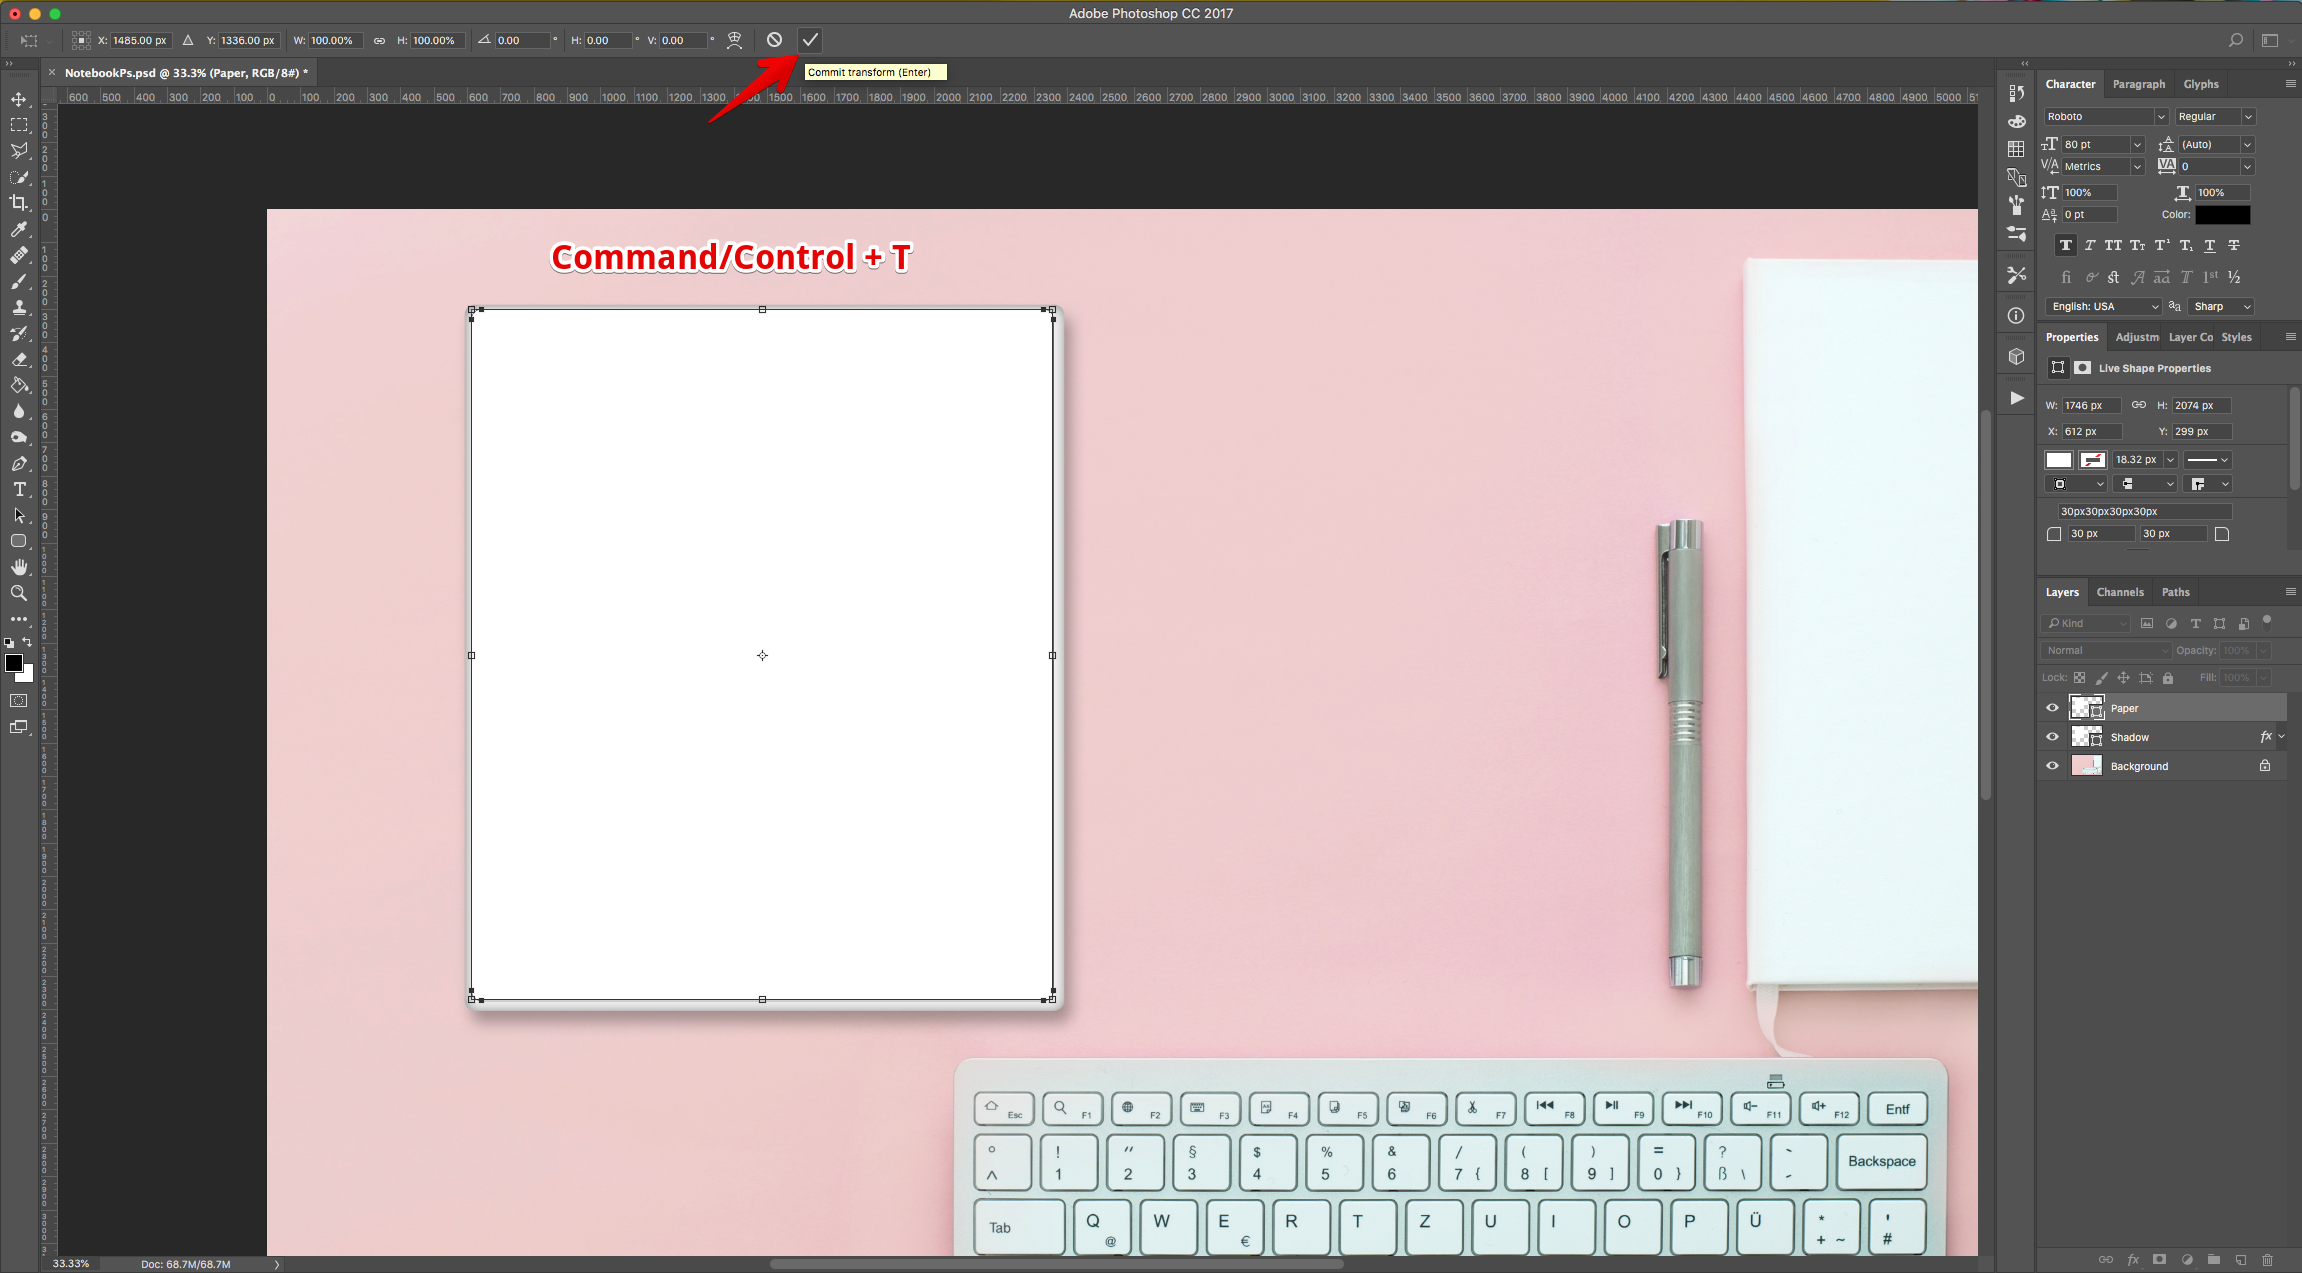
5 - Use “Free Transform” (Command/Control + T) to resize the “Paper” rectangle a bit leaving the top of both rectangles very close. Click on the small Check Mark on the Top Menu or hit “Enter” to “Commit” the changes.
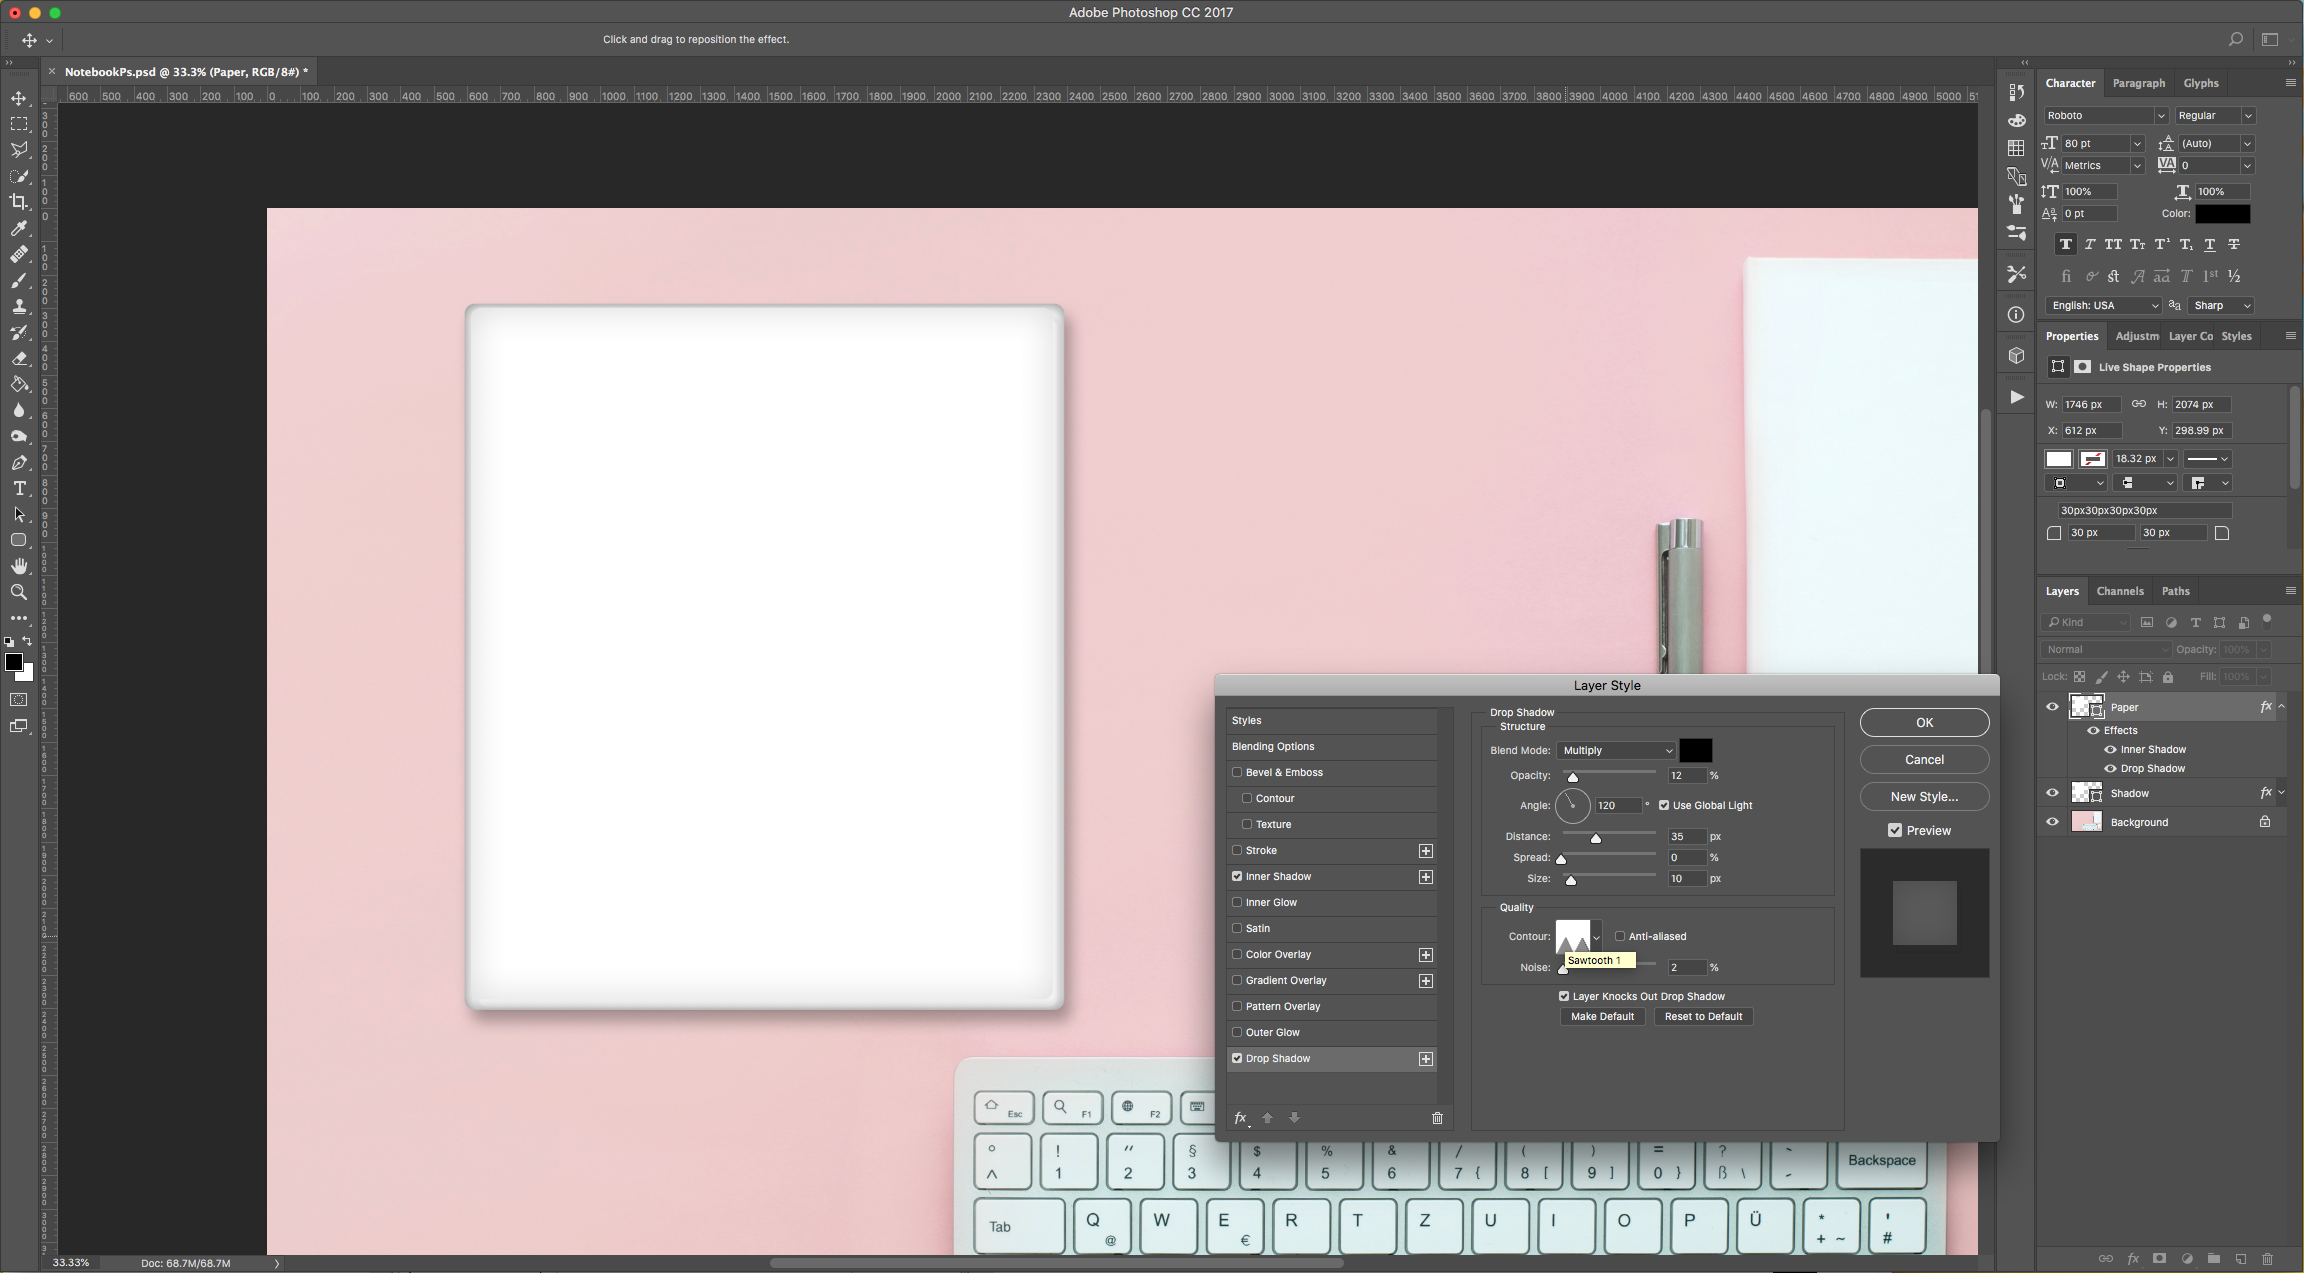
6 - Double-click on top of the “Paper” layer Thumbnail and change the “Layer Styles” values to the following:
Drop Shadow: (Contour: Sawtooth 1)
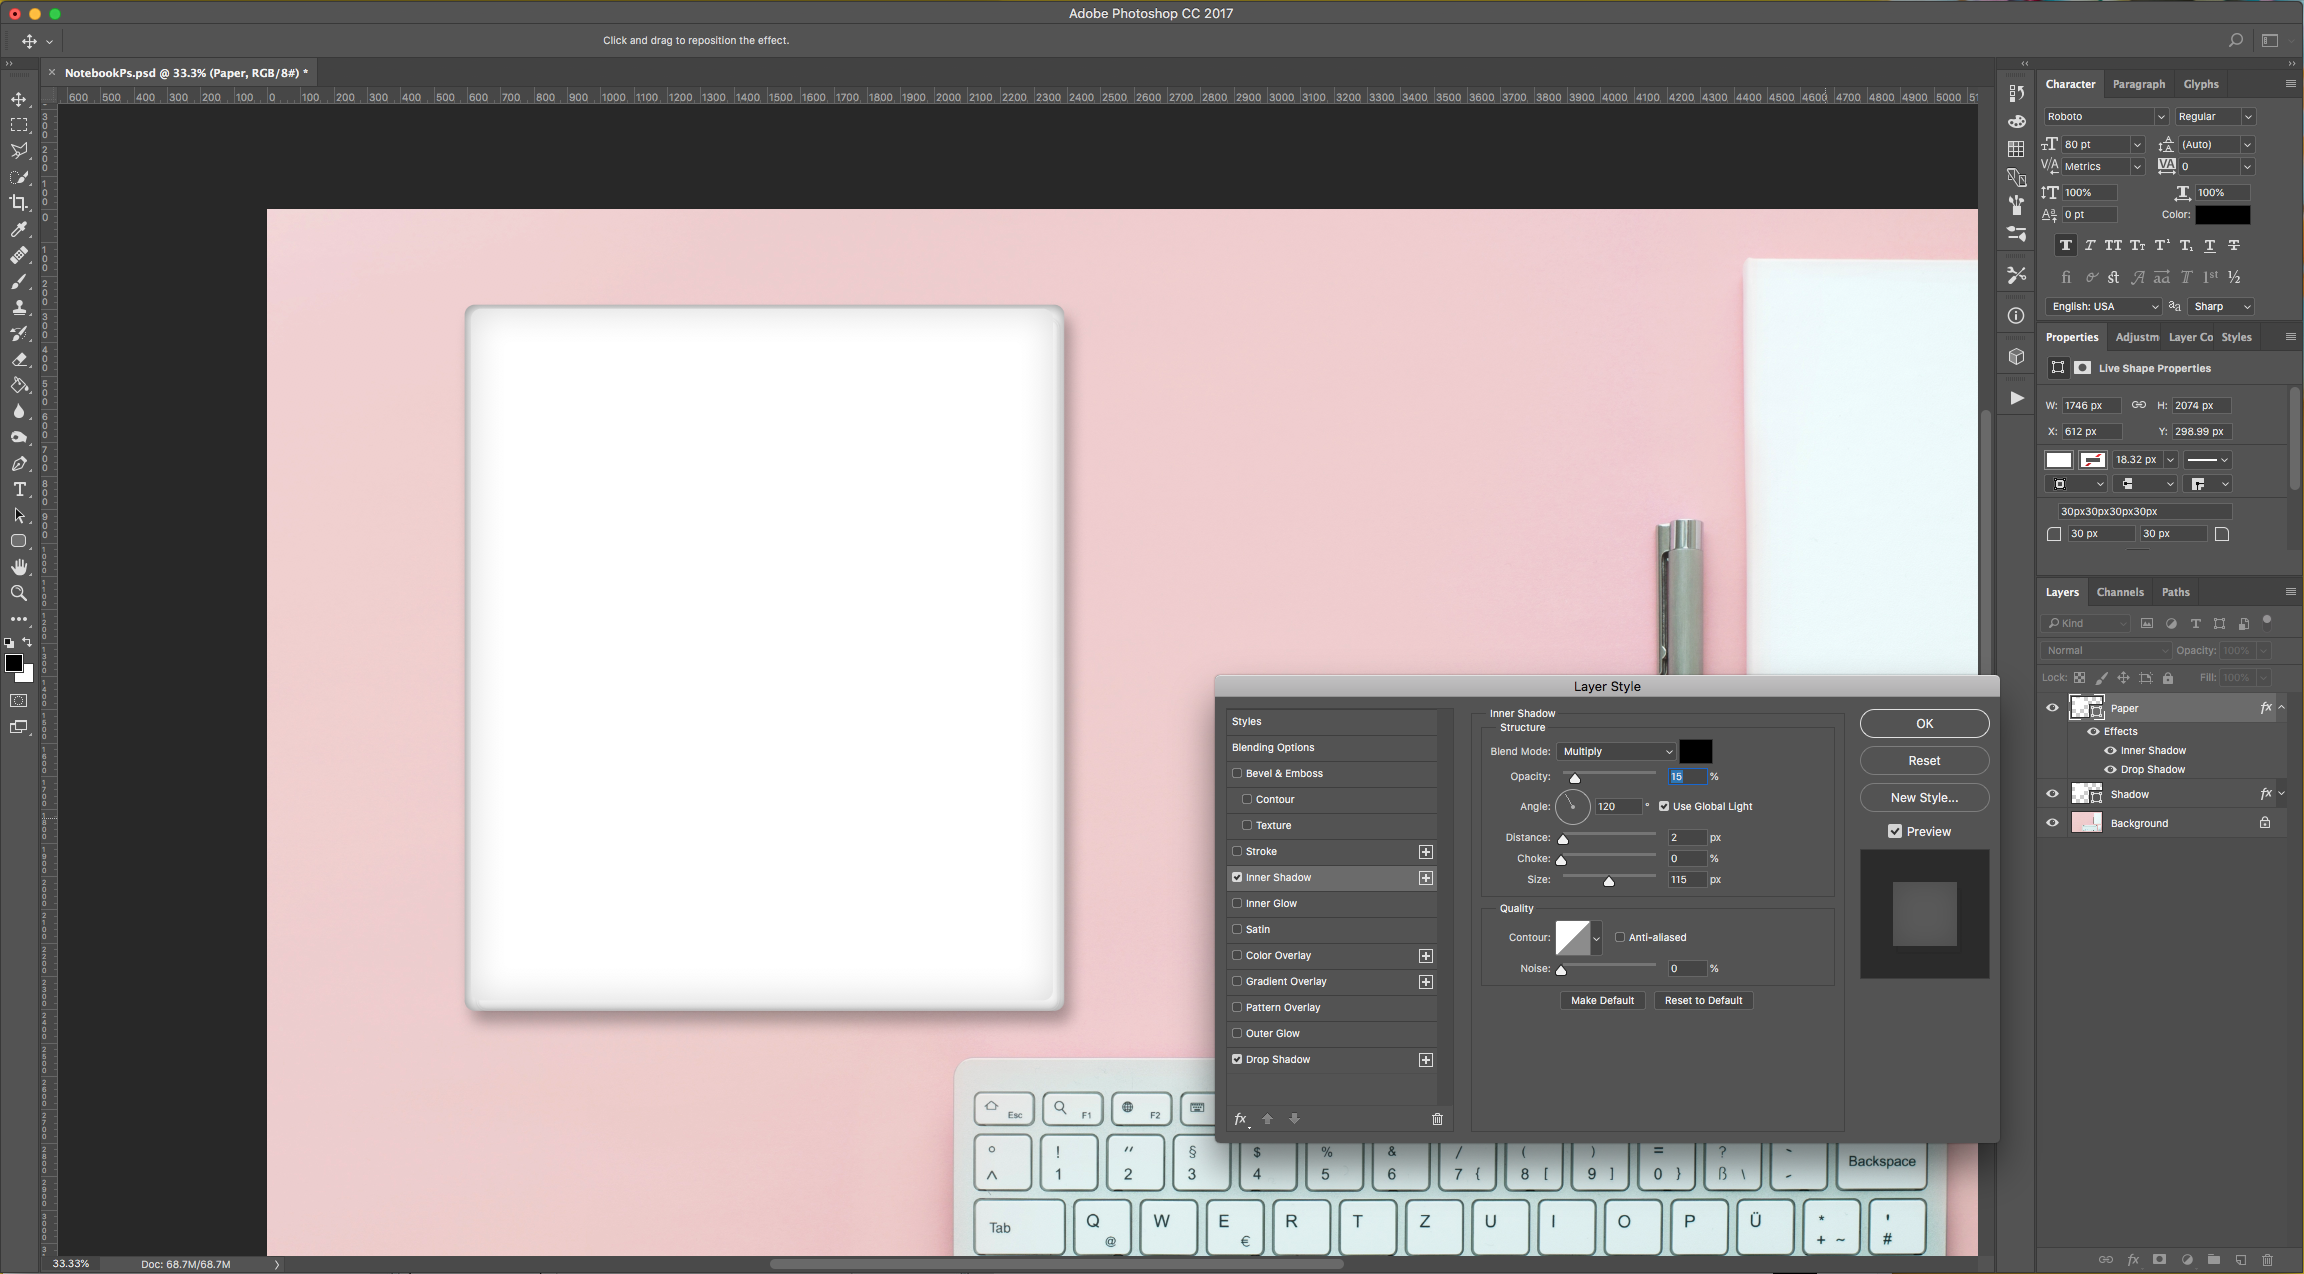
Inner Shadow:
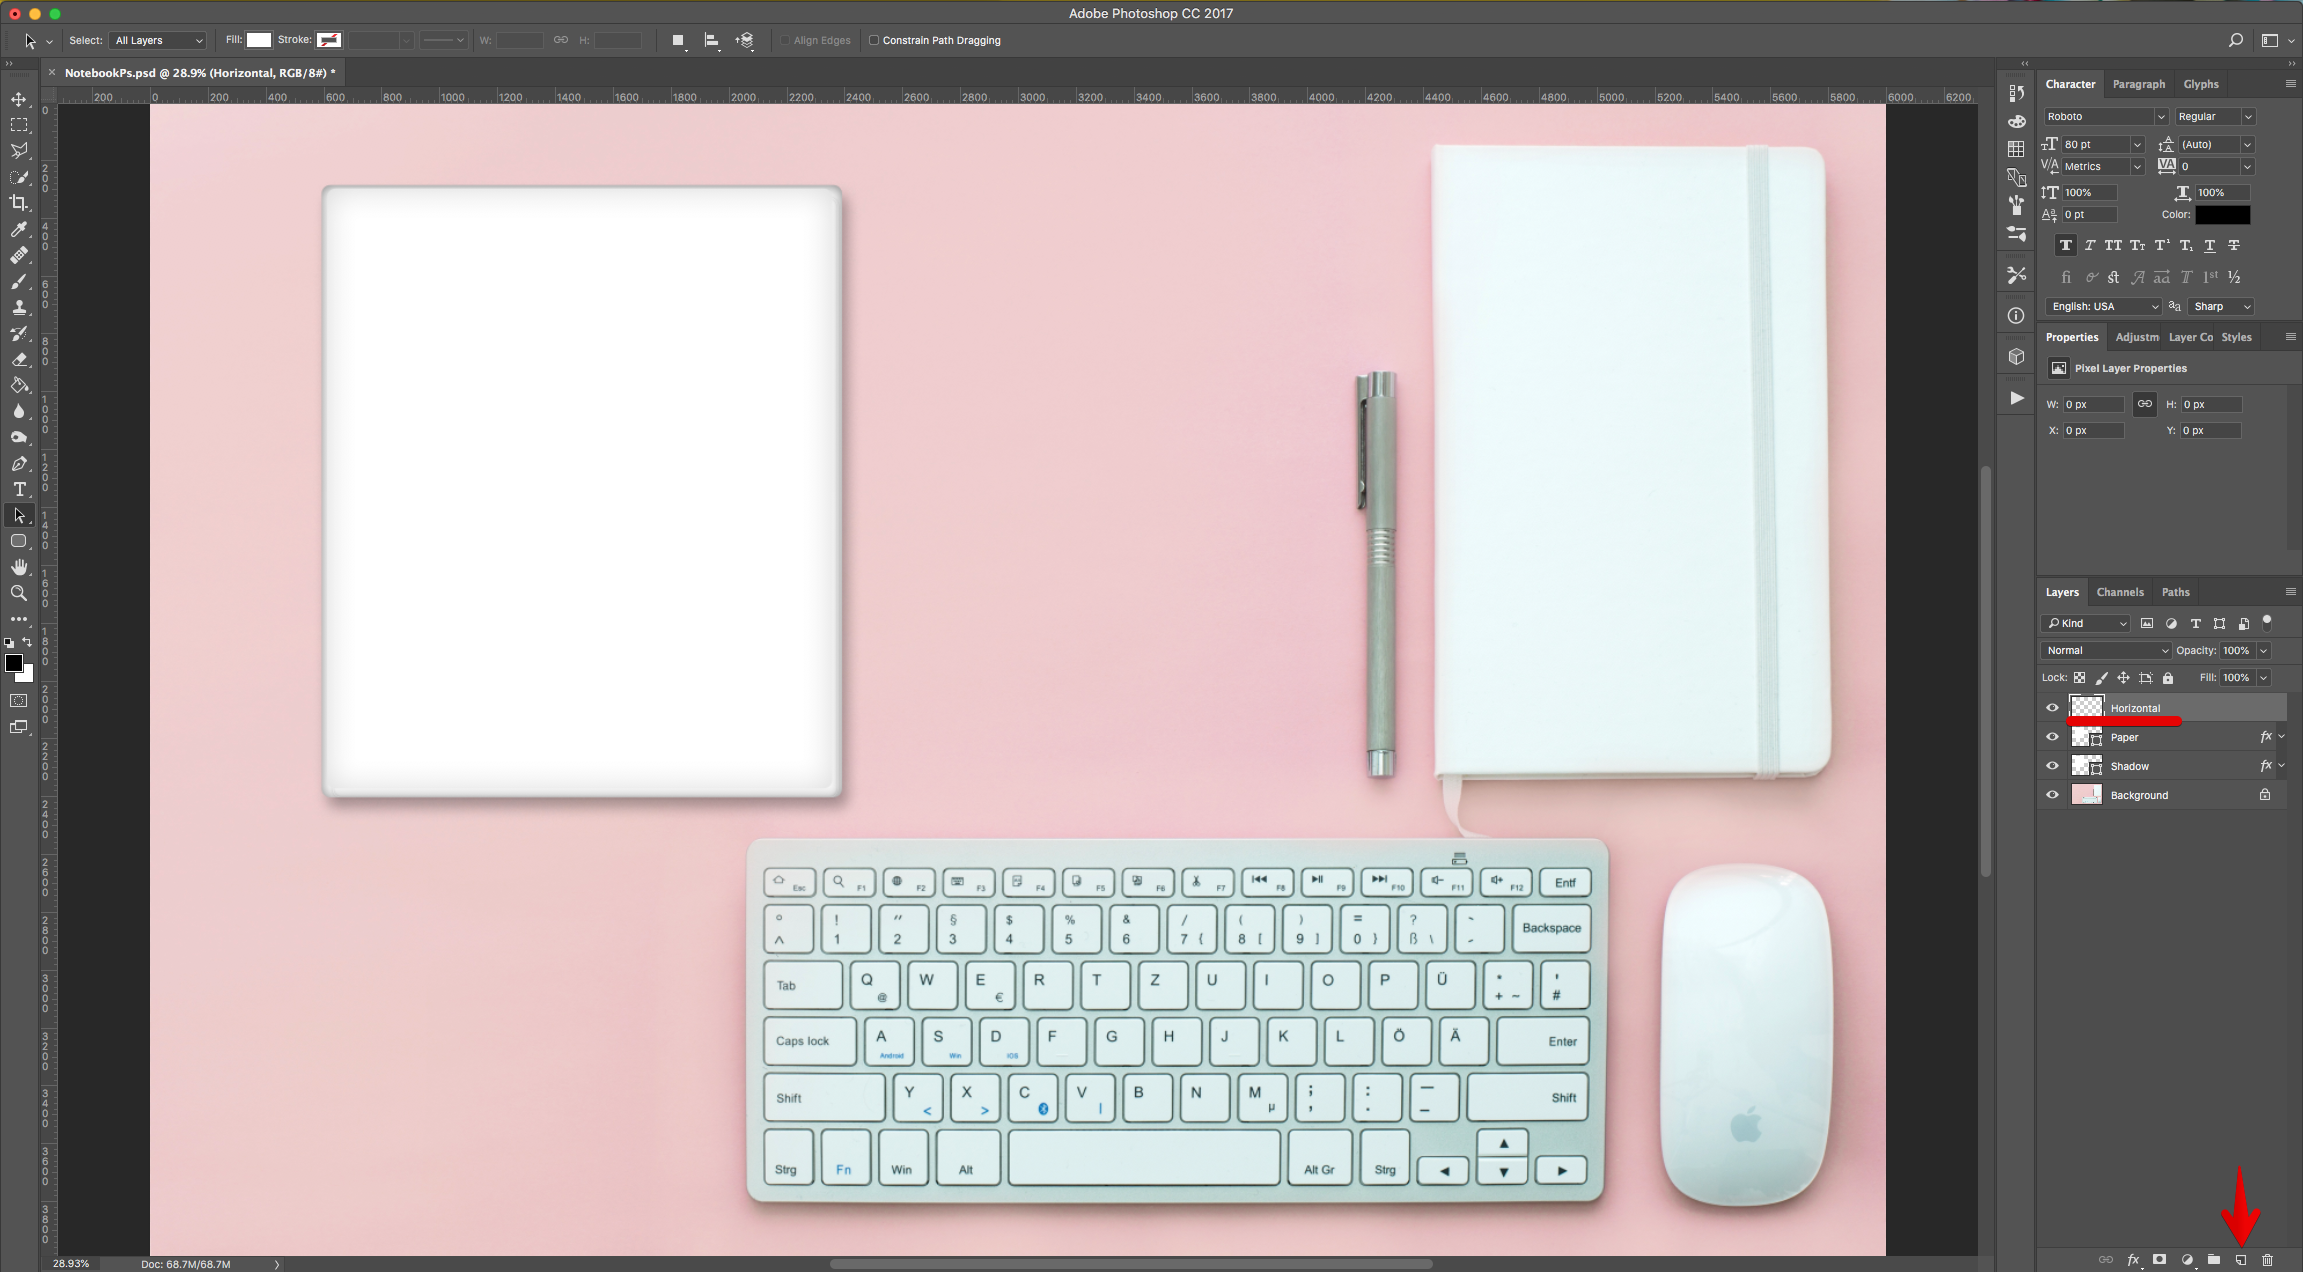
7 - Create a “New Layer” (Shift + Command/Control + N), name it “Horizontal” and make sure it is on top of everything.
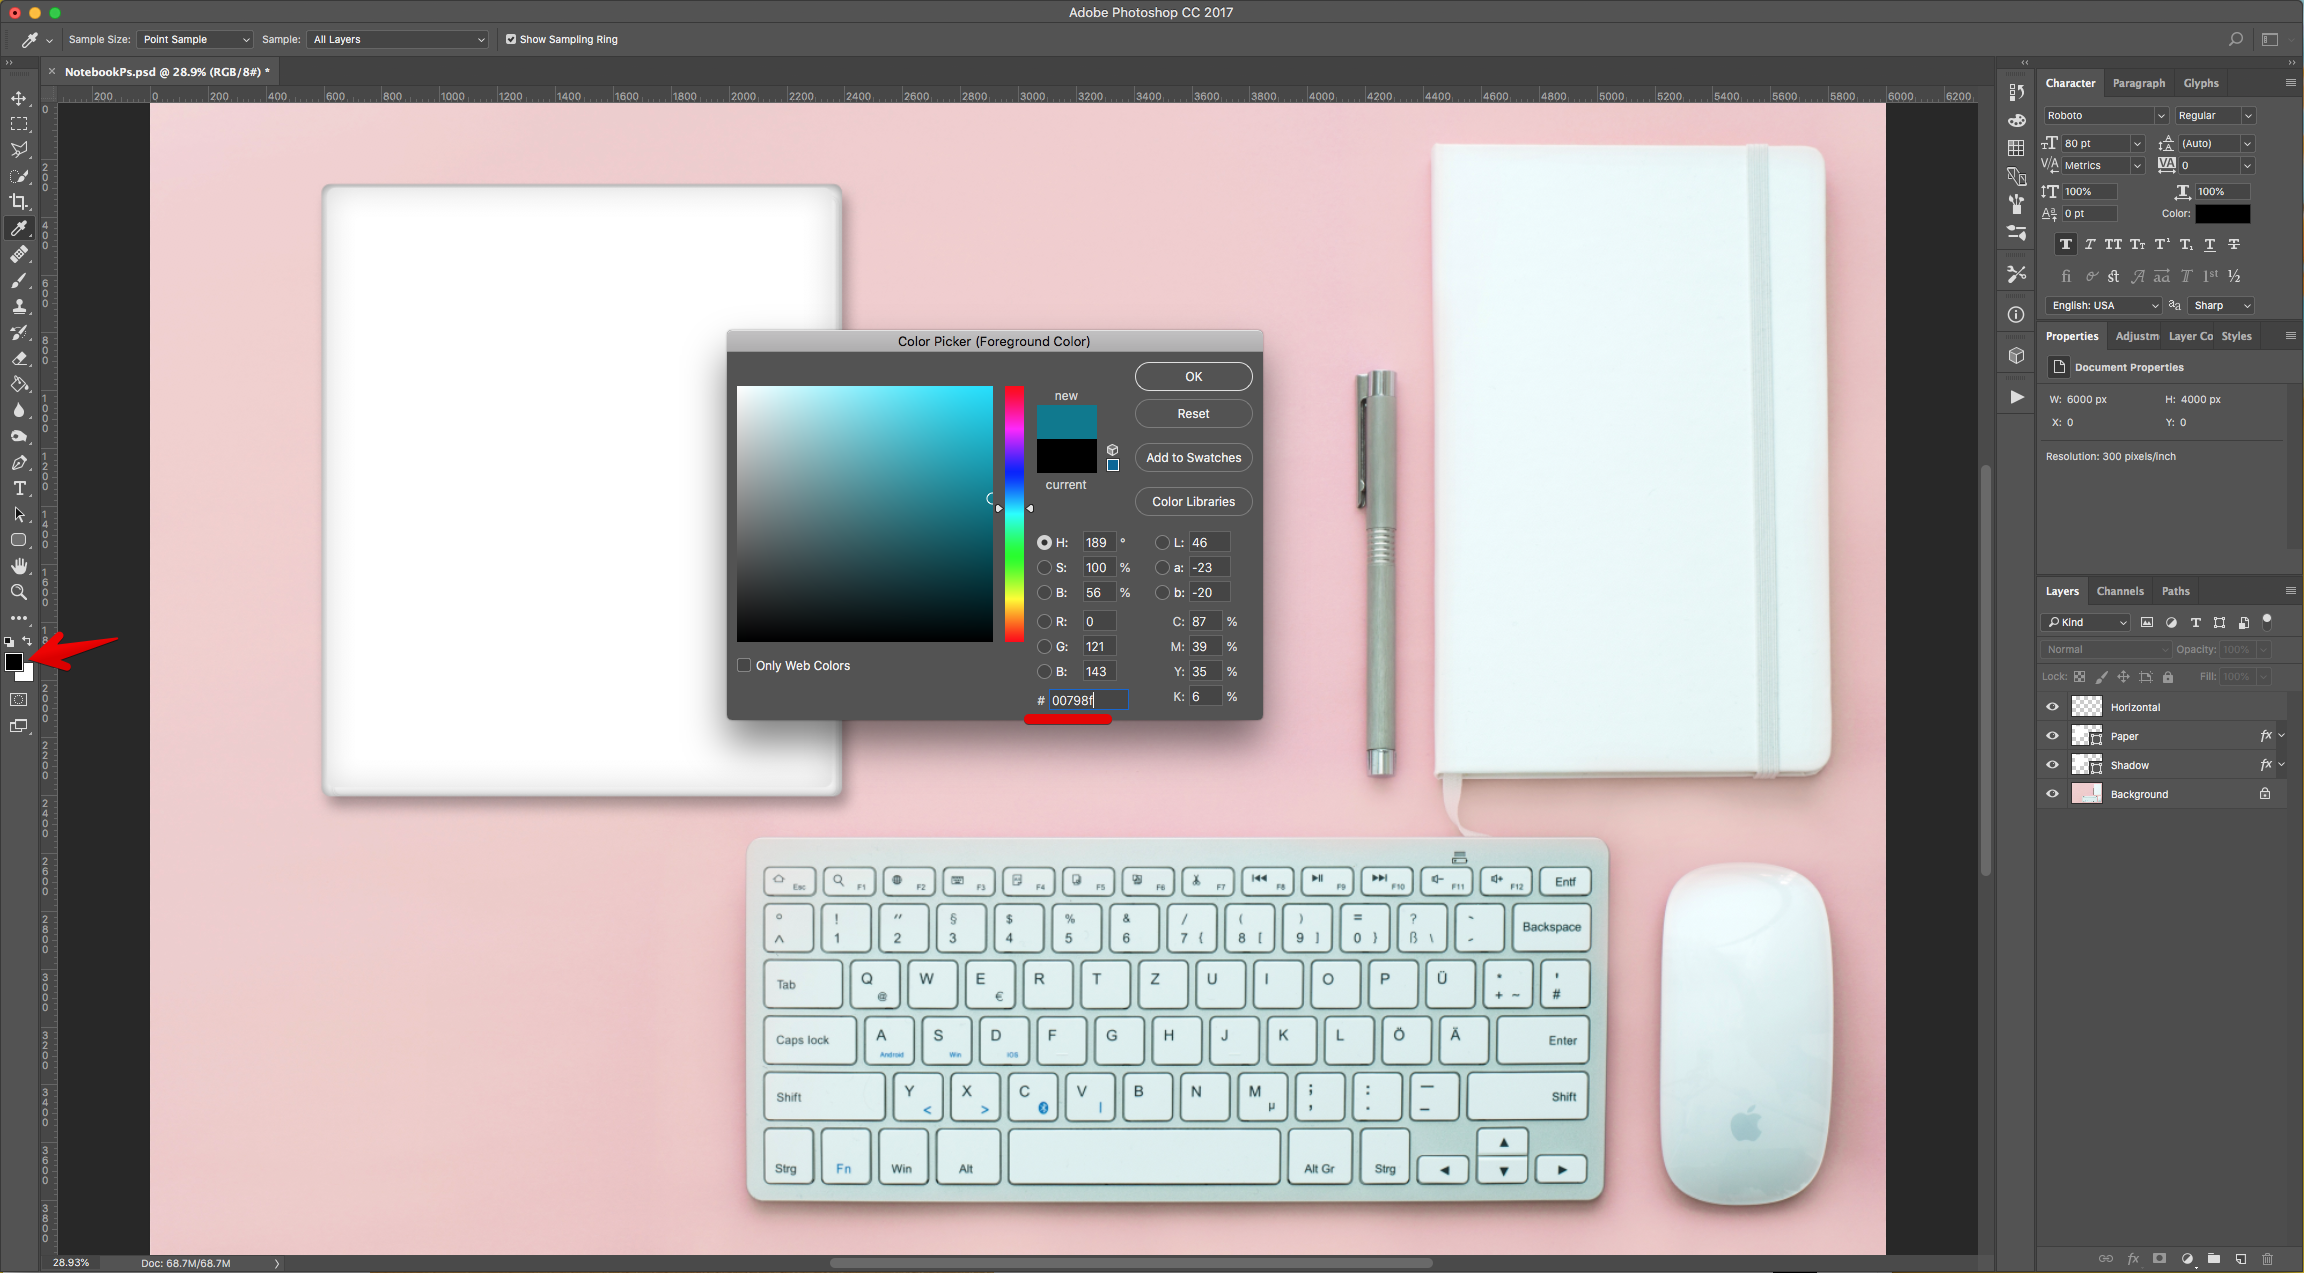
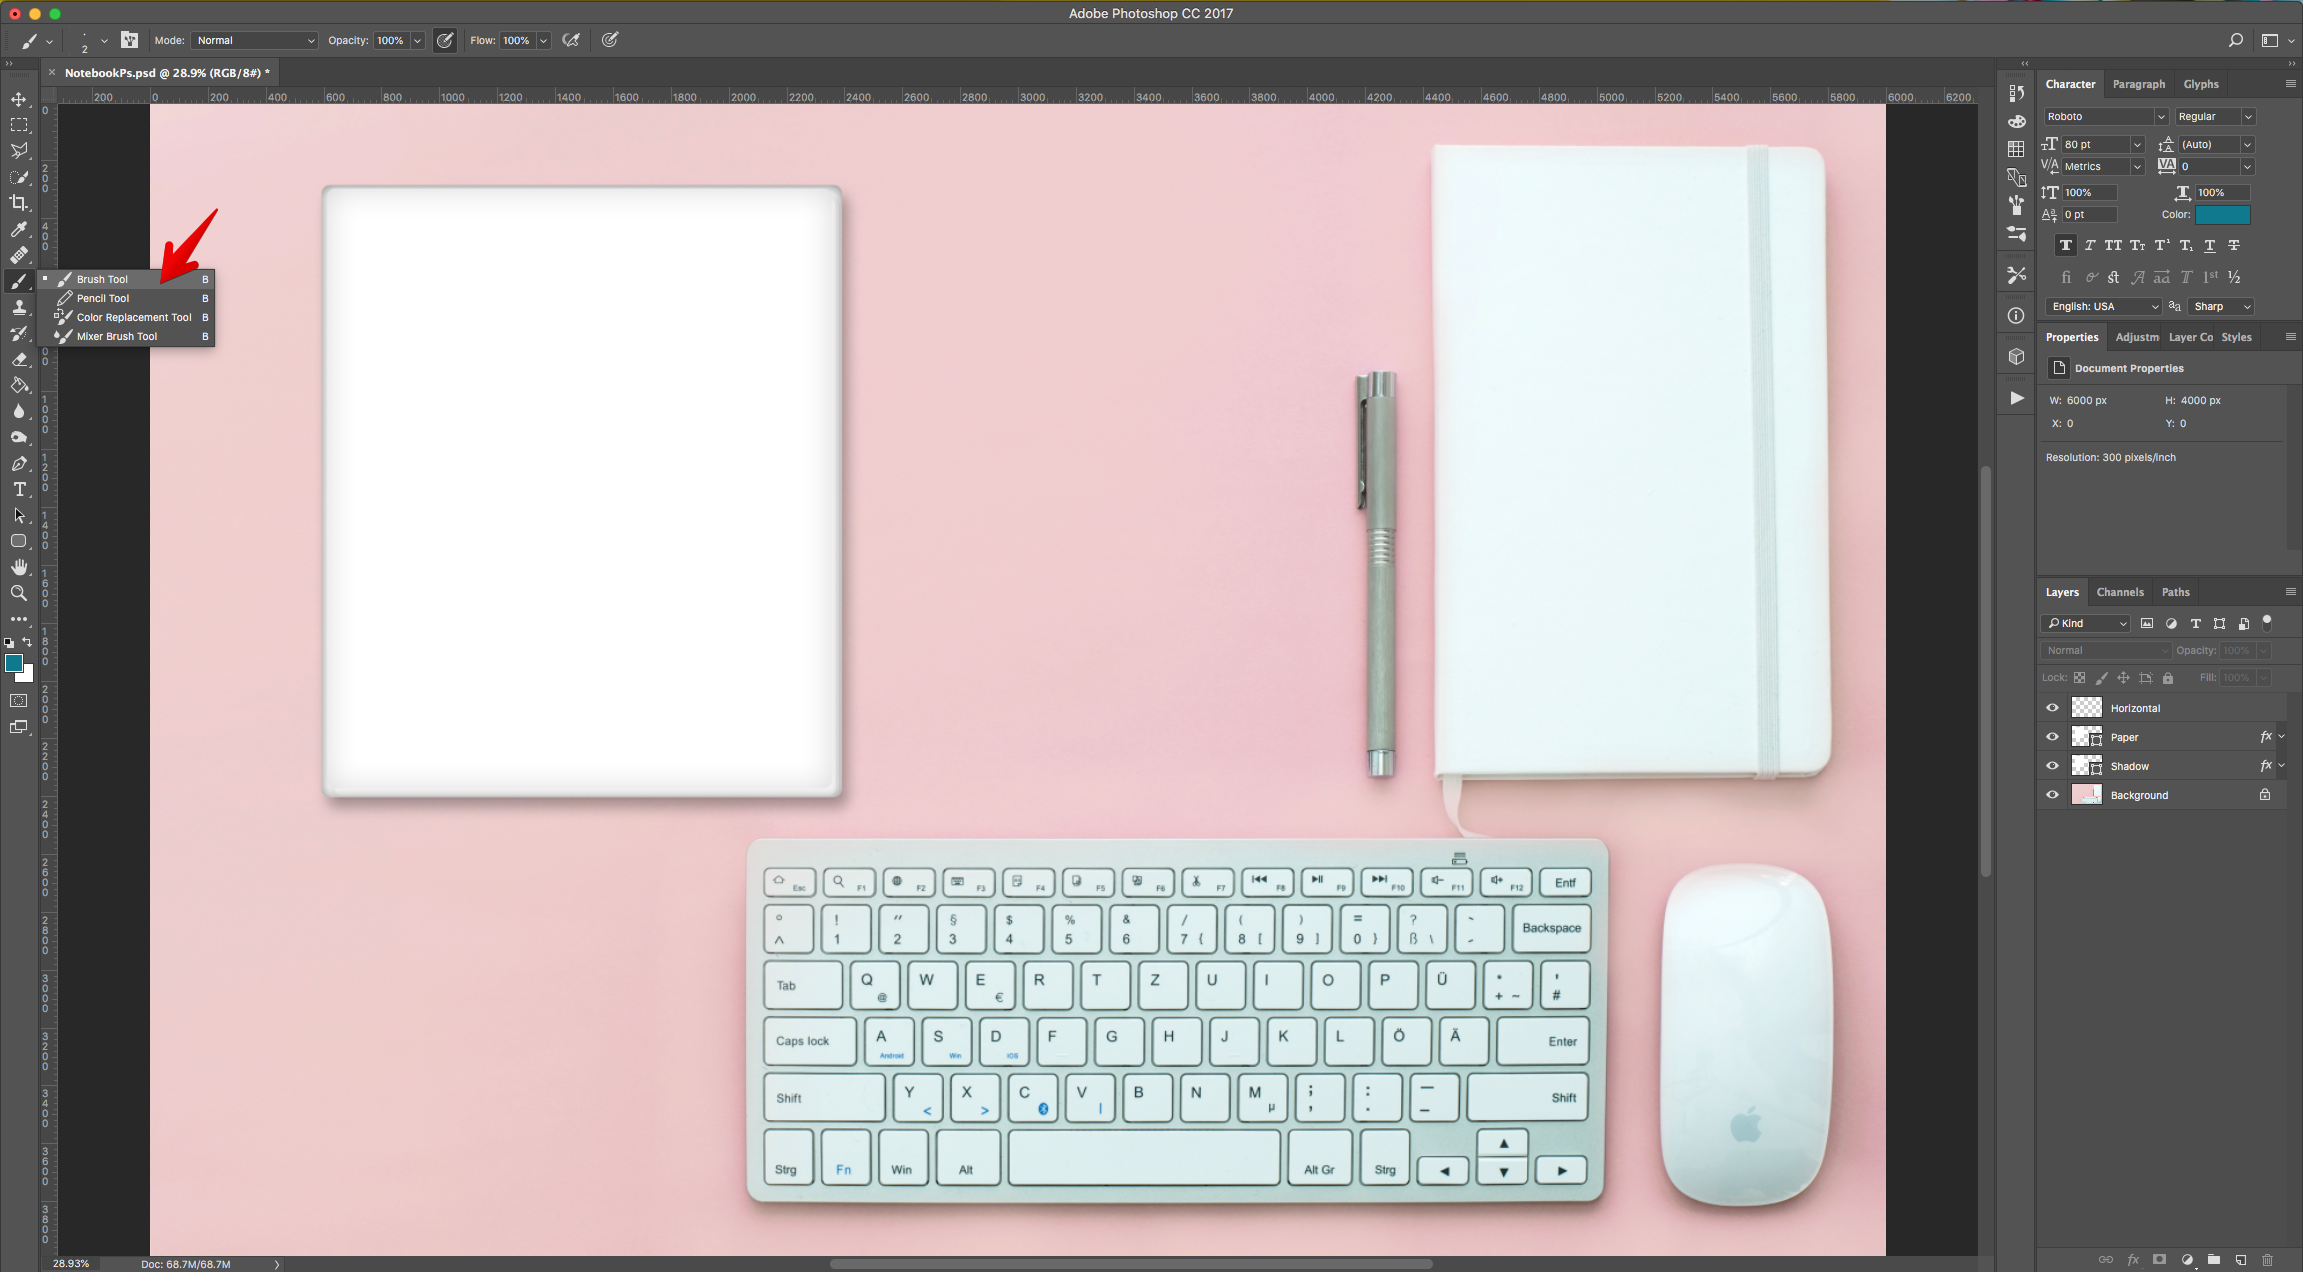
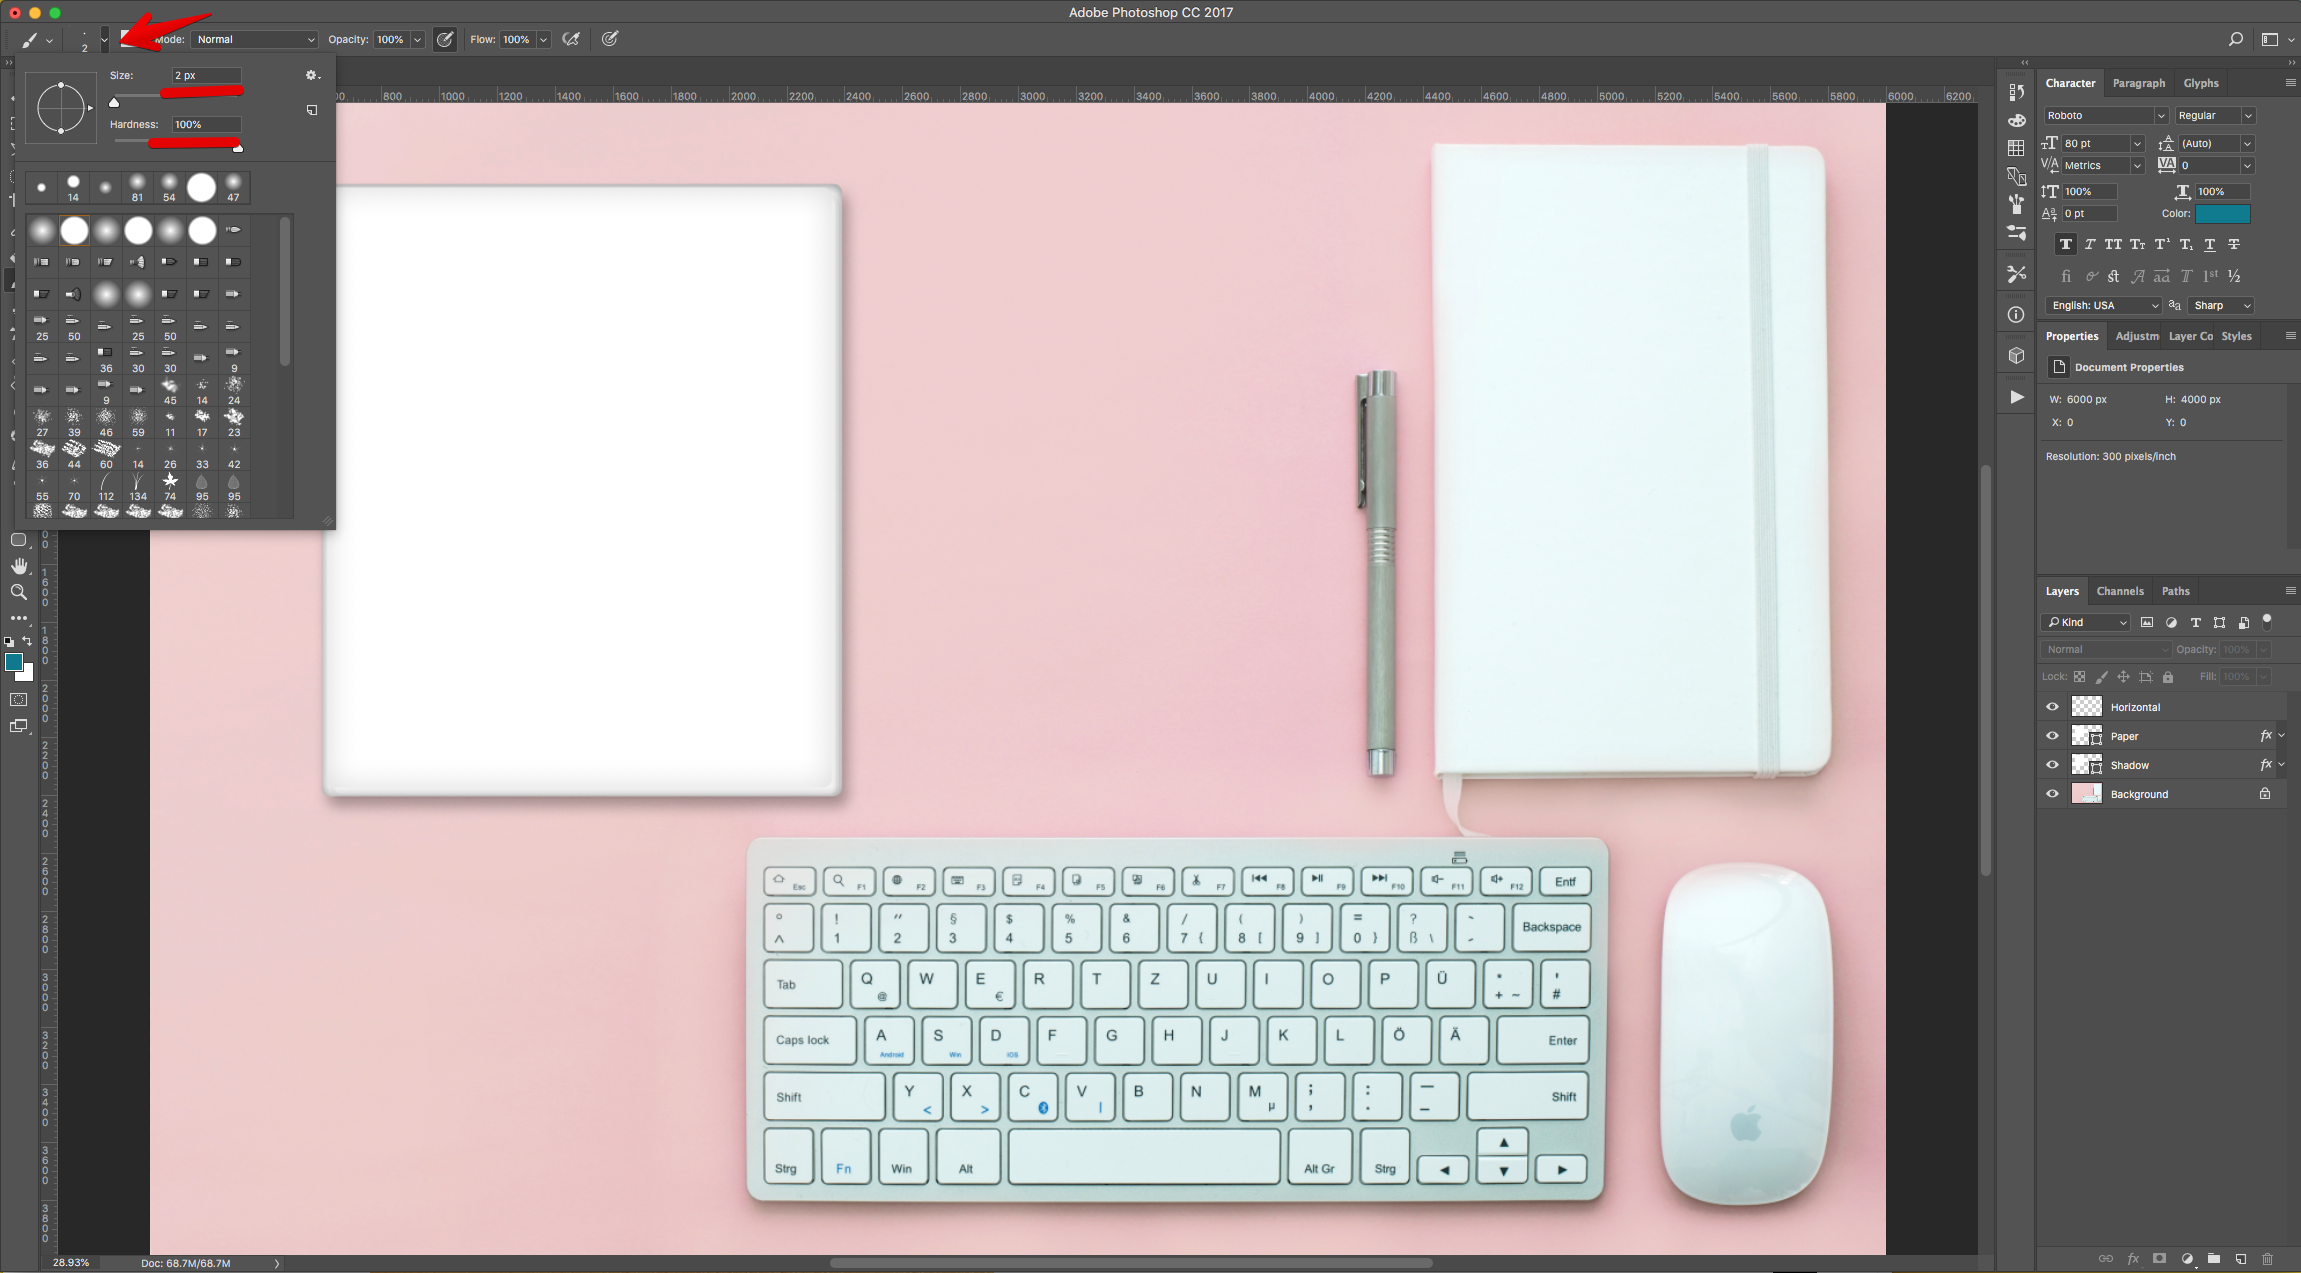
8 - Change the “Foreground” color to #00798f, select the “Brush Tool” (B) with a small and hard brush (2 px and 100% “Hardness”).
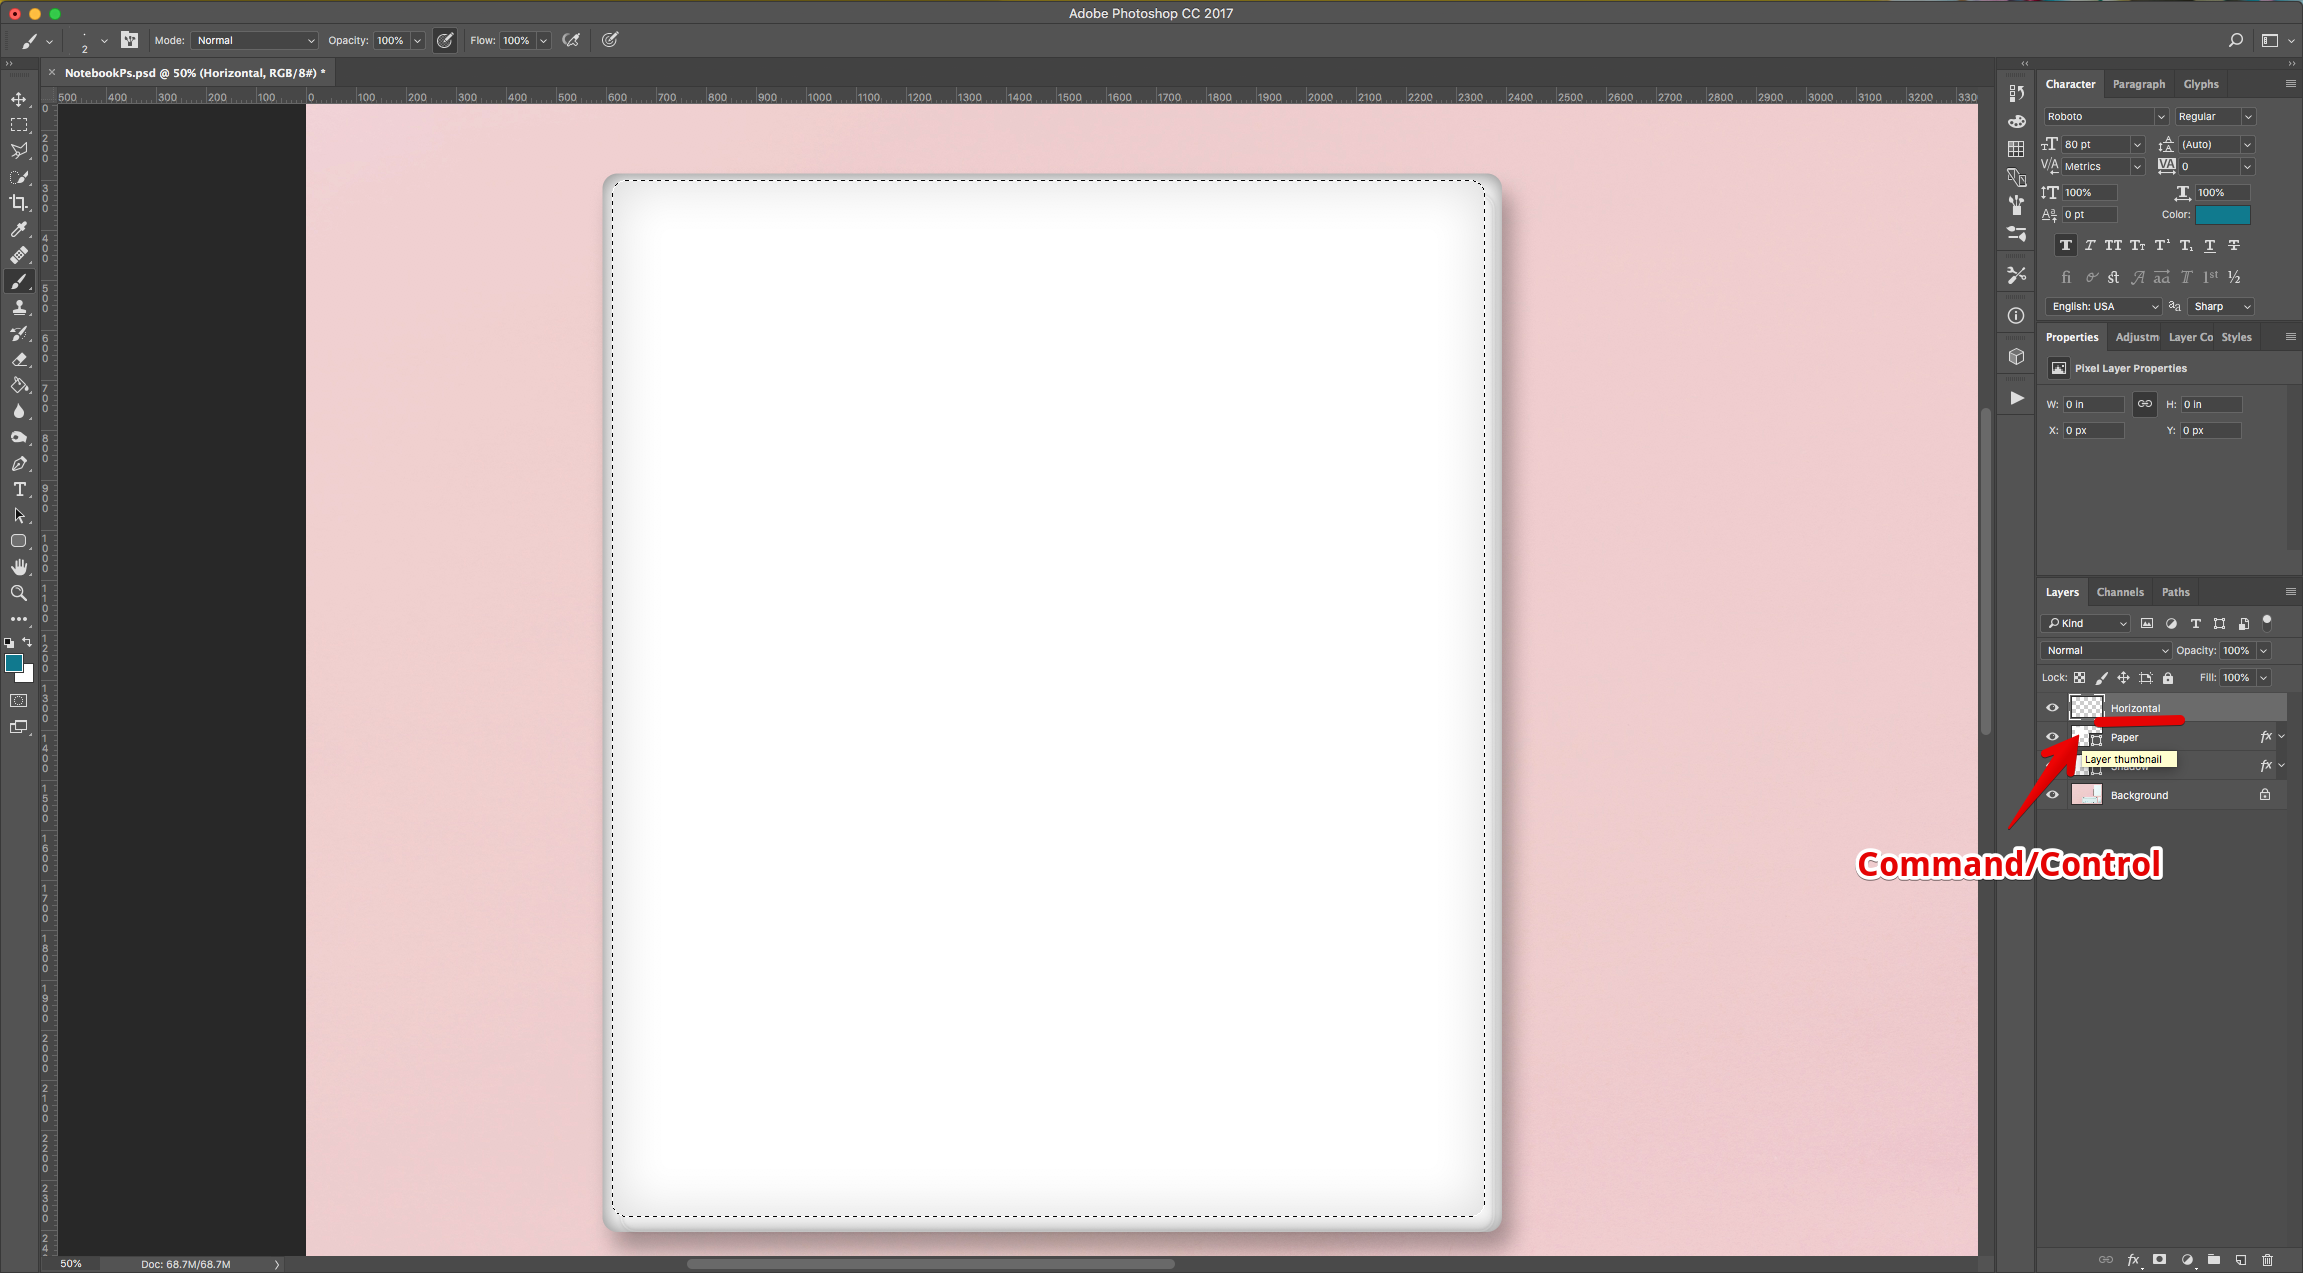
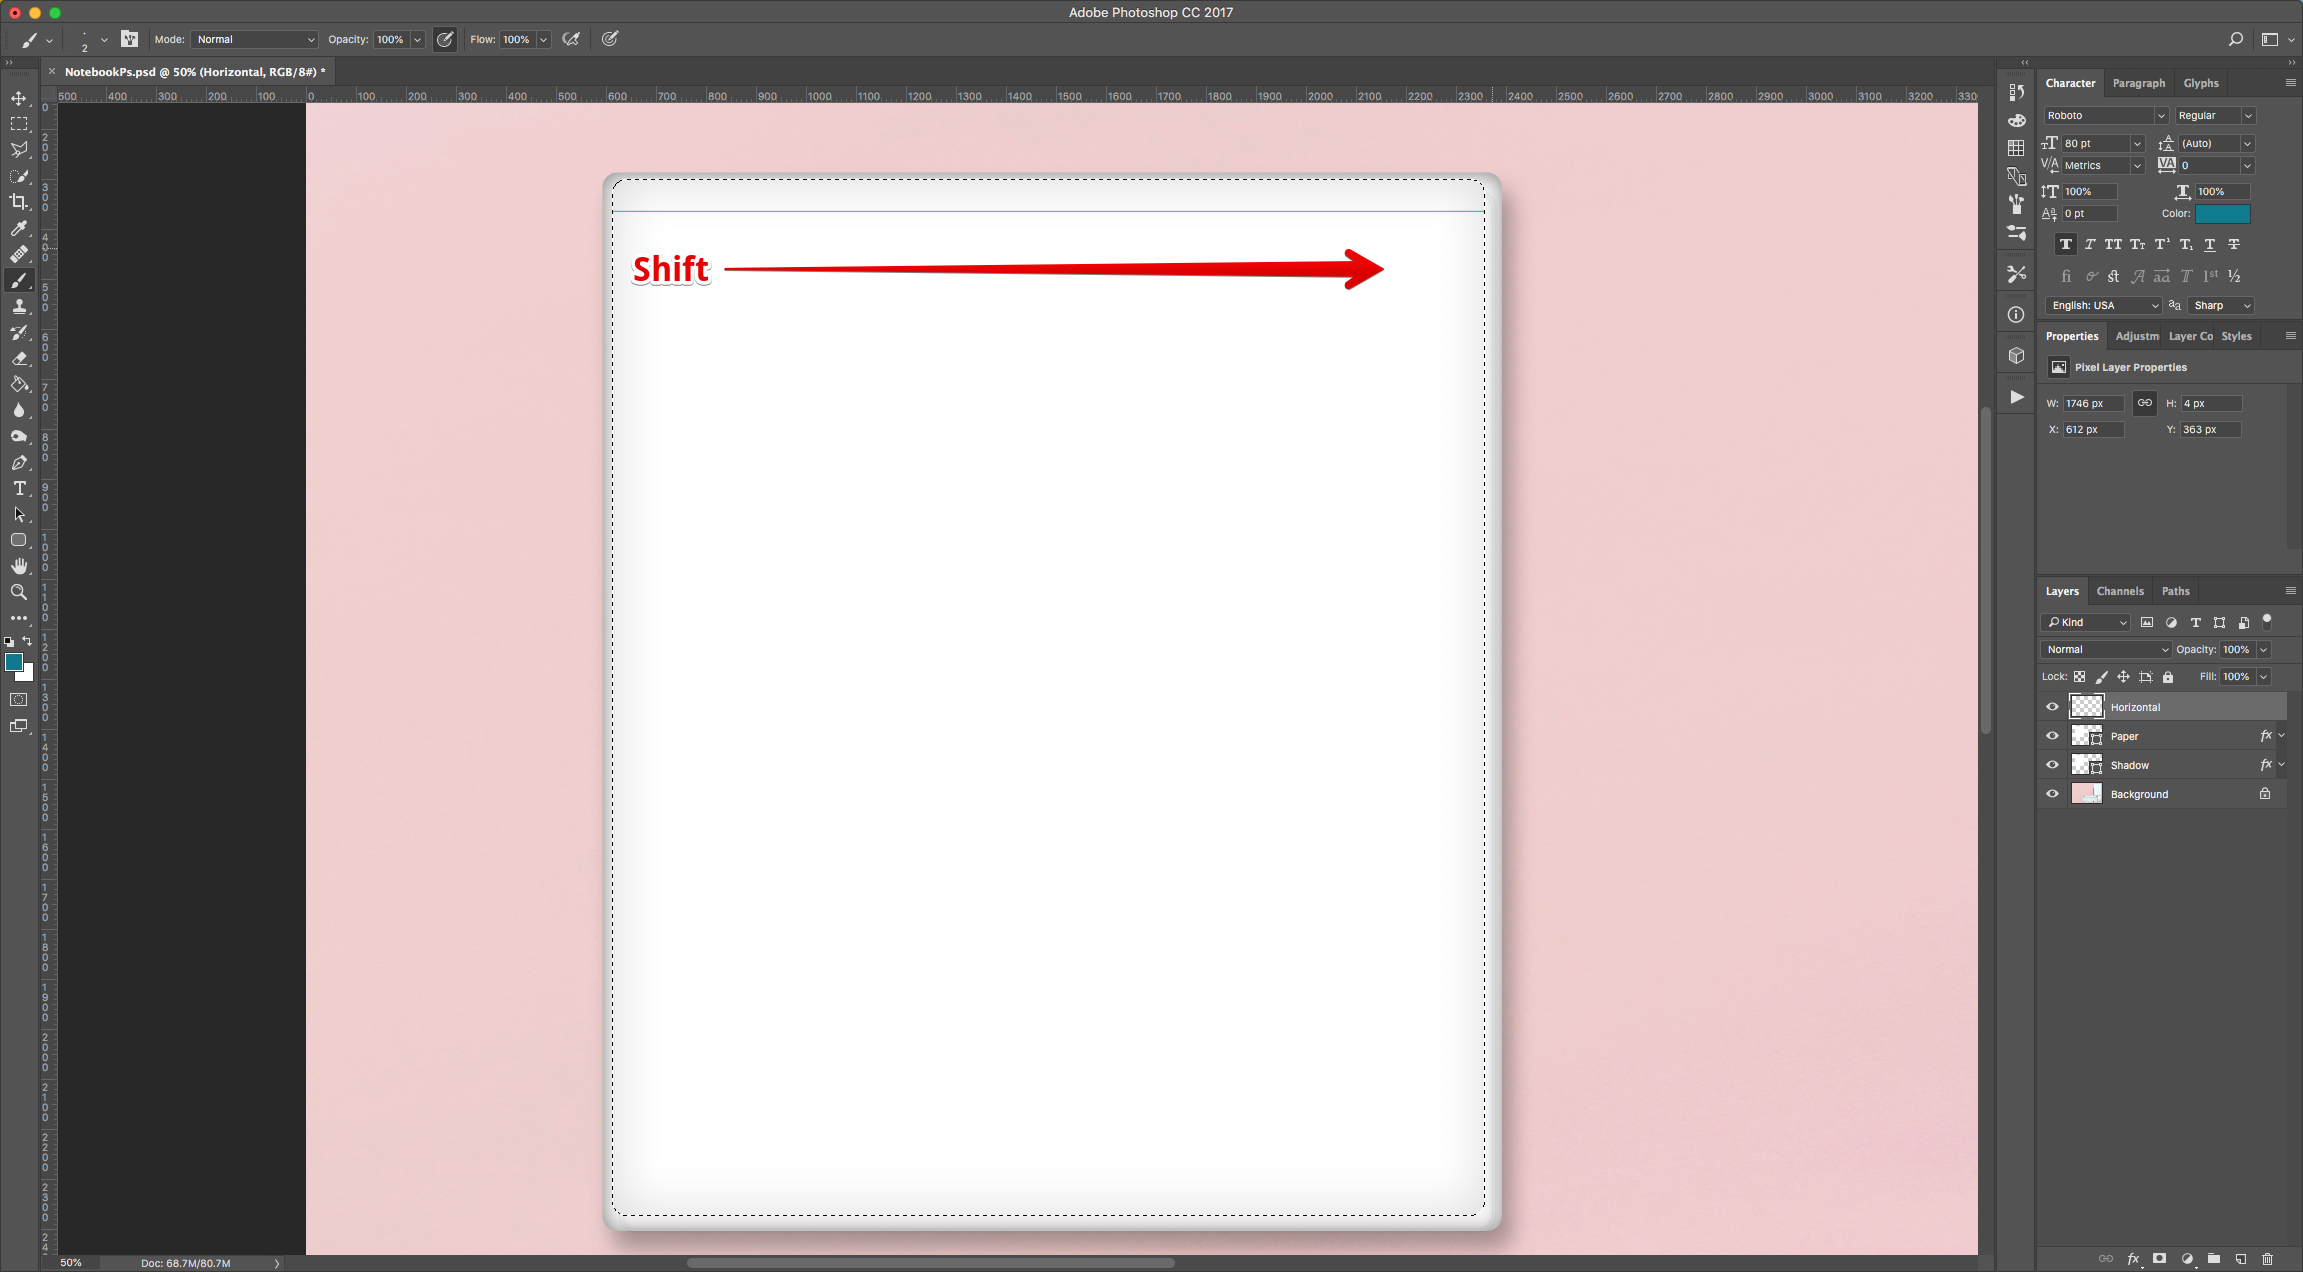
9 - With the “Horizontal” layer still selected “Command/Option” click on top of the “Paper” layer to make a selection. Then, draw “Horizontal” lines (hold the “Shift” key to make them straight). Start about 8 mm from the top and end at about 2 cm from the bottom mimicking the “Lines” in the “Notebook” page.
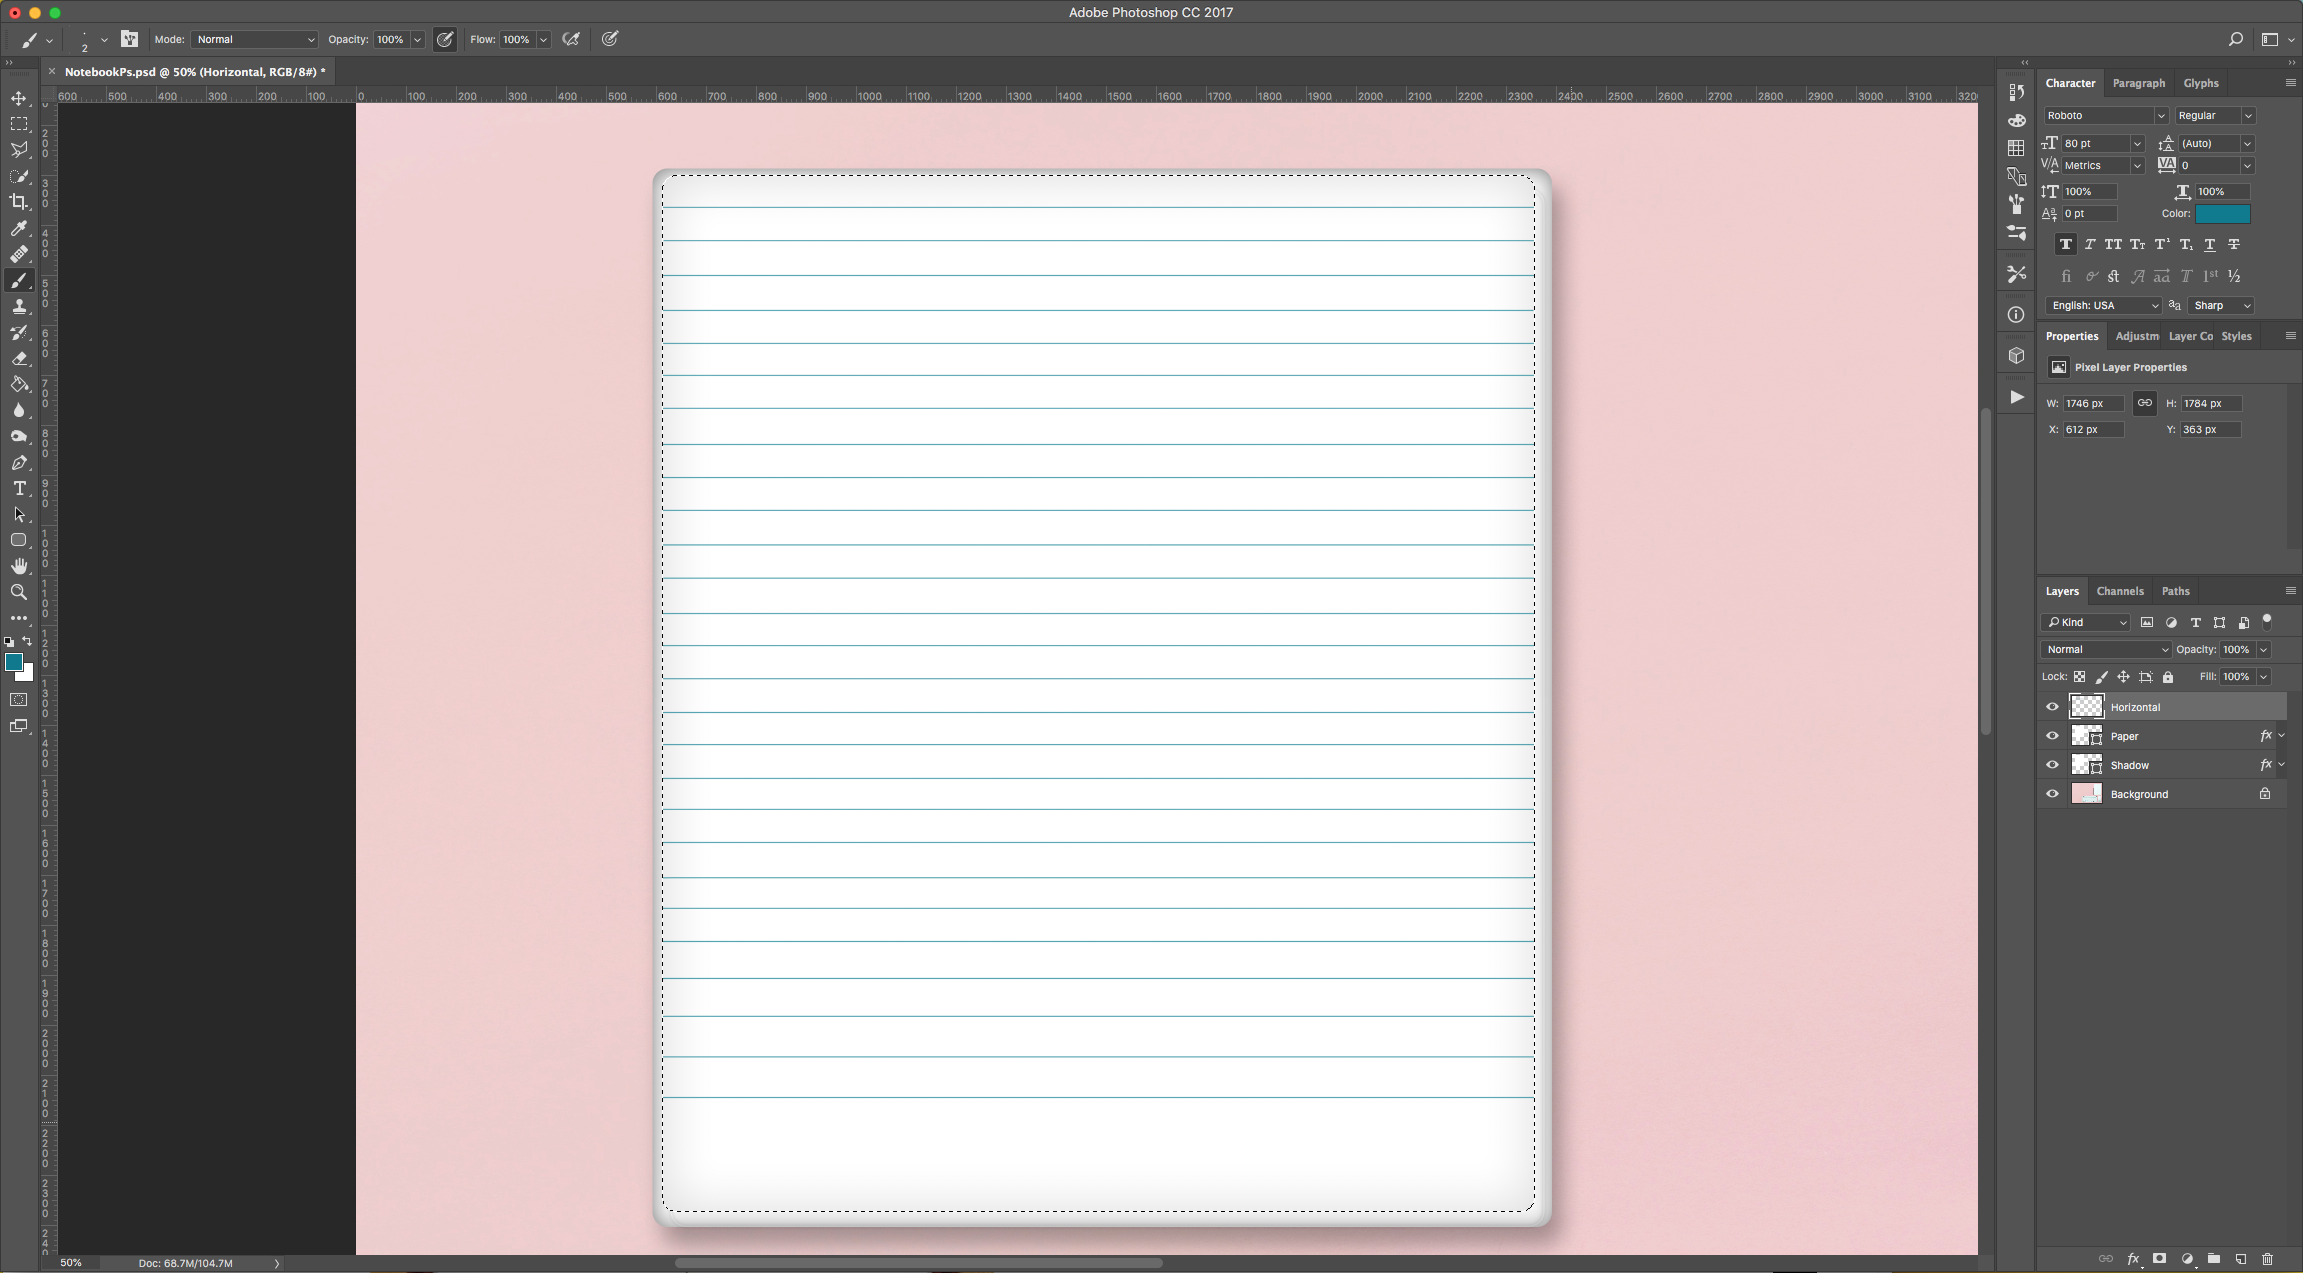
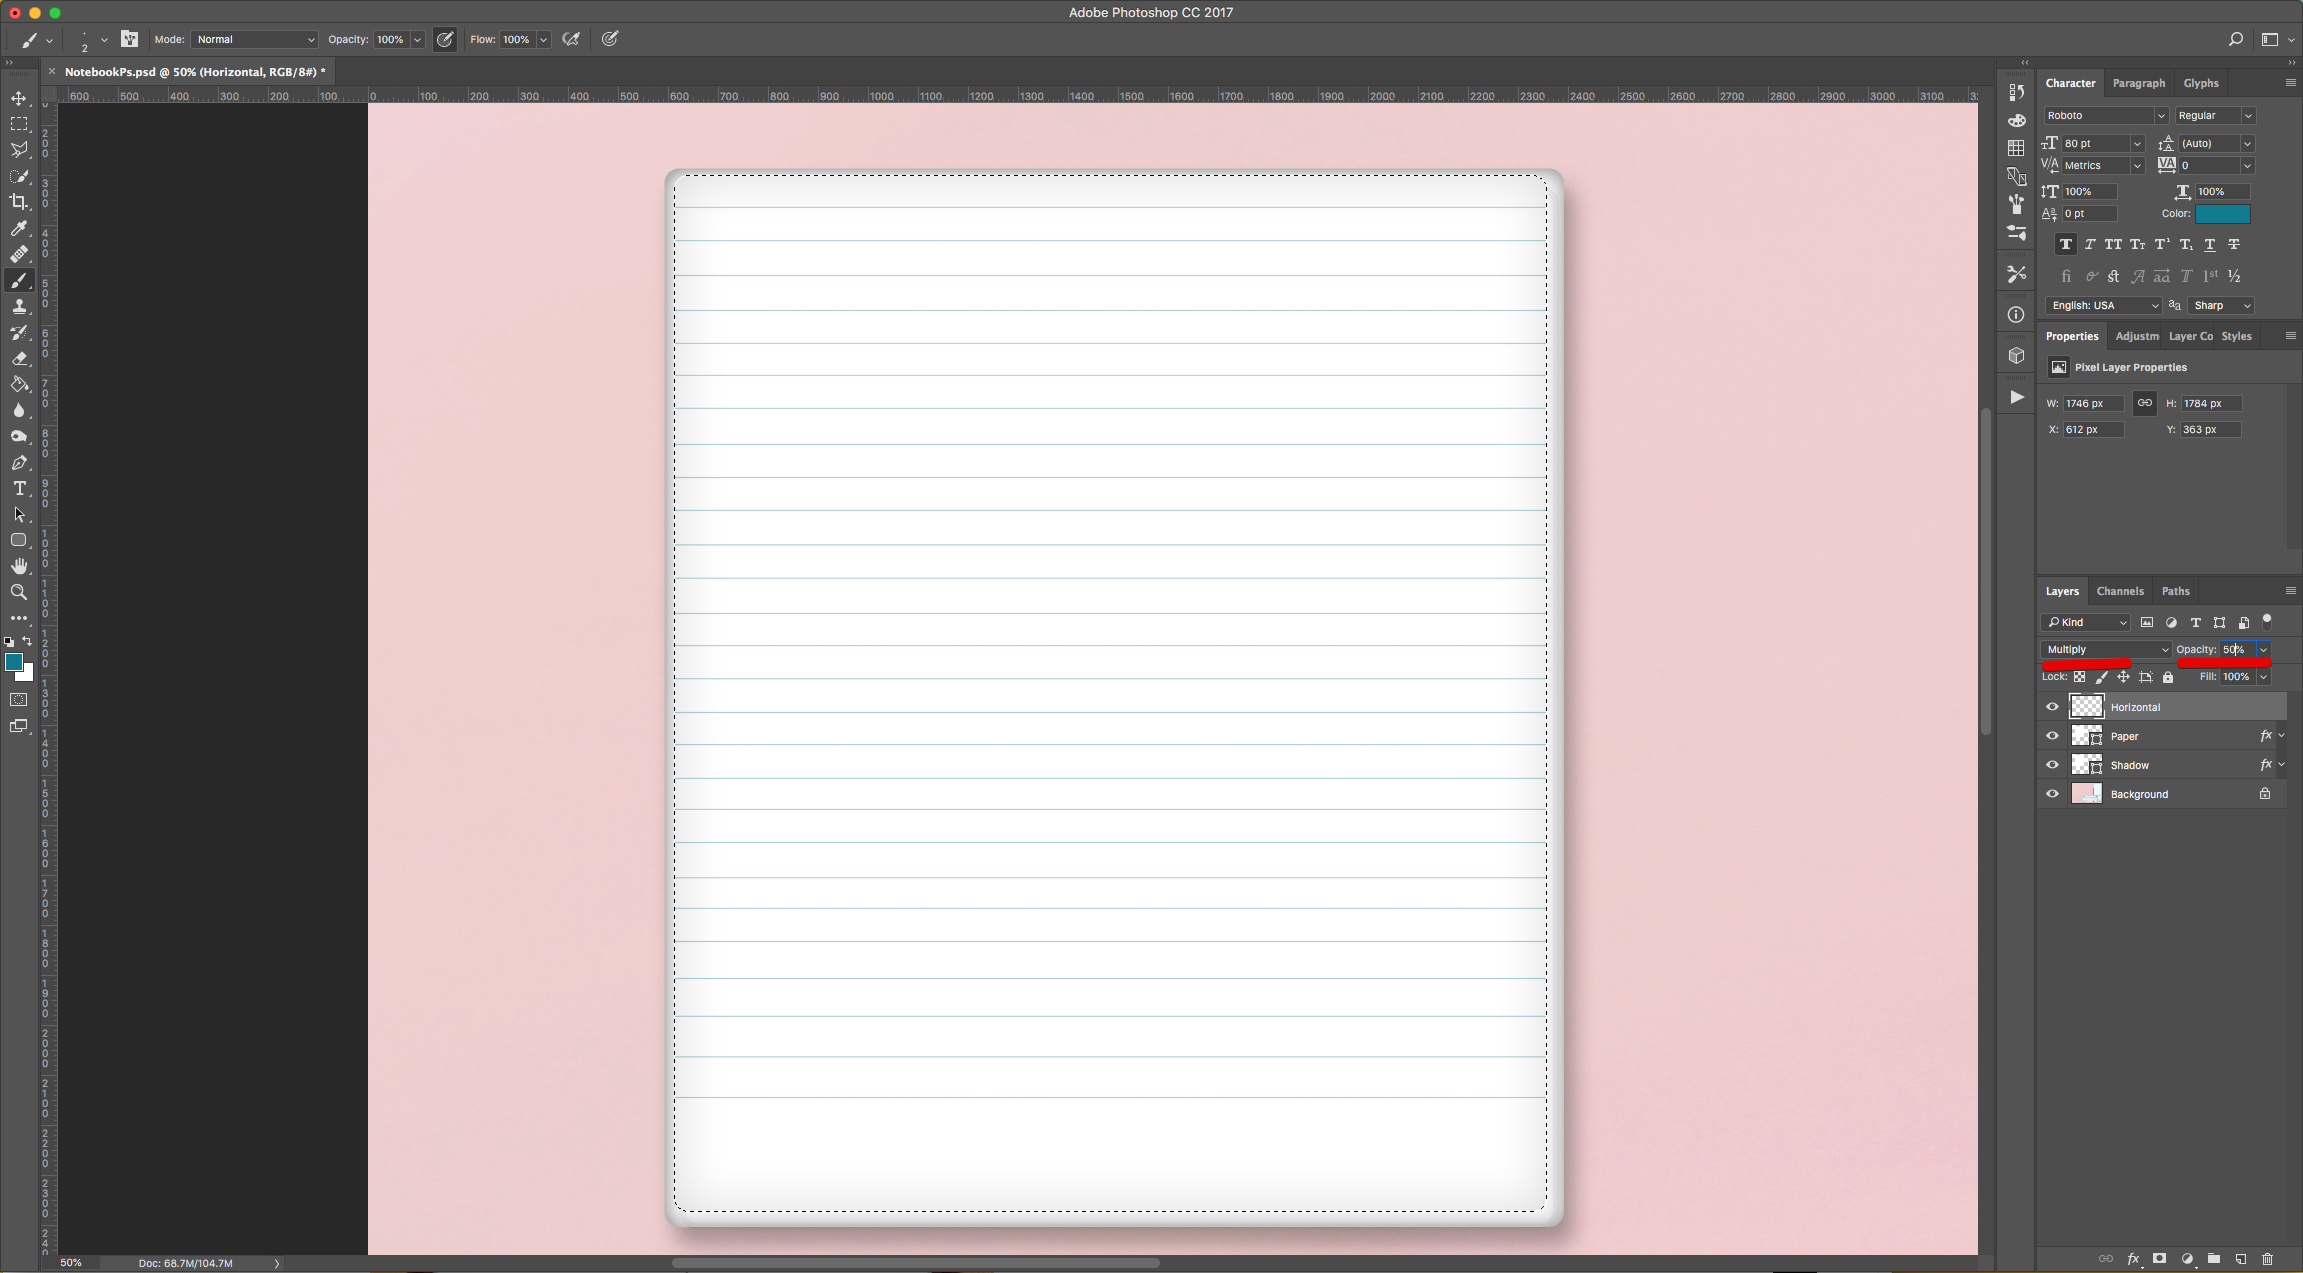
10 - Change the “Blending Mode” to “Multiply” and lower the “Opacity” to 50%.
11 - Create another layer on top of everything and name it “Vertical”.
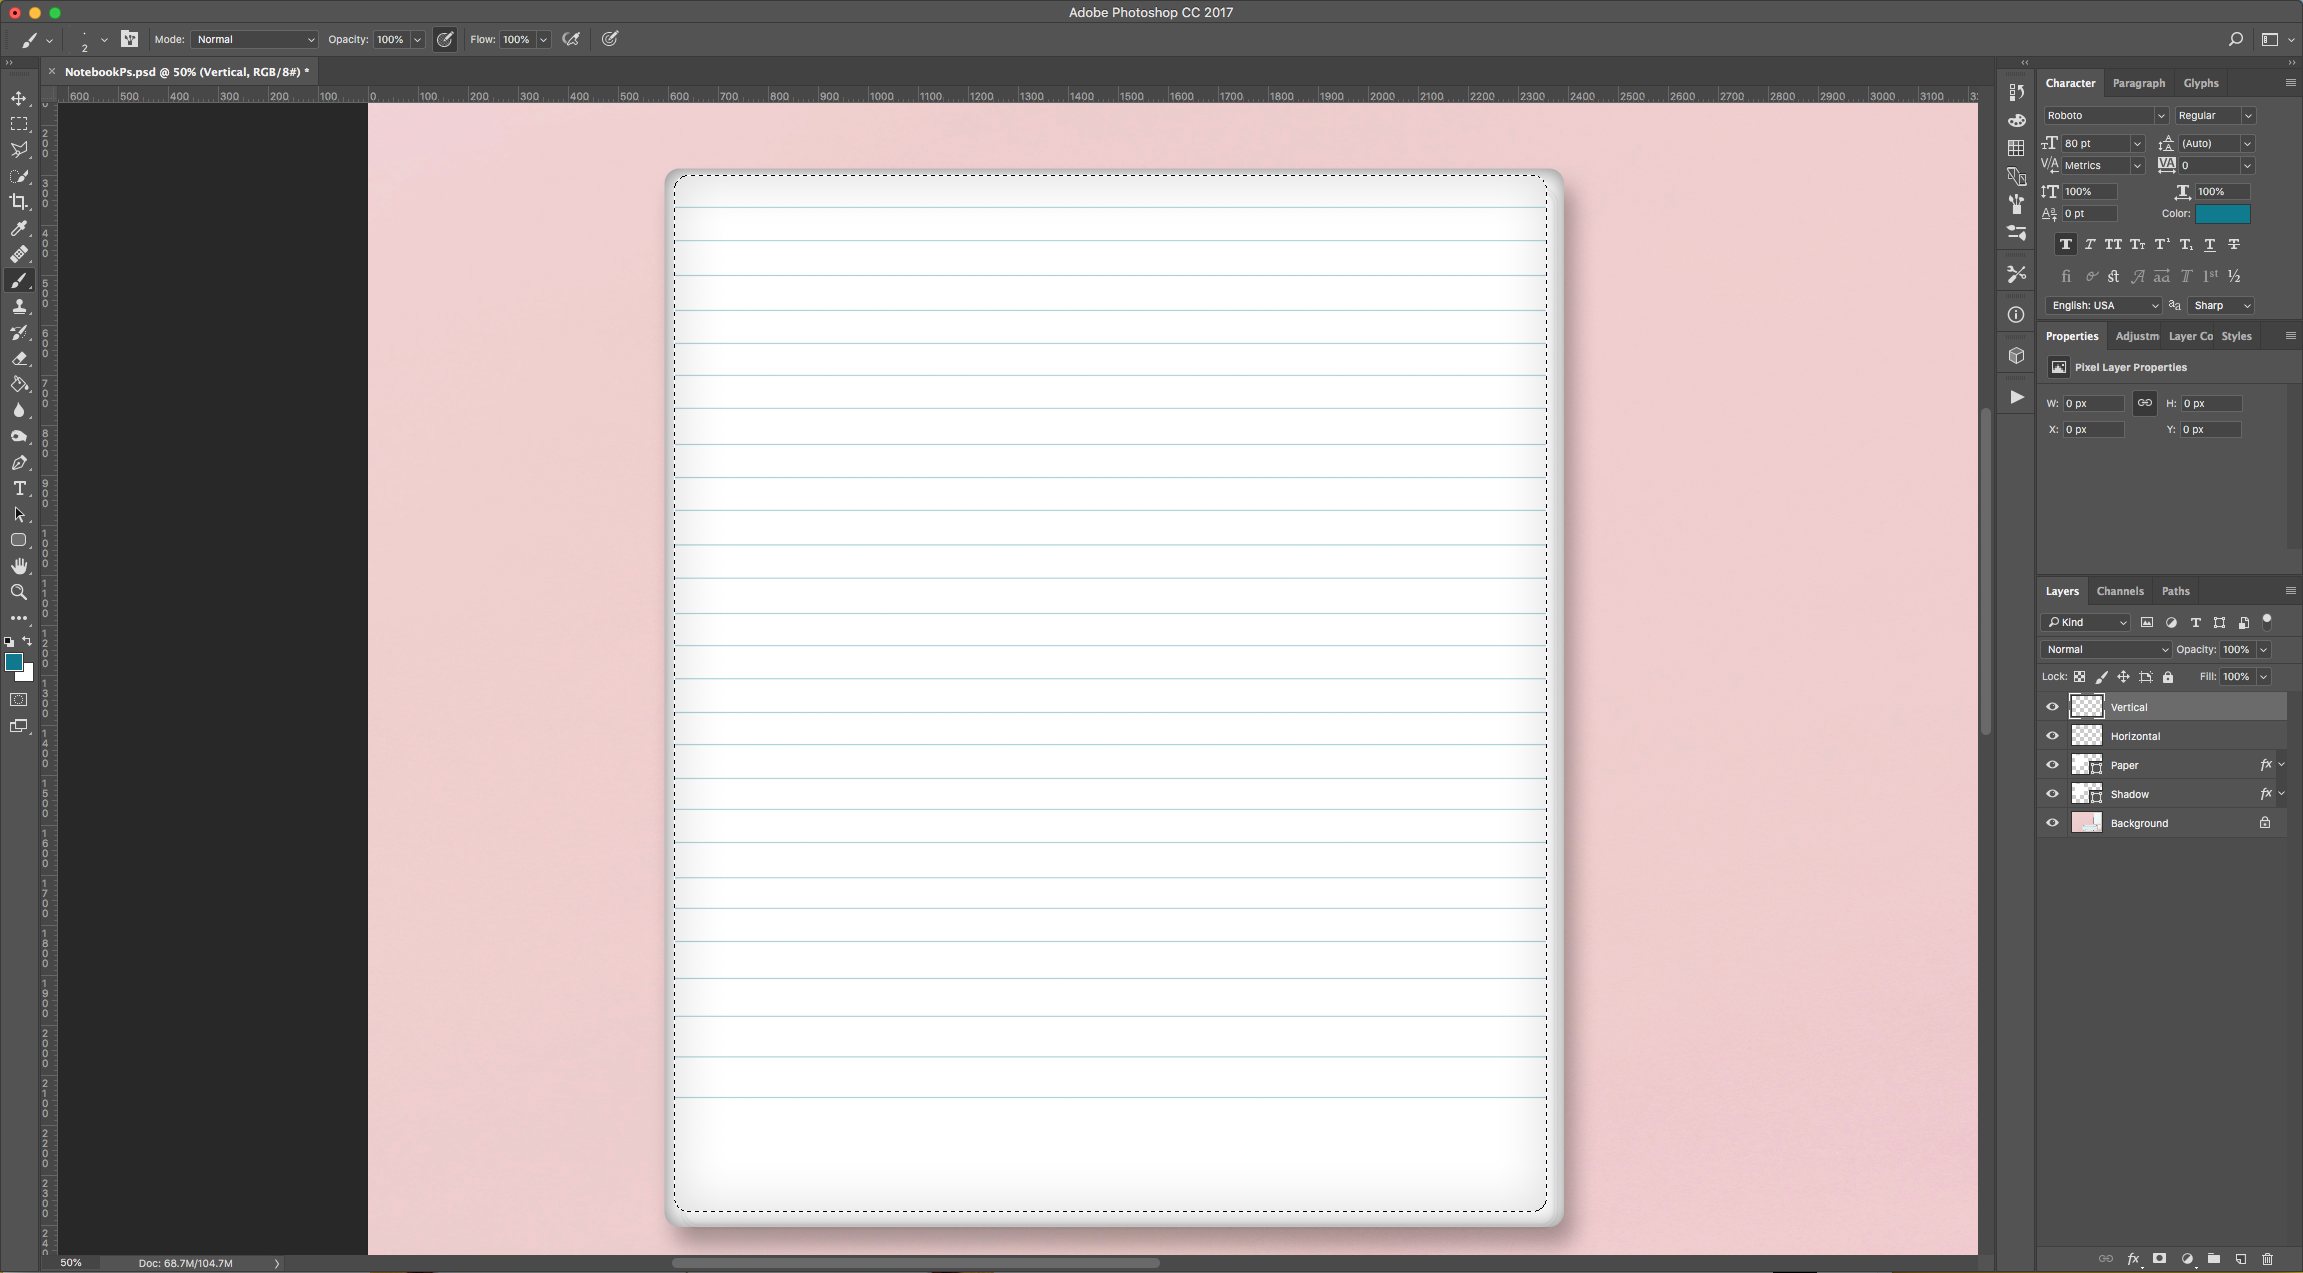
12 - Change the “Foreground” color to #fa2a2a and draw two “Vertical” lines (hold the “Shift” key to make them straight). At about 2 cm from the left side of the page mimicking the “Margins” in the “Notebook” page.
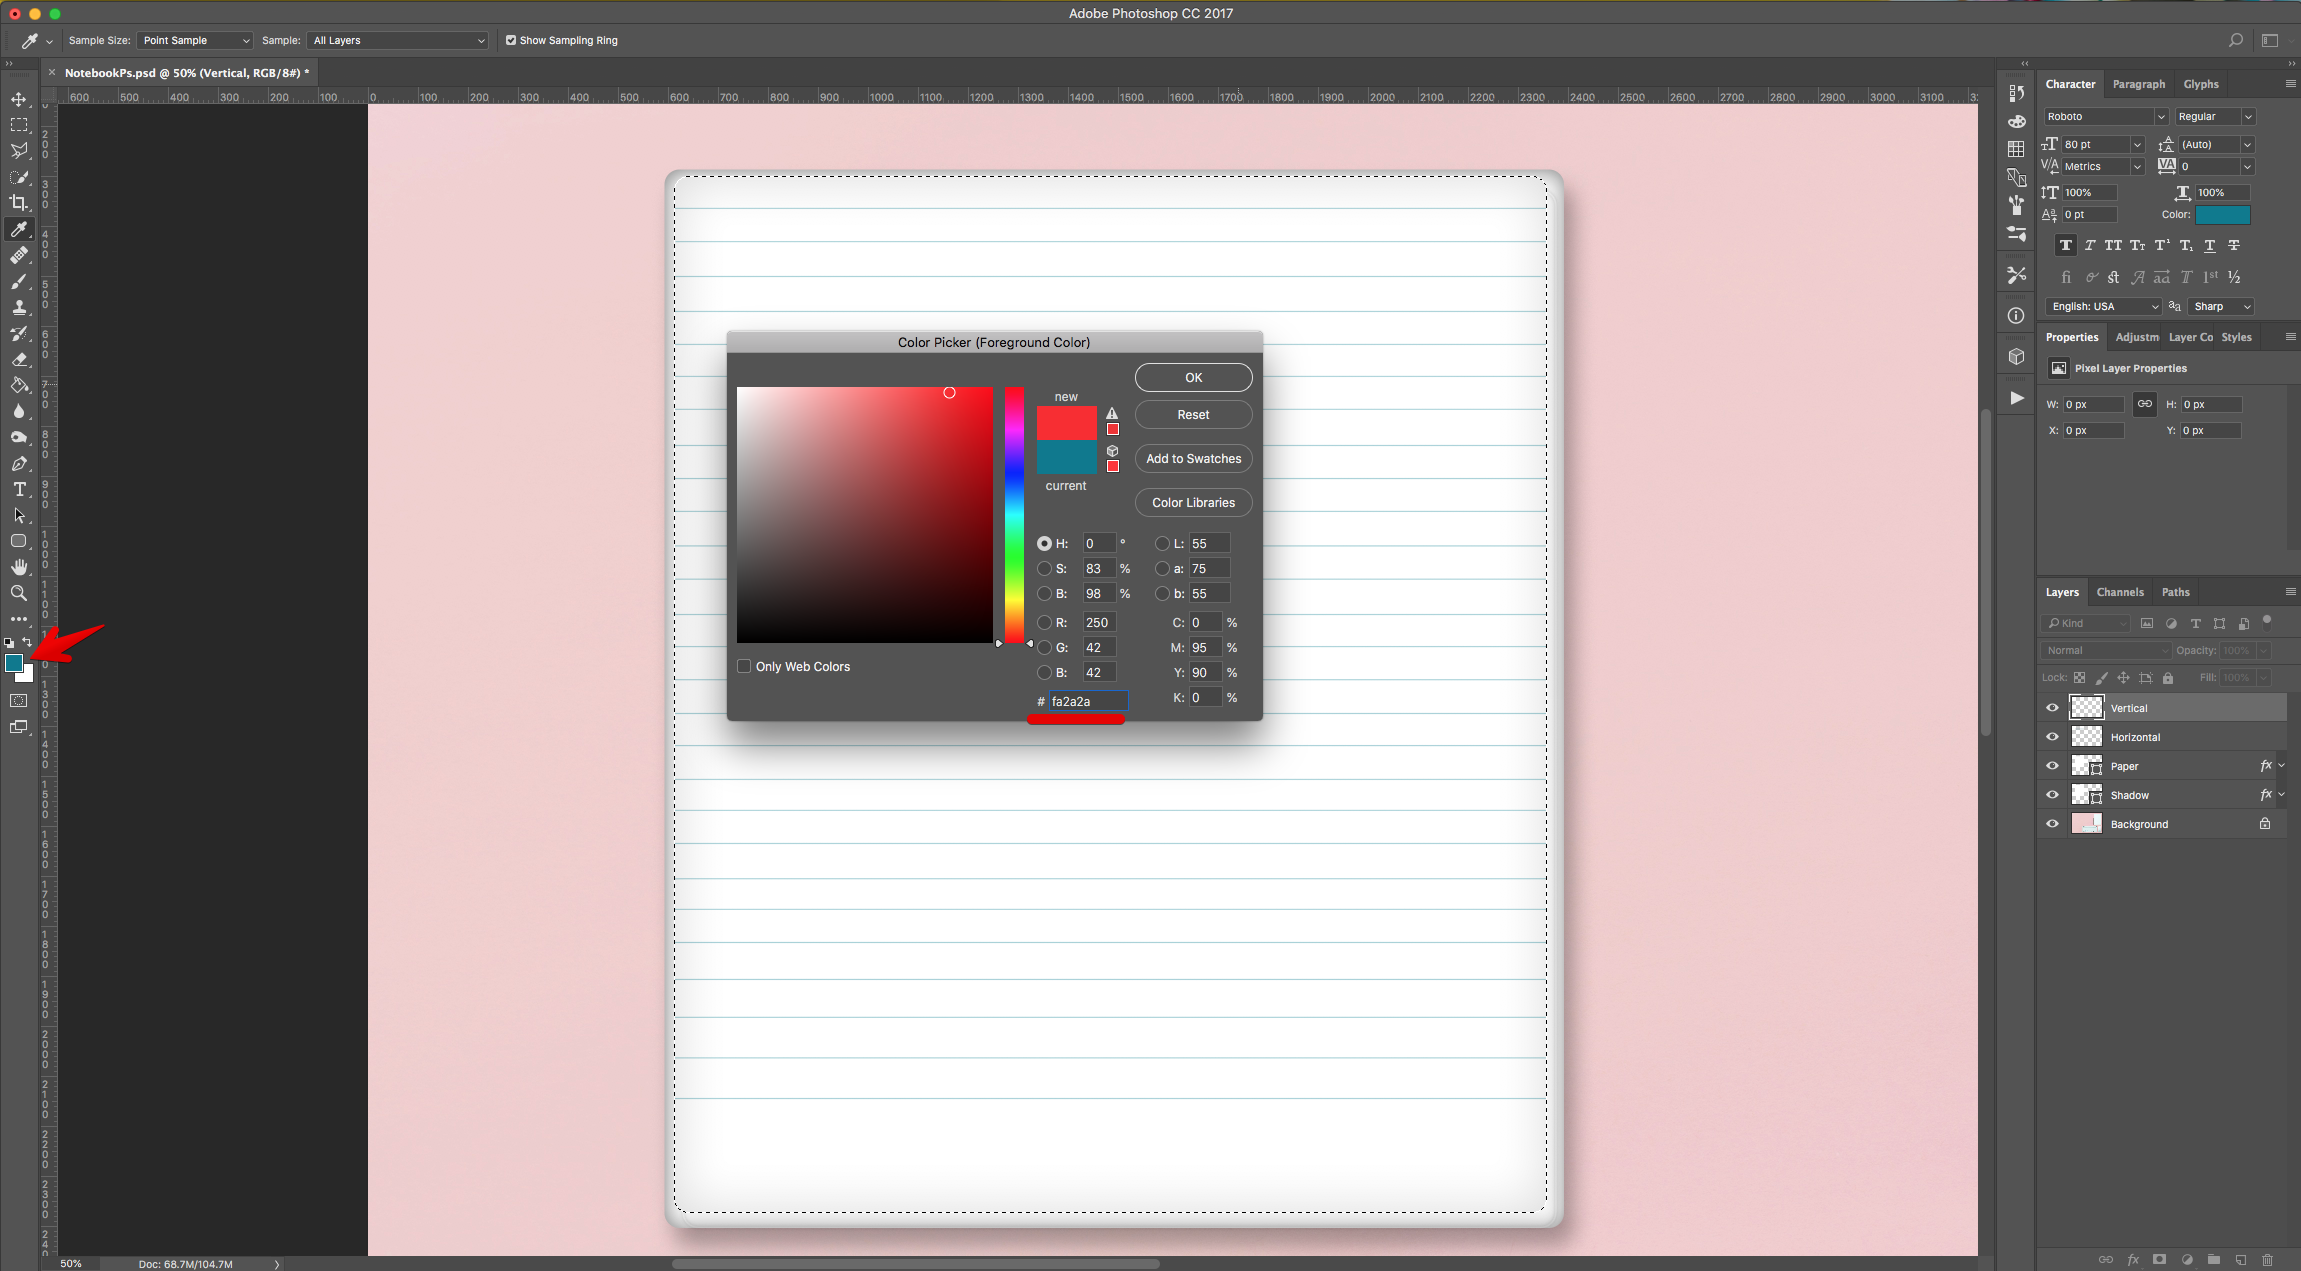
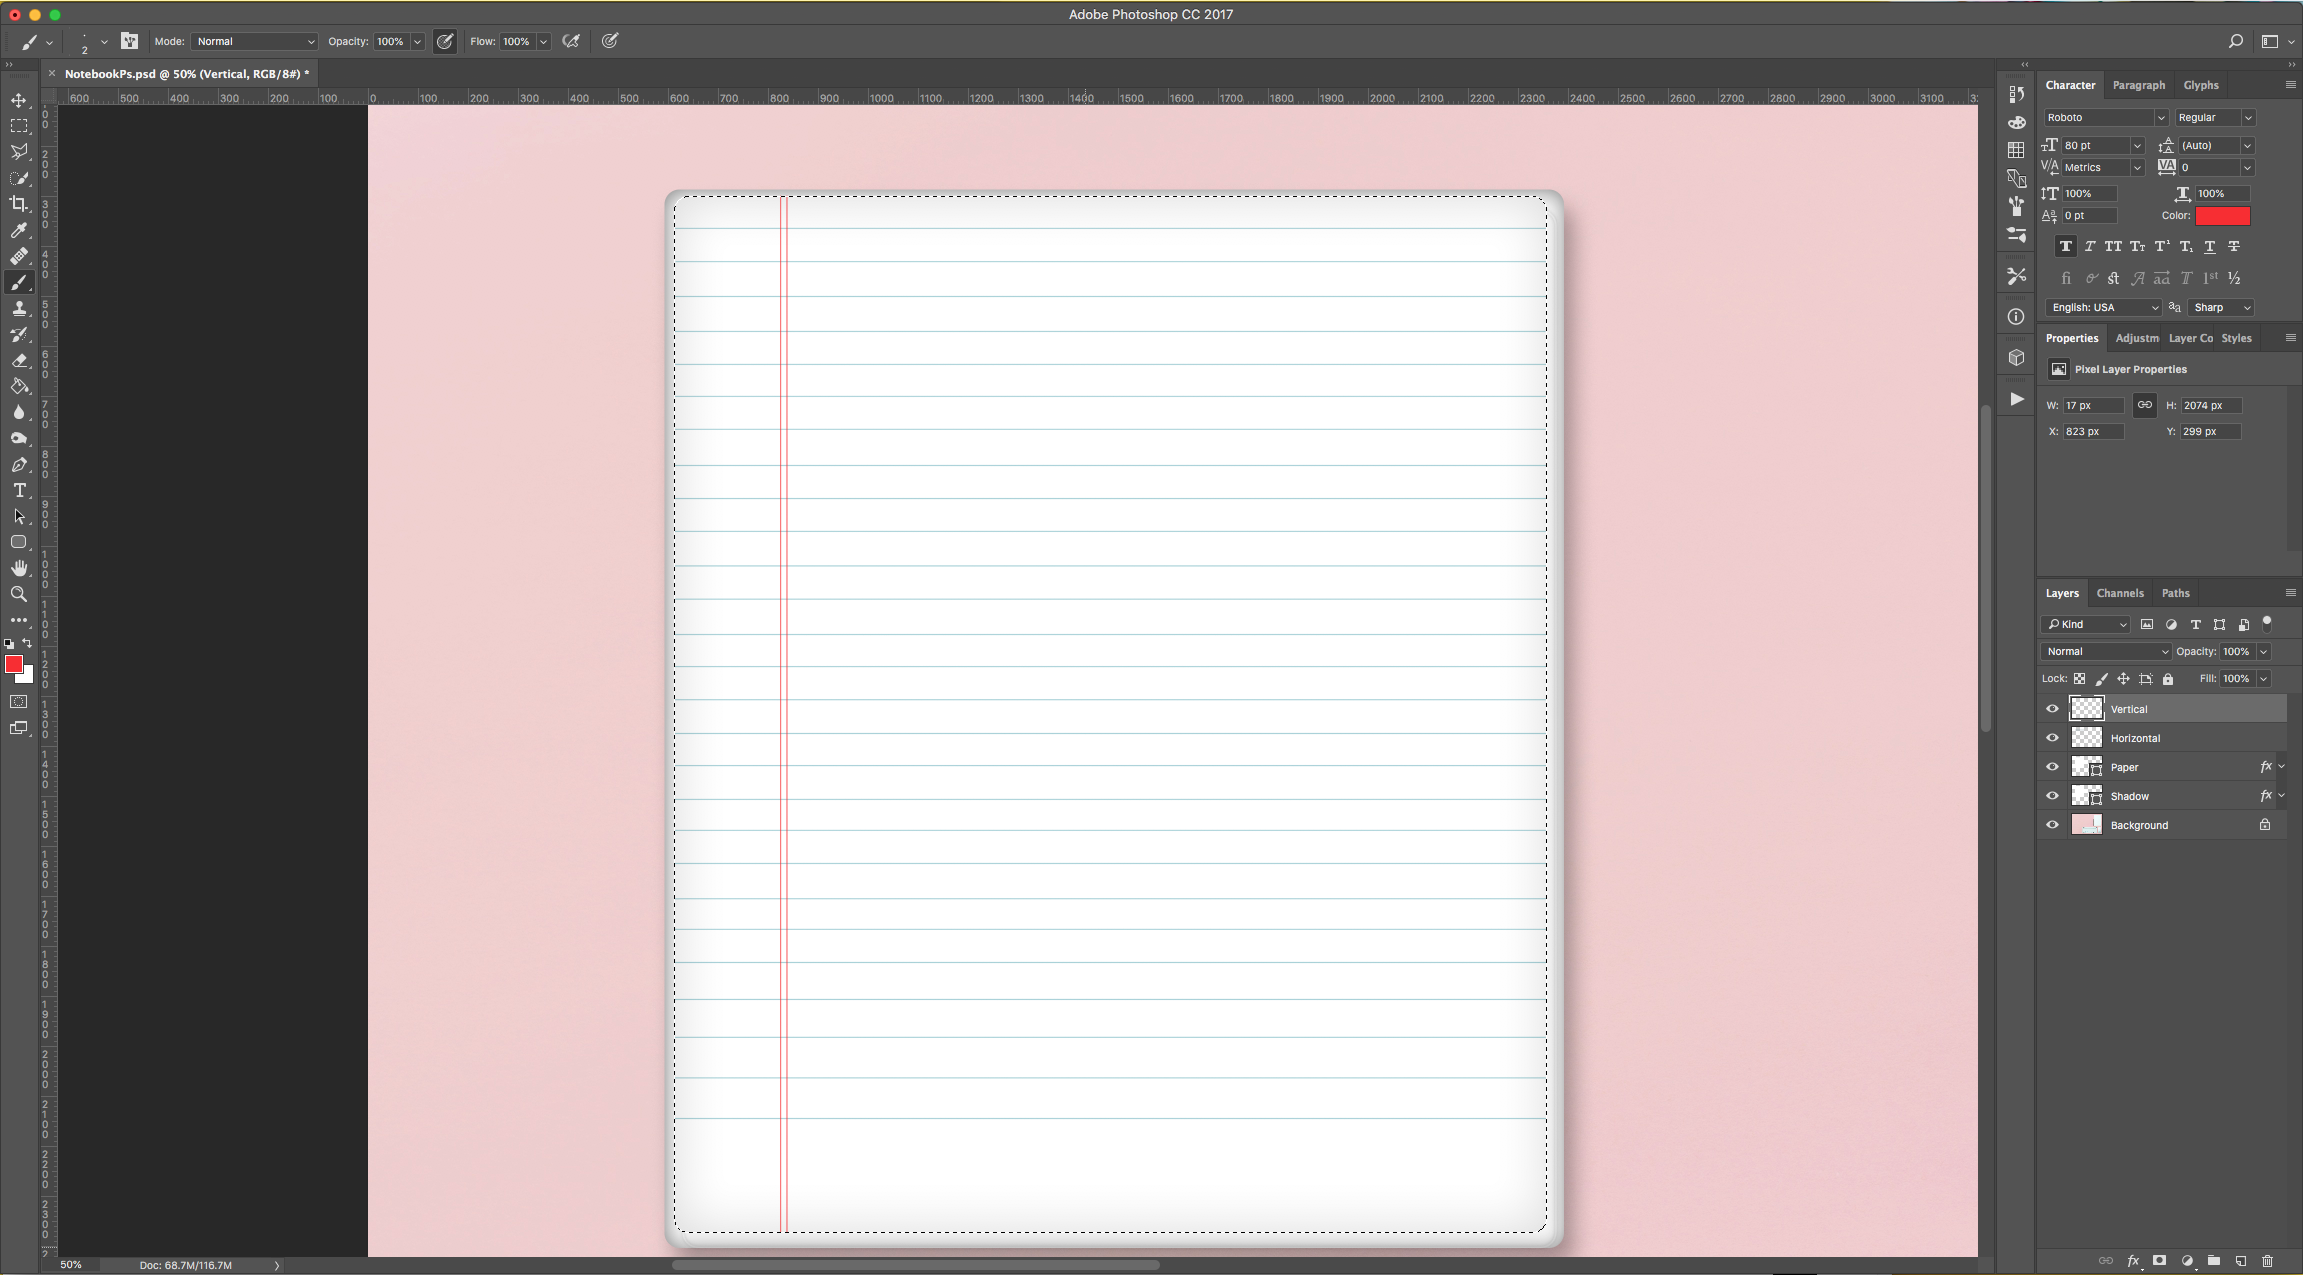
13 - Change the “Blending Mode” to “Linear Burn” and lower the “Opacity” to 50%.
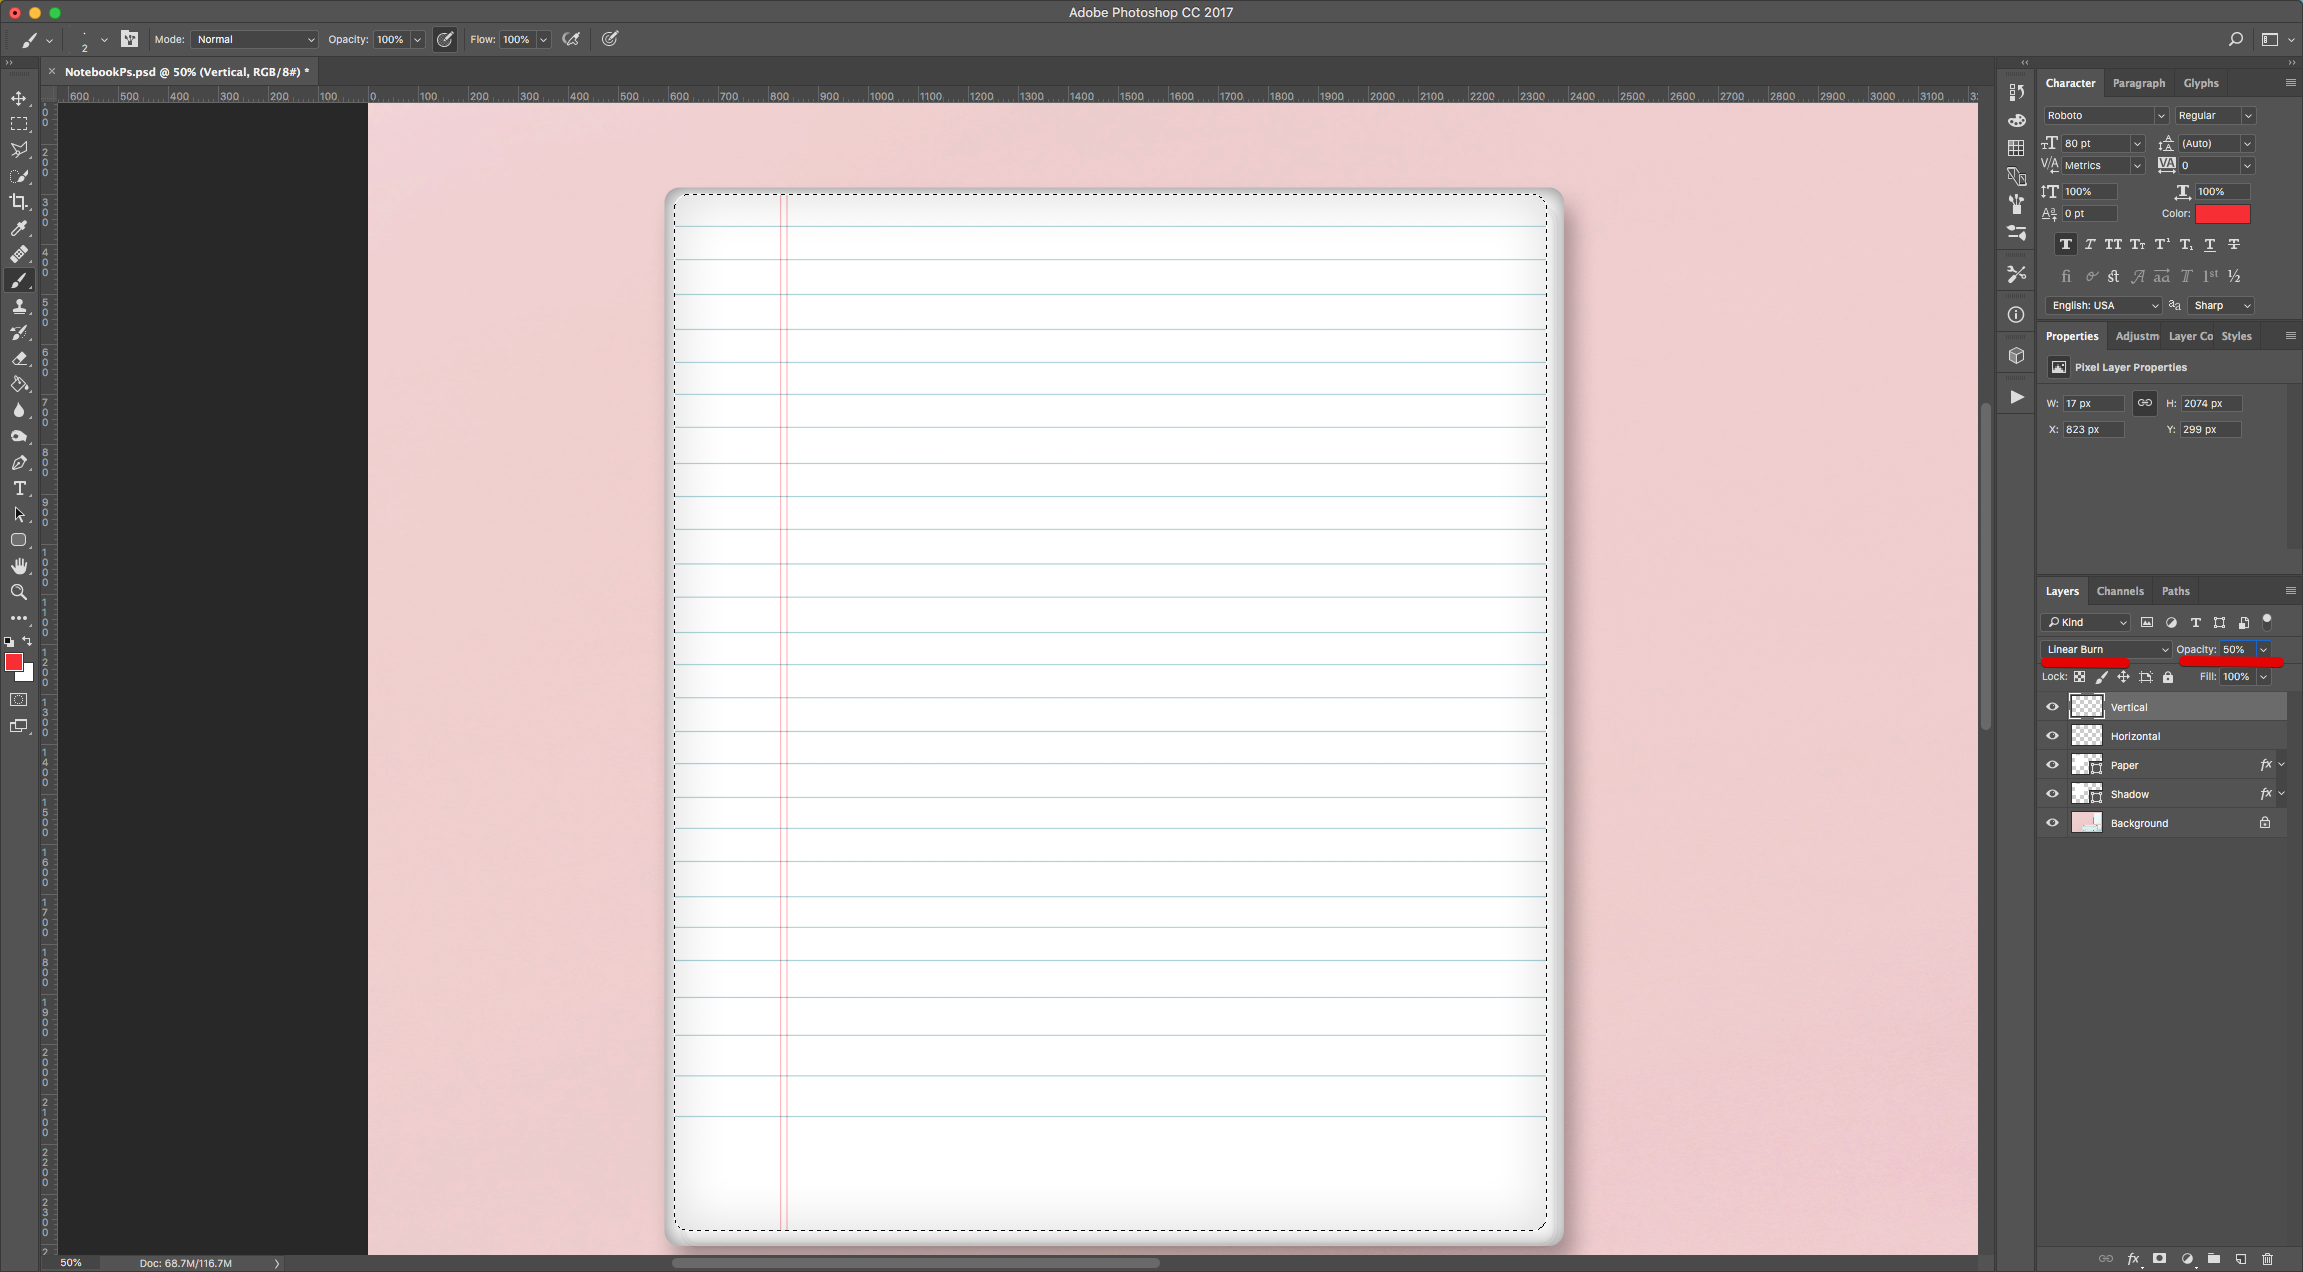
14 - Double-click on top of the “Paper” layer Thumbnail and add this to the “Layer Styles”:
Stoke:
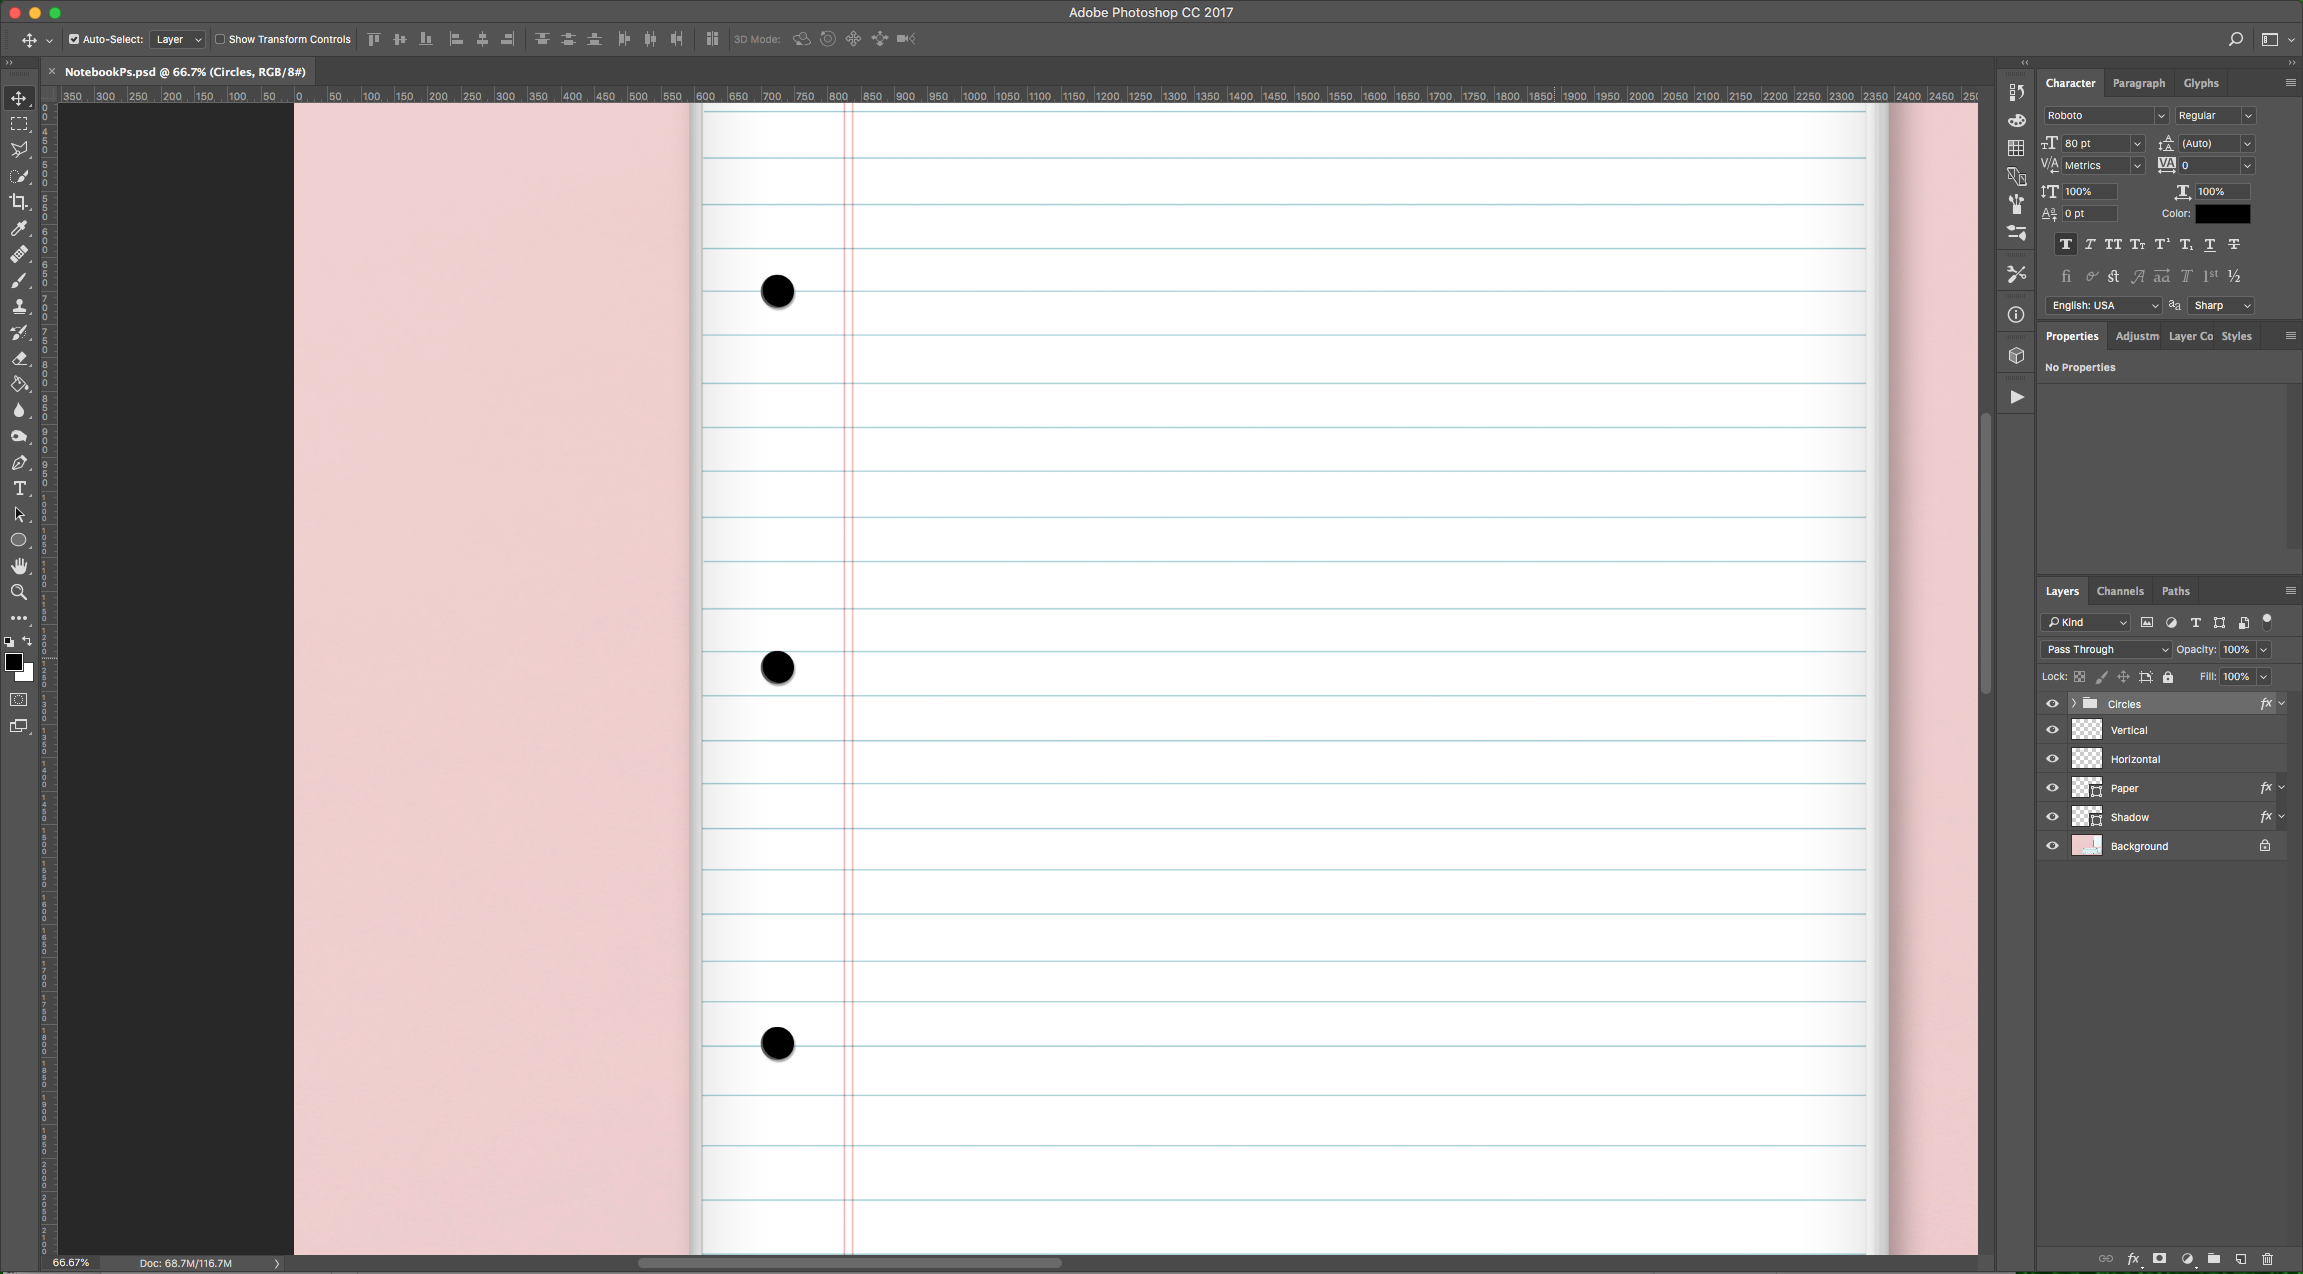
15 - Select the “Ellipse Tool” (U), Black as “Foreground” color and make a small circle to mimic the “Notebook” holes.
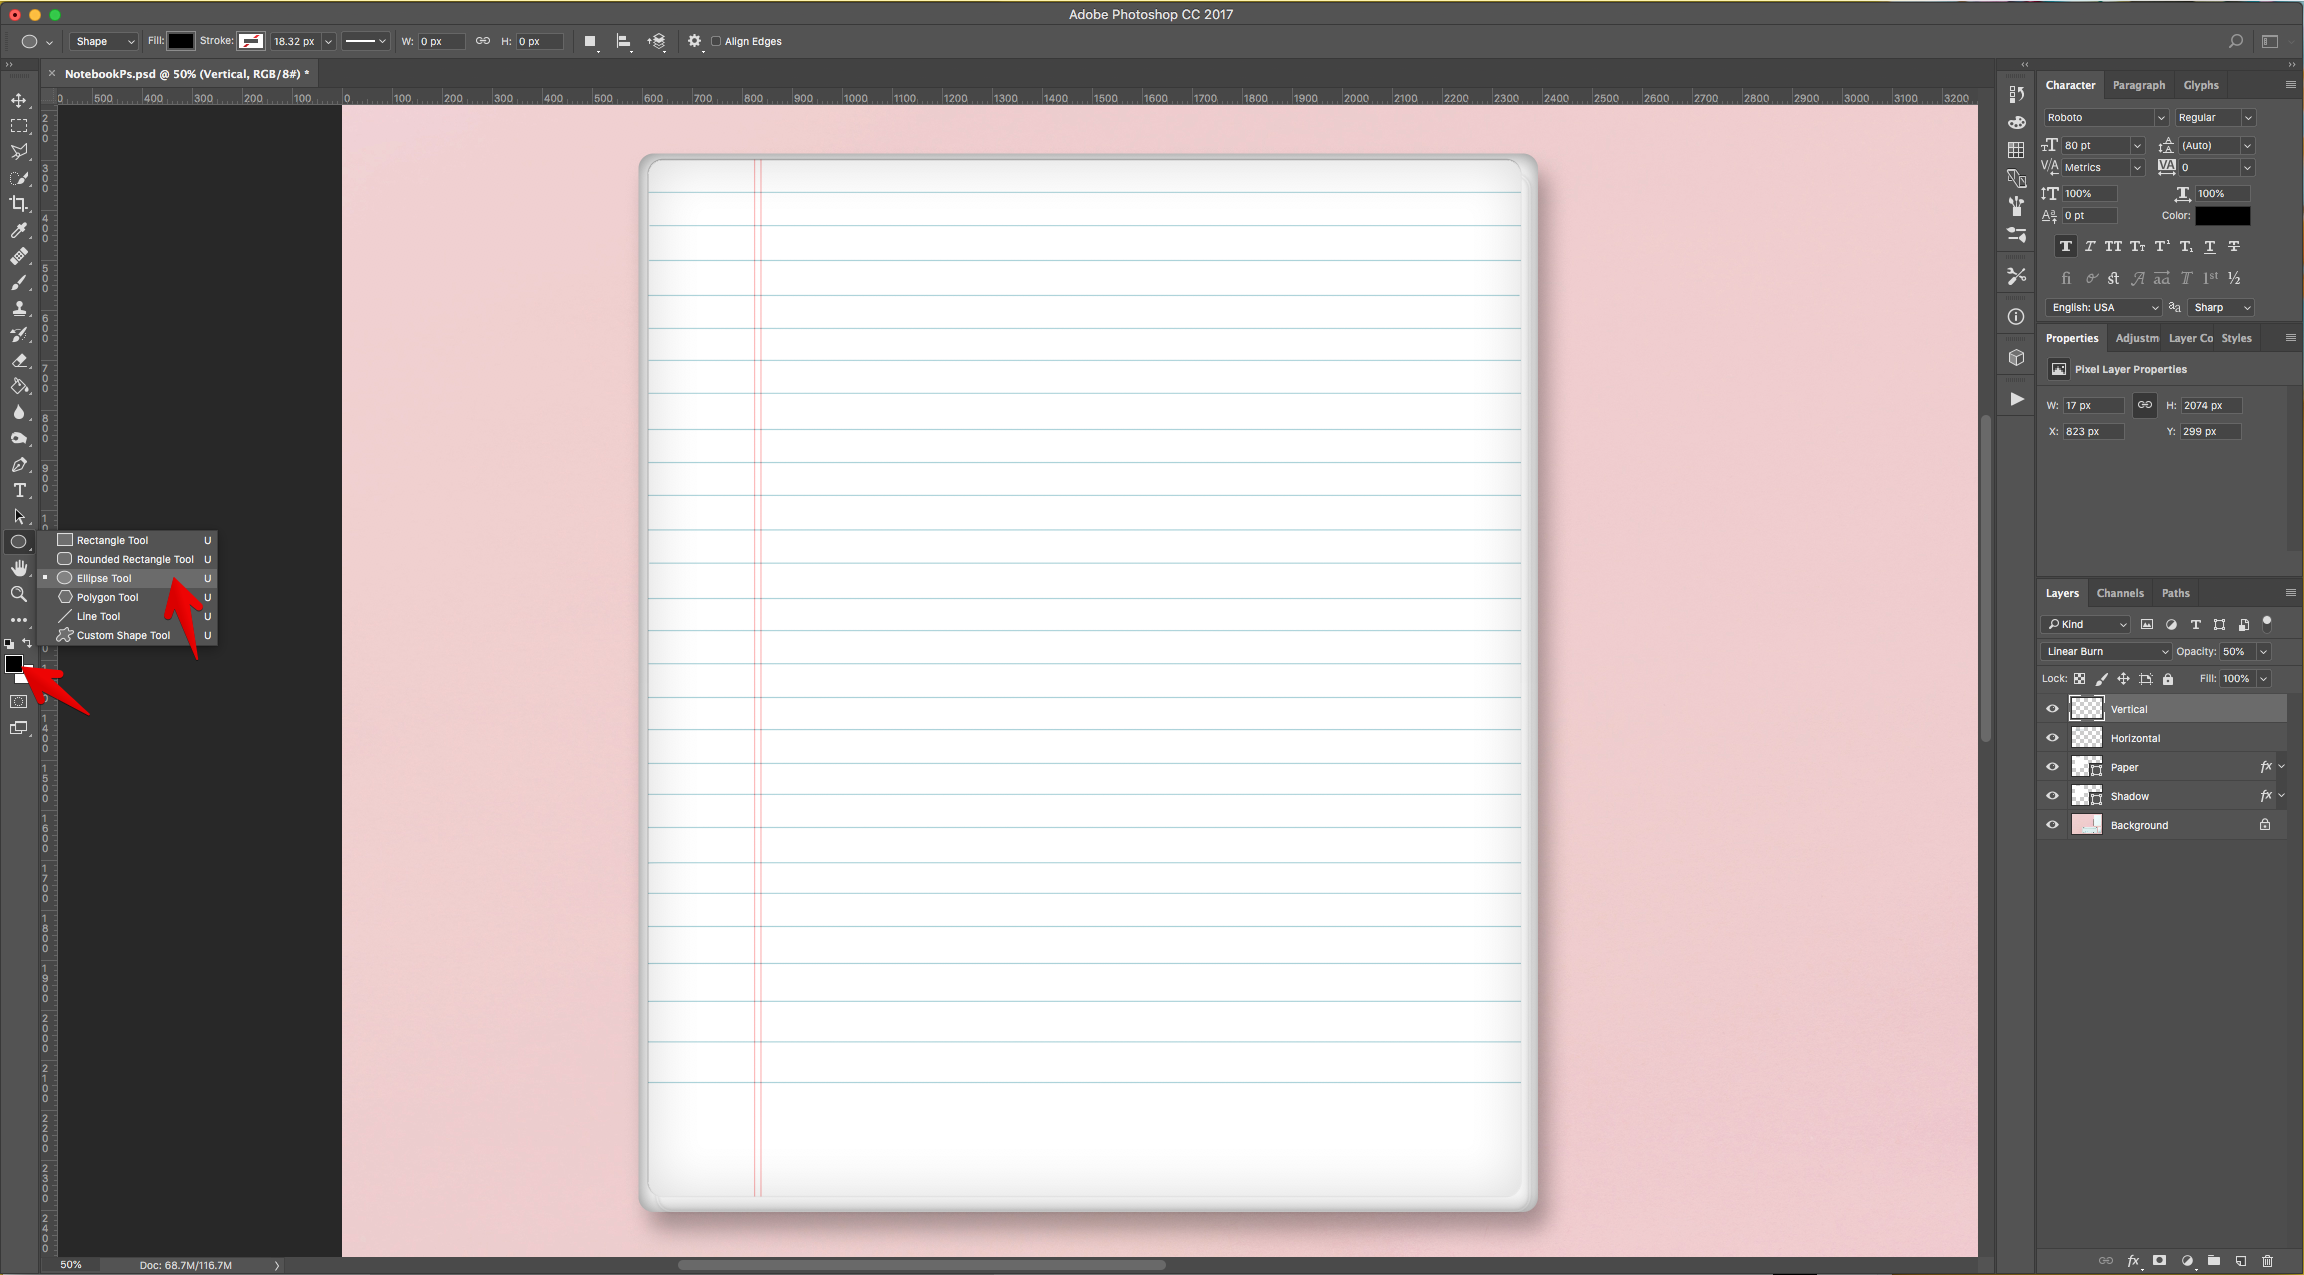
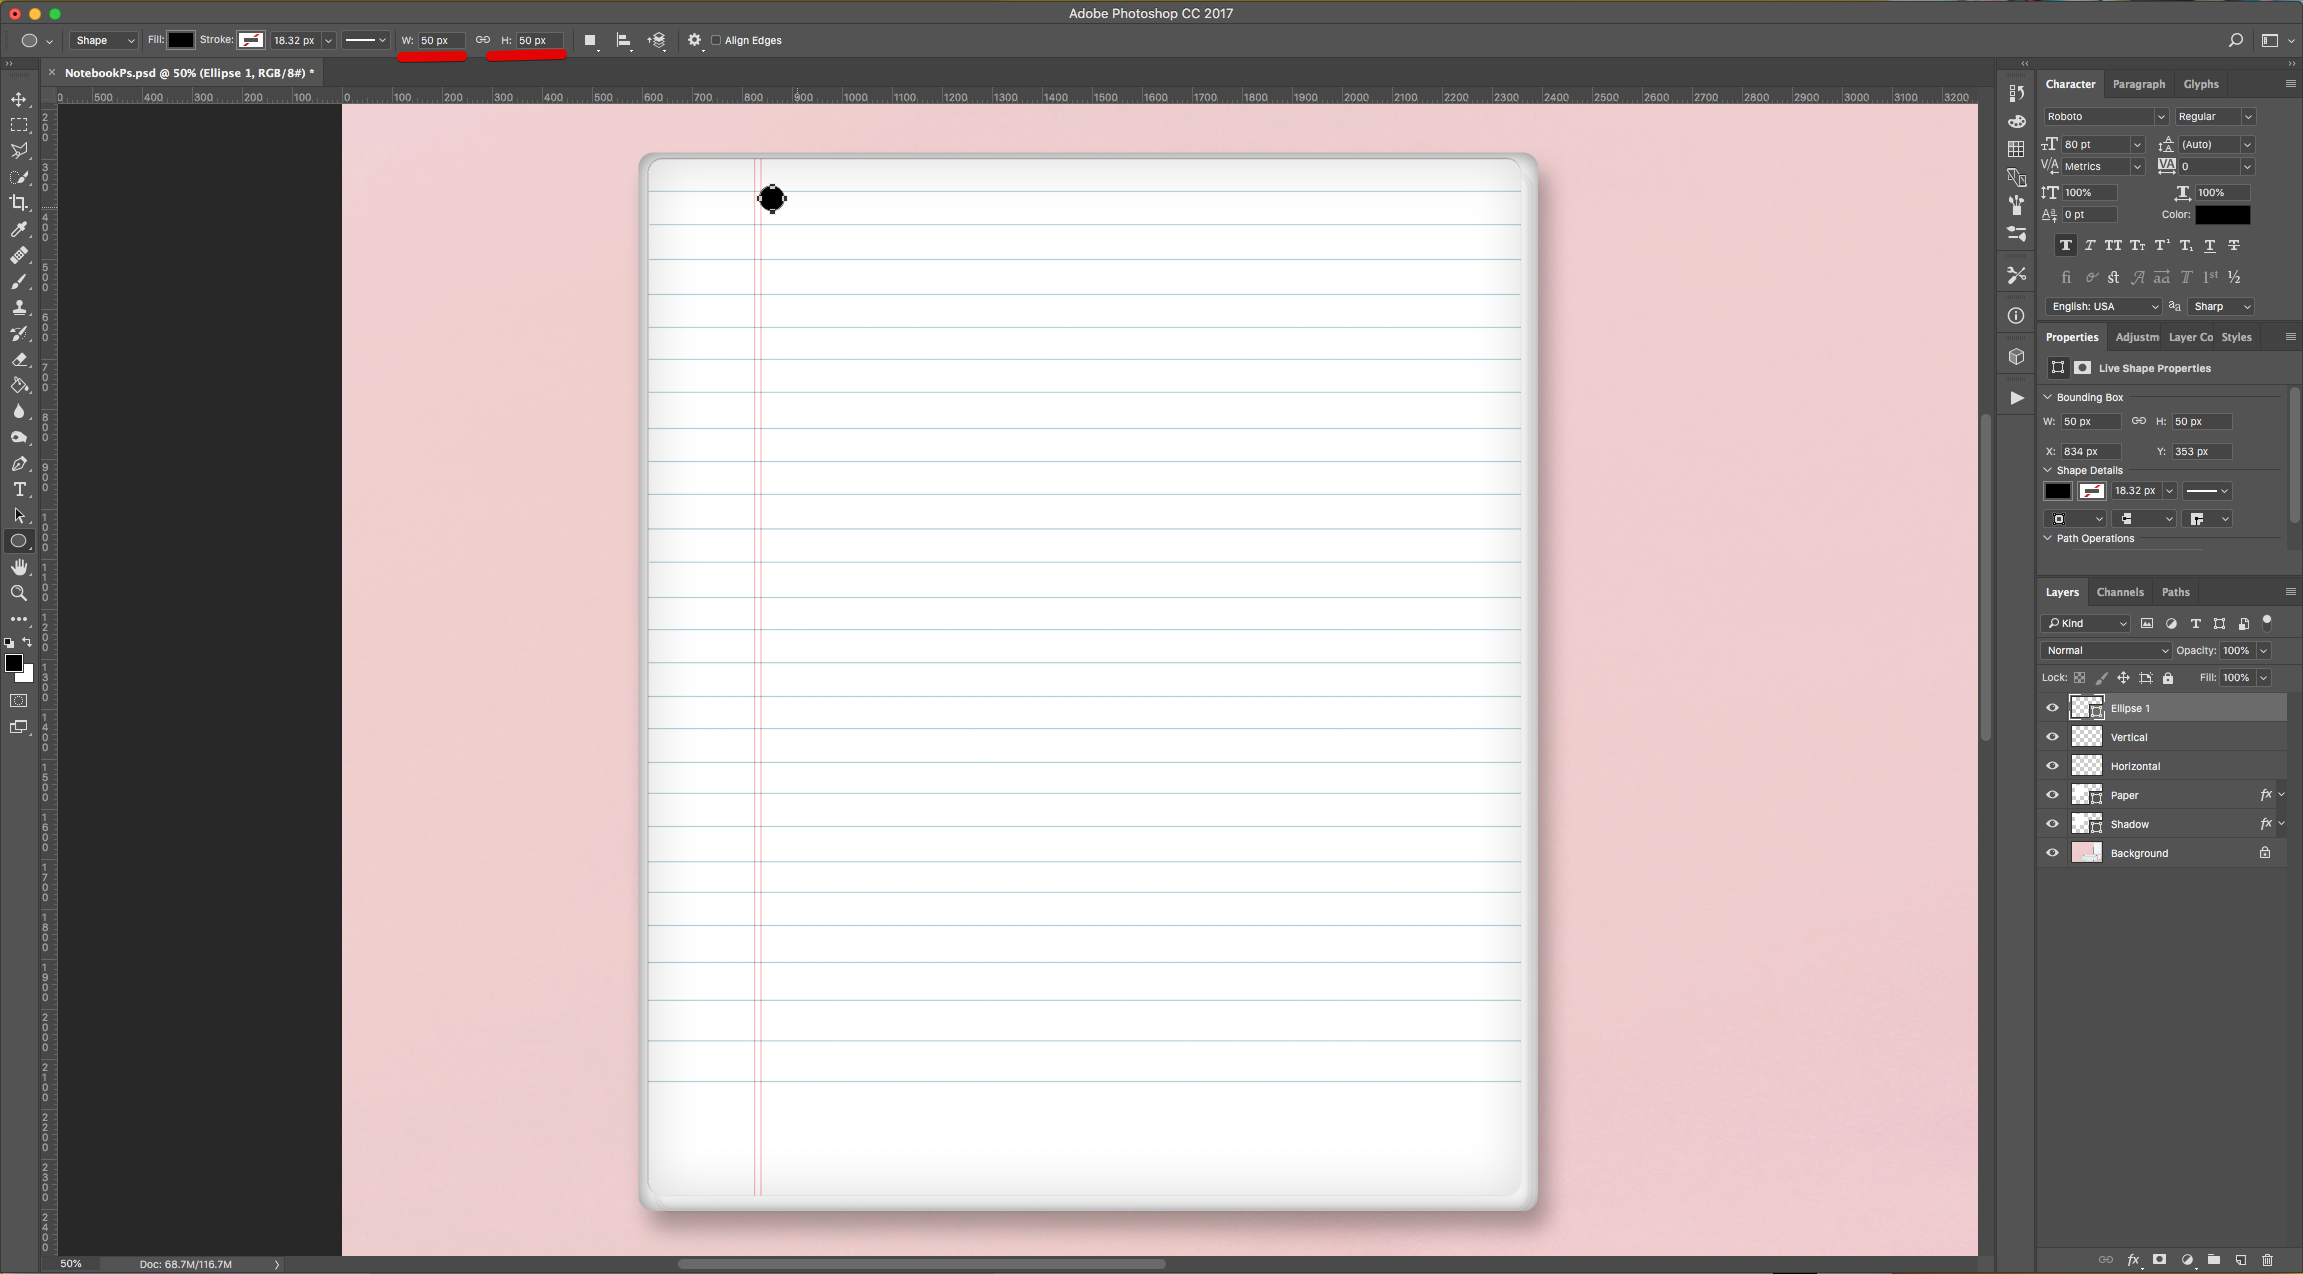
16 - Place it on the Top-Left side of the “Page” inside the “Margin” area. “Duplicate” it a couple of times by dragging its Thumbnail to the “Create New Layer” button at the bottom of the “Layers Panel” and distribute the duplicates in the center and bottom of the “Margin” area.
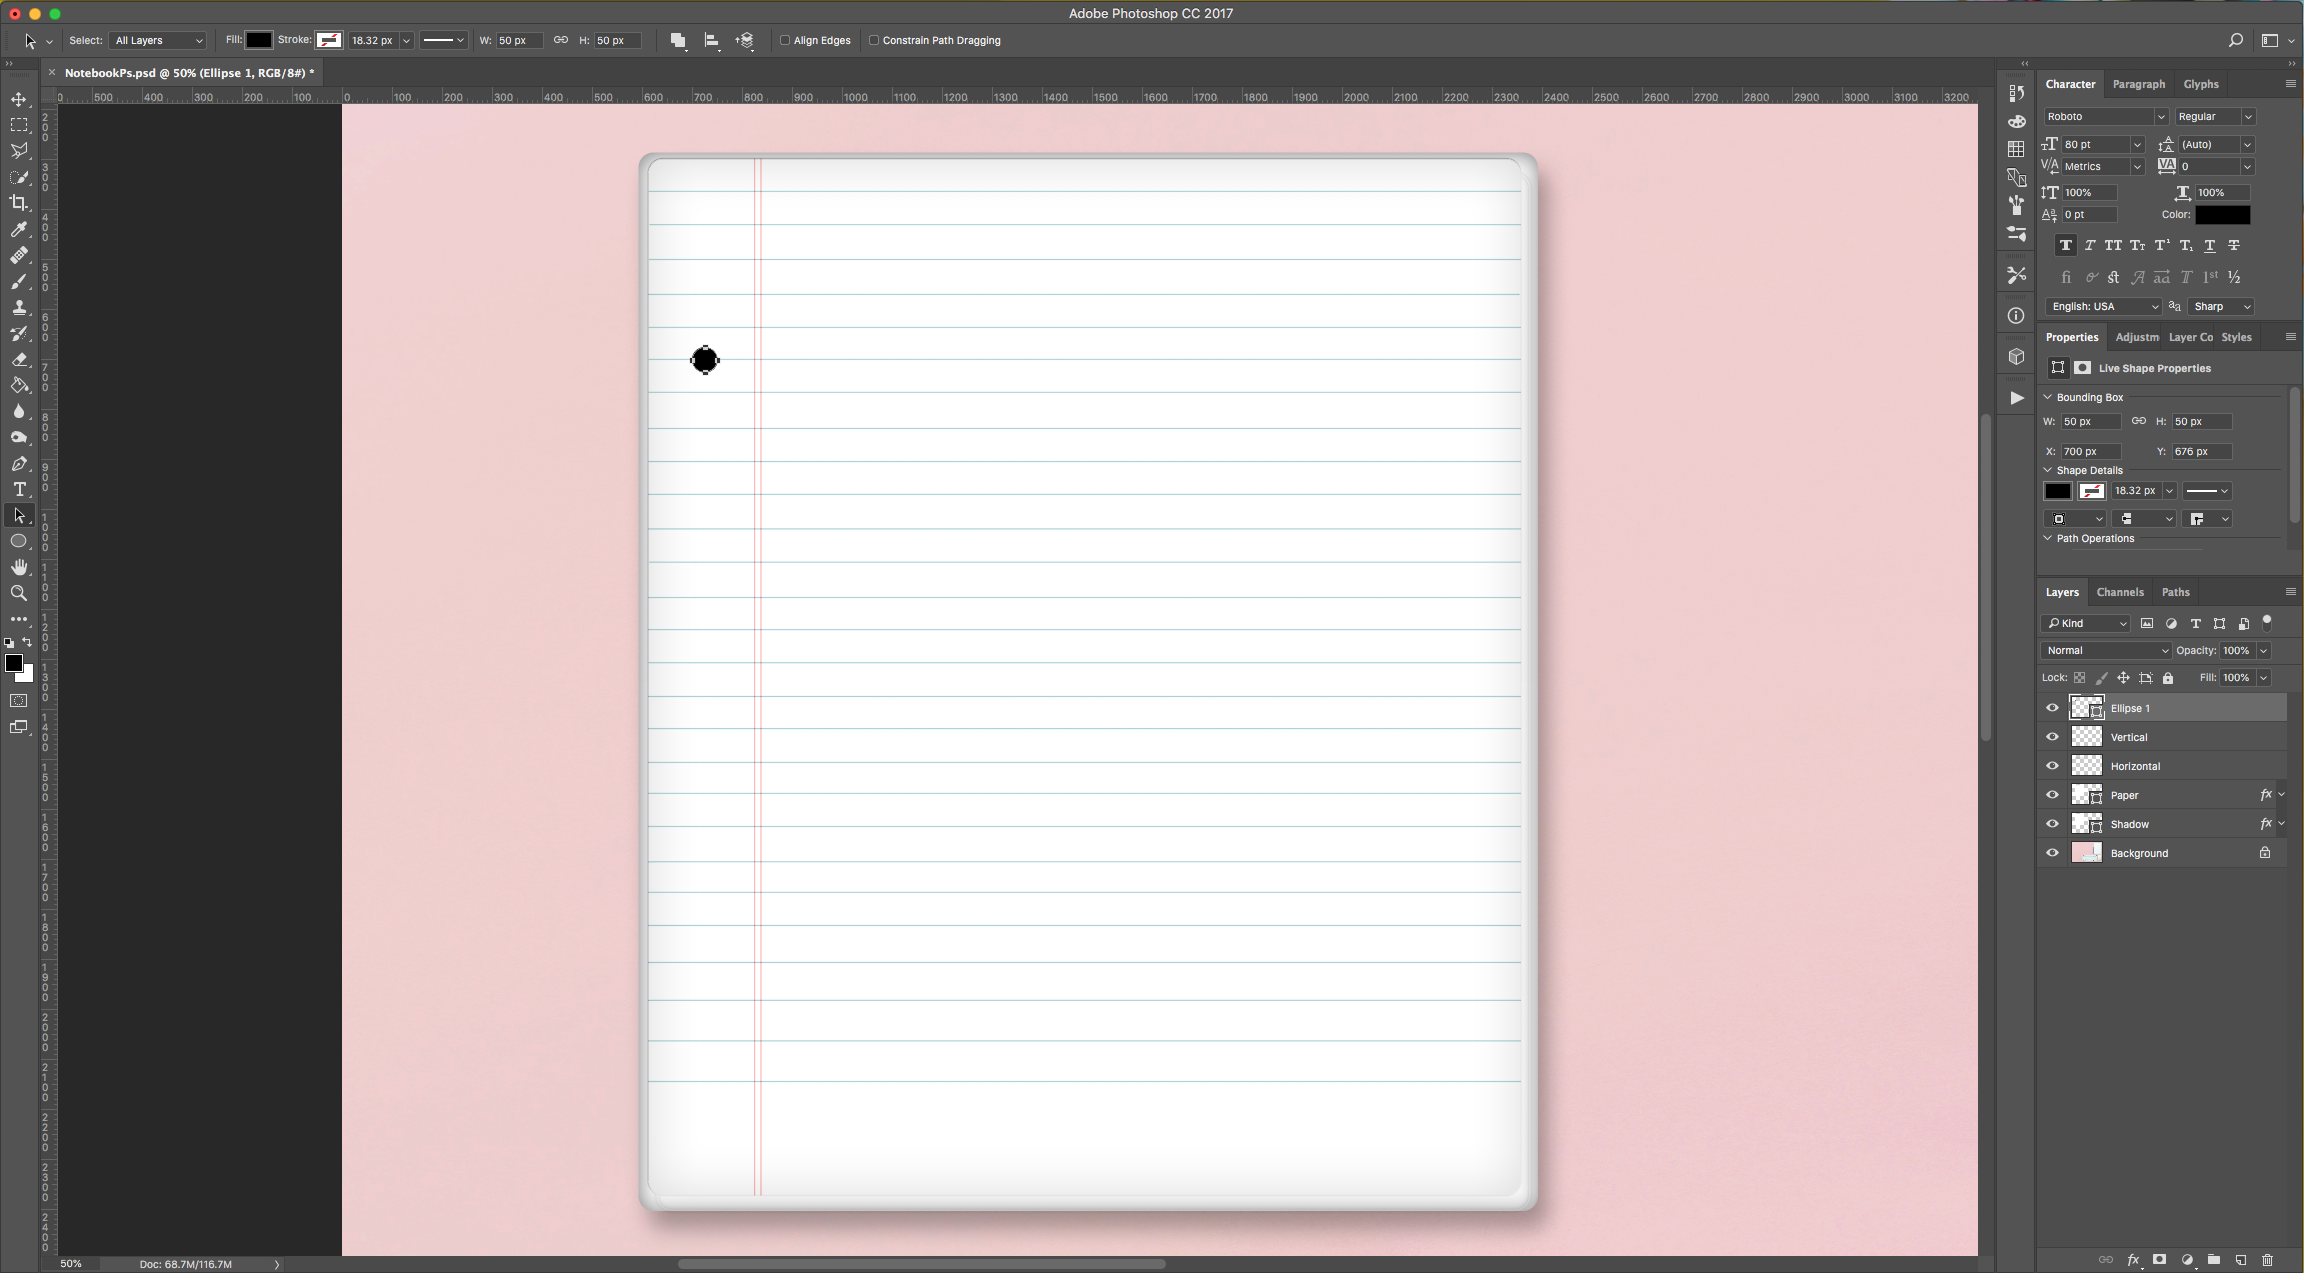
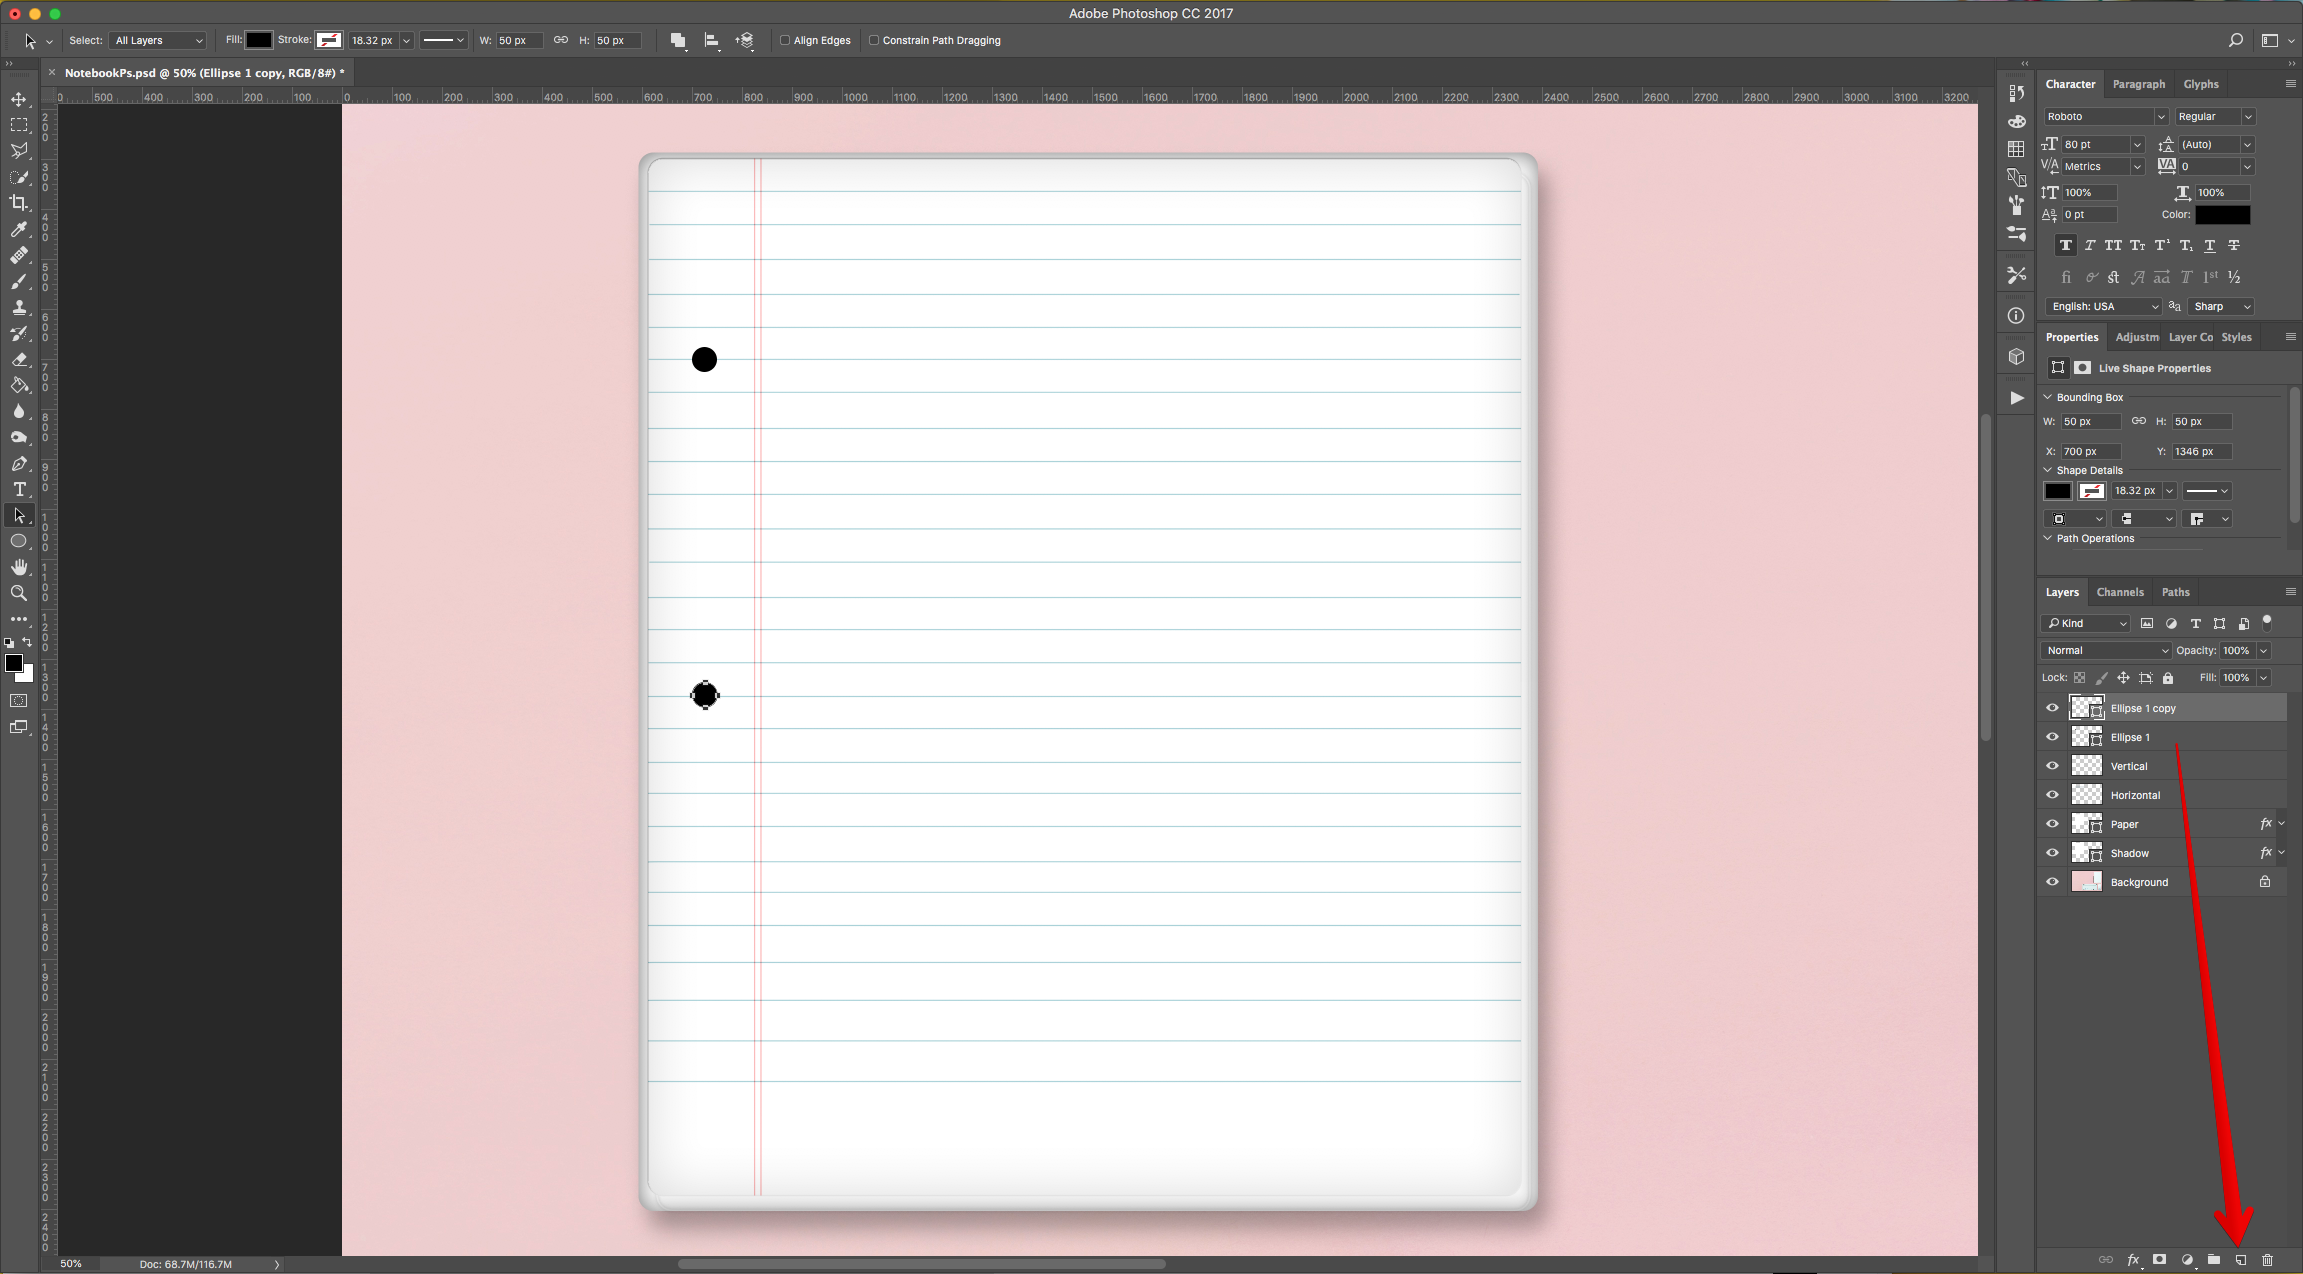
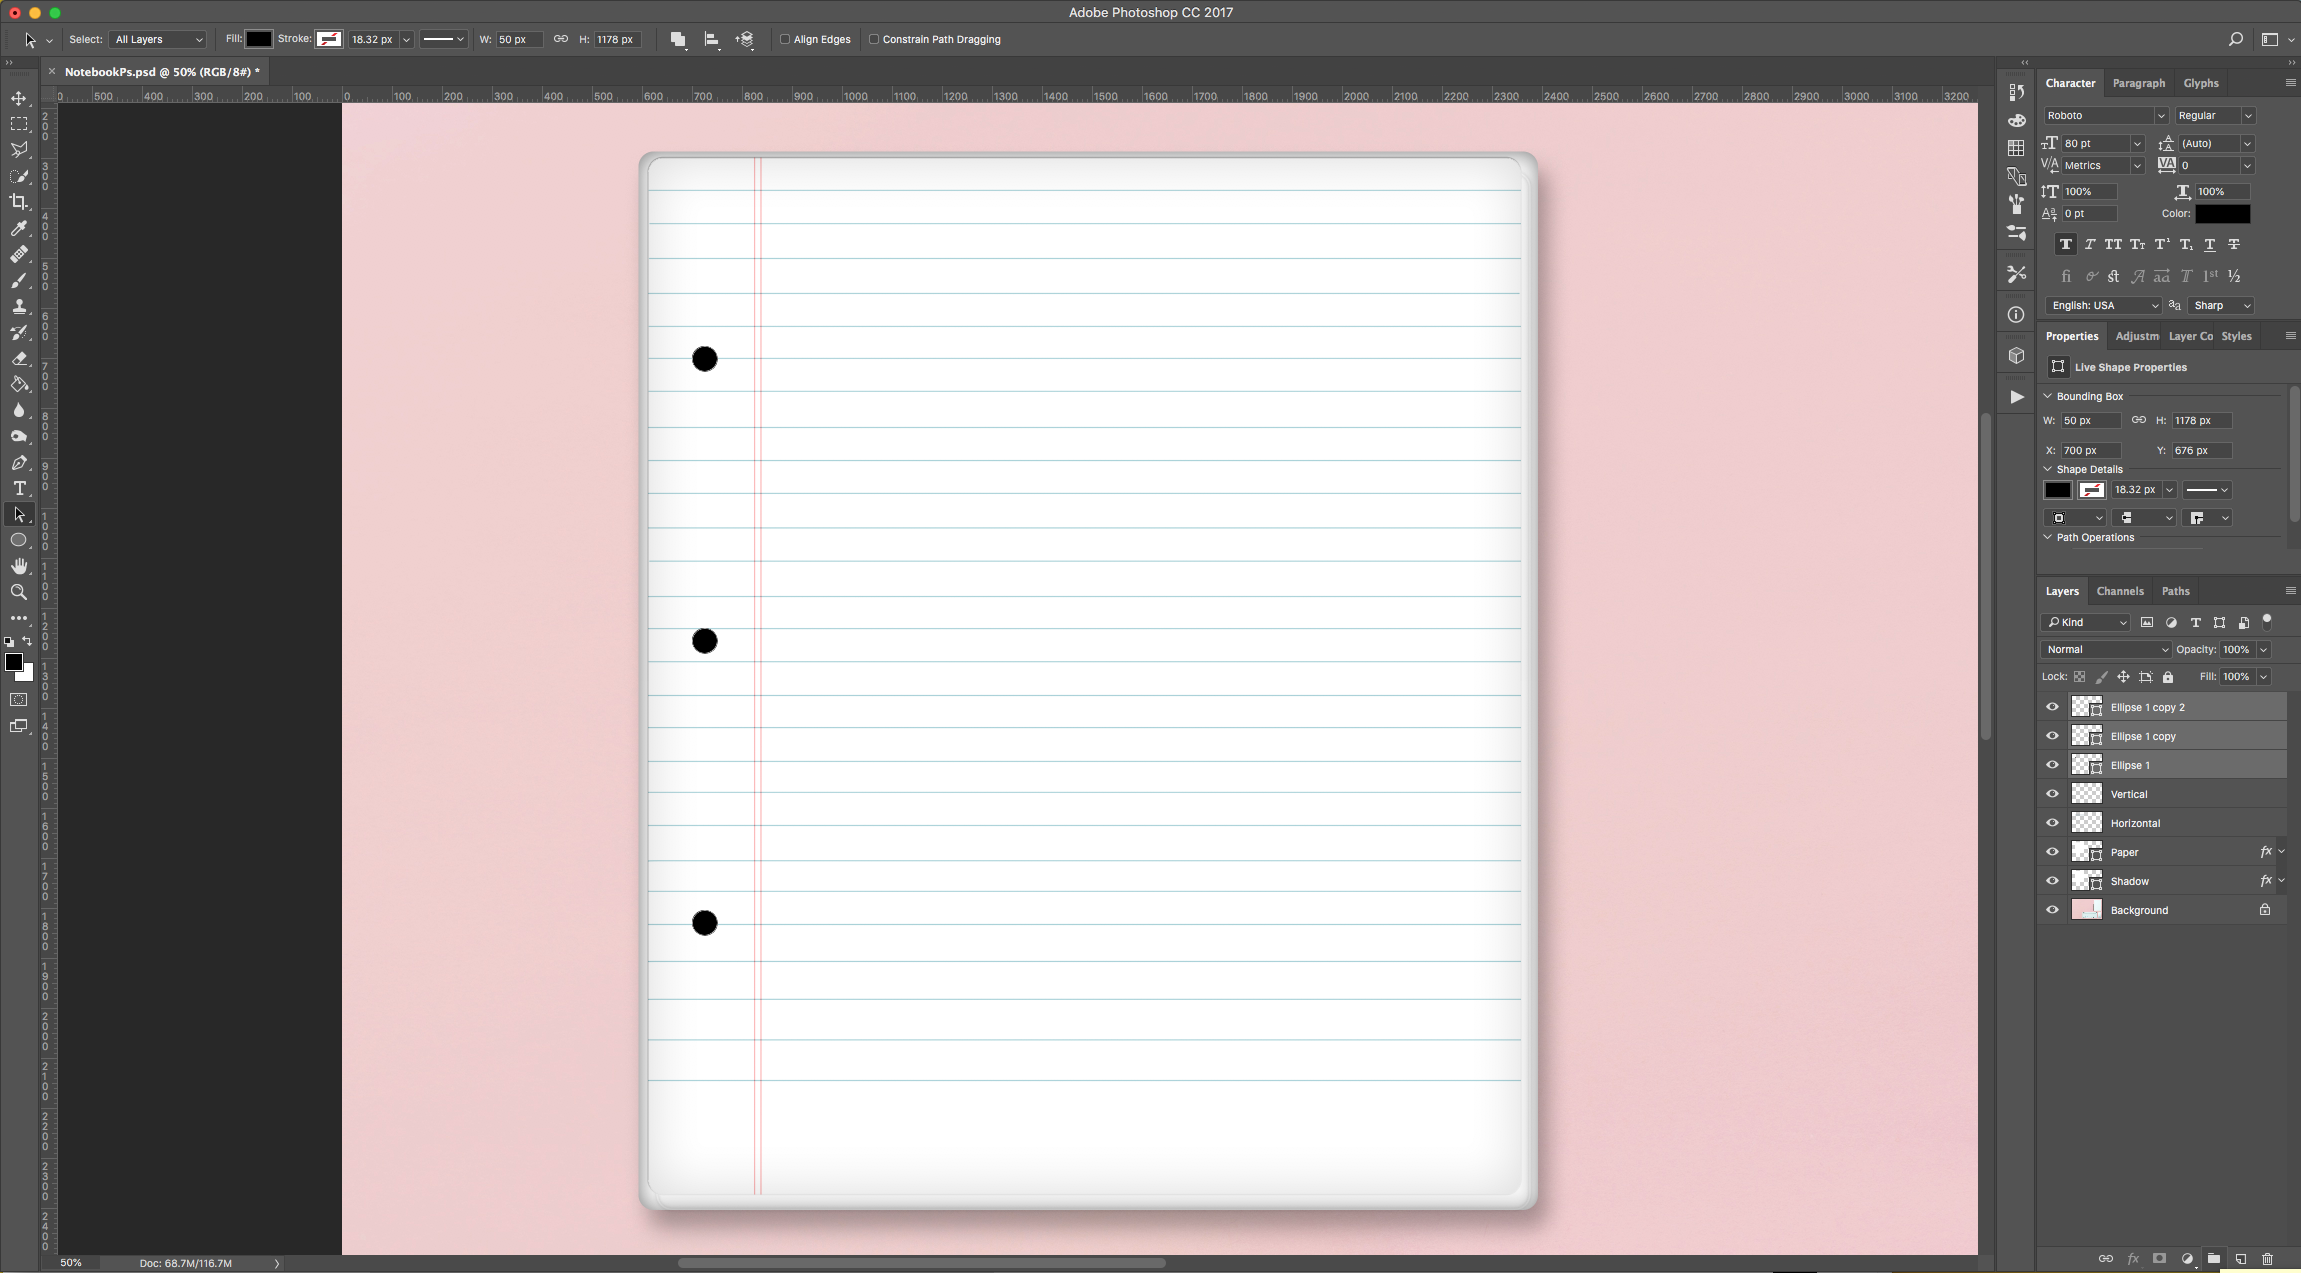
17 - Select all the “Circle” layers (using the “Shift” key) and “Group” them together by clicking on the small “Folder” icon at the bottom of the “Layers Panel”. Name the Group “Circles”.
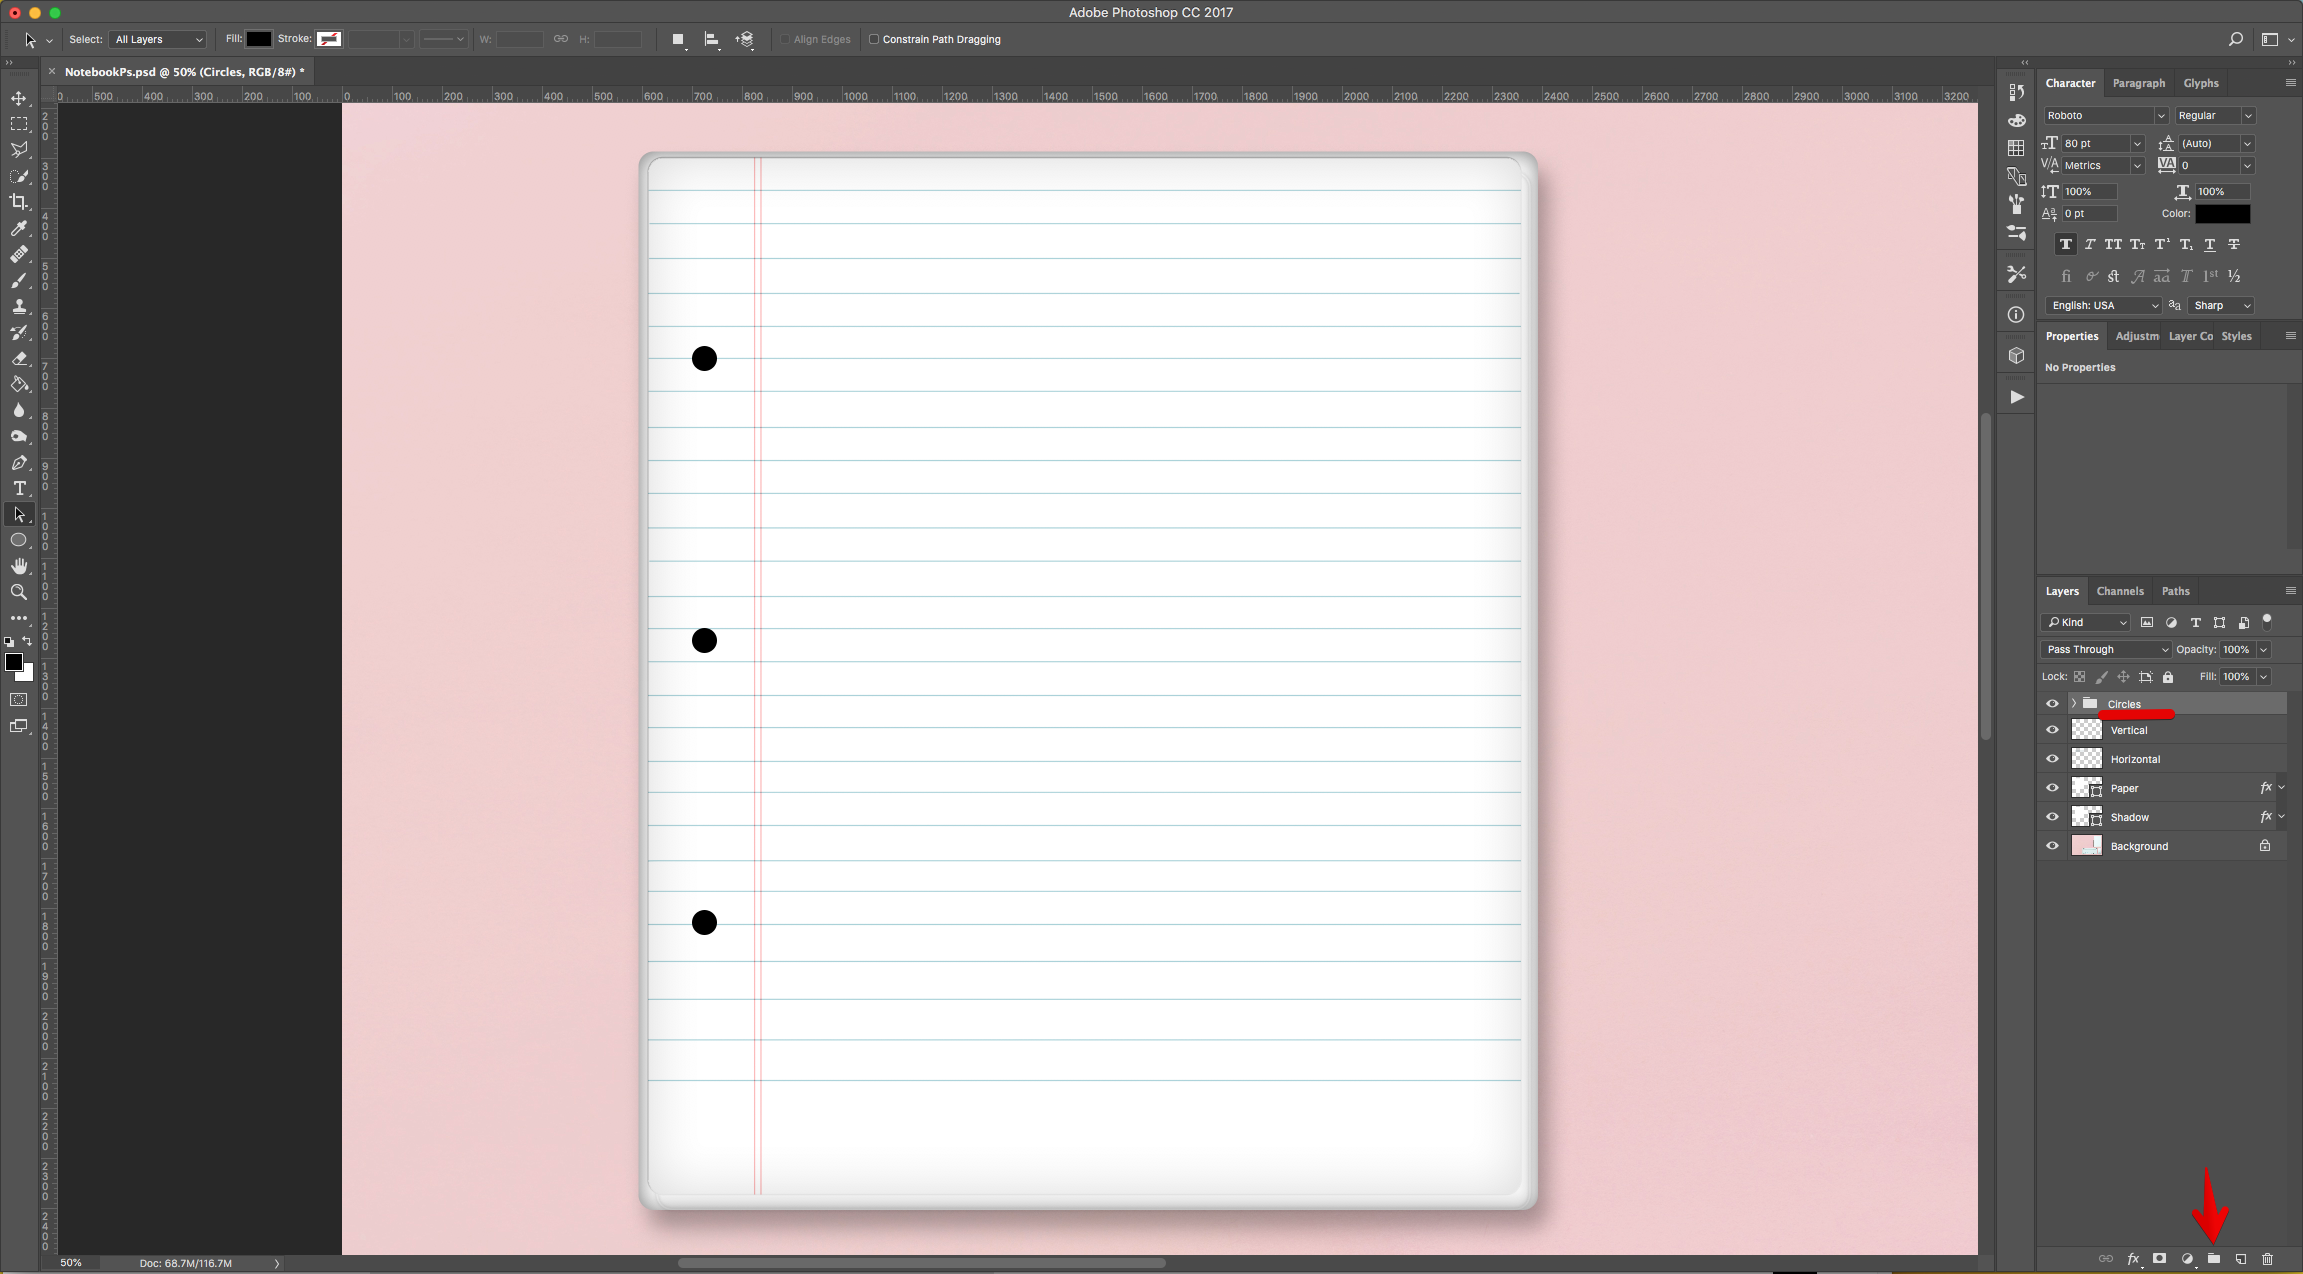
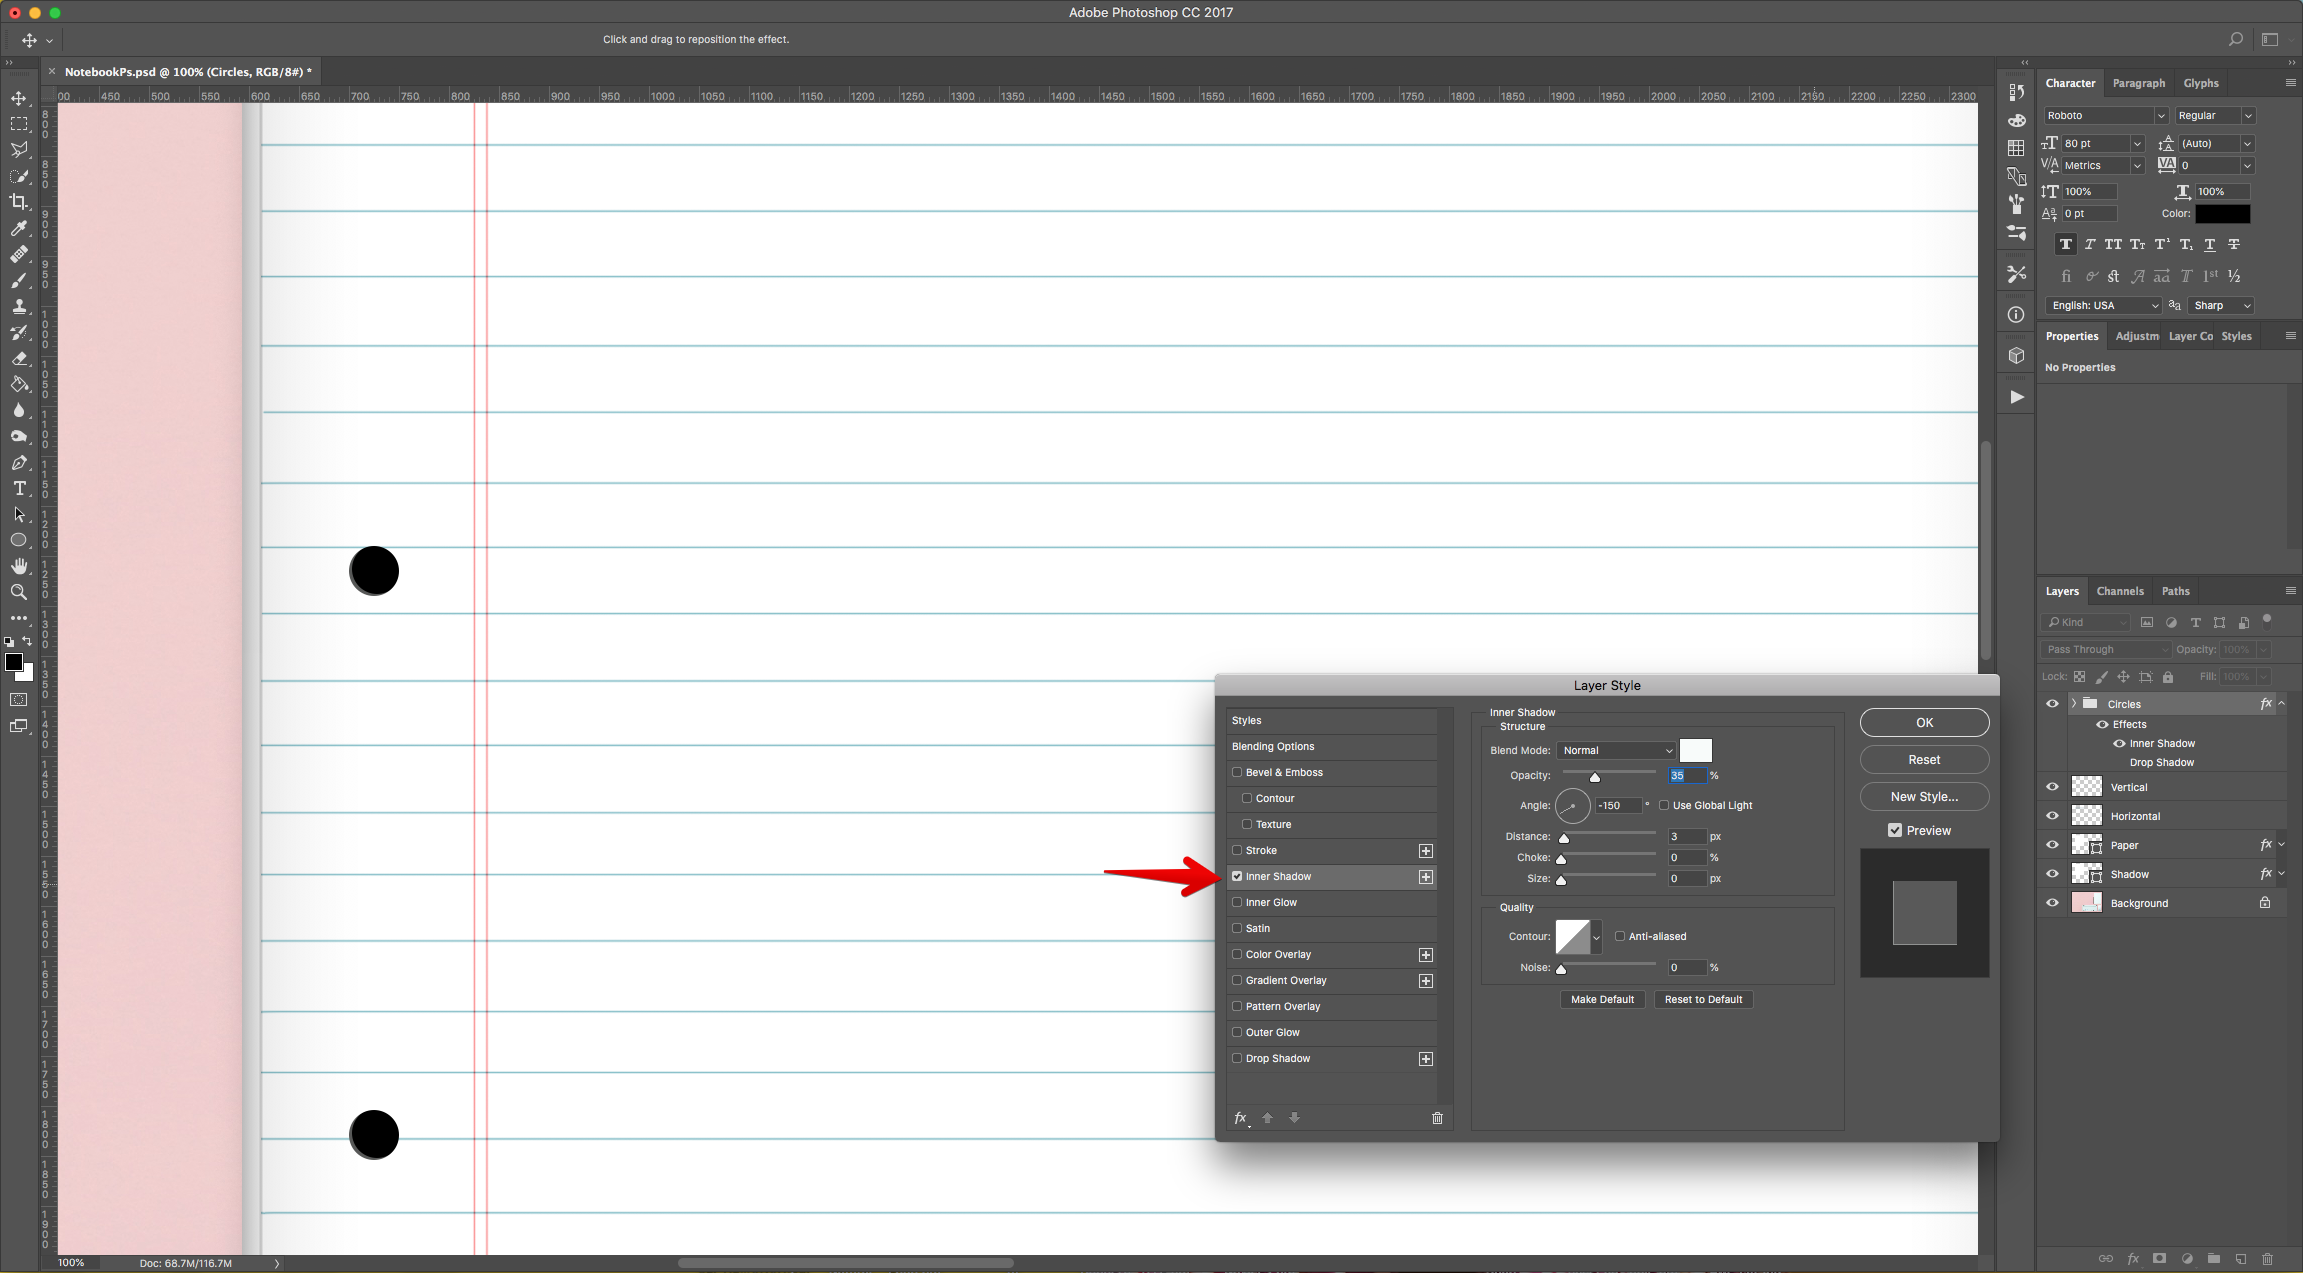
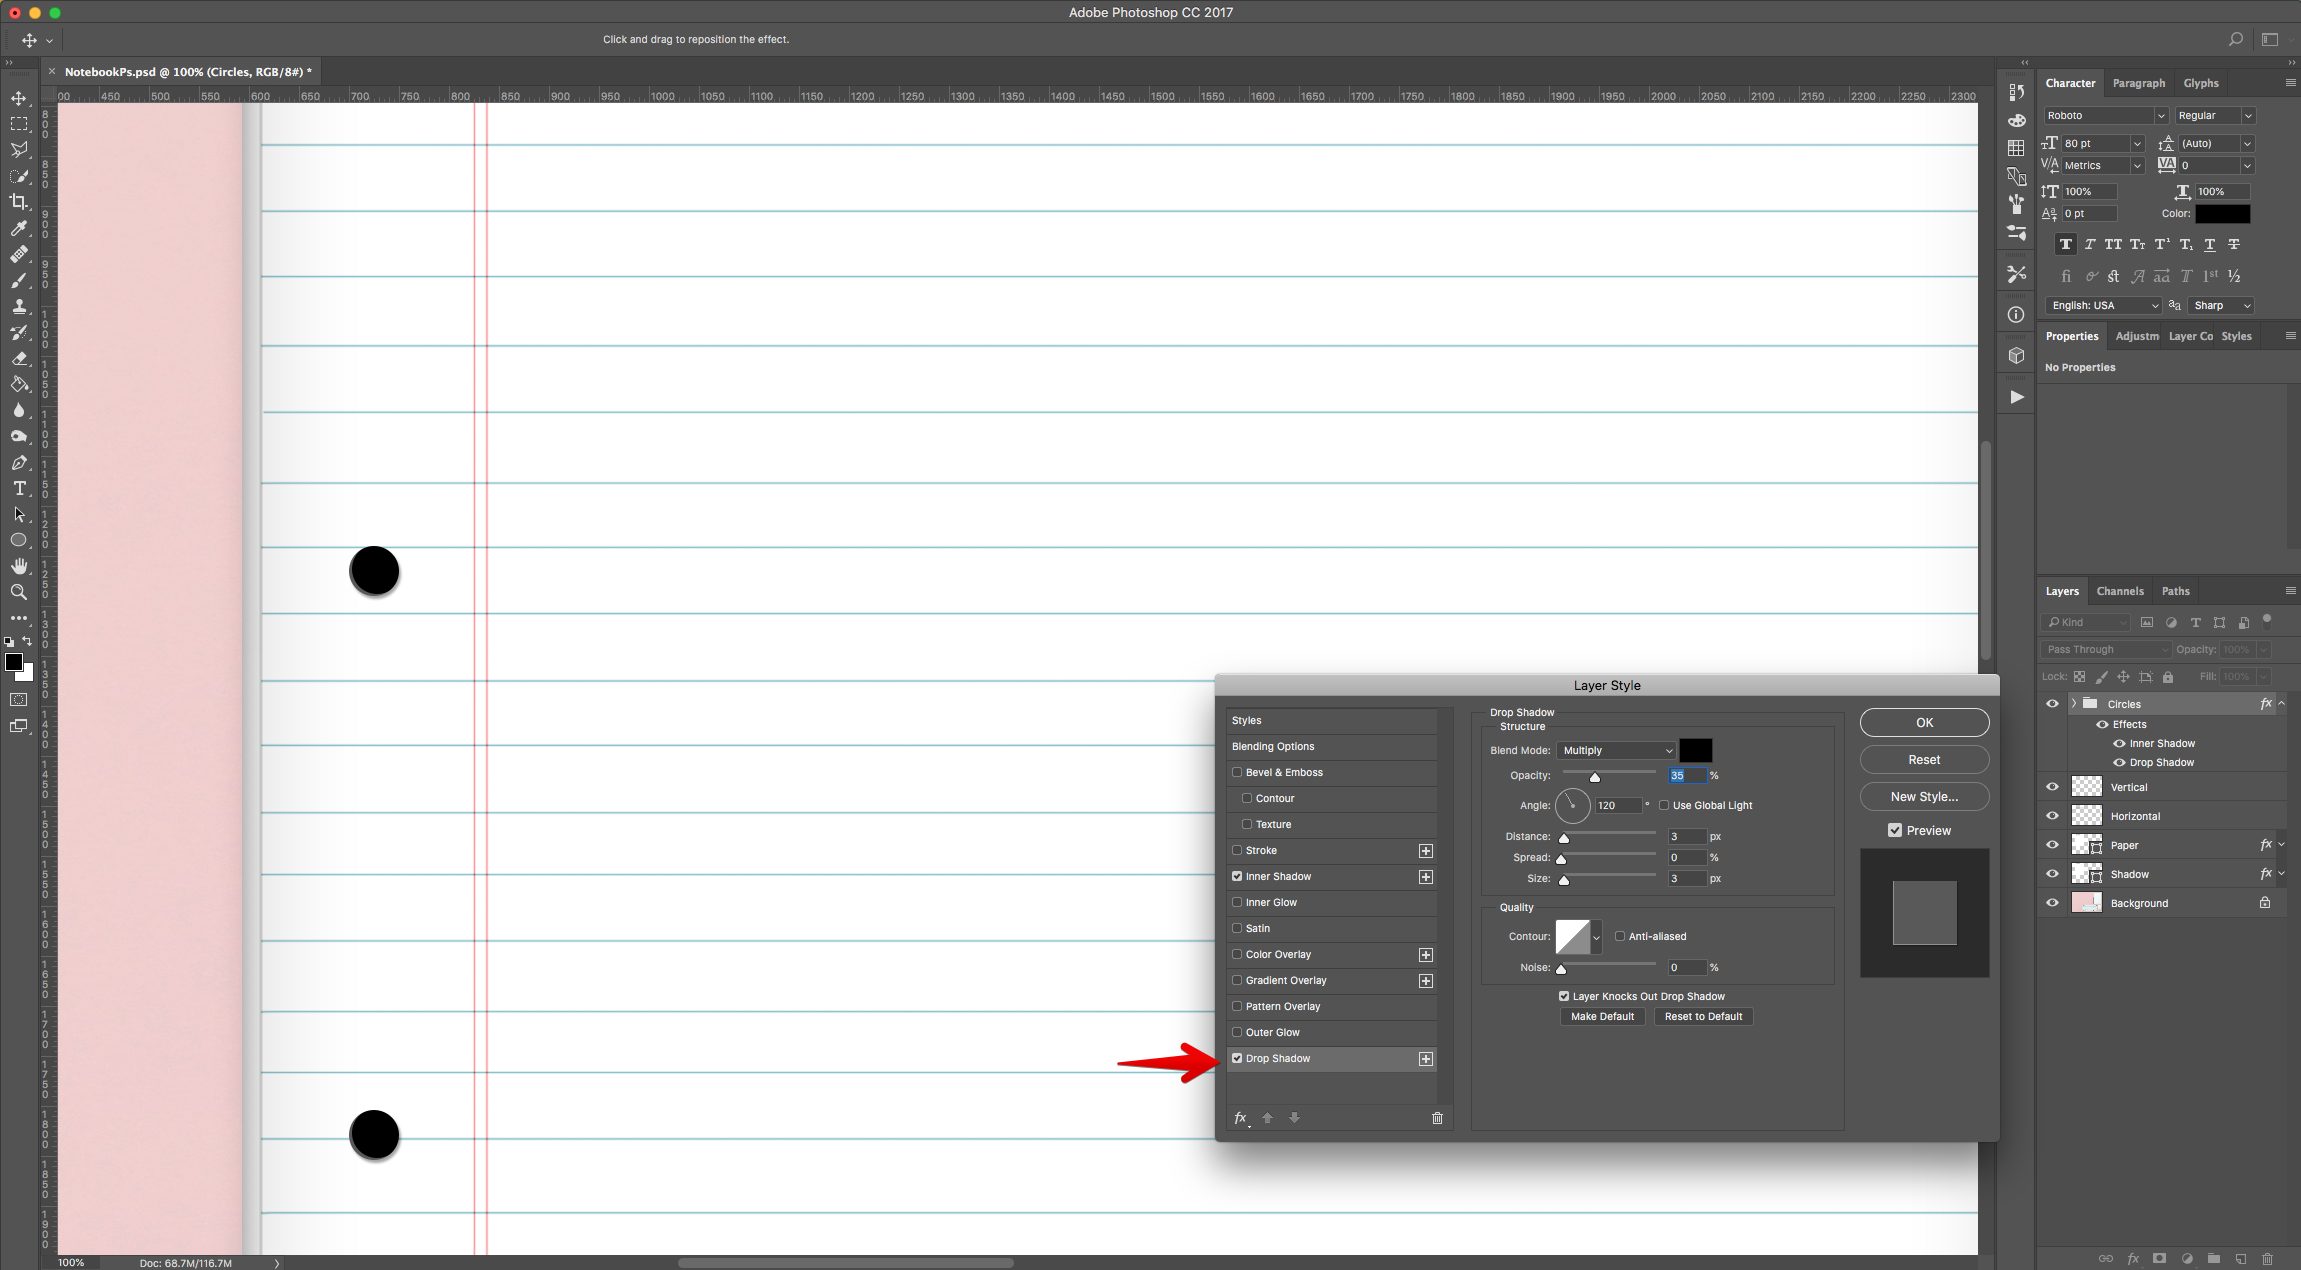
18 - Double-click on top of its Thumbnail and apply the following “Layer Styles”:
Inner Shadow:
Drop Shadow:
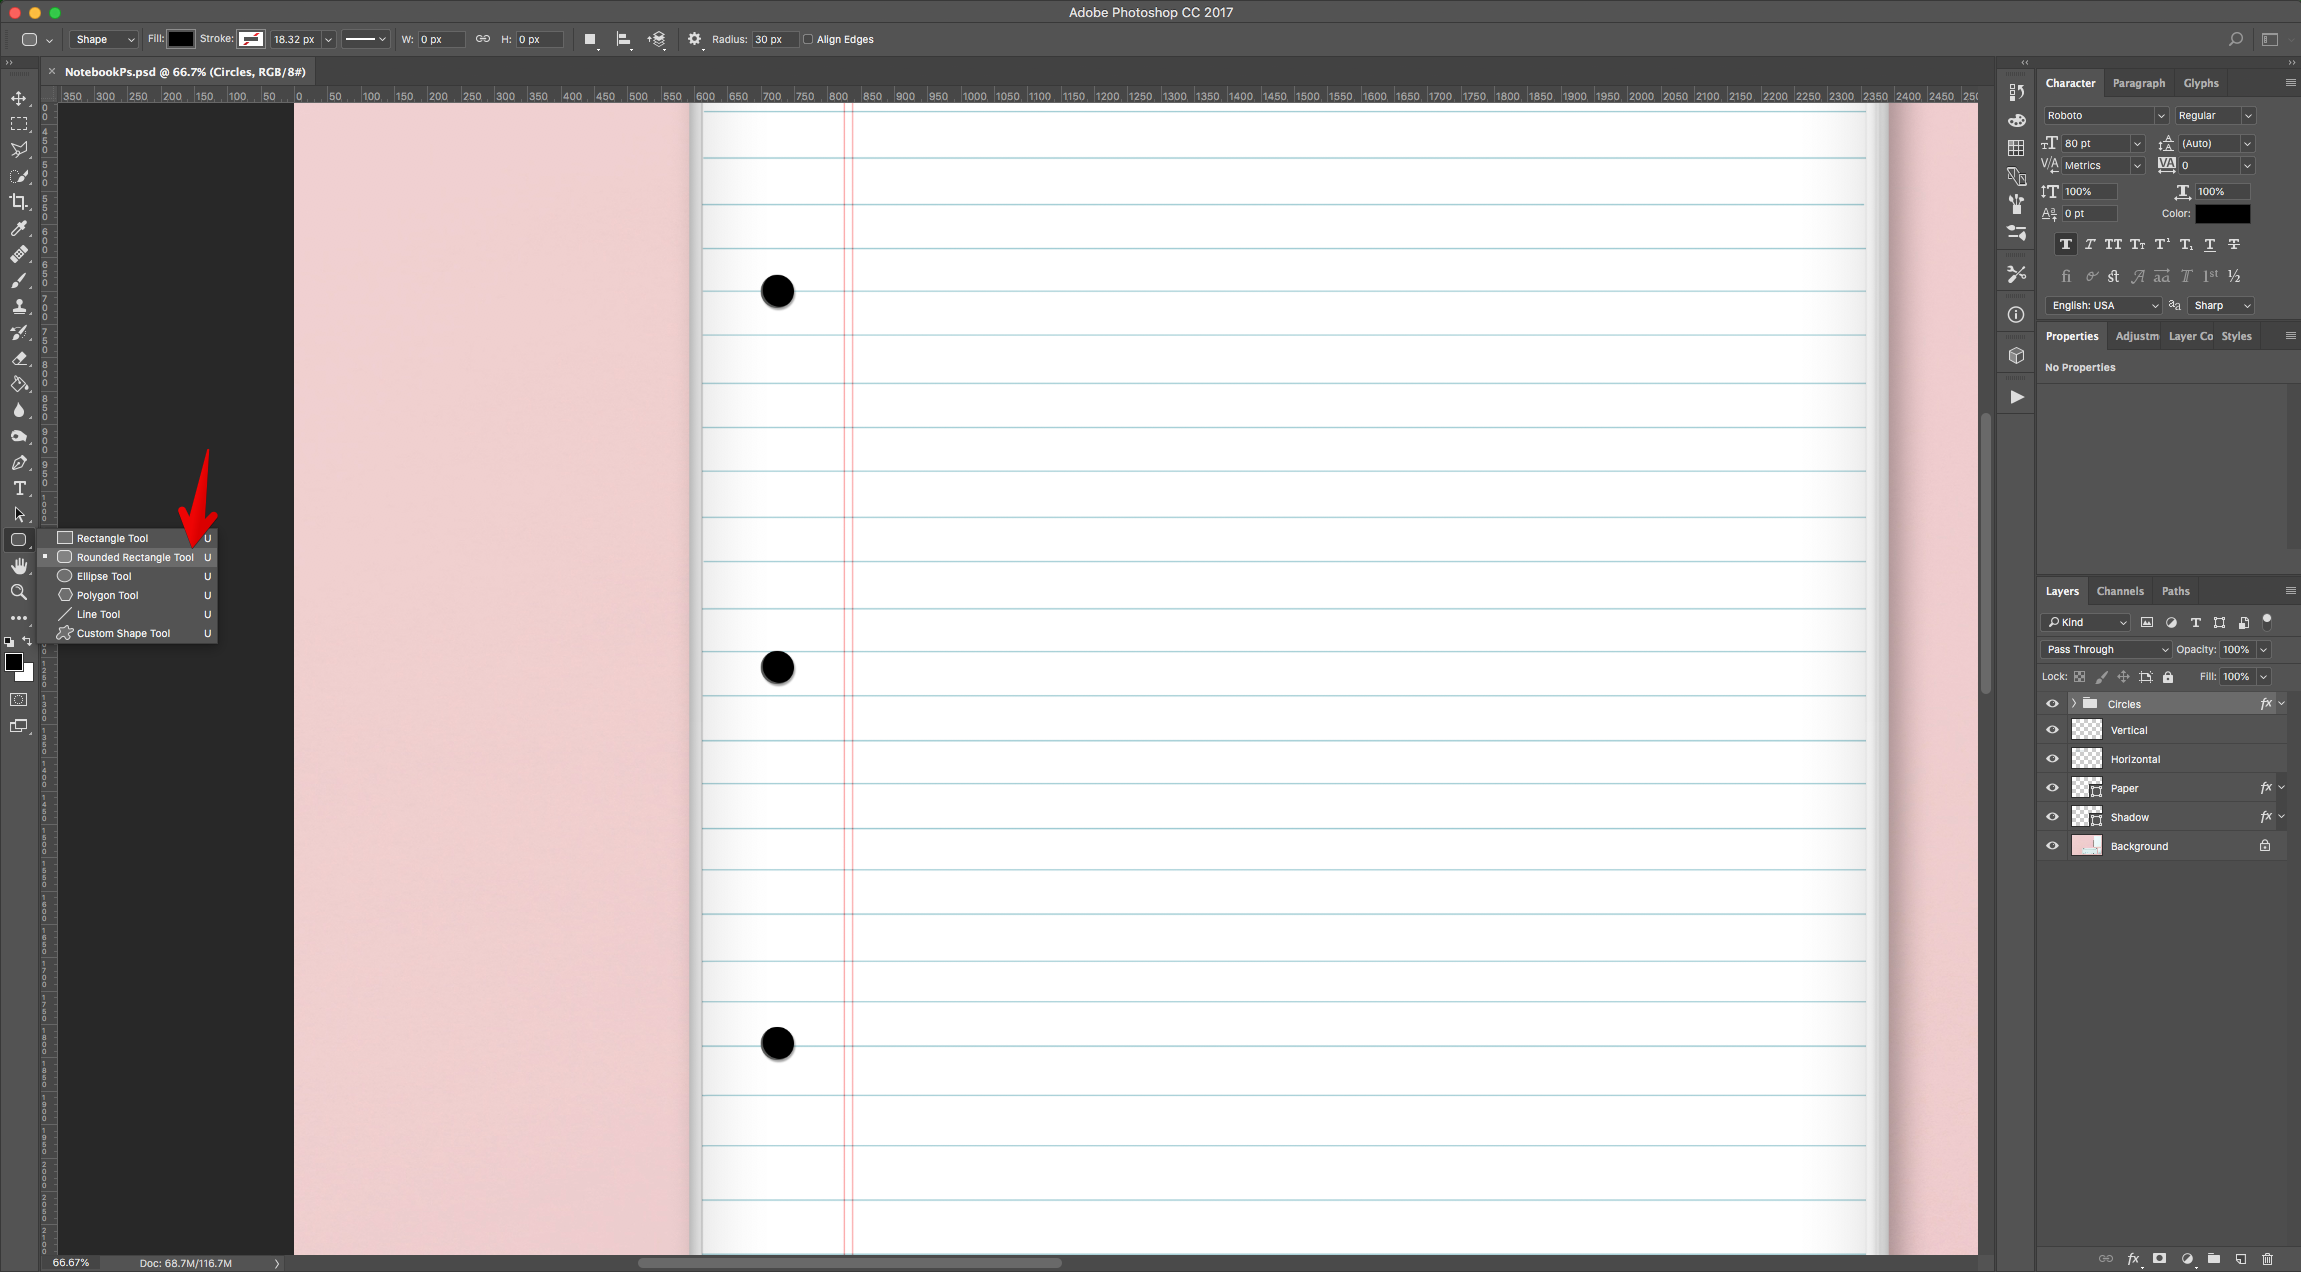
19 - Use the “Rounded Rectangle Tool” (U), to create a “Rectangular” shape that starts from outside the “Page” and ends inside one of the “Circles”. It should be the “Wire” that holds the pages together. Name it “Sipral”.
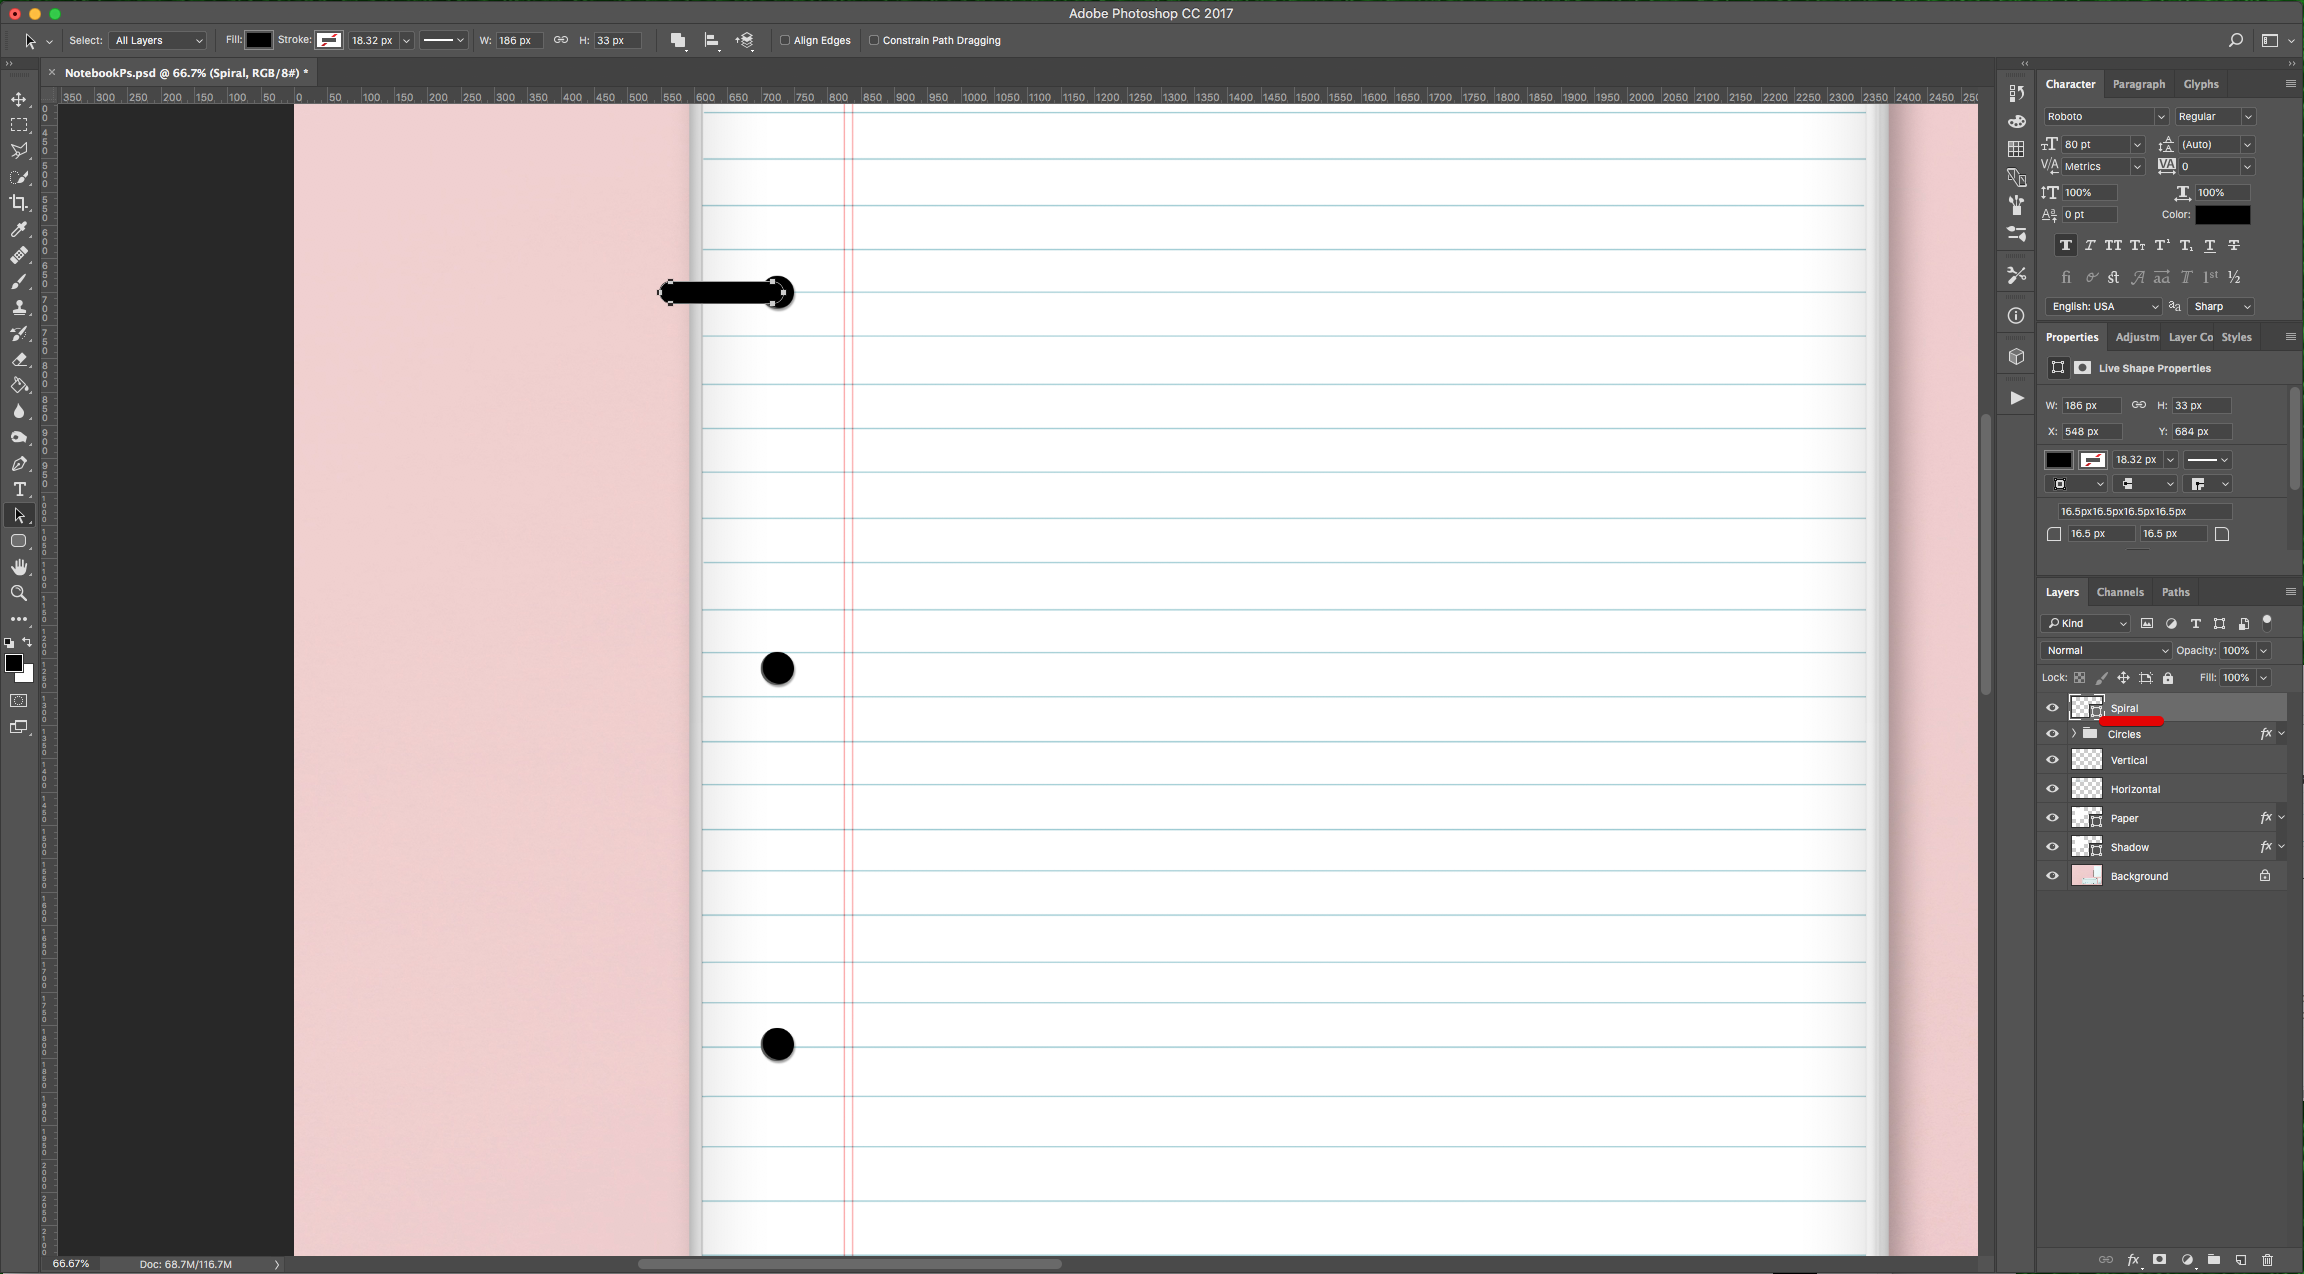
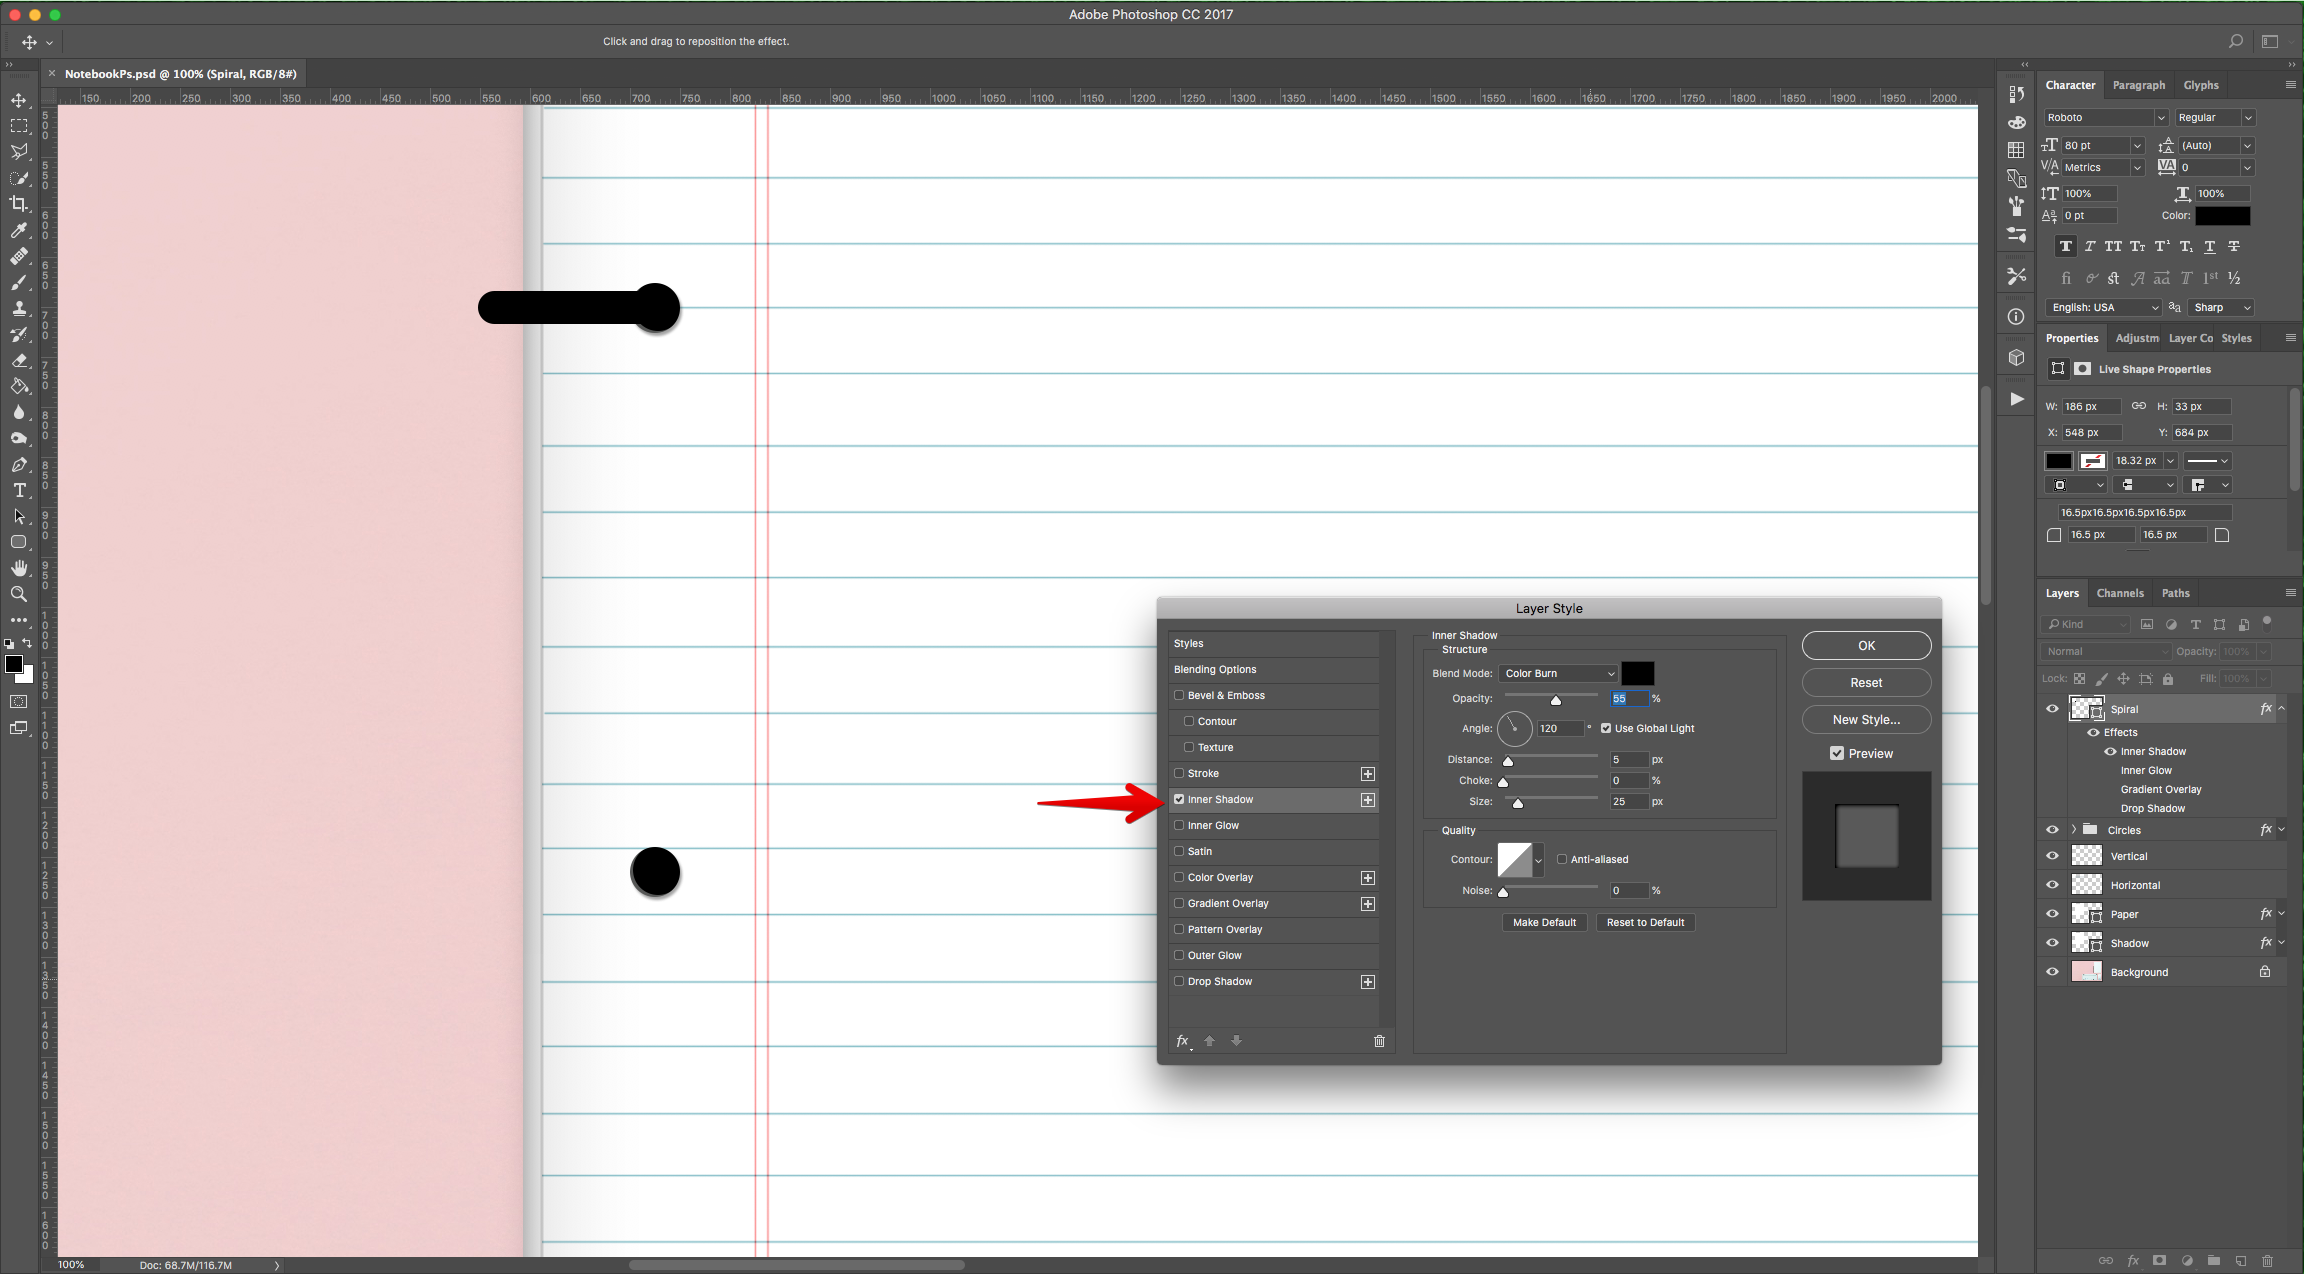
20 - Double-click on top of its Thumbnail and apply the following “Layer Styles”:
Inner Shadow:
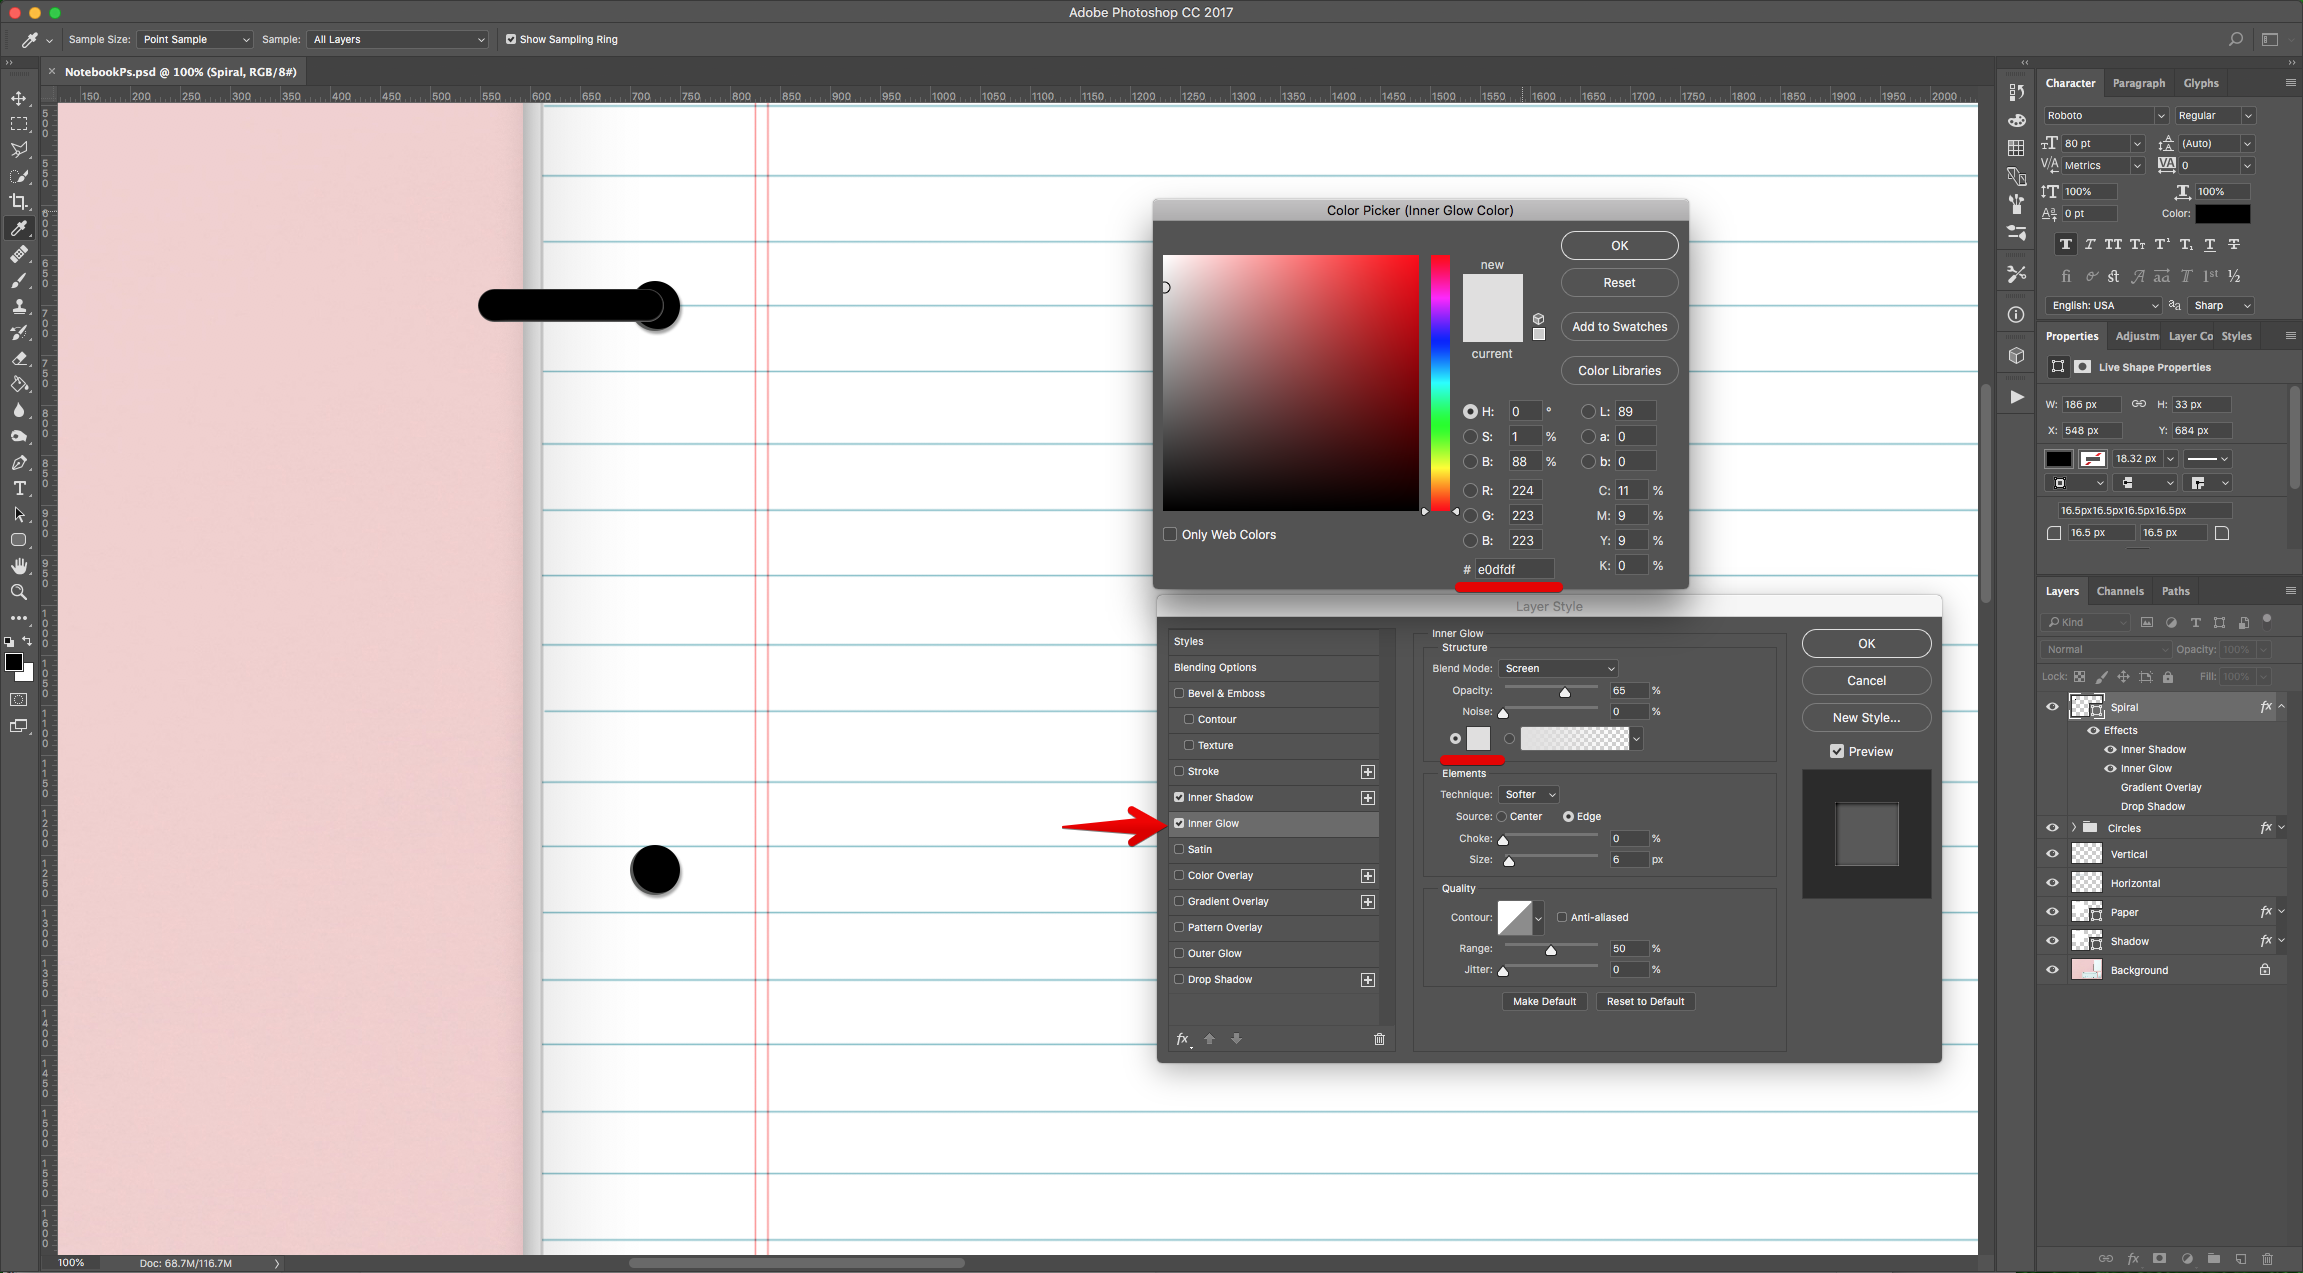
Inner Glow: (#e0dfdf)
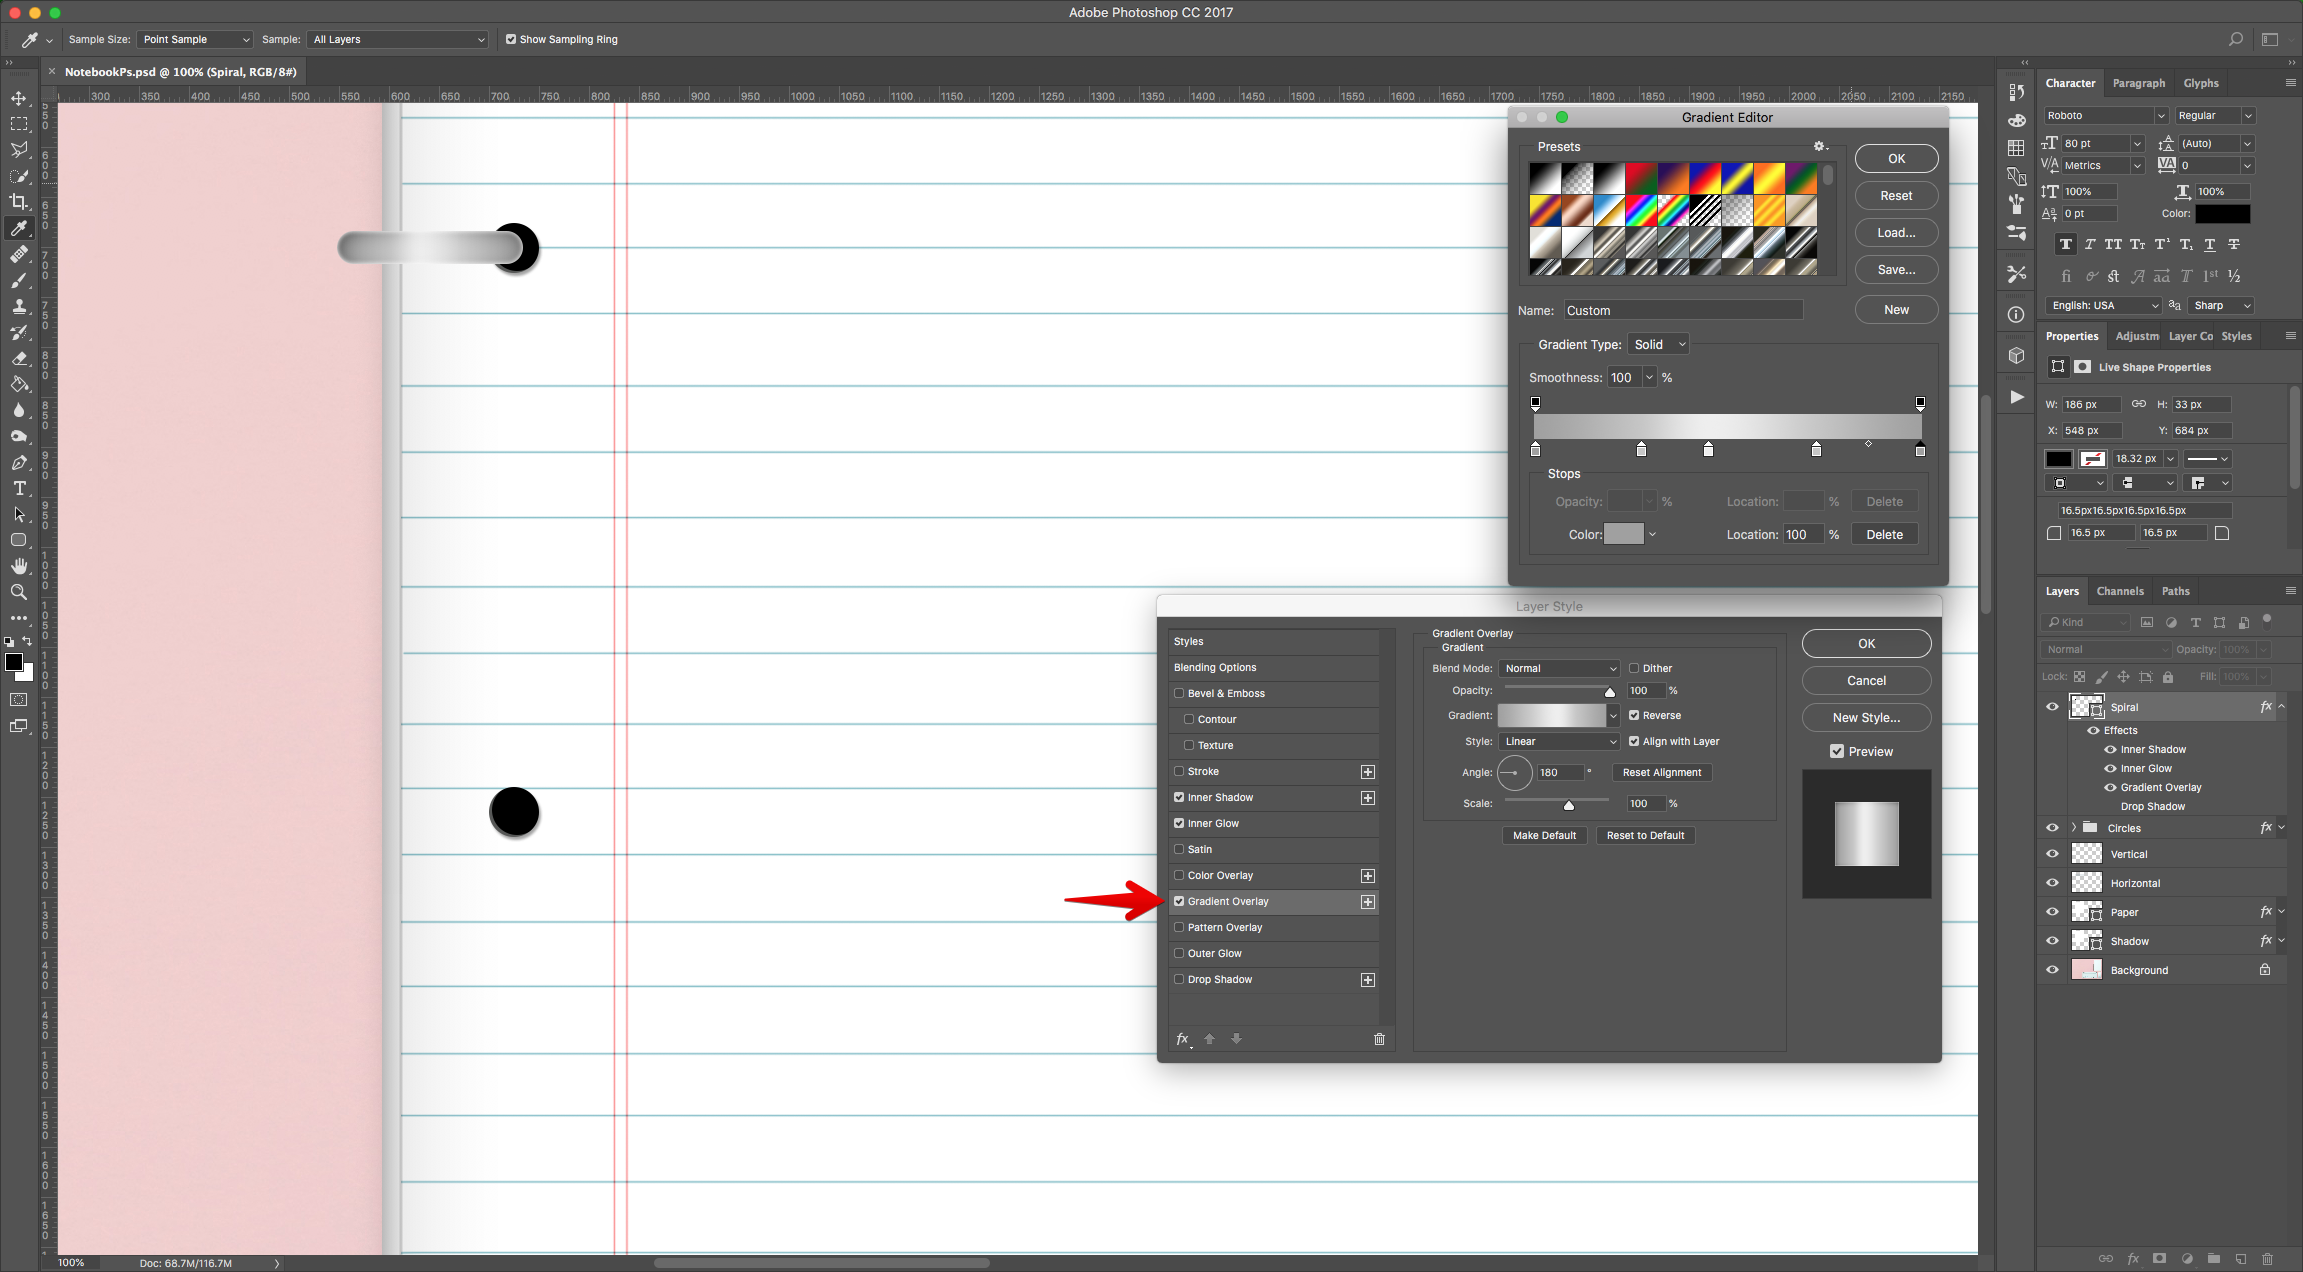
Gradient Overlay: (Location: 0%, Fill: #a0a0a0; Location: 28%, Fill: #c6c6c6; Location: 45%, Fill: #eeeeee; Location: 73%, Fill: # c6c6c6; Location: 100%, Fill: #a0a0a0)
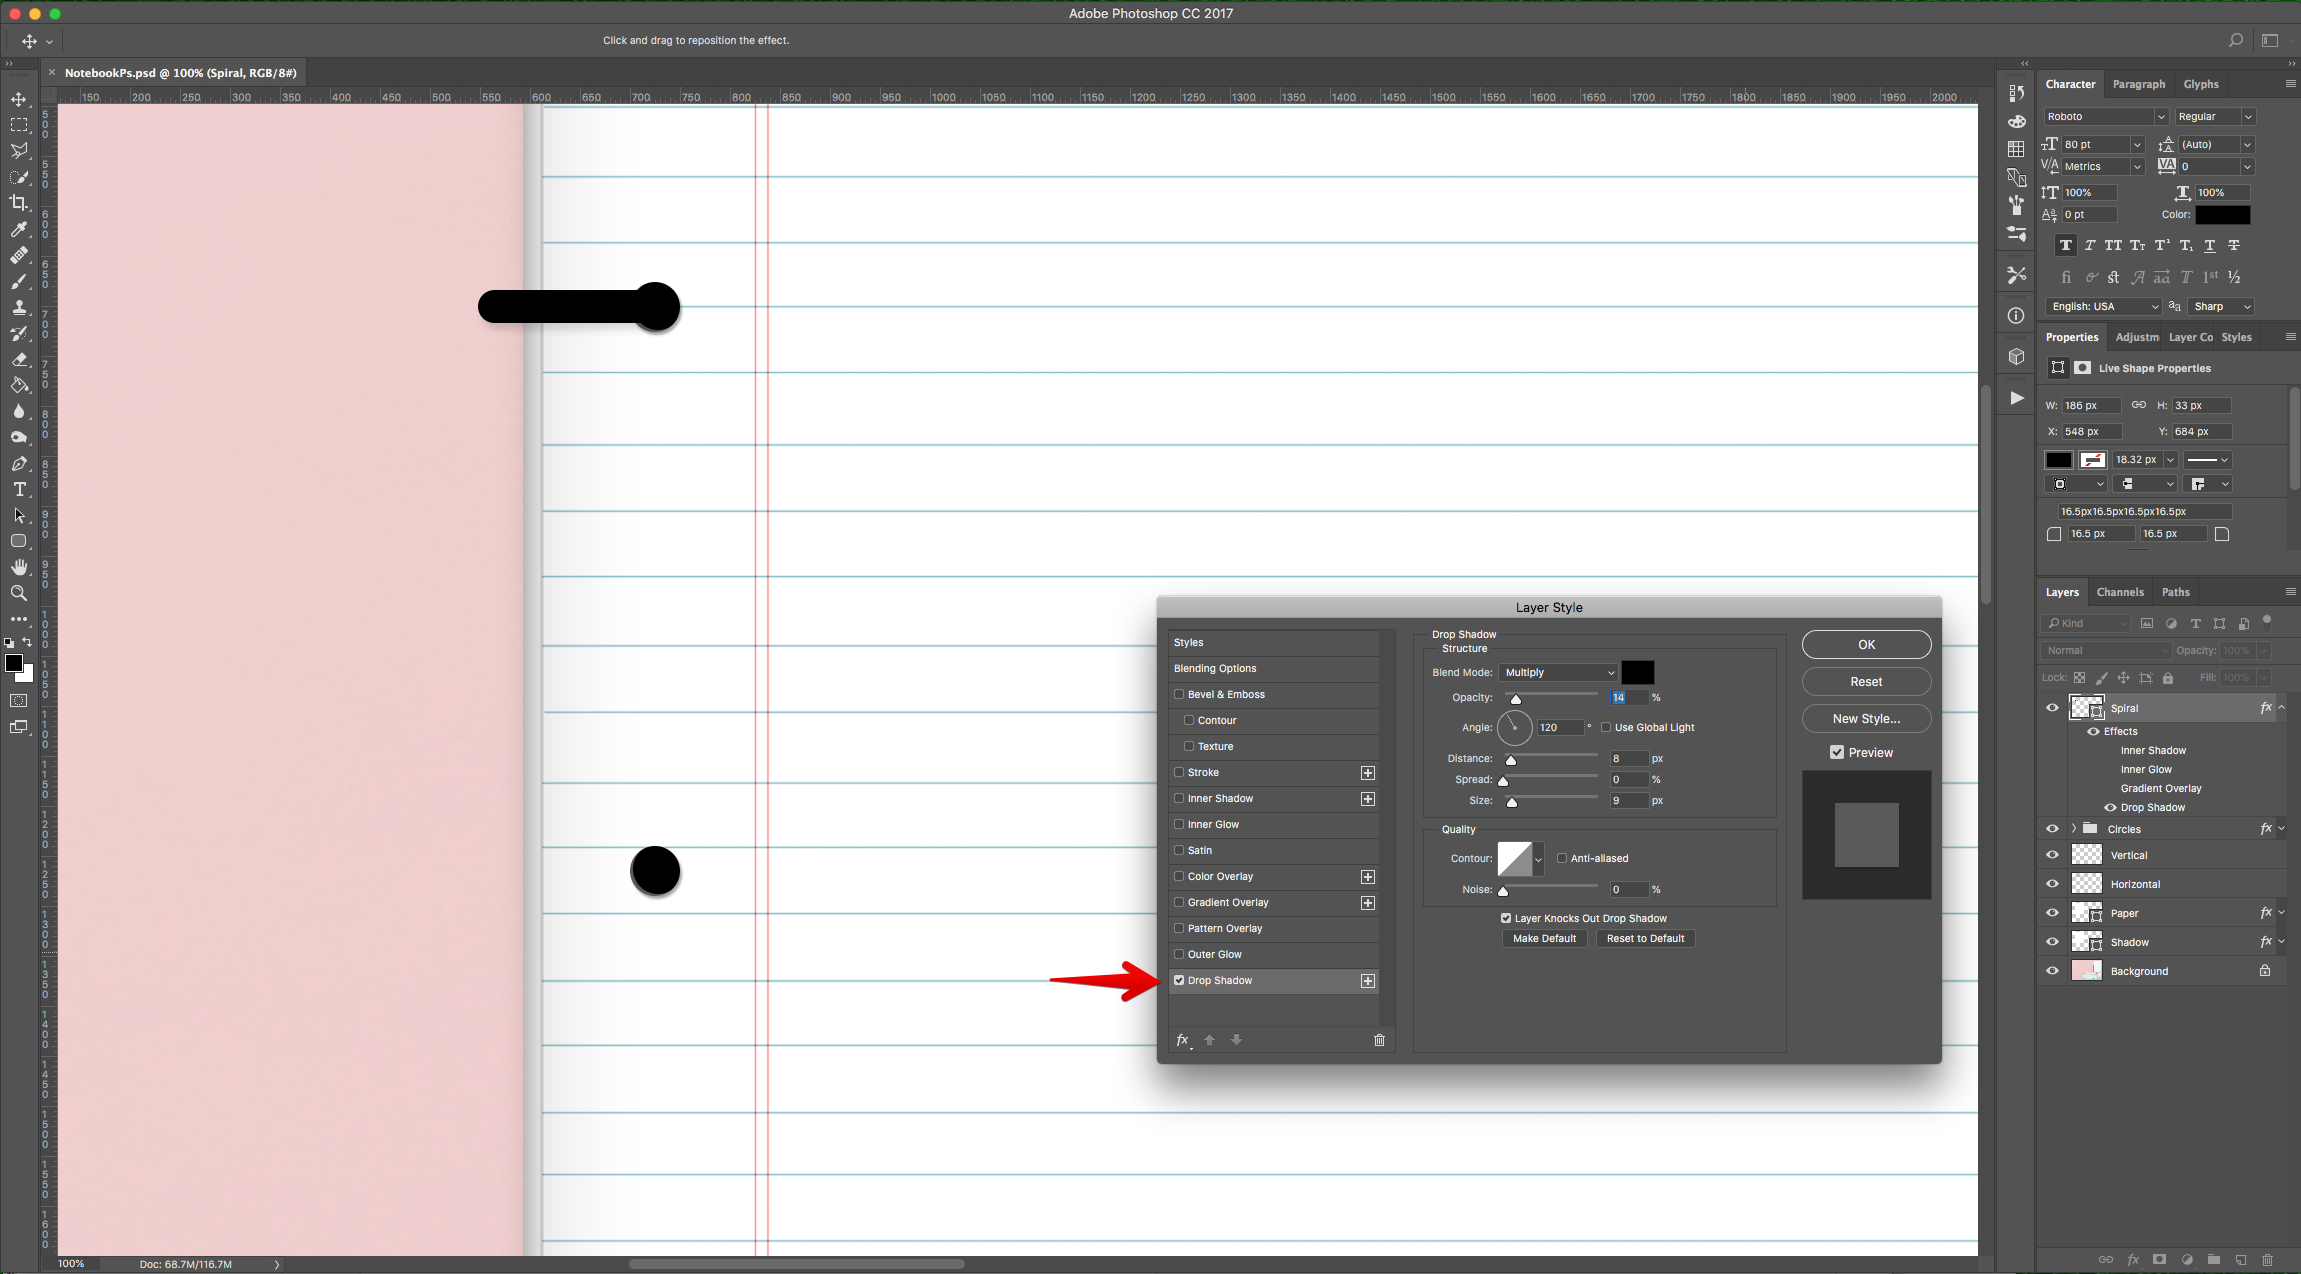
Drop Shadow:
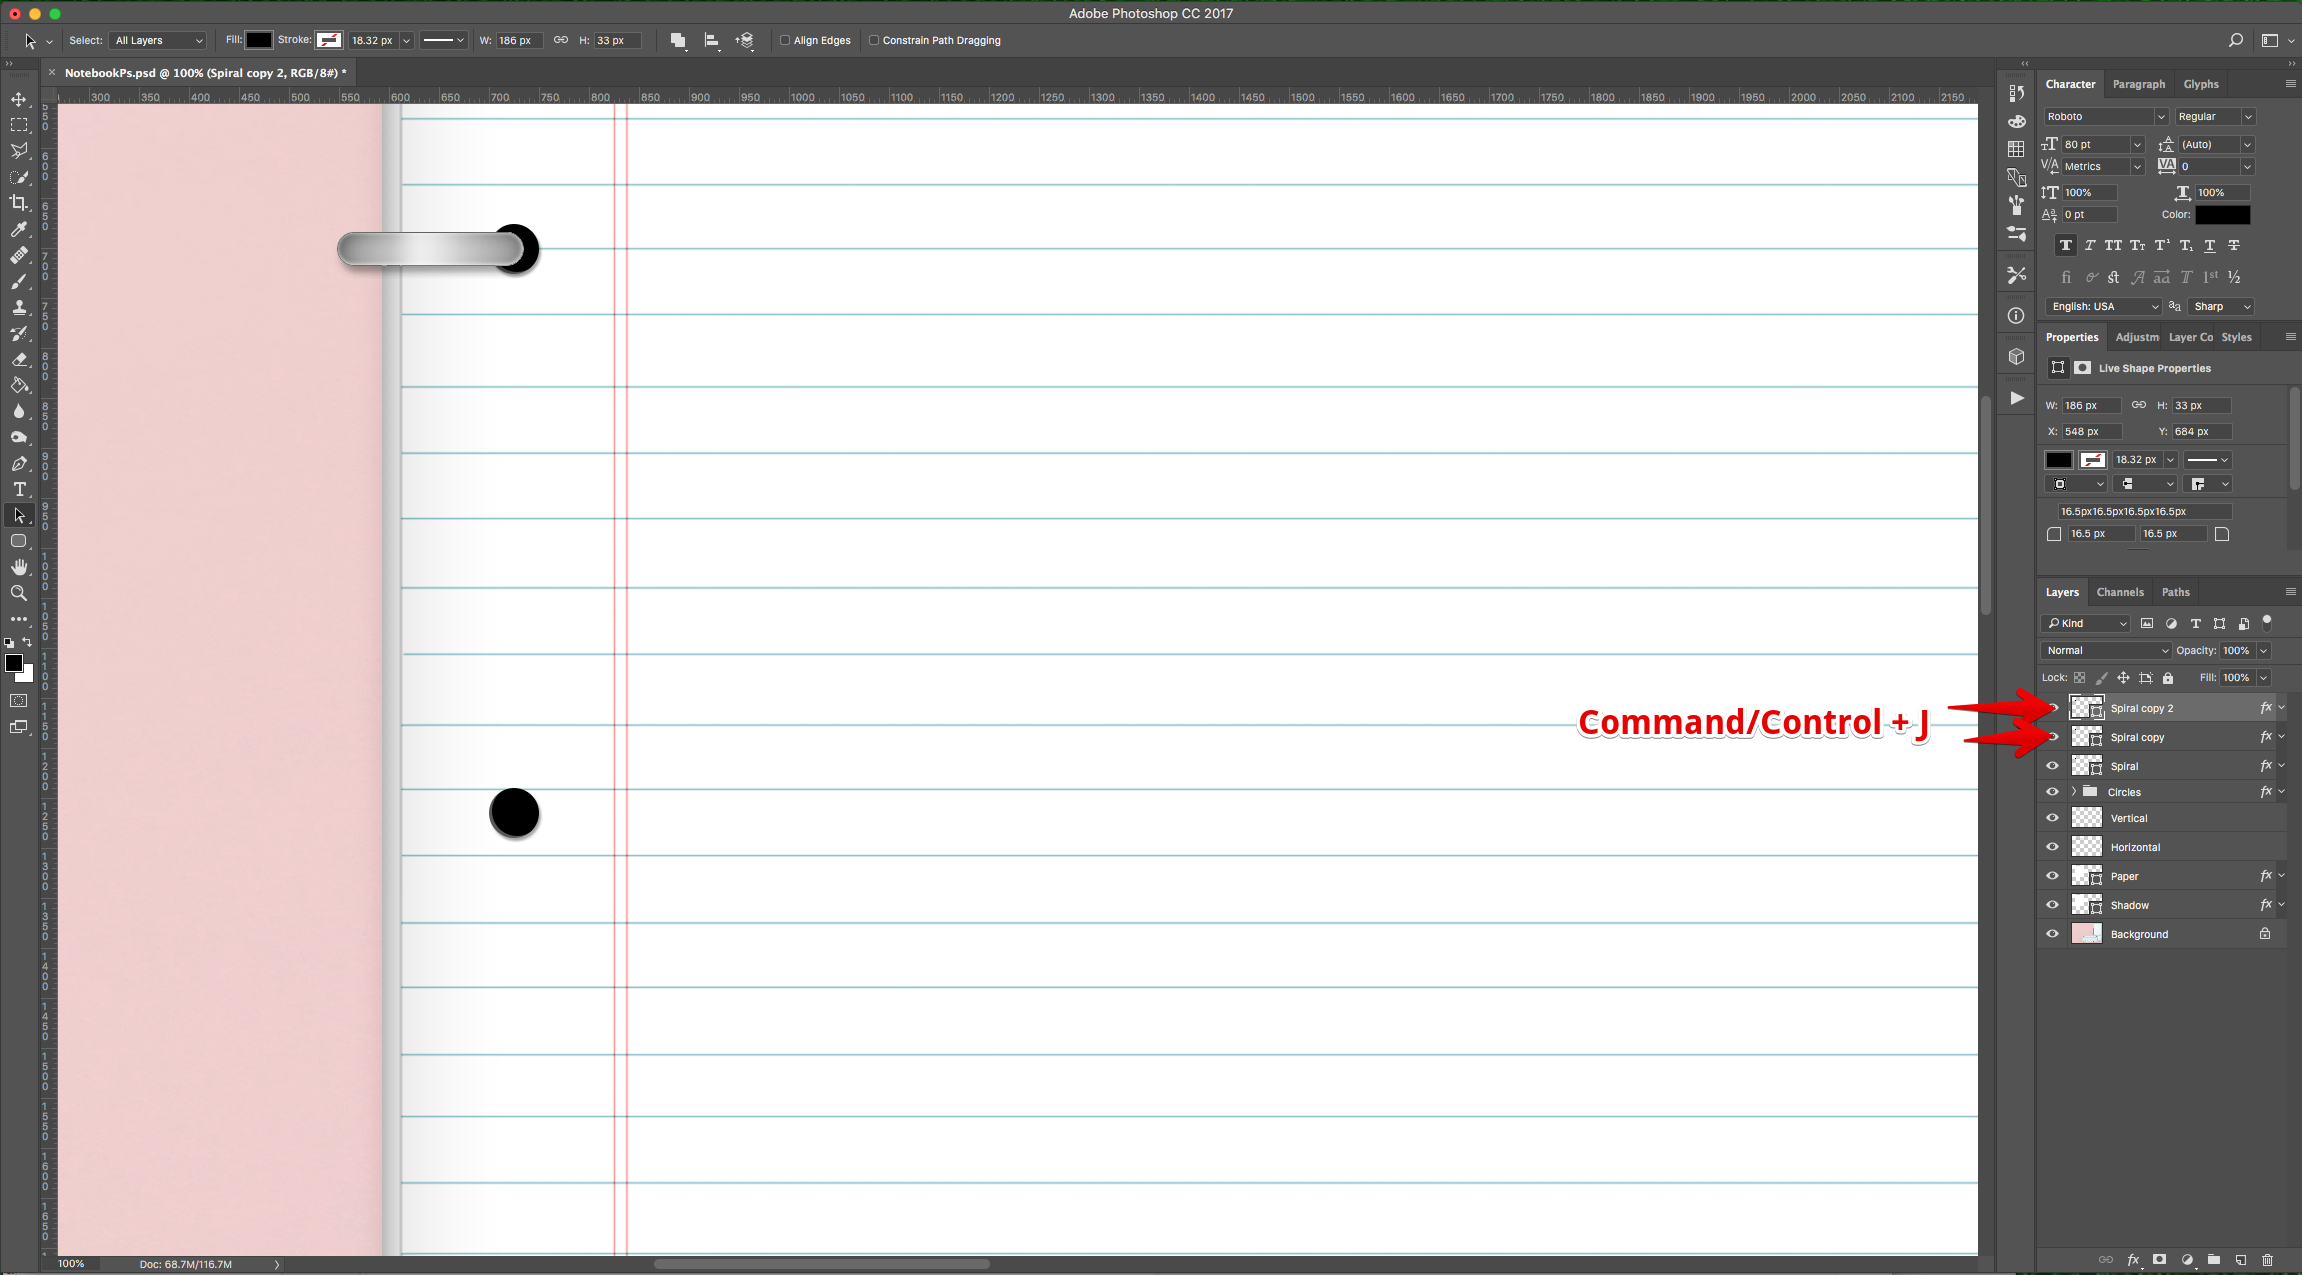
21 - ““Duplicate” the “Spiral” shape a couple of times (Command/Control + J) and distribute the duplicates in the center and bottom of the “Margin” area on top of each “Circle”.
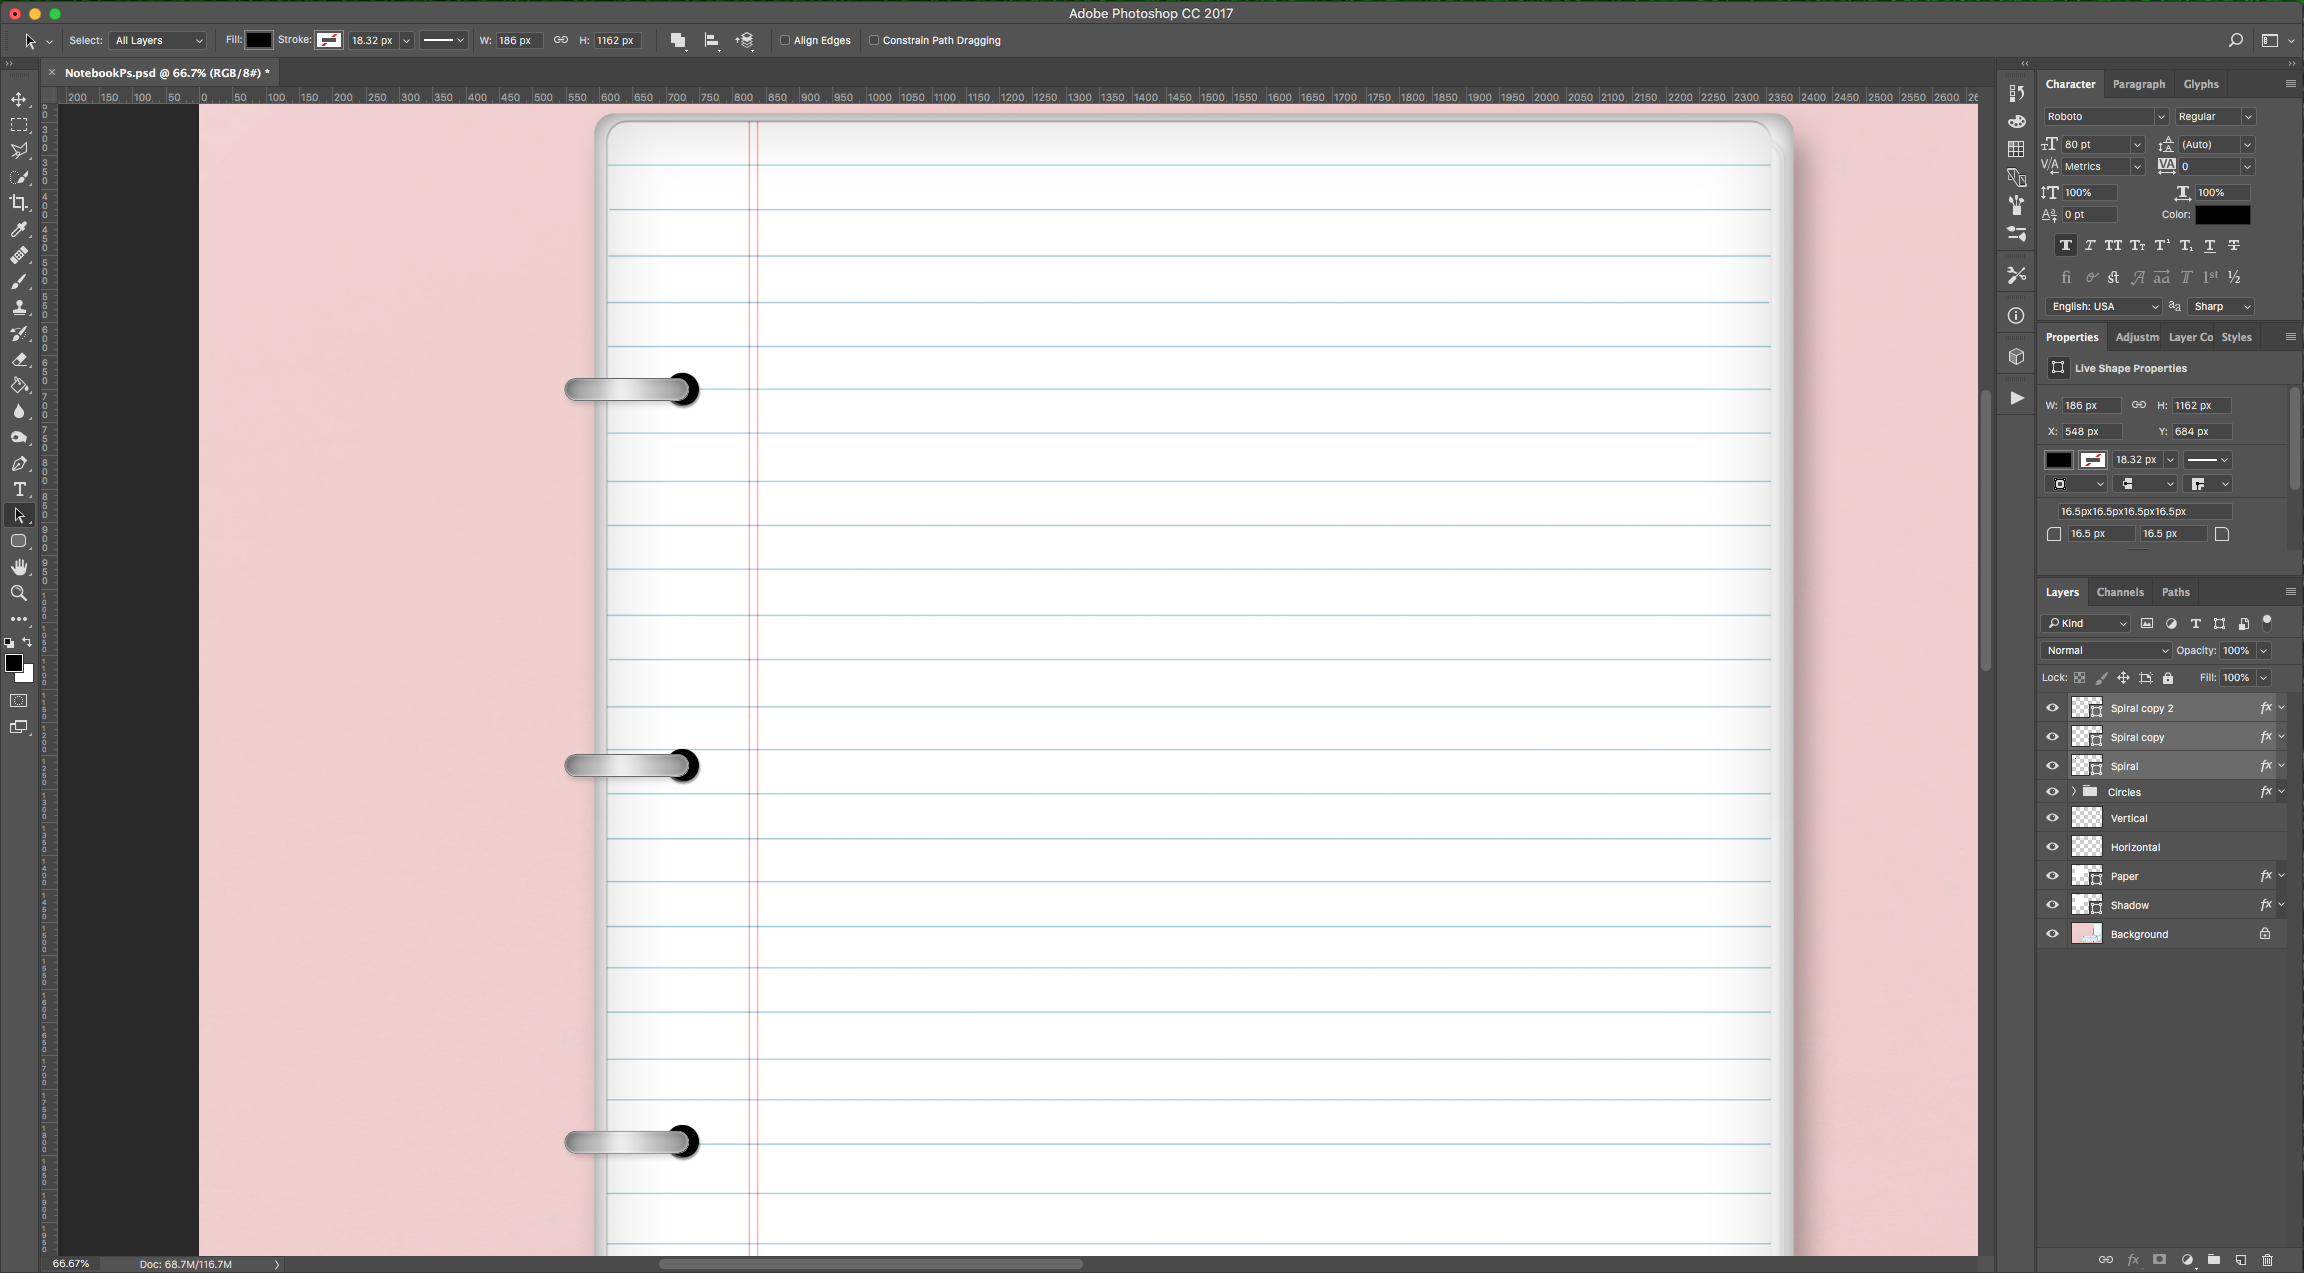
22 - Select all the “Spiral” layers (using the “Shift” key) and “Group” them together by clicking on the small “Folder” icon at the bottom of the “Layers Panel”. Name the Group “Spirals”. Create another “Group” named “Notebook” that includes all the Layers but the “Background” one.
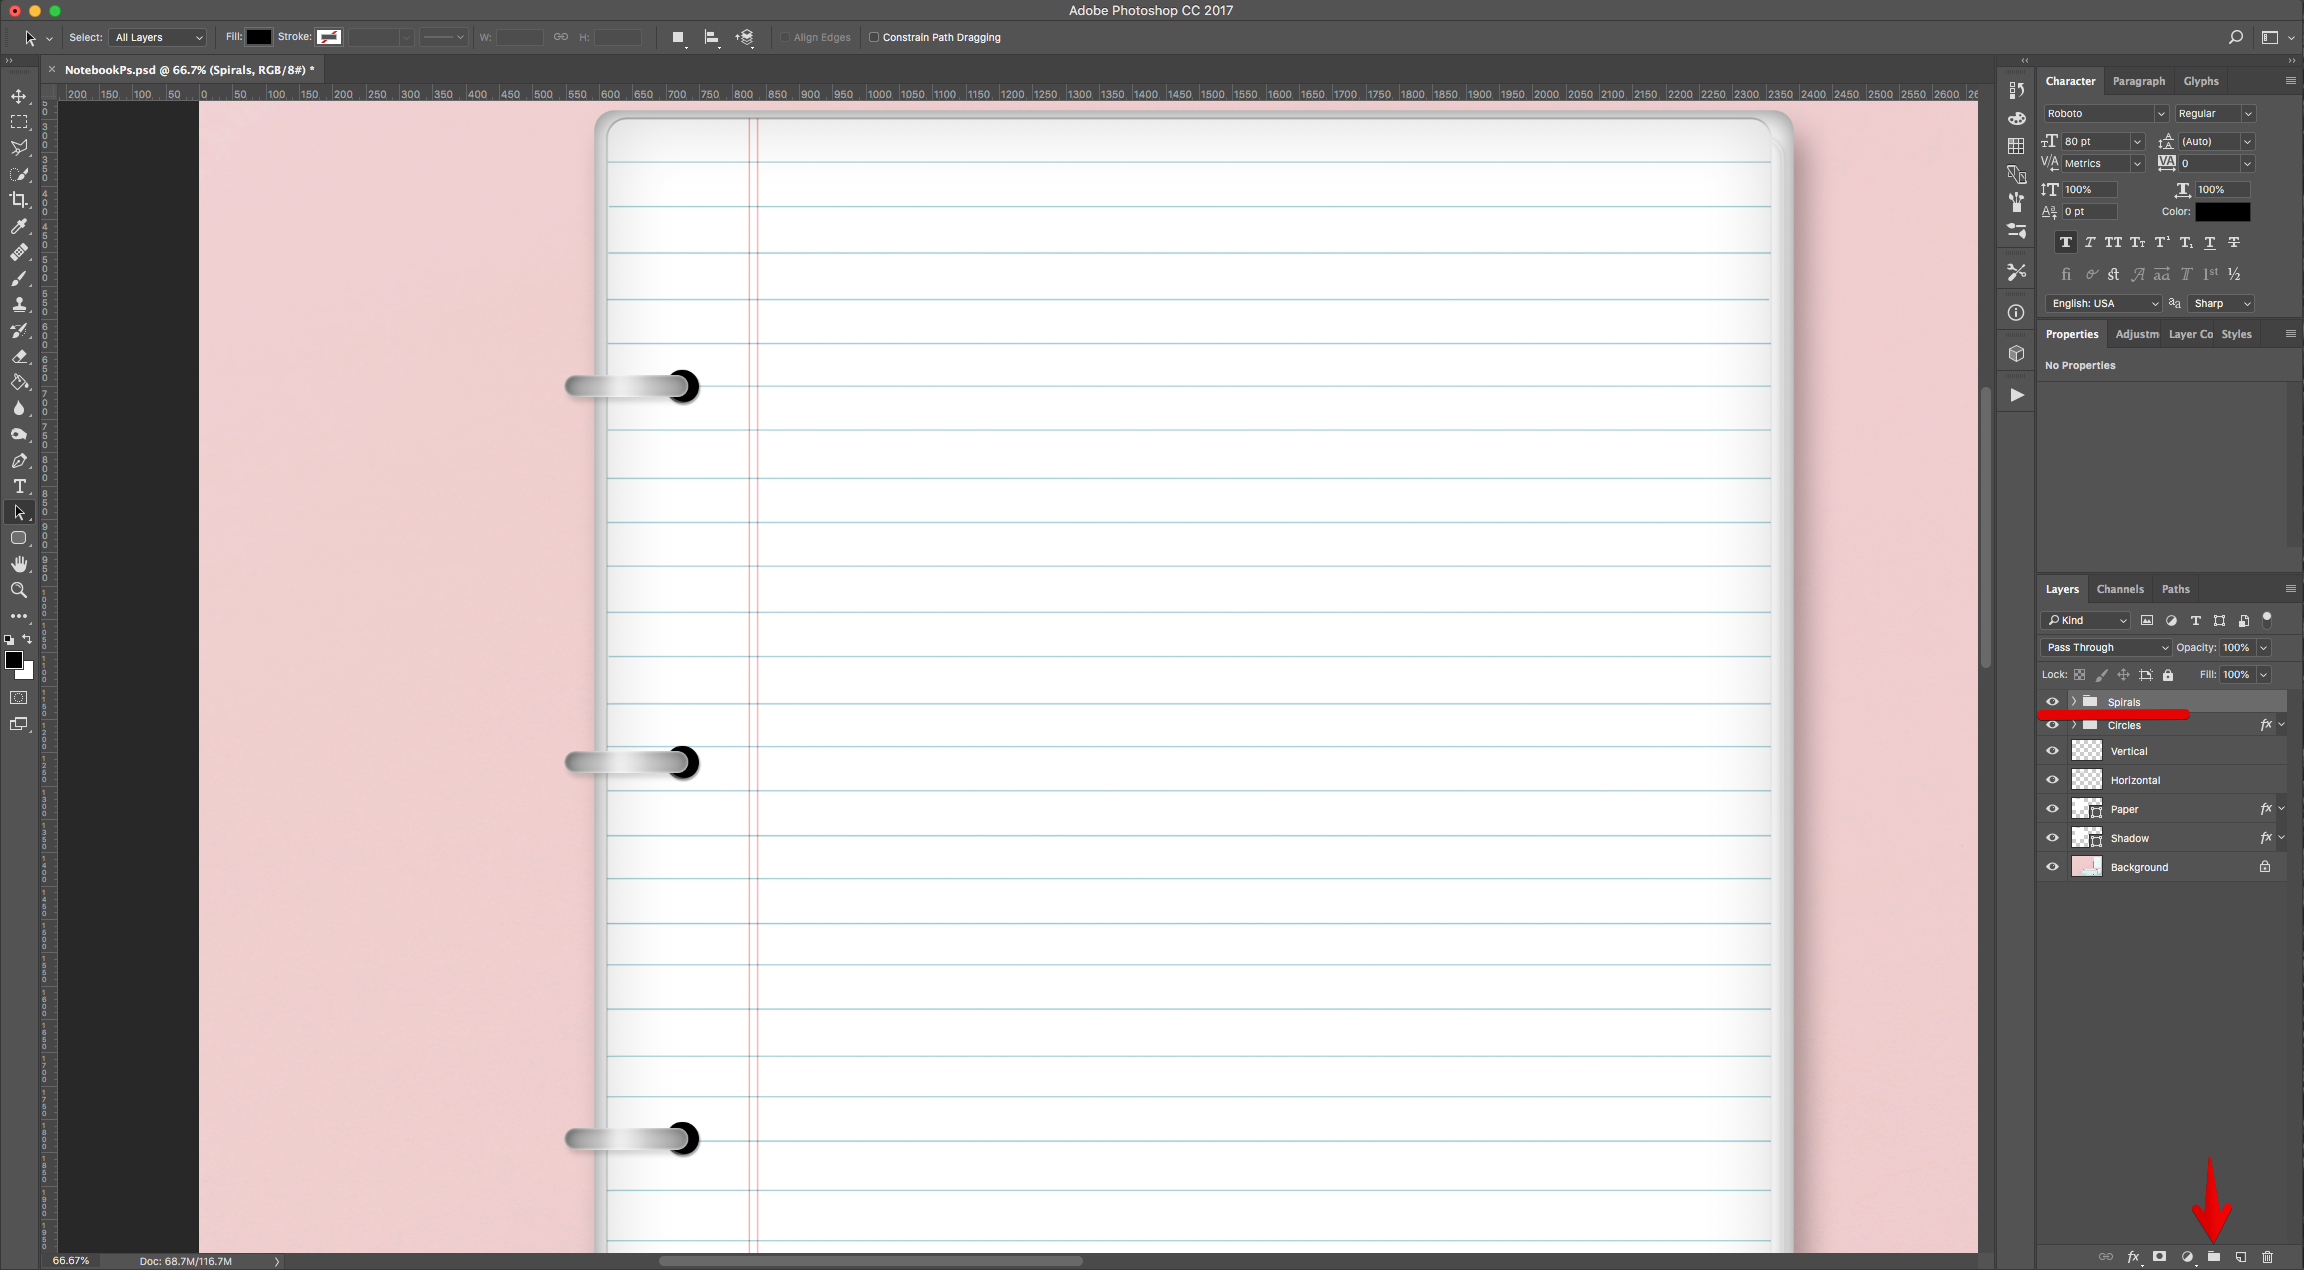
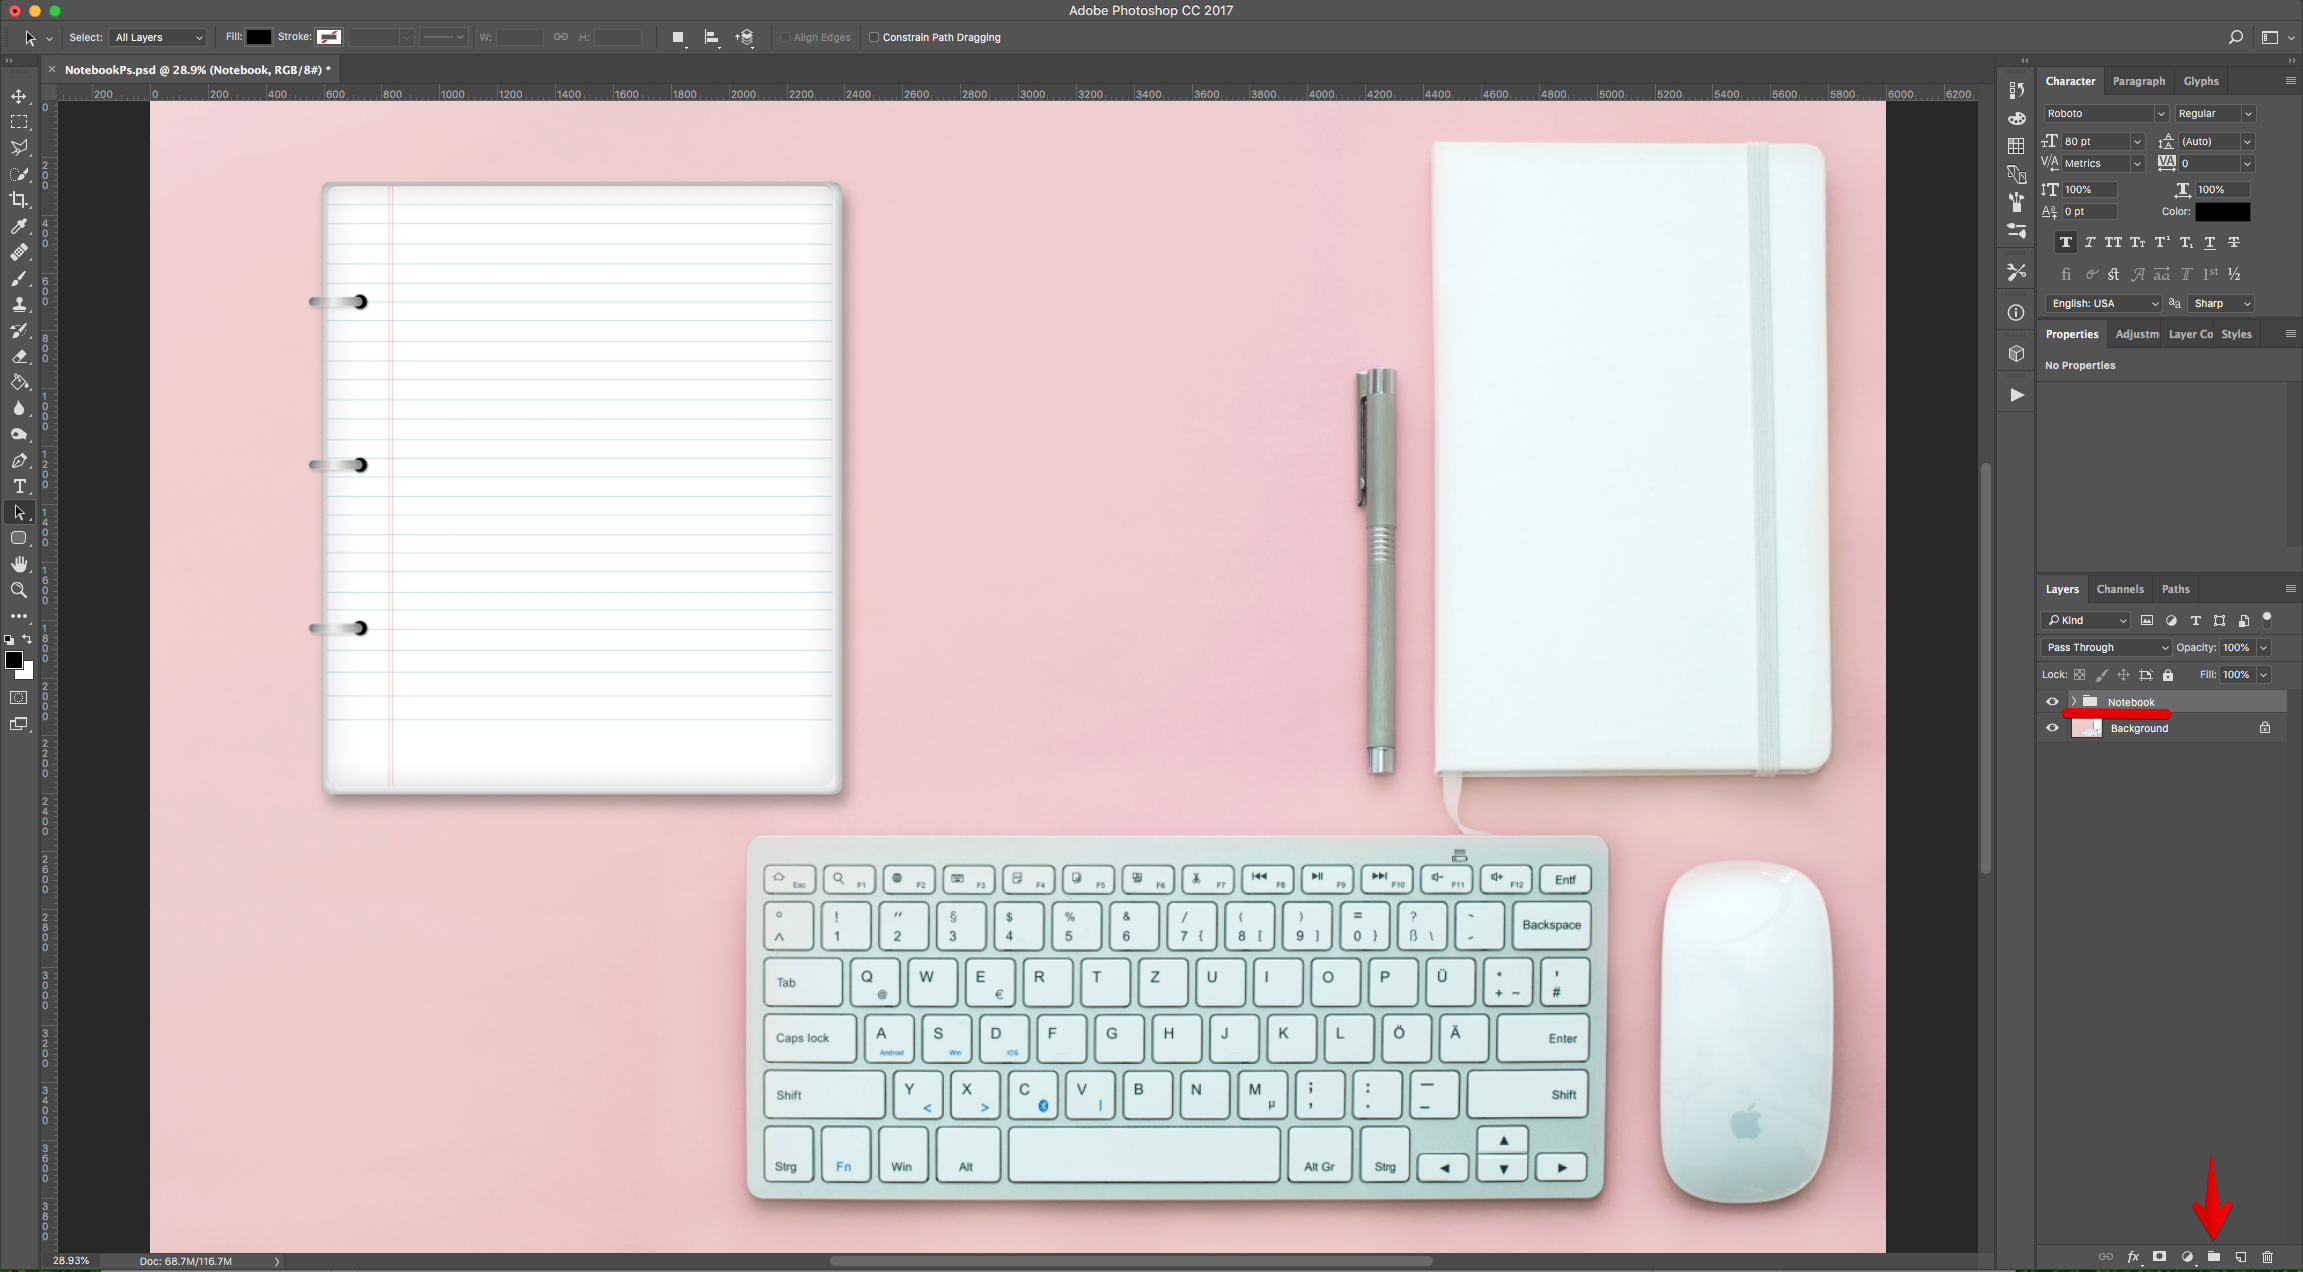
23 - Use “Free Transform” (Command/Control + T) to resize/rotate the “Notebook” if needed. Click on the small Check Mark on the Top Menu or hit “Enter” to “Commit” the changes.
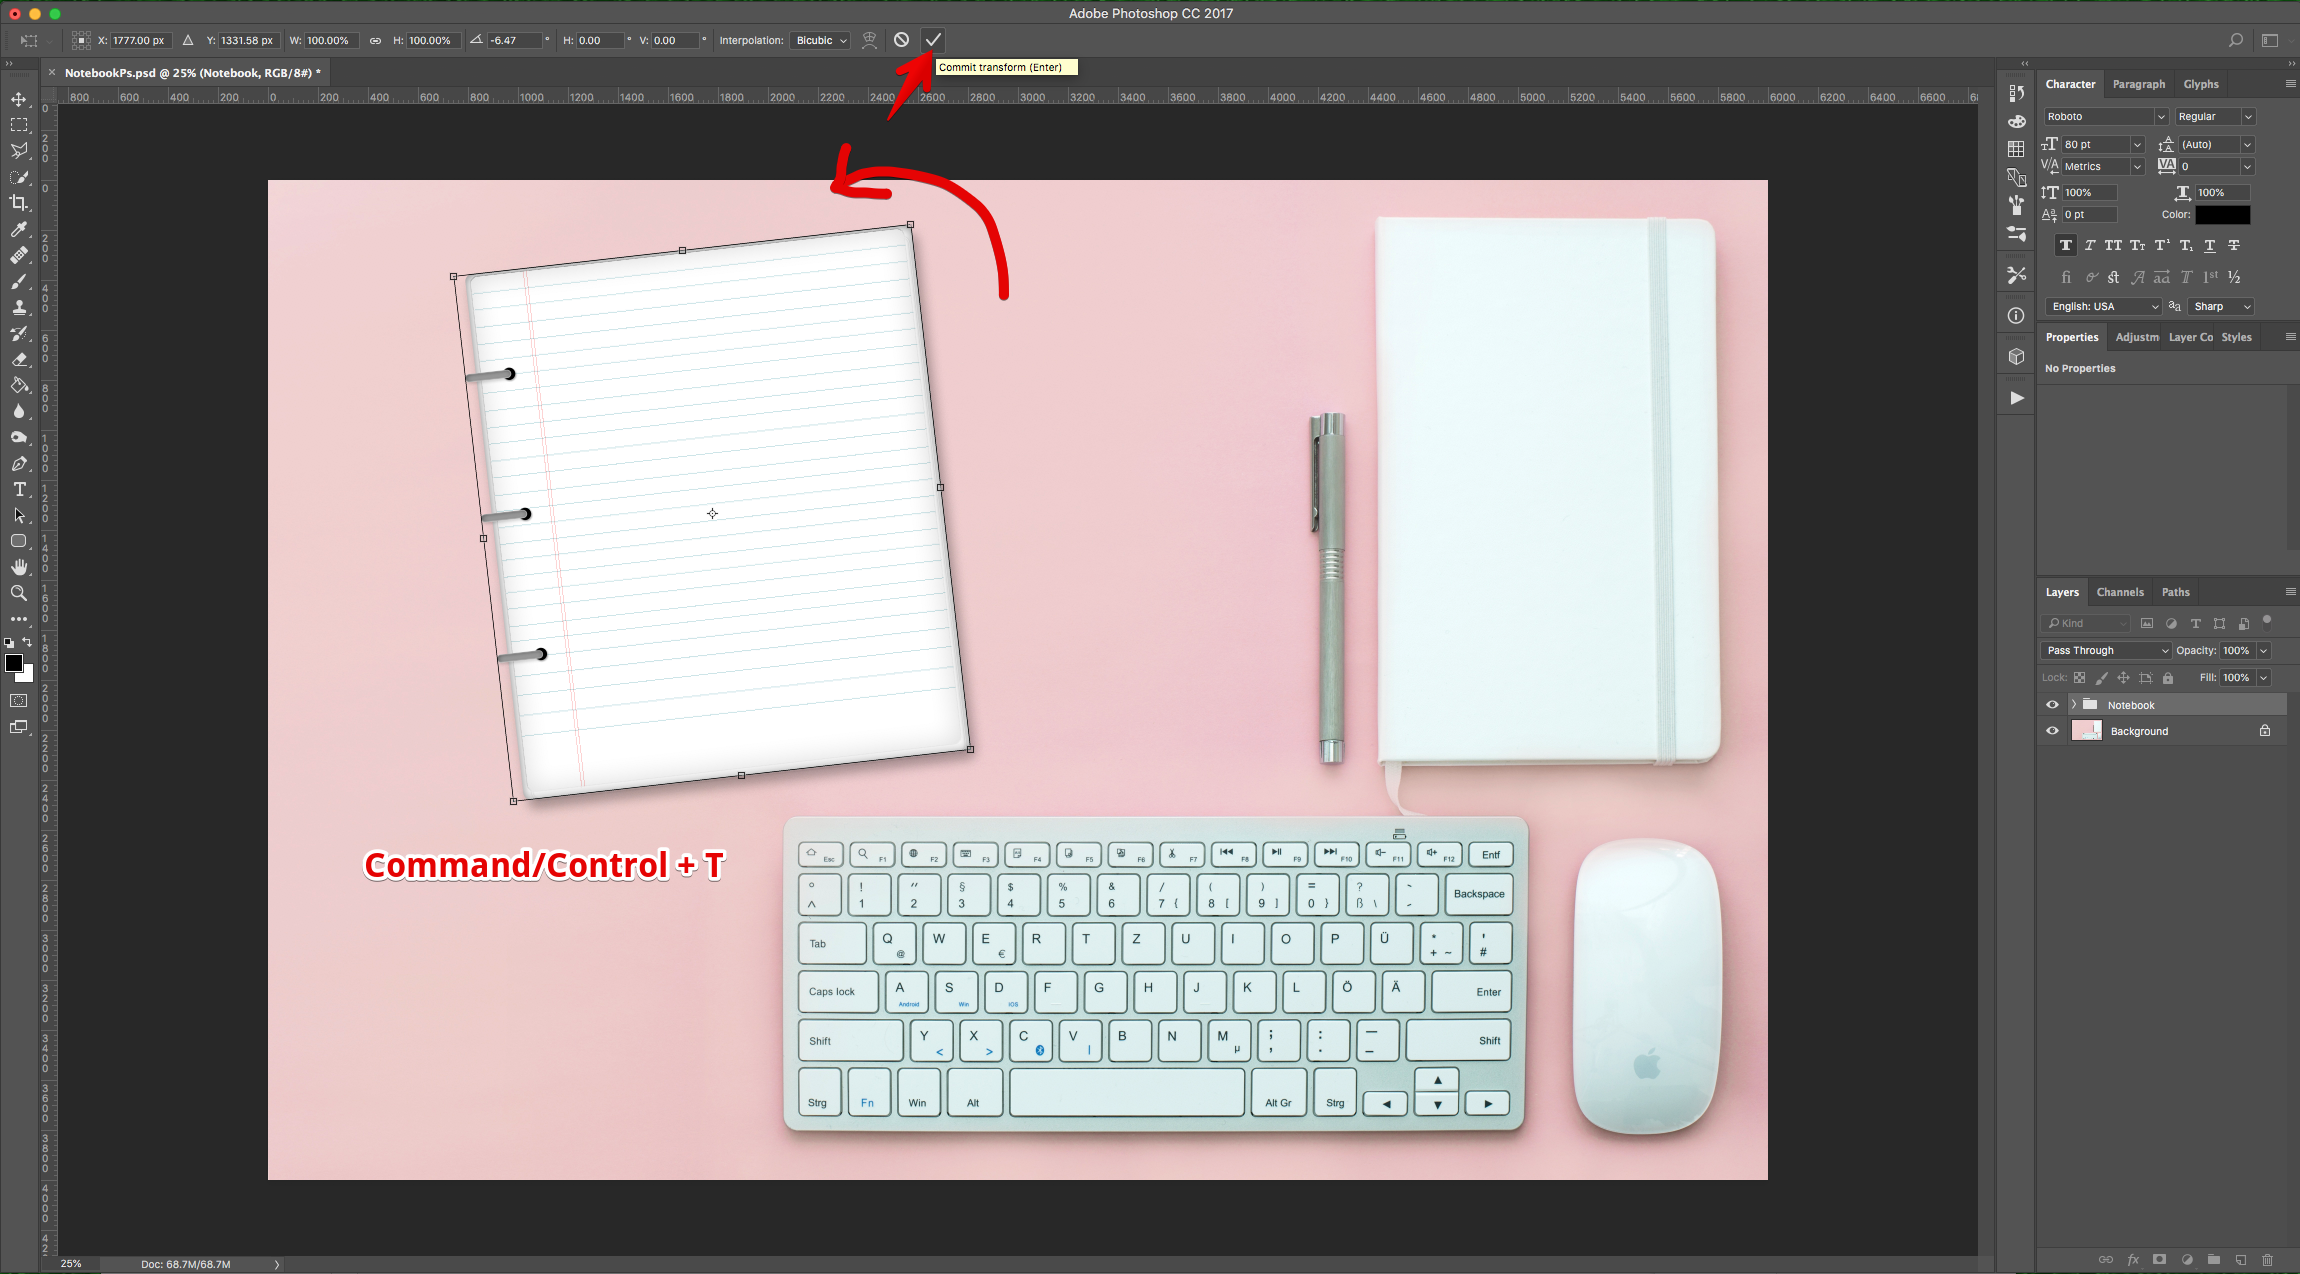
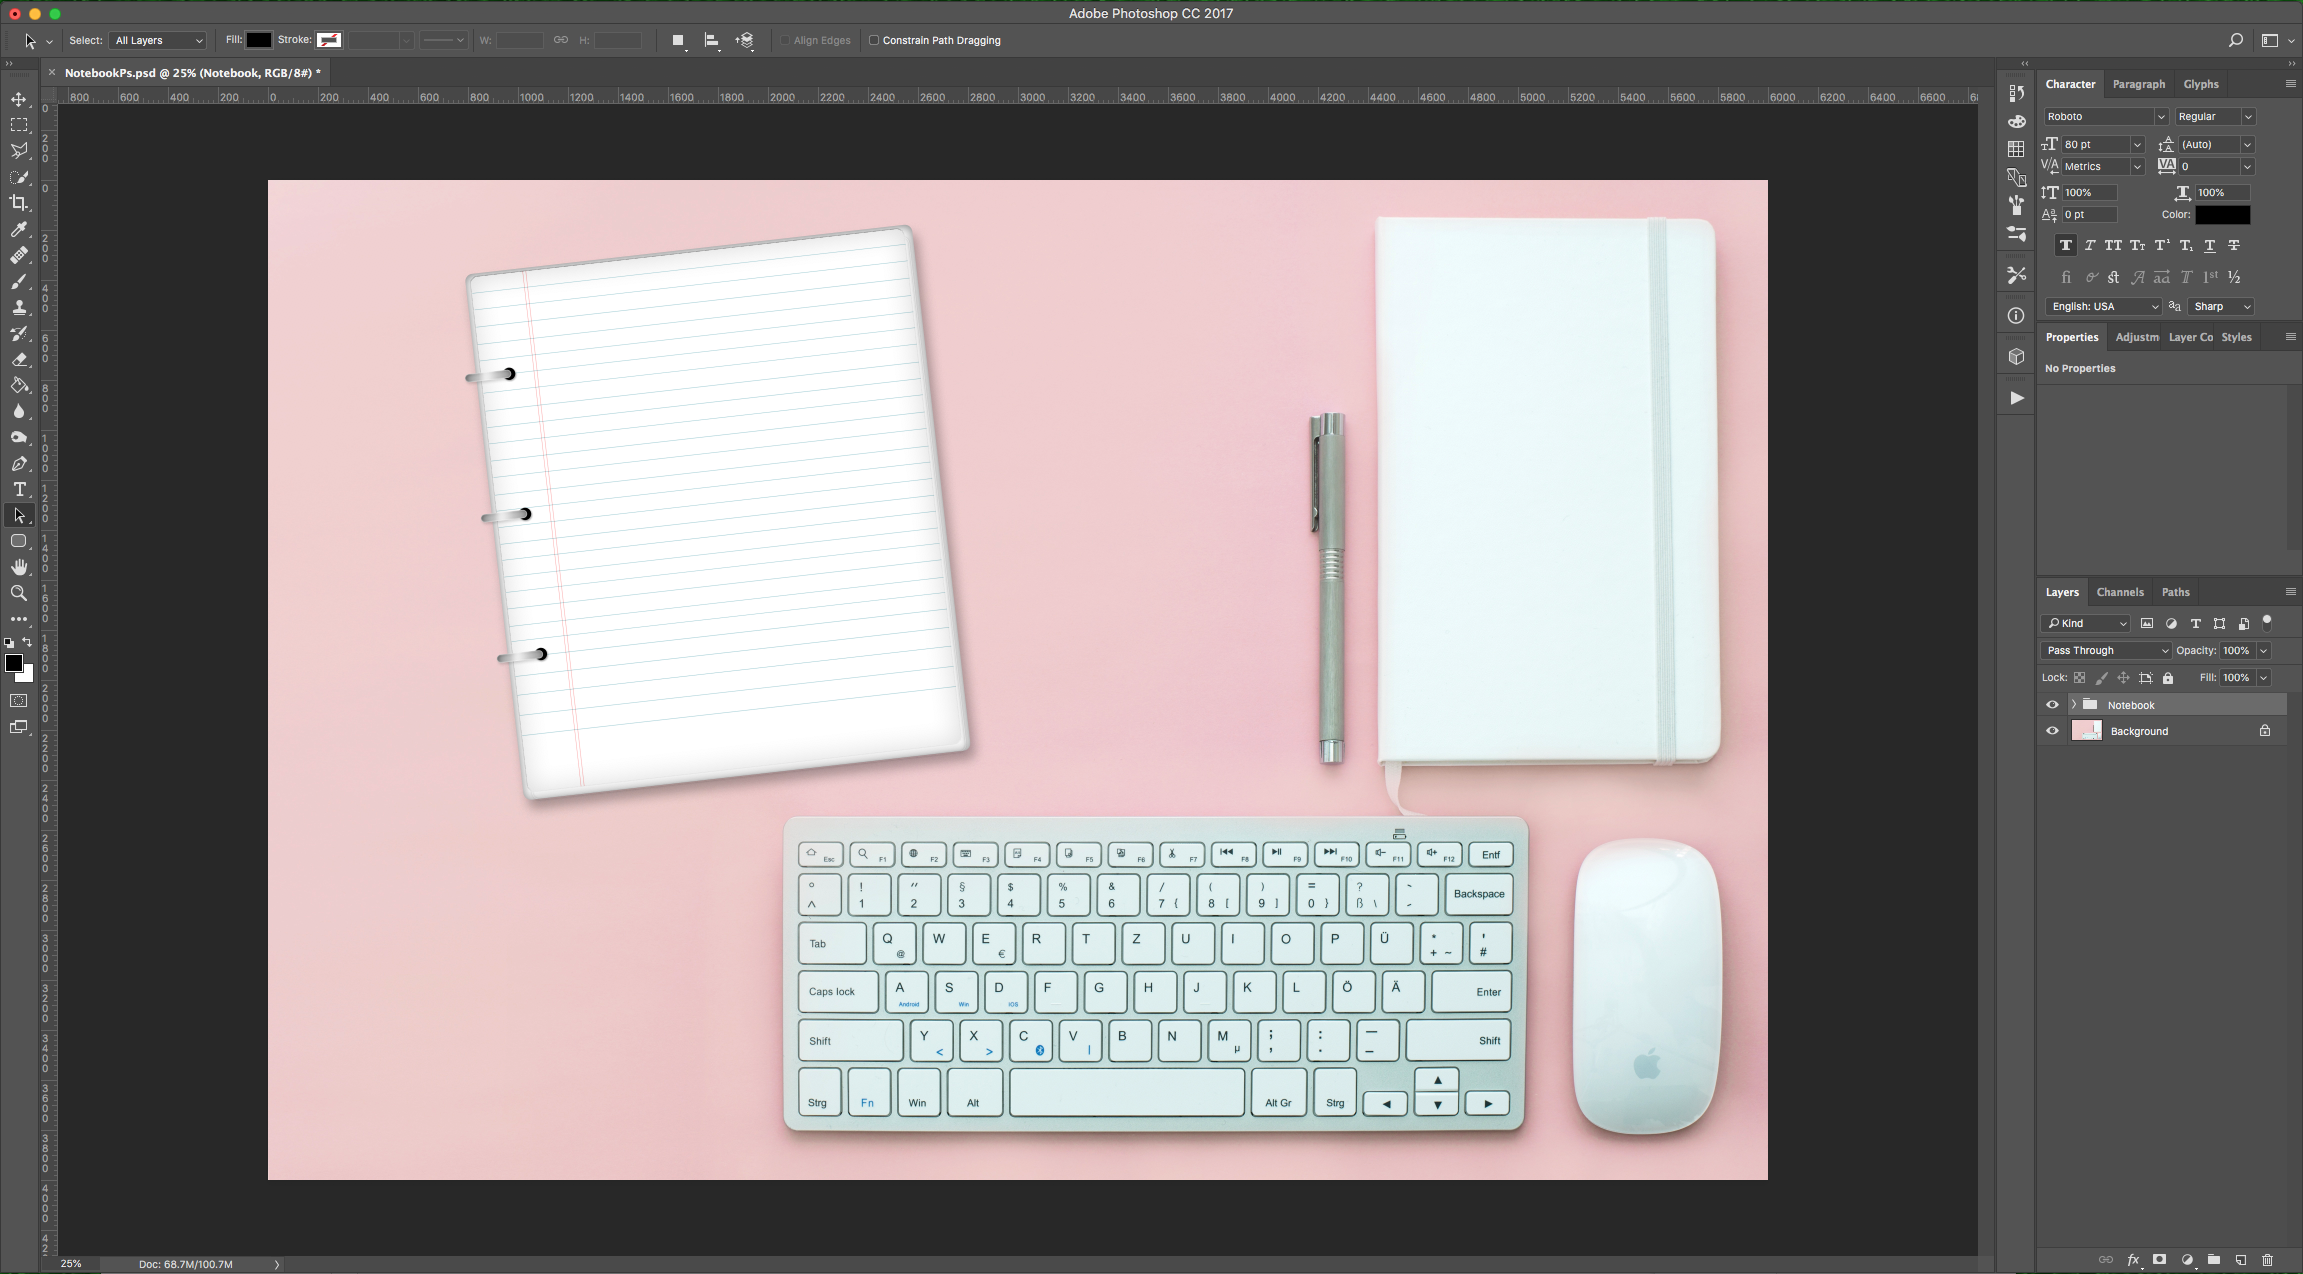
24 - Check out your Artwork!
1 - In Photoshop, open the image you chose as “Background”.
2 - Use the “Rounded Rectangle Tool” (U), to create a “Rectangular” shape. Fill it with White.
3 - Double-click on top of its Thumbnail and apply the following “Layer Styles”:
Drop Shadow:
Gradient Overlay: (from #d6d6d6 to #dbdbdb)
Inner Shadow:
4 - “Duplicate” the layer (Command/Control + J) or by dragging its Thumbnail to the “Create New Layer” button at the bottom of the “Layers Panel” and name it “Paper”. Name the original one “Shadow”.
5 - Use “Free Transform” (Command/Control + T) to resize the “Paper” rectangle a bit leaving the top of both rectangles very close. Click on the small Check Mark on the Top Menu or hit “Enter” to “Commit” the changes.
6 - Double-click on top of the “Paper” layer Thumbnail and change the “Layer Styles” values to the following:
Drop Shadow: (Contour: Sawtooth 1)
Inner Shadow:
7 - Create a “New Layer” (Shift + Command/Control + N), name it “Horizontal” and make sure it is on top of everything.
8 - Change the “Foreground” color to #00798f, select the “Brush Tool” (B) with a small and hard brush (2 px and 100% “Hardness”).
9 - With the “Horizontal” layer still selected “Command/Option” click on top of the “Paper” layer to make a selection. Then, draw “Horizontal” lines (hold the “Shift” key to make them straight). Start about 8 mm from the top and end at about 2 cm from the bottom mimicking the “Lines” in the “Notebook” page.
10 - Change the “Blending Mode” to “Multiply” and lower the “Opacity” to 50%.
11 - Create another layer on top of everything and name it “Vertical”.
12 - Change the “Foreground” color to #fa2a2a and draw two “Vertical” lines (hold the “Shift” key to make them straight). At about 2 cm from the left side of the page mimicking the “Margins” in the “Notebook” page.
13 - Change the “Blending Mode” to “Linear Burn” and lower the “Opacity” to 50%.
14 - Double-click on top of the “Paper” layer Thumbnail and add this to the “Layer Styles”:
Stoke:
15 - Select the “Ellipse Tool” (U), Black as “Foreground” color and make a small circle to mimic the “Notebook” holes.
16 - Place it on the Top-Left side of the “Page” inside the “Margin” area. “Duplicate” it a couple of times by dragging its Thumbnail to the “Create New Layer” button at the bottom of the “Layers Panel” and distribute the duplicates in the center and bottom of the “Margin” area.
17 - Select all the “Circle” layers (using the “Shift” key) and “Group” them together by clicking on the small “Folder” icon at the bottom of the “Layers Panel”. Name the Group “Circles”.
18 - Double-click on top of its Thumbnail and apply the following “Layer Styles”:
Inner Shadow:
Drop Shadow:
19 - Use the “Rounded Rectangle Tool” (U), to create a “Rectangular” shape that starts from outside the “Page” and ends inside one of the “Circles”. It should be the “Wire” that holds the pages together. Name it “Sipral”.
20 - Double-click on top of its Thumbnail and apply the following “Layer Styles”:
Inner Shadow:
Inner Glow: (#e0dfdf)
Gradient Overlay: (Location: 0%, Fill: #a0a0a0; Location: 28%, Fill: #c6c6c6; Location: 45%, Fill: #eeeeee; Location: 73%, Fill: # c6c6c6; Location: 100%, Fill: #a0a0a0)
Drop Shadow:
21 - ““Duplicate” the “Spiral” shape a couple of times (Command/Control + J) and distribute the duplicates in the center and bottom of the “Margin” area on top of each “Circle”.
22 - Select all the “Spiral” layers (using the “Shift” key) and “Group” them together by clicking on the small “Folder” icon at the bottom of the “Layers Panel”. Name the Group “Spirals”. Create another “Group” named “Notebook” that includes all the Layers but the “Background” one.
23 - Use “Free Transform” (Command/Control + T) to resize/rotate the “Notebook” if needed. Click on the small Check Mark on the Top Menu or hit “Enter” to “Commit” the changes.
24 - Check out your Artwork!
by @lornacane
Related Tutorials
Photoshop Tutorials
How to Use Text Effects in Photoshop
With Photoshop Text Effects, you can create text with impact in just a few steps.
Photoshop Tutorials
How to Create Speech Bubbles in Photoshop
Learn how to create and edit fun speech bubbles in Photoshop using custom shapes.
Photoshop Tutorials
How to Make Sublimation Designs in Photoshop
Discover how to make sublimation designs in Photoshop that you can use to create beautiful gifts.
Photoshop Tutorials
How to Use EPS Files in Photoshop
In this tutorial, learn how to use EPS files in Photoshop as Smart Objects to maintain image quality
Photoshop Tutorials
Image Burned in Wood in Photoshop
In this tutorial, discover how to create a realistic wood burned effect in Adobe Photoshop.
Photoshop Tutorials
Easy See through Cut Out Text in Photoshop
Create a see-through cut out text design in Photoshop with these easy to follow steps.