By Design Bundles
Photoshop Tutorials12 min
How to Swap Faces in Photoshop
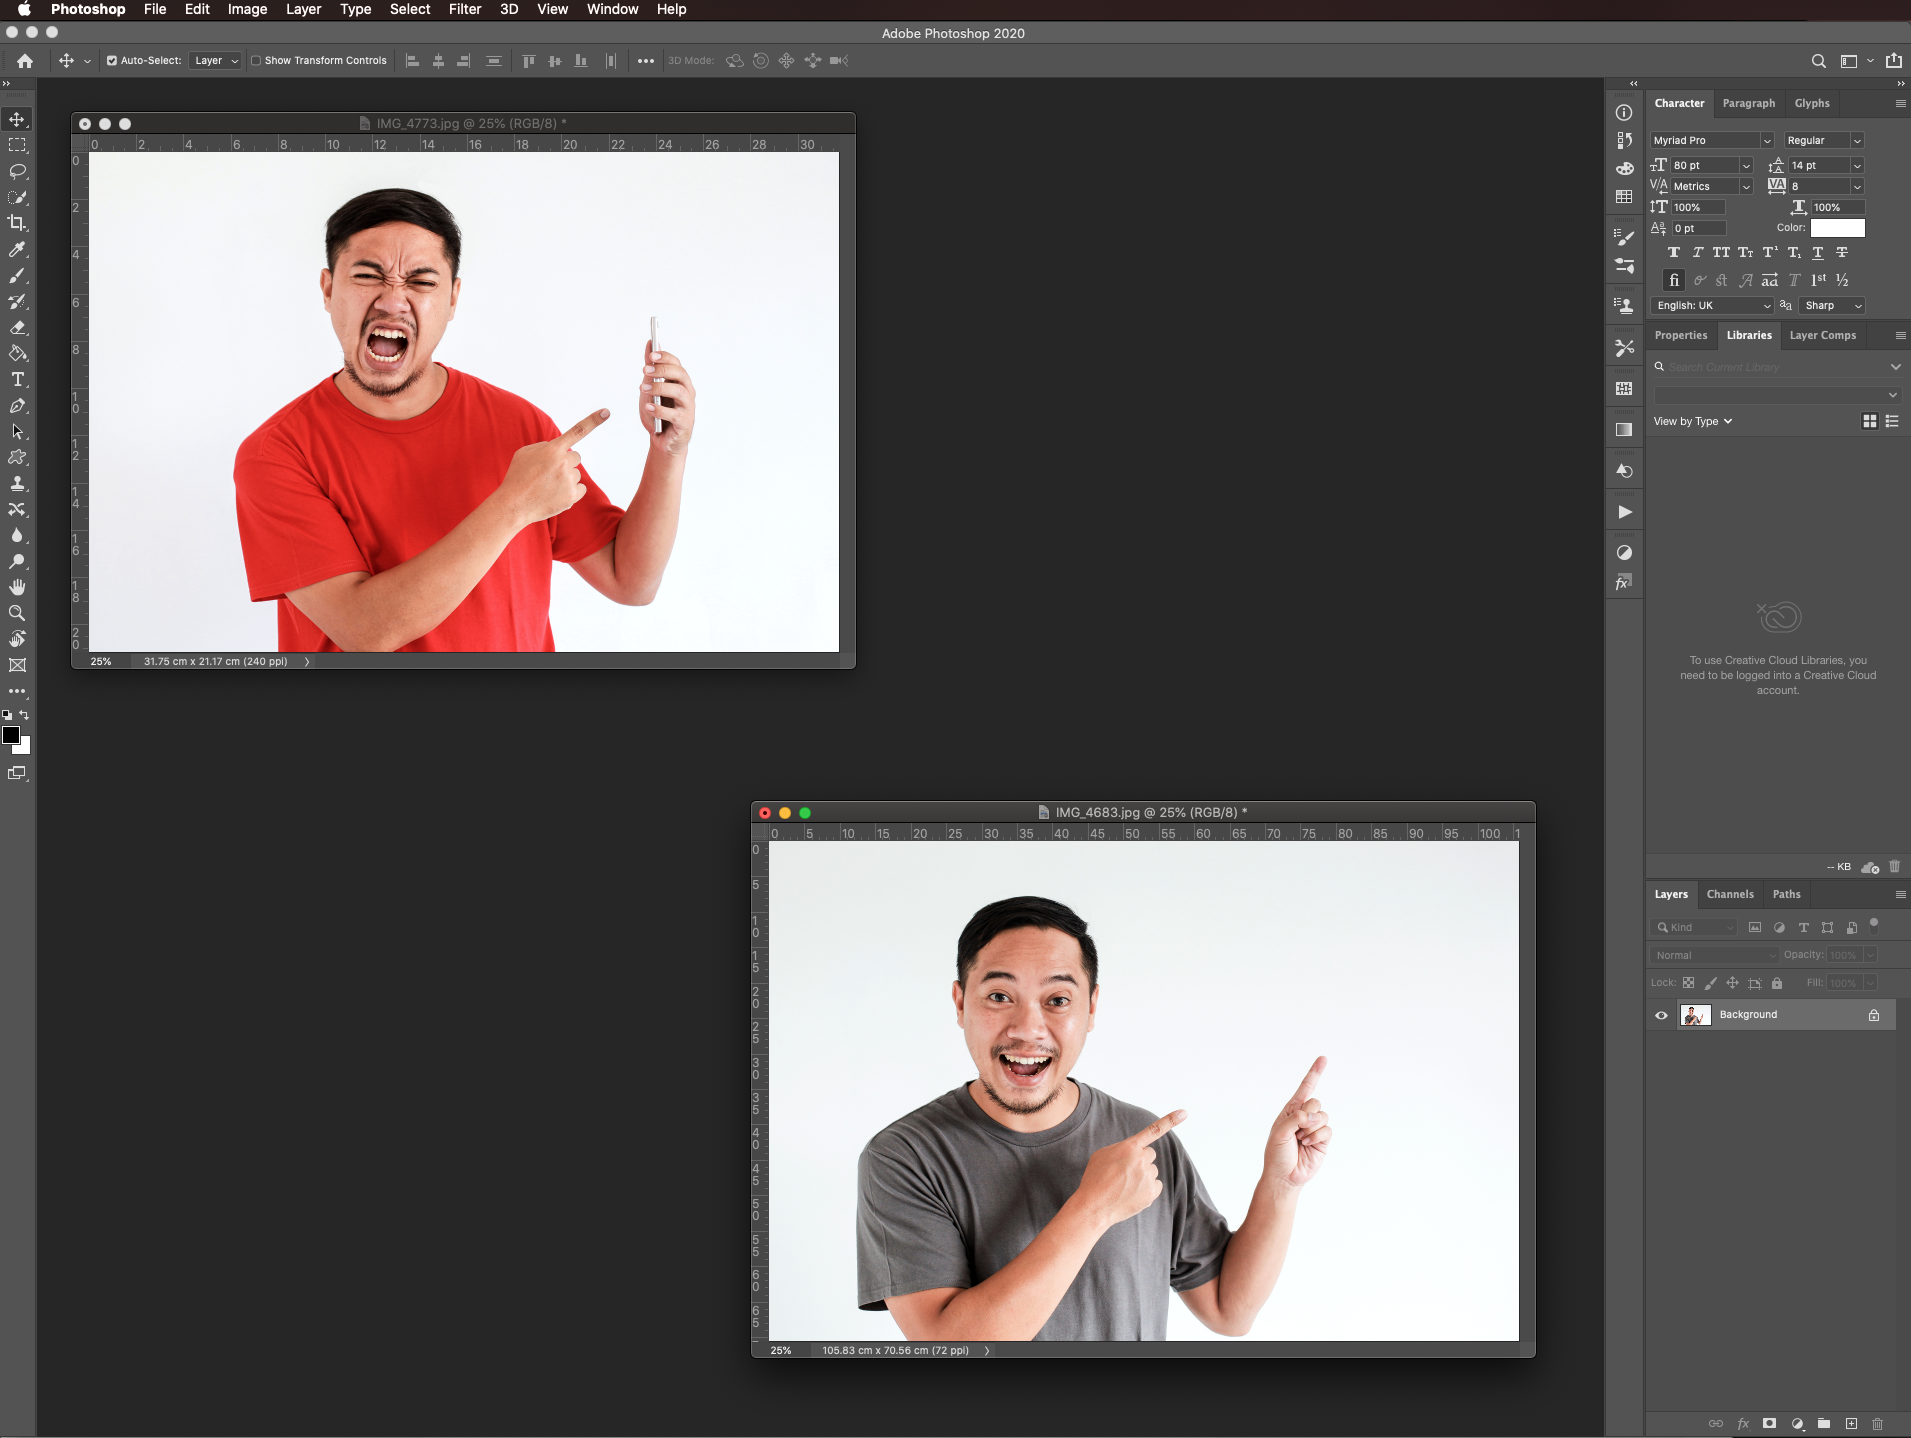
For this tutorial, you will need two images of people. One that has the body and details we want to keep and the second with the face we want to add. We will be using two stock photos of an Asian man.
In Photoshop, open both your images.
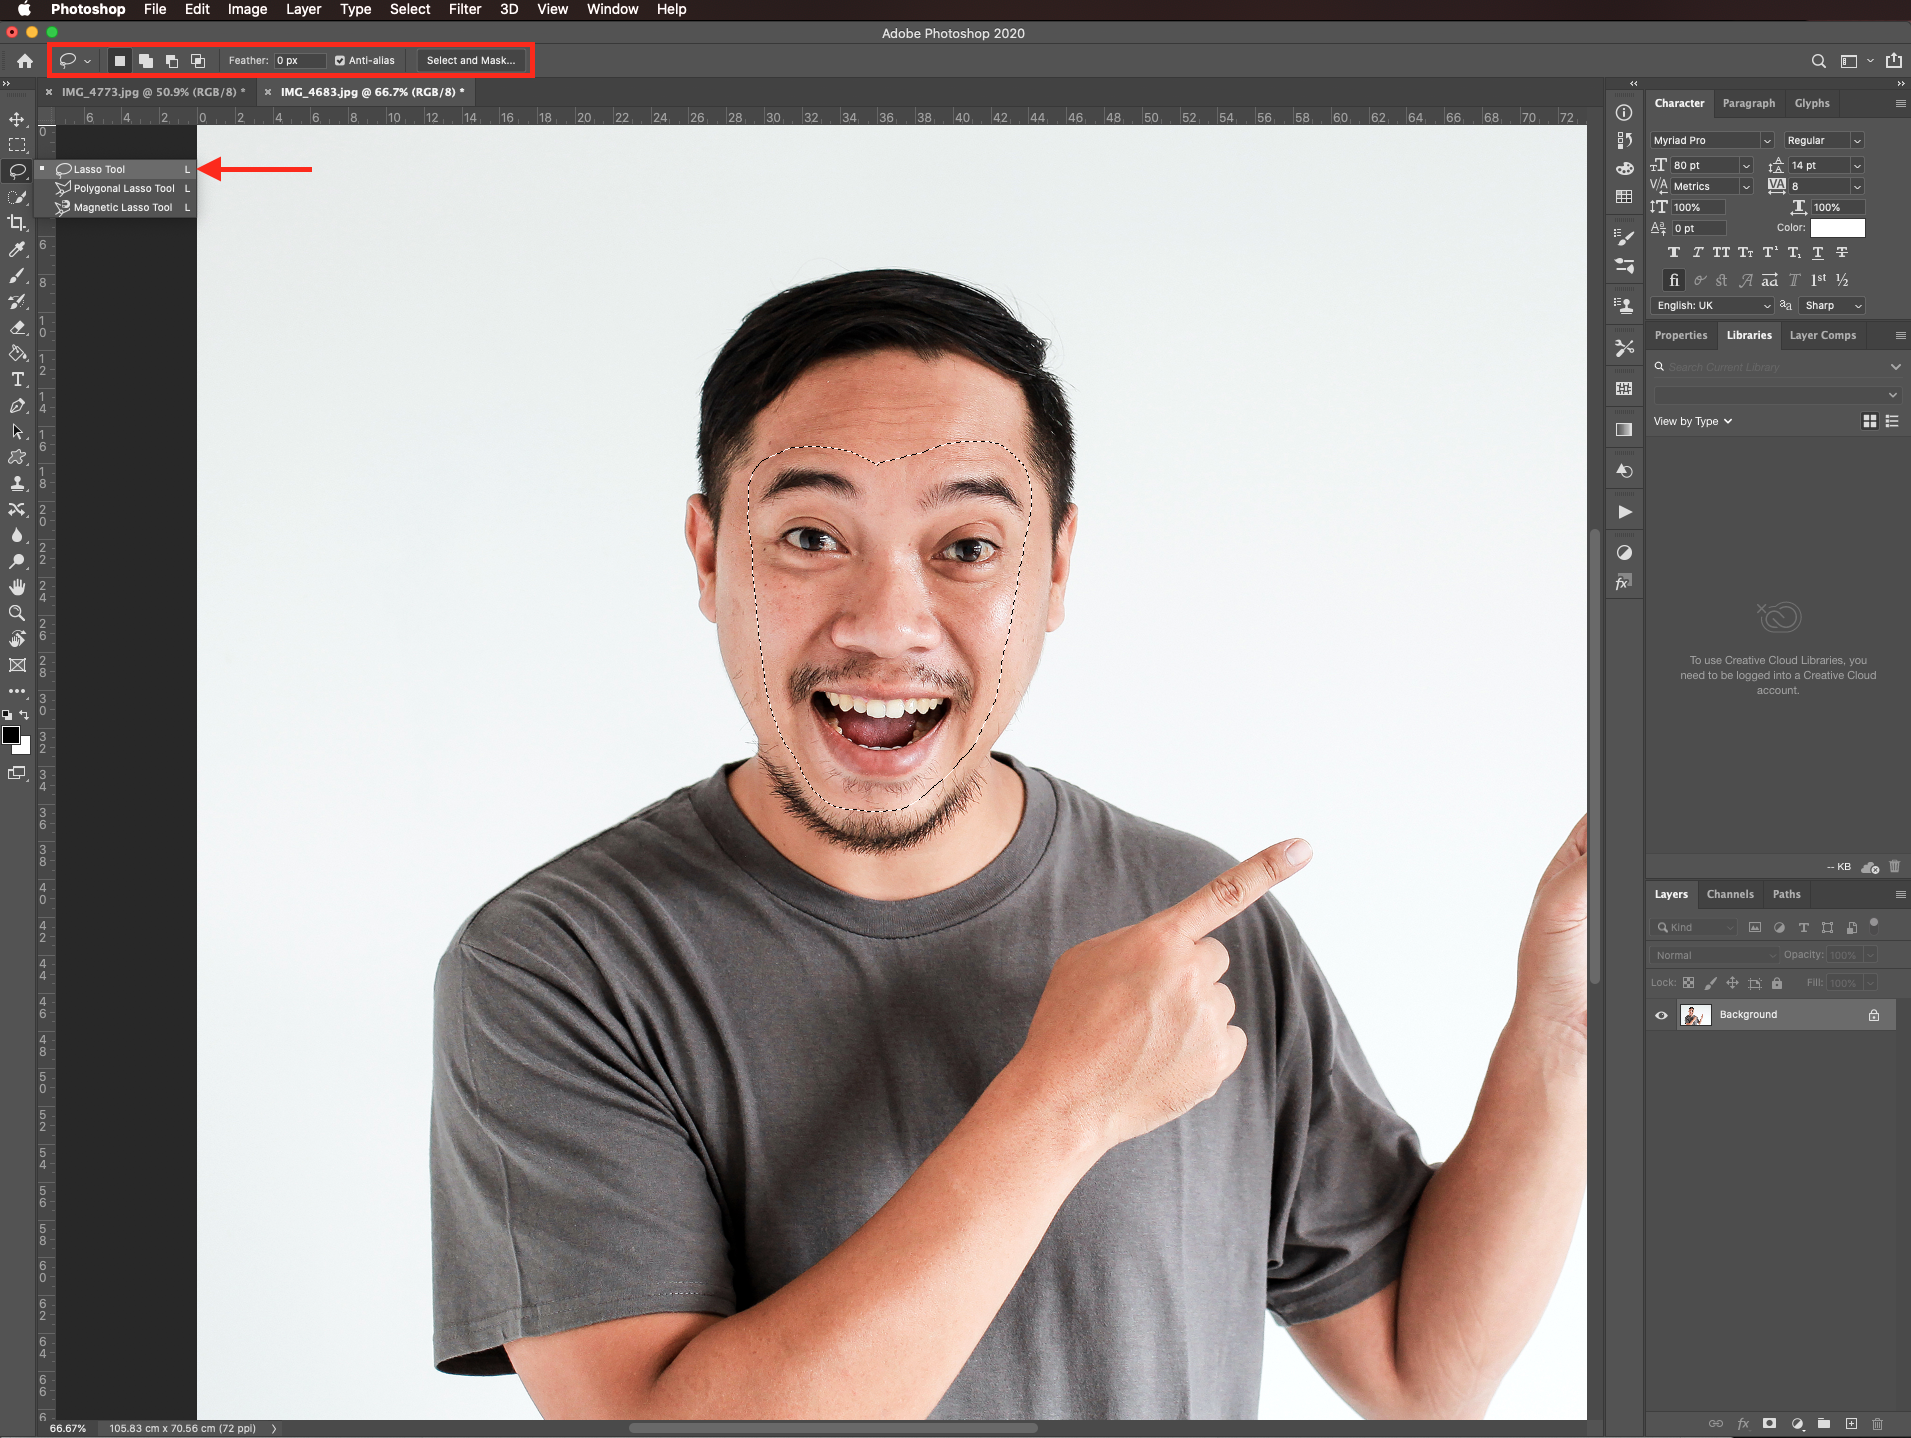
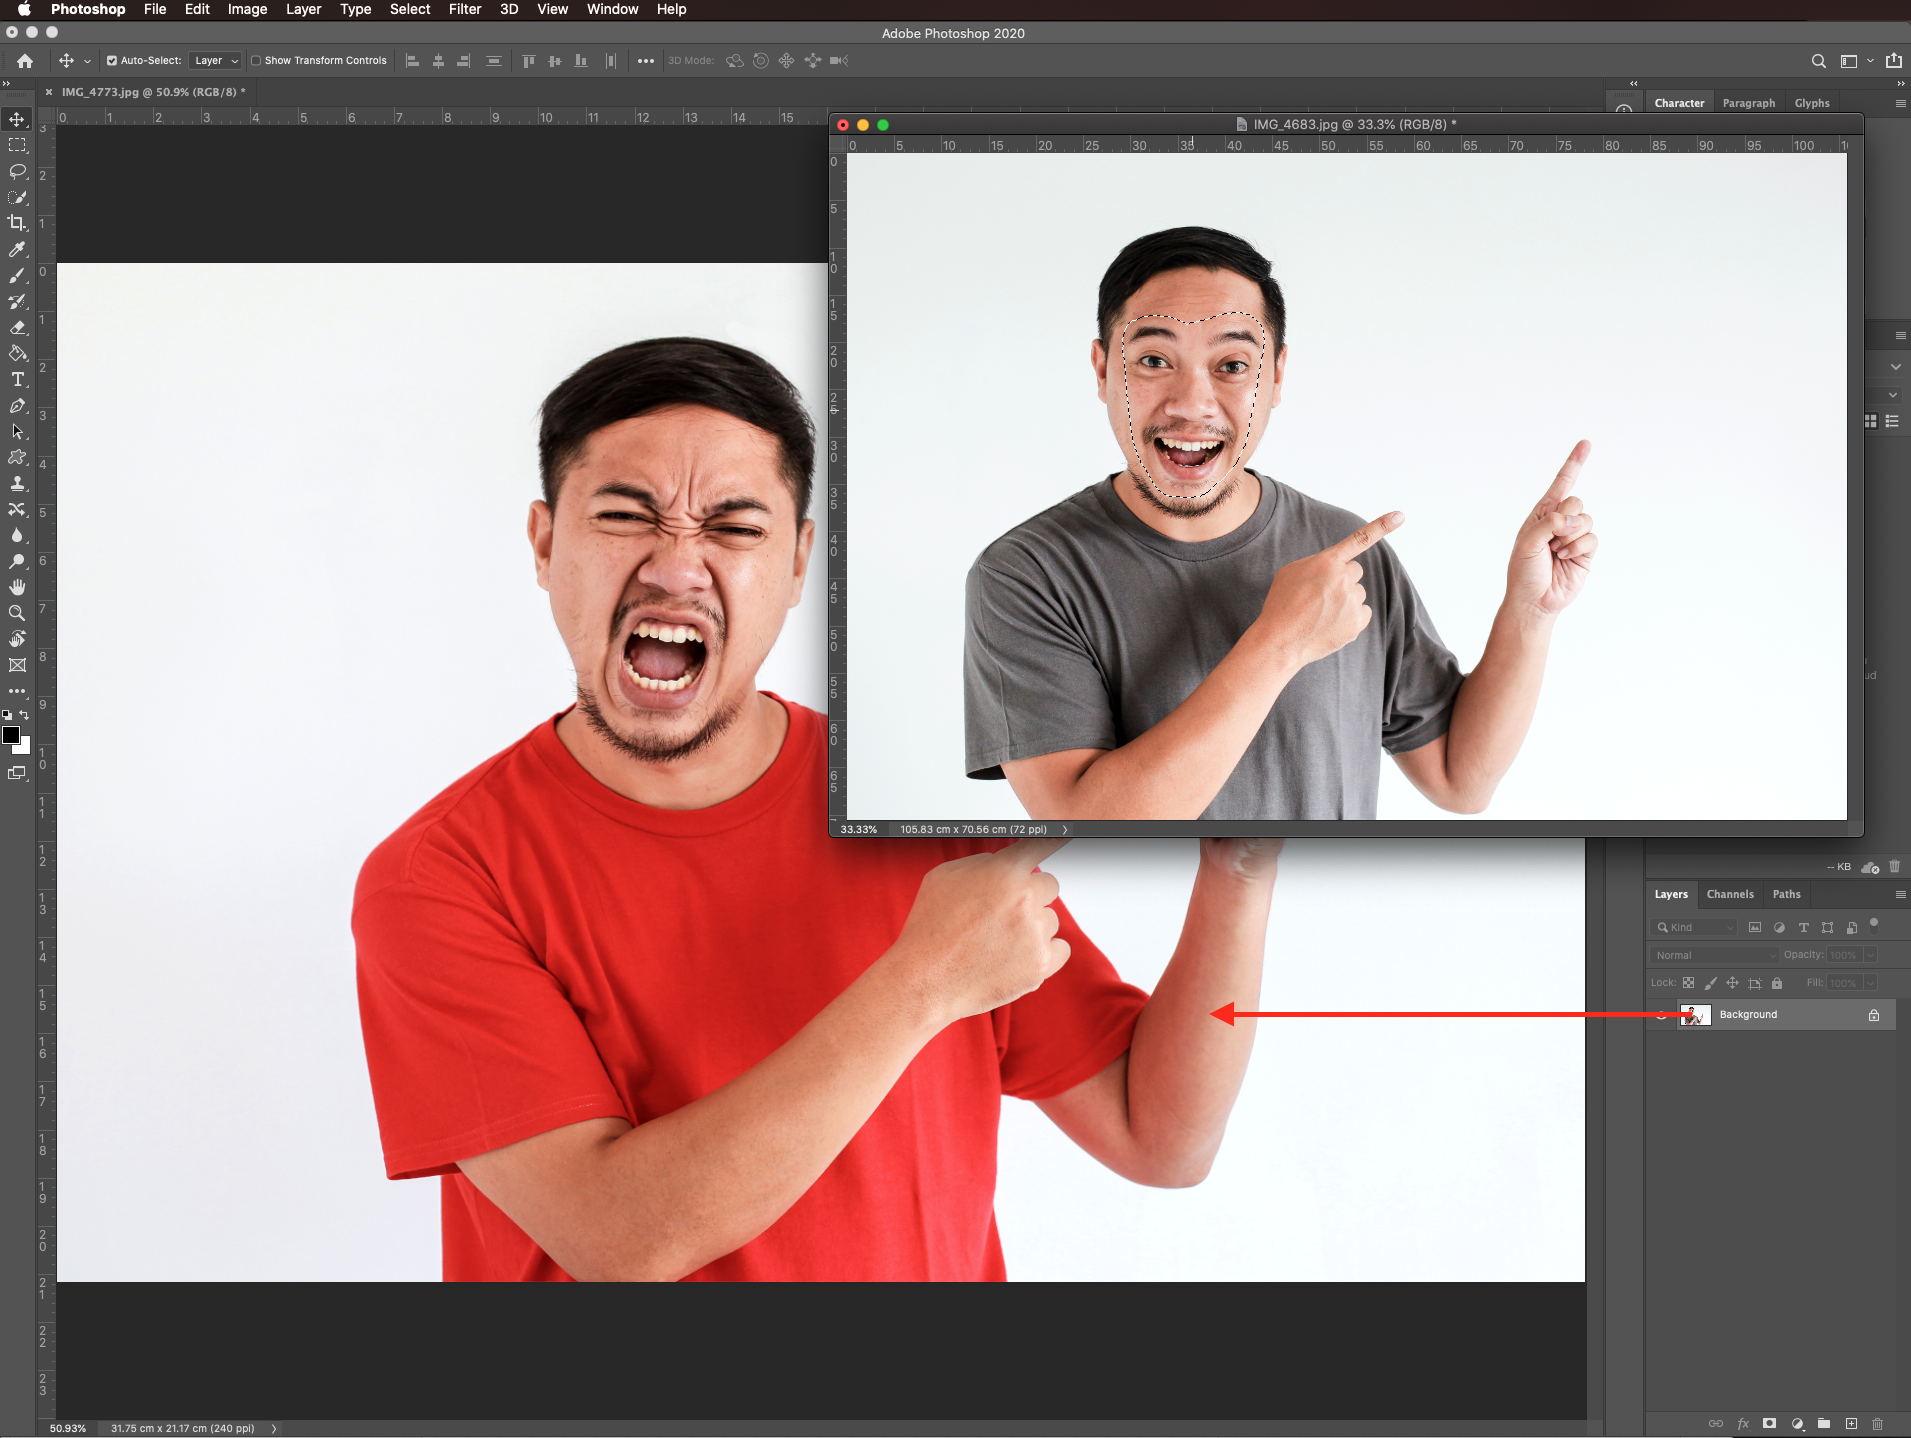
Use the lasso tool (L) to select the inner part of the face of the subject you want to use. To add and/or subtract from the selection, use the small buttons on the left side of the top menu.
Once you are done, drag your selection onto the other image and place it on top of the face.
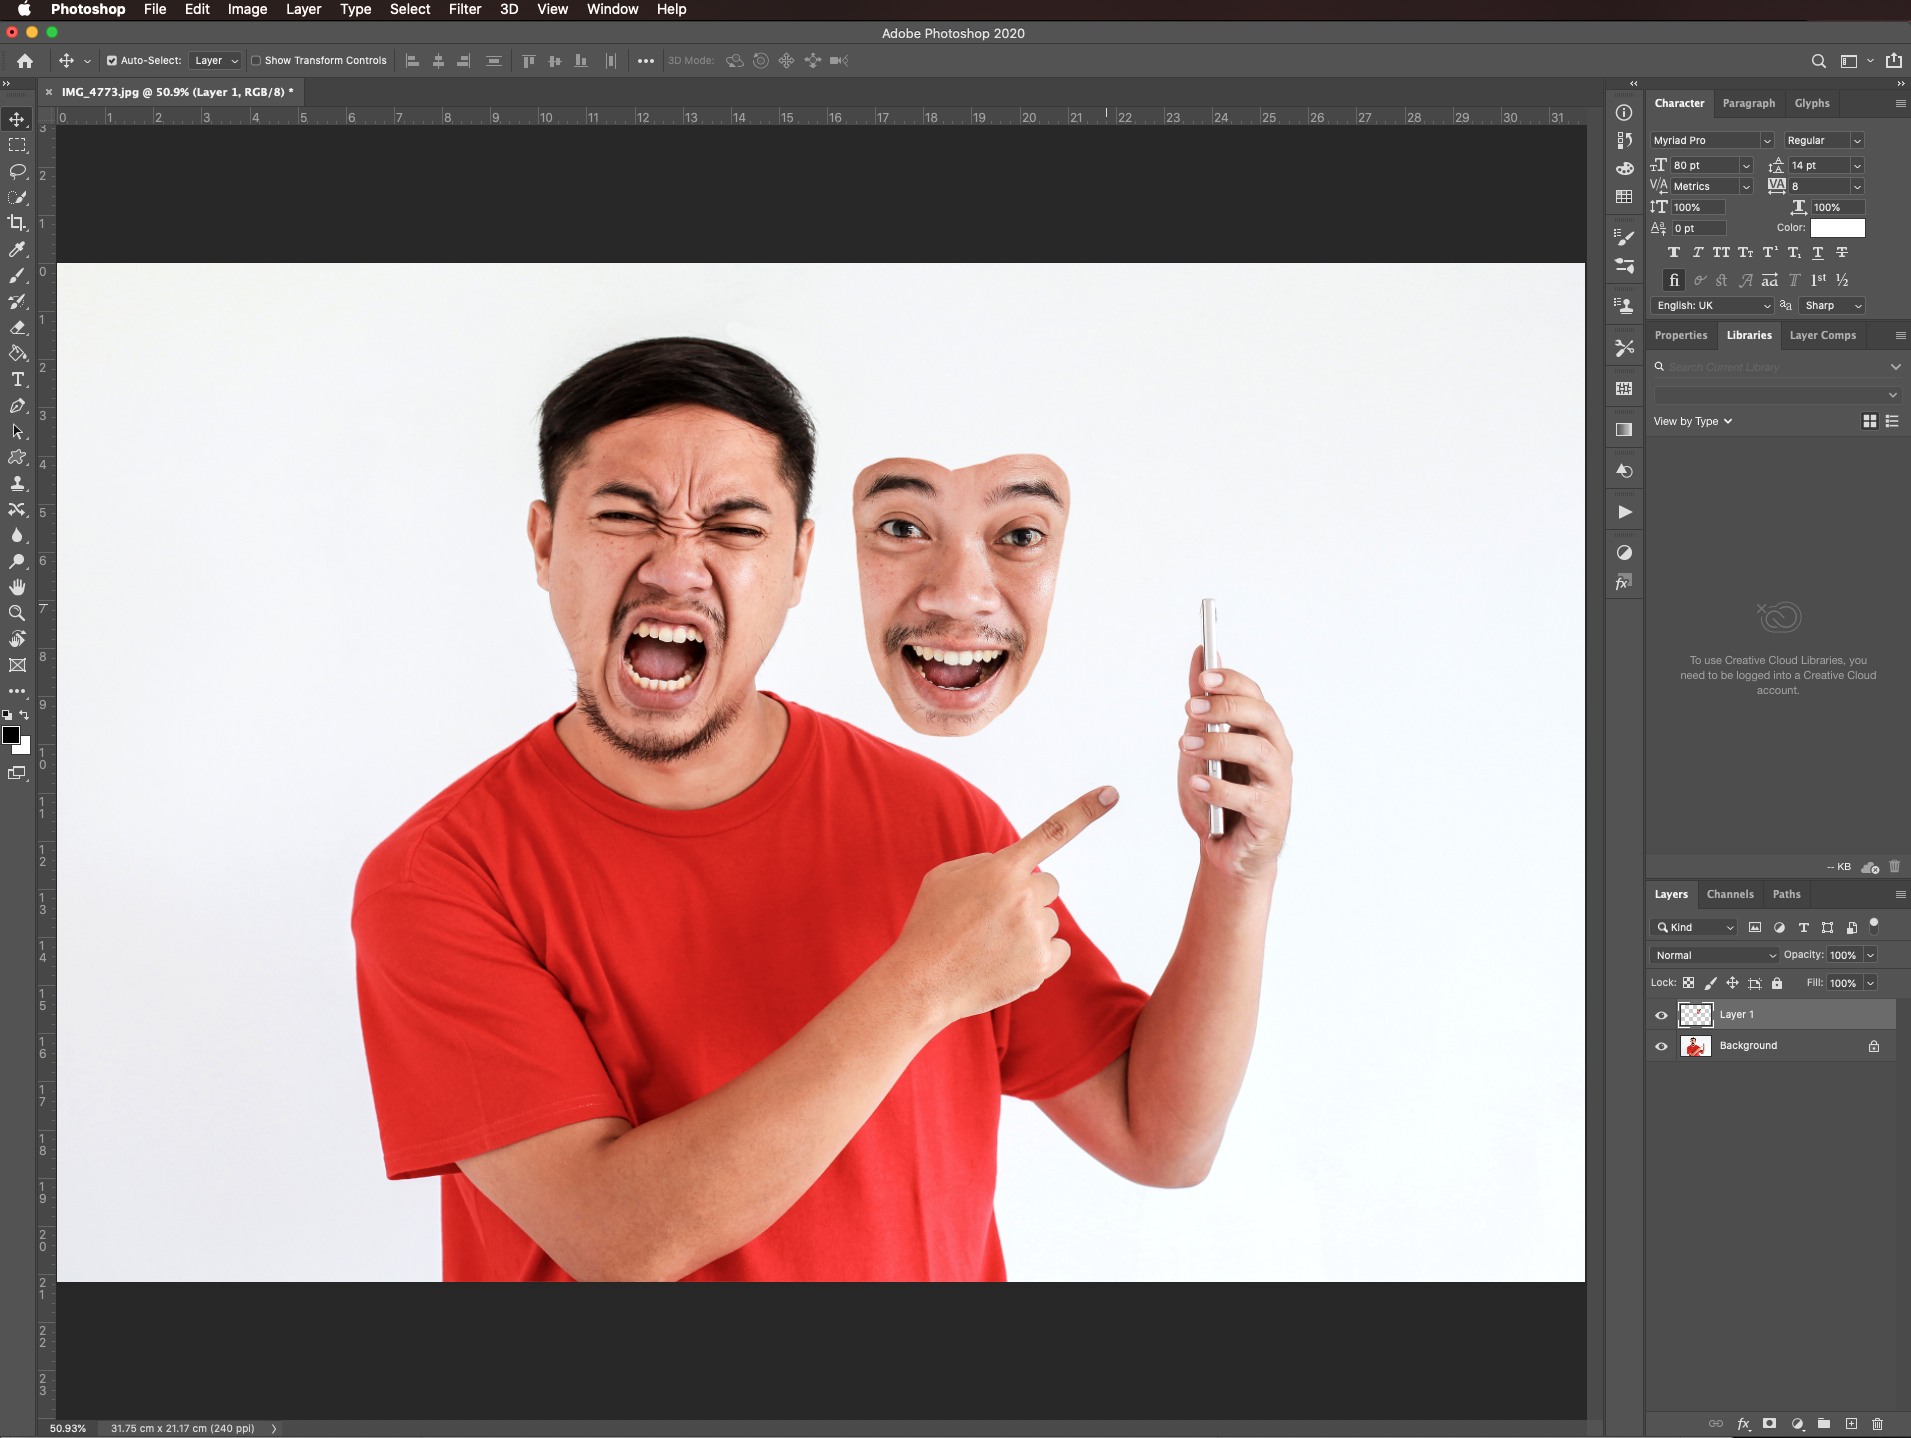
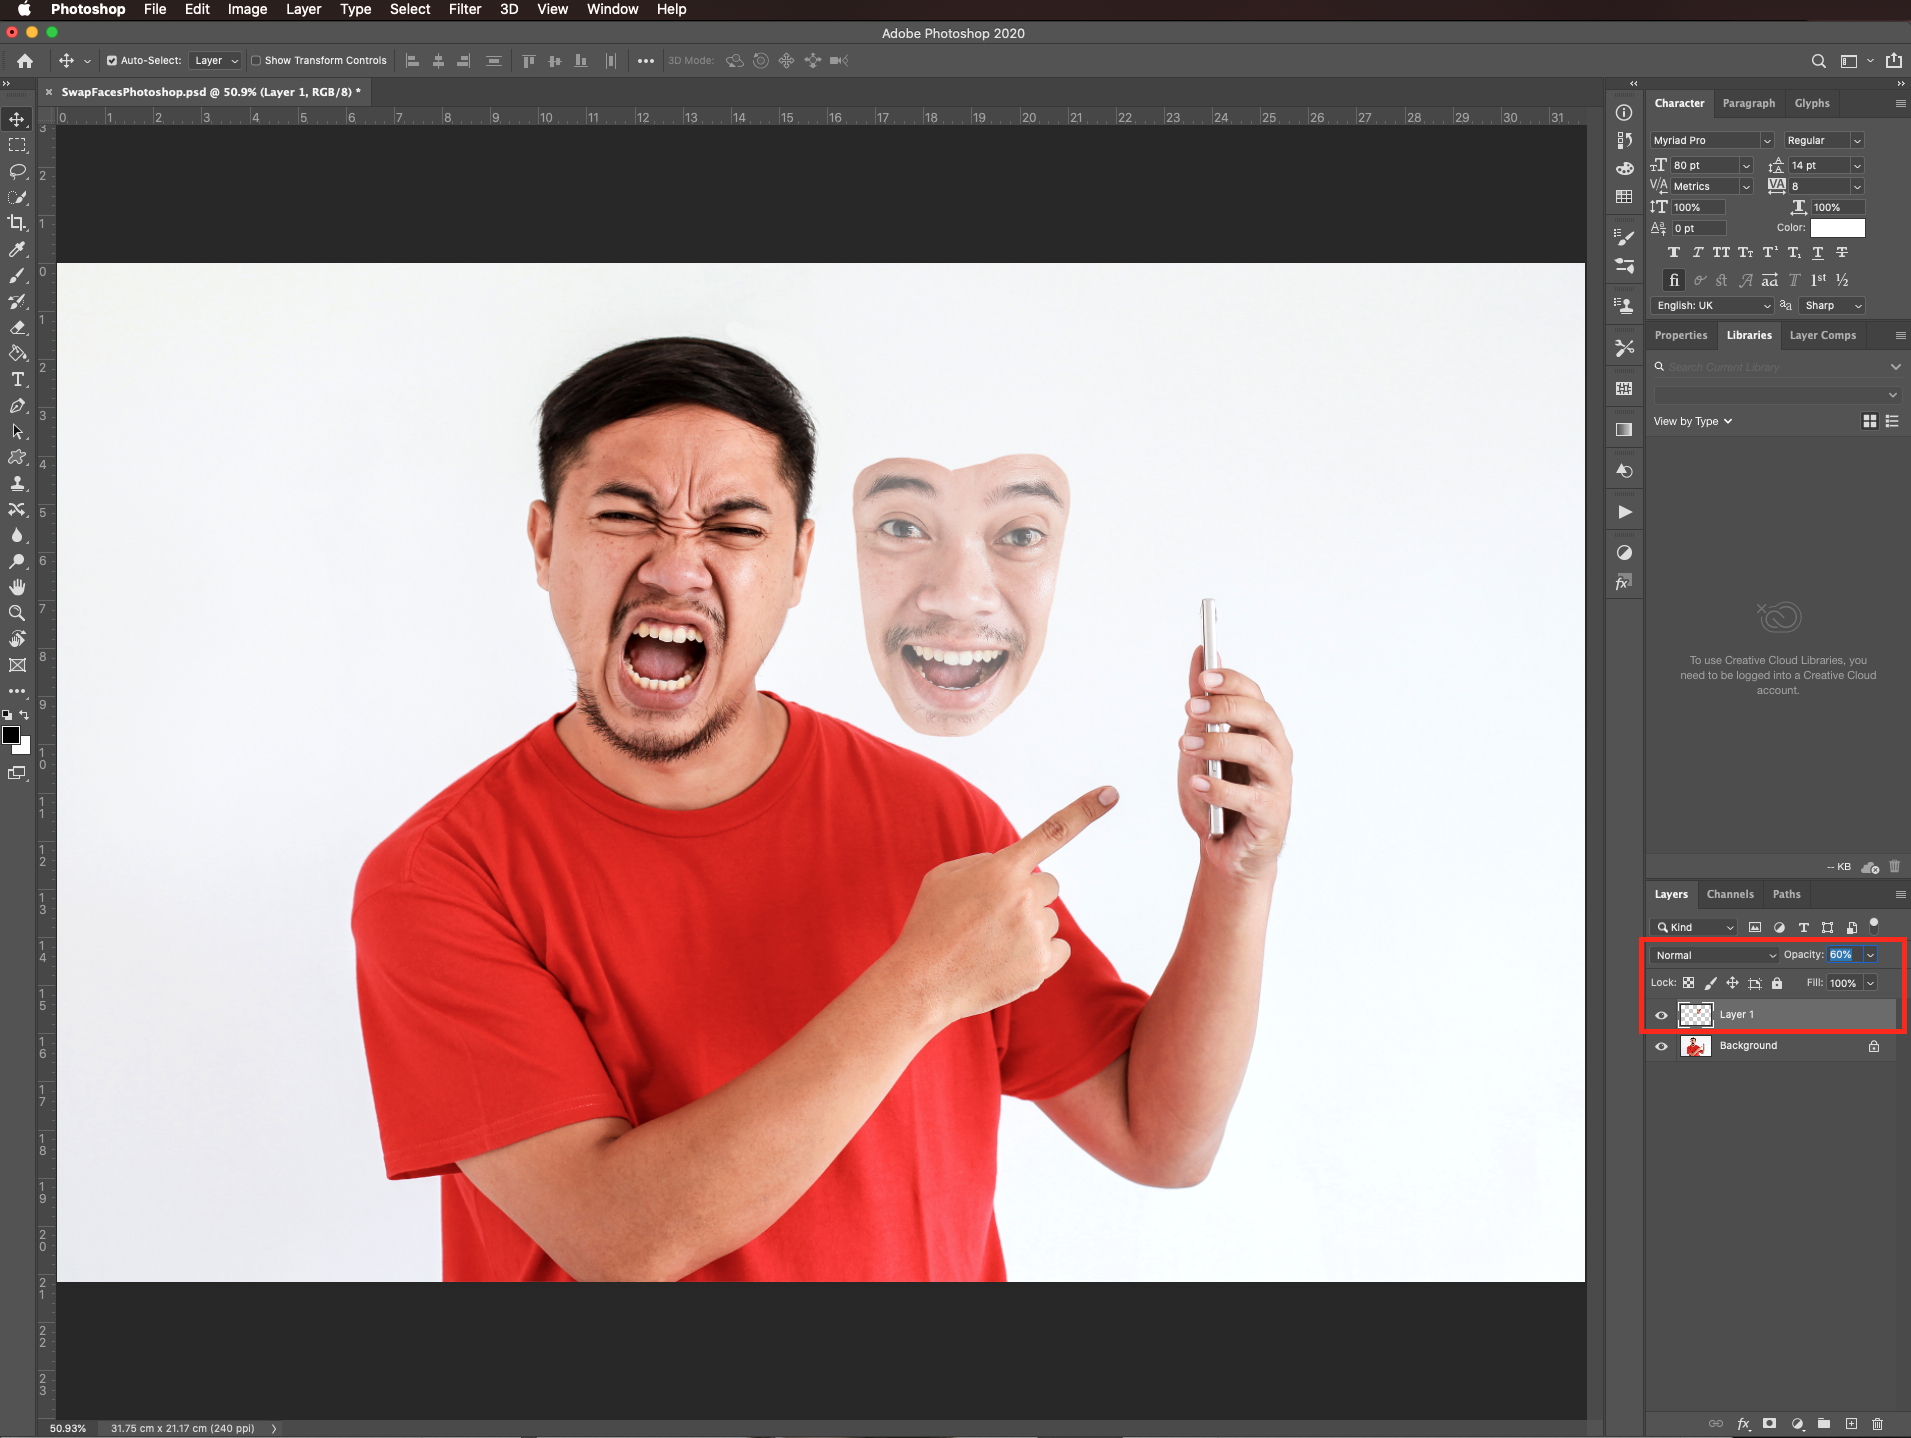
Lower the opacity of the face to about 60% to be able to see through and match the features as much as possible.
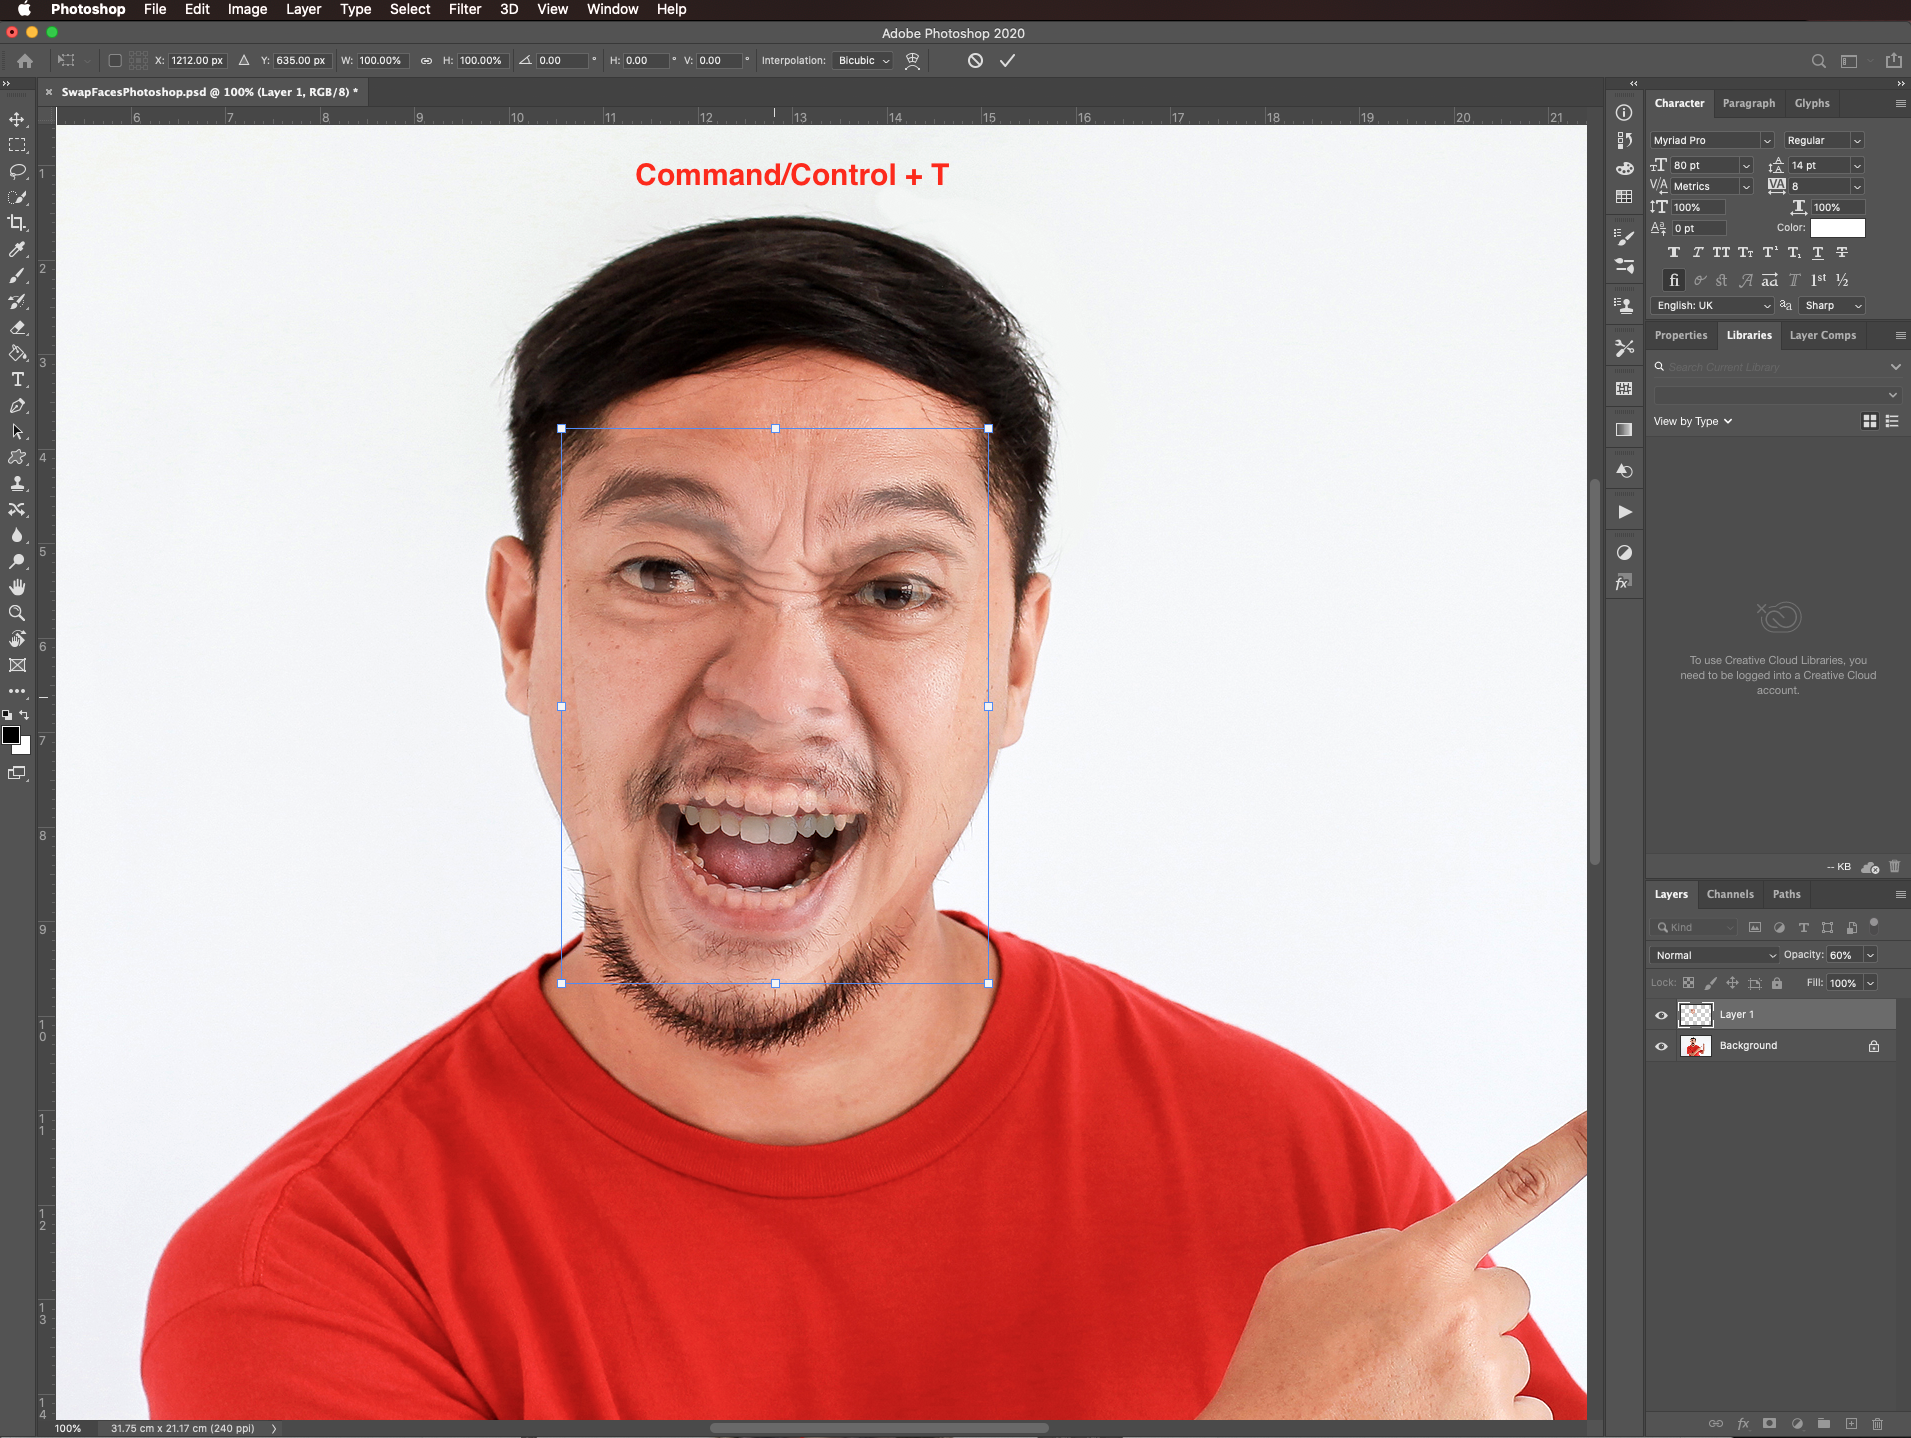
Use free transform (Command/Control + T) to resize and/or rotate the face if needed. Click on the center and move it to a spot that suits your needs better like the corner of the eyes since they will be our reference.
Without exiting free transform, go to edit > transform > warp.
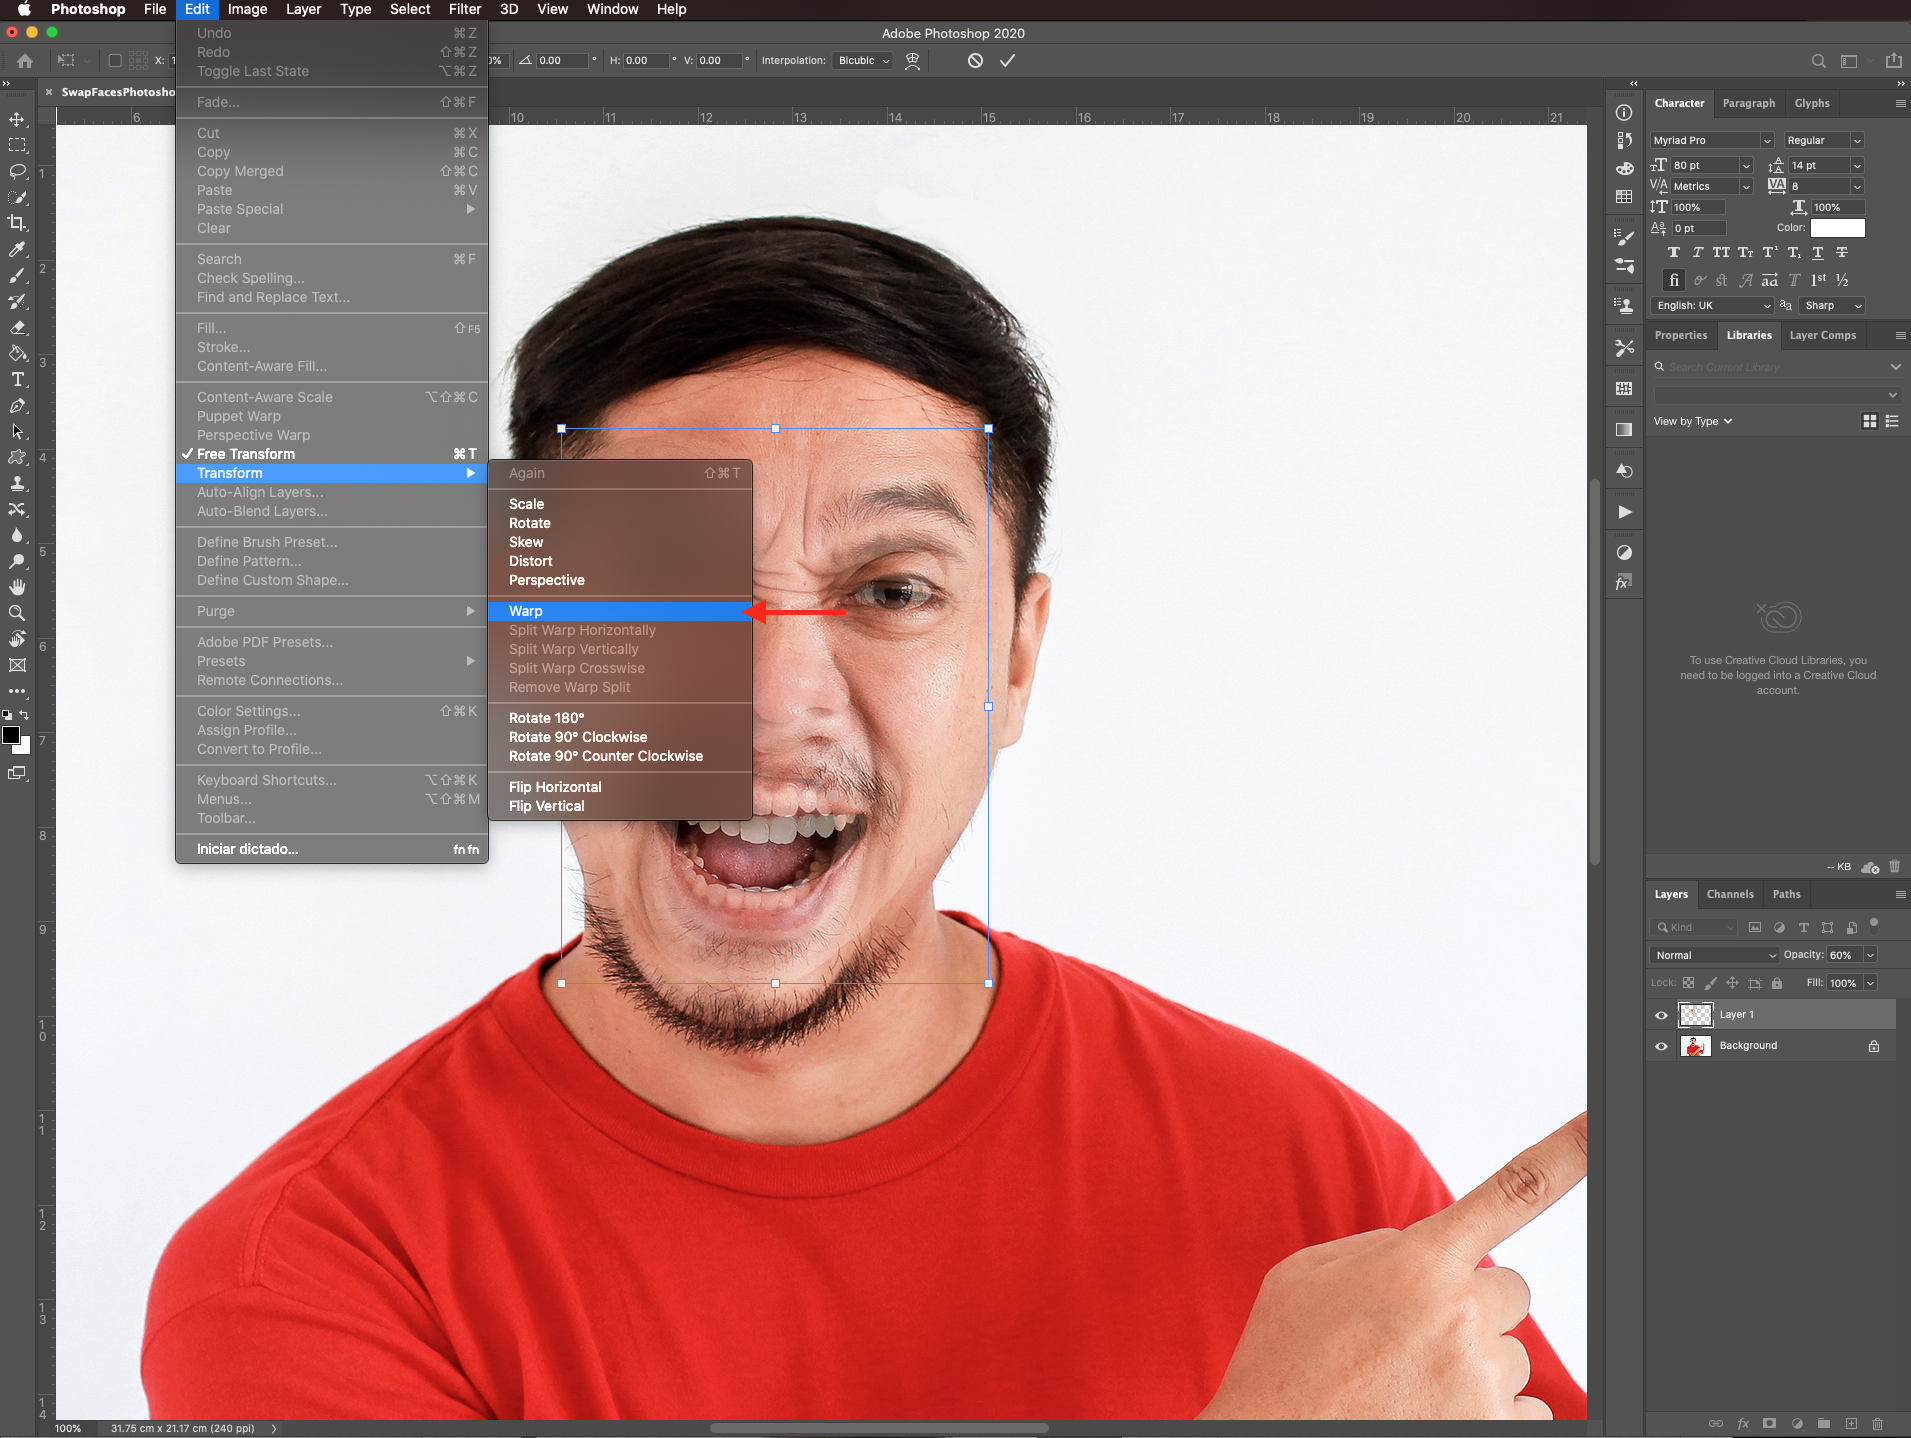
And fix some of the details on the face. Once you are done, click enter or click on the small checkmark on the top menu.
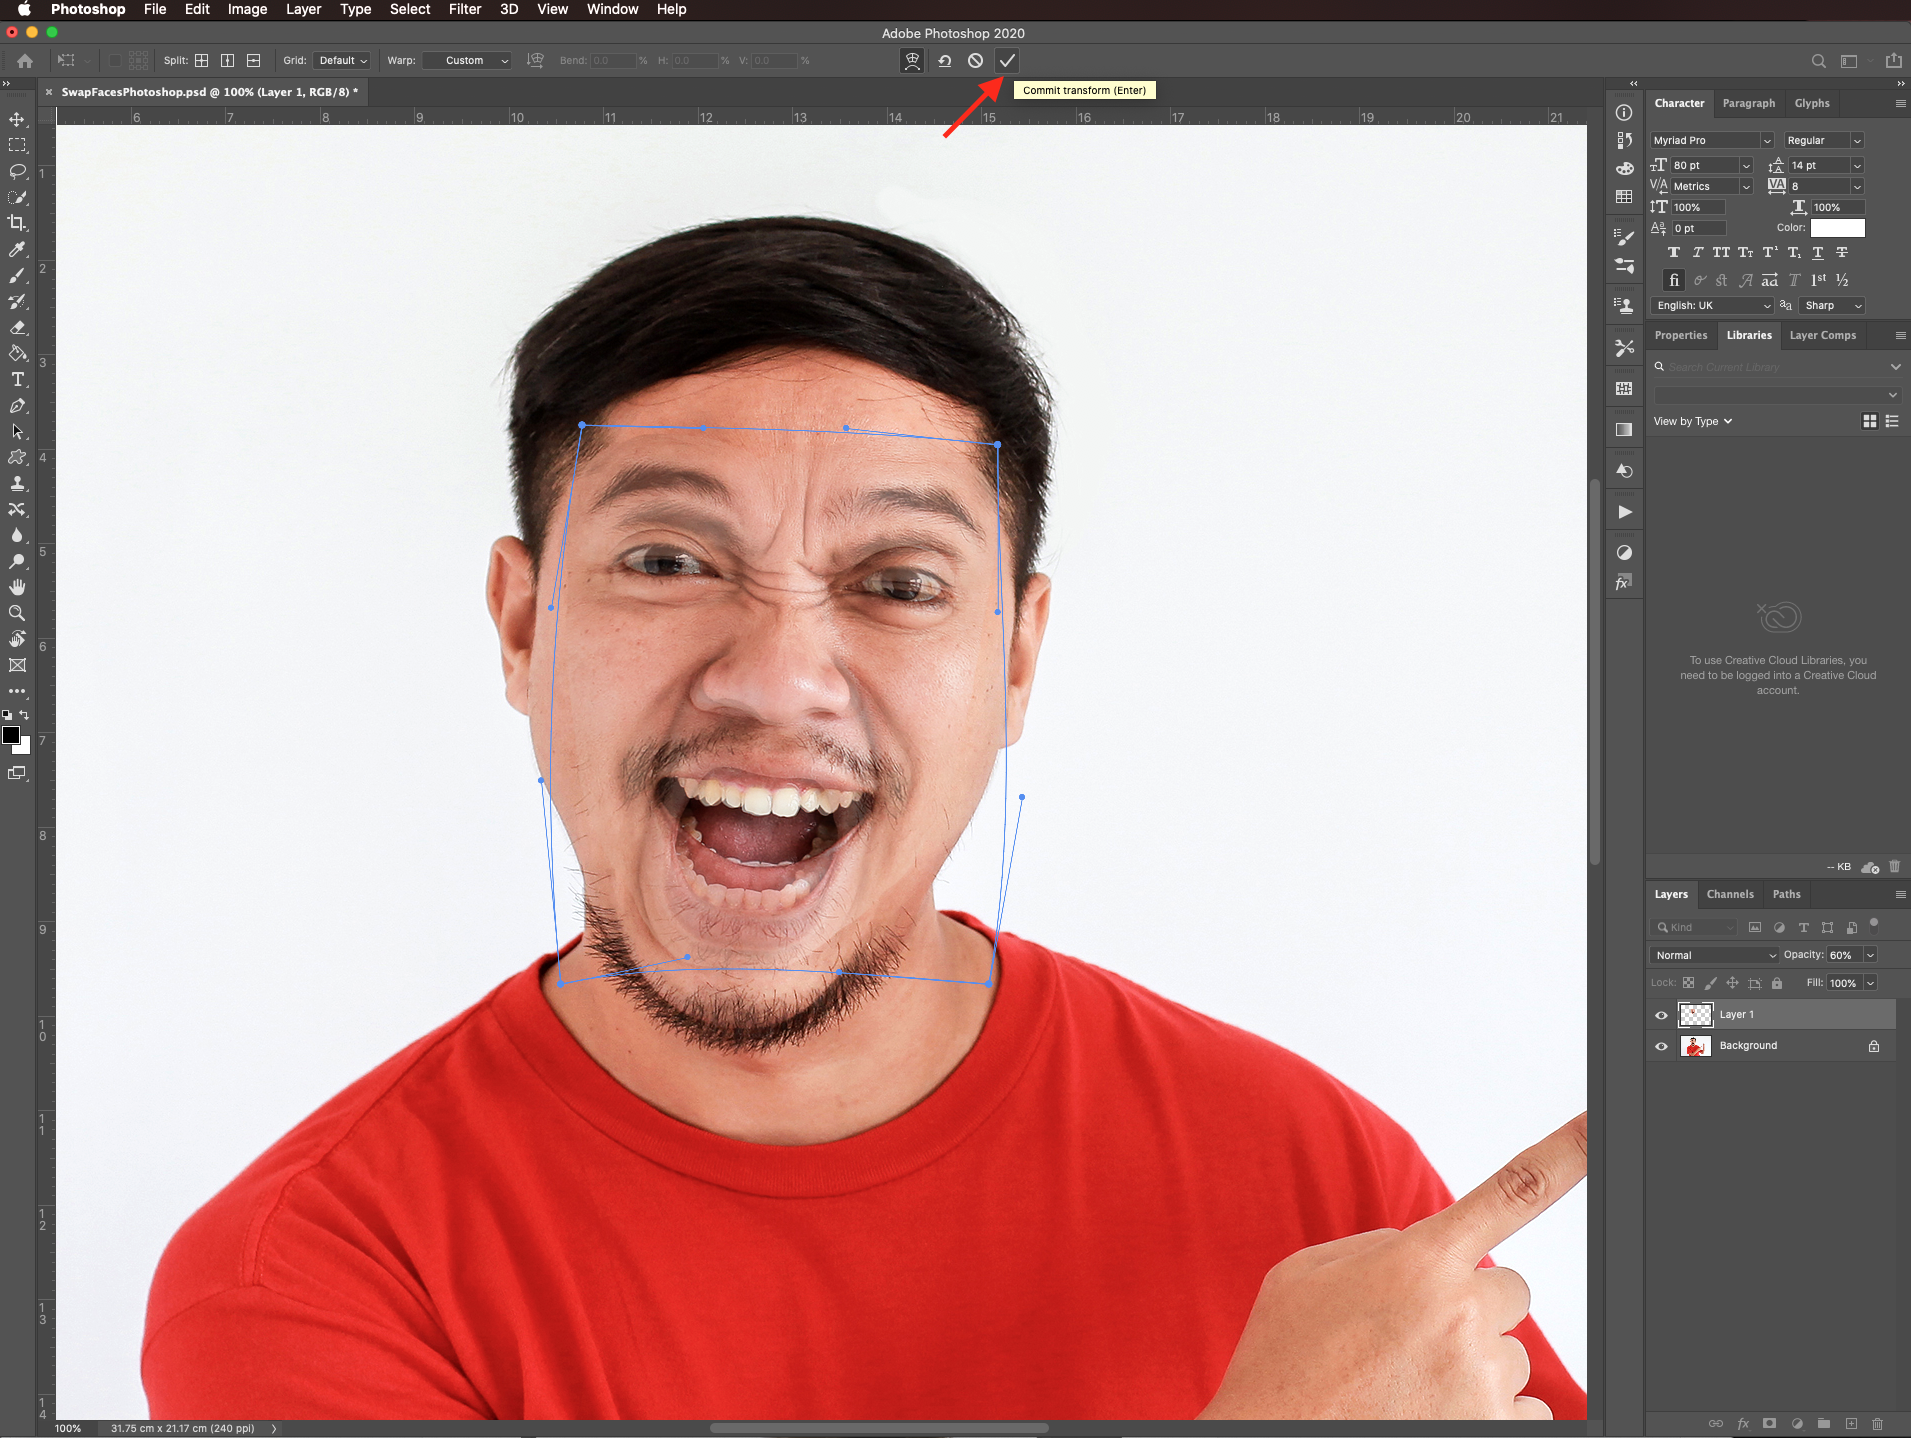
Turn the opacity back to 100% and check if you need to fix any details like the rotation by using free transform again.
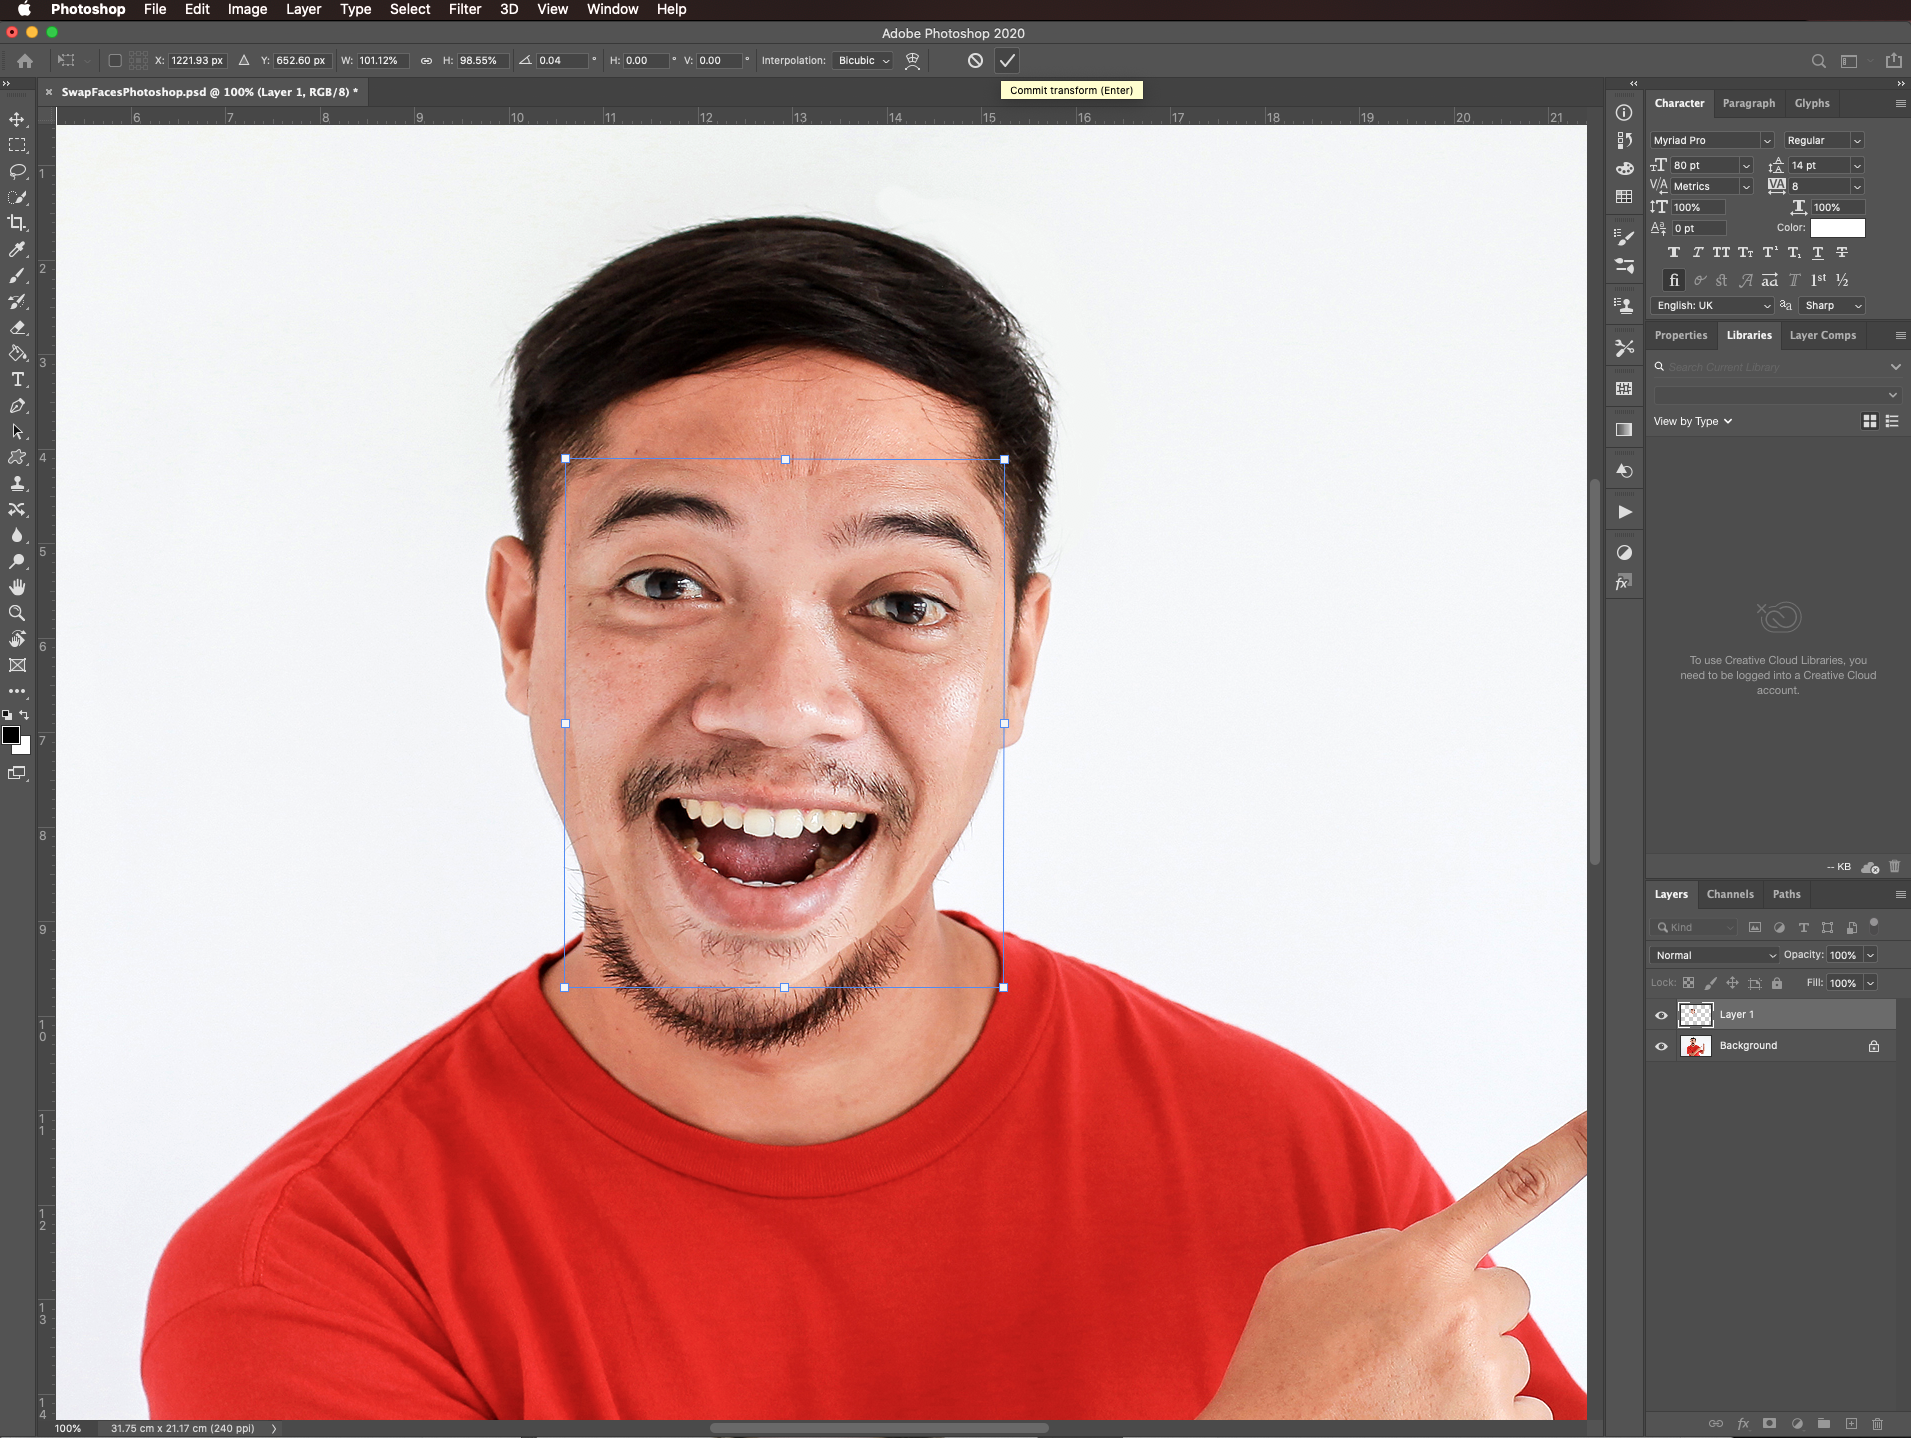
In case the skin tone and colors of your images are noticeably different you cnd adjust them using match color. To do this, option-click on top of the face thumbnail to make a selection, then go to image > adjustments > match color and adjust the settings, use your document as source and background as layer.
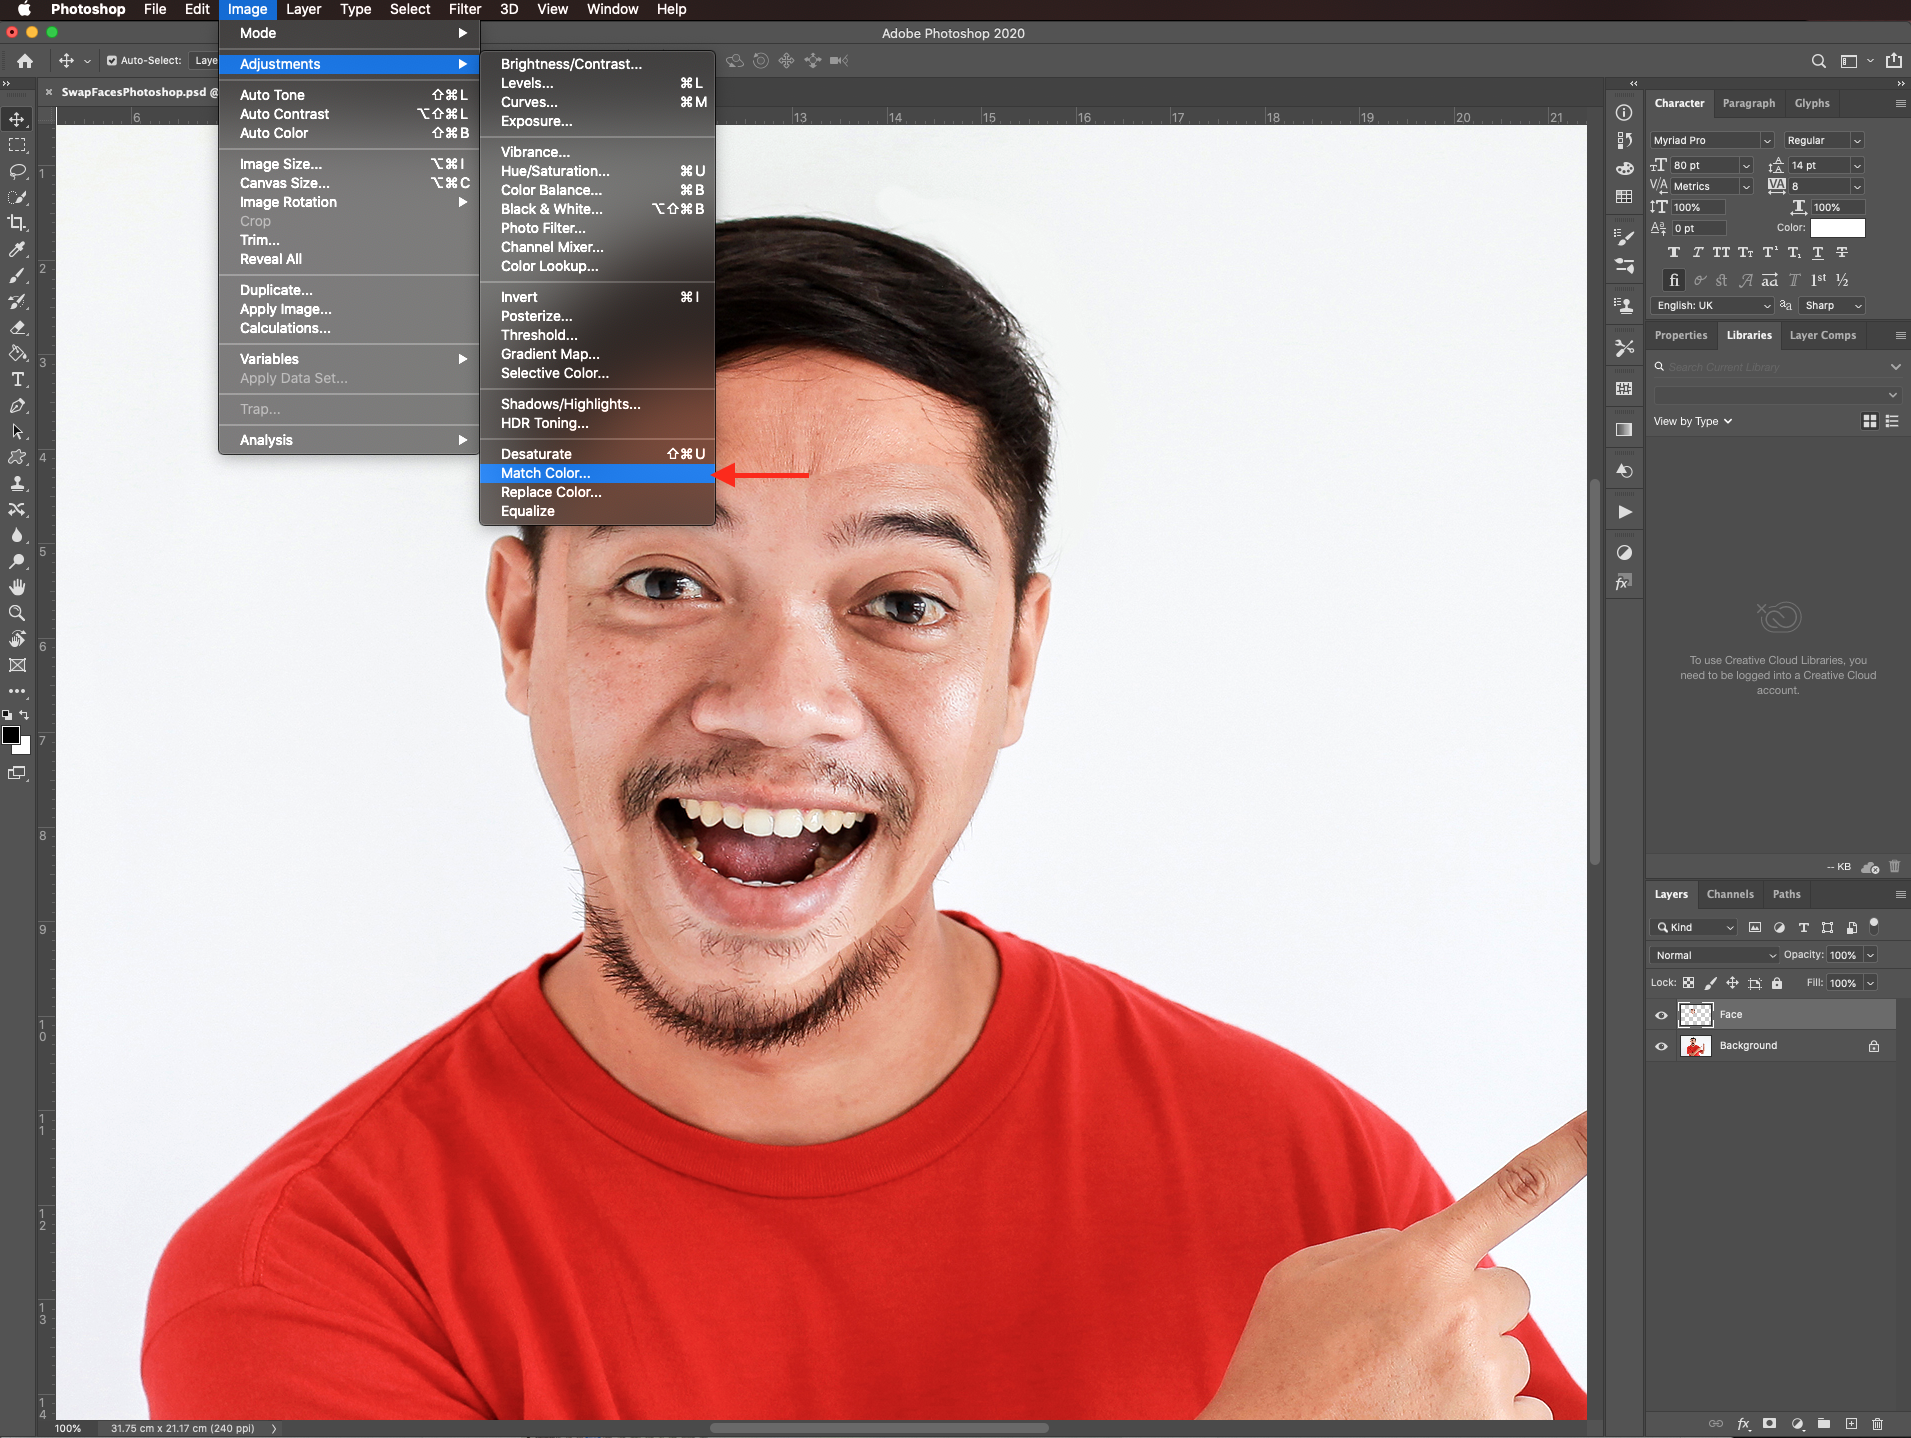
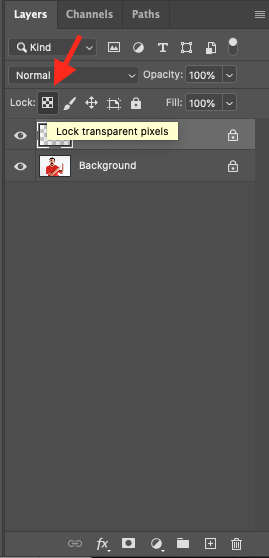
To keep the edges of the face even in case you want to apply a filter, you can click lock transparent pixels on the layers panel and then apply the filter.
We also have a full tutorial on how to retouch skin in Photoshop if needed.
Then go to image > adjustments > shadows/highlights.
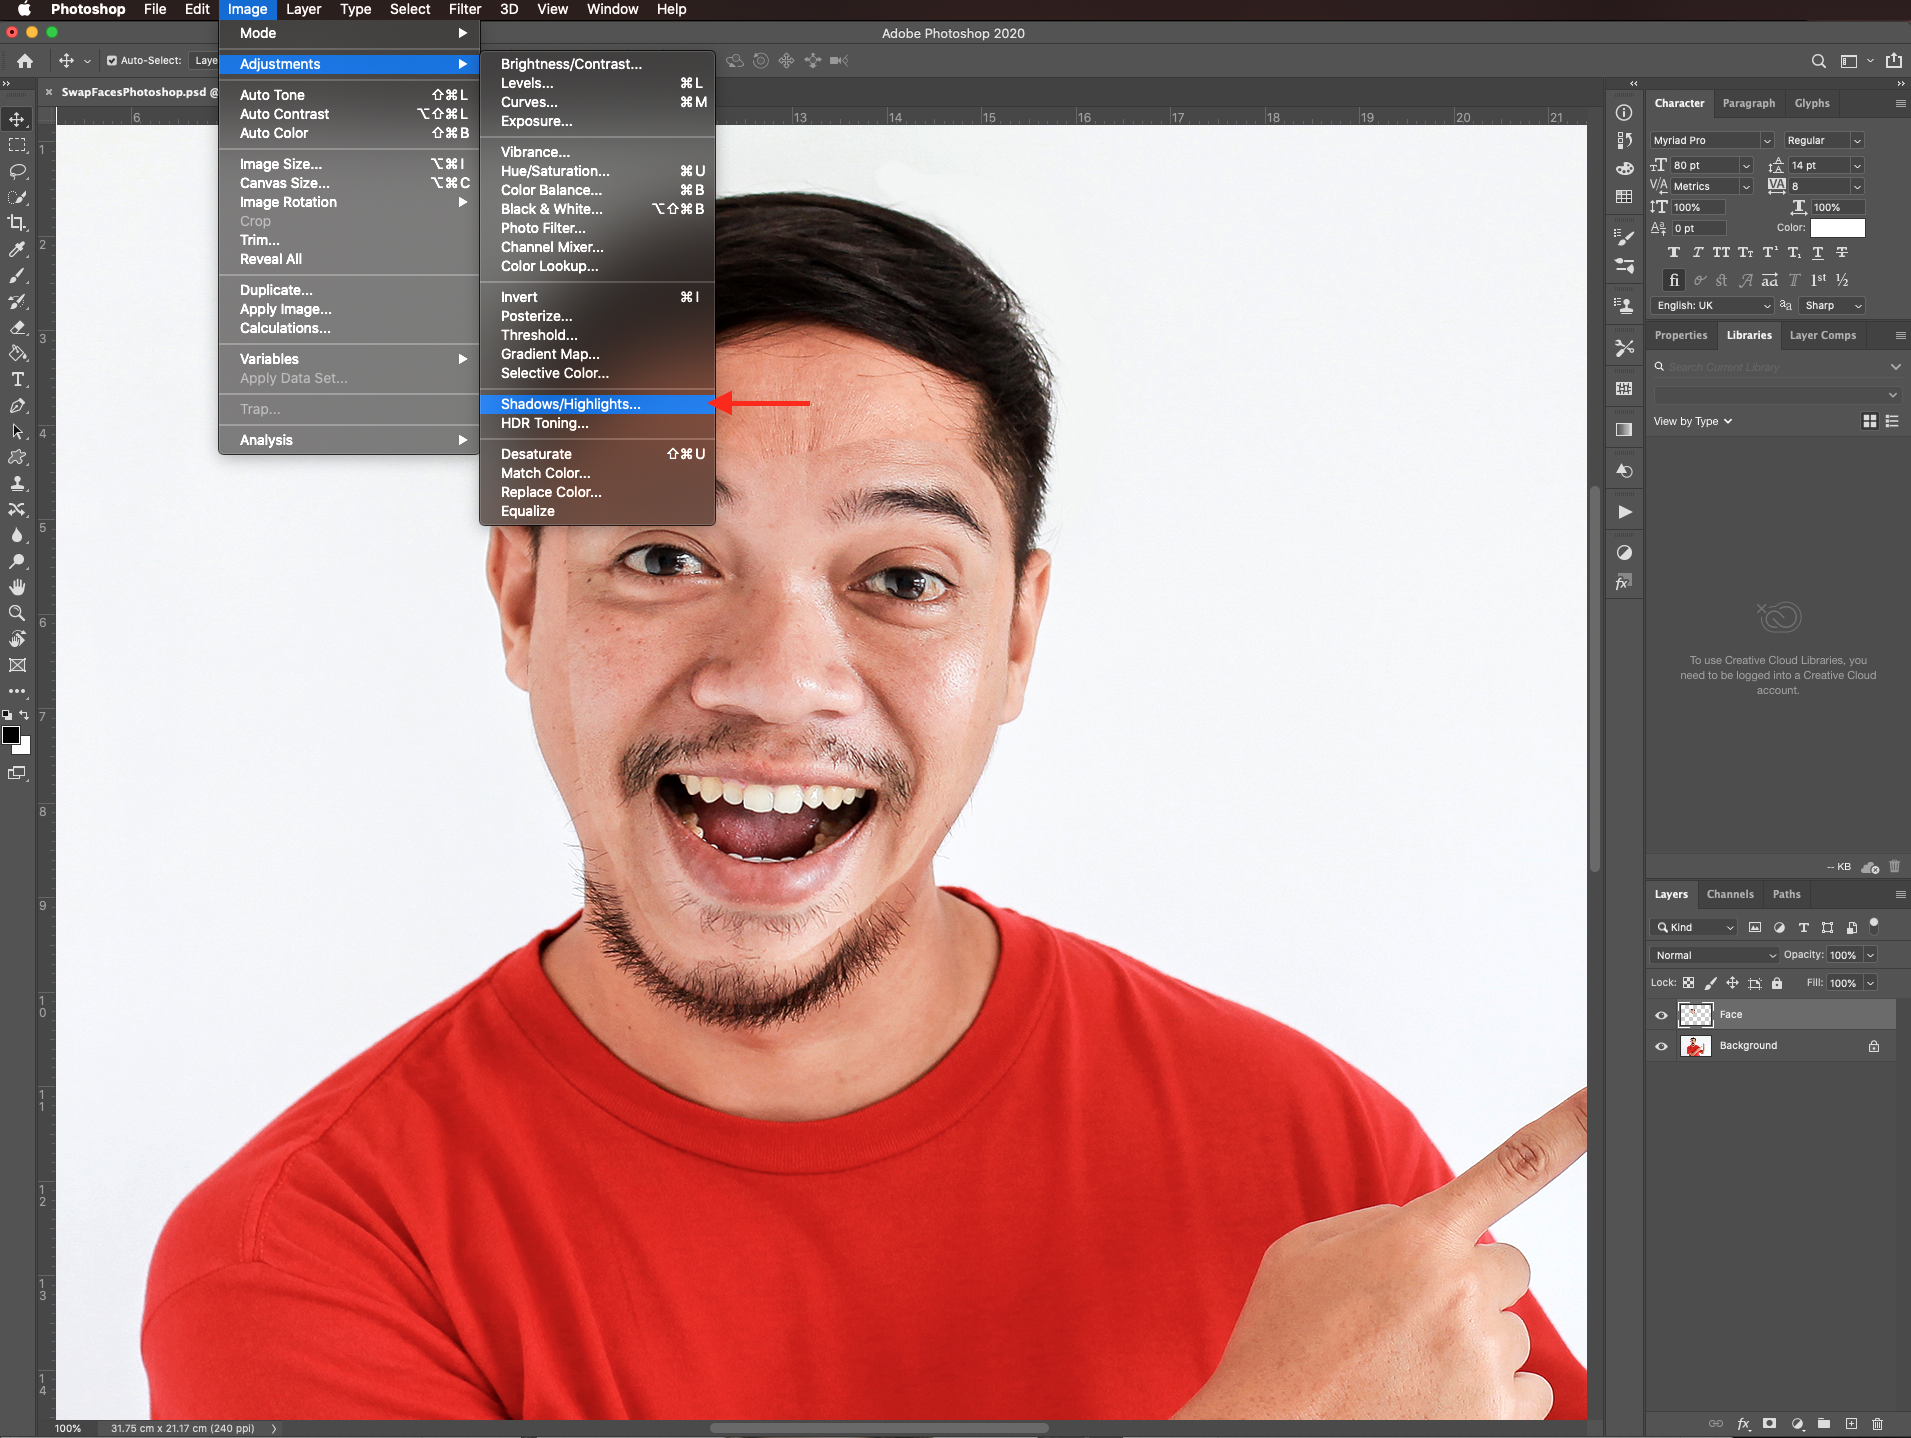
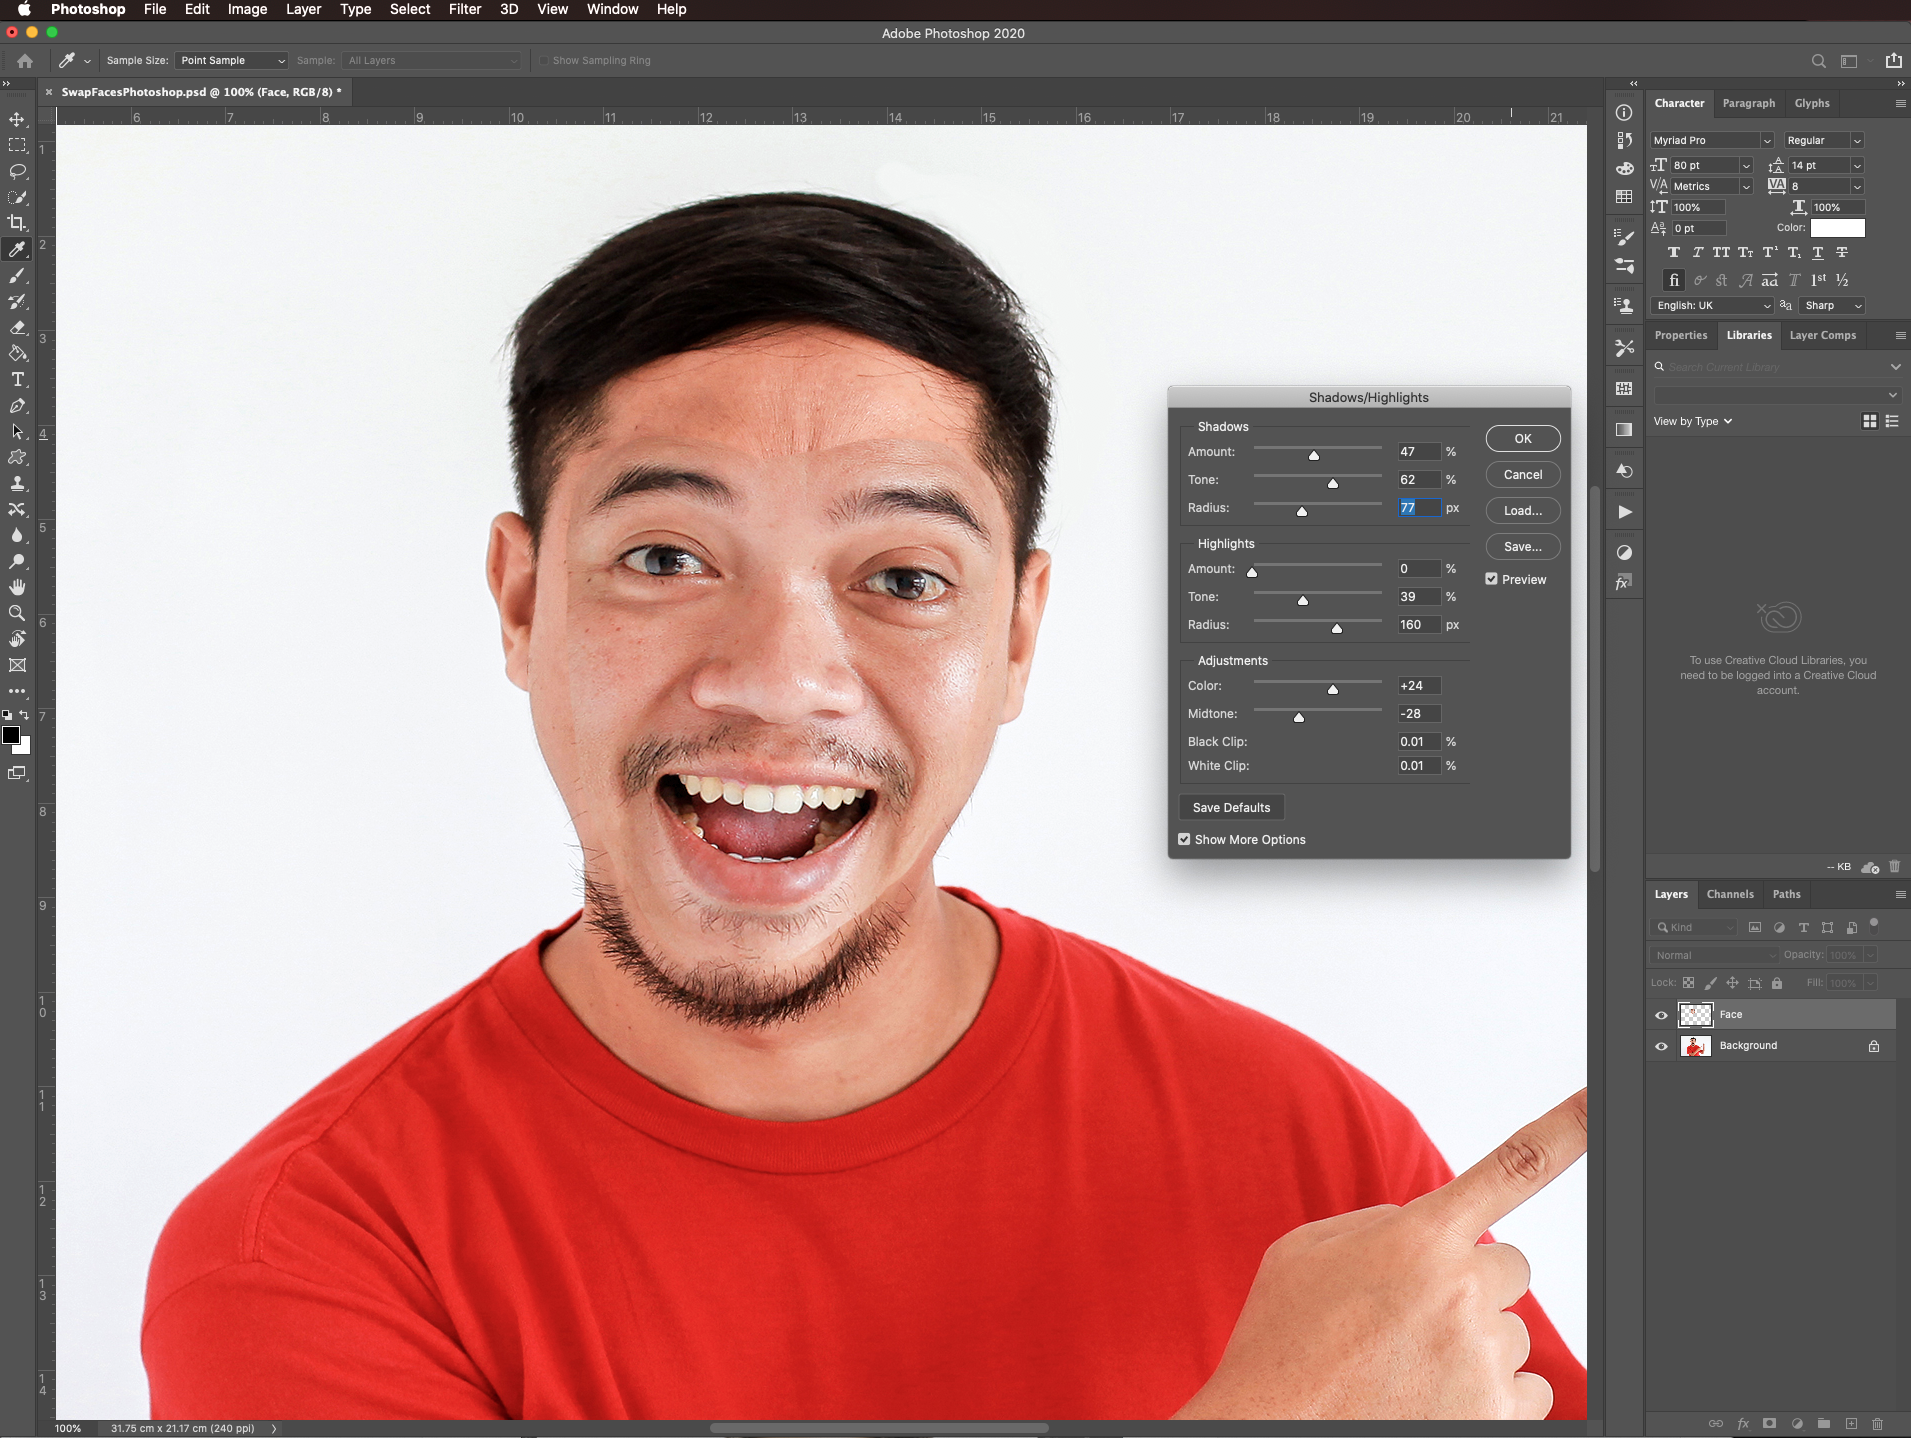
And play around with the values until your images match more.
You can unlock transparent pixels if you want and select the eraser tool (E) with a hard brush (100% hardness).
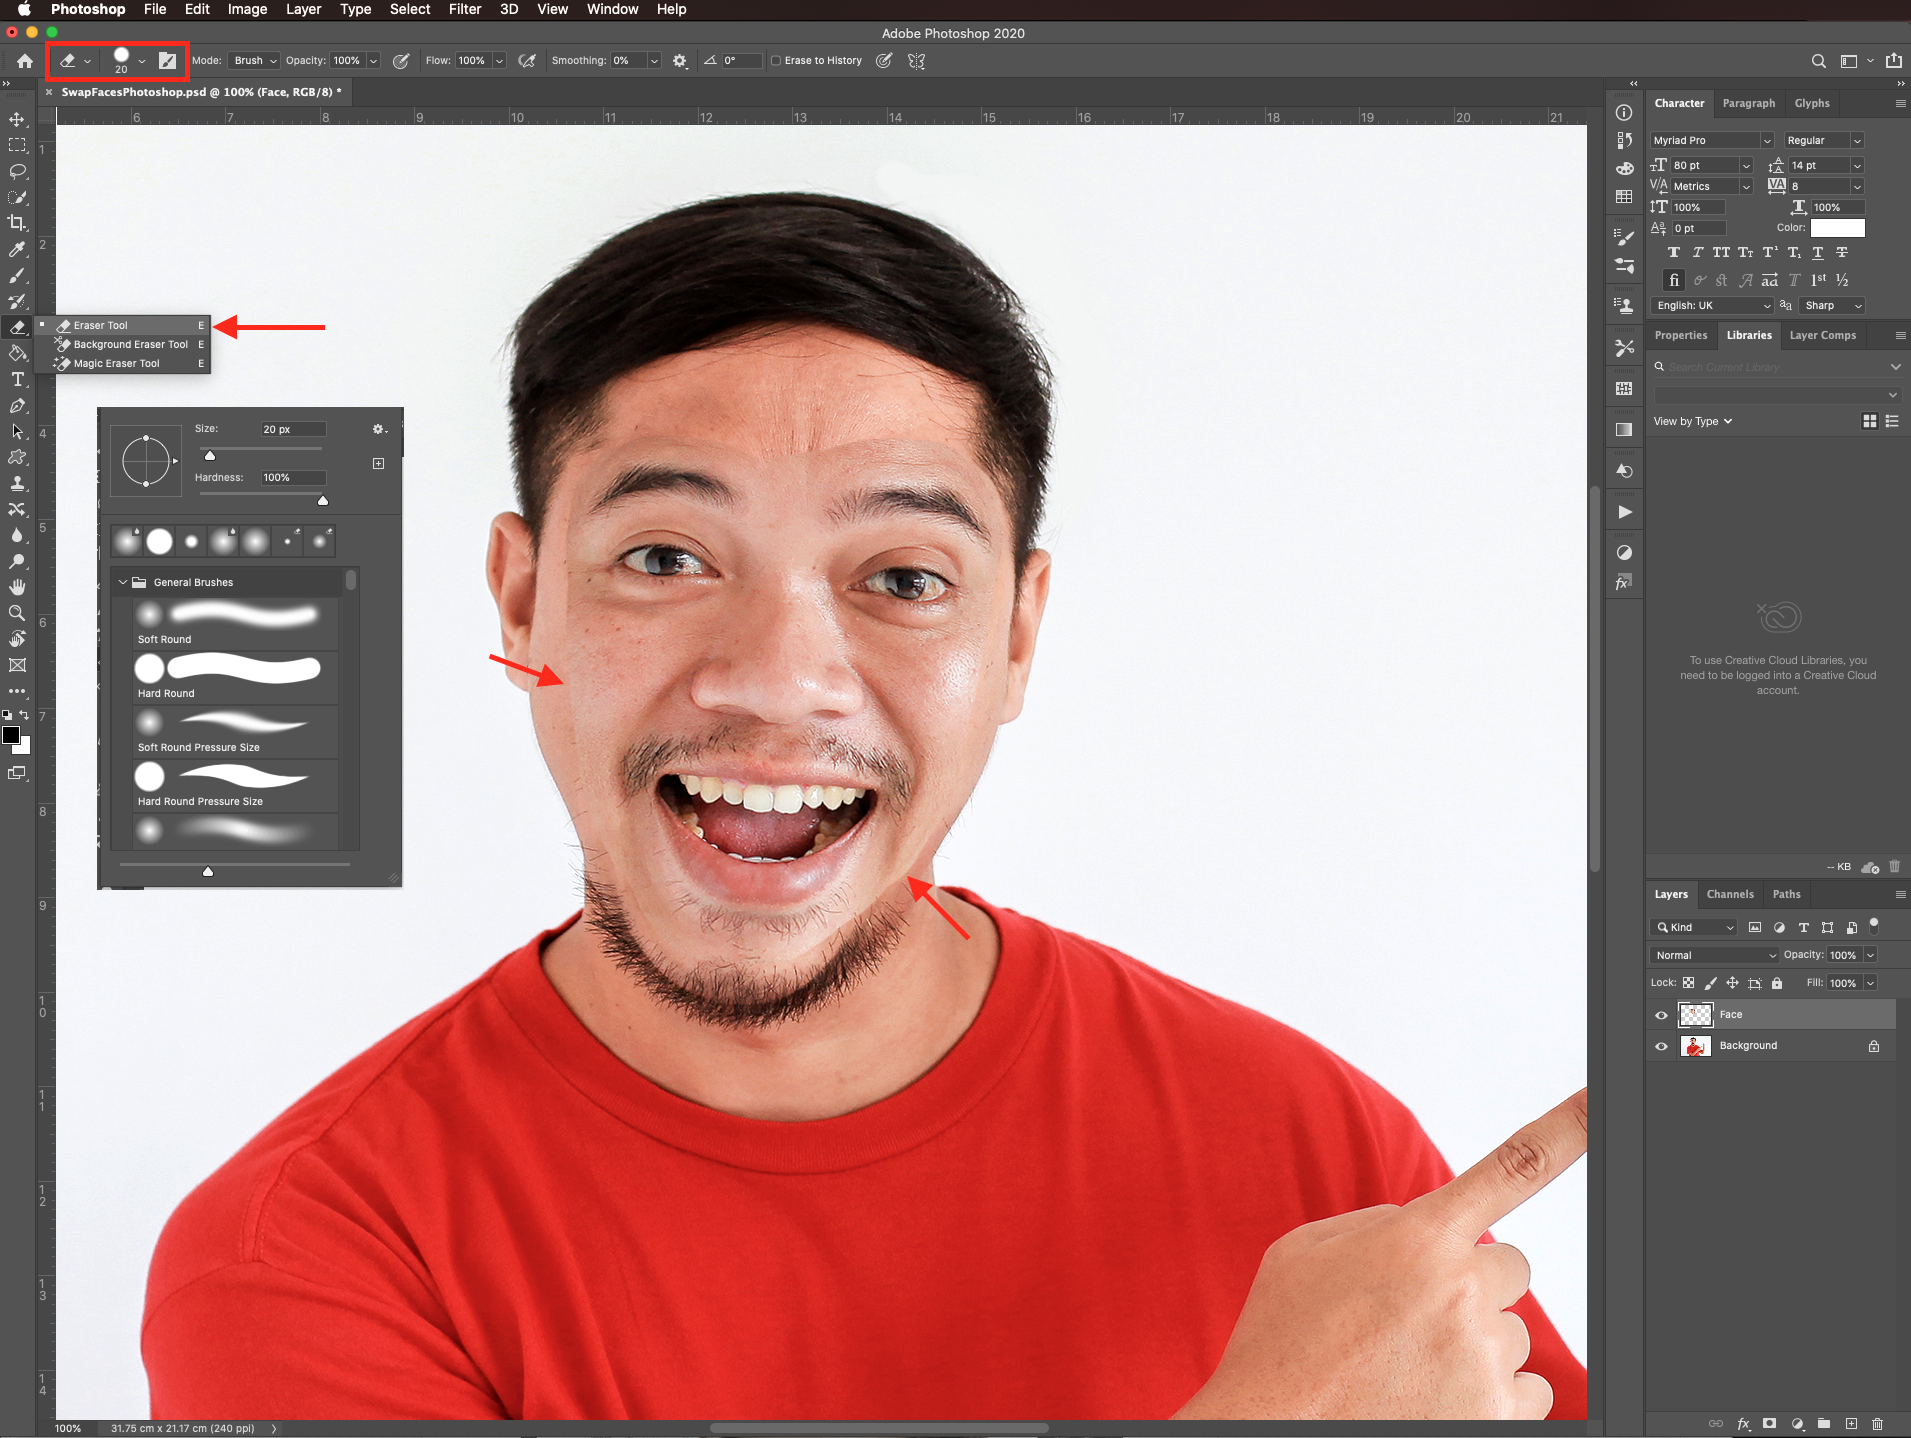
To erase some of the edges of the face if needed.
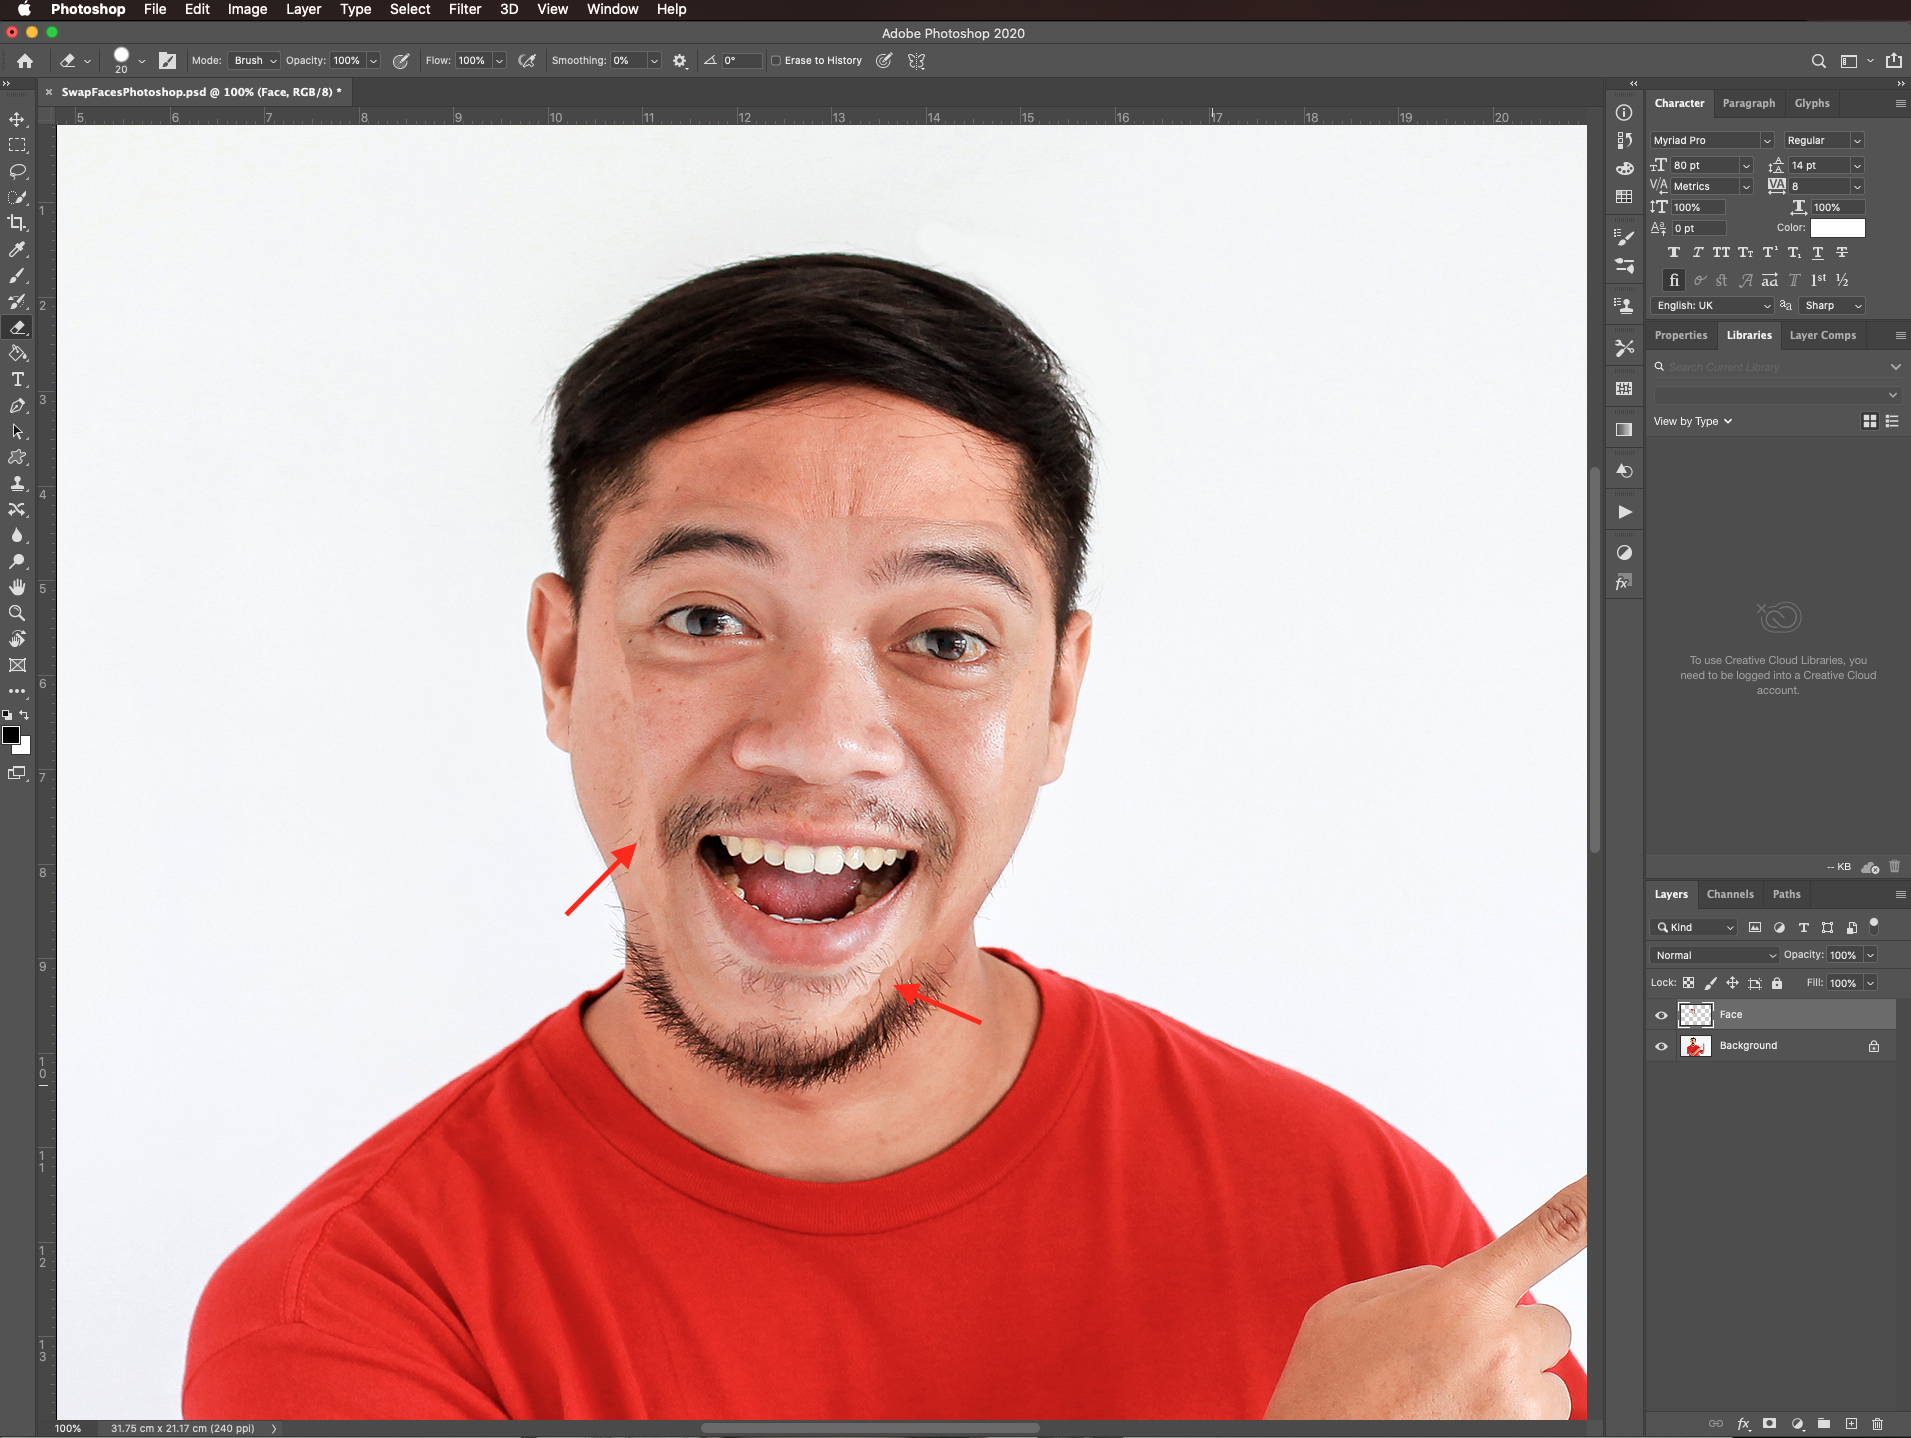
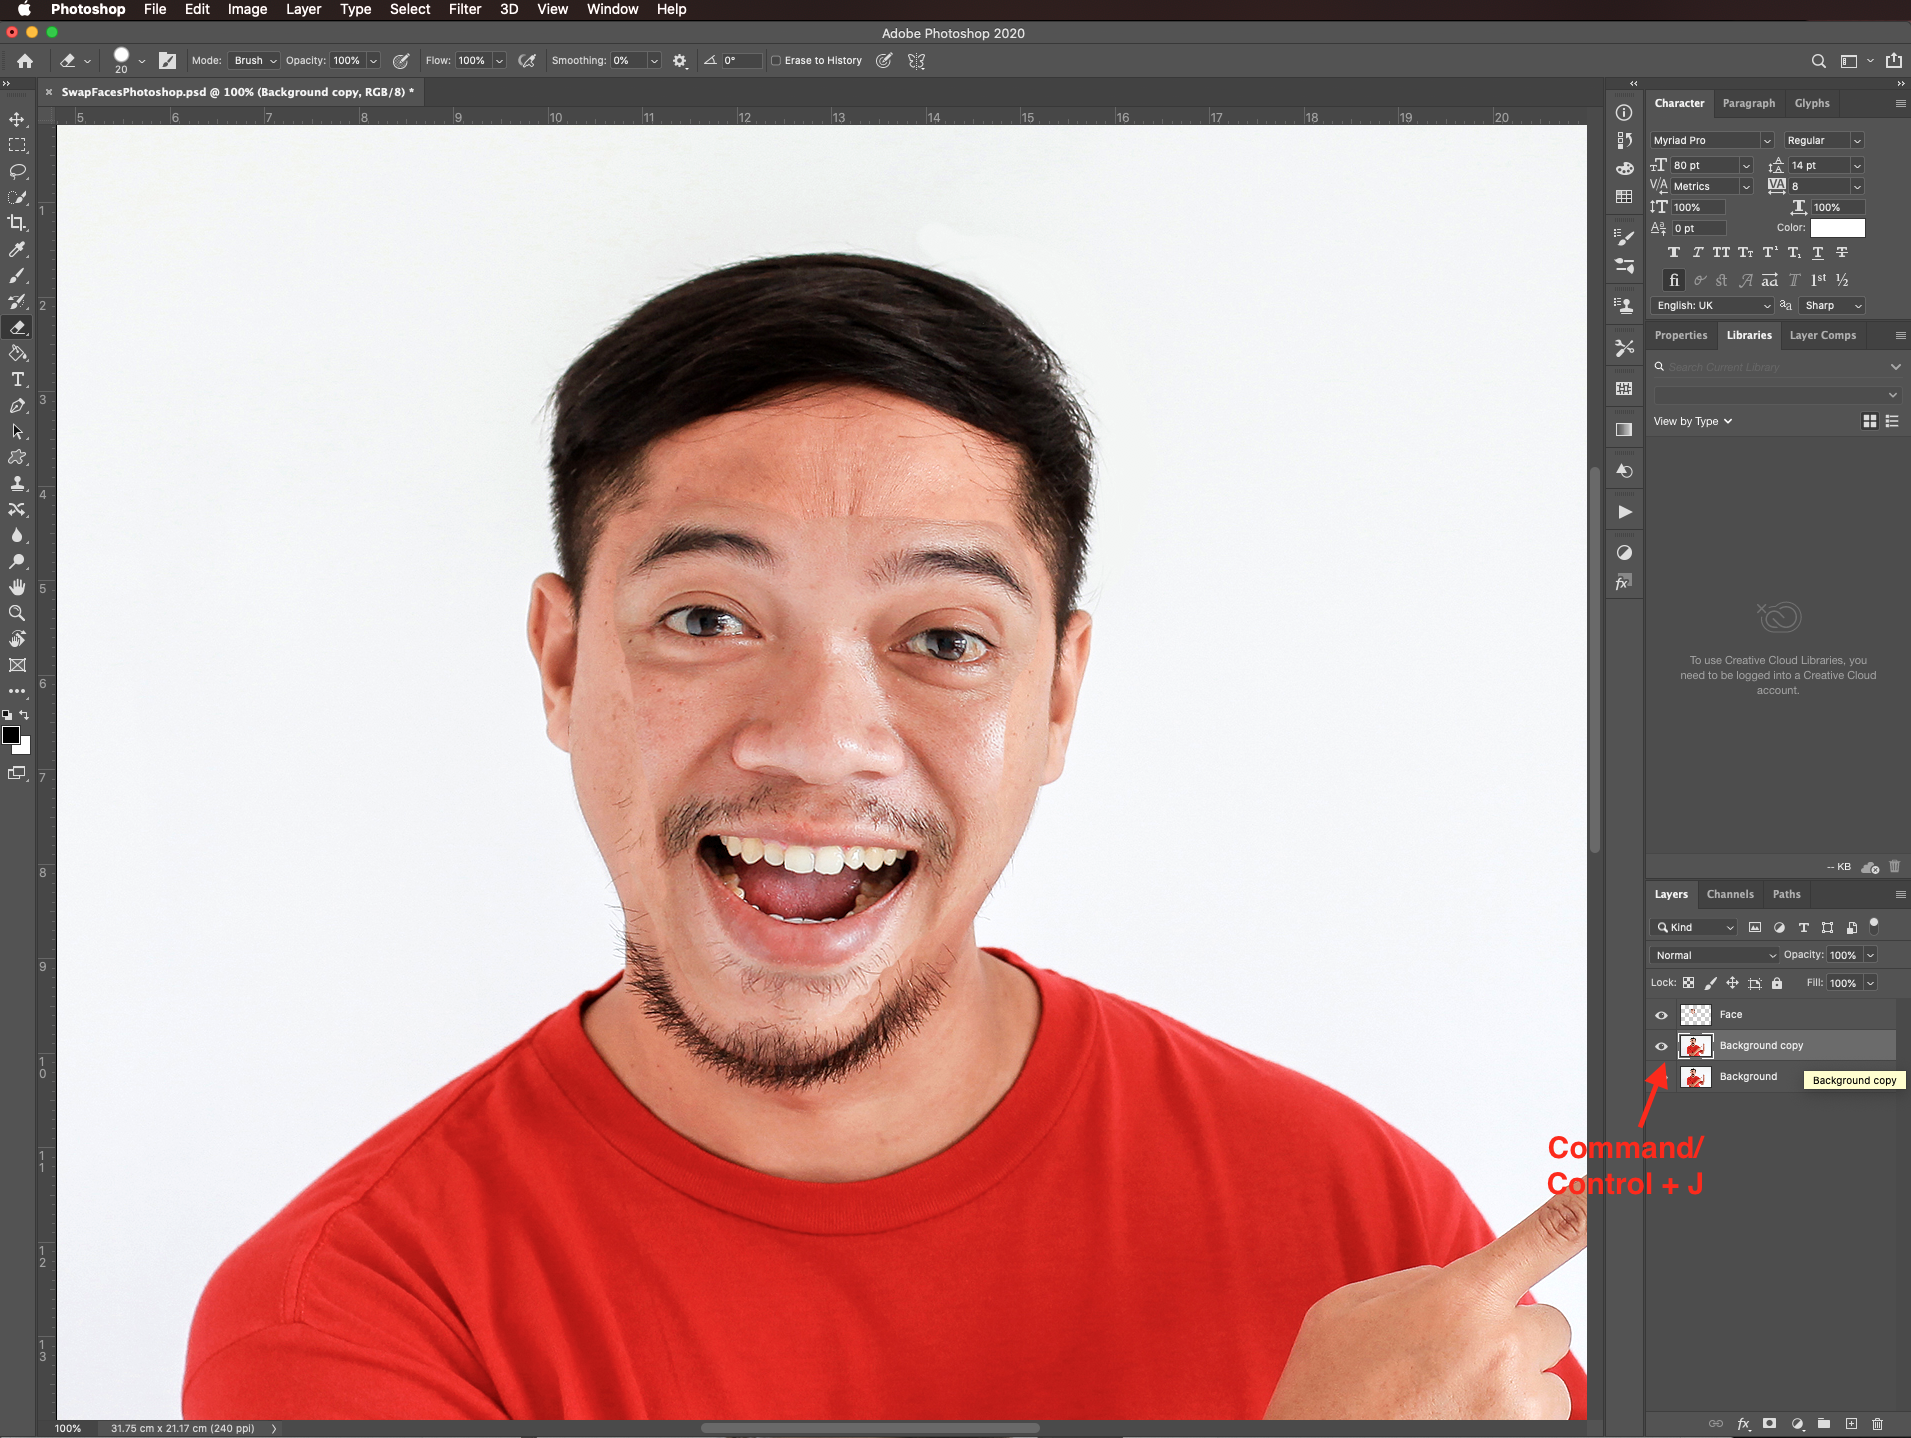
Then, duplicate the background layer (command/control + J).
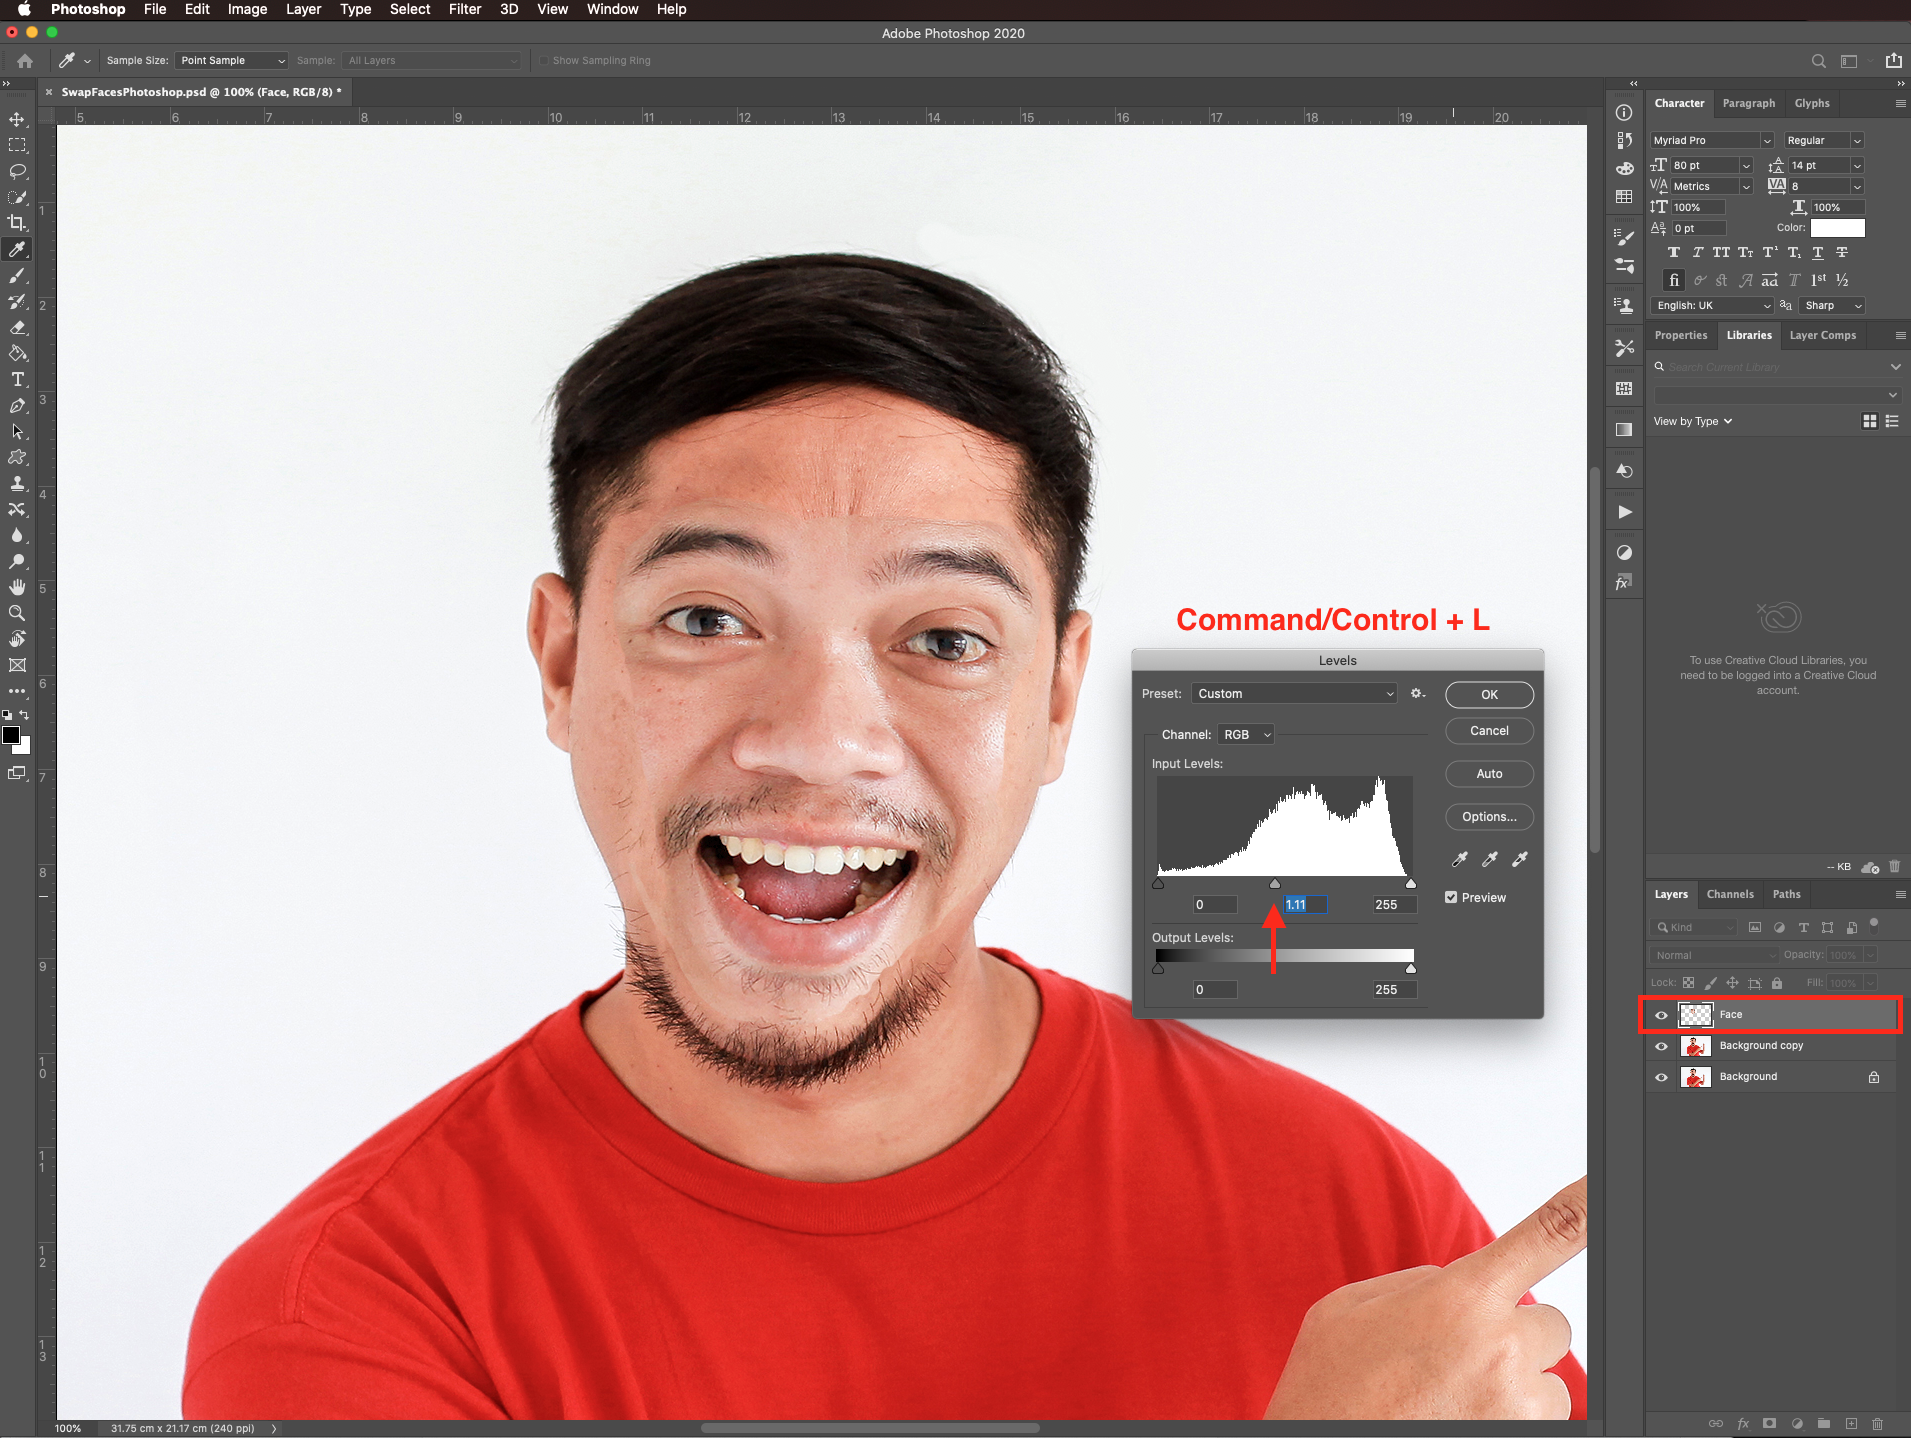
Select your face layer, go to adjustments > level (command/control + L), and move the midtones lever a bit to match the images more.
Option-click on top of the face thumbnail to make a selection.
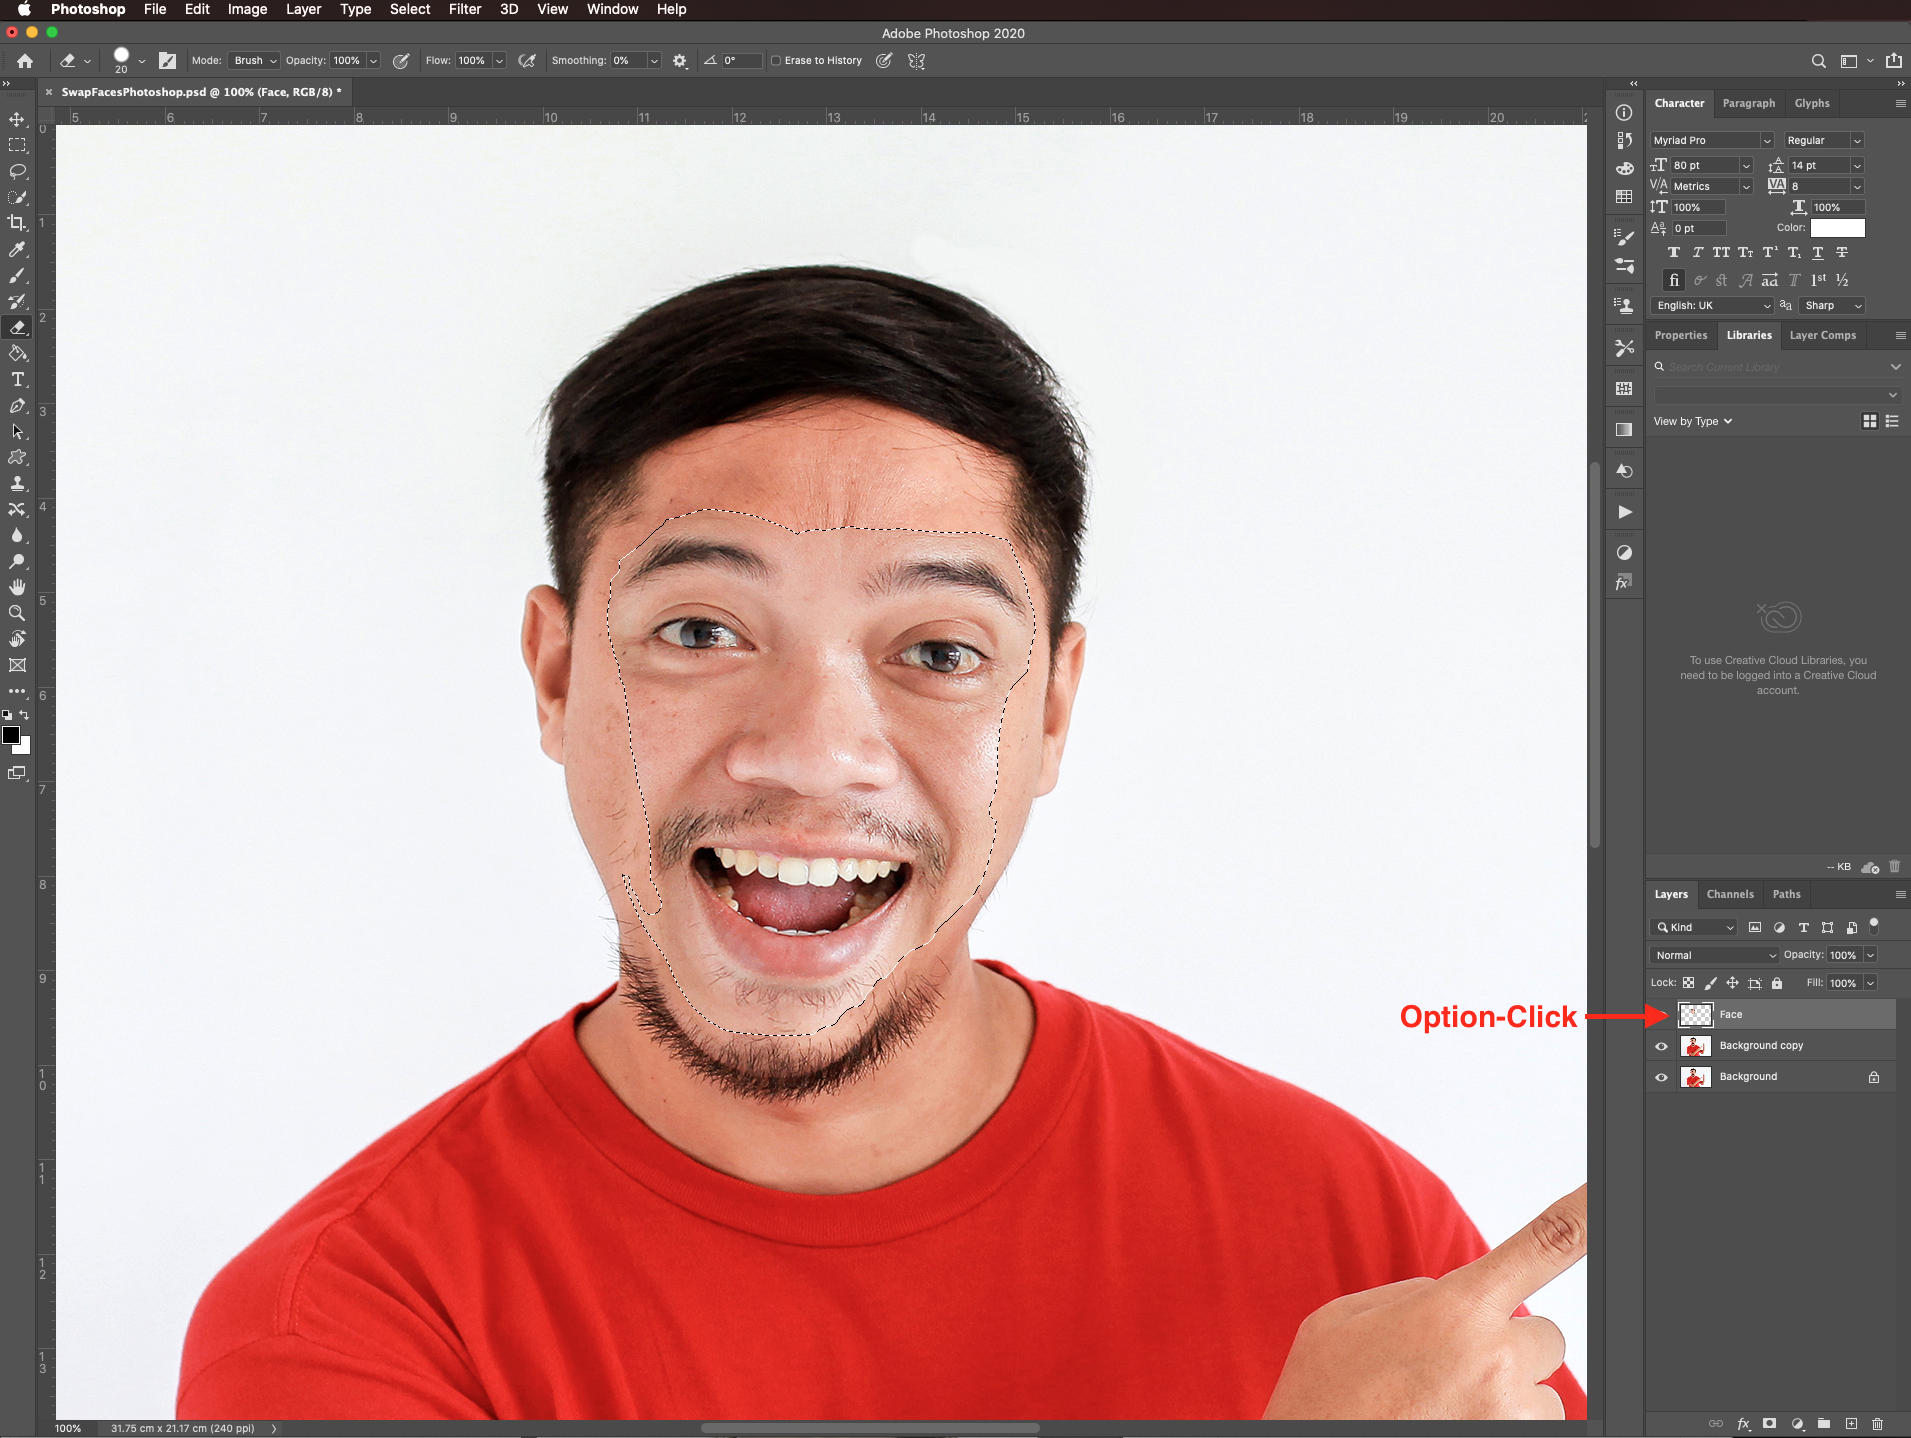
Select your background copy layer, go to modify > contract.
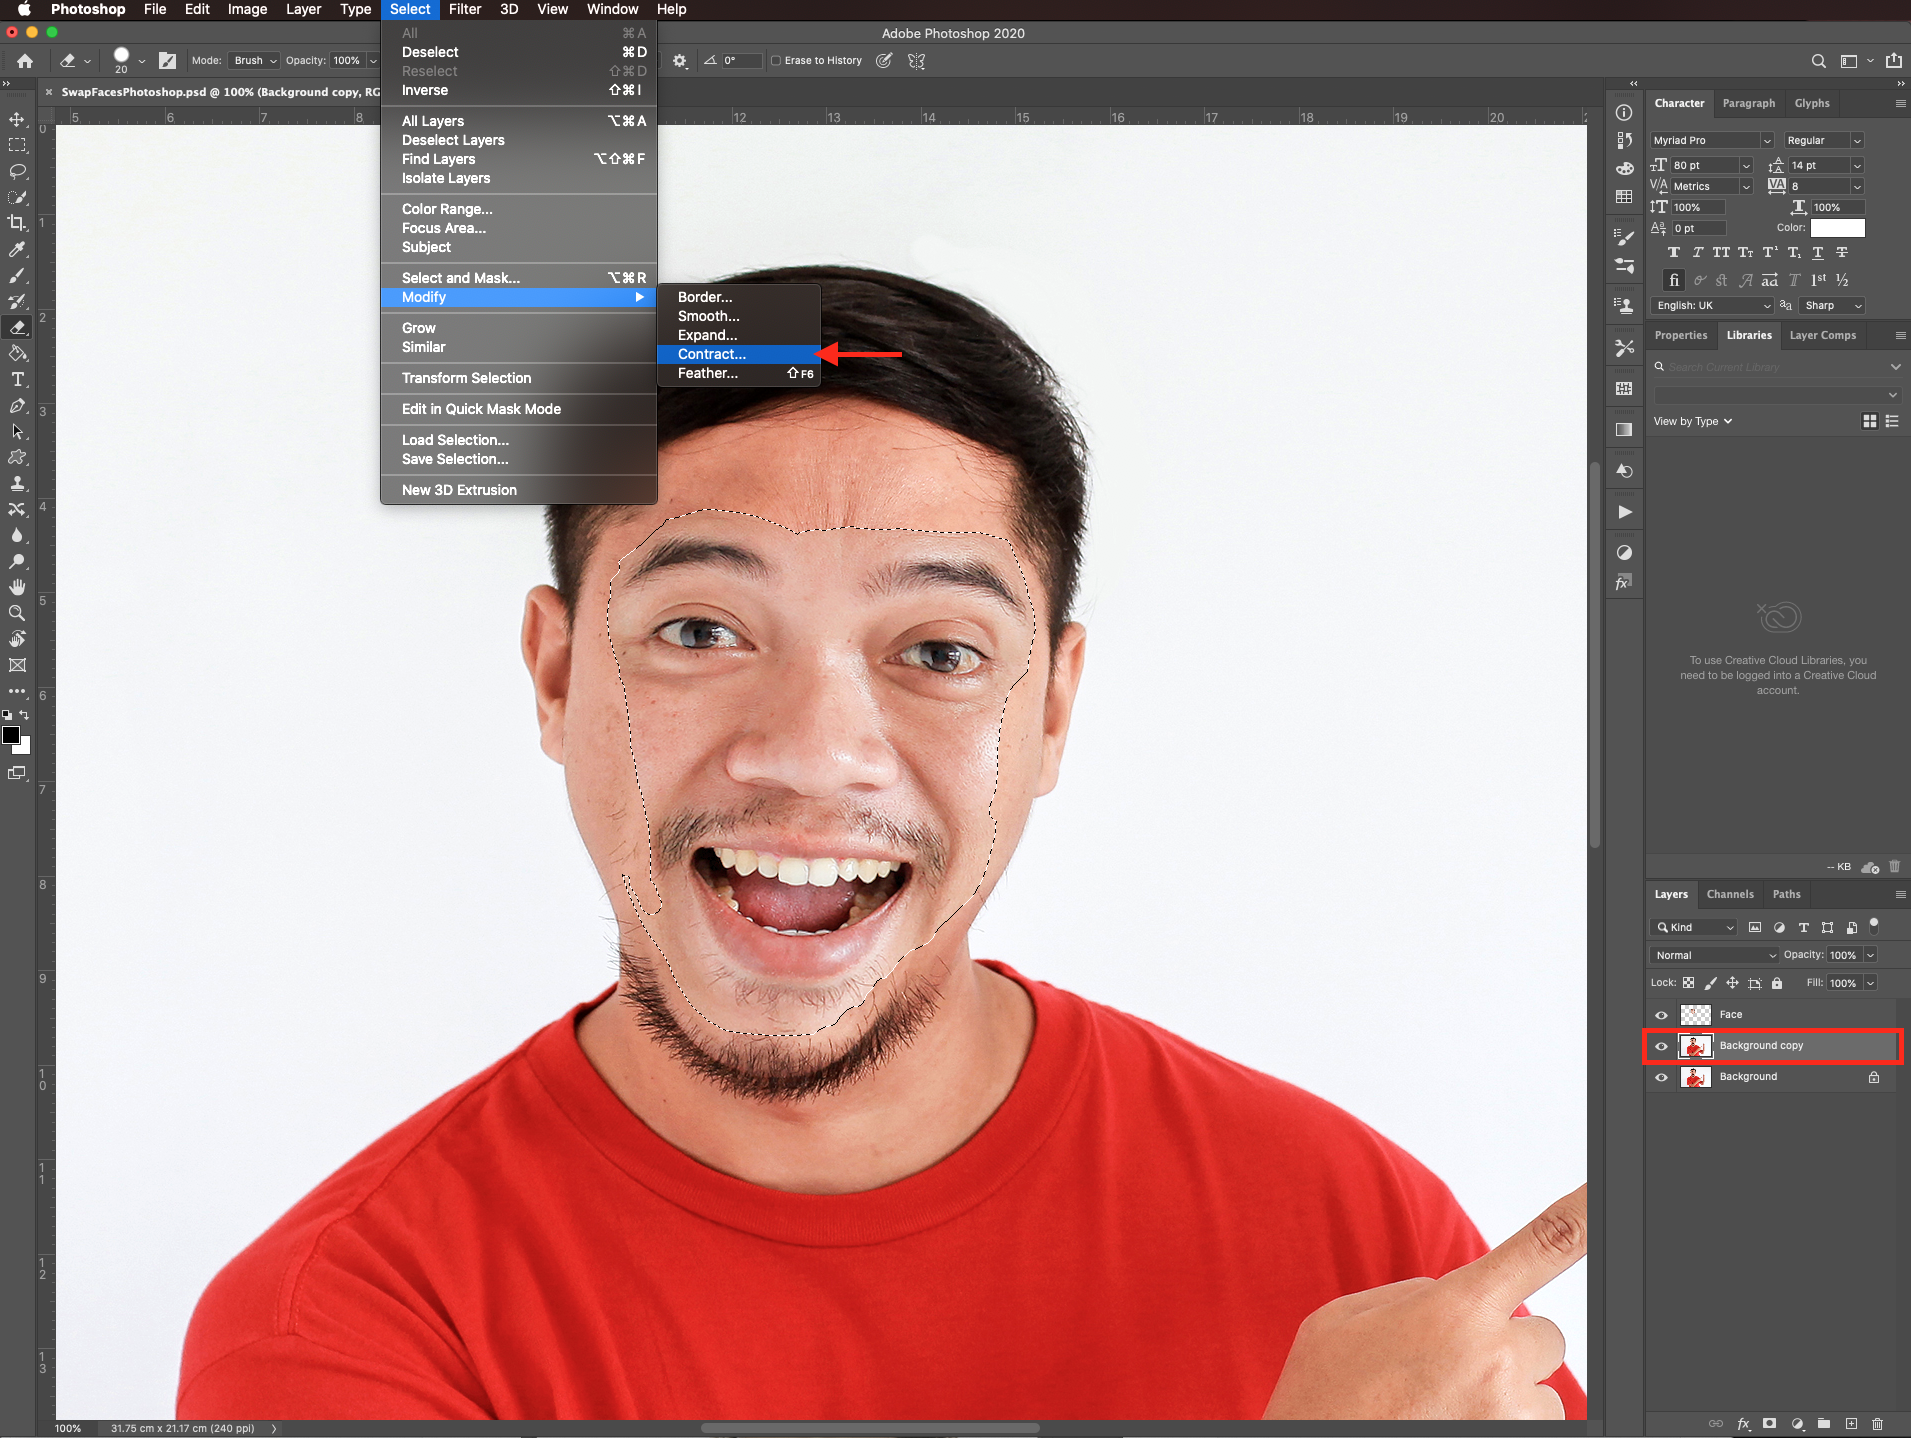
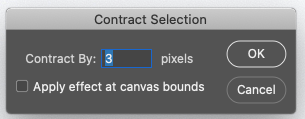
And use a value of 3 pixels (you may need a different value depending on your images).
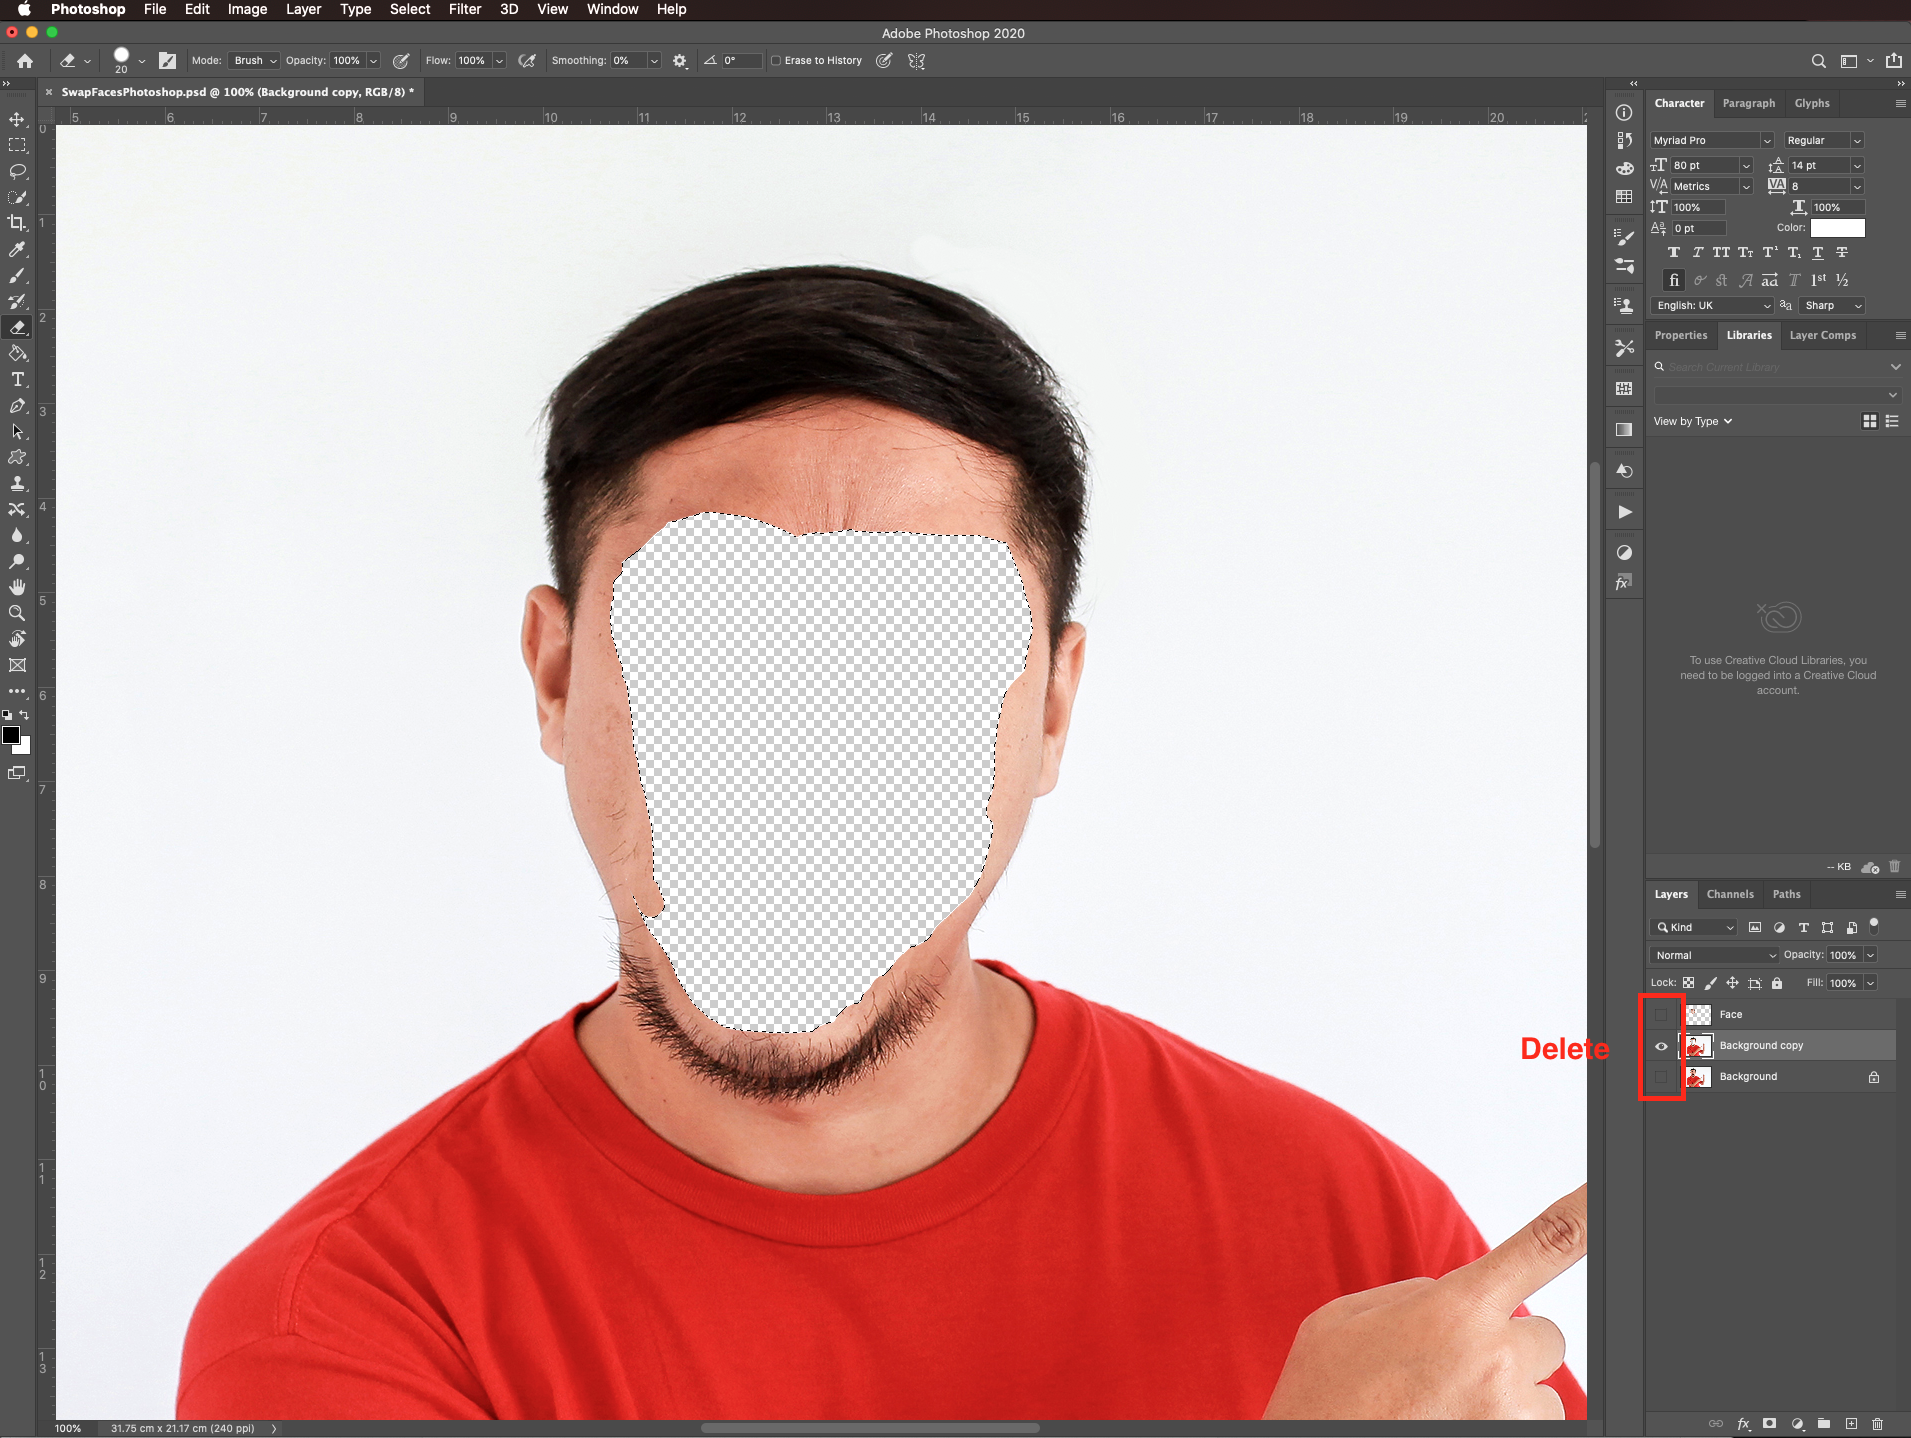
Turn off your face and background layers for now (click on the small eye icon on the left side of their thumbnail), and making sure you are working on the background copy layer click delete.
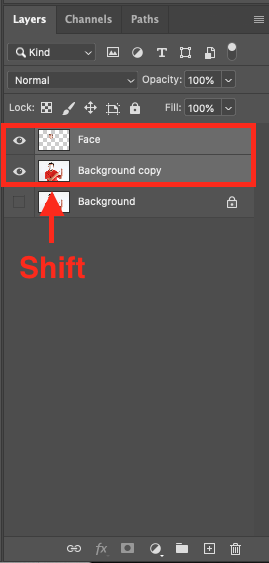
Turn back on the face layer and hold the shift key to select it together with the background copy layer.
Then go to edit > auto-blend layer.
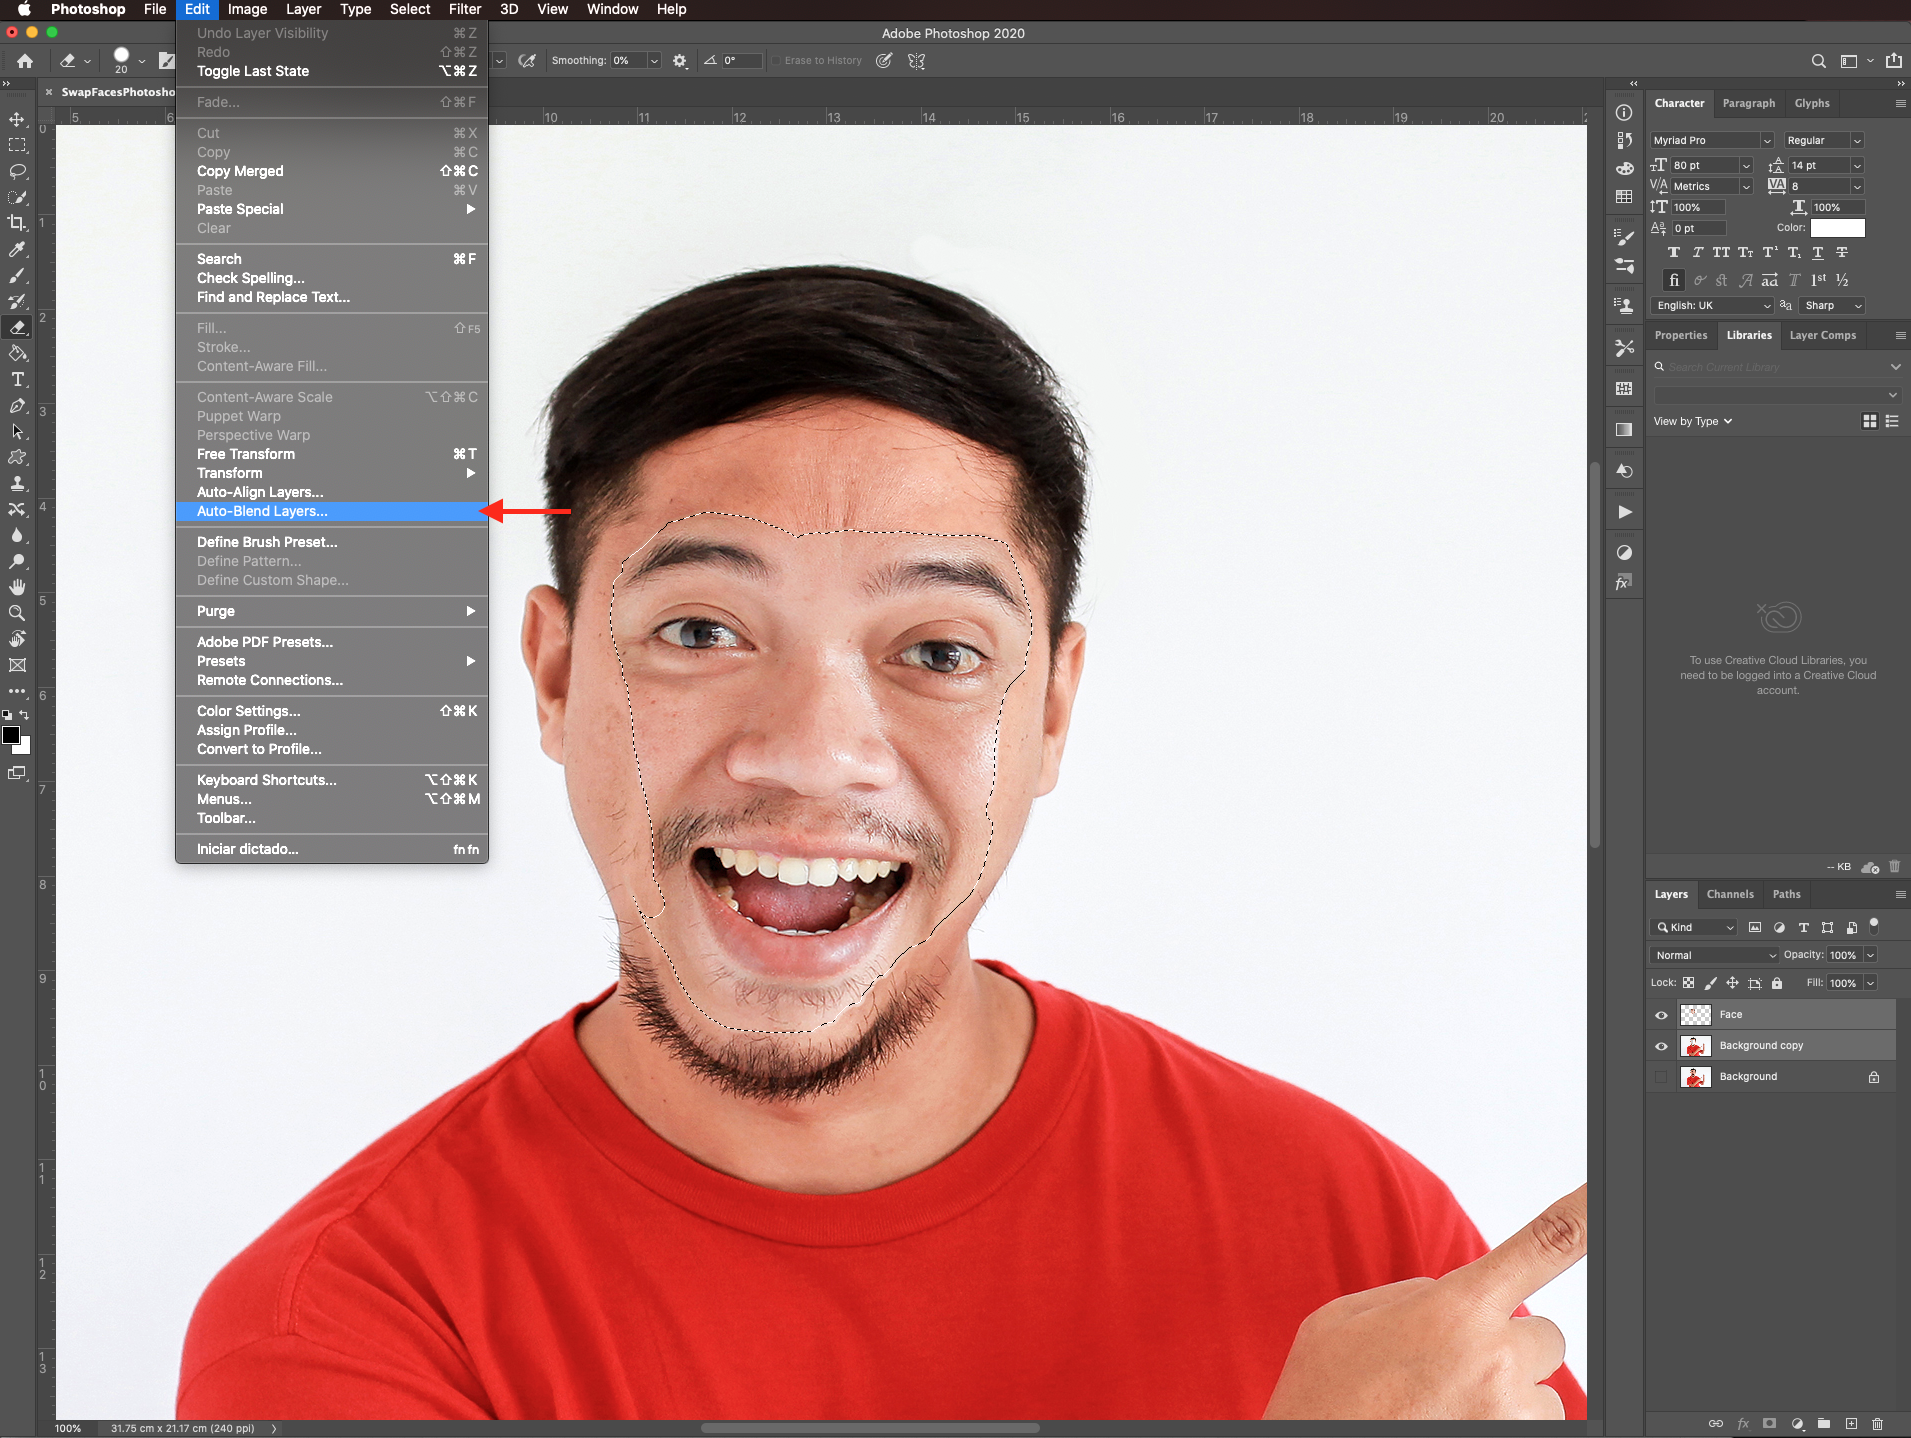
Make sure panorama is your blend method and that both the bottom boxes are checked and click ok.
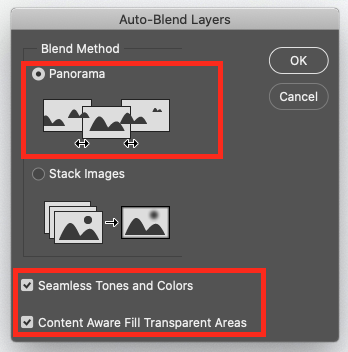
A new layer should appear and your original layers should have layer masks on them.
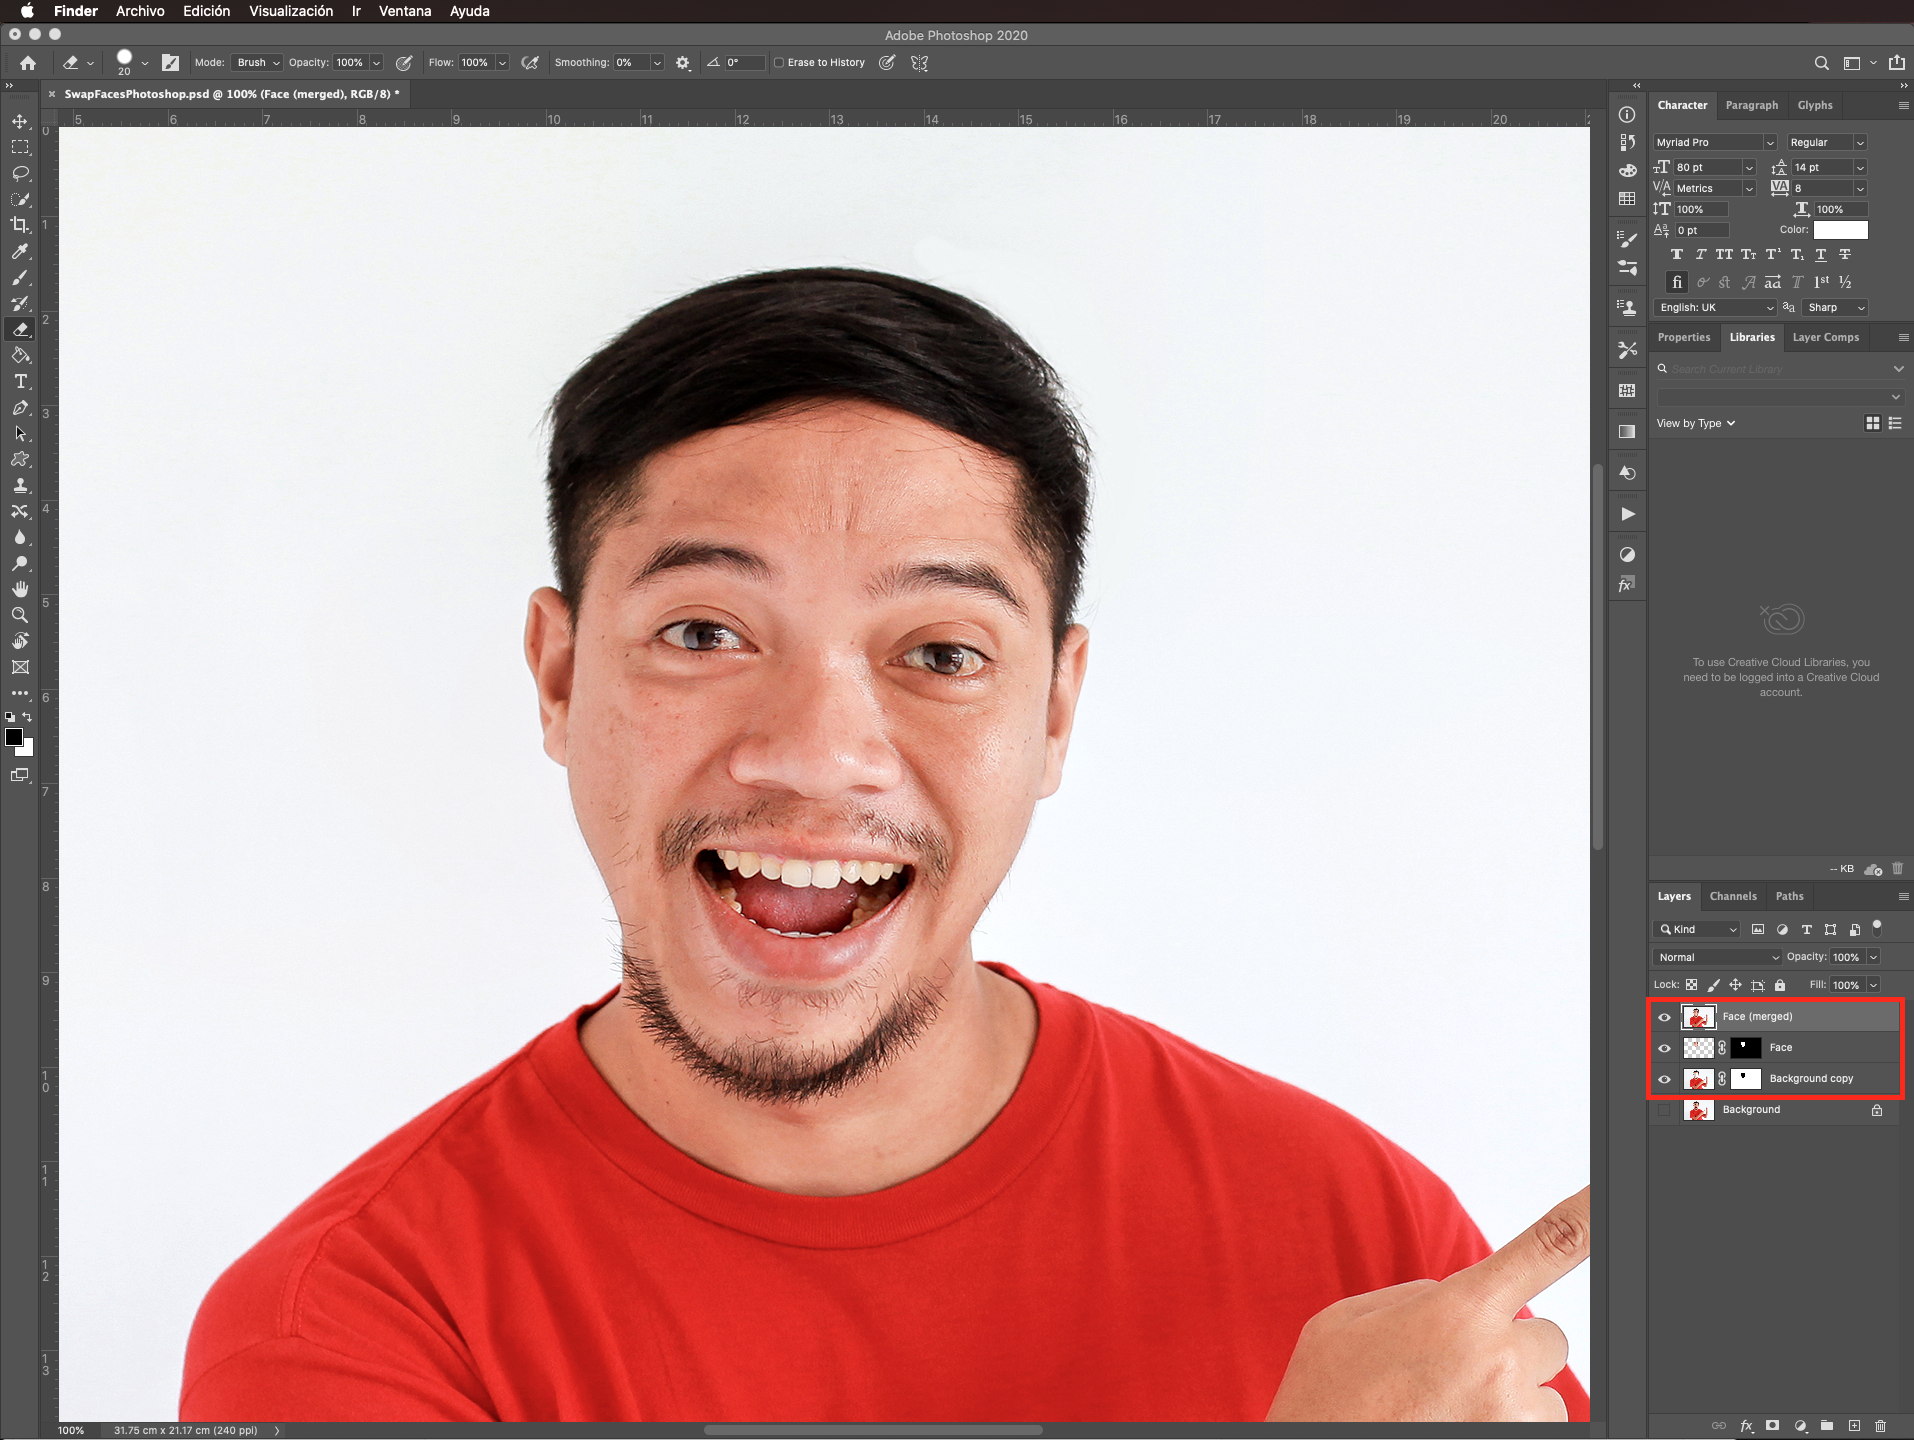
You may notice some edges in the merged layer. To fix this, duplicate the layer (command/control + J) and change the blending mode of the duplicate to color dodge, lower the opacity to 30% and the fill to 50%.
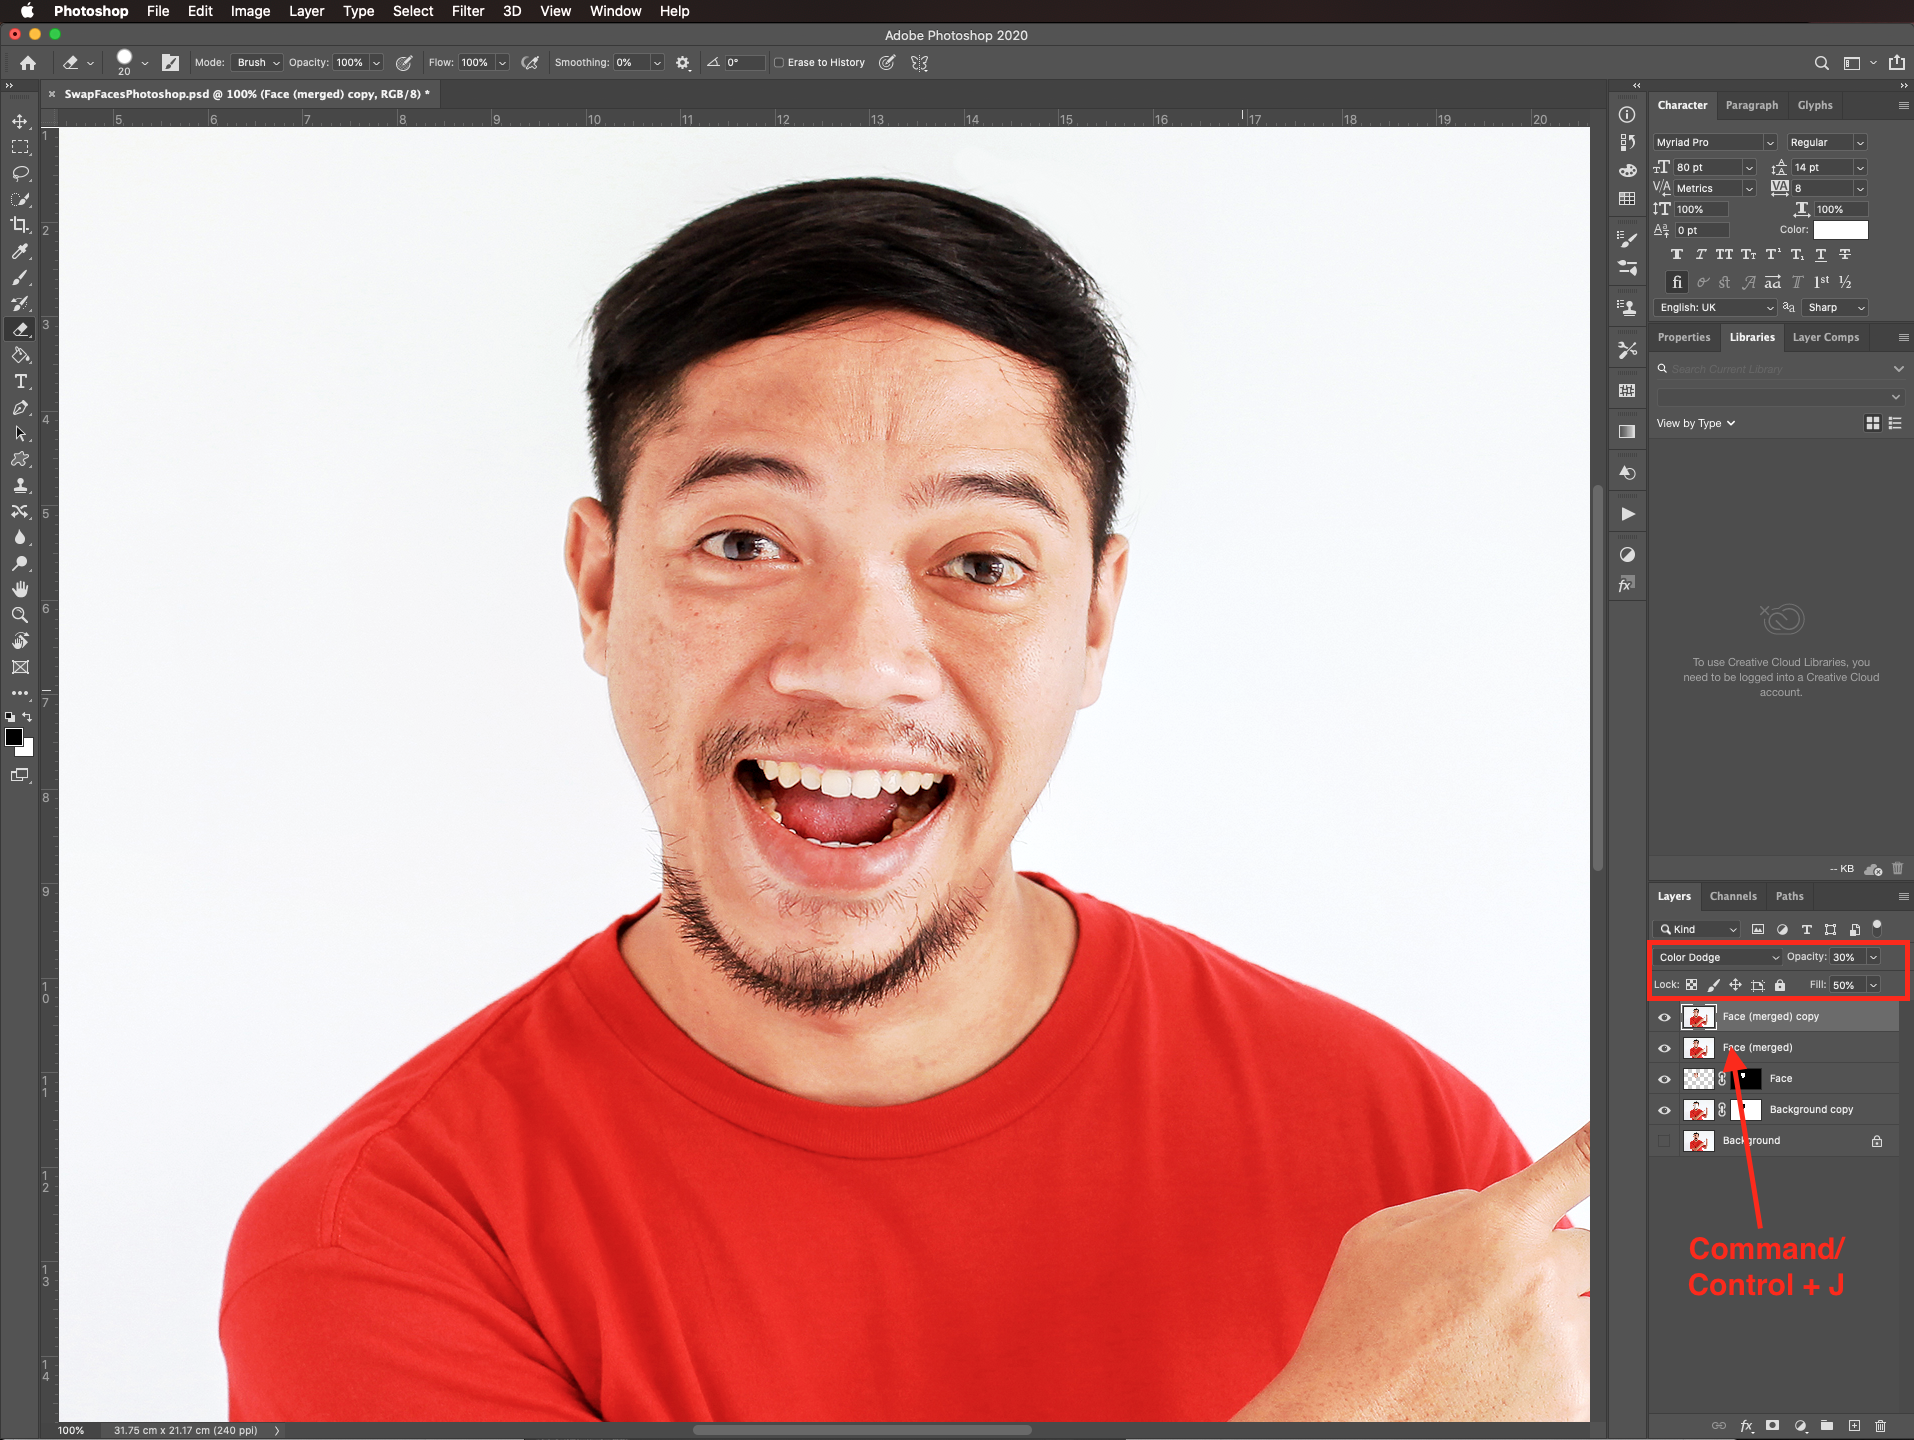
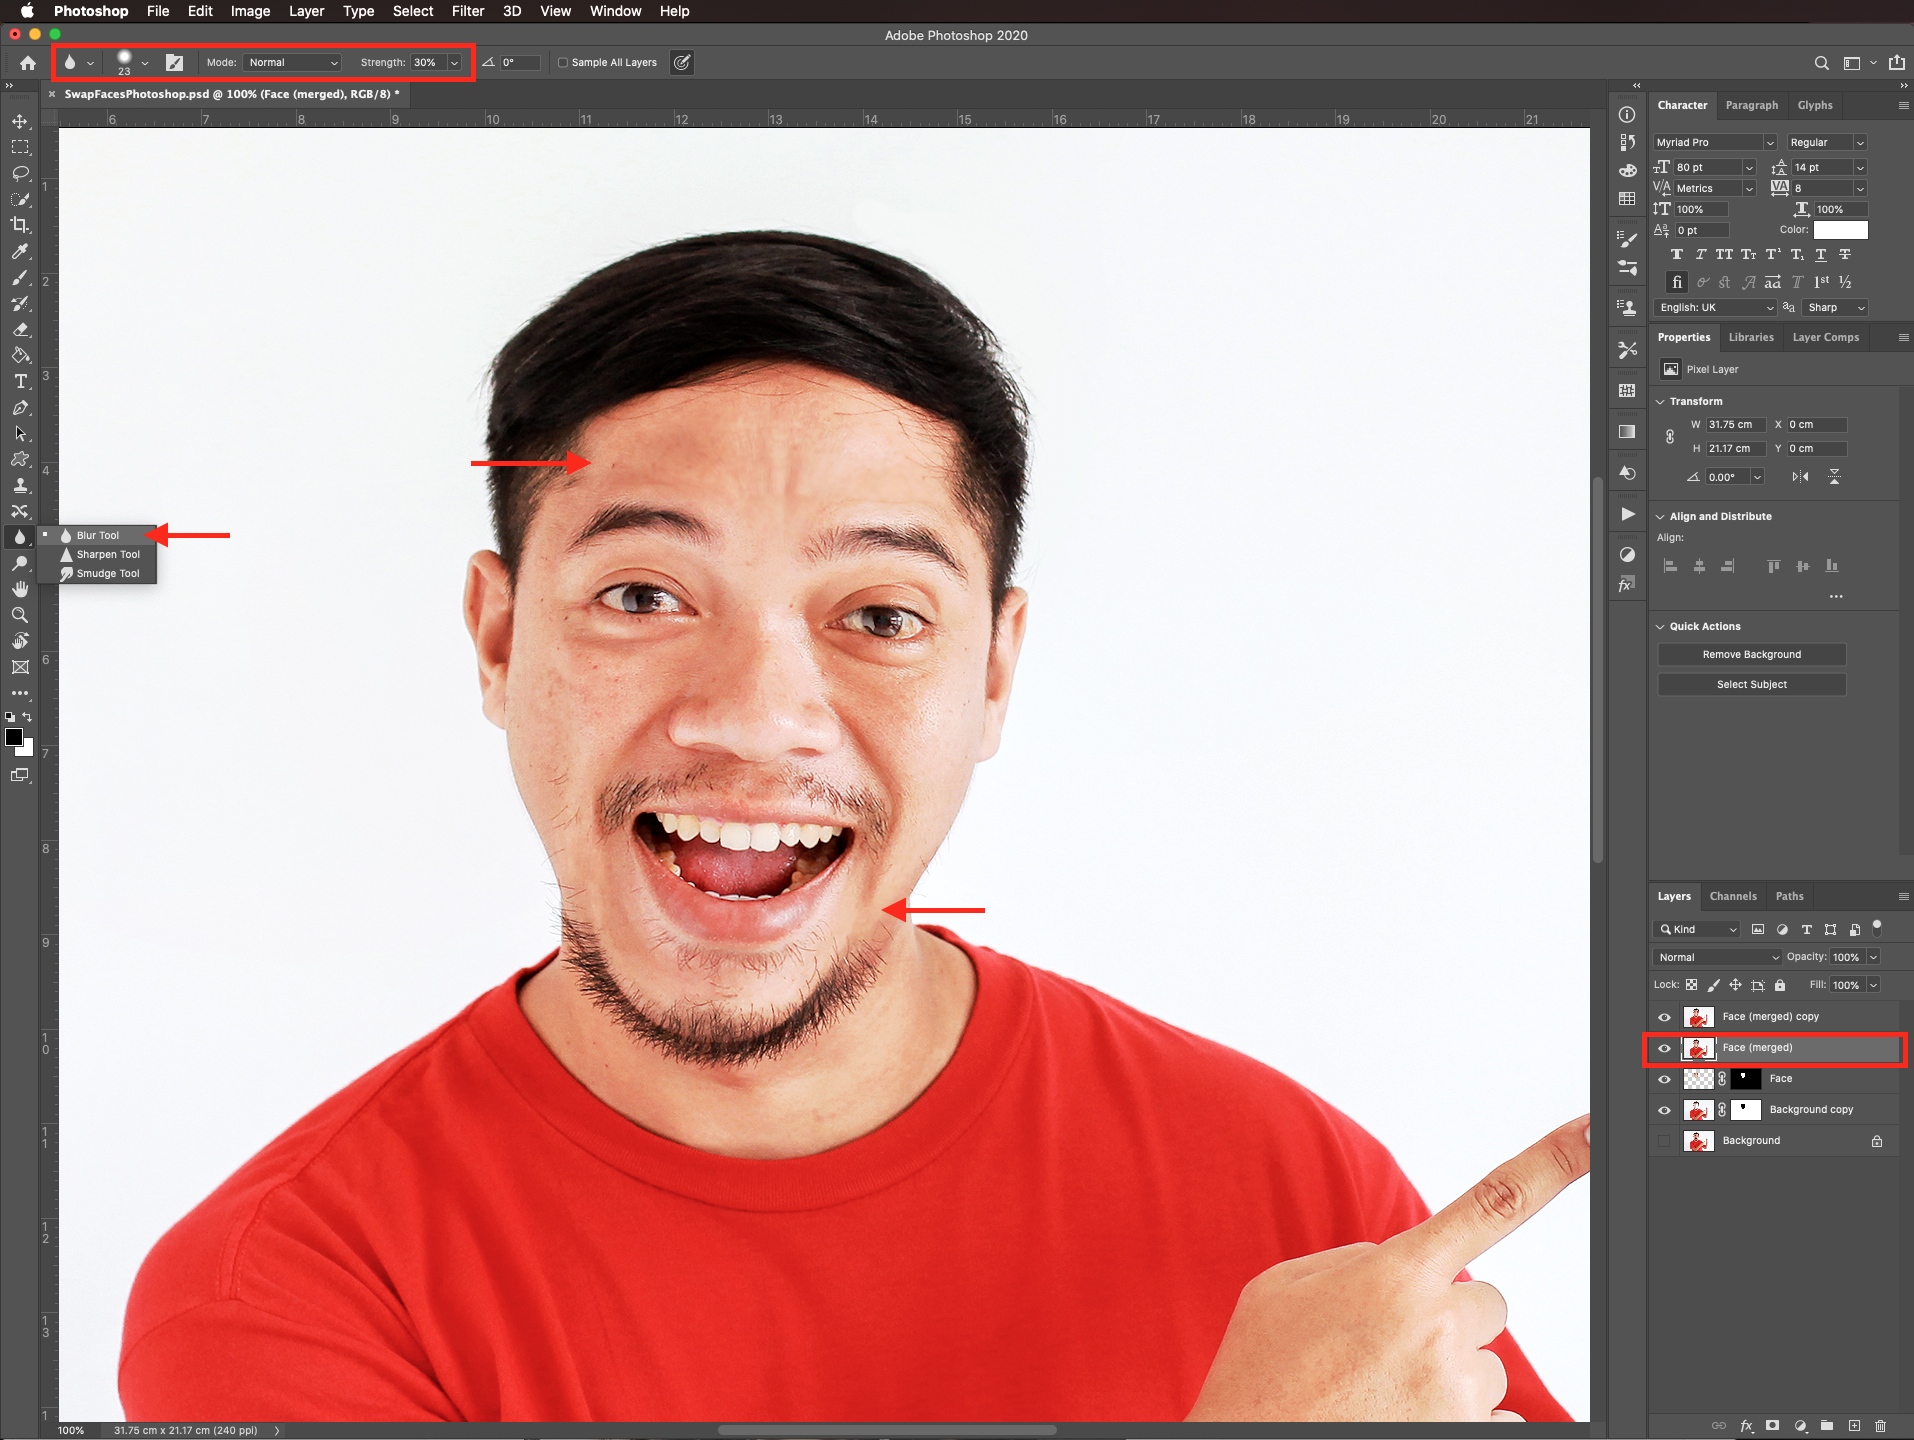
Working on the merged layer, select the blur tool, use a medium and soft brush with a strength of 30% and smooth out the places where the contrast and edges seem too hard.
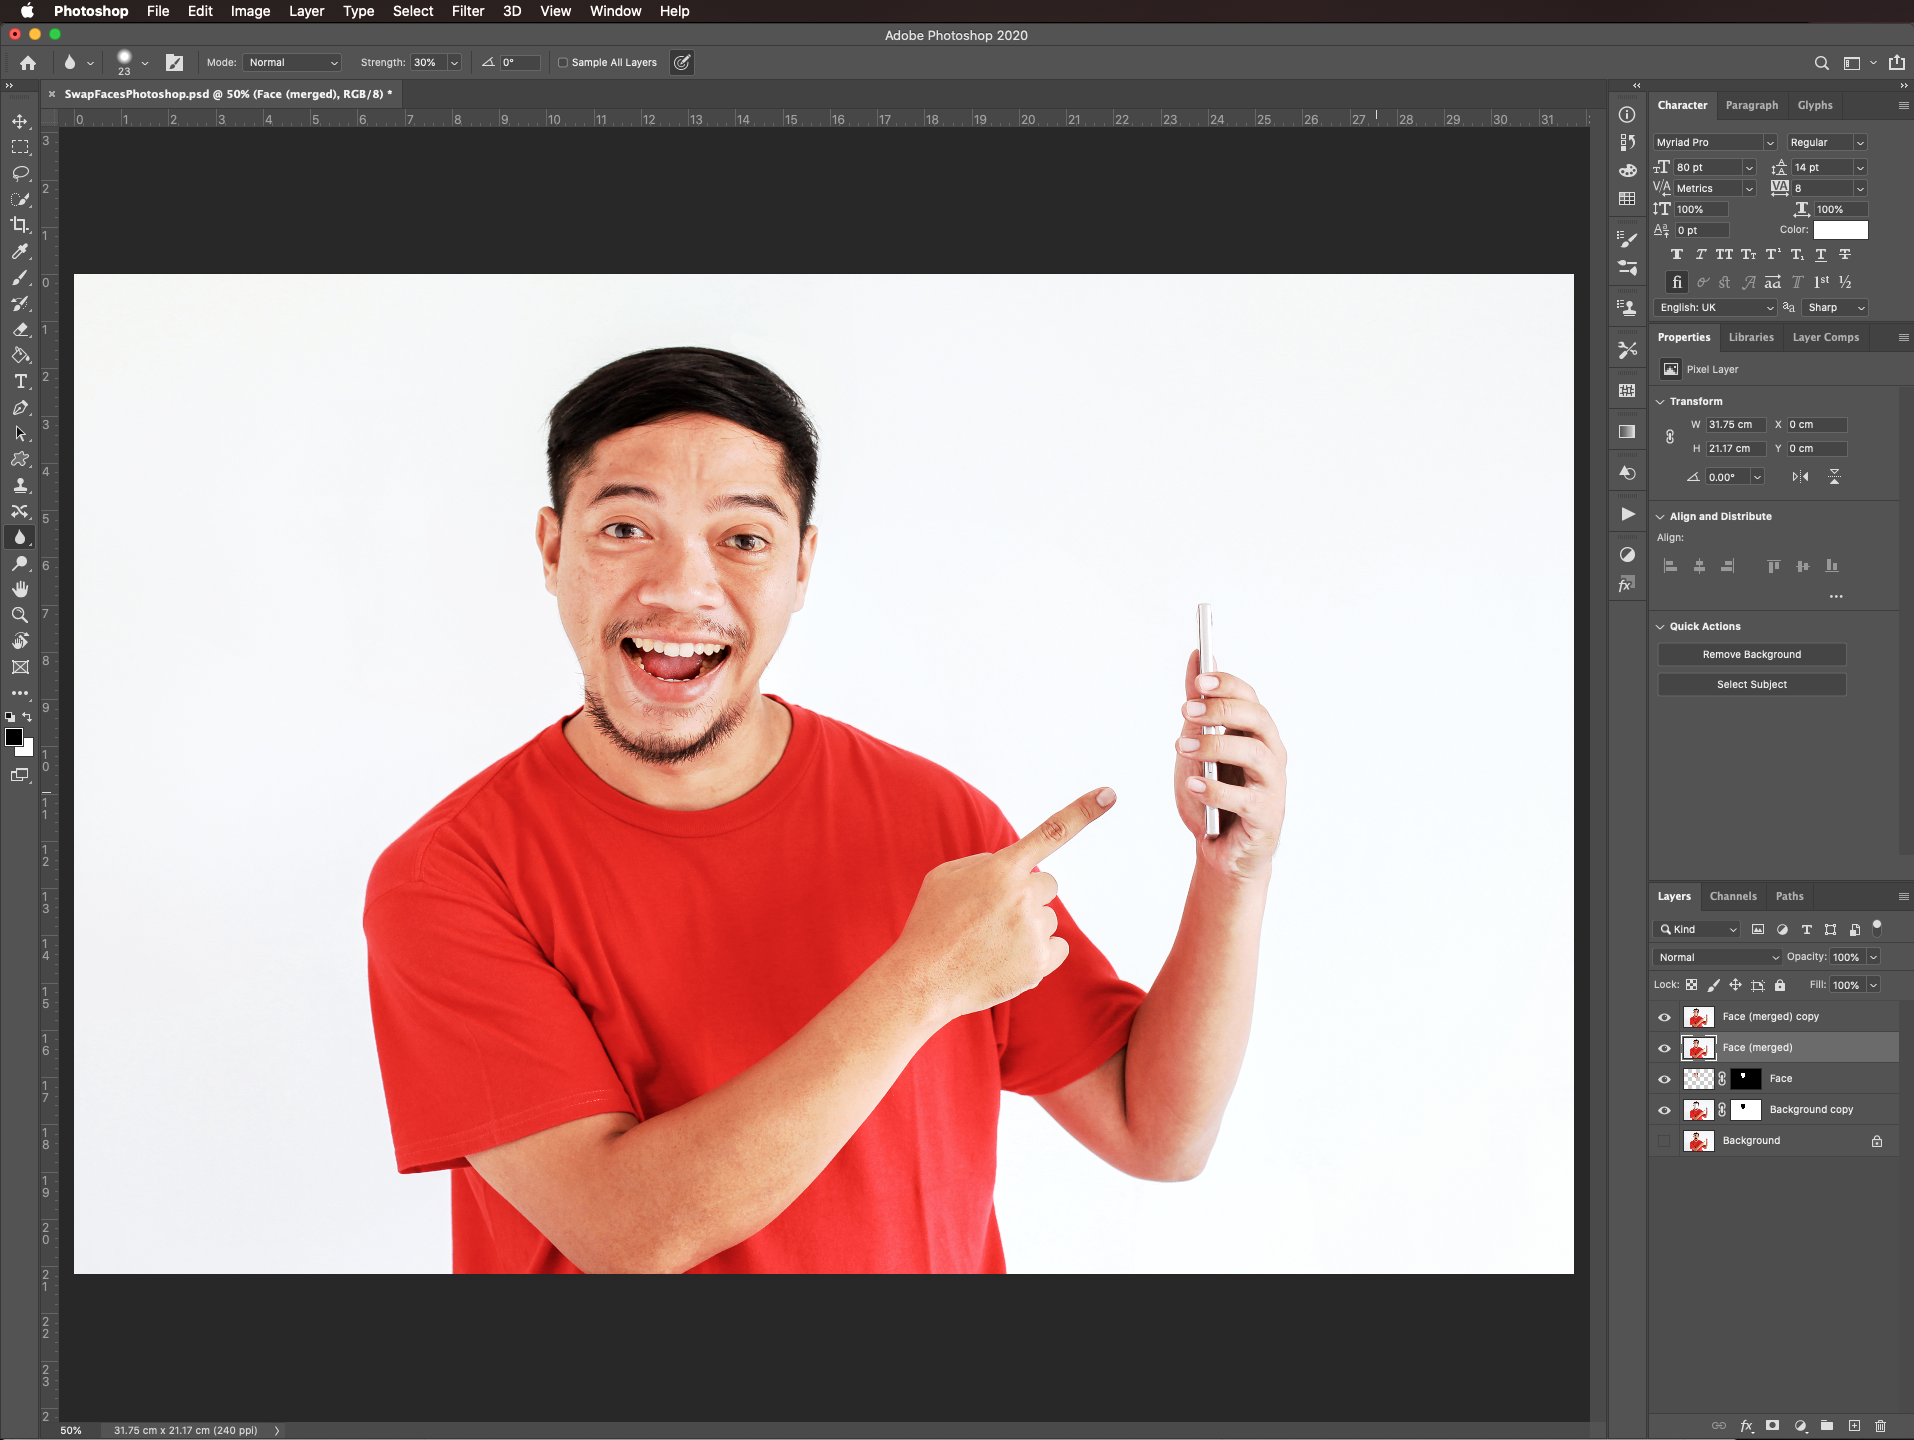
Your work should be similar to this.
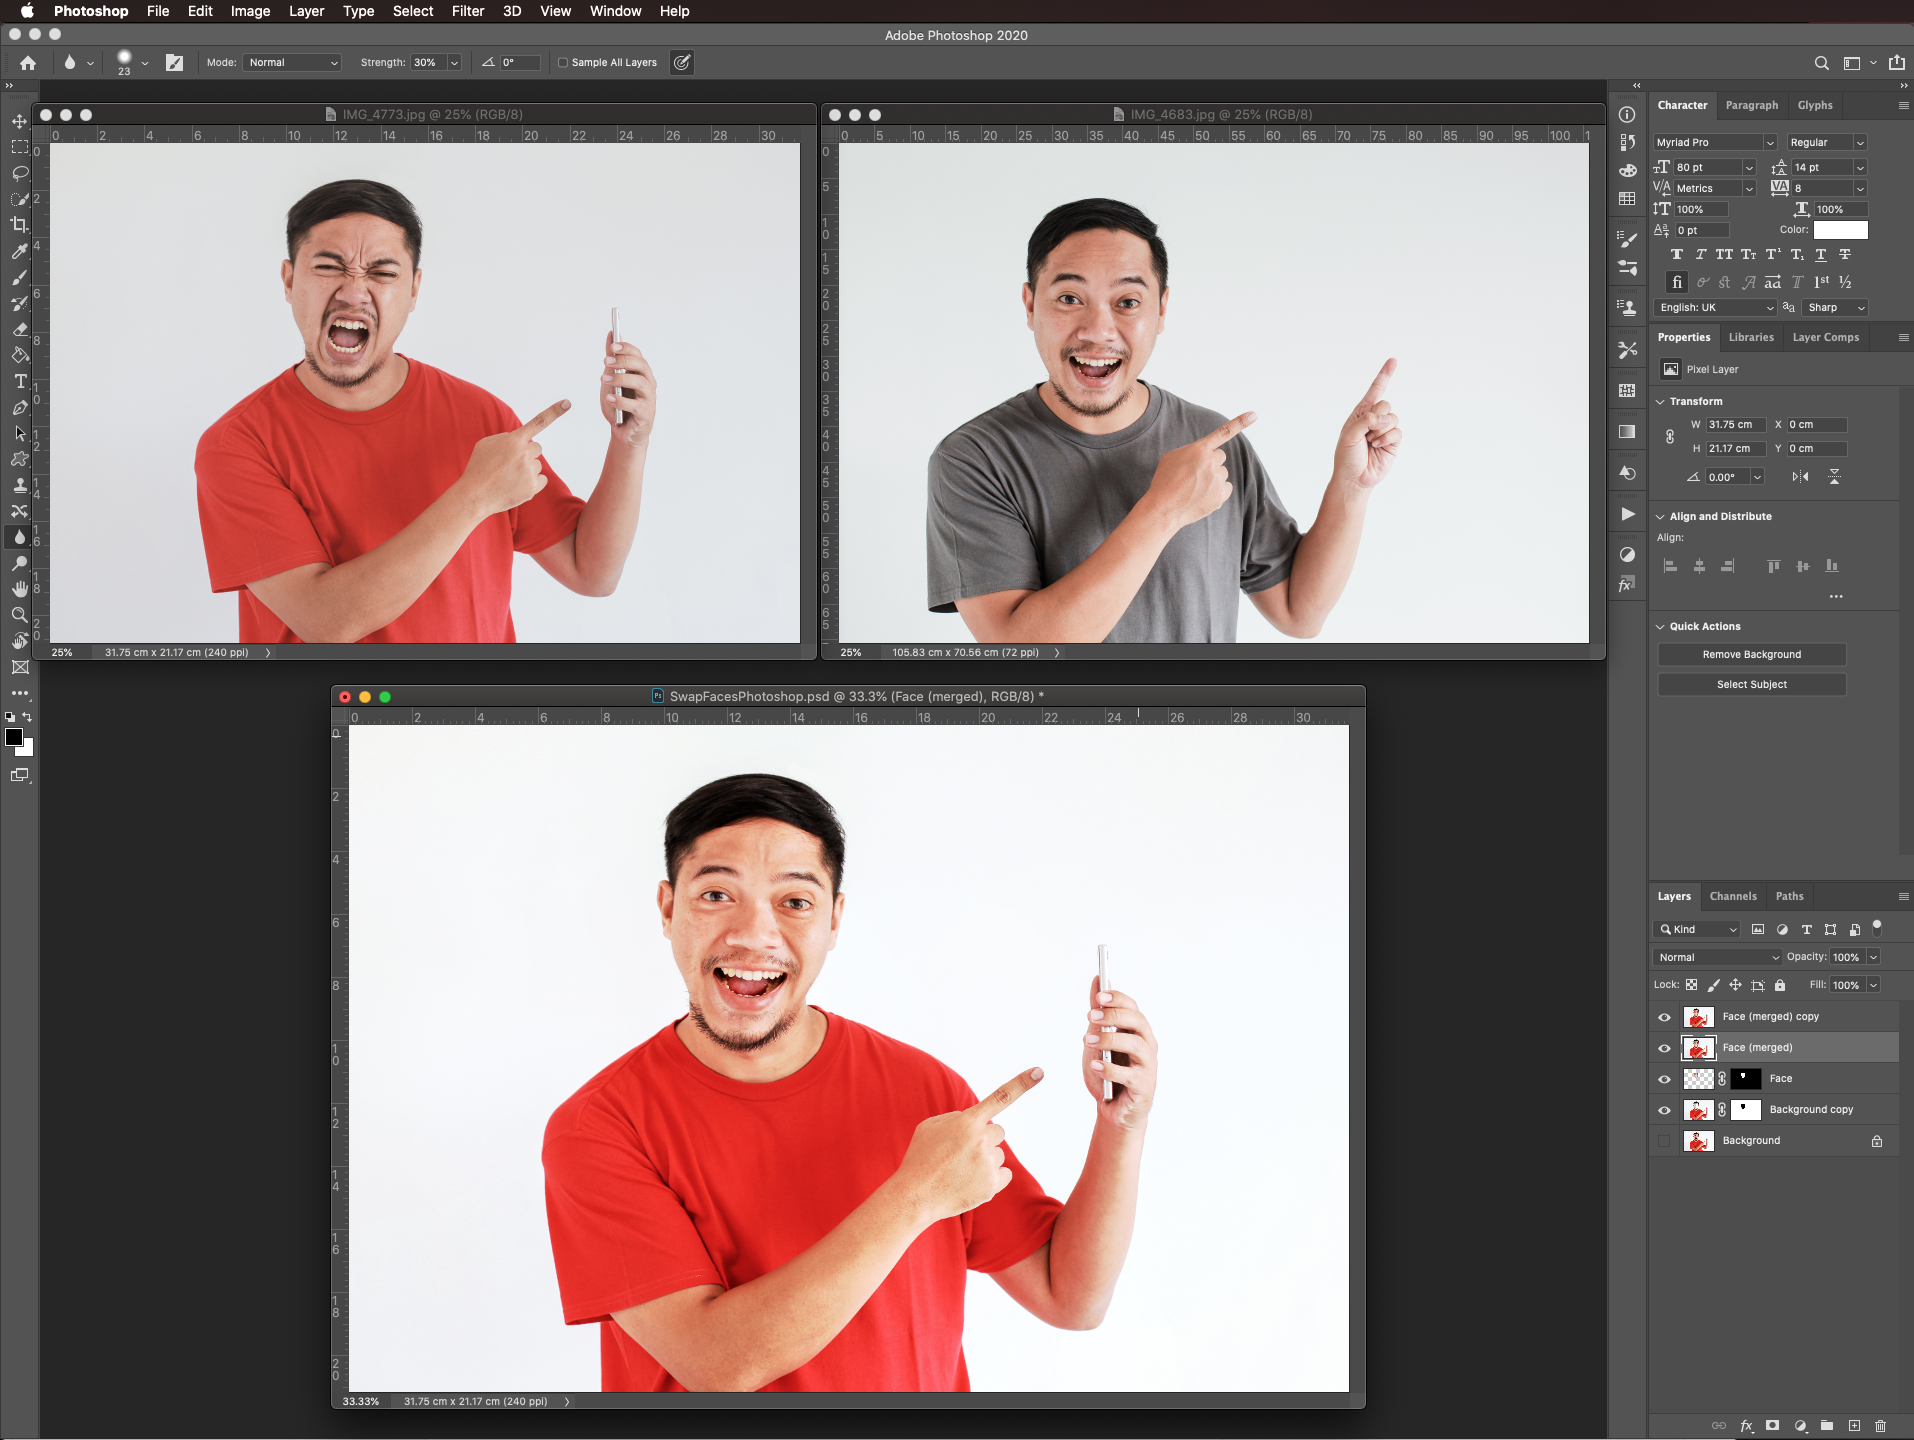
Compare all the images.
If you liked this tutorial make sure to check out other Photoshop tutorials.
Step 1: Open your images.
In Photoshop, open both your images.
Step 2: Select the face
Use the lasso tool (L) to select the inner part of the face of the subject you want to use. To add and/or subtract from the selection, use the small buttons on the left side of the top menu.
Step 3: Bring the selected face into the background image
Once you are done, drag your selection onto the other image and place it on top of the face.
Step 4: Adjust the face to the other subject
Lower the opacity of the face to about 60% to be able to see through and match the features as much as possible.
Use free transform (Command/Control + T) to resize and/or rotate the face if needed. Click on the center and move it to a spot that suits your needs better like the corner of the eyes since they will be our reference.
Without exiting free transform, go to edit > transform > warp.
And fix some of the details on the face. Once you are done, click enter or click on the small checkmark on the top menu.
Turn the opacity back to 100% and check if you need to fix any details like the rotation by using free transform again.
A couple of tips if you need to match colors and/or apply filters
In case the skin tone and colors of your images are noticeably different you cnd adjust them using match color. To do this, option-click on top of the face thumbnail to make a selection, then go to image > adjustments > match color and adjust the settings, use your document as source and background as layer.
To keep the edges of the face even in case you want to apply a filter, you can click lock transparent pixels on the layers panel and then apply the filter.
We also have a full tutorial on how to retouch skin in Photoshop if needed.
Step 5: Adjust the shadows and highlights
Then go to image > adjustments > shadows/highlights.
And play around with the values until your images match more.
Step 6: Erase edges further
You can unlock transparent pixels if you want and select the eraser tool (E) with a hard brush (100% hardness).
To erase some of the edges of the face if needed.
Then, duplicate the background layer (command/control + J).
Step 7: Adjust the midtones
Select your face layer, go to adjustments > level (command/control + L), and move the midtones lever a bit to match the images more.
Step 8: Create a selection of the face
Option-click on top of the face thumbnail to make a selection.
Select your background copy layer, go to modify > contract.
And use a value of 3 pixels (you may need a different value depending on your images).
Step 9: Erase selection from background subject
Turn off your face and background layers for now (click on the small eye icon on the left side of their thumbnail), and making sure you are working on the background copy layer click delete.
Step 10: Blend layers
Turn back on the face layer and hold the shift key to select it together with the background copy layer.
Then go to edit > auto-blend layer.
Make sure panorama is your blend method and that both the bottom boxes are checked and click ok.
A new layer should appear and your original layers should have layer masks on them.
Step 11: Fix edges and further match colors
You may notice some edges in the merged layer. To fix this, duplicate the layer (command/control + J) and change the blending mode of the duplicate to color dodge, lower the opacity to 30% and the fill to 50%.
Working on the merged layer, select the blur tool, use a medium and soft brush with a strength of 30% and smooth out the places where the contrast and edges seem too hard.
Your work should be similar to this.
Compare all the images.
If you liked this tutorial make sure to check out other Photoshop tutorials.
Related Tutorials
Photoshop Tutorials
How to Use Text Effects in Photoshop
With Photoshop Text Effects, you can create text with impact in just a few steps.
Photoshop Tutorials
How to Create Speech Bubbles in Photoshop
Learn how to create and edit fun speech bubbles in Photoshop using custom shapes.
Photoshop Tutorials
How to Make Sublimation Designs in Photoshop
Discover how to make sublimation designs in Photoshop that you can use to create beautiful gifts.
Photoshop Tutorials
How to Use EPS Files in Photoshop
In this tutorial, learn how to use EPS files in Photoshop as Smart Objects to maintain image quality
Photoshop Tutorials
Image Burned in Wood in Photoshop
In this tutorial, discover how to create a realistic wood burned effect in Adobe Photoshop.
Photoshop Tutorials
Easy See through Cut Out Text in Photoshop
Create a see-through cut out text design in Photoshop with these easy to follow steps.