By Design Bundles
Procreate Tutorials14 min
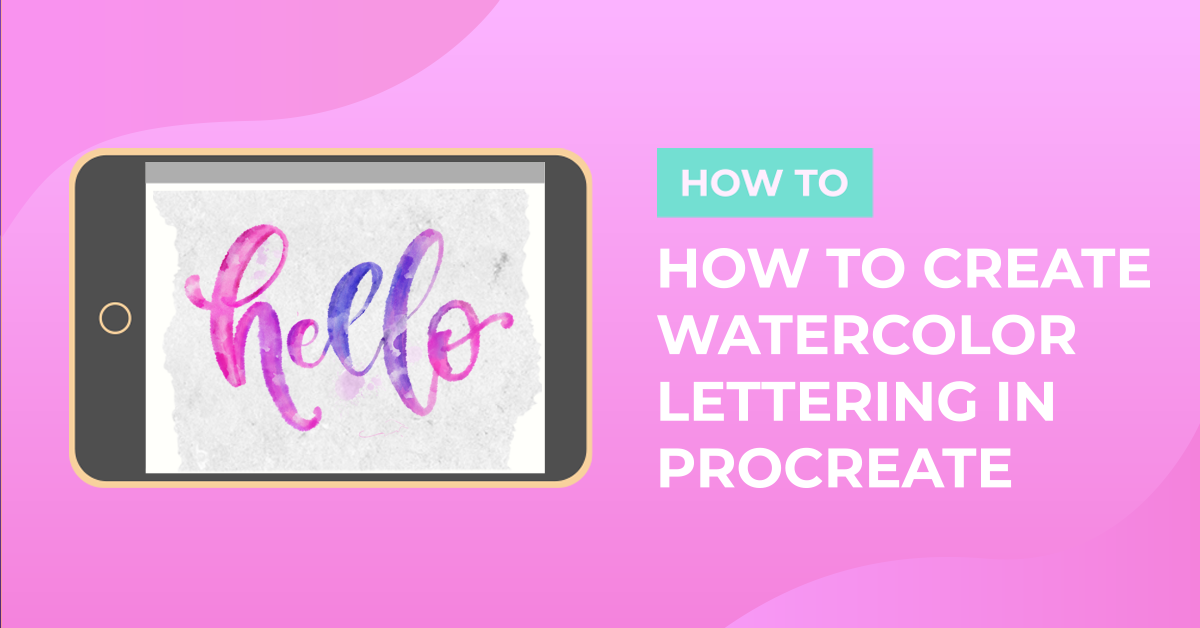
How to Create Watercolor Lettering in Procreate
Watercolor brushes in Procreate give you a great tool to create beautiful artwork without having to make a mess and cleaning up brushes afterward.
In this tutorial, we are using the Watercolor Lettering Procreate brushes from Shannon Layne.
Before you start, download and install your brushes so everything is ready to use once you start with the project. Normally you will also need a nice paper texture background to complement the watercolor effect. Sometimes the brush kits include them, but you can also check out Design Bundles to get one if needed.
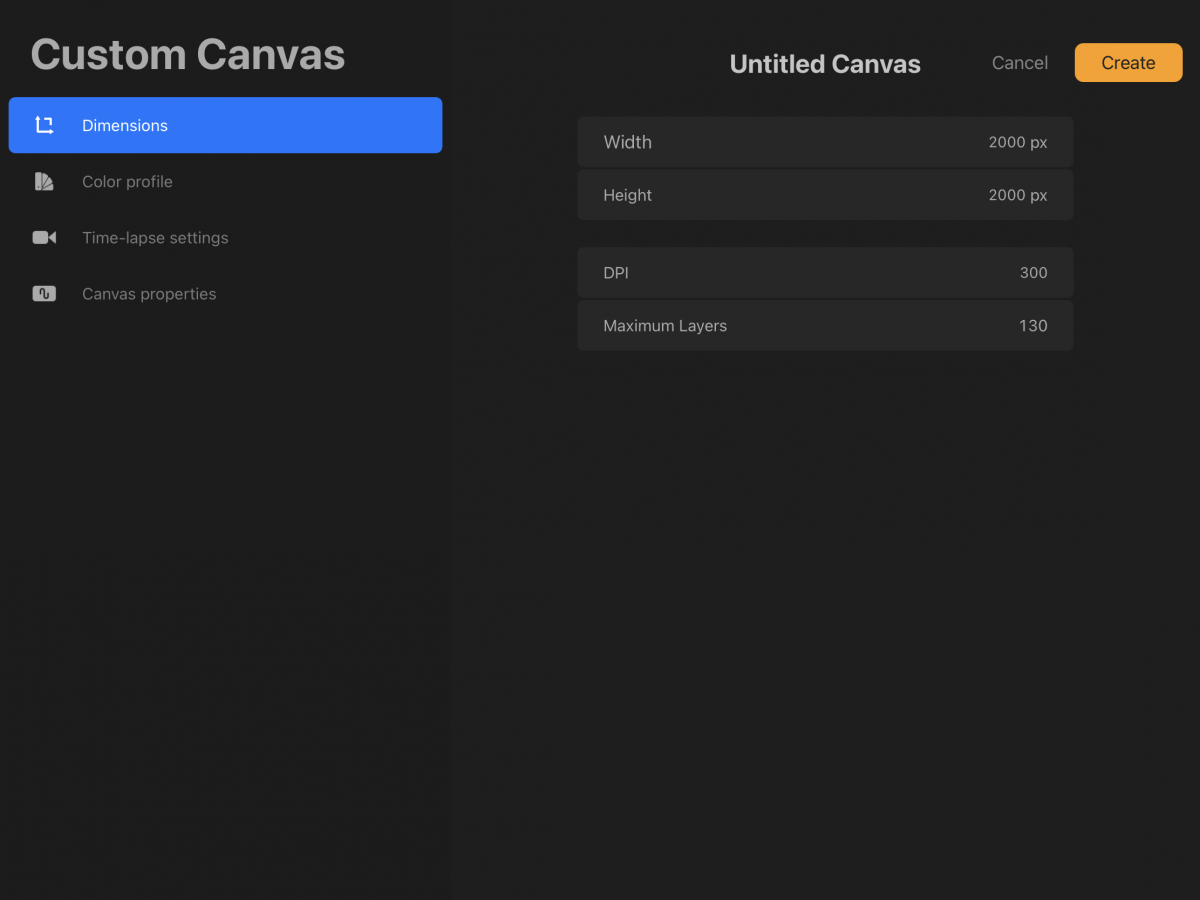
First of all, create a New Canvas in Procreate. Choose the size and resolution depending on the use you want to give to your artwork. For example, if you want to share it on Instagram 2000 x 2000 px @72 dpi is a good choice, but if you want to print it you should use a higher resolution. We made ours 300 dpi.
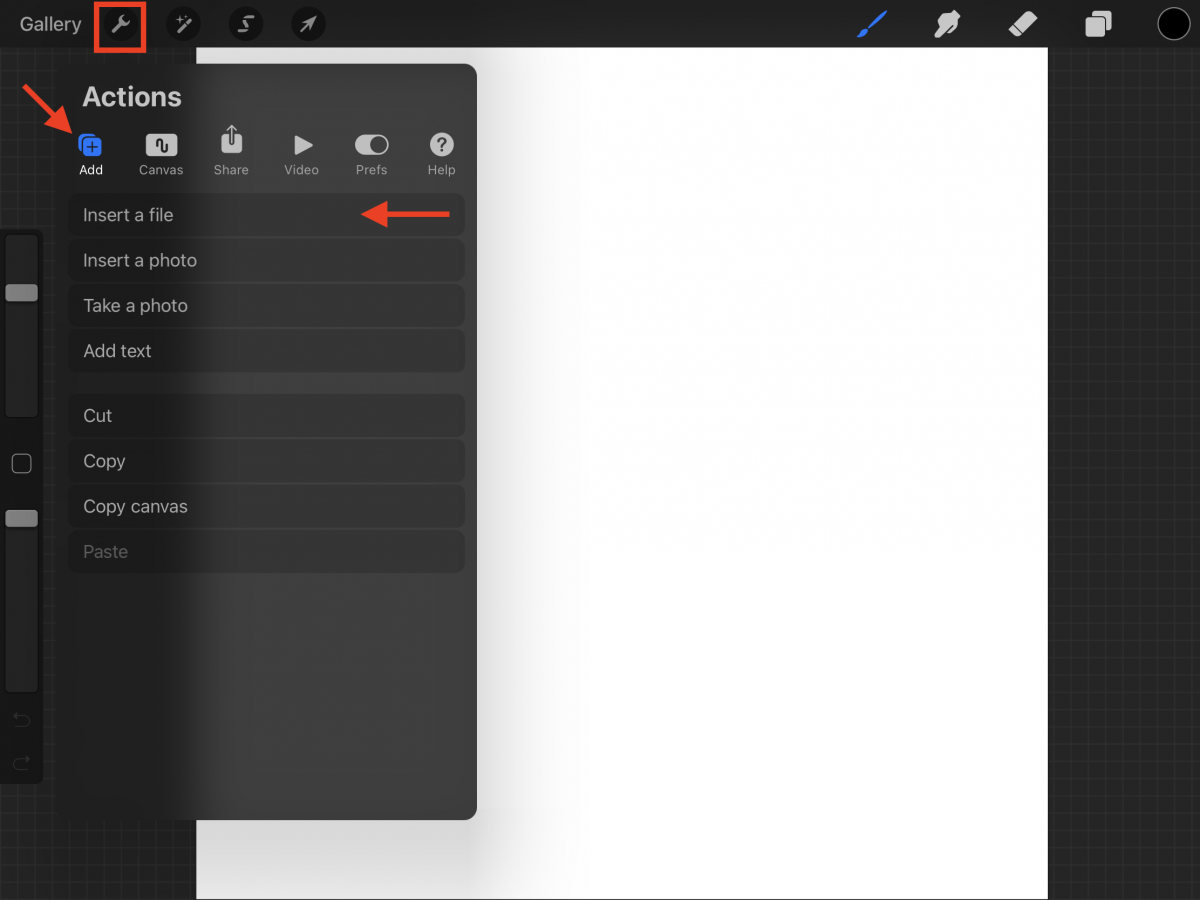
Insert the paper texture you want to use as background. Go to the Tool panel, choose Add and Insert File or Photo (depending on the location where you saved them).
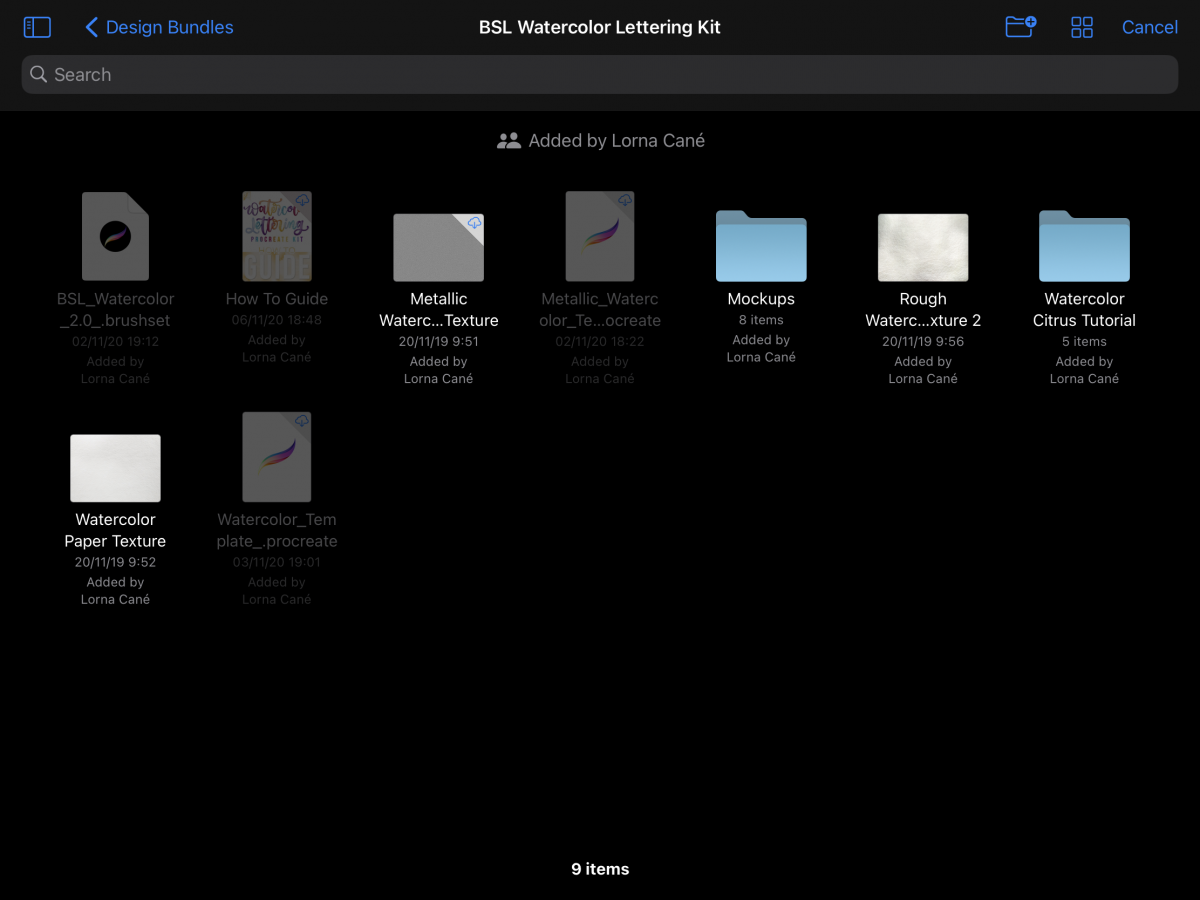
Navigate to where you saved your files and click on the one you want to use.
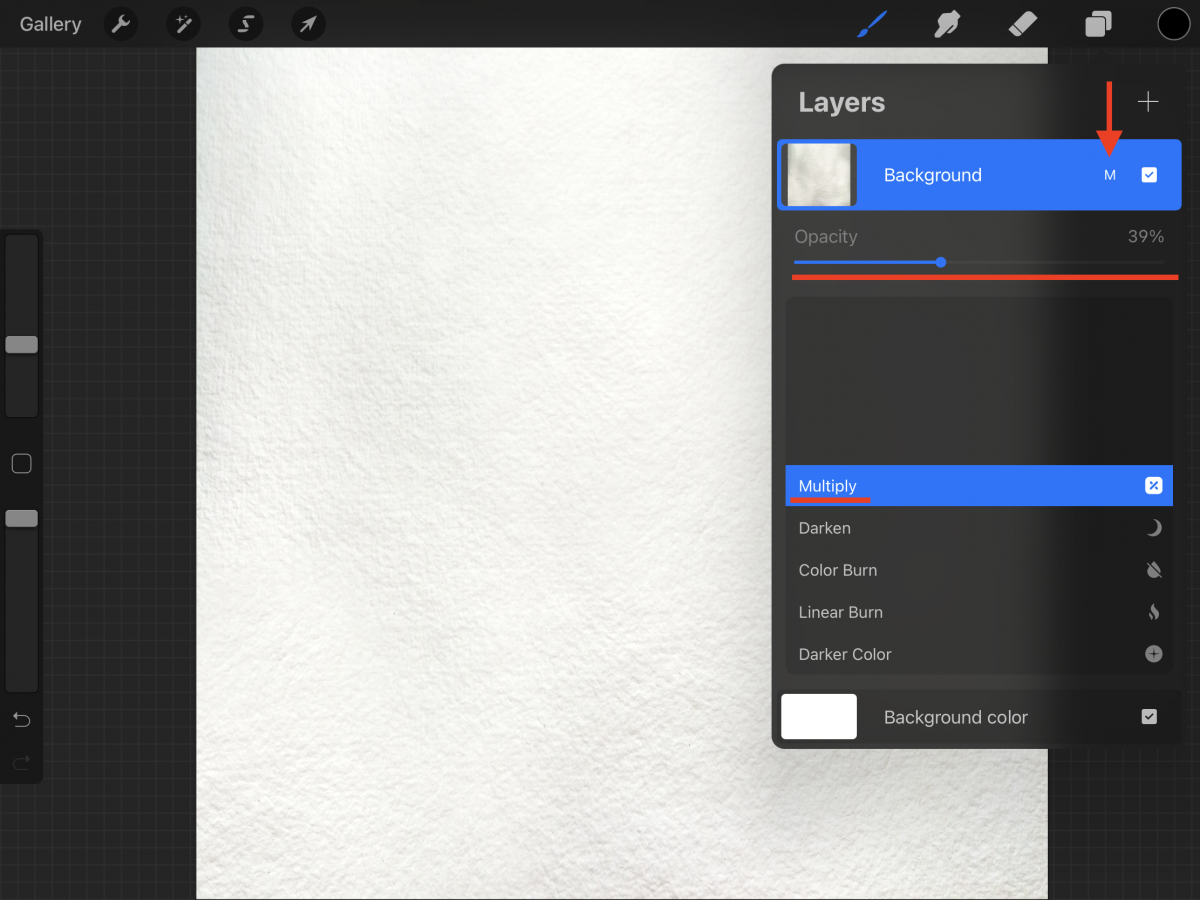
Select the paper background layer and name it (we named it Background). Click on the small N to open the layers setting, change the blending mode to Multiply, and lower the Opacity if you want to tone down the look of the paper a bit.
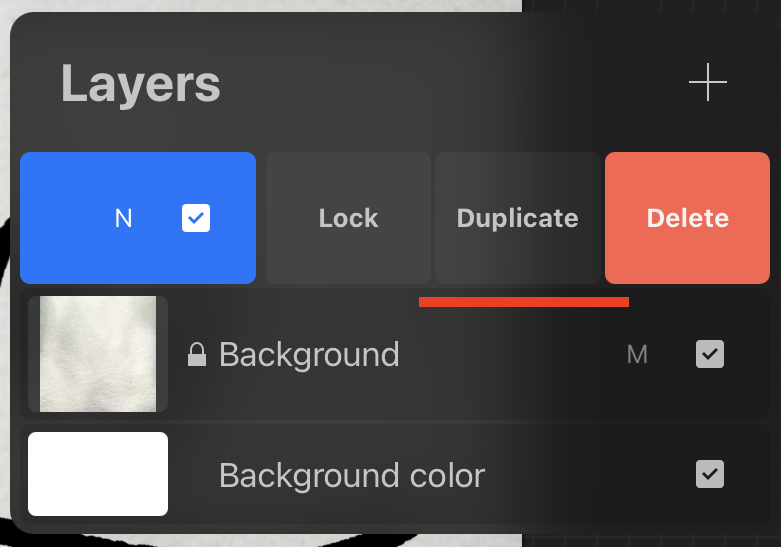
Then, lock the layer by pulling left on it to show the options and choose Lock.
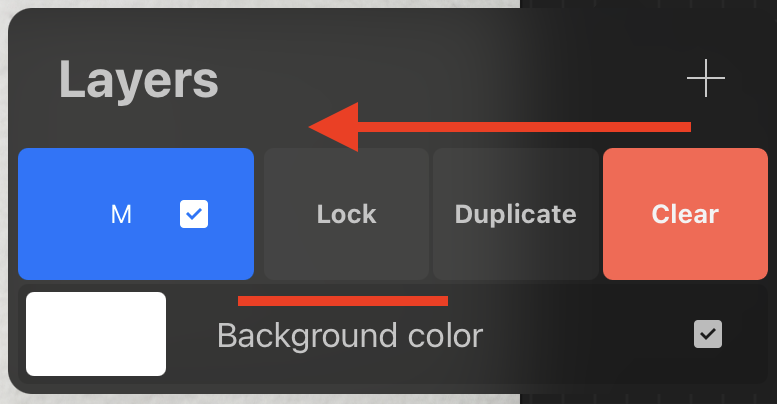
Create a New Layer (+ sign on the top-right corner of the Layers panel), name it appropriately (we named it text base).
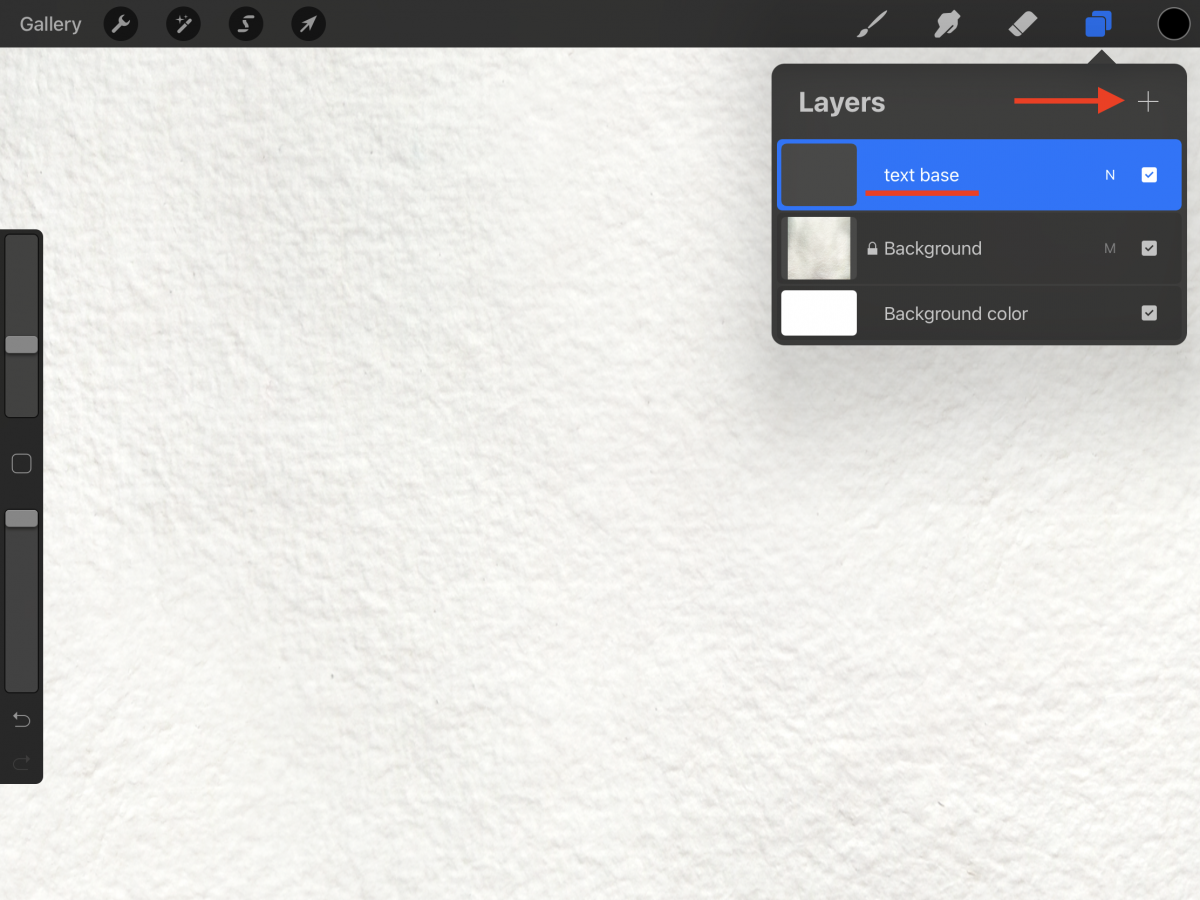
Select the brush you want to use, and write your text. It should be a basic watercolor brush but with rough edges to mimic the bleeding on the paper.
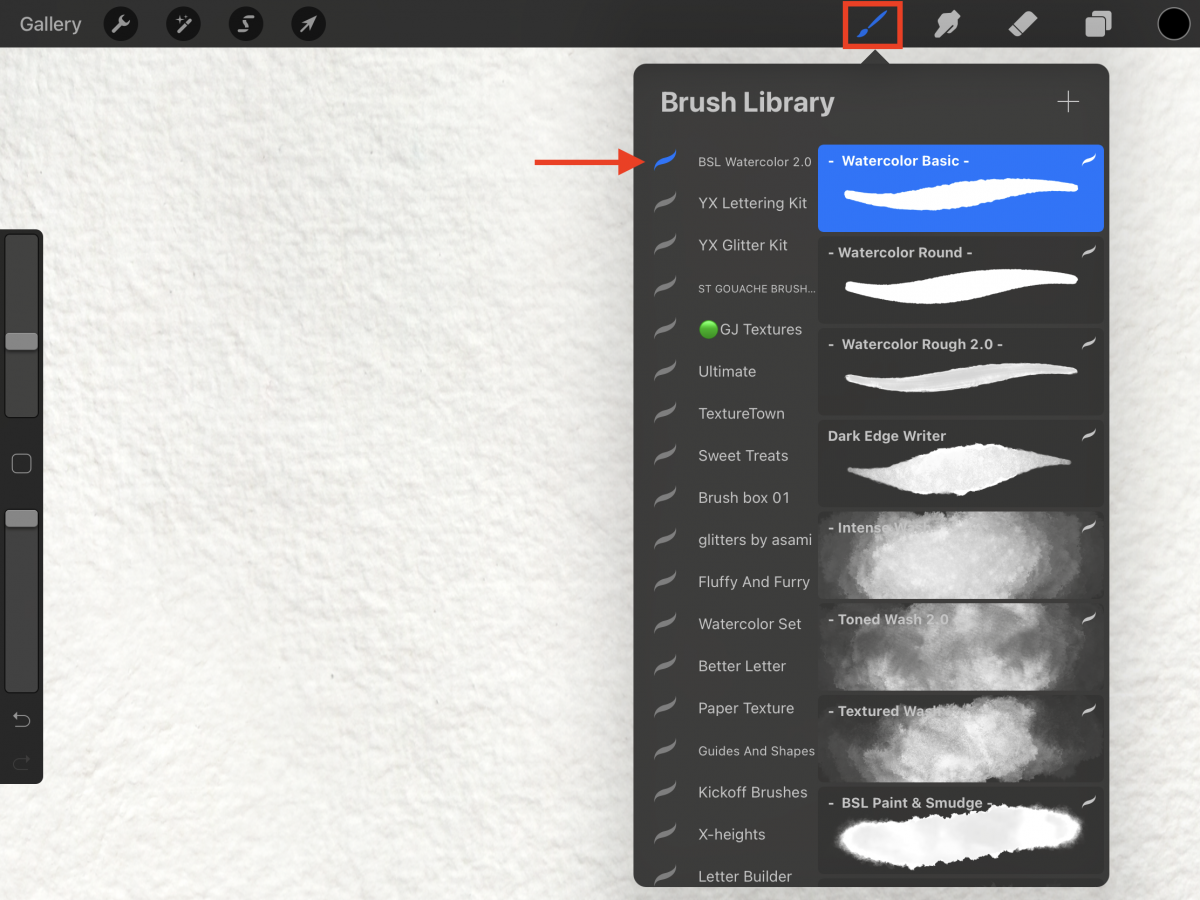
You can either use black, white, or any other color for now.
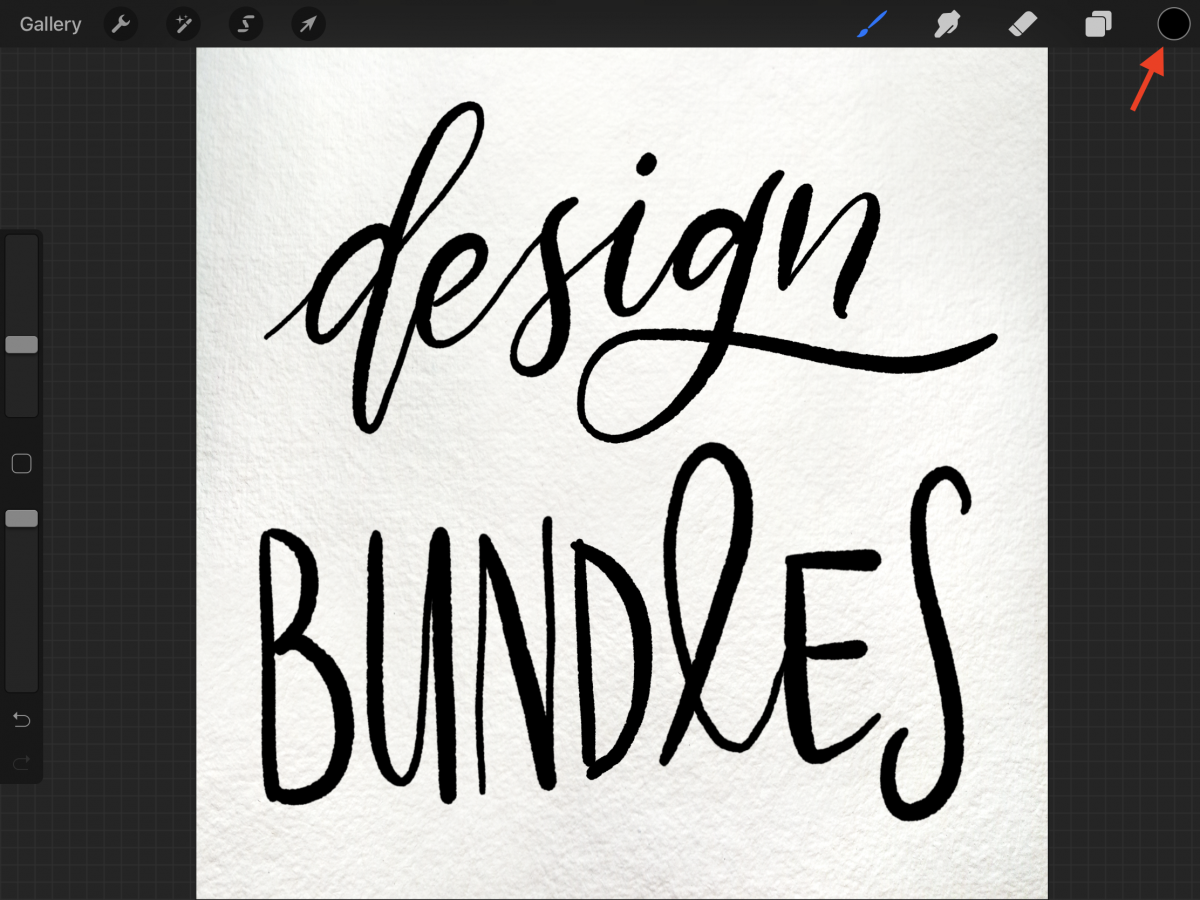
Duplicate the text base layer and name it (we used text color).
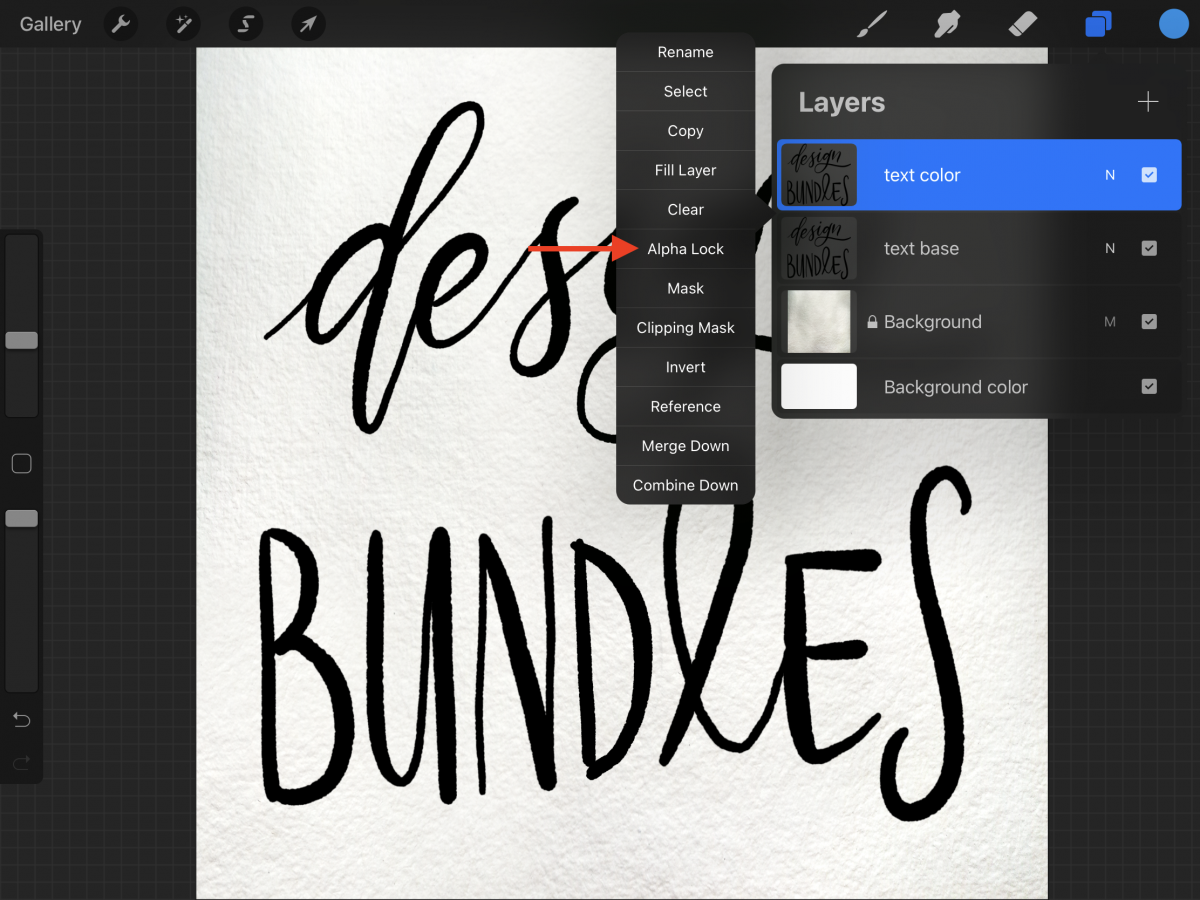
Click on the icon to open the layer menu and click Alpha Lock.
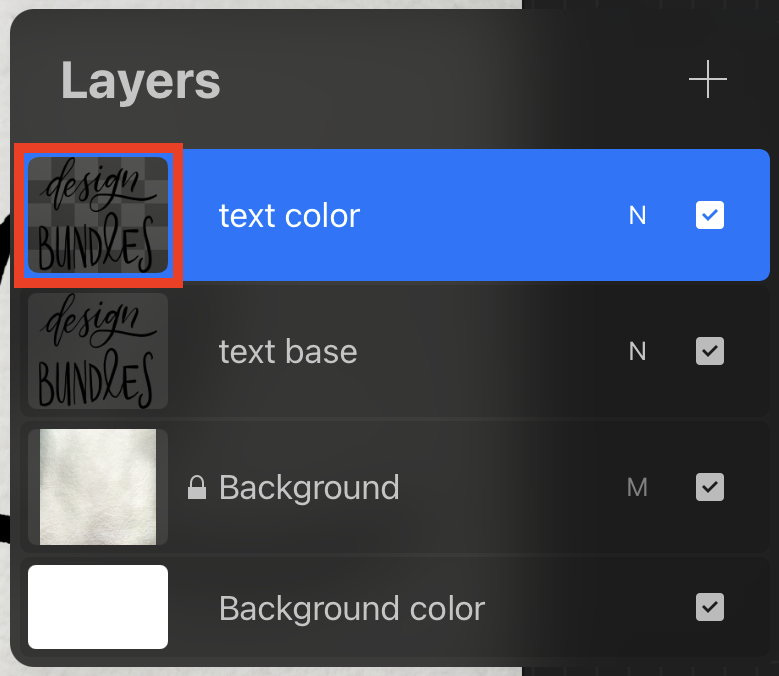
You should notice that the background of the thumbnail turned into a checkered board.
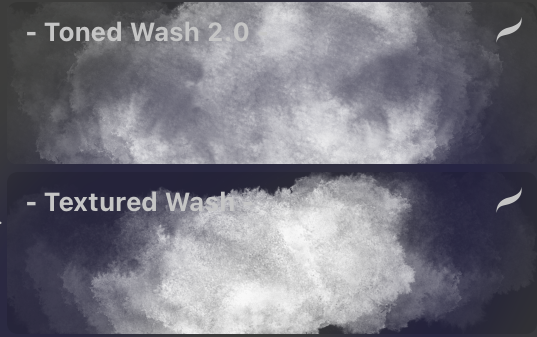
Now, select a color from your library or a color palette and use a wash/texture brush to start applying the color to the letters.
You can alternate between colors or use just one.
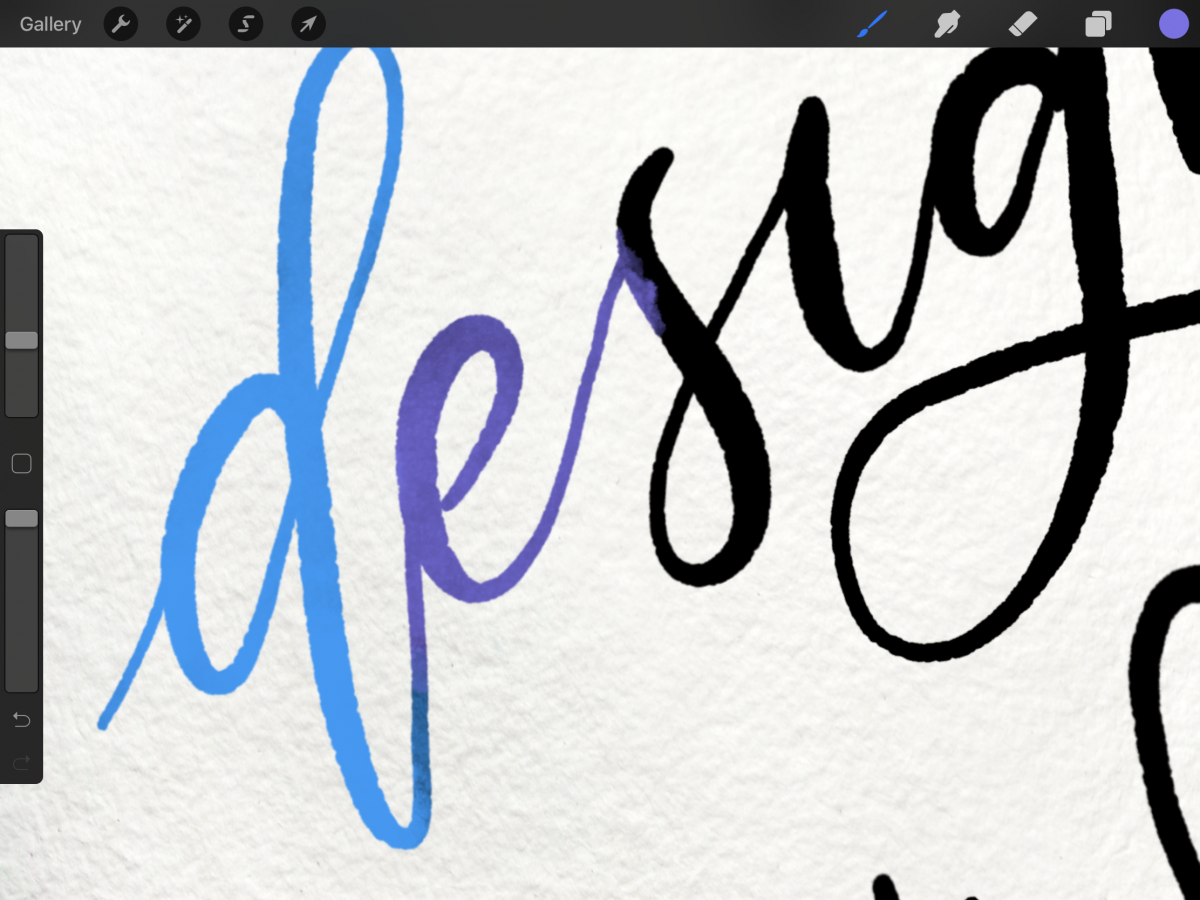
Change the size and opacity of the brush to get a more realistic watercolor effect.
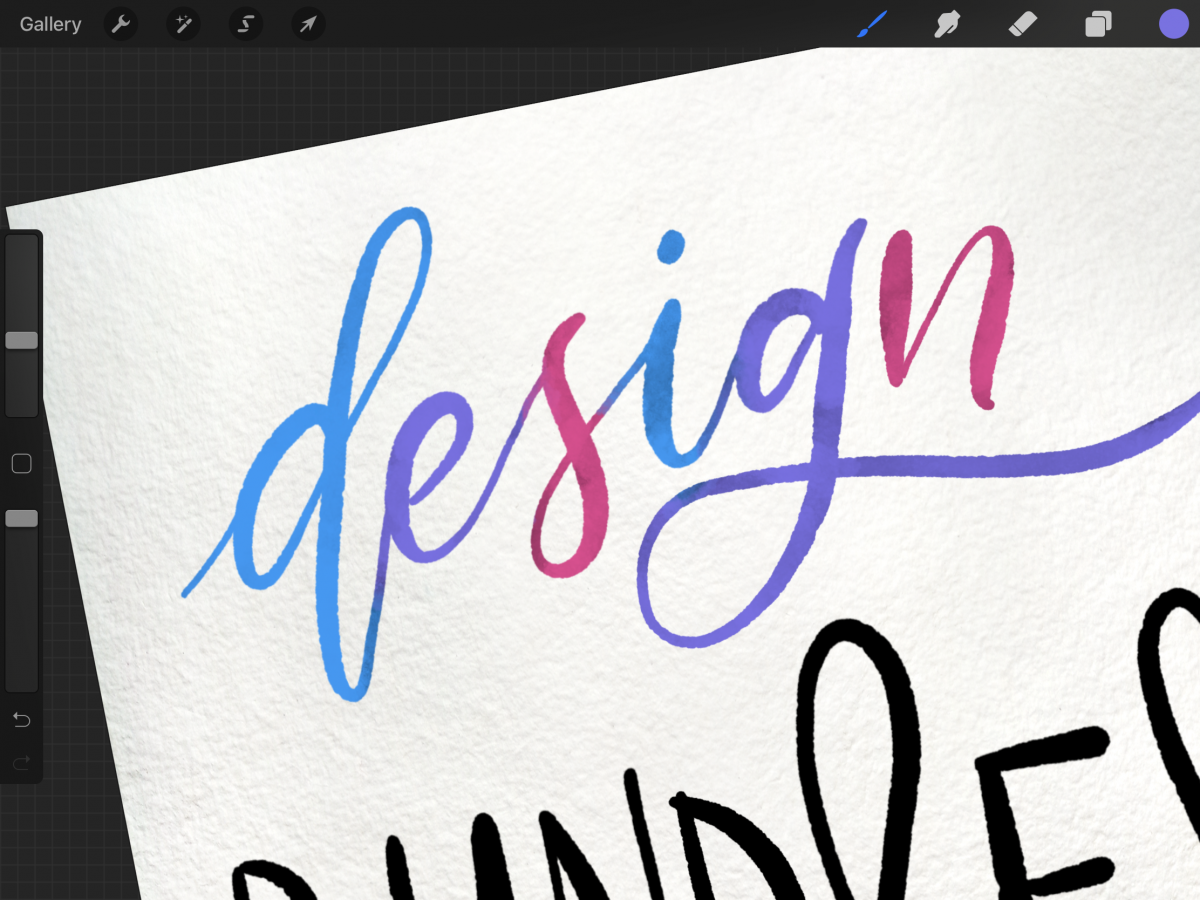
Remember to add some “bleeding” where two colors meet, just like watercolor would do.
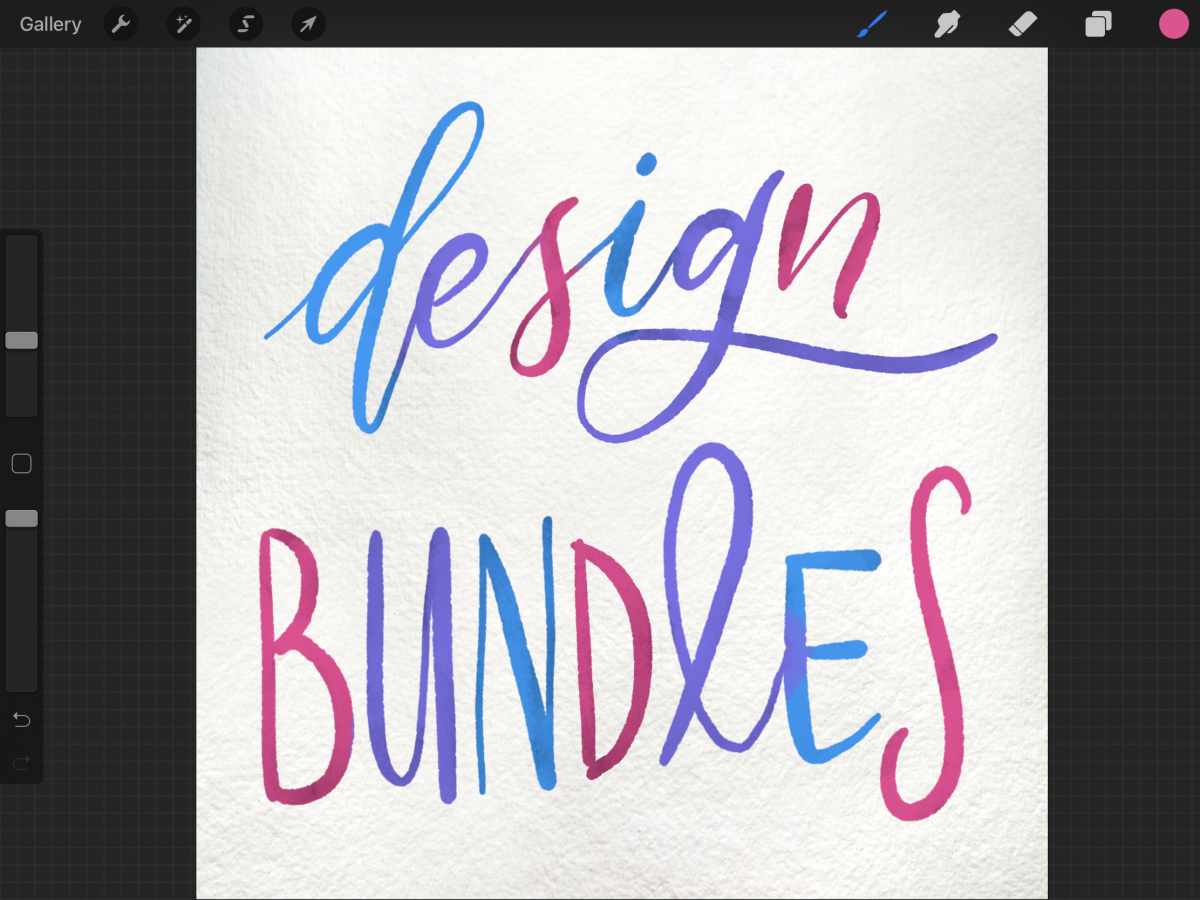
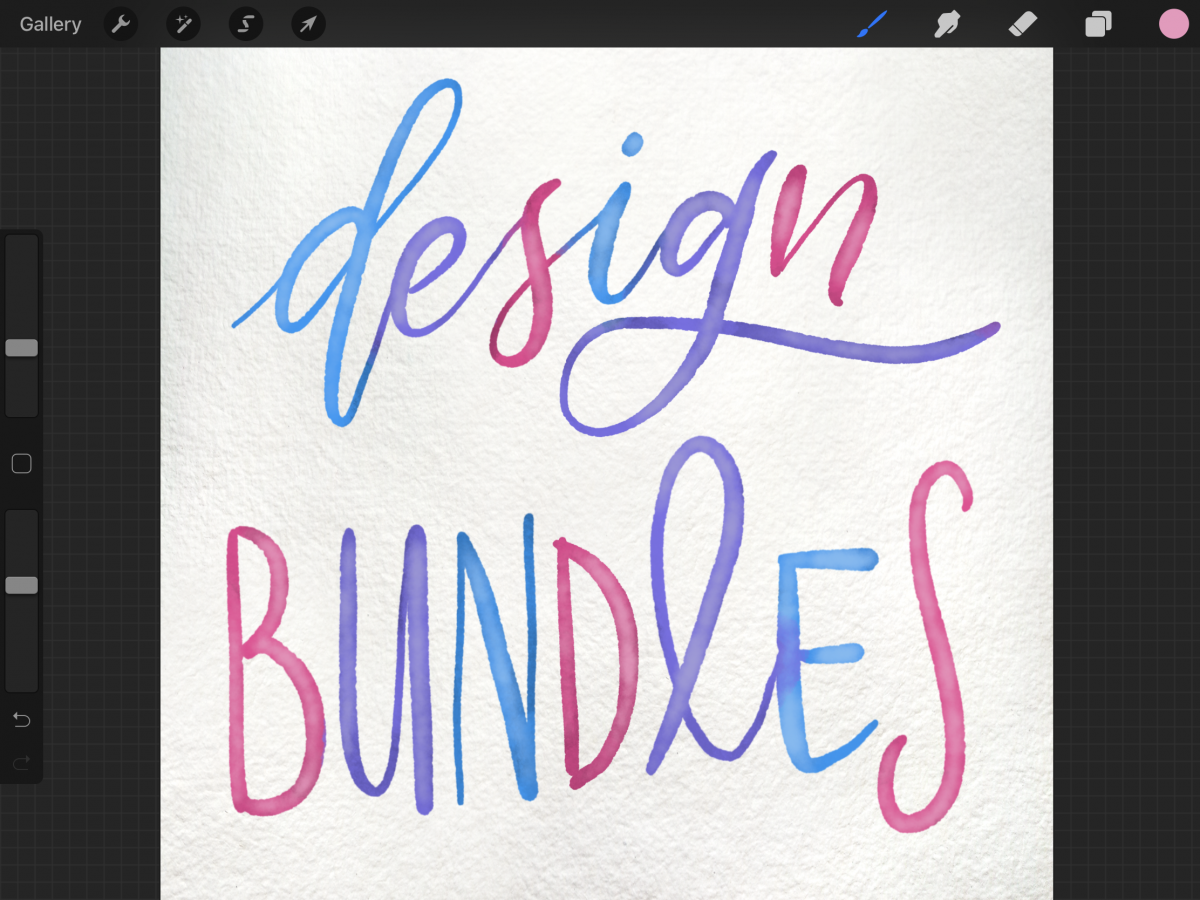
Your colored text should look similar to this.
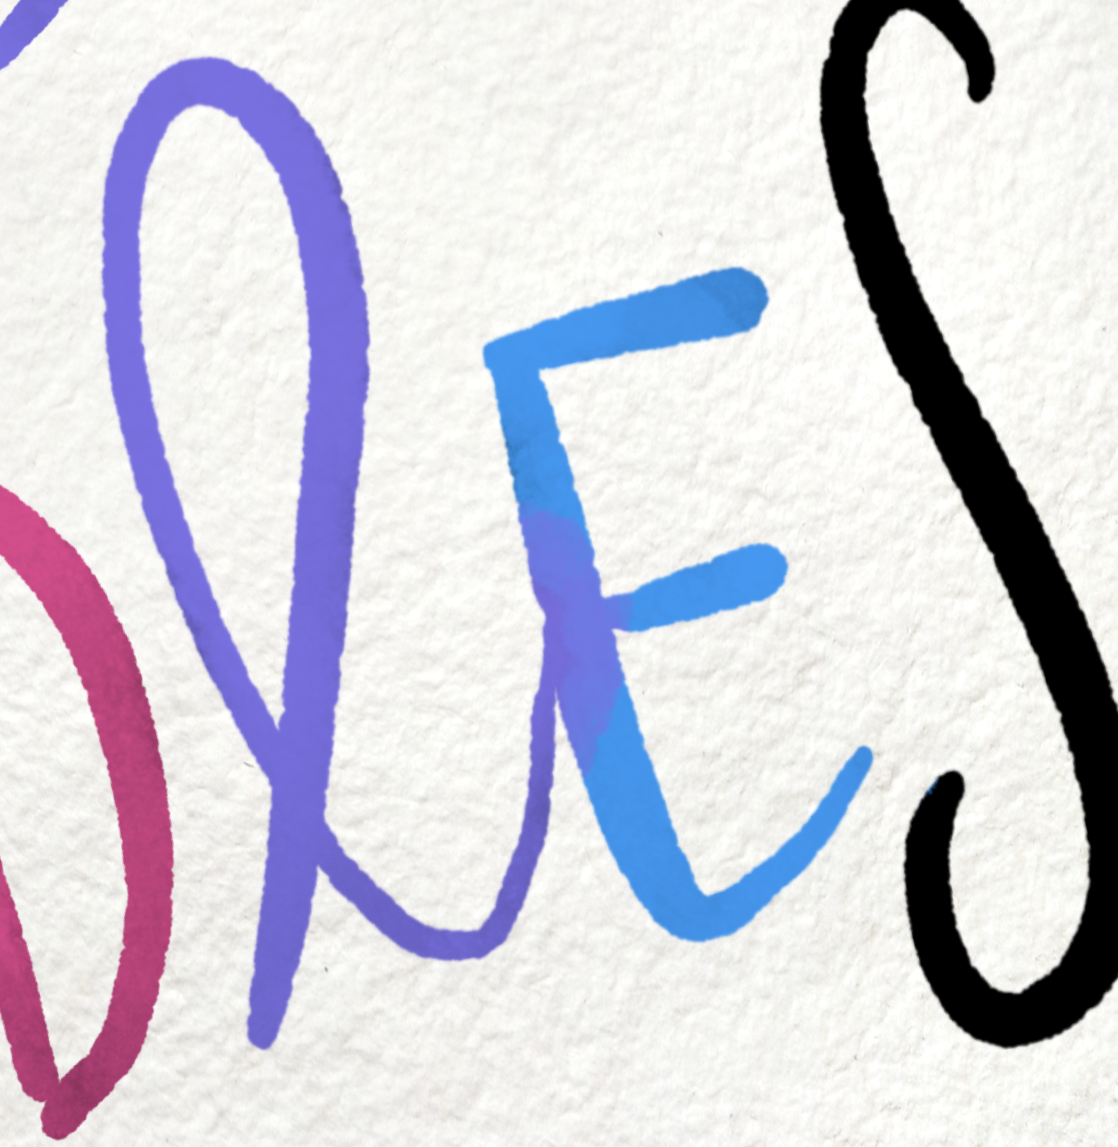
In traditional watercolor painting, the water would pool a bit, pushing the color to the edges making them darker, and leaving a lighter or more watered-down shade in the center.
To recreate the highlights, create a new layer, name it highlights, and make it a Clipping Mask on top of the text color layer.
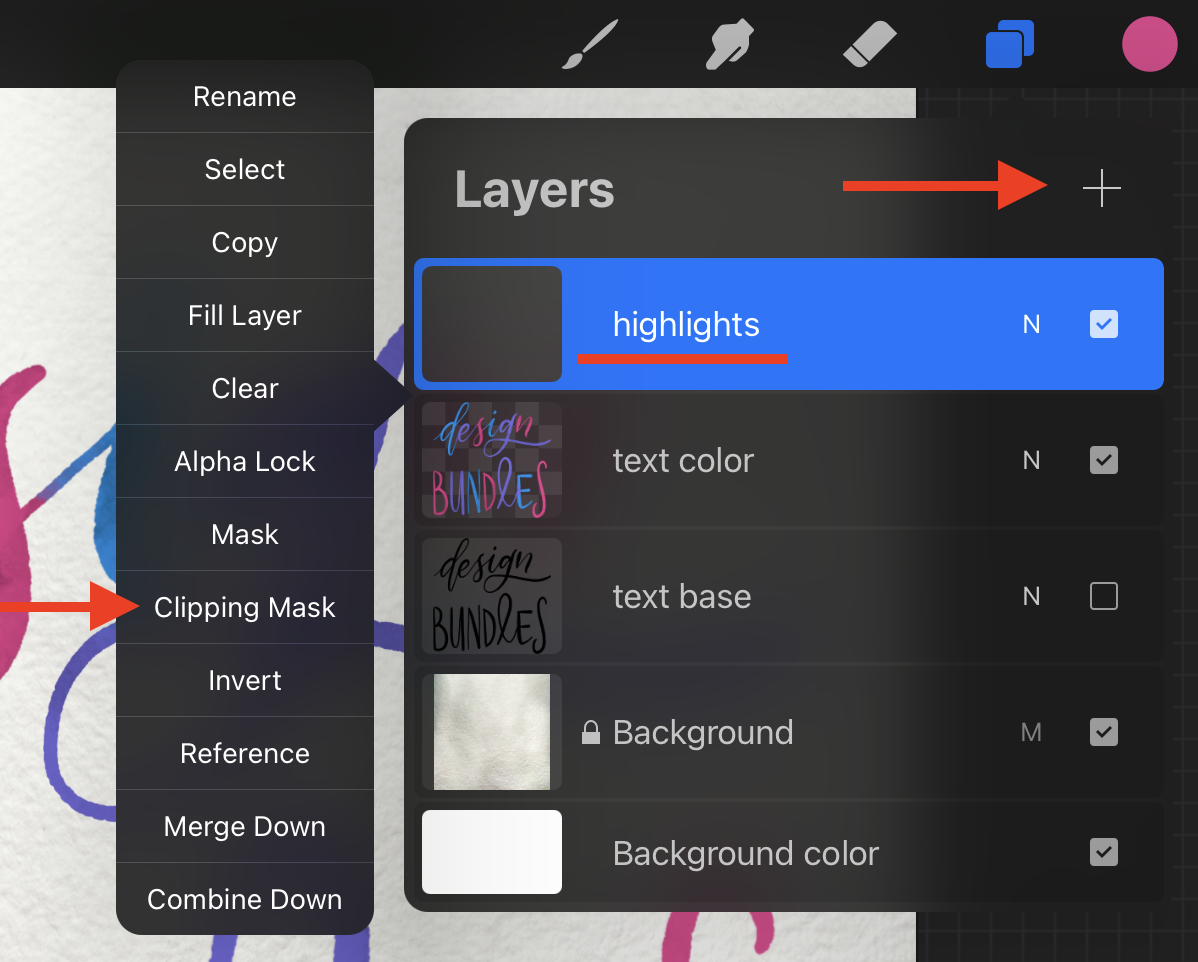
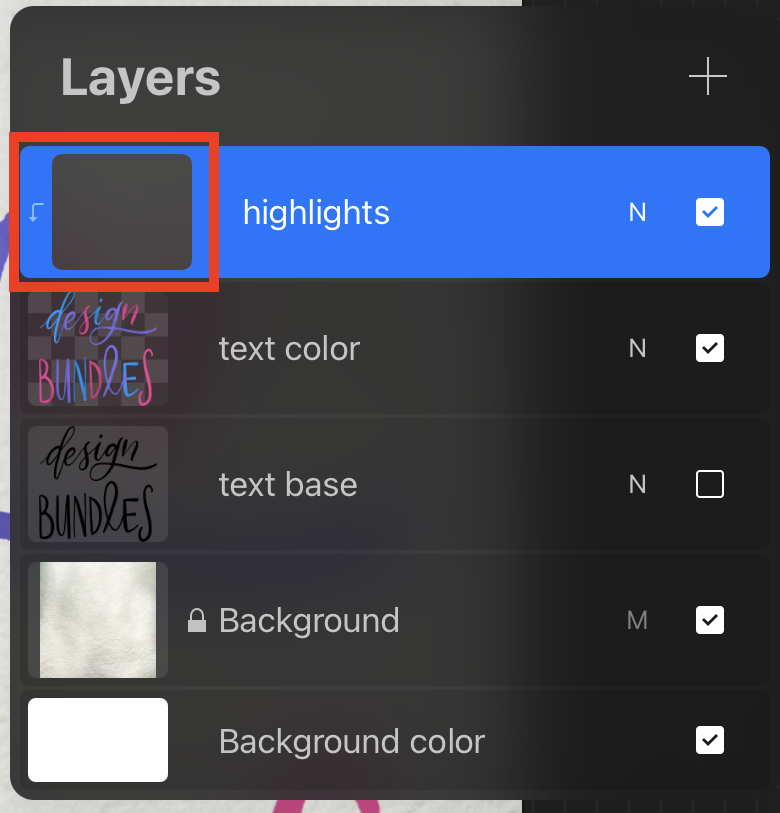
The small downwards arrow will indicate the highlight layer is masking to the text color layer.
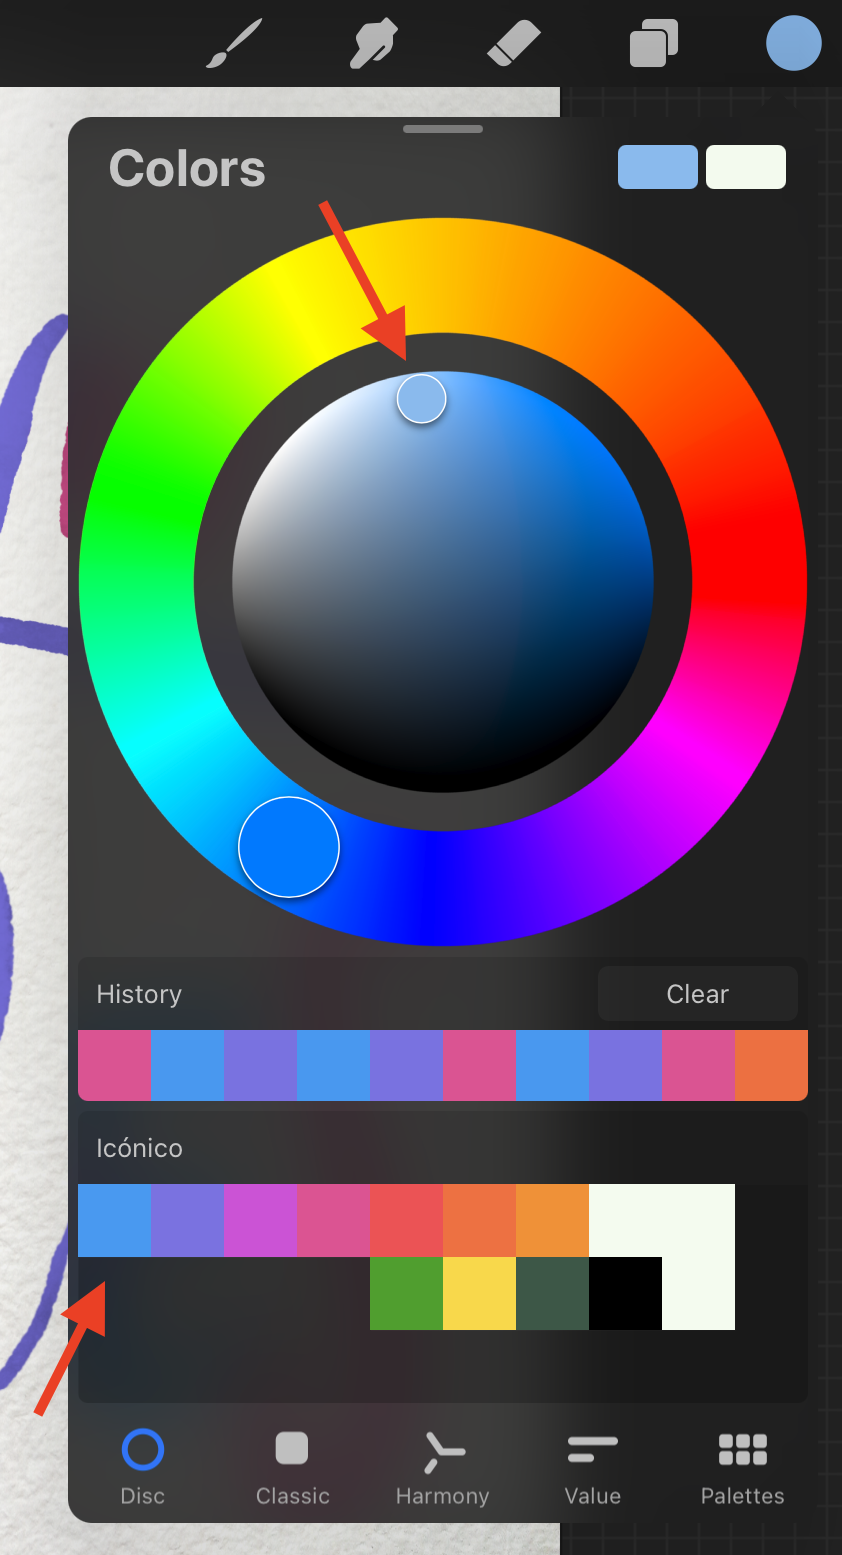
With a special effects brush apply some lighter shades of the color used in the centers of the letters to make it lighter.
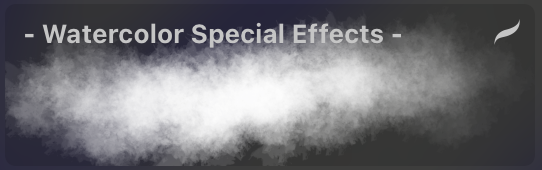
The brush should be really toned down so it just adds a slight highlight.
As before, remember to change the size and opacity of the brush to get a more realistic effect.
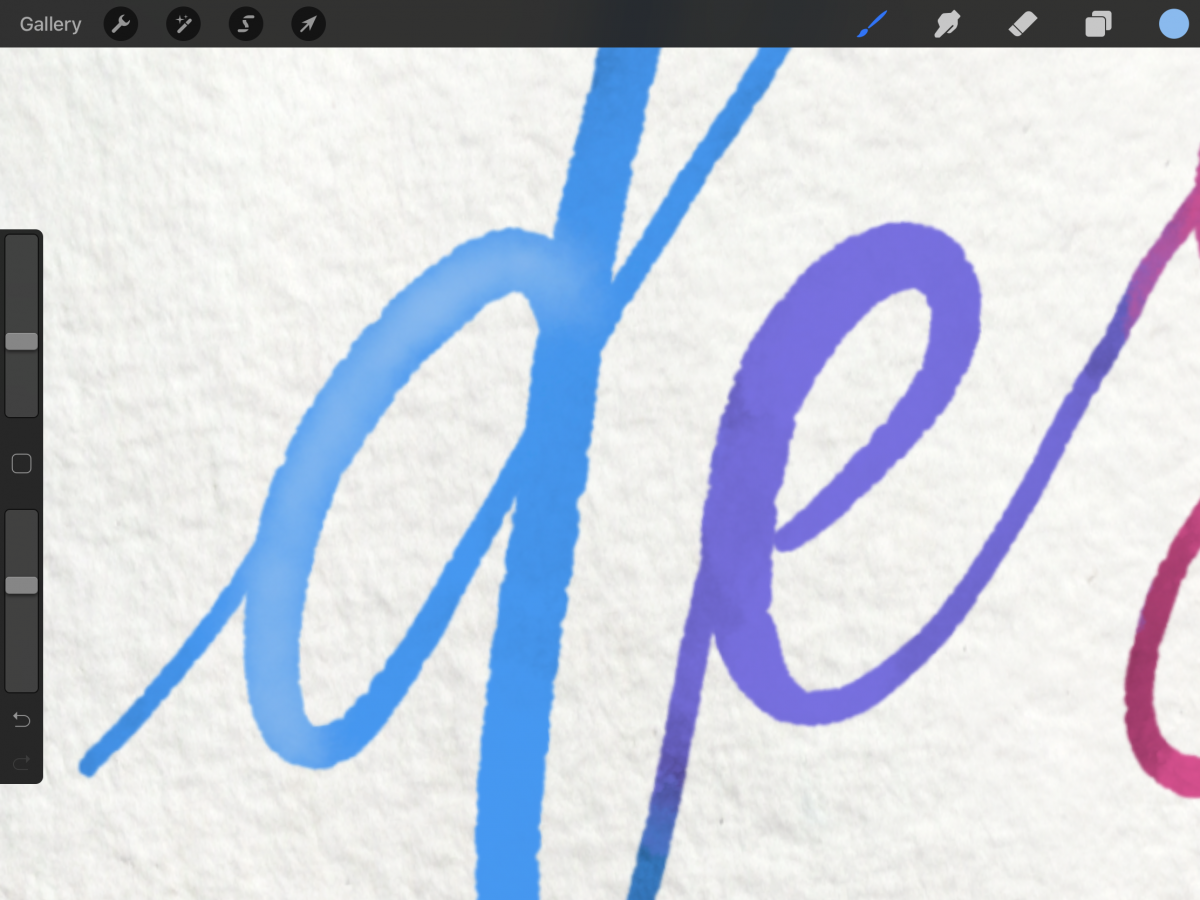
Your artwork should be looking similar to this.
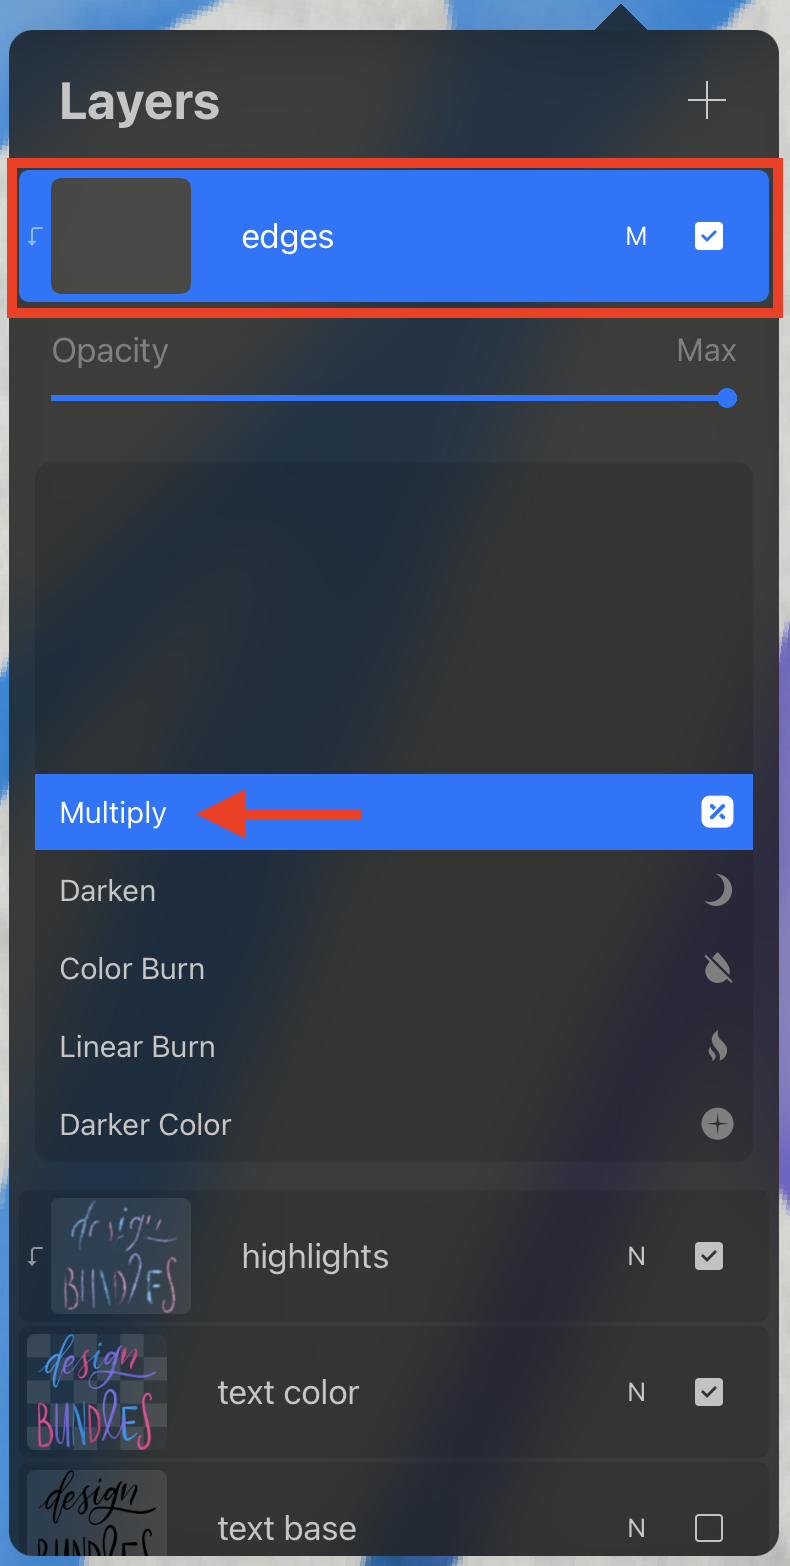
To recreate the bleeding edges (darker), create a new layer, name it edges, and make it a Clipping Mask on top. Click on the small N to open the layers setting and change the blending mode to Multiply.
With a special effects bleed brush apply some darker shades of the color used on the edges of the letters to make them darker.
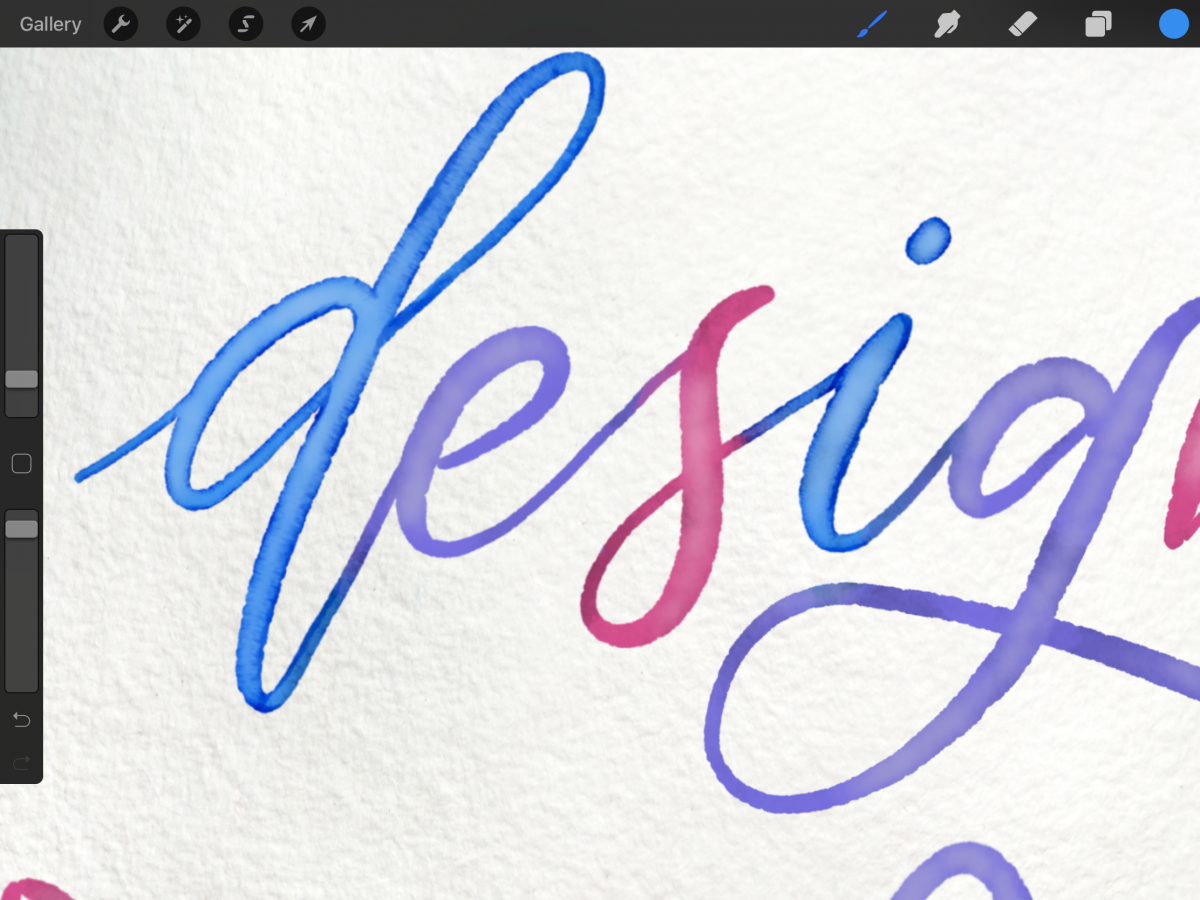
Remember to change the size and opacity of the brush to get a more realistic watercolor effect.
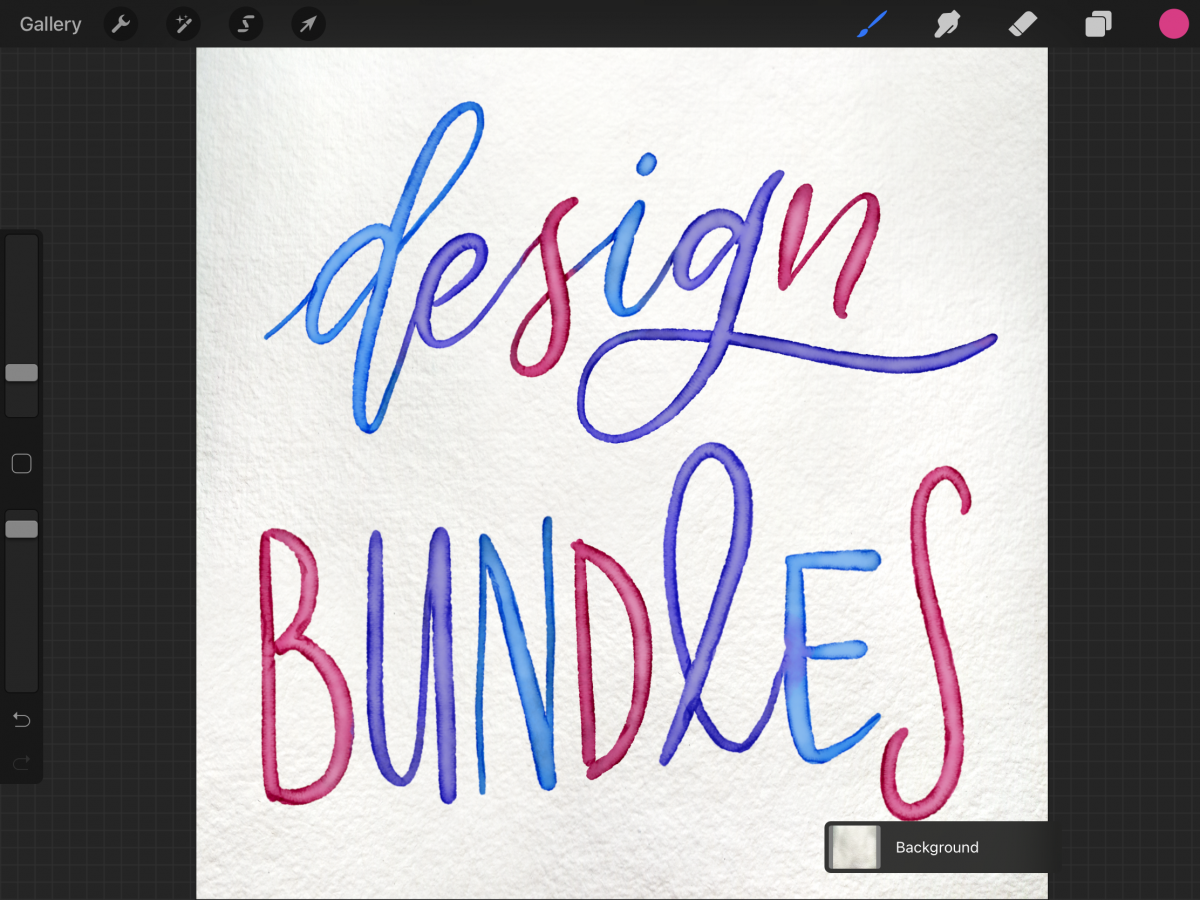
Use the Smudge tool with a blending brush to blend some of the color and make it softer.
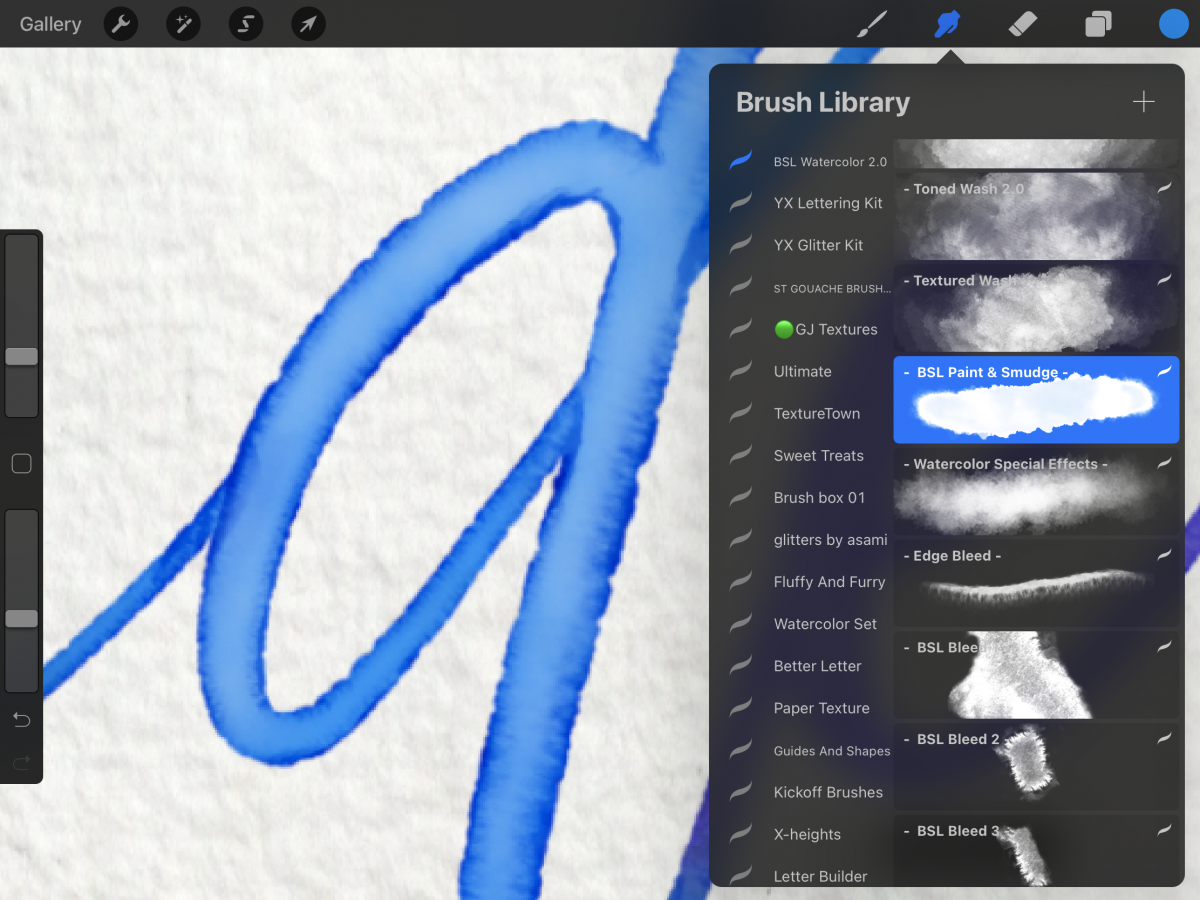
If you want you can add a new clipping layer, and add texture by using a texture brush and alternating between size, opacity, and colors.
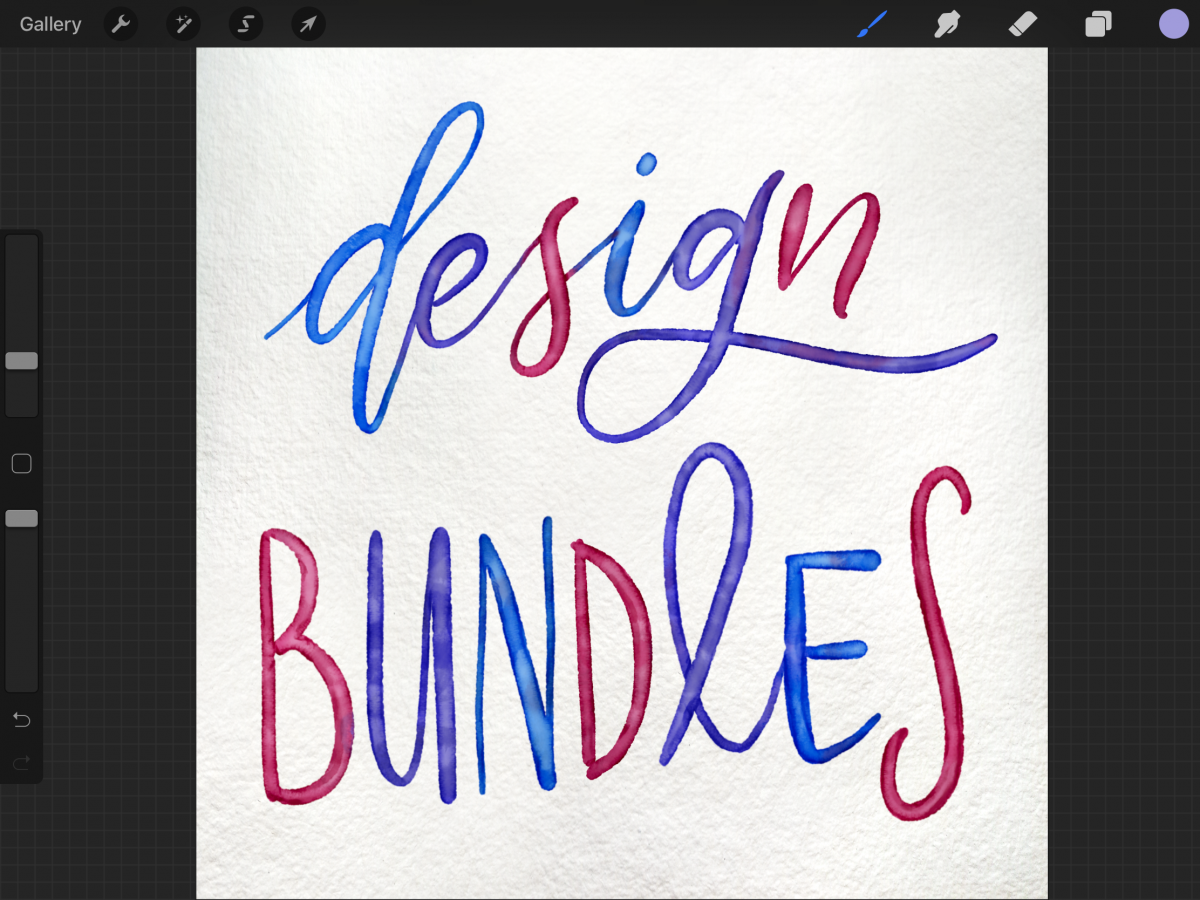
You can also duplicate the paper Background layer, clip it on top and adjust the blending mode and opacity to add even more texture to your letters.
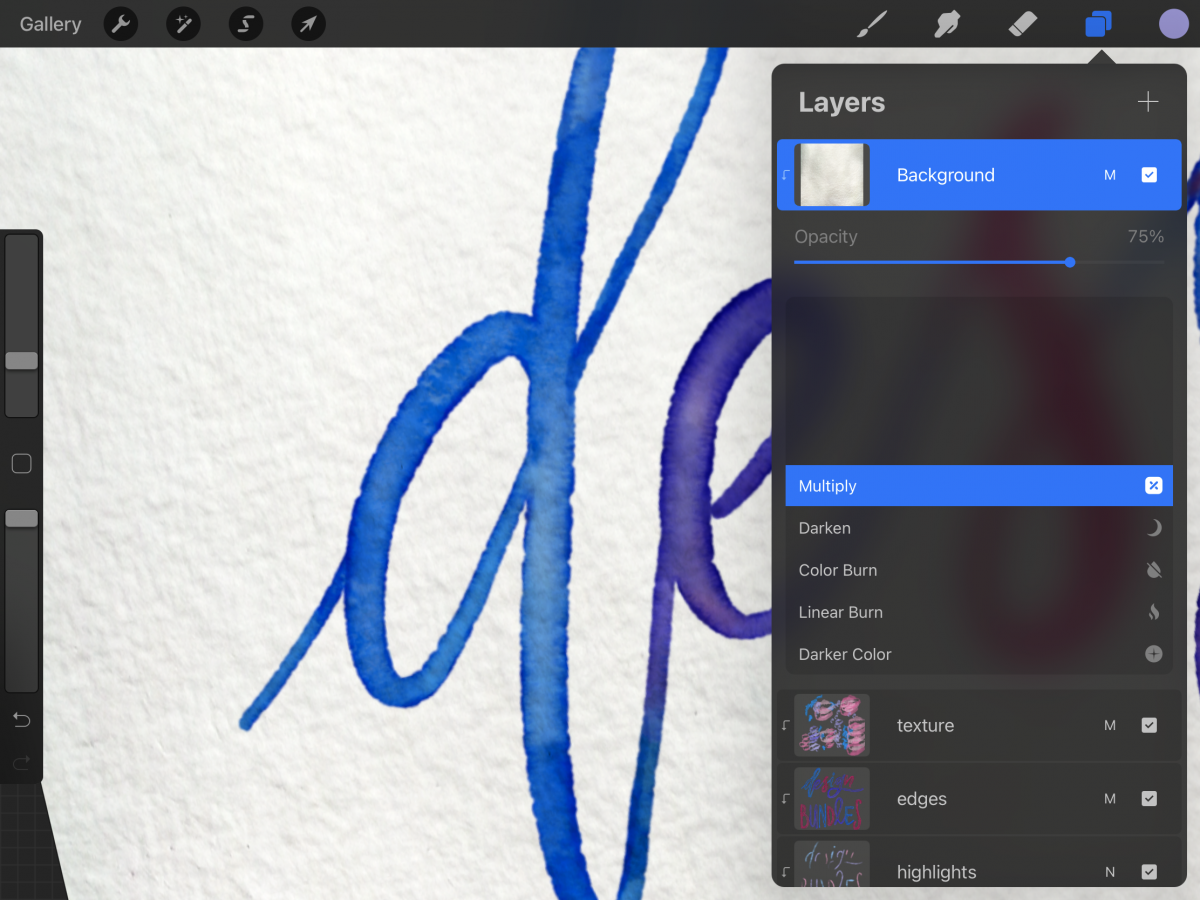
To finish up, you can add a new layer on top, name it splatter, change its blending mode to Multiply.
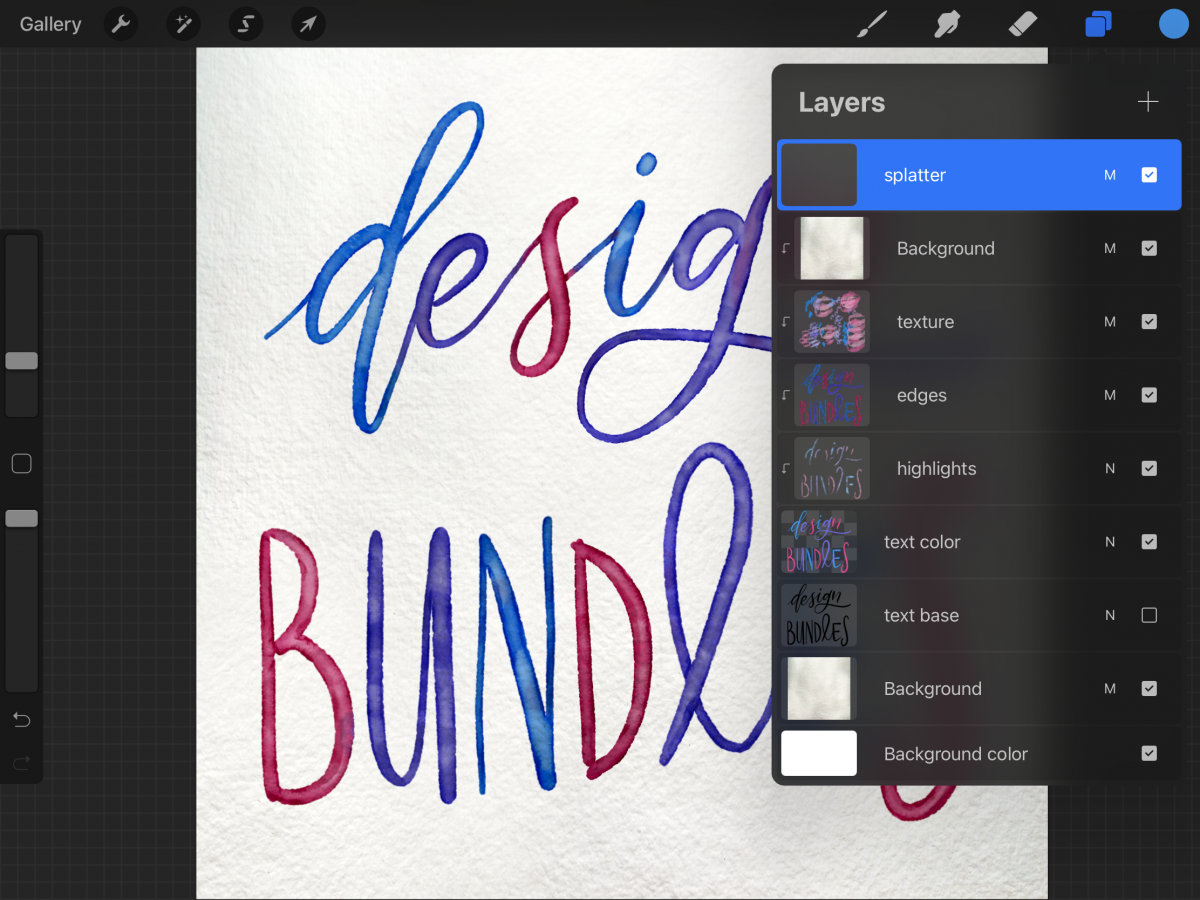
Use some splatter brushes alternating between size, opacity, and colors to add some details to your artwork.
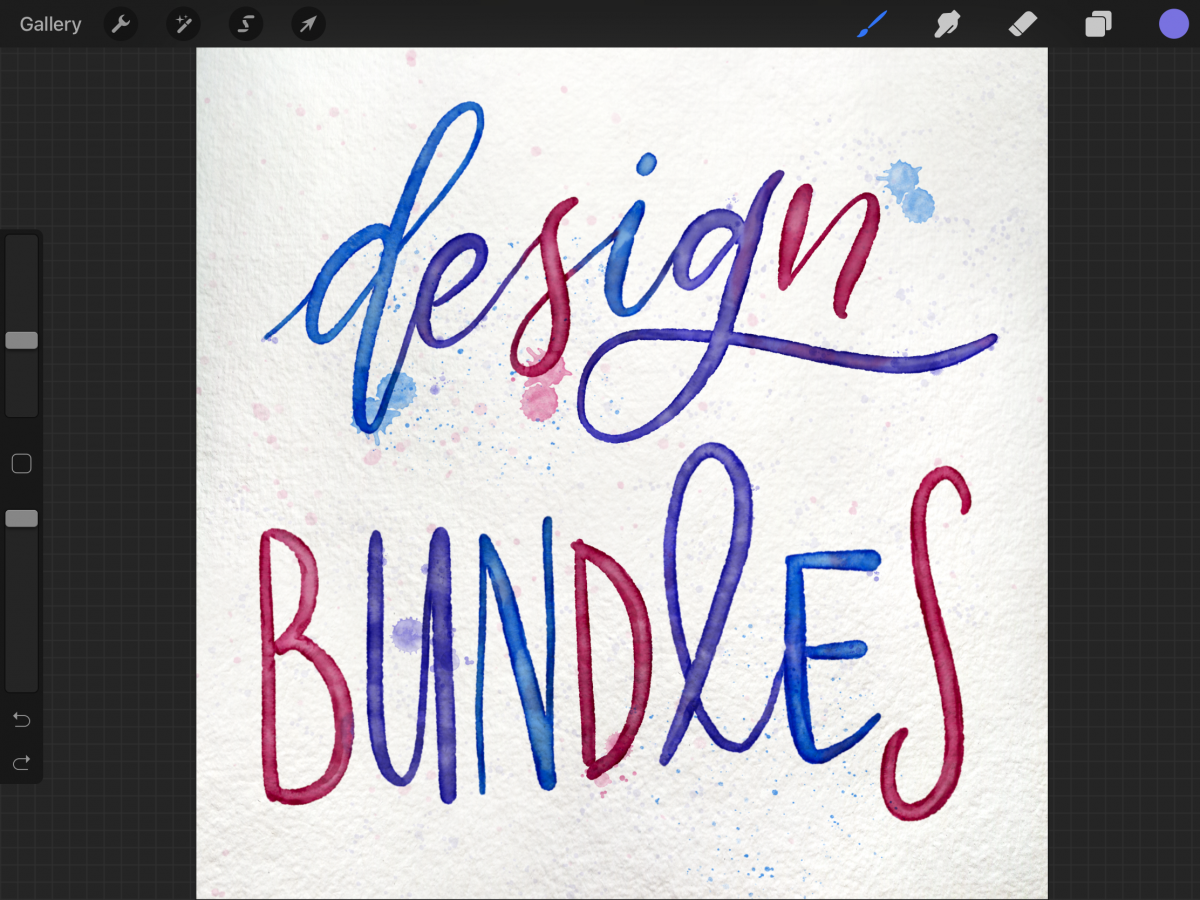
Here's a close up of the final effect.
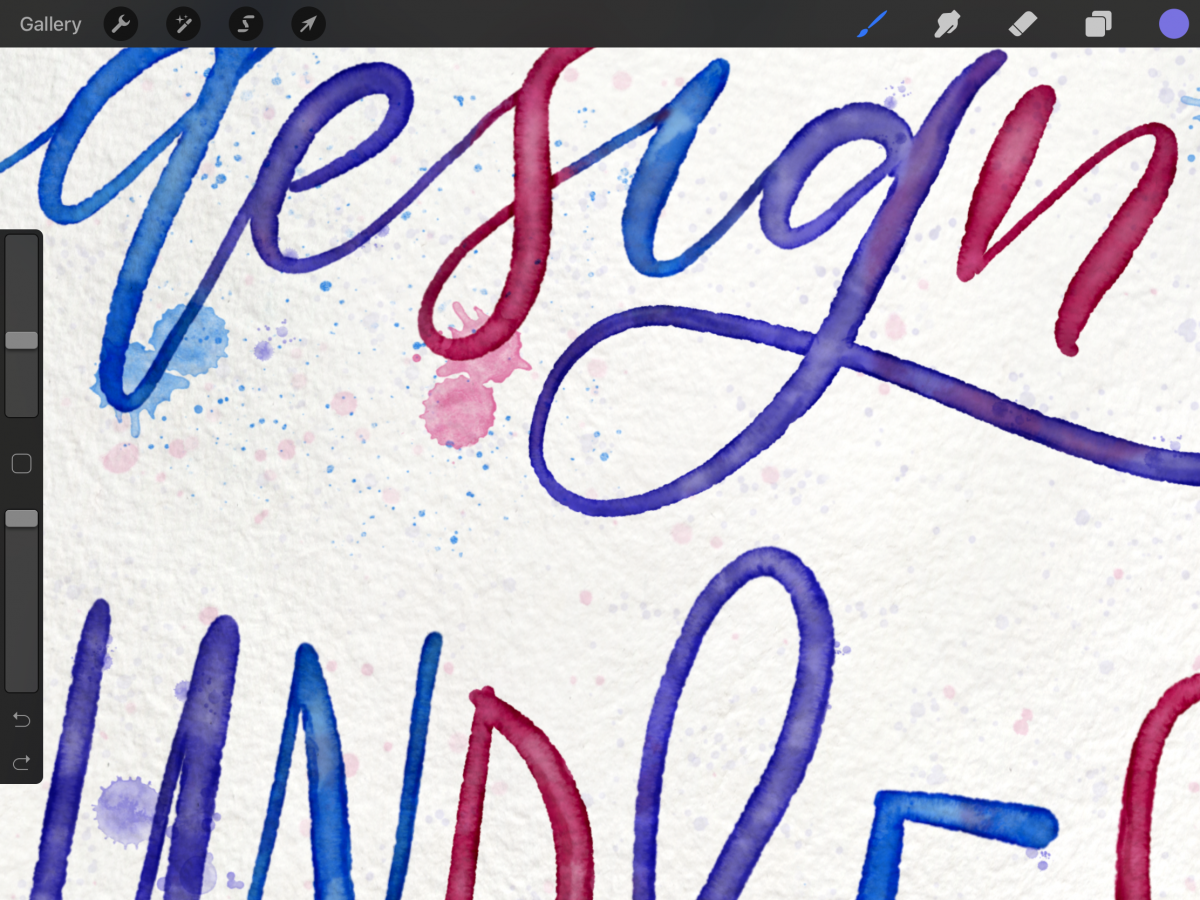
You have now successfully created digital watercolor lettering in Procreate! If you liked this tutorial you might enjoy our in-depth guide on blending colors with the smudge tool in Procreate.
In this tutorial, we are using the Watercolor Lettering Procreate brushes from Shannon Layne.
Before you start, download and install your brushes so everything is ready to use once you start with the project. Normally you will also need a nice paper texture background to complement the watercolor effect. Sometimes the brush kits include them, but you can also check out Design Bundles to get one if needed.
Step 1: Create your document and insert the background texture
First of all, create a New Canvas in Procreate. Choose the size and resolution depending on the use you want to give to your artwork. For example, if you want to share it on Instagram 2000 x 2000 px @72 dpi is a good choice, but if you want to print it you should use a higher resolution. We made ours 300 dpi.
Insert the paper texture you want to use as background. Go to the Tool panel, choose Add and Insert File or Photo (depending on the location where you saved them).
Navigate to where you saved your files and click on the one you want to use.
Select the paper background layer and name it (we named it Background). Click on the small N to open the layers setting, change the blending mode to Multiply, and lower the Opacity if you want to tone down the look of the paper a bit.
Then, lock the layer by pulling left on it to show the options and choose Lock.
Step 2: Add your text
Create a New Layer (+ sign on the top-right corner of the Layers panel), name it appropriately (we named it text base).
Select the brush you want to use, and write your text. It should be a basic watercolor brush but with rough edges to mimic the bleeding on the paper.
You can either use black, white, or any other color for now.
Step 3: Add color to your text
Duplicate the text base layer and name it (we used text color).
Click on the icon to open the layer menu and click Alpha Lock.
You should notice that the background of the thumbnail turned into a checkered board.
Now, select a color from your library or a color palette and use a wash/texture brush to start applying the color to the letters.
You can alternate between colors or use just one.
Change the size and opacity of the brush to get a more realistic watercolor effect.
Remember to add some “bleeding” where two colors meet, just like watercolor would do.
Your colored text should look similar to this.
In traditional watercolor painting, the water would pool a bit, pushing the color to the edges making them darker, and leaving a lighter or more watered-down shade in the center.
Step 4: Add highlights to your text
To recreate the highlights, create a new layer, name it highlights, and make it a Clipping Mask on top of the text color layer.
The small downwards arrow will indicate the highlight layer is masking to the text color layer.
With a special effects brush apply some lighter shades of the color used in the centers of the letters to make it lighter.
The brush should be really toned down so it just adds a slight highlight.
As before, remember to change the size and opacity of the brush to get a more realistic effect.
Your artwork should be looking similar to this.
Step 5: Add the darker edges to your text
To recreate the bleeding edges (darker), create a new layer, name it edges, and make it a Clipping Mask on top. Click on the small N to open the layers setting and change the blending mode to Multiply.
With a special effects bleed brush apply some darker shades of the color used on the edges of the letters to make them darker.
Remember to change the size and opacity of the brush to get a more realistic watercolor effect.
Step 6: Blend some of the color to make it softer
Use the Smudge tool with a blending brush to blend some of the color and make it softer.
Step 7: Add more texture
If you want you can add a new clipping layer, and add texture by using a texture brush and alternating between size, opacity, and colors.
You can also duplicate the paper Background layer, clip it on top and adjust the blending mode and opacity to add even more texture to your letters.
Step 8: Add the finishing touches
To finish up, you can add a new layer on top, name it splatter, change its blending mode to Multiply.
Use some splatter brushes alternating between size, opacity, and colors to add some details to your artwork.
Here's a close up of the final effect.
You have now successfully created digital watercolor lettering in Procreate! If you liked this tutorial you might enjoy our in-depth guide on blending colors with the smudge tool in Procreate.
Related Tutorials
Illustrator Tutorials
How to Create Watercolor Lettering in Illustrator
Learn how to create watercolor lettering in Illustrator in 2 methods.
Procreate Tutorials
How to Outline Lettering in Procreate
Learn how to add outlines to your lettering or design in Procreate on your iPad.
Procreate Tutorials
How to Make Drop Shadow Lettering in Procreate
Procreate Tutorials
How to Draw Ribbon Lettering in Procreate
Procreate Tutorials
How to Draw 3D Lettering in Procreate
Procreate Tutorials
How to Edit and Create a Custom Canvas Size in Procreate
Learn how to edit and create a custom canvas size in Procreate with this step by step tutorial.