Get Unlimited Access to Millions of Craft Designs, Templates, Fonts and More! Start Creating for Free Now

DesignBundles.NET
Pricing
DesignBundles.NET

Categories

New

Account

Start Free Trial
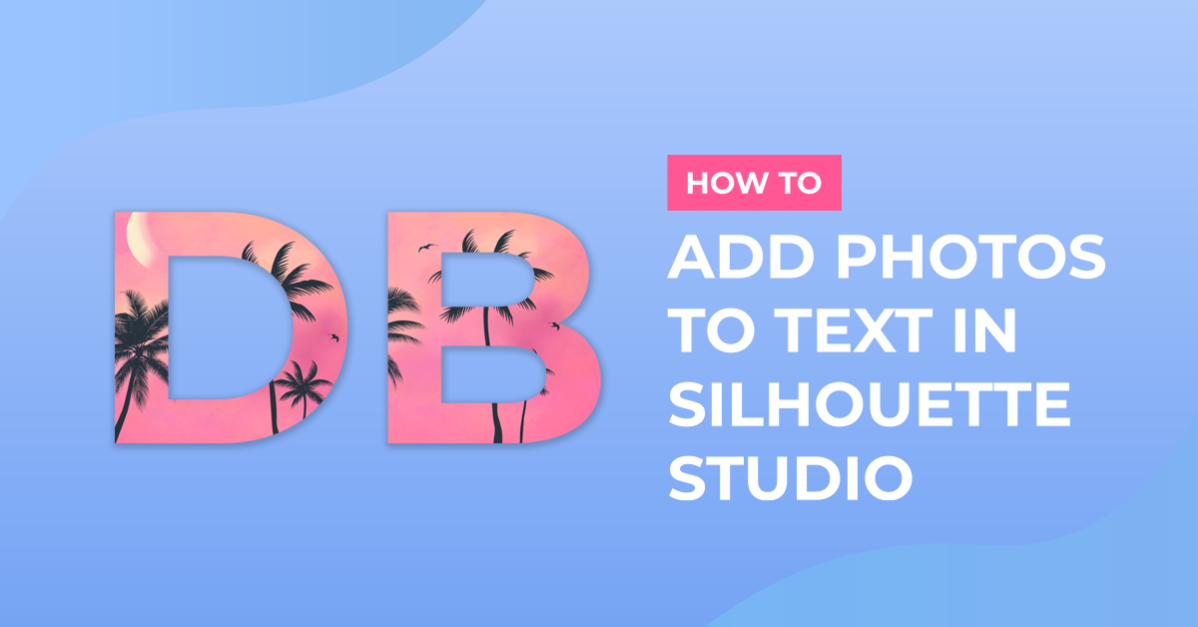
Adding photos to text in Silhouette

By Design Bundles

Adding photos to text in Silhouette

1- Open silhouette studio. Click on the text icon.
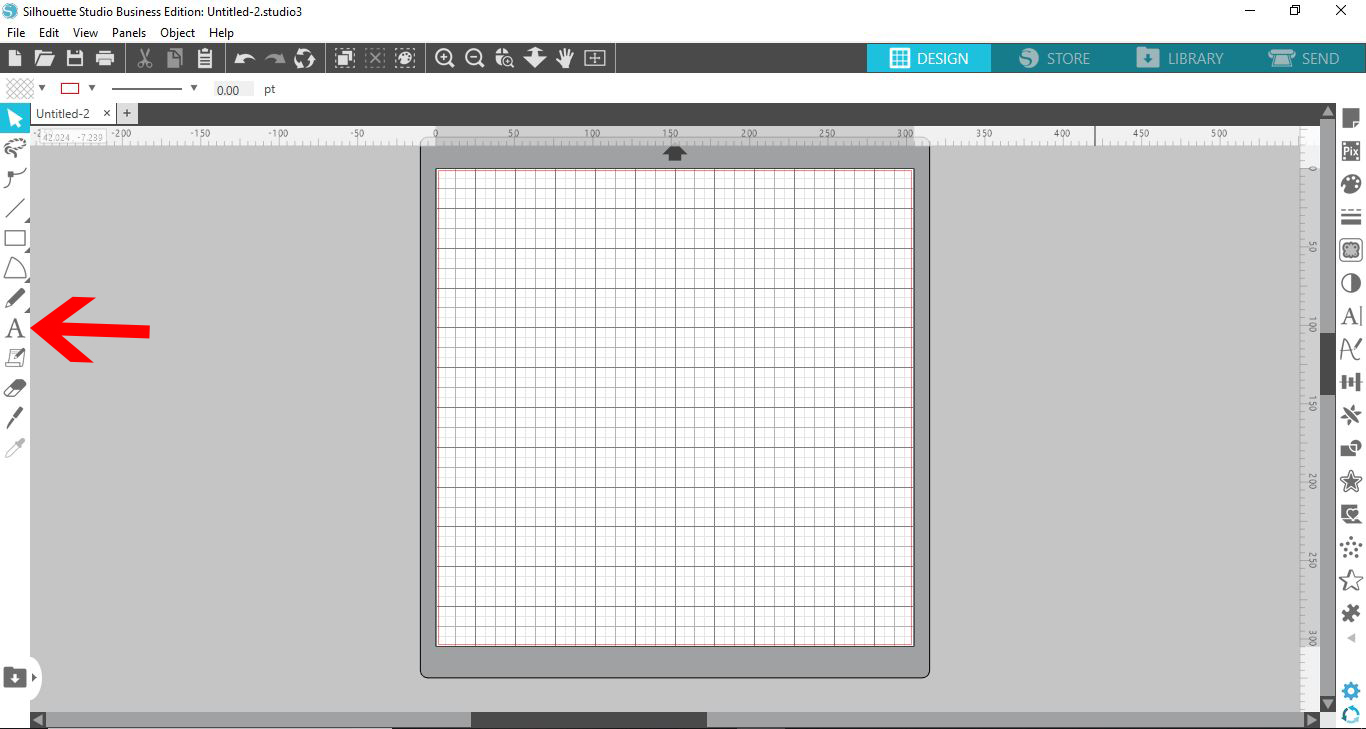
2- Type your text. Click on the text style panel.
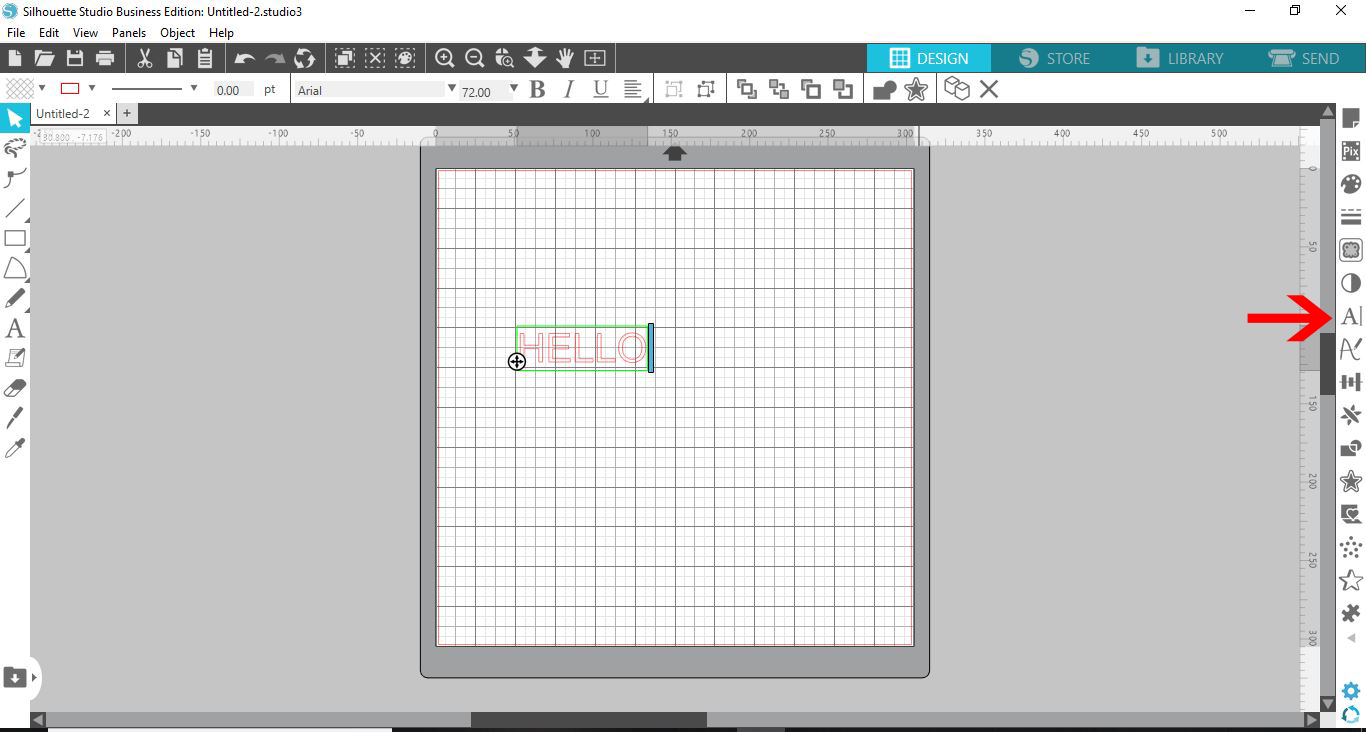
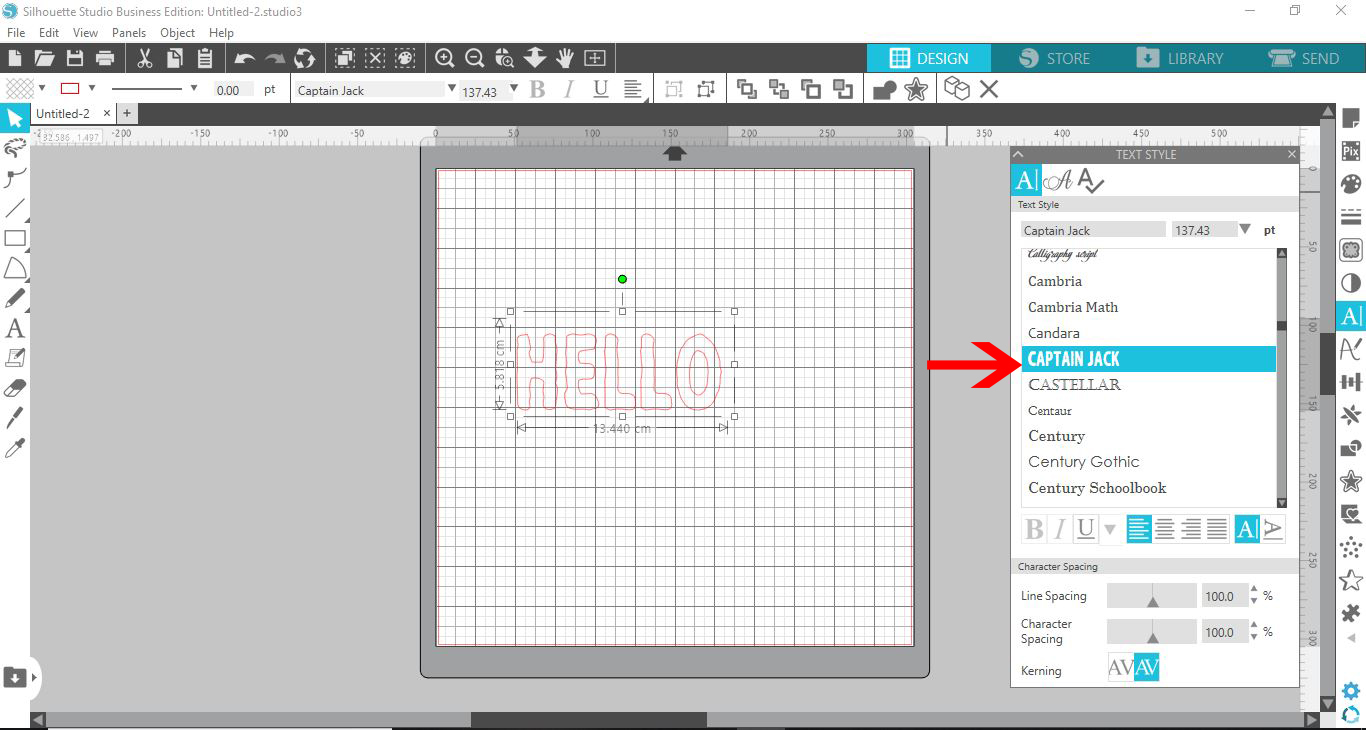
3- Select your font. When inserting photos in a font, try to select a font that is thick so you can see the most of the images. I am usingCaptain Jackby SmartDesigns.
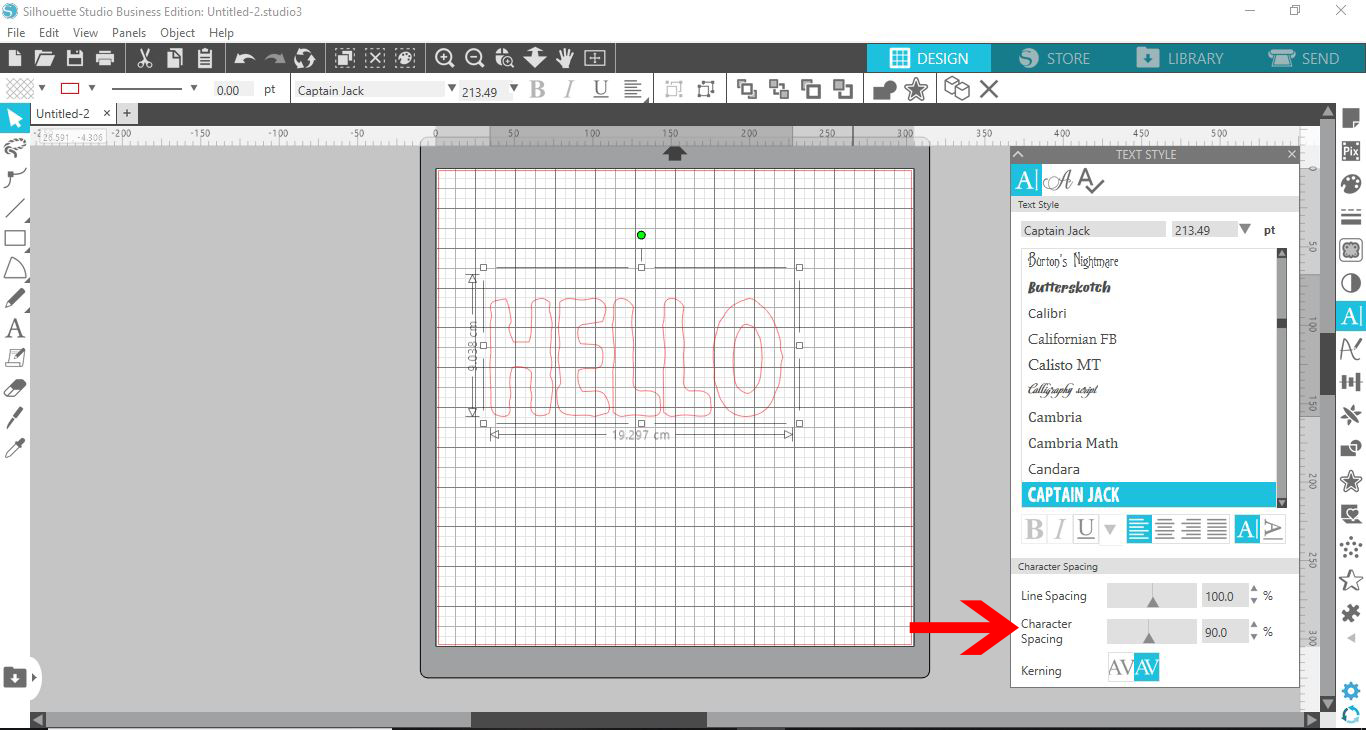
4- Adjust the character spacing of your text. If you only use one photos this will give a better effect. If you use more than one photos you may not need to adjust the character spacing.
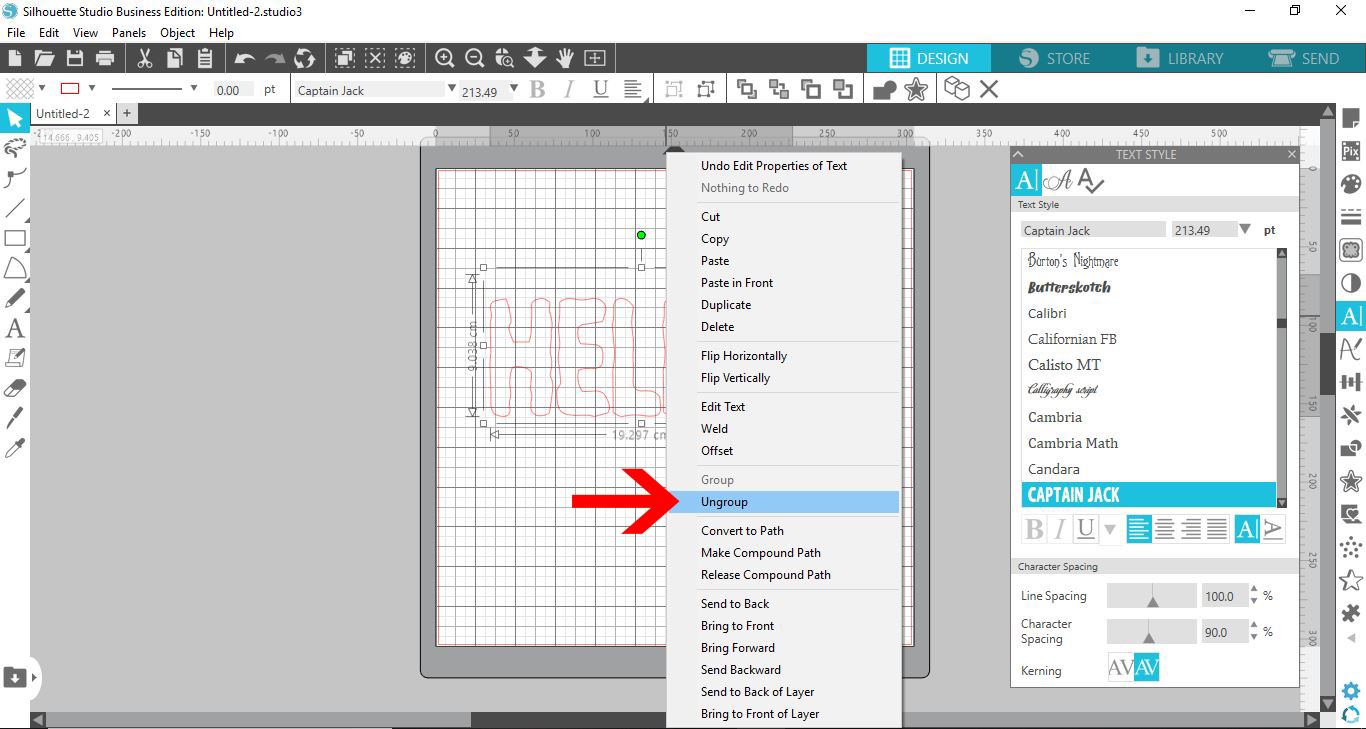
5- Select the text and right click. Ungroup.
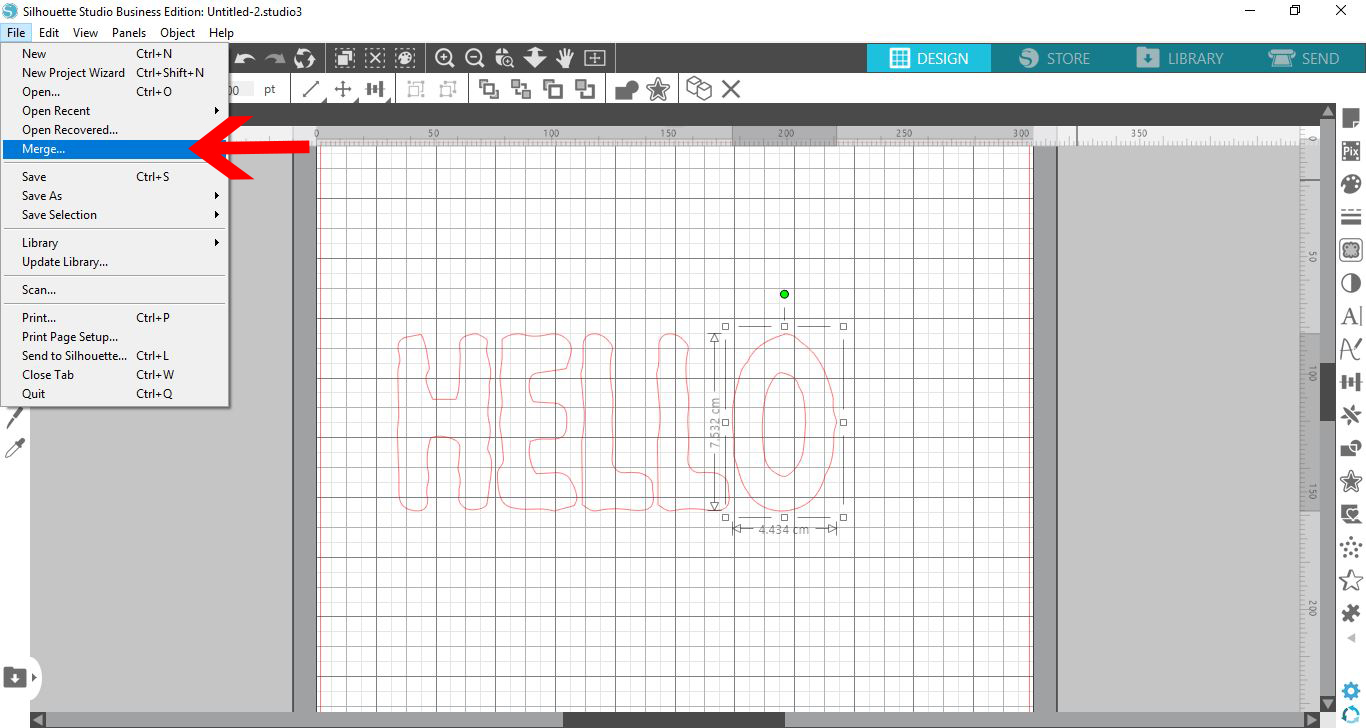
6- Go to file >merge.
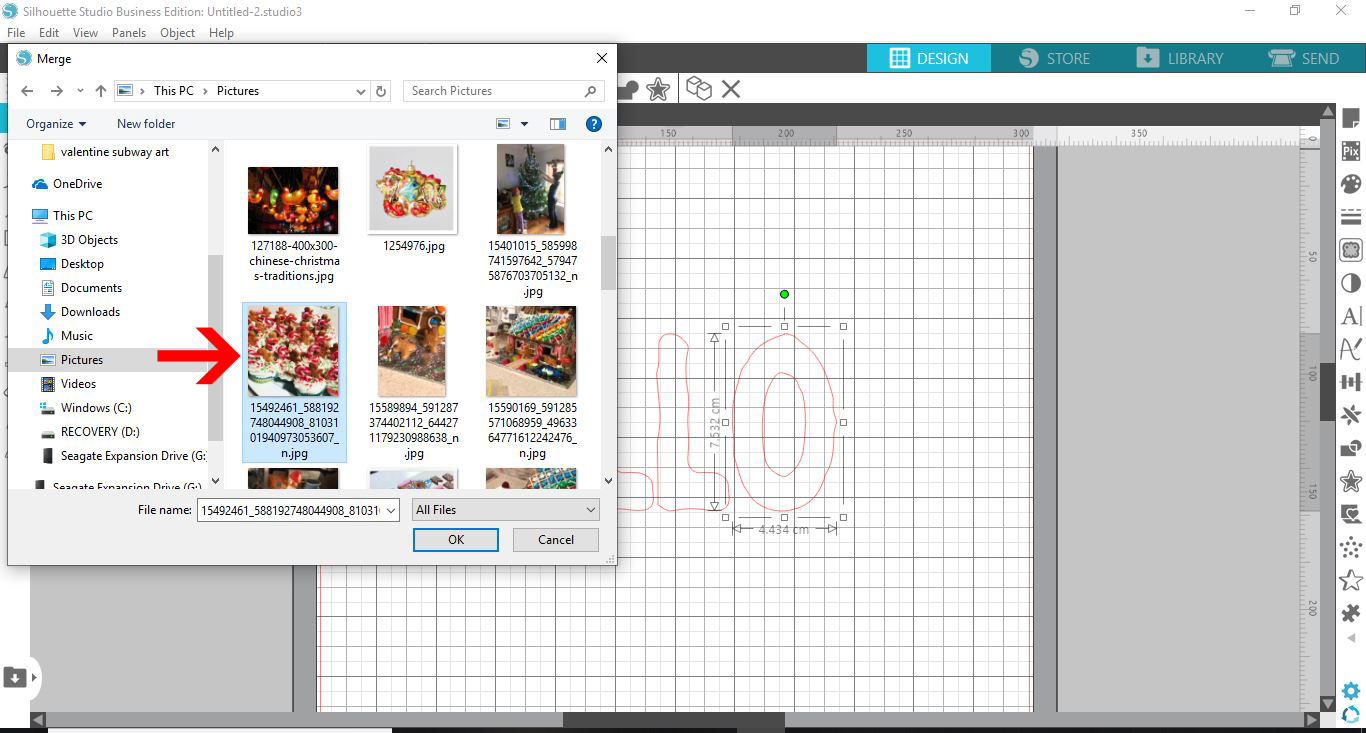
7- Select your photo.
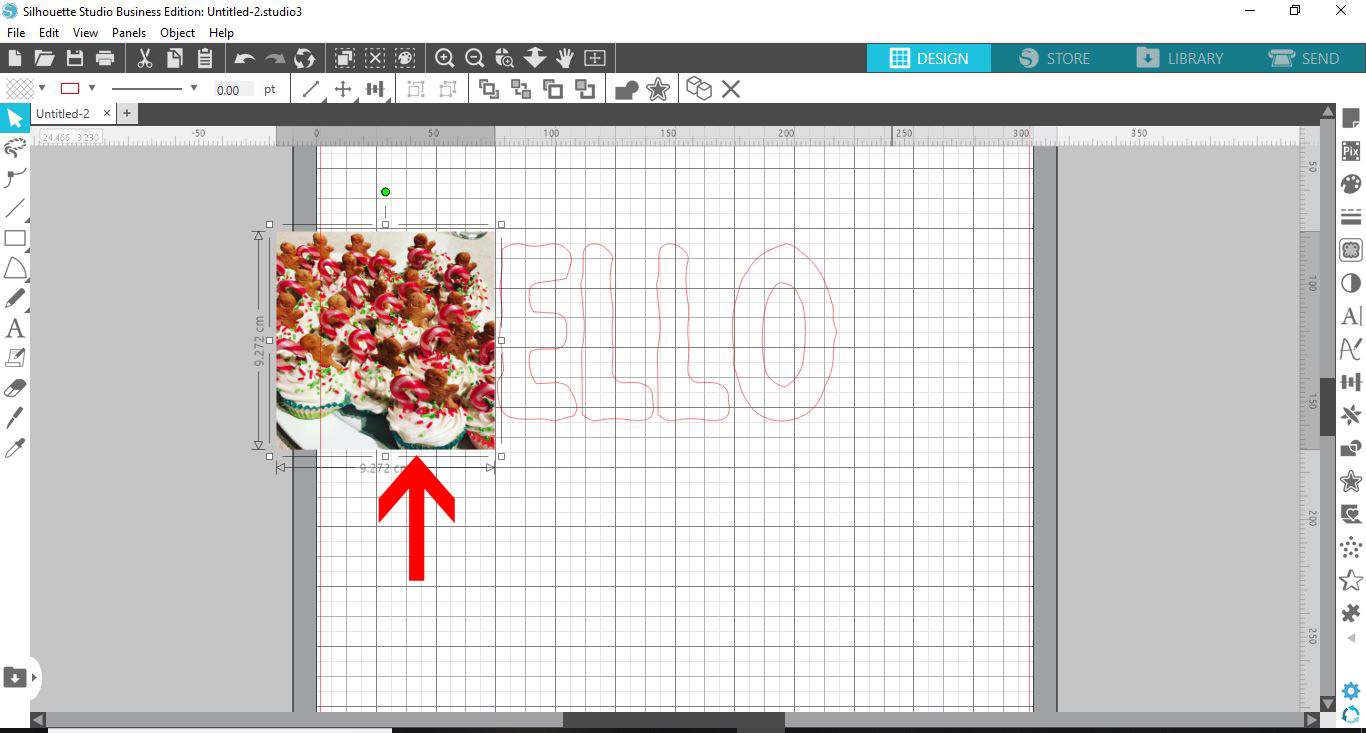
8- Place your image over the letter you would like it to be inserted to.
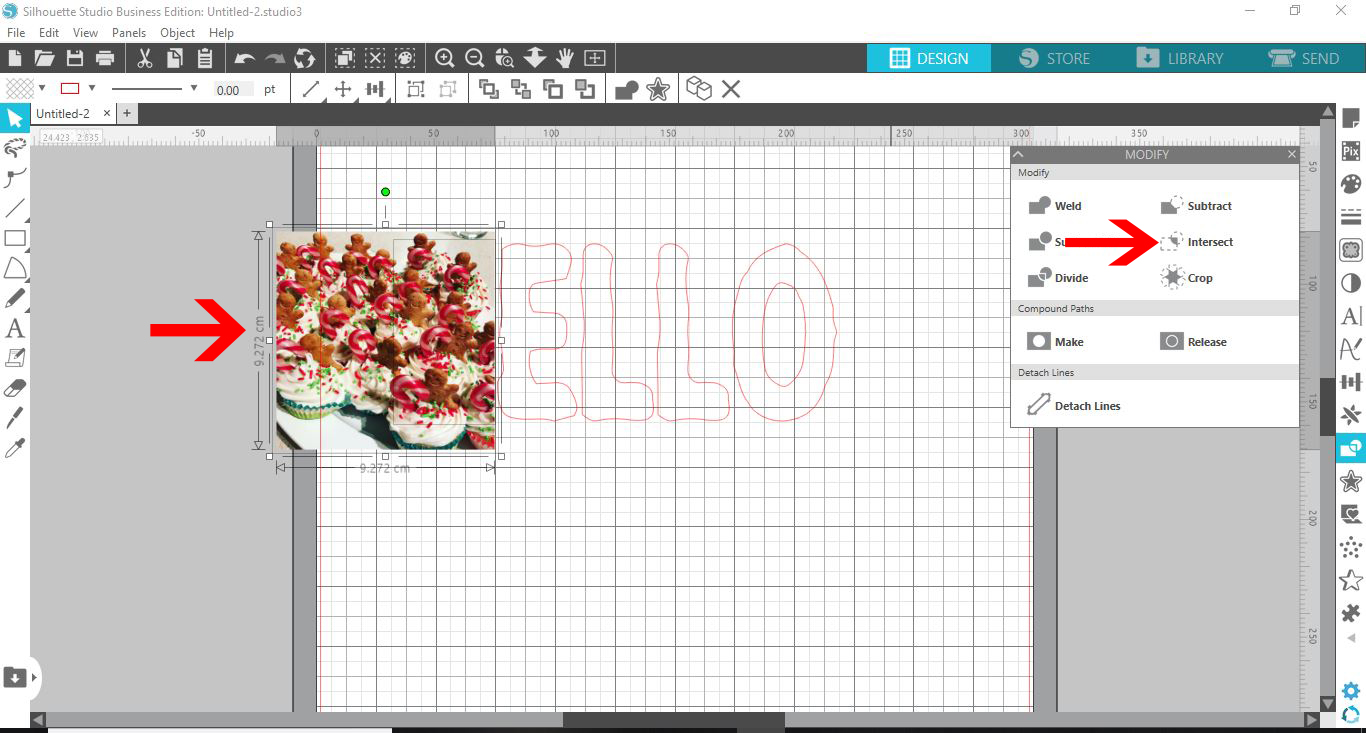
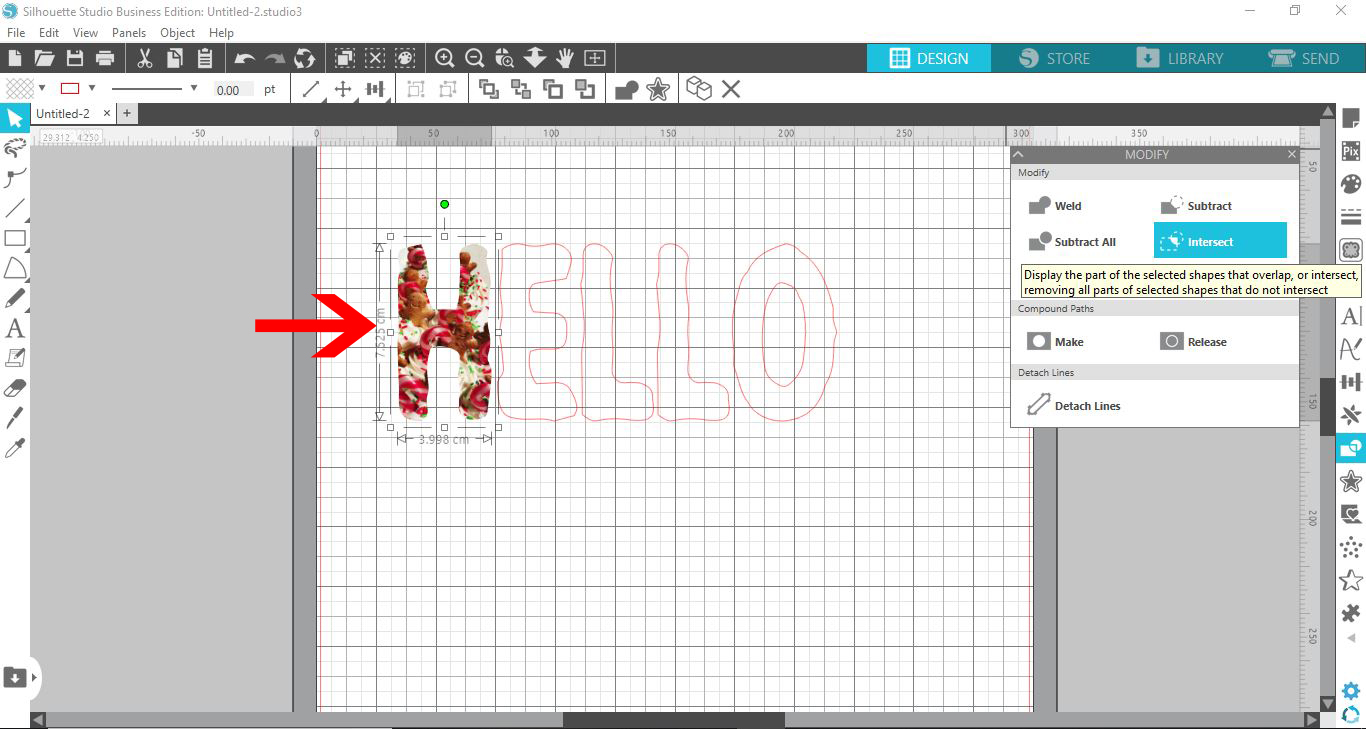
9- Select both and then click on the modify panel. Select intersect. This will only leave the photo when the letter and photo touch.
10- Your image is now in your text.
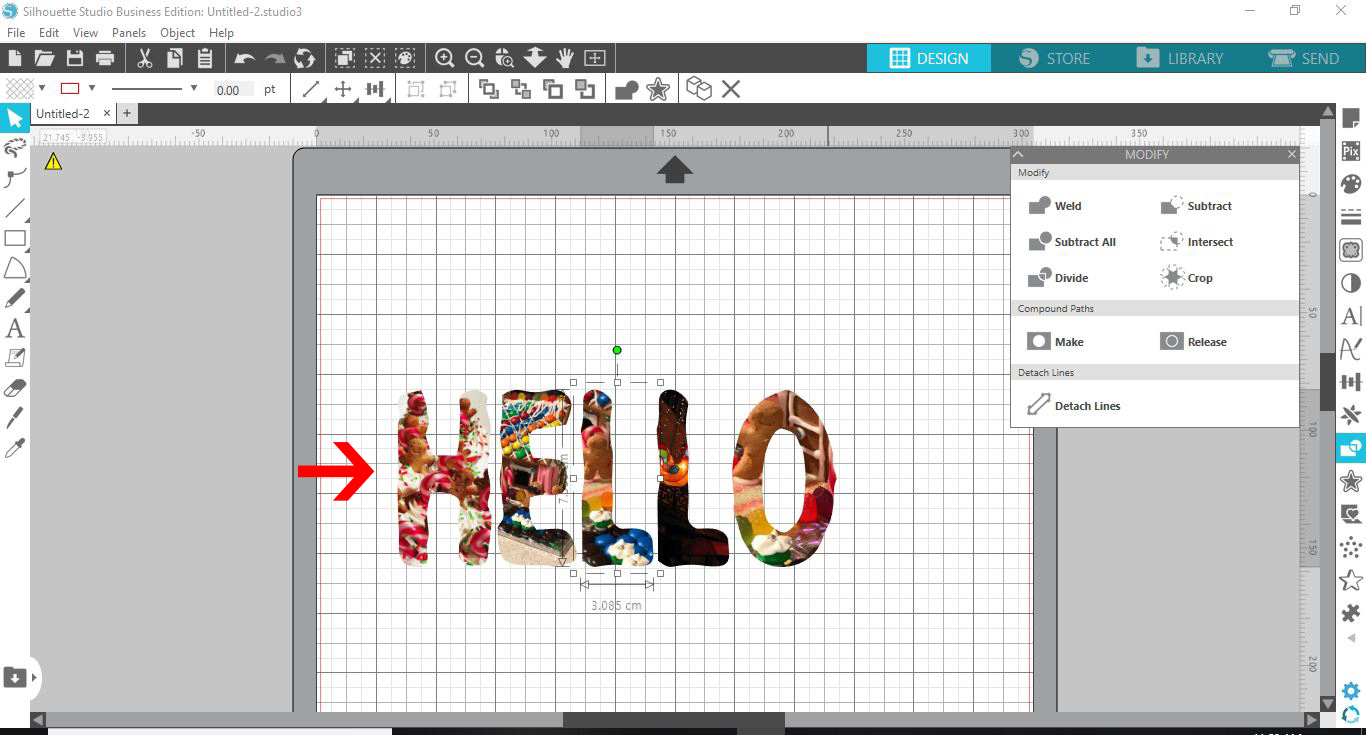
11- Repeat the above steps to fill the rest of the letters.
Related Tutorials

Silhouette Tutorials

How to Add an Outline Around Any Text in Silhouette Studio

Discover how to add an outline to any text in this Silhouette Studio tutorial. Quick read!
Silhouette Tutorials

How to Edit Text in Silhouette Studio

Learn how to edit text in Silhouette Studio in many different ways!
Silhouette Tutorials

How to Mirror Text and Images in Silhouette Curio

In 4 steps discover how to mirror text and images in Silhouette Studio when cutting with HTV.
Silhouette Tutorials

How To Create Text to Path in Silhouette Studio

Discover how to use the Text to Path feature in Silhouette Studio with this easy to follow tutorial.

Keep going

You may also like

All silhouette tutorials
The weekly drop

Fresh tutorials, trends & free files.

Join 6 million makers getting our best craft guides and exclusive freebies straight to their inbox.

No spam. Unsubscribe anytime.