By Design Bundles
How to fill text with the foil quill in silhouette studio free edition
Today we will show you how to fill text with the Foil Quill using the Silhouette Studio Free Edition. The Foil Quill uses heat to transfer foiled designs to several types of media. It’s a fantastic way of making a gift extra special. Usually, single line fonts are used with the Foil Quill. We will show you two tools you can use to fill your favorite font for this effect.
If you prefer, you can browse through the stunning Single Line Fonts available on Design Bundles. A nice bold serif font works very well when filling for foil accents. During this tutorial we will be using a Cameo 3.
Step 1 - Get your Text Ready
After you have opened your Silhouette Studio, you need to create your text. The Text Tool can be found on the left side panel. Click on it to select.

Now, click anywhere on the mat and type out your text. You can also change the font as needed.

Step 2 - Use the Sketch Tool
For the first method we will use the Sketch Tool to fill our text. Depending on your version, once opened, the panel may show as Line Effects or Sketch. Click on the sketch lined icon on the right tollbar. A new window will appear.
It is good to note that adding a sketch fill can sometimes slow your system down. So make sure that you have completed any edits to your text first.
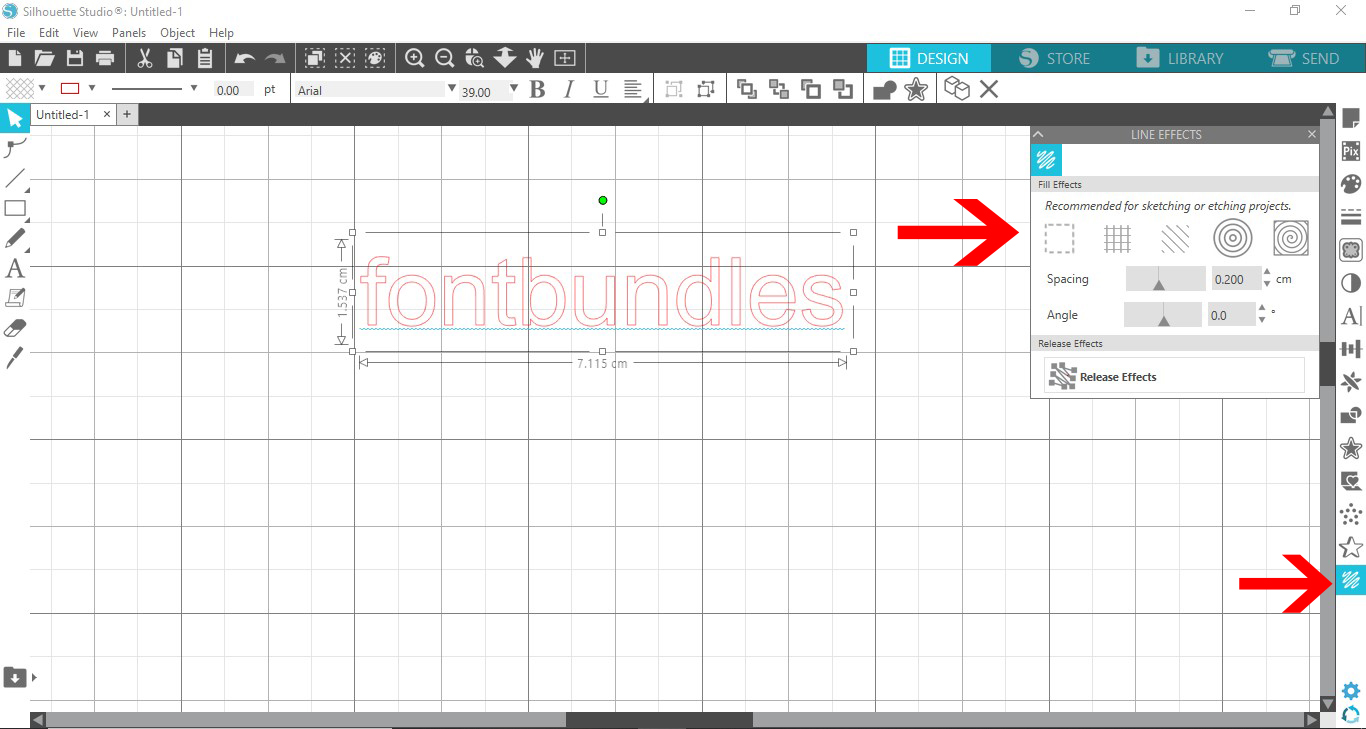
Add a Sketch Fill and Edit Spacing
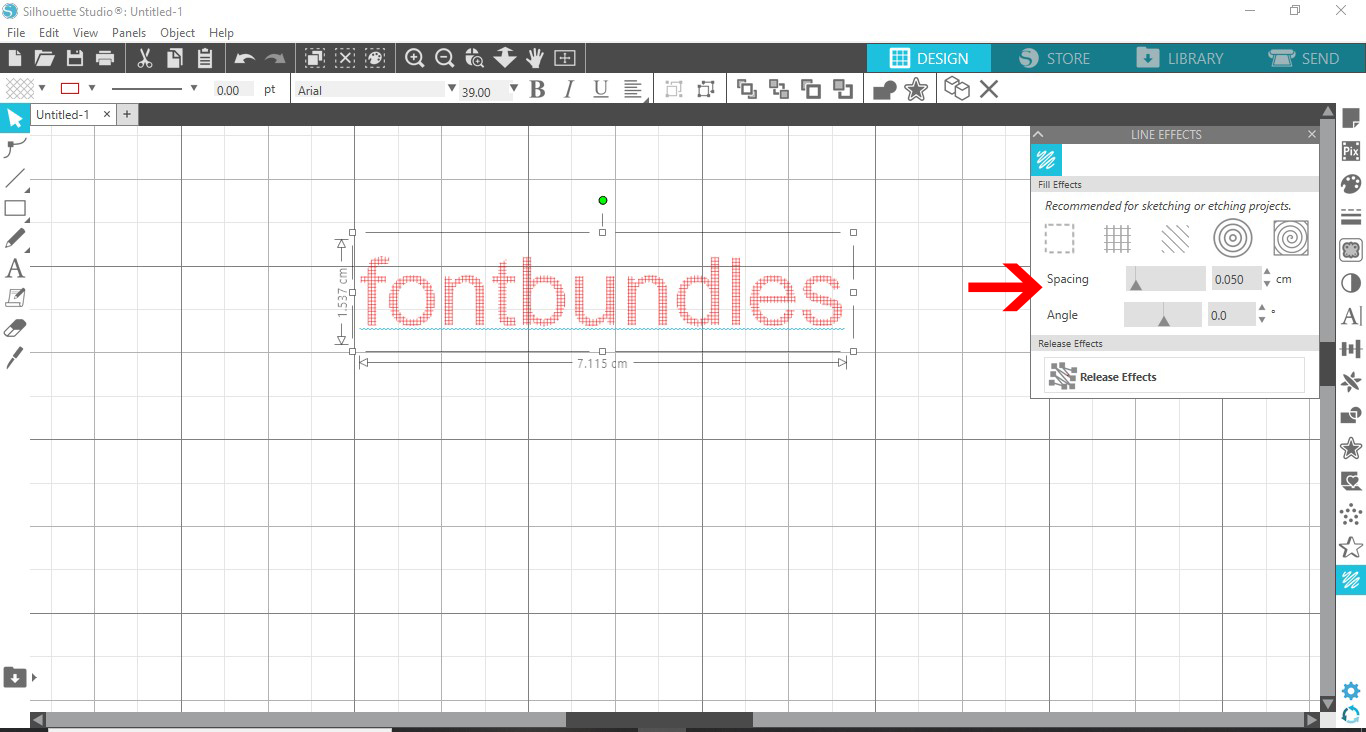
With the Sketch tool, filling the text will give a “colored in” result depending on the settings. In the panel, click on the second icon that says “Add a grid effect to the selected shapes''. You will now get a cross hatch look to your text.
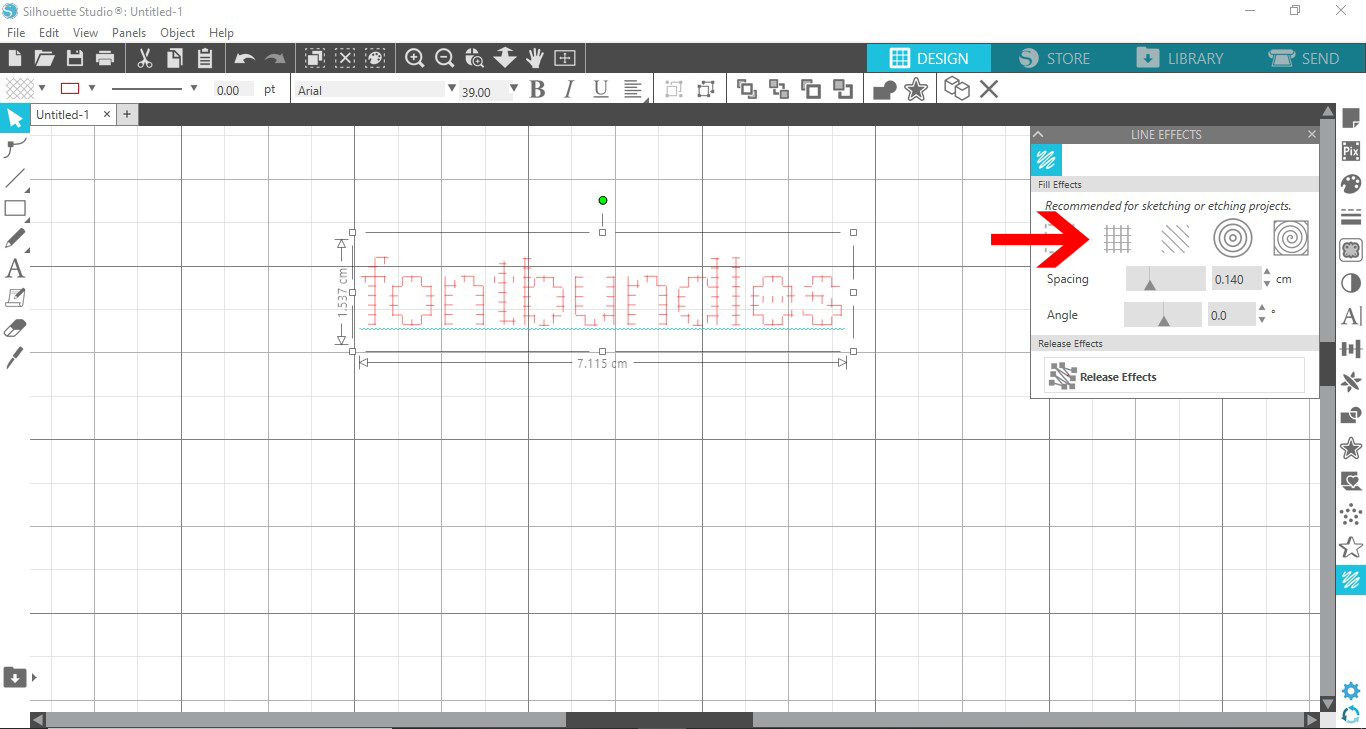
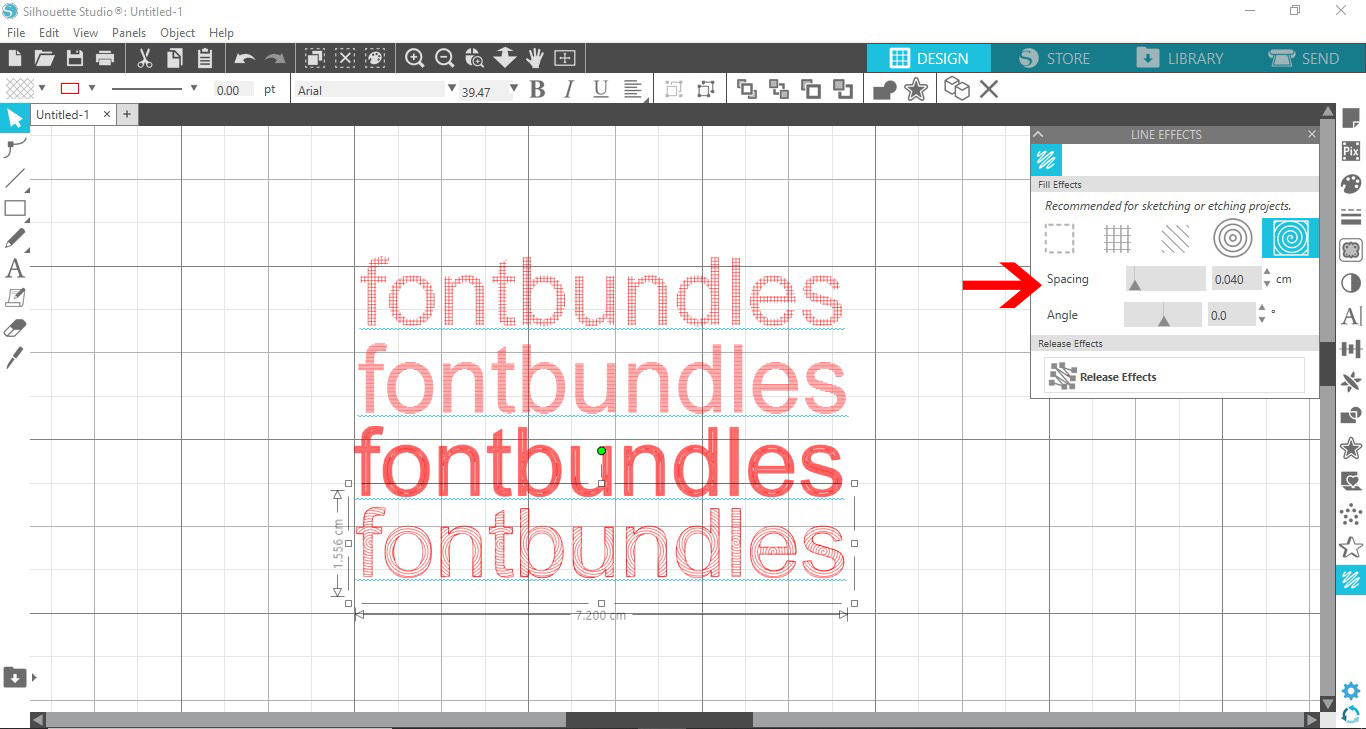
The cross hatch can be made smaller or bigger by adjusting the Spacing slider. You can also input a value to make things easier. The cross hatch will be the fill created by the Foil Quill. Keep in mind, the fill you see, including gaps, is what will be foiled.
Decreasing the Spacing value will add more lines and therefore a thicker “fill”. The Angle will change the direction of the fill.
Experiment with Other Line Effects
Play around with the other line options such as the third option. The diagonal or “Add a stripe effect to the selected shapes” option adds angled lines. Here, we duplicated the text by right clicking > Duplicate. Then added the diagonal line effect.
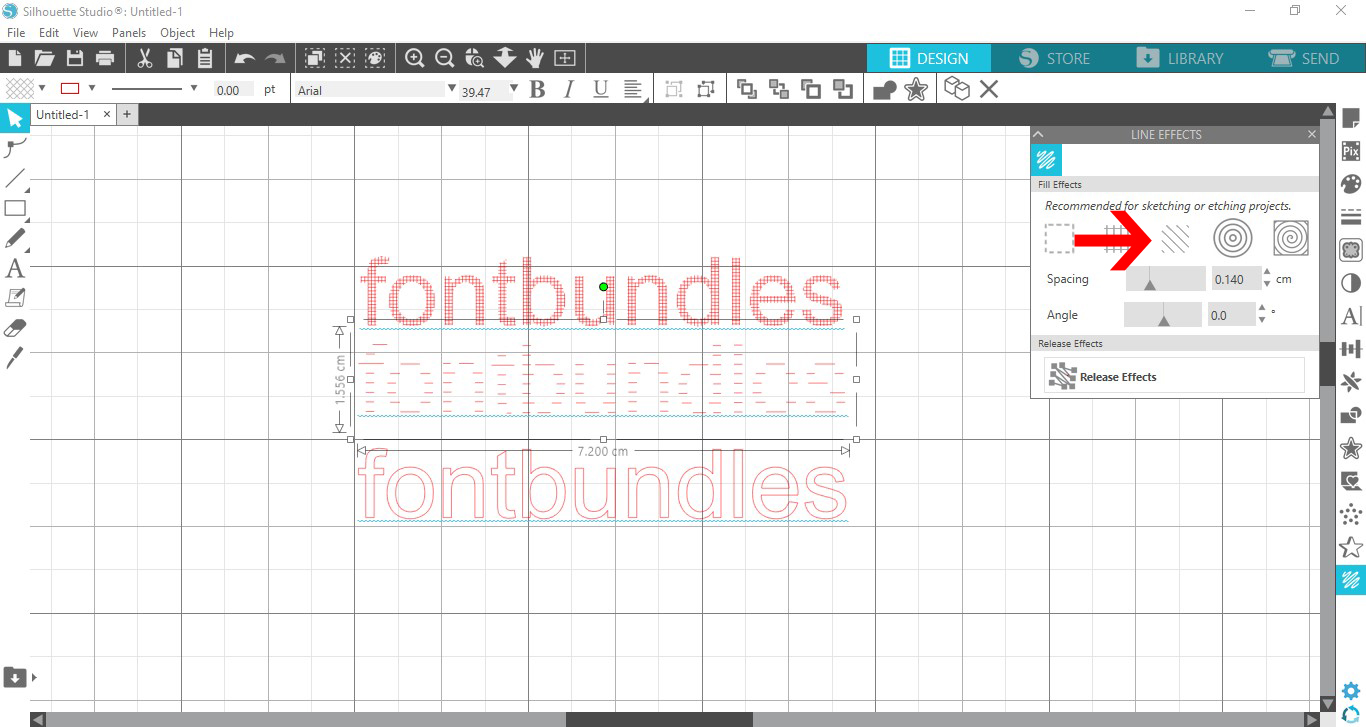
You can also adjust the Spacing.
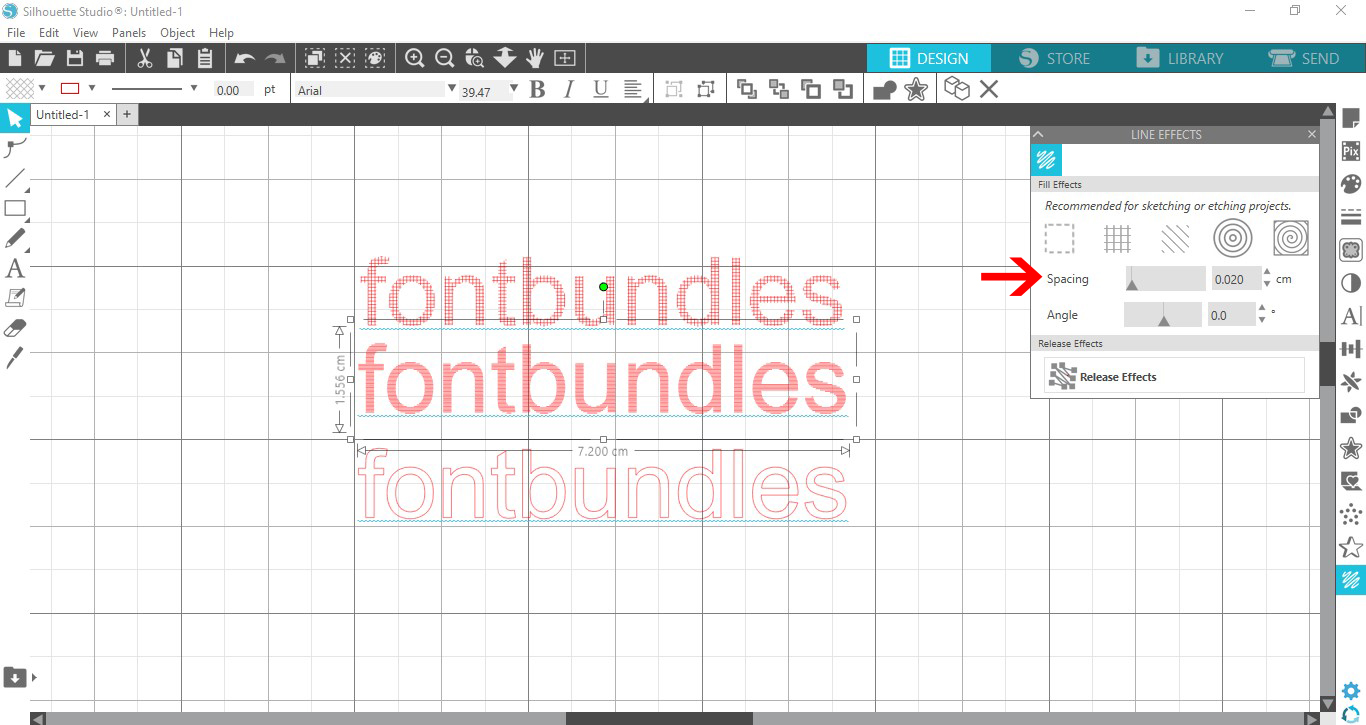
The cross hatch and diagonal options can take time to complete. Each line is a new stroke so this adds more time to the project completion.
The fourth icon adds a circle line effect. Hover your cursor over the icon and it will read “Add a concentric effect to the shapes”. The circle line effect is also great for creating a pattern fill. Adjust Spacing if needed.
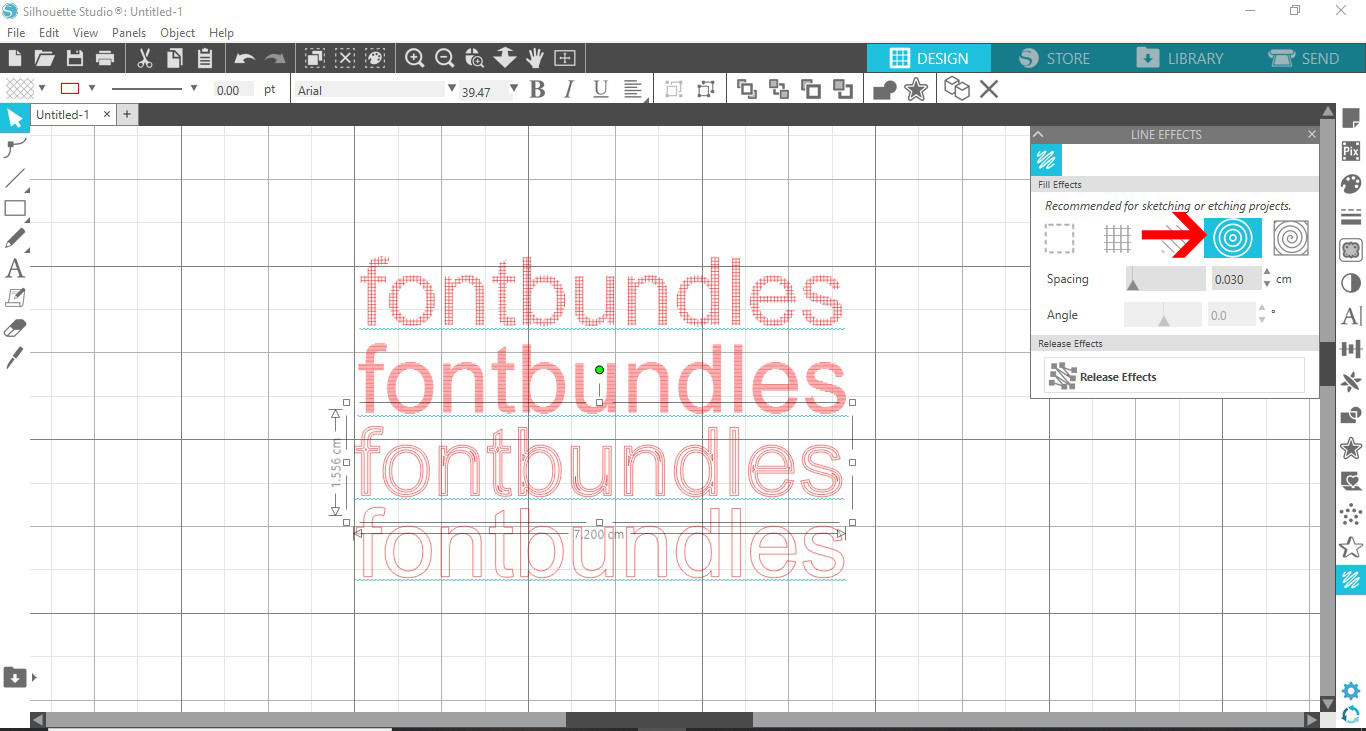
The last icon adds a spiral fill and can be the quickest option when using the Foil Quill. Unlike the other fill effects, this option draws a single line fill in a spiral.
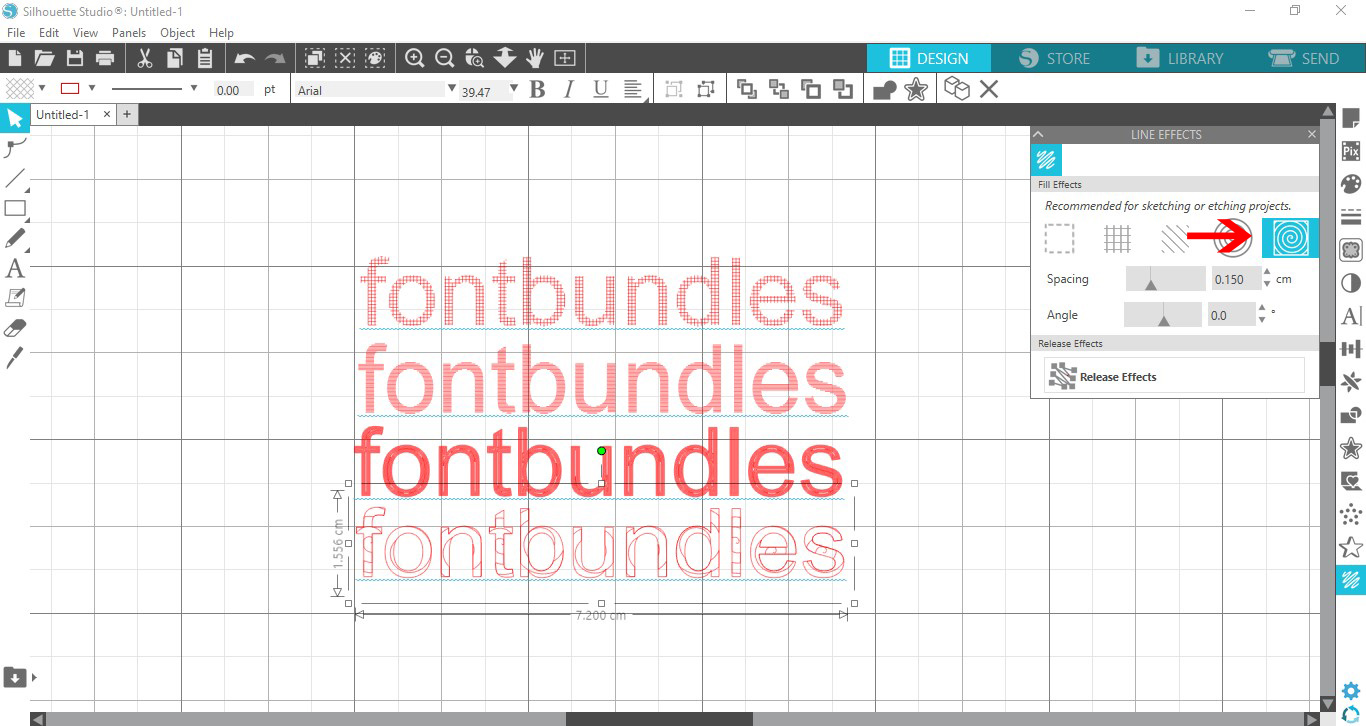
Adjust using the Spacing slider to create a “thicker” fill.
Step 3 - Use Offset Tool to Create a Fill
Did you know that you use the Offset Tool to create a text fill? This is created by adding multiple offsets within each other. On the right side toolbar, click on the Offset Tool.
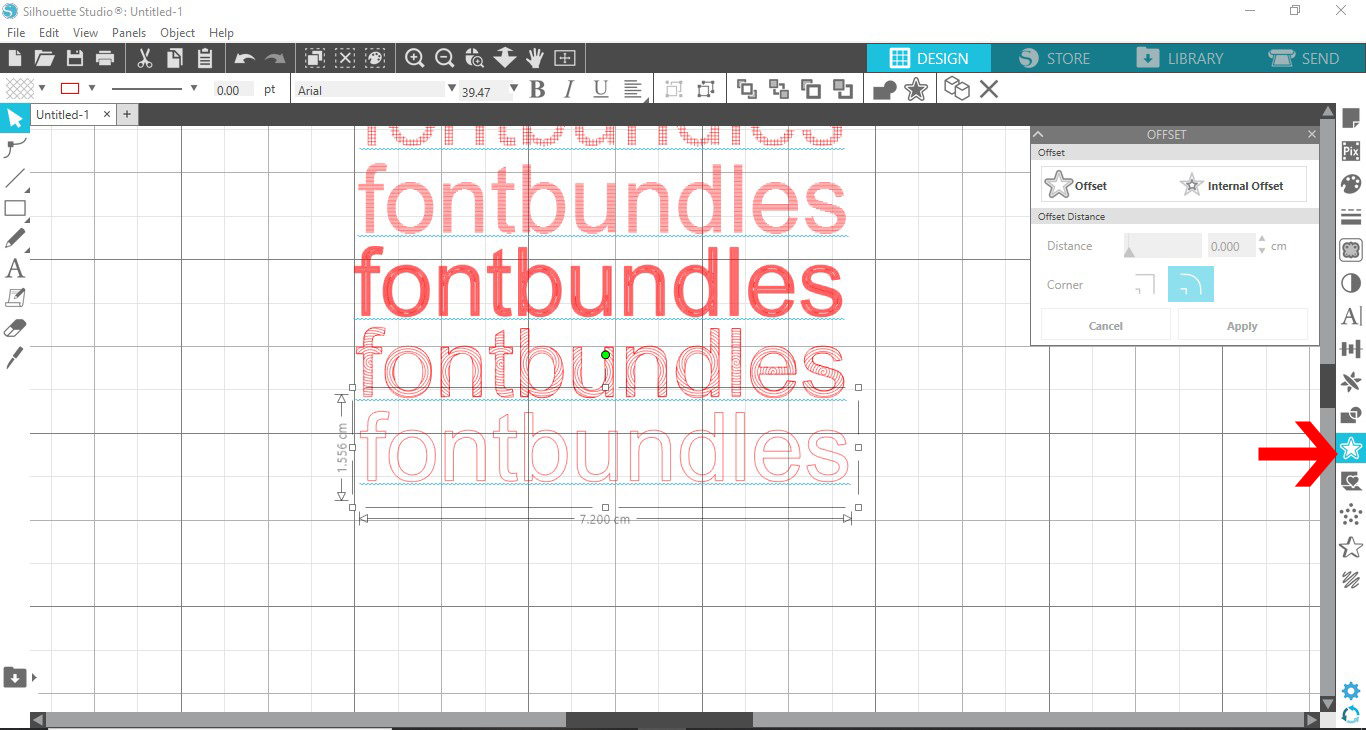
In the Offset window click on the Internal Offset option. The offset will be placed within the text outline. Adjust the Distance so the offset is very close to the edge of the outline. Now, click on Apply.

We are going to repeat the Internal Offset a few times. Each time you create a new Internal Offset, adjust the Distance using the previous offset as your outline. Keep repeating this until the text has been filled the way you want.

Step 4 - Foil the Text in the Send Panel
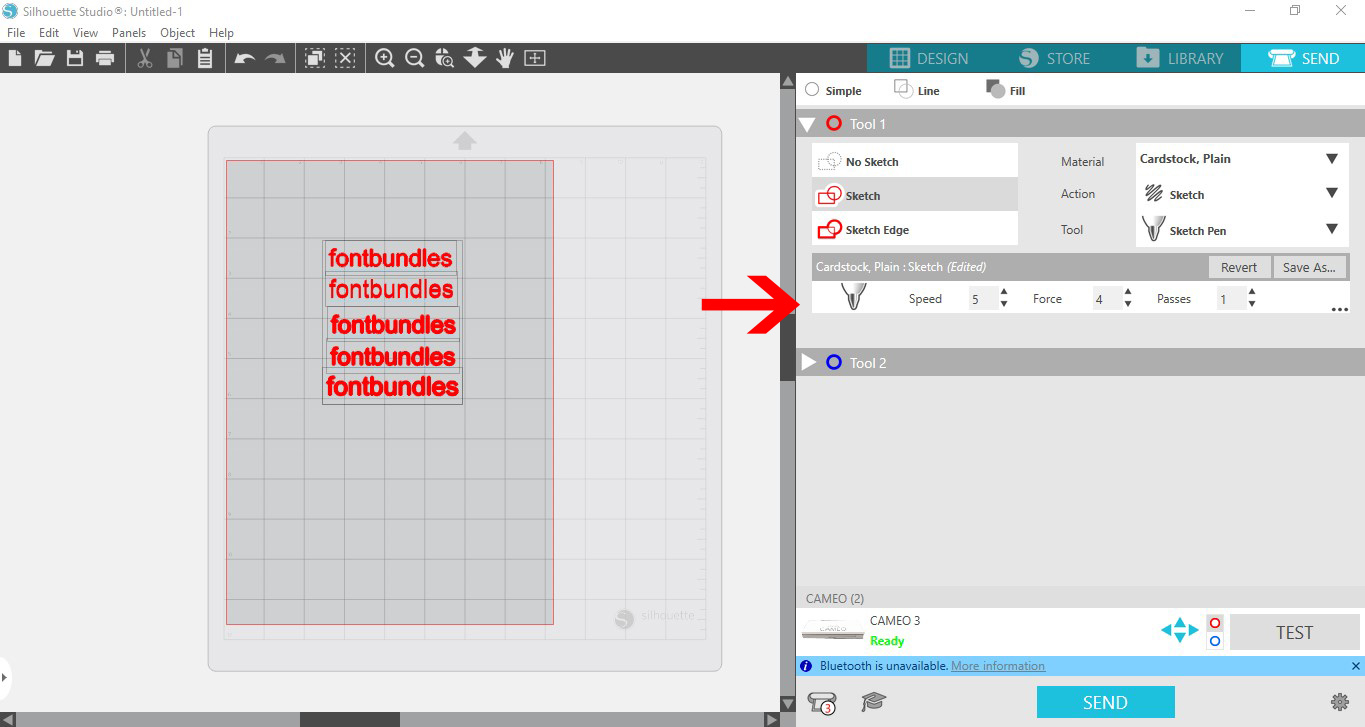
When you are ready, click on the Send panel icon top right of the screen. In the window, make sure to select your Action as Sketch. We use the Sketch Pen option for foiling. Next, select your media.
Then, adjust the Speed to 5, Force to 4 and Passes to 1. You may need to experiment with your machine to see what settings work best.
A lower speed is used to give the heat time to adhere the foil to the media. Don’t use too much force or it may rip the foil. Also, avoid using more than one pass as this can dull the foil.
Attach the media and foil to your mat. Be careful when using the Foil Quill as it’s very HOT!
Now, click Send at the bottom of the panel.
Once the machine has stopped working, safely unplug and remove the Foil Quill. Set aside on a heat resistance surface and don’t burn yourself.
Remove the mat from the machine. You will be able to see where the Foil Quill embossed on the media.
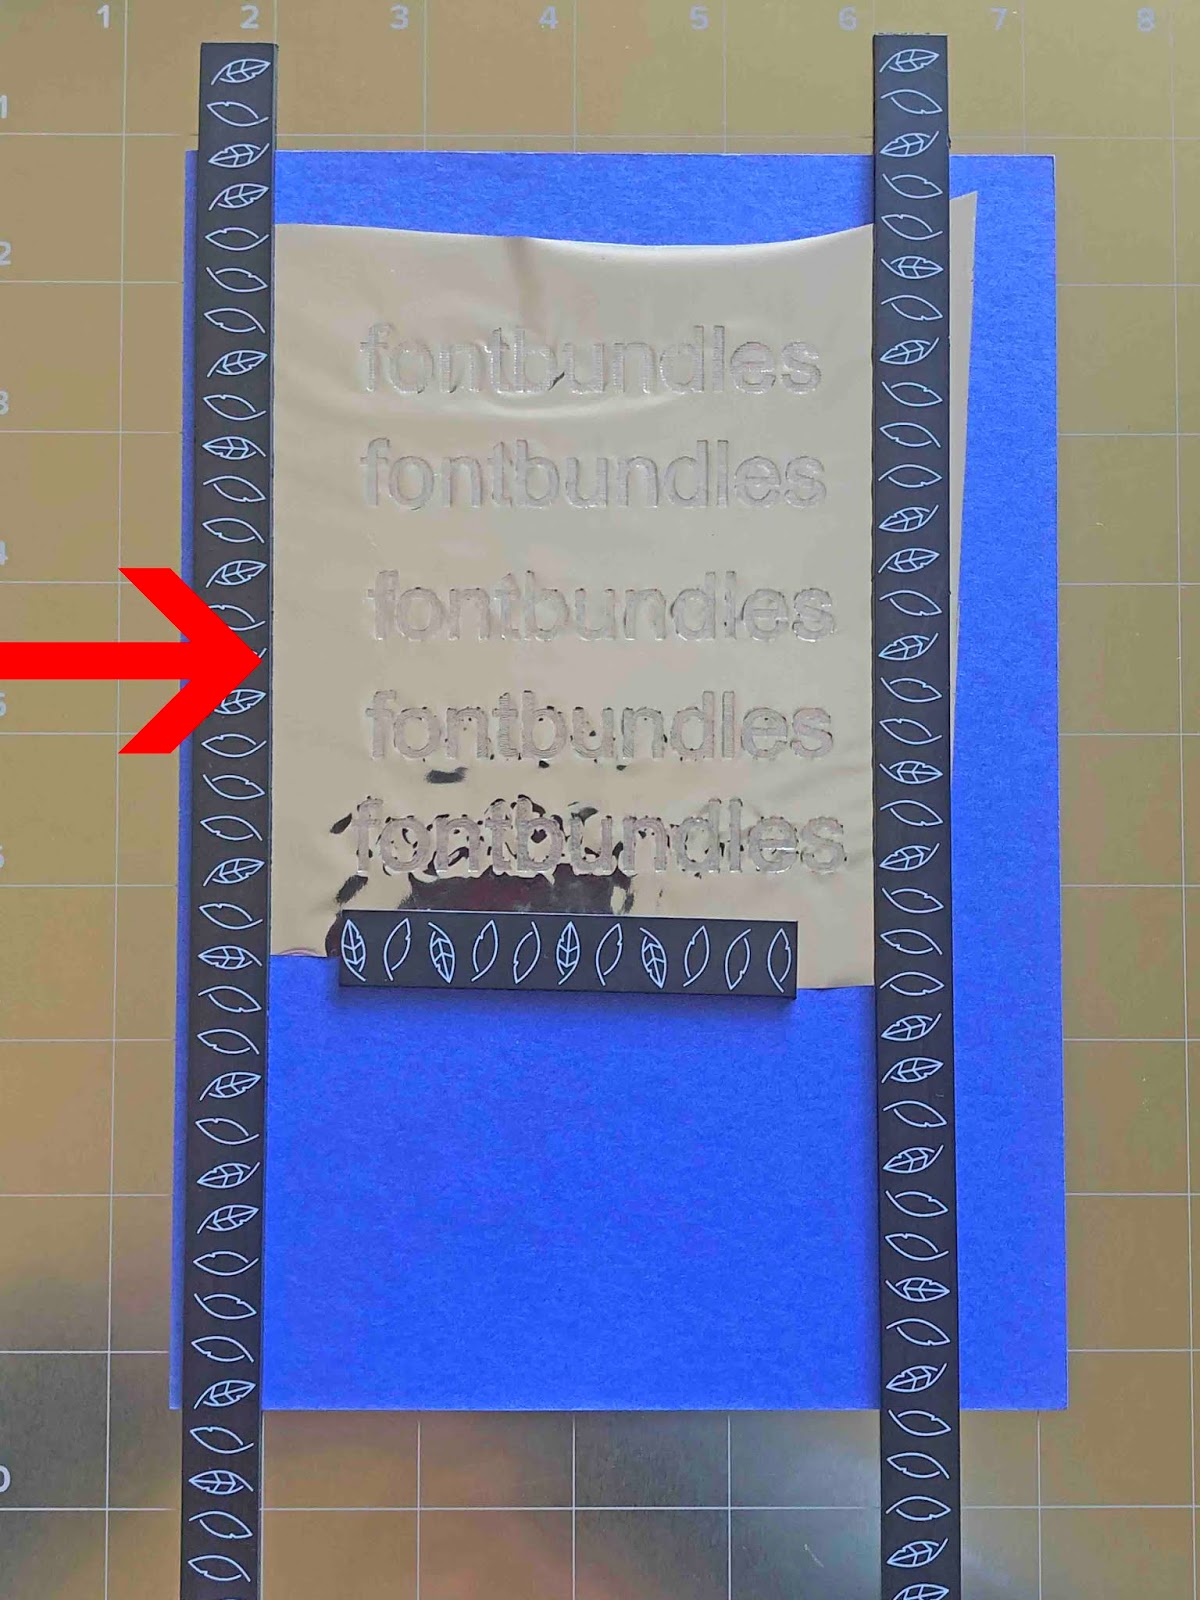
Peel back the foil to see the results. As you can see, no matter which sketch option you choose, the end result is very similar. The only difference may be the time it took to foil. Doing a test run will help with time management.
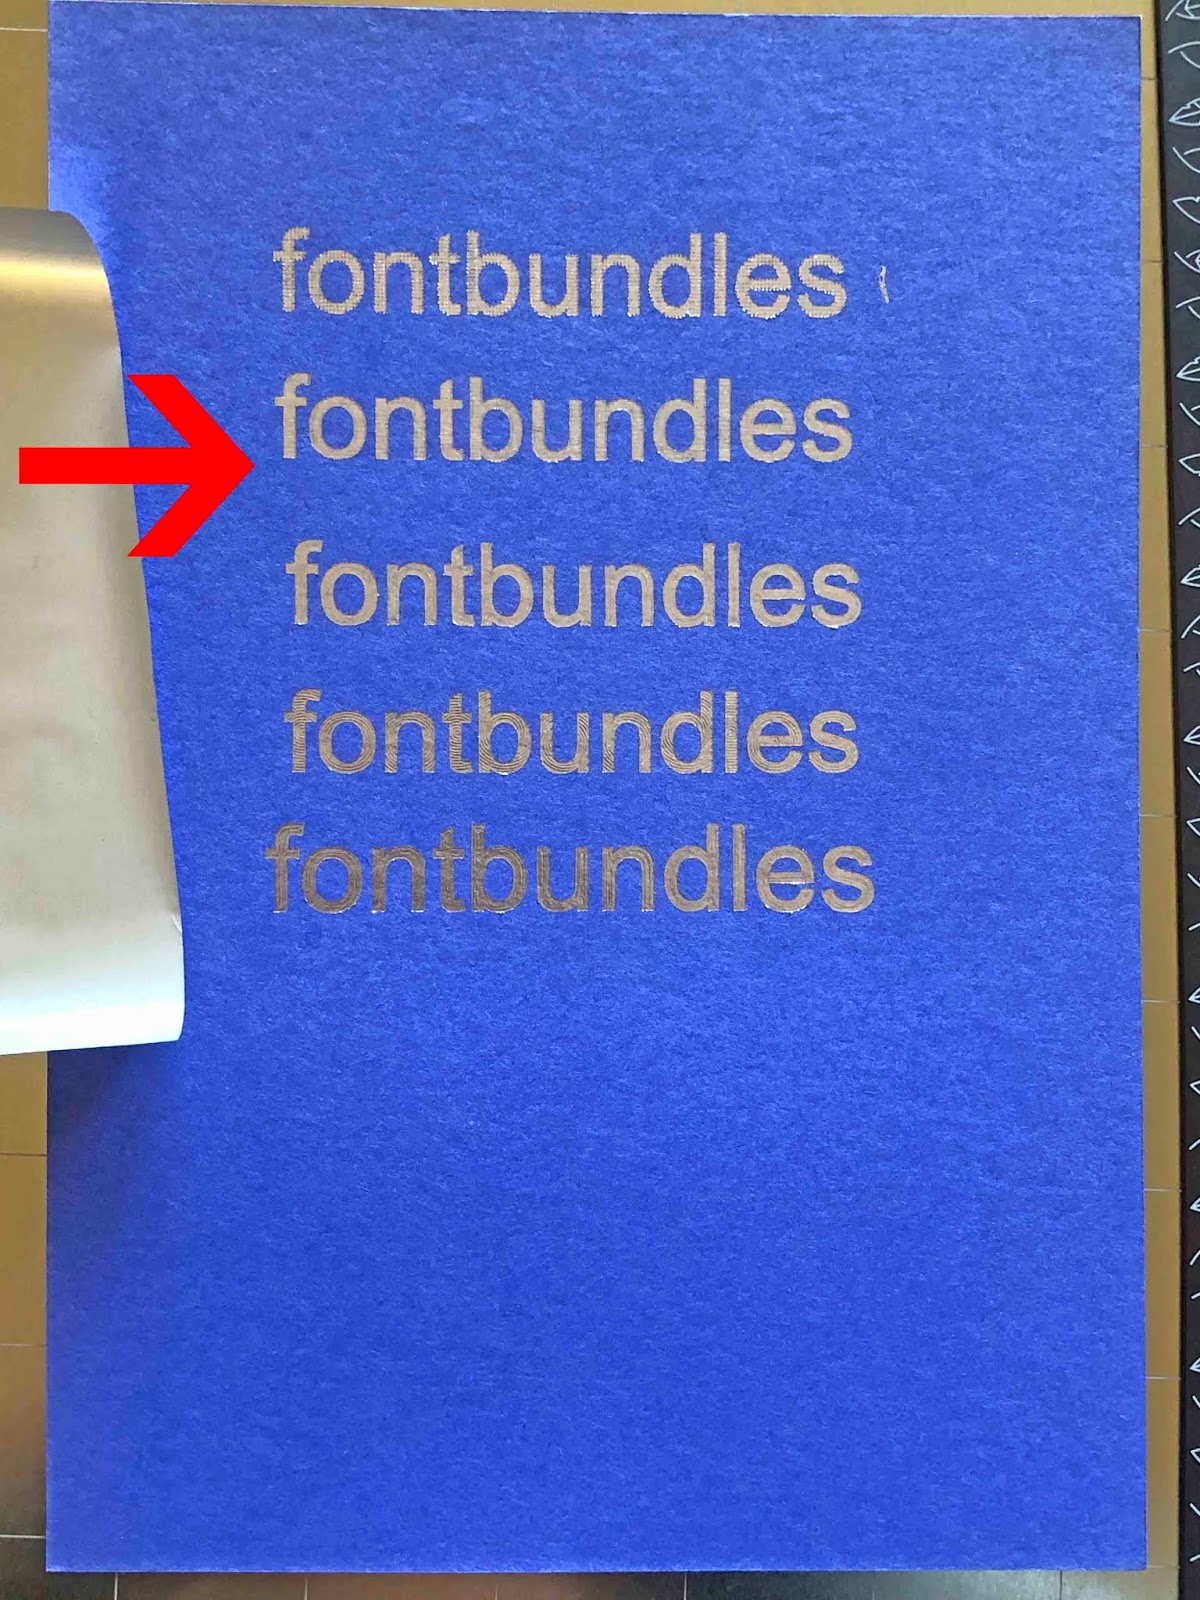
Well done on learning how to fill text with the Foil Quill in the Silhouette Studio Free Edition. Foiled projects are perfect for wedding gifts or invites. Take your projects to the next level by foiling on Acrylic disks for customized orders. We hope that you have enjoyed following this tutorial and learning about the Foil Quill.