By Design Bundles
Silhouette Tutorials6 min
How to Create a Distressed Design in Silhouette Studio
The Modify Panel in Silhouette Studio is a great way to create a Distressed Design. These designs can be used in sublimation, DTG and even with vinyl. Distressing gives a weathered appearance for awesome vintage projects. In this tutorial we will be making a distressed design in Silhouette Studio.
To get started, we will be using a distressed SVG background and adding it to a design from the Sunflower SVG Bundle.
For best results we will use a SVG distressed background and SVG Sunflower design. A PNG and JPEG can be used but you may need to Trace the image first. Have a look at our excellent tutorial on how to Trace in Silhouette Studio for Beginners.
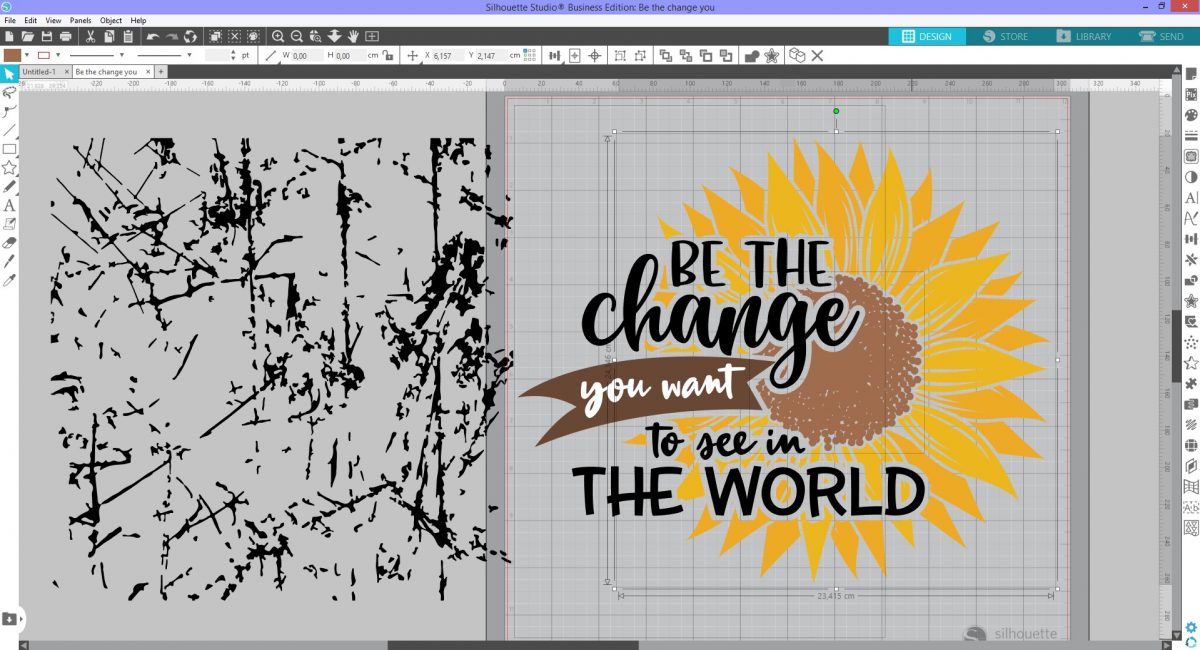
Open Silhouette Studio then go to File, Open and select your SVG design. We chose this lovely Be the change Sunflower. Next, locate where your distressed background is stored and drag and drop onto the canvas.
The distressed look will be applied to the petals of the Sunflower. If the design is grouped, click on Ungroup Selected Shapes at the top menu bar. Now hold Ctrl + Click and select all of the petal layers. Go again to the top bar and this time click on Group Selected Shapes.
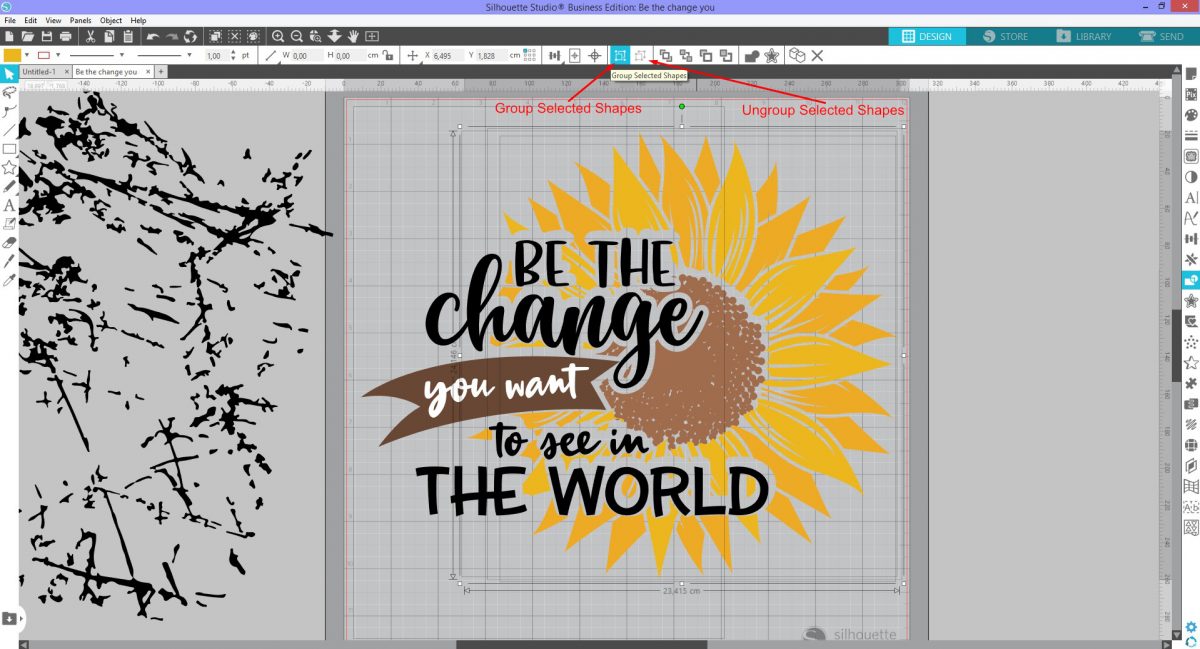
Click on the distressed background and drag it over the Sunflower design. Resize and rotate if necessary to get good coverage.
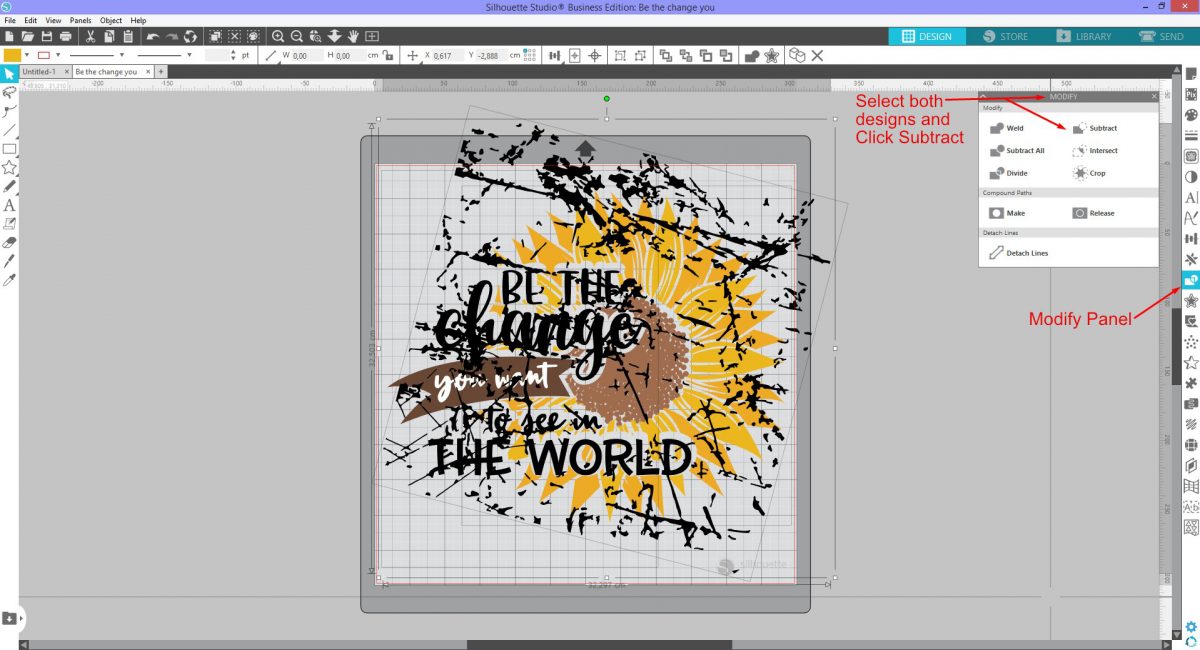
The Subtract Tool will cut out the shape of the top object from the bottom object. Press Ctrl + Click to select the Sunflower petals and the distressed background. Click on the modify panel and then click subtract. We have very helpful tutorial on how to use the modify tool if needed.
While the small parts are still selected, click on Group Selected Shapes or right click and Group.
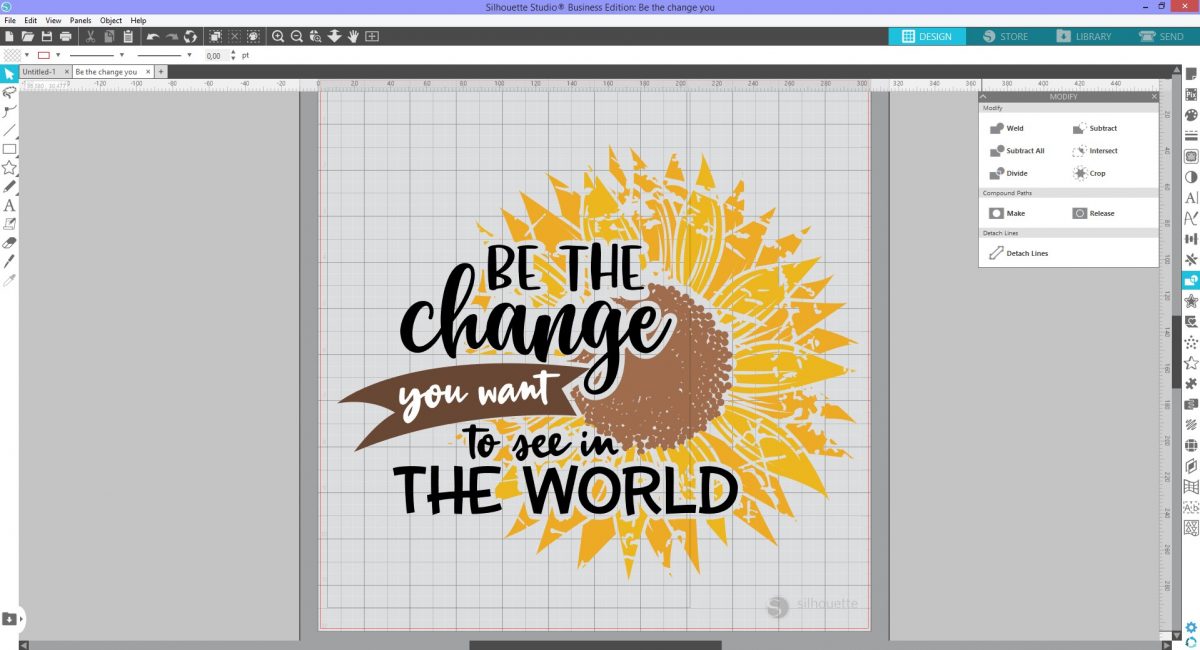
Your distressed design is now ready for your projects. Have fun experimenting designs to get a unique distressed look.
Make sure to check out our other Silhouette tutorials such as how to subtract designs for layering and how to create a knockout design.
To get started, we will be using a distressed SVG background and adding it to a design from the Sunflower SVG Bundle.
Step 1 - Open your SVG distressed background and design
For best results we will use a SVG distressed background and SVG Sunflower design. A PNG and JPEG can be used but you may need to Trace the image first. Have a look at our excellent tutorial on how to Trace in Silhouette Studio for Beginners.
Open Silhouette Studio then go to File, Open and select your SVG design. We chose this lovely Be the change Sunflower. Next, locate where your distressed background is stored and drag and drop onto the canvas.
Step 2 - Use the Subtract Tool
The distressed look will be applied to the petals of the Sunflower. If the design is grouped, click on Ungroup Selected Shapes at the top menu bar. Now hold Ctrl + Click and select all of the petal layers. Go again to the top bar and this time click on Group Selected Shapes.
Click on the distressed background and drag it over the Sunflower design. Resize and rotate if necessary to get good coverage.
The Subtract Tool will cut out the shape of the top object from the bottom object. Press Ctrl + Click to select the Sunflower petals and the distressed background. Click on the modify panel and then click subtract. We have very helpful tutorial on how to use the modify tool if needed.
While the small parts are still selected, click on Group Selected Shapes or right click and Group.
Your distressed design is now ready for your projects. Have fun experimenting designs to get a unique distressed look.
Make sure to check out our other Silhouette tutorials such as how to subtract designs for layering and how to create a knockout design.
Related Tutorials
Silhouette Tutorials
How to Create a Knockout Design in Silhouette Studio
Silhouette Tutorials
How to Create Sublimation Designs in Silhouette Studio
Learn to create Sublimation Designs in Silhouette Studio in 6 easy steps!
Cricut Tutorials
How to Create a Distressed Design in Cricut Design Space
In this tutorial, learn how to create a Distressed Effect in Cricut Design Space.
Silhouette Tutorials
How to Create a Sheet of Stickers in Silhouette Studio
Discover how to create a sheet of stickers in Silhouette Studio step by step.
Silhouette Tutorials
How to Create a Split Monogram in Silhouette Studio
Silhouette Tutorials
How To Create Text to Path in Silhouette Studio
Discover how to use the Text to Path feature in Silhouette Studio with this easy to follow tutorial.