
By Design Bundles
Creating Weeding Lines In Silhouette Studio
Weeding is an essential part of crafting projects, especially with HTV and vinyl. Many crafters enjoy weeding and if all goes well, it’s pretty straightforward. However, in some cases, the material or cut just doesn't work as expected. This is where the option for creating weeding lines in Silhouette Studio comes in handy. These lines section off parts of the material so smaller areas are removed at a time. It is especially great for delicate designs.
In this tutorial we will guide you through the process of adding weeding lines. We will also be using a script font duo called Butterskotch. If you would like to use another font, we have many more font duos to choose from.
Step 1 - Use the Text Tool
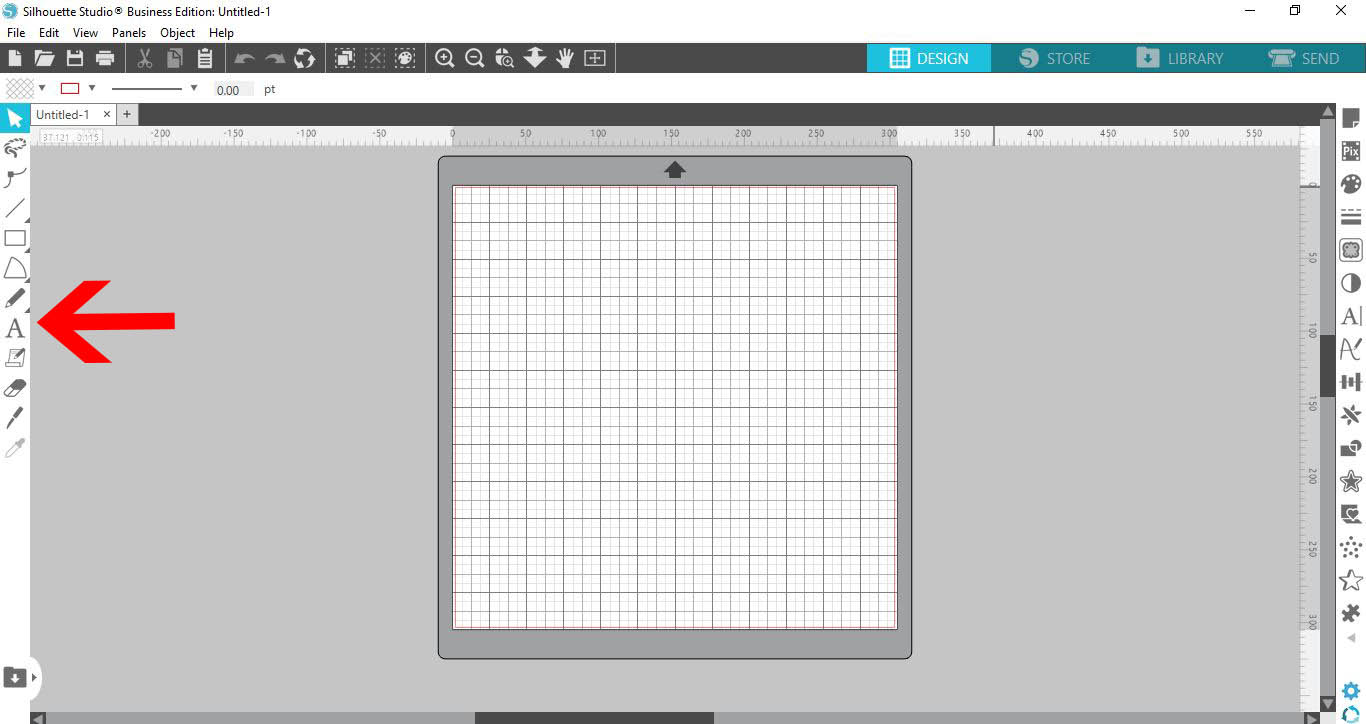
In Silhouette Studio, you will find the Text Tool on the left hand side. Click on it then click anywhere on the canvas and start typing.
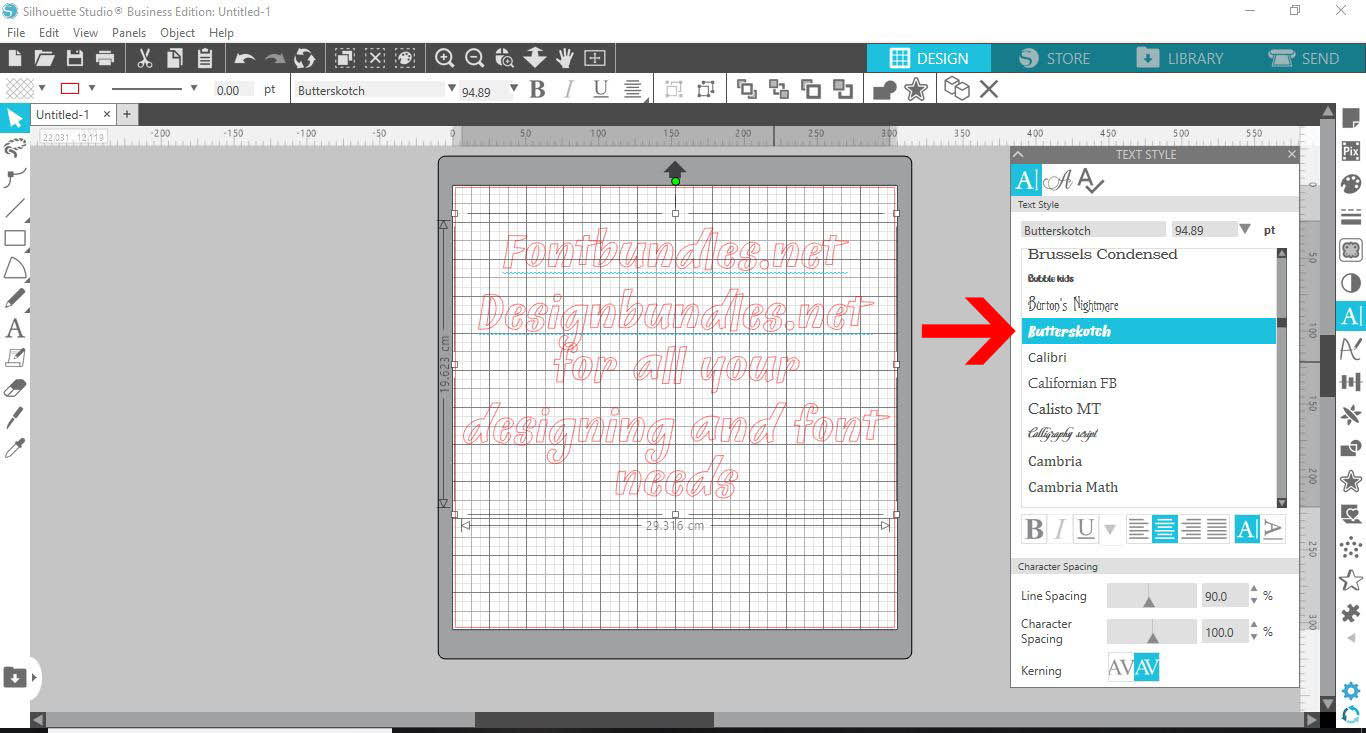
You can change your font by going to the Text Style Panel on the right side. You will find a selection of fonts available on your system here.
Step 2 - Create the weeding lines
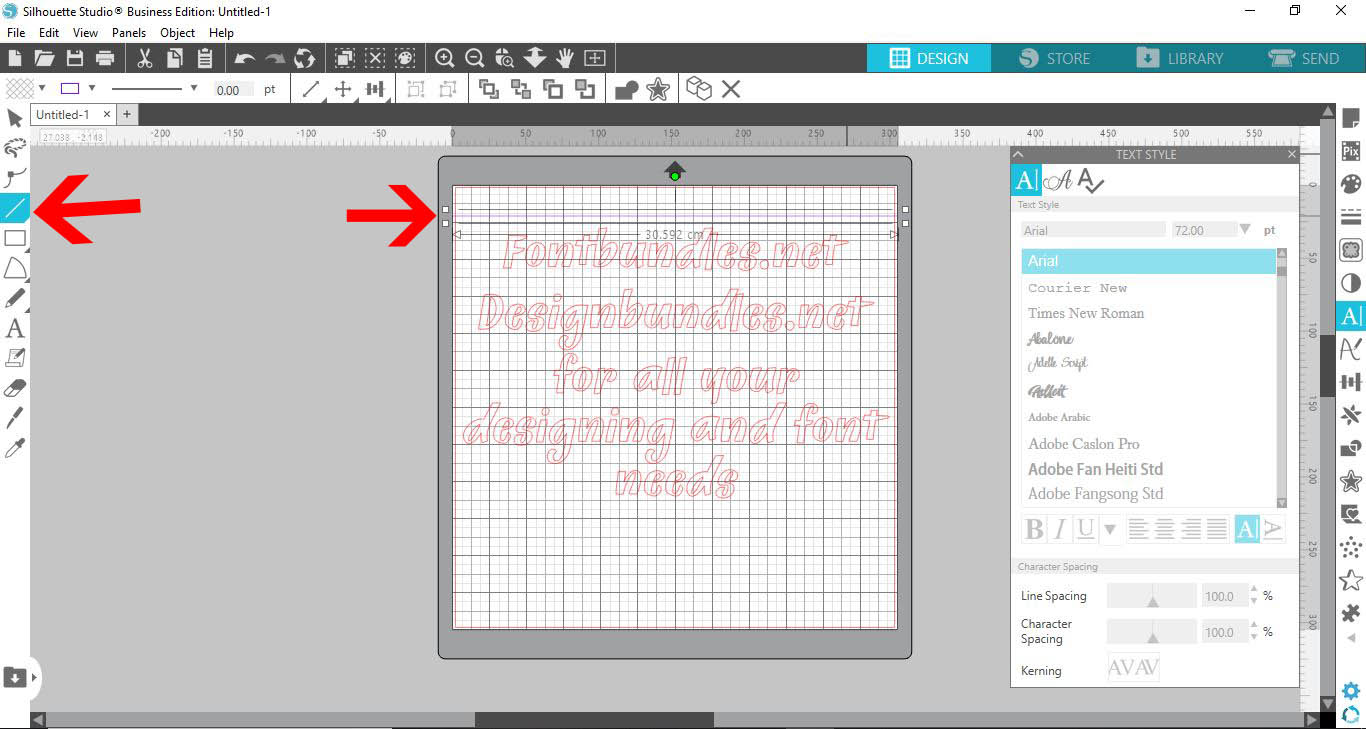
To create our weeding lines, we first need to draw a line then use the Replicate panel.On the left side toolbar, click on the Draw a line tool. Now, holding down Shift, click + drag out a straight line.
You will find the Replicate panel on the right hand side. Click this to open the panel options.
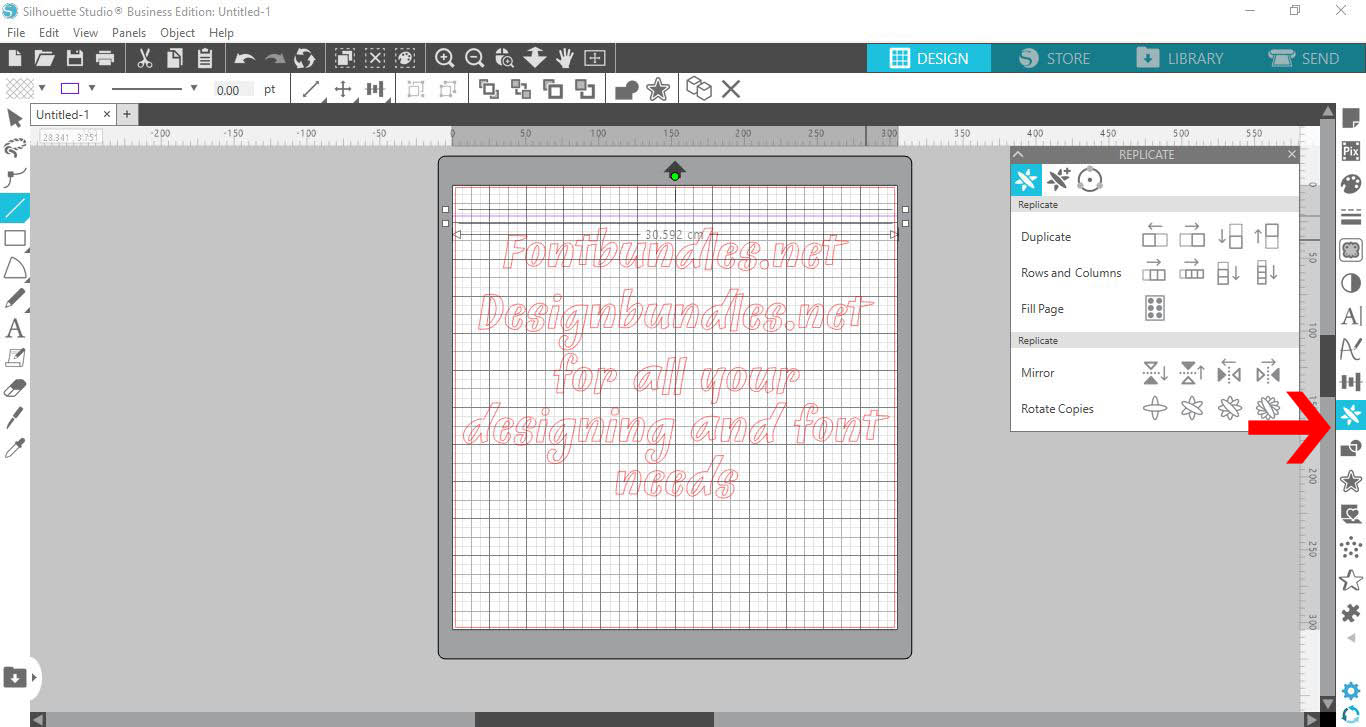
The panel gives you three options. We will be using the second option called Advanced Replicate.
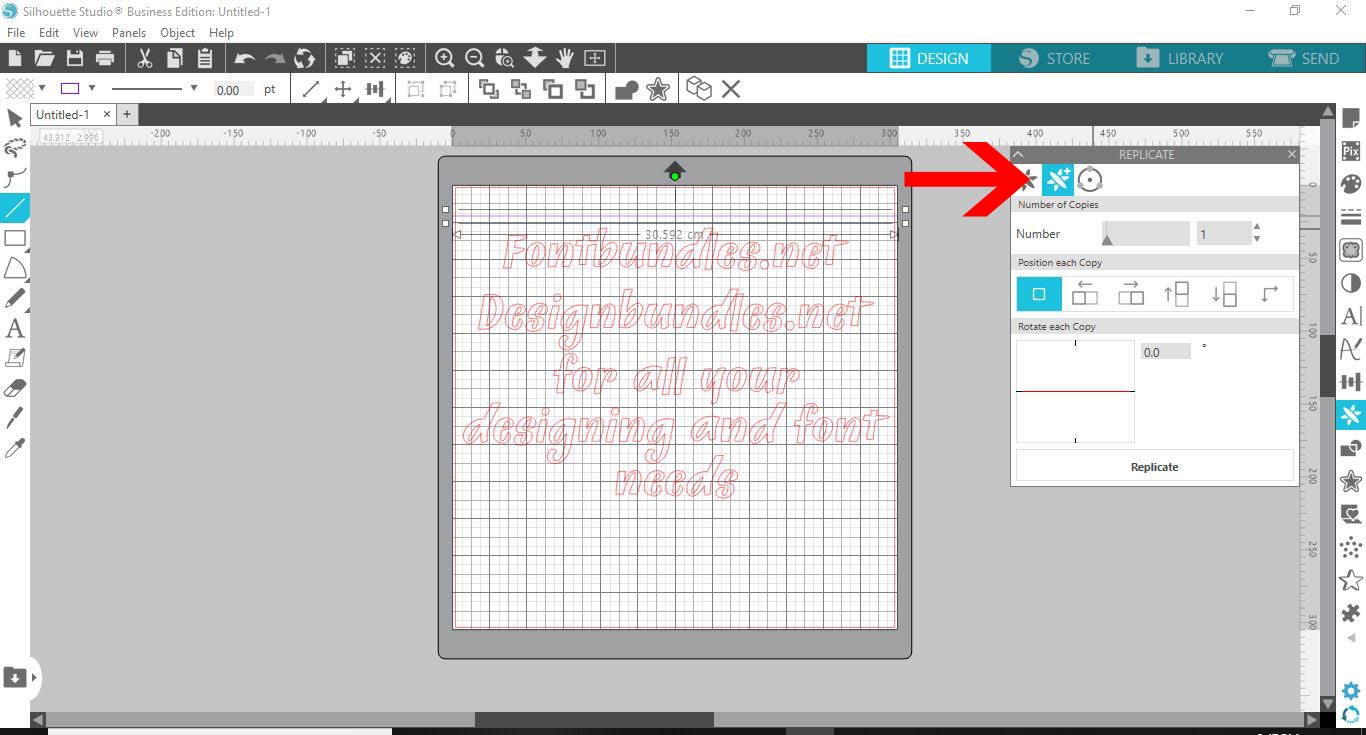
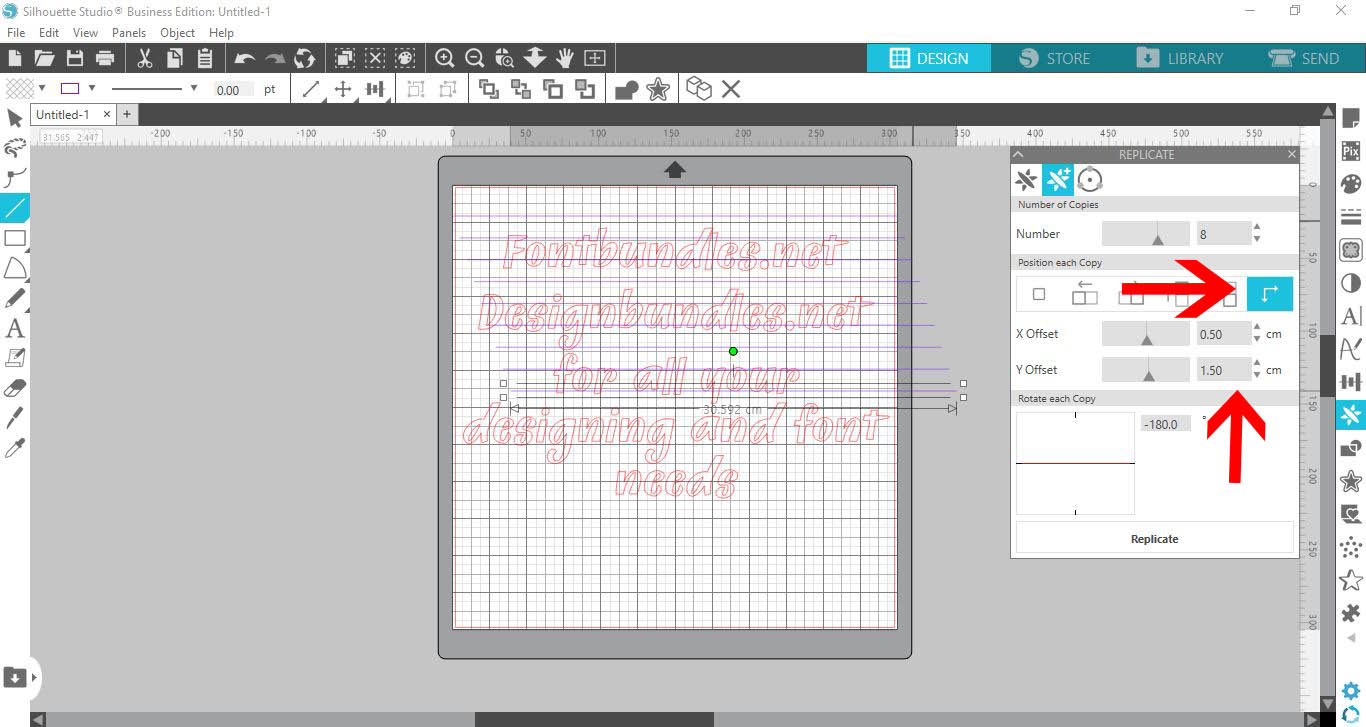
Add the number of lines you need, then click on Custom Position. Next, adjust the Y Offset to create a distance between the lines in cm. Change the distance according to what you need.
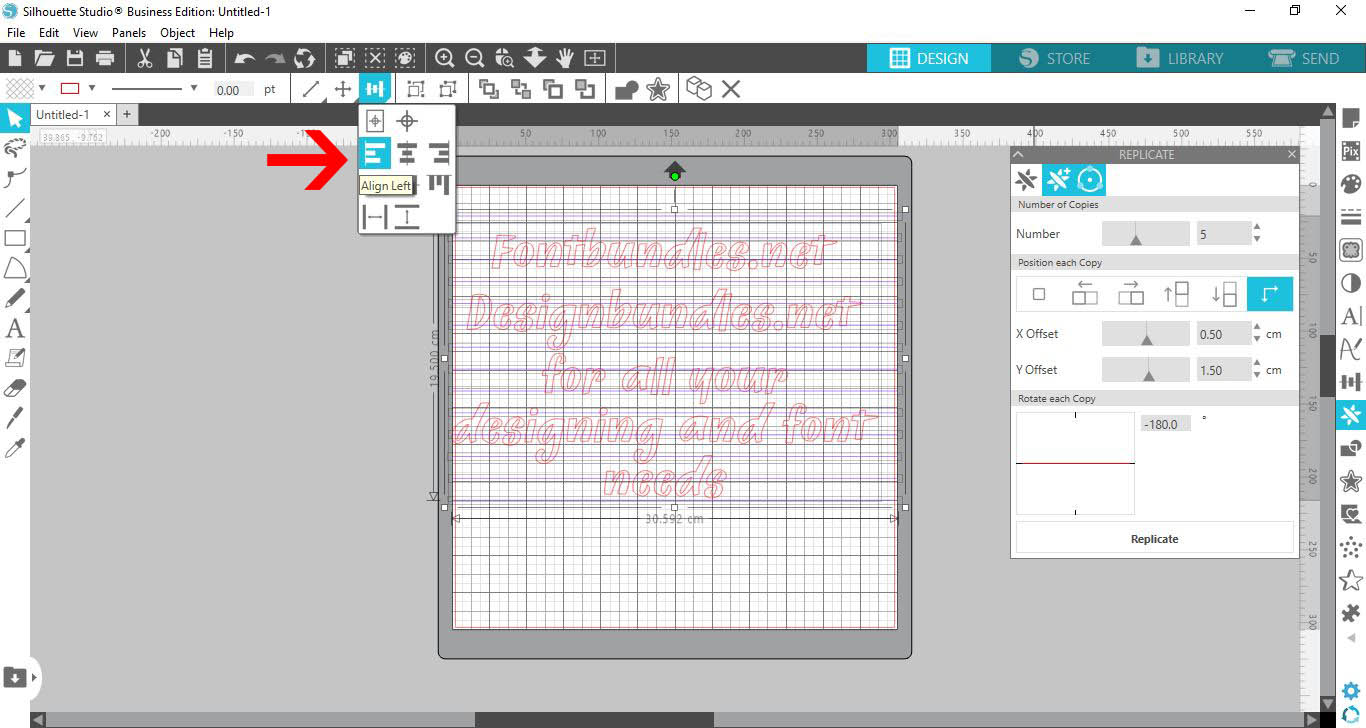
With all the lines selected, click Align left. Adjust the lines over your text so they are in the right place to cut for weeding lines.
Step 3 - Subtract weeding lines from text
We now want to draw a rectangle around the weeding lines. Click the text to select then move to the side away from the lines.
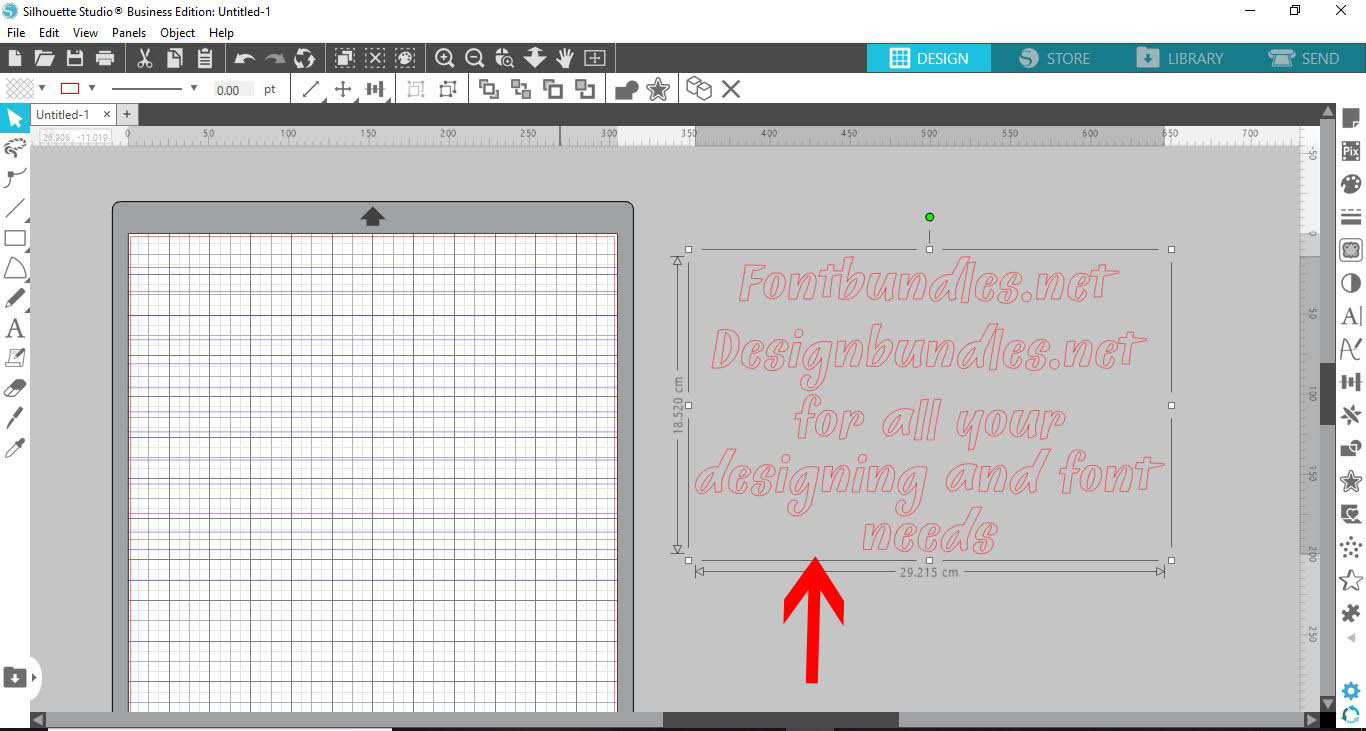
On the left side panel click on Draw a Rectangle. Click + drag out a square around your lines as seen in the image below.
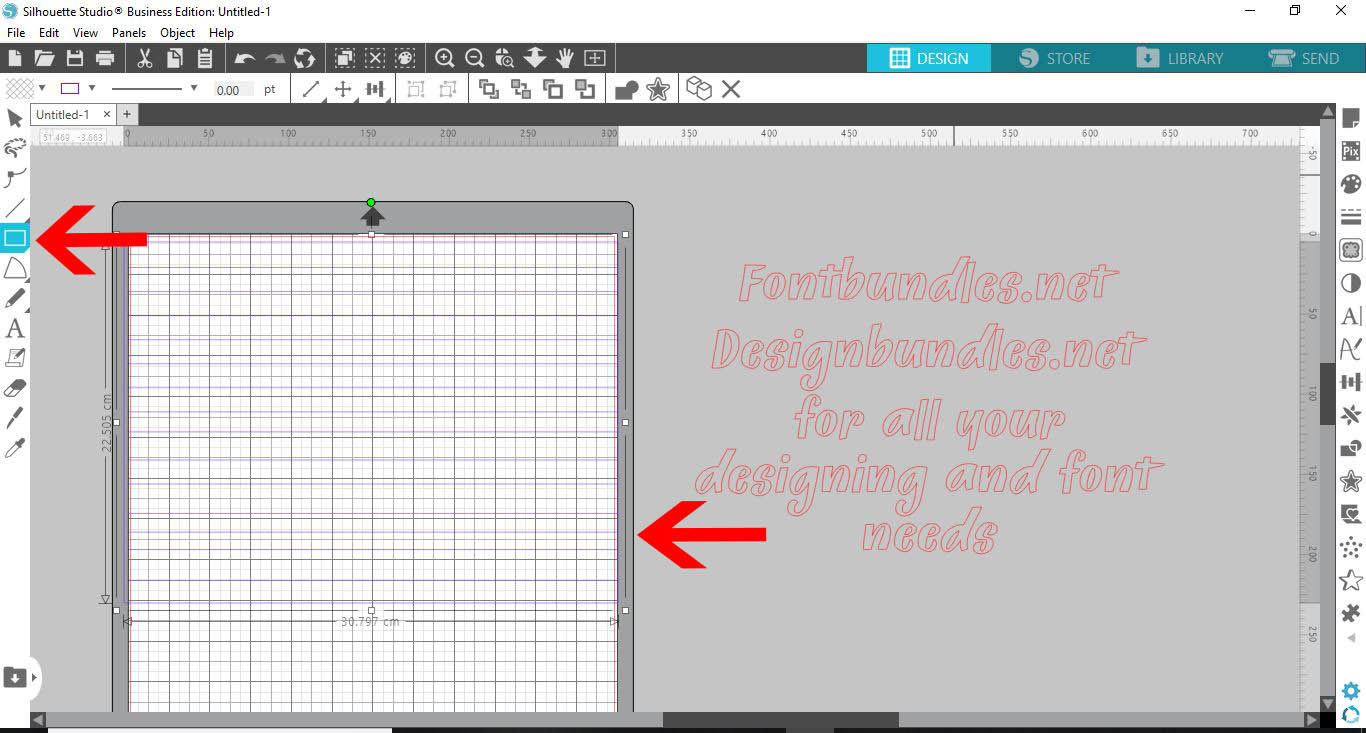
Select all of the lines and the square, then right-click > Make Compound Path.
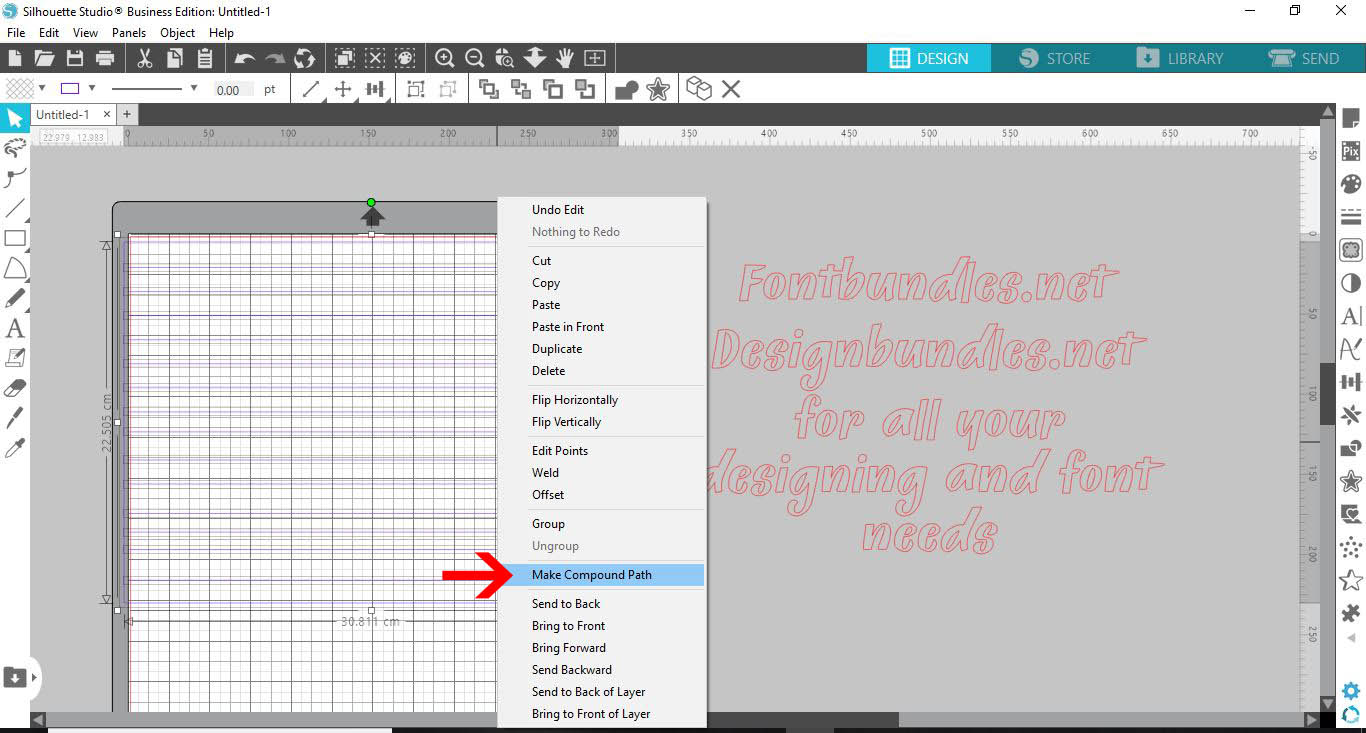
Move the text back over the lines and while selected, right click > Copy.
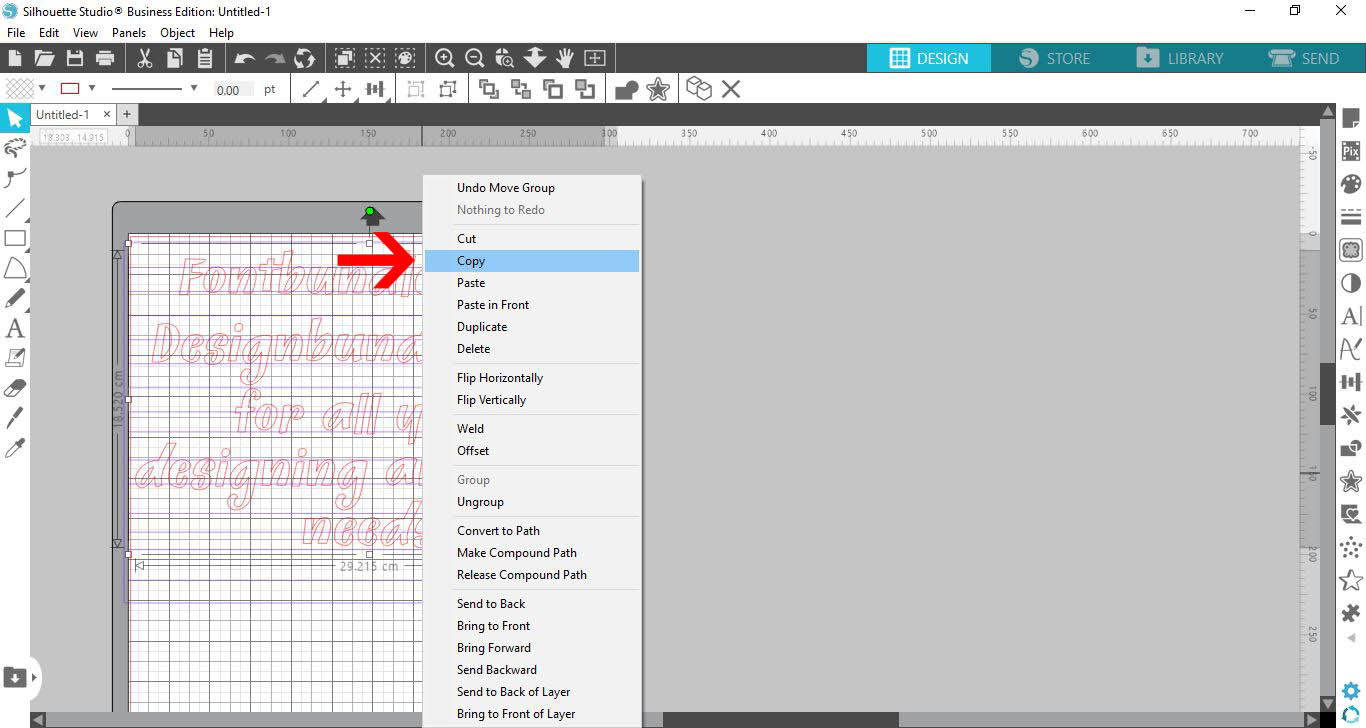
Right click once again and select Paste in Front. This will paste a copy of the text directly over the original text.
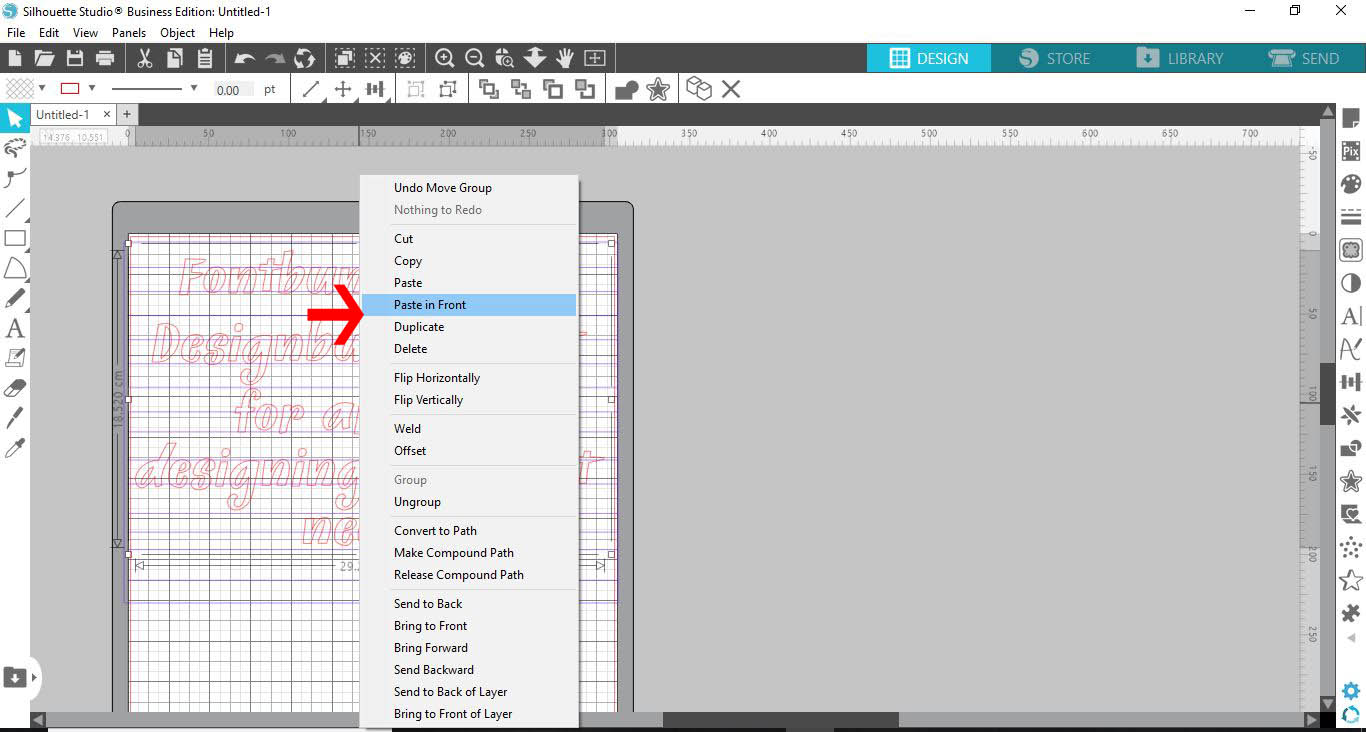
With the duplicated text still selected, hold Shift + click on the weed lines. Click on the Modify Panel on the right side toolbar then click on Subtract.
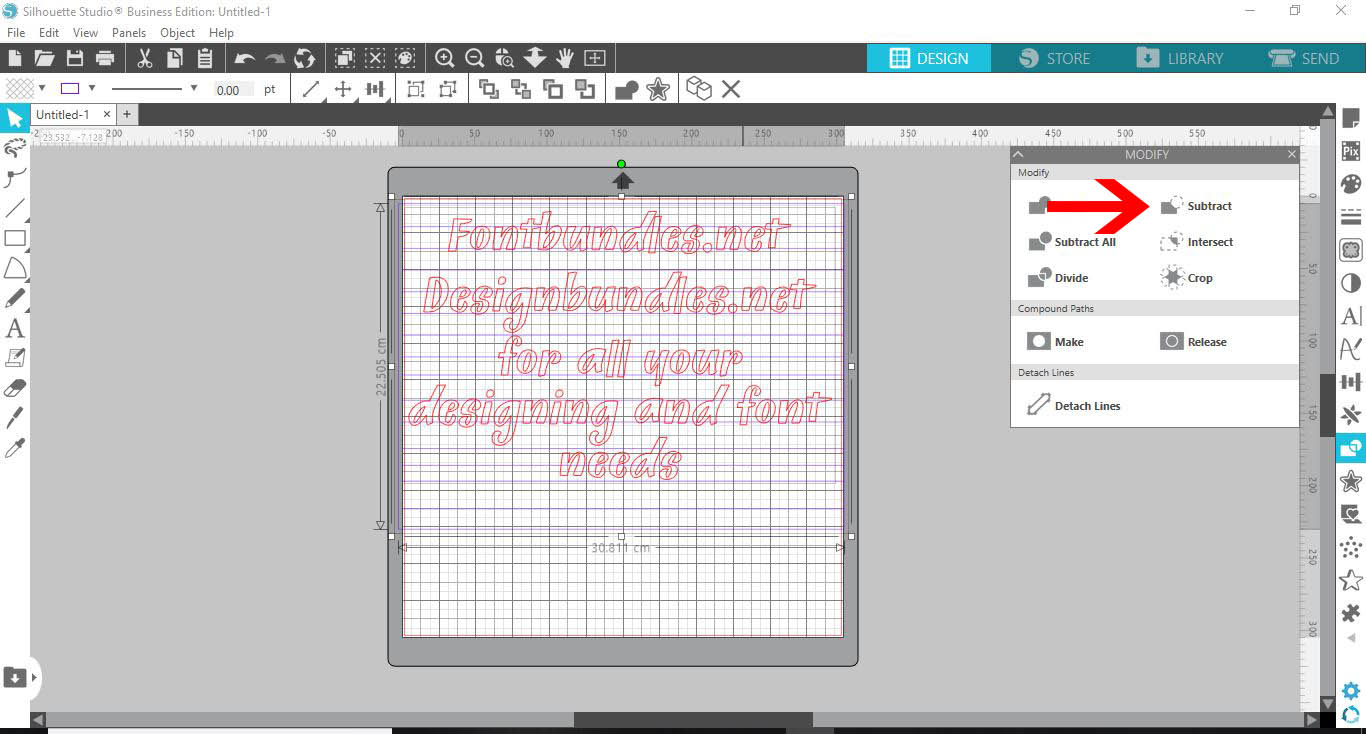
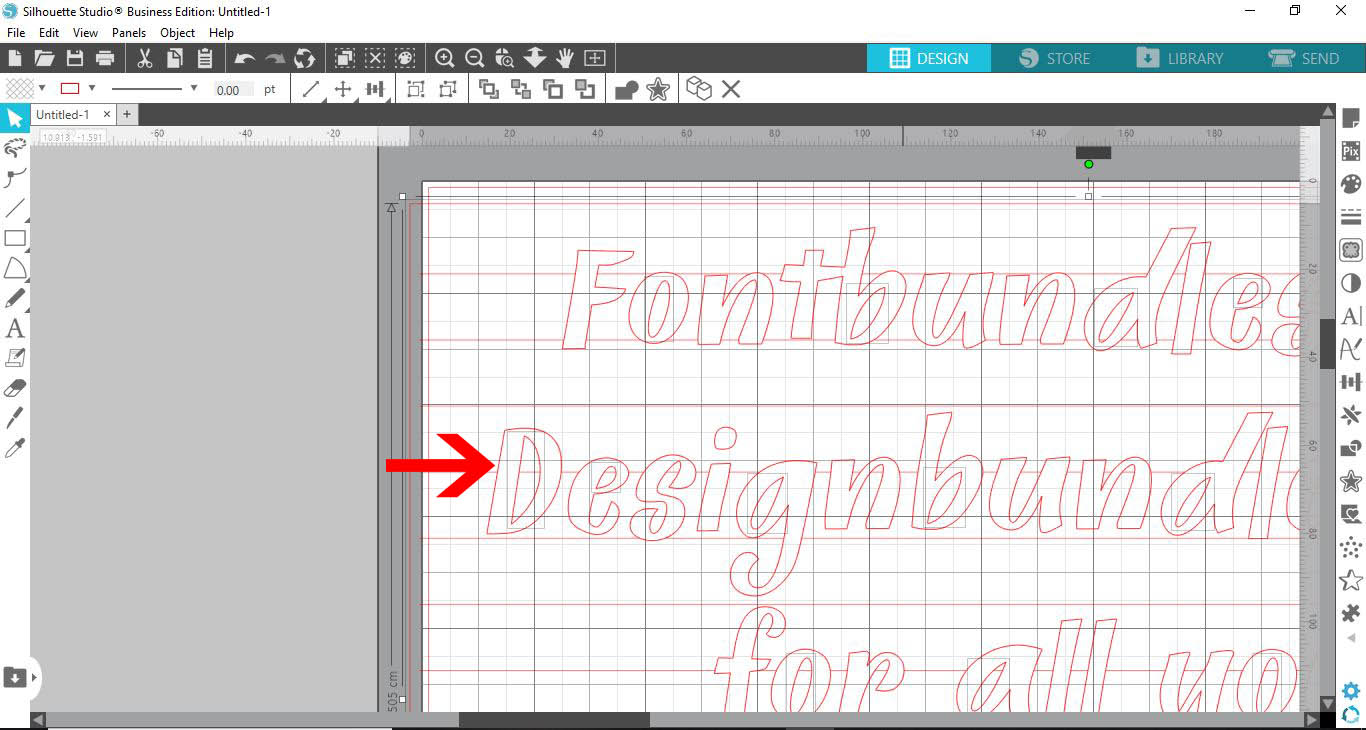
You can now delete the duplicated text. You will be left with the original text and weed lines. If you take a closer look you will see that the weed lines no longer cut through the text.
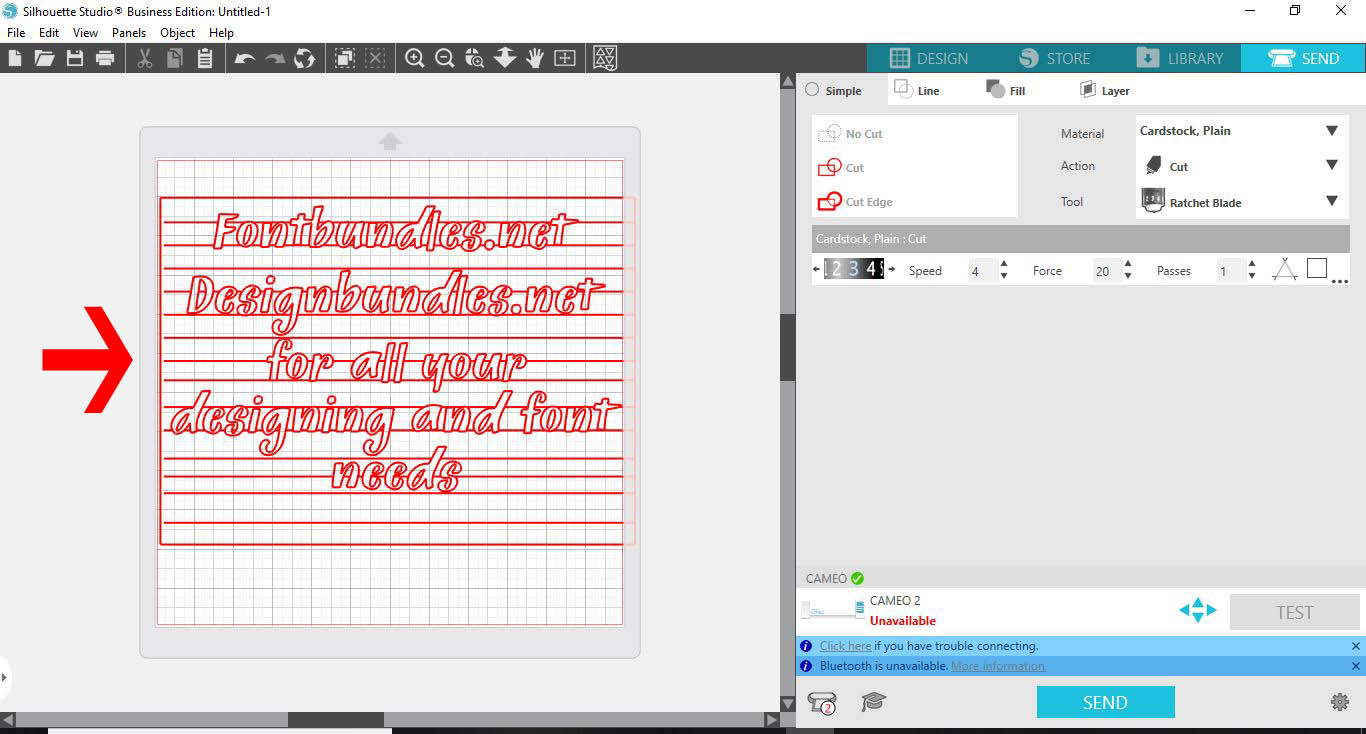
If you go to the Send panel, you will get a preview of the cut lines. The weed lines will only cut around the text, making it easier to weed when cutting vinyl.
If you enjoyed this tutorial you may be interested in how to use warp templates and how to use Silhouette Cut files in Cricut Design Space.