By Design Bundles
Embossing and Debossing with the Silhouette Curio
Embossing and debossing with the Silhouette Curio gives texture to materials such as cardstock. It gives a raised or recessed effect that almost appears three dimensional. The feature is available in all of the Silhouette Studio versions. However, this will only work with the Curio machine. We will show you how to emboss and deboss with the Silhouette Curio.
Step 1 - Import Your Design
We will quickly set up our Curio page settings and import a design.I am using theBird Heart Paper Cuts SVGby Digital Gems.
Once Silhouette Studio is open, click on the cutting mat options and change to Curio. Change the size of the cut area to fit the Curio mat.
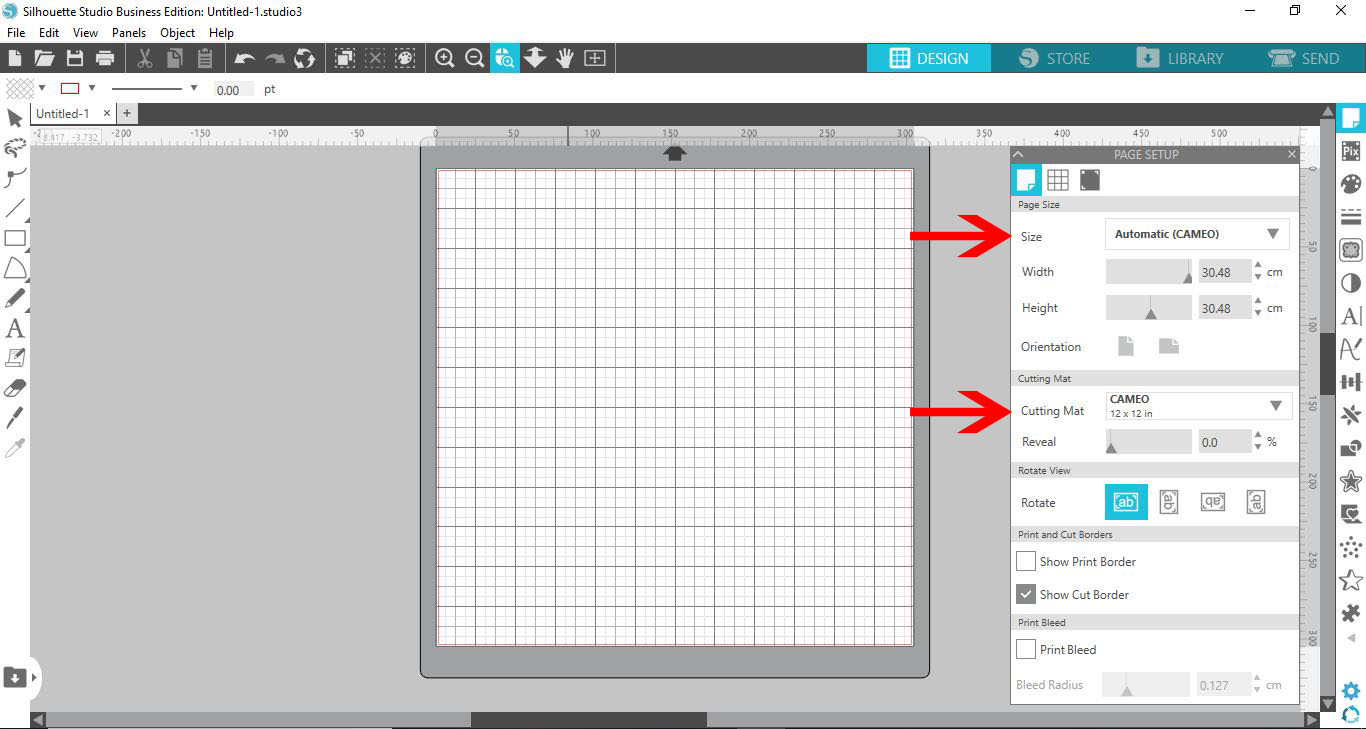
Once changedthe Curio mat will appear on the Silhouette working area.

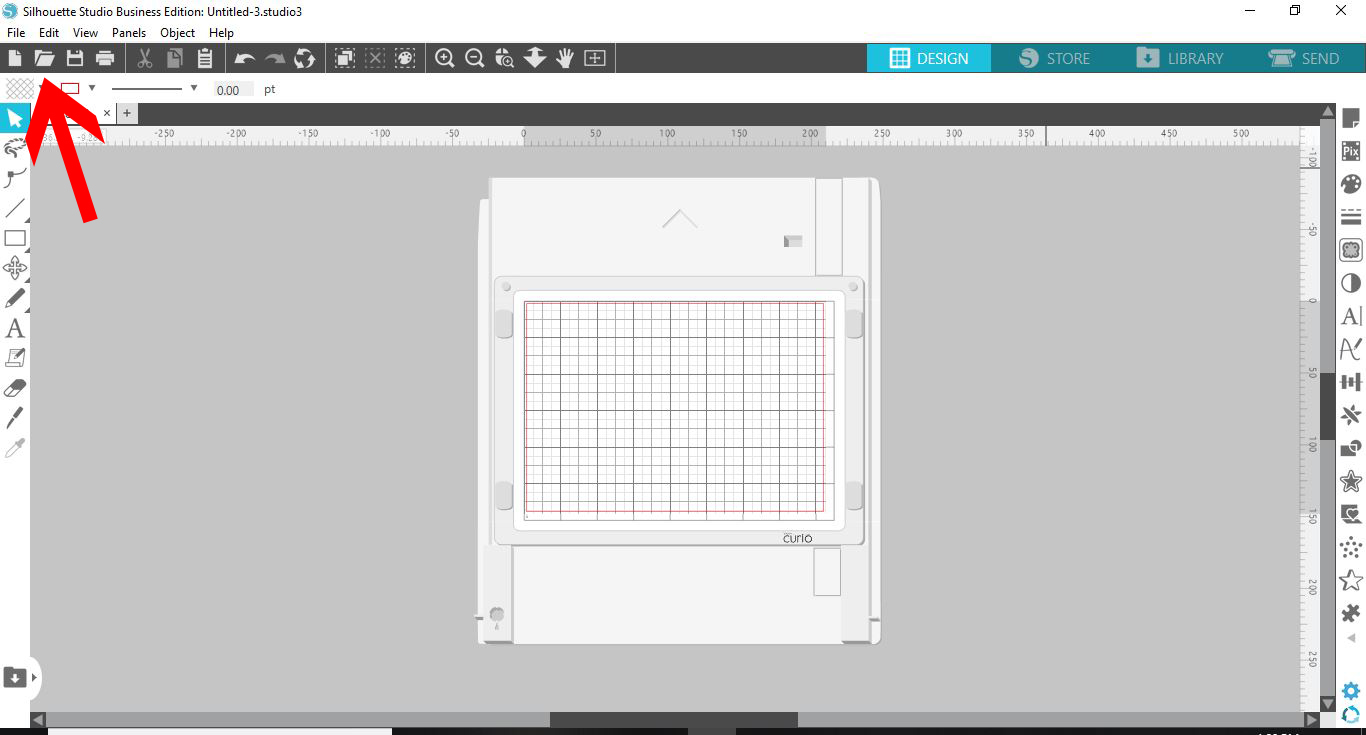
Next, we will import a design. Click on the file folder at the top of the screen. This is a quick way to open a design. Choose your design and click Ok.
Step 2 - Open the Emboss Panel
With your design ready to go, click onOpen the Emboss Panel on the right hand side.
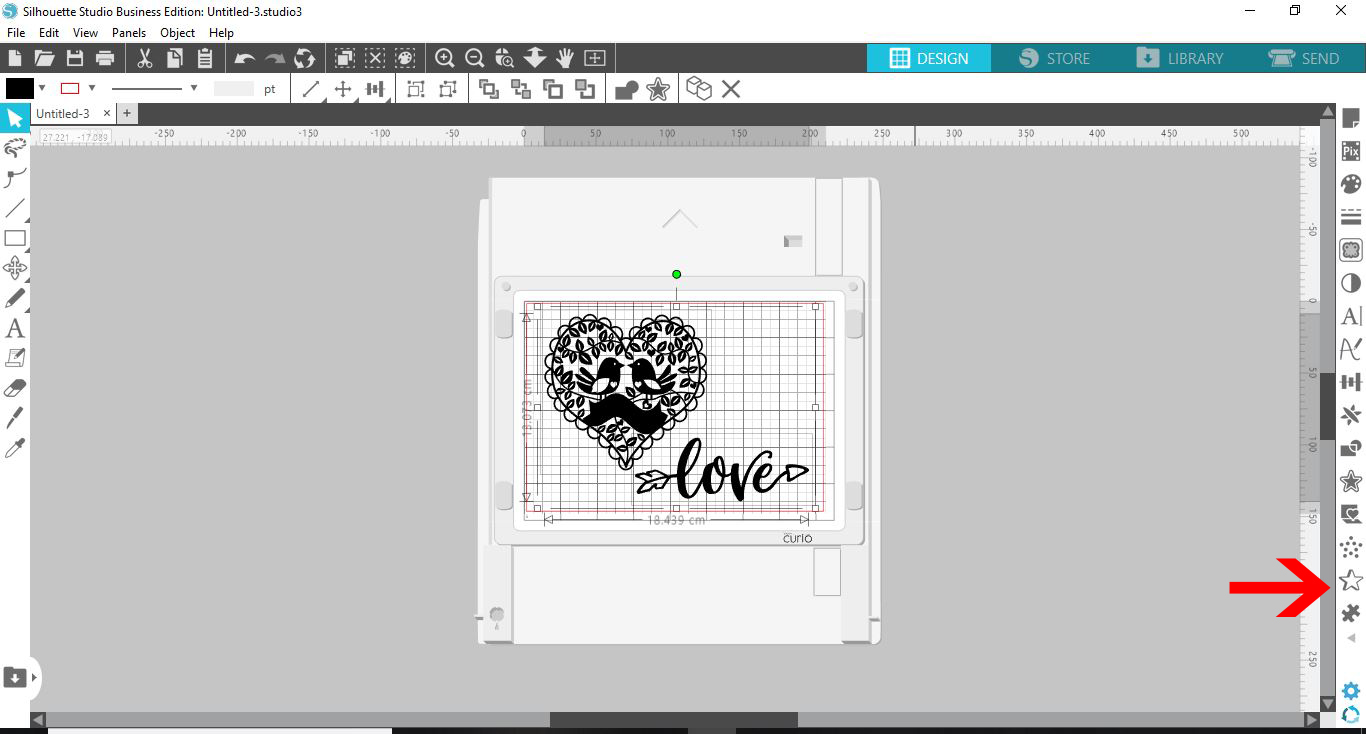
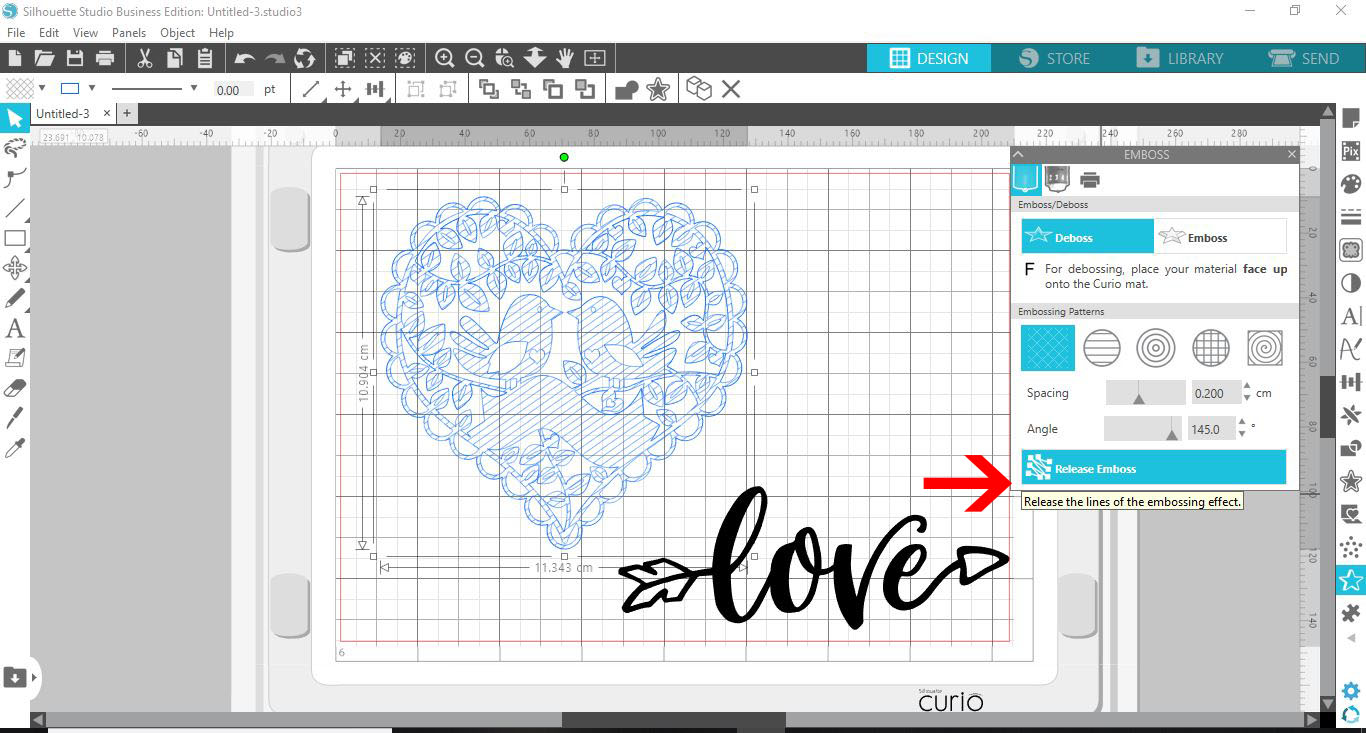
Select the design you want to emboss. By default Deboss is selected. Choose either Deboss or Emboss.
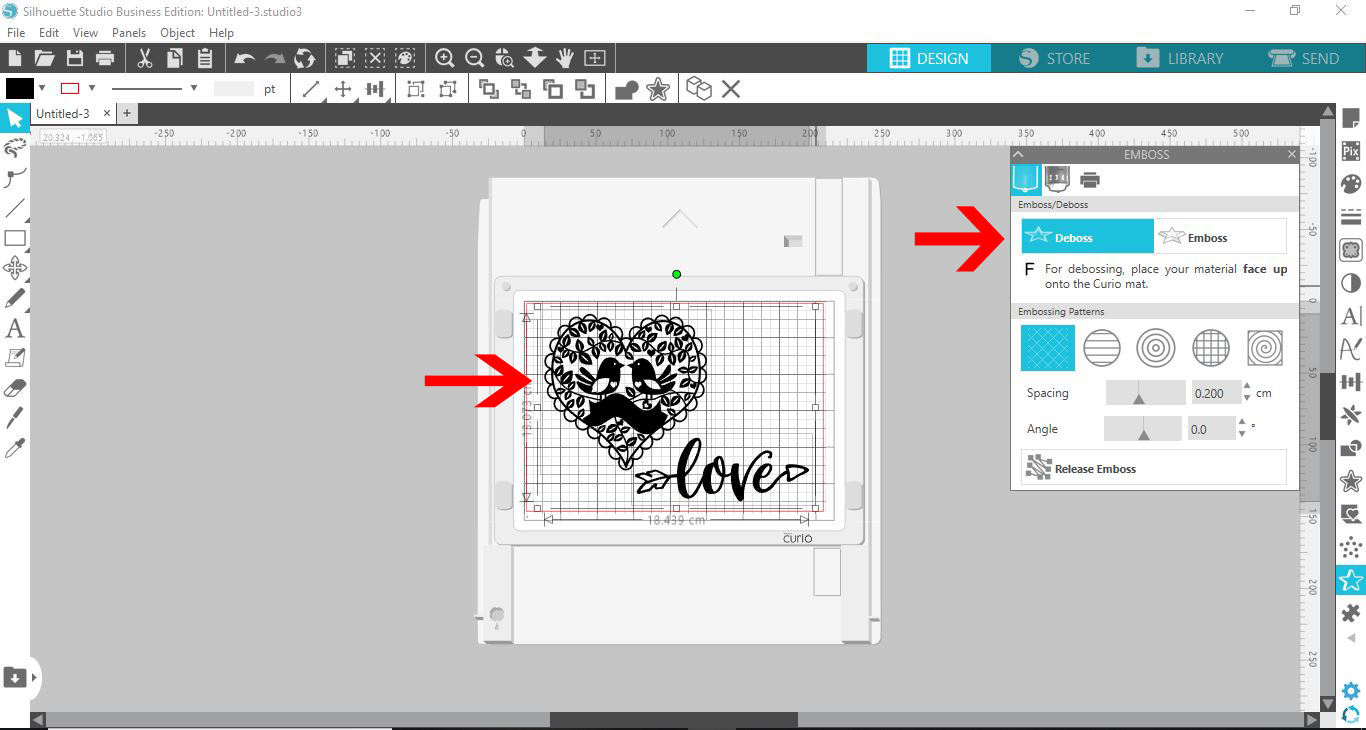
The first option is the No Effect option. When clicked this will outline the design in blue. This indicates it will deboss only the outline.
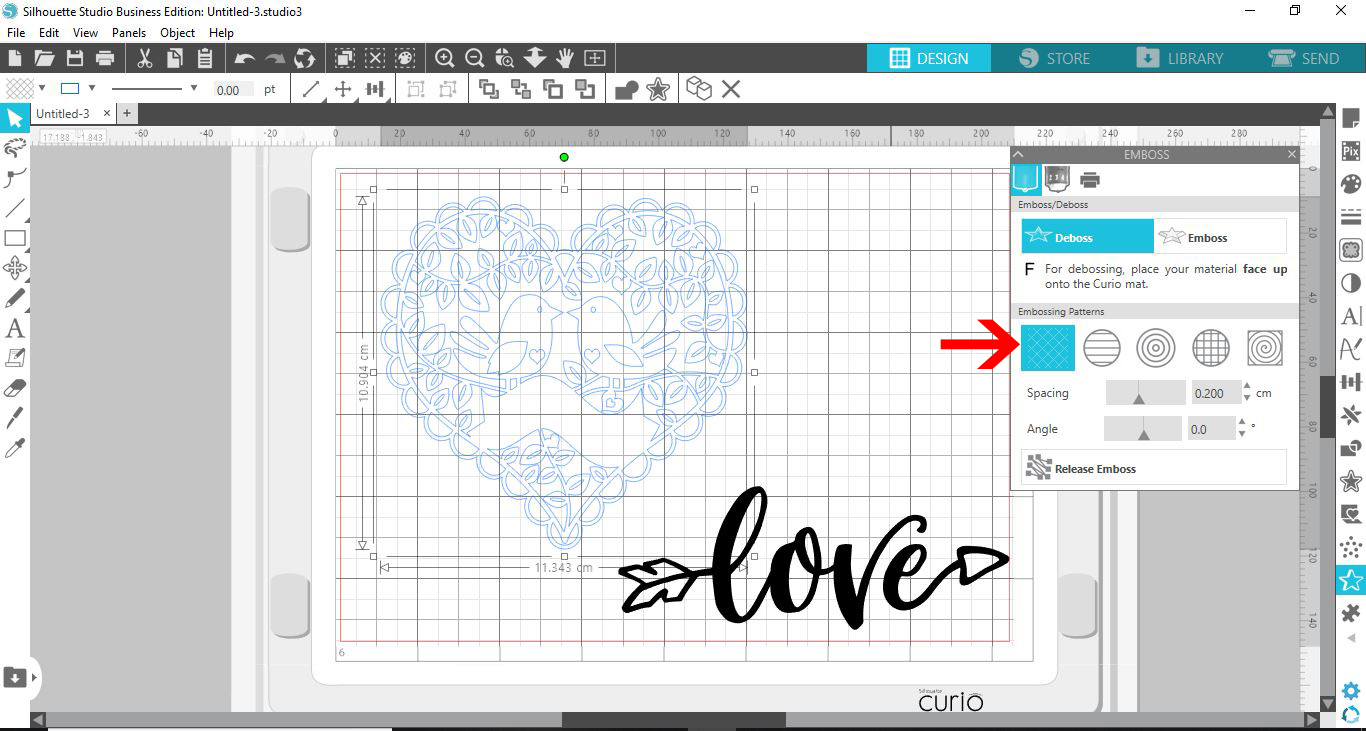
Step 3 - Add a Fill to the Design
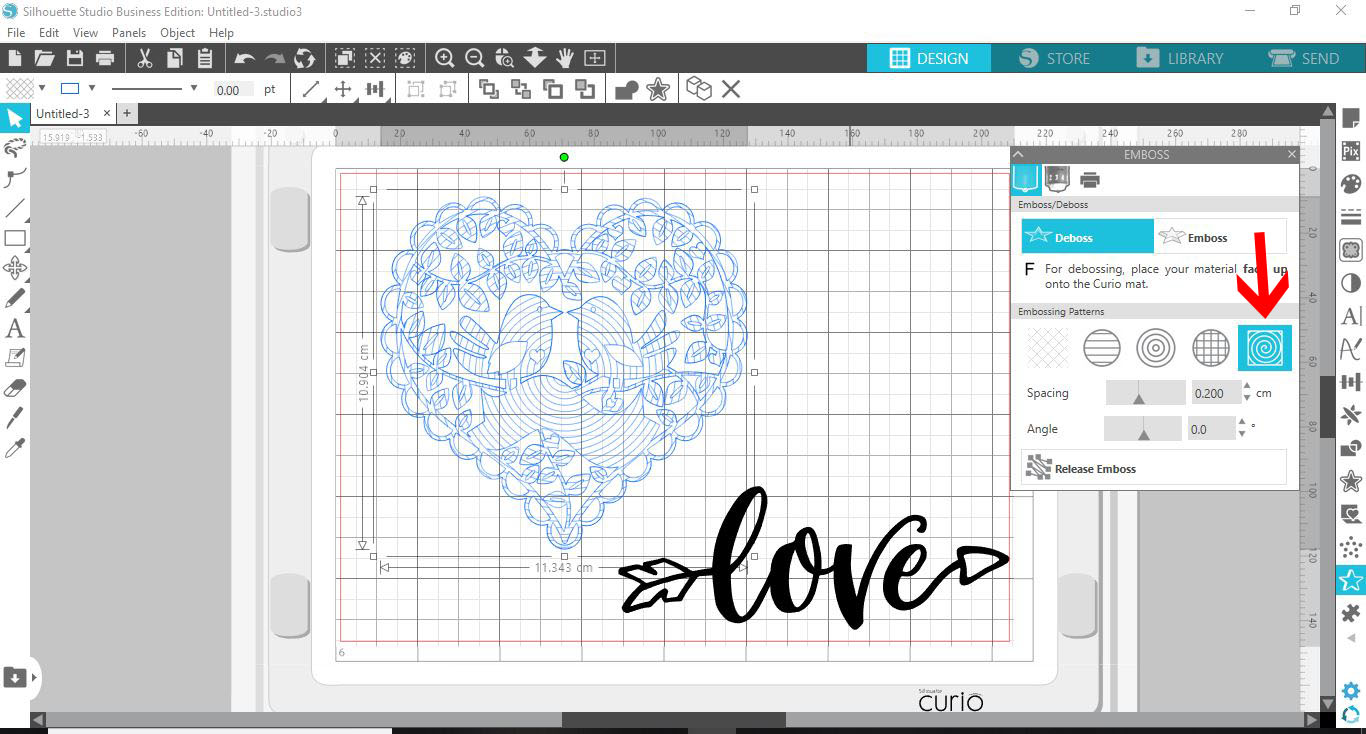
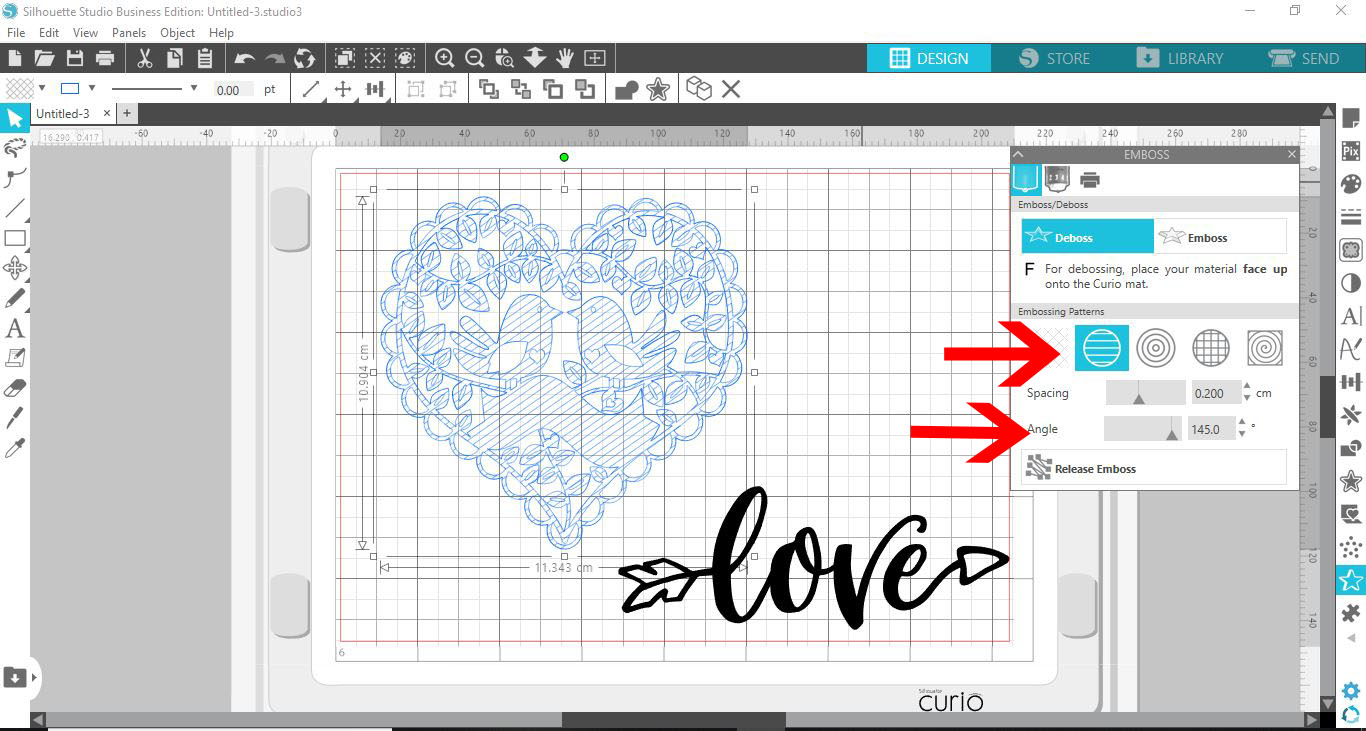
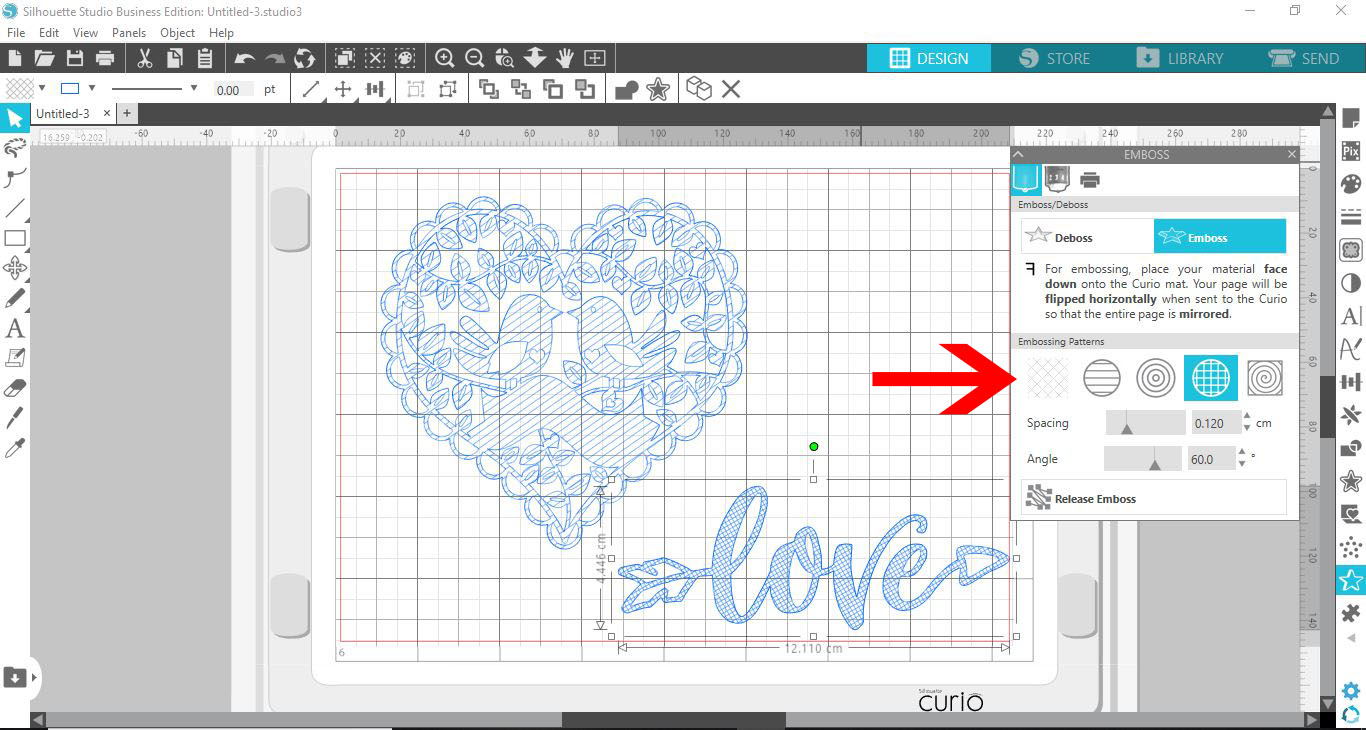
You have four options available for filling the design after No effect. Line Embossing adds multiple straight lines. Concentric circle creates a circular lined fill. Then you get Cross Hatched fill and Spiral fill.You can use any of the fill options to fill the design.
You can also adjust the angle of the embossing.
Once you are done you can click on Release Emboss at the bottom of the panel. This will allow you to resize the design and keep the spacing and fill as is. If you don't release the emboss, as you adjust, so will the fill. Once released, you won't be able to adjust the fill and angle.
Fill and adjust the remaining elements of your design. Here I chose to Emboss the word Love with the Cross Hatched fill.
Step 4 - Send project to be Embossed and Debossed
Our project is ready to be embossed and debossed. Go to the Send panel. For the Action choose the Emboss option and then the Embossing Tool. Choose either the Embossing Fine or Wide option depending on your tool. Make sure thatthe Curio is selected as your machine at the bottom of the screen.
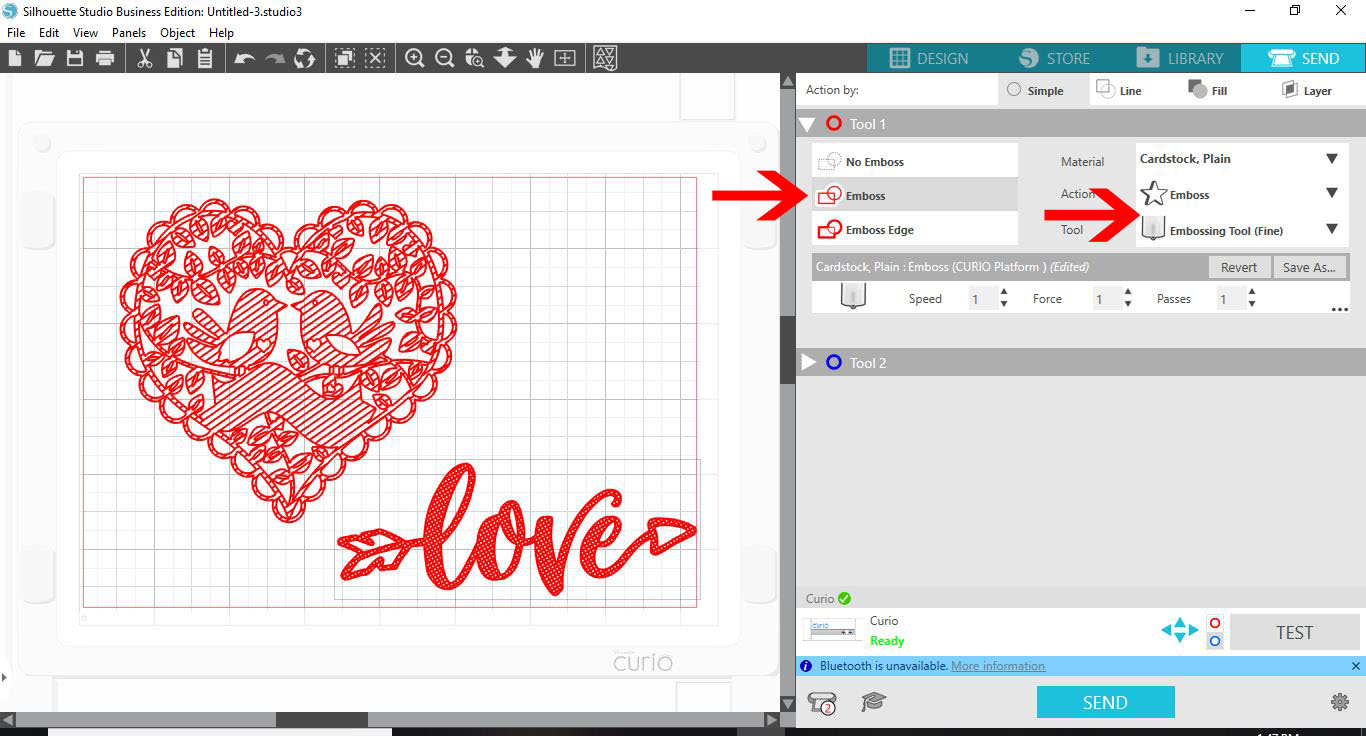
Place your cardstock onto the embossing mat. If you are Embossing your design, place your material face down on the mat. If you are Debossing your design, place your material face up on the mat. If you choose to Deboss one design and Emboss another, they must be done separately.
Add the number of platforms that the send screen recommends. This is usually platform 2 + platform 2 + platform 1. Your embossingmatis seen as platform 1. Load your setup into the machine and click on Send. Then watch the magic happen.
We hope that you enjoyed this tutorial. If you would like to know more, follow our other tutorials like how to use the stipple tooland how to use the sketch tool with the Silhouette Curio.