By Design Bundles
Accessing Fonts and Glyphs with the Silhouette Curio
1- Open Silhouette Studio. Go to the cutting mat and change to the Curio. Next, change the media size to fit the curio mat. A5 will work well.
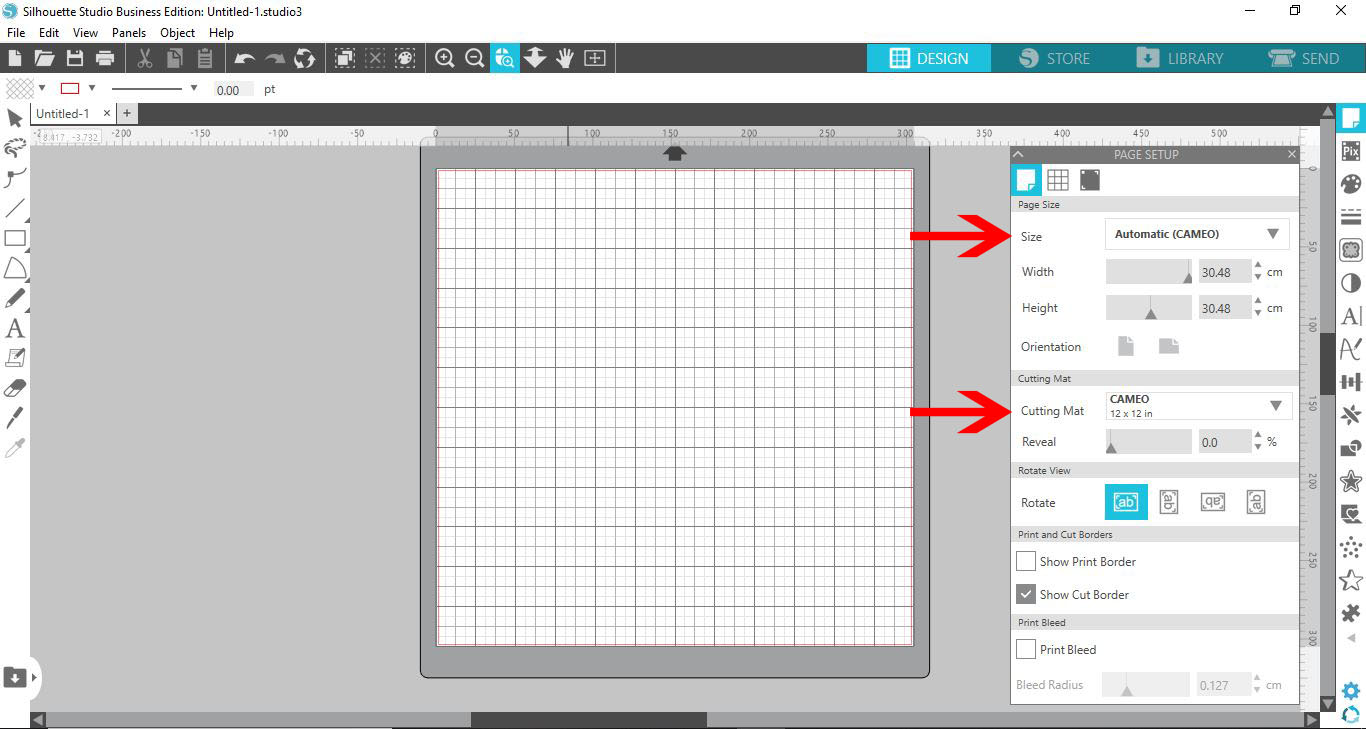
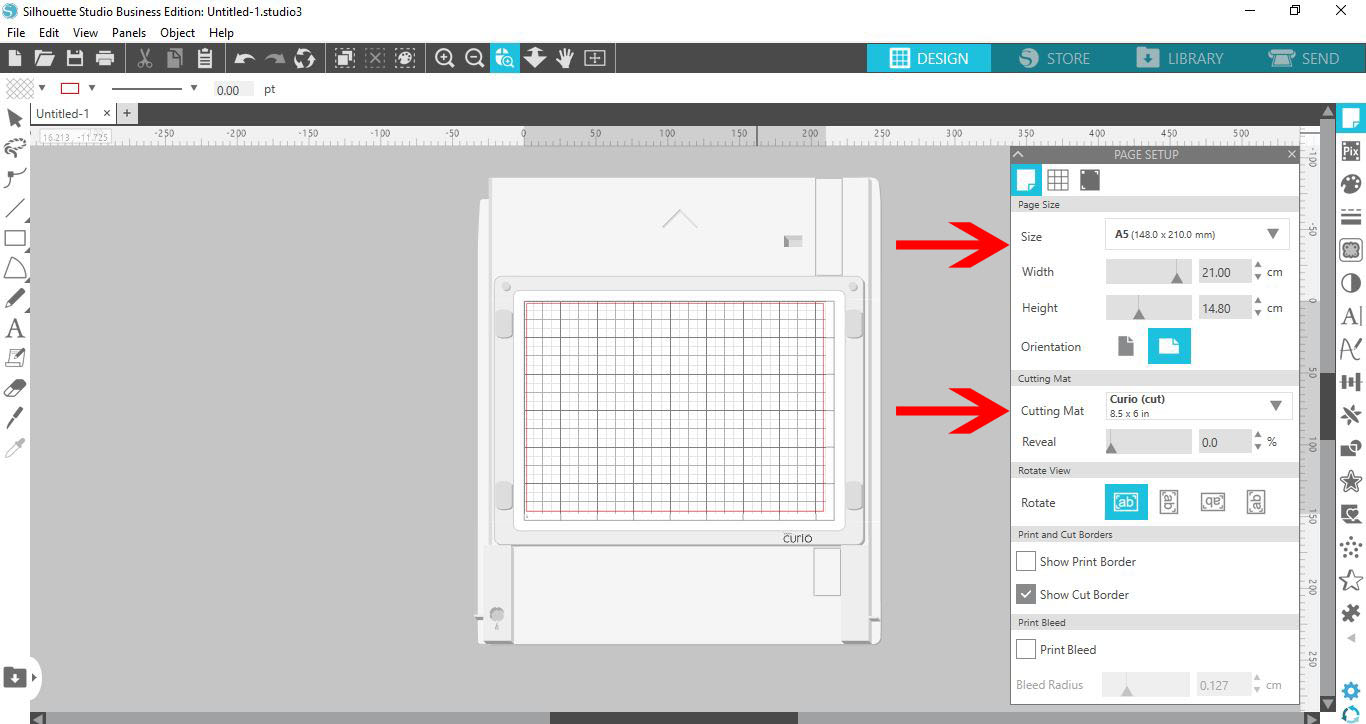
2- With the two sections changed, you will see that the mat on the screen now is the curio mat.
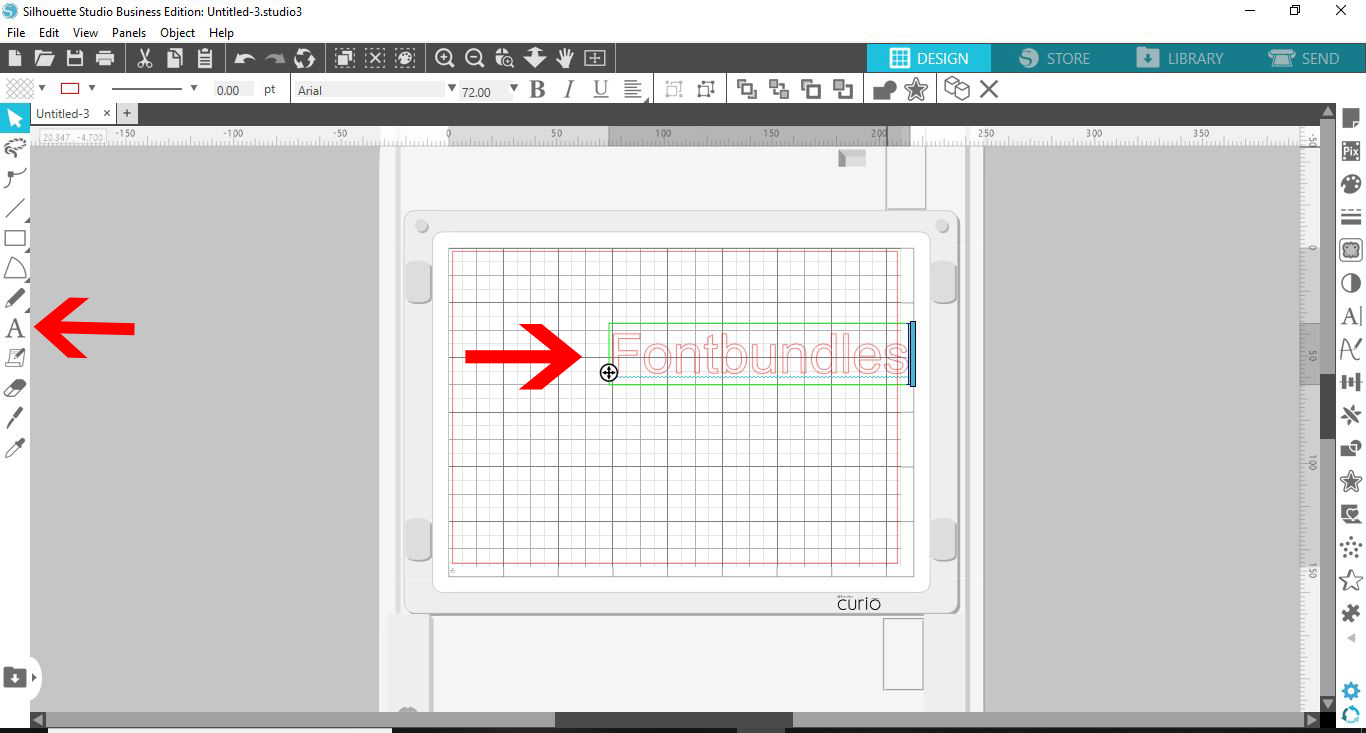
3- Select the text tool and type your text.
4-Select your text and click on the text style tool.
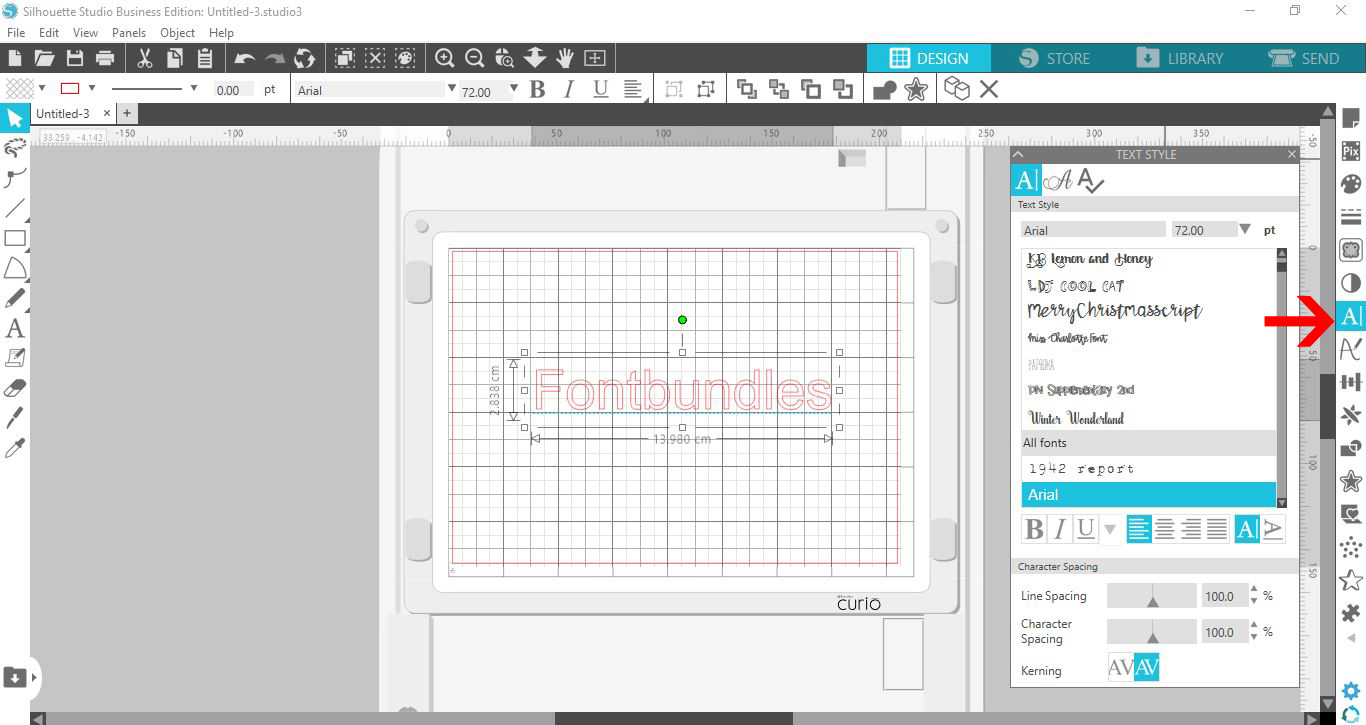
5- There is a new panel that will appear. Here you can select any of your fonts that are installed on your PC. Select a font, and the text that is selected will change to that font.
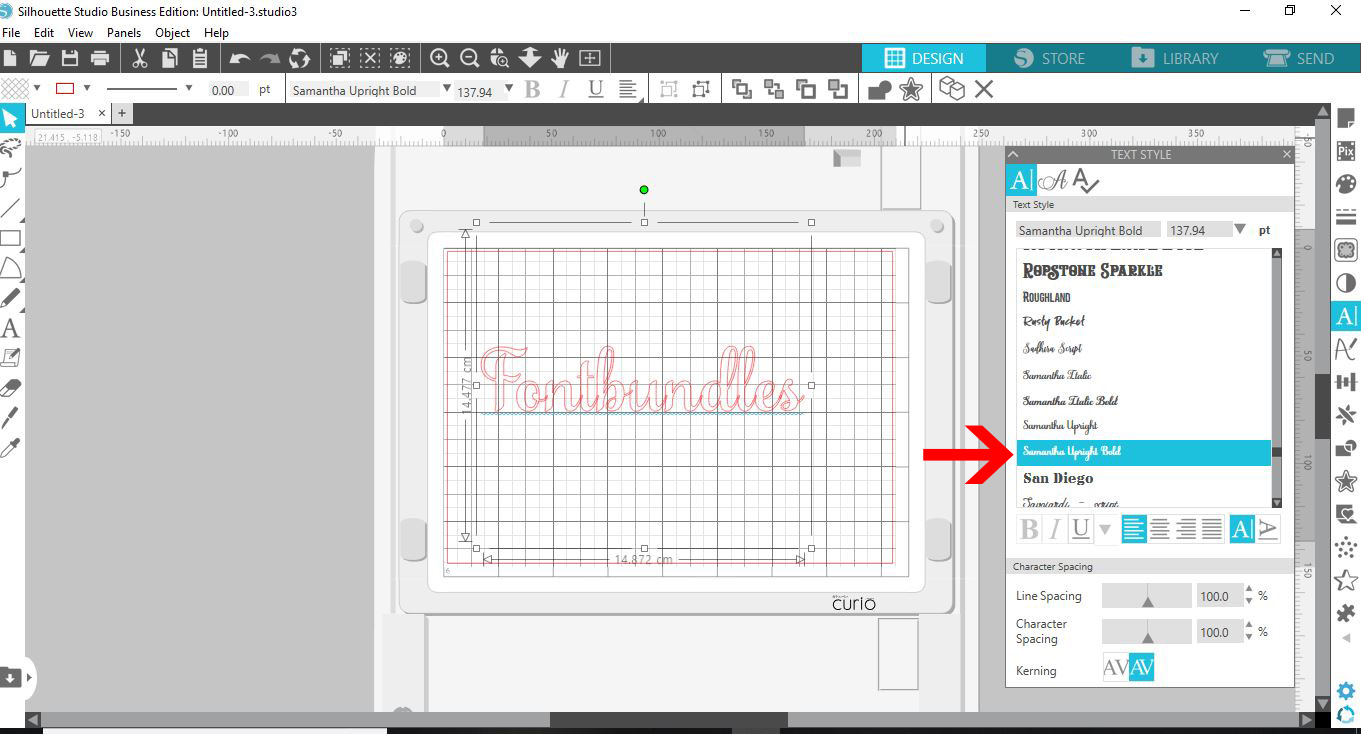
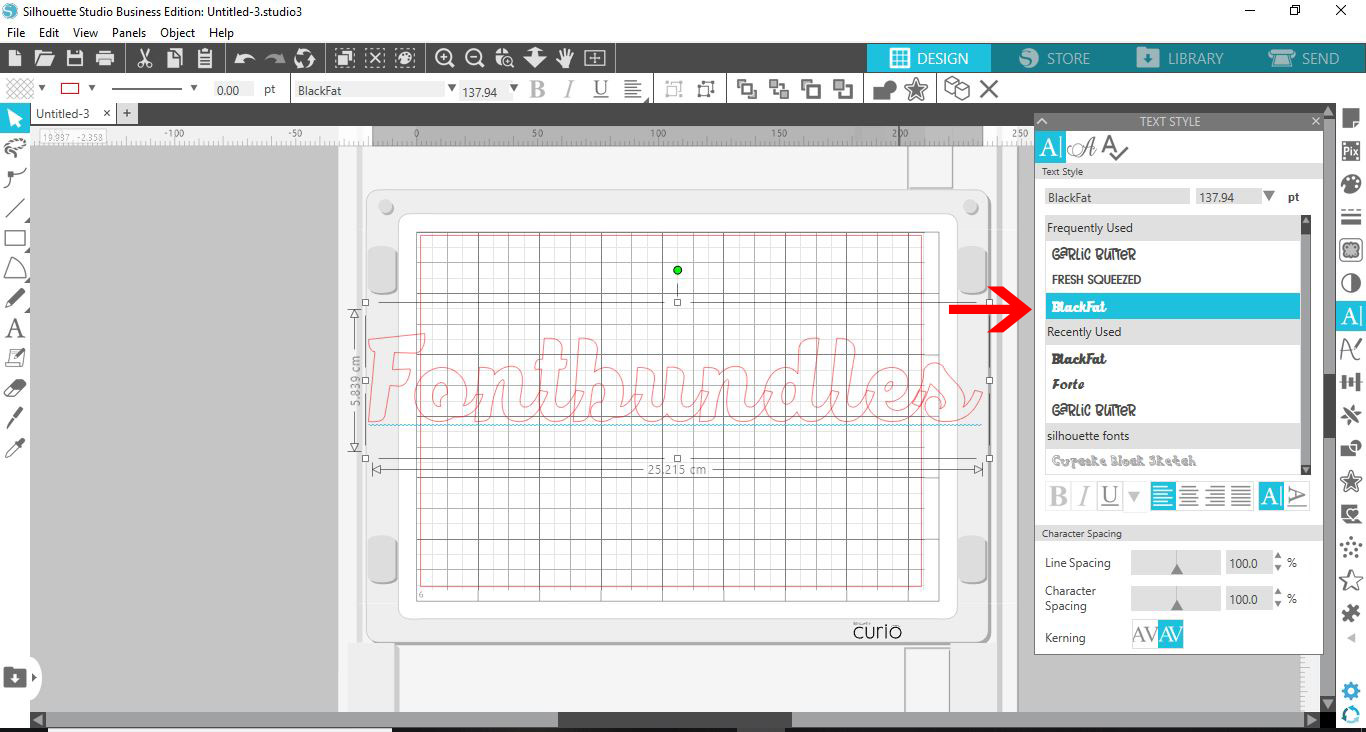
6- You can change your font any time as long as you select the text and then select a font in your style panel.
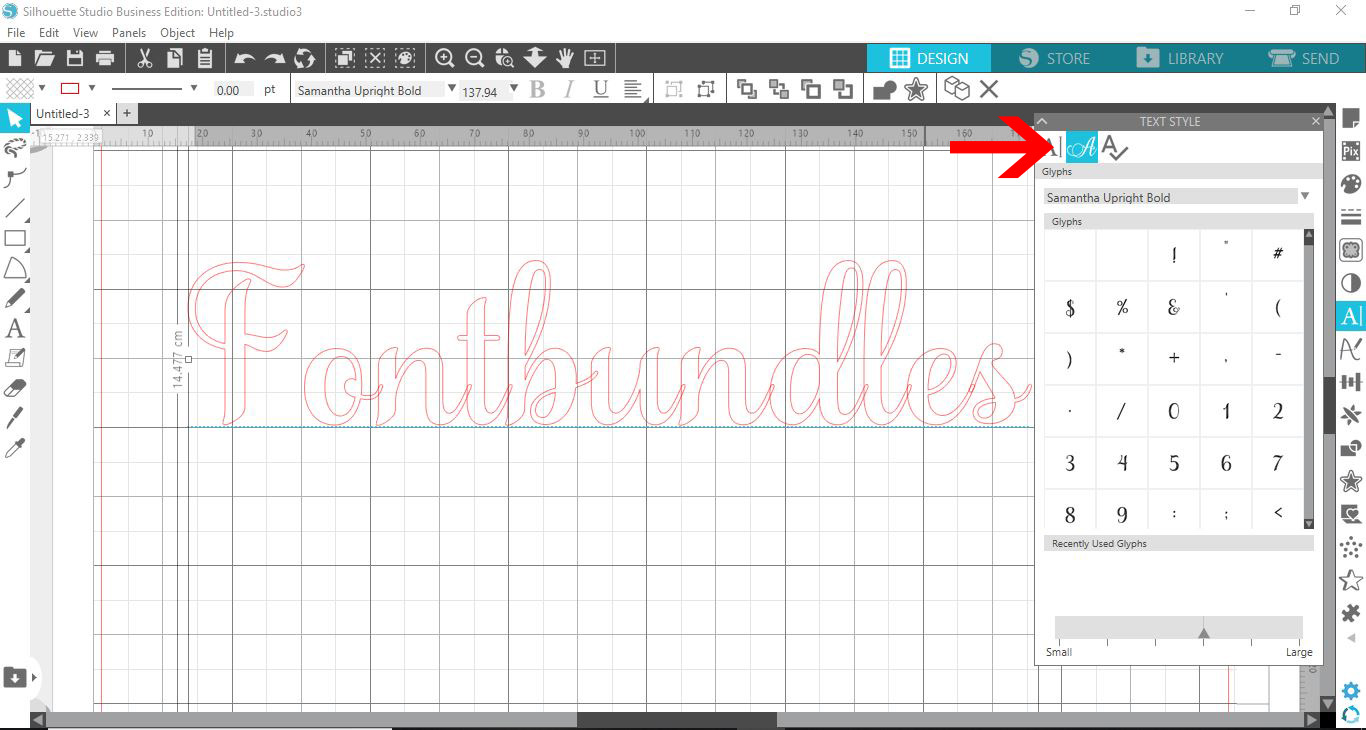
7- If the font you have selected came with any glyphs, you could select the glyph option. A selection of glyphs will appear for you to choose from.
8- If you hover over a glyph, it will become bigger for you to see which one to select.
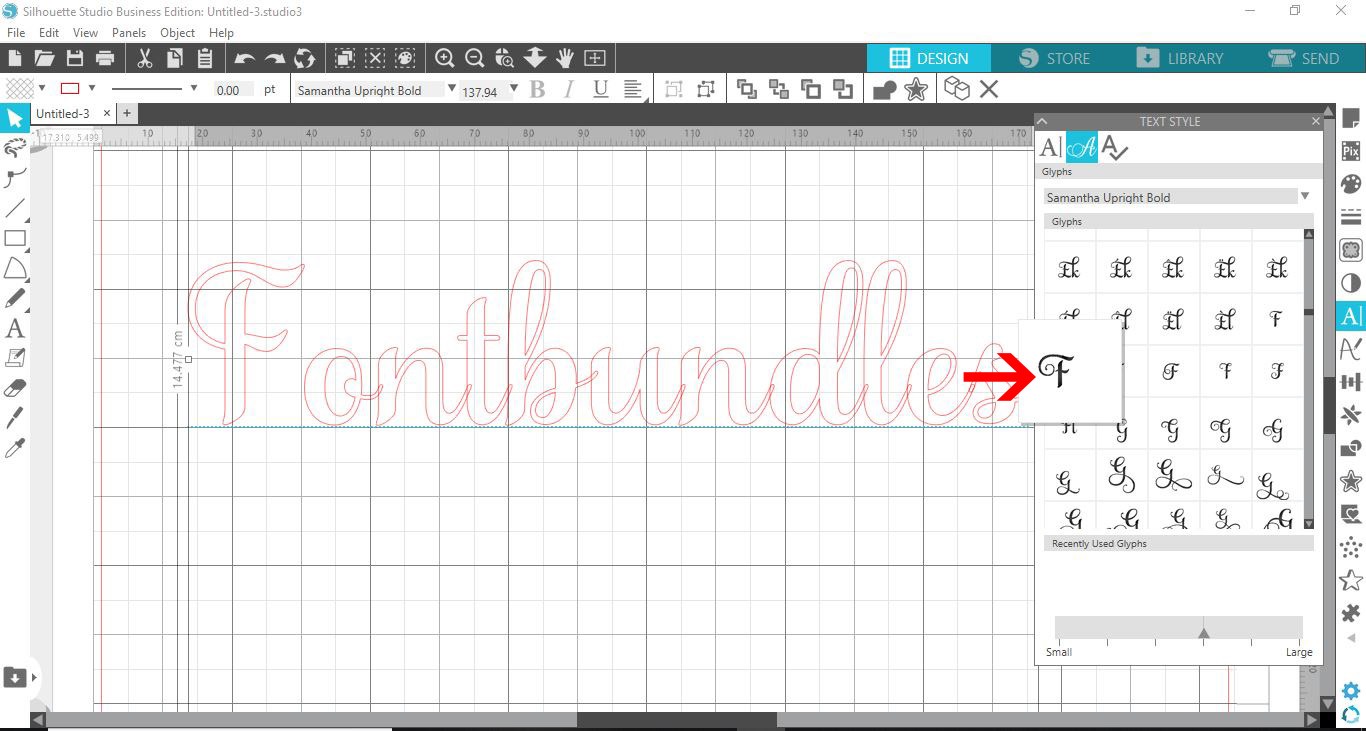
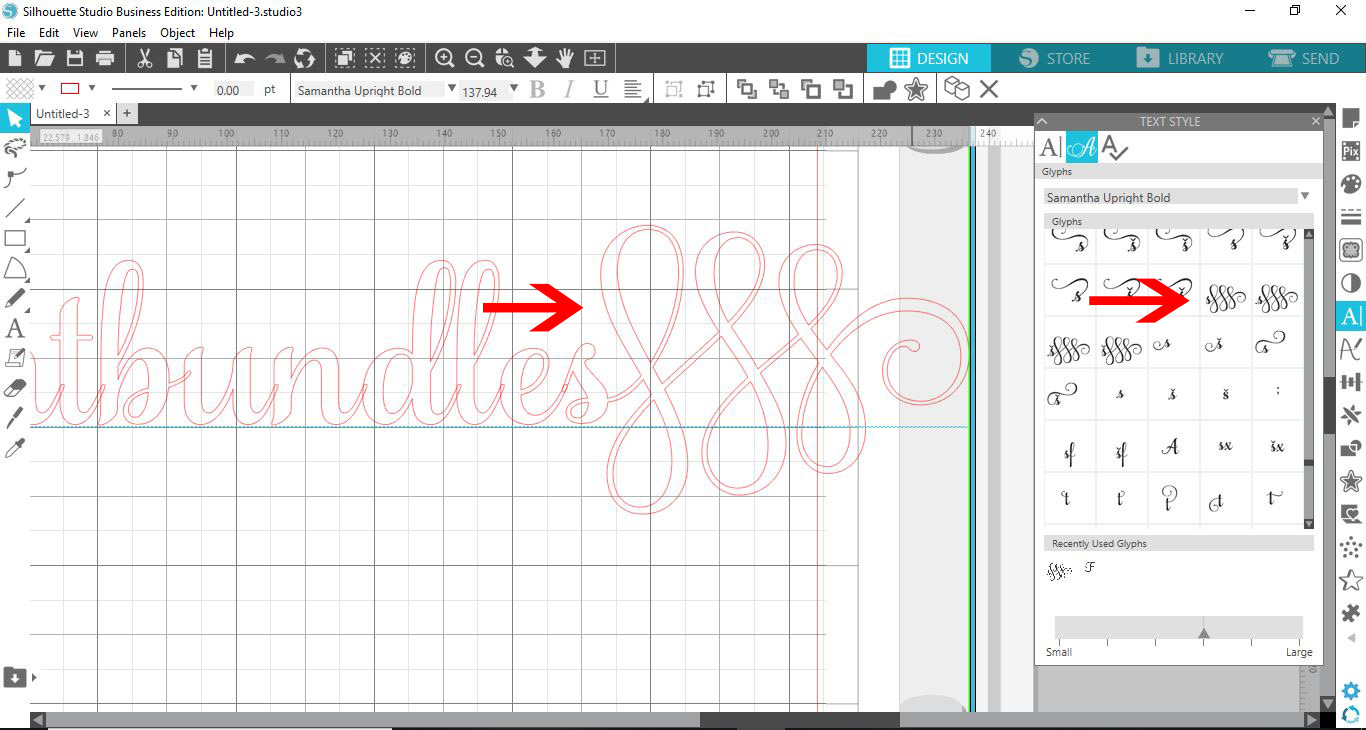
9- Place your cursor where you would like the glyph. You can delete the letter you do not need that you are replacing with a glyph. Next, click on the glyph you would like to use, and it will appear where your cursor is.
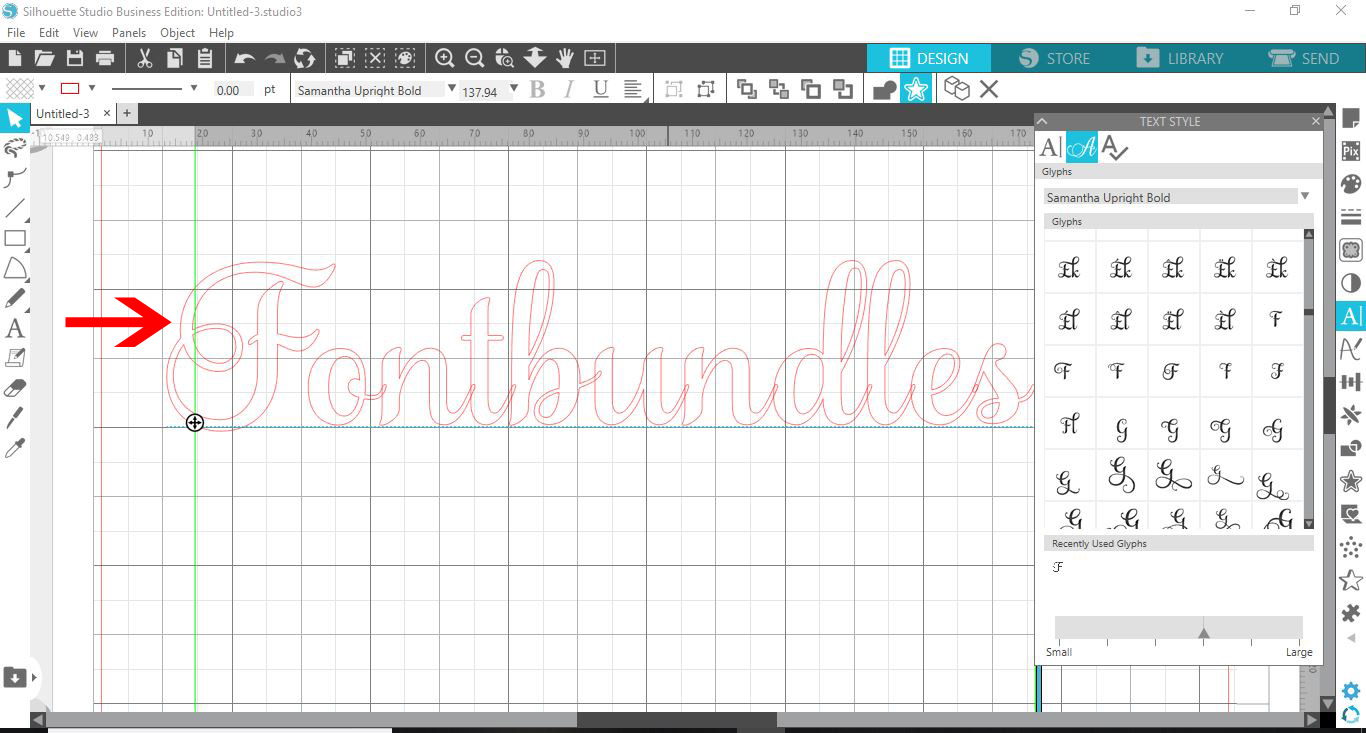
10- You can repeat this as many times as you would like in your text.
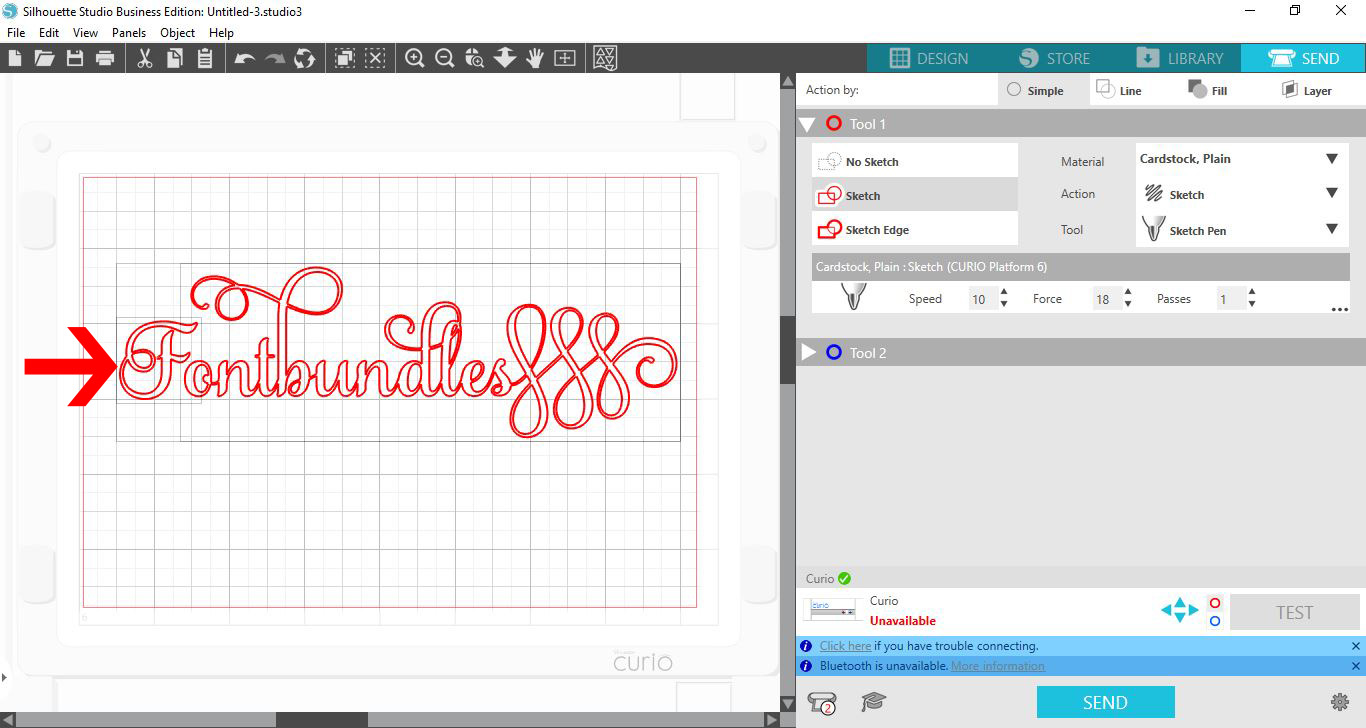
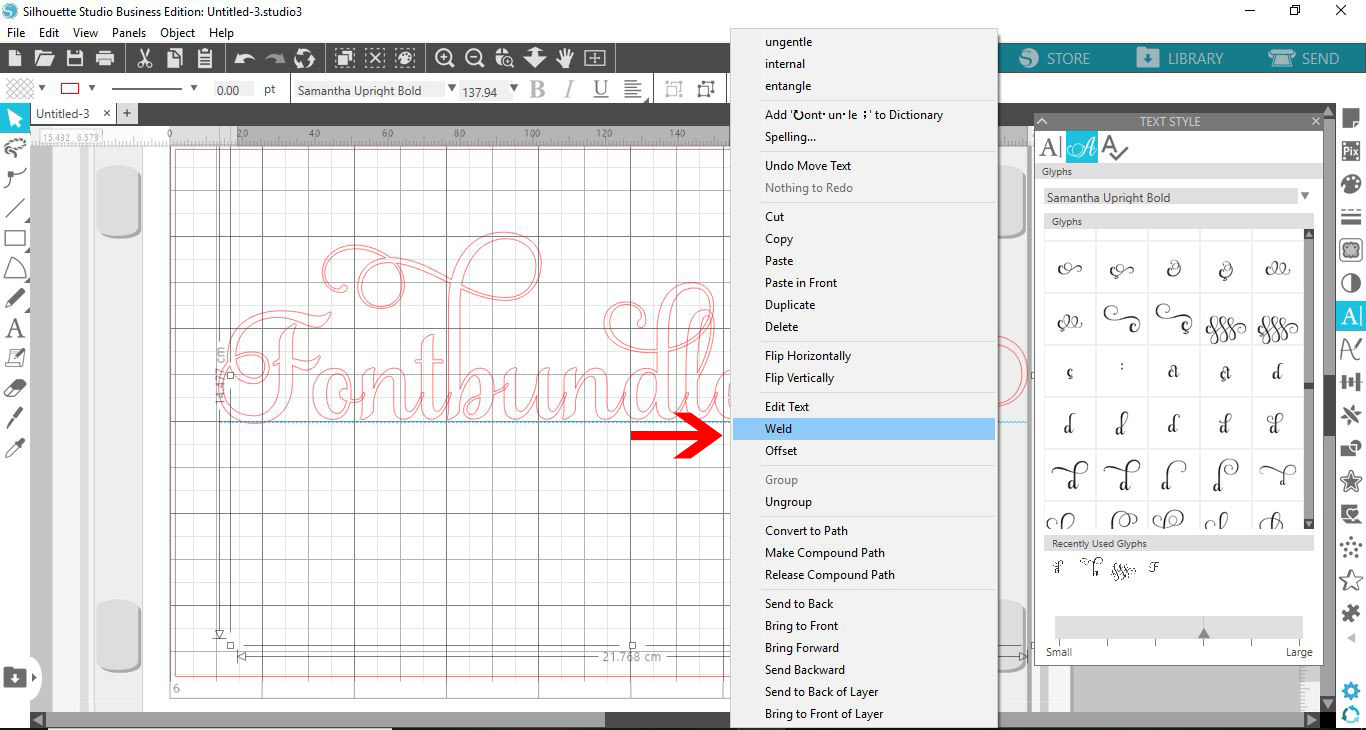
11- Once you are happy with the finished glyphs and text, right-click and group. If you want all the letters to join (if overlapped), you can click weld to join the overlapping letters.
12- Click on send when you are finished. You will see that the glyphs act as text and will have cut lines automatically.