By Design Bundles
Silhouette Tutorials9 min
How to Fill Text with Images in Silhouette Studio
In Silhouette Studio images and photos can be manipulated to fit text. This method is a super fun way to personalize projects and gifts. You can use one or multiple images to achieve this effect. In this tutorial we will show you how to fill text with images in Silhouette Studio.
In this tutorial we are using a fall leaves pattern from the Plus Hub, but you can choose from tons of hand drawn patterns available on Design Bundles. We will also be using a Sunflower pattern and a modern sans serif font called Cedric.
Step 1 - Type your text and bring in images
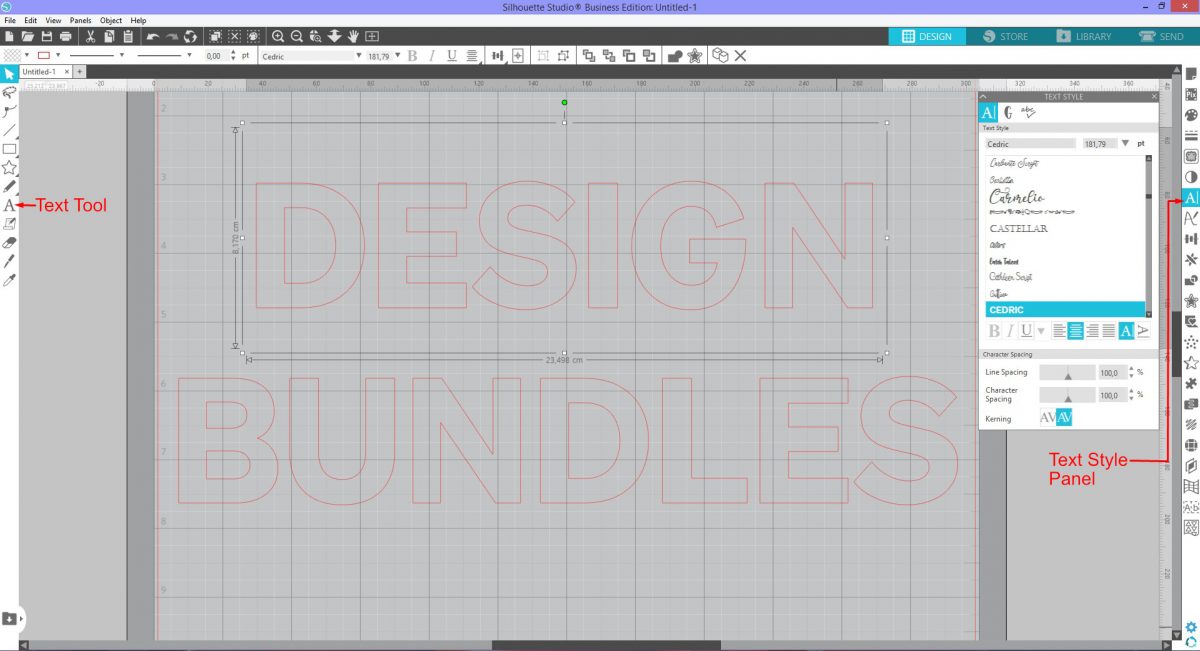
Open Silhouette Studio and click on the Text Tool on the left side. Type your text then change the font with the Text Style Panel. We have a more detailed tutorial on How to edit text in Silhouette Studio if you need some help.
For this tutorial each word was typed as a separate text object. An image will be applied to each word instead of each letter.
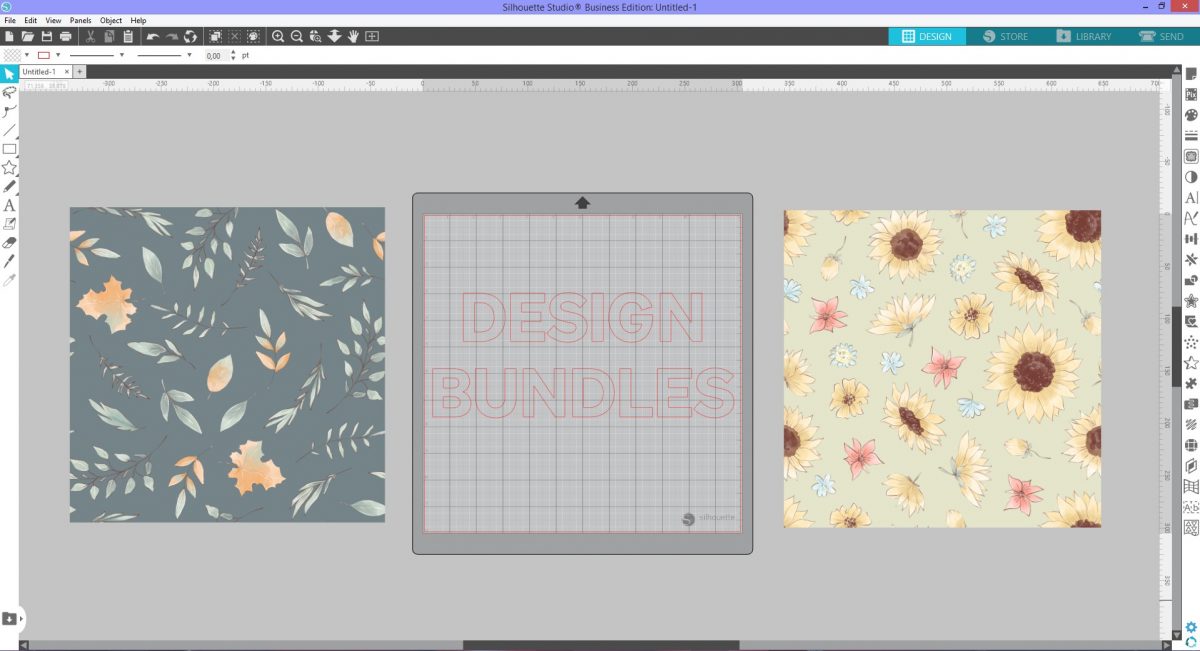
The drag and drop method is a quick way of bringing in images. Locate your image files and drag and drop them into Silhouette Studio. When using the drag and drop method be sure to drop the new image onto a clear area. If you drag and drop the image over another, it will replace that image.
Step 2 - Use the Modify Panel
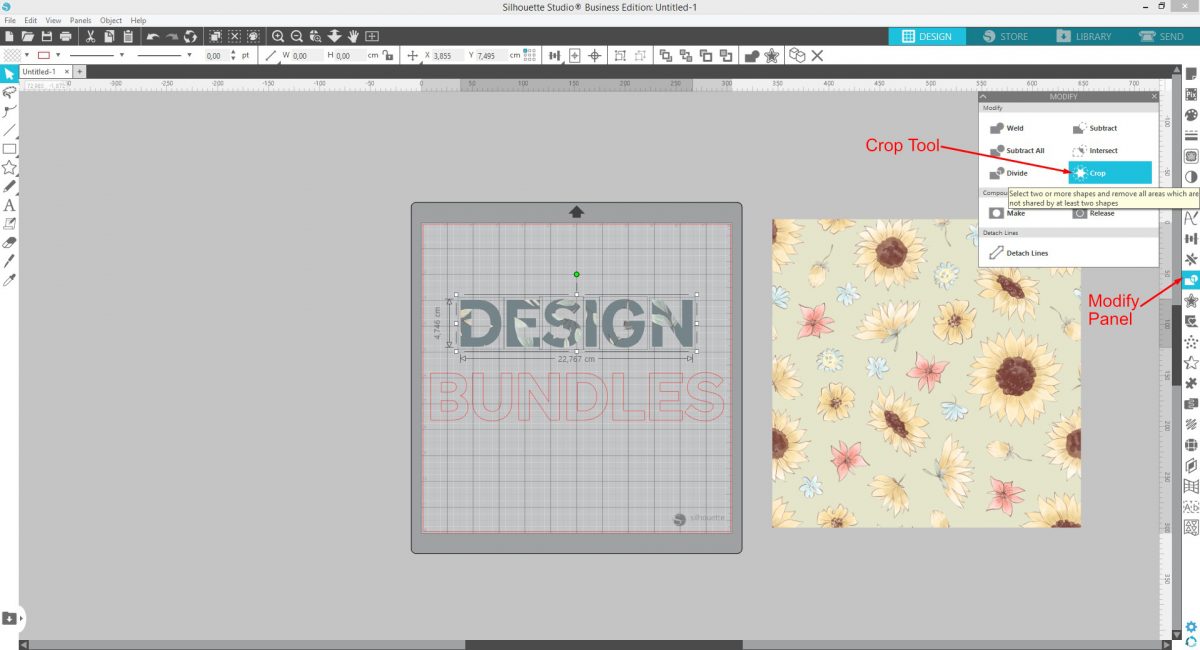
The Modify Panel has a group of options to edit how objects interact with each other. The Crop Tool will be used for this step. Learn more about the modify panel in Silhouette Studio with our great tutorial.
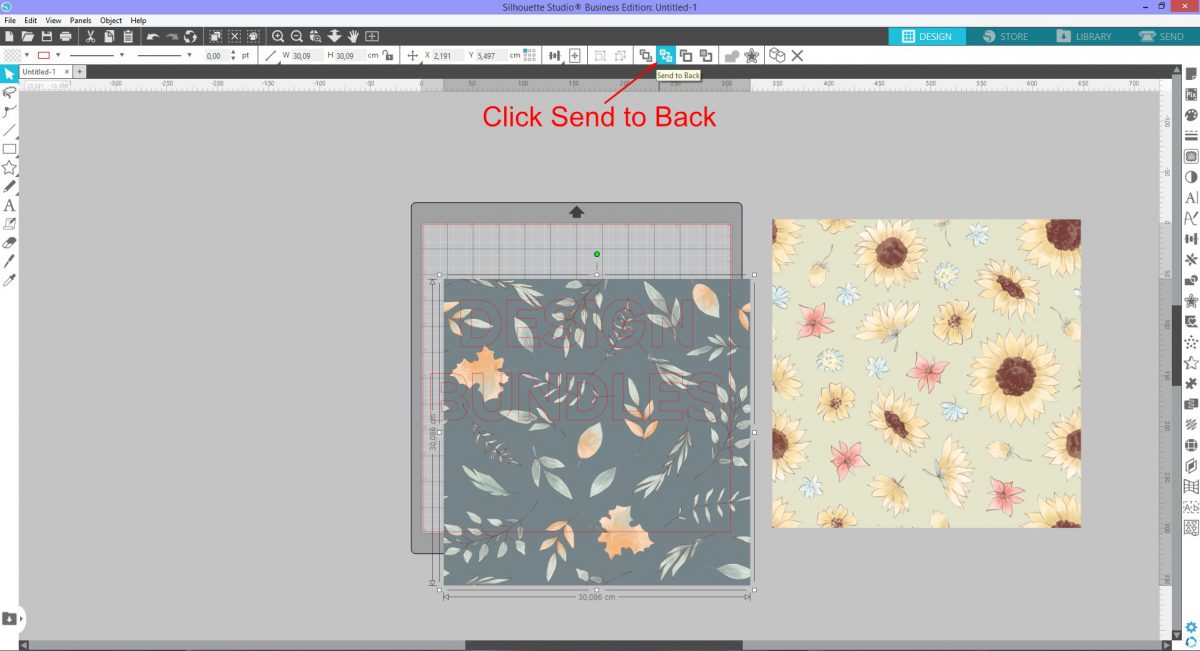
Click on one of the images and drag it over to the first word. At the top click on Send to Back so that the image is behind the word. Position where you think is best to get the most out of the image.
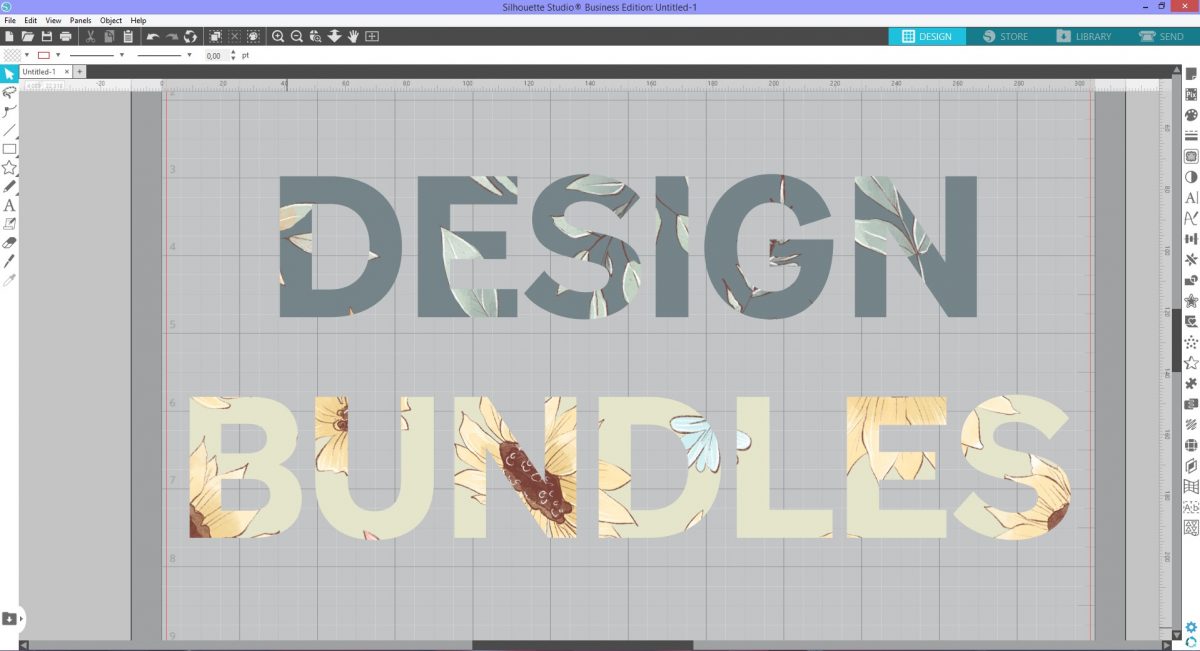
On the right side click on the Modify Panel to open. Click on the image then Shift + click on the text to select both. On the Modify Panel click Crop. The image has been cropped to the shape of the text. When the Crop Tool is used the text becomes an object and can no longer be edited with the text edit tools. Each letter will become an individual object.
Repeat this step for the second part of the text.
Step 3 - Add a stroke to the text objects
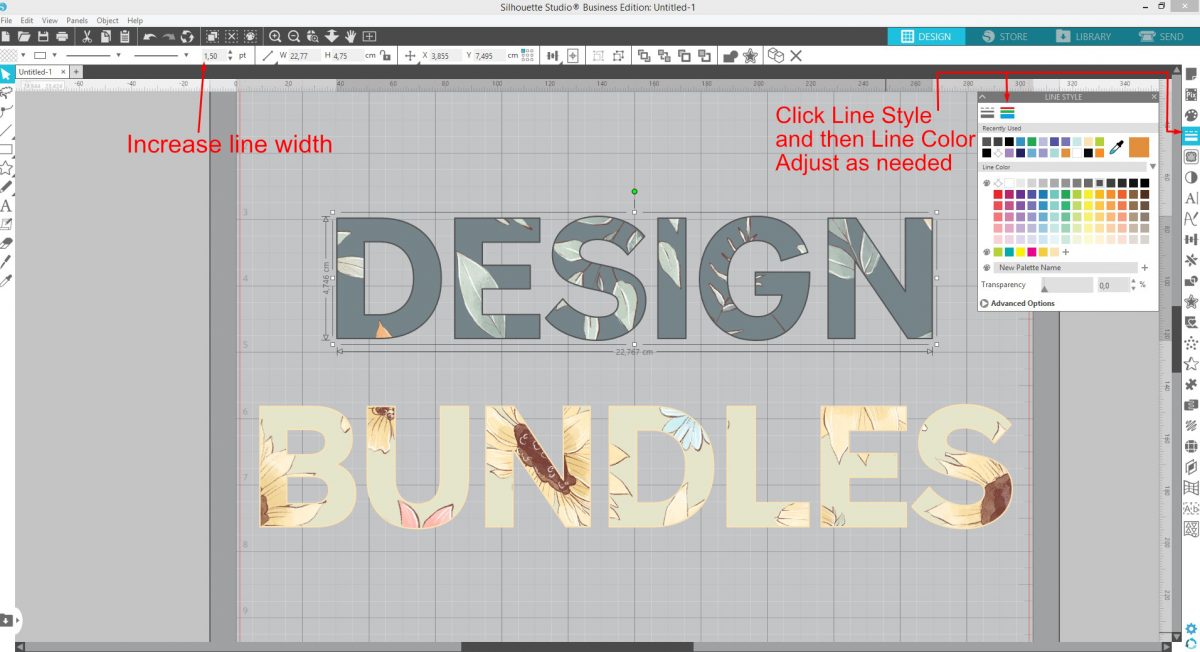
Although not necessary, you may want to have an outline around the text objects. It can enhance the look of the text especially if you want it to stand out against a background.
Select the object and click on the Line Style panel on the right. Next click on Line color and change the color as you choose. You can adjust the line width one of two ways. Click on the Line Style icon next to the Line Color icon or adjust the width at the top of the screen.
If you liked this tutorial make sure to check out our other fun Silhouette Studio tutorials like how to make sticker sheets with Silhouette, how to use the puzzle feature, and how to warp templates.
Related Tutorials
Silhouette Tutorials
How to fill text with the foil quill in silhouette studio free edition
In 4 easy steps learn two ways to fill text with the Foil Quill in Silhouette Studio Free Edition.
Silhouette Tutorials
How to fill text with a cuttable pattern in silhouette studio
Silhouette Tutorials
How to fill text using the foil quill with silhouette studio designer and business edition
Silhouette Tutorials
Filling Text with Digital Patterns and Papers in Silhouette Studio
Filling text with digital patterns and papers in Silhouette Studio is so easy with our tutorial.
Cricut Tutorials
Filling text in Cricut Design Space using Silhouette Studio software
Learn how to fill text with a pattern using Silhouette Studio, then import to Cricut Design Space.
Silhouette Tutorials
How to Add an Outline Around Any Text in Silhouette Studio
Discover how to add an outline to any text in this Silhouette Studio tutorial. Quick read!