By Design Bundles
How to Mirror Text and Images in Silhouette Curio
Have you ever wanted to mirror text and images in Silhouette Studio with your Curio? Then be sure to check out this tutorial. We will guide you through the steps on setting up your text to be mirrored in projects. This method is mostly used when working with HTV projects where the design needs to be mirrored.
During the tutorial we will be using a script display font called Amastery Font Duo. You are welcome to browse through the collection of Modern Script fonts for more options.
Step 1 - Change the Mat Layout to Curio
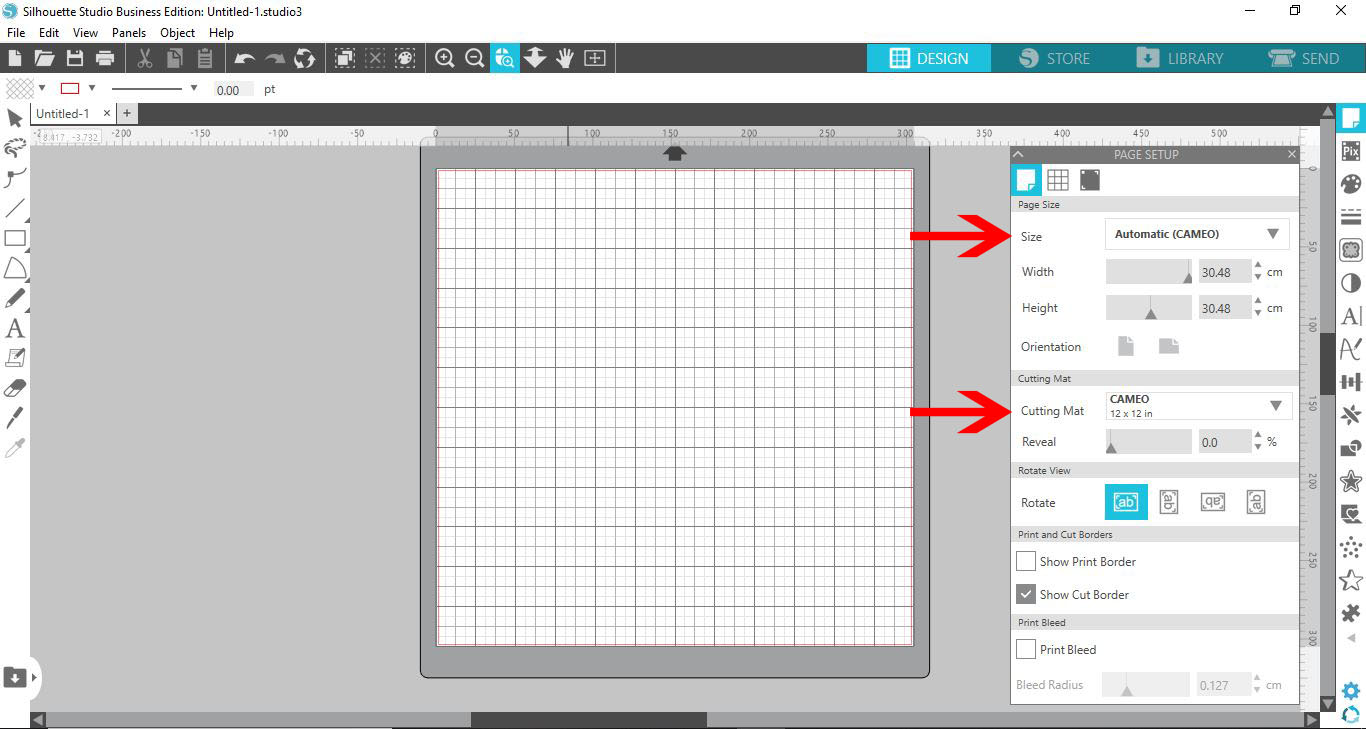
When opening Silhouette Studio, it will most likely display a Cameo mat set up. We need to change this to the Curio mat. On the right side panel, click on the Page Setup.
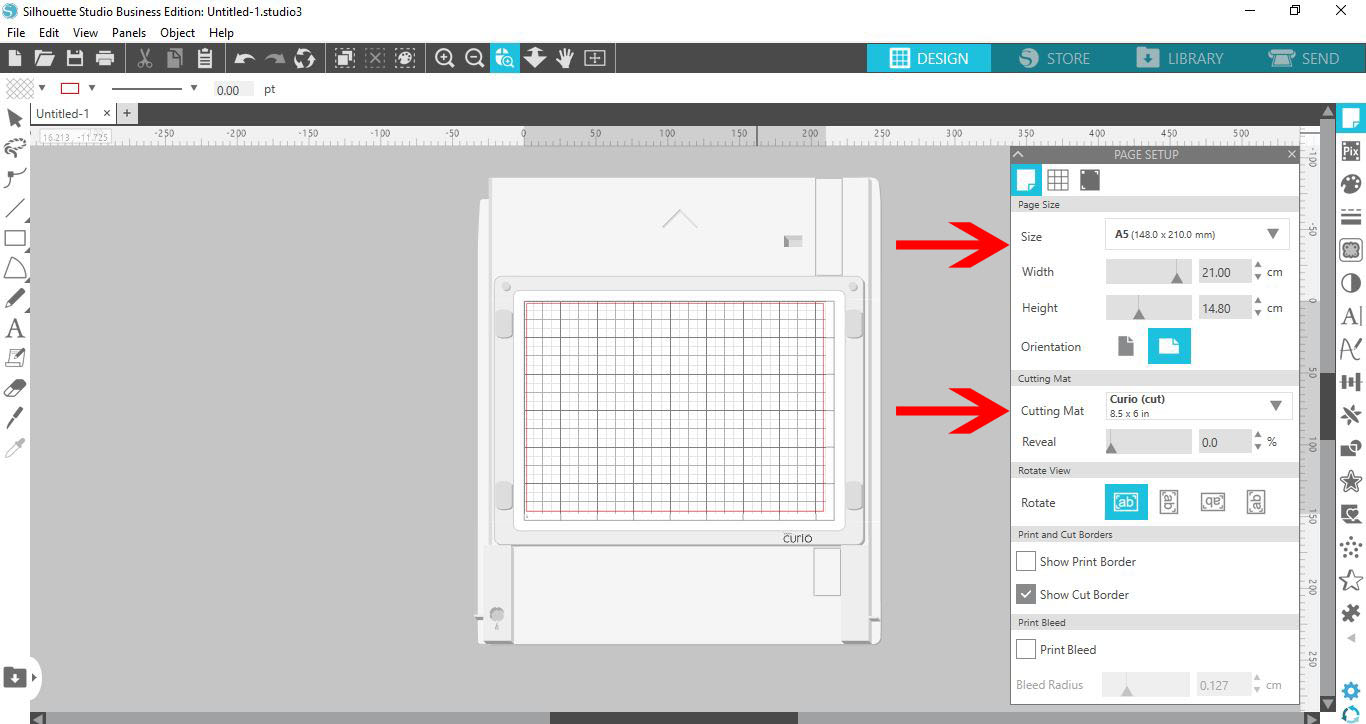
Change the Size, or Machine depending on your version, to Curio. Next, check on the Cutting Mat setting. It should automatically change to the Curio but if not, select Curio from the drop down menu. If a Media size option is available, leave this as Auto or change to A5.
The mat on your screen should now change to the Curio mat. You may need to change the Orientation so the arrow on the mat is facing upwards as shown below.
Step 2 - Create and Edit your Text Design
Using the Text Tool on the left side panel, type out your text on the mat.
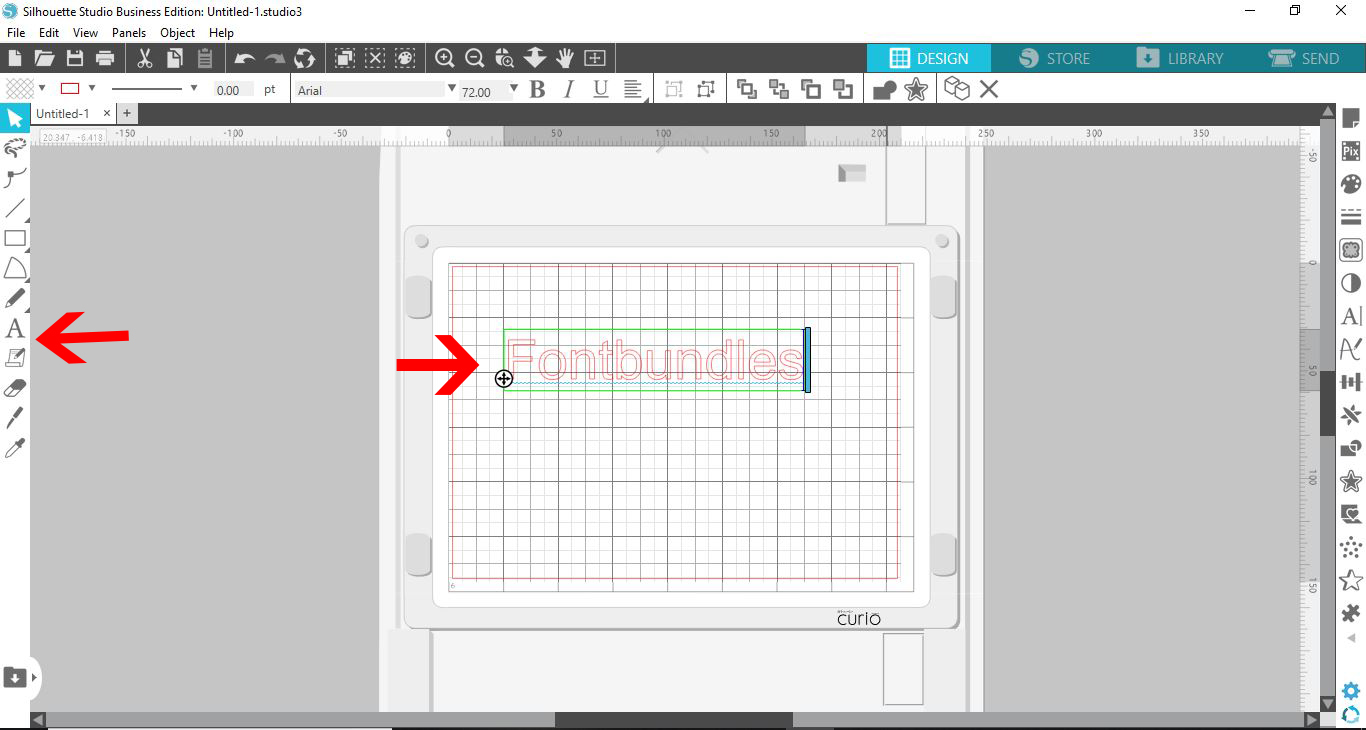
To change the font, use the Text Style Panel on the right hand side. Choose the font you want to use and click to apply.
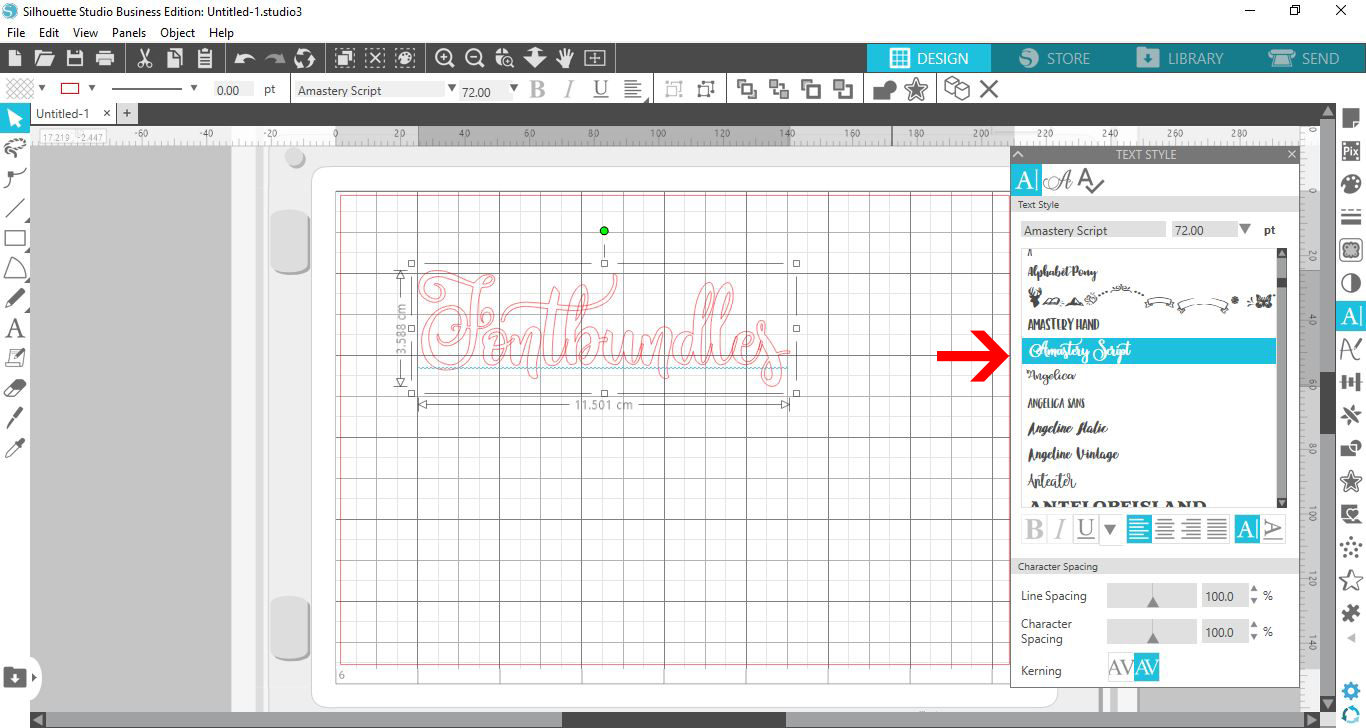
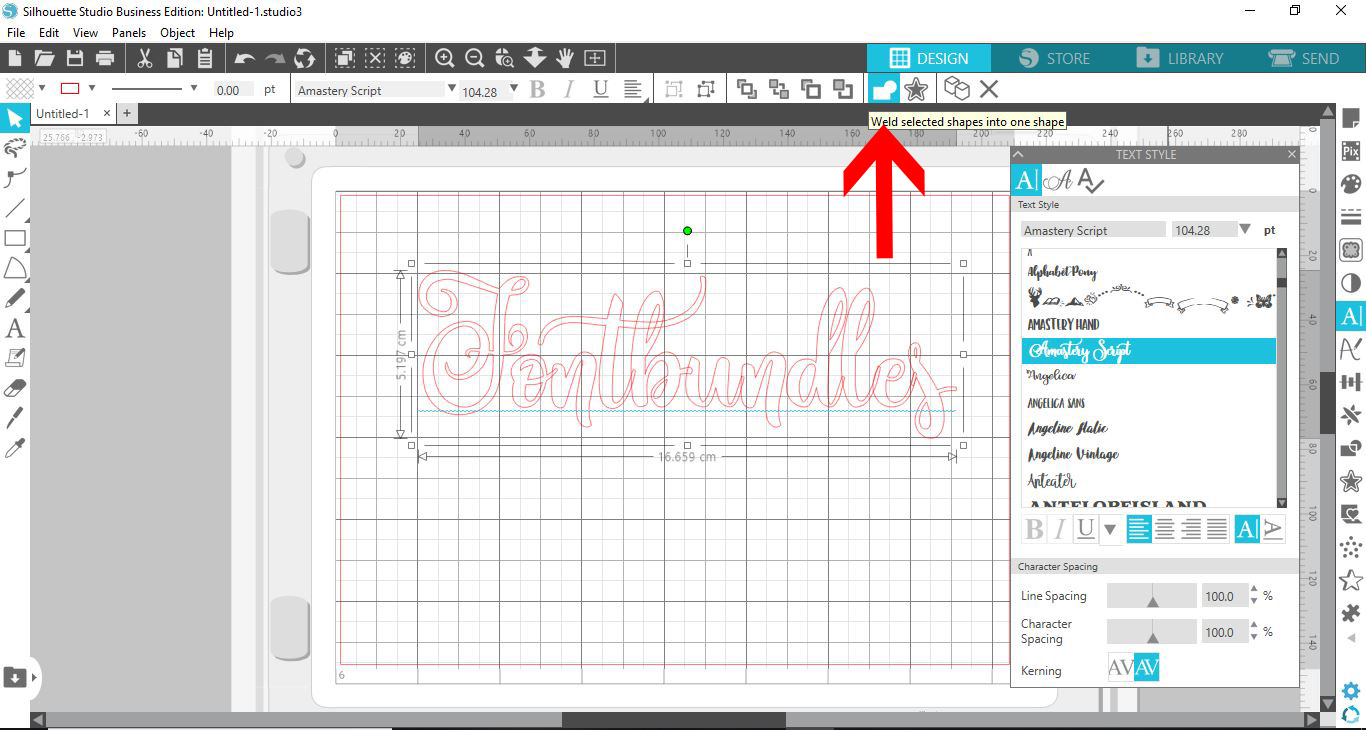
When working with fonts, some fonts will need to be welded due to overlapping. If needed, edit the text before welding. Once welded, you will not be able to change the text wording or font.
Once adjusted, with the text selected go to the top toolbar. Now, click on the icon Weld selected shapes into one shape. Alternatively, you can right click > Weld.
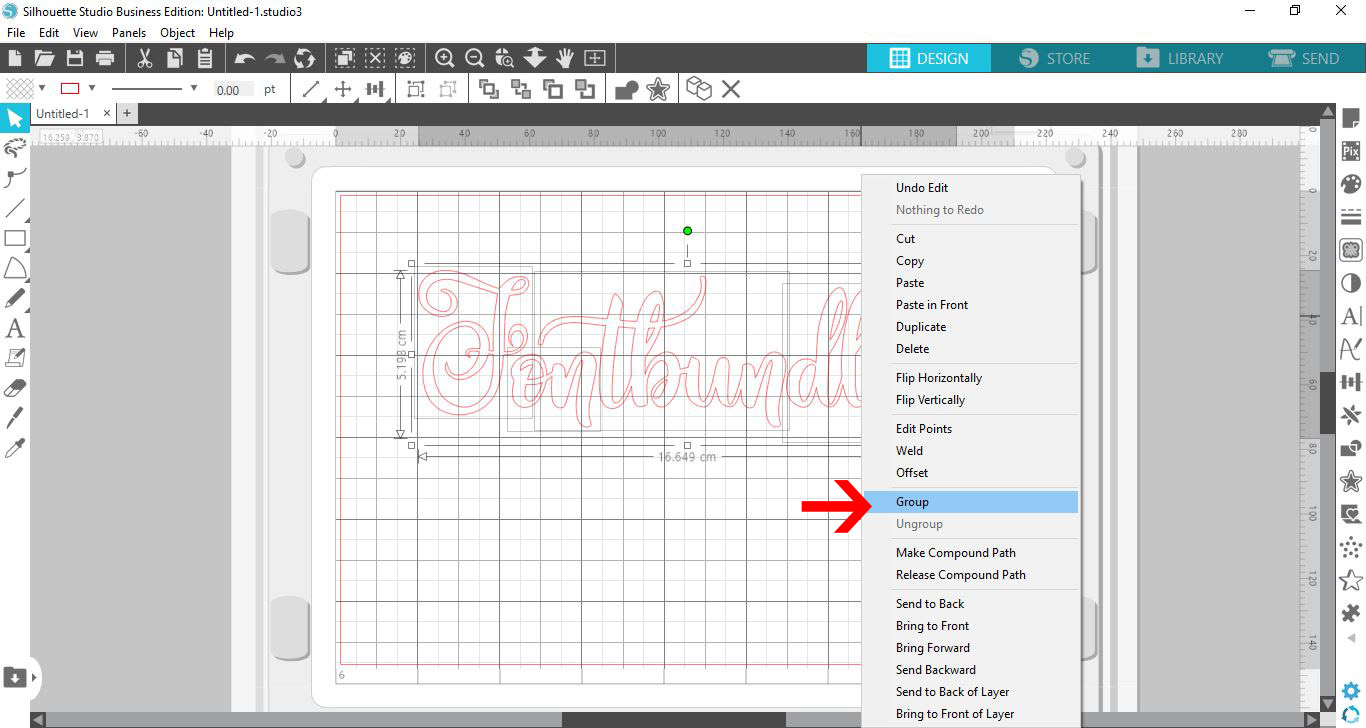
Areas that overlap will become one object. Other areas, like the openings in the letters “D” and “L”, will be individual objects. This will make it difficult to move around together. So we need to select everything with the Select Tool, then right click > Group.
We are also going to add an image but the following step is completely optional.
Step 3 - Use the Mirror Option
Before we mirror our design, let’s add a cute whale image to the text design. You can use any image you want. We have an awesome selection of Whale Designs to choose from on Design Bundles.
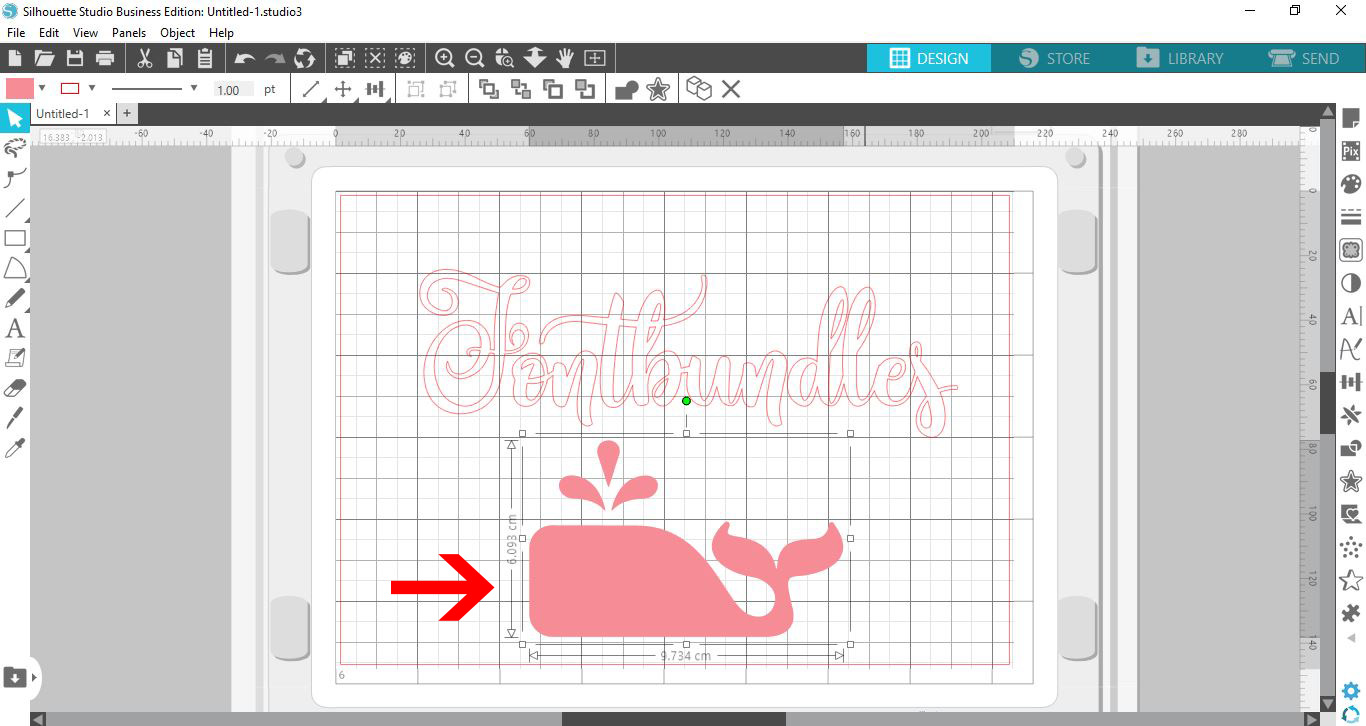
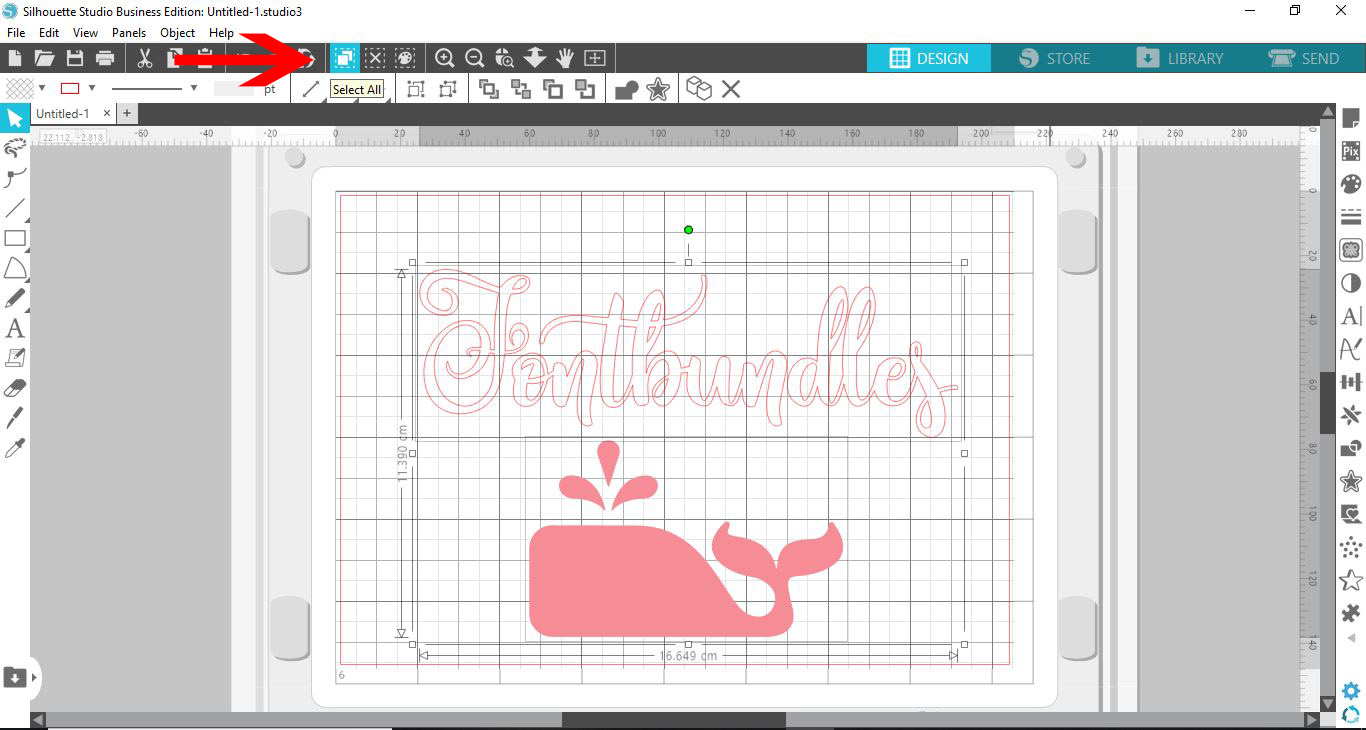
Select everything that you would like to mirror. In this case, we selected the text and the whale image.
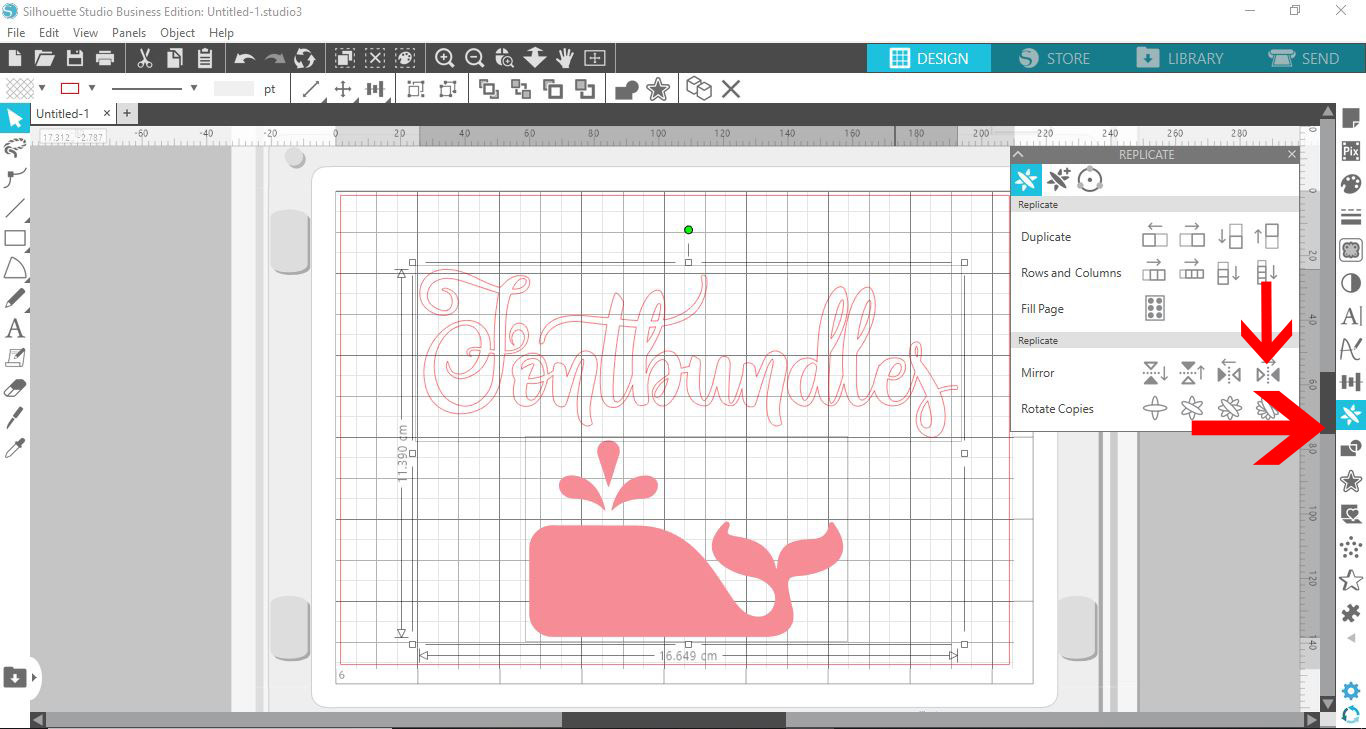
On the right side panel, click on Open the Replicate Panel. In the Mirror row option, click on the last icon Mirror Right.
Your image will be mirrored to the right of the original.
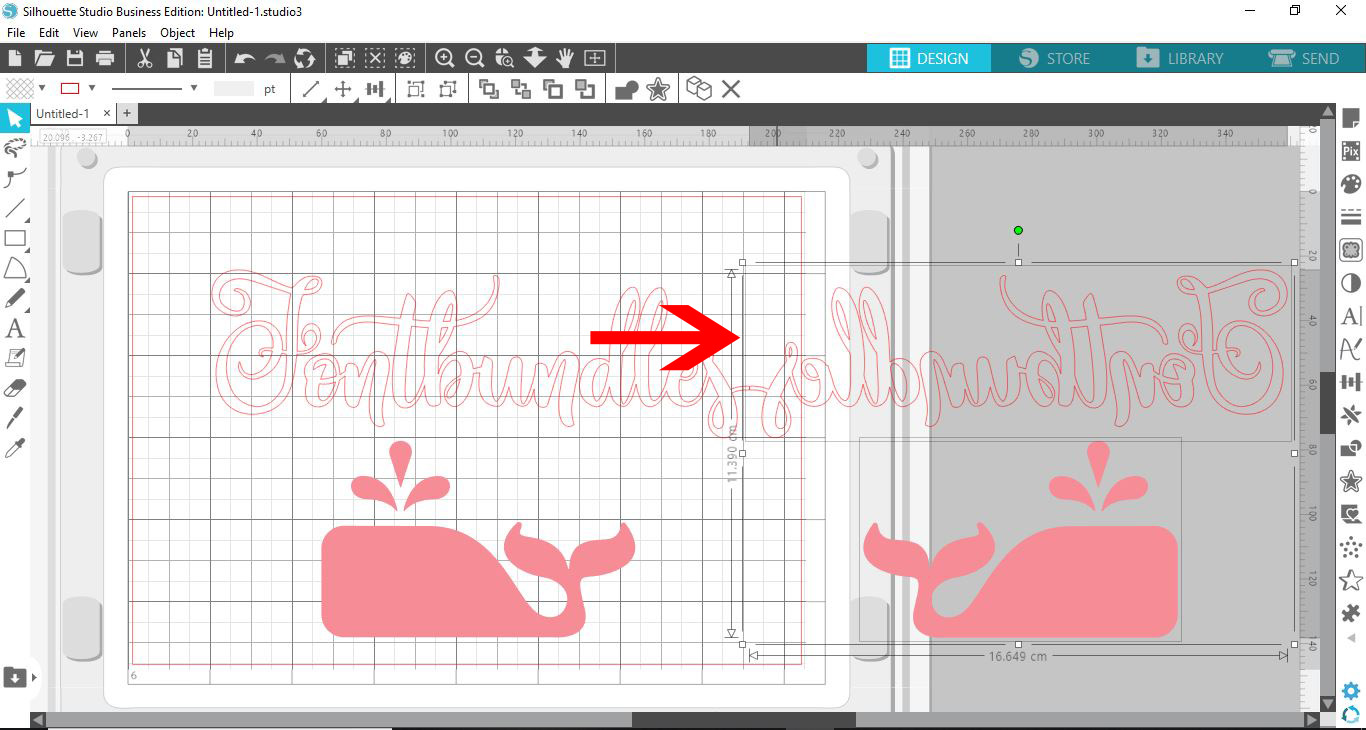
Now that the image has been mirrored, you can delete the original image as it’s no longer needed. Then reposition the mirrored image on the mat.
Step 4 - Send Mirrored Design to Cut
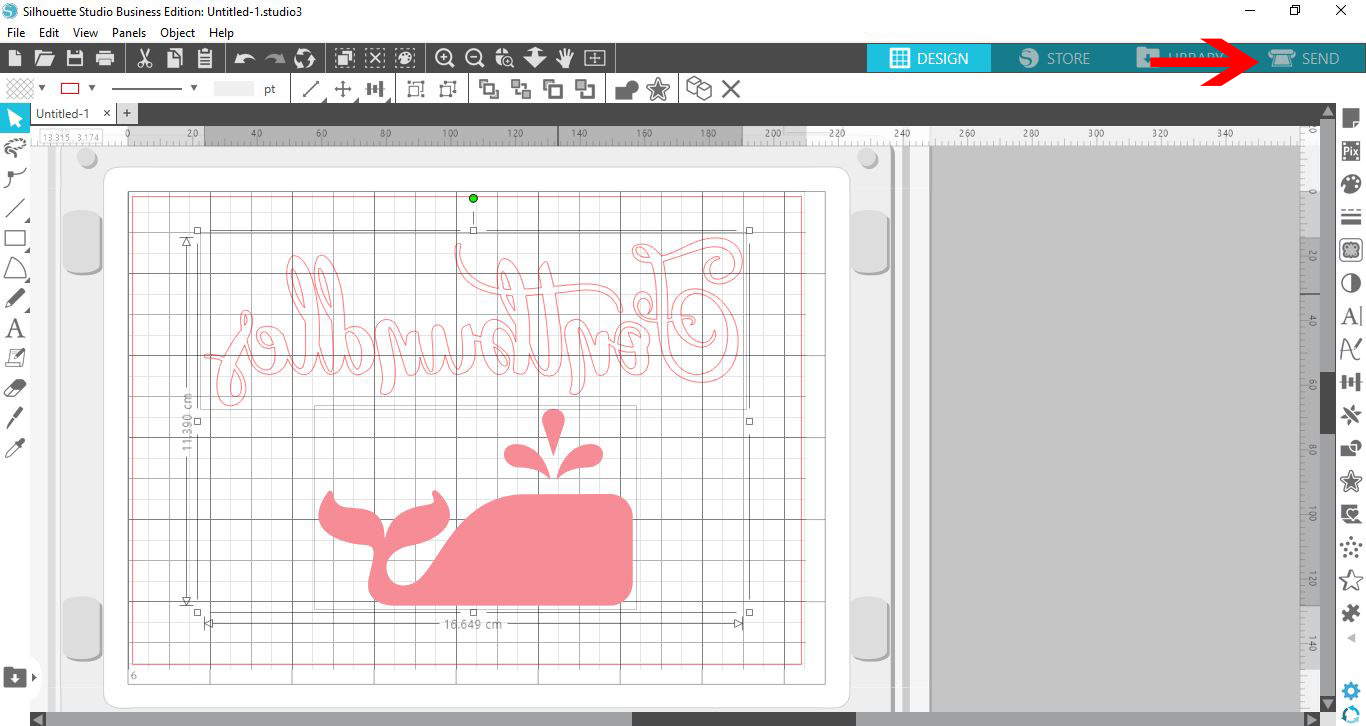
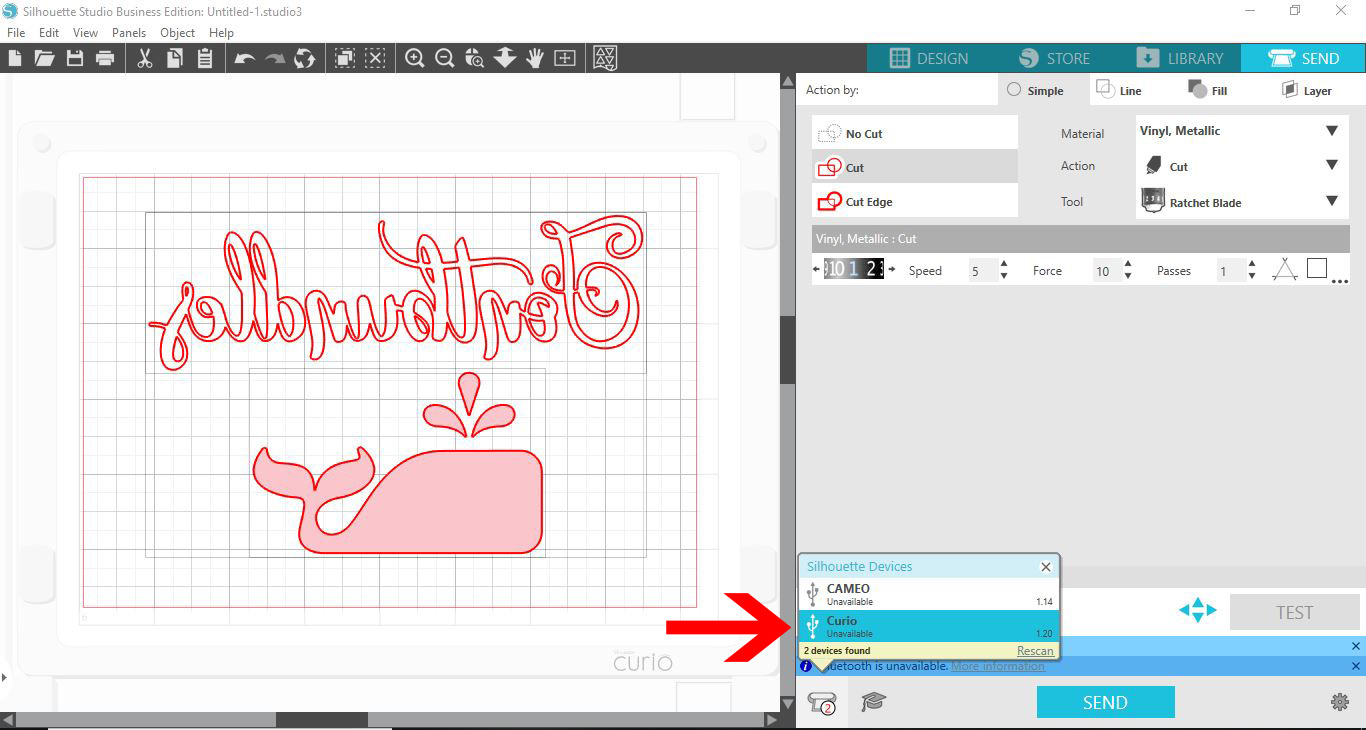
On the top right click on the Send icon to go to the cut settings. At the bottom of the screen, click on the machine icon and select your Curio.
Silhouette Studio detects if you are using HTV based on your settings. So, for this step we will show you two ways of working with this option.
Cut Design that is Already Mirrored
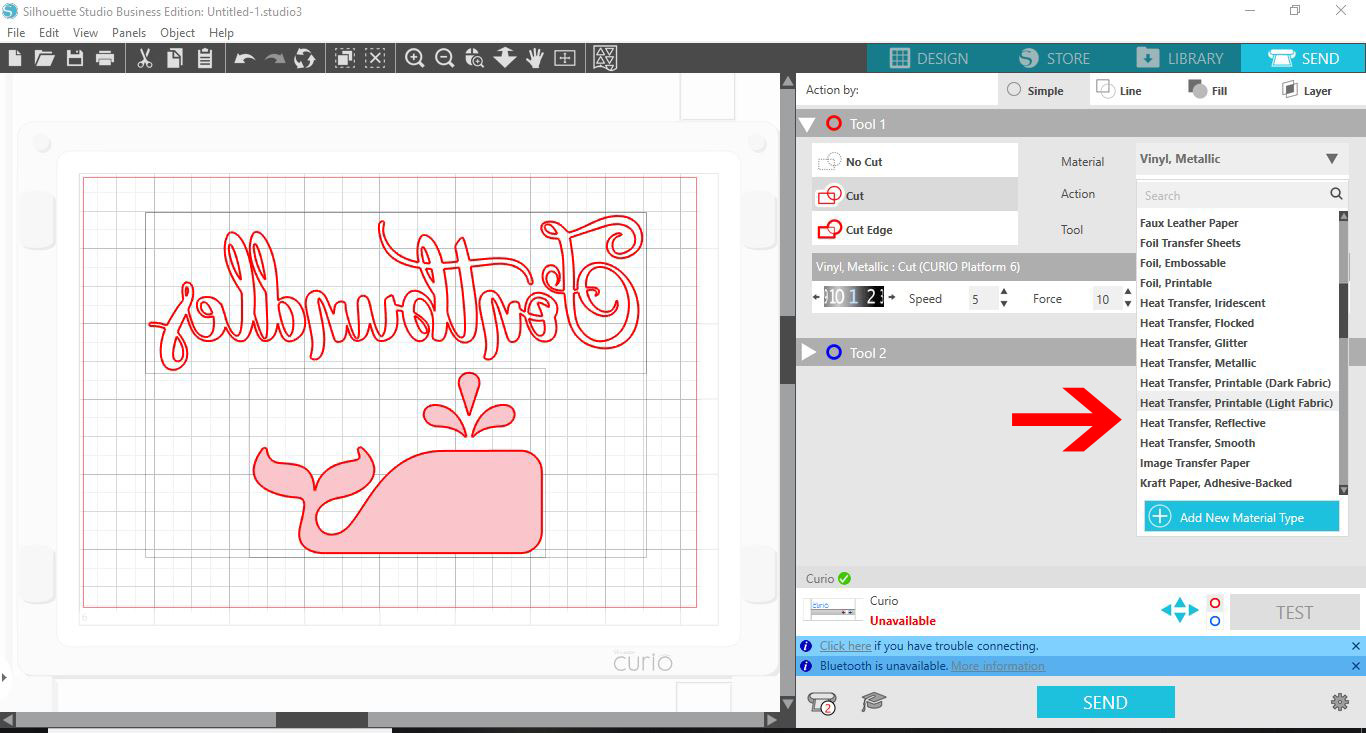
Select your HTV material and settings. For more information or a refresher, be sure to check out our tutorial on making your first cut with the Silhouette Curio.
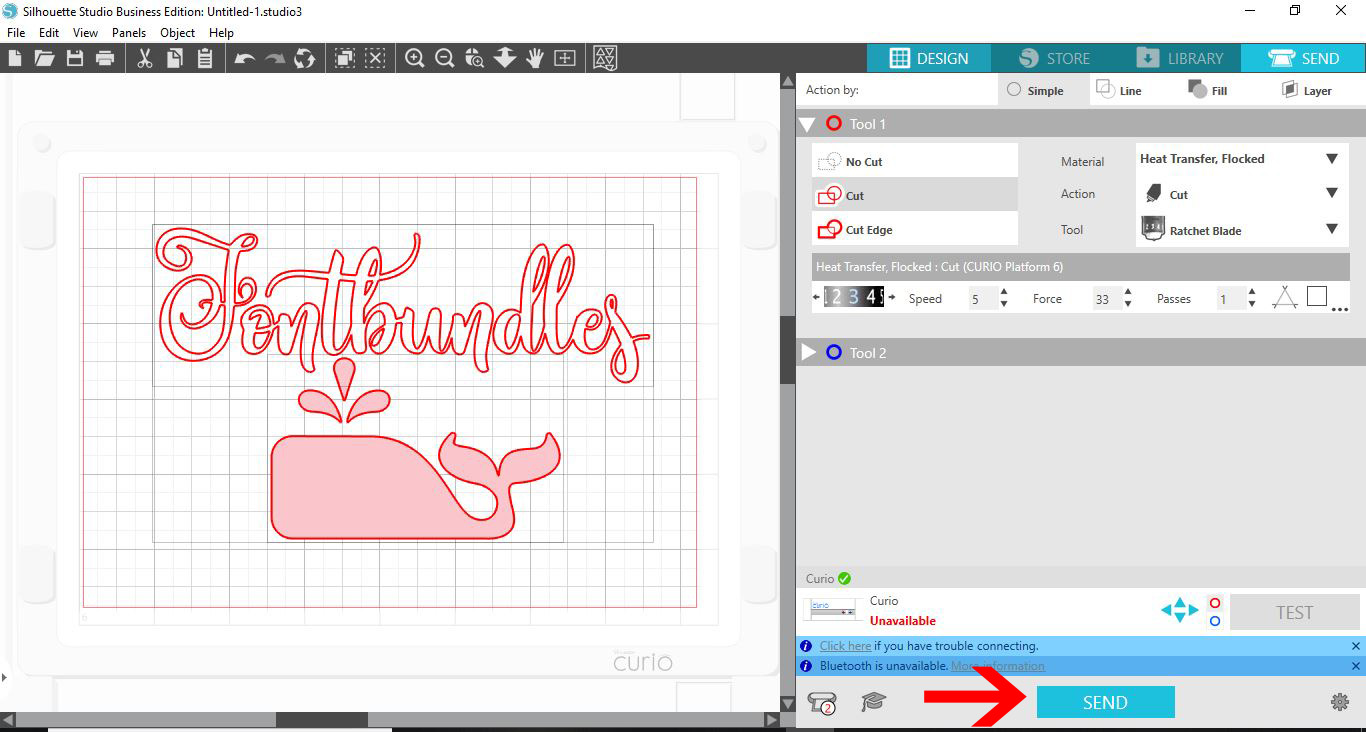
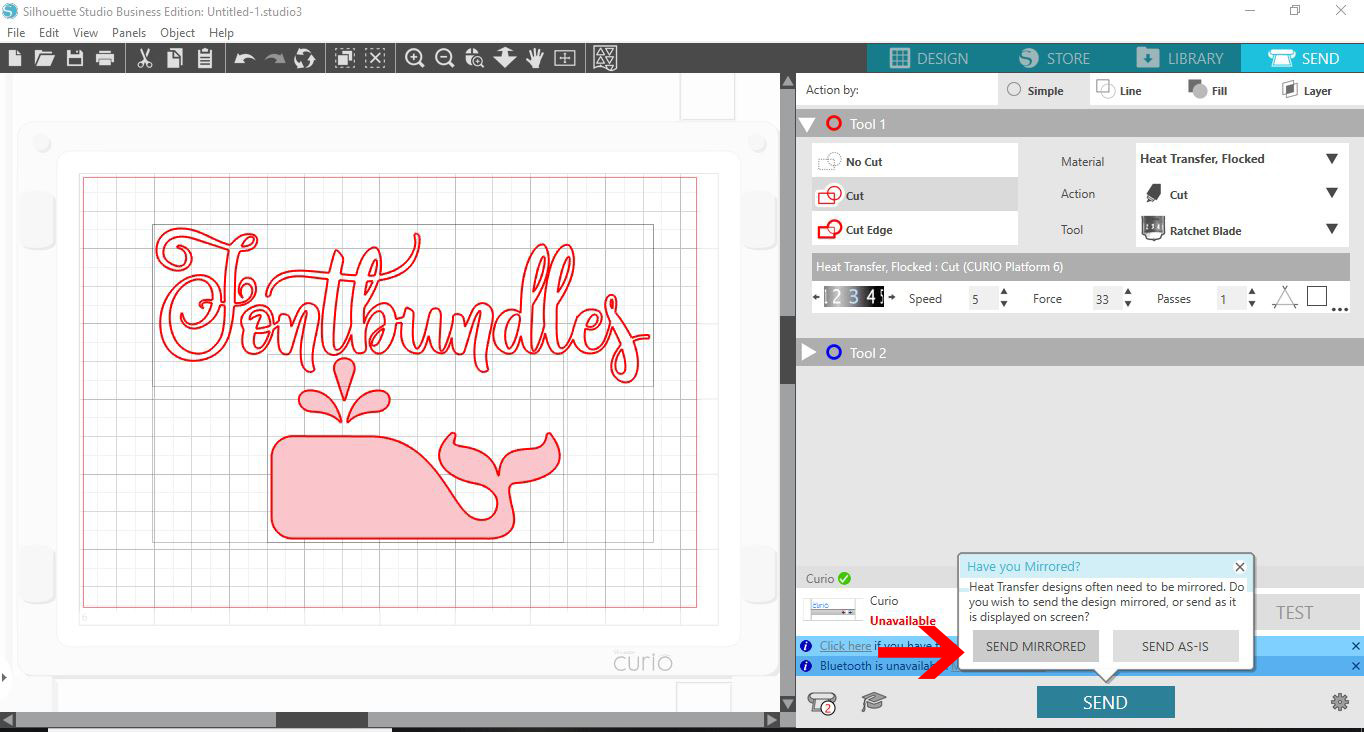
Once you click on the Send button at the bottom, a pop up window will appear. Silhouette Studio will ask if you want to mirror the image.
This is a precaution as we can sometimes forget to do this. It can be helpful but in this case, we have already mirrored the design. So instead, click on Send As Is. Your design will now be cut.
Mirror Design in Send Panel
If you don’t mirror your design as we did above, Silhouette Studio will do it for you in the Send panel.
In the image below, we did not mirror the design. Once you have selected the HTV you want to use, click on the Send button.
This time, in the pop up window, select Send Mirrored. Silhouette Studio will mirror your design and cut. An important thing to note is that not just the design may be mirrored. The software may mirror the entire mat.
It can cause issues if you are using a smaller piece of HTV placed specifically on the mat. Your design may then cut on the opposite side.
So, this option would work best if the HTV is covering the entire mat.
If you prefer to use up your smaller pieces of HTV, use the Mirror option in the Replicate panel. Then, click on Send As Is when sending to cut.
Now you can happily cut, weed and press your design to your favorite products. The Mirror option is a great way of using up smaller or left over pieces of HTV. We hope that this tutorial has been helpful and will add to your Silhouette Studio knowledge.