By Design Bundles
Affinity Tutorials12 min
How to Make a Pastel Gradient Background in Affinity Designer
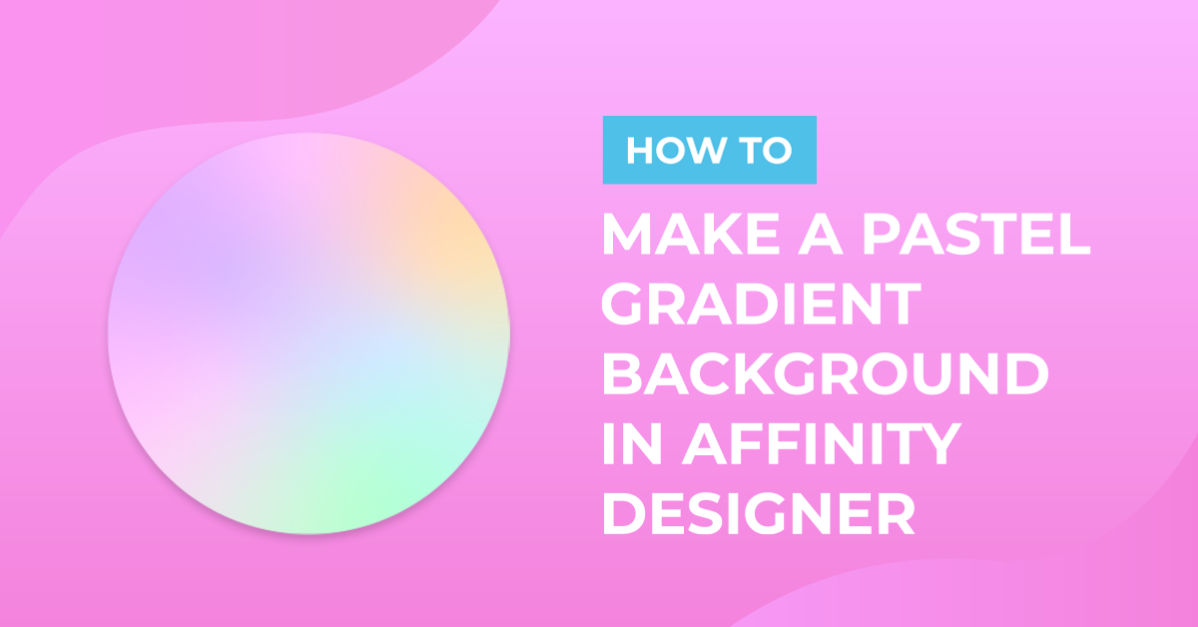
Gradient backgrounds are great for making social media posts, graphics, and more. In Affinity Designer we don't have the luxury of a mesh gradient. However, we can blend multiple gradients using the Blending modes. How you position the layers also impacts on the final result.
In this tutorial we will be creating a pastel gradient background in Affinity Designer. To pick our colors we have chosen a Pastel Color Palette by FaeryDesign.
You can use the .ase file or choose to create a custom palette instead by using the Color Picker Tool. Colors from photos or objects can be quickly selected and added to a custom palette.
Open Affinity Designer then click on New Document. Adjust your settings as needed then click Create.
Affinity Designer allows you to install .ase or Adobe Swatch Exchange files. You are able to install palettes created for Adobe Illustrator and expand your collection of color. Once in Affinity Designer, click on the Swatches panel on the right hand side.
To the far right of the Swatches panel are three lines. Click to access the Swatches menu and select Import Palette then As Application Palette. This will import the palette so that it can be accessed by any document in Affinity Designer.
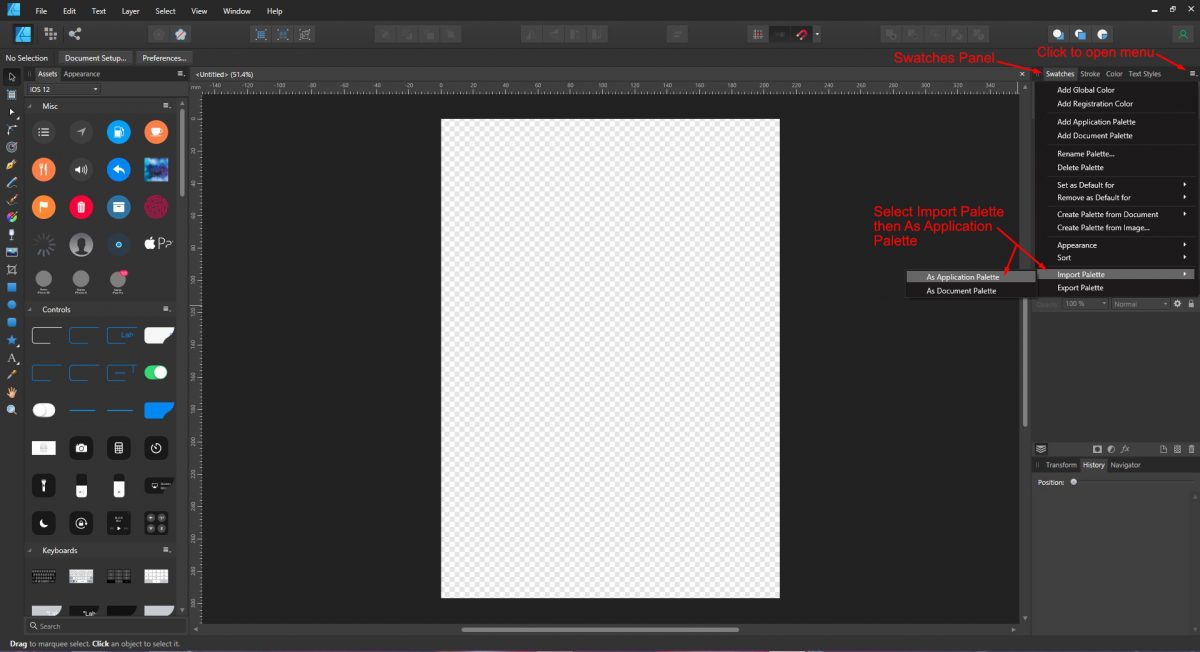
Locate the folder where the palette is stored. It will have the palette name followed by .ase. Click on open and the palette will automatically be added to the Swatches Panel.
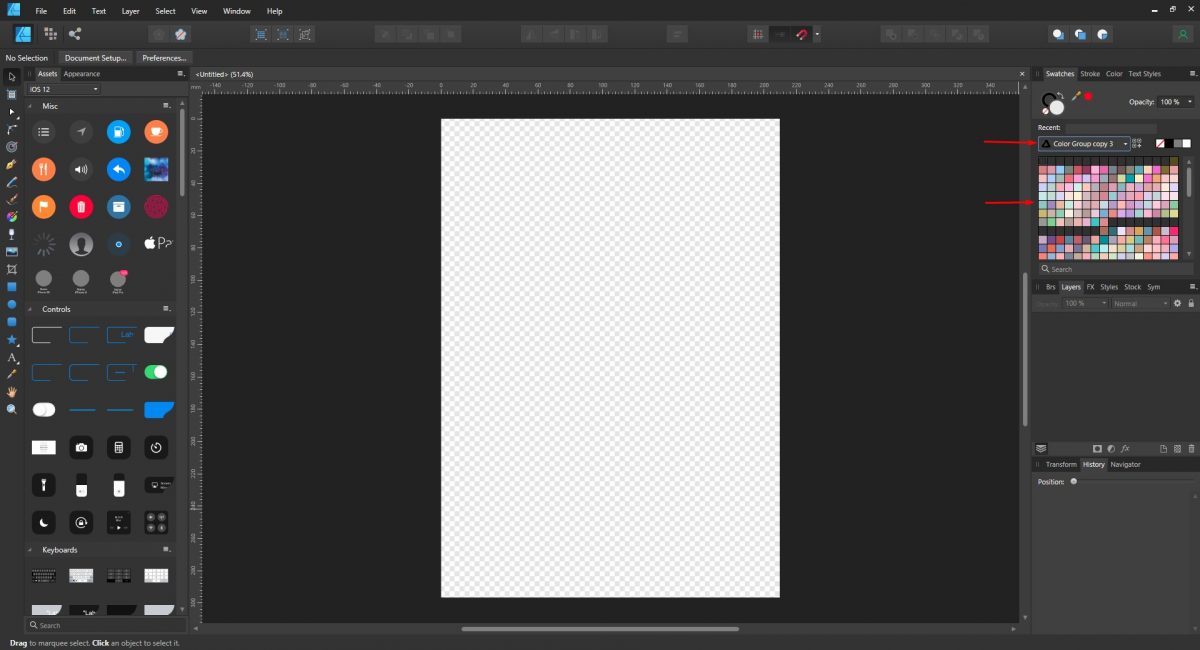
For a more in depth tutorial on adding custom palettes check out Using Color Palettes in Affinity Designer.
The gradient needs a shape to fill. You can use any shape but for the gradient background we will use a rectangle. We have an awesome tutorial on how to Create Gradients in Affinity Designer to help you get started.
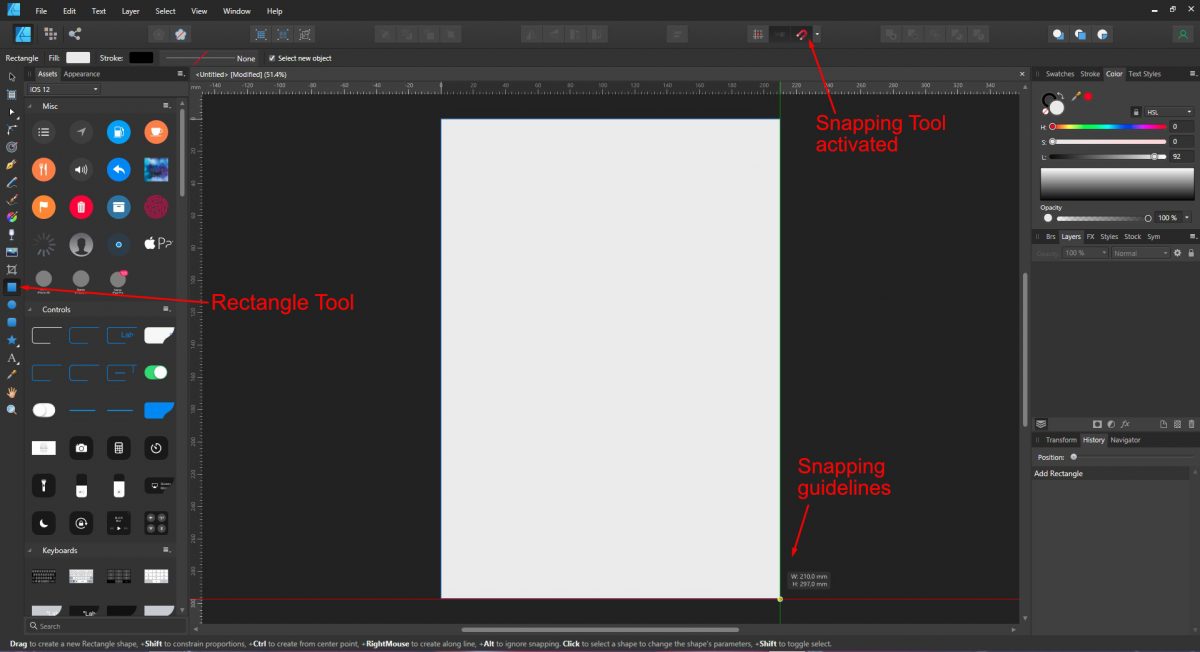
First, activate the Snapping tool at the top of the screen. It looks like a red horseshoe magnet. This will help to snap the rectangle to the edges of the canvas document. Click on the Rectangle Tool on the left side panel. Then click + drag the rectangle starting from the top left corner down to the bottom right. A new layer will automatically be created under the Layers Panel.
Add a gradient by clicking on the Fill Tool on the left side panel. Click + drag out the gradient as you choose.
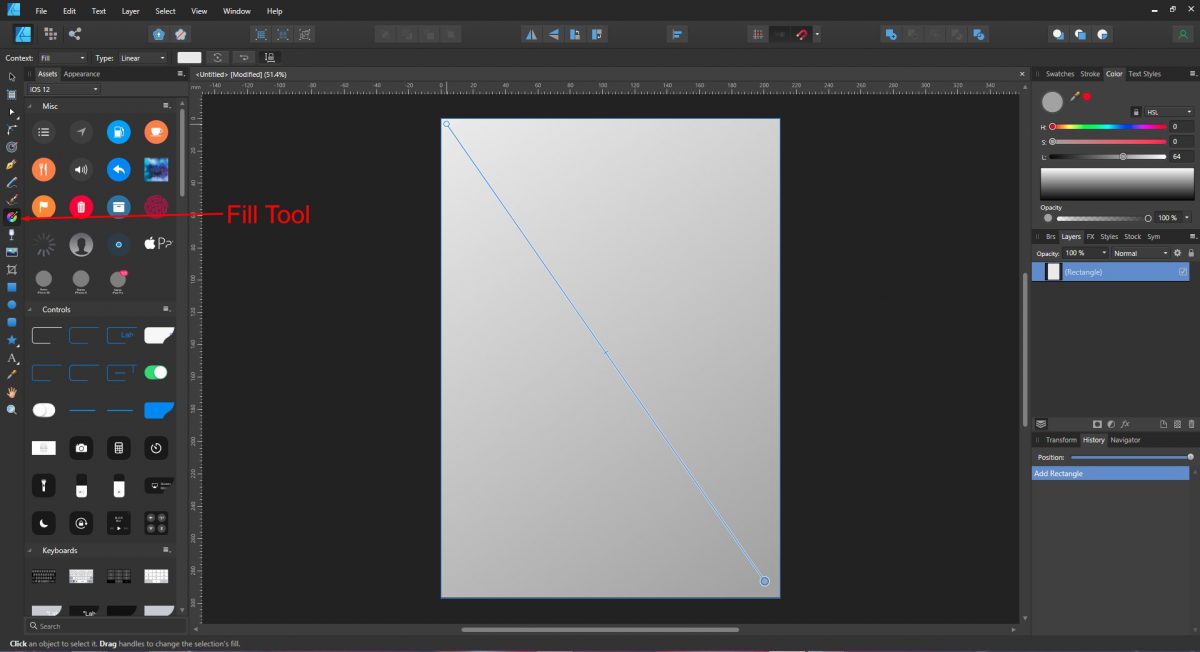
Click one of the color stops on either side, then under Swatches choose a color. Do the same for the other end. To add another color stop, click anywhere on the gradient line.
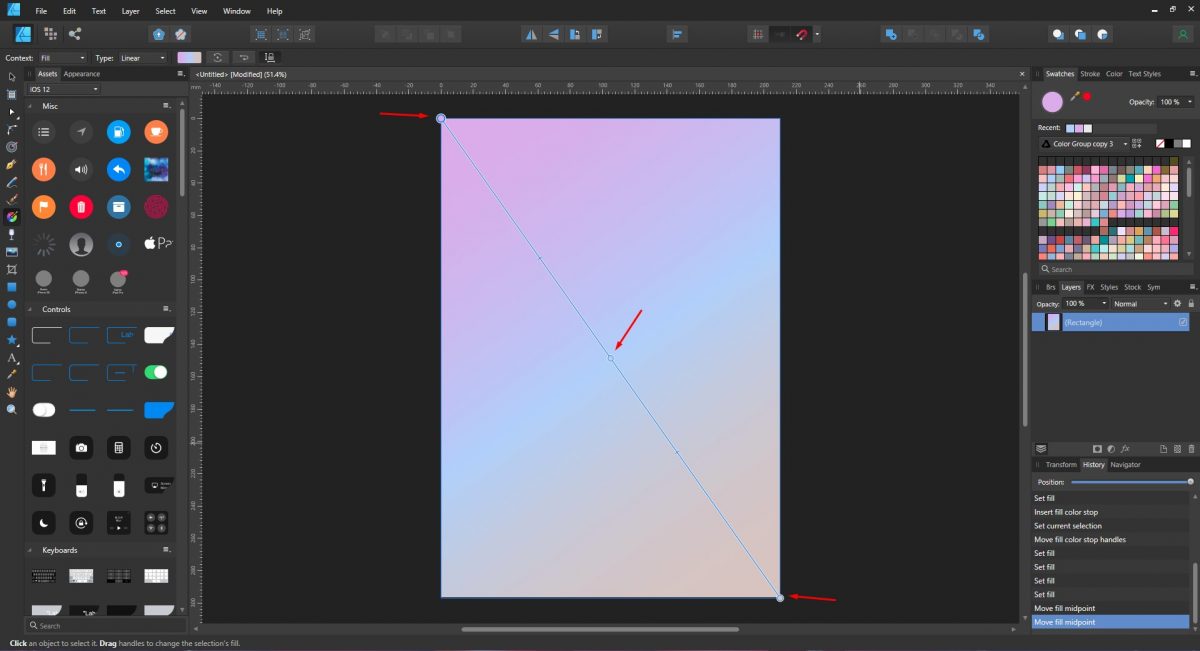
Now, this step will be about experimenting with different gradients and using the Blending modes. The result will depend on where the gradient is placed and the blend used.
Add a new Pixel layer for each gradient. Do this by clicking on Add Pixel Layer bottom right of the Layers panel. With the Fill tool still selected drag out another gradient. At the top left of the screen are the Gradient editing tools. Under Type select a gradient. We chose Elliptical and changed the one color end stop and middle stop colors.
When adding colors keep in mind the contrast. Too much contrast between colors disrupts the smooth blending and causes halos.
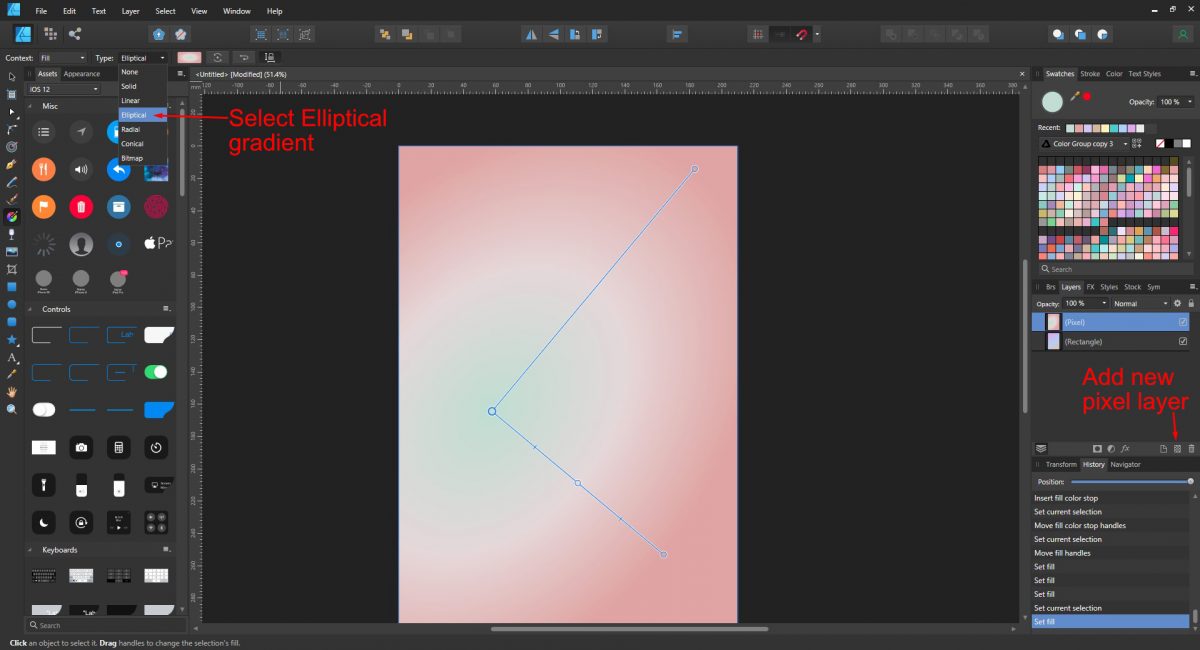
With this layer still selected, under the Layers Panel select the blend mode option. It should, by default, have Normal selected and appear next to the Opacity option. Click to open and go through the blending options available. Each one will have a different effect. We chose Lighten but you can experiment with whatever blend mode you want.
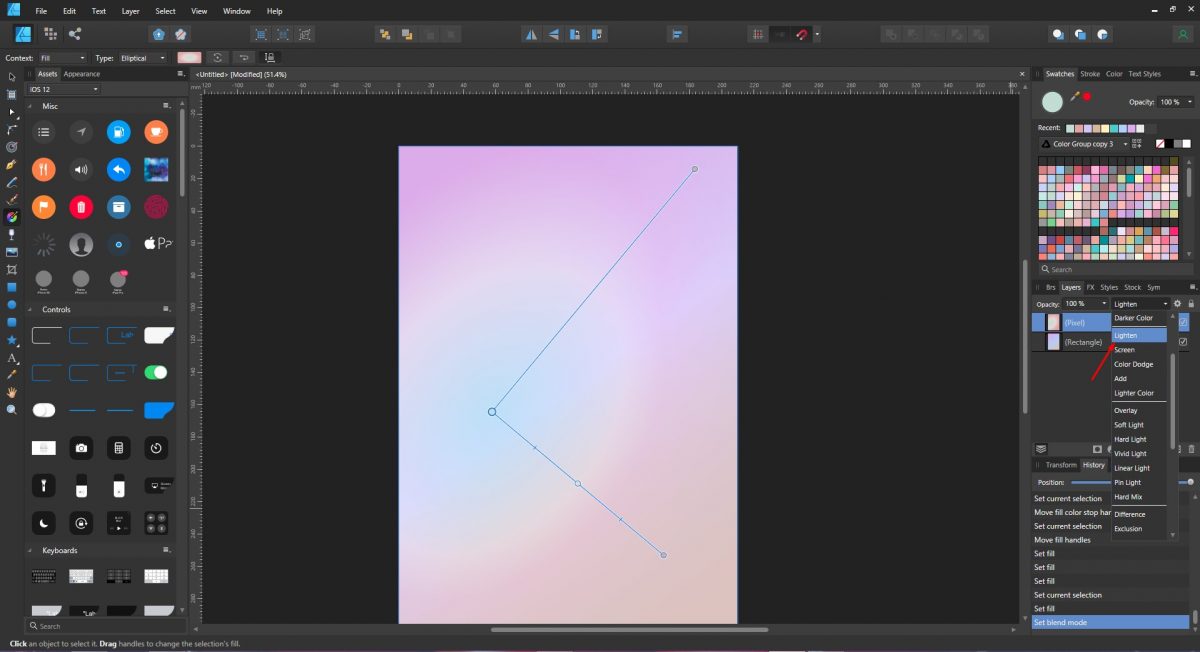
Keep adding new layers with different gradients until you create a result you like. If you find that the blend mode isn't working as well you want, then change the Opacity.
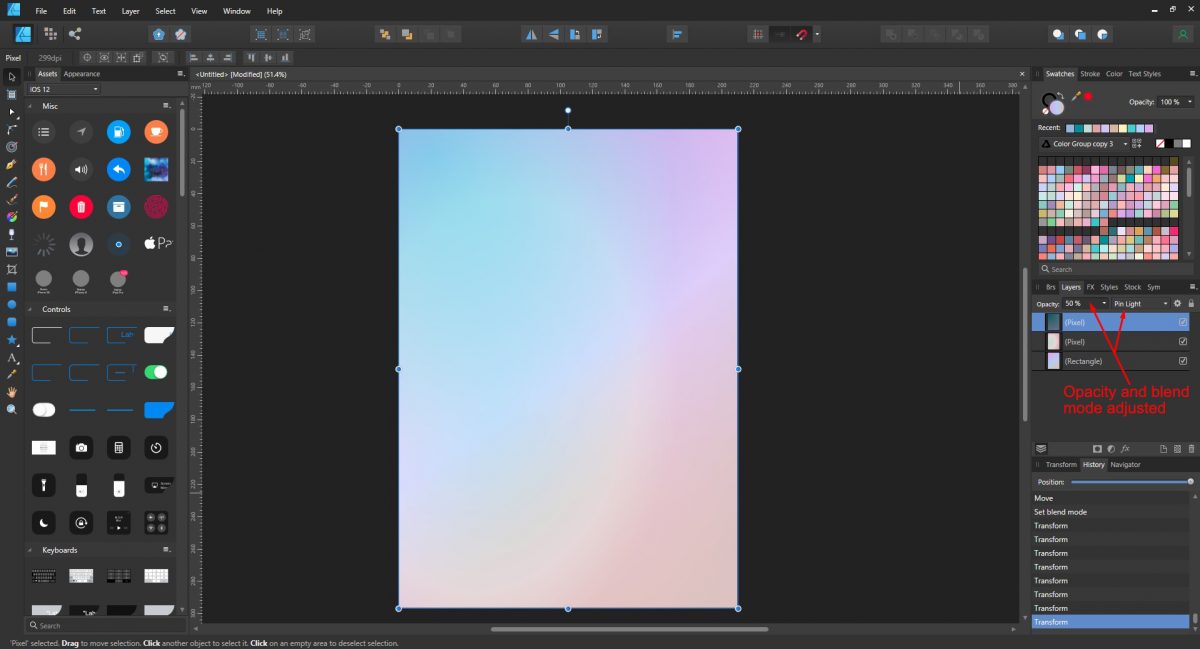
The layers can be moved around and even clipped to each other. Save your new pastel gradient background by clicking File and Export. Under the Export options chose a File format and click Export. There are so many creative possibilities with gradients. You can now use your background in projects like digital scrapbooking and more.
Next up, check out our guide on how to Type on a Path in Affinity Designer.
In this tutorial we will be creating a pastel gradient background in Affinity Designer. To pick our colors we have chosen a Pastel Color Palette by FaeryDesign.
You can use the .ase file or choose to create a custom palette instead by using the Color Picker Tool. Colors from photos or objects can be quickly selected and added to a custom palette.
Open Affinity Designer then click on New Document. Adjust your settings as needed then click Create.
Step 1 - Install the Pastel Color Palette
Affinity Designer allows you to install .ase or Adobe Swatch Exchange files. You are able to install palettes created for Adobe Illustrator and expand your collection of color. Once in Affinity Designer, click on the Swatches panel on the right hand side.
To the far right of the Swatches panel are three lines. Click to access the Swatches menu and select Import Palette then As Application Palette. This will import the palette so that it can be accessed by any document in Affinity Designer.
Locate the folder where the palette is stored. It will have the palette name followed by .ase. Click on open and the palette will automatically be added to the Swatches Panel.
For a more in depth tutorial on adding custom palettes check out Using Color Palettes in Affinity Designer.
Step 2 - Add a Gradient to a Shape
The gradient needs a shape to fill. You can use any shape but for the gradient background we will use a rectangle. We have an awesome tutorial on how to Create Gradients in Affinity Designer to help you get started.
First, activate the Snapping tool at the top of the screen. It looks like a red horseshoe magnet. This will help to snap the rectangle to the edges of the canvas document. Click on the Rectangle Tool on the left side panel. Then click + drag the rectangle starting from the top left corner down to the bottom right. A new layer will automatically be created under the Layers Panel.
Add a gradient by clicking on the Fill Tool on the left side panel. Click + drag out the gradient as you choose.
Click one of the color stops on either side, then under Swatches choose a color. Do the same for the other end. To add another color stop, click anywhere on the gradient line.
Step 3 - Add Another Gradient and Use Blend Mode
Now, this step will be about experimenting with different gradients and using the Blending modes. The result will depend on where the gradient is placed and the blend used.
Add a new Pixel layer for each gradient. Do this by clicking on Add Pixel Layer bottom right of the Layers panel. With the Fill tool still selected drag out another gradient. At the top left of the screen are the Gradient editing tools. Under Type select a gradient. We chose Elliptical and changed the one color end stop and middle stop colors.
When adding colors keep in mind the contrast. Too much contrast between colors disrupts the smooth blending and causes halos.
With this layer still selected, under the Layers Panel select the blend mode option. It should, by default, have Normal selected and appear next to the Opacity option. Click to open and go through the blending options available. Each one will have a different effect. We chose Lighten but you can experiment with whatever blend mode you want.
Step 4 - Experiment with More Gradients
Keep adding new layers with different gradients until you create a result you like. If you find that the blend mode isn't working as well you want, then change the Opacity.
The layers can be moved around and even clipped to each other. Save your new pastel gradient background by clicking File and Export. Under the Export options chose a File format and click Export. There are so many creative possibilities with gradients. You can now use your background in projects like digital scrapbooking and more.
Next up, check out our guide on how to Type on a Path in Affinity Designer.
Related Tutorials
Affinity Tutorials
How to Make a Gradient in Affinity Designer
In this tutorial, learn how to make a gradient background in Affinity Designer.
Illustrator Tutorials
How to Make a Pastel Gradient Background in Illustrator
Learn how to make a pastel gradient background in Adobe Illustrator.
Affinity Tutorials
How to Make an SVG in Affinity Designer
Learn how to create SVG files in Affinity Designer with this tutorial.
Affinity Tutorials
How to Make GIFs Using Affinity Designer
In just 3 easy steps you will learn how to create animated GIFs using Affinity Designer.
Affinity Tutorials
How to Make a Seamless Pattern in Affinity Designer
In this tutorial you will learn how create a Seamless Pattern in Affinity Designer.
Affinity Tutorials
How to Remove and Change a Background with Affinity Designer
Learn how to quickly remove a background from photos in Affinity Designer.