By Design Bundles
Affinity Tutorials13 min
How to Make a Split Monogram in Affinity Designer
Making a split monogram in Affinity Designer is a fun and simple way to change up any design into one that can be personalized with a name or address.
In this tutorial, we'll be using a Mandala Keychain Svg Design which is featured in the Plus section of Design Bundles.
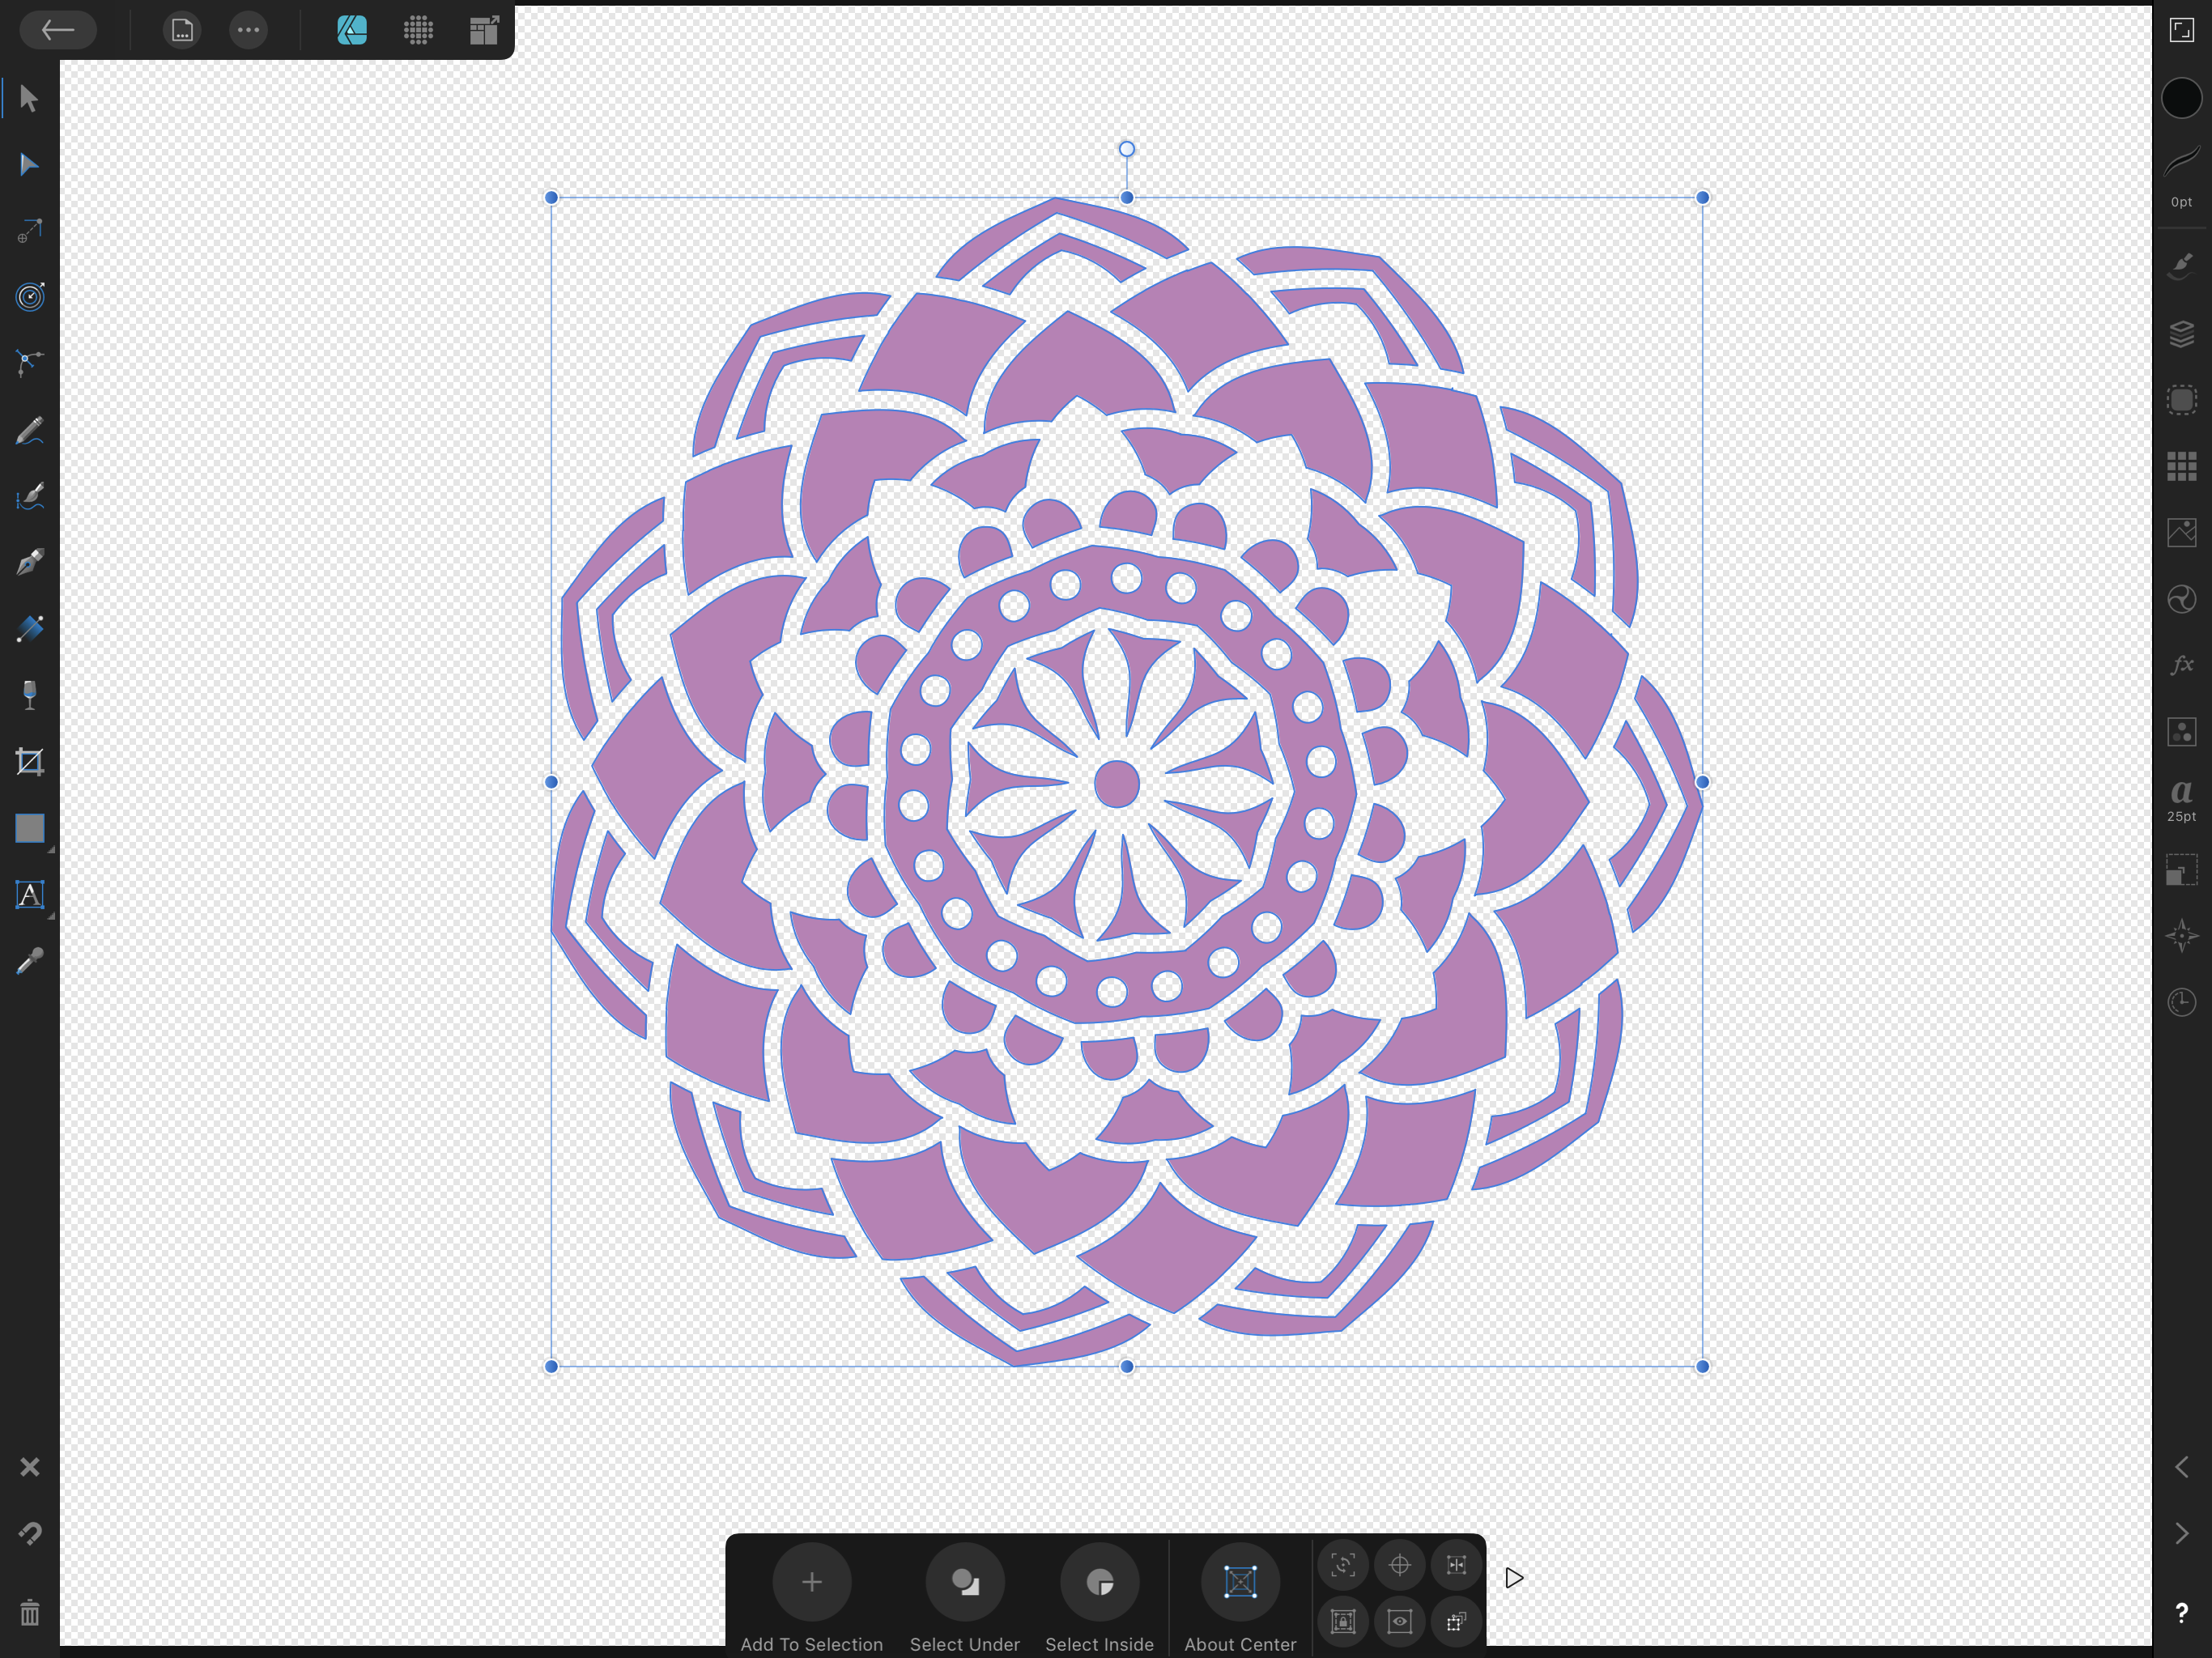
Start with your SVG on your canvas you can make it as large or small as you want. You can also resize it after you have finished working on the modifications.
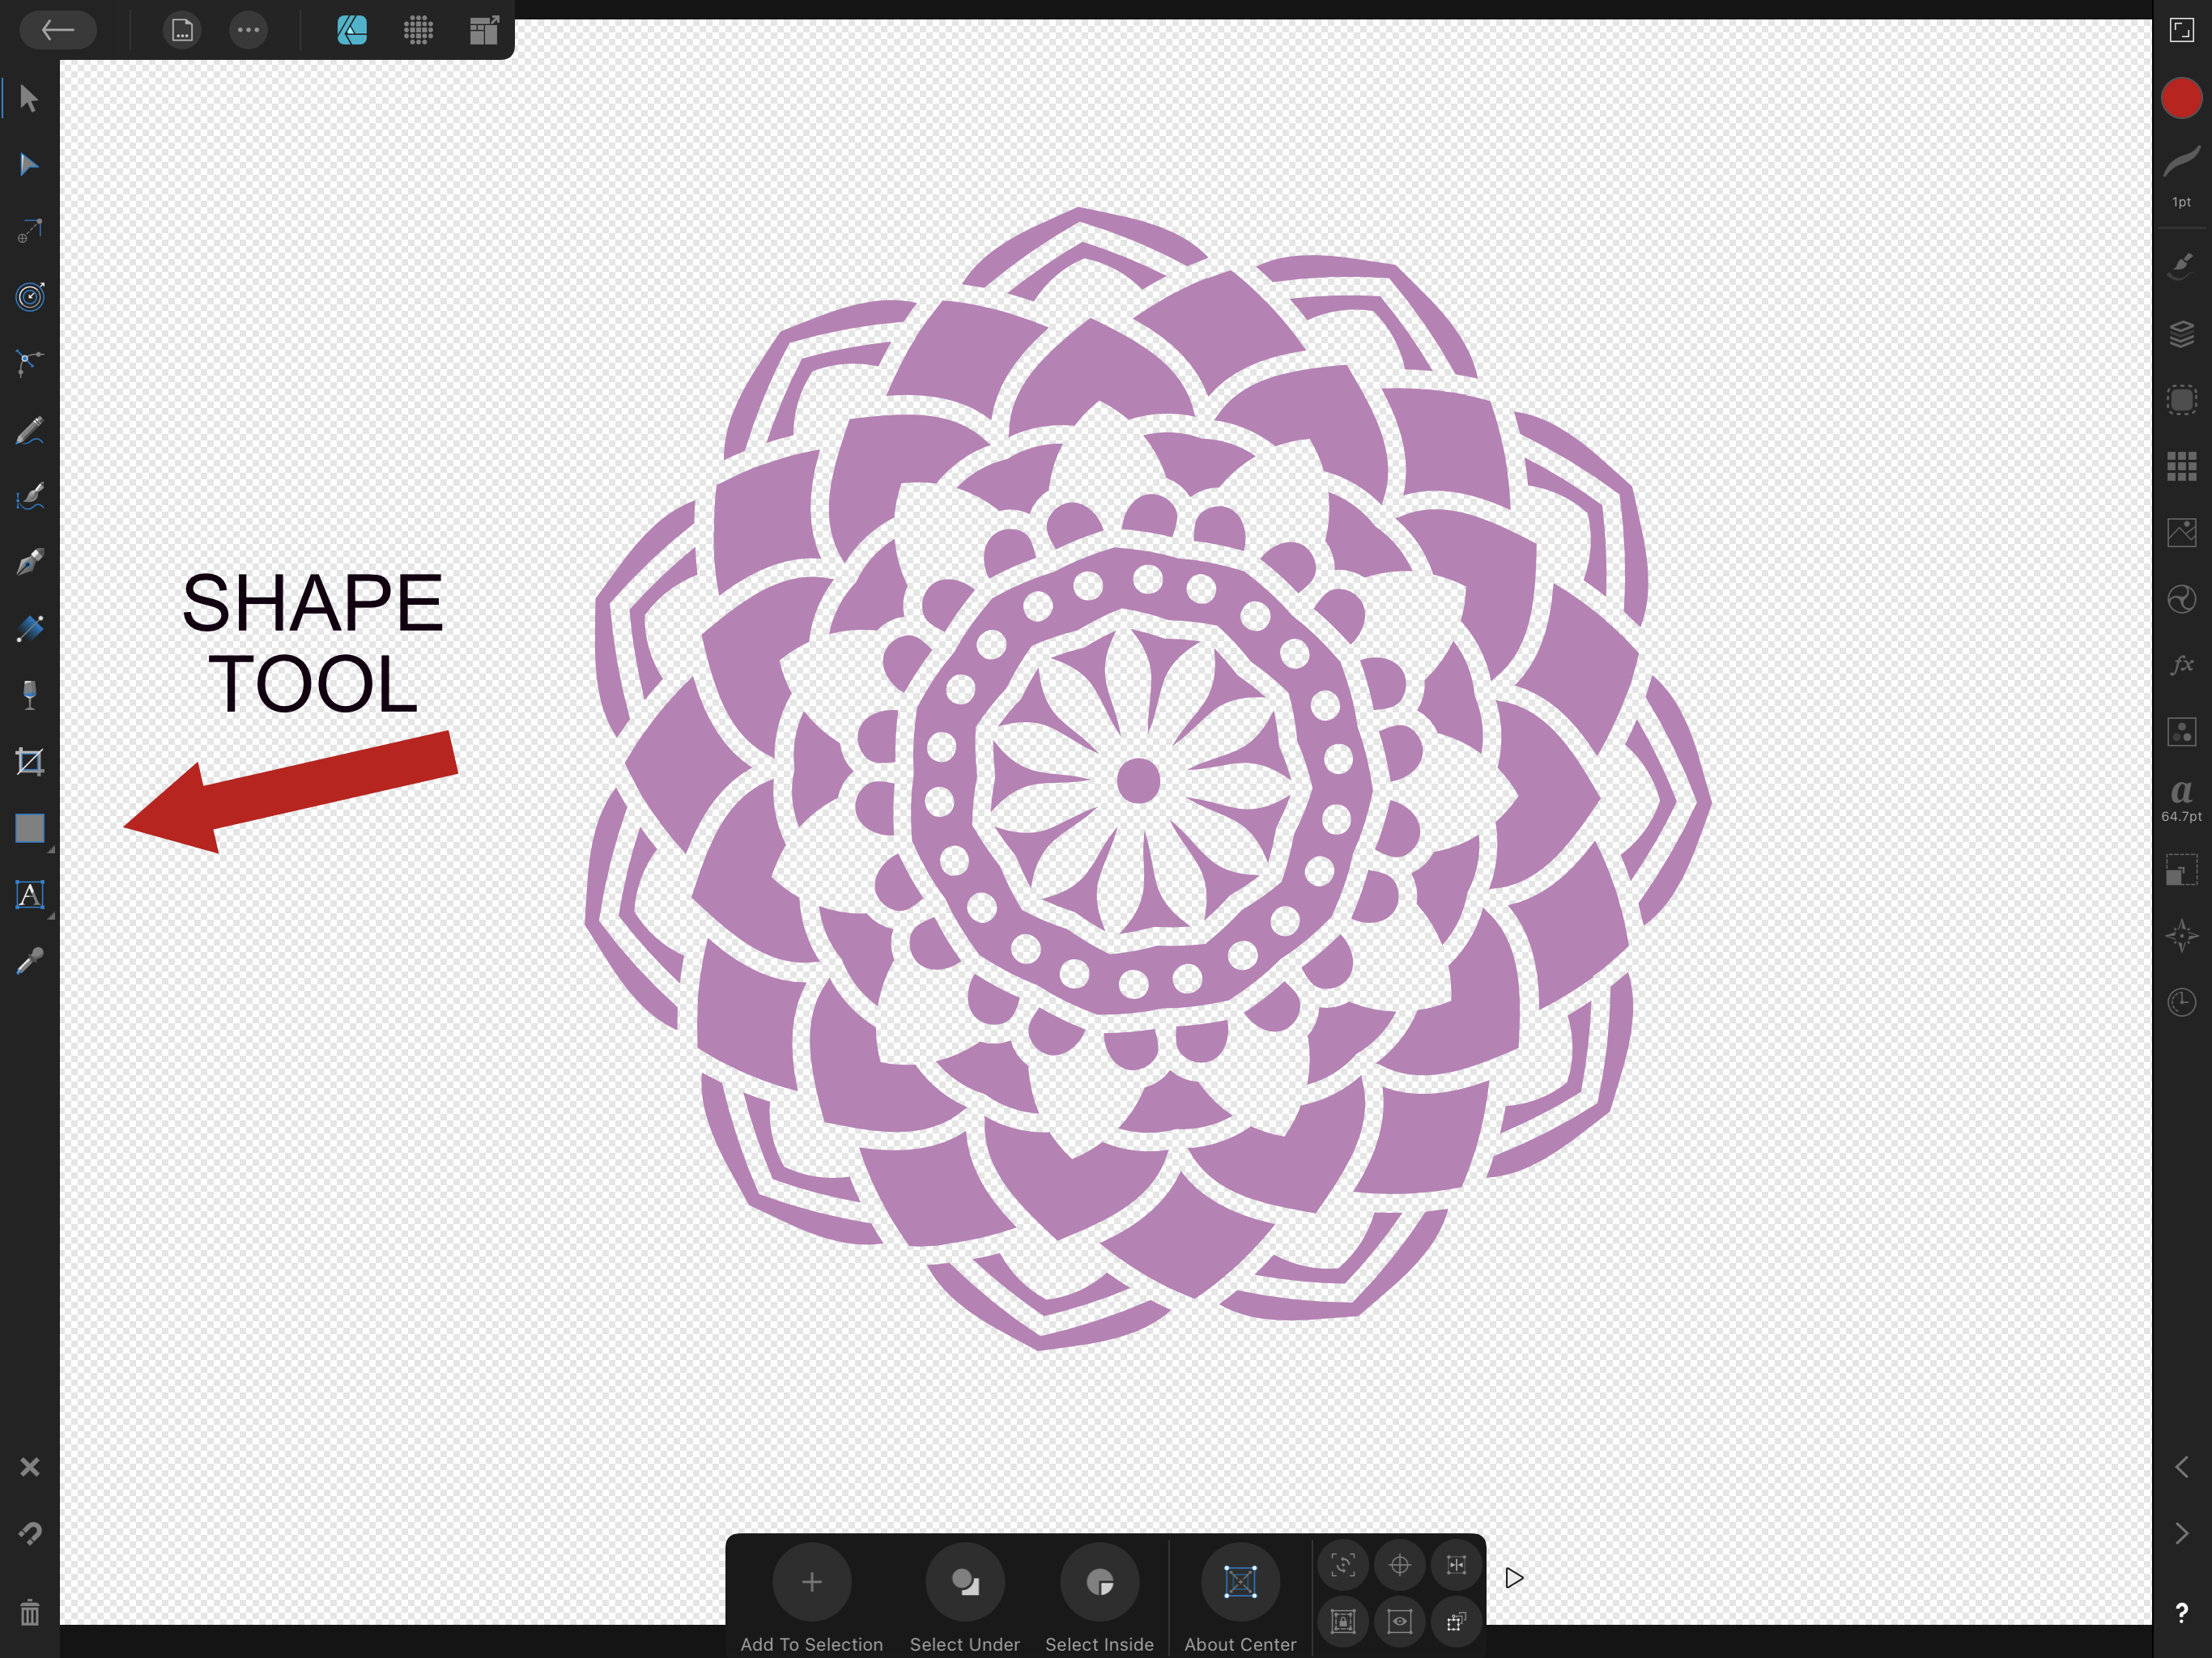
The shape tool is located on the left toolbar and will have an icon of the currently selected shape. Click on the shape and change the selection to the rectangle if it is not already selected. Then you can draw out your rectangle that will be used to split the design.
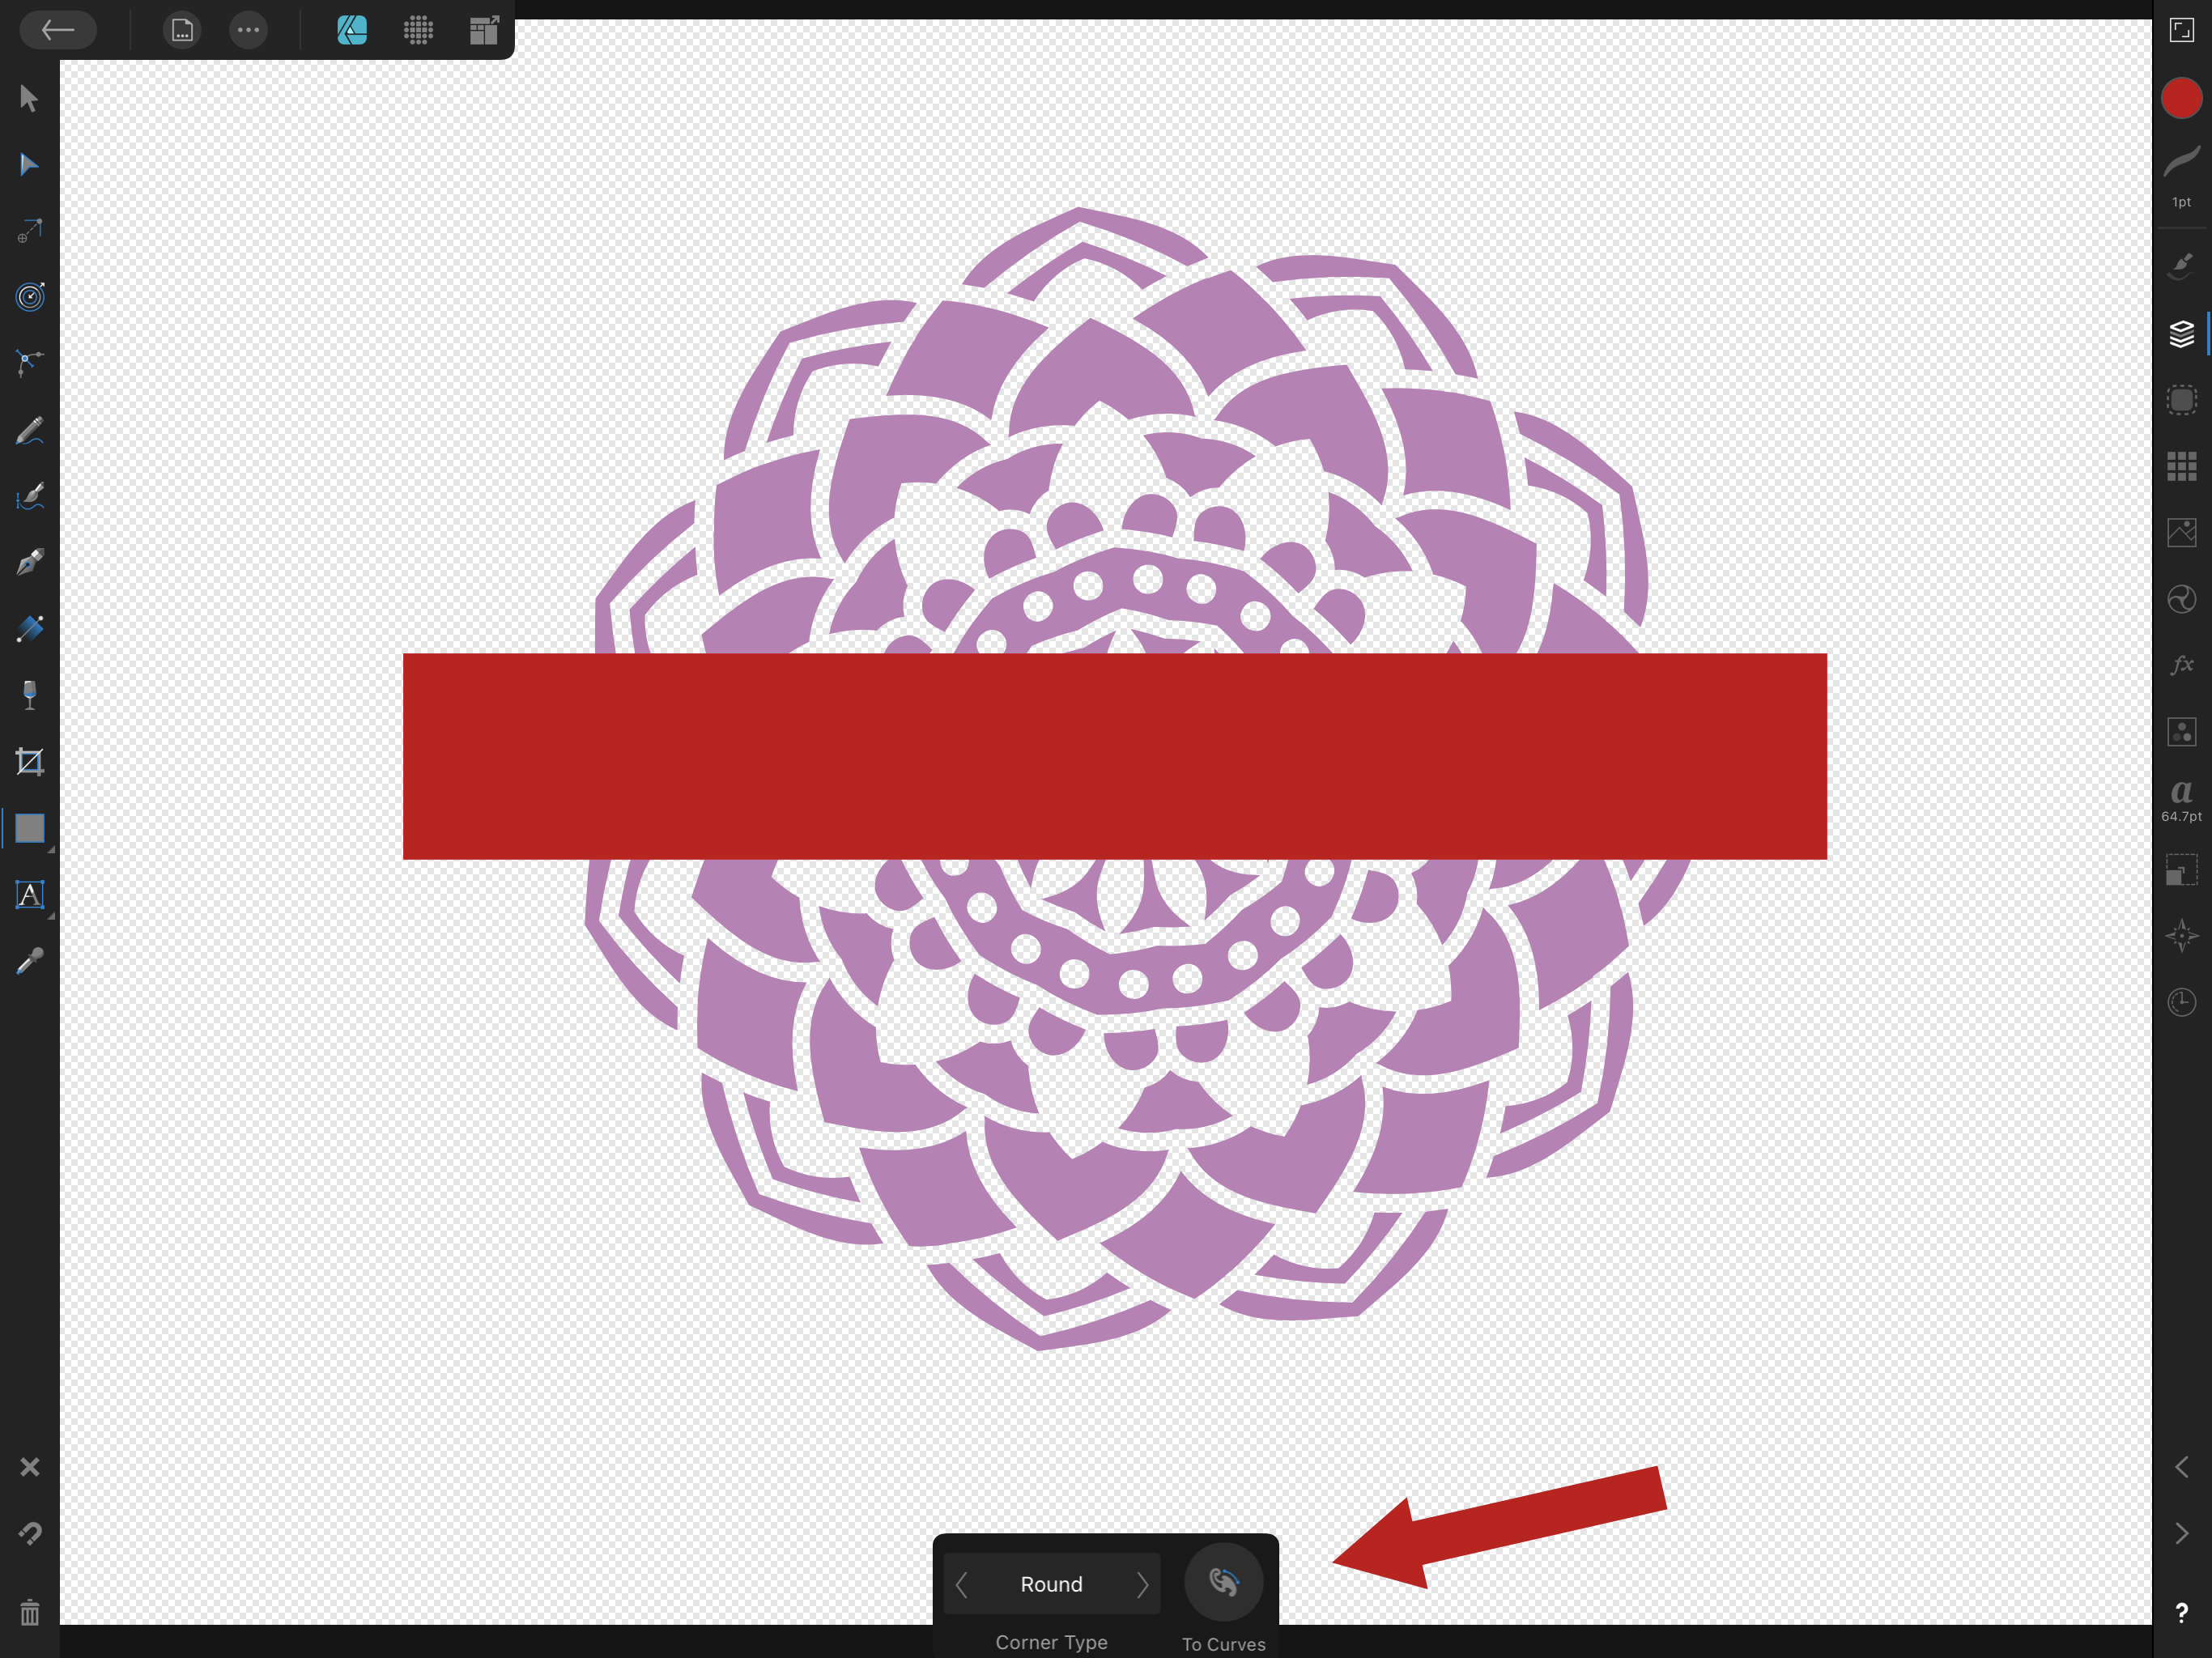
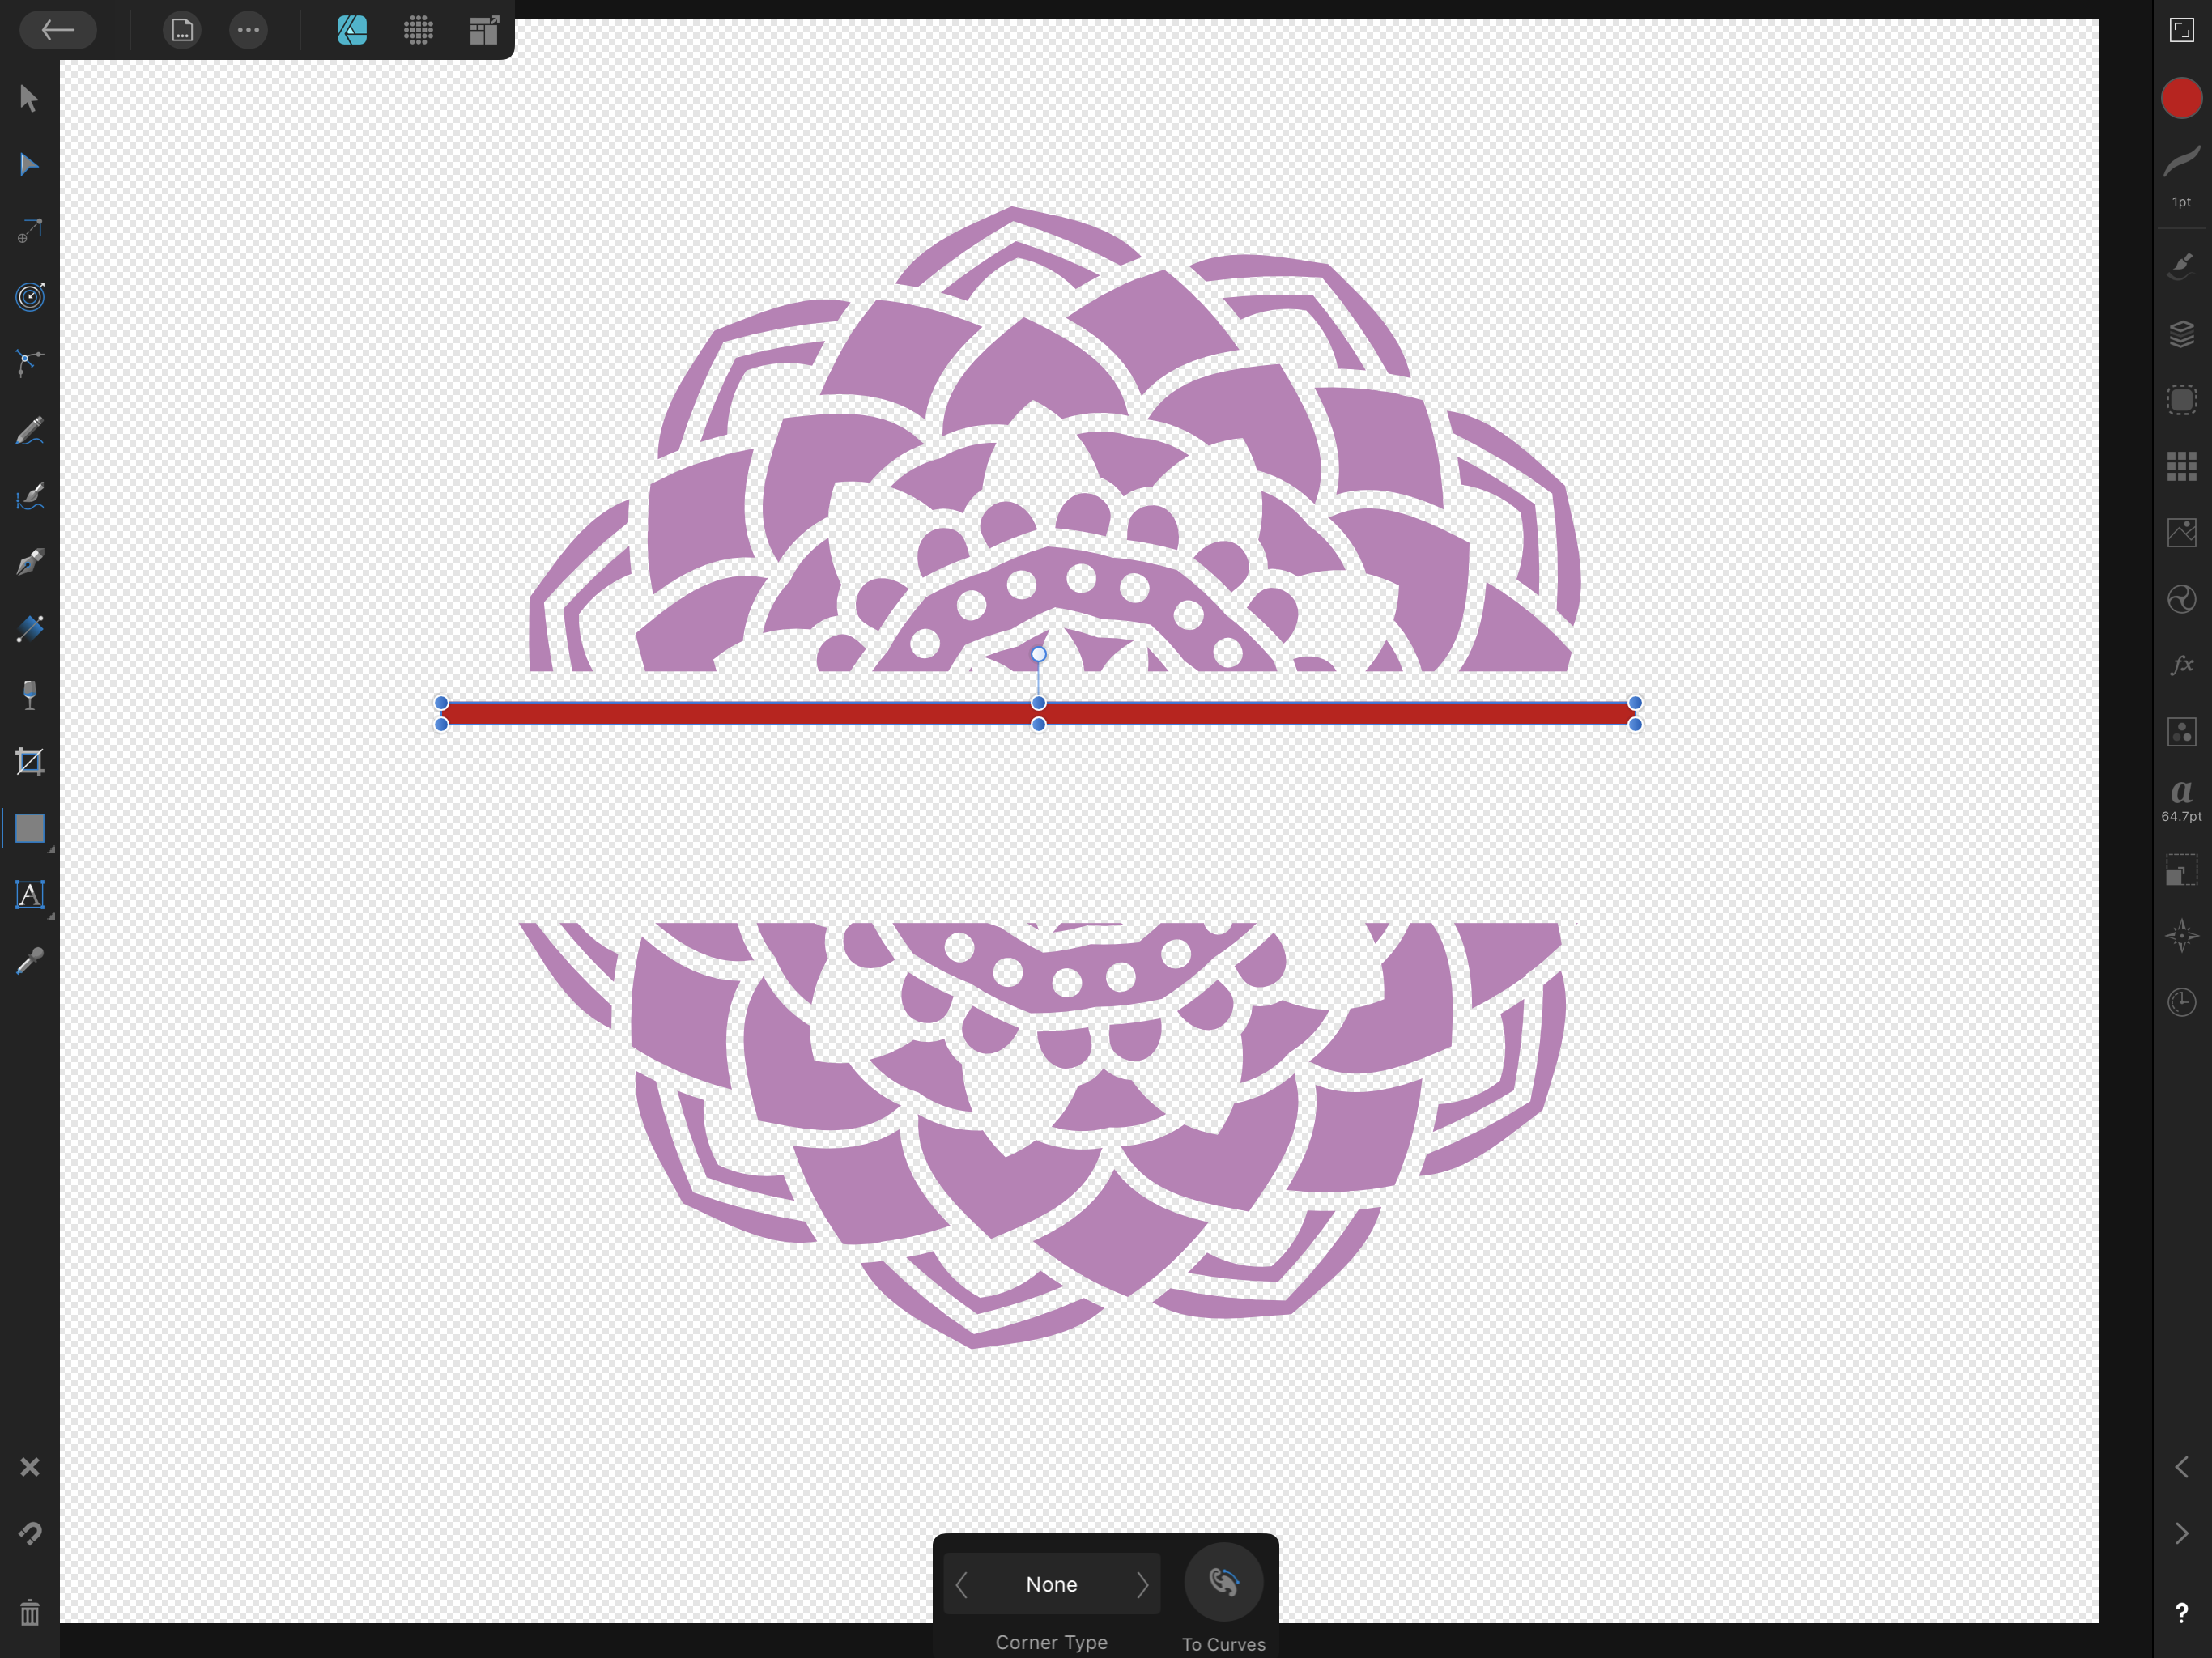
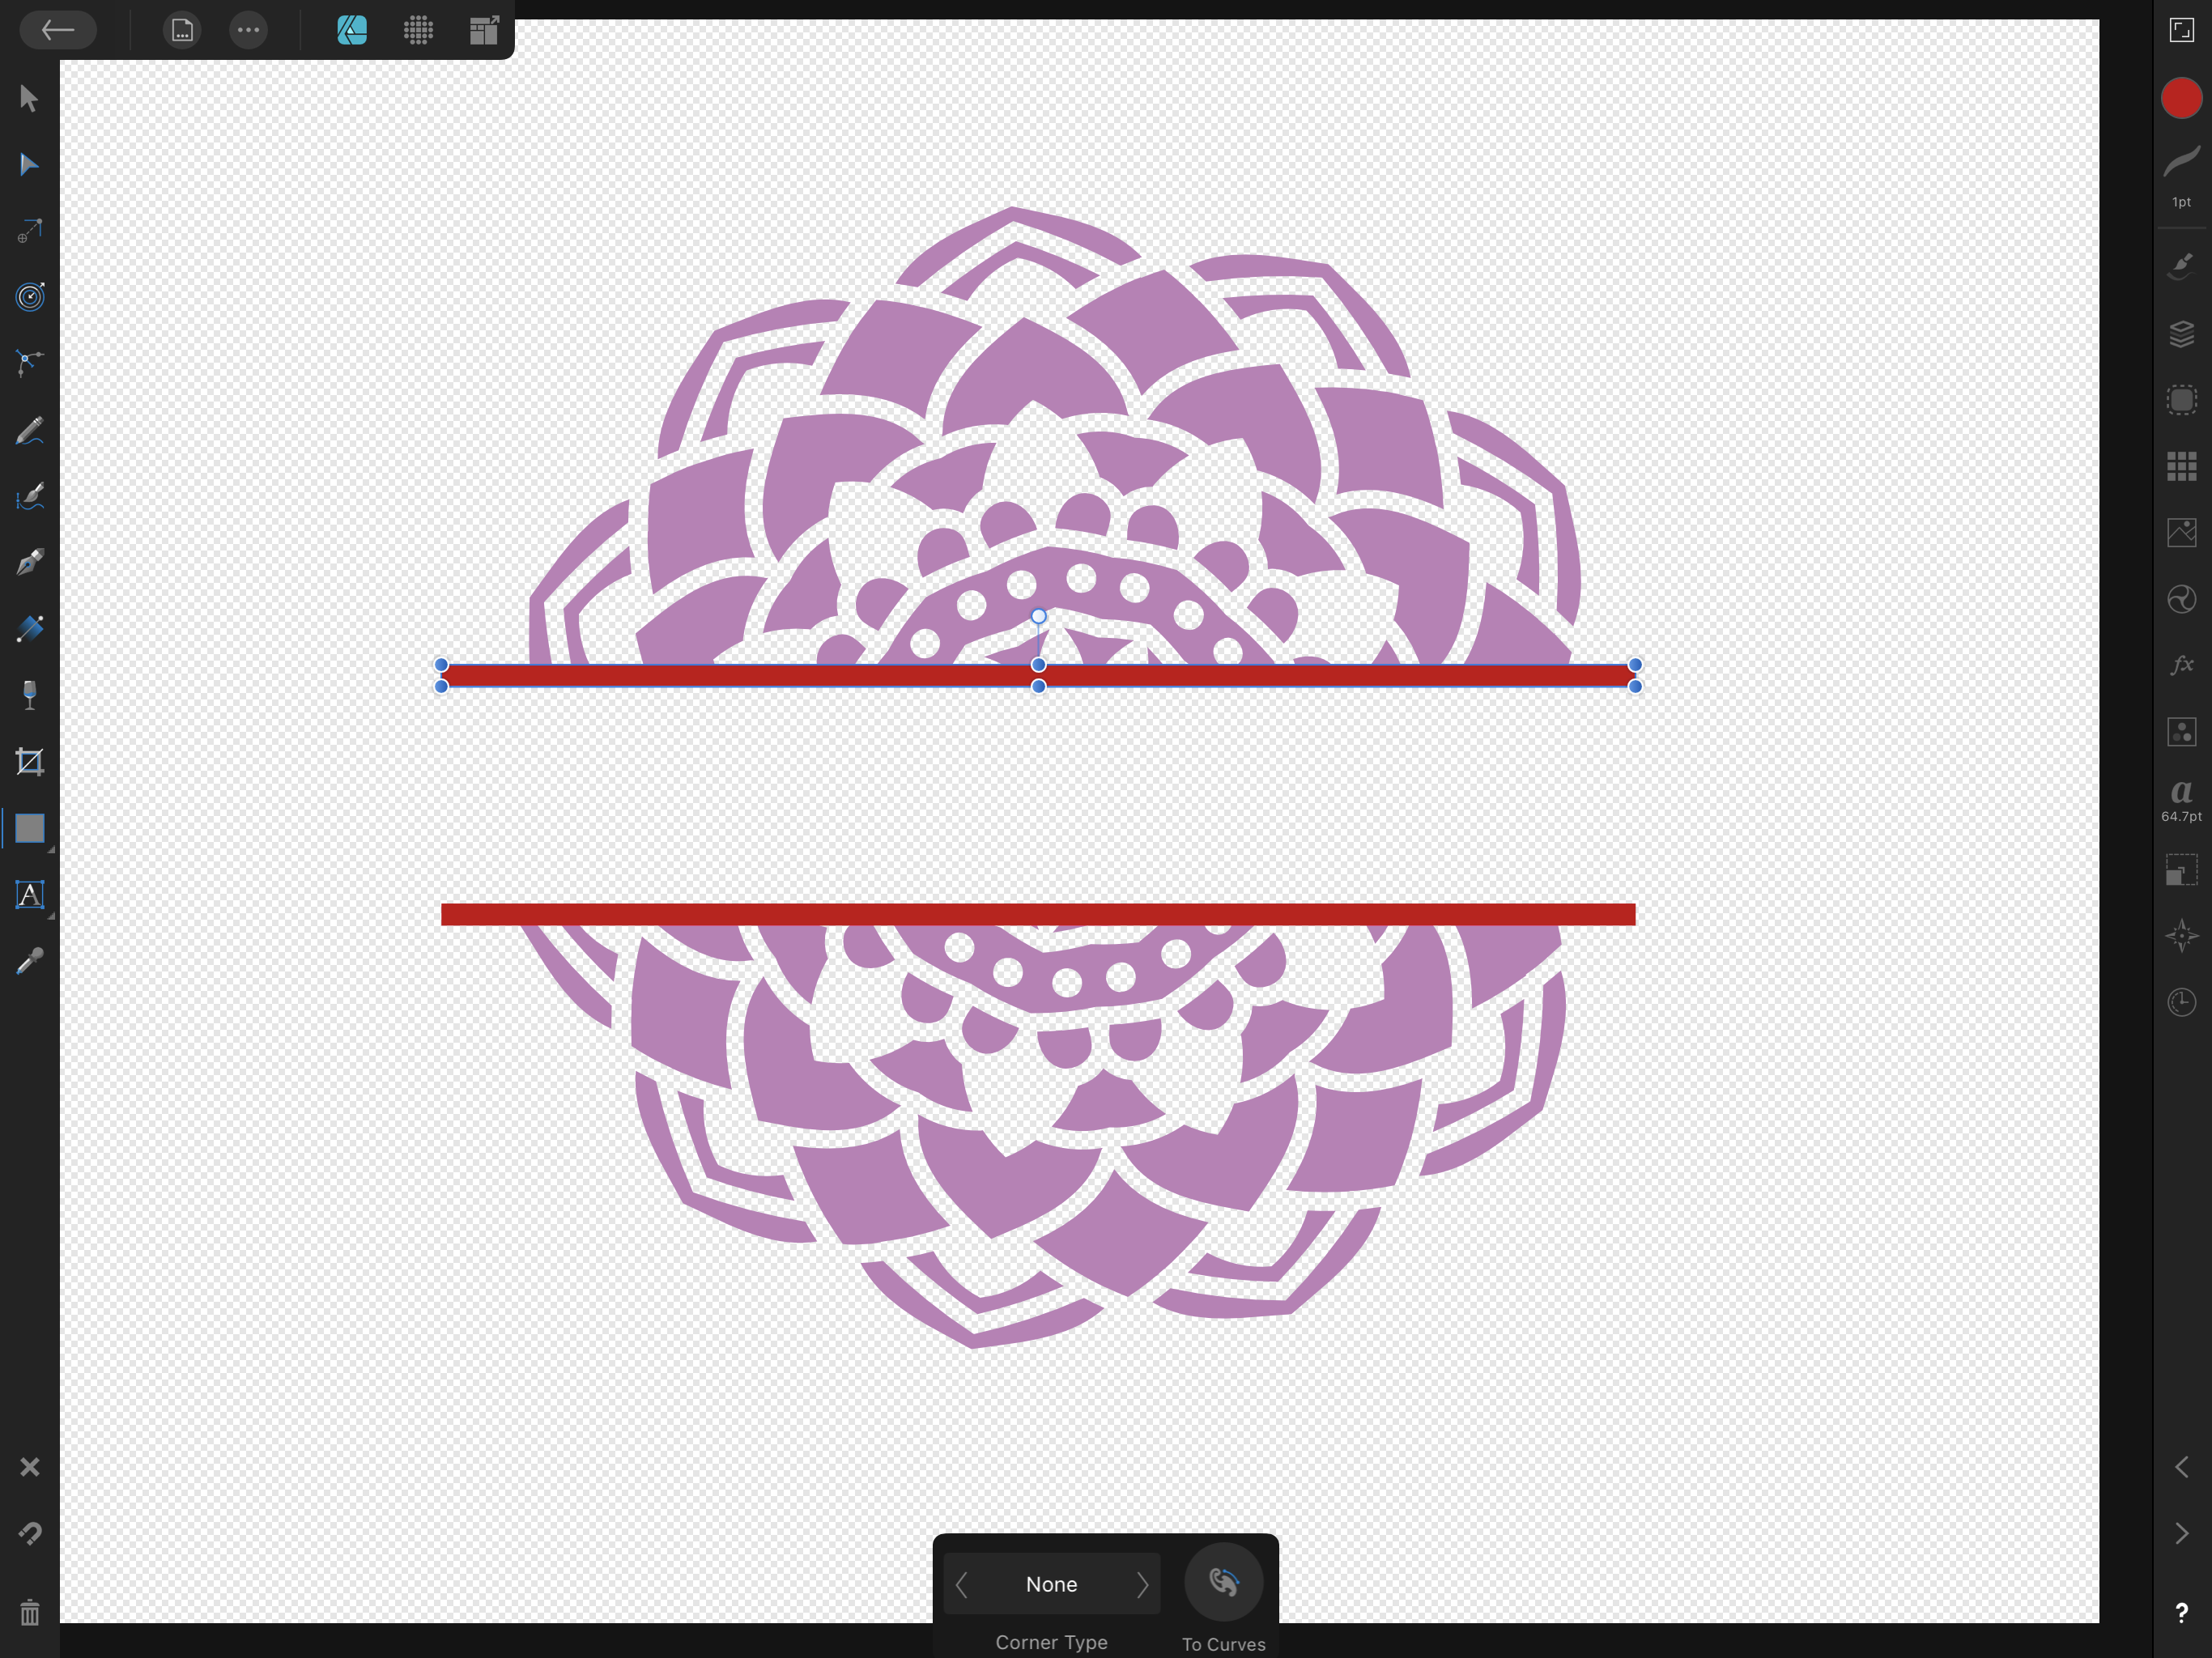
Once you have the size of your rectangle pinned down you can click on the button on the bottom toolbar that is called "To Curves". This completes the operation to turn your drawing into an object that can be manipulated.
Position your rectangle where you want your blank space to be and select both objects by dragging your mouse or pencil around both items.
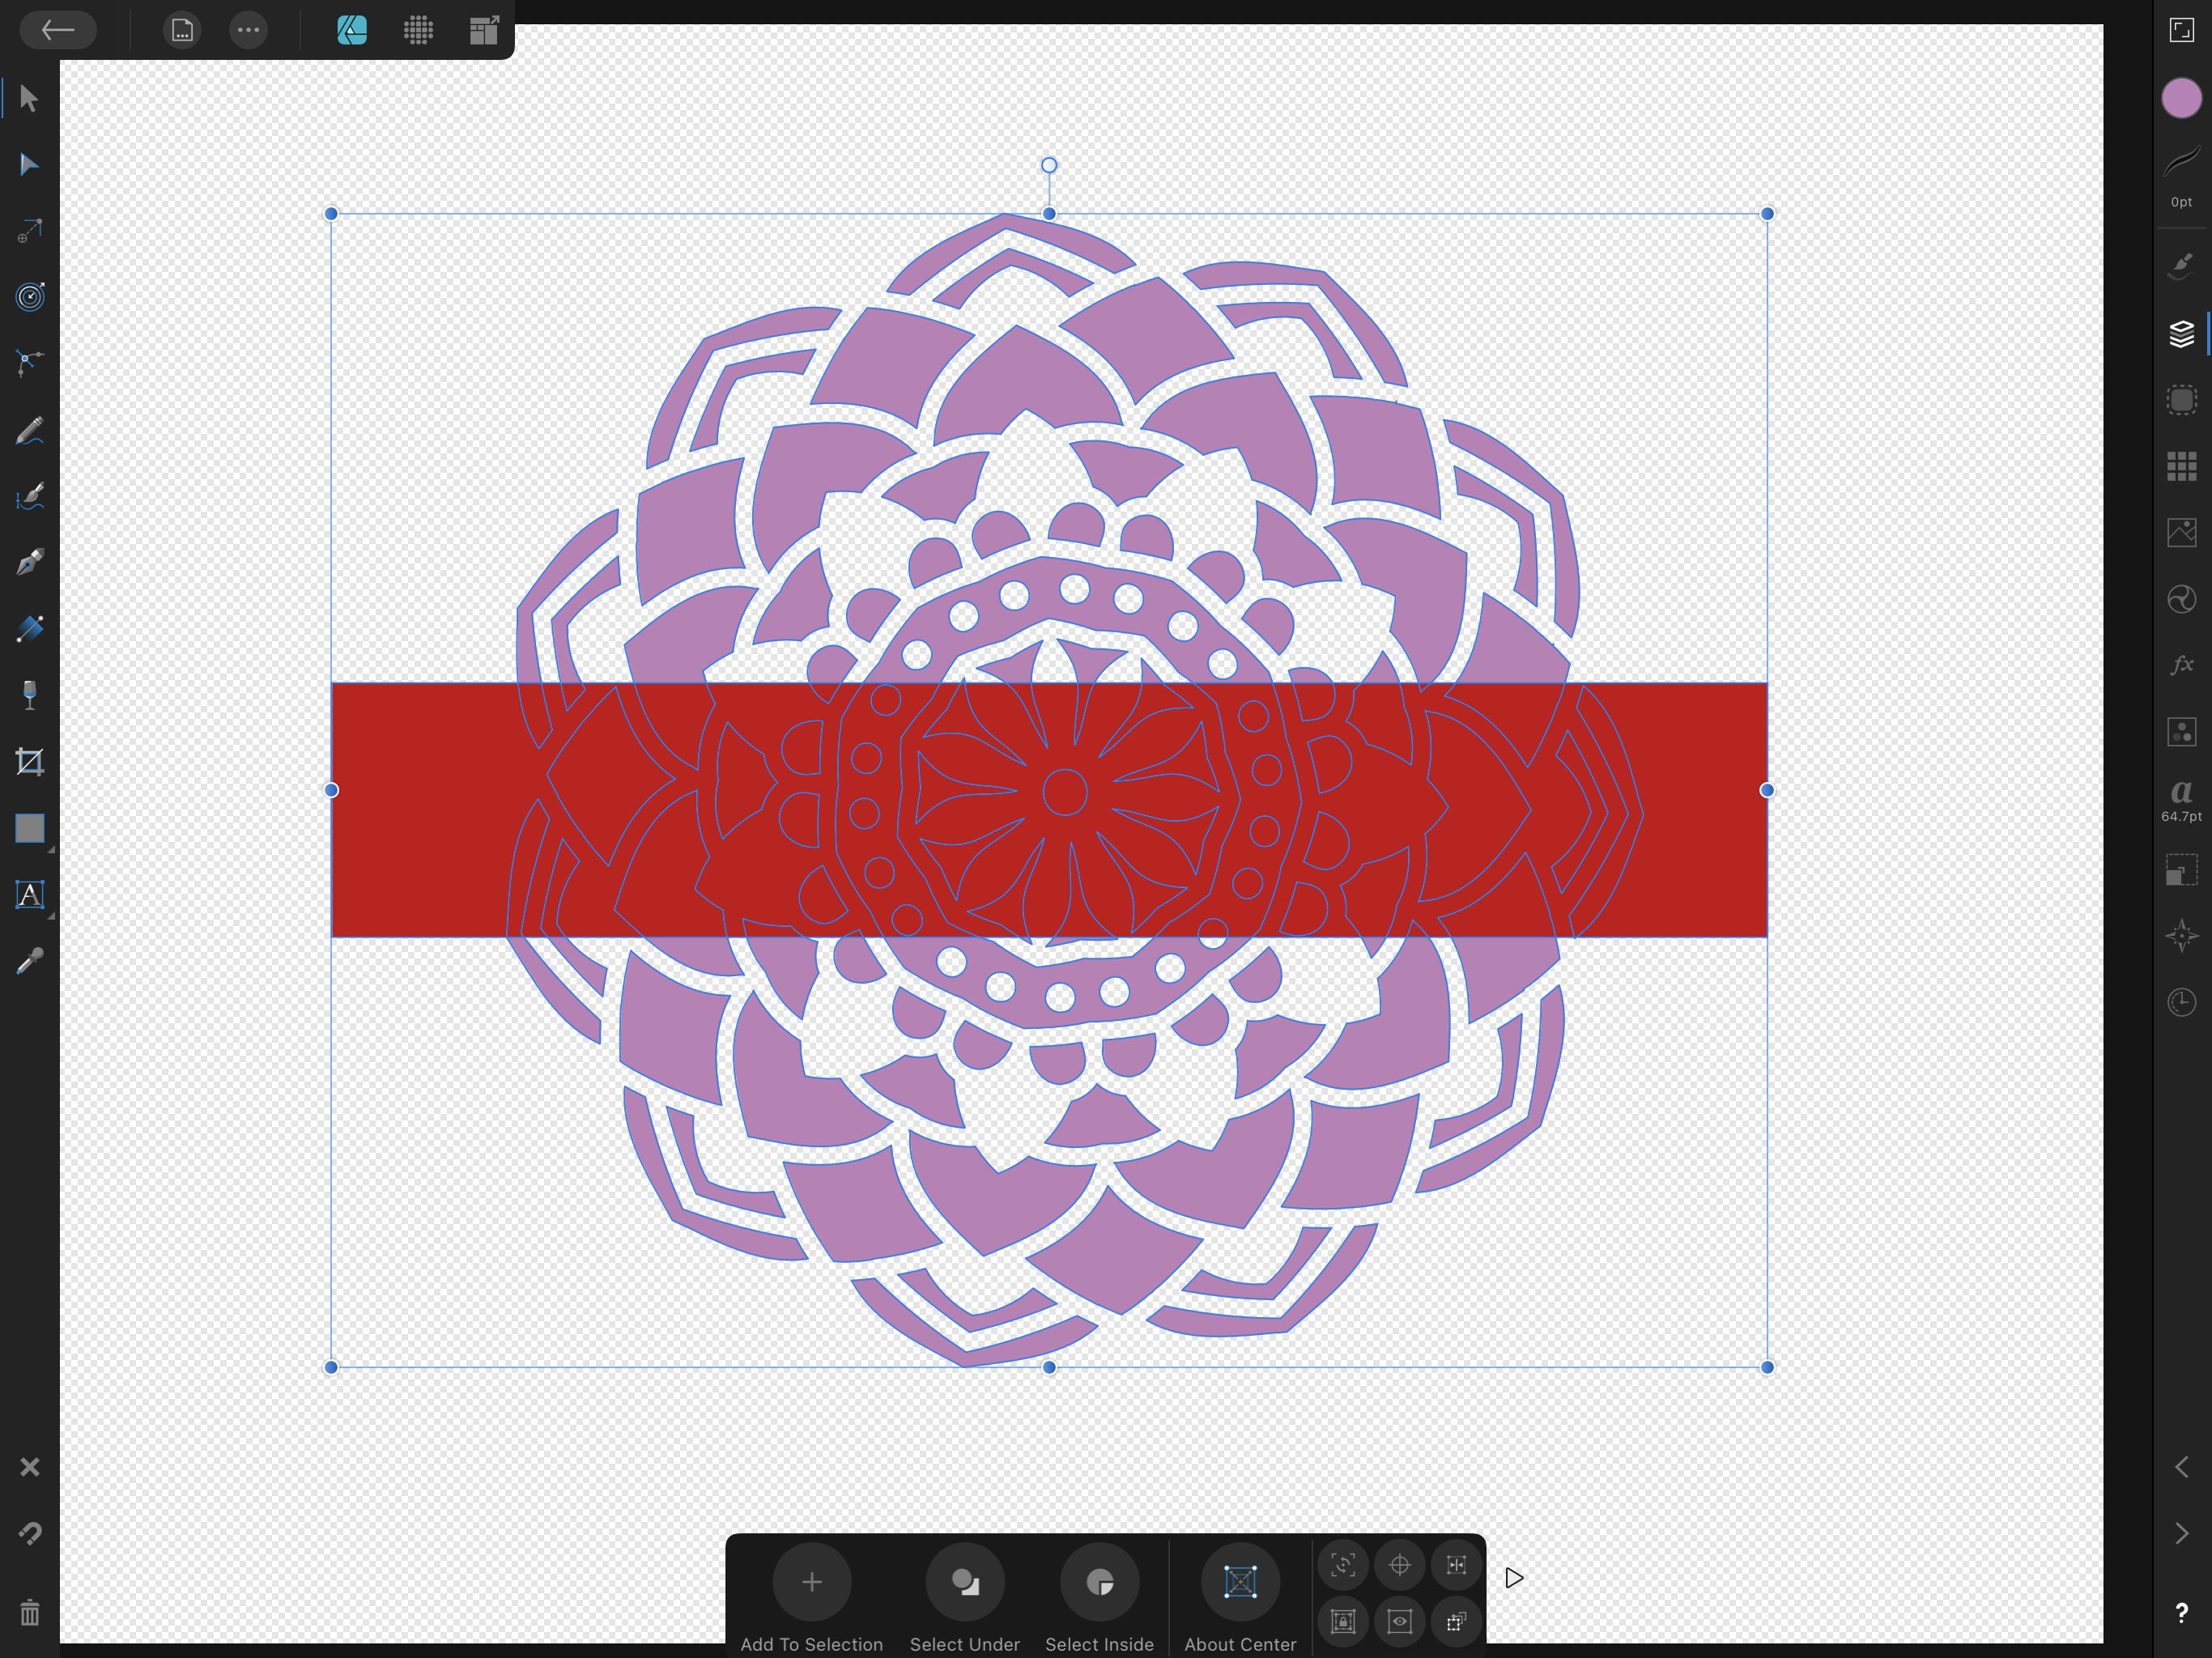
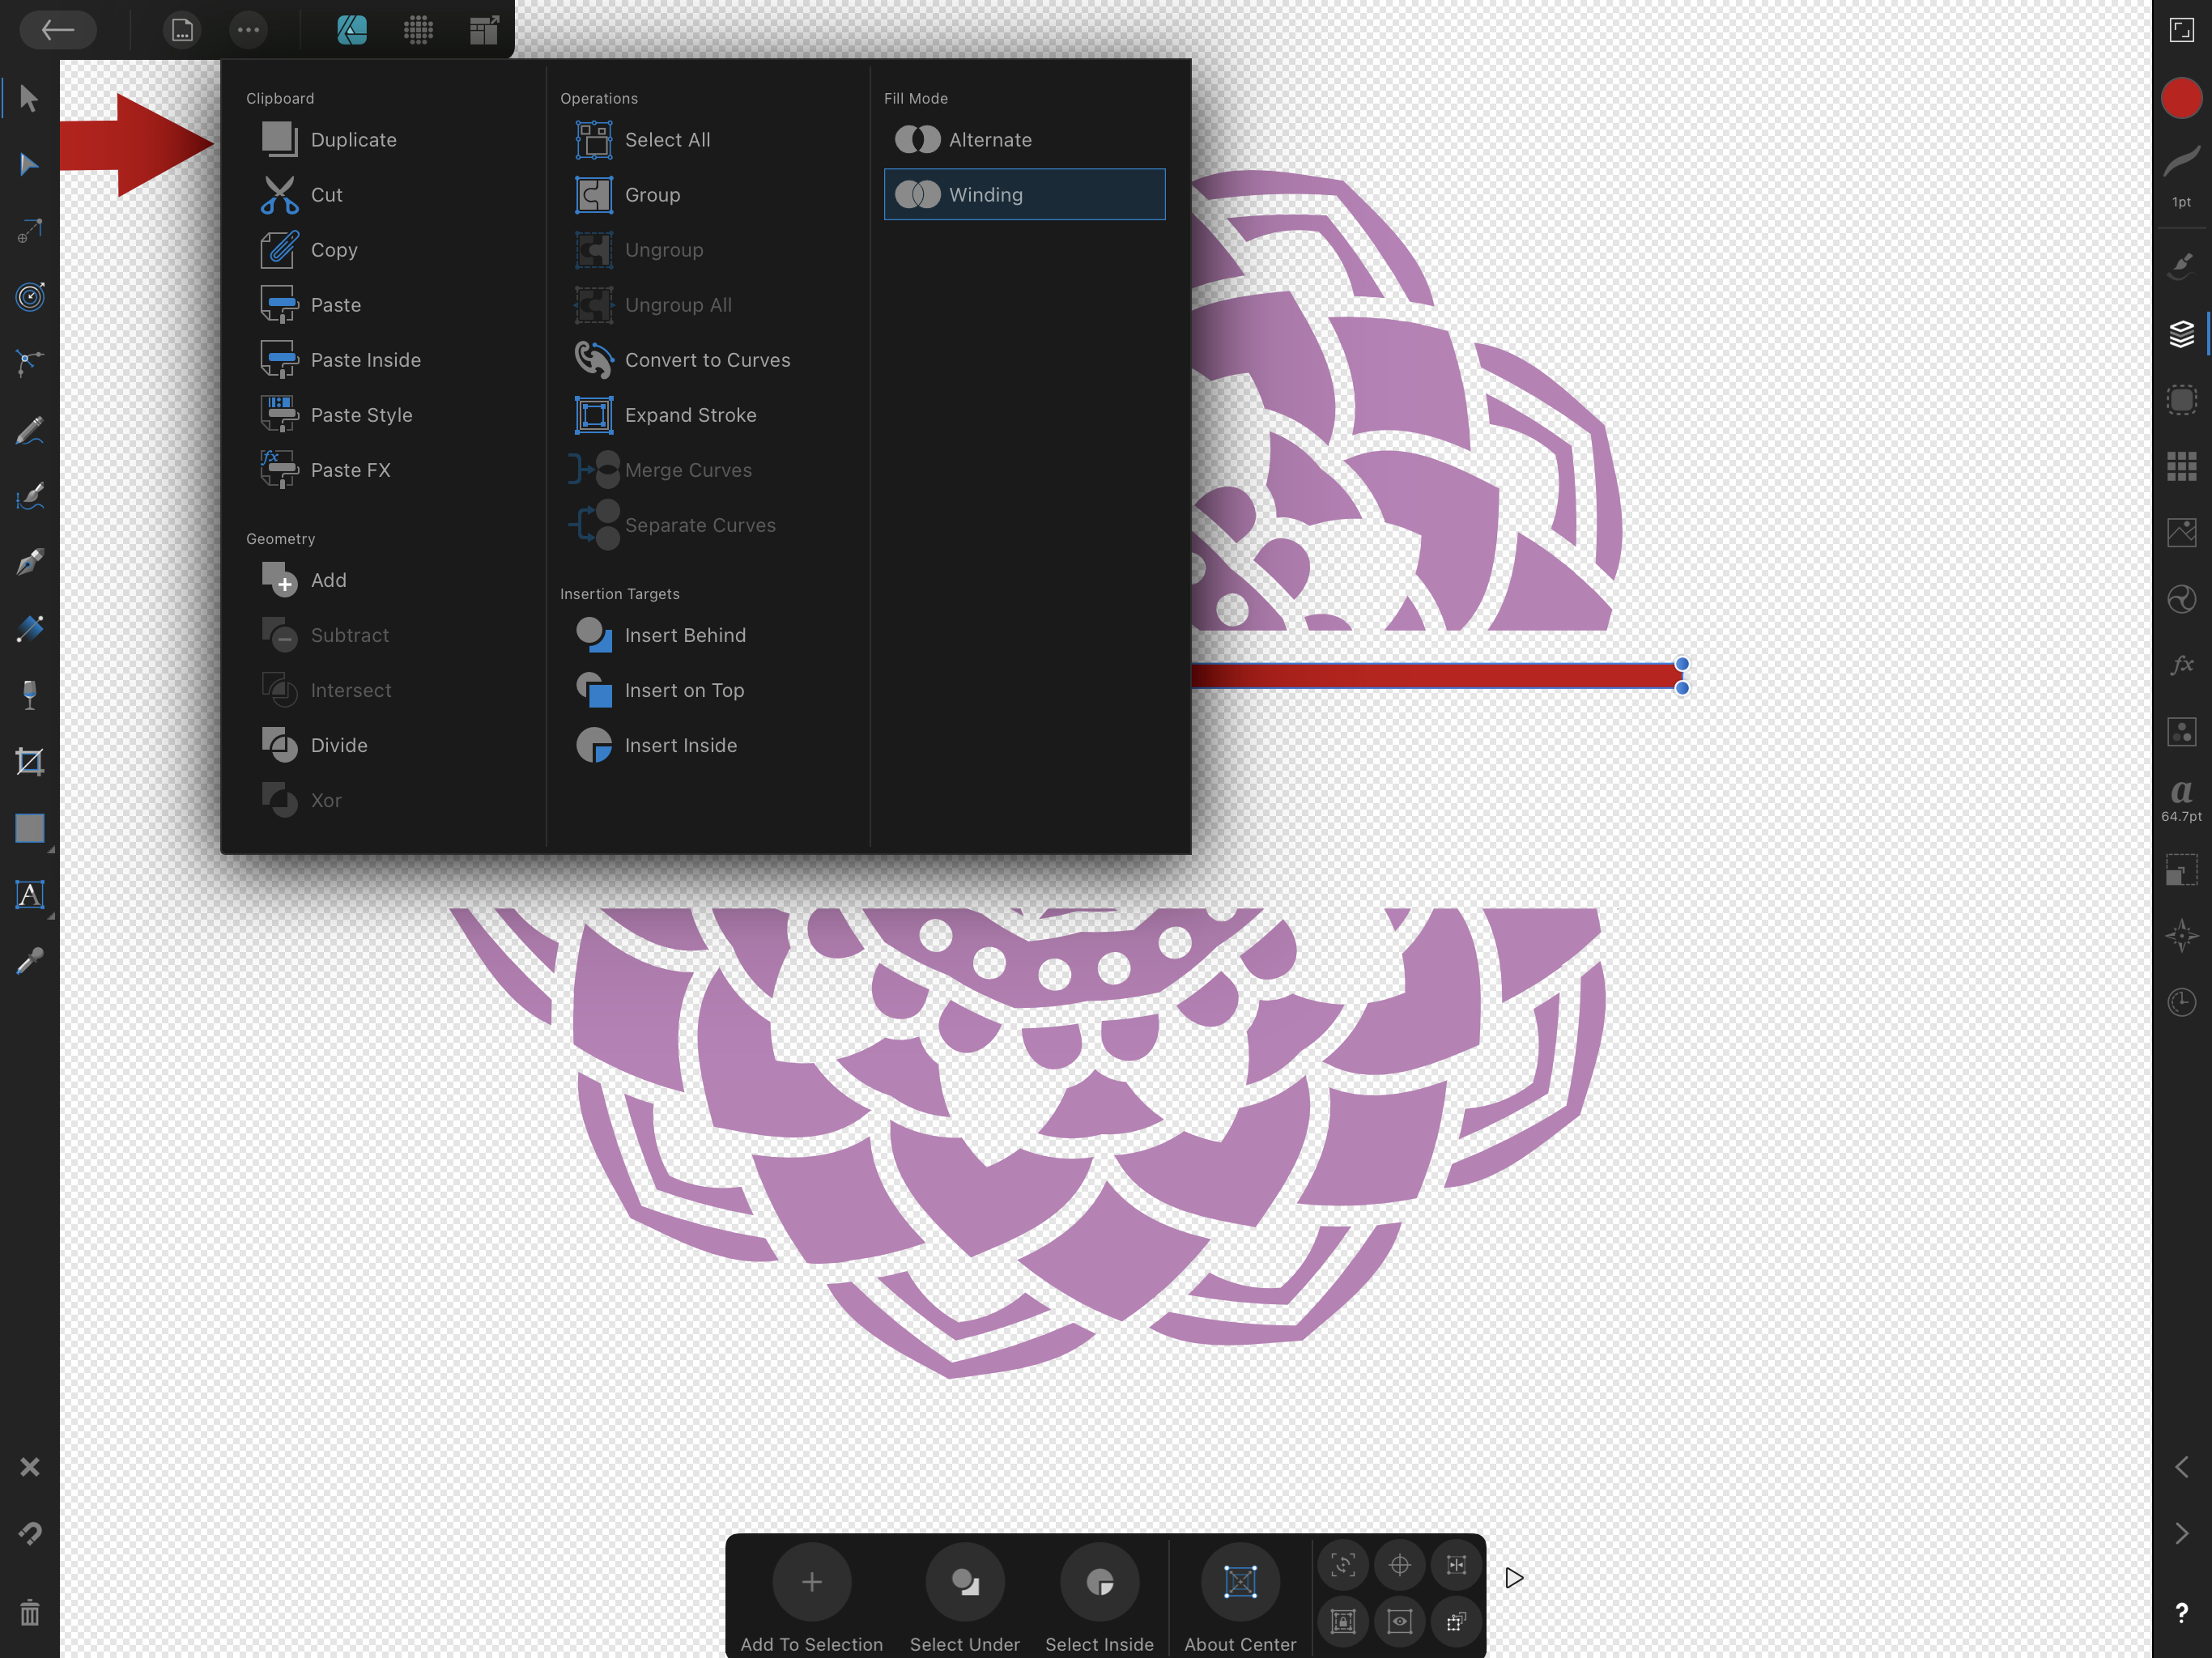
With both objects selected click on the Edit menu. You will find this at the top of the screen with an icon of 3 dots and then click on Subtract.
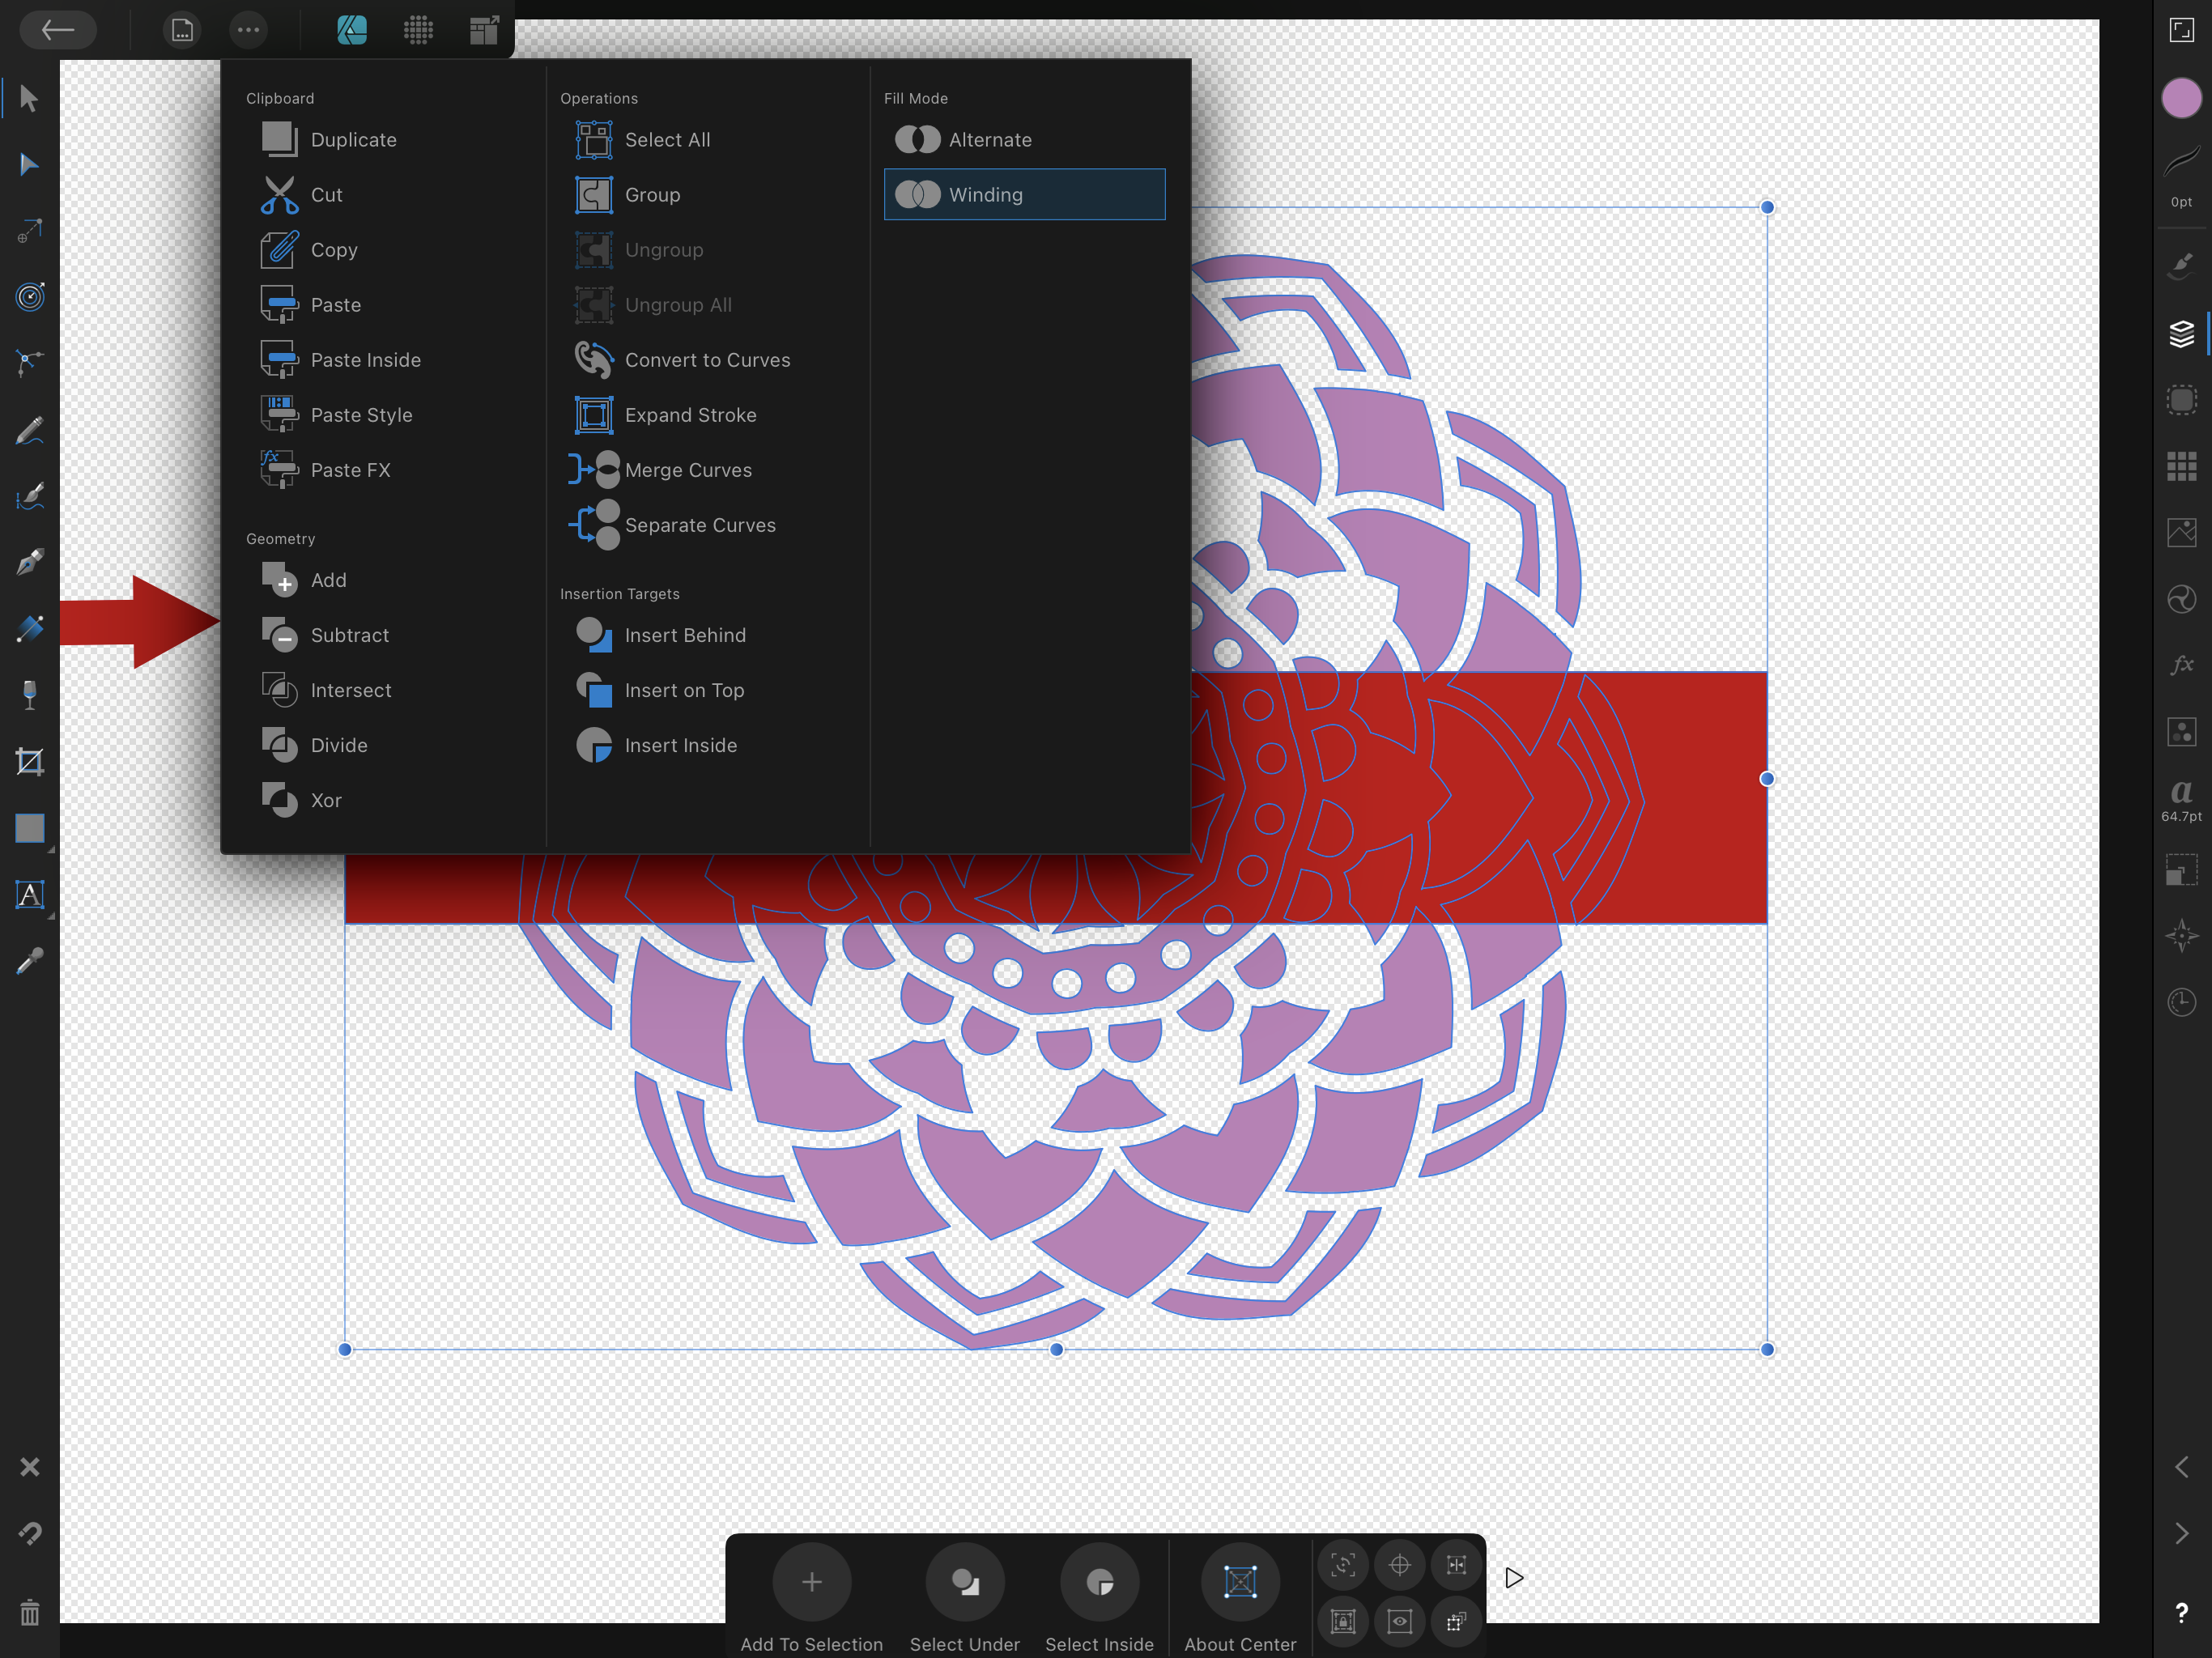
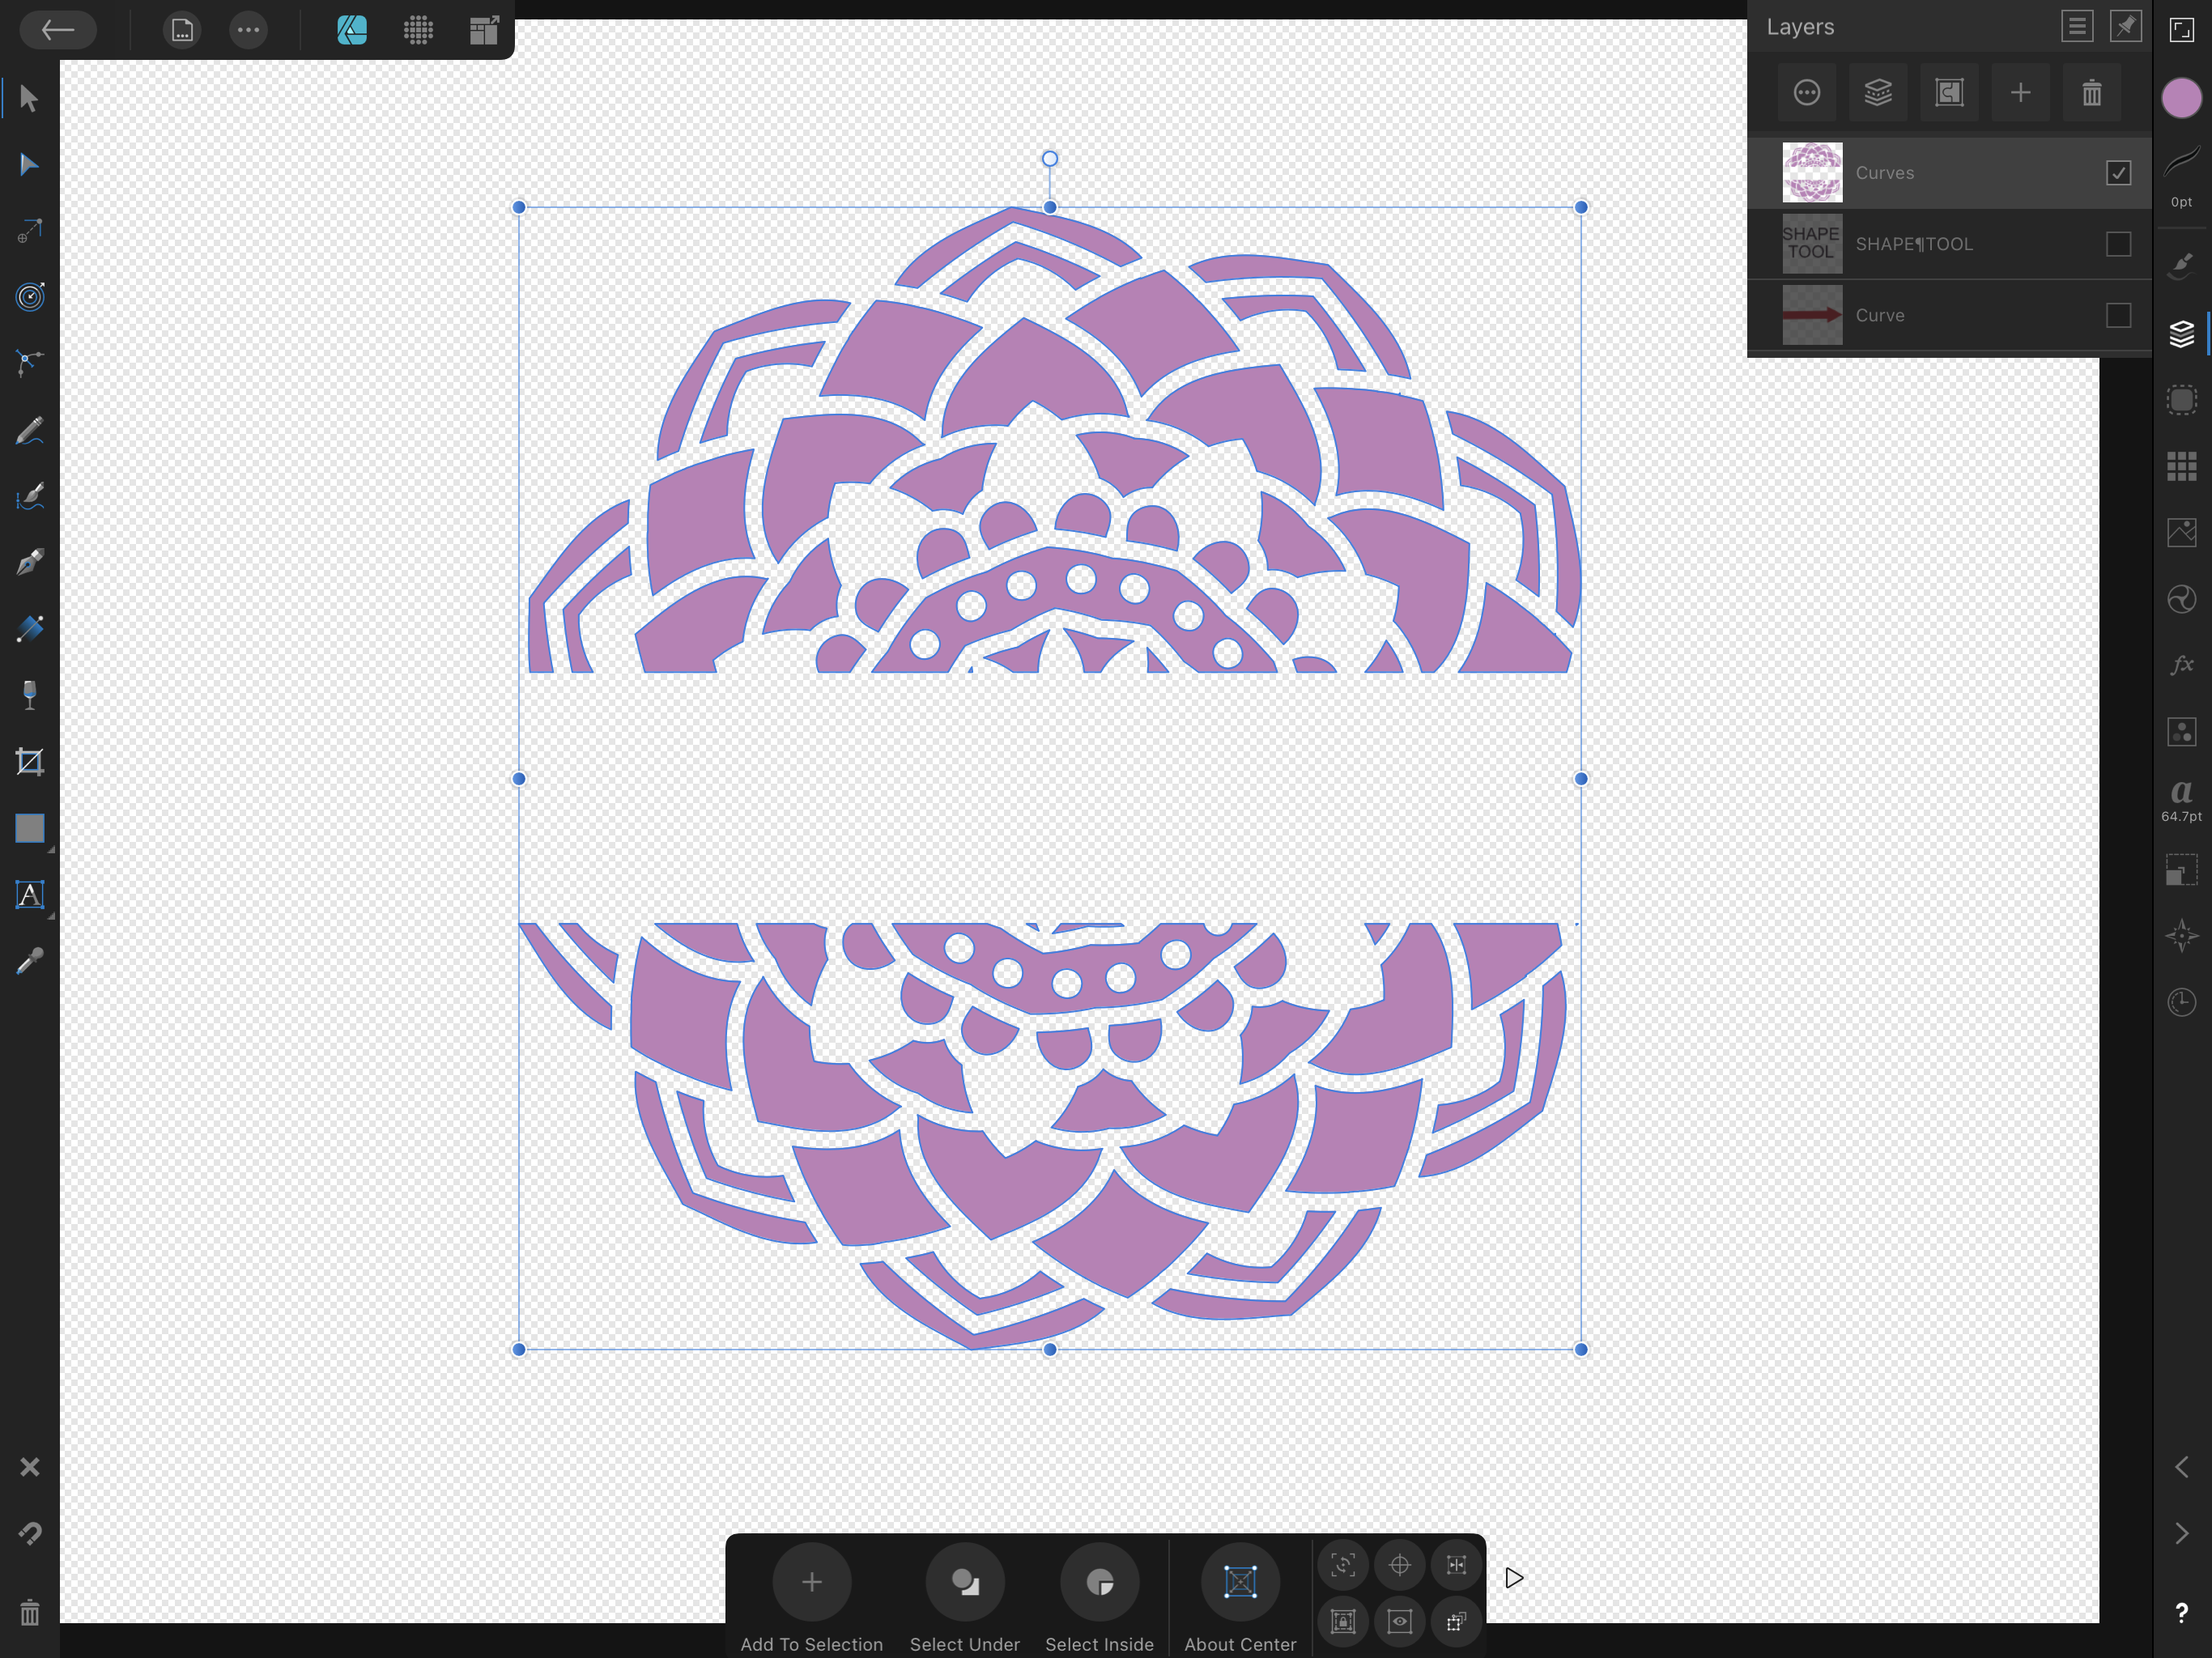
In basic terms, you are using the rectangle as a kind of cookie cutter to remove the part of the mandala that is under the rectangle.
Using the same steps as you did above create another rectangle and expand it. This time I chose to make it slightly wider than the mandala design and skinny to create a border.
Click on the Edit menu at the top of the screen and select duplicate. This will create an exact copy of your rectangle on top of the original.
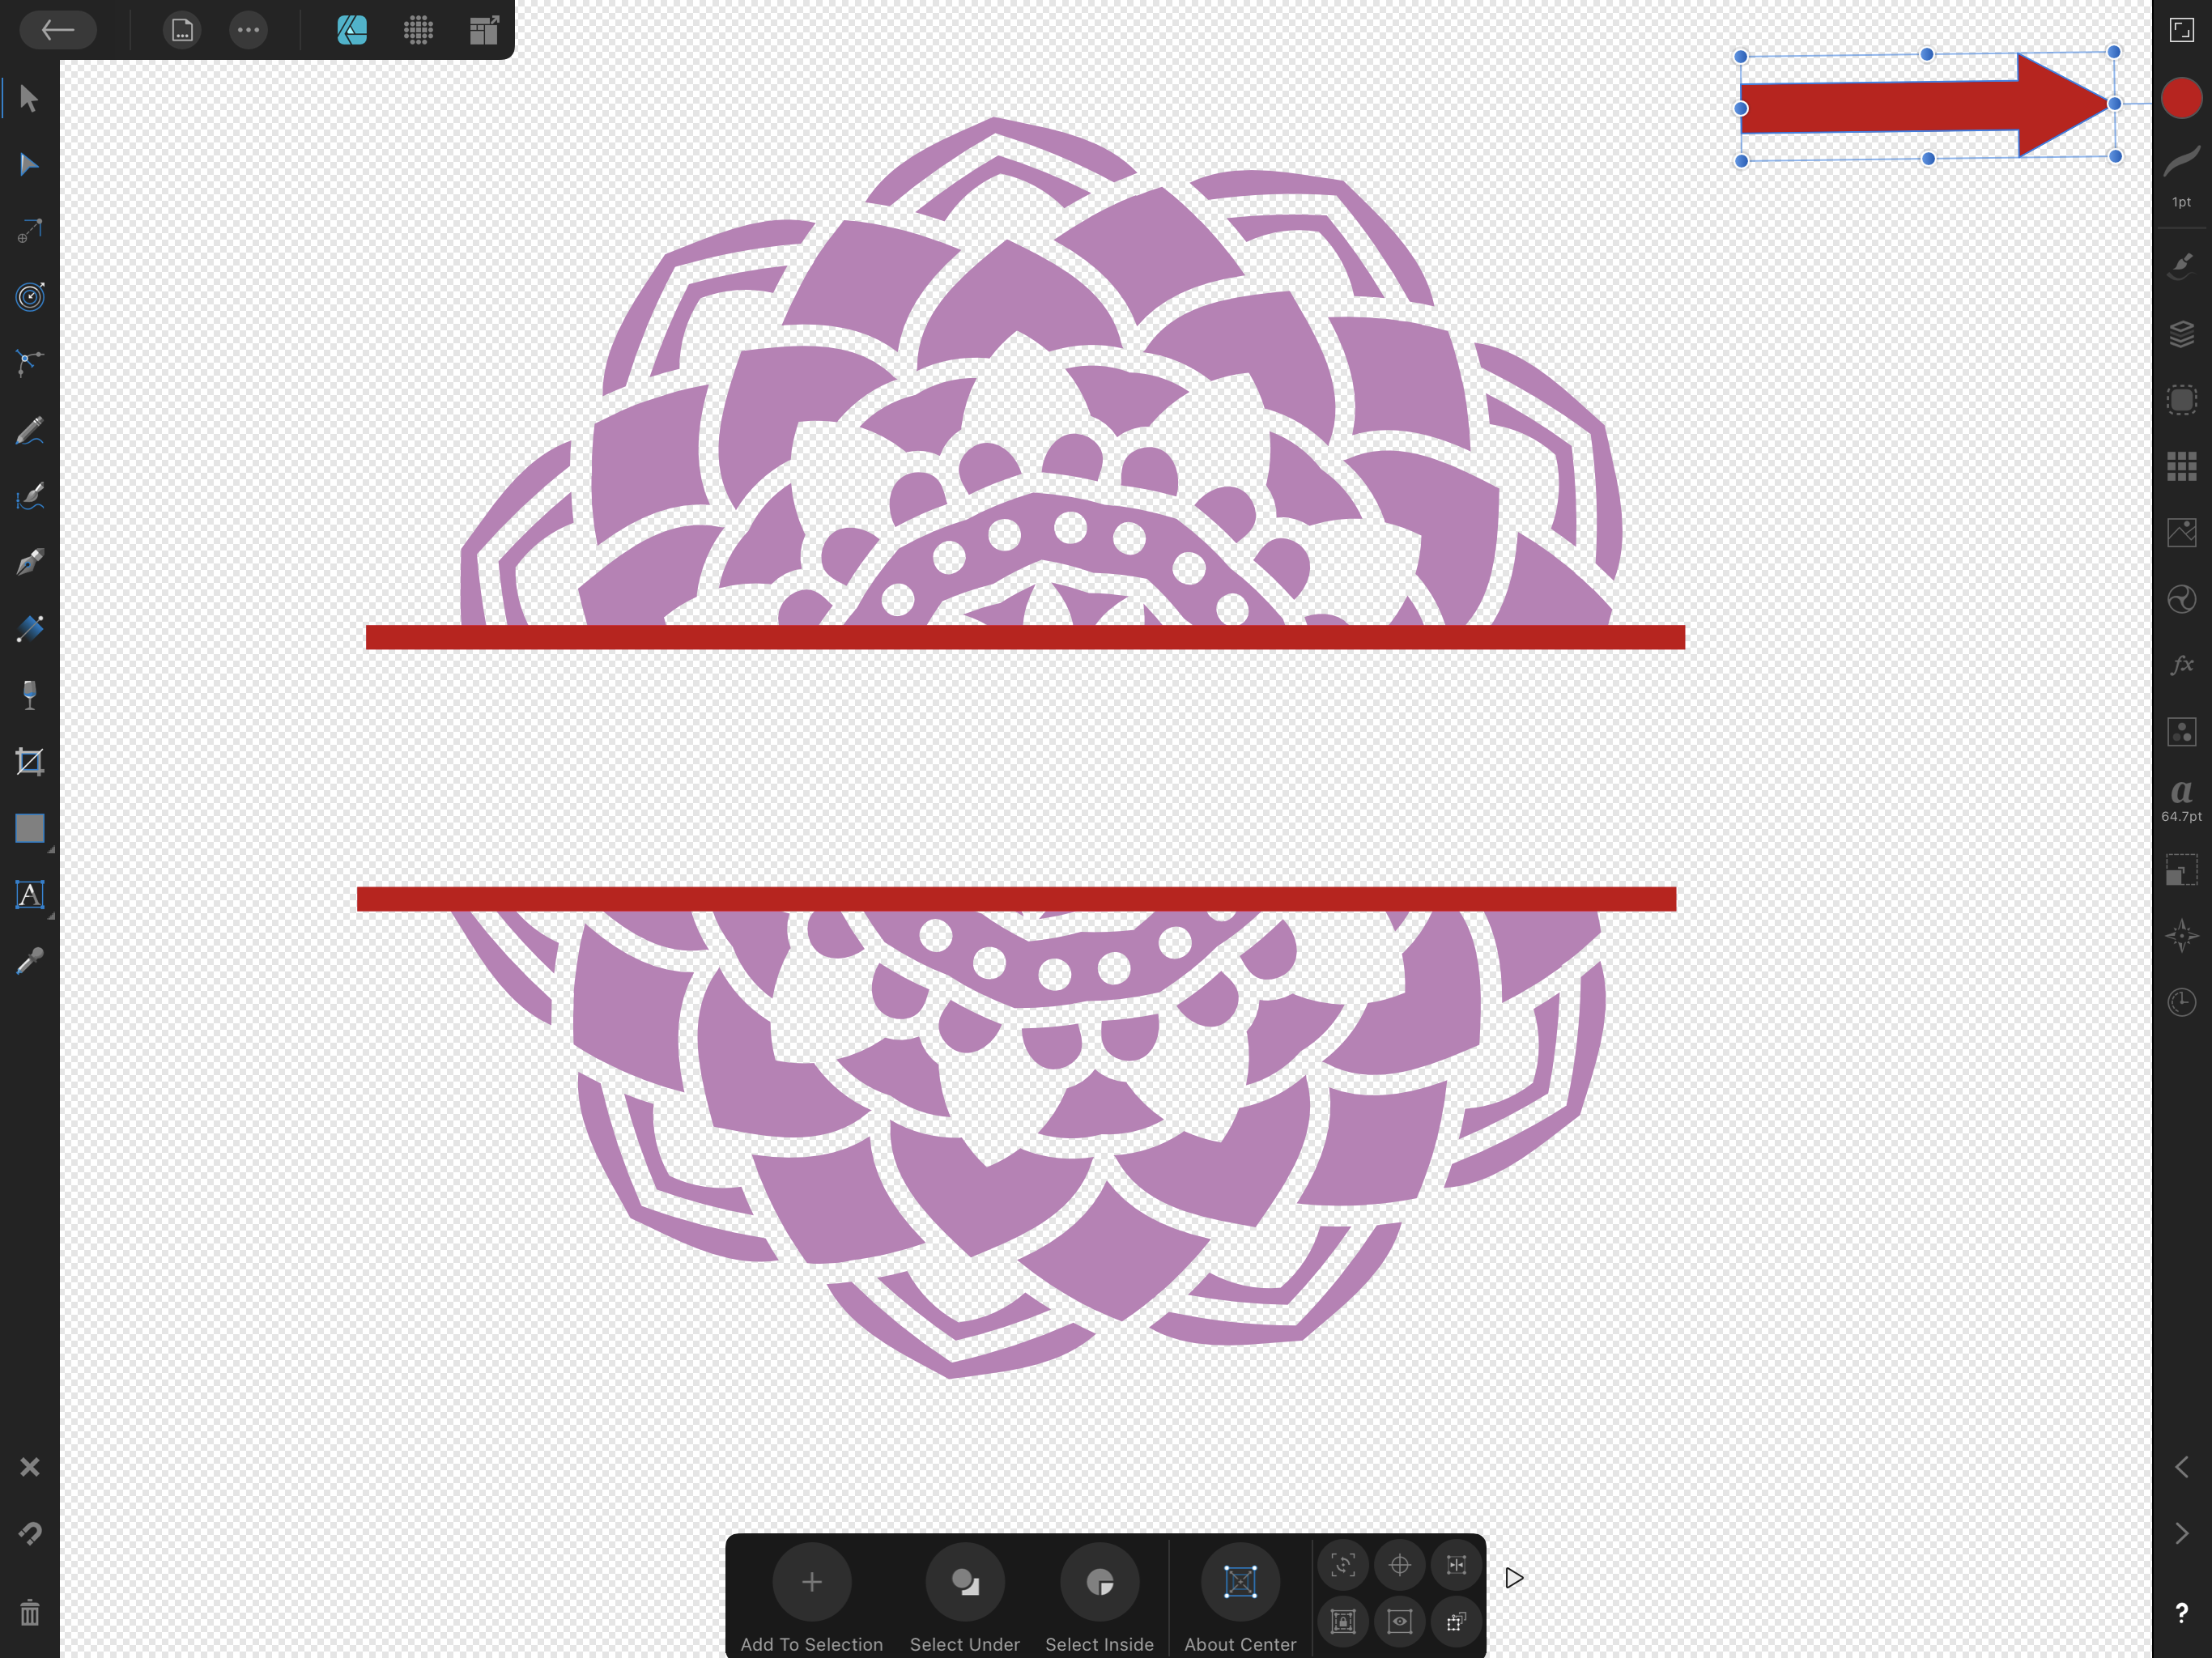
Take your pencil or mouse and drag one of the rectangles to the top of your blank space and the other one to the bottom of your blank space. Don't worry about them not being aligned, we can take care of that in the next step. Make sure that both of the rectangles are very slightly overlapping the mandala.
Locate the Color Studio on the right side of the screen. It is represented by an icon of a dot filled with the currently selected color. Click on it to open more options.
Select the icon that looks like an eyedropper tool and drag it over an area on the main image to select that color as the active color.
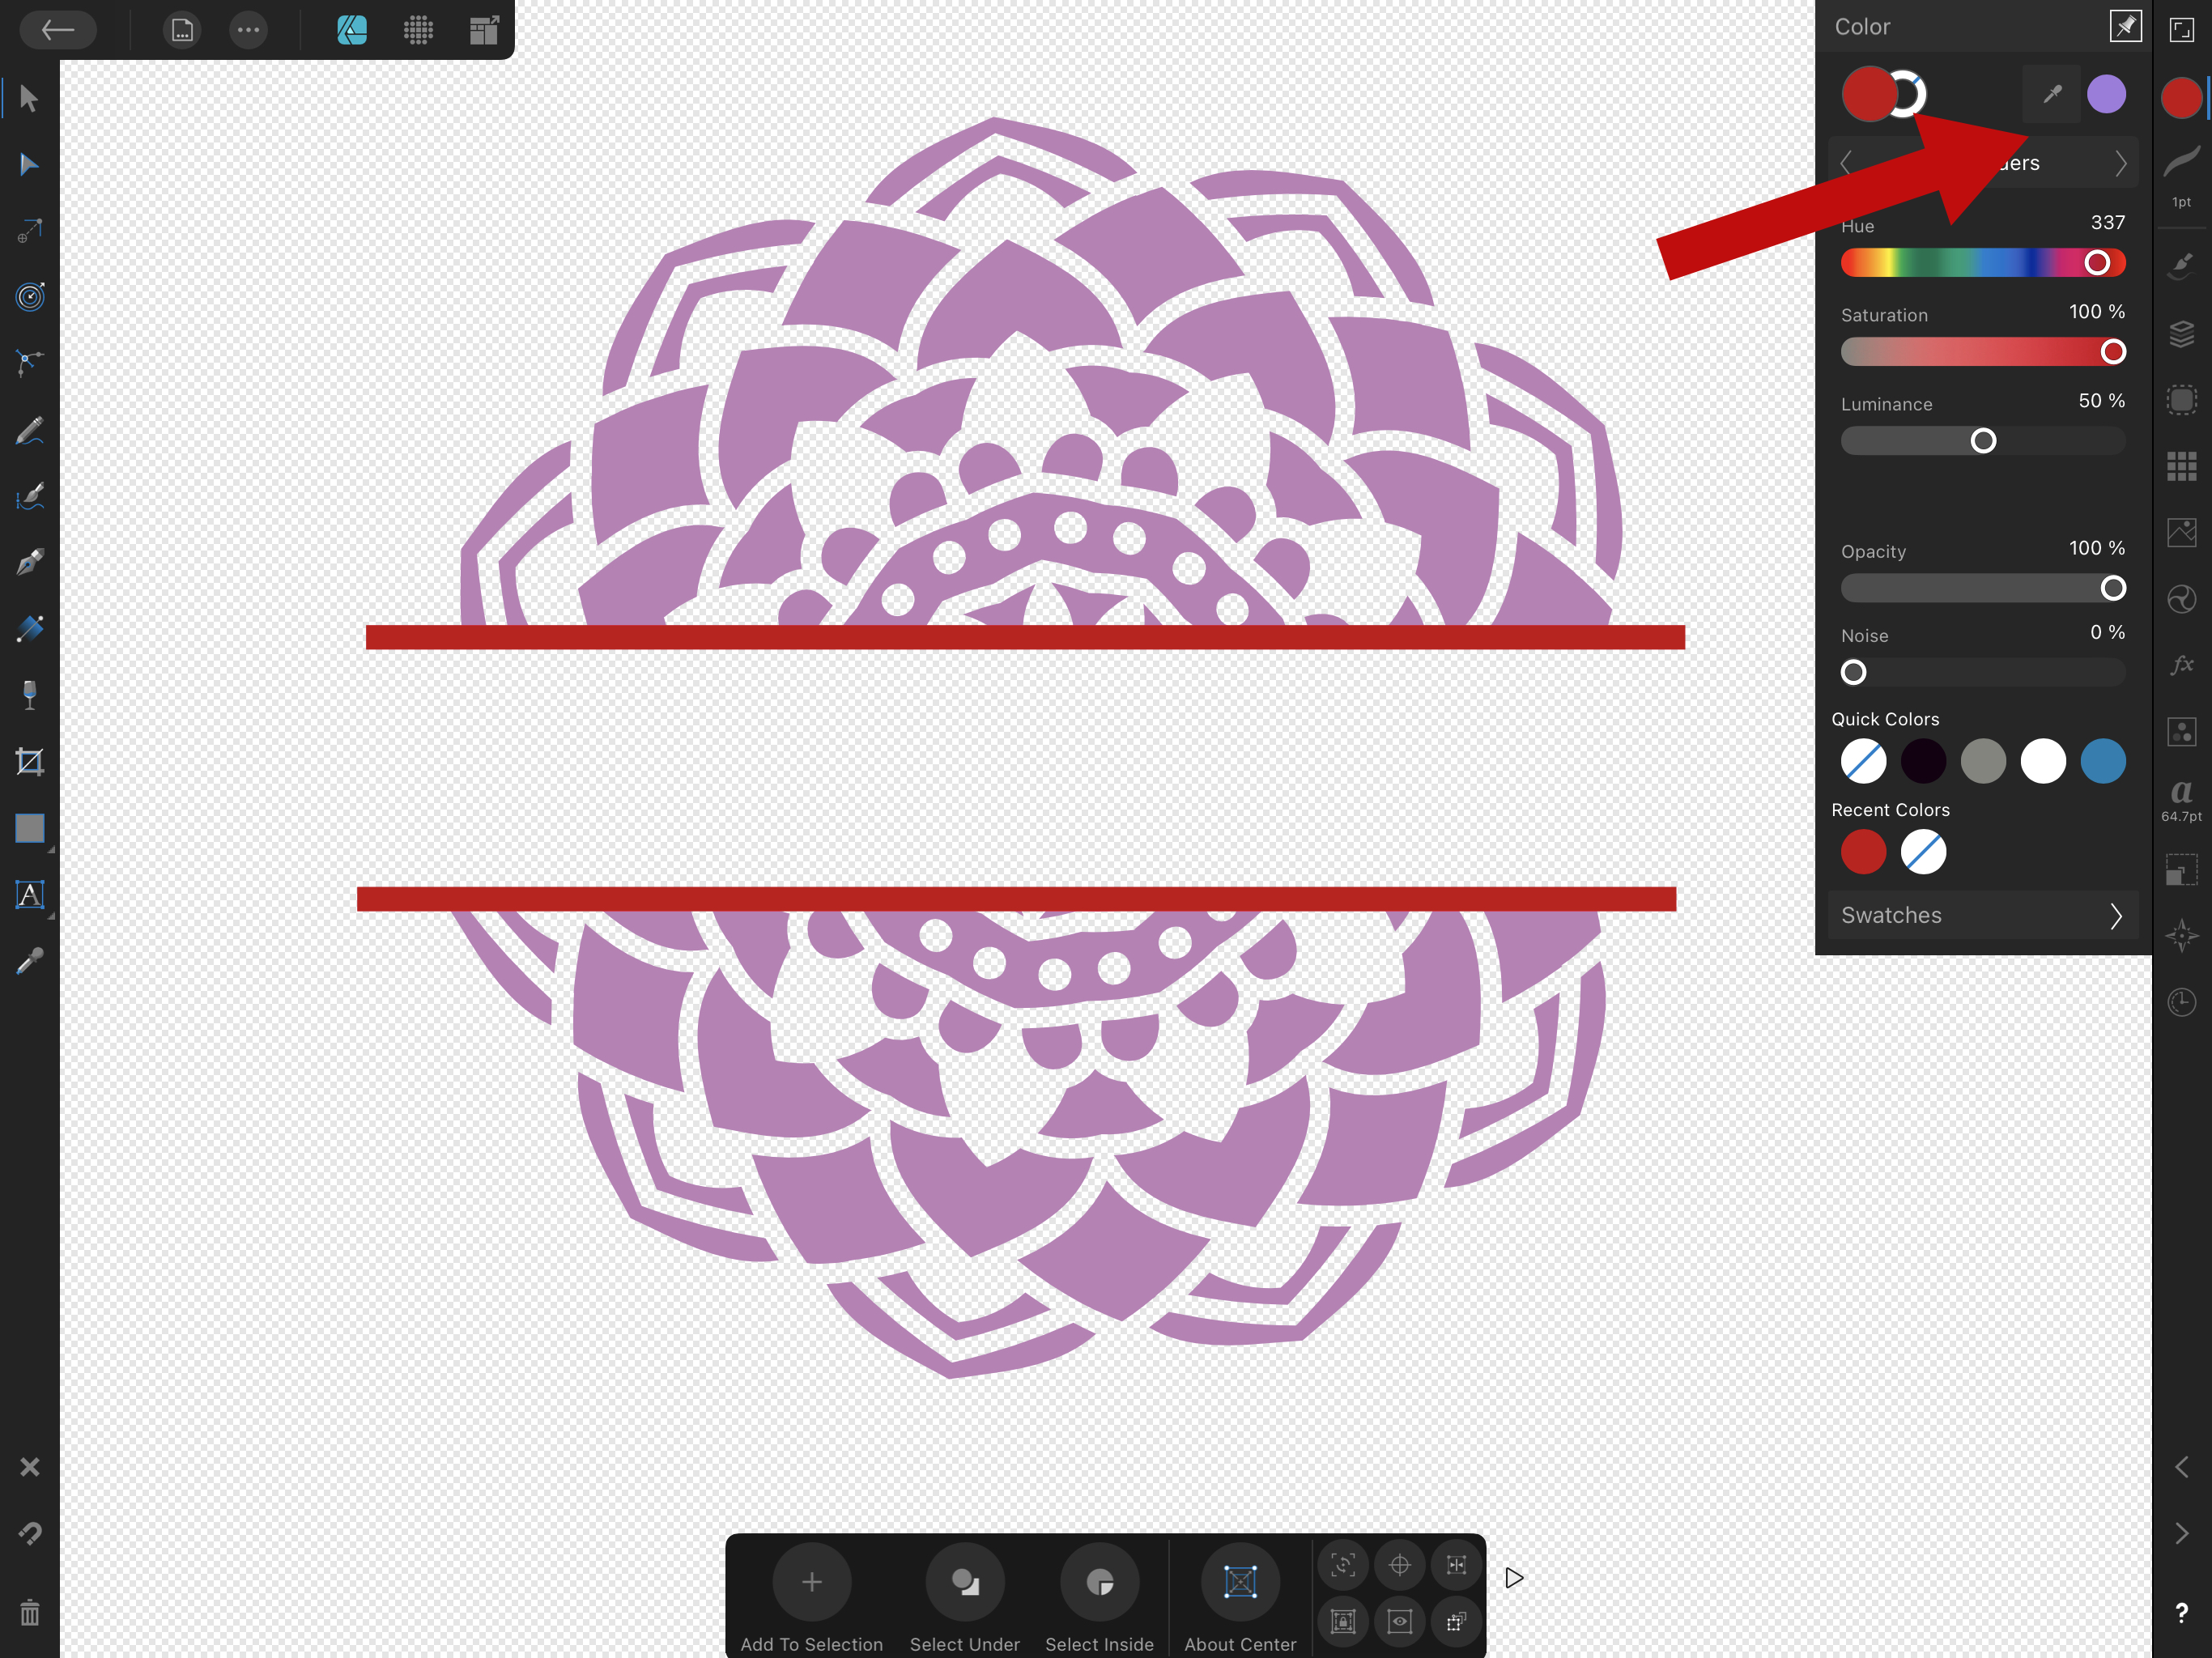
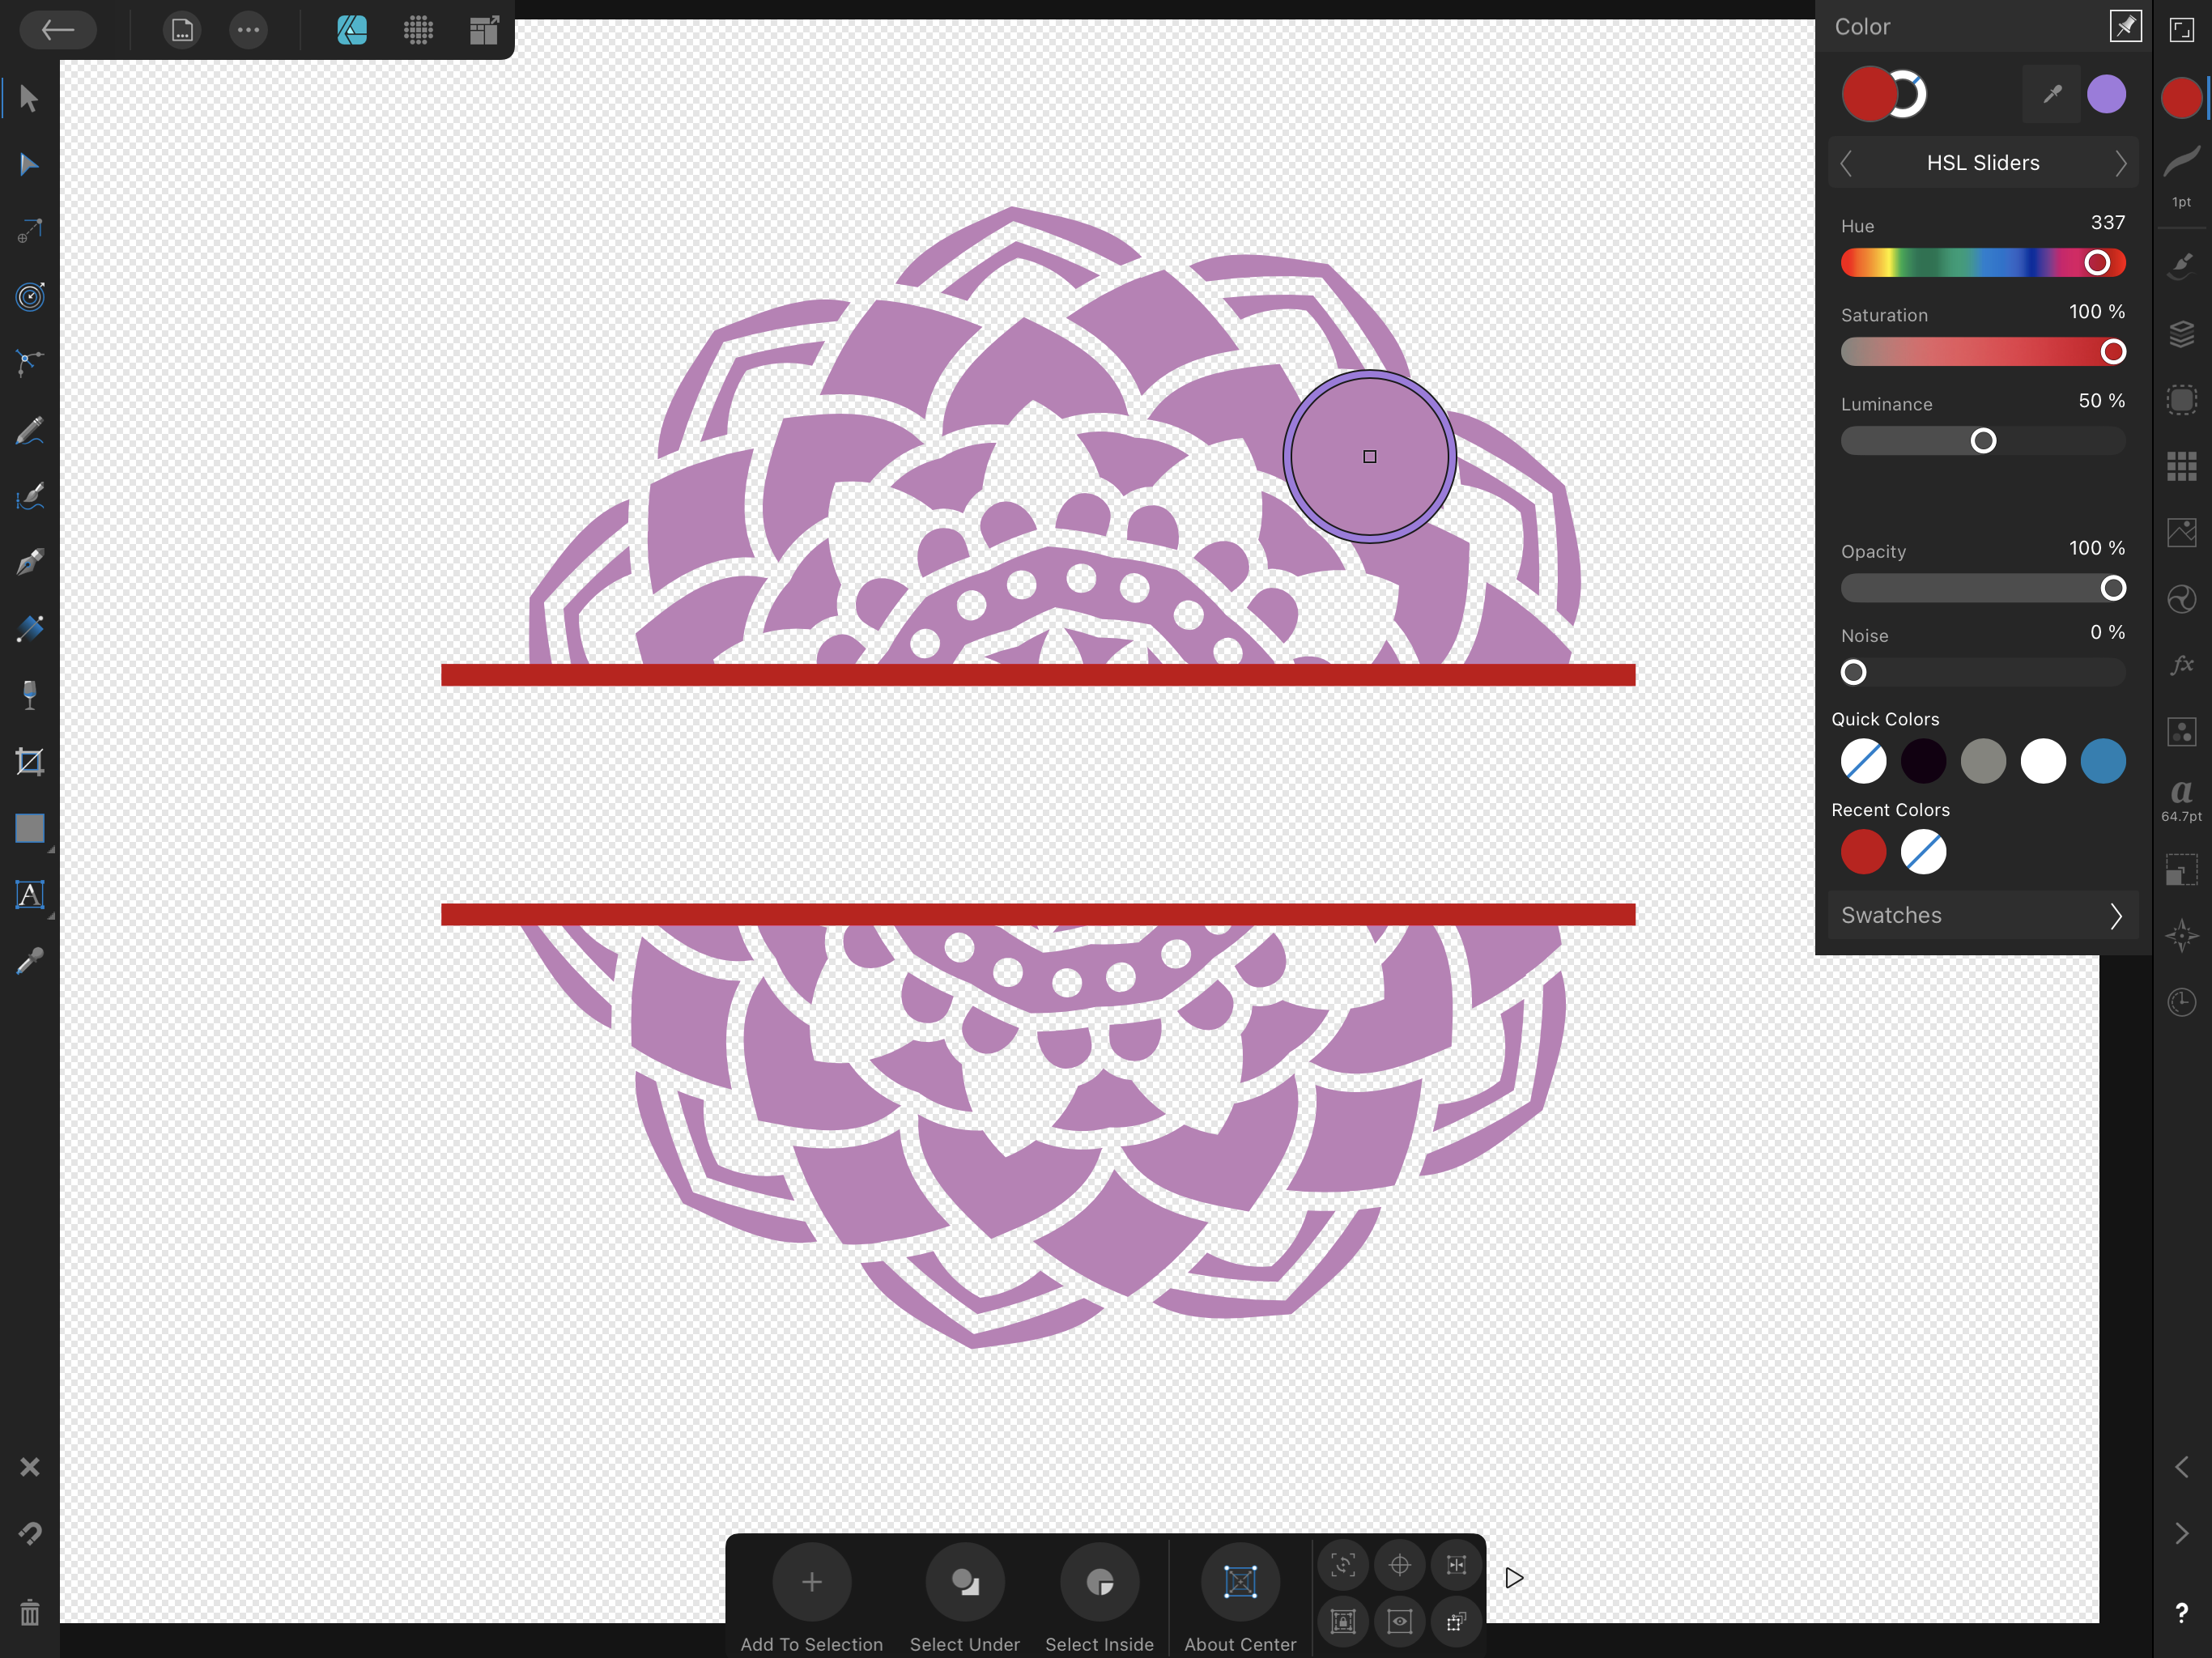
With both red rectangles selected, click on the purple dot to change the red rectangles to purple.
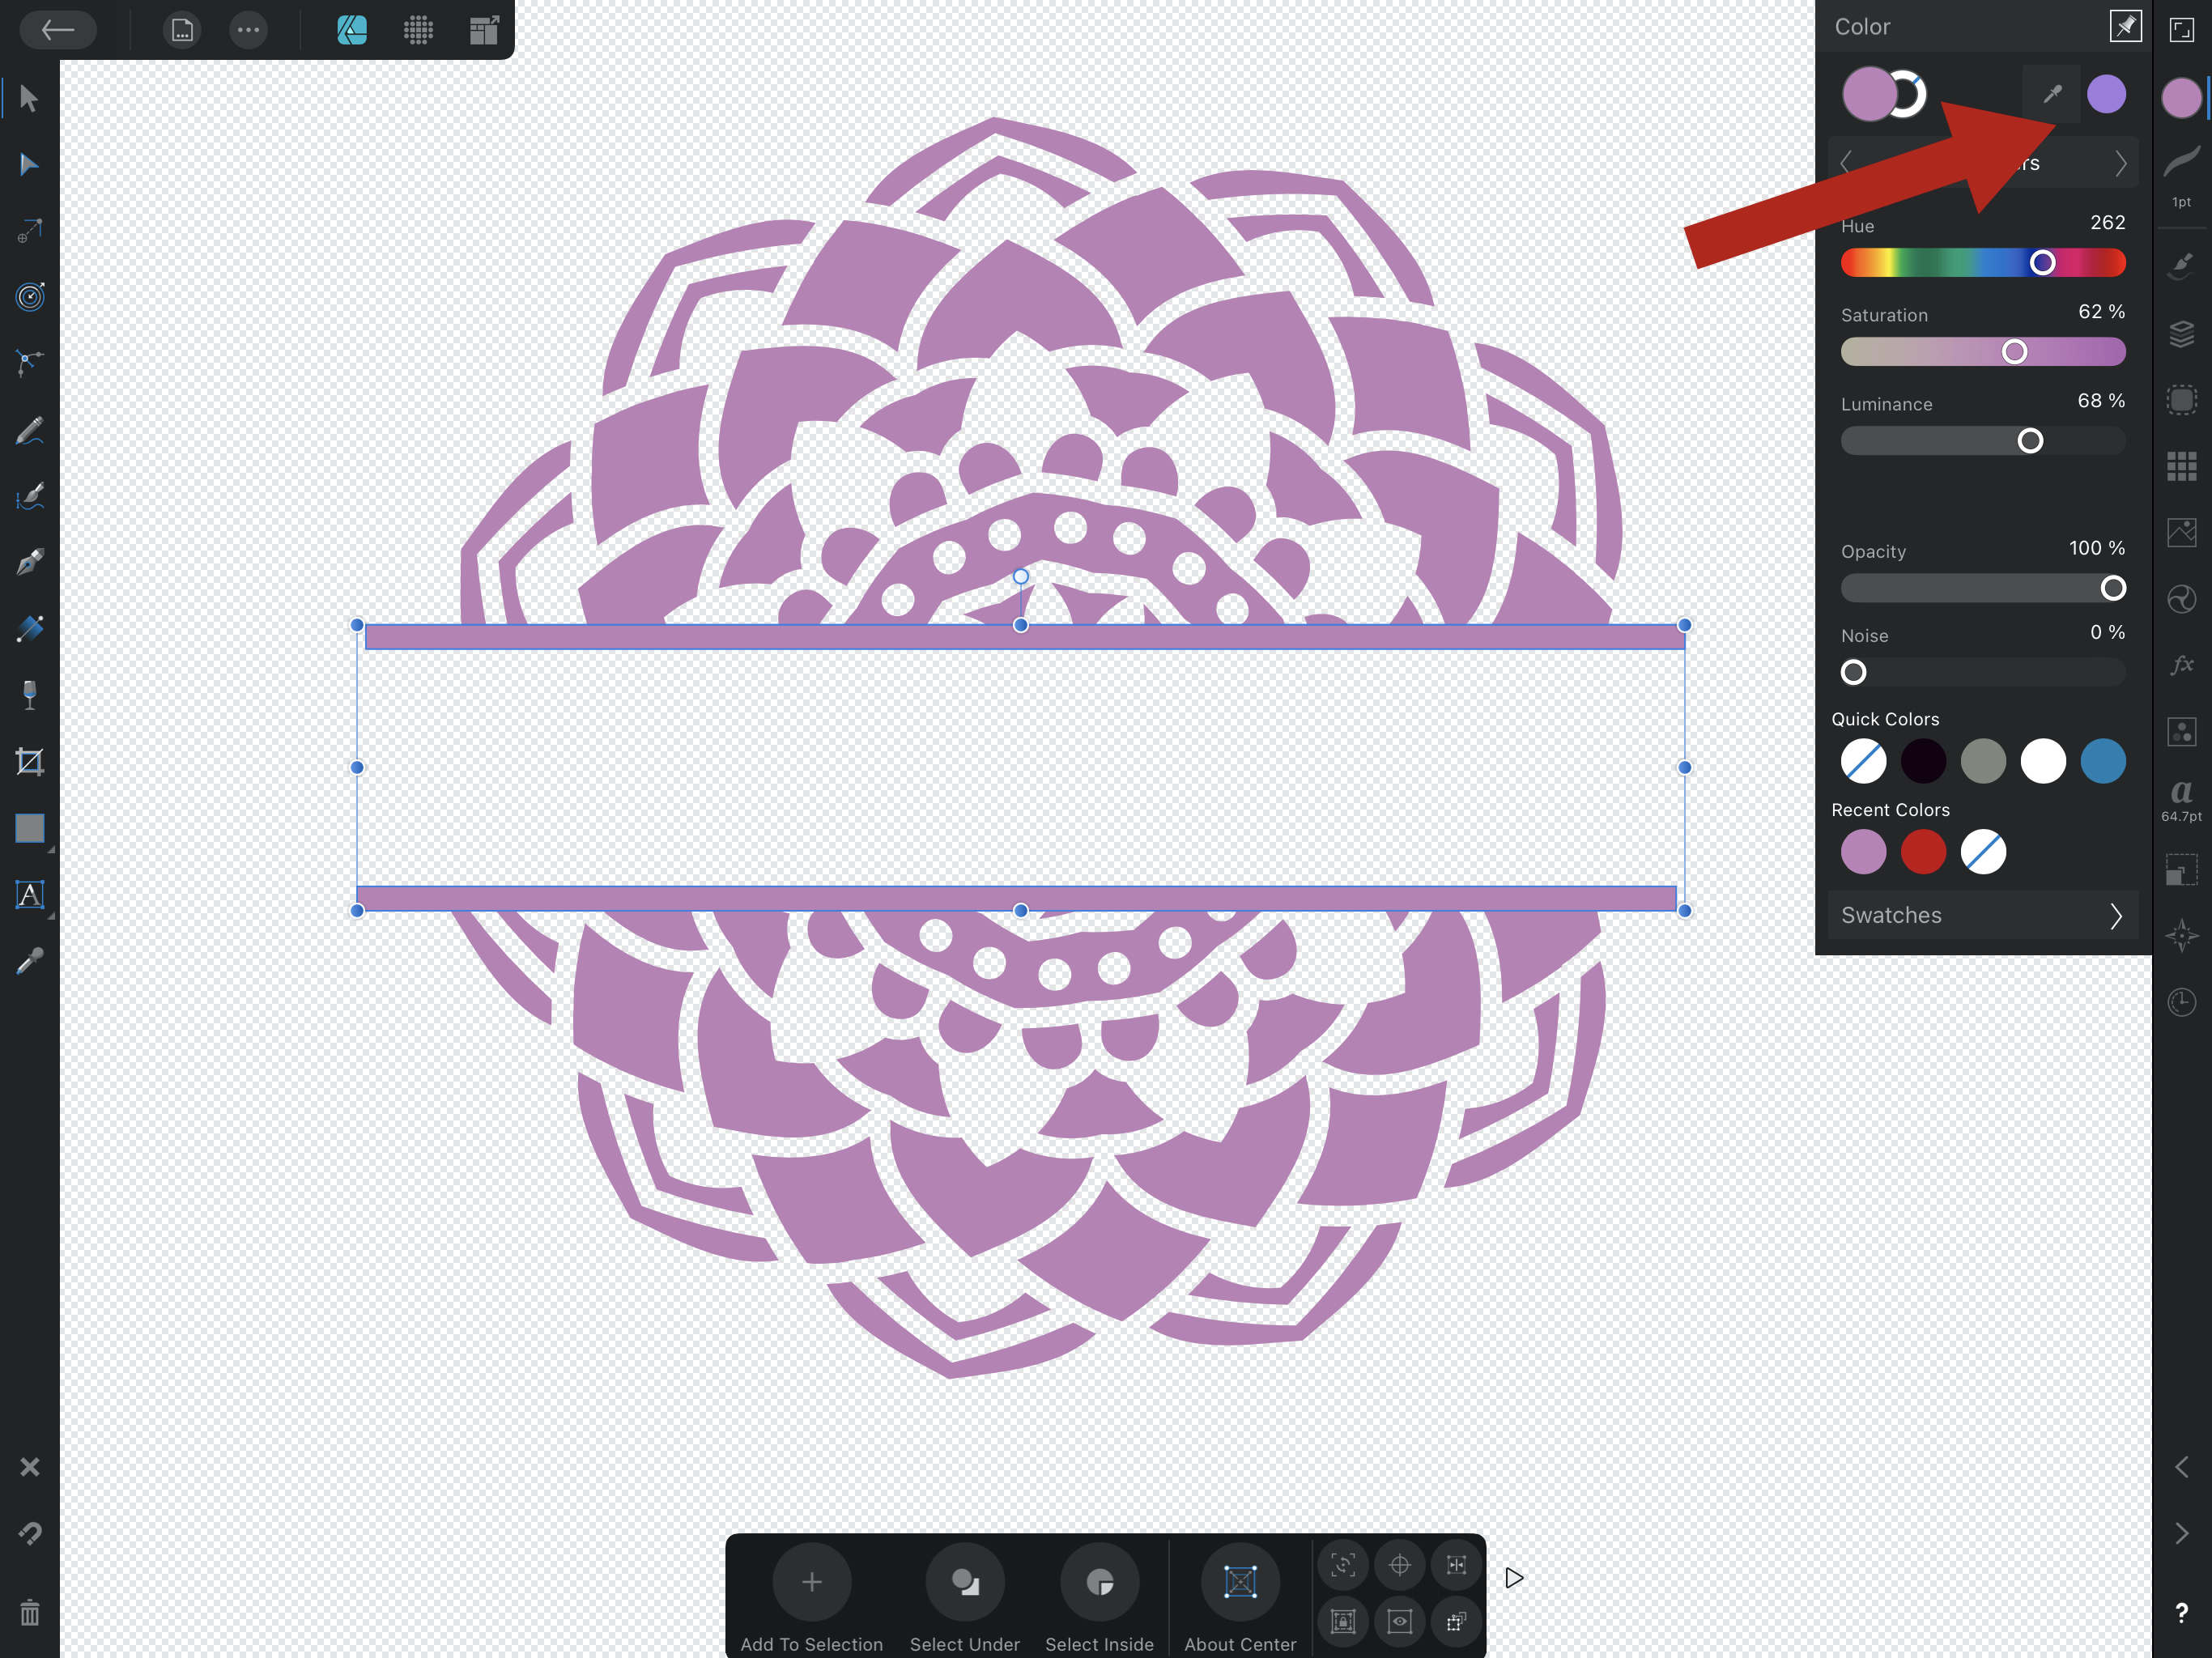
Drag your mouse or pencil around all three objects on the screen. And select the Transform Studio. You can locate this on the right toolbar, it is represented by an icon of a square with another square in the corner.
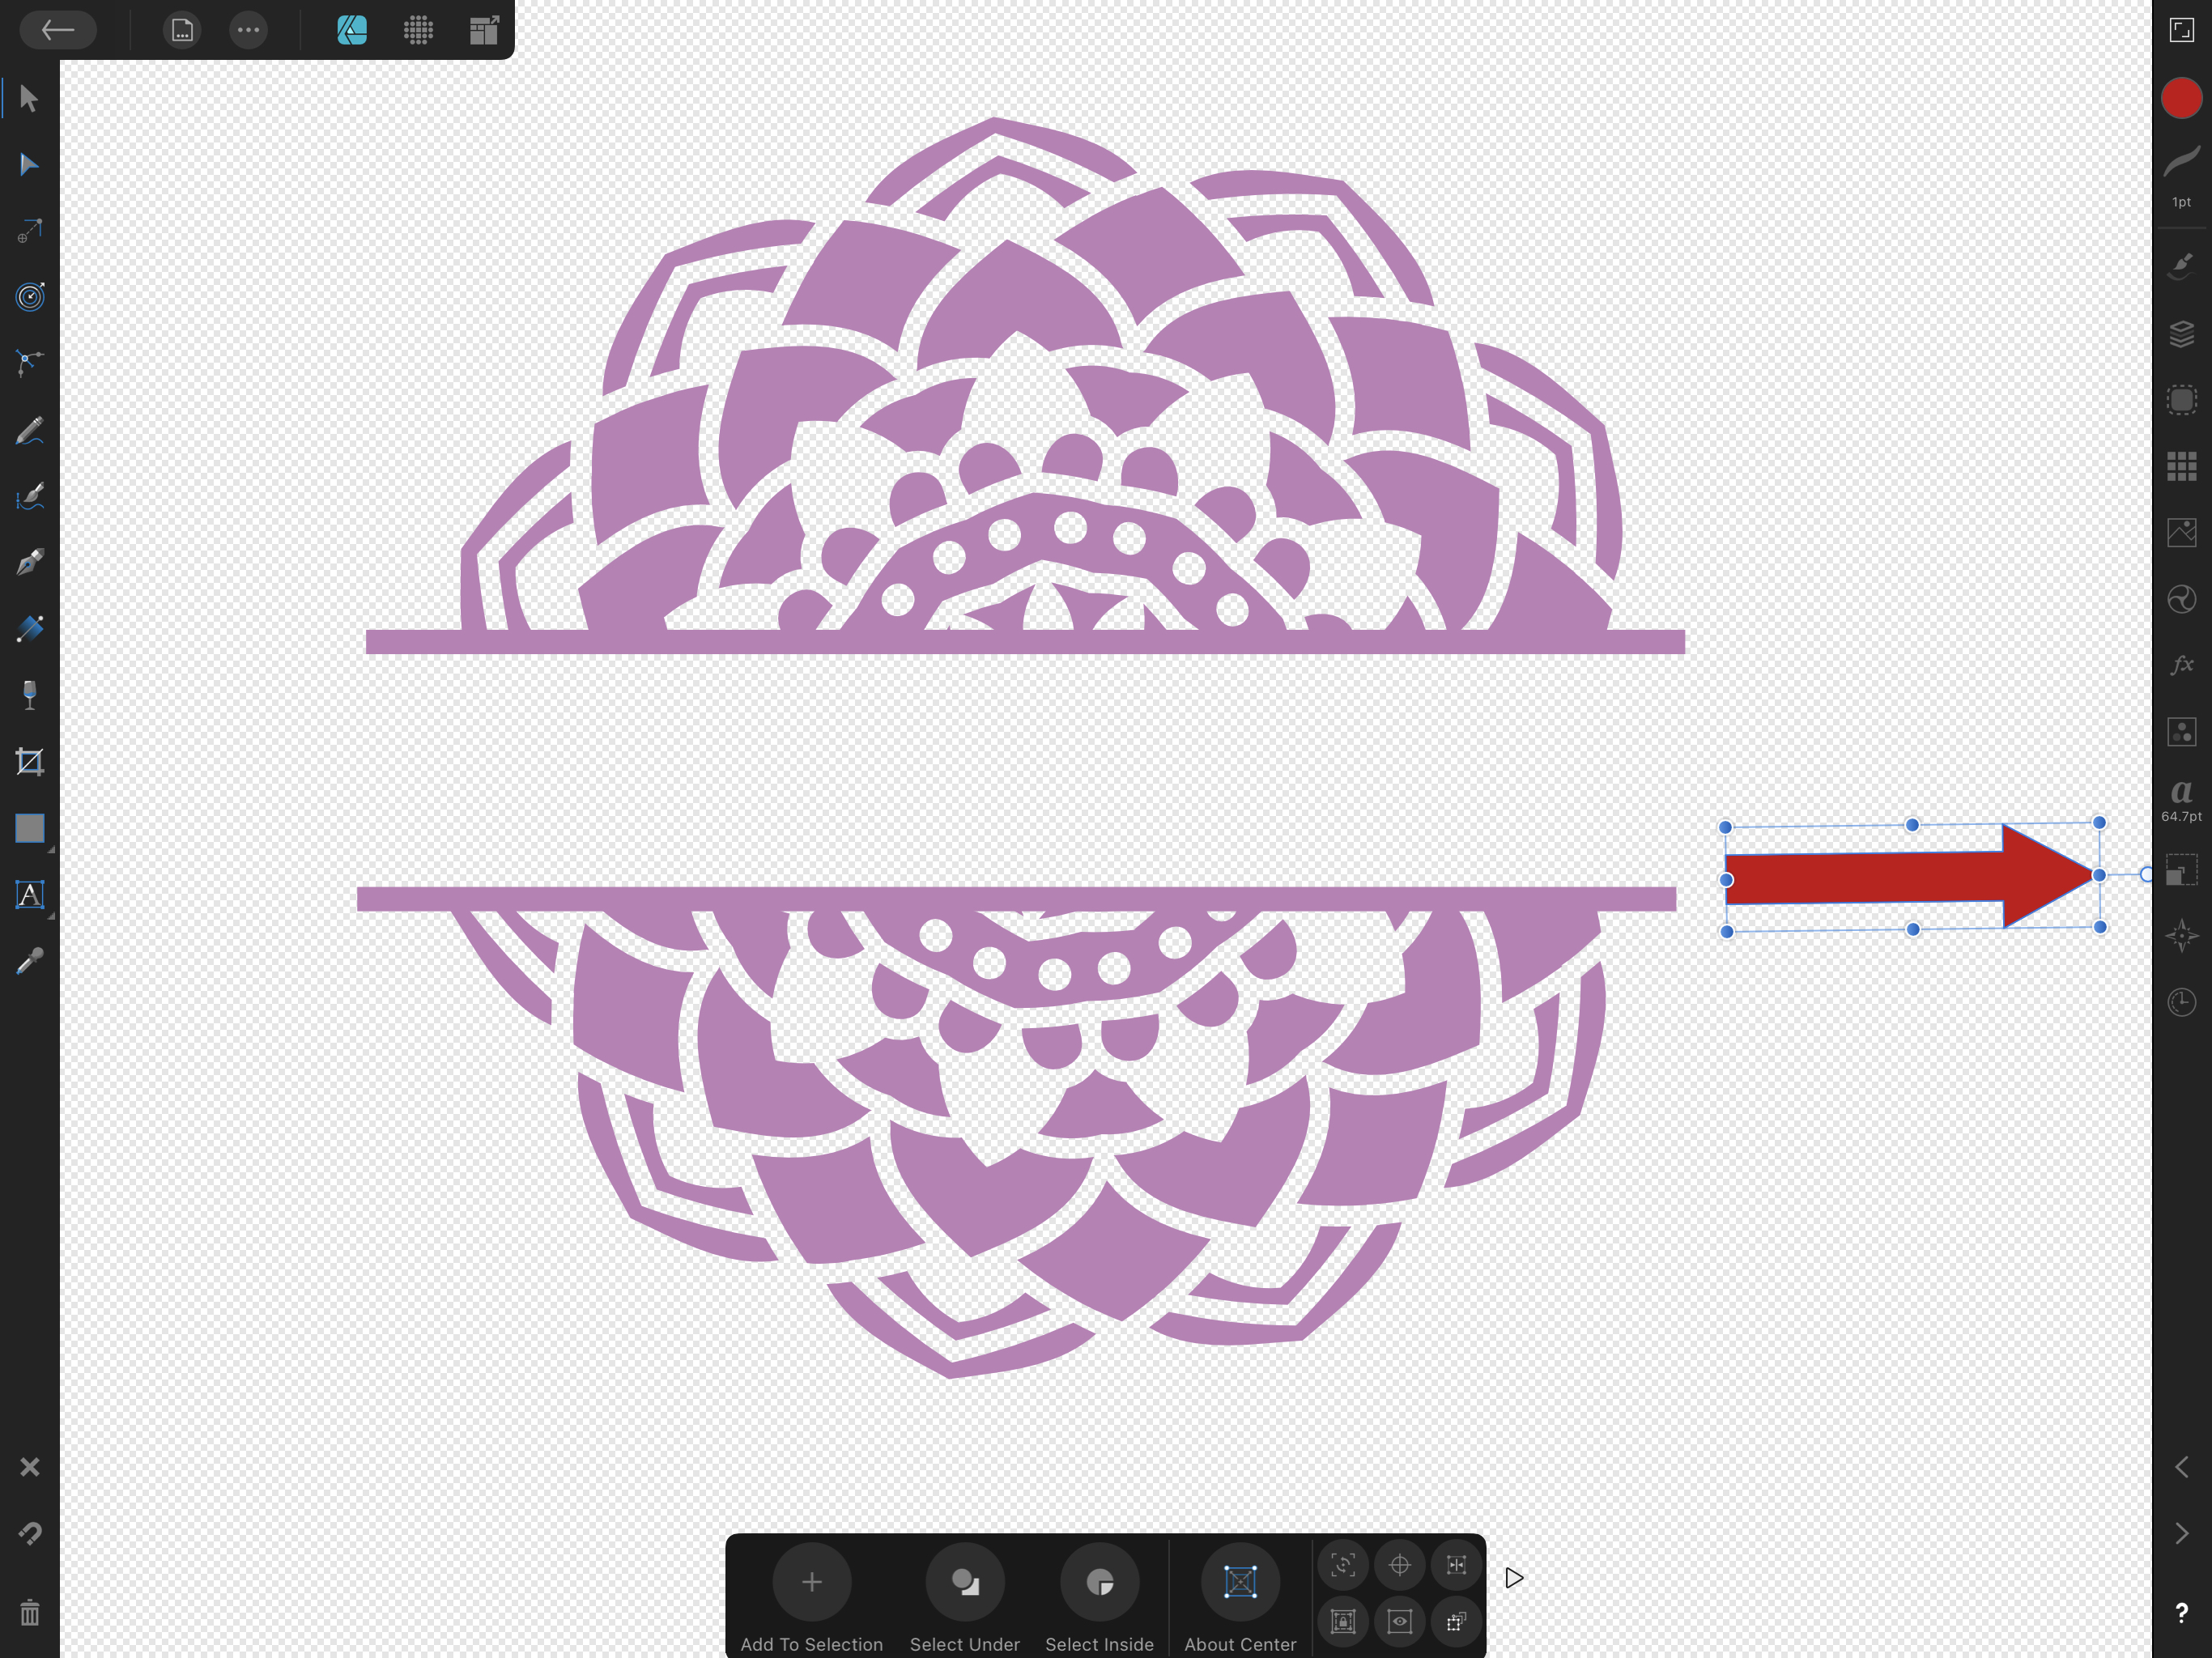
After selecting the Transform Studio at the bottom of the panel that opens is a selection called Alignment Options. Click on this option.
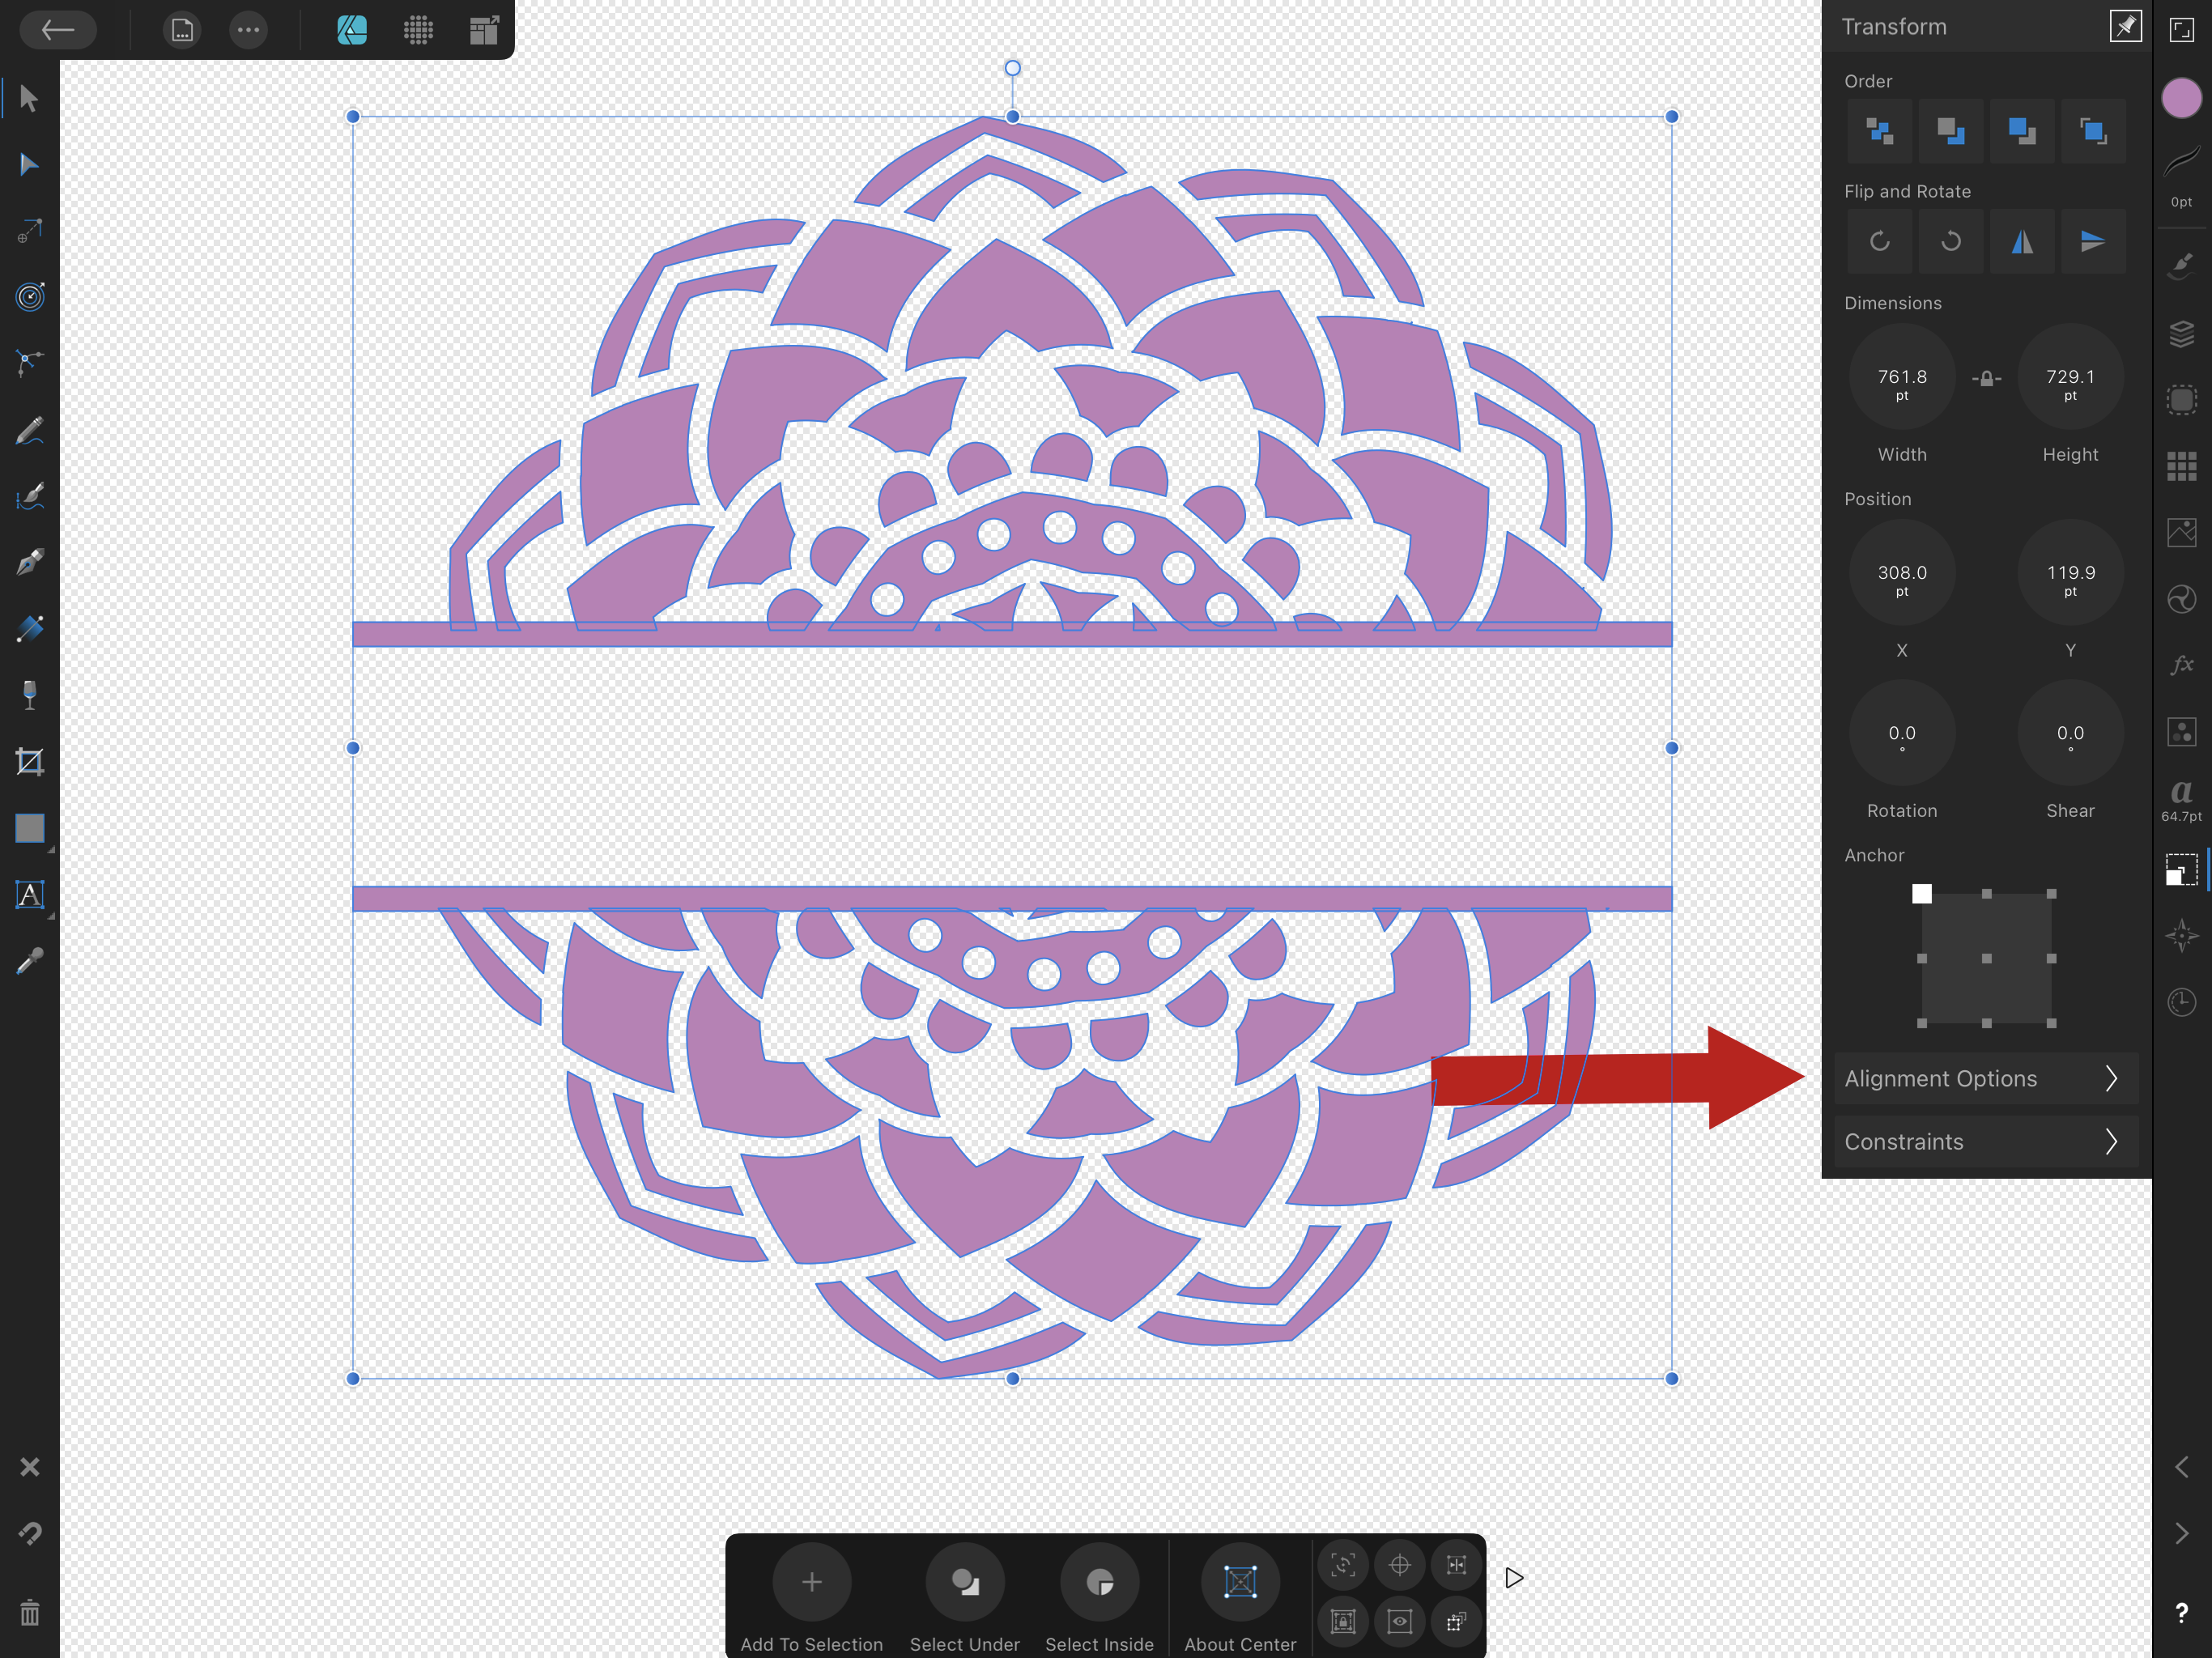
Make sure that you have selected all three elements of the design. There are several options in the Alignment Options. For this design, you will choose Align Horizontally at the top and select the icon that has two rectangles and a blue line going vertically down the center. This will ensure your design is centered.
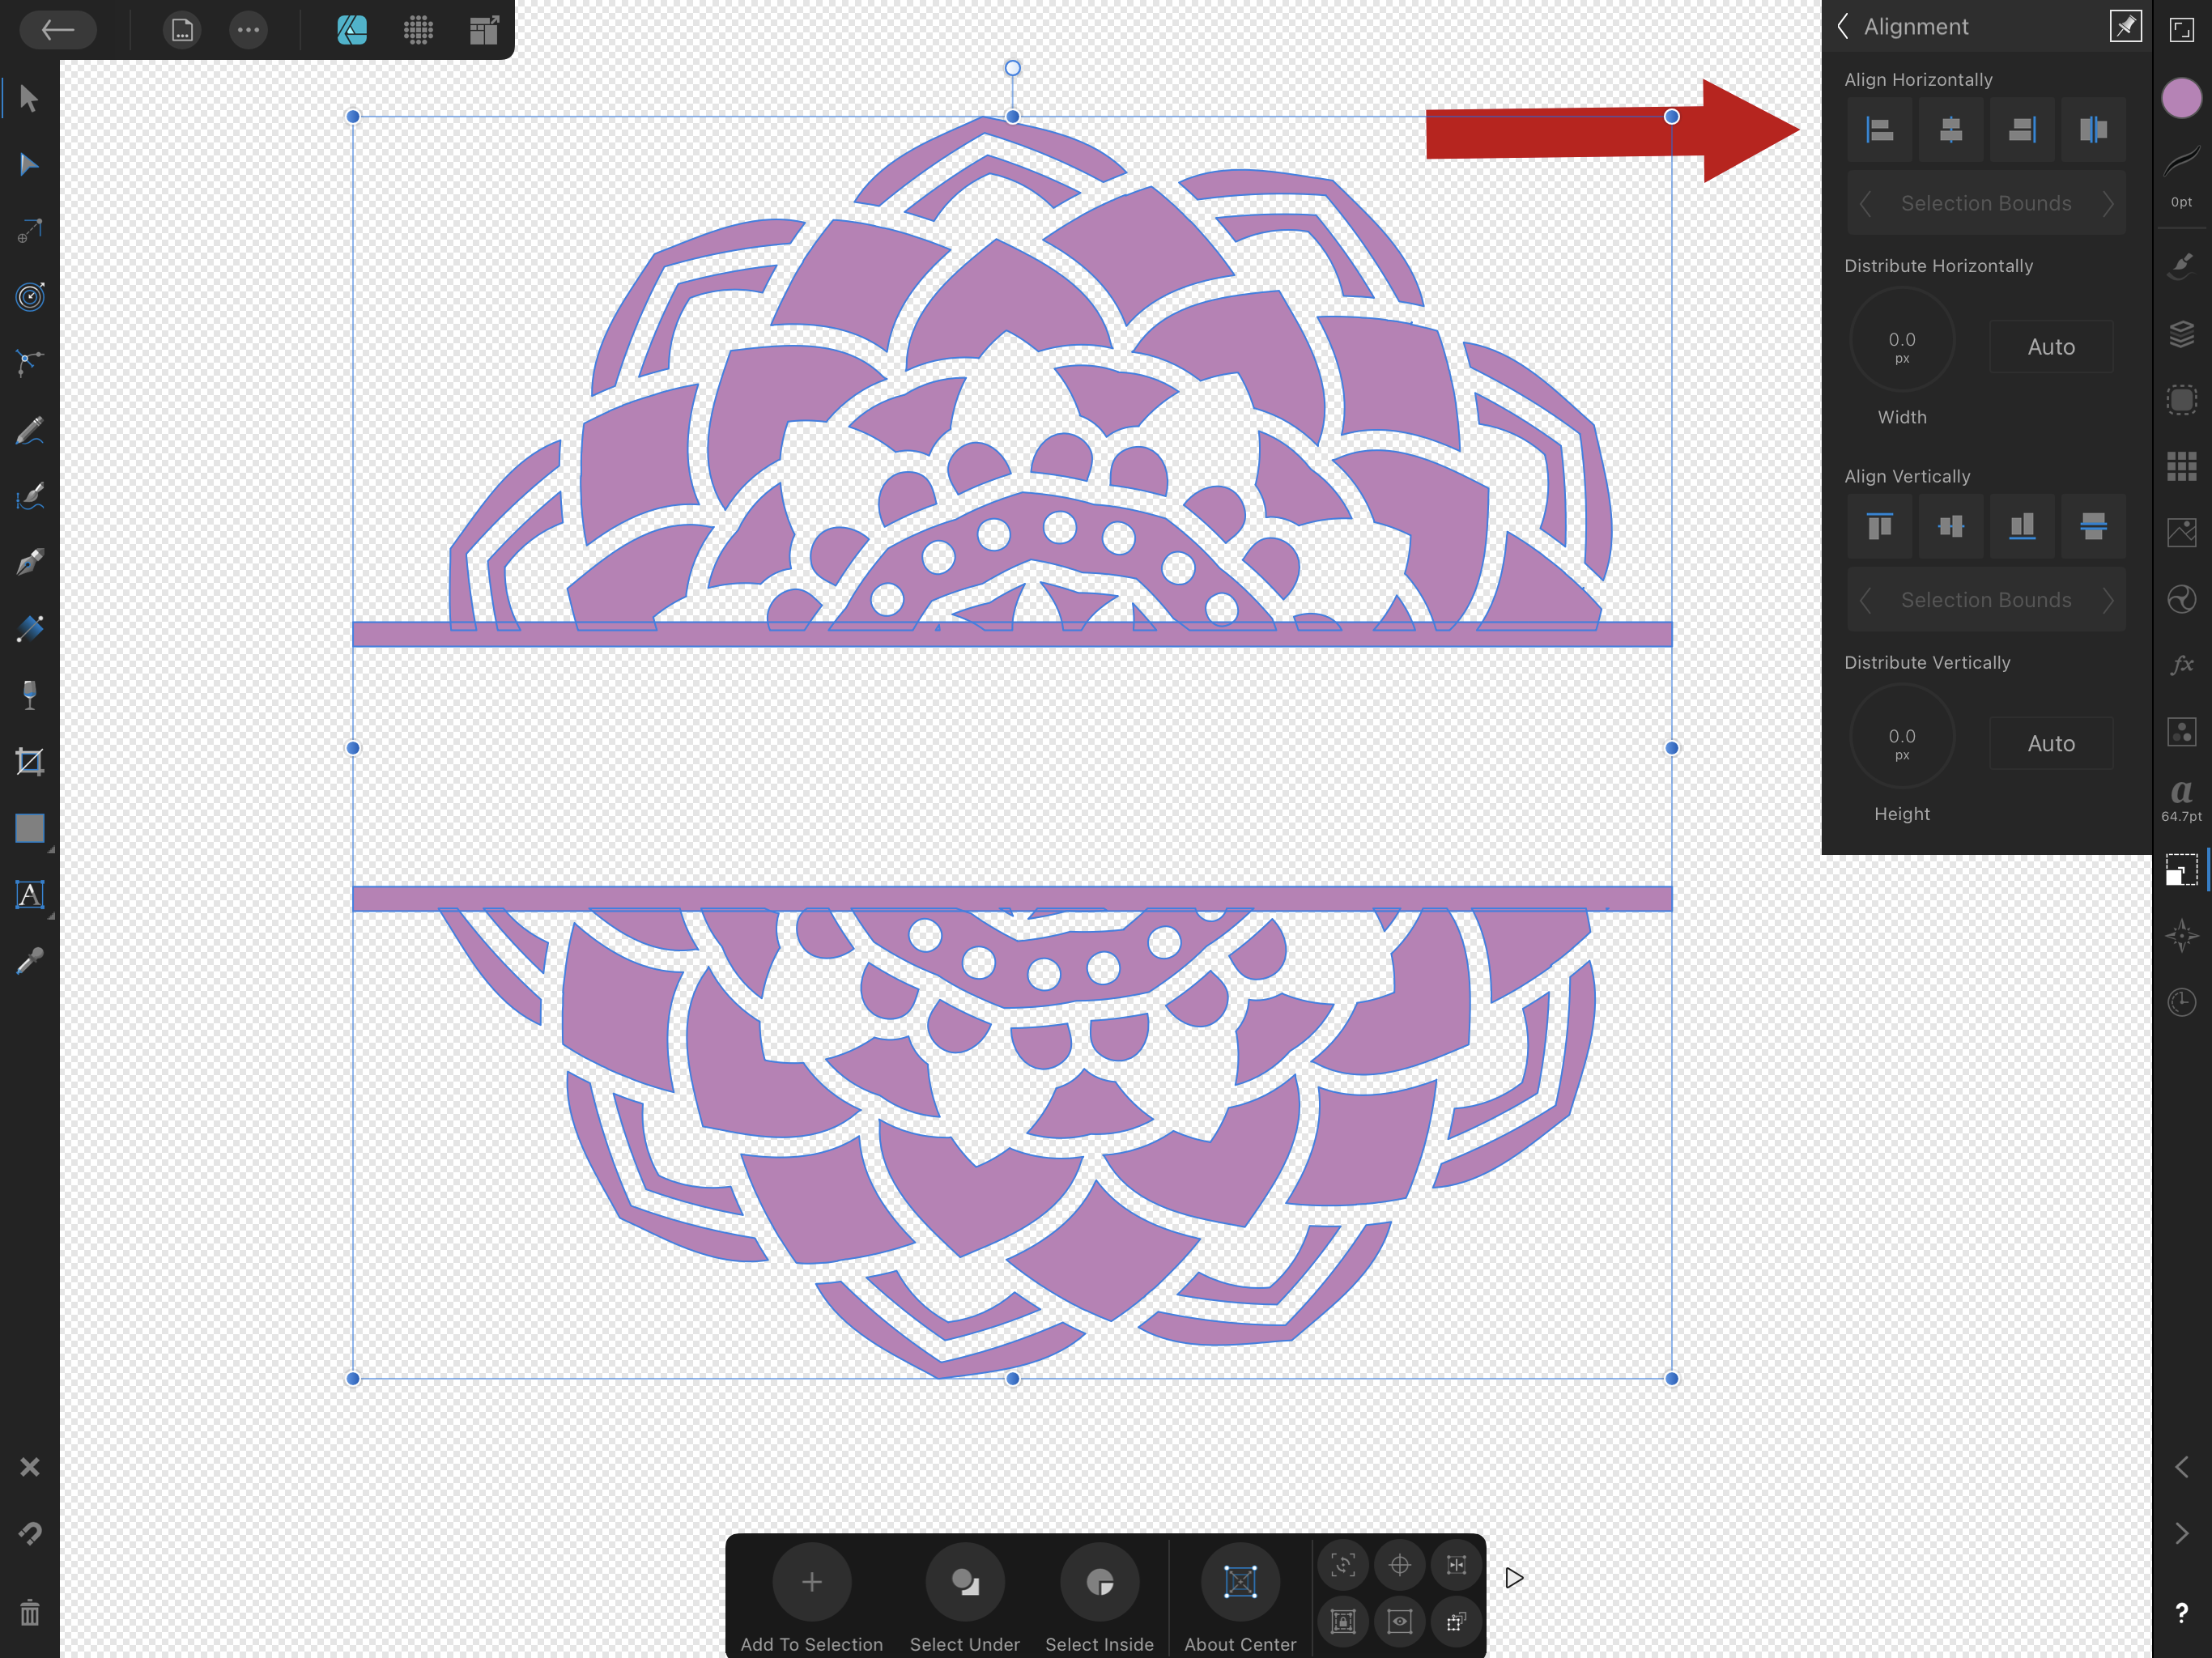
Again with all three elements selected. Hit the Edit Menu and select Add in the Geometry section of the menu.
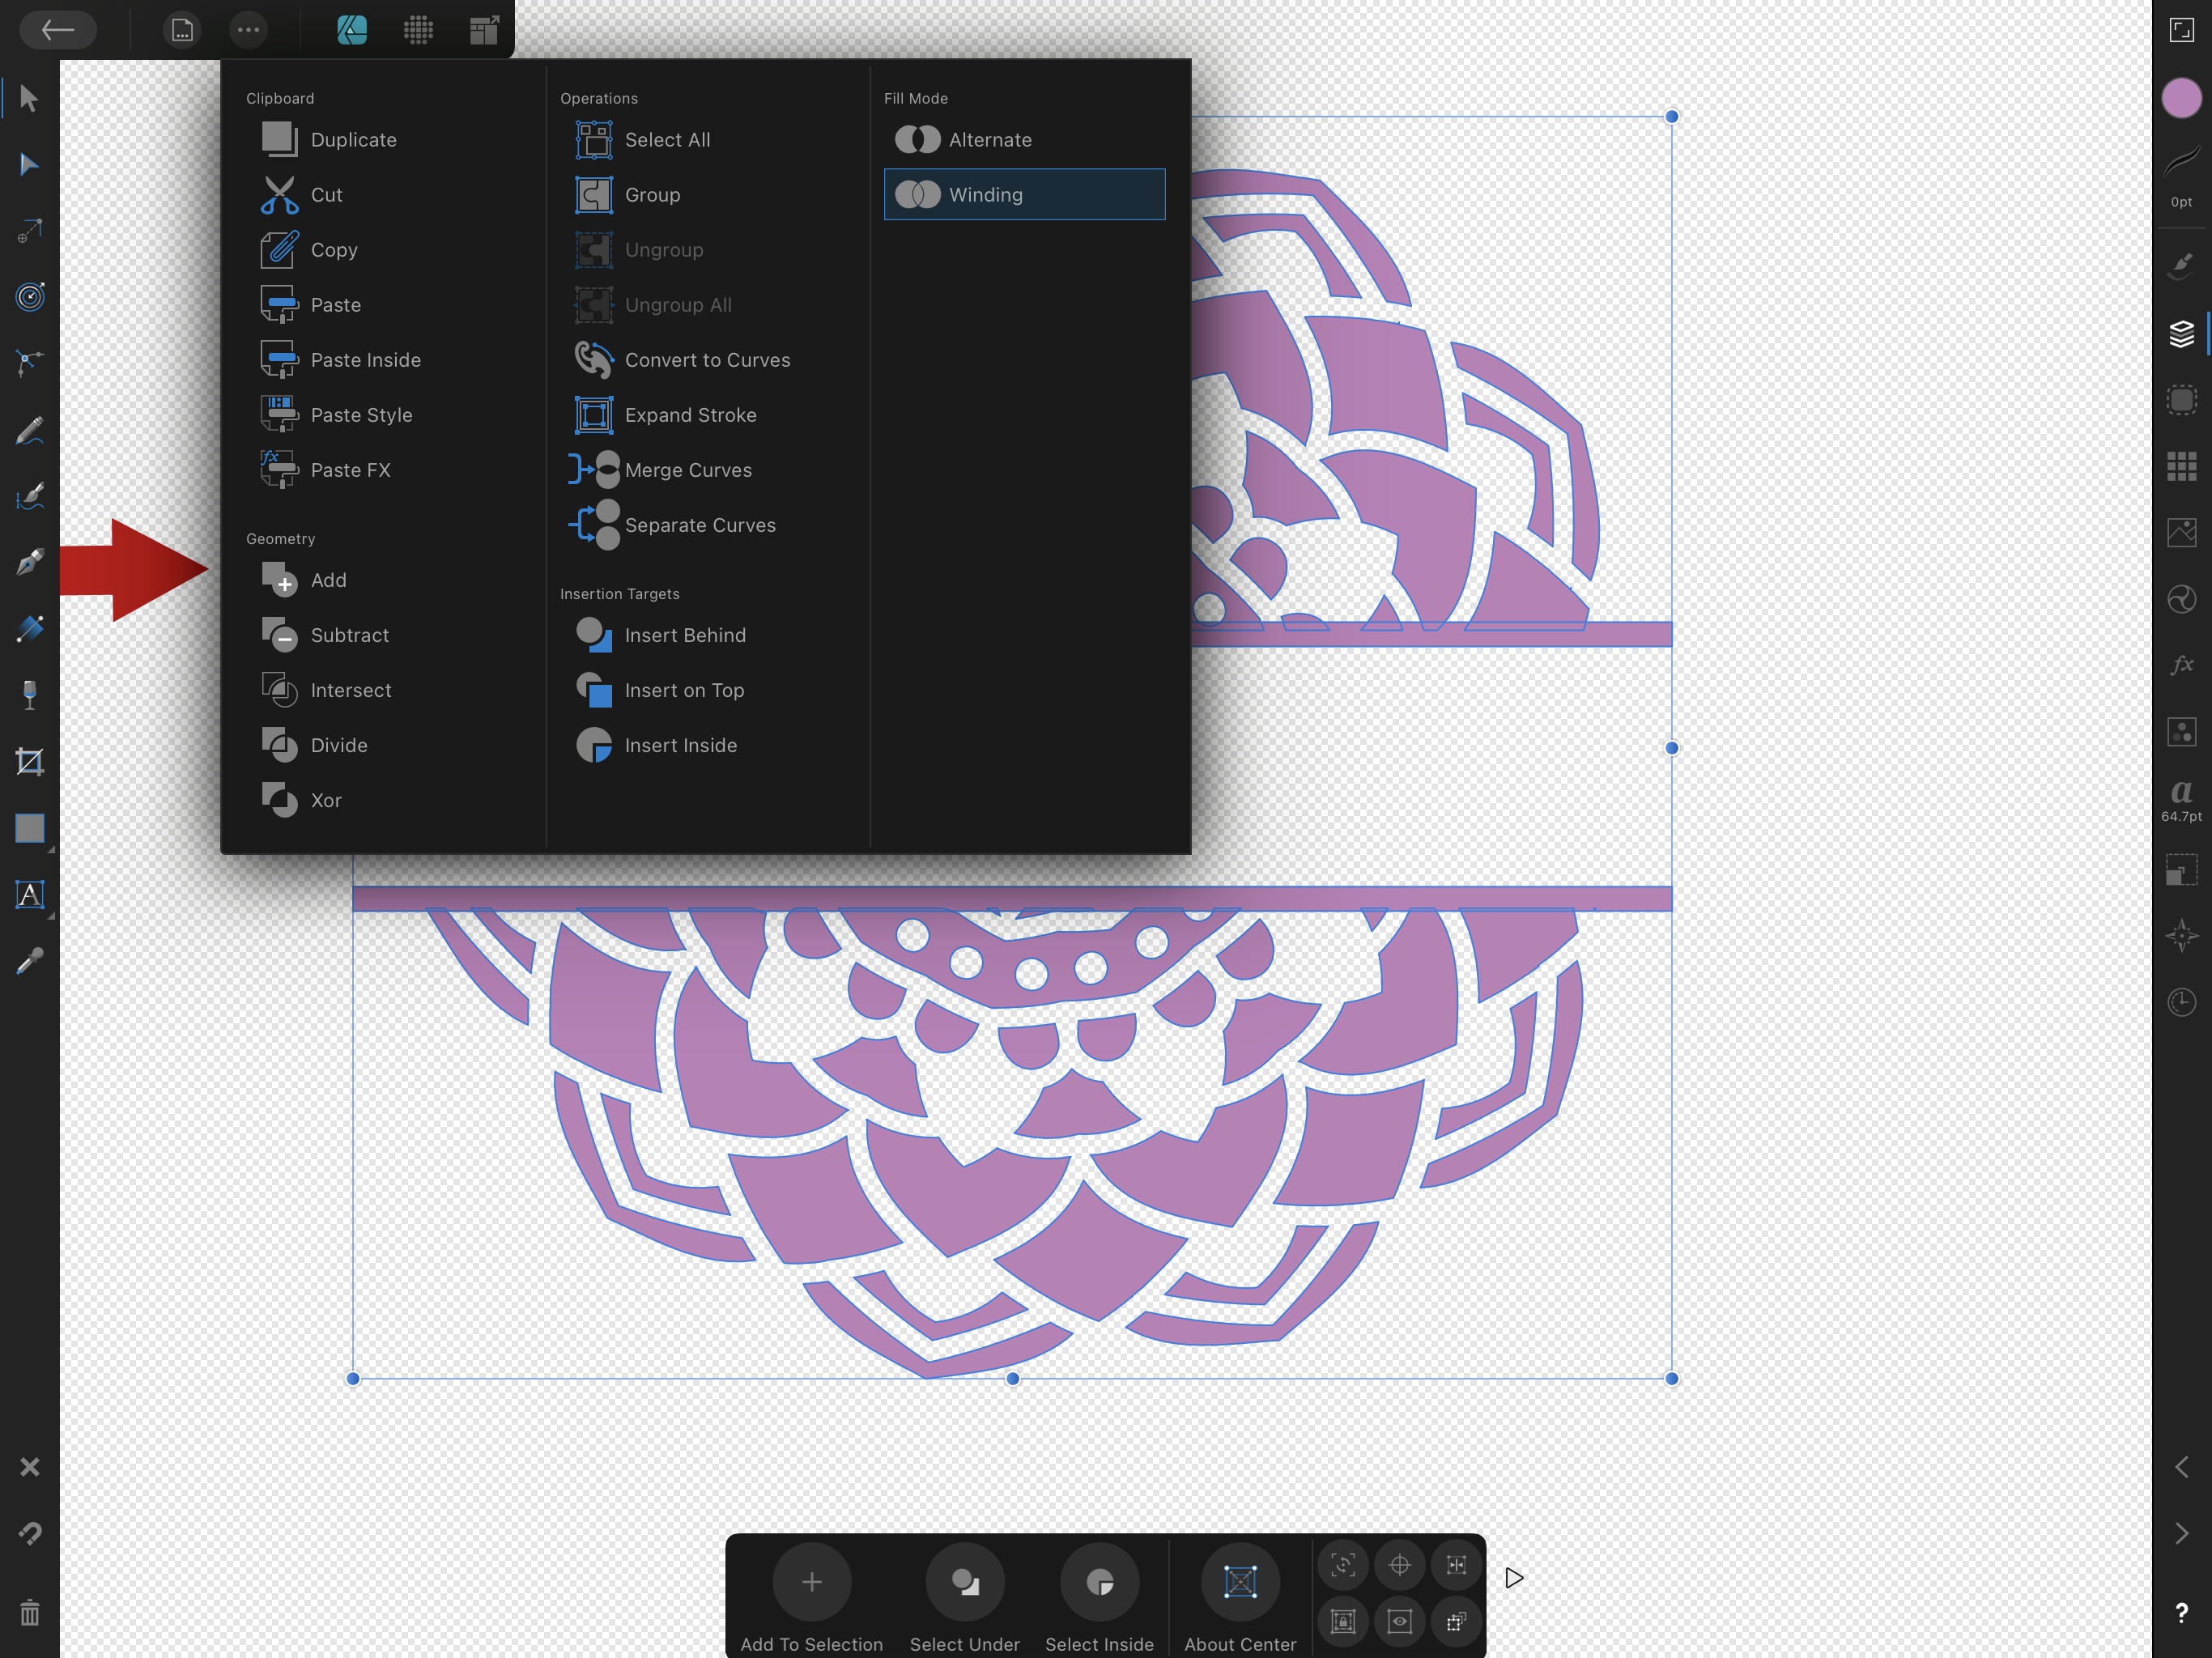
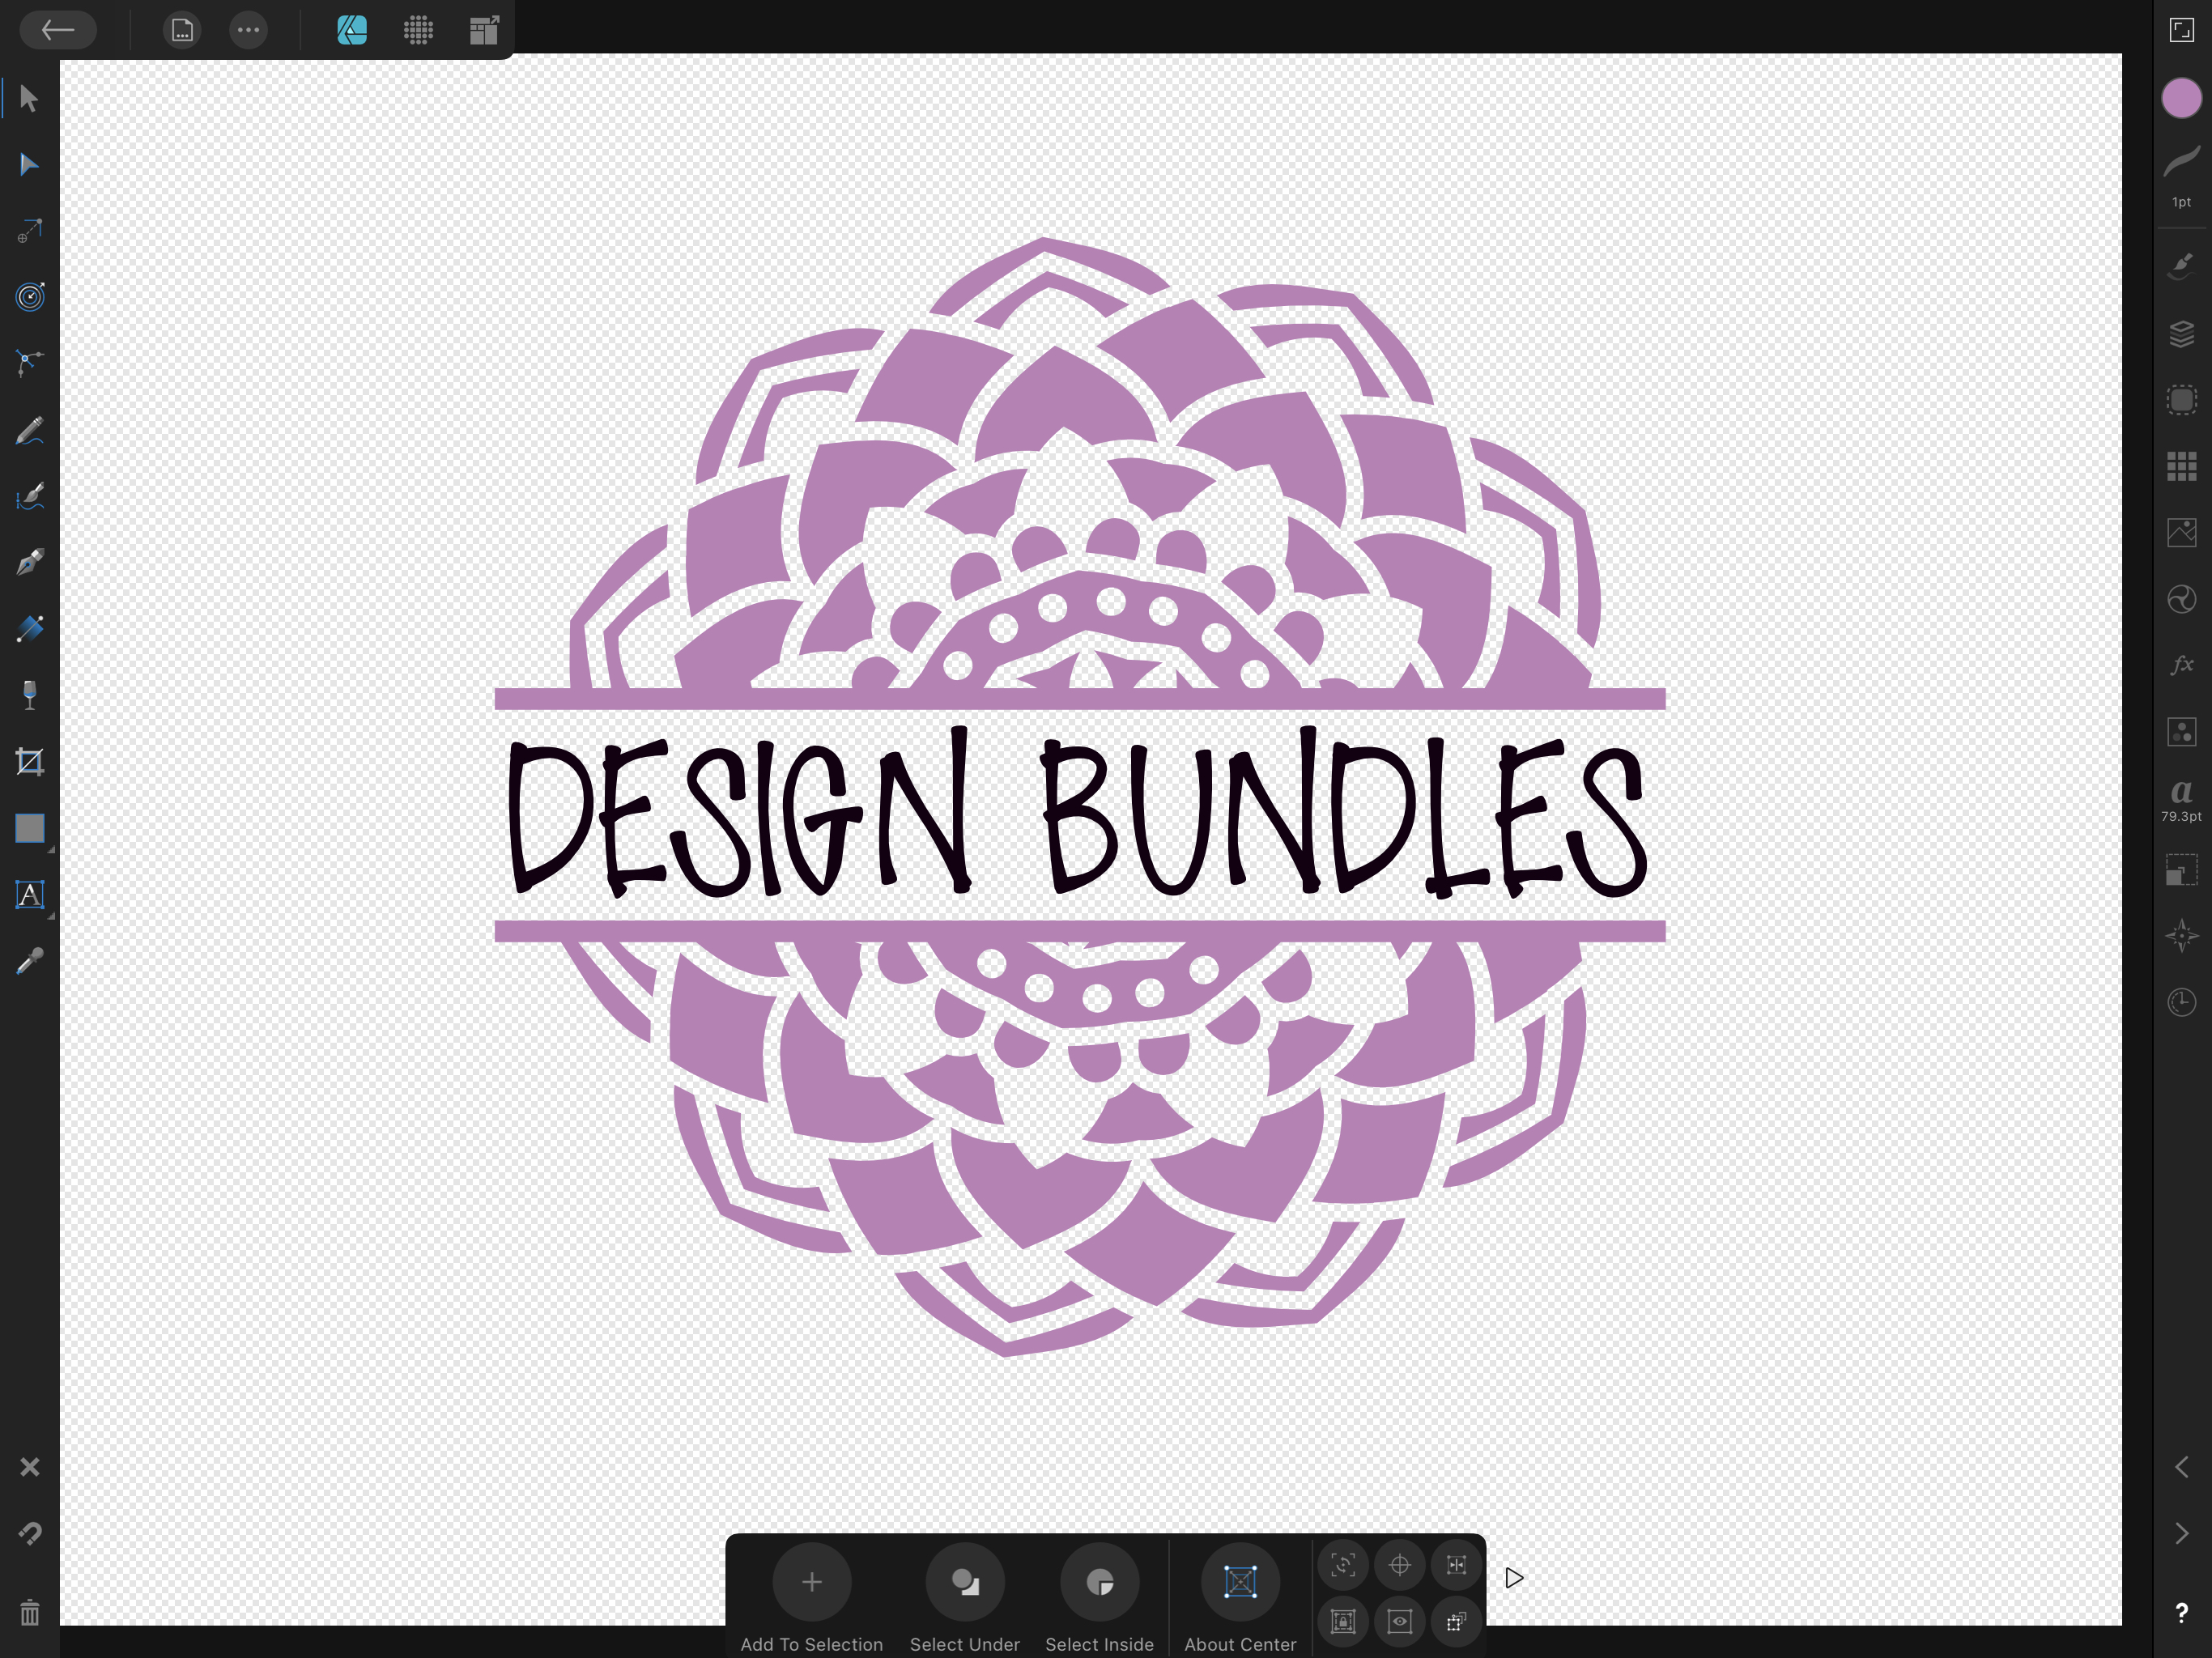
From here you can simply export the design as an SVG and upload it to your cutting software or you can add some more detail to it such as a name or address in the space.
I chose Scribbles font, from the Plus Section of Design Bundles to add some text to the design.
If you liked this tutorial, check out the rest of our Beginner Affinity Designer Tutorials such as how to access the Preferences Panel, how to make a gradient, and how to use the color picker.
In this tutorial, we'll be using a Mandala Keychain Svg Design which is featured in the Plus section of Design Bundles.
Step 1. Place the original image on your Affinity Canvas.
Start with your SVG on your canvas you can make it as large or small as you want. You can also resize it after you have finished working on the modifications.
Step 2. Draw a rectangle.
The shape tool is located on the left toolbar and will have an icon of the currently selected shape. Click on the shape and change the selection to the rectangle if it is not already selected. Then you can draw out your rectangle that will be used to split the design.
Step 3. Expand the rectangle.
Once you have the size of your rectangle pinned down you can click on the button on the bottom toolbar that is called "To Curves". This completes the operation to turn your drawing into an object that can be manipulated.
Step 4. Split the image.
Step 1. Select both objects.
Position your rectangle where you want your blank space to be and select both objects by dragging your mouse or pencil around both items.
Step 2. Subtract the rectangle
With both objects selected click on the Edit menu. You will find this at the top of the screen with an icon of 3 dots and then click on Subtract.
In basic terms, you are using the rectangle as a kind of cookie cutter to remove the part of the mandala that is under the rectangle.
Step 5. Add a finished border to the split design.
Step 1. Create a rectangle
Using the same steps as you did above create another rectangle and expand it. This time I chose to make it slightly wider than the mandala design and skinny to create a border.
Step 2. Duplicate the rectangle
Click on the Edit menu at the top of the screen and select duplicate. This will create an exact copy of your rectangle on top of the original.
Step 3. Place the Border
Take your pencil or mouse and drag one of the rectangles to the top of your blank space and the other one to the bottom of your blank space. Don't worry about them not being aligned, we can take care of that in the next step. Make sure that both of the rectangles are very slightly overlapping the mandala.
Step 6. Use the color picker to change the colors
Locate the Color Studio on the right side of the screen. It is represented by an icon of a dot filled with the currently selected color. Click on it to open more options.
Select the icon that looks like an eyedropper tool and drag it over an area on the main image to select that color as the active color.
With both red rectangles selected, click on the purple dot to change the red rectangles to purple.
Step 7. Align the border
Step 1. Locate the Transform Studio
Drag your mouse or pencil around all three objects on the screen. And select the Transform Studio. You can locate this on the right toolbar, it is represented by an icon of a square with another square in the corner.
Step 2. Select the Alignment Tool
After selecting the Transform Studio at the bottom of the panel that opens is a selection called Alignment Options. Click on this option.
Step 3. Align all three parts of the design
Make sure that you have selected all three elements of the design. There are several options in the Alignment Options. For this design, you will choose Align Horizontally at the top and select the icon that has two rectangles and a blue line going vertically down the center. This will ensure your design is centered.
Step 8. Combine the design
Again with all three elements selected. Hit the Edit Menu and select Add in the Geometry section of the menu.
Step 9. Export or add to the design
From here you can simply export the design as an SVG and upload it to your cutting software or you can add some more detail to it such as a name or address in the space.
I chose Scribbles font, from the Plus Section of Design Bundles to add some text to the design.
If you liked this tutorial, check out the rest of our Beginner Affinity Designer Tutorials such as how to access the Preferences Panel, how to make a gradient, and how to use the color picker.
Related Tutorials
Affinity Tutorials
How to Make an SVG in Affinity Designer
Learn how to create SVG files in Affinity Designer with this tutorial.
Affinity Tutorials
How to Make GIFs Using Affinity Designer
In just 3 easy steps you will learn how to create animated GIFs using Affinity Designer.
Affinity Tutorials
How to Make a Seamless Pattern in Affinity Designer
In this tutorial you will learn how create a Seamless Pattern in Affinity Designer.
Affinity Tutorials
How to Make a Gradient in Affinity Designer
In this tutorial, learn how to make a gradient background in Affinity Designer.
Affinity Tutorials
How to Make a Flat Character in Affinity Designer
Learn how to make a flat character in Affinity Designer with this step by step tutorial.
Affinity Tutorials