By Design Bundles
Cricut Tutorials6 min
How to Shadow an Image in Cricut Design Space
Today we’ll learn how to manually create a shadow around our image in the Cricut mobile app.
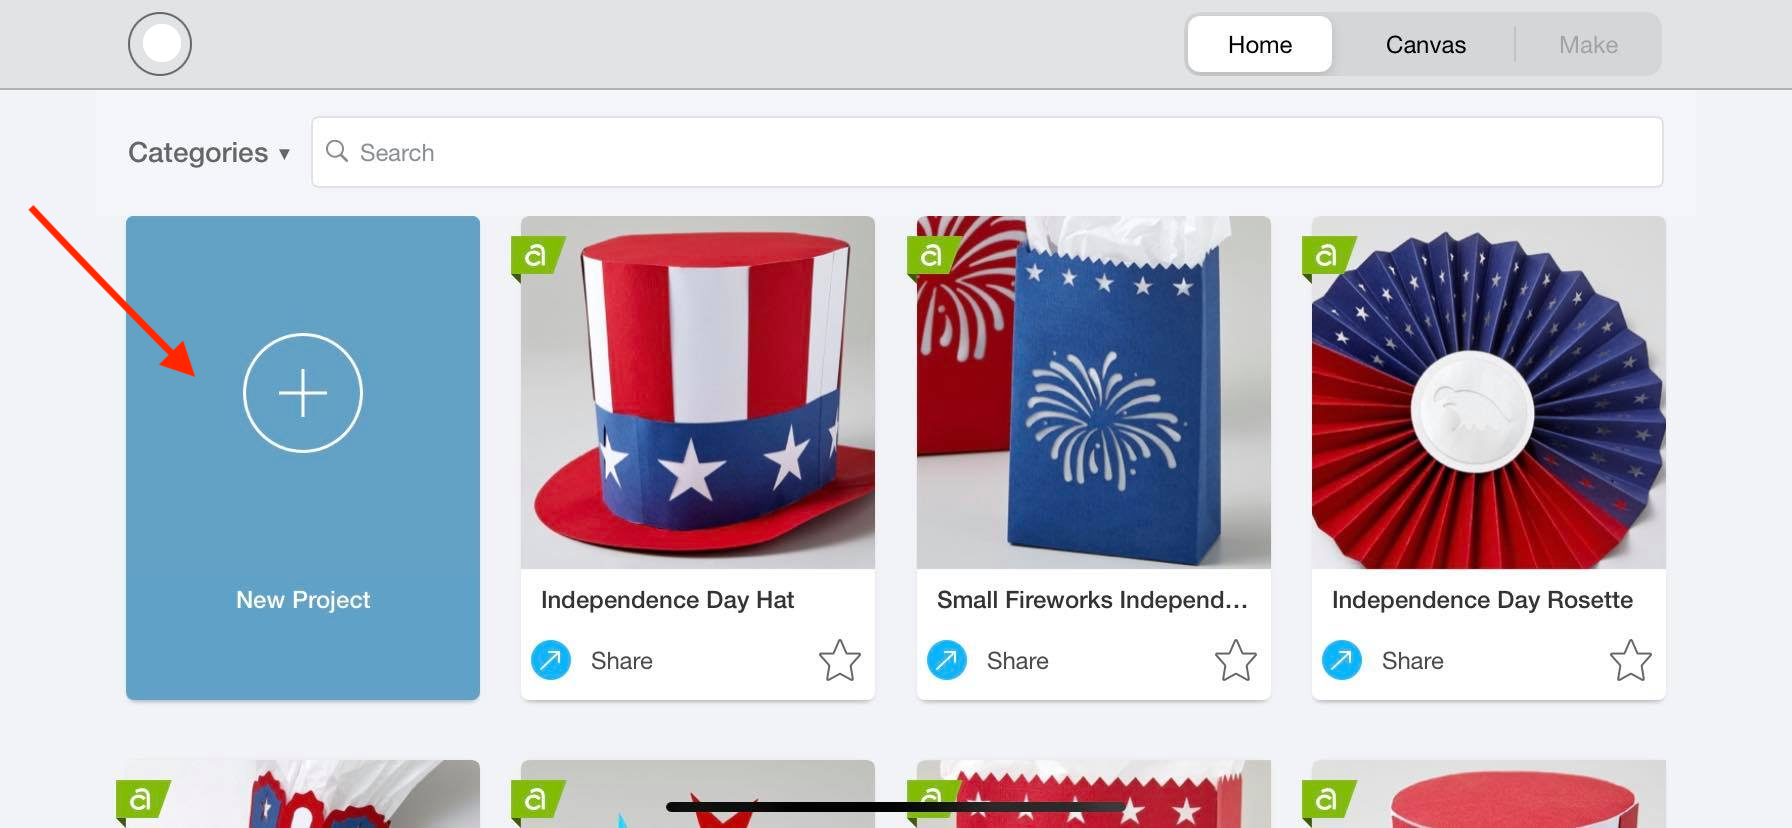
Open Cricut Design Space and create a new project. You can simply do this by clicking on the blue rectangle box that is labeled New Project.
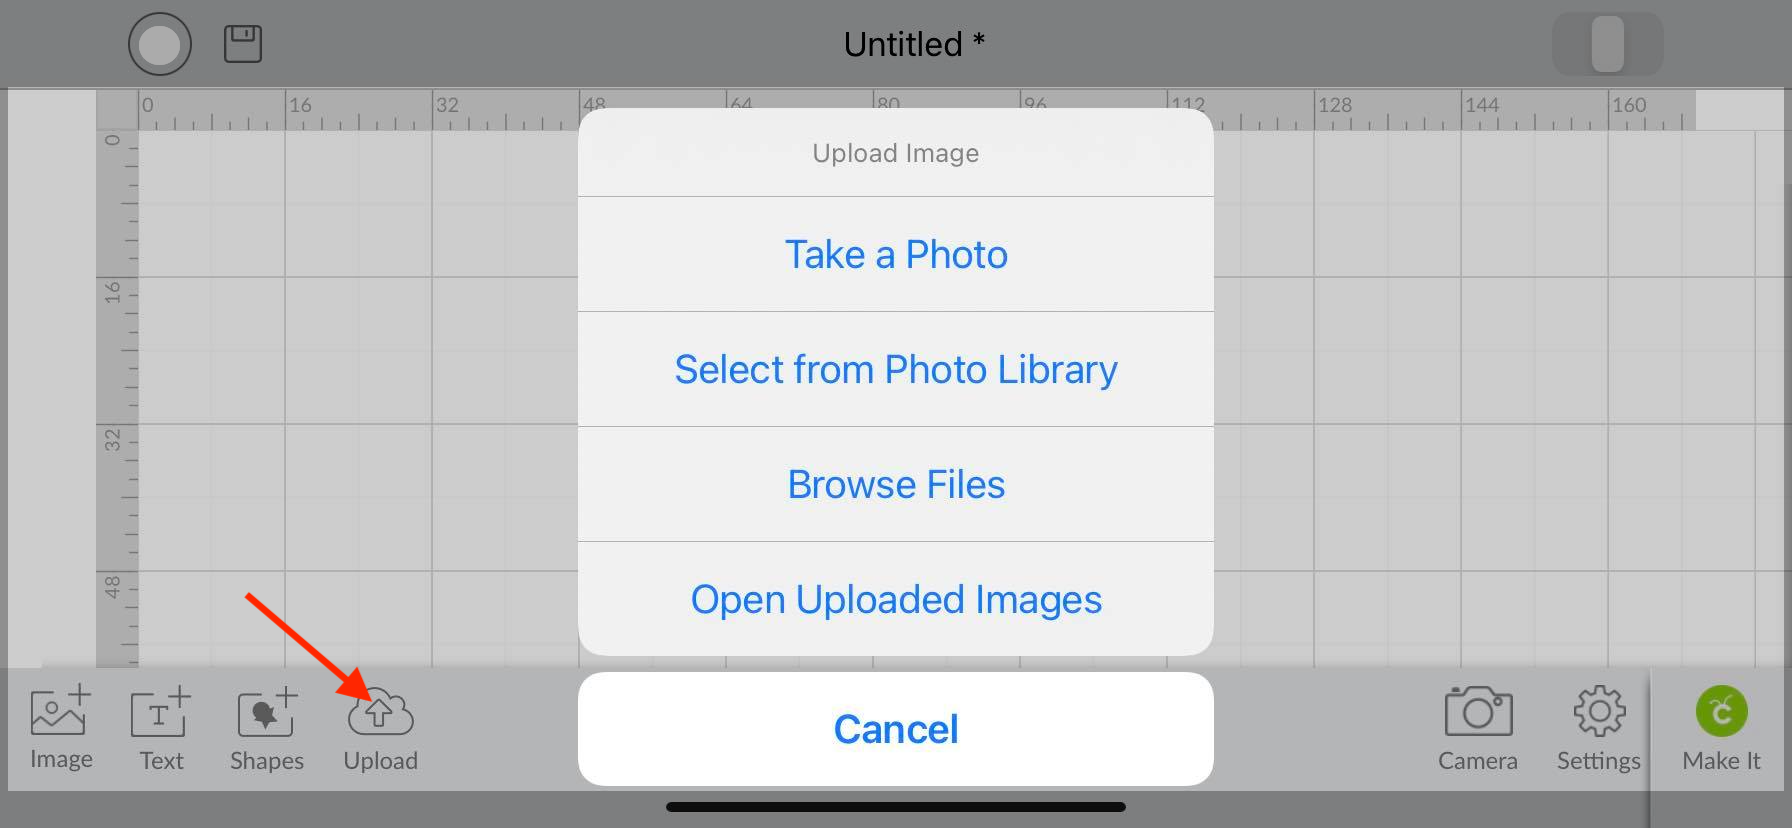
First, you will need to upload your images to Cricut Design Space app. Today we will use a cheetah illustration to use in our project.
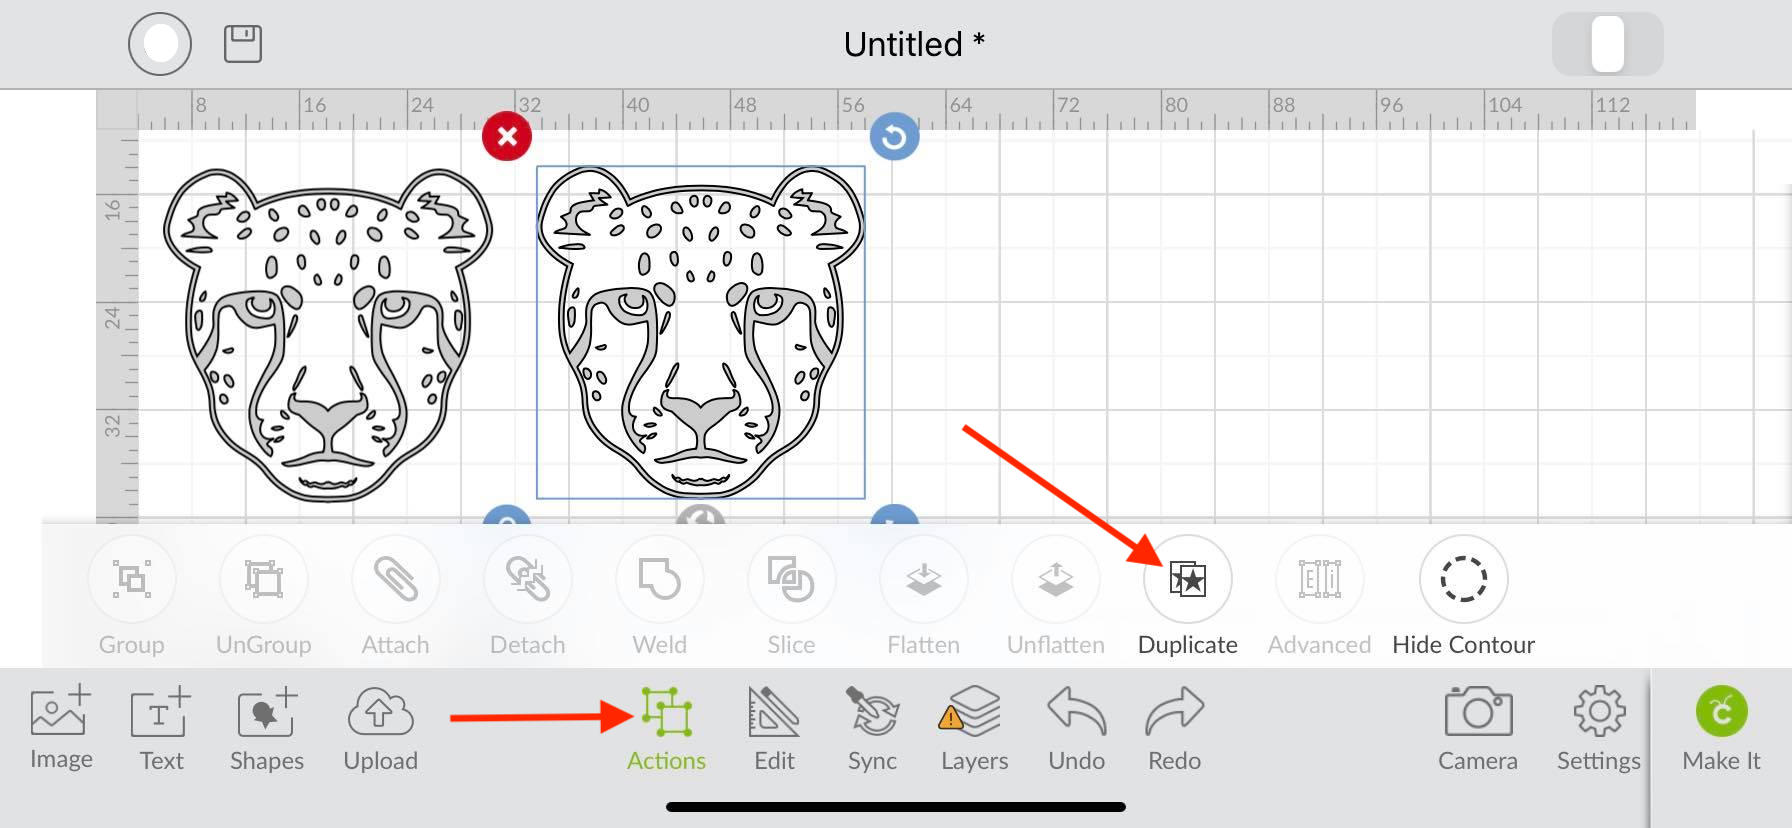
After, select your image and duplicate. Click on the Action icon and then click Duplicate on the pop up toolbar. This will become your shadow layer.
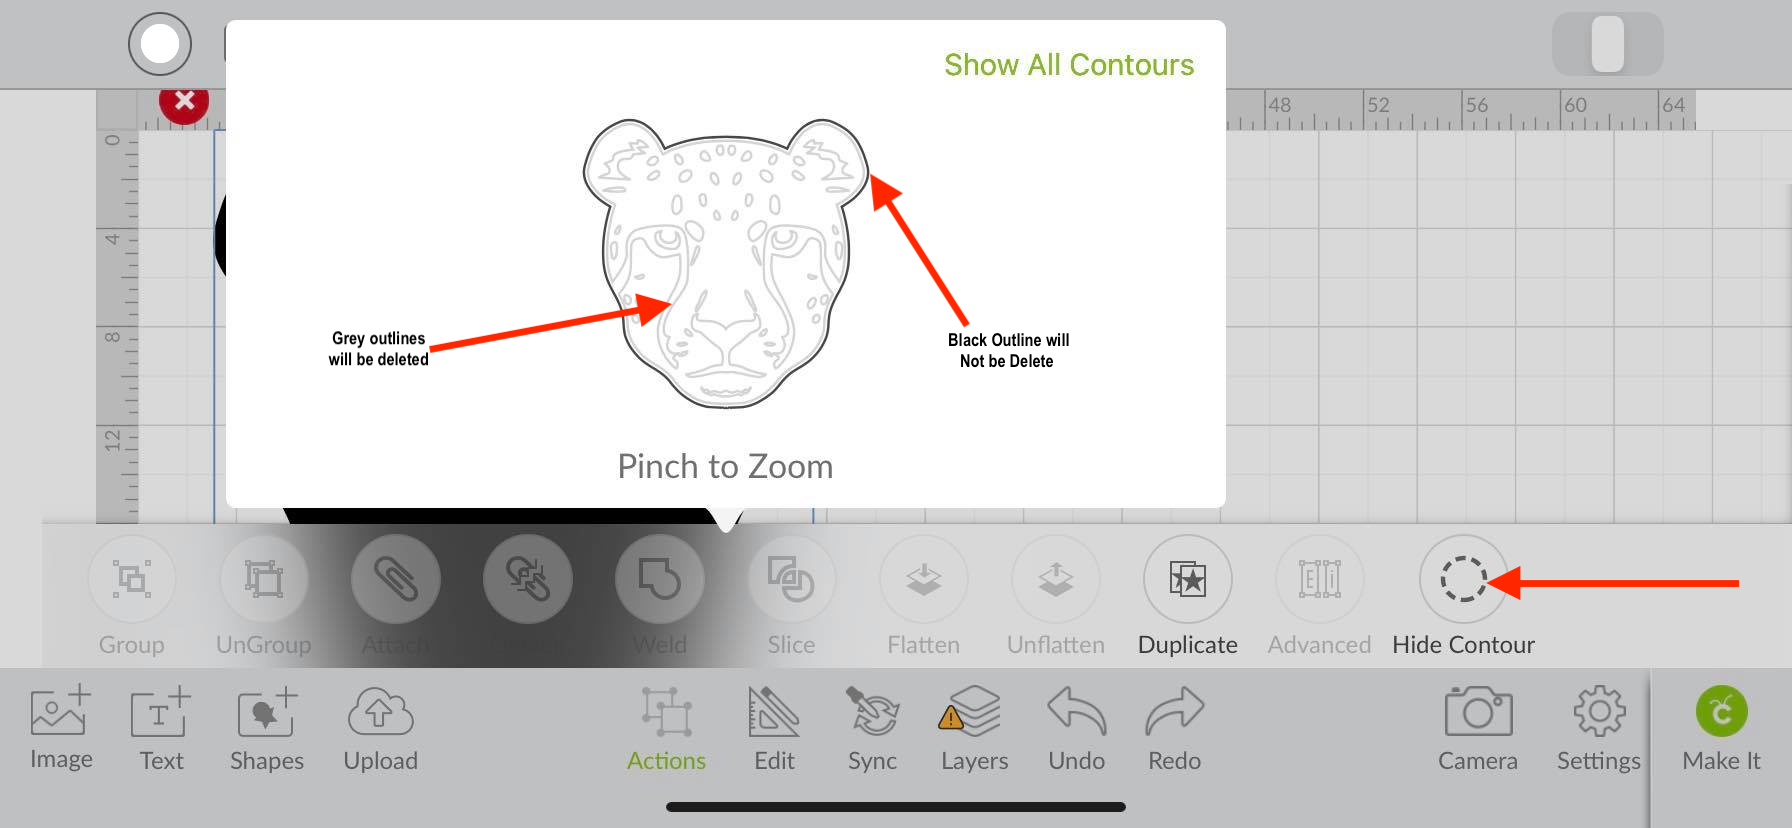
Next, we will use the contour tool to remove the inside details of the image.This will leave us with the silhouette of our image. We have a great tutorial on using the contour tool in the Design Space app if needed.
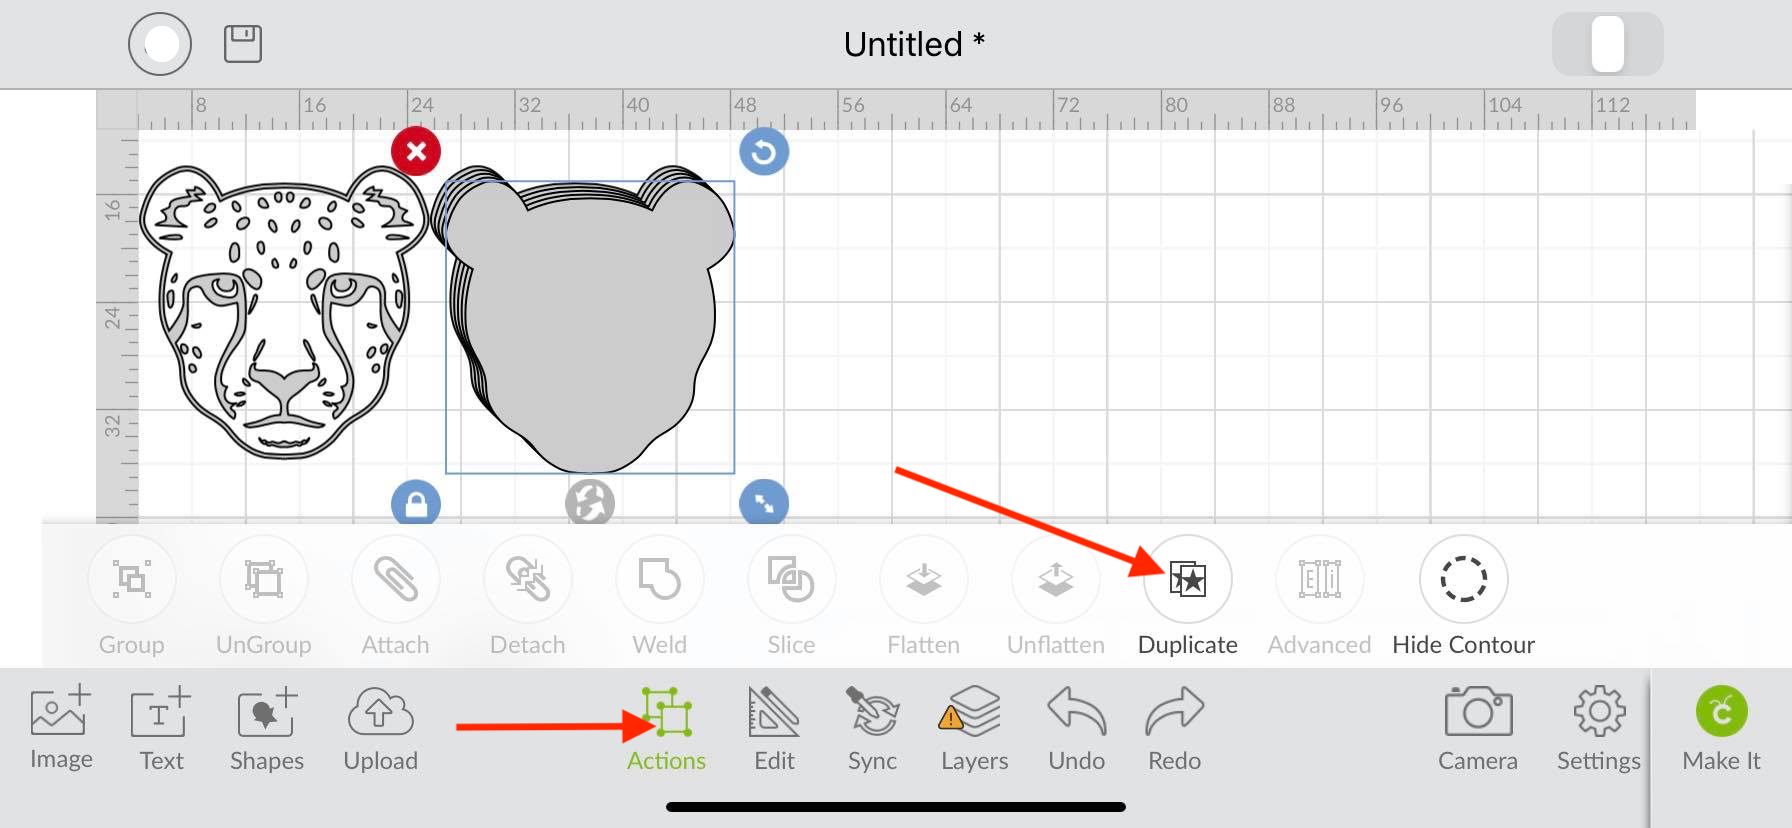
Now that you have a silhouette of your image, create several duplicates. This will help us create the shadow. To do this, click the action icon and then the duplicate icon multiple times.
Before you start creating the shadow, recolor your original illustration and bring it to the front. You can do this by using your Color Swatch and Arrange tool which you can find under your Edit icon. This will make it a lot easier to view your placement when you arrange your shadow layers.
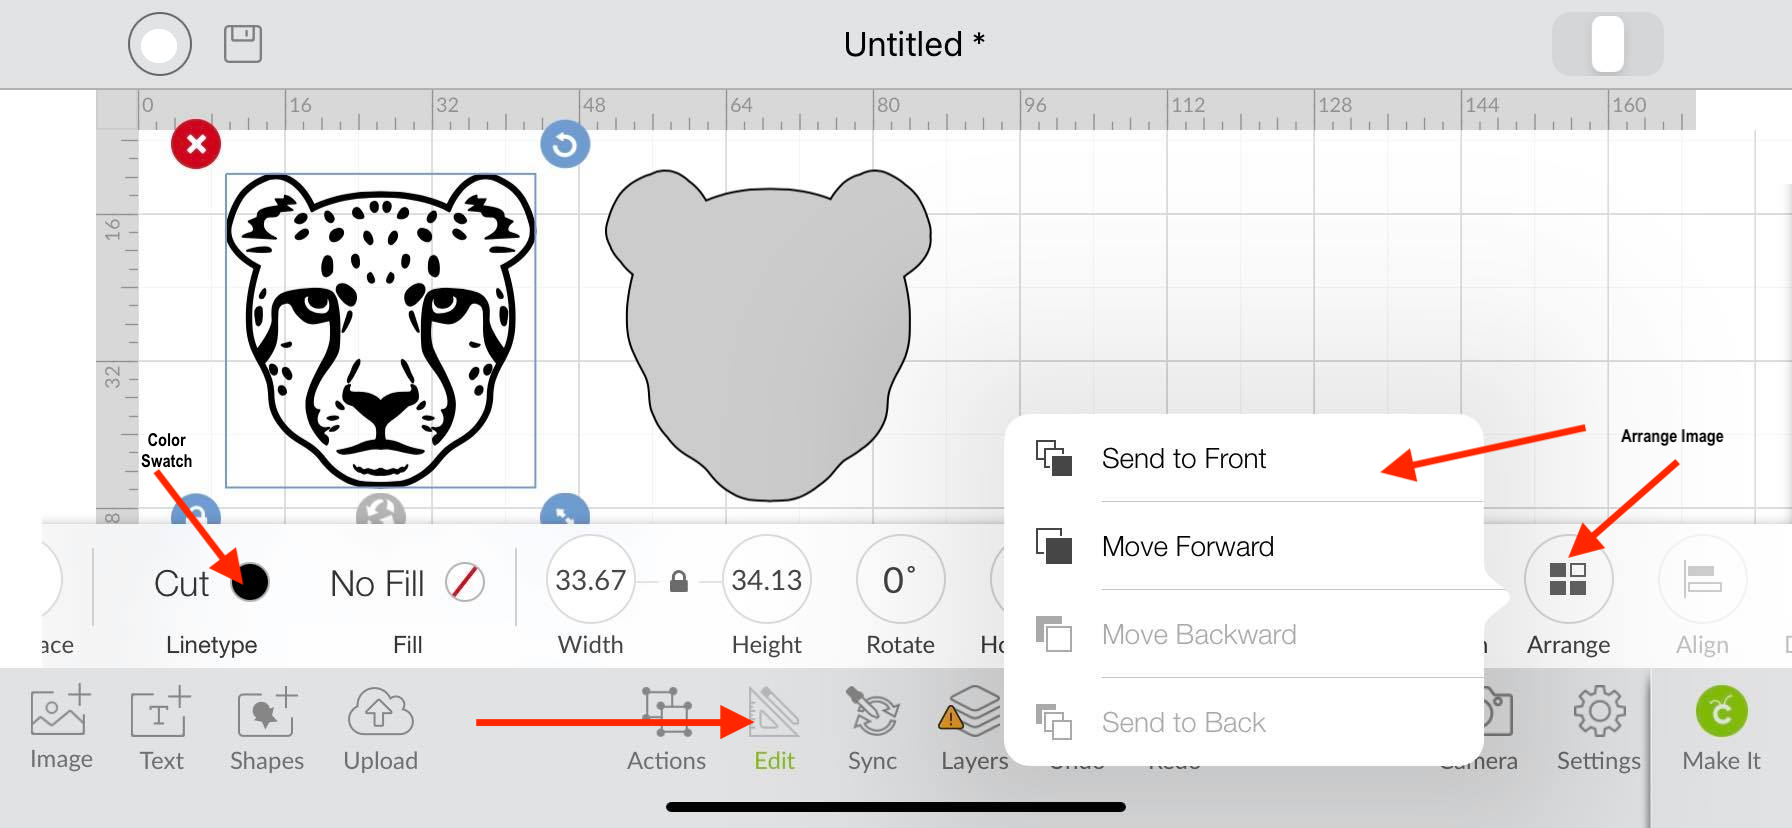
Now, arrange your layers behind the original image you just recolored. Slightly move each one to the right, left, bottom or top.
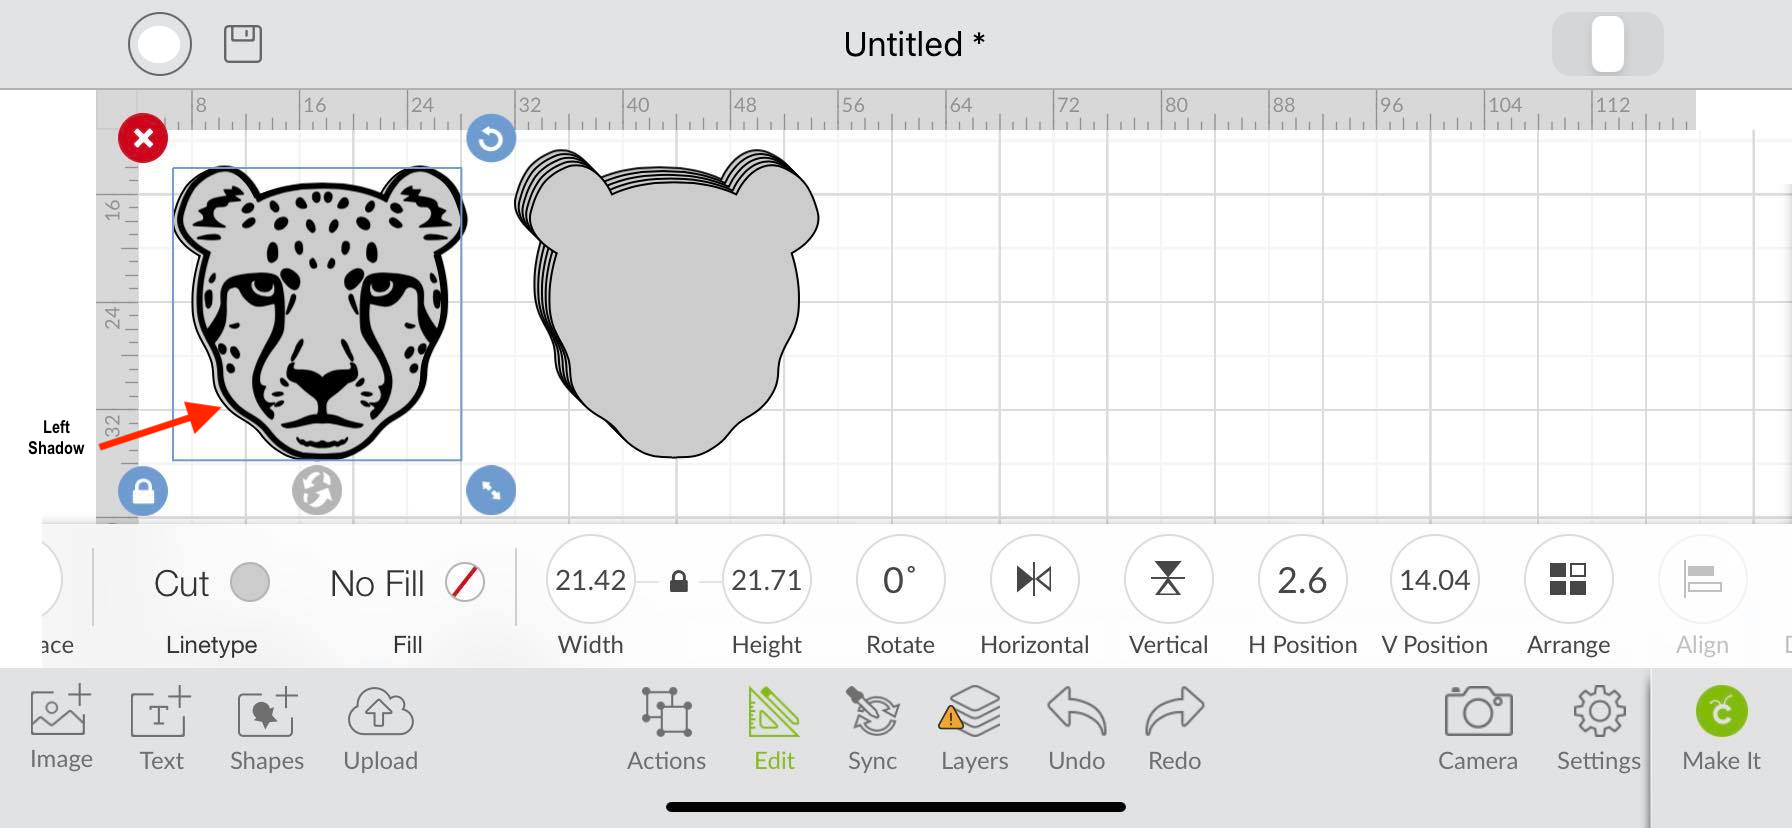
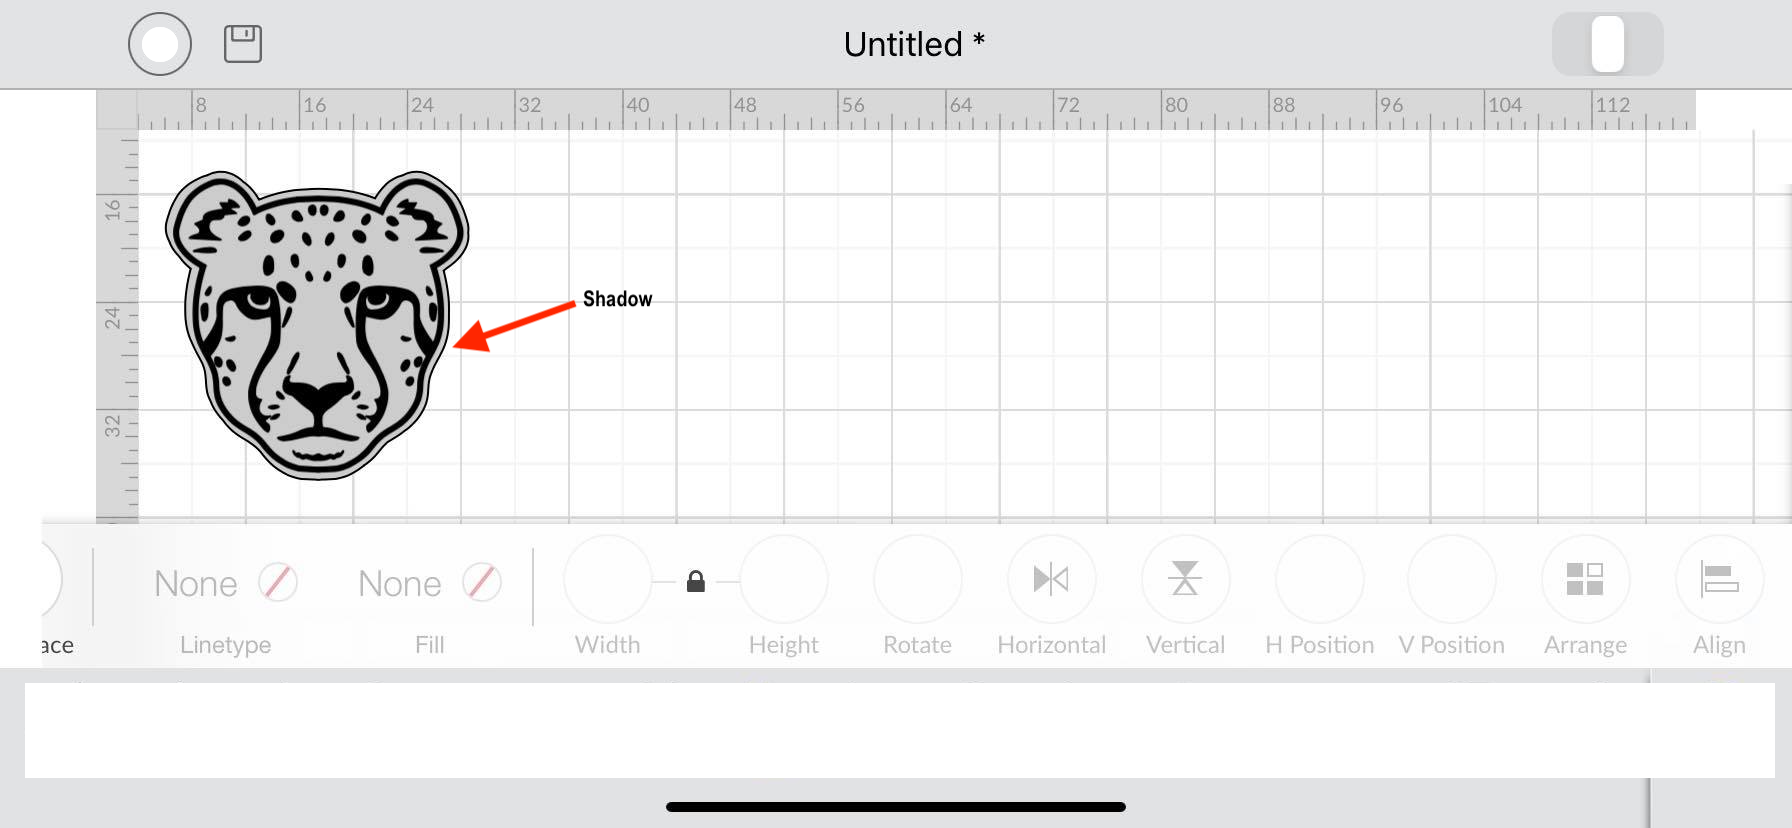
You will notice that a shadow is being created around the image. Continue this process until you have completed a shadow around the whole image.
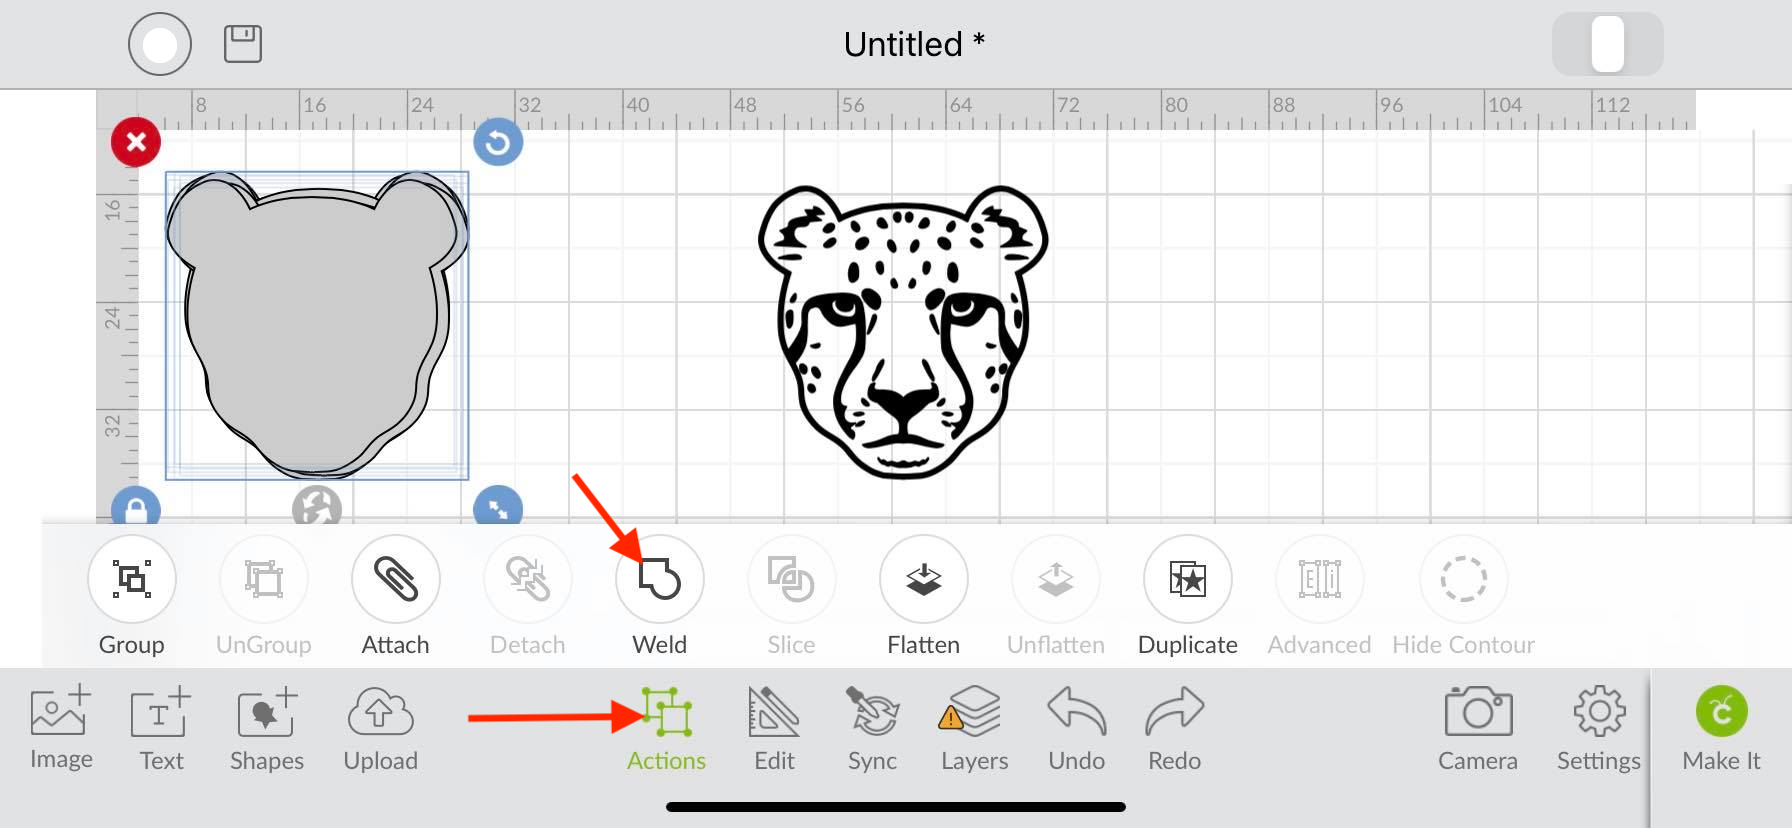
To finish, select the shadow layers and weld together. You can do this by clicking on the Action icon and then the weld icon.
You have successfully created a shadow in cricut design space app. If you like this tutorial, check out our other Cricut tutorial on offsetting text in Design Space.
Step 1. Create a New Project
Open Cricut Design Space and create a new project. You can simply do this by clicking on the blue rectangle box that is labeled New Project.
Step 2. Upload your Image
First, you will need to upload your images to Cricut Design Space app. Today we will use a cheetah illustration to use in our project.
Step 3. Duplicate image
After, select your image and duplicate. Click on the Action icon and then click Duplicate on the pop up toolbar. This will become your shadow layer.
Step 4. Contour Duplicate Layer
Next, we will use the contour tool to remove the inside details of the image.This will leave us with the silhouette of our image. We have a great tutorial on using the contour tool in the Design Space app if needed.
Step 5. Duplicate Shadow Layer Multiple Times
Now that you have a silhouette of your image, create several duplicates. This will help us create the shadow. To do this, click the action icon and then the duplicate icon multiple times.
Step 6. Recolor and Arrange
Before you start creating the shadow, recolor your original illustration and bring it to the front. You can do this by using your Color Swatch and Arrange tool which you can find under your Edit icon. This will make it a lot easier to view your placement when you arrange your shadow layers.
Step 7. Arrange your Shadow Layers
Now, arrange your layers behind the original image you just recolored. Slightly move each one to the right, left, bottom or top.
You will notice that a shadow is being created around the image. Continue this process until you have completed a shadow around the whole image.
Step 8. Weld Shadow Layers
To finish, select the shadow layers and weld together. You can do this by clicking on the Action icon and then the weld icon.
You have successfully created a shadow in cricut design space app. If you like this tutorial, check out our other Cricut tutorial on offsetting text in Design Space.
Related Tutorials
Cricut Tutorials
How to Create a Layered Image in Cricut Design Space
In this tutorial, you will learn how to create a layered image in Cricut Design Space.
Cricut Tutorials
Separating Images From a Multiple Image in Cricut Design Space 3
Discover how easy it is to separate images from a single design in Cricut Design Space.
Cricut Tutorials
How to Create a Text Shadow in Cricut Design Space
Discover how to create a text shadow to add dimension to your designs with a shadow outline.
Cricut Tutorials
How to Create a Multi Layered Image From a Single Layered Image in Cricut Design Space
Cricut Tutorials
How to Flatten Your image in Cricut Design Space
In this tutorial, learn how to flatten a images into one layer in Cricut Design Space.v
Cricut Tutorials
How To Use The Slice Tool In Cricut Design Space To Split Images
Learn how easily to Split Images in Cricut Design Space using the Slice Tool.