By Design Bundles
How to Make Sticker Sheets in Cricut Design Space
In this tutorial, learn how to make a Sticker Sheet in Cricut Design Space using the Print then Cut feature. Sticker sheets are great for scrapbooking, making planner stickers, and for kids!
Step 1 - Create a New Project
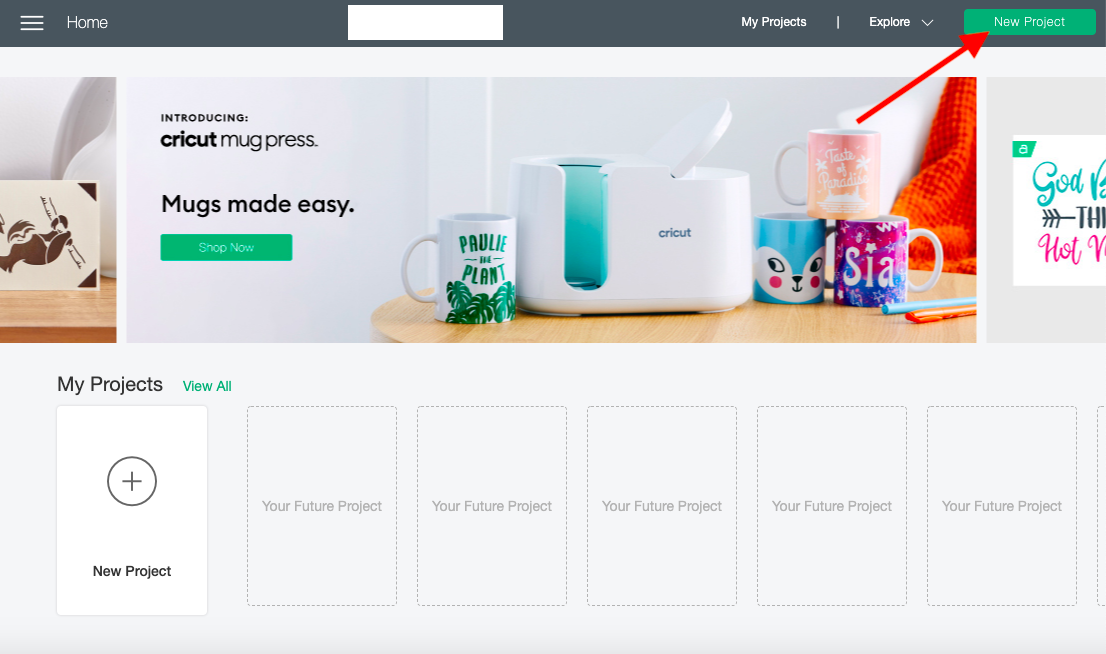
Once you are have logged in, create a new project in Cricut Design Space by simply clicking on the green button that is labeled New Project on the top right-hand corner.
Step 2 - Create or Upload Your Sticker Design
There are several ways to make your sticker design. You can create them right in Cricut Design Space itself or use a pre-made file to get you started. We have a great guide that will take you through the steps to build your stickers.
Today I'll pass on the designing and use a great Bee Bundle by DreamONprints. This Bundle comes with 15 individual files that are ready to cut. If you want to bypass this whole process, Design Bundle has a great selection of pre-made sticker sheets that you can just print and cut. If you choose to do this you can skip to step 6 in this tutorial.

Step 3 - Create Sticker Sheet Guide
Once you have created or uploaded your sticker files, its time to lay them out on your canvas screen. We are going to create a little guide to help us do this. Select your Shapes tool which is located on the left side of your canvas Screen. Click onto the square shape.

A square will appear in your canvas screen with four circles on each corner on the square. Click on the circle on the bottom left side of your square to unlock your sizing ability. Click onto the circle on the bottom right to resize your shape to become a long rectangle.

Next locate your Operation Tab which you can find on the top toolbar. Click on the down arrow and select Standard print And Cut. This will create specific guidelines for the project we are making.

If the rectangle is too big for the print and cut feature, you will receive a warning symbol next to the layer within your Layers Panel that is on the right side of your screen. This will tell you to reduce the print and cut size to 6.75" by 9.25". If you don't have this warning you are well within the size guidelines for the print and cut feature.

Step 4 - Lay Stickers Out
Organize your stickers within the long rectangle. This will assure you, that you are well within the size guidelines for the print and cut future.

If you need to resize a few stickers to fit in the rectangle simply select the sticker you want and click the Circle on the lower right hand side of the selected image.

If you still have space that can be filled on your rectangle layer, duplicate a few more of your stickers. You can do this by selecting the sticker you want to duplicate. Once selected click Duplicate. This is located on the top of your layer panel.

Continue to do this until your rectangle layer is filled.

Step 5 - Flatten Your Stickers
You can now delete the sticker sheet guide. Select all your stickers and click Flatten on the lower right-hand corner of the canvas screen.

All your items will now be flatten together and you can start the next process.

Step 6 - Make It
Press the green Make It button on the upper right-hand side of your canvas screen to continue making your sticker sheet.

You will now be able to preview your project. Click Continue on the lower right hand side if everything looks correct.

Once you hit Continue you will be redirected to another page where you can now send the items to your printer. Simply click the green Send To Printer button to get started.

Step 7 - Print Set up
Time to print out some stickers sheet. I often use Avery Matte White sticker Paper but you can use the sticker paper that you believe would be best for this project. Place sticker paper in printer you are using. Make sure the printer is selected and that the bleed is on. When settings are correct click on the green Print button on the right hand corner.

Step 8 - Cut Stickers Out
Once you have printed the stickers, you can start cutting them out using your Cricut cutting machine . Place the sticker sheet on your Cricut cutting mat and load it into the cutting machine. Continue to follow the prompts on your computer. Make sure to have your settings set to sticky note. You can find this setting when you click on Browse All Materials. If you are satisfied with your settings you can start cutting your Kiss Stickers out.

You have successfully created a sticker sheet in Cricut Design Space. Continue to practice and create more stickers sheets for your family and friends.
For all those who use a Silhouette, we have an awesome tutorial on making Sticker Sheets in Silhouette Studio just for you. Make sure to check it out to get started.