By Design Bundles
How to Weld Text in Inkscape
In this tutorial we are going to show you how to weld text in Inkscape. Some fonts tend to overlap which can cause issues with cut files. So when you weld your text, you combine the characters to form one object. There may also be times where welding creates an aesthetic appearance even if the characters don’t overlap. We will guide you on how to do both of these options.
Method 1 - Weld Overlapping Text
Script fonts, while lovely to use, can pose a problem with overlapping characters. This is where welding comes in very useful.
You can use any script font of your choice or choose from our selection of modern script fonts.
It should be noted that welding text should be done once you are certain you no longer want to edit the text. Once welded, you won’t be able to edit the wording as it will now become an object.
Once you have opened Inkscape, use the Text Tool on the left side toolbar to type out your text.

While in text edit mode, adjust the font using the Font Family top left. Change the fill color to none and the stroke to black at the top. This way, we can see where lines will weld.
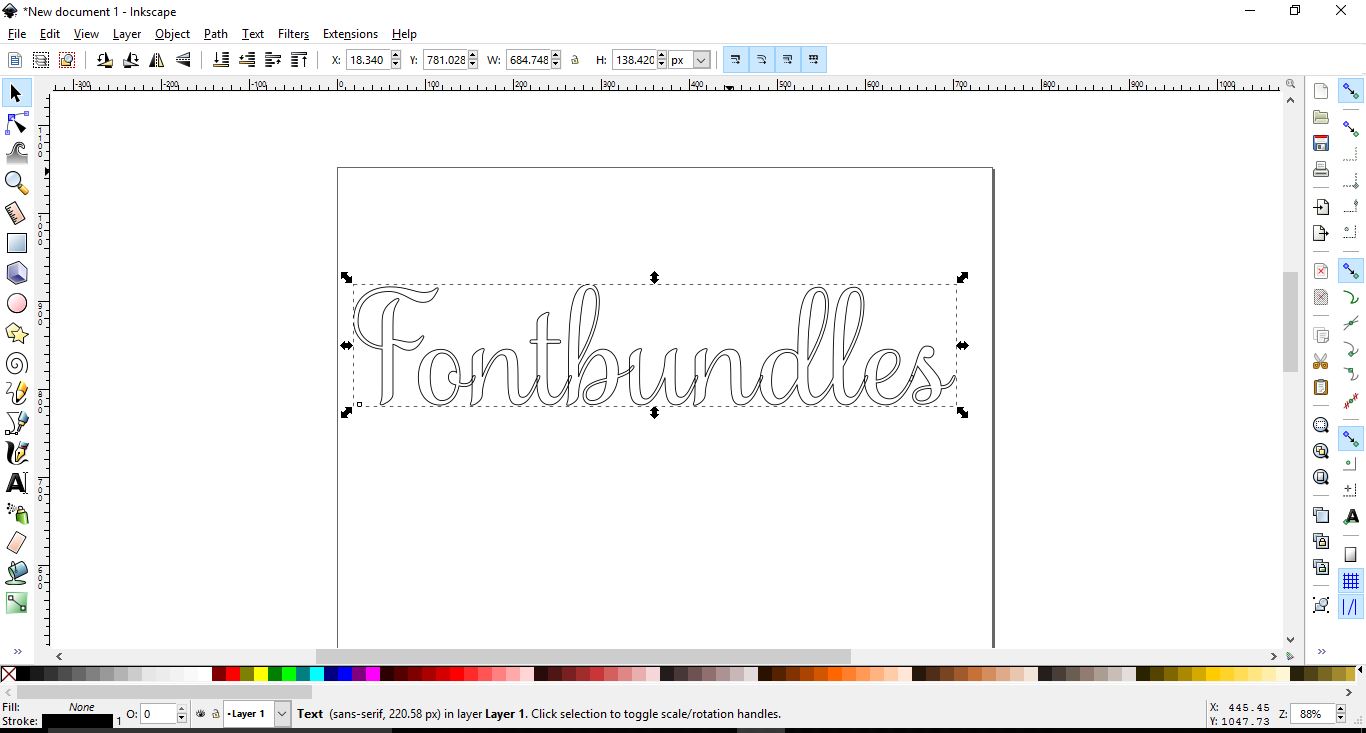
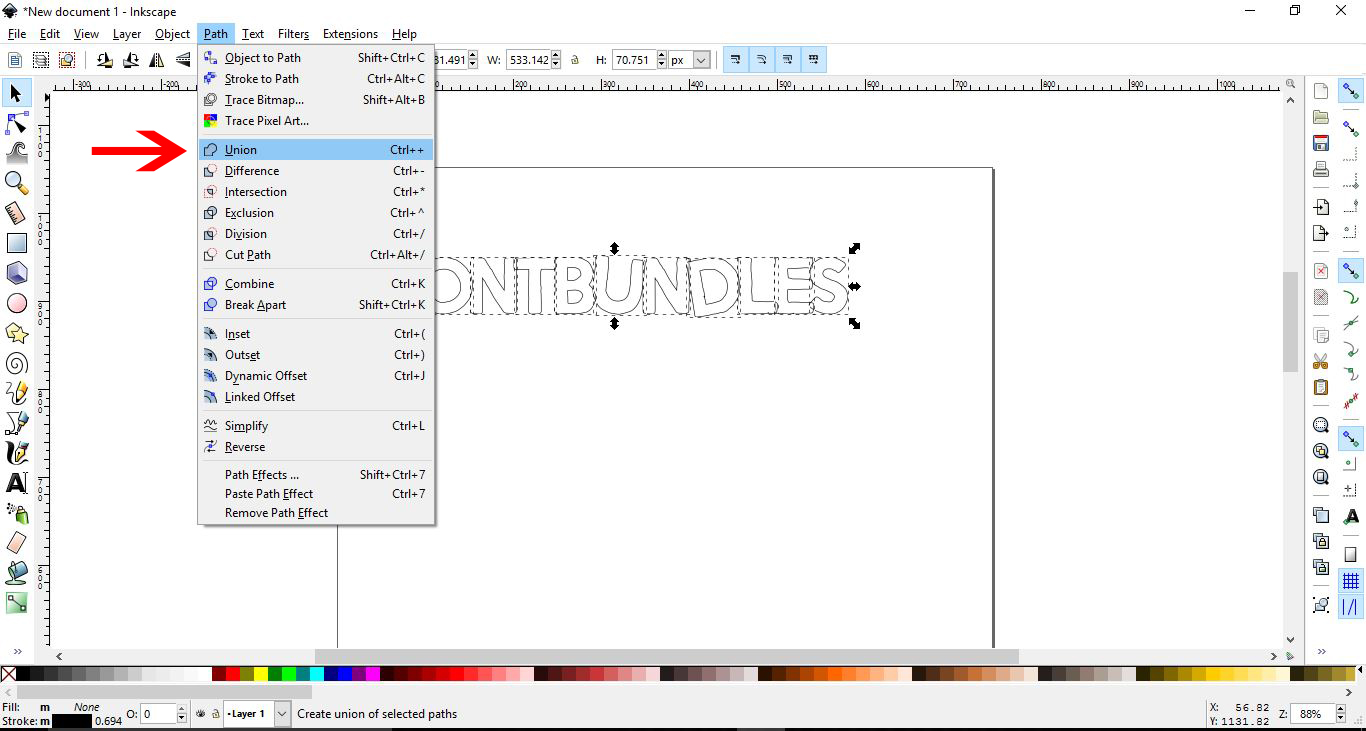
Now click on the Select and transform objects tool, the black arrow top left. Click on the text to select then go to Path > Union. Union is the same as Weld in other programs.
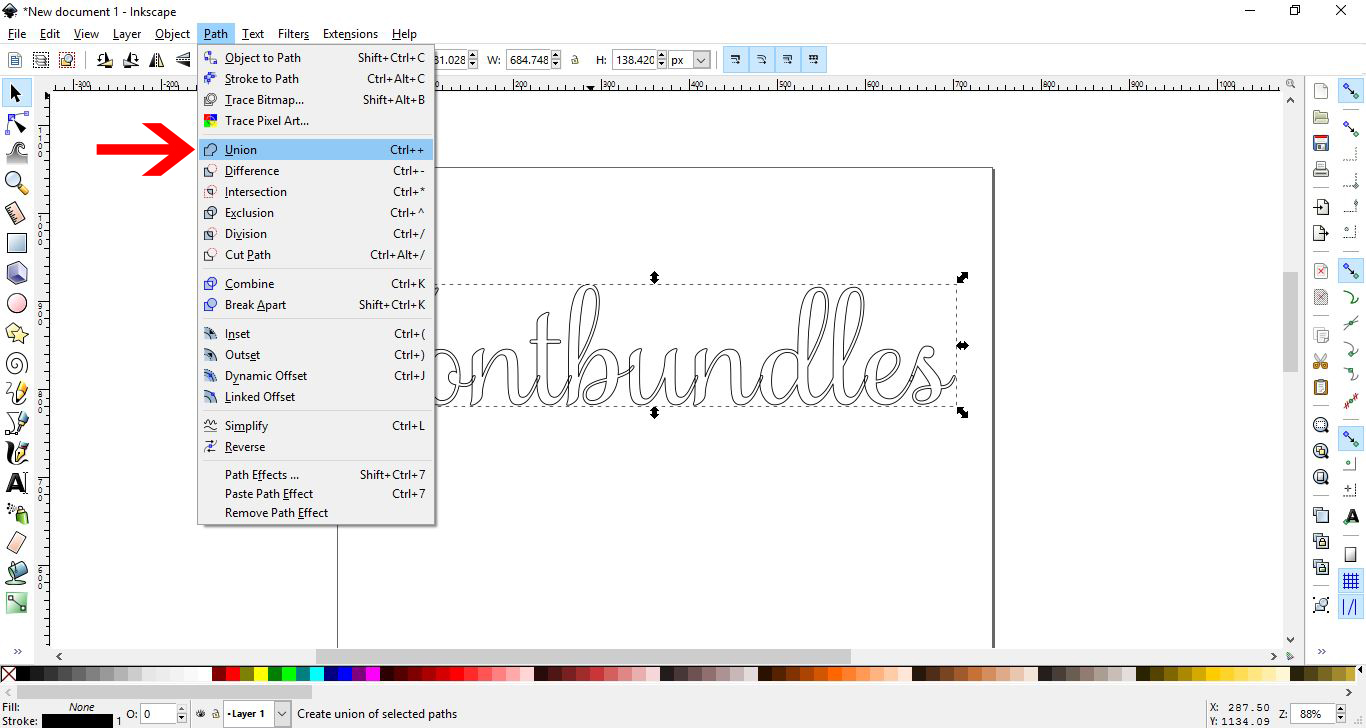
The characters are now combined into one object.
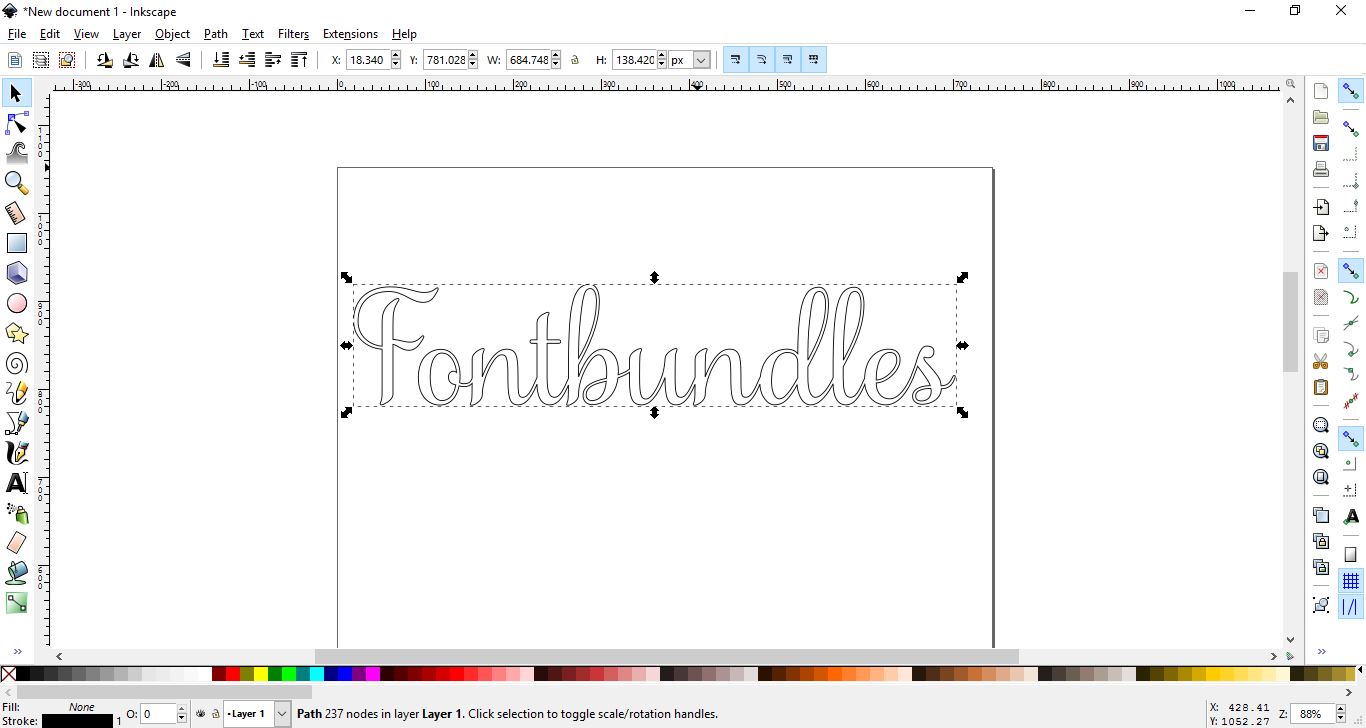
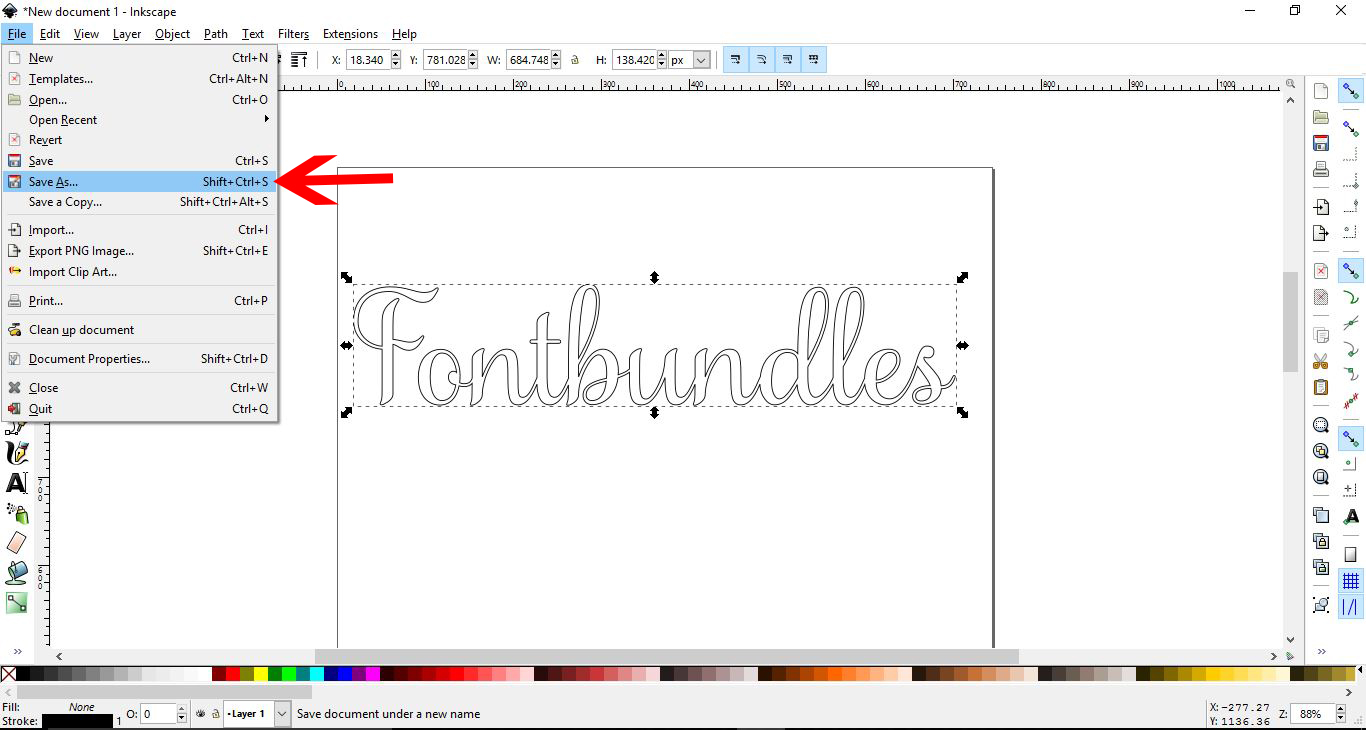
You can save this as an SVG to use as a cut file. Go to File > Save As.
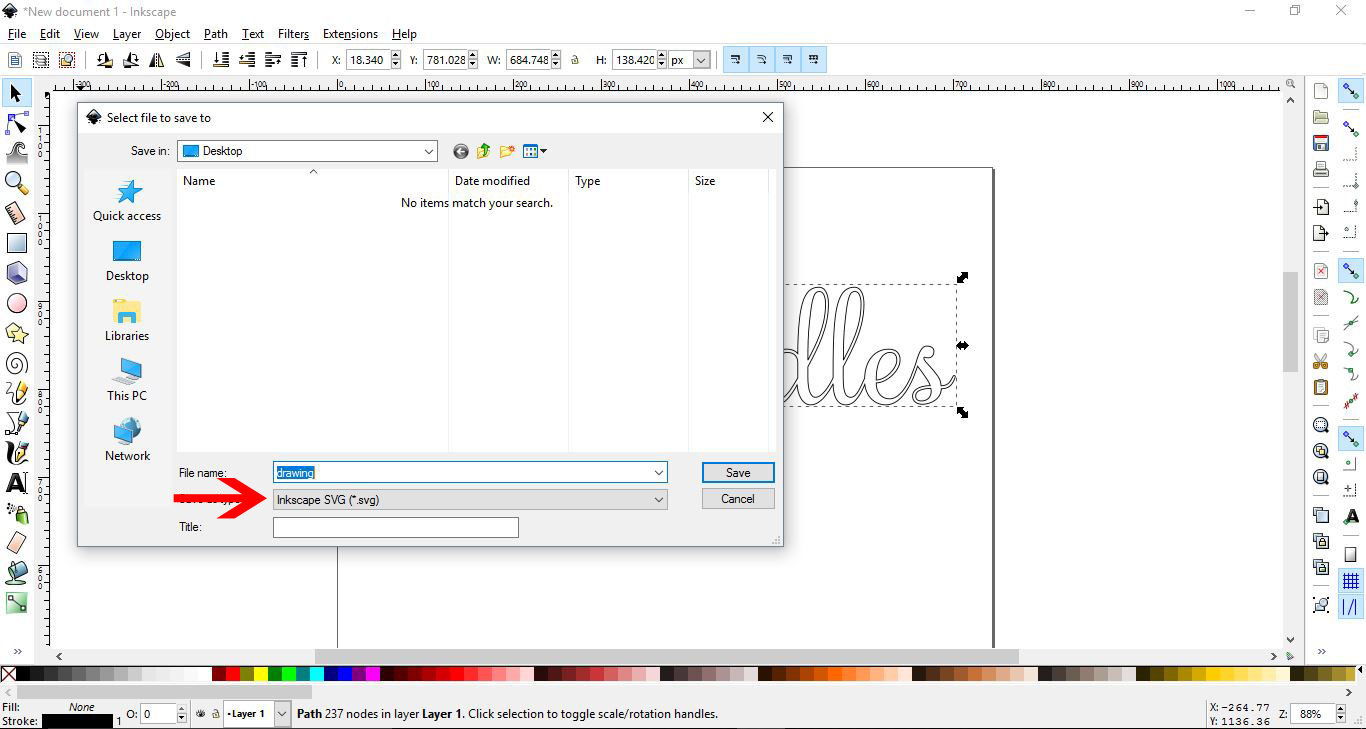
Under Save as type select Inkscape SVG then click Save.
Method 2 - Weld Normal Text
You can weld text that doesn’t have overlapping characters. You may want to do this for the look or just to create a single object.
As with the first method, type out your text then change the font with fill to none and stroke to black. This will help to see where to overlap your text. For this example we used a handmade font called Script Calm.
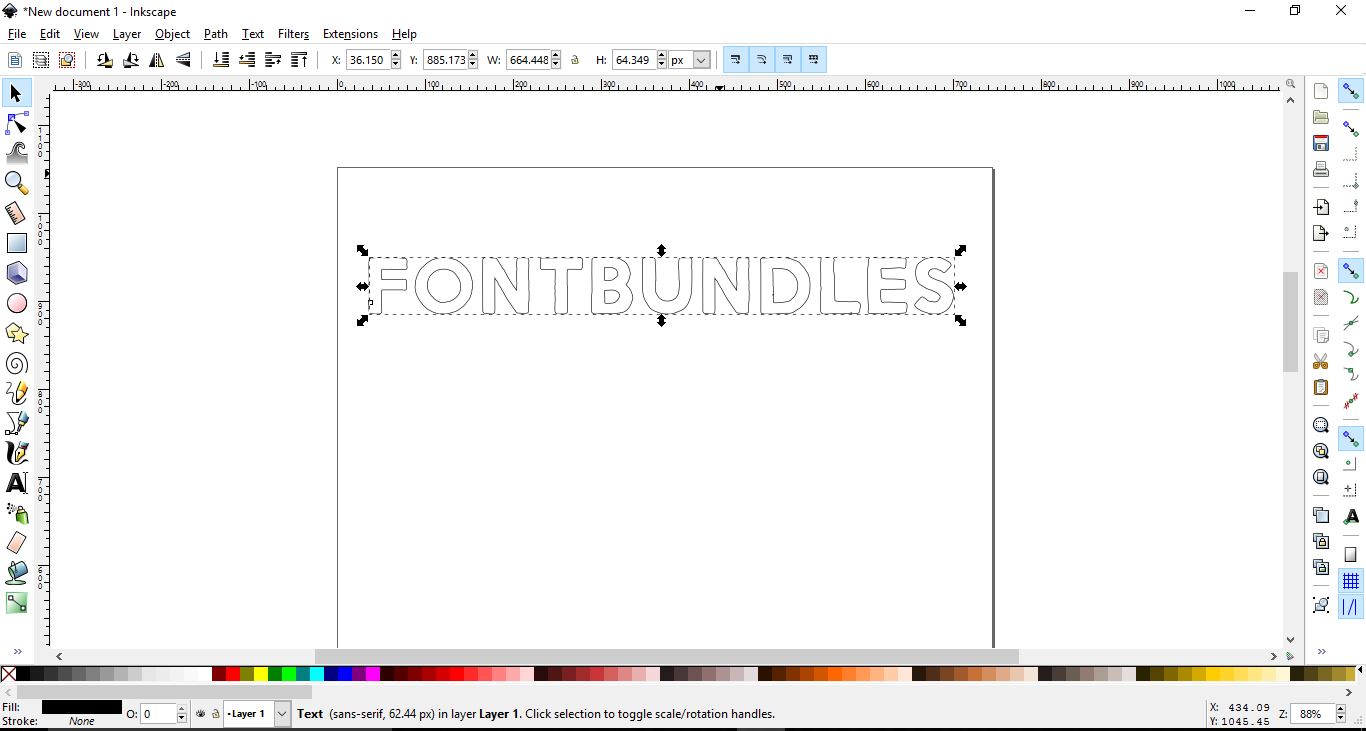
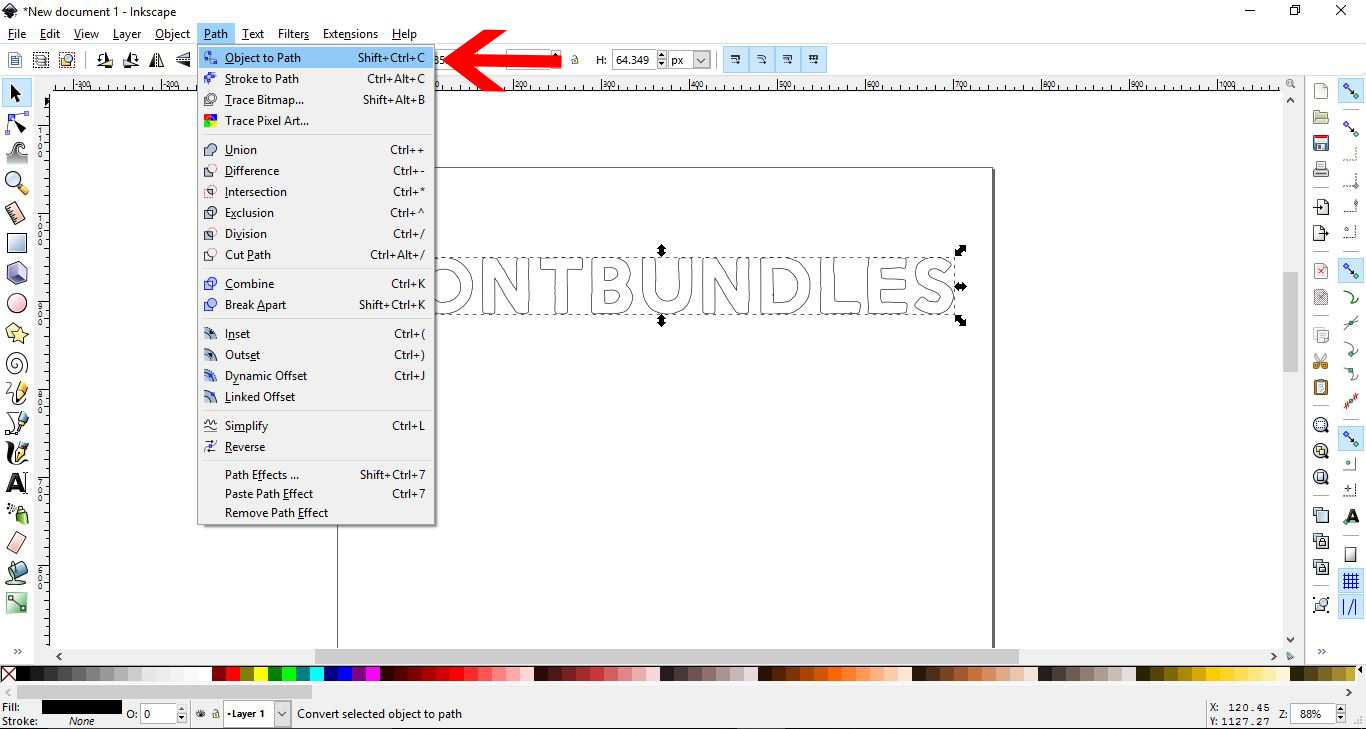
Select your text and go to Path > Object to Path.
Next, with the text still selected, go to Object > Ungroup.
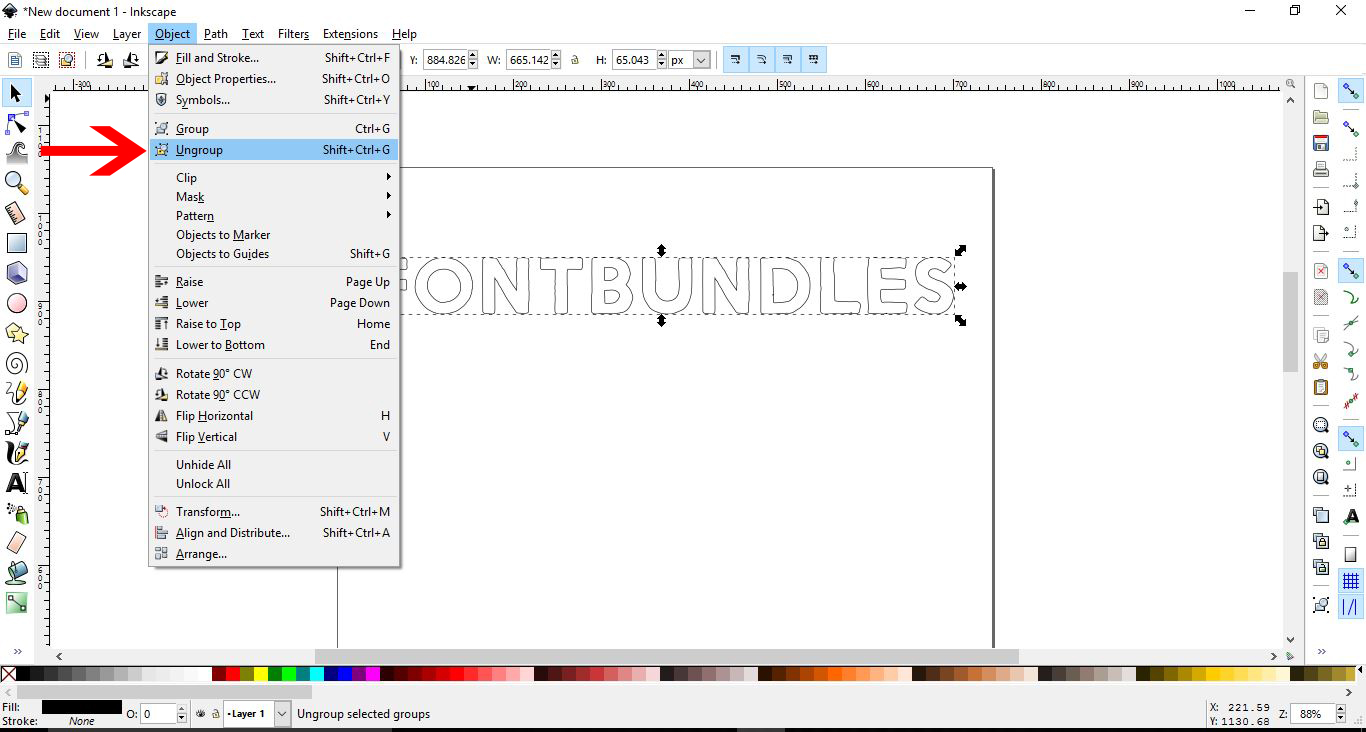
The text will now be separated into individual characters that can be independently adjusted.
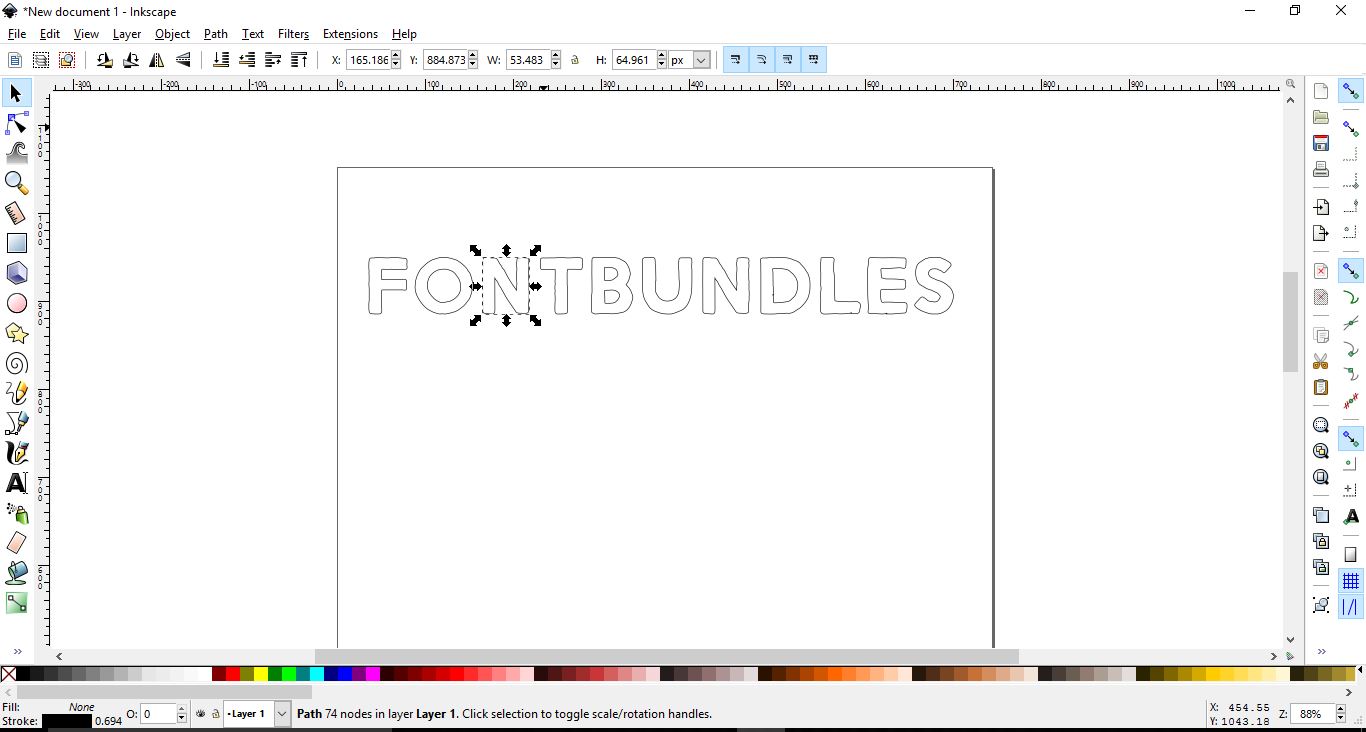
Adjust the position of each letter until one overlaps the other. You can also rotate the letters slightly to fit better for welding or spice up the text design.
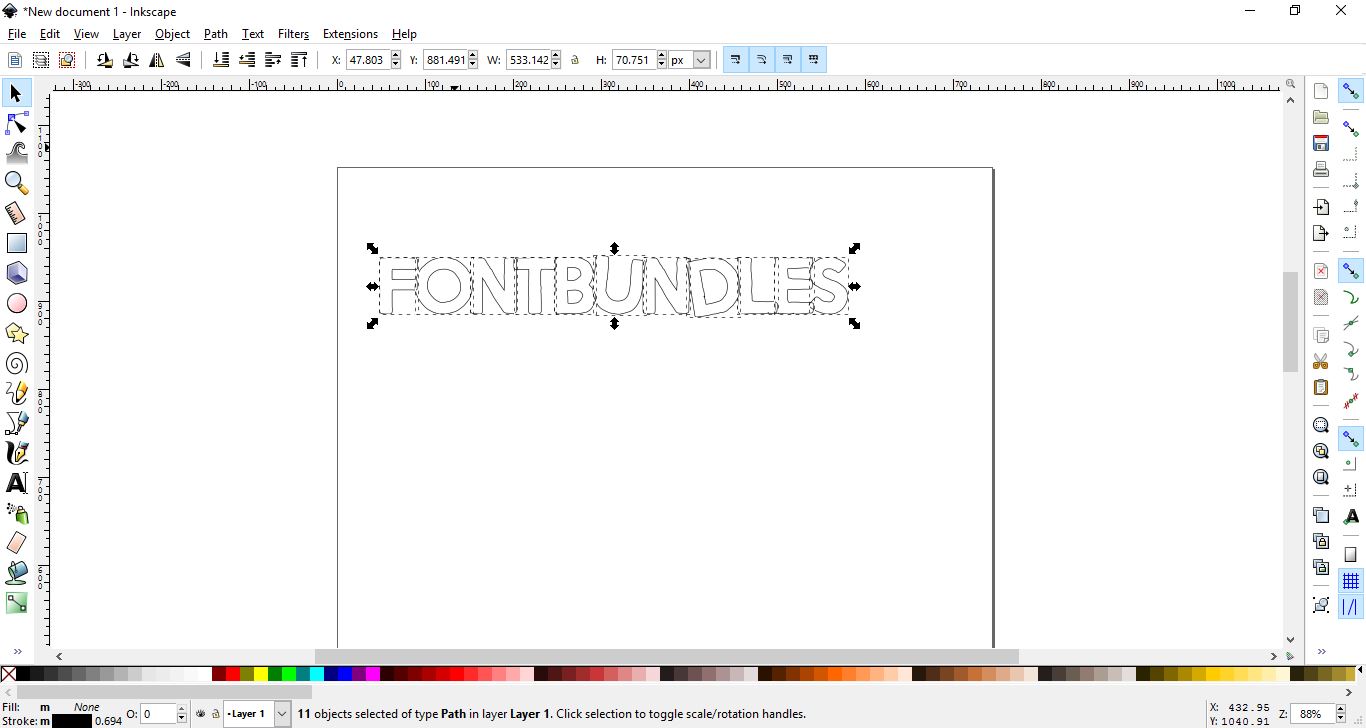
When you are done editing, select all of the letters then go to Path > Union.
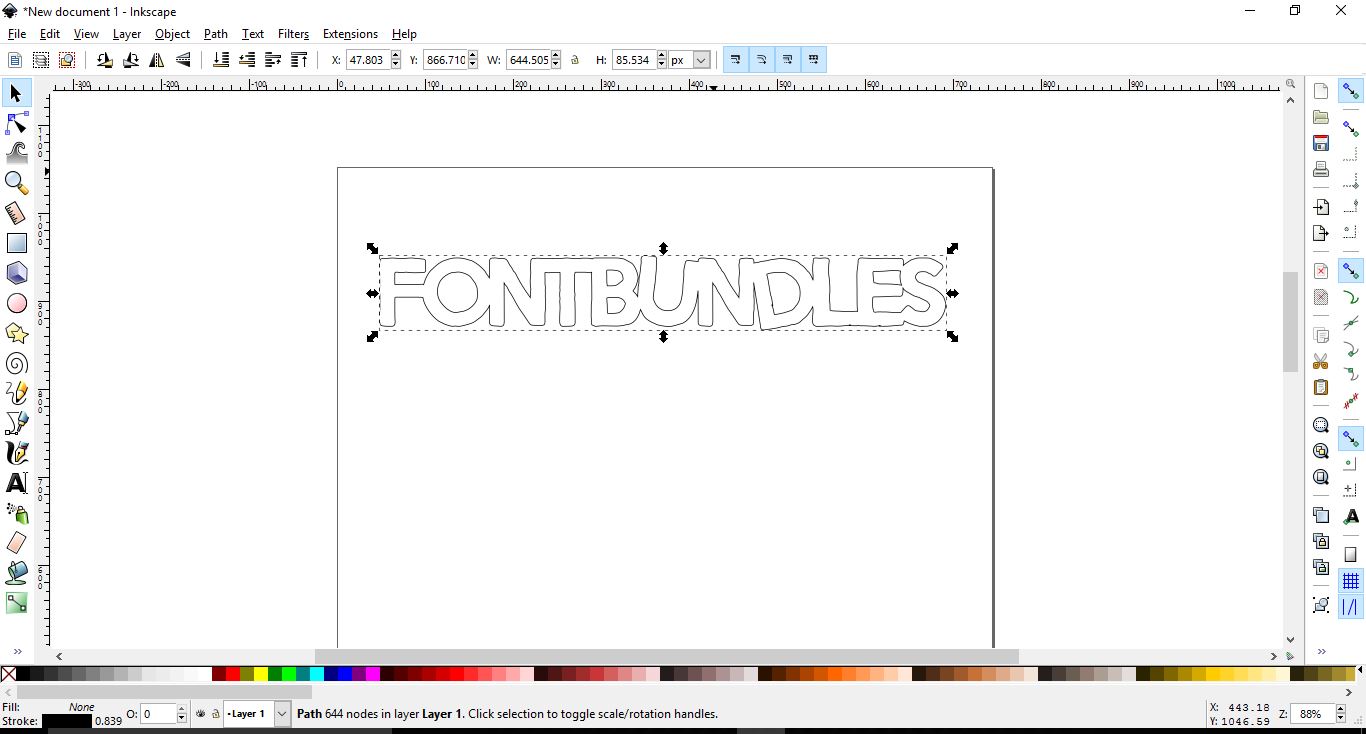
Here is our welded result.
There are so many ways that you can make your text pop. Why not create a gold text effect or add a pattern to text in Inkscape? We hope that you found this tutorial helpful and carry on to experiment to get different results.