By Design Bundles
Scatter Brushes in Illustrator
There are several types of brushes that you can make in Illustrator. In today’s tutorial, you will learn how to create and use scatter brushes. Scatter brushes are made up of vector shapes. This type of brush scatters vector shapes across a path.

To follow along with this tutorial, you will need some vector shapes to create the scatter brush. We’ll be using star vectors, but some great shape ideas are music note vectors, heart vectors, and feather vectors.
Step 1 - Import/Place Your Vectors
In your new document, go to File > Place. Locate and select the vector shape you would like to use for your scatter brush. Then click Place.
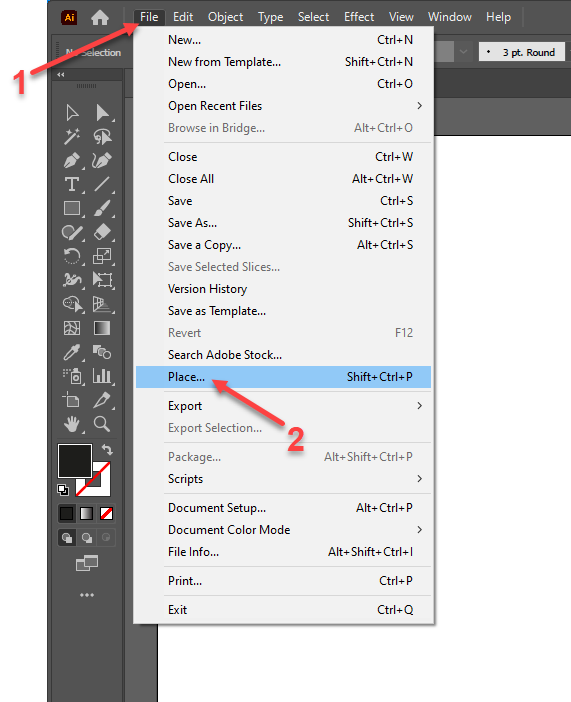
You can single-click on the artboard or click + drag on the artboard to place your vector shape. It can be placed anywhere and in any size, as we’ll edit it in the next step.

Repeat Step 1 for your other vector shapes if needed.
Step 2 - Make the Brush Design and Create a New Brush
You can use one or multiple vector shapes to create a scatter brush. You can also change the colors of the vector shapes, vary the sizes, and arrange them how you’d like. Select your vector brush design and open the Brushes panel (Window > Brushes). Click the New Brush icon at the bottom of the panel.

In the New Brush dialog, choose Scatter Brush and click OK.

For now, just give your brush a Name and click OK. You can delete the vector shapes now if you want.

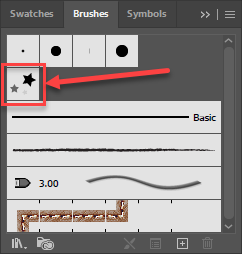
Your new scatter brush should now be in the Brushes panel near the top in one of the squares.
Step 3 - Draw a Line to Test Your New Scatter Brush
To test your new scatter brush, draw a line on the artboard with the Pen Tool (P), Curvature Tool (Shift + ~), Line Segment Tool (\), or Brush Tool (B). Then with the line selected, click on your new brush in the Brushes panel. Your scatter brush will be applied to the line as the Stroke. Make sure the Fill is set to None.

Step 4 - Edit Scatter Brush Options
Double-click on your new scatter brush’s thumbnail in the Brushes panel. Doing so will open the Scatter Brush Options dialog again. In the Scatter Brush Options dialog, enable the Preview to see the option changes in real-time.
We went with the following options for our scatter brush:
- Size: Random (60% and 100%)
- Spacing: Fixed (100%)
- Scatter: Random (-10% and 20%)
- Rotation: Random (-180° and 180°)
- Rotation relative to: Path
- Method: Tints
You can play around with the settings and see what you like, as your brush will be different from ours. When adjusting the sliders, the left sliders correspond to the minimum setting, and the right sliders correspond to the maximum setting for each option. You can click the lightbulb icon for more information on Colorization.
Click OK when you’re happy with the results.

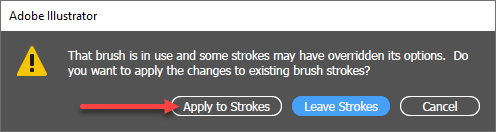
When prompted, select Apply to Strokes.
Step 5 - Add and Edit Text
We want to show how you can apply your scatter brush to text. We'll be using the bold sans serif font, Cedric.
Delete the line you created earlier. Then select the Type Tool (T), click on the artboard, and type your text. You can edit the font and text options in the Character panel (Window > Type > Character). To change the color of the text, change its Fill.
Note: we have a guide on using fonts in Illustrator if needed.

Create Outlines of the Text
With the text selected, right-click and choose Create Outlines.

Center Align Text to the Artboard
With the text still selected, center the text to the artboard using the Horizontal and Vertical Align Center options in the Control panel at the top. If the options are hidden, click on Align first.

Step 6 - Apply the New Scatter Brush to the Stroke
Select the text and choose your newly created scatter brush as the Stroke. Change the Weight of the Stroke if needed. This will change the overall size of the brush without changing the actual scatter brush options.

Remember, you can always double-click on your scatter brush to modify the settings if you need to. Just don’t forget to select Apply to Strokes when asked.
If you don’t like the placement of the shapes and some of your scatter brush options are set to Random, you can click on the scatter brush in the Brush panel again to change up how it looks.

Step 7 - Fine Tune Your Design By Expanding Appearance
When you’re happy with your design, select the objects that have the scatter brush applied as the Stroke, and go to Object > Expand Appearance.

This will turn each shape in the Stroke into its own object. You can see in the following image that each shape has an outline as it is now its own object.

You can Ungroup (Shift + Ctrl/Cmd + G) and edit each shape individually to fine-tune your design. In the following image, we applied a gradient to the stars, which could not have been done before applying Expand Appearance.

You can create some unique and fun designs using scatter brushes and multiple layers. We hope this tutorial got you comfortable with creating and using scatter brushes in Illustrator!