By Design Bundles
Silhouette Tutorials3 min
Accessing Glyphs in Silhouette V4.1 Designer Edition.
1- Open Silhouette Studio.
2- Select the text style icon.
3- In the text style panel select the second tab. This will bring up the Glyph options.
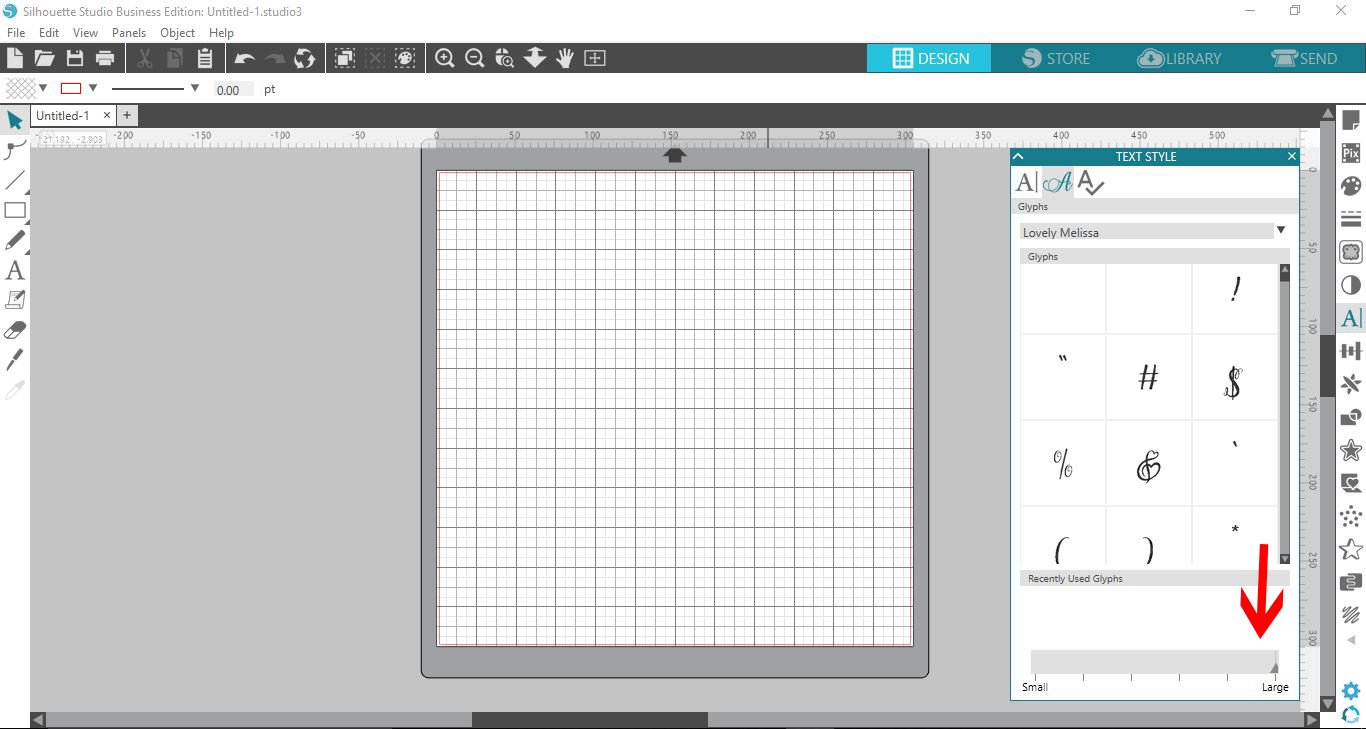
4- In the glyphs panel you can change the size of the glyphs so you can see them better by using the slider.
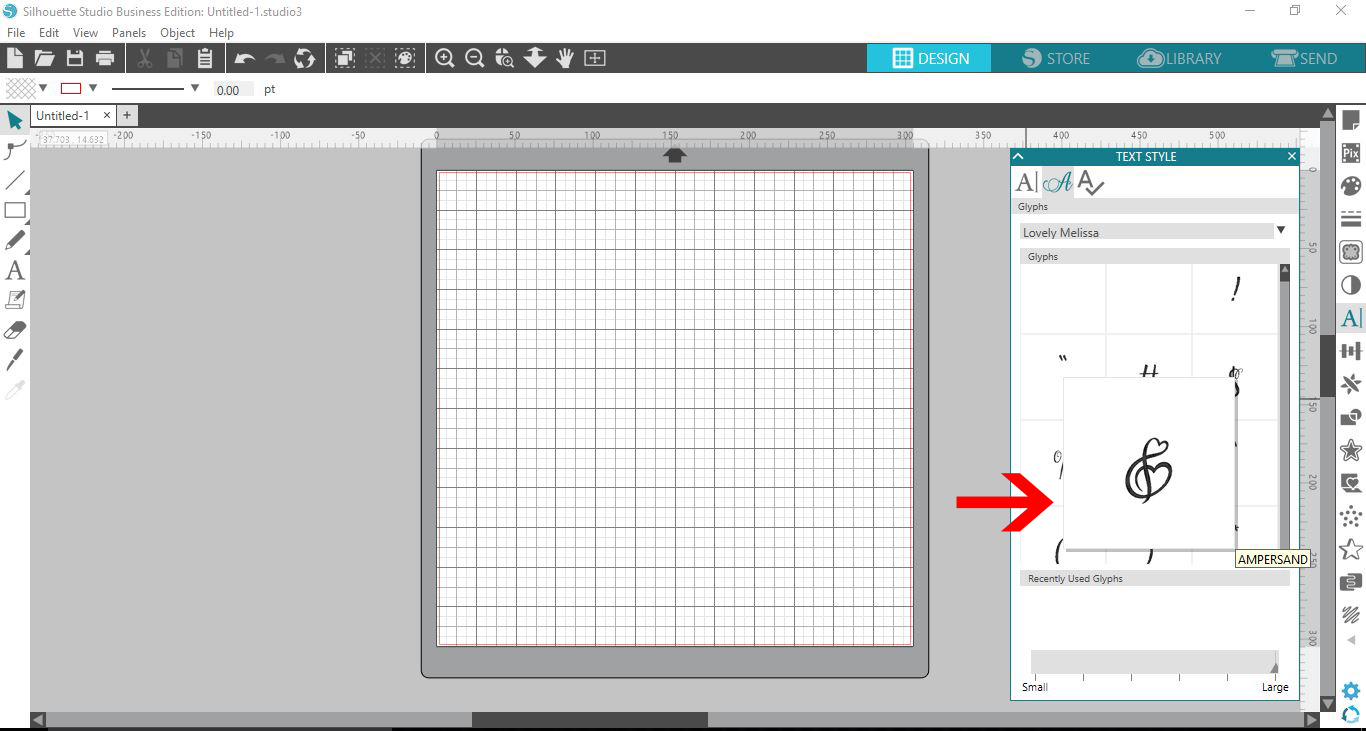
5- You can also hover over the the glyphs and make the glyph become larger also.
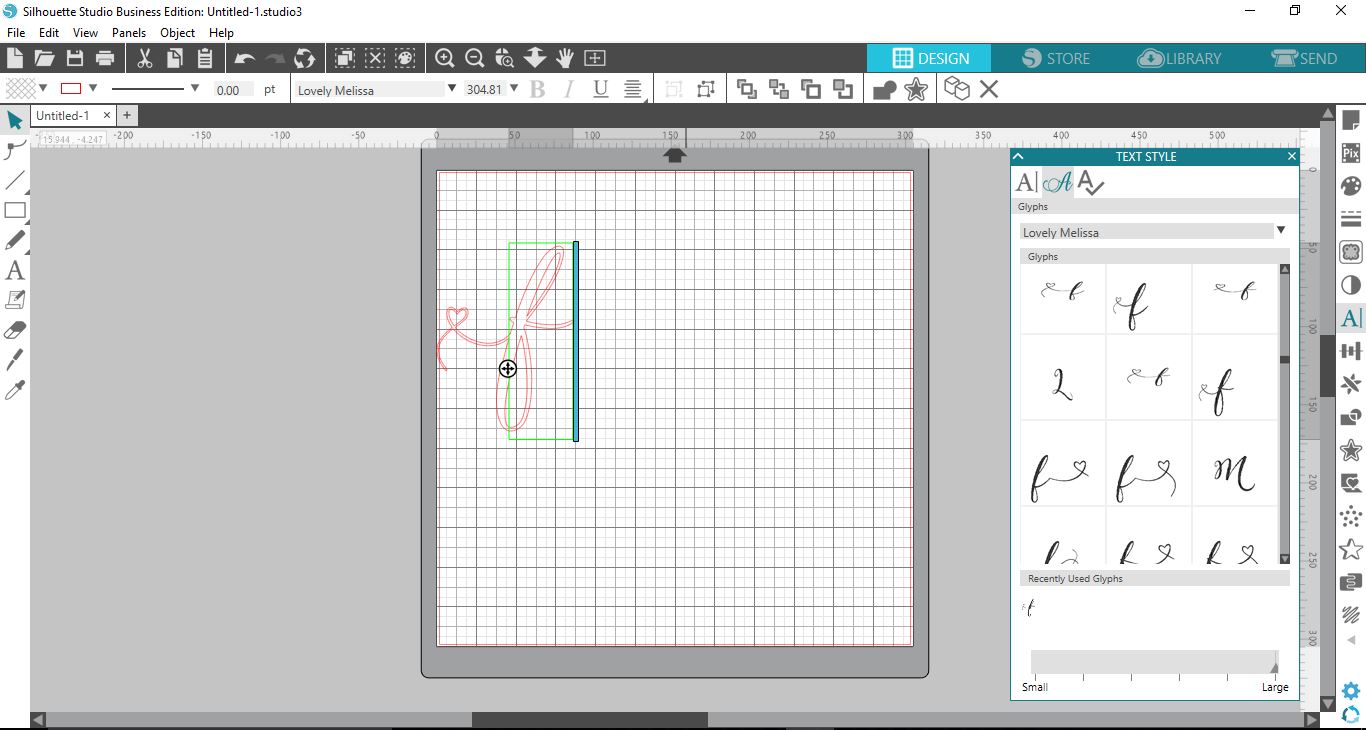
6- To use the glyph, simply click on it and the glyph will appear on your screen.
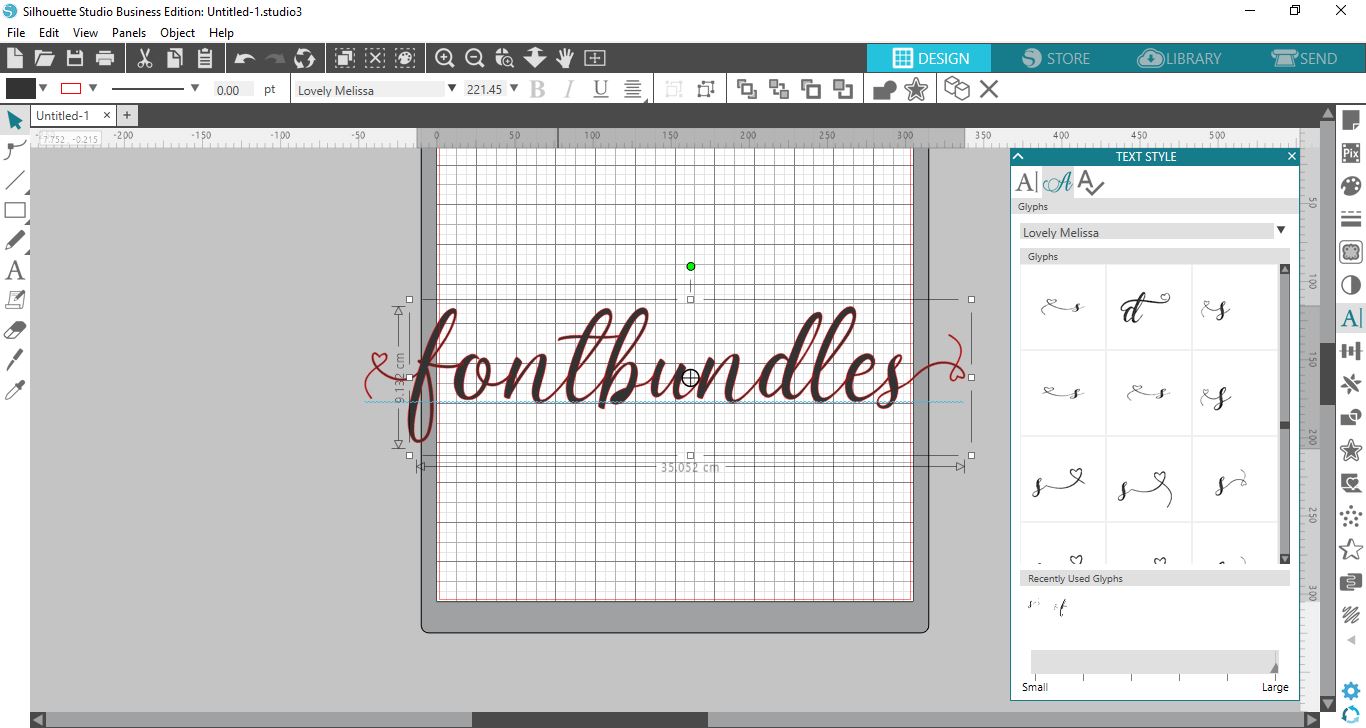
7- You can place a glyph on your workspace then add the regular text as normal, then add another glyph as needed and they will all link as one line of text.
8- You can also click on the colour tab and fill the glyphs as you would any regular text.
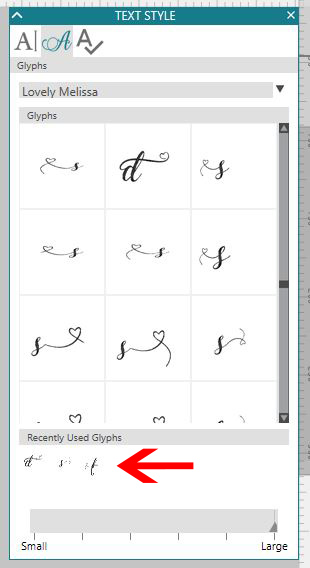
9- In the glyph panel you also have the recently used glyphs option where you can simply re click to add the same recently used glyph again.
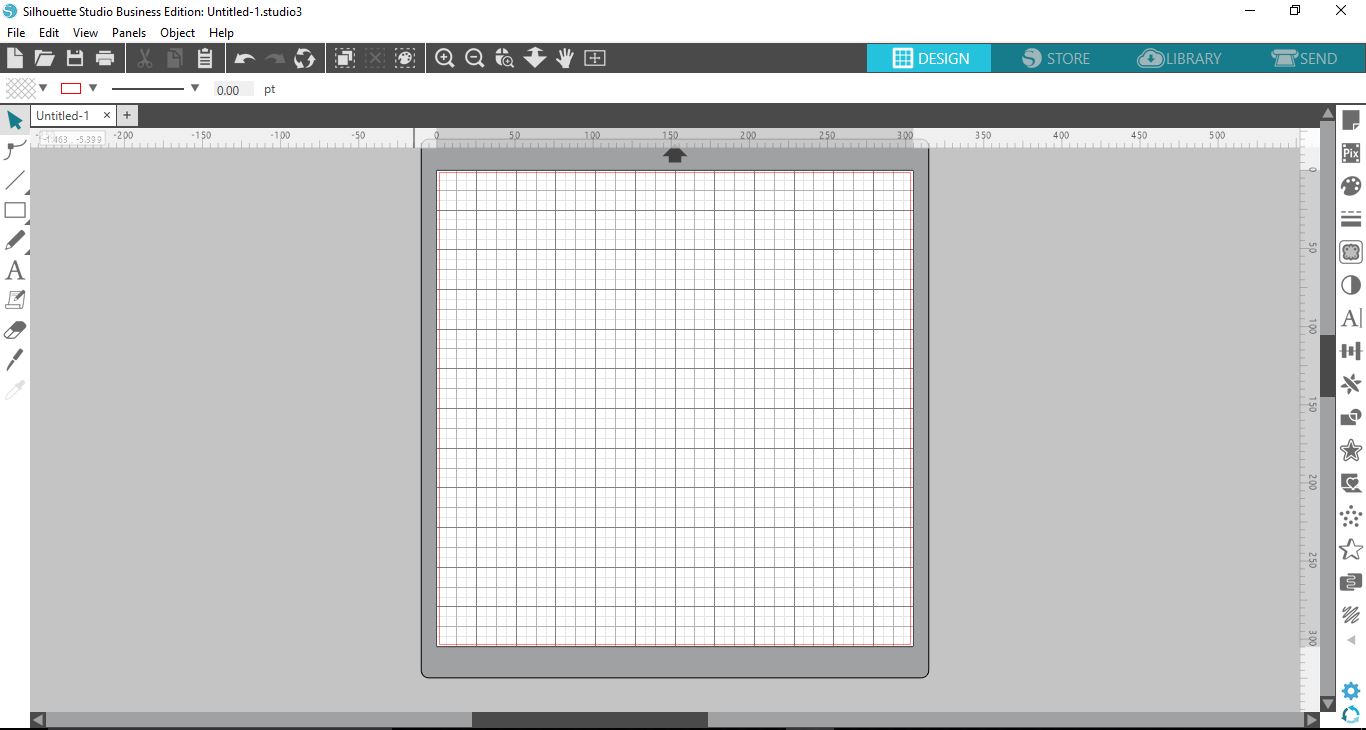
2- Select the text style icon.
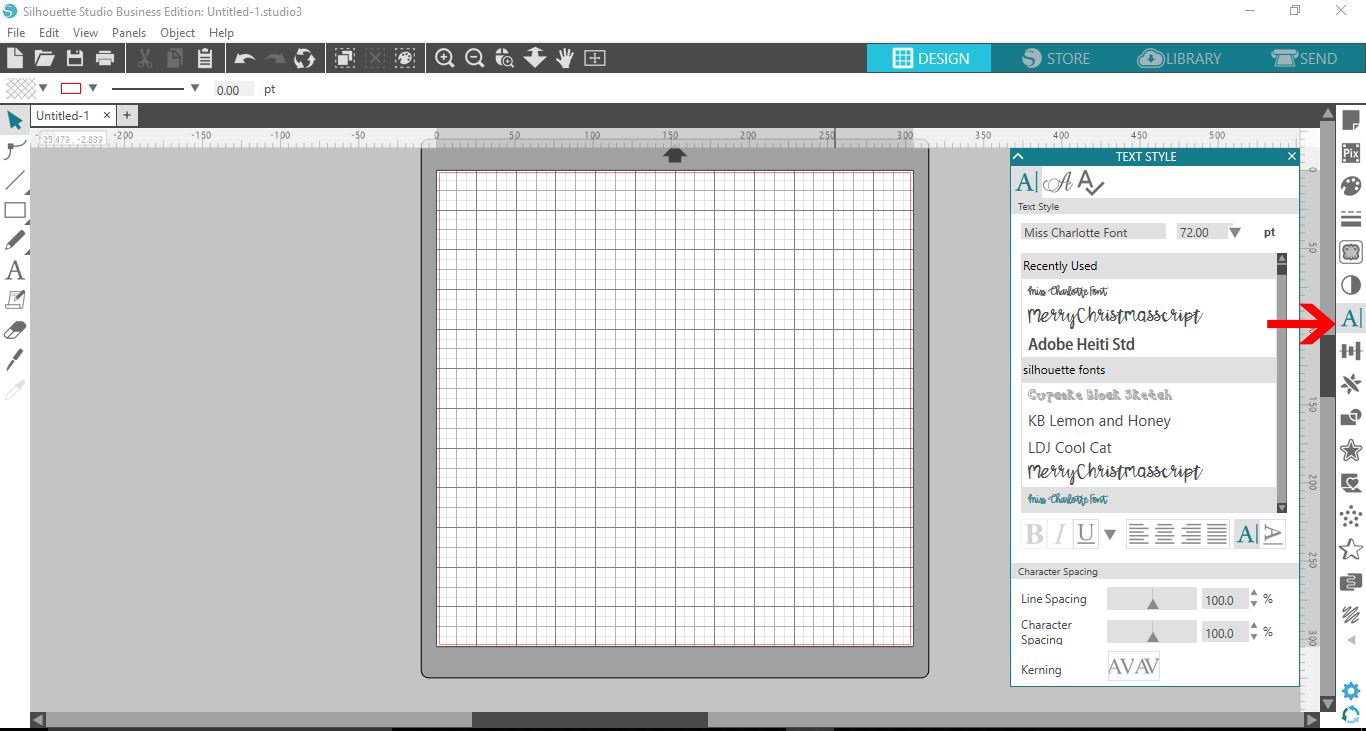
3- In the text style panel select the second tab. This will bring up the Glyph options.
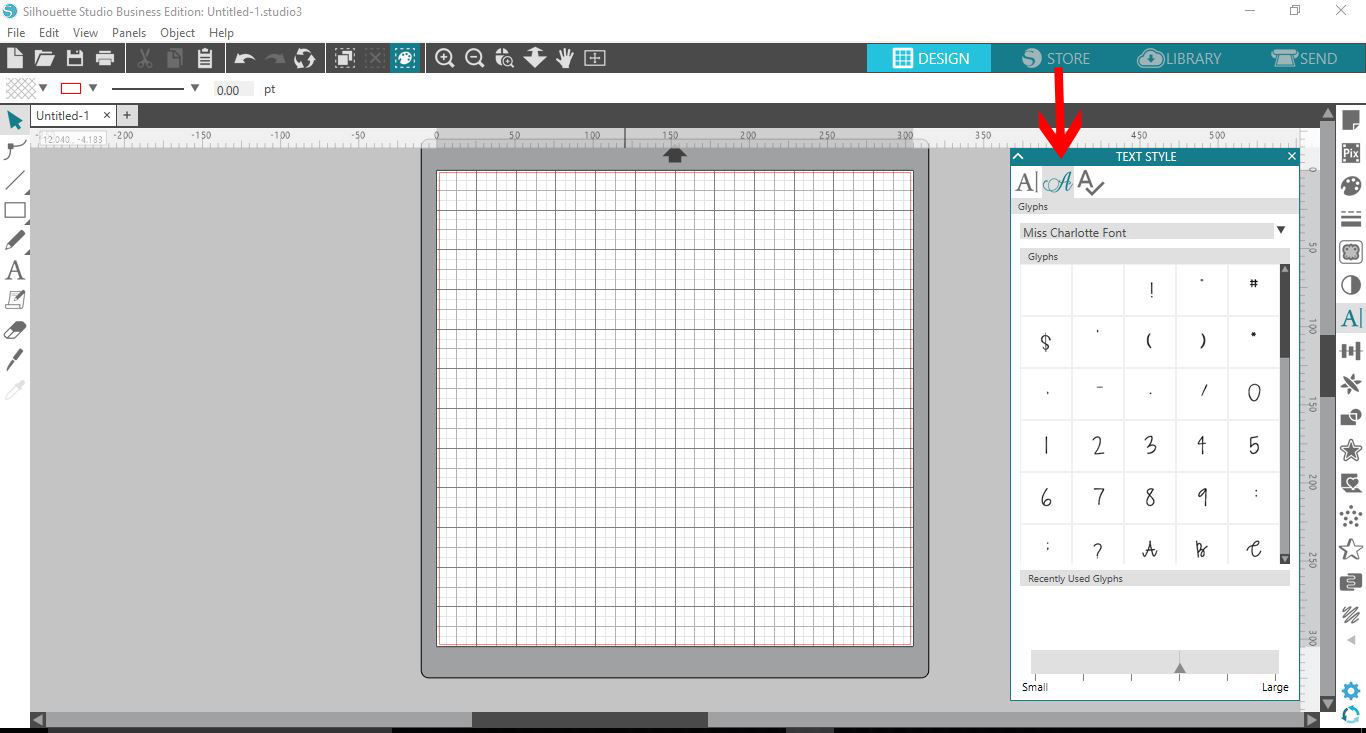
4- In the glyphs panel you can change the size of the glyphs so you can see them better by using the slider.
5- You can also hover over the the glyphs and make the glyph become larger also.
6- To use the glyph, simply click on it and the glyph will appear on your screen.
7- You can place a glyph on your workspace then add the regular text as normal, then add another glyph as needed and they will all link as one line of text.
8- You can also click on the colour tab and fill the glyphs as you would any regular text.
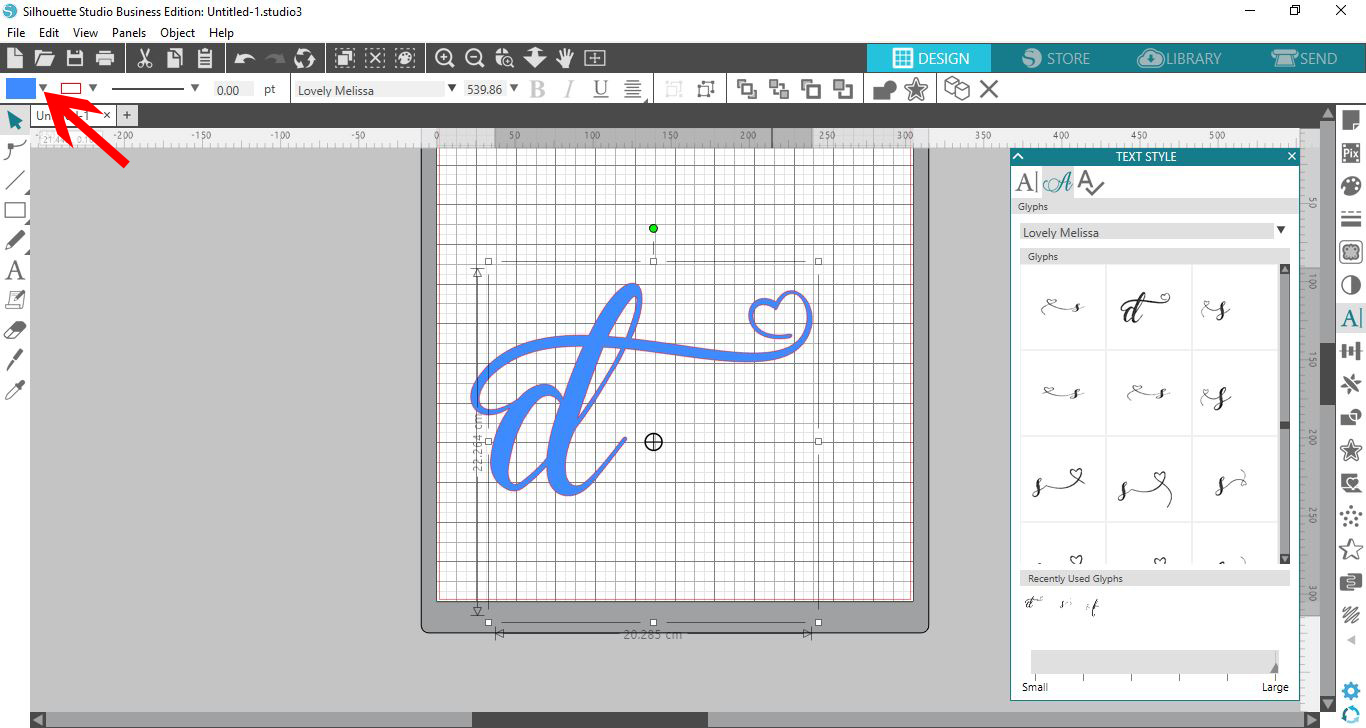
9- In the glyph panel you also have the recently used glyphs option where you can simply re click to add the same recently used glyph again.
Related Tutorials
Silhouette Tutorials
Accessing Glyphs and Swashes in Silhouette Studio
Discover how to access and use glyphs in Silhouette Studio.
Silhouette Tutorials
Opening a SVG file in Silhouette V4.1 Free edition
Silhouette Tutorials
How to fill text using the foil quill with silhouette studio designer and business edition
Silhouette Tutorials
Accessing Fonts and Glyphs with the Silhouette Curio
Silhouette Tutorials
Multiple Undo Feature in Silhouette Business Edition V4.1
Font Tutorials
Accessing Font Glyphs with Font Book on Mac
In this tutorial, learn how to access Font Glyphs on a Mac using Font Book.